
파괴 스타크래프트 맵 모음
'파괴' 태그가 등록된 맵을 모았습니다. 장르 하나로 찾기 어려운 플레이 방식, 난이도와 특징을 중심으로 인기 맵과 최신 맵을 비교해 보세요.
- 등록 맵
- 23개
- 누적 다운로드
- 6
- 누적 조회
- 1,194
인기 맵
다운로드와 조회 반응이 높은 맵입니다.
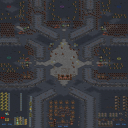
레벨컴까기 후반극악 1.61 (Level Compakgi Hardcore v1.61)
스타크래프트 브루드워의 대표적인 유즈맵 장르 중 하나인 ‘컴까기’로 유명한 맵, ‘레벨컴까기후반극악 1.61 (255업)’은 난이도가 매우 높은 디펜스 유형으로, 플레이어는 끊임없이 밀려오는 적군을 방어하면서 레벨을 올리며 진행하는 구조를 갖추고 있다. 맵은 넓은 우주 타일셋을 배경으로 펼쳐지며, 중앙에 위치한 본진을 중심으로 여러 곳에서 적의 공격이 끊임없이 발생한다. 특히 255업을 달성해야 하는 목표는 초보자와 숙련자 모두에게 도전적인 요소로 작용하는데, 고레벨 단계로 갈수록 적의 공격 패턴이 복잡해지고 소모전으로 변모하는 특징을 보인다. 맵의 특성은 기본적으로 컴퓨터 상대 디펜스로, 플레이어는 건물을 건설하고 유닛을 배치하여 방어선을 구축해야 하며, 일부 구간에서는 랜덤한 요소나 운빨이 요구되는 경우가 있다. 맵의 밀집된 구조와 빠른 공격 템포는 집중력을 요하며, 한 번의 실수가 패배로 이어질 수 있어 전략적 사고와 실시간 대응 능력이 중요하다. 초보자보다는 중급 이상의 플레이어에게 적합하며, 지속적인 레벨 업을 위한 자원 관리와 방어 전략 수립이 핵심이다. 또한, 맵의 타일셋과 분위기가 우주 배경으로 조성되어 있어 시원한 느낌을 주는 동시에, 디자인상으로는 적의 공격 루트가 비교적 명확하게 배치되어 있어 공략법을 익히면 난이도를 낮출 수 있다. 이 맵을 즐기기 위해서는 사전 공략이나Tip을 숙지하는 것이 좋으며, 다운로드 후에는 맵의 로딩 화면에서 제공되는 정보를 참고하는 것이 좋다. 주어진 목표를 달성하는 과정에서 발생하는 긴장감과 성취감은 이 맵의 가장 큰 매력으로, 스타크래프트 유즈맵의Classic한 재미를 느낄 수 있는 작품이다. 255업을 달성하기 위해선 적어도 30분 이상의 플레이 시간이 필요하며, 난이도 조절을 위해 플레이어는 자신의 실력에 맞는 레벨을 선택할 필요가 있다. 맵의 구조상으로는 중앙 본진 외에 보조 건물을 배치할 수 있는 공간이 제한적으로 존재하며, 이는 방어선을 강화하는 전략을 제한하는 요소로 작용하기도 한다. 하지만 이러한 제한이 오히려 플레이어의 창의성을 자극하며, 다양한 빌드와 전술을 시도해 볼 수 있는 기회를 제공한다. 이 맵을 통해 스타크래프트의 유즈맵 장르에 익숙해지면서 동시에 전략적 사고를 키울 수 있을 것이다. "Level Compakgi Hardcore v1.61 (255 Up)" is a highly challenging defense-style custom map within the popular Brood War community, renowned for its intense wave-based gameplay where players must fend off relentless enemy attacks while leveling up. Set against a cosmic backdrop with a vast tile layout, the map features a central base that players must defend while managing resources and unit production. As players progress through levels, the enemy waves become increasingly complex, shifting from straightforward assaults to sophisticated multi-pronged attacks that demand strategic foresight and adaptability. The core gameplay revolves around constructing defenses, positioning units effectively, and making critical decisions under pressure, as even minor mistakes can lead to defeat. While the map is technically a computer-based defense scenario, its high difficulty curve and reliance on precise execution make it more suited for intermediate to advanced players seeking a tough challenge. The compact layout and rapid attack cycles emphasize quick reflexes and tactical planning, while the space-themed tile set enhances immersion. Players are advised to familiarize themselves with common strategies or consult community guides to optimize their approach. Achieving the 255-level goal typically requires around 30 minutes of focused playtime, and the map offers a rewarding sense of accomplishment upon completion. Despite limited auxiliary building space, this constraint encourages creative problem-solving and experimentation with different build orders. Overall, this map exemplifies the depth and creativity of Brood War's custom maps, offering both a test of skill and an engaging experience for enthusiasts of the genre.
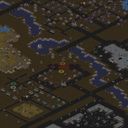
Rage
Rage 맵은 황무지 타일셋을 배경으로 한 1인용 파괴형 유즈맵으로, 제한 시간 안에 마을을 최대한 파괴하는 것이 목표입니다. 플레이어는 맵 중앙에 배치된 거대한 야수를 조작해 건물, 유닛, 지형을 파괴할 수 있으며, 파괴량은 야수의 공격력과 이동 경로에 따라 달라집니다. 맵 구조는 비교적 넓은 평지와 몇 개의 작은 골목으로 이루어져 있어, 야수를 자유롭게 이동시키면서 전략적으로 파괴 지점을 선택할 수 있습니다. 파괴 대상은 주로 마을의 상점, 주택, 방어 타워 등이며, 파괴된 건물은 일정 시간 후 잔해로 남아 다른 플레이어가 이용할 수 없게 됩니다. 시간 제한은 맵 파일에 명시되지 않았지만, 일반적인 5~10분 정도의 라운드가 적당합니다. 플레이 경험은 야수의 이동 속도와 공격 범위를 조절하며 최적의 파괴 루트를 찾는 과정에서 긴장감과 성취감을 동시에 제공합니다. 초보자도 직관적인 조작으로 쉽게 접근할 수 있지만, 고득점 플레이를 위해서는 건물 배치와 파괴 순서를 미리 분석하고, 야수의 스킬 쿨타임을 고려한 효율적인 타이밍 관리가 필요합니다. 파괴량을 최대화하려는 경쟁적인 플레이어에게 적합하며, 혼자서도 충분히 즐길 수 있는 솔로 모드이지만, 친구와 번갈아 가며 점수를 비교하는 방식으로도 재미를 느낄 수 있습니다. Rage is a solo destruction‑focused UMS map set on a wasteland tileset, where the objective is to wreak as much havoc on a town within a time limit. Players control a massive beast placed near the center of the map, using its attacks and movement to demolish buildings, units, and terrain features. The map layout consists of a relatively open plain dotted with a few narrow alleys, allowing the beast to roam freely while strategically selecting demolition targets. Structures such as shops, houses, and defensive towers are the primary targets; once destroyed, they remain as wreckage for a short period, preventing further use. Although the exact time limit isn’t specified in the file, a typical 5‑10 minute round works well. The gameplay experience combines tension and satisfaction as players adjust the beast’s speed and attack range to find the optimal destruction route. While the controls are straightforward enough for beginners, achieving high scores requires pre‑analysis of building placements, ordering of demolitions, and careful timing of the beast’s skill cooldowns. This map suits competitive players who aim to maximize destruction, and it can be enjoyed solo or in a turn‑based score‑compare mode with friends.
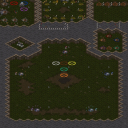
골렘 레벨레이션 v9.0 (Golem Revelation v9.0)
골렘 레벨레이션 v9.0은 사막 타일셋을 배경으로 한 5인용 유즈맵으로, 맵 설명에 따르면 골렘을 파괴하고 건설하며 골렘 팩토리를 제거하는 것이 주요 목표다. 맵 크기는 2048×2048로 넓은 전장을 제공하며, 64×64 타일 단위로 세밀한 지형 배치가 가능하다. 플레이어는 각자 기지를 운영하면서 골렘 유닛을 생산해 적진을 압박하거나, 팩토리를 방어하며 자원을 확보하는 전략적 선택을 하게 된다. 골렘이라는 특수 유닛이 핵심 자원이자 공격 수단이므로, 일반적인 밀리 전투와는 다른 자원 관리와 유닛 컨트롤이 요구된다. 맵 내부에는 별도의 트리거나 스토리 텍스트가 확인되지 않아, 자유로운 샌드박스식 진행이 예상된다. 난이도는 공식 정보가 없으나, 골렘 생산과 팩토리 파괴의 밸런스에 따라 초보자도 접근 가능한 보통 수준으로 보인다. 협동보다는 개인별 목표 달성이 강조되므로, 팀플레이보다는 솔로 또는 프리포올 형태의 플레이에 적합하다. 골렘 테마의 독특한 메커닉을 경험하고 싶은 유즈맵 애호가에게 추천한다. 맵 파일명은 Golem Revelation v.9.1.scx로 버전 표기가 약간 다르지만 내부 제목은 v9.0으로 통일되어 있다. 인코딩은 cp949로 한글 환경에서 정상적으로 로드된다. 사막 타일셋 특유의 밝은 색감과 넓은 시야는 골렘 유닛의 이동 경로를 한눈에 파악하기 좋게 만든다. 골렘 팩토리는 맵 곳곳에 분포해 있어, 초반 정찰과 팩토리 선점 여부가 승부를 가른다. 자원 채취는 일반적인 미네랄과 가스 외에 골렘 생산을 위한 별도 자원이 필요할 것으로 보이며, 이는 맵 제작자 DoomWarrior가 의도한 독자적 경제 시스템을 암시한다. 트리거가 공개되지 않아 정확한 승리 조건은 알 수 없으나, 모든 팩토리 파괴 또는 일정 수의 골렘 보유 시 승리하는 방식이 유력하다. 플레이 타임은 30분 내외로 예상되며, 맵 크기와 유닛 생산 속도를 고려할 때 지루하지 않은 템포를 유지한다. 골렘 레벨레이션 시리즈의 최신 버전인 만큼, 기존 버전 플레이어에게도 새로운 밸런스 조정을 체감할 수 있는 기회가 될 것이다. Golem Revelation v9.0 is a 5‑player UMS map set on a desert tileset where the main objective, according to the map description, is to destroy and build Golems and eliminate Golem Factories. The map spans 2048×2048 with a 64×64 tile grid, offering a spacious battlefield for detailed terrain placement. Each player manages a base, producing Golem units to pressure opponents or defending factories to secure resources. Because Golems serve as both a key resource and offensive tool, the map demands resource management and unit control distinct from standard melee games. No explicit triggers or story text are visible, suggesting a sandbox‑style progression. While no official difficulty rating exists, the balance between Golem production and factory destruction appears accessible to newcomers, placing it at a moderate level. The design emphasizes individual goal completion over cooperation, making it better suited for solo or free‑for‑all play rather than team matches. Fans of unique UMS mechanics centered on Golems will find this map appealing. The file name Golem Revelation v.9.1.scx shows a slight version discrepancy, yet the internal title settles on v9.0. The map uses cp949 encoding, loading correctly in Korean environments. The bright desert palette and wide sightlines help track Golem movement paths. Factories are scattered across the map, so early scouting and factory control often decide the outcome. Beyond standard minerals and gas, a separate resource for Golem production is likely required, hinting at a custom economy devised by creator DoomWarrior. With triggers undisclosed, victory likely comes from destroying all factories or amassing a set number of Golems. Expected playtime is around 30 minutes, and the map size combined with unit production speed keeps the pace engaging. As the latest iteration in the Golem Revelation series, it offers returning players a chance to experience revised balance.
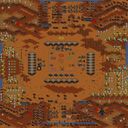
생존의 시험 - 죽음!!!! (Test of Survival - DEATH!!!!)
황혼의 어두운 대지 위에서 시작되는 이 서바이벌 맵은 제목 그대로 죽음과의 끈질긴 싸움을 강요한다. 다섯 명의 플레이어가 각자 제한된 자원과 좁은 공간에서 시작하며, 주변은 적대적인 컴퓨터 유닛과 건물로 빽빽하게 둘러싸여 있다. 맵의 핵심 목표는 단순하지만 가혹하다. 컴퓨터의 모든 유닛과 건물을 파괴하고 살아남아야 한다. 내부 설명에 적힌 “Can U Win? Or Will U Just Die?”라는 문구가 이 맵의 정체성을 단적으로 드러낸다. 초반 몇 분은 숨 돌릴 틈 없이 몰려오는 공격을 방어하느라 정신이 없다. 자원은 극도로 부족하고, 병력 생산 속도는 적의 공세를 따라잡기 어렵게 설계되어 있어 한순간의 방심이 곧바로 전멸로 이어진다. 이 맵은 전형적인 건설형 서바이벌 장르에 속하며, 협동을 전제로 하지만 실제로는 각자의 진영이 개별적으로 압박을 견뎌내는 방식으로 진행된다. 동료가 무너지면 그 여파가 순식간에 자신의 진영으로 번지기 때문에, 모두가 끝까지 버텨야 한다는 부담감이 상당하다. 제작자는 “재미를 더했다”고 밝혔지만, 그 재미는 극한의 난이도에서 오는 쾌감에 가깝다. 적을 하나씩 제거하며 조금씩 전선을 확장할 때의 성취감은 분명히 존재한다. 하지만 이 과정이 매우 더디고, 적의 병력 구성은 예측을 벗어나며, 한 번 밀리기 시작하면 회복이 거의 불가능하다. 특히 후반으로 갈수록 컴퓨터의 방어선이 견고해지고 공격도 거세져서, 플레이어는 끊임없이 멀티태스킹을 강요받는다. 이 맵을 제대로 즐기기 위해서는 빠른 초반 방어 체계 구축과 자원 관리에 능숙해야 하며, 서바이벌 장르 특유의 끈기와 인내심이 필수적이다. 캐주얼한 플레이어보다는 극한의 도전을 원하는 숙련된 플레이어 그룹에게 적합하다. 플레이 전 반드시 모든 참가자가 이 맵의 특성, 즉 무자비한 난이도와 긴 플레이 시간을 감수할 각오가 되어 있는지 확인해야 한다. 중간에 한 명이라도 포기하면 경험이 급격히 무너지므로, “TRY NOT TO QUIT!!!!!”이라는 경고는 단순한 협박이 아니라 이 맵을 체험하기 위한 유일한 지침이다. The survival map begins on the twilight terrain, and as the title suggests, it forces a relentless struggle against death itself. Five players start with severely limited resources and cramped space, immediately surrounded by a dense swarm of hostile computer units and structures. The core objective is brutally simple: destroy every enemy unit and building and stay alive. The internal description’s challenge, “Can U Win? Or Will U Just Die?” perfectly encapsulates the map’s identity. The opening minutes are a frantic blur of defending against waves of attacks that leave no room to breathe. Resources are painfully scarce, and unit production speed is deliberately outpaced by the enemy’s aggression, meaning a single moment of carelessness leads directly to annihilation. This map belongs to the classic build-and-survive genre, designed for cooperation, yet in practice each player’s base is individually pressured. If an ally collapses, the gap floods toward the others instantly, creating immense pressure for everyone to hold on until the end. The creator claimed to have made it “more fun,” but that fun is akin to the thrill derived from overcoming extreme adversity. There is genuine satisfaction in destroying enemy pockets one by one and gradually expanding your front line, but the process is brutally slow and unforgiving. The enemy force composition is unpredictable, and once you start losing ground, recovery becomes nearly impossible. As the game progresses into the later stages, the computer’s defensive lines harden and their offensives intensify, constantly forcing players into relentless multitasking. To face this map, you must be proficient in rapid early-game defense setups and efficient resource management, and an innate patience for the survival genre is mandatory. It is far more suitable for a group of highly skilled players seeking extreme challenges than for casual enjoyment. Before playing, every participant must fully understand and accept the map’s nature, namely its merciless difficulty and the lengthy time commitment required. If even one person quits midway, the entire experience collapses, so the warning “TRY NOT TO QUIT!!!!!” is not just a threat but the single essential rule for experiencing this map.
바나나 농장 2 (Die Bananenplantagen-2 v1)
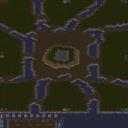
스타크래프트 브루드워의 유즈맵 '바나나 농장 2'는 상대방의 모든 농장을 파괴하는 목표를 지닌 디펜스 장르의 맵입니다. 맵은 넓은 사막 지형을 배경으로 펼쳐지며, 중앙에는 넓은 개방 지대가 있고 주변으로 농장 건물이 배치되어 있는 구조를 보입니다. 플레이어는 각자 고유한 시작 지점에서 출발해 자원을 확보하고 유닛을 생산해야 하며, 상대방의 농장을 파괴하기 위해 전략적으로 공격로를 설정해야 합니다. 이 맵의 특징은 대규모 맵 크기와 넓은 시야에서 오는 전략적 선택입니다. 맵 중앙의 개방된 공간은 전투가 벌어지기 쉬운 곳으로, 양측의 유닛이 조우할 경우 대규모 전투가 벌어질 가능성이 큽니다. 또한, 농장 건물은 맵의 모서리나 중앙 부근에 집중되어 있어 방어와 공격의 균형을 carefully 고려해야 합니다. 초보자는 자원 확보와 유닛 생산에 집중해야 하며, 숙련자는 상대방의 움직임을 예측하고 방어선을 구축하는 전략을 세워야 합니다. 특히, 맵의 넓은 공간은 기동성을 요구하며, 빠른 유닛과 강력한 방어 타워의 조합이 승패를 좌우할 수 있습니다. 맵의 사막 타일셋은 건조한 분위기를 살리며, 전투 시 먼지 효과가 추가되어 시각적 몰입감을 높입니다. 플레이 전에는 맵의 주요 자원 위치와 주요 공격로, 방어 가능 지점을 미리 파악하는 것이 중요합니다. 또한, 팀 플레이가 가능하다면 각자의 역할을 분담해 방어와 공격을 병행하는 전략이 필요합니다. 이 맵은 8명의 플레이어가 참여할 수 있으며, 상대방의 모든 농장 건물을 파괴하면 승리합니다. 맵의 구조상 초보와 숙련자 모두 즐길 수 있지만, 대규모 전투와 전략적 선택을 요구하기 때문에 충분한 연습이 필요합니다. 사막 분위기의 맵은 여름이나 건조한 환경을 연상시키며, 전투 시 먼지 효과가 시야를 제한할 수 있어 조준과 위치 선정이 중요합니다. StarCraft: Brood War's custom map "Banana Farm 2" is a defense genre map where the objective is to destroy all of the opponent's farms. The map unfolds against a vast desert terrain, featuring a wide open central area surrounded by farm buildings. Players start from unique positions, gathering resources and producing units while strategically planning attack routes to destroy the opponent's farms. A key feature of this map is its large scale and expansive visibility, which demands strategic decisions. The open space in the center is a hotspot for battles, where large-scale combat is likely to erupt when both sides' units clash. Farm buildings are concentrated near the corners or central areas, requiring careful balance between defense and offense. Beginners should focus on resource gathering and unit production, while experienced players need to predict opponent movements and establish defensive lines. The map's vast space emphasizes mobility, and the combination of fast units and powerful defensive towers can determine victory. The desert tile set enhances the dry atmosphere, and dust effects during combat heighten visual immersion. Before playing, it's crucial to scout key resource locations, primary attack routes, and defensible positions. If team play is supported, assigning roles for balanced defense and offense is essential. The map supports up to eight players, and victory is achieved by destroying all of the opponent's farm buildings. While its structure allows both beginners and experienced players to enjoy it, the large-scale battles and strategic depth require ample practice. The desert-themed map evokes summer or arid environments, and the dust effects during combat can limit visibility, making targeting and positioning critical.
헤븐 바운드 (Heaven Bounda)
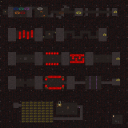
《헤븐 바운드(Hèàv£ñ ßöÚñÐ)》는 스타크래프트 브루드워의 유즈맵으로, 7명의 플레이어가 한 팀이 되어 적의 건물을 파괴하는 목표를 달성하는 전투 맵이다. 맵은 정글 테마의 넓은 공간에 배치되어 있으며, 중앙에는 넓은 평야가 있고 사방으로 숲이 둘러싸인 구조로 보인다. 플레이어는 각각의 시작 위치에서 출발해 맵 곳곳에 흩어져 있는 적의 건물을 찾아 파괴해야 하는데, 맵 상단과 좌우에 붉은색으로 표시된 건물이 적의 주요據點으로 추정된다. 맵의 중앙 지역은 비교적 개방되어 있어 이동이 편리하지만, 숲 지대는 시야를 가리고 기습을 받기 쉬운 환경을 제공한다. 또한, 맵의 가장자리로 갈수록 지형이 복잡해지면서 방어와 공격의 전략적 선택이 중요해진다.Destory all enemy buildings.라는 간단한 내장 설명에도 불구하고, 이 맵은 단순한 파괴가 아니라 시작 위치와 적據點 간의 거리, 지형의 활용, 팀원과의 협력 등 여러 요소가 조화를 이뤄야만 승리를 이끌어낼 수 있는 전략적 깊이를 지니고 있다. 특히 7인이 동시에 참여하는 만큼, 역할 분배와 기동력이 승패를 좌우할 가능성이 크다. 초보자도 쉽게 접근할 수 있는 기본 틀을 갖추고 있지만, 숙련된 플레이어라면 지형을 최대한 활용한 기습과 방어 라인 구축으로 우위를 점할 수 있을 것이다. 맵을 플레이하기 전에 확인해야 할 부분은 시작 지점 간의 거리와 주요據點의 위치, 그리고 숲 지대의 시야 차단 여부다. 맵의 전체적인 균형이 잘 맞춰져 있는지 여부는 개인의 실력과 팀워크에 따라 달라질 수 있지만, 기본적으로는 공격과 이동의 타이밍을 잘 조절하는 것이 핵심이다. 만약 맵이 너무 넓거나 공백이 크다면, 제한된 자원과 시간 내에 모든 건물을 파괴하는 것이 불가능할 수도 있으므로, 맵의 밸런스를 미리 체크하는 것이 좋다. 이 맵은 스타크래프트 브루드워의 유즈맵 중에서도Destruction(파괴) 장르에 속하며, 팀원 간의 협력이 필수적이므로 친구들과 함께 플레이하기에 적합하다. 또한, 맵의 구조가 비교적 단순하지만 전략적 깊이가 있어, 반복 플레이를 통해 새로운 전술을 발견할 수 있는 재미도 느낄 수 있을 것이다. 《Heaven’s Bound》 is a custom map in StarCraft: Brood War where seven players team up to destroy enemy buildings. The map is set in a jungle-themed expanse with a wide central plain surrounded by dense forests. Players start at different positions and must locate and demolish scattered enemy structures, with key strongholds marked in red at the top and sides of the map. The central area offers open terrain for easy movement, but the forested zones restrict visibility and make ambushes more likely. As players move toward the edges, the terrain becomes more complex, forcing strategic choices between defense and offense. Despite the simple in-map directive—"Destroy all enemy buildings."—victory depends on balancing starting positions, distances to objectives, terrain use, and teamwork. With seven players involved, roles and mobility often determine the outcome. The map is accessible to beginners but rewards skilled players who exploit the terrain for ambushes and set up defensive lines. Before playing, check distances between starting points, the locations of major strongholds, and how much the forests obstruct vision. While balance can shift with individual skill and teamwork, timing attacks and movements remains crucial. If the map feels too vast or empty, it may be impossible to destroy all buildings within the limited resources and time, so checking the map’s balance beforehand is wise. As a Destruction genre custom map in StarCraft: Brood War, cooperation is essential, making it ideal for playing with friends. Though its layout is straightforward, its strategic depth invites repeated play and discovery of new tactics.
메가맨 X 골렘즈 (Megaman X Golems)
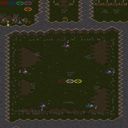
스타크래프트 브루드워 유즈맵으로 등장한 <메가맨 X 골렘즈>는 디펜스와 건설 요소가 결합된 독특한 게임 플레이를 제공합니다. 맵은 거대한 사막 평야를 배경으로 하며, централь에 위치한 주요 구조물을 파괴하고 재건하는 것이 주요 목표로 보입니다. 맵 곳곳에 scattered된 유닛들은 파괴 가능한 오브젝트나 방어 시설로 추정되며, 이를 조작해 적대적 유닛이나 구조물을 제어하거나 파괴해야 합니다. 맵 이미지에서 확인되는 수많은 잔해와 잔디 패턴은 파괴와 건설의 반복을 암시하며, 플레이어는 이를 통해 전술을 유동적으로 변화시켜야 할 것입니다. 5인 플레이를 지원하는 이 맵은 혼자서도 진행할 수 있지만, 협력 플레이가 유리할 것으로 보입니다. 특히 사막 타일셋의 황량한 분위기는 긴장감을 조성하며, 파괴와 재건의 반복 속에서 전략적 깊이를 느낄 수 있습니다. 초보자와 숙련자 모두 즐길 수 있도록 디자인된 이 맵은 파괴와 건설의 밸런스가 핵심이며, 맵의 복잡한 구조를 파악하기 전까지는 다소 난해할 수 있습니다. 따라서 플레이 전 맵의 각 구역별 기능을 미리 확인하고, 파괴와 재건의 우선순위를 신중히 결정해야 합니다. 추천 대상은 전략적 사고를 좋아하는 플레이어이며, 특히 디펜스와 건설 요소가 결합된 게임을 선호하는 유저에게 어울릴 것입니다. This StarCraft: Brood War custom map, Megaman X Golems, combines defense mechanics with construction elements to deliver a unique gameplay experience. Set against a vast desert backdrop, the map appears to revolve around destroying and rebuilding central structures as the primary objective. Scattered units throughout the map likely serve as destructible objects or defensive installations that players must manipulate to control or destroy. The scattered debris and grass patterns hint at the cycle of destruction and reconstruction, requiring players to adapt their strategies dynamically. Supporting up to five players, this map can be played solo but benefits significantly from cooperative play. The barren desert tileset enhances the tense atmosphere, immersing players in a strategic depth of destruction and rebuilding. Designed for both beginners and experienced players, the map emphasizes the balance between destruction and construction, though its complex structure may initially challenge players. Before diving in, it's advisable to familiarize yourself with the functions of each map zone and carefully decide the priority of destruction and reconstruction. Recommended for players who enjoy strategic thinking, particularly those who appreciate maps that blend defense and construction mechanics.
골렘 매드니스 with 매스 어택 v11 (Golem Madness with Mass Attack v11)
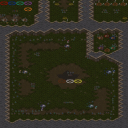
스타크래프트 브루드워의 유즈맵 〈골렘 매드니스 with 매스 어택 v11〉은 파괴와 건설의 조화를 통해 전략을 펼치는 독특한 디펜스 및 빌드업을 요구하는 맵이다. 맵의 중앙에는 거대한 골렘이 위치하고 있으며, 플레이어는 이를 파괴하거나 재건하는 두 가지 핵심 목표를 동시에 고민해야 한다. 골렘을 파괴하면 일정량의 자원이 제공되어 건물을 건설하거나 유닛을 생산할 수 있으며, 반대로 골렘을 재건하면 방어력을 강화하거나 추가 자원을 획득할 수 있는 구조로 추정된다. 맵의 사막 타일셋은 건조한 분위기를 연출하며, 넓은 개활지와 협소한 길목이 조화를 이루며 플레이어의 움직임과 전략을 제한한다. 골렘 주변의 좁은 통로는 유닛의 진입을 어렵게 만들어 방어 측에 유리한 환경을 제공하며, 이는 골렘을 지키려는 플레이어와 파괴하려는 플레이어 간의 긴장감을 고조시킨다. 맵의 난이도는 골렘의 체력과 방어력, 그리고 제공되는 자원의 양에 따라 크게 좌우되며, 초보자의 경우 골렘을 재건하는 데 중점을 두는 것이 효과적일 수 있다. 반면 숙련된 플레이어는 골렘을 신속히 파괴하여 자원을 확보한 뒤 방어선을 구축하는 전략을 선호할 가능성이 높다. 맵의 진행은 일정 주기 또는 조건에 따라 골렘이 재생성되는 시스템으로 보이며, 이를 예측하여 자원 확보와 방어 준비를 동시에 진행해야 한다. 게임의 승리는 골렘의 파괴와 재건을 두고 벌어지는 자원 경쟁과 방어戦略의 균형에 달려 있으며, 플레이어 간의 협력이나 경쟁이 예상된다. 〈골렘 매드니스 with 매스 어택 v11〉은 특히 파괴와 건설의 Trade-off를 즐기는 유저들에게 강력히 추천되며, 전략적 깊이와 빠른 진행이 어우러진 재미를 제공할 것으로 보인다. 플레이 전에는 골렘의 재생성 주기와 자원 획득 조건, 그리고 맵의 주요 통로와 지형지물을 미리 숙지하는 것이 중요하다. 또한, 팀플레이가 가능하다면 골렘 파괴와 방어 임무를 분담하여 효율성을 높일 수 있을 것이다. 이 맵은 단순한 디펜스가 아니라 골렘을 둘러싼 전략적 선택과 자원 관리 능력을 동시에 시험하는 유즈맵으로, 스타크래프트의Classic한 재미와 전략성을 동시에 느낄 수 있는佳作라 할 수 있다. 4인 이상의 플레이가 권장되며, 특히 5인 플레이 시 각 플레이어의 역할 분담이 게임의 승패를 가를 가능성이 높다. 맵의 난이도는 보통 수준으로, 골렘의 재생성 주기와 자원 획득량을 조절한다면 초보자도 충분히 즐길 수 있을 것이지만, 고난이도 모드로 전환하면 전략의 깊이가 한층 깊어질 것으로 예상된다. StarCraft: Brood War's custom map *Golem Madness with Mass Attack v11* is a unique defense and build-up map that demands a balance between destruction and construction to execute strategies. At the center of the map lies a massive golem, forcing players to constantly weigh two core objectives: destroying or rebuilding it. Destroying the golem grants a set amount of resources to construct buildings or produce units, while rebuilding it appears to strengthen defenses or yield additional resources. The desert-themed tileset creates a dry atmosphere, and the contrast between open spaces and narrow pathways restricts player movement and strategy. The tight corridors around the golem make unit entry difficult, favoring defenders and heightening the tension between those trying to protect the golem and those attempting to destroy it. The map's difficulty heavily depends on the golem's health, defense, and resource rewards. Beginners may find it effective to focus on rebuilding the golem, while experienced players likely prefer quickly destroying it to secure resources and establish defensive lines. The golem appears to regenerate at set intervals or under specific conditions, requiring players to anticipate its respawn to balance resource acquisition and defense preparation. Victory hinges on the strategic balance between golem destruction, reconstruction, resource competition, and defensive tactics, with both cooperation and competition among players expected. *Golem Madness with Mass Attack v11* is highly recommended for players who enjoy the trade-offs between destruction and construction, offering strategic depth and fast-paced fun. Before playing, it's crucial to familiarize yourself with the golem's respawn cycle, resource acquisition conditions, key pathways, and terrain features. If team play is possible, dividing roles between golem destruction and defense can boost efficiency. This isn't just a simple defense map—it's a custom game that tests both strategic decision-making around the golem and resource management skills, delivering classic StarCraft fun and depth. The map is best enjoyed with four or more players, and in five-player matches, role distribution among teammates can significantly impact the outcome. While the difficulty is moderate—adjusting the golem's respawn rate and resource rewards can make it accessible to beginners—switching to a high-difficulty mode would further deepen the strategic challenges.
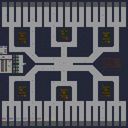
루러커 방어 36길 (Lurker Defense 36 Way)
이 맵은 4096×4096 타일 규모의 대형 디펜스 유즈맵으로, 6인 플레이를 기준으로 설계되었습니다. 전체 맵은 네 개의 대칭적인 구역으로 나뉘어 있으며, 각 구역마다 중앙에 방어진 초석과 주변에 여러 방어 타워가 배치된 구조를 가지고 있습니다. 플레이어는 각 구역의 입구에서 적물의 물결을 방어하며, 타워와 유닛을 전략적으로 배치하고 이동시켜 파동을 무력화해야 합니다. 방어 타워는 다양한 레벨과 스킬을 보유하고 있어 플레이어가 적의 종류와 파동 강도에 맞춰 조정할 수 있습니다. 맵은 비교적 균형 잡힌 진행 흐름을 보여주며, 초반에는 방어선을 구축하고 중반에는 여러 구역을 오가며 다각적인 전략을 구사해야 합니다. 특히 36개의 방어 라인이 존재하는 점에서 전략적 깊이와 리플레이 가치가 높습니다. 초보자에게는 조작 습득과 타워 배치가 수월하지만, 고수에게는 타이밍과 자원 관리 능력이 핵심입니다. 맵 내부에 존재하는 다양한 타워 유형과 유닛 스킬은 플레이어가 상황에 맞춰 맞춤 전략을 구사하도록 돕습니다. 또한, 각 구역의 입구와 출구에 배치된 트리거와 트리거 효과는 파동 발생 시점을 조절하여 전략적 타이밍을 조정할 수 있게 합니다. 이러한 요소들은 팀 협력과 개인 기술 모두를 테스트하는 풍부한 경험을 제공합니다. 따라서 이 맵은 6인 팀플레이를 선호하며, 방어 전략을 즐기는 플레이어에게 강력히 추천합니다. 맵을 시작하기 전에는 타워 배치와 유닛 스킬을 미리 점검하고, 적의 파동 패턴을 숙지하는 것이 승리의 관건이 됩니다. This map is a large defense custom map with a 4096×4096 tile size, designed for 6 players. The entire map is divided into four symmetric sectors, each featuring a central fortified base and surrounding defensive towers. Players start at the entrance of each sector and must defend against waves of units by strategically placing and moving towers and units to neutralize the attacks. The towers have multiple levels and skills, allowing players to adjust their strategy according to unit types and wave intensity. The map offers a balanced progression flow; early game focuses on building defenses, while mid‑late game requires moving across sectors and employing diverse tactics. Notably, the presence of 36 defense lines adds significant strategic depth and replay value. Beginners find unit control and tower placement easy, but experts rely on timing and resource management. The various tower types and unit skills available within the map enable players to devise customized strategies for different situations. Additionally, triggers placed at the entrances and exits of each sector allow the timing of wave spawns to be adjusted, providing opportunities for strategic timing adjustments. These elements together create a rich experience that tests both team cooperation and individual skill. Therefore, this map is highly recommended for 6‑player team play and for players who enjoy defensive strategy. Before starting, players should review tower placements and unit skills and become familiar with enemy wave patterns, which are key to victory.
![[PVV20] 귀향 (Homebound) 맵 미리보기](https://cdn-star-data.huzy.net/thumbnail_f2f801cc5d63426a93f19761418c182d.jpg)
[PVV20] 귀향 (Homebound)
스타크래프트 브루드워 유즈맵 '[PVV20] 귀향 (Homebound)'은 코랄(Korhal) 행성을 무대로 한 싱글 플레이 캠페인 미션이다. 내부 설명에 따르면 플레이어는 OZD 복합 단지에 잠입하여 시설을 완전히 파괴하는 것이 주 목표다. 황혼(Twilight) 타일셋이 적용된 192x192 크기의 맵은 붉은 안개와 폐허가 어우러진 황량한 코랄의 분위기를 잘 살려내며, 공식 캠페인 못지않은 몰입감을 주는 것으로 보인다. 진행 방식은 일반적인 기지 건설형이 아닌, 주어진 병력과 영웅 유닛을 활용해 고정된 적 진영을 돌파하는 '고정 병력 미션' 형태에 가깝다. 트리거를 통해 중간 목표 갱신, 강화 병력 투입, 시네마틱 연출 등이 구현되어 있어 단순한 컴까기나 디펜스와는 차별화된 서사 중심 플레이가 예상된다. 적 구성은 테란 자치령 병력을 중심으로 벙커, 포탑, 공성 전차 등이 층층이 배치되어 있어 무리한 돌진보다는 우회로 확보와 병력 분산, 스펠 캐스터 활용 등 전술적 판단이 승패를 가를 것으로 보인다. 러시아어 원제 'Связь с домом(집과의 연결)'과 영문 파일명 'Homebound'가 암시하듯 귀환이나 구출, 혹은 과거와의 단절 같은 서사적 복선이 깔려 있을 가능성이 높다. 다만 브리핑과 목표 텍스트가 러시아어로만 제공되어 한국어권 유저는 플레이 전 번역 확인이 필수적이다. 난이도는 병력 보충이 제한적인 후반부로 갈수록 상승하며, 전체 클리어까지 30~40분 내외가 소요될 것으로 추정된다. 스토리 연출과 전술 퍼즐을 동시에 즐기고 싶은 캠페인 마니아에게 추천할 만한 수작으로 보인다. StarCraft Brood War UMS map '[PVV20] Homebound' is a single-player campaign mission set on the planet Korhal. According to the internal description, the player's objective is to infiltrate the OZD complex and destroy the facility. The 192x192 map utilizing the Twilight tileset captures the desolate atmosphere of Korhal with red fog and ruins, offering immersion comparable to official campaigns. The gameplay resembles a 'fixed force mission' rather than a base-building style, requiring the player to breach fortified enemy positions using a predetermined army and hero units. Triggers appear to implement updated objectives, reinforcement drops, and cinematic sequences, suggesting a narrative-driven experience distinct from simple comp-stomps or defense maps. Enemy composition centers on Terran Dominion forces with bunkers, turrets, and siege tanks layered defensively, demanding tactical judgment—flanking, force splitting, and spellcaster usage—over brute force. The Russian title 'Связь с домом' (Connection to Home) and the filename 'Homebound' hint at narrative themes of return, rescue, or severance from the past. However, since briefings and objectives are only in Russian, Korean players will need translation tools beforehand. Difficulty likely ramps up in the later stages due to limited reinforcements, with an estimated clear time of 30-40 minutes. This is a recommended pick for campaign enthusiasts who enjoy both storytelling and tactical puzzles.
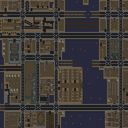
도시박살내기2 (City Destruction 2)
스타크래프트 브루드워 맵 중에서도 독특한 파괴의 재미를 선사하는 유즈맵 도시박살내기2(City Destruction 2)는 도심 속에서 펼쳐지는 시원시원한 전투 경험을 제공하는 작품이다. 황무지 타일셋을 활용하여 고층 빌딩과 도로, 그리고 경찰서와 같은 공공시설들이 배치된 복잡한 시가지 지형을 구현해 낸 것이 가장 큰 특징이다. 이 스타크래프트 맵 유즈맵은 일반적인 밀리 전투와는 완전히 다른 결을 지니고 있으며, 플레이어가 직접 주어진 전력을 활용해 도심 전체를 초토화해 나가는 독창적인 플레이 방식을 보여준다. 내부 설명에 따르면 혼잡한 도시를 박살내 버리는 것이 핵심 목표이며, 특히 맵 내에 위치한 특정 핵심 거점인 경찰서를 완전히 파괴하는 순간 승리를 거두게 되는 명확한 승리 조건을 가지고 있다. 플레이어는 제한된 공간 속에서 다양한 유닛들을 동원해 건물을 철거하고 방해 세력을 돌파해야 하므로, 효율적인 진격 경로를 고민하고 화력을 집중하는 전략적인 판단이 요구된다. 시가지 맵 특유의 좁은 도로와 블록 형태의 구조물들은 병력의 이동을 제한하면서도, 목표물을 향해 맹렬하게 진격할 때의 파괴적인 카타르시스를 배가시키는 역할을 한다. 평소와는 다른 색다른 규칙과 목표를 가진 유즈맵을 찾는 이들이나, 스트레스를 시원하게 날려버릴 수 있는 간단하면서도 몰입감 넘치는 싱글 플레이 위주의 브루드워 콘텐츠를 선호하는 플레이어들에게 적합하다. 복잡한 컨트롤보다는 주어진 조건 속에서 목표를 완수해 나가는 재미에 집중되어 있어, 가볍게 접속해 색다른 규칙의 미션을 즐기고자 하는 유저라면 한 번쯤 플레이해 볼 가치가 있는 흥미로운 맵이다. City Destruction 2 is a Use Map Settings map for StarCraft: Brood War that offers a unique and destructive gaming experience set within an urban environment. Utilizing the wasteland tileset, the map features a complex city layout complete with high-rise buildings, roads, and public facilities such as police stations. This StarCraft use map differs completely from standard melee matches, focusing instead on a distinct gameplay style where the player utilizes available forces to devastate the entire cityscape. According to the internal map description, the core objective is to smash through a congested city, with a clear win condition achieved specifically by destroying the designated police station. Players must mobilize various units within the confined layout to demolish buildings and overcome opposing forces, requiring strategic decisions regarding efficient advancement paths and concentrated firepower. The narrow roads and block-structured terrain characteristic of urban maps restrict troop movement while amplifying the destructive catharsis felt when pushing relentlessly toward the target. This map is well-suited for players seeking unconventional rules and objectives, or those who prefer engaging single-player Brood War content designed to blow off some steam. With its focus on completing specific goals under unique conditions rather than complex micro-control, it stands out as an interesting custom map for anyone looking to enjoy a casual yet engaging mission.
9999의 배럭 부수기.만든이:aavnm
황혼 타일셋의 음울한 분위기 속에서 펼쳐지는 이 유즈맵은 제목이 암시하듯 단순하면서도 기묘한 매력을 지닌 작품이다. 플레이어는 갑자기 분노에 휩싸인 생선이 되어 죄없는 배럭을 향한 파괴 본능을 분출하게 된다. 맵의 구조는 전형적인 유즈맵 스타일로, 넓은 공간에 무수히 많은 배럭이 배치되어 있고 플레이어는 제한된 유닛으로 이 건물들을 하나하나 부수며 진행한다. 단조로울 수 있는 반복 행위임에도 불구하고, 생선이라는 엉뚱한 설정과 9999라는 숫자가 주는 압도감이 독특한 플레이 경험을 만들어낸다. 초반에는 가볍게 클릭 몇 번으로 배럭이 철거되는 시원시원한 타격감을 느낄 수 있지만, 숫자가 줄어들수록 남은 목표물을 찾아 맵 이곳저곳을 누비는 숨은그림찾기 같은 요소가 가미된다. 단순히 공격 버튼을 연타하는 것을 넘어서, 맵 구석구석에 숨은 배럭을 발견하는 소소한 재미와 함께 방대한 작업량을 동료 플레이어들과 어떻게 분담할지에 대한 암묵적인 협동심도 요구된다. 최대 8명이 함께할 수 있는 점은 이 맵의 핵심적인 진행 방식이다. 혼자서 9999개의 배럭을 부수는 것은 거의 수행에 가까운 지루한 노동이 될 수 있지만, 여러 명이 모여 각자 역할을 나누고 구역을 정해 부수기 시작하면 작업의 효율이 눈에 띄게 올라가는 것을 체감할 수 있다. 이 과정에서 별다른 의사소통 없이도 자연스럽게 팀워크가 형성되는 경험은 의외의 재미를 선사한다. 다만, 플레이 전에 반드시 인지해야 할 점은 이 맵이 극도로 단순한 목표를 반복하는, 이른바 노가다성 콘텐츠라는 사실이다. 화려한 이펙트나 긴장감 넘치는 전투, 복잡한 트리거 시스템을 기대한다면 실망할 수 있다. 제작자가 내부 설명에 명시한 것처럼 불법 수정을 엄격히 금지하는 점을 고려하면, 순수하게 주어진 환경 안에서 생선이라는 역할에 충실히 몰입하며 목표 달성을 위한 인내심을 시험하는 맵이다. 결국 이 맵은 단순한 조작 속에서 해방감을 찾고자 하는 플레이어, 또는 친구들과 함께 무의미한 노동을 공유하며 대화를 나누는 소셜 게임 형태를 즐기는 이들에게 추천할 만하다. 배럭이 파괴되는 소리와 함께 쌓이는 킬 수를 보며 느끼는 성취감은 의외로 중독성이 있다. Within the somber atmosphere of the Twilight tileset, this Use Map Settings creation possesses a simple yet bizarre charm, just as the title suggests. Players become fish that have suddenly been overcome with rage, unleashing their destructive instincts upon innocent barracks. The map structure follows a typical style, featuring a vast area filled with countless barracks, and players must start with limited units to destroy these buildings one by one. Although the act itself could be monotonous, the absurd premise of playing as fish and the overwhelming scale implied by the number 9999 create a unique gameplay experience. In the beginning, you can enjoy the cathartic sensation of demolishing barracks with light clicks, but as the number dwindles, the process turns into a sort of hidden object game where you must scour every corner of the map to find the remaining targets. Beyond simply mashing the attack button, the map requires subtle cooperation as you share the massive workload with fellow players and experience the small joy of discovering barracks tucked away in obscure spots. The ability to play with up to 8 people is the core progression element of this map. Destroying 9999 barracks alone could feel like a tedious chore akin to penance, but when multiple players join and divide the sectors among themselves, you can tangibly feel the work efficiency skyrocket. The experience of naturally forming teamwork without any explicit communication provides an unexpected source of fun. However, a crucial point to check before playing is that this map focuses on extremely repetitive, grind-heavy content with a simple objective. If you are expecting flashy effects, tense combat, or complex trigger systems, you will likely be disappointed. Considering the creator's strict warning against illegal modifications in the internal description, this is a map that tests your patience by asking you to faithfully immerse yourself in the role of a fish within the original environment. Ultimately, this map is recommended for players who seek liberation through simple controls or those who enjoy a casual social game where they can share in a meaningless endeavor and chat with friends. The sense of achievement you feel as the kill count stacks up alongside the sound of crumbling barracks is surprisingly addictive.
최근 등록된 맵
새로 추가된 파일과 버전을 확인하세요.
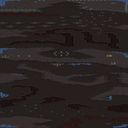
건물 파괴 임무 (Untitled Scenario)
스타크래프트 브루드워의 유즈맵 ‘Untitled Scenario’를 플레이하면서 느낄 수 있는 가장 큰 특징은 ‘단순함과 집중력’이다. 이 맵은 내부 설명에도 그대로 나타나 있듯이 ‘모든 적 건물 파괴’를 목표로 하며, 오직Destruction(파괴)만을 위한 구조로 설계되었다. 맵의 전체적인 분위기는 정글 타일셋을 활용한 어두운 분위기 속에서 전장의 한복판에 서 있는 듯한 느낌을 준다. 맵의 크기는 1024x1024로 비교적 넓은 편이지만, 주요 건물들은 중앙 부근에 밀집되어 있어 파괴 목표가 명확하다. 플레이어는 테란, 저그, 프로토스 중 하나를 선택해 적의 건물을 파괴하는 데 집중해야 하며, 적 건물의 위치를 빠르게 파악하고 효율적으로 공격을 плани해야 한다. 맵의 해상도와 타일 단위가 특이하게도 3072 x 8192, 96 x 256로 설정되어 있는데, 이는 넓은 시야와 세밀한 배치감을 동시에 제공하기 위한 것으로 추정된다. 전투는 주로 건물 주변에서 벌어지며, 적절한 유닛 생산과 자원 관리가 필수적이다. 플레이어는 초반부터 적의 위치와 방어선을 신속히 분석하고, 중반에는 다수의 유닛을 동원해 일제히 공격을 펼치는 전략이 요구된다. 맵의 난이도는 플레이어의 전략과 유닛 컨트롤에 따라 크게 달라질 수 있으며, 특히 건물 파괴 후의 후속 공격이나 방어 태세를 어떻게 준비하느냐가 승패를 가른다. 이 맵은 ‘파괴’라는 단순한 목표와는 달리, 전략적 사고와 빠른 판단력이 요구되는 유즈맵으로, 초보자와 숙련자 모두에게 흥미로운 플레이 경험을 제공한다. 또한, 정글 타일셋의 분위기와 조화된 맵 디자인은 플레이어에게 immersive한 전투 환경을 선사한다. рекомен드 대상은Destroy all enemy buildings를 단순한 파괴가 아니라 전략적 접근이 필요한 유즈맵으로 즐기고 싶어하는 이들에게 추천하며, 특히 ‘목표 중심의 플레이’를 선호하는 게이머들에게 적합하다. 플레이 전에는 자신의 종족 선택과 초반 유닛 생산 계획을 충분히 고민하고, 적 건물의 배치와 방어선을 빠르게 분석하는 연습이 필요하다. 또한, 넓은 맵의 특성상 시야 확보와 유닛 이동 경로 설정이 승패를 좌우할 수 있으니, 미니맵과 맵 전체의 지형을 꼼꼼히 살피는 습관이 필수적이다. 이 맵은 오랜 시간 플레이를 즐길 수 있는 콘텐츠는 아니지만, 짧고 간결한 플레이 타임에도 불구하고 전략적 깊이를 느낄 수 있어 한 번쯤 시도해 볼 만한 가치가 충분하다. The most notable feature of the *Untitled Scenario* custom map in *StarCraft: Brood War* is its simplicity and focus on concentration. As the in-map description states, the objective is to destroy all enemy buildings, and the entire structure is designed solely for destruction. The map’s overall atmosphere, using a jungle tile set, creates a dark, immersive feeling as if you’re standing in the middle of the battlefield. While the map size is relatively large at 1024x1024, the key structures are densely packed near the center, making the destruction objective clear. Players choose between Terran, Zerg, or Protoss and must concentrate on demolishing enemy buildings, quickly identifying their locations and planning efficient attacks. The map’s resolution and tile units are uniquely set at 3072 x 8192 and 96 x 256, respectively, likely to provide both wide visibility and detailed spatial awareness. Combat primarily takes place around buildings, requiring smart unit production and resource management. From the start, players must swiftly analyze enemy positions and defenses, and in the mid-game, deploy large numbers of units for coordinated assaults. The difficulty heavily depends on the player’s strategy and unit control, with victory often hinging on how well they prepare for follow-up attacks or defensive setups after destroying buildings. Despite its straightforward goal of destruction, this custom map demands strategic thinking and quick decision-making, offering an engaging experience for both beginners and veterans. The jungle tile set’s atmosphere further enhances immersion, creating a battle environment that feels alive. Recommended for those who want to enjoy *Destroy All Enemy Buildings* not just as mindless destruction but as a strategic challenge, this map suits players who prefer goal-oriented gameplay. Before playing, carefully consider your chosen race and early unit production plans, and practice quickly analyzing enemy building layouts and defenses. Given the map’s size, securing vision and optimizing unit movement paths are crucial to success, so always check the minimap and terrain thoroughly. While not a map for long-term replayability, its short yet strategic playtime offers enough depth to make it worth trying at least once.
Rage
Rage 맵은 황무지 타일셋을 배경으로 한 1인용 파괴형 유즈맵으로, 제한 시간 안에 마을을 최대한 파괴하는 것이 목표입니다. 플레이어는 맵 중앙에 배치된 거대한 야수를 조작해 건물, 유닛, 지형을 파괴할 수 있으며, 파괴량은 야수의 공격력과 이동 경로에 따라 달라집니다. 맵 구조는 비교적 넓은 평지와 몇 개의 작은 골목으로 이루어져 있어, 야수를 자유롭게 이동시키면서 전략적으로 파괴 지점을 선택할 수 있습니다. 파괴 대상은 주로 마을의 상점, 주택, 방어 타워 등이며, 파괴된 건물은 일정 시간 후 잔해로 남아 다른 플레이어가 이용할 수 없게 됩니다. 시간 제한은 맵 파일에 명시되지 않았지만, 일반적인 5~10분 정도의 라운드가 적당합니다. 플레이 경험은 야수의 이동 속도와 공격 범위를 조절하며 최적의 파괴 루트를 찾는 과정에서 긴장감과 성취감을 동시에 제공합니다. 초보자도 직관적인 조작으로 쉽게 접근할 수 있지만, 고득점 플레이를 위해서는 건물 배치와 파괴 순서를 미리 분석하고, 야수의 스킬 쿨타임을 고려한 효율적인 타이밍 관리가 필요합니다. 파괴량을 최대화하려는 경쟁적인 플레이어에게 적합하며, 혼자서도 충분히 즐길 수 있는 솔로 모드이지만, 친구와 번갈아 가며 점수를 비교하는 방식으로도 재미를 느낄 수 있습니다. Rage is a solo destruction‑focused UMS map set on a wasteland tileset, where the objective is to wreak as much havoc on a town within a time limit. Players control a massive beast placed near the center of the map, using its attacks and movement to demolish buildings, units, and terrain features. The map layout consists of a relatively open plain dotted with a few narrow alleys, allowing the beast to roam freely while strategically selecting demolition targets. Structures such as shops, houses, and defensive towers are the primary targets; once destroyed, they remain as wreckage for a short period, preventing further use. Although the exact time limit isn’t specified in the file, a typical 5‑10 minute round works well. The gameplay experience combines tension and satisfaction as players adjust the beast’s speed and attack range to find the optimal destruction route. While the controls are straightforward enough for beginners, achieving high scores requires pre‑analysis of building placements, ordering of demolitions, and careful timing of the beast’s skill cooldowns. This map suits competitive players who aim to maximize destruction, and it can be enjoyed solo or in a turn‑based score‑compare mode with friends.
9999의 배럭 부수기.만든이:aavnm
황혼 타일셋의 음울한 분위기 속에서 펼쳐지는 이 유즈맵은 제목이 암시하듯 단순하면서도 기묘한 매력을 지닌 작품이다. 플레이어는 갑자기 분노에 휩싸인 생선이 되어 죄없는 배럭을 향한 파괴 본능을 분출하게 된다. 맵의 구조는 전형적인 유즈맵 스타일로, 넓은 공간에 무수히 많은 배럭이 배치되어 있고 플레이어는 제한된 유닛으로 이 건물들을 하나하나 부수며 진행한다. 단조로울 수 있는 반복 행위임에도 불구하고, 생선이라는 엉뚱한 설정과 9999라는 숫자가 주는 압도감이 독특한 플레이 경험을 만들어낸다. 초반에는 가볍게 클릭 몇 번으로 배럭이 철거되는 시원시원한 타격감을 느낄 수 있지만, 숫자가 줄어들수록 남은 목표물을 찾아 맵 이곳저곳을 누비는 숨은그림찾기 같은 요소가 가미된다. 단순히 공격 버튼을 연타하는 것을 넘어서, 맵 구석구석에 숨은 배럭을 발견하는 소소한 재미와 함께 방대한 작업량을 동료 플레이어들과 어떻게 분담할지에 대한 암묵적인 협동심도 요구된다. 최대 8명이 함께할 수 있는 점은 이 맵의 핵심적인 진행 방식이다. 혼자서 9999개의 배럭을 부수는 것은 거의 수행에 가까운 지루한 노동이 될 수 있지만, 여러 명이 모여 각자 역할을 나누고 구역을 정해 부수기 시작하면 작업의 효율이 눈에 띄게 올라가는 것을 체감할 수 있다. 이 과정에서 별다른 의사소통 없이도 자연스럽게 팀워크가 형성되는 경험은 의외의 재미를 선사한다. 다만, 플레이 전에 반드시 인지해야 할 점은 이 맵이 극도로 단순한 목표를 반복하는, 이른바 노가다성 콘텐츠라는 사실이다. 화려한 이펙트나 긴장감 넘치는 전투, 복잡한 트리거 시스템을 기대한다면 실망할 수 있다. 제작자가 내부 설명에 명시한 것처럼 불법 수정을 엄격히 금지하는 점을 고려하면, 순수하게 주어진 환경 안에서 생선이라는 역할에 충실히 몰입하며 목표 달성을 위한 인내심을 시험하는 맵이다. 결국 이 맵은 단순한 조작 속에서 해방감을 찾고자 하는 플레이어, 또는 친구들과 함께 무의미한 노동을 공유하며 대화를 나누는 소셜 게임 형태를 즐기는 이들에게 추천할 만하다. 배럭이 파괴되는 소리와 함께 쌓이는 킬 수를 보며 느끼는 성취감은 의외로 중독성이 있다. Within the somber atmosphere of the Twilight tileset, this Use Map Settings creation possesses a simple yet bizarre charm, just as the title suggests. Players become fish that have suddenly been overcome with rage, unleashing their destructive instincts upon innocent barracks. The map structure follows a typical style, featuring a vast area filled with countless barracks, and players must start with limited units to destroy these buildings one by one. Although the act itself could be monotonous, the absurd premise of playing as fish and the overwhelming scale implied by the number 9999 create a unique gameplay experience. In the beginning, you can enjoy the cathartic sensation of demolishing barracks with light clicks, but as the number dwindles, the process turns into a sort of hidden object game where you must scour every corner of the map to find the remaining targets. Beyond simply mashing the attack button, the map requires subtle cooperation as you share the massive workload with fellow players and experience the small joy of discovering barracks tucked away in obscure spots. The ability to play with up to 8 people is the core progression element of this map. Destroying 9999 barracks alone could feel like a tedious chore akin to penance, but when multiple players join and divide the sectors among themselves, you can tangibly feel the work efficiency skyrocket. The experience of naturally forming teamwork without any explicit communication provides an unexpected source of fun. However, a crucial point to check before playing is that this map focuses on extremely repetitive, grind-heavy content with a simple objective. If you are expecting flashy effects, tense combat, or complex trigger systems, you will likely be disappointed. Considering the creator's strict warning against illegal modifications in the internal description, this is a map that tests your patience by asking you to faithfully immerse yourself in the role of a fish within the original environment. Ultimately, this map is recommended for players who seek liberation through simple controls or those who enjoy a casual social game where they can share in a meaningless endeavor and chat with friends. The sense of achievement you feel as the kill count stacks up alongside the sound of crumbling barracks is surprisingly addictive.
도시박살내기 1.5 (City Destruction 1.5)
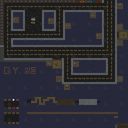
브루드워 유즈맵 ‘도시박살내기 1.5’는 플레이어가 강력한 유닛을 조종해 도시를 파괴하는 서바이벌 디펜스 장르의 맵으로, 초반부터 끊임없는 적의 공격을 버티며 전략적으로 건물을 파괴하는 재미가 인상적이다. 맵은 황무지 타일셋을 기반으로 4096x4096 크기의 넓은 평야가 펼쳐져 있으며, 중앙에 위치한 플레이어 기지 주변으로 도시 구조물이 촘촘히 배치되어 있어 파괴감이 한층 살아난다. 게임은 5명의 플레이어가 각각 독립된 기지에서 시작하며, 적 유닛과 건물을 파괴하는 동시에 자신의 기지를 지키면서 진행된다. 맵의 핵심 재미는 ‘파괴’에 중점을 둔 디자인으로, 건물이나 유닛을 파괴할 때마다 점수가 적립되는 시스템이 보인다. 적의 공세는 초반에는 소규모 정찰병이, 중반에는 강력한 조합의 혼종 부대가, 후반에는 대규모 공세가 몰려오는 식으로 단계가 나뉘어 있으며, 이를 대비해 방어 건물을 배치하고 유닛을 보강하는 전략이 필요하다. 특히 도시 구조물은 파괴 가능한 오브젝트로 설정되어 있어, 단순히 적을 잡는 것만이 아니라 맵 자체를 ‘파괴하는’ 재미가 있어 타 디펜스 맵과 차별화된다. 또한 맵의 넓은 평야는 유닛 이동과 전투 공간을 충분히 제공해 전략적 깊이를 더한다. 이 맵은 초보자보다는 중수 이상 플레이어에게 적합하며, 특히 전략적 사고와 자원 관리 능력이 요구된다. 초반에 방어선을 제대로 구축하지 못하면 기지가 무너지기 쉽고, 적의 혼종 부대 공세는 방어 건물의 배치와 유닛 조합에 따라 승패가 좌우된다. 또한 파괴 시스템을 적극 활용해 점수를 최대한 확보하는 플레이가 중요하다. 만약Destruction 2’와 같은 후속 버전이 있다면, 이 맵의 인기 요소를 더 발전시킨 형태일 가능성이 높다. 공격과 방어, 파괴와 보존의 밸런스가 잘 잡힌本作은 브루드워 유즈맵 중에서도 손에 꼽히는 재미를 자랑하는 디펜스 장르의佳作으로, 파괴의 쾌감을 즐기는 플레이어라면 반드시 체험해볼 가치가 있다. 다만, 넓은 맵과 다양한 적 조합 때문에 전투가 지연될 수 있으니, 팀원과의 원활한 소통이 필요하다. 자신의 기지를 지키면서도 적극적으로 공격을 펼쳐야만 높은 점수를 얻을 수 있어, 전략적 선택이 중요한 게임이다. This Brood War custom map, ‘도시박살내기 1.5’ (City Destruction 1.5), delivers a thrilling survival defense experience where players command powerful units to demolish a sprawling cityscape. Set on a vast 4096x4096 wasteland map using the desert tileset, the game tasks five players with defending their bases while systematically destroying enemy structures and fending off escalating waves of attacks. The core appeal lies in its destruction-focused gameplay, where each destroyed building or unit contributes to a scoring system, adding a rewarding layer beyond mere survival. The enemy AI progresses through distinct phases: small scouting units early on, followed by mixed hybrid forces, and culminating in large-scale attacks. Players must strategically place defensive structures and manage unit compositions to counter these threats. The city’s destructible buildings serve as interactive elements, enhancing the sense of chaos and impact as the map transforms with each explosion. Designed for intermediate to advanced players, this map demands strategic foresight and resource management. Poor early-game preparation can lead to base collapse, while hybrid attacks in later stages require meticulous defensive planning. The scoring system incentivizes aggressive play, rewarding players who balance offense and defense effectively. Fans of this title may also enjoy its sequel, ‘도시박살내기 2’ (City Destruction 2), which likely expands on these mechanics. Balancing destruction and preservation, ‘도시박살내기 1.5’ stands out as a premier defense custom map in Brood War, offering visceral satisfaction for players who enjoy high-stakes combat. Its intricate enemy AI and destructible environment ensure varied experiences, though the map’s scale and tactical depth may require team coordination to optimize performance. Success hinges on making calculated choices—protecting your base while seizing opportunities to attack—making it a must-play for strategy enthusiasts.
[PVV20] 귀향 (Homebound)
스타크래프트 브루드워 유즈맵 '[PVV20] 귀향 (Homebound)'은 코랄(Korhal) 행성을 무대로 한 싱글 플레이 캠페인 미션이다. 내부 설명에 따르면 플레이어는 OZD 복합 단지에 잠입하여 시설을 완전히 파괴하는 것이 주 목표다. 황혼(Twilight) 타일셋이 적용된 192x192 크기의 맵은 붉은 안개와 폐허가 어우러진 황량한 코랄의 분위기를 잘 살려내며, 공식 캠페인 못지않은 몰입감을 주는 것으로 보인다. 진행 방식은 일반적인 기지 건설형이 아닌, 주어진 병력과 영웅 유닛을 활용해 고정된 적 진영을 돌파하는 '고정 병력 미션' 형태에 가깝다. 트리거를 통해 중간 목표 갱신, 강화 병력 투입, 시네마틱 연출 등이 구현되어 있어 단순한 컴까기나 디펜스와는 차별화된 서사 중심 플레이가 예상된다. 적 구성은 테란 자치령 병력을 중심으로 벙커, 포탑, 공성 전차 등이 층층이 배치되어 있어 무리한 돌진보다는 우회로 확보와 병력 분산, 스펠 캐스터 활용 등 전술적 판단이 승패를 가를 것으로 보인다. 러시아어 원제 'Связь с домом(집과의 연결)'과 영문 파일명 'Homebound'가 암시하듯 귀환이나 구출, 혹은 과거와의 단절 같은 서사적 복선이 깔려 있을 가능성이 높다. 다만 브리핑과 목표 텍스트가 러시아어로만 제공되어 한국어권 유저는 플레이 전 번역 확인이 필수적이다. 난이도는 병력 보충이 제한적인 후반부로 갈수록 상승하며, 전체 클리어까지 30~40분 내외가 소요될 것으로 추정된다. 스토리 연출과 전술 퍼즐을 동시에 즐기고 싶은 캠페인 마니아에게 추천할 만한 수작으로 보인다. StarCraft Brood War UMS map '[PVV20] Homebound' is a single-player campaign mission set on the planet Korhal. According to the internal description, the player's objective is to infiltrate the OZD complex and destroy the facility. The 192x192 map utilizing the Twilight tileset captures the desolate atmosphere of Korhal with red fog and ruins, offering immersion comparable to official campaigns. The gameplay resembles a 'fixed force mission' rather than a base-building style, requiring the player to breach fortified enemy positions using a predetermined army and hero units. Triggers appear to implement updated objectives, reinforcement drops, and cinematic sequences, suggesting a narrative-driven experience distinct from simple comp-stomps or defense maps. Enemy composition centers on Terran Dominion forces with bunkers, turrets, and siege tanks layered defensively, demanding tactical judgment—flanking, force splitting, and spellcaster usage—over brute force. The Russian title 'Связь с домом' (Connection to Home) and the filename 'Homebound' hint at narrative themes of return, rescue, or severance from the past. However, since briefings and objectives are only in Russian, Korean players will need translation tools beforehand. Difficulty likely ramps up in the later stages due to limited reinforcements, with an estimated clear time of 30-40 minutes. This is a recommended pick for campaign enthusiasts who enjoy both storytelling and tactical puzzles.
도시박살내기2 (City Destruction 2)
스타크래프트 브루드워 맵 중에서도 독특한 파괴의 재미를 선사하는 유즈맵 도시박살내기2(City Destruction 2)는 도심 속에서 펼쳐지는 시원시원한 전투 경험을 제공하는 작품이다. 황무지 타일셋을 활용하여 고층 빌딩과 도로, 그리고 경찰서와 같은 공공시설들이 배치된 복잡한 시가지 지형을 구현해 낸 것이 가장 큰 특징이다. 이 스타크래프트 맵 유즈맵은 일반적인 밀리 전투와는 완전히 다른 결을 지니고 있으며, 플레이어가 직접 주어진 전력을 활용해 도심 전체를 초토화해 나가는 독창적인 플레이 방식을 보여준다. 내부 설명에 따르면 혼잡한 도시를 박살내 버리는 것이 핵심 목표이며, 특히 맵 내에 위치한 특정 핵심 거점인 경찰서를 완전히 파괴하는 순간 승리를 거두게 되는 명확한 승리 조건을 가지고 있다. 플레이어는 제한된 공간 속에서 다양한 유닛들을 동원해 건물을 철거하고 방해 세력을 돌파해야 하므로, 효율적인 진격 경로를 고민하고 화력을 집중하는 전략적인 판단이 요구된다. 시가지 맵 특유의 좁은 도로와 블록 형태의 구조물들은 병력의 이동을 제한하면서도, 목표물을 향해 맹렬하게 진격할 때의 파괴적인 카타르시스를 배가시키는 역할을 한다. 평소와는 다른 색다른 규칙과 목표를 가진 유즈맵을 찾는 이들이나, 스트레스를 시원하게 날려버릴 수 있는 간단하면서도 몰입감 넘치는 싱글 플레이 위주의 브루드워 콘텐츠를 선호하는 플레이어들에게 적합하다. 복잡한 컨트롤보다는 주어진 조건 속에서 목표를 완수해 나가는 재미에 집중되어 있어, 가볍게 접속해 색다른 규칙의 미션을 즐기고자 하는 유저라면 한 번쯤 플레이해 볼 가치가 있는 흥미로운 맵이다. City Destruction 2 is a Use Map Settings map for StarCraft: Brood War that offers a unique and destructive gaming experience set within an urban environment. Utilizing the wasteland tileset, the map features a complex city layout complete with high-rise buildings, roads, and public facilities such as police stations. This StarCraft use map differs completely from standard melee matches, focusing instead on a distinct gameplay style where the player utilizes available forces to devastate the entire cityscape. According to the internal map description, the core objective is to smash through a congested city, with a clear win condition achieved specifically by destroying the designated police station. Players must mobilize various units within the confined layout to demolish buildings and overcome opposing forces, requiring strategic decisions regarding efficient advancement paths and concentrated firepower. The narrow roads and block-structured terrain characteristic of urban maps restrict troop movement while amplifying the destructive catharsis felt when pushing relentlessly toward the target. This map is well-suited for players seeking unconventional rules and objectives, or those who prefer engaging single-player Brood War content designed to blow off some steam. With its focus on completing specific goals under unique conditions rather than complex micro-control, it stands out as an interesting custom map for anyone looking to enjoy a casual yet engaging mission.
생존의 시험 - 죽음!!!! (Test of Survival - DEATH!!!!)
황혼의 어두운 대지 위에서 시작되는 이 서바이벌 맵은 제목 그대로 죽음과의 끈질긴 싸움을 강요한다. 다섯 명의 플레이어가 각자 제한된 자원과 좁은 공간에서 시작하며, 주변은 적대적인 컴퓨터 유닛과 건물로 빽빽하게 둘러싸여 있다. 맵의 핵심 목표는 단순하지만 가혹하다. 컴퓨터의 모든 유닛과 건물을 파괴하고 살아남아야 한다. 내부 설명에 적힌 “Can U Win? Or Will U Just Die?”라는 문구가 이 맵의 정체성을 단적으로 드러낸다. 초반 몇 분은 숨 돌릴 틈 없이 몰려오는 공격을 방어하느라 정신이 없다. 자원은 극도로 부족하고, 병력 생산 속도는 적의 공세를 따라잡기 어렵게 설계되어 있어 한순간의 방심이 곧바로 전멸로 이어진다. 이 맵은 전형적인 건설형 서바이벌 장르에 속하며, 협동을 전제로 하지만 실제로는 각자의 진영이 개별적으로 압박을 견뎌내는 방식으로 진행된다. 동료가 무너지면 그 여파가 순식간에 자신의 진영으로 번지기 때문에, 모두가 끝까지 버텨야 한다는 부담감이 상당하다. 제작자는 “재미를 더했다”고 밝혔지만, 그 재미는 극한의 난이도에서 오는 쾌감에 가깝다. 적을 하나씩 제거하며 조금씩 전선을 확장할 때의 성취감은 분명히 존재한다. 하지만 이 과정이 매우 더디고, 적의 병력 구성은 예측을 벗어나며, 한 번 밀리기 시작하면 회복이 거의 불가능하다. 특히 후반으로 갈수록 컴퓨터의 방어선이 견고해지고 공격도 거세져서, 플레이어는 끊임없이 멀티태스킹을 강요받는다. 이 맵을 제대로 즐기기 위해서는 빠른 초반 방어 체계 구축과 자원 관리에 능숙해야 하며, 서바이벌 장르 특유의 끈기와 인내심이 필수적이다. 캐주얼한 플레이어보다는 극한의 도전을 원하는 숙련된 플레이어 그룹에게 적합하다. 플레이 전 반드시 모든 참가자가 이 맵의 특성, 즉 무자비한 난이도와 긴 플레이 시간을 감수할 각오가 되어 있는지 확인해야 한다. 중간에 한 명이라도 포기하면 경험이 급격히 무너지므로, “TRY NOT TO QUIT!!!!!”이라는 경고는 단순한 협박이 아니라 이 맵을 체험하기 위한 유일한 지침이다. The survival map begins on the twilight terrain, and as the title suggests, it forces a relentless struggle against death itself. Five players start with severely limited resources and cramped space, immediately surrounded by a dense swarm of hostile computer units and structures. The core objective is brutally simple: destroy every enemy unit and building and stay alive. The internal description’s challenge, “Can U Win? Or Will U Just Die?” perfectly encapsulates the map’s identity. The opening minutes are a frantic blur of defending against waves of attacks that leave no room to breathe. Resources are painfully scarce, and unit production speed is deliberately outpaced by the enemy’s aggression, meaning a single moment of carelessness leads directly to annihilation. This map belongs to the classic build-and-survive genre, designed for cooperation, yet in practice each player’s base is individually pressured. If an ally collapses, the gap floods toward the others instantly, creating immense pressure for everyone to hold on until the end. The creator claimed to have made it “more fun,” but that fun is akin to the thrill derived from overcoming extreme adversity. There is genuine satisfaction in destroying enemy pockets one by one and gradually expanding your front line, but the process is brutally slow and unforgiving. The enemy force composition is unpredictable, and once you start losing ground, recovery becomes nearly impossible. As the game progresses into the later stages, the computer’s defensive lines harden and their offensives intensify, constantly forcing players into relentless multitasking. To face this map, you must be proficient in rapid early-game defense setups and efficient resource management, and an innate patience for the survival genre is mandatory. It is far more suitable for a group of highly skilled players seeking extreme challenges than for casual enjoyment. Before playing, every participant must fully understand and accept the map’s nature, namely its merciless difficulty and the lengthy time commitment required. If even one person quits midway, the entire experience collapses, so the warning “TRY NOT TO QUIT!!!!!” is not just a threat but the single essential rule for experiencing this map.
골렘 매드니스 매스어택 (Golem Madness /w Mass-Attack)
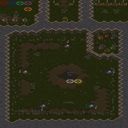
이 맵은 스타크래프트 브루드워의 유즈맵으로, 다섯 명의 플레이어가 골렘을 파괴하고 조립하는 독특한 전략을 펼치는 디펜스 장르의 게임입니다. 맵 중앙에 위치한 거대한 골렘의 머리를 파괴한 후, 파괴된 골렘의 파편을 모아 새로운 골련을 조립하는 방식으로 진행됩니다. 골렘의 머리를 파괴하면 맵 곳곳에 흩어진 파편을 수집할 수 있으며, 이를 조합해 새로운 골렐을 만들 수 있습니다. 골렘은 일정 시간마다 자동으로 생성되며, 플레이어는 골렘을 파괴하고 재조립하는 과정에서 발생하는 전략적 선택과 리스크를 관리해야 합니다. 맵의 디자인은 사막 테마로 이루어져 있으며, 중앙의 골렘 머리 주변에는 파괴 가능한 구조물들이 배치되어 있어 플레이어의 공격 루트를 다양하게 만듭니다. 골렘을 파괴하는 즉시 맵 내의 파편이 생성되어 수집 가능해지므로, 빠른 판단과 효율적인 자원 관리가 중요합니다. 이 맵은 보통 난이도로 설계되어 있으나, 골렘의 파괴와 재조립 사이의 균형을 맞추는 것이 핵심입니다. 초보 플레이어는 골렘을 파괴하는 데 집중하고, 경험이 쌓이면 재조립 전략을 세우는 등 점차 난이도를 높일 수 있습니다. 다섯 명의 플레이어가 모두 참여할 수 있어 팀웍과 개인의 능력 모두가 요구되는 점이 특징입니다. 골렘을 파괴하는 재미와 함께 새로운 골렘을 조립하는 성취감을 느낄 수 있는 맵으로, 디펜스와 전략 요소가 결합된 독특한 경험을 제공합니다. 플레이 전에는 골렘의 파괴와 파편 수집, 재조립의 타이밍을 미리 계획해두는 것이 중요합니다. 또한, 맵의 구조상 중앙 지역을 장악하는 것이 골렘 파괴와 파편 수집에 유리하므로, 초반 위치 선정이 중요합니다. This custom map for *StarCraft: Brood War* is a defense genre game where five players engage in a unique strategy of destroying and reassembling golems. The game progresses by first destroying the massive golem’s head located at the center of the map, then collecting the scattered fragments to rebuild a new golem. Once the golem’s head is destroyed, fragments appear across the map for collection, which can then be combined to form a new golem. Golems automatically respawn at set intervals, and players must balance strategic decisions and risks while managing both the destruction and reassembly process. The map features a desert theme, with destructible structures around the central golem head that diversify attack routes. Since fragments spawn immediately upon destruction, quick judgment and efficient resource management are crucial. Designed with moderate difficulty, the key challenge lies in balancing golem destruction with reassembly. Beginners can focus on destroying golems, while more experienced players can develop advanced reassembly strategies to increase difficulty. With support for five players, the map emphasizes both teamwork and individual skill. It offers a distinctive experience blending defense and strategy, delivering the thrill of destroying golems alongside the satisfaction of assembling new ones. Before playing, it’s important to plan the timing for destruction, fragment collection, and reassembly. Given the map layout, securing the central area early provides an advantage for both golem destruction and fragment collection, making early positioning critical.
맵 선택 가이드
태그는 맵의 핵심 특징을 빠르게 설명하지만 제작 버전마다 규칙이 다를 수 있습니다. 상세 설명에서 권장 인원, 난이도, 플레이 시간과 버전을 함께 확인한 뒤 다운로드하세요.