
튜토리얼 스타크래프트 맵 모음
'튜토리얼' 태그가 등록된 맵을 모았습니다. 장르 하나로 찾기 어려운 플레이 방식, 난이도와 특징을 중심으로 인기 맵과 최신 맵을 비교해 보세요.
- 등록 맵
- 10개
- 누적 다운로드
- 2
- 누적 조회
- 166
인기 맵
다운로드와 조회 반응이 높은 맵입니다.
튜토리얼 1 (Tutorial 1)
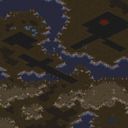
스타크래프트 브루드워의 튜토리얼 맵으로 알려진 <strong>Tutorial 1</strong>은 초보 유저들이 기본 조작과 게임 메커니즘을 익히도록 설계된 유즈맵입니다. 맵 내부 설명에 따르면 '모든 적 건물 파괴'가 승리 조건으로, 단순하면서도 핵심적인 목표를 제공합니다. 황무지 타일셋을 기반으로 한 1024x1024 크기의 평지형 맵으로, 초심자도 쉽게 접근할 수 있는 구조로 구성되어 있습니다. 중앙에 위치한 플레이어 본진과 사방으로 배치된 적 건물들이 특징이며, 초반 자원 수급과 건물을 짓는 법, 유닛을 생산하고 조종하는 기본기를 자연스럽게 익힐 수 있도록 배려했습니다. 맵의 symmetrical한 배치 덕분에 양측의 밸런스가 맞춰져 있으며, 초등학생부터 성인까지 누구나 무리 없이 플레이할 수 있는 난이도로 제작되었습니다. 다만, 튜토리얼 맵의 특성상 추가적인 스킬이나 전략적 깊이는 없으므로, 실제 유즈맵이나 멀티 플레이를 준비하는 유저들에게는 기본기를 다지는 '시작점' 정도로만 활용할 수 있습니다. 플레이 전에는 자신의 종족에 맞는 빌드오더와 základní 유닛 구성(예: 테란의 경우 SCV + 마린)을 미리 숙지하고, 건물 건설 순서와 자원 관리 방법을 연습하는 데 집중하는 것이 좋습니다. 또한, 맵의 symmetrical한 구조상 적 건물의 위치를 미리 숙지하면 승리 확률을 높일 수 있습니다. рекомендуется 사용자 그룹: 스타크래프트 브루드워 초보자, 게임 룰 학습 중인 유저, 기본 조작 연습을 원하는 모든 플레이어 Tutorial 1, known as the tutorial map of *StarCraft: Brood War*, is a custom map designed to help beginner players learn basic controls and game mechanics. According to the in-map instructions, the victory condition is to "destroy all enemy buildings," providing a simple yet essential objective. The map features a 1024x1024 flat terrain based on a wasteland tileset, structured to be easily accessible even for newcomers. It includes a central player base with enemy buildings spread around, allowing beginners to naturally practice early resource gathering, building construction, unit production, and basic control. The symmetrical layout ensures balanced sides, making it playable for anyone from elementary students to adults without difficulty. However, as a tutorial map, it lacks additional skills or strategic depth, serving primarily as a starting point for those preparing for custom maps or multiplayer. Before playing, it’s advisable to memorize the build order and basic unit compositions (e.g., Terran’s SCV + Marine), practice building placement and resource management, and familiarize yourself with the symmetrical layout to increase your chances of victory. Recommended user groups: *StarCraft: Brood War* beginners, players learning game rules, and anyone practicing basic controls.
튜토리얼 2 (Tutorial 2)
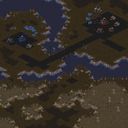
스타크래프트 브루드워의 튜토리얼 맵인 Tutorial 2는 초보 유저부터 숙련자까지 손쉽게 게임의 기본기를 익힐 수 있도록 설계된 유즈맵입니다. 맵의 목표는 단일 플레이어로 모든 적 건물 파괴하기이며, 단순하면서도 효과적인 구조로 구성되어 있어 게임의 기본 메커니즘을 빠르게 이해할 수 있습니다. 맵은 황무지 테마의 황량한 지형 위에 배치되어 있으며, 기본 유닛 생산 건물인 커맨드 센터와 적 건물로만 구성된 구조물을 확인할 수 있습니다. 플레이어는 초반에 제공되는 SCV를 활용해 자원을 채취하고, 점차 병력을 확장하며 적 건물을 파괴하는 과정을 자연스럽게 경험할 수 있습니다. 맵의 좁고 직선적인 배치 덕에 전략보다는 기본 조작과 컨트롤에 집중할 수 있으며, 적 건물의 위치와 배치 패턴을 익히기에 적합합니다. 또한, 맵의 난이도는 별도로 설정되어 있지 않지만, 적 건물 수가 제한적이어서 초보자도 쉽게 완료할 수 있습니다. 이 맵은 스타크래프트의 기본 튜토리얼을 넘어서는 실전 연습용으로도 유용하며, 특히 초보 유저들에게는 게임의 핵심인 자원 관리와 유닛 컨트롤을 익히는 데 도움이 될 것입니다. 다만, 맵 특성상 반복 플레이 시 지루함을 느낄 수 있으며, 숙련자들에게는 다소 단순한 구조로 느껴질 수 있습니다. 따라서 이 맵은 게임의 기본기를 다지려는 신규 유저들에게 강력히 추천합니다. 플레이 전에는 커맨드 센터와 SCV의 생산, 자원의 채취 방법, 그리고 기본 전투 유닛의 생산과 활용 방법을 숙지하는 것이 좋습니다. 또한, 맵의 좁은 길목에서 적과 마주칠 가능성이 높으므로 SCV를 통한 방어와 자원 확보에 주의를 기울여야 합니다. This StarCraft: Brood War tutorial map, Tutorial 2, is designed to help new players grasp fundamental mechanics through a straightforward yet effective structure. The objective is simple: destroy all enemy buildings as a single player. The map, set on a barren terrain with a wasteland tileset, features a clear layout centered around a main base (Command Center) and scattered enemy structures. Players begin with SCVs to gather resources and gradually expand their forces to eliminate enemy buildings. The narrow and linear design encourages focus on basic control and resource management rather than complex strategies. While the difficulty isn't explicitly rated, the limited number of enemy buildings ensures accessibility for beginners. This map serves as both a tutorial and practical exercise, making it ideal for newcomers to practice core mechanics like unit control and base expansion. However, its simplicity may lead to boredom for experienced players seeking more depth. It’s highly recommended for new players looking to build a strong foundation in StarCraft. Before playing, familiarize yourself with SCV production, resource gathering, and basic unit deployment. Pay close attention to defense and resource management, as the confined paths increase the likelihood of early confrontations with enemies.
테란 템플 트릭 (Terran Temple Tricks)
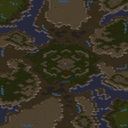
테란 템플 트릭스는 로스트 템플 맵을 무대로 테란 종족의 기본 운영과 전술적 요소를 단계별로 익히도록 구성된 단일 플레이어 UMS 맵이다. 사막 타일셋 위에 배치된 기지와 자원 지대는 원작 맵의 지형을 그대로 살리면서도 튜토리얼 목적에 맞게 단순화되어 있어 초보자가 부담 없이 진입할 수 있다. 진행 방식은 정해진 미션 순서에 따라 유닛 생산, 건물 배치, 업그레이드 타이밍 등을 안내 메시지와 함께 실습하게 되며, 각 단계가 완료되면 다음 과제로 자연스럽게 이어진다. 플레이 경험은 실전과 유사한 속도감 속에서 테란의 핵심 빌드 오더와 멀티태스킹을 체감할 수 있게 해주며, 실패 시 즉시 재시작이 가능해 반복 학습에 유리하다. 추천 대상은 테란을 처음 접하는 입문자나 빌드 오더를 체계적으로 정리하고 싶은 중급자이며, 이미 고급 전략을 숙지한 유저에게는 단순한 복습용으로만 의미가 있다. 플레이 전에는 맵 설명에 명시된 튜토리얼 목적을 숙지하고, 별도의 트리거나 승리 조건이 없으므로 자유롭게 연습 모드로 활용하면 된다. Terran Temple Tricks is a single‑player UMS map that uses the Lost Temple layout to teach the fundamentals of Terran play step by step. The desert tileset preserves the original terrain while simplifying bases and resource spots for tutorial purposes, allowing newcomers to jump in without pressure. Progression follows a fixed mission sequence that guides unit production, building placement, and upgrade timing through on‑screen prompts, each stage flowing naturally into the next. The experience delivers a near‑real‑time feel of core Terran build orders and multitasking, and instant restarts make repeated practice easy. It is best suited for beginners learning Terran or intermediate players wanting a structured build‑order review; advanced users will find it only a light refresher. Before playing, note that the map description states its tutorial aim and that there are no custom triggers or victory conditions, so it can be used freely as a practice sandbox.
Purificación
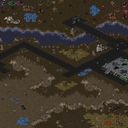
이 맵은 스페인어로 된 튜토리얼 맵으로, ‘Escuela de Batalla’ 모드의 초보자를 위한 교육 단계로 설계되었습니다. 내부 제목과 설명에서 알 수 있듯이, 플레이어는 인간 마린 부대를 조종해 끔찍한 저그의 침공으로부터 동료를 구출해야 합니다. 맵 구조는 비교적 제한된 영역에 여러 방어 지점이 배치되어 있어, 마린 유닛을 적절히 배치하고 방어 타워와 특수 능력을 활용해 저그 유닛의 파동을 차단하는 방식으로 진행됩니다. 초반에는 기본적인 유닛 생산과 이동, 공격 명령을 익히게 되며, 점차 저그의 공격 파동이 강해지면서 유닛 관리와 자원 배분의 중요성이 부각됩니다. 시야가 제한된 구역과 좁은 통로가 존재해, 적의 급습을 예측하고 사전 대비를 해야 하는 점이 특징이며, 이는 초보자에게 전략적 사고를 키우는 좋은 연습이 됩니다. 플레이 경험은 서서히 난이도가 상승하면서도, 각 단계마다 명확한 목표와 피드백을 제공해 학습 곡선을 부드럽게 유지합니다. 따라서 스타크래프트 브루드워의 기본 전투 메커니즘을 익히고자 하는 초보자나, 저그에 대한 방어 전술을 연습하고 싶은 유저에게 적합합니다. 플레이 전에는 맵 내의 방어 지점과 자원 위치를 미리 확인하고, 마린 유닛의 체력과 스킬 쿨타임을 관리할 준비를 하는 것이 좋습니다. This map is a Spanish-language tutorial designed for the ‘Escuela de Batalla’ mode, serving as an introductory training stage for beginners. According to its internal title and description, the player controls a Marine squad tasked with rescuing comrades from the onslaught of repulsive Zerg. The layout features a confined area with several defensive positions where Marines must be strategically placed, employing basic structures and special abilities to halt waves of Zerg units. Early sections teach fundamental unit production, movement, and attack commands, while later waves increase the Zerg pressure, emphasizing unit management and resource allocation. Limited vision zones and narrow passages require anticipating Zerg rushes and preparing defenses in advance, which provides valuable strategic practice for newcomers. The gameplay experience gradually escalates in difficulty but offers clear objectives and feedback at each step, ensuring a smooth learning curve. Consequently, this map is well-suited for StarCraft: Brood War beginners looking to master basic combat mechanics or players wishing to rehearse Zerg defense tactics. Before playing, it is advisable to familiarize yourself with the defensive positions and resource spots on the map, and be ready to monitor Marine health and skill cooldowns.
스타크래프트 64 부트 캠프 가이드 (StarCraft 64 Boot Camp Guide)
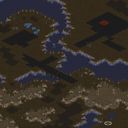
이 맵은 스타크래프트 64에 수록된 부트 캠프 튜토리얼을 PC 버전으로 옮긴 단일 플레이어 가이드 맵입니다. 파일명 'BootCamp64(к).scm'과 내부 설명에서 '스타크래프트 64의 독점 가이드'라는 문구가 확인되며, 러시아어 인코딩 오류로 제목이 깨져 보이는 점을 제외하면 내용은 명확합니다. 맵 크기는 64×64 타일로 매우 작으며, 황무지 타일셋을 사용해 단순한 지형 위에 기초적인 유닛 조작, 자원 채취, 건물 건설 순서 등을 단계별로 안내하는 트리거가 배치되어 있습니다. 플레이어는 1인용으로 시작하며, 별도의 적 유닛이나 승리 조건 없이 튜토리얼 메시지를 따라가며 기본 조작을 익히는 방식입니다. 난이도는 초보자도 부담 없이 따라할 수 있을 만큼 쉬우며, 예상 플레이 타임은 10~15분 내외로 짧습니다. 멀티플레이어나 경쟁 요소가 없는 순수 학습용 맵이므로, 스타크래프트를 처음 접하는 유저나 브루드워 환경에서 64버전 튜토리얼을 체험하고 싶은 유저에게 적합합니다. 맵 파일이 단일 시나리오로 구성되어 있어 추가 버전이나 모드 없이 바로 실행 가능하며, 별도의 밸런스 조정이나 전략적 깊이는 없습니다. 추천 대상은 초보자 입문 연습, 고전 콘솔 버전 콘텐츠 복원 관심자, 맵 제작 시 튜토리얼 트리거 참고용으로 활용하려는 제작자입니다. This map is a single‑player guide that ports the Boot Camp tutorial from StarCraft 64 to the PC version. The filename ‘BootCamp64(к).scm’ and the internal description mentioning an ‘exclusive guide from StarCraft 64’ confirm its origin, while the garbled Russian title is merely an encoding issue. The map size is only 64×64 tiles using the Badlands tileset, and a series of triggers walk the player through basic unit control, resource gathering, and building order in a step‑by‑step manner. There are no enemy units or explicit victory conditions; the player simply follows the on‑screen instructions. Difficulty is very easy, and a full run takes roughly 10–15 minutes. Because it contains no multiplayer or competitive elements, it serves purely as a learning tool. It is ideal for newcomers to StarCraft, fans wanting to experience the console‑era tutorial, or map makers looking for a reference on tutorial trigger design. The file is a standalone scenario with no extra versions or balance concerns.
스킬 연습 튜토리얼 (Special Abilities Tutorial)
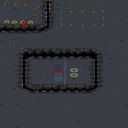
‘Special Abilities Tutorial’은 스타크래프트 브루드워의 유즈맵으로, 초보 플레이어들이 스킬 사용법을 익힐 수 있도록 설계된 튜토리얼 성격의 맵이다. 1명의 트레이너와 3명의 옵저버가 참여하는 이 맵은 주로 새로운 유저들의 실전 감각을 키우는 데 중점을 두고 있다. 맵 내부 설명에 따르면, 이메일로 문의가 가능하다는 점과 함께 초보자 대상임을 분명히 하고 있다. 맵의 구조는 넓은 평야와 중앙에 위치한 훈련 구역으로 나뉘며, 훈련 구역에서는 다양한 유닛과 건물들이 배치되어 있어 스킬 연습에 최적화되어 보인다. 플레이어들은 트레이너의 지시에 따라 유닛을 조작하고, 스킬 사용법을 익히며, 옵저버들은 이를 관찰하고 피드백을 제공하는 방식으로 진행된다. 맵의 분위기는 밝고 학습에 집중할 수 있도록 단순하지만, 스킬 사용법과 유닛 조작법 같은 기본기를 다질 수 있는 구조로 구성되어 있다. 이 맵은 특히 스타크래프트의 기본기와 스킬 사용법을 익히고 싶어 하는 초보자들에게 추천되며, 혼자서 또는 친구들과 함께 플레이하며 실력을 쌓아 나갈 수 있다. 플레이 전에는 트레이너의 지시를 잘 듣고, 훈련 구역의 유닛과 건물 배치에 익숙해지는 것이 중요하다. 또한, 옵저버의 피드백을 적극적으로 활용하여 스킬 사용법을 개선하는 것이 좋다. 이 맵은 스킬 사용법뿐만 아니라 유닛 간의 조합과 전략적 사고를 기르는 데에도 도움이 될 것으로 보인다. 초보자들이라면 한 번쯤 시도해 볼 만한 맵으로, 스타크래프트의 기본기를 다지고 싶다면 필수적인 맵이라고 할 수 있다. "Special Abilities Tutorial" is a custom map for *StarCraft: Brood War* designed as a tutorial to help new players learn how to use abilities. The map involves one trainer and three observers, focusing primarily on building practical skills for beginners. According to the in-game description, players can contact the creator via email, and the map explicitly targets novices. The layout consists of a wide open plain divided into a training area at the center, where various units and buildings are arranged for optimal skill practice. Players follow the trainer’s instructions to control units and learn ability usage, while observers monitor and provide feedback. The atmosphere is simple and bright, encouraging focused learning, and the structure helps reinforce fundamental skills like ability usage and unit control. This map is especially recommended for beginners looking to master *StarCraft*'s basics and ability mechanics, whether playing alone or with friends to gradually improve. Before starting, it’s important to listen carefully to the trainer’s guidance and familiarize yourself with the unit and building placements in the training area. Actively incorporating the observers’ feedback can also help refine your ability usage. Beyond just learning abilities, the map appears to foster unit combinations and strategic thinking. For any newcomers, it’s a worthwhile map to try, and for those aiming to solidify their *StarCraft* fundamentals, it’s practically essential.
TUTORIAL: 부트 캠프 (Boot Camp)
스타크래프트 브루드워의 튜토리얼 맵을 개선했다는 ‘TUTORIAL: "Boot Camp"’은 기본적인 유닛 훈련과 전략적 사고를 동시에 연습할 수 있는 UMS(유즈맵)이다. 황무지 타일셋으로 꾸며진 이 맵은 기존 튜토리얼의 경험을 한층 더 발전시킨다는 목표 아래 제작된 것으로 보이며, 특히 초보자부터 숙련자까지 폭넓은 플레이어에게 적합한 구조로 설계되었다. 맵의 가장 큰 특징은 단일 플레이어용으로 구성되어 있지만, 단순한 튜토리얼을 넘어 전략적 선택과 자원 관리를 요구한다는 점이다. 맵의 중앙에는 훈련장과 같은 구조물이 배치되어 있으며, 주변에는 적절한 공격로를 따라 움직이는 적이 배치되어 있다. 플레이어는 이 적들을 상대하며 유닛을 훈련하고, 동시에 맵 곳곳에 흩어져 있는 자원과 건물을 활용해 전략을 세워야 한다. 초보자는 기본적인 유닛 컨트롤과 빌드 오더를 익히기에 좋으며, 숙련자는 자원 효율성과 타이밍 공격에 대한 감각을 키울 수 있는 장점이 있다. 맵의 진행은 비교적 직관적이지만, 맵 곳곳에 숨겨진 소규모 전투와 자원 수집 포인트가 있어 플레이어의 집중력을 요구한다. 특히, 맵의 크기가 1024x1024로 크지 않기 때문에 플레이 시간은 20~30분 내외로 예상되며, 이는 짧은 시간 안에 기본기와 전략을 모두 경험해 볼 수 있는 장점으로 작용한다. 다만, 맵의 설명이 다소 모호한 부분을 보완하기 위해 플레이 전 맵의 구조와 배치된 적의 종류를 미리 확인하는 것이 좋다. 이 맵은 스타크래프트의 기본기를 단단히 다지고 싶거나, 유즈맵을 통한 전략적 사고를 연습하고자 하는 모든 플레이어에게 추천할 만하다. 특히 스타크래프트의 세계관에 익숙한 플레이어라면 더욱 몰입感을 느낄 수 있을 것이다. 또한, 맵의 인코딩이 cp949로 되어 있어 한글 환경에서도 문제없이 구동된다는 점도 장점이다. 마지막으로, 이 맵은 튜토리얼을 보완한다는 목표와 달리, 플레이어의 능동적인 참여를 요구한다는 점에서 단순히 ‘학습용’으로만 보기에는 아쉬운 부분이 있다. 하지만 그로 인해 전략적 깊이와 재미를 동시에 추구할 수 있는 장점이 있다. 플레이 전, 맵의 구조와 배치된 적의 종류를 미리 확인하고, 자신의 스타일에 맞는 전략을 준비하는 것이 좋다. 이 맵을 통해 스타크래프트의 기본기를 다지고, 나아가 유즈맵의 세계로 입문해 보는 것은 어떨까? "TUTORIAL: 'Boot Camp'" is a UMS (user-made map) that improves upon StarCraft: Brood War's tutorial maps by allowing players to practice both basic unit training and strategic thinking simultaneously. Designed with a wasteland tileset, this map aims to elevate the tutorial experience, catering to a wide range of players from beginners to experts. Its key feature is that, while single-player, it goes beyond a simple tutorial by requiring strategic choices and resource management. At the center lies a training-like structure, surrounded by enemies positioned along suitable attack routes. Players must fight these enemies to train units while also using scattered resources and buildings across the map to formulate strategies. Beginners can hone basic unit control and build orders, while experienced players can sharpen their resource efficiency and timing attacks. The progression is intuitive, though small-scale battles and resource collection points hidden throughout the map demand the player's focus. With a map size of 1024x1024, gameplay typically lasts 20–30 minutes, making it an efficient way to experience both fundamentals and strategy in a short time. However, to compensate for vague instructions, it's wise to review the map layout and enemy types before playing. This map is highly recommended for players looking to solidify StarCraft fundamentals or practice strategic thinking through user-made maps. Those familiar with the StarCraft universe will likely feel even more immersed. Additionally, since the map uses cp949 encoding, it runs smoothly even in Korean-language environments. While its goal is to enhance tutorials, the map’s reliance on active player participation means it transcends mere "learning tools." Instead, it strikes a balance between strategic depth and fun. Before playing, check the map layout and enemy types, and prepare a strategy that suits your style. Why not use this map to strengthen your StarCraft basics and take the first step into the world of user-made maps?
최후의 왕국 - 튜토리얼 (The Last Kingdom - Tutorial)
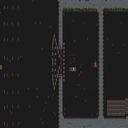
최후의 왕국 - 튜토리얼은 스타크래프트 브루드워 UMS 맵으로, 플레이어가 성을守하거나 적의 대장을 처치하는 두 가지 목표 중 하나를 선택하여 진행하는 시나리오식 방어 맵이다. 맵은 황무지 타일셋을 사용하며, 전체 크기는 8192×2048 타일로 구성되어 넓은 전장을 제공하지만, 실제 플레이 영역은 성 주변과 적 진영에 집중되어 있다. 게임 시작 시 플레이어는 기본 유닛과 제한된 자원을 받고, 먼저 성 주변에 방어진지를 구축하거나 적의 약점을 파악해 공략로를 마련해야 한다. 목표가 성 보호일 경우에는 웨이브形式으로 다가오는 적군을 막아내는 디펜스 방식이 적용되며, 적 대장을 처치하는 경우에는 제한된 시간 내에 정찰과 기습을 결합한 소규모 전투가 주를 이룬다. 두 가지 모드는 각각 별도의 트리거로 구분되어 있어, 플레이어는 원하는 목표를 선택해 반복 플레이가 가능하며, 실패 시 초기 상태로 돌아가는 리셋 mekanism이 마련되어 있다. 전반적인 난이도는 튜토리얼 성격답게 쉬움에서 보통 사이로 설정되어 있어, 스타크래프트 입문자나 디펜스 초보자에게 적합하며, 기본적인 유닛 조작과 자원 관리, 타이밍 감각을 익히기에 좋은 구성을 갖추고 있다. 플레이 전에는 맵 설명에 명시된 두 가지 승리 조건을 확인하고, 자신이 선호하는 플레이 스타일에 따라 모드를 선택하는 것이 좋으며, 멀티플레이 시에는 최대 7명까지 동시에 참여할 수 있어 협동 방어나 경쟁적 대결도 가능하다. 따라서 최후의 왕국 - 튜토리얼은 기본기를 다지고 싶은 유저뿐 아니라, 짧은 시간 안에 전략적 판단과 micro 컨트롤을 연습하고자 하는 intermediate 플레이어에게도 추천할 만한 UMS 맵이다. The Last Kingdom - Tutorial is a StarCraft: Brood War UMS map where the player either defends the castle or assassinates the enemy commander, choosing one of two objectives to progress in a scenario‑style defense map. The map uses the wasteland tileset and spans 8192×2048 tiles, offering a broad battlefield, but the actual play area focuses on the castle vicinity and enemy forces. At the start, the player receives basic units and limited resources, and must first build a defensive perimeter around the castle or scout the enemy’s weaknesses to devise an approach. If the goal is to protect the castle, incoming enemy waves arrive in a traditional defense format; if the goal is to kill the enemy leader, the gameplay shifts to a limited‑time scouting and guerrilla‑style skirmish. Each objective is handled by separate triggers, allowing the player to select a preferred mode and replay it repeatedly, with a reset mechanism that returns to the initial state upon failure. Overall difficulty is set between easy and medium, fitting the tutorial nature, making it suitable for StarCraft newcomers or defense beginners who wish to practice basic unit control, resource management, and timing. Before playing, review the two victory conditions described in the map and pick the mode that matches your preferred play style; in multiplayer, up to seven participants can join, enabling cooperative defense or competitive matches. Consequently, The Last Kingdom - Tutorial is recommended not only for users wanting to solidify fundamentals but also for intermediate players seeking a short session to sharpen strategic judgment and micro‑control.
격자 튜토리얼 (Grid Tutorial)
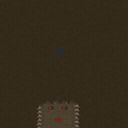
스타크래프트 브루드워 유즈맵 〈Grid Tutorial〉은 초기 맵 구조와 배치 시스템을 익히기 위한 튜토리얼 맵으로, 초보자부터 숙련자까지 다양한 플레이어에게 추천할 수 있는 교습용 맵이다. 이 맵은 1024x1024 크기의 격자형 평면 위에서 진행되며, 황무지 타일셋으로 구성되어 있어 지형이 단순하고 학습에 집중할 수 있도록 설계되었다. 맵 중앙에는 플레이어 기지가 위치하고, 주변에는 자원과 간단한 구조물이 배치되어 있어 기본적인 건설과 자원 관리 과정을 자연스럽게 체험할 수 있다. 특히, 격자형 배치 덕분에 각 건물과 유닛의 위치를 직관적으로 파악할 수 있어 초보자들이 맵 읽기 능력을 키우기에 적합하다. 또한, 맵의 모든 요소가 규칙적으로 배치되어 있어 전략적 깊이는 다소 부족하지만, 초보자 입문용으로서는 이상적인 환경을 제공한다. 이 맵을 통해 플레이어는 스타크래프트의 기본 메커니즘인 자원 채취, 건물을 짓는 방법, 유닛 생산 등 핵심 기능을 실습해 볼 수 있으며, 이후 복잡한 맵이나 전략을 다루기에 앞서 필수적인 기초를 다질 수 있다. 다만, 이 맵 자체는 튜토리얼에 특화되어 있어 장기적인 플레이를 즐기기보다는 일회성 학습용으로 활용하는 것이 바람직하다. 플레이 전에는 맵의 격자 구조와 각 구역의 역할을 확실히 이해하고, 트리거로 제공되는 안내 메시지를 참고하여 진행 순서를 따라야 한다. 특히, 건물을 짓는 위치와 자원 위치가 고정되어 있으므로, 초기 배치와 자원 관리에 대한 이해가 곧 플레이의 성패를 좌우할 수 있다. 이 맵은 스타크래프트의 기본기를 다지고 싶거나 새로운 플레이어에게 추천하고 싶다면 반드시 한 번 접해볼 만한 가치가 있다. Grid Tutorial is a StarCraft: Brood War custom map designed as a tutorial to help players learn map layouts and basic mechanics. Set on a 1024x1024 grid with a barren tileset, the map features a player base at the center, surrounded by resources and simple structures, making it ideal for beginners to practice building placement and resource management. The structured grid layout allows players to intuitively understand unit and building positions, fostering essential map-reading skills. While the strategic depth is minimal due to its educational purpose, the map serves as an excellent introduction to core StarCraft mechanics such as resource gathering, building construction, and unit production. It is particularly useful for newcomers to build foundational knowledge before tackling more complex maps or strategies. However, its focus on tutorials means it is best suited for short-term use rather than long-term gameplay. Players should familiarize themselves with the grid structure and the roles of each zone before starting. Since building and resource locations are fixed, mastering their positions early on is crucial for success. For anyone looking to grasp the basics of StarCraft or introduce the game to others, Grid Tutorial is a highly recommended starting point that delivers its intended educational value effectively.
튜토리얼: 붓 캠프 (TUTORIAL: Boot Camp)
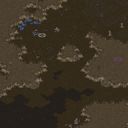
튜토리얼 붓 캠프(TUTORIAL: Boot Camp)는 스타크래프트 브루드워 맵 유즈맵 장르 중에서도 독특한 위치를 차지하는 싱글플레이어 중심의 교육용 지도다. 이 스타크래프트 맵은 원본 게임이 제공하는 기본 튜토리얼의 한계를 보완하고 개선하려는 목적에서 제작된 것으로 추정된다. 전체적인 구성은 플레이어가 유닛 조작, 자원 채취, 건물 건설 및 기본적인 전투 메커니즘을 자연스럽게 익힐 수 있도록 설계되어 있다. 화려한 전투나 복잡한 생존 규칙보다는 기초적인 전략 시뮬레이션의 감각을 되짚어보는 데 초점이 맞춰져 있다. 따라서 이 유즈맵은 스타크래프트를 처음 접하는 초보자뿐만 아니라, 오랫동안 브루드워를 즐겨온 유저들이 가벼운 마음으로 기본기를 점검하고 예전 추억을 떠올리며 플레이하기에 알맞은 형태를 띤다. 게임이 진행되는 동안 플레이어는 정해진 흐름에 따라 주어진 과제를 완수해야 하며, 너무 어렵거나 복잡하지 않은 구조 덕분에 부담 없이 접근할 수 있다. 플레이 특징을 살펴보면 대규모 멀티플레이어 대전이나 협동 플레이보다는 온전히 혼자서 게임의 시스템을 음미하는 싱글 플레이 경험에 집중되어 있다. 추천 대상으로는 클래식 스타크래프트 브루드워의 초창기 감성을 느끼고 싶은 유저나, 가벼운 교육용 시나리오를 선호하는 이들에게 적합하다. 플레이 전 확인 포인트로는 멀티플레이어 환경이 아닌 1인용 진행을 상정하고 제작되었으므로 친구와 함께 즐기기보다는 혼자서 여유를 가지고 차근차근 플레이를 진행하는 편이 바람직하다는 점을 들 수 있다. Tutorial: Boot Camp is a single-player custom map within StarCraft: Brood War that occupies a unique position as an educational scenario. Based on its internal description and structure, this map appears to be designed as an improvement upon the original tutorial provided by the base game. The overall layout and progression aim to help players naturally learn basic unit control, resource gathering, building construction, and fundamental combat mechanics. Rather than focusing on massive battles or complex survival rules, it emphasizes revisiting the core feel of real-time strategy simulation. Therefore, this user-map is suitable not only for beginners who are new to StarCraft, but also for long-time Brood War veterans who want to brush up on their basics with a light heart and reminisce about past memories. As the game unfolds, players must complete given tasks following a predetermined flow, and the straightforward structure allows for a stress-free experience. Looking at its play characteristics, it focuses entirely on a solo gameplay experience rather than large-scale multiplayer battles or cooperative play. It is recommended for users who want to feel the early-stage sensibility of classic StarCraft: Brood War or those who prefer light educational scenarios. A key point to check before playing is that since it was created for single-player progression rather than a multiplayer environment, it is best to approach it solo and take your time rather than trying to play with friends.
최근 등록된 맵
새로 추가된 파일과 버전을 확인하세요.
최후의 왕국 - 튜토리얼 (The Last Kingdom - Tutorial)
최후의 왕국 - 튜토리얼은 스타크래프트 브루드워 UMS 맵으로, 플레이어가 성을守하거나 적의 대장을 처치하는 두 가지 목표 중 하나를 선택하여 진행하는 시나리오식 방어 맵이다. 맵은 황무지 타일셋을 사용하며, 전체 크기는 8192×2048 타일로 구성되어 넓은 전장을 제공하지만, 실제 플레이 영역은 성 주변과 적 진영에 집중되어 있다. 게임 시작 시 플레이어는 기본 유닛과 제한된 자원을 받고, 먼저 성 주변에 방어진지를 구축하거나 적의 약점을 파악해 공략로를 마련해야 한다. 목표가 성 보호일 경우에는 웨이브形式으로 다가오는 적군을 막아내는 디펜스 방식이 적용되며, 적 대장을 처치하는 경우에는 제한된 시간 내에 정찰과 기습을 결합한 소규모 전투가 주를 이룬다. 두 가지 모드는 각각 별도의 트리거로 구분되어 있어, 플레이어는 원하는 목표를 선택해 반복 플레이가 가능하며, 실패 시 초기 상태로 돌아가는 리셋 mekanism이 마련되어 있다. 전반적인 난이도는 튜토리얼 성격답게 쉬움에서 보통 사이로 설정되어 있어, 스타크래프트 입문자나 디펜스 초보자에게 적합하며, 기본적인 유닛 조작과 자원 관리, 타이밍 감각을 익히기에 좋은 구성을 갖추고 있다. 플레이 전에는 맵 설명에 명시된 두 가지 승리 조건을 확인하고, 자신이 선호하는 플레이 스타일에 따라 모드를 선택하는 것이 좋으며, 멀티플레이 시에는 최대 7명까지 동시에 참여할 수 있어 협동 방어나 경쟁적 대결도 가능하다. 따라서 최후의 왕국 - 튜토리얼은 기본기를 다지고 싶은 유저뿐 아니라, 짧은 시간 안에 전략적 판단과 micro 컨트롤을 연습하고자 하는 intermediate 플레이어에게도 추천할 만한 UMS 맵이다. The Last Kingdom - Tutorial is a StarCraft: Brood War UMS map where the player either defends the castle or assassinates the enemy commander, choosing one of two objectives to progress in a scenario‑style defense map. The map uses the wasteland tileset and spans 8192×2048 tiles, offering a broad battlefield, but the actual play area focuses on the castle vicinity and enemy forces. At the start, the player receives basic units and limited resources, and must first build a defensive perimeter around the castle or scout the enemy’s weaknesses to devise an approach. If the goal is to protect the castle, incoming enemy waves arrive in a traditional defense format; if the goal is to kill the enemy leader, the gameplay shifts to a limited‑time scouting and guerrilla‑style skirmish. Each objective is handled by separate triggers, allowing the player to select a preferred mode and replay it repeatedly, with a reset mechanism that returns to the initial state upon failure. Overall difficulty is set between easy and medium, fitting the tutorial nature, making it suitable for StarCraft newcomers or defense beginners who wish to practice basic unit control, resource management, and timing. Before playing, review the two victory conditions described in the map and pick the mode that matches your preferred play style; in multiplayer, up to seven participants can join, enabling cooperative defense or competitive matches. Consequently, The Last Kingdom - Tutorial is recommended not only for users wanting to solidify fundamentals but also for intermediate players seeking a short session to sharpen strategic judgment and micro‑control.
튜토리얼: 붓 캠프 (TUTORIAL: Boot Camp)
튜토리얼 붓 캠프(TUTORIAL: Boot Camp)는 스타크래프트 브루드워 맵 유즈맵 장르 중에서도 독특한 위치를 차지하는 싱글플레이어 중심의 교육용 지도다. 이 스타크래프트 맵은 원본 게임이 제공하는 기본 튜토리얼의 한계를 보완하고 개선하려는 목적에서 제작된 것으로 추정된다. 전체적인 구성은 플레이어가 유닛 조작, 자원 채취, 건물 건설 및 기본적인 전투 메커니즘을 자연스럽게 익힐 수 있도록 설계되어 있다. 화려한 전투나 복잡한 생존 규칙보다는 기초적인 전략 시뮬레이션의 감각을 되짚어보는 데 초점이 맞춰져 있다. 따라서 이 유즈맵은 스타크래프트를 처음 접하는 초보자뿐만 아니라, 오랫동안 브루드워를 즐겨온 유저들이 가벼운 마음으로 기본기를 점검하고 예전 추억을 떠올리며 플레이하기에 알맞은 형태를 띤다. 게임이 진행되는 동안 플레이어는 정해진 흐름에 따라 주어진 과제를 완수해야 하며, 너무 어렵거나 복잡하지 않은 구조 덕분에 부담 없이 접근할 수 있다. 플레이 특징을 살펴보면 대규모 멀티플레이어 대전이나 협동 플레이보다는 온전히 혼자서 게임의 시스템을 음미하는 싱글 플레이 경험에 집중되어 있다. 추천 대상으로는 클래식 스타크래프트 브루드워의 초창기 감성을 느끼고 싶은 유저나, 가벼운 교육용 시나리오를 선호하는 이들에게 적합하다. 플레이 전 확인 포인트로는 멀티플레이어 환경이 아닌 1인용 진행을 상정하고 제작되었으므로 친구와 함께 즐기기보다는 혼자서 여유를 가지고 차근차근 플레이를 진행하는 편이 바람직하다는 점을 들 수 있다. Tutorial: Boot Camp is a single-player custom map within StarCraft: Brood War that occupies a unique position as an educational scenario. Based on its internal description and structure, this map appears to be designed as an improvement upon the original tutorial provided by the base game. The overall layout and progression aim to help players naturally learn basic unit control, resource gathering, building construction, and fundamental combat mechanics. Rather than focusing on massive battles or complex survival rules, it emphasizes revisiting the core feel of real-time strategy simulation. Therefore, this user-map is suitable not only for beginners who are new to StarCraft, but also for long-time Brood War veterans who want to brush up on their basics with a light heart and reminisce about past memories. As the game unfolds, players must complete given tasks following a predetermined flow, and the straightforward structure allows for a stress-free experience. Looking at its play characteristics, it focuses entirely on a solo gameplay experience rather than large-scale multiplayer battles or cooperative play. It is recommended for users who want to feel the early-stage sensibility of classic StarCraft: Brood War or those who prefer light educational scenarios. A key point to check before playing is that since it was created for single-player progression rather than a multiplayer environment, it is best to approach it solo and take your time rather than trying to play with friends.
튜토리얼 2 (Tutorial 2)
스타크래프트 브루드워의 튜토리얼 맵인 Tutorial 2는 초보 유저부터 숙련자까지 손쉽게 게임의 기본기를 익힐 수 있도록 설계된 유즈맵입니다. 맵의 목표는 단일 플레이어로 모든 적 건물 파괴하기이며, 단순하면서도 효과적인 구조로 구성되어 있어 게임의 기본 메커니즘을 빠르게 이해할 수 있습니다. 맵은 황무지 테마의 황량한 지형 위에 배치되어 있으며, 기본 유닛 생산 건물인 커맨드 센터와 적 건물로만 구성된 구조물을 확인할 수 있습니다. 플레이어는 초반에 제공되는 SCV를 활용해 자원을 채취하고, 점차 병력을 확장하며 적 건물을 파괴하는 과정을 자연스럽게 경험할 수 있습니다. 맵의 좁고 직선적인 배치 덕에 전략보다는 기본 조작과 컨트롤에 집중할 수 있으며, 적 건물의 위치와 배치 패턴을 익히기에 적합합니다. 또한, 맵의 난이도는 별도로 설정되어 있지 않지만, 적 건물 수가 제한적이어서 초보자도 쉽게 완료할 수 있습니다. 이 맵은 스타크래프트의 기본 튜토리얼을 넘어서는 실전 연습용으로도 유용하며, 특히 초보 유저들에게는 게임의 핵심인 자원 관리와 유닛 컨트롤을 익히는 데 도움이 될 것입니다. 다만, 맵 특성상 반복 플레이 시 지루함을 느낄 수 있으며, 숙련자들에게는 다소 단순한 구조로 느껴질 수 있습니다. 따라서 이 맵은 게임의 기본기를 다지려는 신규 유저들에게 강력히 추천합니다. 플레이 전에는 커맨드 센터와 SCV의 생산, 자원의 채취 방법, 그리고 기본 전투 유닛의 생산과 활용 방법을 숙지하는 것이 좋습니다. 또한, 맵의 좁은 길목에서 적과 마주칠 가능성이 높으므로 SCV를 통한 방어와 자원 확보에 주의를 기울여야 합니다. This StarCraft: Brood War tutorial map, Tutorial 2, is designed to help new players grasp fundamental mechanics through a straightforward yet effective structure. The objective is simple: destroy all enemy buildings as a single player. The map, set on a barren terrain with a wasteland tileset, features a clear layout centered around a main base (Command Center) and scattered enemy structures. Players begin with SCVs to gather resources and gradually expand their forces to eliminate enemy buildings. The narrow and linear design encourages focus on basic control and resource management rather than complex strategies. While the difficulty isn't explicitly rated, the limited number of enemy buildings ensures accessibility for beginners. This map serves as both a tutorial and practical exercise, making it ideal for newcomers to practice core mechanics like unit control and base expansion. However, its simplicity may lead to boredom for experienced players seeking more depth. It’s highly recommended for new players looking to build a strong foundation in StarCraft. Before playing, familiarize yourself with SCV production, resource gathering, and basic unit deployment. Pay close attention to defense and resource management, as the confined paths increase the likelihood of early confrontations with enemies.
튜토리얼 1 (Tutorial 1)
스타크래프트 브루드워의 튜토리얼 맵으로 알려진 <strong>Tutorial 1</strong>은 초보 유저들이 기본 조작과 게임 메커니즘을 익히도록 설계된 유즈맵입니다. 맵 내부 설명에 따르면 '모든 적 건물 파괴'가 승리 조건으로, 단순하면서도 핵심적인 목표를 제공합니다. 황무지 타일셋을 기반으로 한 1024x1024 크기의 평지형 맵으로, 초심자도 쉽게 접근할 수 있는 구조로 구성되어 있습니다. 중앙에 위치한 플레이어 본진과 사방으로 배치된 적 건물들이 특징이며, 초반 자원 수급과 건물을 짓는 법, 유닛을 생산하고 조종하는 기본기를 자연스럽게 익힐 수 있도록 배려했습니다. 맵의 symmetrical한 배치 덕분에 양측의 밸런스가 맞춰져 있으며, 초등학생부터 성인까지 누구나 무리 없이 플레이할 수 있는 난이도로 제작되었습니다. 다만, 튜토리얼 맵의 특성상 추가적인 스킬이나 전략적 깊이는 없으므로, 실제 유즈맵이나 멀티 플레이를 준비하는 유저들에게는 기본기를 다지는 '시작점' 정도로만 활용할 수 있습니다. 플레이 전에는 자신의 종족에 맞는 빌드오더와 základní 유닛 구성(예: 테란의 경우 SCV + 마린)을 미리 숙지하고, 건물 건설 순서와 자원 관리 방법을 연습하는 데 집중하는 것이 좋습니다. 또한, 맵의 symmetrical한 구조상 적 건물의 위치를 미리 숙지하면 승리 확률을 높일 수 있습니다. рекомендуется 사용자 그룹: 스타크래프트 브루드워 초보자, 게임 룰 학습 중인 유저, 기본 조작 연습을 원하는 모든 플레이어 Tutorial 1, known as the tutorial map of *StarCraft: Brood War*, is a custom map designed to help beginner players learn basic controls and game mechanics. According to the in-map instructions, the victory condition is to "destroy all enemy buildings," providing a simple yet essential objective. The map features a 1024x1024 flat terrain based on a wasteland tileset, structured to be easily accessible even for newcomers. It includes a central player base with enemy buildings spread around, allowing beginners to naturally practice early resource gathering, building construction, unit production, and basic control. The symmetrical layout ensures balanced sides, making it playable for anyone from elementary students to adults without difficulty. However, as a tutorial map, it lacks additional skills or strategic depth, serving primarily as a starting point for those preparing for custom maps or multiplayer. Before playing, it’s advisable to memorize the build order and basic unit compositions (e.g., Terran’s SCV + Marine), practice building placement and resource management, and familiarize yourself with the symmetrical layout to increase your chances of victory. Recommended user groups: *StarCraft: Brood War* beginners, players learning game rules, and anyone practicing basic controls.
격자 튜토리얼 (Grid Tutorial)
스타크래프트 브루드워 유즈맵 〈Grid Tutorial〉은 초기 맵 구조와 배치 시스템을 익히기 위한 튜토리얼 맵으로, 초보자부터 숙련자까지 다양한 플레이어에게 추천할 수 있는 교습용 맵이다. 이 맵은 1024x1024 크기의 격자형 평면 위에서 진행되며, 황무지 타일셋으로 구성되어 있어 지형이 단순하고 학습에 집중할 수 있도록 설계되었다. 맵 중앙에는 플레이어 기지가 위치하고, 주변에는 자원과 간단한 구조물이 배치되어 있어 기본적인 건설과 자원 관리 과정을 자연스럽게 체험할 수 있다. 특히, 격자형 배치 덕분에 각 건물과 유닛의 위치를 직관적으로 파악할 수 있어 초보자들이 맵 읽기 능력을 키우기에 적합하다. 또한, 맵의 모든 요소가 규칙적으로 배치되어 있어 전략적 깊이는 다소 부족하지만, 초보자 입문용으로서는 이상적인 환경을 제공한다. 이 맵을 통해 플레이어는 스타크래프트의 기본 메커니즘인 자원 채취, 건물을 짓는 방법, 유닛 생산 등 핵심 기능을 실습해 볼 수 있으며, 이후 복잡한 맵이나 전략을 다루기에 앞서 필수적인 기초를 다질 수 있다. 다만, 이 맵 자체는 튜토리얼에 특화되어 있어 장기적인 플레이를 즐기기보다는 일회성 학습용으로 활용하는 것이 바람직하다. 플레이 전에는 맵의 격자 구조와 각 구역의 역할을 확실히 이해하고, 트리거로 제공되는 안내 메시지를 참고하여 진행 순서를 따라야 한다. 특히, 건물을 짓는 위치와 자원 위치가 고정되어 있으므로, 초기 배치와 자원 관리에 대한 이해가 곧 플레이의 성패를 좌우할 수 있다. 이 맵은 스타크래프트의 기본기를 다지고 싶거나 새로운 플레이어에게 추천하고 싶다면 반드시 한 번 접해볼 만한 가치가 있다. Grid Tutorial is a StarCraft: Brood War custom map designed as a tutorial to help players learn map layouts and basic mechanics. Set on a 1024x1024 grid with a barren tileset, the map features a player base at the center, surrounded by resources and simple structures, making it ideal for beginners to practice building placement and resource management. The structured grid layout allows players to intuitively understand unit and building positions, fostering essential map-reading skills. While the strategic depth is minimal due to its educational purpose, the map serves as an excellent introduction to core StarCraft mechanics such as resource gathering, building construction, and unit production. It is particularly useful for newcomers to build foundational knowledge before tackling more complex maps or strategies. However, its focus on tutorials means it is best suited for short-term use rather than long-term gameplay. Players should familiarize themselves with the grid structure and the roles of each zone before starting. Since building and resource locations are fixed, mastering their positions early on is crucial for success. For anyone looking to grasp the basics of StarCraft or introduce the game to others, Grid Tutorial is a highly recommended starting point that delivers its intended educational value effectively.
TUTORIAL: 부트 캠프 (Boot Camp)
스타크래프트 브루드워의 튜토리얼 맵을 개선했다는 ‘TUTORIAL: "Boot Camp"’은 기본적인 유닛 훈련과 전략적 사고를 동시에 연습할 수 있는 UMS(유즈맵)이다. 황무지 타일셋으로 꾸며진 이 맵은 기존 튜토리얼의 경험을 한층 더 발전시킨다는 목표 아래 제작된 것으로 보이며, 특히 초보자부터 숙련자까지 폭넓은 플레이어에게 적합한 구조로 설계되었다. 맵의 가장 큰 특징은 단일 플레이어용으로 구성되어 있지만, 단순한 튜토리얼을 넘어 전략적 선택과 자원 관리를 요구한다는 점이다. 맵의 중앙에는 훈련장과 같은 구조물이 배치되어 있으며, 주변에는 적절한 공격로를 따라 움직이는 적이 배치되어 있다. 플레이어는 이 적들을 상대하며 유닛을 훈련하고, 동시에 맵 곳곳에 흩어져 있는 자원과 건물을 활용해 전략을 세워야 한다. 초보자는 기본적인 유닛 컨트롤과 빌드 오더를 익히기에 좋으며, 숙련자는 자원 효율성과 타이밍 공격에 대한 감각을 키울 수 있는 장점이 있다. 맵의 진행은 비교적 직관적이지만, 맵 곳곳에 숨겨진 소규모 전투와 자원 수집 포인트가 있어 플레이어의 집중력을 요구한다. 특히, 맵의 크기가 1024x1024로 크지 않기 때문에 플레이 시간은 20~30분 내외로 예상되며, 이는 짧은 시간 안에 기본기와 전략을 모두 경험해 볼 수 있는 장점으로 작용한다. 다만, 맵의 설명이 다소 모호한 부분을 보완하기 위해 플레이 전 맵의 구조와 배치된 적의 종류를 미리 확인하는 것이 좋다. 이 맵은 스타크래프트의 기본기를 단단히 다지고 싶거나, 유즈맵을 통한 전략적 사고를 연습하고자 하는 모든 플레이어에게 추천할 만하다. 특히 스타크래프트의 세계관에 익숙한 플레이어라면 더욱 몰입感을 느낄 수 있을 것이다. 또한, 맵의 인코딩이 cp949로 되어 있어 한글 환경에서도 문제없이 구동된다는 점도 장점이다. 마지막으로, 이 맵은 튜토리얼을 보완한다는 목표와 달리, 플레이어의 능동적인 참여를 요구한다는 점에서 단순히 ‘학습용’으로만 보기에는 아쉬운 부분이 있다. 하지만 그로 인해 전략적 깊이와 재미를 동시에 추구할 수 있는 장점이 있다. 플레이 전, 맵의 구조와 배치된 적의 종류를 미리 확인하고, 자신의 스타일에 맞는 전략을 준비하는 것이 좋다. 이 맵을 통해 스타크래프트의 기본기를 다지고, 나아가 유즈맵의 세계로 입문해 보는 것은 어떨까? "TUTORIAL: 'Boot Camp'" is a UMS (user-made map) that improves upon StarCraft: Brood War's tutorial maps by allowing players to practice both basic unit training and strategic thinking simultaneously. Designed with a wasteland tileset, this map aims to elevate the tutorial experience, catering to a wide range of players from beginners to experts. Its key feature is that, while single-player, it goes beyond a simple tutorial by requiring strategic choices and resource management. At the center lies a training-like structure, surrounded by enemies positioned along suitable attack routes. Players must fight these enemies to train units while also using scattered resources and buildings across the map to formulate strategies. Beginners can hone basic unit control and build orders, while experienced players can sharpen their resource efficiency and timing attacks. The progression is intuitive, though small-scale battles and resource collection points hidden throughout the map demand the player's focus. With a map size of 1024x1024, gameplay typically lasts 20–30 minutes, making it an efficient way to experience both fundamentals and strategy in a short time. However, to compensate for vague instructions, it's wise to review the map layout and enemy types before playing. This map is highly recommended for players looking to solidify StarCraft fundamentals or practice strategic thinking through user-made maps. Those familiar with the StarCraft universe will likely feel even more immersed. Additionally, since the map uses cp949 encoding, it runs smoothly even in Korean-language environments. While its goal is to enhance tutorials, the map’s reliance on active player participation means it transcends mere "learning tools." Instead, it strikes a balance between strategic depth and fun. Before playing, check the map layout and enemy types, and prepare a strategy that suits your style. Why not use this map to strengthen your StarCraft basics and take the first step into the world of user-made maps?
스타크래프트 64 부트 캠프 가이드 (StarCraft 64 Boot Camp Guide)
이 맵은 스타크래프트 64에 수록된 부트 캠프 튜토리얼을 PC 버전으로 옮긴 단일 플레이어 가이드 맵입니다. 파일명 'BootCamp64(к).scm'과 내부 설명에서 '스타크래프트 64의 독점 가이드'라는 문구가 확인되며, 러시아어 인코딩 오류로 제목이 깨져 보이는 점을 제외하면 내용은 명확합니다. 맵 크기는 64×64 타일로 매우 작으며, 황무지 타일셋을 사용해 단순한 지형 위에 기초적인 유닛 조작, 자원 채취, 건물 건설 순서 등을 단계별로 안내하는 트리거가 배치되어 있습니다. 플레이어는 1인용으로 시작하며, 별도의 적 유닛이나 승리 조건 없이 튜토리얼 메시지를 따라가며 기본 조작을 익히는 방식입니다. 난이도는 초보자도 부담 없이 따라할 수 있을 만큼 쉬우며, 예상 플레이 타임은 10~15분 내외로 짧습니다. 멀티플레이어나 경쟁 요소가 없는 순수 학습용 맵이므로, 스타크래프트를 처음 접하는 유저나 브루드워 환경에서 64버전 튜토리얼을 체험하고 싶은 유저에게 적합합니다. 맵 파일이 단일 시나리오로 구성되어 있어 추가 버전이나 모드 없이 바로 실행 가능하며, 별도의 밸런스 조정이나 전략적 깊이는 없습니다. 추천 대상은 초보자 입문 연습, 고전 콘솔 버전 콘텐츠 복원 관심자, 맵 제작 시 튜토리얼 트리거 참고용으로 활용하려는 제작자입니다. This map is a single‑player guide that ports the Boot Camp tutorial from StarCraft 64 to the PC version. The filename ‘BootCamp64(к).scm’ and the internal description mentioning an ‘exclusive guide from StarCraft 64’ confirm its origin, while the garbled Russian title is merely an encoding issue. The map size is only 64×64 tiles using the Badlands tileset, and a series of triggers walk the player through basic unit control, resource gathering, and building order in a step‑by‑step manner. There are no enemy units or explicit victory conditions; the player simply follows the on‑screen instructions. Difficulty is very easy, and a full run takes roughly 10–15 minutes. Because it contains no multiplayer or competitive elements, it serves purely as a learning tool. It is ideal for newcomers to StarCraft, fans wanting to experience the console‑era tutorial, or map makers looking for a reference on tutorial trigger design. The file is a standalone scenario with no extra versions or balance concerns.
Purificación
이 맵은 스페인어로 된 튜토리얼 맵으로, ‘Escuela de Batalla’ 모드의 초보자를 위한 교육 단계로 설계되었습니다. 내부 제목과 설명에서 알 수 있듯이, 플레이어는 인간 마린 부대를 조종해 끔찍한 저그의 침공으로부터 동료를 구출해야 합니다. 맵 구조는 비교적 제한된 영역에 여러 방어 지점이 배치되어 있어, 마린 유닛을 적절히 배치하고 방어 타워와 특수 능력을 활용해 저그 유닛의 파동을 차단하는 방식으로 진행됩니다. 초반에는 기본적인 유닛 생산과 이동, 공격 명령을 익히게 되며, 점차 저그의 공격 파동이 강해지면서 유닛 관리와 자원 배분의 중요성이 부각됩니다. 시야가 제한된 구역과 좁은 통로가 존재해, 적의 급습을 예측하고 사전 대비를 해야 하는 점이 특징이며, 이는 초보자에게 전략적 사고를 키우는 좋은 연습이 됩니다. 플레이 경험은 서서히 난이도가 상승하면서도, 각 단계마다 명확한 목표와 피드백을 제공해 학습 곡선을 부드럽게 유지합니다. 따라서 스타크래프트 브루드워의 기본 전투 메커니즘을 익히고자 하는 초보자나, 저그에 대한 방어 전술을 연습하고 싶은 유저에게 적합합니다. 플레이 전에는 맵 내의 방어 지점과 자원 위치를 미리 확인하고, 마린 유닛의 체력과 스킬 쿨타임을 관리할 준비를 하는 것이 좋습니다. This map is a Spanish-language tutorial designed for the ‘Escuela de Batalla’ mode, serving as an introductory training stage for beginners. According to its internal title and description, the player controls a Marine squad tasked with rescuing comrades from the onslaught of repulsive Zerg. The layout features a confined area with several defensive positions where Marines must be strategically placed, employing basic structures and special abilities to halt waves of Zerg units. Early sections teach fundamental unit production, movement, and attack commands, while later waves increase the Zerg pressure, emphasizing unit management and resource allocation. Limited vision zones and narrow passages require anticipating Zerg rushes and preparing defenses in advance, which provides valuable strategic practice for newcomers. The gameplay experience gradually escalates in difficulty but offers clear objectives and feedback at each step, ensuring a smooth learning curve. Consequently, this map is well-suited for StarCraft: Brood War beginners looking to master basic combat mechanics or players wishing to rehearse Zerg defense tactics. Before playing, it is advisable to familiarize yourself with the defensive positions and resource spots on the map, and be ready to monitor Marine health and skill cooldowns.
맵 선택 가이드
태그는 맵의 핵심 특징을 빠르게 설명하지만 제작 버전마다 규칙이 다를 수 있습니다. 상세 설명에서 권장 인원, 난이도, 플레이 시간과 버전을 함께 확인한 뒤 다운로드하세요.