
타이밍 공격 스타크래프트 맵 모음
'타이밍 공격' 태그가 등록된 맵을 모았습니다. 장르 하나로 찾기 어려운 플레이 방식, 난이도와 특징을 중심으로 인기 맵과 최신 맵을 비교해 보세요.
- 등록 맵
- 6개
- 누적 다운로드
- 0
- 누적 조회
- 226
인기 맵
다운로드와 조회 반응이 높은 맵입니다.
라커 디펜스 온 유어 오운! 2.0 (Lurker Defense On Your Own! 2.0)
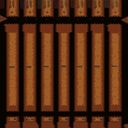
「라커 디펜스 온 유어 오운! 2.0」은 스타크래프트: 브루드워의 디펜스 장르 유즈맵으로, 총 30단계의 레벨을 클리어하며 적의 모든 유닛이 맵 하단에 도달하지 못하게 저지하는 것이 목표인 맵이다. 맵의 전체적인 구성은 가로로 길게 펼쳐진 통로와 다수의 분기점으로 이루어져 있으며, 각 레벨마다 배치된 적 유닛들이 아군의 기지나 특정 지점에 도달하기 전에 모두 섬멸해야 한다. 적의 종류는 저글링, 히드라리스크, 뮤탈리스크, 벌처, 시즈 탱크, 울트라리스크 등 다양하며, 레벨이 올라갈수록 적의 규모와 조합이 복잡해지는 특징을 보인다. 맵의 디자인상으로는 중앙 통로가 좁아진 지점에 방어 포인트를 집중할 수 있도록 유도하고, 측면 통로에는 보조 방어 라인을 설정하는 등 전략적인 배치와 타이밍이 요구된다. 또한, 일부 레벨에서는 특정 유닛의 제한된 생산이나 자원 소모가 필요할 수 있어, 자원 관리와 병력 운용의 밸런스를 맞추는 것이 중요하다. 플레이어는 각 레벨에서 주어지는 제한된 유닛이나 건물로 적을 상대해야 하며, 실패 시 즉시 해당 레벨을 재도전하거나 초기화할 수 있는 구조로 보인다. 맵의 난이도는 레벨이 진행될수록 점차 상승하는 경향이 있으며, 후반부로 갈수록 적의 공격 패턴이 예측 불가능해지고 방어 라인의 밀집도가 높아진다. 초보 플레이어의 경우 낮은 레벨에서 기본적인 방어 패턴을 익히며 점차 난이도를 올려가는 것이 좋으며, 숙련된 플레이어는 고난이도 레벨에서 다중 방어 라인을 구축하고 효율적인 유닛 활용을 통해 클리어 시간을 단축시키는 전략을 세울 수 있다. 맵의 전체적인 분위기는 황혼 테마의 타일셋을 사용하여 어두운 톤의 색감으로 일관되어 있으며, 적의 유닛들이 하단으로 다가오는 긴장감 있는 연출이 특징이다. 맵을 플레이하기 전에 확인해야 할 사항으로는 각 레벨의 목표와 제한 사항, 적의 주력 유닛 조합, 그리고 방어에 유리한 지형적 특징을 꼼꼼히 살펴보는 것이다. 또한, 맵의 길이가 길고 레벨이 많으므로 플레이 시간과 집중력을 고려하여 플레이하는 것이 좋다. 이 맵은 디펜스 장르를 좋아하는 유저들에게는 새로운 도전 과제를 제공하며, 특히 적의 공격을 효율적으로 방어하고 병력을 최적화하는 전략적 사고를 기르기에 좋은 콘텐츠로 평가된다. 초보와 숙련자 모두에게 적절한 난이도 조절이 가능하다는 점에서 접근성이 높다는 장점도 있다. Lurker Defense On Your Own! 2.0 is a defense genre custom map for StarCraft: Brood War, where players must prevent all enemy units from reaching the bottom of the map across 30 levels. The map features a horizontally elongated layout with multiple branches, and each level requires the player to eliminate all approaching enemies before they reach the designated area or base. The enemy units vary by level and include zerglings, hydralisks, mutalisks, vultures, siege tanks, and ultralisks, with escalating scale and complexity as the levels progress. The map design encourages strategic placement of defenses, particularly at narrow choke points in the central corridor, while side routes may require auxiliary defensive lines. Some levels may impose restrictions on unit production or require resource expenditure, emphasizing the need for balanced resource management and troop deployment. Players are given limited units or buildings per level and can retry or reset upon failure. The difficulty gradually increases, with later levels featuring unpredictable attack patterns and densely packed defenses. Beginners should start with lower-level stages to master basic defense tactics, while experienced players can optimize multi-layered defenses and efficient unit utilization for faster completion. The map’s atmosphere is consistently dark and moody, utilizing a twilight-themed tileset that heightens the tension of enemy advances. Before playing, it’s essential to review each level’s objectives, restrictions, enemy compositions, and terrain advantages. Given the map’s length and numerous levels, players should plan for extended sessions to maintain focus. This map offers a fresh challenge for defense genre enthusiasts, fostering strategic thinking in unit optimization and defense tactics. Its adjustable difficulty and accessibility make it suitable for both beginners and experienced players alike.
40 Way Lurker Defence 4.5
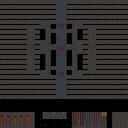
이 맵은 이름 그대로 ‘40 Way Lurker Defence 4.5’로, 플레이어들이 끊임없이 몰려오는 저글링과 러커를 상대로 방어전을 펼치는 디펜스 장르의 유즈맵이다. 맵 중앙에 위치한 플레이어 기지와 40개의 입구Advance Mode에서는 더 많은 입구가 활성화될 수 있는 것으로 추정된다가 사방에서 공격을 퍼부으며, 방어 건물과 유닛을 배치해가며 버티는 것이 핵심이다. 맵의 구조는 중앙 기지에서 각 입구까지의 거리가 균등하게 설계되어 있어 러커의 사정거리 내에 들어오기 전에 대처해야 하는 긴장감이 특징이다. 방어 건물의 선택과 배치, 그리고 자원 관리 능력이 곧 승패를 가르는 요소로, 초보자는 방어선을 efficiently 하게 구축하기 어려워 금방 무너질 수 있지만 숙련된 플레이어는 입구별로 러커를 차단하거나 저글링을 효율적으로 정리하면서 버틸 수 있다. 특히 러커가 등장하는 순간부터는 입구별로 신속한 대응이 요구되며, 일정 시간마다 증가하는 적의 물량과 난이도 상승이 플레이어의 집중력을 끊임없이 요구한다. 이 맵은 디펜스 유즈맵의 기본 틀을 따르지만, 40개의 입구가 제공하는 변칙성과 러커의 강력한 딜링이 조화를 이뤄 단순 반복이 아닌 전략적 사고를 요구하는 점이 매력적이다. 초보자도 쉽게 접근할 수 있는 구조이지만, 고수들은 입구별로 다른 방어 전략을 구사하면서 끊임없는 긴장감 속에서 플레이할 수 있다. This map, titled "40 Way Lurker Defence 4.5," is a defense-style custom map where players must fend off relentless waves of Zerglings and Lurkers pouring in from multiple entry points. The core gameplay revolves around strategically placing defensive structures and units to withstand the assaults. The map features 40 entry points surrounding the player's base, each positioned at an equal distance from the center, creating a balanced yet challenging layout. Effective resource management and defensive positioning are crucial, as the game intensifies with higher difficulty levels and increased enemy waves. Novices may struggle with rapid decision-making, while experienced players can optimize their base layouts and unit compositions to counter the Lurkers' long-range attacks. The map's appeal lies in its blend of simplicity and depth, offering both casual and competitive players a tense and rewarding experience.
Sims With Wolves
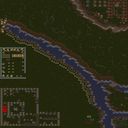
스타크래프트 브루드워의 유즈맵 «Sims With Wolves»는 8인용 디펜스 장르의 맵으로, 사막 타일셋을 배경으로 펼쳐지는 흥미로운 전투를 제공한다. 내부 맵 제목 그대로, 제작자 xThingx가 만든 이 맵은 플레이어들이 늑대 무리(늑대인간 또는 늑대 무리 컨셉을 추정됨)를 상대하는 디펜스 형식의 전투를 경험할 수 있도록 구성되어 보인다. 맵 중앙에 위치한 주요 건물을 보호하거나, 늑대 무리가 접근하지 못하도록 방어선을 구축하는 것이 주 목표로 추정된다. 맵의 사막 지형은 넓은 시야와 함께 전략적 요충지를 제공하며, 넓은 공간을 활용한 방어 배치와 기습 공격을 고려해야 한다. 늑대 무리 또는 적대적 유닛들은 일정 시간 또는 특정 조건에 따라 등장하는 것으로 보이며, 플레이어는 자원 관리와 유닛 생산을 통해 지속적인 방어 체계를 구축해야 한다. 맵의 대부분은 개방형 지형이지만, 일부 협소한 통로나 언덕 지형이 방어 포인트로 활용될 가능성이 있어 전략적 깊이를 더한다. 초보자보다는 중간 이상의 전략적 감각을 요구하는 편으로 보이며, 팀 플레이보다는 개별 또는 2~4인 팀 단위의 방어 플레이가 어울릴 것으로 판단된다. 맵의 제작 의도와 승리 조건은 명확히 드러나지 않지만, 방어 목표 달성과 함께 자원 관리, 유닛 배치, 타이밍 공격 등 종합적인 전략이 요구되는 맵으로 보인다. 플레이 전에는 맵의 주요 방어 포인트와 늑대 무리의 공격 패턴을 미리 파악하는 것이 중요하며, 넓은 맵을 활용한 방어선 구축과 자원 확보가 핵심이다. 또한, 맵의 해상도와 타일셋을 고려했을 때, 사막 특유의 건조한 분위기가 전투의 긴장감을 더할 것으로 예상된다. Sims With Wolves is an 8-player UMS defense map in StarCraft: Brood War, set against a desert tileset. The map appears to pit players against waves of wolf-like units (possibly werewolves or a wolf pack faction), requiring strategic defense against relentless assaults. Central to the gameplay is protecting key structures—likely located in the map's middle—while managing resources and unit production to sustain long-term defense. The open desert terrain offers expansive sightlines but also strategic chokepoints and elevated positions that can be leveraged for tactical advantage. While the map's core mechanics revolve around wave-based enemy spawns and defensive positioning, the exact win conditions remain unclear without additional context. However, effective resource allocation, unit composition, and timing are crucial for holding off waves. The map likely appeals to players seeking a challenge beyond basic tactics, rewarding foresight in preparing defenses against predictable but escalating enemy patterns. Given its large size, mastering the terrain's key areas and anticipating enemy routes will significantly impact survival rates. The desert atmosphere enhances immersion, creating a tense, high-stakes environment for players navigating the map's strategic depth.
고양이 vs 쥐 성채! (Cat vs Mice Castle!)
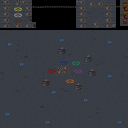
스타크래프트 브루드워의 유즈맵 《Cat vs Mice Castle!》는 쥐와 고양이의 대결을 테마로 한 디펜스 장르의 맵으로, 7명의 플레이어가 한 팀을 이루어 일정 시간 동안 고양이의 공격을 방어하는 구조를 가지고 있다. 맵 중앙에 위치한 성채를 중심으로 쥐 유닛들이 배치되어 있으며, 게임이 시작되면 지속적으로 고양이 유닛들이 공격해 온다. 플레이어는 쥐 유닛을 조종하여 성채를 지키며, 고양이 유닛을 효율적으로 저지해야 한다. 맵은 2048x2048의 넓은 공간에 우주 타일셋을 사용하여 우주 공간에서 펼쳐지는 듯한 분위기를 연출하며, 디펜스 요소 외에도 유닛의 배치와 자원 관리, 타이밍 공격이 중요한 포인트로 작용한다. 플레이어는 시작 시 쥐 유닛을 보유한 상태로 게임을 시작하며, 고양이 유닛들은 일정 시간마다 혹은 랜덤한 패턴으로 공격해 온다. 고양이의 공격 패턴은 맵의 난이도를 조절하는 요소로, 높은 난이도에서는 더 많은 수의 고양이와 다양한 유닛이 등장하여 방어 난이도가 급격히 상승한다. 플레이어는 쥐 유닛의 업그레이드와 배치 전략을 통해 성채를 보호해야 하며, 성채의 내구도가 0이 되면 게임이 종료된다. 맵의 구조는 성채 주변을 중심으로 쥐 유닛이 배치될 수 있는 공간과 고양이 유닛의 진입로가 명확히 구분되어 있어 전략적인 플레이가 요구된다. 이 맵은 특히 디펜스 장르에 익숙한 플레이어들에게 추천되며, 팀워크와 전략적 사고가 필요한 만큼 친구들과 함께 플레이하는 것이 좋다. 또한, 다양한 고양이 유닛의 공격 패턴을 학습하고 대비하는 재미가 있으며, 맵의 난이도를 조절할 수 있는 요소가 있어 초보자와 숙련자 모두 즐길 수 있는 요소로 구성되어 있다. 다만, 쥐 유닛의 업그레이드와 배치, 그리고 고양이 유닛의 공격 타이밍을 잘 파고들어야만 높은 점수를 얻을 수 있으므로, 꾸준한 연습과 전략 수정이 필요하다는 점을 유념해야 한다. 이 맵은 《Cat and Mouse Castle! 2.scm》이라는 파일명으로 배포되었으며, 내부적으로는 ‘Cat vs Mice Castle!’라는 제목을 사용하고 있다. 맵의 제작자나 스토리, 승리 조건 등은 내부 설명에서 확인되지 않지만, 디펜스 장르의 특성을 살린 재미있는 유즈맵으로 평가된다. 플레이 전에는 성채 주변의 배치 공간과 고양이 유닛의 진입 경로를 미리 확인하여 전략을 수립하는 것이 중요하다. StarCraft: Brood War’s custom map *Cat vs Mice Castle!* is a defense-style game where seven players team up to protect a central stronghold from waves of attacking cats. The map is set on a 2048x2048 grid using a space-themed tileset, giving it the feel of a battle unfolding in outer space. Players control mouse units positioned around the stronghold, fending off periodic or randomized cat assaults while managing upgrades, unit placement, and resource flow to keep the stronghold intact. The cats’ attack patterns escalate with difficulty, introducing more units and tighter timings that demand sharper strategy. The layout clearly separates mouse deployment zones from cat entry paths, forcing players to think tactically about positioning and defense. Teamwork and adaptability are key, as success depends on coordinating upgrades, timing responses, and learning the cats’ varied assault rhythms. Recommended for defense-map enthusiasts, the game offers adjustable difficulty for beginners and veterans alike, though mastering mouse upgrades and cat attack windows is essential for high scores. Distributed under the filename *Cat and Mouse Castle! 2.scm* (internally titled *Cat vs Mice Castle!*), the map delivers solid defense gameplay even without clear lore or victory conditions, rewarding those who scout the terrain and refine their tactics before diving in.
라스 신코 무에르테스 (Las Cinco Muertes)
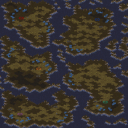
‘라스 신코 무에르테스(Las Cinco Muertes)’는 스타크래프트 브루드워의 밀리 맵으로, 섬과 바다, 좁은 육지가 복잡하게 배치된 아치пе라고된 지형을 배경으로 한다. 다섯 개의 주요 섬으로 나뉜 이 맵은 중앙 바다와 좁은 다리로 연결되어 있어 양 측의 병력이 신중히 이동해야 한다. 섬 특성상 테란의 벙커링이나 프로토스의 공중 유닛 운용이 제한적일 수밖에 없으며, 저그의 경우 지상군과 공중 유닛의 균형을 carefully 조절해야만 승리를 노릴 수 있다. 맵 전체가 비교적 작고 좁은 길목이 많아 전투가 자주 발생하는 편으로, 초반 러시나 타이밍 공격이 강력하게 작용할 수 있는 구조다. 또한, 지형이 복잡한 만큼 시야 확보가 중요하며, 섬의 각 부분에 배치된 자원 분포도 균형 있게 설계되어 있다. 따라서 초보자는 지형 이해와 병력 컨트롤에 어려움을 느낄 수 있으며, 숙련자라면 섬 간의 이동과Micro 관리에서 우위를 점할 수 있을 것이다. 이 맵은 ‘다섯 죽음’이라는 이름답게 섬 하나하나가 치열한 전투의 무대가 될 수 있으며, 다양한 전술이 요구되는 만큼 플레이어의 전략적 선택이 승패를 가를 것이다. 특히 섬 간의 연결 다리나 해안가 near에서의 전투는 게임의 흐름을 결정짓는 핵심 포인트다. 추천하는 플레이 방식은 섬 간의 이동을 최소화하고, 중앙 바다를 활용한 기습이나 방어 라인 구축에 중점을 두는 것이다. 또한, 섬 하나에 고립되지 않도록 병력 이동 경로를 미리 예측하고 대비하는 것이 중요하다. This StarCraft: Brood War melee map, ‘Las Cinco Muertes,’ features a fragmented archipelago terrain divided into five major islands connected by narrow land bridges and surrounded by expansive waters. The layout forces players to carefully maneuver units, limiting the effectiveness of Terran bunker rushes or Protoss air dominance due to the constrained space. Zerg players must balance ground and air units effectively, as the tight corridors favor focused engagements. The map’s compact size and frequent choke points lead to frequent combat, making early rushes or timing attacks viable strategies. Resource distribution is balanced across the islands, ensuring no side gains an unfair advantage. Beginners may struggle with terrain adaptation and unit control, while experienced players can exploit micro-management and strategic positioning between islands. The ‘Five Deaths’ name reflects the high-stakes battles across each island, where tactical decisions and adaptability determine victory. Critical moments often arise at the narrow bridges or coastal battlefields, making vision control and pathfinding essential. Players are advised to minimize unnecessary unit movement between islands, prioritize defensive structures near bridges, and anticipate enemy strategies to avoid isolation. Mastery of the map’s unique geography is key to outmaneuvering opponents and securing dominance in this archipelago battlefield.
내Nem시스 (My Nemesis)
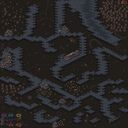
스타크래프트 브루드워의 UMS 유즈맵인 <My Nemesis>는 오리지널 설정의 저그의 오버마인드를 파괴하는 것이 목표인 디펜스+서바이벌 장르의 맵이다. 맵 이미지에서는 우주 배경의 넓은 타일셋이 특징으로, 중앙에 위치한 오버마인드 건물 주변으로 저글링, 히드라리스크, 뮤탈리스크 등 다양한 저그 유닛이 끊임없이 몰려오는 구조가 보인다. 플레이어는 시작 시 주어지는 커맨드 센터와 SCV를 활용해 기지를 확장하고 방어선을 구축해야 하며, 오버마인드 파괴를 위한 병력을 지속적으로 생산해야 한다. 맵의 특징은 적의 물량이 매우 많고 끊임없이 쏟아지는 점으로, 단순히 방어만으로는 부족하며 능동적인 병력 운용과 타이밍을 잡아야 한다. 또한, 기지 주변에는 보호막이 있는 구조물이 배치되어 있어 방어 시설의 중요성이 크다. 초보 플레이어는 방어와 확장을 동시에 신경 써야 하는 어려움이 있지만, 경험이 쌓이면 오버마인드를 파괴할 수 있는 전략적 깊이를 느낄 수 있는 맵이다. 추천 대상은 저그의 심화 전략을 배우고 싶은 플레이어, 디펜스와 서바이벌을 동시에 즐기고 싶은 유저, 그리고 긴장감 넘치는 대결을 원하는 게이머들이다. 플레이 전에는 오버마인드 주변의 방어 시설과 맵의 확장 포인트를 꼼꼼히 확인해야 하며, 초반 SCV 생산과 커맨드 센터 확장이 게임의 성패를 좌우할 수 있음을 유념해야 한다. StarCraft: Brood War's UMS custom map *My Nemesis* is a defense + survival genre map where the goal is to destroy the Zerg Overmind from the original setting. The map features a wide tileset set against a space background, with various Zerg units—such as Zerglings, Hydralisks, and Mutalisks—constantly swarming around the Overmind building at the center. Players start with a Command Center and SCVs, using them to expand their base, build defenses, and continuously produce forces to destroy the Overmind. The map's defining trait is the overwhelming and relentless enemy forces, requiring more than just passive defense—players must actively manage their forces and time their attacks. Additionally, structures with protective shields are placed around the base, making defensive buildings crucial. While beginners may struggle with balancing defense and expansion, experienced players can appreciate the map's strategic depth once they break through. Recommended for those looking to learn advanced Zerg strategies, players who enjoy both defense and survival, and gamers seeking high-tension matches. Before playing, carefully check the defensive structures around the Overmind and the expansion points on the map, and remember that early SCV production and Command Center expansion can determine the outcome of the game.
최근 등록된 맵
새로 추가된 파일과 버전을 확인하세요.
Sims With Wolves
스타크래프트 브루드워의 유즈맵 «Sims With Wolves»는 8인용 디펜스 장르의 맵으로, 사막 타일셋을 배경으로 펼쳐지는 흥미로운 전투를 제공한다. 내부 맵 제목 그대로, 제작자 xThingx가 만든 이 맵은 플레이어들이 늑대 무리(늑대인간 또는 늑대 무리 컨셉을 추정됨)를 상대하는 디펜스 형식의 전투를 경험할 수 있도록 구성되어 보인다. 맵 중앙에 위치한 주요 건물을 보호하거나, 늑대 무리가 접근하지 못하도록 방어선을 구축하는 것이 주 목표로 추정된다. 맵의 사막 지형은 넓은 시야와 함께 전략적 요충지를 제공하며, 넓은 공간을 활용한 방어 배치와 기습 공격을 고려해야 한다. 늑대 무리 또는 적대적 유닛들은 일정 시간 또는 특정 조건에 따라 등장하는 것으로 보이며, 플레이어는 자원 관리와 유닛 생산을 통해 지속적인 방어 체계를 구축해야 한다. 맵의 대부분은 개방형 지형이지만, 일부 협소한 통로나 언덕 지형이 방어 포인트로 활용될 가능성이 있어 전략적 깊이를 더한다. 초보자보다는 중간 이상의 전략적 감각을 요구하는 편으로 보이며, 팀 플레이보다는 개별 또는 2~4인 팀 단위의 방어 플레이가 어울릴 것으로 판단된다. 맵의 제작 의도와 승리 조건은 명확히 드러나지 않지만, 방어 목표 달성과 함께 자원 관리, 유닛 배치, 타이밍 공격 등 종합적인 전략이 요구되는 맵으로 보인다. 플레이 전에는 맵의 주요 방어 포인트와 늑대 무리의 공격 패턴을 미리 파악하는 것이 중요하며, 넓은 맵을 활용한 방어선 구축과 자원 확보가 핵심이다. 또한, 맵의 해상도와 타일셋을 고려했을 때, 사막 특유의 건조한 분위기가 전투의 긴장감을 더할 것으로 예상된다. Sims With Wolves is an 8-player UMS defense map in StarCraft: Brood War, set against a desert tileset. The map appears to pit players against waves of wolf-like units (possibly werewolves or a wolf pack faction), requiring strategic defense against relentless assaults. Central to the gameplay is protecting key structures—likely located in the map's middle—while managing resources and unit production to sustain long-term defense. The open desert terrain offers expansive sightlines but also strategic chokepoints and elevated positions that can be leveraged for tactical advantage. While the map's core mechanics revolve around wave-based enemy spawns and defensive positioning, the exact win conditions remain unclear without additional context. However, effective resource allocation, unit composition, and timing are crucial for holding off waves. The map likely appeals to players seeking a challenge beyond basic tactics, rewarding foresight in preparing defenses against predictable but escalating enemy patterns. Given its large size, mastering the terrain's key areas and anticipating enemy routes will significantly impact survival rates. The desert atmosphere enhances immersion, creating a tense, high-stakes environment for players navigating the map's strategic depth.
내Nem시스 (My Nemesis)
스타크래프트 브루드워의 UMS 유즈맵인 <My Nemesis>는 오리지널 설정의 저그의 오버마인드를 파괴하는 것이 목표인 디펜스+서바이벌 장르의 맵이다. 맵 이미지에서는 우주 배경의 넓은 타일셋이 특징으로, 중앙에 위치한 오버마인드 건물 주변으로 저글링, 히드라리스크, 뮤탈리스크 등 다양한 저그 유닛이 끊임없이 몰려오는 구조가 보인다. 플레이어는 시작 시 주어지는 커맨드 센터와 SCV를 활용해 기지를 확장하고 방어선을 구축해야 하며, 오버마인드 파괴를 위한 병력을 지속적으로 생산해야 한다. 맵의 특징은 적의 물량이 매우 많고 끊임없이 쏟아지는 점으로, 단순히 방어만으로는 부족하며 능동적인 병력 운용과 타이밍을 잡아야 한다. 또한, 기지 주변에는 보호막이 있는 구조물이 배치되어 있어 방어 시설의 중요성이 크다. 초보 플레이어는 방어와 확장을 동시에 신경 써야 하는 어려움이 있지만, 경험이 쌓이면 오버마인드를 파괴할 수 있는 전략적 깊이를 느낄 수 있는 맵이다. 추천 대상은 저그의 심화 전략을 배우고 싶은 플레이어, 디펜스와 서바이벌을 동시에 즐기고 싶은 유저, 그리고 긴장감 넘치는 대결을 원하는 게이머들이다. 플레이 전에는 오버마인드 주변의 방어 시설과 맵의 확장 포인트를 꼼꼼히 확인해야 하며, 초반 SCV 생산과 커맨드 센터 확장이 게임의 성패를 좌우할 수 있음을 유념해야 한다. StarCraft: Brood War's UMS custom map *My Nemesis* is a defense + survival genre map where the goal is to destroy the Zerg Overmind from the original setting. The map features a wide tileset set against a space background, with various Zerg units—such as Zerglings, Hydralisks, and Mutalisks—constantly swarming around the Overmind building at the center. Players start with a Command Center and SCVs, using them to expand their base, build defenses, and continuously produce forces to destroy the Overmind. The map's defining trait is the overwhelming and relentless enemy forces, requiring more than just passive defense—players must actively manage their forces and time their attacks. Additionally, structures with protective shields are placed around the base, making defensive buildings crucial. While beginners may struggle with balancing defense and expansion, experienced players can appreciate the map's strategic depth once they break through. Recommended for those looking to learn advanced Zerg strategies, players who enjoy both defense and survival, and gamers seeking high-tension matches. Before playing, carefully check the defensive structures around the Overmind and the expansion points on the map, and remember that early SCV production and Command Center expansion can determine the outcome of the game.
40 Way Lurker Defence 4.5
이 맵은 이름 그대로 ‘40 Way Lurker Defence 4.5’로, 플레이어들이 끊임없이 몰려오는 저글링과 러커를 상대로 방어전을 펼치는 디펜스 장르의 유즈맵이다. 맵 중앙에 위치한 플레이어 기지와 40개의 입구Advance Mode에서는 더 많은 입구가 활성화될 수 있는 것으로 추정된다가 사방에서 공격을 퍼부으며, 방어 건물과 유닛을 배치해가며 버티는 것이 핵심이다. 맵의 구조는 중앙 기지에서 각 입구까지의 거리가 균등하게 설계되어 있어 러커의 사정거리 내에 들어오기 전에 대처해야 하는 긴장감이 특징이다. 방어 건물의 선택과 배치, 그리고 자원 관리 능력이 곧 승패를 가르는 요소로, 초보자는 방어선을 efficiently 하게 구축하기 어려워 금방 무너질 수 있지만 숙련된 플레이어는 입구별로 러커를 차단하거나 저글링을 효율적으로 정리하면서 버틸 수 있다. 특히 러커가 등장하는 순간부터는 입구별로 신속한 대응이 요구되며, 일정 시간마다 증가하는 적의 물량과 난이도 상승이 플레이어의 집중력을 끊임없이 요구한다. 이 맵은 디펜스 유즈맵의 기본 틀을 따르지만, 40개의 입구가 제공하는 변칙성과 러커의 강력한 딜링이 조화를 이뤄 단순 반복이 아닌 전략적 사고를 요구하는 점이 매력적이다. 초보자도 쉽게 접근할 수 있는 구조이지만, 고수들은 입구별로 다른 방어 전략을 구사하면서 끊임없는 긴장감 속에서 플레이할 수 있다. This map, titled "40 Way Lurker Defence 4.5," is a defense-style custom map where players must fend off relentless waves of Zerglings and Lurkers pouring in from multiple entry points. The core gameplay revolves around strategically placing defensive structures and units to withstand the assaults. The map features 40 entry points surrounding the player's base, each positioned at an equal distance from the center, creating a balanced yet challenging layout. Effective resource management and defensive positioning are crucial, as the game intensifies with higher difficulty levels and increased enemy waves. Novices may struggle with rapid decision-making, while experienced players can optimize their base layouts and unit compositions to counter the Lurkers' long-range attacks. The map's appeal lies in its blend of simplicity and depth, offering both casual and competitive players a tense and rewarding experience.
라커 디펜스 온 유어 오운! 2.0 (Lurker Defense On Your Own! 2.0)
「라커 디펜스 온 유어 오운! 2.0」은 스타크래프트: 브루드워의 디펜스 장르 유즈맵으로, 총 30단계의 레벨을 클리어하며 적의 모든 유닛이 맵 하단에 도달하지 못하게 저지하는 것이 목표인 맵이다. 맵의 전체적인 구성은 가로로 길게 펼쳐진 통로와 다수의 분기점으로 이루어져 있으며, 각 레벨마다 배치된 적 유닛들이 아군의 기지나 특정 지점에 도달하기 전에 모두 섬멸해야 한다. 적의 종류는 저글링, 히드라리스크, 뮤탈리스크, 벌처, 시즈 탱크, 울트라리스크 등 다양하며, 레벨이 올라갈수록 적의 규모와 조합이 복잡해지는 특징을 보인다. 맵의 디자인상으로는 중앙 통로가 좁아진 지점에 방어 포인트를 집중할 수 있도록 유도하고, 측면 통로에는 보조 방어 라인을 설정하는 등 전략적인 배치와 타이밍이 요구된다. 또한, 일부 레벨에서는 특정 유닛의 제한된 생산이나 자원 소모가 필요할 수 있어, 자원 관리와 병력 운용의 밸런스를 맞추는 것이 중요하다. 플레이어는 각 레벨에서 주어지는 제한된 유닛이나 건물로 적을 상대해야 하며, 실패 시 즉시 해당 레벨을 재도전하거나 초기화할 수 있는 구조로 보인다. 맵의 난이도는 레벨이 진행될수록 점차 상승하는 경향이 있으며, 후반부로 갈수록 적의 공격 패턴이 예측 불가능해지고 방어 라인의 밀집도가 높아진다. 초보 플레이어의 경우 낮은 레벨에서 기본적인 방어 패턴을 익히며 점차 난이도를 올려가는 것이 좋으며, 숙련된 플레이어는 고난이도 레벨에서 다중 방어 라인을 구축하고 효율적인 유닛 활용을 통해 클리어 시간을 단축시키는 전략을 세울 수 있다. 맵의 전체적인 분위기는 황혼 테마의 타일셋을 사용하여 어두운 톤의 색감으로 일관되어 있으며, 적의 유닛들이 하단으로 다가오는 긴장감 있는 연출이 특징이다. 맵을 플레이하기 전에 확인해야 할 사항으로는 각 레벨의 목표와 제한 사항, 적의 주력 유닛 조합, 그리고 방어에 유리한 지형적 특징을 꼼꼼히 살펴보는 것이다. 또한, 맵의 길이가 길고 레벨이 많으므로 플레이 시간과 집중력을 고려하여 플레이하는 것이 좋다. 이 맵은 디펜스 장르를 좋아하는 유저들에게는 새로운 도전 과제를 제공하며, 특히 적의 공격을 효율적으로 방어하고 병력을 최적화하는 전략적 사고를 기르기에 좋은 콘텐츠로 평가된다. 초보와 숙련자 모두에게 적절한 난이도 조절이 가능하다는 점에서 접근성이 높다는 장점도 있다. Lurker Defense On Your Own! 2.0 is a defense genre custom map for StarCraft: Brood War, where players must prevent all enemy units from reaching the bottom of the map across 30 levels. The map features a horizontally elongated layout with multiple branches, and each level requires the player to eliminate all approaching enemies before they reach the designated area or base. The enemy units vary by level and include zerglings, hydralisks, mutalisks, vultures, siege tanks, and ultralisks, with escalating scale and complexity as the levels progress. The map design encourages strategic placement of defenses, particularly at narrow choke points in the central corridor, while side routes may require auxiliary defensive lines. Some levels may impose restrictions on unit production or require resource expenditure, emphasizing the need for balanced resource management and troop deployment. Players are given limited units or buildings per level and can retry or reset upon failure. The difficulty gradually increases, with later levels featuring unpredictable attack patterns and densely packed defenses. Beginners should start with lower-level stages to master basic defense tactics, while experienced players can optimize multi-layered defenses and efficient unit utilization for faster completion. The map’s atmosphere is consistently dark and moody, utilizing a twilight-themed tileset that heightens the tension of enemy advances. Before playing, it’s essential to review each level’s objectives, restrictions, enemy compositions, and terrain advantages. Given the map’s length and numerous levels, players should plan for extended sessions to maintain focus. This map offers a fresh challenge for defense genre enthusiasts, fostering strategic thinking in unit optimization and defense tactics. Its adjustable difficulty and accessibility make it suitable for both beginners and experienced players alike.
고양이 vs 쥐 성채! (Cat vs Mice Castle!)
스타크래프트 브루드워의 유즈맵 《Cat vs Mice Castle!》는 쥐와 고양이의 대결을 테마로 한 디펜스 장르의 맵으로, 7명의 플레이어가 한 팀을 이루어 일정 시간 동안 고양이의 공격을 방어하는 구조를 가지고 있다. 맵 중앙에 위치한 성채를 중심으로 쥐 유닛들이 배치되어 있으며, 게임이 시작되면 지속적으로 고양이 유닛들이 공격해 온다. 플레이어는 쥐 유닛을 조종하여 성채를 지키며, 고양이 유닛을 효율적으로 저지해야 한다. 맵은 2048x2048의 넓은 공간에 우주 타일셋을 사용하여 우주 공간에서 펼쳐지는 듯한 분위기를 연출하며, 디펜스 요소 외에도 유닛의 배치와 자원 관리, 타이밍 공격이 중요한 포인트로 작용한다. 플레이어는 시작 시 쥐 유닛을 보유한 상태로 게임을 시작하며, 고양이 유닛들은 일정 시간마다 혹은 랜덤한 패턴으로 공격해 온다. 고양이의 공격 패턴은 맵의 난이도를 조절하는 요소로, 높은 난이도에서는 더 많은 수의 고양이와 다양한 유닛이 등장하여 방어 난이도가 급격히 상승한다. 플레이어는 쥐 유닛의 업그레이드와 배치 전략을 통해 성채를 보호해야 하며, 성채의 내구도가 0이 되면 게임이 종료된다. 맵의 구조는 성채 주변을 중심으로 쥐 유닛이 배치될 수 있는 공간과 고양이 유닛의 진입로가 명확히 구분되어 있어 전략적인 플레이가 요구된다. 이 맵은 특히 디펜스 장르에 익숙한 플레이어들에게 추천되며, 팀워크와 전략적 사고가 필요한 만큼 친구들과 함께 플레이하는 것이 좋다. 또한, 다양한 고양이 유닛의 공격 패턴을 학습하고 대비하는 재미가 있으며, 맵의 난이도를 조절할 수 있는 요소가 있어 초보자와 숙련자 모두 즐길 수 있는 요소로 구성되어 있다. 다만, 쥐 유닛의 업그레이드와 배치, 그리고 고양이 유닛의 공격 타이밍을 잘 파고들어야만 높은 점수를 얻을 수 있으므로, 꾸준한 연습과 전략 수정이 필요하다는 점을 유념해야 한다. 이 맵은 《Cat and Mouse Castle! 2.scm》이라는 파일명으로 배포되었으며, 내부적으로는 ‘Cat vs Mice Castle!’라는 제목을 사용하고 있다. 맵의 제작자나 스토리, 승리 조건 등은 내부 설명에서 확인되지 않지만, 디펜스 장르의 특성을 살린 재미있는 유즈맵으로 평가된다. 플레이 전에는 성채 주변의 배치 공간과 고양이 유닛의 진입 경로를 미리 확인하여 전략을 수립하는 것이 중요하다. StarCraft: Brood War’s custom map *Cat vs Mice Castle!* is a defense-style game where seven players team up to protect a central stronghold from waves of attacking cats. The map is set on a 2048x2048 grid using a space-themed tileset, giving it the feel of a battle unfolding in outer space. Players control mouse units positioned around the stronghold, fending off periodic or randomized cat assaults while managing upgrades, unit placement, and resource flow to keep the stronghold intact. The cats’ attack patterns escalate with difficulty, introducing more units and tighter timings that demand sharper strategy. The layout clearly separates mouse deployment zones from cat entry paths, forcing players to think tactically about positioning and defense. Teamwork and adaptability are key, as success depends on coordinating upgrades, timing responses, and learning the cats’ varied assault rhythms. Recommended for defense-map enthusiasts, the game offers adjustable difficulty for beginners and veterans alike, though mastering mouse upgrades and cat attack windows is essential for high scores. Distributed under the filename *Cat and Mouse Castle! 2.scm* (internally titled *Cat vs Mice Castle!*), the map delivers solid defense gameplay even without clear lore or victory conditions, rewarding those who scout the terrain and refine their tactics before diving in.
라스 신코 무에르테스 (Las Cinco Muertes)
‘라스 신코 무에르테스(Las Cinco Muertes)’는 스타크래프트 브루드워의 밀리 맵으로, 섬과 바다, 좁은 육지가 복잡하게 배치된 아치пе라고된 지형을 배경으로 한다. 다섯 개의 주요 섬으로 나뉜 이 맵은 중앙 바다와 좁은 다리로 연결되어 있어 양 측의 병력이 신중히 이동해야 한다. 섬 특성상 테란의 벙커링이나 프로토스의 공중 유닛 운용이 제한적일 수밖에 없으며, 저그의 경우 지상군과 공중 유닛의 균형을 carefully 조절해야만 승리를 노릴 수 있다. 맵 전체가 비교적 작고 좁은 길목이 많아 전투가 자주 발생하는 편으로, 초반 러시나 타이밍 공격이 강력하게 작용할 수 있는 구조다. 또한, 지형이 복잡한 만큼 시야 확보가 중요하며, 섬의 각 부분에 배치된 자원 분포도 균형 있게 설계되어 있다. 따라서 초보자는 지형 이해와 병력 컨트롤에 어려움을 느낄 수 있으며, 숙련자라면 섬 간의 이동과Micro 관리에서 우위를 점할 수 있을 것이다. 이 맵은 ‘다섯 죽음’이라는 이름답게 섬 하나하나가 치열한 전투의 무대가 될 수 있으며, 다양한 전술이 요구되는 만큼 플레이어의 전략적 선택이 승패를 가를 것이다. 특히 섬 간의 연결 다리나 해안가 near에서의 전투는 게임의 흐름을 결정짓는 핵심 포인트다. 추천하는 플레이 방식은 섬 간의 이동을 최소화하고, 중앙 바다를 활용한 기습이나 방어 라인 구축에 중점을 두는 것이다. 또한, 섬 하나에 고립되지 않도록 병력 이동 경로를 미리 예측하고 대비하는 것이 중요하다. This StarCraft: Brood War melee map, ‘Las Cinco Muertes,’ features a fragmented archipelago terrain divided into five major islands connected by narrow land bridges and surrounded by expansive waters. The layout forces players to carefully maneuver units, limiting the effectiveness of Terran bunker rushes or Protoss air dominance due to the constrained space. Zerg players must balance ground and air units effectively, as the tight corridors favor focused engagements. The map’s compact size and frequent choke points lead to frequent combat, making early rushes or timing attacks viable strategies. Resource distribution is balanced across the islands, ensuring no side gains an unfair advantage. Beginners may struggle with terrain adaptation and unit control, while experienced players can exploit micro-management and strategic positioning between islands. The ‘Five Deaths’ name reflects the high-stakes battles across each island, where tactical decisions and adaptability determine victory. Critical moments often arise at the narrow bridges or coastal battlefields, making vision control and pathfinding essential. Players are advised to minimize unnecessary unit movement between islands, prioritize defensive structures near bridges, and anticipate enemy strategies to avoid isolation. Mastery of the map’s unique geography is key to outmaneuvering opponents and securing dominance in this archipelago battlefield.
맵 선택 가이드
태그는 맵의 핵심 특징을 빠르게 설명하지만 제작 버전마다 규칙이 다를 수 있습니다. 상세 설명에서 권장 인원, 난이도, 플레이 시간과 버전을 함께 확인한 뒤 다운로드하세요.