
타이밍 스타크래프트 맵 모음
'타이밍' 태그가 등록된 맵을 모았습니다. 장르 하나로 찾기 어려운 플레이 방식, 난이도와 특징을 중심으로 인기 맵과 최신 맵을 비교해 보세요.
- 등록 맵
- 9개
- 누적 다운로드
- 6
- 누적 조회
- 403
인기 맵
다운로드와 조회 반응이 높은 맵입니다.
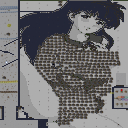
이누야샤 가영이 벗기기 (Strip Kagome)
이누야샤 가영이 벗기기는 스크린상에서 볼 수 있는 플레이어의 캐릭터를 progressively 벗겨내는 재미있는 유즈맵이다. 이누야샤와 가영이라는 제목에서 느껴지듯, 맵의 배경 테마는 일본 애니메이션풍으로 꾸며져 있으며, 플레이어는 맵 중앙에 위치한 스크린을 둘러싼 위치에서 진행된다. 맵의 구조는 맵 중앙을 중심으로 동그랗게 배치된 스크린과 그 주변에 흩어져 있는 각종 장애물 및 상호작용 가능한 오브젝트로 구성되어 있다. 플레이어는 스크린에 표시되는 캐릭터를 progressively 벗기기 위한 조작을 하게 되며, 이는 맵의 핵심 메커니즘으로 보인다. 맵의 UI는 스크린을 중심으로 구성되어 있으며, 캐릭터의 상태 변화가 실시간으로 반영되는 방식으로 보인다. 이 맵은 플레이어 간 경쟁보다는 개인의 조작력과 타이밍을 요구하는 방식으로 보이며, 특히 애니메이션 캐릭터를 상대로 하는Strip(벗기기)라는 독특한 게임플레이가 특징이다. 맵의 해상도와 타일셋을 고려할 때, 맵의 크기는 상당히 넓은 편이지만, 플레이어의 활동 공간은 스크린 주변으로 한정되어 있는 것으로 추정된다. 이 맵을 플레이하기 위해서는 조작력과 더불어 캐릭터를 벗기기 위한 전략적 접근이 필요할 것으로 보인다. 특히, 애니메이션 캐릭터의 옷을 progressively 벗기는 gameplay는 시각적 재미와 더불어 플레이어의 집중력을 요구하는 요소로 작용할 것이다. 이 맵은 주로 유희용 맵으로, 친구들과 함께 즐기기에 적합한 컨텐츠로 보인다. 다만,Strip(벗기기)라는 소재 특성상 연령 제한이나 민감한 사용자에게는 부적합할 수 있으니 플레이 전 확인을 권장한다. 또한, 맵의 구조상 플레이어 간의 직접적인 상호작용은 제한되어 있으며, 개인의 조작력과 타이밍에 따라 결과가 좌우될 것으로 보인다. This StarCraft: Brood War custom map, Strip Kagome, revolves around the unique gameplay of progressively undressing a character displayed on a central screen. The theme draws inspiration from Japanese anime, with visuals centered on the characters Inuyasha and Kagome, creating an engaging and playful atmosphere. The map features a circular screen surrounded by interactive objects and obstacles, guiding players to focus on their timing and precision. The user interface centers on the screen, where real-time updates reflect the character's state changes as players progress through the undressing sequence. Unlike competitive multiplayer modes, this map emphasizes individual skill, strategic timing, and quick decision-making. Its wide 4096x4096 resolution and platform tileset provide ample space, though player activity remains concentrated around the screen. To master gameplay, players must balance fast reflexes with careful planning, especially since the strip mechanic relies heavily on visual cues and timing. While designed for casual entertainment, the nature of the strip theme suggests it may not be suitable for all audiences, so discretion is advised. The map's structure limits direct player-to-player interaction, making individual performance the key to success. It’s best enjoyed with friends looking for a lighthearted challenge rather than a competitive experience.
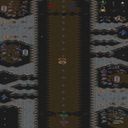
마린 터그 오 워 v1.4 (Marine Tug O War v1.4)
마린 터그 오 워는 4명의 플레이어가 협동하거나 경쟁하며 맵 중간지점을 점령하는 독특한 전투형 유즈맵으로, 스타크래프트 브루드워의 유틸리티와 전략성을 최대한 살린 작품이다. 맵은 가운데 분수대를 중심으로 좌우 대칭 구조로 이뤄져 있으며, 각 플레이어는 시작 지점에서 시작해 좁은 통로를 따라 전진하며 상대방을 밀어내거나 협동하여 목표 지점을 차지해야 한다. 미네랄과 베스핀 가스를 확보할 수 있는 자원 지점이 중간 통로 양쪽에 배치되어 있어 자원 확보와 진출 타이밍이 승패를 좌우한다. 맵의 핵심은 좁은 길목을 두고 펼쳐지는 밀고 당기기로, 적절한 컨트롤과 타이밍을 요구하기 때문에 초보 플레이어보다는 어느 정도 손이 맞는 유저들에게 더 재미를 준다. 맵의 분위기는 황무지 타일셋을 활용해 황량한 평야를 연상시키며, 중간 지점의 분수대는 시각적으로도 포인트가 되는 요소다. 전투는 주로 저글링과 마린을 중심으로 이루어지며, 순간적인 스킬 사용이나 컨트롤이 관건이기 때문에 타 유즈맵에 비해 게임 감각을 많이 타는 편이다. 특히 협동 플레이 시 팀워크가 중요해지는데, 같은 팀끼리 어떻게 호흡을 맞춰 전진할지 전략을 짜는 재미가 쏠쏠하다. 반대로 혼자서 상대방을 밀어내는 플레이도 가능해 경쟁심도 자극하는 구조다. 맵을 플레이하기 전에는 중간의 좁은 통로에서 벌어지는 전투가 치열할 수 있으니, 자원 확보와 병력 관리, 그리고 타이밍을 잘 맞춰야 한다. 또한 팀 플레이 시에는 같은 팀끼리 미리 전략을 공유하는 것이 중요하다. 마린 터그 오 워는 마치 줄다리기를 연상시키는 독특한 플레이 방식으로, 스타크래프트의 기본 전투가 주는 재미를 한 차원 끌어올린 작품이다. 4인용 맵이지만, 협동과 경쟁이 조화롭게 어우러져서 혼자서도 충분히 즐길 수 있으며, 특히 팀전에서는 팀워크가 빛을 발하는 재미가 있다.Battle-style UMS map where four players compete or cooperate to control a central point. The map features a symmetric design with a central fountain, narrow corridors for advancing, and resource points along the way. Victory depends on resource management, timing, and unit control, making it more suitable for players with moderate to high skill levels. The map's visual design, using the wasteland tileset, enhances the immersive experience. Cooperative play emphasizes teamwork, while competitive play challenges individual unit control and strategy. Before playing, focus on resource collection, unit management, and timing your advances through the narrow passages. This map offers a unique tug-of-war-like experience that elevates the fun of basic StarCraft combat.
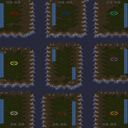
Perfect Tiny Islands
‘Perfect Tiny Islands’는 스타크래프트 브루드워의 미니맵 크기에서 벌어지는 밀리전을 위한 맵으로, 섬 세 곳의 좁은 공간에서 펼쳐지는 전투가 인상적이다. 맵의 주요 특징은 중앙에 위치한 좁은 통로와 세 개의 섬으로 나뉜 지형인데, 각 섬은 미네랄과 가스만 배치되어 있어 병력 생산과 확장이 제한적이다. 플레이어는 시작부터 좁은 통로를 통해 접전을 벌이거나, 섬에 가둔 채 소규모 전투를 반복해야 한다. 좁은 공간에서 벌어지는 전투는 컨트롤과 타이밍이 중요하며, 특히 좁은 길목을 활용한 전략적 플레이가 승부를 가른다. 맵의 ‘Tiny’라는 이름답게 제한된 자원과 좁은 공간이 특징으로, 빠른 판단과 효율적인 자원 관리가 필요하다. 초보자들은 섬 간의 이동과 자원 확보가 어려울 수 있지만, 경험이 쌓일수록 섬을 활용한 공격과 방어 전략을 자연스럽게 익힐 수 있다. 맵의 밸런스는 섬 간의 접근성과 자원 배분에 달려 있으며, 섬을 점령하는 것이 승리의 핵심이다. 섬 맵의 특성상 부대 컨트롤과Micro 컨트롤이 중요해, 유닛의 효율적인 사용과 적절한 타이밍의 공격이 필수적이다. 또한, 섬 간의 이동이 제한적이기 때문에 적의 움직임을 미리 예측하고 대응하는 플레이가 중요하다. 맵을 플레이하기 전에는 섬 간의 통로와 자원 배치를 숙지하고, 섬을 점령하기 위한 전략을 미리 세워두는 것이 좋다. 섬 맵의 특성상 게임이 빠르게 진행되므로, 자원 확보와 병력 생산을 동시에 관리해야 한다. 섬을 점령하기 위한 전투에서 승리하면 상대방의 자원 확보를 방해할 수 있어, 섬의 중요성은 크다. 좁은 공간에서 벌어지는 전투는 긴장감을 더하며, 특히 좁은 통로에서 벌어지는 전투는 컨트롤과 타이밍이 승부를 가른다. 맵의 특성상 멀티태스킹 능력이 중요해, 자원 관리와 병력 생산을 동시에 진행해야 한다. 섬 맵의 특성상 게임이 끝나기 전에 빠르게 승부를 내야 하므로, 효율적인 전략과 컨트롤이 요구된다. ‘Perfect Tiny Islands’ is a map for Starcraft: Brood War melee battles set in a mini-map-sized arena, featuring intense combat across three tightly clustered islands. The map’s key features are the narrow central corridor and the division into three islands, each containing only minerals and gas, limiting unit production and expansion. Players must either engage in close-quarters combat through the narrow passage or trap enemies on an island for repeated skirmishes. Battles in these confined spaces demand precise control and timing, with strategic plays around the choke points often deciding the outcome. As the name suggests, ‘Tiny’ emphasizes limited resources and cramped terrain, requiring quick decision-making and efficient resource management. Beginners may struggle with navigating between islands and securing resources, but as experience grows, they’ll naturally develop strategies for attacking and defending using the islands. The map’s balance hinges on accessibility between islands and resource distribution, with controlling the islands being critical to victory. The island layout makes unit control and micro-management essential, as efficient unit usage and well-timed attacks are vital. Movement between islands is restricted, so predicting and countering the opponent’s movements is crucial. Before playing, it’s wise to familiarize yourself with the corridors and resource layouts and plan strategies for securing islands. Games progress quickly due to the map’s constraints, so balancing resource gathering and unit production is a must. Winning control of an island can disrupt the opponent’s resource collection, underscoring their importance. The confined combat zones heighten tension, especially in battles through narrow passages where control and timing are decisive. The map also tests multitasking skills, requiring simultaneous resource management and unit production. With games often concluding rapidly, efficient strategies and precise control are essential for securing a win.
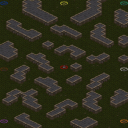
술 취한 탱크 운전자 (Drunk Tank Driver)
스타크래프트 브루드워의 재미있는 유즈맵 중 하나인 〈Drunk Tank Driver〉는 8인 플레이가 가능한 독특한 디펜스 장르로, 탱크를 조종하며 적의 공격을 방어하는 것이 핵심이다. 맵은 사막 지형을 배경으로 하며, 중앙의 도로 중앙선을 따라 탱크가 움직이며 탱크의 이동 경로가 제한된 상태로 적이 끊임없이 몰려오는 구조로 보인다. 탱크는 좌우로만 움직일 수 있으며, 플레이어는 탱크의 방향 전환과 공격 타이밍을 조절해 적을 제거해야 한다. 맵의 가장 큰 특징은 탱크의 움직임이 마치 술에 취한 운전자처럼 다소 불규칙하다는 점으로, 이는 맵의 이름에서 유래한 컨셉으로 추정된다. 적의 웨이브는 점차 강해지며, 후반으로 갈수록 난이도가 상승하는 패턴이 보이며, 맵의 중앙 도로와 주변 건물, 지형이 방어선을 형성하는 역할을 한다. 플레이어는 제한된 시야와 움직임 속에서 적을 efficiently 제거해야 하며, 탱크의 체력 관리와 공격 타이밍이 승리의 열쇠로 보인다. 이 맵은 디펜스 장르임에도 불구하고 탱크의 움직임이 제한적이고, 술 취한 듯한 조작감이 특징적이라 일반적인 디펜스 맵과는 차별화된 재미를 제공한다. 8인까지 동시에 플레이할 수 있어 팀워크가 중요하며, 각 플레이어의 숙련도가 결과에 큰 영향을 미친다. 또한, 맵의 디자인과 사운드 효과가 몰입감을 높이는 요소로 작용할 것으로 추정된다. 초보 플레이어는 탱크의 움직임을 익히는 데 다소 시간이 걸릴 수 있지만, 반복 플레이를 통해 실력을 향상시킬 수 있다. 추천하는 대상은 디펜스 장르를 좋아하는 유저뿐만 아니라, 스타크래프트의 새로운 플레이 스타일을 경험해 보고 싶은 게이머들에게도 적합하다. 플레이 전에는 탱크의 움직임과 공격 패턴을 충분히 숙지하고, 팀원과의 협동 플레이를 연습하는 것이 중요하다. Drunk Tank Driver is one of the most fun custom maps in StarCraft: Brood War, offering an 8-player defensive experience where players control a tank to fend off relentless enemy waves. The map is set in a desert terrain, with a central road acting as the tank's path, restricted to left and right movements. The core mechanic revolves around timing attacks and maneuvering the tank to eliminate incoming enemies, which resemble waves of units growing progressively stronger. The name suggests the tank's movement is deliberately erratic or "drunk," adding a unique twist to the defensive genre. Unlike traditional defense maps, the limited mobility and irregular movement of the tank create a distinct challenge, requiring players to adapt their strategies dynamically. Teamwork is crucial as 8 players can participate simultaneously, each contributing to the defense. The map's design, including terrain and buildings, forms natural barriers, while sound effects and visuals enhance immersion. Beginners may need time to master the tank's controls, but the learning curve is rewarding. This map is ideal for fans of the defense genre and players seeking fresh gameplay mechanics in StarCraft. Before starting, familiarize yourself with the tank's movement and attack patterns, and practice coordination with teammates to maximize your chances of success.
쓰나미 런! (Tsunami Run!)
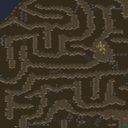
스타크래프트 브루드워의 유즈맵 장르 중 하나인 ‘러닝 게임’ 스타일을 대표하는 ‘쓰나미 런!(Tsunami Run!)’은 플레이어가 끊임없이 밀려오는 파도를 피해 생존하는 퍼즐형 디펜스 맵이다. 맵의 전체적인 분위기는 황무지 타일셋으로 구성되어 있으며, 파도가 밀려오는 방향과 타이밍을 예측하며 유닛을 이동시키는 것이 핵심 mechanics다. 맵의 중앙에는 안전지대가 있으며, 파도가 덮치는 구역은 서서히 줄어들기 때문에 제한된 시간 내에 최대한 멀리 이동해야 한다. 플레이어는 기본적으로 유닛을 조종할 수 있으며, 파도가 덮치기 전에 안전지대로 피하지 못하면 게임 오버된다. 맵의 구조는 비교적 단순해 보이지만, 파도의 패턴과 속도가 시간에 따라 변화하기 때문에 전략적 선택과 반사 신경이 요구된다. 특히, 인원 수가 6명으로 제한되어 있어 팀 플레이보다는 개인의 실력이 중요하게 작용한다. 맵의 난이도는 중간 수준으로, 초보자는 파도의 패턴을 숙지하는 데 시간이 걸리지만, 숙련되면 비교적 쉽게 클리어할 수 있다. 추천 대상은 스타크래프트 초보자부터 숙련자까지 폭넓게 즐길 수 있는 맵이지만, 빠른 반사 신경과 전략적 사고가 필요하다는 점에서 경쟁적인 유저들에게 더욱 매력적으로 다가갈 것이다. 플레이 전에는 반드시 파도의 이동 경로와 안전지대의 위치를 숙지해야 하며, 초반에는 파도 속도를 천천히 조절하는 연습을 추천한다. 맵의 전체적인 볼륨은 크지 않지만, 반복 플레이 시 새로운 패턴과 전략을 발견할 수 있어 재플레이 가치가 높은 작품이다. "Tsunami Run!" is a puzzle-style defense map in the "running game" genre of *StarCraft: Brood War* custom maps, where players must survive by dodging relentlessly incoming waves. The map features a desolate tileset, and the core mechanics involve predicting the direction and timing of the waves while maneuvering units. A central safe zone exists, with the area affected by waves gradually shrinking, forcing players to move as far as possible within the limited time. Players control units directly, and failing to reach the safe zone before the waves hit results in a game over. Though the map’s structure appears simple, the waves’ changing patterns and speeds demand strategic decision-making and quick reflexes. With a player limit of six, individual skill plays a bigger role than teamwork. The difficulty is moderate—beginners may struggle to memorize the wave patterns, but experienced players can clear it relatively easily. Suitable for a wide range of players, from beginners to veterans, it particularly appeals to competitive users due to its need for fast reflexes and tactical thinking. Before playing, it’s essential to study the waves’ paths and the safe zone’s location, and beginners should practice adjusting to the wave speed early on. While the map isn’t overly large, its replay value is high, as repeated plays reveal new patterns and strategies.
블랙 아웃 2: 인베이전 (Black Out 2: Invasion)
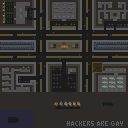
《블랙 아웃 2: 인베이전》은 스타크래프트 브루드워의 UMS 유즈맵으로, 좀비 웨이브를 버텨내며 40분간 생존하는 디펜스 장르의 핵심적인 재미를 담은 맵이다. 맵의 전체적인 구조는 중앙Spawn 지역을 중심으로 3방향으로 갈라지는 길, 그리고 그 끝에 위치한 3개의 기지 구역으로 구성되어 있다. 플레이어는 각자 할당된 기지 구역에서 자원 채취와 방어 시설을 구축하면서 끊임없이 몰려오는 좀비 무리를 상대해야 한다. 맵의 주요 특징은 각 기지 구역이 서로 독립되어 있지만, 중앙Spawn을 통해 공유되는 자원과 방어 병력의 흐름이 존재한다는 점이다. 이는 협력과 경쟁이 공존하는 전략적 선택을 강제하며, 한 구역의 방어가 무너지면 다른 구역으로 좀비가 집중된다는 긴장감을 제공한다. 맵의 그래픽은 황무지 타일셋을 기반으로 하며, 어두운 색조와 조명이 대비되는 디자인으로 좀비 웨이브가 몰려올 때의 공포감을 배가시킨다. 특히,Spawn 지역과 기지 구역 사이의 거리가 멀어 방어선의 중요성이 부각되며, 플레이어는 자원 관리와 병력 배치, 그리고 타이밍을 맞춰 좀비를 물리치는 데 집중해야 한다. 맵의 난이도는 초반에는 비교적 여유롭지만, 시간이 지날수록 웨이브의 규모와 속도가 급격히 증가하여 후반으로 갈수록 극한의 집중력을 요구한다. 또한, 각 구역의 방어 시설을 어떻게 배치하느냐에 따라 생존 확률이 크게 달라지므로, 플레이어의 전략적 사고가 maps의 핵심이다. 초보자도 쉽게 접근할 수 있지만, 숙련자라면 고도의 협력과 타이밍을 필요로 하는 이 맵은 다양한 전략적 가능성을 제공한다. 다만, 팀 간의 협력이 원활하지 않으면 한 구역의 무너짐이 전체의 패배로 이어질 수 있어, 팀워크가 중요하다. 《블랙 아웃 2: 인베이전》은 디펜스 장르의 정수를 체험할 수 있는 맵으로, 특히 좀비 테마의 디펜스를 즐기는 유저들에게 강력히 추천할 만하다. 이 맵을 플레이하기 전에는 각 구역의 자원 분포와 길목의 취약점을 미리 파악해두는 것이 중요하며, 초반 방어 시설 구축이 후반 생존의 열쇠가 된다. 또한, 팀원 간의 역할 분배와 소통이 원활하지 않으면 쉽게 무너질 수 있으므로, 사전 협의가 필수적이다. 《Blackout 2: Invasion》 is a UMS custom map for *StarCraft: Brood War* that captures the core fun of defense games—surviving waves of zombies for 40 minutes. The map’s layout features a central spawn area branching into three paths, each leading to one of three base zones. Players must gather resources and build defenses in their assigned zones while fending off relentless zombie hordes. A key mechanic is that while the base zones are isolated, resources and defensive units are shared through the central spawn, forcing players to balance cooperation and competition. If one zone falls, zombies will focus their attacks there, adding tension to the game. The map’s aesthetic uses a wasteland tileset with dark tones and stark lighting to amplify the dread of incoming zombie waves. The long distance between the spawn and base zones highlights the importance of defensive lines, pushing players to manage resources, deploy troops, and time their defenses carefully. While the early game is manageable, waves grow larger and faster over time, demanding peak focus in the late stages. Survival hinges on strategic defense placement, making adaptability crucial. Beginners can jump in easily, but the map rewards skilled players with high-level teamwork and precise timing, offering deep strategic possibilities. However, poor team coordination can lead to a single zone’s collapse dooming the entire team, so teamwork is essential. *Blackout 2: Invasion* delivers the essence of defense games, especially for fans of zombie-themed challenges. Before playing, study each zone’s resource distribution and weak points, as early defense construction is vital for late-game survival. Clear role assignments and communication among teammates are non-negotiable—pre-game coordination is key.
대폭발 (Bolshoy Vzryv)
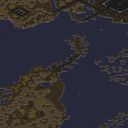
‘Áîëüøîé Âçðûâ’(‘대폭발’)은 스타크래프트 브루드워의 유즈맵으로, 단일 플레이어가 에너지를 집중하는 пушка(대포)를 조작해 목표물을 파괴하는 디펜스 및 피하기 장르의 미니게임에 가깝다. 맵은 8192x8192 규모의 황무지 타일셋으로 구성되어 있으며, 중앙에 위치한 거대한 구조물 주변으로 적의 공격이 끊임없이 쏟아진다. 플레이어는 에너지를 모아 포격을 가할 수 있지만, 에너지가 발사되기 전까지는 일정 시간 동안 무방비 상태가 되므로 타이밍과 패턴 읽기가 중요하다. 맵 이미지 상으로는 적의 공격 루트와 포격 지점이 명확히 구분되어 있으며, 구조물의 일부가 파괴되면서 새로운 공격 루트가 생성되는 방식으로 진행된다. 플레이 방식은 에너지를 모으는 ‘충전’과 발사 타이밍을 맞추는 ‘사격’으로 단순하지만, 에너지가 발사되는 순간의 무방비 상태와 적의 지속적인 공격 패턴으로 인해 긴장감이 지속된다. 맵의 특징은 에너지를 모으는 동안에도 적의 공격이 지속된다는 점으로, 에너지 충전 시간과 사격 타이밍을 조율하지 않으면 구조물이 쉽게 파괴될 수 있다. 추천 대상은 스타크래프트의 기본 조작에 익숙한 플레이어로, 단순하지만 숙련도가 필요한 패턴을 요구하는 맵이다. 플레이 전 확인해야 할 포인트는 에너지의 충전 속도와 발사 후 무방비 상태의 지속 시간, 그리고 적의 공격 루트 변화 패턴이다. 맵의 규모가 크고 타일셋이 황무지로 구성되어 있어 시각적인 몰입감이 높지만, 반대로 맵의 복잡한 구조로 인해 에너지를 모으는 위치선정이 중요하다. 전체적으로는 짧은 플레이 타임과 높은 집중력을 요구하는 미니게임에 가까운 장르로, 디펜스와 피하기 요소의 조합이 돋보인다. 맵의 제목 ‘대폭발’은 에너지의 폭발적 파괴력을 상징하는 것으로 보이며, 플레이어는 에너지를 모아 구조물을 보호하는 동시에 적의 공격을 방어해야 한다. 맵의 내부 설명이 러시아어와 한국어로 혼용되어 있어 언어 장벽이 존재할 수 있으므로, 사전 지식이 있다면 더욱 원활한 플레이가 가능하다. "Big Bang" is a StarCraft: Brood War custom map similar to a mini-game where a single player controls a cannon (a weapon that concentrates energy) to destroy targets in a defense and dodging genre. The map consists of a 8192x8192 wasteland tileset, with enemy attacks continuously raining down around a massive structure at the center. Players can gather energy to fire, but remain vulnerable for a set duration before firing, making timing and pattern recognition crucial. The map's visual layout clearly distinguishes enemy attack routes and firing points, and new attack paths emerge as parts of the structure are destroyed. While the gameplay—consisting of "charging" energy and timing shots—is simple, the constant attacks and moments of vulnerability during firing create sustained tension. A key feature is that enemies continue attacking even while energy is being gathered, so failing to balance charging time and firing timing can quickly lead to the structure's destruction. Recommended for players familiar with StarCraft's basic controls, this map demands skill despite its simplicity. Before playing, it’s important to understand the energy charging speed, the duration of vulnerability after firing, and how enemy attack routes change. With its vast scale and wasteland tileset, the map offers strong visual immersion, but the complex layout makes choosing where to charge energy critical. Overall, it’s a short, high-focus mini-game blending defense and dodging elements. The title "Big Bang" likely symbolizes the explosive destructive power of the energy, as players must both protect the structure by gathering energy and defend against enemy attacks. Since the map’s in-game instructions mix Russian and Korean, language barriers may exist, so prior knowledge can help ensure smoother gameplay.
CombinationBound Bound
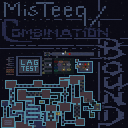
CombinationBound Bound는 여러 인기 바운드 맵을 조합해 재구성한 6인용 장애물 코스 유즈맵이다. 화산 타일셋 위에 펼쳐진 128×128 타일 크기의 맵은 'Different Levels'라는 설명대로 여러 단계의 구간으로 나뉘어 있으며, 각 구간마다 점프, 이동, 타이밍 회피 등 서로 다른 기믹이 배치되어 있다. 제작자 MisTeeq(Teeq3)는 v1.3 버전에서 기존 바운드들의 핵심 패턴을 선별·변형해 하나의 흐름으로 엮었으며, 'Crucial Timing'이라는 문구에서 알 수 있듯 정밀한 컨트롤과 순간 판단력이 클리어의 열쇠가 된다. 진행 방식은 선형적이며, 구간별 체크포인트나 부활 트리거가 있는지 여부는 이미지상 명확하지 않으나 일반적인 바운드 관례상 구간 실패 시 처음부터 재시작하거나 직전 지점에서 재도전하는 형태일 것으로 보인다. 난이도는 중상급으로 추정되며, 바운드 장르 입문자보다는 어느 정도 컨트롤 숙련자가 도전하기에 적합하다. 플레이 전에는 키보드 반응 속도, 마우스 감도, 그리고 맵 설명에 명시된 'v1.3' 버전 확인을 권장한다. 협력보다는 개인 기량 경쟁에 가까우며, 6명 동시 입장 시 대기 시간과 화면 혼잡을 고려해 소수 인원으로 즐기는 것도 좋다. CombinationBound Bound is a 6-player obstacle course use-map that recombines several popular bound maps into a single experience. Built on the Volcano tileset across a 128×128 tile grid, the map is divided into multiple stages as suggested by 'Different Levels,' each featuring distinct gimmicks such as jumps, movement challenges, and timing-based evasion. Creator MisTeeq (Teeq3) selected and modified core patterns from existing bounds in v1.3, weaving them into one continuous flow; as the phrase 'Crucial Timing' implies, precise control and split-second decision-making are the keys to clearing. Progression is linear, and while checkpoint or revive triggers are not visible in the image, bound convention suggests either restart-from-start or retry-from-last-section on failure. Difficulty appears upper-intermediate, making it better suited for players with existing bound control experience rather than newcomers. Before playing, verify keyboard response, mouse sensitivity, and the stated 'v1.3' version. The focus is on individual skill competition rather than cooperation, and with six simultaneous players, wait times and screen clutter may arise—smaller groups are recommended for a smoother experience.
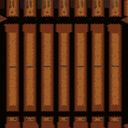
러커 디펜스 온유어온 플러스! (Lurker Defense OnYourOwn Plus!)
스타크래프트 브루드워의 디펜스 장르 유즈맵인 〈Lurker Defense OnYourOwn Plus!〉는 플레이어가 적의 공격을 방어하면서Bottom(하단 지역)에 도달하지 못하게 막는 것이 핵심 목표인 맵이다. 내부 맵 설명에 따르면 총 30레벨을 클리어해야 하며, 각 레벨에서 끊임없이 몰려오는 적 유닛을 Lurker(러커)나 다른 방어 유닛을 배치해 저지해야 한다. 맵의 구조는 하단 중앙에 위치한 기지(혹은 방어 지점)으로 이어지는 좁은 길목이 중심이 되며, 적 유닛은 주로 이 길을 따라 прод进(진进)하려는 형태로 보인다. 맵 이미지 상단과 하단의 지형은 비교적 평탄한 반면, 중앙부는 좁은 통로와 협곡 형태로 구성되어 있어 러커나 지상 방어 유닛의 효율적인 배치와 타이밍이 승부의 관건으로 추정된다. 특히 러커의 사정거리와 각 레벨별 적 배치 패턴을 숙지하지 않으면 방어선이 쉽게 무너질 수 있어, 초보 플레이어보다는 방어 전략과 자원 관리에 익숙한 중수 이상의 플레이어가 적합할 것으로 보인다. 또한, 맵의 아랫부분과 가운데에는 방어 건물을 짓기 위한 공간이 넓게 배치되어 있어, 초반 자원 확보와 방어 건물의 배치 전략이 중요하다는 점을 확인할 수 있다. 이 맵은 디펜스 장르의 기본 틀을 갖추고 있지만, 러커와 같은 특수 유닛을 활용한 전략적 깊이가 더해져 단순 반복보다는 창의적인 방어 구축이 요구된다. 특히 30레벨까지 progression(진행)이 이어지므로, 각 레벨의 난이도 상승과 적 배치 패턴의 변화에 대응할 수 있는 능력이 필요하며, 이를 위해선 꾸준한 연습과 전략 수정이 필수적이다. 추천 대상은 디펜스 장르를 즐기는 플레이어이며, 특히 지상 방어와 러커 활용에 관심이 있는 유저에게 적합한 맵으로 판단된다. 플레이 전에는 맵의 하단 길목과 협곡 구조를 미리 확인하고, 러커의 사정거리와 공격 타이밍을 숙지하는 것이 중요하다. 또한, 초반 자원 확보와 방어 건물의 배치 계획을 미리 세워두면 레벨 진행 시 큰 도움이 될 것이다. The StarCraft: Brood War defense custom map *Lurker Defense OnYourOwn Plus!* challenges players to prevent enemy units from reaching the bottom (lower section) of the map while defending against relentless waves of attacks. According to the in-game description, the map consists of 30 levels, each requiring players to strategically place Lurkers and other defensive units to block incoming enemy forces. The map’s layout revolves around a narrow path leading to a central base or defense point at the bottom, with enemies primarily advancing along this route. While the upper and lower sections of the map feature relatively flat terrain, the middle section is dominated by tight corridors and canyons, making efficient Lurker placement and precise timing crucial for success. Without a solid understanding of Lurker range and enemy spawn patterns per level, defensive lines can quickly collapse, suggesting that intermediate or advanced players—rather than beginners—are better suited for the challenge. The bottom and central areas offer ample space for constructing defensive buildings, emphasizing the importance of early resource management and strategic placement. While the map follows classic defense mechanics, its reliance on specialized units like Lurkers adds depth, shifting the focus from repetitive tactics to creative defensive setups. With 30 levels of escalating difficulty and evolving enemy patterns, players must adapt their strategies through consistent practice and adjustments. Ideal for fans of the defense genre, this map particularly appeals to those interested in ground-based defenses and Lurker utilization. Before playing, it’s essential to study the bottom path and canyon structures, master Lurker range and attack timing, and plan early resource gathering and defensive building placements to ensure smoother progression through the levels.
최근 등록된 맵
새로 추가된 파일과 버전을 확인하세요.
대폭발 (Bolshoy Vzryv)
‘Áîëüøîé Âçðûâ’(‘대폭발’)은 스타크래프트 브루드워의 유즈맵으로, 단일 플레이어가 에너지를 집중하는 пушка(대포)를 조작해 목표물을 파괴하는 디펜스 및 피하기 장르의 미니게임에 가깝다. 맵은 8192x8192 규모의 황무지 타일셋으로 구성되어 있으며, 중앙에 위치한 거대한 구조물 주변으로 적의 공격이 끊임없이 쏟아진다. 플레이어는 에너지를 모아 포격을 가할 수 있지만, 에너지가 발사되기 전까지는 일정 시간 동안 무방비 상태가 되므로 타이밍과 패턴 읽기가 중요하다. 맵 이미지 상으로는 적의 공격 루트와 포격 지점이 명확히 구분되어 있으며, 구조물의 일부가 파괴되면서 새로운 공격 루트가 생성되는 방식으로 진행된다. 플레이 방식은 에너지를 모으는 ‘충전’과 발사 타이밍을 맞추는 ‘사격’으로 단순하지만, 에너지가 발사되는 순간의 무방비 상태와 적의 지속적인 공격 패턴으로 인해 긴장감이 지속된다. 맵의 특징은 에너지를 모으는 동안에도 적의 공격이 지속된다는 점으로, 에너지 충전 시간과 사격 타이밍을 조율하지 않으면 구조물이 쉽게 파괴될 수 있다. 추천 대상은 스타크래프트의 기본 조작에 익숙한 플레이어로, 단순하지만 숙련도가 필요한 패턴을 요구하는 맵이다. 플레이 전 확인해야 할 포인트는 에너지의 충전 속도와 발사 후 무방비 상태의 지속 시간, 그리고 적의 공격 루트 변화 패턴이다. 맵의 규모가 크고 타일셋이 황무지로 구성되어 있어 시각적인 몰입감이 높지만, 반대로 맵의 복잡한 구조로 인해 에너지를 모으는 위치선정이 중요하다. 전체적으로는 짧은 플레이 타임과 높은 집중력을 요구하는 미니게임에 가까운 장르로, 디펜스와 피하기 요소의 조합이 돋보인다. 맵의 제목 ‘대폭발’은 에너지의 폭발적 파괴력을 상징하는 것으로 보이며, 플레이어는 에너지를 모아 구조물을 보호하는 동시에 적의 공격을 방어해야 한다. 맵의 내부 설명이 러시아어와 한국어로 혼용되어 있어 언어 장벽이 존재할 수 있으므로, 사전 지식이 있다면 더욱 원활한 플레이가 가능하다. "Big Bang" is a StarCraft: Brood War custom map similar to a mini-game where a single player controls a cannon (a weapon that concentrates energy) to destroy targets in a defense and dodging genre. The map consists of a 8192x8192 wasteland tileset, with enemy attacks continuously raining down around a massive structure at the center. Players can gather energy to fire, but remain vulnerable for a set duration before firing, making timing and pattern recognition crucial. The map's visual layout clearly distinguishes enemy attack routes and firing points, and new attack paths emerge as parts of the structure are destroyed. While the gameplay—consisting of "charging" energy and timing shots—is simple, the constant attacks and moments of vulnerability during firing create sustained tension. A key feature is that enemies continue attacking even while energy is being gathered, so failing to balance charging time and firing timing can quickly lead to the structure's destruction. Recommended for players familiar with StarCraft's basic controls, this map demands skill despite its simplicity. Before playing, it’s important to understand the energy charging speed, the duration of vulnerability after firing, and how enemy attack routes change. With its vast scale and wasteland tileset, the map offers strong visual immersion, but the complex layout makes choosing where to charge energy critical. Overall, it’s a short, high-focus mini-game blending defense and dodging elements. The title "Big Bang" likely symbolizes the explosive destructive power of the energy, as players must both protect the structure by gathering energy and defend against enemy attacks. Since the map’s in-game instructions mix Russian and Korean, language barriers may exist, so prior knowledge can help ensure smoother gameplay.
쓰나미 런! (Tsunami Run!)
스타크래프트 브루드워의 유즈맵 장르 중 하나인 ‘러닝 게임’ 스타일을 대표하는 ‘쓰나미 런!(Tsunami Run!)’은 플레이어가 끊임없이 밀려오는 파도를 피해 생존하는 퍼즐형 디펜스 맵이다. 맵의 전체적인 분위기는 황무지 타일셋으로 구성되어 있으며, 파도가 밀려오는 방향과 타이밍을 예측하며 유닛을 이동시키는 것이 핵심 mechanics다. 맵의 중앙에는 안전지대가 있으며, 파도가 덮치는 구역은 서서히 줄어들기 때문에 제한된 시간 내에 최대한 멀리 이동해야 한다. 플레이어는 기본적으로 유닛을 조종할 수 있으며, 파도가 덮치기 전에 안전지대로 피하지 못하면 게임 오버된다. 맵의 구조는 비교적 단순해 보이지만, 파도의 패턴과 속도가 시간에 따라 변화하기 때문에 전략적 선택과 반사 신경이 요구된다. 특히, 인원 수가 6명으로 제한되어 있어 팀 플레이보다는 개인의 실력이 중요하게 작용한다. 맵의 난이도는 중간 수준으로, 초보자는 파도의 패턴을 숙지하는 데 시간이 걸리지만, 숙련되면 비교적 쉽게 클리어할 수 있다. 추천 대상은 스타크래프트 초보자부터 숙련자까지 폭넓게 즐길 수 있는 맵이지만, 빠른 반사 신경과 전략적 사고가 필요하다는 점에서 경쟁적인 유저들에게 더욱 매력적으로 다가갈 것이다. 플레이 전에는 반드시 파도의 이동 경로와 안전지대의 위치를 숙지해야 하며, 초반에는 파도 속도를 천천히 조절하는 연습을 추천한다. 맵의 전체적인 볼륨은 크지 않지만, 반복 플레이 시 새로운 패턴과 전략을 발견할 수 있어 재플레이 가치가 높은 작품이다. "Tsunami Run!" is a puzzle-style defense map in the "running game" genre of *StarCraft: Brood War* custom maps, where players must survive by dodging relentlessly incoming waves. The map features a desolate tileset, and the core mechanics involve predicting the direction and timing of the waves while maneuvering units. A central safe zone exists, with the area affected by waves gradually shrinking, forcing players to move as far as possible within the limited time. Players control units directly, and failing to reach the safe zone before the waves hit results in a game over. Though the map’s structure appears simple, the waves’ changing patterns and speeds demand strategic decision-making and quick reflexes. With a player limit of six, individual skill plays a bigger role than teamwork. The difficulty is moderate—beginners may struggle to memorize the wave patterns, but experienced players can clear it relatively easily. Suitable for a wide range of players, from beginners to veterans, it particularly appeals to competitive users due to its need for fast reflexes and tactical thinking. Before playing, it’s essential to study the waves’ paths and the safe zone’s location, and beginners should practice adjusting to the wave speed early on. While the map isn’t overly large, its replay value is high, as repeated plays reveal new patterns and strategies.
Perfect Tiny Islands
‘Perfect Tiny Islands’는 스타크래프트 브루드워의 미니맵 크기에서 벌어지는 밀리전을 위한 맵으로, 섬 세 곳의 좁은 공간에서 펼쳐지는 전투가 인상적이다. 맵의 주요 특징은 중앙에 위치한 좁은 통로와 세 개의 섬으로 나뉜 지형인데, 각 섬은 미네랄과 가스만 배치되어 있어 병력 생산과 확장이 제한적이다. 플레이어는 시작부터 좁은 통로를 통해 접전을 벌이거나, 섬에 가둔 채 소규모 전투를 반복해야 한다. 좁은 공간에서 벌어지는 전투는 컨트롤과 타이밍이 중요하며, 특히 좁은 길목을 활용한 전략적 플레이가 승부를 가른다. 맵의 ‘Tiny’라는 이름답게 제한된 자원과 좁은 공간이 특징으로, 빠른 판단과 효율적인 자원 관리가 필요하다. 초보자들은 섬 간의 이동과 자원 확보가 어려울 수 있지만, 경험이 쌓일수록 섬을 활용한 공격과 방어 전략을 자연스럽게 익힐 수 있다. 맵의 밸런스는 섬 간의 접근성과 자원 배분에 달려 있으며, 섬을 점령하는 것이 승리의 핵심이다. 섬 맵의 특성상 부대 컨트롤과Micro 컨트롤이 중요해, 유닛의 효율적인 사용과 적절한 타이밍의 공격이 필수적이다. 또한, 섬 간의 이동이 제한적이기 때문에 적의 움직임을 미리 예측하고 대응하는 플레이가 중요하다. 맵을 플레이하기 전에는 섬 간의 통로와 자원 배치를 숙지하고, 섬을 점령하기 위한 전략을 미리 세워두는 것이 좋다. 섬 맵의 특성상 게임이 빠르게 진행되므로, 자원 확보와 병력 생산을 동시에 관리해야 한다. 섬을 점령하기 위한 전투에서 승리하면 상대방의 자원 확보를 방해할 수 있어, 섬의 중요성은 크다. 좁은 공간에서 벌어지는 전투는 긴장감을 더하며, 특히 좁은 통로에서 벌어지는 전투는 컨트롤과 타이밍이 승부를 가른다. 맵의 특성상 멀티태스킹 능력이 중요해, 자원 관리와 병력 생산을 동시에 진행해야 한다. 섬 맵의 특성상 게임이 끝나기 전에 빠르게 승부를 내야 하므로, 효율적인 전략과 컨트롤이 요구된다. ‘Perfect Tiny Islands’ is a map for Starcraft: Brood War melee battles set in a mini-map-sized arena, featuring intense combat across three tightly clustered islands. The map’s key features are the narrow central corridor and the division into three islands, each containing only minerals and gas, limiting unit production and expansion. Players must either engage in close-quarters combat through the narrow passage or trap enemies on an island for repeated skirmishes. Battles in these confined spaces demand precise control and timing, with strategic plays around the choke points often deciding the outcome. As the name suggests, ‘Tiny’ emphasizes limited resources and cramped terrain, requiring quick decision-making and efficient resource management. Beginners may struggle with navigating between islands and securing resources, but as experience grows, they’ll naturally develop strategies for attacking and defending using the islands. The map’s balance hinges on accessibility between islands and resource distribution, with controlling the islands being critical to victory. The island layout makes unit control and micro-management essential, as efficient unit usage and well-timed attacks are vital. Movement between islands is restricted, so predicting and countering the opponent’s movements is crucial. Before playing, it’s wise to familiarize yourself with the corridors and resource layouts and plan strategies for securing islands. Games progress quickly due to the map’s constraints, so balancing resource gathering and unit production is a must. Winning control of an island can disrupt the opponent’s resource collection, underscoring their importance. The confined combat zones heighten tension, especially in battles through narrow passages where control and timing are decisive. The map also tests multitasking skills, requiring simultaneous resource management and unit production. With games often concluding rapidly, efficient strategies and precise control are essential for securing a win.
마린 터그 오 워 v1.4 (Marine Tug O War v1.4)
마린 터그 오 워는 4명의 플레이어가 협동하거나 경쟁하며 맵 중간지점을 점령하는 독특한 전투형 유즈맵으로, 스타크래프트 브루드워의 유틸리티와 전략성을 최대한 살린 작품이다. 맵은 가운데 분수대를 중심으로 좌우 대칭 구조로 이뤄져 있으며, 각 플레이어는 시작 지점에서 시작해 좁은 통로를 따라 전진하며 상대방을 밀어내거나 협동하여 목표 지점을 차지해야 한다. 미네랄과 베스핀 가스를 확보할 수 있는 자원 지점이 중간 통로 양쪽에 배치되어 있어 자원 확보와 진출 타이밍이 승패를 좌우한다. 맵의 핵심은 좁은 길목을 두고 펼쳐지는 밀고 당기기로, 적절한 컨트롤과 타이밍을 요구하기 때문에 초보 플레이어보다는 어느 정도 손이 맞는 유저들에게 더 재미를 준다. 맵의 분위기는 황무지 타일셋을 활용해 황량한 평야를 연상시키며, 중간 지점의 분수대는 시각적으로도 포인트가 되는 요소다. 전투는 주로 저글링과 마린을 중심으로 이루어지며, 순간적인 스킬 사용이나 컨트롤이 관건이기 때문에 타 유즈맵에 비해 게임 감각을 많이 타는 편이다. 특히 협동 플레이 시 팀워크가 중요해지는데, 같은 팀끼리 어떻게 호흡을 맞춰 전진할지 전략을 짜는 재미가 쏠쏠하다. 반대로 혼자서 상대방을 밀어내는 플레이도 가능해 경쟁심도 자극하는 구조다. 맵을 플레이하기 전에는 중간의 좁은 통로에서 벌어지는 전투가 치열할 수 있으니, 자원 확보와 병력 관리, 그리고 타이밍을 잘 맞춰야 한다. 또한 팀 플레이 시에는 같은 팀끼리 미리 전략을 공유하는 것이 중요하다. 마린 터그 오 워는 마치 줄다리기를 연상시키는 독특한 플레이 방식으로, 스타크래프트의 기본 전투가 주는 재미를 한 차원 끌어올린 작품이다. 4인용 맵이지만, 협동과 경쟁이 조화롭게 어우러져서 혼자서도 충분히 즐길 수 있으며, 특히 팀전에서는 팀워크가 빛을 발하는 재미가 있다.Battle-style UMS map where four players compete or cooperate to control a central point. The map features a symmetric design with a central fountain, narrow corridors for advancing, and resource points along the way. Victory depends on resource management, timing, and unit control, making it more suitable for players with moderate to high skill levels. The map's visual design, using the wasteland tileset, enhances the immersive experience. Cooperative play emphasizes teamwork, while competitive play challenges individual unit control and strategy. Before playing, focus on resource collection, unit management, and timing your advances through the narrow passages. This map offers a unique tug-of-war-like experience that elevates the fun of basic StarCraft combat.
러커 디펜스 온유어온 플러스! (Lurker Defense OnYourOwn Plus!)
스타크래프트 브루드워의 디펜스 장르 유즈맵인 〈Lurker Defense OnYourOwn Plus!〉는 플레이어가 적의 공격을 방어하면서Bottom(하단 지역)에 도달하지 못하게 막는 것이 핵심 목표인 맵이다. 내부 맵 설명에 따르면 총 30레벨을 클리어해야 하며, 각 레벨에서 끊임없이 몰려오는 적 유닛을 Lurker(러커)나 다른 방어 유닛을 배치해 저지해야 한다. 맵의 구조는 하단 중앙에 위치한 기지(혹은 방어 지점)으로 이어지는 좁은 길목이 중심이 되며, 적 유닛은 주로 이 길을 따라 прод进(진进)하려는 형태로 보인다. 맵 이미지 상단과 하단의 지형은 비교적 평탄한 반면, 중앙부는 좁은 통로와 협곡 형태로 구성되어 있어 러커나 지상 방어 유닛의 효율적인 배치와 타이밍이 승부의 관건으로 추정된다. 특히 러커의 사정거리와 각 레벨별 적 배치 패턴을 숙지하지 않으면 방어선이 쉽게 무너질 수 있어, 초보 플레이어보다는 방어 전략과 자원 관리에 익숙한 중수 이상의 플레이어가 적합할 것으로 보인다. 또한, 맵의 아랫부분과 가운데에는 방어 건물을 짓기 위한 공간이 넓게 배치되어 있어, 초반 자원 확보와 방어 건물의 배치 전략이 중요하다는 점을 확인할 수 있다. 이 맵은 디펜스 장르의 기본 틀을 갖추고 있지만, 러커와 같은 특수 유닛을 활용한 전략적 깊이가 더해져 단순 반복보다는 창의적인 방어 구축이 요구된다. 특히 30레벨까지 progression(진행)이 이어지므로, 각 레벨의 난이도 상승과 적 배치 패턴의 변화에 대응할 수 있는 능력이 필요하며, 이를 위해선 꾸준한 연습과 전략 수정이 필수적이다. 추천 대상은 디펜스 장르를 즐기는 플레이어이며, 특히 지상 방어와 러커 활용에 관심이 있는 유저에게 적합한 맵으로 판단된다. 플레이 전에는 맵의 하단 길목과 협곡 구조를 미리 확인하고, 러커의 사정거리와 공격 타이밍을 숙지하는 것이 중요하다. 또한, 초반 자원 확보와 방어 건물의 배치 계획을 미리 세워두면 레벨 진행 시 큰 도움이 될 것이다. The StarCraft: Brood War defense custom map *Lurker Defense OnYourOwn Plus!* challenges players to prevent enemy units from reaching the bottom (lower section) of the map while defending against relentless waves of attacks. According to the in-game description, the map consists of 30 levels, each requiring players to strategically place Lurkers and other defensive units to block incoming enemy forces. The map’s layout revolves around a narrow path leading to a central base or defense point at the bottom, with enemies primarily advancing along this route. While the upper and lower sections of the map feature relatively flat terrain, the middle section is dominated by tight corridors and canyons, making efficient Lurker placement and precise timing crucial for success. Without a solid understanding of Lurker range and enemy spawn patterns per level, defensive lines can quickly collapse, suggesting that intermediate or advanced players—rather than beginners—are better suited for the challenge. The bottom and central areas offer ample space for constructing defensive buildings, emphasizing the importance of early resource management and strategic placement. While the map follows classic defense mechanics, its reliance on specialized units like Lurkers adds depth, shifting the focus from repetitive tactics to creative defensive setups. With 30 levels of escalating difficulty and evolving enemy patterns, players must adapt their strategies through consistent practice and adjustments. Ideal for fans of the defense genre, this map particularly appeals to those interested in ground-based defenses and Lurker utilization. Before playing, it’s essential to study the bottom path and canyon structures, master Lurker range and attack timing, and plan early resource gathering and defensive building placements to ensure smoother progression through the levels.
이누야샤 가영이 벗기기 (Strip Kagome)
이누야샤 가영이 벗기기는 스크린상에서 볼 수 있는 플레이어의 캐릭터를 progressively 벗겨내는 재미있는 유즈맵이다. 이누야샤와 가영이라는 제목에서 느껴지듯, 맵의 배경 테마는 일본 애니메이션풍으로 꾸며져 있으며, 플레이어는 맵 중앙에 위치한 스크린을 둘러싼 위치에서 진행된다. 맵의 구조는 맵 중앙을 중심으로 동그랗게 배치된 스크린과 그 주변에 흩어져 있는 각종 장애물 및 상호작용 가능한 오브젝트로 구성되어 있다. 플레이어는 스크린에 표시되는 캐릭터를 progressively 벗기기 위한 조작을 하게 되며, 이는 맵의 핵심 메커니즘으로 보인다. 맵의 UI는 스크린을 중심으로 구성되어 있으며, 캐릭터의 상태 변화가 실시간으로 반영되는 방식으로 보인다. 이 맵은 플레이어 간 경쟁보다는 개인의 조작력과 타이밍을 요구하는 방식으로 보이며, 특히 애니메이션 캐릭터를 상대로 하는Strip(벗기기)라는 독특한 게임플레이가 특징이다. 맵의 해상도와 타일셋을 고려할 때, 맵의 크기는 상당히 넓은 편이지만, 플레이어의 활동 공간은 스크린 주변으로 한정되어 있는 것으로 추정된다. 이 맵을 플레이하기 위해서는 조작력과 더불어 캐릭터를 벗기기 위한 전략적 접근이 필요할 것으로 보인다. 특히, 애니메이션 캐릭터의 옷을 progressively 벗기는 gameplay는 시각적 재미와 더불어 플레이어의 집중력을 요구하는 요소로 작용할 것이다. 이 맵은 주로 유희용 맵으로, 친구들과 함께 즐기기에 적합한 컨텐츠로 보인다. 다만,Strip(벗기기)라는 소재 특성상 연령 제한이나 민감한 사용자에게는 부적합할 수 있으니 플레이 전 확인을 권장한다. 또한, 맵의 구조상 플레이어 간의 직접적인 상호작용은 제한되어 있으며, 개인의 조작력과 타이밍에 따라 결과가 좌우될 것으로 보인다. This StarCraft: Brood War custom map, Strip Kagome, revolves around the unique gameplay of progressively undressing a character displayed on a central screen. The theme draws inspiration from Japanese anime, with visuals centered on the characters Inuyasha and Kagome, creating an engaging and playful atmosphere. The map features a circular screen surrounded by interactive objects and obstacles, guiding players to focus on their timing and precision. The user interface centers on the screen, where real-time updates reflect the character's state changes as players progress through the undressing sequence. Unlike competitive multiplayer modes, this map emphasizes individual skill, strategic timing, and quick decision-making. Its wide 4096x4096 resolution and platform tileset provide ample space, though player activity remains concentrated around the screen. To master gameplay, players must balance fast reflexes with careful planning, especially since the strip mechanic relies heavily on visual cues and timing. While designed for casual entertainment, the nature of the strip theme suggests it may not be suitable for all audiences, so discretion is advised. The map's structure limits direct player-to-player interaction, making individual performance the key to success. It’s best enjoyed with friends looking for a lighthearted challenge rather than a competitive experience.
술 취한 탱크 운전자 (Drunk Tank Driver)
스타크래프트 브루드워의 재미있는 유즈맵 중 하나인 〈Drunk Tank Driver〉는 8인 플레이가 가능한 독특한 디펜스 장르로, 탱크를 조종하며 적의 공격을 방어하는 것이 핵심이다. 맵은 사막 지형을 배경으로 하며, 중앙의 도로 중앙선을 따라 탱크가 움직이며 탱크의 이동 경로가 제한된 상태로 적이 끊임없이 몰려오는 구조로 보인다. 탱크는 좌우로만 움직일 수 있으며, 플레이어는 탱크의 방향 전환과 공격 타이밍을 조절해 적을 제거해야 한다. 맵의 가장 큰 특징은 탱크의 움직임이 마치 술에 취한 운전자처럼 다소 불규칙하다는 점으로, 이는 맵의 이름에서 유래한 컨셉으로 추정된다. 적의 웨이브는 점차 강해지며, 후반으로 갈수록 난이도가 상승하는 패턴이 보이며, 맵의 중앙 도로와 주변 건물, 지형이 방어선을 형성하는 역할을 한다. 플레이어는 제한된 시야와 움직임 속에서 적을 efficiently 제거해야 하며, 탱크의 체력 관리와 공격 타이밍이 승리의 열쇠로 보인다. 이 맵은 디펜스 장르임에도 불구하고 탱크의 움직임이 제한적이고, 술 취한 듯한 조작감이 특징적이라 일반적인 디펜스 맵과는 차별화된 재미를 제공한다. 8인까지 동시에 플레이할 수 있어 팀워크가 중요하며, 각 플레이어의 숙련도가 결과에 큰 영향을 미친다. 또한, 맵의 디자인과 사운드 효과가 몰입감을 높이는 요소로 작용할 것으로 추정된다. 초보 플레이어는 탱크의 움직임을 익히는 데 다소 시간이 걸릴 수 있지만, 반복 플레이를 통해 실력을 향상시킬 수 있다. 추천하는 대상은 디펜스 장르를 좋아하는 유저뿐만 아니라, 스타크래프트의 새로운 플레이 스타일을 경험해 보고 싶은 게이머들에게도 적합하다. 플레이 전에는 탱크의 움직임과 공격 패턴을 충분히 숙지하고, 팀원과의 협동 플레이를 연습하는 것이 중요하다. Drunk Tank Driver is one of the most fun custom maps in StarCraft: Brood War, offering an 8-player defensive experience where players control a tank to fend off relentless enemy waves. The map is set in a desert terrain, with a central road acting as the tank's path, restricted to left and right movements. The core mechanic revolves around timing attacks and maneuvering the tank to eliminate incoming enemies, which resemble waves of units growing progressively stronger. The name suggests the tank's movement is deliberately erratic or "drunk," adding a unique twist to the defensive genre. Unlike traditional defense maps, the limited mobility and irregular movement of the tank create a distinct challenge, requiring players to adapt their strategies dynamically. Teamwork is crucial as 8 players can participate simultaneously, each contributing to the defense. The map's design, including terrain and buildings, forms natural barriers, while sound effects and visuals enhance immersion. Beginners may need time to master the tank's controls, but the learning curve is rewarding. This map is ideal for fans of the defense genre and players seeking fresh gameplay mechanics in StarCraft. Before starting, familiarize yourself with the tank's movement and attack patterns, and practice coordination with teammates to maximize your chances of success.
CombinationBound Bound
CombinationBound Bound는 여러 인기 바운드 맵을 조합해 재구성한 6인용 장애물 코스 유즈맵이다. 화산 타일셋 위에 펼쳐진 128×128 타일 크기의 맵은 'Different Levels'라는 설명대로 여러 단계의 구간으로 나뉘어 있으며, 각 구간마다 점프, 이동, 타이밍 회피 등 서로 다른 기믹이 배치되어 있다. 제작자 MisTeeq(Teeq3)는 v1.3 버전에서 기존 바운드들의 핵심 패턴을 선별·변형해 하나의 흐름으로 엮었으며, 'Crucial Timing'이라는 문구에서 알 수 있듯 정밀한 컨트롤과 순간 판단력이 클리어의 열쇠가 된다. 진행 방식은 선형적이며, 구간별 체크포인트나 부활 트리거가 있는지 여부는 이미지상 명확하지 않으나 일반적인 바운드 관례상 구간 실패 시 처음부터 재시작하거나 직전 지점에서 재도전하는 형태일 것으로 보인다. 난이도는 중상급으로 추정되며, 바운드 장르 입문자보다는 어느 정도 컨트롤 숙련자가 도전하기에 적합하다. 플레이 전에는 키보드 반응 속도, 마우스 감도, 그리고 맵 설명에 명시된 'v1.3' 버전 확인을 권장한다. 협력보다는 개인 기량 경쟁에 가까우며, 6명 동시 입장 시 대기 시간과 화면 혼잡을 고려해 소수 인원으로 즐기는 것도 좋다. CombinationBound Bound is a 6-player obstacle course use-map that recombines several popular bound maps into a single experience. Built on the Volcano tileset across a 128×128 tile grid, the map is divided into multiple stages as suggested by 'Different Levels,' each featuring distinct gimmicks such as jumps, movement challenges, and timing-based evasion. Creator MisTeeq (Teeq3) selected and modified core patterns from existing bounds in v1.3, weaving them into one continuous flow; as the phrase 'Crucial Timing' implies, precise control and split-second decision-making are the keys to clearing. Progression is linear, and while checkpoint or revive triggers are not visible in the image, bound convention suggests either restart-from-start or retry-from-last-section on failure. Difficulty appears upper-intermediate, making it better suited for players with existing bound control experience rather than newcomers. Before playing, verify keyboard response, mouse sensitivity, and the stated 'v1.3' version. The focus is on individual skill competition rather than cooperation, and with six simultaneous players, wait times and screen clutter may arise—smaller groups are recommended for a smoother experience.
맵 선택 가이드
태그는 맵의 핵심 특징을 빠르게 설명하지만 제작 버전마다 규칙이 다를 수 있습니다. 상세 설명에서 권장 인원, 난이도, 플레이 시간과 버전을 함께 확인한 뒤 다운로드하세요.