
타이머 스타크래프트 맵 모음
'타이머' 태그가 등록된 맵을 모았습니다. 장르 하나로 찾기 어려운 플레이 방식, 난이도와 특징을 중심으로 인기 맵과 최신 맵을 비교해 보세요.
- 등록 맵
- 8개
- 누적 다운로드
- 0
- 누적 조회
- 276
인기 맵
다운로드와 조회 반응이 높은 맵입니다.
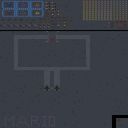
마리오의 모자 디펜스 (Mario's Hat Defense)
마리오의 모자를 지켜야 한다는 독특한 컨셉의 디펜스 맵, 「마리오의 모자 디펜스」는 플레이어가 지속적으로 몰려드는 적 유닛으로부터 주인공 마리오의 모자를 보호해야 하는 구조로 구성되어 있다. 맵 중앙에 위치한 커다란 모자 아이콘이 보호 대상이며, 이 모자가 적의 공격으로 파괴되면 게임이 즉시 종료된다. 플레이어는 제한된 자원으로 방어 건물을 건설하고 유닛을 배치해 적의 공격을 막아야 하며, 시간이 지날수록 적의 공격 빈도와 강도가 점점 높아지는 디펜스 형식의 진행을 보인다. 맵 우측 하단에는 일시정지 버튼이 배치되어 있으며, 좌측 상단에는 경과 시간이 표시되어 플레이어가 남은 시간을 가늠할 수 있도록 한다. 공격 측은 좌측 하단에서 끊임없이 생성되는 적 유닛으로 구성되며, 주로 저글링과 질럿, 그리고 occasional 히드라리스크가 섞이는 것으로 보인다. 방어 측은 초기 자원과 건물을 통해 방어선을 구축해야 하며, 건물을 지을 때마다 자원이 소모된다. 맵의 균형과 난이도 조절을 위해 일부 구간에서는 적의 공격 패턴이 변하거나, 특정 유닛이 다수 등장하는 패턴이 포함되어 있는 것으로 추정된다. 또한, 맵 제작자 GreatSingingMan에 의해 버그 수정이 이루어진 v1.03 버전에서는 타이머 관련 버그가 수정되었다고 명시되어 있어, 안정적인 플레이 환경을 제공할 것으로 예상된다. 이 맵은 디펜스 장르 특유의 긴장감을 유지하면서도 마리오의 iconic 모자를 보호해야 한다는 독특한 목표 설정이 특징이다. 마리오 팬이라면 흥미를 느낄 수 있는 소재이지만, 디펜스 맵의 기본 구조와 시스템을 그대로 따르기 때문에 장르에 익숙한 플레이어라면 진입장벽 없이 즐길 수 있을 것이다. 특히, 방어 건물의 배치와 자원 관리, 적의 공격 타이밍을 예측하는 전략적 요소가 돋보이며, 한 판당 소요되는 시간은 약 20~30분 정도로 예상된다. 다만, 초기 자원이 제한적이라는 점과 적의 공격이 끊임없이 이어진다는 점에서 초보자에게는 다소 어려울 수 있어, 난이도 조절이 필요할 수 있다. 이 맵을 즐기기 위해서는 스타크래프트 브루드워의 기본적인 조작법과 디펜스 맵의 구조에 대한 이해가 필요하며, 특히 방어 건물의 효율적인 배치와 자원 관리에 중점을 둬야 한다. 또한, 적의 공격 패턴을 숙지하고, 예상치 못한在这个时候에 대비하는 것이 승리의 열쇠가 될 것이다. Mario's Hat Defense is a unique defense-style custom map where players must protect Mario's iconic hat from relentless waves of enemy units. The hat, located at the center of the map, serves as the core objective—if it’s destroyed, the game ends immediately. Players start with limited resources to build defensive structures and deploy units to fend off increasingly frequent and intense attacks as time progresses. The bottom-right corner features a pause button, while the top-left displays elapsed time, helping players track their progress. The attacking force consists of enemy units spawned from the bottom-left corner, primarily composed of zerglings, zealots, and occasional hydralisks. Defenders must strategically construct buildings and deploy units to form a defensive line, as resources are consumed with each building placement. The map appears to include dynamic shifts in enemy attack patterns, with certain phases introducing waves of specific units to increase challenge. Version 1.03, as noted by the creator GreatSingingMan, addressed timer-related bugs, ensuring a smoother gameplay experience. This map stands out due to its blend of classic defense mechanics and the whimsical goal of protecting Mario’s hat, making it appealing to both Mario fans and defense-map enthusiasts. While the core gameplay follows traditional defense-map conventions, the unique theme adds a layer of charm and novelty. Players should focus on efficient resource management and strategic unit placement, as the constant pressure from enemy waves demands quick decision-making. For those familiar with defense maps, the learning curve is minimal, but beginners may find the limited starting resources and relentless enemy assaults challenging. A typical playthrough lasts around 20 to 30 minutes, making it a great choice for short, engaging sessions. To fully enjoy Mario's Hat Defense, players should have a solid grasp of StarCraft: Brood War’s controls and defense-map mechanics. Prioritizing defensive structures and resource allocation is essential, as is adapting to the evolving attack patterns. Anticipating enemy movements and preparing contingency plans will significantly improve your chances of success.
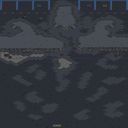
Survival Defense (서바이벌 디펜스)
스타크래프트 브루드워의 디펜스 장르 유즈맵 'Survival Defense'는 이름 그대로 끊임없는 웨이브의 적을 상대하며 최대한 오랫동안 살아남는 것이 목표인 서바이벌 디펜스 맵이다. 맵 중앙에 위치한 본진을 지키며, 주기적으로 몰려오는 적들을 막아내야 하며, 제한 시간이 지나면 승리하는 구조로 보인다. 맵의 중앙에 넓은 본진 지역이 마련되어 있고, 주변으로 좁은 길과 다리가 연결되어 있어 방어선의 구축이 중요하다. 본진 주변의 언덕 지형은 시야 확보와 자원 확보에 유리한 위치로 활용할 수 있으며, 좁아터진 길목은 방어 병력을 집중시키기 좋은 지점이다. 적의 공격 패턴은 다양할 것으로 추정되며, 초반에는 소규모 유닛들이 주를 이루겠지만 점차 대규모 혼성부대가 등장할 가능성이 있어 보인다. 방어 건물의 배치와 유닛 컨트롤, 자원 관리가 승리의 핵심으로 작용할 것이다. 특히 방어선 유지와 자원 수급의 밸런스를 어떻게 잡느냐가 관전 포인트다. 초보자는 방어선을 쉽게 무너뜨리는 적 웨이브에 당황할 수 있어 적응이 필요하며, 숙련자는 자원과 병력의 효율적인 운영으로 장기전을 이끌어낼 수 있다. 맵의 난이도는 맵의 구조상 방어 포인트가 많지 않고 길목이 좁아 초보자의 경우 어려움을 느낄 수 있어 보통 수준으로 설정하는 것이 적절해 보인다. 플레이 전에는 본진 주변의 주요 길목과 언덕 지형을 미리 파악해 방어 전략을 수립하는 것이 좋다. 또한, 적의 공격 타이밍과 패턴을 미리 숙지하여 효율적인 대비를 하는 것이 중요하다. 맵의 구조상 좁은 길목이 많아 공중 유닛을 적극적으로 활용하는 전략이 효율적일 수 있다. 자원 수급을 원활히 하기 위해 멀티 지역도 확보하는 것이 유리하며, 방어 건물의 종류와 업그레이드도 신중히 선택해야 한다. 초반 자원 부족을 극복하기 위해 초반 병력 생산과 방어 라인 구축의 균형을 잘 맞춰야 한다. 맵의 디자인과 난이도는 적절히 구성되어 있으며, 디펜스 장르를 좋아하는 유저들에게는 흥미로운 도전 과제가 될 것이다. 특히 제한 시간 내에 최대한 많은 적을 처리하는 재미와 긴장감이 플레잉의 묘미다. Survival Defense, a defense genre custom map in StarCraft: Brood War, is a survival defense map where the goal is to survive as long as possible by continuously fighting off waves of enemies, just as the name suggests. The objective appears to be protecting the main base located in the center of the map, fending off enemies that periodically swarm in, and winning once the time limit expires. The map features a spacious main base area at the center, connected to surrounding areas by narrow paths and bridges, making strategic defense line construction crucial. The elevated terrain around the base provides favorable positions for securing vision and resources, while the tight bottlenecks are ideal for concentrating defensive forces. Enemy attack patterns are expected to vary, with small-scale units dominating early on but gradually escalating to large mixed forces. The placement of defensive structures, unit control, and resource management will be key to victory. Balancing the maintenance of the defense line with resource supply will be a major point of focus. Beginners may struggle with the sudden waves that easily overwhelm weak defenses, requiring adaptation, while experienced players can prolong the game through efficient resource and unit operations. Given the map's structure with few defensive points and narrow paths, the difficulty may feel high for beginners, making an intermediate level setting appropriate. Before playing, it's wise to scout the main base's key paths and elevated terrain to plan a defense strategy. Understanding enemy attack timings and patterns in advance is also crucial for effective preparation. Due to the map's design with many bottlenecks, leveraging air units strategically can be highly effective. Securing expansion areas is also advantageous for smooth resource gathering, and careful selection of defensive buildings and upgrades is essential. To overcome early resource shortages, balancing initial unit production with defense line setup is vital. The map's design and difficulty are well-balanced, offering an engaging challenge for defense genre enthusiasts. The thrill of eliminating as many enemies as possible within the time limit and the tension of the gameplay make it a rewarding experience.
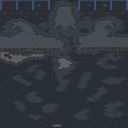
생존 디펜스 (Survival Defense)
스타크래프트 브루드워의 유즈맵 <생존 디펜스>는 이름 그대로 끊임없는 웨이브를 버텨야 하는 디펜스 장르의 서바이벌 맵이다. 맵 중앙의 보호 구역을 중심으로 적의 공격이 끊임없이 밀려오며, 플레이어는 그 속에서 건물을 건설하고 유닛을 배치해 방어선을 구축해야 한다. 맵 구조는 비교적 평지 위주로 이루어져 있어 기동성과 방어 시설의 배치에 따라 난이도가 크게 달라진다. 맵 상단과 하단에는 체력 regeneration zone(회복 zones)으로 추정되는 구역이 배치되어 있어, 이를 활용하면 자원과 체력을 관리할 수 있다. 또한, 중앙에는Resource Vespene Geyser(가스 geyser)가 배치되어 있어 가스를 확보할 수 있는 기회가 있는 것으로 보인다. 맵의 특징은 방어 시설의 배치가 자유롭다는 점인데, 이는 플레이어의 전략적 선택을 유도하며, 초보자와 숙련자 모두에게 접근 가능한 수준으로 구성되어 있다. 다만, 적의 공격 패턴과 웨이브 타이밍은 맵 설명만으로는 정확히 알 수 없으므로, 직접 플레이하며 적응해야 한다. 맵의 목표는 주어진 시간을 버티는 것인데, 타이머가 종료될 때까지 살아남아야 하는지 아니면 특정 조건을 달성해야 하는지는 내부 설명만으로는 명확하지 않다. 따라서 플레이 전에는 맵의 승리 조건을 확인하는 것이 중요하다. 이 맵은 디펜스 장르의 기본적인 재미와 전략적 깊이를 제공하며, 특히 서바이벌 요소와 회복 존의 활용이 게임의 재미를 더한다. 추천 대상은 디펜스 맵을 좋아하는 유저들로, 특히 초보자의 경우 회복 존과 가스 geyser의 위치를 숙지하고 방어 시설을 신중히 배치하는 연습이 필요하다. 숙련자의 경우 더 빠른 적 웨이브나 변칙적인 공격 패턴에 대응할 수 있는 전략을 구상해볼 만하다. 맵의 난이도는 맵 설명만으로는 명확하지 않지만, 회복 존과 가스 geyser의 활용 여부가 난이도를 좌우할 수 있으므로 이를 염두에 두고 플레이하는 것이 좋다. Survival Defense, a custom map from StarCraft: Brood War, is a survival defense game where players must withstand endless waves of enemies, as the name suggests. The map centers around a protected area that is constantly assaulted, and players must construct buildings and deploy units to build their defenses. The terrain is mostly flat, making movement and defensive structure placement crucial to difficulty. At the top and bottom of the map are zones that appear to regenerate health, allowing players to manage resources and sustain their forces. In the center lies a Resource Vespene Geyser, offering an opportunity to secure gas. A key feature of the map is the freedom to place defensive structures, encouraging strategic choices while remaining accessible to both beginners and experienced players. However, the enemy’s attack patterns and wave timings aren’t clearly explained in the map description, so players will need to adapt through experience. The objective is to survive for a set time, though it’s unclear from the description alone whether the goal is simply to endure until the timer runs out or to meet specific conditions—so checking the victory conditions before playing is essential. This map delivers the core fun and strategic depth of defense games, with survival elements and the smart use of healing zones adding to the enjoyment. It’s recommended for players who enjoy defense maps, especially beginners who should familiarize themselves with the healing zones and gas geyser locations while carefully arranging their defenses. Experienced players can experiment with strategies to counter faster enemy waves or unconventional attack patterns. While the difficulty isn’t clearly defined in the description, effectively using healing zones and the gas geyser can significantly influence the challenge, so keeping those in mind while playing is important.
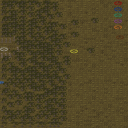
빅풋 서바이벌 (Bigfoot Survival)
스타크래프트 브루드워의 서바이벌 장르 유즈맵 'Bigfoot Survival'은 7명의 플레이어가 함께 타이머가 끝날 때까지 살아남는 것을 목표로 하는 흥미로운 게임입니다. 맵의 제목에서도 알 수 있듯이, 빅풋(Bigfoot)과 같은 거대한 괴물이 등장하는 이 맵은 플레이어들에게 끊임없는 압박감을 제공합니다. 맵은 황무지 타일셋으로 구성되어 있으며, 넓은 공간에서 발생하는 전투와 회피가 주요 볼거리입니다. 타이머가 끝날 때까지 살아남는 것이 승리 조건이지만, 맵 내에서는 괴물과의 교전 외에도 다양한 리소스와 아이템을 활용한 전략이 요구됩니다. 특히, 맵의 넓은 공간에서 발생하는 전투는 플레이어 간의 협력과 개인의 판단력이 모두 중요하다는 점에서 긴장감을 높입니다. 추천 대상은 서바이벌 장르에 익숙한 유저부터 초보까지 폭넓게, 특히 팀플레이를 선호하는 플레이어들에게 적합합니다. 다만, 넓은 맵에서 발생하는 빈번한 전투와 끊임없는 압박감으로 인해 초보자들은 다소 어려움을 느낄 수 있습니다. 플레이 전에는 맵의 주요 루트와 리소스 위치, 그리고 괴물과의 교전 타이밍을 미리 숙지하는 것이 좋습니다. 또한, 팀원과의 원활한 소통을 통해 생존 전략을 공유하는 것이 중요합니다. 이 맵은 단순히 생존을 넘어서, 전략과 협력의 중요성을 강조하는 유즈맵으로, 스타크래프트의Classic한 재미를 느낄 수 있는 작품입니다. Bigfoot Survival is a survival-style custom map in StarCraft: Brood War where seven players aim to survive until the timer runs out. As the title suggests, the map features encounters with a giant creature resembling Bigfoot, creating constant pressure for players. The terrain, using a barren tileset, offers wide-open spaces where combat and evasion become the main attractions. While the goal is simply to survive until the timer ends, players must also strategize using resources and items scattered across the map. The vast expanse of the battlefield emphasizes both teamwork and individual decision-making, heightening the tension. This map is recommended for users familiar with survival games, as well as beginners who enjoy team play, though novices might find the frequent combat and relentless pressure challenging. Before playing, it's advisable to familiarize yourself with key routes, resource locations, and the timing of encounters with the creature. Effective communication with teammates to share survival strategies is also crucial. Beyond mere survival, this map highlights the importance of strategy and cooperation, offering classic StarCraft fun in a unique custom format.
개미농장 사마귀의 지원 (Ant Farm: Mantis Support)
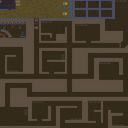
「개미농장 사마귀의 지원」은 스타크래프트 브루드워의 UMS 유즈맵으로, 8명의 플레이어가 개미와 벌이라는 두 진영으로 나뉘어 경쟁하는 독특한 디펜스 게임이다. 맵 중앙의 개미 농장을 중심으로 벌어지는 전투에서, 개미 플레이어는 타이머가 종료될 때까지 농장 건물을 지키며 버텨야 하고, 벌 플레이어는 그 시간을 앞당기기 위해 개미 건물을 공격해야 한다. 여기에 추가로 지렁이 유닛이 개미를 돕는다는 설정으로, 개미 진영은 지렁이의 지원 사격으로 벌의 공격을 방어할 수 있다. 맵은 황무지 타일셋을 기반으로 넓게 펼쳐져 있어 넓은 시야에서 전략을 펼치기에 적합하며, 지형은 비교적 평탄해 기지 방어와 공격 루트의 설계가 중요한 포인트다. 개미 플레이어는 방어용 건물을 배치하고, 벌 플레이어는 효율적인 공격을 위한 진입로와 화력을 집중할 만한 요충지를 찾아야 한다. 지렁이의 등장 타이밍과 개미의 방어 라인 구축 타이밍이 승패를 좌우할 수 있어, 리스크 관리와 빠른 판단력이 요구되는 맵이다. 초보자는 개미 진영을 선택해 방어에 중점을 두는 것이 유리하고, 숙련자는 벌 진영을 선택해 개미의 방어 라인을 공략하는 전략을 구사할 수 있다. 맵의 핵심은 타이머를 관리하는 동시에 상대의 움직임을 예측하는 데 있으며, 특히 지렁이 유닛의 배치와 활용이 승패의 변수를 크게 만든다. 개미농장 사마귀의 지원은 전략적 깊이와 간단한 조작성으로 스타크래프트 유즈맵의 묘미를 느낄 수 있는 작품으로, 한 번 플레이해 볼 만한 가치가 있다. 개미 진영은 방어에, 벌 진영은 공격에 집중해야 하며, 지렁이의 지원 사격을 어떻게 활용하느냐가 승리의 열쇠가 된다. 맵을 처음 플레이한다면 개미 진영을 통해 기본 전략을 익히고, 점차 벌 진영의 공략 방법을 연마해 보는 것을 추천한다. "Ant Farm Mantis’ Support" is a UMS custom map in *StarCraft: Brood War* where eight players are divided into two factions—ants and bees—and compete in a unique defense game. The ants must defend their central farm building until the timer runs out, while the bees aim to shorten that time by attacking the ants' structures. Additionally, worm units assist the ants, allowing the ant faction to defend against bee attacks with their support fire. The map, built on a wasteland tileset, offers wide visibility, making it ideal for strategic maneuvering, with relatively flat terrain that emphasizes base defense and attack route planning. Ant players must position defensive structures, while bee players must scout for efficient attack paths and key chokepoints to focus their firepower. The timing of the worms' appearance and the ants' defensive line setup can determine victory, demanding risk management and quick decision-making. Beginners may find it easier to play as the ants, focusing on defense, while experienced players can choose the bees and employ strategies to break the ants' defenses. The core of the map lies in managing the timer while predicting the opponent’s movements, with the placement and utilization of worm units serving as major variables in the outcome. "Ant Farm Mantis’ Support" offers strategic depth and simple controls, capturing the charm of *StarCraft* custom maps, and is well worth trying. Ant players should focus on defense, bee players on offense, and mastering the worms’ support fire will be key to victory. If playing for the first time, starting with the ant faction to learn the basics before refining bee strategies is recommended.
뉴 러커 디펜스 (New Lurker Defence)
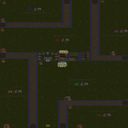
'뉴 러커 디펜스(New Lurker Defence)'는 제작자 'Short.Stuff'가 제작한 6인용 협동 디펜스 유즈맵으로, 사막 타일셋을 배경으로 한 128x128 타일(4096x4096 픽셀) 크기의 전장에서 펼쳐진다. 내부 설명에 'Player 1 Starts The Levels, Yet You Must Finish Before The Timer Runs Out'라고 명시된 것처럼, 플레이어 1이 게임을 개시하면 레벨 시스템에 따라 러커 웨이브가 몰려오고, 정해진 제한 시간 내에 모든 단계를 클리어해야 하는 미션 클리어형 진행 방식을 채택하고 있다. 맵 제목과 기존 '러커 디펜스' 시리즈의 계보를 고려할 때, 땅속 이동과 원거리 공격을 겸비한 러커 무리가 다방면에서 밀려들어오며, 플레이어들은 입구 막기나 진형 구축을 통해 이를 저지하는 고전적인 디펜스 양상을 띨 것으로 보인다. 6인 최대 인원을 지원하는 만큼 솔로 플레이보다는 팀원 간의 역할 분담—탐지기 보유, 화력 집중, 수리 및 보조—이 필수적이며, 플레이어 1이 트리거를 통제하는 구조상 호스트의 숙련도가 진행 흐름에 큰 영향을 미칠 수 있다. 타이머가 존재하는 점은 무한 생존이 아닌 속도전 성격을 부여하며, 자원 관리와 업그레이드 타이밍을 재촉하는 요소로 작용할 전망이다. 사막 지형 특유의 탁 트인 시야는 러커의 은폐 접근을 감시하기 유리하지만, 동시에 넓은 전선을 커버해야 하는 부담도 준다. 시리즈 전작인 '러커 디펜스 4'나 'Lurker Defence v1.0'과 비교했을 때 'New'라는 접두어가 붙은 만큼, 웨이브 패턴이나 밸런스, UI 측면에서 개선이 시도되었을 가능성이 있다. 정해진 시간 내 웨이브를 소탕하는 명확한 목표와 협동의 재미를 원하는 유저, 러커 특유의 압박감을 즐기는 고전 디펜스 마니아에게 추천할 만하다. 플레이 전에는 반드시 플레이어 1이 게임을 시작해야 진행된다는 점, 제한 시간과 웨이브 수를 대략적으로 파악하는 것, 탐지기 확보 우선순위를 팀원과 공유하는 것이 승률을 높이는 열쇠가 될 것이다. 'New Lurker Defence' is a 6-player cooperative defense use map created by 'Short.Stuff', set on a 128x128 tile (4096x4096 pixel) battlefield using the Desert tileset. As the internal description states, 'Player 1 Starts The Levels, Yet You Must Finish Before The Timer Runs Out,' the game begins when Player 1 initiates the levels, triggering Lurker waves according to a level system, and players must clear all stages within a set time limit in a mission-clear format. Judging from the map title and the lineage of the existing 'Lurker Defence' series, hordes of Lurkers—capable of burrowing and ranged attacks—will likely rush in from multiple directions, and players will engage in classic defense gameplay, blocking entrances or forming formations to stop them. With support for up to 6 players, role division among teammates—securing detectors, focusing fire, repairing and supporting—is essential rather than solo play, and since Player 1 controls the triggers, the host's proficiency may greatly influence the flow. The presence of a timer adds a speed-run element rather than endless survival, pressing resource management and upgrade timing. The open sightlines typical of the Desert tileset help monitor cloaked Lurker approaches, but also burden players with covering a wide front. As the prefix 'New' suggests compared to predecessors like 'Lurker Defence 4' or 'Lurker Defence v1.0', improvements in wave patterns, balance, or UI may have been attempted. It is recommended for users who want a clear objective of eliminating waves within a time limit, enjoy cooperative fun, or appreciate the classic defense pressure unique to Lurkers. Before playing, it is key to remember that Player 1 must start the game for progression, to grasp the approximate time limit and wave count, and to share detector priority with the team to increase win rates.
더 퀴즈 위드 타이머 (-The Quiz- With Timer)
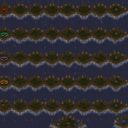
더 퀴즈 위드 타이머(-The Quiz- With Timer)는 제한 시간 내에 주어지는 문제의 정답을 맞히며 진행하는 독특한 방식의 스타크래프트 브루드워 맵 유즈맵입니다. 전통적인 실시간 전략 게임의 틀에서 벗어나 지식과 빠른 판단력을 시험하는 퍼즐 및 미니게임 성격을 강하게 띠고 있어, 색다른 재미를 찾는 유저들에게 적합한 작품입니다. 맵 구조를 살펴보면 플레이어들이 각각 독립된 공간이나 분리된 구역에서 주어진 상황에 대처할 수 있도록 배치되어 있으며, 상단과 하단에 걸쳐 반복되는 형태의 지형 배치를 통해 다인용 플레이를 원활하게 지원합니다. 게임의 진행 방식은 단순하면서도 긴장감 넘칩니다. 플레이어는 화면에 제시되는 물음에 알맞은 행동을 하거나 정답을 찾아내야 하며, 타이머가 작동하는 촉박한 환경 속에서 실수를 줄이고 정확한 선택을 내려야 합니다. 원작자의 설계를 바탕으로 타이머 요소를 가미해 몰입감을 높인 버전인 만큼, 플레이어 간의 순발력 경쟁이나 지식을 겨루는 상황이 자연스럽게 연출됩니다. 퀴즈와 퍼즐 장르를 선호하는 유저나 친구들과 함께 가볍게 모여 색다른 두뇌 싸움을 즐기고 싶은 이들에게 추천할 만합니다. 플레이 전에는 제한 시간 동안 정확한 정답을 입력하거나 조건을 만족해야 하는 맵의 핵심 규칙을 미리 숙지하는 것이 유리하며, 타이머 압박 속에서도 침착하게 문제를 해결하는 집중력이 승패를 가르는 중요한 포인트가 됩니다. The Quiz With Timer is a unique StarCraft Brood War usemap that challenges players to solve questions correctly within a strict time limit. Breaking away from traditional real-time strategy gameplay, it leans heavily into puzzle and minigame elements that test knowledge and quick decision-making, making it a great choice for users looking for something different. The map layout features separated zones where individual players can handle given situations, while the repeating structural design from top to bottom smoothly accommodates multiple participants. The progression is straightforward yet tense, requiring players to perform the right actions or find correct answers presented on the screen. Operating under a ticking timer, participants must minimize mistakes and make accurate choices in a high-pressure environment. As a version that builds upon original concepts with added timer elements to boost immersion, it naturally creates moments of reflex-based competition and intellectual showdowns among players. It is recommended for fans of quiz and puzzle genres or anyone wanting a casual yet brain-teasing experience with friends. Before playing, it is helpful to understand the core rule of meeting conditions or entering exact answers within the time limit, and maintaining focus under time pressure will be the key factor in determining success.
팀플라이트 (TeamPlay - Light)
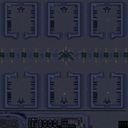
팀플라이트(TeamPlay - Light)는 스타크래프트 브루드워 맵 유즈맵 장르 중에서도 독특한 대결 구도를 지향하는 플레이어 대항전 형태의 게임입니다. 전체적인 맵 구조를 살펴보면, 화산 타일셋을 바탕으로 여러 개의 독립된 구역과 중앙 통로가 배치되어 있는 것을 볼 수 있습니다. 각 진영은 자신만의 거점에서 시작해 자원을 채취하고 병력을 생산하며, 제한 시간 혹은 타이머 시스템과 연계된 규칙 속에서 상대 팀과의 치열한 공방전을 펼치게 됩니다. 내부 설명에서 짐작할 수 있듯 타이머에 따른 목표 달성과 상대 팀 제거가 핵심 승리 조건으로 작용할 가능성이 높습니다. 이 맵은 다인원이 모여서 팀을 나누어 협력하고 경쟁하는 플레이어들에게 적합합니다. 단순히 개인의 컨트롤 능력만 요구하는 것이 아니라, 팀원 간의 자원 공유, 병력 조합, 공격 타이밍 조율 등 전략적인 호흡이 매우 중요합니다. 중앙의 중립 지역이나 자원 배치 형태를 활용해 교전 양상이 시시각각 바뀔 수 있으며, 타이머 압박 속에서 빠르게 판단을 내려야 하는 긴장감을 선사합니다. 평소 일반적인 밀리 방식이나 단순한 컴까기에서 벗어나, 색다른 규칙이 가미된 팀 플레이 유즈맵을 찾고 있는 유저들에게 추천할 만합니다. 플레이를 시작하기 전, 맵의 내부 타이머 시스템과 자원 분배 방식, 그리고 승리 조건을 미리 숙지하는 것이 좋습니다. 다인원 참여가 전제되므로 팀원 전원이 룰을 이해하고 있어야 원활한 진행이 가능합니다. 화산 지형의 특유의 시각적 분위기 속에서 펼쳐지는 독특한 팀 대항전을 즐겨보시기 바랍니다. TeamPlay - Light is a StarCraft: Brood War UMS map that focuses on a distinctive team versus team competitive structure. Examining the overall map layout reveals multiple independent bases and central pathways built upon a volcanic tileset. Each faction starts in its own protected zone to gather resources and produce units, engaging in intense warfare governed by rules linked to a timer system. As hinted by the in-game description, achieving objectives based on the timer and eliminating the opposing team serve as the core progression mechanics. This map is well-suited for groups of players looking to form teams and engage in cooperative yet competitive matches. Success relies heavily on strategic teamwork, such as resource sharing, unit composition coordination, and timing attacks, rather than individual micro-control alone. The layout of central areas and resource nodes can dynamically shift skirmishes, offering a thrilling sense of urgency as players must make quick decisions under timer pressure. It is recommended for users seeking a unique team-based UMS experience that breaks away from standard melee games or basic computer-opponent maps. Before starting the game, it is advisable to understand the internal timer system, resource distribution, and victory conditions. Since multiplayer participation is required, all team members should be familiar with the rules for a smooth experience. Enjoy the unique team confrontation unfolding within the distinctive atmospheric volcanic terrain.
최근 등록된 맵
새로 추가된 파일과 버전을 확인하세요.
개미농장 사마귀의 지원 (Ant Farm: Mantis Support)
「개미농장 사마귀의 지원」은 스타크래프트 브루드워의 UMS 유즈맵으로, 8명의 플레이어가 개미와 벌이라는 두 진영으로 나뉘어 경쟁하는 독특한 디펜스 게임이다. 맵 중앙의 개미 농장을 중심으로 벌어지는 전투에서, 개미 플레이어는 타이머가 종료될 때까지 농장 건물을 지키며 버텨야 하고, 벌 플레이어는 그 시간을 앞당기기 위해 개미 건물을 공격해야 한다. 여기에 추가로 지렁이 유닛이 개미를 돕는다는 설정으로, 개미 진영은 지렁이의 지원 사격으로 벌의 공격을 방어할 수 있다. 맵은 황무지 타일셋을 기반으로 넓게 펼쳐져 있어 넓은 시야에서 전략을 펼치기에 적합하며, 지형은 비교적 평탄해 기지 방어와 공격 루트의 설계가 중요한 포인트다. 개미 플레이어는 방어용 건물을 배치하고, 벌 플레이어는 효율적인 공격을 위한 진입로와 화력을 집중할 만한 요충지를 찾아야 한다. 지렁이의 등장 타이밍과 개미의 방어 라인 구축 타이밍이 승패를 좌우할 수 있어, 리스크 관리와 빠른 판단력이 요구되는 맵이다. 초보자는 개미 진영을 선택해 방어에 중점을 두는 것이 유리하고, 숙련자는 벌 진영을 선택해 개미의 방어 라인을 공략하는 전략을 구사할 수 있다. 맵의 핵심은 타이머를 관리하는 동시에 상대의 움직임을 예측하는 데 있으며, 특히 지렁이 유닛의 배치와 활용이 승패의 변수를 크게 만든다. 개미농장 사마귀의 지원은 전략적 깊이와 간단한 조작성으로 스타크래프트 유즈맵의 묘미를 느낄 수 있는 작품으로, 한 번 플레이해 볼 만한 가치가 있다. 개미 진영은 방어에, 벌 진영은 공격에 집중해야 하며, 지렁이의 지원 사격을 어떻게 활용하느냐가 승리의 열쇠가 된다. 맵을 처음 플레이한다면 개미 진영을 통해 기본 전략을 익히고, 점차 벌 진영의 공략 방법을 연마해 보는 것을 추천한다. "Ant Farm Mantis’ Support" is a UMS custom map in *StarCraft: Brood War* where eight players are divided into two factions—ants and bees—and compete in a unique defense game. The ants must defend their central farm building until the timer runs out, while the bees aim to shorten that time by attacking the ants' structures. Additionally, worm units assist the ants, allowing the ant faction to defend against bee attacks with their support fire. The map, built on a wasteland tileset, offers wide visibility, making it ideal for strategic maneuvering, with relatively flat terrain that emphasizes base defense and attack route planning. Ant players must position defensive structures, while bee players must scout for efficient attack paths and key chokepoints to focus their firepower. The timing of the worms' appearance and the ants' defensive line setup can determine victory, demanding risk management and quick decision-making. Beginners may find it easier to play as the ants, focusing on defense, while experienced players can choose the bees and employ strategies to break the ants' defenses. The core of the map lies in managing the timer while predicting the opponent’s movements, with the placement and utilization of worm units serving as major variables in the outcome. "Ant Farm Mantis’ Support" offers strategic depth and simple controls, capturing the charm of *StarCraft* custom maps, and is well worth trying. Ant players should focus on defense, bee players on offense, and mastering the worms’ support fire will be key to victory. If playing for the first time, starting with the ant faction to learn the basics before refining bee strategies is recommended.
더 퀴즈 위드 타이머 (-The Quiz- With Timer)
더 퀴즈 위드 타이머(-The Quiz- With Timer)는 제한 시간 내에 주어지는 문제의 정답을 맞히며 진행하는 독특한 방식의 스타크래프트 브루드워 맵 유즈맵입니다. 전통적인 실시간 전략 게임의 틀에서 벗어나 지식과 빠른 판단력을 시험하는 퍼즐 및 미니게임 성격을 강하게 띠고 있어, 색다른 재미를 찾는 유저들에게 적합한 작품입니다. 맵 구조를 살펴보면 플레이어들이 각각 독립된 공간이나 분리된 구역에서 주어진 상황에 대처할 수 있도록 배치되어 있으며, 상단과 하단에 걸쳐 반복되는 형태의 지형 배치를 통해 다인용 플레이를 원활하게 지원합니다. 게임의 진행 방식은 단순하면서도 긴장감 넘칩니다. 플레이어는 화면에 제시되는 물음에 알맞은 행동을 하거나 정답을 찾아내야 하며, 타이머가 작동하는 촉박한 환경 속에서 실수를 줄이고 정확한 선택을 내려야 합니다. 원작자의 설계를 바탕으로 타이머 요소를 가미해 몰입감을 높인 버전인 만큼, 플레이어 간의 순발력 경쟁이나 지식을 겨루는 상황이 자연스럽게 연출됩니다. 퀴즈와 퍼즐 장르를 선호하는 유저나 친구들과 함께 가볍게 모여 색다른 두뇌 싸움을 즐기고 싶은 이들에게 추천할 만합니다. 플레이 전에는 제한 시간 동안 정확한 정답을 입력하거나 조건을 만족해야 하는 맵의 핵심 규칙을 미리 숙지하는 것이 유리하며, 타이머 압박 속에서도 침착하게 문제를 해결하는 집중력이 승패를 가르는 중요한 포인트가 됩니다. The Quiz With Timer is a unique StarCraft Brood War usemap that challenges players to solve questions correctly within a strict time limit. Breaking away from traditional real-time strategy gameplay, it leans heavily into puzzle and minigame elements that test knowledge and quick decision-making, making it a great choice for users looking for something different. The map layout features separated zones where individual players can handle given situations, while the repeating structural design from top to bottom smoothly accommodates multiple participants. The progression is straightforward yet tense, requiring players to perform the right actions or find correct answers presented on the screen. Operating under a ticking timer, participants must minimize mistakes and make accurate choices in a high-pressure environment. As a version that builds upon original concepts with added timer elements to boost immersion, it naturally creates moments of reflex-based competition and intellectual showdowns among players. It is recommended for fans of quiz and puzzle genres or anyone wanting a casual yet brain-teasing experience with friends. Before playing, it is helpful to understand the core rule of meeting conditions or entering exact answers within the time limit, and maintaining focus under time pressure will be the key factor in determining success.
팀플라이트 (TeamPlay - Light)
팀플라이트(TeamPlay - Light)는 스타크래프트 브루드워 맵 유즈맵 장르 중에서도 독특한 대결 구도를 지향하는 플레이어 대항전 형태의 게임입니다. 전체적인 맵 구조를 살펴보면, 화산 타일셋을 바탕으로 여러 개의 독립된 구역과 중앙 통로가 배치되어 있는 것을 볼 수 있습니다. 각 진영은 자신만의 거점에서 시작해 자원을 채취하고 병력을 생산하며, 제한 시간 혹은 타이머 시스템과 연계된 규칙 속에서 상대 팀과의 치열한 공방전을 펼치게 됩니다. 내부 설명에서 짐작할 수 있듯 타이머에 따른 목표 달성과 상대 팀 제거가 핵심 승리 조건으로 작용할 가능성이 높습니다. 이 맵은 다인원이 모여서 팀을 나누어 협력하고 경쟁하는 플레이어들에게 적합합니다. 단순히 개인의 컨트롤 능력만 요구하는 것이 아니라, 팀원 간의 자원 공유, 병력 조합, 공격 타이밍 조율 등 전략적인 호흡이 매우 중요합니다. 중앙의 중립 지역이나 자원 배치 형태를 활용해 교전 양상이 시시각각 바뀔 수 있으며, 타이머 압박 속에서 빠르게 판단을 내려야 하는 긴장감을 선사합니다. 평소 일반적인 밀리 방식이나 단순한 컴까기에서 벗어나, 색다른 규칙이 가미된 팀 플레이 유즈맵을 찾고 있는 유저들에게 추천할 만합니다. 플레이를 시작하기 전, 맵의 내부 타이머 시스템과 자원 분배 방식, 그리고 승리 조건을 미리 숙지하는 것이 좋습니다. 다인원 참여가 전제되므로 팀원 전원이 룰을 이해하고 있어야 원활한 진행이 가능합니다. 화산 지형의 특유의 시각적 분위기 속에서 펼쳐지는 독특한 팀 대항전을 즐겨보시기 바랍니다. TeamPlay - Light is a StarCraft: Brood War UMS map that focuses on a distinctive team versus team competitive structure. Examining the overall map layout reveals multiple independent bases and central pathways built upon a volcanic tileset. Each faction starts in its own protected zone to gather resources and produce units, engaging in intense warfare governed by rules linked to a timer system. As hinted by the in-game description, achieving objectives based on the timer and eliminating the opposing team serve as the core progression mechanics. This map is well-suited for groups of players looking to form teams and engage in cooperative yet competitive matches. Success relies heavily on strategic teamwork, such as resource sharing, unit composition coordination, and timing attacks, rather than individual micro-control alone. The layout of central areas and resource nodes can dynamically shift skirmishes, offering a thrilling sense of urgency as players must make quick decisions under timer pressure. It is recommended for users seeking a unique team-based UMS experience that breaks away from standard melee games or basic computer-opponent maps. Before starting the game, it is advisable to understand the internal timer system, resource distribution, and victory conditions. Since multiplayer participation is required, all team members should be familiar with the rules for a smooth experience. Enjoy the unique team confrontation unfolding within the distinctive atmospheric volcanic terrain.
생존 디펜스 (Survival Defense)
스타크래프트 브루드워의 유즈맵 <생존 디펜스>는 이름 그대로 끊임없는 웨이브를 버텨야 하는 디펜스 장르의 서바이벌 맵이다. 맵 중앙의 보호 구역을 중심으로 적의 공격이 끊임없이 밀려오며, 플레이어는 그 속에서 건물을 건설하고 유닛을 배치해 방어선을 구축해야 한다. 맵 구조는 비교적 평지 위주로 이루어져 있어 기동성과 방어 시설의 배치에 따라 난이도가 크게 달라진다. 맵 상단과 하단에는 체력 regeneration zone(회복 zones)으로 추정되는 구역이 배치되어 있어, 이를 활용하면 자원과 체력을 관리할 수 있다. 또한, 중앙에는Resource Vespene Geyser(가스 geyser)가 배치되어 있어 가스를 확보할 수 있는 기회가 있는 것으로 보인다. 맵의 특징은 방어 시설의 배치가 자유롭다는 점인데, 이는 플레이어의 전략적 선택을 유도하며, 초보자와 숙련자 모두에게 접근 가능한 수준으로 구성되어 있다. 다만, 적의 공격 패턴과 웨이브 타이밍은 맵 설명만으로는 정확히 알 수 없으므로, 직접 플레이하며 적응해야 한다. 맵의 목표는 주어진 시간을 버티는 것인데, 타이머가 종료될 때까지 살아남아야 하는지 아니면 특정 조건을 달성해야 하는지는 내부 설명만으로는 명확하지 않다. 따라서 플레이 전에는 맵의 승리 조건을 확인하는 것이 중요하다. 이 맵은 디펜스 장르의 기본적인 재미와 전략적 깊이를 제공하며, 특히 서바이벌 요소와 회복 존의 활용이 게임의 재미를 더한다. 추천 대상은 디펜스 맵을 좋아하는 유저들로, 특히 초보자의 경우 회복 존과 가스 geyser의 위치를 숙지하고 방어 시설을 신중히 배치하는 연습이 필요하다. 숙련자의 경우 더 빠른 적 웨이브나 변칙적인 공격 패턴에 대응할 수 있는 전략을 구상해볼 만하다. 맵의 난이도는 맵 설명만으로는 명확하지 않지만, 회복 존과 가스 geyser의 활용 여부가 난이도를 좌우할 수 있으므로 이를 염두에 두고 플레이하는 것이 좋다. Survival Defense, a custom map from StarCraft: Brood War, is a survival defense game where players must withstand endless waves of enemies, as the name suggests. The map centers around a protected area that is constantly assaulted, and players must construct buildings and deploy units to build their defenses. The terrain is mostly flat, making movement and defensive structure placement crucial to difficulty. At the top and bottom of the map are zones that appear to regenerate health, allowing players to manage resources and sustain their forces. In the center lies a Resource Vespene Geyser, offering an opportunity to secure gas. A key feature of the map is the freedom to place defensive structures, encouraging strategic choices while remaining accessible to both beginners and experienced players. However, the enemy’s attack patterns and wave timings aren’t clearly explained in the map description, so players will need to adapt through experience. The objective is to survive for a set time, though it’s unclear from the description alone whether the goal is simply to endure until the timer runs out or to meet specific conditions—so checking the victory conditions before playing is essential. This map delivers the core fun and strategic depth of defense games, with survival elements and the smart use of healing zones adding to the enjoyment. It’s recommended for players who enjoy defense maps, especially beginners who should familiarize themselves with the healing zones and gas geyser locations while carefully arranging their defenses. Experienced players can experiment with strategies to counter faster enemy waves or unconventional attack patterns. While the difficulty isn’t clearly defined in the description, effectively using healing zones and the gas geyser can significantly influence the challenge, so keeping those in mind while playing is important.
Survival Defense (서바이벌 디펜스)
스타크래프트 브루드워의 디펜스 장르 유즈맵 'Survival Defense'는 이름 그대로 끊임없는 웨이브의 적을 상대하며 최대한 오랫동안 살아남는 것이 목표인 서바이벌 디펜스 맵이다. 맵 중앙에 위치한 본진을 지키며, 주기적으로 몰려오는 적들을 막아내야 하며, 제한 시간이 지나면 승리하는 구조로 보인다. 맵의 중앙에 넓은 본진 지역이 마련되어 있고, 주변으로 좁은 길과 다리가 연결되어 있어 방어선의 구축이 중요하다. 본진 주변의 언덕 지형은 시야 확보와 자원 확보에 유리한 위치로 활용할 수 있으며, 좁아터진 길목은 방어 병력을 집중시키기 좋은 지점이다. 적의 공격 패턴은 다양할 것으로 추정되며, 초반에는 소규모 유닛들이 주를 이루겠지만 점차 대규모 혼성부대가 등장할 가능성이 있어 보인다. 방어 건물의 배치와 유닛 컨트롤, 자원 관리가 승리의 핵심으로 작용할 것이다. 특히 방어선 유지와 자원 수급의 밸런스를 어떻게 잡느냐가 관전 포인트다. 초보자는 방어선을 쉽게 무너뜨리는 적 웨이브에 당황할 수 있어 적응이 필요하며, 숙련자는 자원과 병력의 효율적인 운영으로 장기전을 이끌어낼 수 있다. 맵의 난이도는 맵의 구조상 방어 포인트가 많지 않고 길목이 좁아 초보자의 경우 어려움을 느낄 수 있어 보통 수준으로 설정하는 것이 적절해 보인다. 플레이 전에는 본진 주변의 주요 길목과 언덕 지형을 미리 파악해 방어 전략을 수립하는 것이 좋다. 또한, 적의 공격 타이밍과 패턴을 미리 숙지하여 효율적인 대비를 하는 것이 중요하다. 맵의 구조상 좁은 길목이 많아 공중 유닛을 적극적으로 활용하는 전략이 효율적일 수 있다. 자원 수급을 원활히 하기 위해 멀티 지역도 확보하는 것이 유리하며, 방어 건물의 종류와 업그레이드도 신중히 선택해야 한다. 초반 자원 부족을 극복하기 위해 초반 병력 생산과 방어 라인 구축의 균형을 잘 맞춰야 한다. 맵의 디자인과 난이도는 적절히 구성되어 있으며, 디펜스 장르를 좋아하는 유저들에게는 흥미로운 도전 과제가 될 것이다. 특히 제한 시간 내에 최대한 많은 적을 처리하는 재미와 긴장감이 플레잉의 묘미다. Survival Defense, a defense genre custom map in StarCraft: Brood War, is a survival defense map where the goal is to survive as long as possible by continuously fighting off waves of enemies, just as the name suggests. The objective appears to be protecting the main base located in the center of the map, fending off enemies that periodically swarm in, and winning once the time limit expires. The map features a spacious main base area at the center, connected to surrounding areas by narrow paths and bridges, making strategic defense line construction crucial. The elevated terrain around the base provides favorable positions for securing vision and resources, while the tight bottlenecks are ideal for concentrating defensive forces. Enemy attack patterns are expected to vary, with small-scale units dominating early on but gradually escalating to large mixed forces. The placement of defensive structures, unit control, and resource management will be key to victory. Balancing the maintenance of the defense line with resource supply will be a major point of focus. Beginners may struggle with the sudden waves that easily overwhelm weak defenses, requiring adaptation, while experienced players can prolong the game through efficient resource and unit operations. Given the map's structure with few defensive points and narrow paths, the difficulty may feel high for beginners, making an intermediate level setting appropriate. Before playing, it's wise to scout the main base's key paths and elevated terrain to plan a defense strategy. Understanding enemy attack timings and patterns in advance is also crucial for effective preparation. Due to the map's design with many bottlenecks, leveraging air units strategically can be highly effective. Securing expansion areas is also advantageous for smooth resource gathering, and careful selection of defensive buildings and upgrades is essential. To overcome early resource shortages, balancing initial unit production with defense line setup is vital. The map's design and difficulty are well-balanced, offering an engaging challenge for defense genre enthusiasts. The thrill of eliminating as many enemies as possible within the time limit and the tension of the gameplay make it a rewarding experience.
뉴 러커 디펜스 (New Lurker Defence)
'뉴 러커 디펜스(New Lurker Defence)'는 제작자 'Short.Stuff'가 제작한 6인용 협동 디펜스 유즈맵으로, 사막 타일셋을 배경으로 한 128x128 타일(4096x4096 픽셀) 크기의 전장에서 펼쳐진다. 내부 설명에 'Player 1 Starts The Levels, Yet You Must Finish Before The Timer Runs Out'라고 명시된 것처럼, 플레이어 1이 게임을 개시하면 레벨 시스템에 따라 러커 웨이브가 몰려오고, 정해진 제한 시간 내에 모든 단계를 클리어해야 하는 미션 클리어형 진행 방식을 채택하고 있다. 맵 제목과 기존 '러커 디펜스' 시리즈의 계보를 고려할 때, 땅속 이동과 원거리 공격을 겸비한 러커 무리가 다방면에서 밀려들어오며, 플레이어들은 입구 막기나 진형 구축을 통해 이를 저지하는 고전적인 디펜스 양상을 띨 것으로 보인다. 6인 최대 인원을 지원하는 만큼 솔로 플레이보다는 팀원 간의 역할 분담—탐지기 보유, 화력 집중, 수리 및 보조—이 필수적이며, 플레이어 1이 트리거를 통제하는 구조상 호스트의 숙련도가 진행 흐름에 큰 영향을 미칠 수 있다. 타이머가 존재하는 점은 무한 생존이 아닌 속도전 성격을 부여하며, 자원 관리와 업그레이드 타이밍을 재촉하는 요소로 작용할 전망이다. 사막 지형 특유의 탁 트인 시야는 러커의 은폐 접근을 감시하기 유리하지만, 동시에 넓은 전선을 커버해야 하는 부담도 준다. 시리즈 전작인 '러커 디펜스 4'나 'Lurker Defence v1.0'과 비교했을 때 'New'라는 접두어가 붙은 만큼, 웨이브 패턴이나 밸런스, UI 측면에서 개선이 시도되었을 가능성이 있다. 정해진 시간 내 웨이브를 소탕하는 명확한 목표와 협동의 재미를 원하는 유저, 러커 특유의 압박감을 즐기는 고전 디펜스 마니아에게 추천할 만하다. 플레이 전에는 반드시 플레이어 1이 게임을 시작해야 진행된다는 점, 제한 시간과 웨이브 수를 대략적으로 파악하는 것, 탐지기 확보 우선순위를 팀원과 공유하는 것이 승률을 높이는 열쇠가 될 것이다. 'New Lurker Defence' is a 6-player cooperative defense use map created by 'Short.Stuff', set on a 128x128 tile (4096x4096 pixel) battlefield using the Desert tileset. As the internal description states, 'Player 1 Starts The Levels, Yet You Must Finish Before The Timer Runs Out,' the game begins when Player 1 initiates the levels, triggering Lurker waves according to a level system, and players must clear all stages within a set time limit in a mission-clear format. Judging from the map title and the lineage of the existing 'Lurker Defence' series, hordes of Lurkers—capable of burrowing and ranged attacks—will likely rush in from multiple directions, and players will engage in classic defense gameplay, blocking entrances or forming formations to stop them. With support for up to 6 players, role division among teammates—securing detectors, focusing fire, repairing and supporting—is essential rather than solo play, and since Player 1 controls the triggers, the host's proficiency may greatly influence the flow. The presence of a timer adds a speed-run element rather than endless survival, pressing resource management and upgrade timing. The open sightlines typical of the Desert tileset help monitor cloaked Lurker approaches, but also burden players with covering a wide front. As the prefix 'New' suggests compared to predecessors like 'Lurker Defence 4' or 'Lurker Defence v1.0', improvements in wave patterns, balance, or UI may have been attempted. It is recommended for users who want a clear objective of eliminating waves within a time limit, enjoy cooperative fun, or appreciate the classic defense pressure unique to Lurkers. Before playing, it is key to remember that Player 1 must start the game for progression, to grasp the approximate time limit and wave count, and to share detector priority with the team to increase win rates.
마리오의 모자 디펜스 (Mario's Hat Defense)
마리오의 모자를 지켜야 한다는 독특한 컨셉의 디펜스 맵, 「마리오의 모자 디펜스」는 플레이어가 지속적으로 몰려드는 적 유닛으로부터 주인공 마리오의 모자를 보호해야 하는 구조로 구성되어 있다. 맵 중앙에 위치한 커다란 모자 아이콘이 보호 대상이며, 이 모자가 적의 공격으로 파괴되면 게임이 즉시 종료된다. 플레이어는 제한된 자원으로 방어 건물을 건설하고 유닛을 배치해 적의 공격을 막아야 하며, 시간이 지날수록 적의 공격 빈도와 강도가 점점 높아지는 디펜스 형식의 진행을 보인다. 맵 우측 하단에는 일시정지 버튼이 배치되어 있으며, 좌측 상단에는 경과 시간이 표시되어 플레이어가 남은 시간을 가늠할 수 있도록 한다. 공격 측은 좌측 하단에서 끊임없이 생성되는 적 유닛으로 구성되며, 주로 저글링과 질럿, 그리고 occasional 히드라리스크가 섞이는 것으로 보인다. 방어 측은 초기 자원과 건물을 통해 방어선을 구축해야 하며, 건물을 지을 때마다 자원이 소모된다. 맵의 균형과 난이도 조절을 위해 일부 구간에서는 적의 공격 패턴이 변하거나, 특정 유닛이 다수 등장하는 패턴이 포함되어 있는 것으로 추정된다. 또한, 맵 제작자 GreatSingingMan에 의해 버그 수정이 이루어진 v1.03 버전에서는 타이머 관련 버그가 수정되었다고 명시되어 있어, 안정적인 플레이 환경을 제공할 것으로 예상된다. 이 맵은 디펜스 장르 특유의 긴장감을 유지하면서도 마리오의 iconic 모자를 보호해야 한다는 독특한 목표 설정이 특징이다. 마리오 팬이라면 흥미를 느낄 수 있는 소재이지만, 디펜스 맵의 기본 구조와 시스템을 그대로 따르기 때문에 장르에 익숙한 플레이어라면 진입장벽 없이 즐길 수 있을 것이다. 특히, 방어 건물의 배치와 자원 관리, 적의 공격 타이밍을 예측하는 전략적 요소가 돋보이며, 한 판당 소요되는 시간은 약 20~30분 정도로 예상된다. 다만, 초기 자원이 제한적이라는 점과 적의 공격이 끊임없이 이어진다는 점에서 초보자에게는 다소 어려울 수 있어, 난이도 조절이 필요할 수 있다. 이 맵을 즐기기 위해서는 스타크래프트 브루드워의 기본적인 조작법과 디펜스 맵의 구조에 대한 이해가 필요하며, 특히 방어 건물의 효율적인 배치와 자원 관리에 중점을 둬야 한다. 또한, 적의 공격 패턴을 숙지하고, 예상치 못한在这个时候에 대비하는 것이 승리의 열쇠가 될 것이다. Mario's Hat Defense is a unique defense-style custom map where players must protect Mario's iconic hat from relentless waves of enemy units. The hat, located at the center of the map, serves as the core objective—if it’s destroyed, the game ends immediately. Players start with limited resources to build defensive structures and deploy units to fend off increasingly frequent and intense attacks as time progresses. The bottom-right corner features a pause button, while the top-left displays elapsed time, helping players track their progress. The attacking force consists of enemy units spawned from the bottom-left corner, primarily composed of zerglings, zealots, and occasional hydralisks. Defenders must strategically construct buildings and deploy units to form a defensive line, as resources are consumed with each building placement. The map appears to include dynamic shifts in enemy attack patterns, with certain phases introducing waves of specific units to increase challenge. Version 1.03, as noted by the creator GreatSingingMan, addressed timer-related bugs, ensuring a smoother gameplay experience. This map stands out due to its blend of classic defense mechanics and the whimsical goal of protecting Mario’s hat, making it appealing to both Mario fans and defense-map enthusiasts. While the core gameplay follows traditional defense-map conventions, the unique theme adds a layer of charm and novelty. Players should focus on efficient resource management and strategic unit placement, as the constant pressure from enemy waves demands quick decision-making. For those familiar with defense maps, the learning curve is minimal, but beginners may find the limited starting resources and relentless enemy assaults challenging. A typical playthrough lasts around 20 to 30 minutes, making it a great choice for short, engaging sessions. To fully enjoy Mario's Hat Defense, players should have a solid grasp of StarCraft: Brood War’s controls and defense-map mechanics. Prioritizing defensive structures and resource allocation is essential, as is adapting to the evolving attack patterns. Anticipating enemy movements and preparing contingency plans will significantly improve your chances of success.
빅풋 서바이벌 (Bigfoot Survival)
스타크래프트 브루드워의 서바이벌 장르 유즈맵 'Bigfoot Survival'은 7명의 플레이어가 함께 타이머가 끝날 때까지 살아남는 것을 목표로 하는 흥미로운 게임입니다. 맵의 제목에서도 알 수 있듯이, 빅풋(Bigfoot)과 같은 거대한 괴물이 등장하는 이 맵은 플레이어들에게 끊임없는 압박감을 제공합니다. 맵은 황무지 타일셋으로 구성되어 있으며, 넓은 공간에서 발생하는 전투와 회피가 주요 볼거리입니다. 타이머가 끝날 때까지 살아남는 것이 승리 조건이지만, 맵 내에서는 괴물과의 교전 외에도 다양한 리소스와 아이템을 활용한 전략이 요구됩니다. 특히, 맵의 넓은 공간에서 발생하는 전투는 플레이어 간의 협력과 개인의 판단력이 모두 중요하다는 점에서 긴장감을 높입니다. 추천 대상은 서바이벌 장르에 익숙한 유저부터 초보까지 폭넓게, 특히 팀플레이를 선호하는 플레이어들에게 적합합니다. 다만, 넓은 맵에서 발생하는 빈번한 전투와 끊임없는 압박감으로 인해 초보자들은 다소 어려움을 느낄 수 있습니다. 플레이 전에는 맵의 주요 루트와 리소스 위치, 그리고 괴물과의 교전 타이밍을 미리 숙지하는 것이 좋습니다. 또한, 팀원과의 원활한 소통을 통해 생존 전략을 공유하는 것이 중요합니다. 이 맵은 단순히 생존을 넘어서, 전략과 협력의 중요성을 강조하는 유즈맵으로, 스타크래프트의Classic한 재미를 느낄 수 있는 작품입니다. Bigfoot Survival is a survival-style custom map in StarCraft: Brood War where seven players aim to survive until the timer runs out. As the title suggests, the map features encounters with a giant creature resembling Bigfoot, creating constant pressure for players. The terrain, using a barren tileset, offers wide-open spaces where combat and evasion become the main attractions. While the goal is simply to survive until the timer ends, players must also strategize using resources and items scattered across the map. The vast expanse of the battlefield emphasizes both teamwork and individual decision-making, heightening the tension. This map is recommended for users familiar with survival games, as well as beginners who enjoy team play, though novices might find the frequent combat and relentless pressure challenging. Before playing, it's advisable to familiarize yourself with key routes, resource locations, and the timing of encounters with the creature. Effective communication with teammates to share survival strategies is also crucial. Beyond mere survival, this map highlights the importance of strategy and cooperation, offering classic StarCraft fun in a unique custom format.
맵 선택 가이드
태그는 맵의 핵심 특징을 빠르게 설명하지만 제작 버전마다 규칙이 다를 수 있습니다. 상세 설명에서 권장 인원, 난이도, 플레이 시간과 버전을 함께 확인한 뒤 다운로드하세요.