
타워 디펜스 스타크래프트 맵 모음
'타워 디펜스' 태그가 등록된 맵을 모았습니다. 장르 하나로 찾기 어려운 플레이 방식, 난이도와 특징을 중심으로 인기 맵과 최신 맵을 비교해 보세요.
- 등록 맵
- 452개
- 누적 다운로드
- 135
- 누적 조회
- 17,538
인기 맵
다운로드와 조회 반응이 높은 맵입니다.
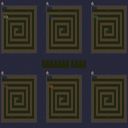
빙글 터렛 디펜스 1.5.5 (Binggeul Turret Defense 1.5.5)
스타크래프트 브루드워 유즈맵 '빙글 터렛디펜스 1.5.5'는 제작자 S_D_K가 EUD 트리거를 적극 활용해 개발한 6인용 협동 타워 디펜스 콘텐츠다. 사막 타일셋 기반의 128x96 타일 전장에서 펼쳐지는 이 맵은, 제목에서 알 수 있듯 회전하거나 각도가 변하는 '빙글' 터렛 시스템이 핵심 차별점이다. 일반적인 고정형 타워 디펜스와 달리 EUD로 구현된 동적 포탑 메커니즘이 적용되어 있어, 플레이어는 마우스 클릭이나 단축키만으로 포탑의 조준 방향을 실시간 조작하거나 자동 회전 모드를 활용해 사각 지대를 최소화할 수 있다. 6명 전원이 단일 팀으로 묶여 적 웨이브를 공동 방어하는 구조이며, 미네랄과 가스 자원을 분배해 터렛 생산, 업그레이드, 특수 스킬 해금을 병행해야 한다. 초반에는 저글링, 히드라리스크 등 지상 유닛 위주로 몰려오나 중반 이후 공중 유닛과 보스급 거대 유닛이 등장하며, 특정 웨이브마다 고유 패턴(분열, 순간이동, 보호막 등)이 부여되어 단순 화력전 이상의 대처가 요구된다. EUD 전용 인터페이스가 화면 하단에 배치되어 건설 메뉴, 업그레이드 트리, 웨이브 알림 등을 직관적으로 확인 가능하며, 랙 방지를 위한 유닛 수 제한 및 자동 정리 루틴도 내장된 것으로 보인다. 협동 디펜스의 재미와 EUD 기술력을 동시에 체험하고 싶은 유저, 고정형 배치에 식상함을 느낀 디펜스 마니아에게 특히 권장된다. 게임 시작 전에는 1.5.5 최신 버전 적용 여부, EUD 지원 런처(예: 스타크래프트 리마스터 호환 패치) 사용 여부, 6인 미만 접속 시 난이도 보정 기능 유무를 반드시 점검하길 권한다. StarCraft Brood War use map 'Binggeul Turret Defense 1.5.5' is a 6-player cooperative tower defense content developed by creator S_D_K utilizing EUD triggers extensively. Unfolding on a 128x96 tile battlefield based on the desert tileset, this map features a unique 'rotating' turret system as its key differentiator, as the title suggests. Unlike conventional fixed tower defenses, a dynamic turret mechanism implemented via EUD allows players to control turret aim direction in real-time via mouse clicks or hotkeys, or utilize auto-rotation modes to minimize blind spots. All six players form a single team to jointly defend against enemy waves, requiring distribution of minerals and gas for turret production, upgrades, and special skill unlocks. Early waves consist mainly of ground units like Zerglings and Hydralisks, but mid-to-late game introduces air units and boss-class massive units, with specific waves granting unique patterns (splitting, blinking, shields) demanding responses beyond raw firepower. An EUD-exclusive interface at the bottom provides intuitive access to build menus, upgrade trees, and wave alerts, and routines for unit count limits and auto-cleanup to prevent lag appear to be built-in. Highly recommended for users wanting to experience both cooperative defense fun and EUD technical prowess, and defense maniacs tired of fixed placements. Before starting, verify application of the latest 1.5.5 version, use of an EUD-supporting launcher (e.g., StarCraft Remastered compatibility patch), and whether difficulty scaling for fewer than 6 players exists.
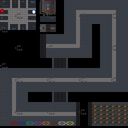
터렛 디펜스 10003 (Turret Defense 10003 V.1.8)
터렛 디펜스 10003 V1.8은 스타크래프트 브루드워 유즈맵 중 전형적인 타워 디펜스 장르에 속하는 맵으로, 우주 타일셋을 배경으로 6인 플레이어가 각자의 진영에서 밀려오는 적 유닛을 타워로 막아내는 구조로 보인다. 맵 크기는 2048x2048로 넓은 편이며 64x64 타일 단위로 구성되어 있어 각 플레이어 구역이 비교적 명확하게 분리된 것으로 추정된다. 내부 설명에 따르면 제작자는 Killerarty이며 에디터는 HOH_HOH_HOH로 표기되어 있다. 게임 진행은 웨이브 단위로 적이 등장하고, 플레이어는 자원을 모아 타워를 건설·업그레이드하며 방어선을 구축하는 방식으로 흘러갈 것으로 보인다. 6인용인 만큼 협동 플레이가 핵심이 될 것이며, 난이도 조절이나 웨이브 구성에 따라 초보자부터 숙련자까지 폭넓게 즐길 수 있을 것으로 예상된다. 우주 배경 특성상 공중 유닛 비중이 높을 수 있으며, 타워 종류별 특성 파악과 자원 배분 타이밍이 승패를 가를 것으로 보인다. 플레이 전에는 버전 1.8 기준의 밸런스 패치 내역이나 트리거 작동 여부, 시작 자원 설정, 웨이브 수 및 보스 등장 여부 등을 확인하는 것이 좋다. 타워 디펜스 특유의 전략적 배치와 자원 관리, 팀원과의 역할 분담을 선호하는 유저에게 추천하며, 혼자서도 6개 진영을 모두 조작하며 연습하기에도 적합해 보인다. Turret Defense 10003 V1.8 appears to be a classic tower defense map for StarCraft Brood War, set on a space tileset where six players each defend their own base against incoming enemy waves using turrets. The map size is 2048x2048 with 64x64 tiles, suggesting each player zone is clearly separated. According to the internal description, the creator is Killerarty and the editor is HOH_HOH_HOH. Gameplay likely progresses in waves, with players gathering resources to build and upgrade turrets to hold the line. As a six-player map, cooperative play is central, and difficulty scaling or wave composition may cater to both beginners and veterans. The space theme may feature many air units, making turret selection and resource timing crucial. Before playing, it is advisable to check the v1.8 balance changes, trigger functionality, starting resources, wave count, and boss presence. This map is recommended for users who enjoy strategic placement, resource management, and role coordination typical of tower defense, and it may also serve as solo practice by controlling all six lanes.
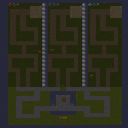
메이즈 디펜스 3-웨이 (Maze Defense 3-Way)
스타크래프트 브루드워 유즈맵 '메이즈 디펜스 3-웨이'는 3인 협력형 미로 디펜스 장르로, 사막 타일셋 위에서 벙커와 히어로 유닛을 활용해 몰려오는 적 웨이브를 막아내는 구조다. 맵 크기는 128×128 타일로 넓은 편이며, 세 갈래 길목이 중앙으로 모이는 3-웨이 지형이 특징이다. 각 플레이어는 입구 구간에서 벙커를 배치해 미로를 직접 설계하고, 히어로 유닛으로 보스나 특수 적을 제압하며 진행한다. 내부 설명에 따르면 11.0 버전에서 사토(Sato)라는 제작자가 히어로 밸런스를 조정하고 벙커 성능을 재조정했으며, 베타 2 단계에서 공개된 것으로 보인다. 플레이 초반에는 미로 형태를 어떻게 짜느냐에 따라 난이도가 크게 갈리므로, 벙커 업그레이드 순서와 히어로 스킬 타이밍을 익히는 것이 중요하다. 3인 고정 인원이라 인원 미달 시 난이도 급상승하므로 정해진 파티로 즐기길 권장한다. 디펜스 초보자보다는 미로 설계 경험이 있는 유저에게 적합하며, 긴 웨이브 지속 시간과 자원 관리가 핵심이다. 플레이 전 벙커 종류별 사거리·공속, 히어로별 스킬 쿨타임을 숙지하면 초반 붕괴를 막을 수 있다. Maze Defense 3-Way is a three-player cooperative maze defense map set on a desert tileset where players use bunkers and hero units to stop incoming enemy waves. The map spans 128×128 tiles, featuring a three-way layout where three lanes converge at the center. Each player builds their own maze by placing bunkers at the entrance and controls a hero to deal with bosses or special units. According to the internal description, version 11.0 introduced hero balance changes and bunker adjustments by a creator named Sato, and the file corresponds to a beta 2 release. Early maze design heavily influences difficulty, so learning bunker upgrade paths and hero skill timing is crucial. Since the map is balanced for exactly three players, missing members will spike the challenge; a pre-arranged party is recommended. The experience suits players familiar with maze design rather than pure defense beginners, as long wave durations and resource management are key. Checking bunker range, attack speed, and hero cooldowns before starting helps prevent early collapses.
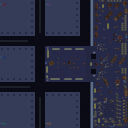
3-5 섬 컴까기 255업 (초당 100원) 완결 (3-5 Island Rush 255 Level Up (100 Resources per Second) Complete)
스타크래프트 브루드워의 유즈맵 가운데 독특한 시스템을 자랑하는 ‘3-5 섬 컴까기 255업(초당100원)완결’은 한정된 공간에서 끊임없이 쏟아지는 적을 상대하며 종족 건물을 255레벨까지 강화하는 컴까기 장르의 정수다. 맵은 4096×4096 크기의 거대한 화산 타일셋으로 구성되어 있으며, 플레이어는 초당 100원의 자원이 지속적으로 공급되는 환경에서 방어 타워를 건설하고 업그레이드하는 데 집중한다. 맵 좌측 하단과 우측 하단에 위치한 플레이어 기지에서 시작해, 중앙과 3~5개의 섬을 오가는 다리 구조를 통해 적의 공격로를 방어해야 한다. 적들은 끊임없이 몰려오며, 1킬당 500원의 추가 자원을 획득할 수 있어 Ekonomy(자원 관리)와 방어 전략이 동시에 요구된다. 일반 유닛의 체력은 3배, 기본 공격력은 2배로 상승하고 생산 속도는 절반으로 줄어드는 등 밸런스 조정을 통해 초당 100원의 자원 생성량을 최대한 활용할 수 있도록 설계되었다. 방어 타워는 각 섬에 배치된 포탑을 중심으로 구축할 수 있으며, 레벨이 오를수록 공격력과 내구력이 증가한다. 맵의 핵심은 ‘완결’이라는 이름에서 짐작할 수 있듯, 255레벨에 도달하는 순간을 목표로 하며 이는 장기간의 전략과 끈기 있는 플레이가 필요한 도전 과제다. 초보 플레이어는 자원의 흐름과 타워의 배치 위치를 우선적으로 숙지해야 하며, 후반부로 갈수록 쏟아지는 적의 물량과 맞서기 위해 효율적인 업그레이드 우선순위를 세워야 한다. 특히 다리 구조를 활용한 입체적인 방어와 섬별 자원 확보가 승리의 열쇠가 될 것이다. 이 맵은 장기간 플레이를 즐기는 유저들에게 적합하며, 자원 관리와 방어 전략의 조합을 통해 게임의 재미를 극대화할 수 있는 작품이다. 시스템의 복잡성 때문에 초보자는 다소 어려울 수 있지만, 익숙해지면 스타크래프트 유즈맵의 새로운 장을 경험할 수 있을 것이다. Among the custom maps of *StarCraft: Brood War*, *"3-5 Island Rushdown 255 Upgrades (100 Minerals/sec) Complete"* stands out for its unique system, blending a confined space with relentless enemy waves in a tower-defense-style "comp" genre where players max out their faction buildings to level 255. The map spans a massive 4096×4096 volcanic tileset, where players start in bases located at the bottom-left and bottom-right corners, connected by bridges to central and 3-5 scattered islands that must be defended. With a steady income of 100 minerals per second, the challenge lies in balancing economy and defense—every kill grants an additional 500 minerals, rewarding efficient resource management. Units are balanced to exploit the 100 minerals/sec flow: their HP is tripled, base attack doubled, and production speed halved, forcing players to optimize upgrades and tower placements. Defensive towers can be built around the cannons on each island, gaining power and durability with each level. The ultimate goal, as hinted by the name *"Complete,"* is reaching level 255—a grueling test of long-term strategy and perseverance. New players should focus on understanding the resource flow and tower positioning early on, while mid-to-late game demands prioritizing upgrades to withstand the escalating enemy waves. Strategic use of the bridge network for layered defenses and securing resources across islands becomes critical. Best suited for players who enjoy extended sessions, this map maximizes fun by merging resource management with tactical defense. While the system’s complexity may overwhelm beginners, mastering it opens up a new dimension of *StarCraft* custom maps.
원피스랜덤디펜스NEW2.8
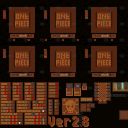
스타크래프트 브루드워 유즈맵 '원피스 랜덤 디펜스 NEW 2.8'은 인기 애니메이션 원피스 세계관을 배경으로 한 6인 협동 랜덤 디펜스 맵이다. 제작자 AngelikaS가 제작한 이 맵은 기존 디펜스 장르에 랜덤 요소와 원피스 특유의 캐릭터, 능력 시스템을 결합해 매 판 다른 전략을 요구한다. 최대 6명의 플레이어가 한 팀이 되어 밀려오는 적 웨이브를 막아내는 방식으로, 황혼 타일셋 위에서 진행된다. 핵심 플레이는 무작위로 주어지는 유닛이나 영웅을 조합해 시너지를 내는 데 있다. 원피스 원작의 해적단, 해군, 칠무해 등 다양한 진영의 유닛이 등장하며, 각 유닛은 고유 스킬과 업그레이드 트리를 갖춰 육성 재미를 더한다. 웨이브가 진행될수록 보스 몬스터의 체력과 패턴이 까다로워져 단순 화력전만으로는 클리어가 어렵다. 플레이어 간 자원 공유, 유닛 합성, 배치 타이밍 같은 협업이 필수적이며, 랜덤 뽑기 운에 따라 초반 난이도 편차가 크지만 후반부로 갈수록 운영 실력이 승패를 가른다. 추천 대상은 원피스 팬층은 물론, 랜덤 디펜스 특유의 조합 찾기와 파티 플레이를 즐기는 유저다. 입문자는 초반 유닛 뽑기 운에 휘둘리지 않고 기본 유닛 강화와 라인 유지만 신경 써도 중반까지 무난히 버틸 수 있다. 고난도 도전을 원한다면 의도적으로 약한 조합을 골라 클리어하는 '자급자족' 플레이도 가능하다. 플레이 전 확인할 점은 버전 2.8 기준 밸런스 패치 내역과 유닛 합성표 숙지 여부다. 트리거 연출이 많아 구형 컴퓨터나 랙이 심한 환경에서는 프레임 드랍이 발생할 수 있으니 게임 속도 조절을 권장한다. 6인 풀파티로 음성 채팅을 병행하면 전략적 깊이가 더해져 최고의 협동 경험을 선사한다. StarCraft Brood War custom map 'One Piece Random Defense NEW 2.8' is a 6-player cooperative random defense map set in the world of the popular anime One Piece. Created by AngelikaS, this map combines random elements and One Piece's unique characters and ability systems with the existing defense genre, demanding different strategies every game. Up to 6 players form a single team to stop waves of incoming enemies on the Twilight tileset. The core gameplay lies in creating synergies with randomly assigned units or heroes. Units from various factions of the original work, such as Pirate Crews, Marines, and Warlords, appear, each possessing unique skills and upgrade trees, adding depth to unit development. As waves progress, boss monsters' HP and patterns become trickier, making sheer firepower insufficient. Cooperation between players—resource sharing, unit synthesis, and placement timing—is essential. While early difficulty varies greatly due to RNG draws, management skill determines victory in the late game. It is recommended for One Piece fans as well as users who enjoy the combo-finding and party play unique to random defense. Beginners can survive until the mid-game by focusing on basic unit upgrades and line maintenance without being swayed by early draw luck. For those seeking high difficulty, 'self-sufficiency' play—intentionally picking weak combos to clear—is also possible. Points to check before playing include the balance patch notes for version 2.8 and familiarity with the unit synthesis table. Due to heavy trigger effects, frame drops may occur on older PCs or laggy environments, so adjusting game speed is advised. A full 6-player party with voice chat adds strategic depth, providing the best cooperative experience.
매니아 디펜스 GG vEUD3 (Mania Defense GG vEUD3)
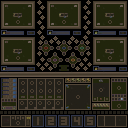
스타크래프트 브루드워 유즈맵 '매니아 디펜스 GG vEUD3'는 맵 매니아(MapMania)가 제작하고 페루나앙(Pehruunaang)이 EUD 패치를 적용한 디펜스 맵입니다. 사막 타일셋의 128x128 타일(4096x4096) 전장에서 EUD 트리거로 일반 트리거 한계를 넘어선 정교한 시스템을 구현했습니다. 플레이어는 적 웨이브를 막기 위해 유닛 생산·업그레이드로 방어선을 구축하며, GG 버전 표기로 난이도·밸런스 패치 버전임을 알 수 있습니다. 제작자·패치자 연락처가 명시돼 커뮤니티 소통 창구가 열려 있습니다. 협동이 핵심이므로 역할 분담과 자원 관리가 승패를 가릅니다. 개방적 시야는 적 경로 예측에 유리하나 넓은 범위 커버 부담도 줍니다. 입문자는 초반 빌드와 상성 익히기에, 숙련자는 EUD 시스템 최적화 공략에 집중하면 좋습니다. 2인 이상 협력 플레이 권장하며, 웨이브 클리어 쾌감과 전략적 깊이를 원하는 유저에게 적합합니다. 플레이 전 EUD 적용 여부와 버전 호환성 확인이 필요합니다. 맵 크기가 표준 맵 1/4로 컴팩트해 이동 거리가 짧고 템포가 빠릅니다. 모래 언덕·바위 지형이 자연 장애물로 작용해 입구 막기 등에 이점을 줍니다. EUD 패치는 실시간 UI, 커스텀 스킬, 동적 난이도 등 고급 기능을 가능하게 합니다. 제작자 시리즈 노하우와 패치자 EUD 전문성이 결합돼 안정적일 것으로 보입니다. 파일명 한글명 포함으로 국내 배포용임을 알 수 있으며, 인코딩 mixed는 EUD·일반 트리거 혼재를 시사합니다. 승리 조건은 전 웨이브 클리어 또는 보스 처치, 패배 조건은 핵심 건물 파괴나 전원 전멸로 추정됩니다. Mania Defense GG vEUD3 is a StarCraft Brood War UMS defense map created by MapMania and EUD-patched by Pehruunaang. Built on the Desert tileset with a 128x128 tile (4096x4096) battlefield, it leverages EUD triggers to implement sophisticated systems beyond standard trigger limits. Players must produce and upgrade units to hold defensive lines against incoming enemy waves, and the 'GG' suffix suggests a version with difficulty and balance adjustments. The map description lists contact info for both creator and patcher, indicating an open community channel. As with most defense maps, cooperation is key—role assignment and resource management decide victory. The open desert visibility helps predict enemy paths but also demands wide coverage. Newcomers should focus on early build orders and unit counters, while veterans can optimize using EUD-driven mechanics. Co-op play with two or more players is recommended for those seeking both the thrill of wave clearance and strategic depth. Before playing, verify EUD compatibility and version matching. The compact map size (one‑quarter of a standard 256x256 map) shortens travel distance and accelerates tempo. Sand dunes and rocky terrain act as natural obstacles, offering chokepoint advantages. The EUD patch enables real‑time UI, custom skills, and dynamic difficulty scaling. MapMania’s series experience combined with Pehruunaang’s EUD expertise points to a stable release. The Korean filename confirms a domestic distribution target, and the mixed encoding hints at mixed EUD and standard trigger data. Victory likely requires clearing all waves or defeating a boss; defeat triggers on core building destruction or total wipeout.
앰이징 터렛 디펜스 PRO (Amazing Turret Defense PRO)
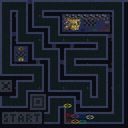
스타크래프트 브루드워의 디펜스 장르 유즈맵인 《Amazing Turret Defense PRO》는 방어 포탑을 직접 배치하고 강력한 유닛을 조합해 적의 공격을 막아내는 재미를 극대화한 작품이다. 맵 제목에서 알 수 있듯 'Amazing Turret'(놀라운 포탑) 시스템이 핵심으로, 플레이어는 시작부터 주어지는 제한된 자원으로 방어선을 구축해야 한다. 맵 이미지를 보면 중앙에 거대한 포탑을 중심으로 좁은 길목이 배치되어 있으며, 각 길목마다 방어 시설을 설치할 수 있는 공간이 마련되어 있다. 특히 오른쪽 하단에 있는 'secret units'라는 설명과 함께 등장하는 다채로운 유닛들은 게임 후반부 전략의 다양성을 높이는 요소로 추정된다. 맵의 배경은 화산 테마의 타일셋으로 어두운 톤의 색상이 전체적인 분위기를 조성하며, 포탑과 유닛의 시야 확보를 위해 지형이 비교적 개방되어 있어 시야 싸움도 중요한 포인트로 보인다. 방어와 공격의 밸런스를 맞추기 위해 포탑의 공격력과 체력, 유닛의 생산 비용과 능력치가 세심하게 조율되었을 것으로 보이며, 적의Wave가 점차 강해지는 구조로 예상된다. 초보자부터 숙련자까지 즐길 수 있도록 난이도 조절이 가능할 것이며, 특히 타워 디펜스와 포탑 디펜스에 익숙한 플레이어들에게는 익숙한 구조이지만 'secret units'를 활용한 새로운 전술을 시도해 볼 수 있어 반복 플레이 가치를 높일 수 있다. 맵을 플레이하기 전에는 포탑의 배치 위치와 유닛 생산 시기를 carefully 계획해야 하며, 후반부로 갈수록 등장하는 적의 조합에 맞춰 방어 전략을 유연하게 변경할 준비를 해야 한다. 맵의 전체적인 분위기는 긴장감 넘치는 방어戦으로, 특히 화산의 어두운 배경과 포탑의 불꽃 효과가 어우러져 시각적인 몰입감을 제공할 것으로 보인다. 4인 이상의 다인 플레이를 염두에 둔 디자인으로 보이나, 팀전보다는 개인전 또는 협동전 형식으로 진행될 가능성이 높다. 이 맵은 디펜스 유즈맵의 기본 틀을 따르면서도 'secret units'라는 숨은 요소로 차별화를 시도한 작품으로, 꾸준한 플레이를 통해 숨겨진 전략과 유닛의 조합을 발견하는 재미가 클 것이다. 《Amazing Turret Defense PRO》 is a StarCraft: Brood War defense-style custom map where players place turrets and combine powerful units to maximize the fun of fending off enemy attacks. As the title suggests, the "Amazing Turret" system is central to the experience, requiring players to build their defenses from the start with limited starting resources. The map features a central large turret with narrow pathways branching out, each offering designated spaces to install defensive structures. The diverse "secret units" located in the bottom-right section likely add strategic depth in the late game. The volcanic-themed tileset sets a dark, intense tone, while the relatively open terrain ensures clear lines of sight, making vision control a key element. The balance between turret damage, health, unit costs, and abilities appears finely tuned, with enemy waves escalating in strength over time. Designed to accommodate both beginners and veterans, the map likely offers adjustable difficulty, appealing especially to players familiar with tower defense mechanics—though the hidden "secret units" encourage fresh tactics and replayability. Success depends on careful initial turret placement and unit production timing, with flexible defensive strategies needed to counter evolving enemy compositions. The overall atmosphere is one of high-stakes survival, enhanced by the map’s dark volcanic backdrop and fiery turret effects. While the design suggests support for four or more players, it’s more likely structured for solo or cooperative play rather than full team battles. By blending classic tower defense elements with the hidden "secret units," this map rewards persistent players with discoveries of new strategies and unit synergies.
![[EUD]영웅운빨타워디펜스 맵 미리보기](https://cdn-star-data.huzy.net/thumbnail_1f62f0c478aa4a839a9637e8e8563aa7.jpg)
[EUD]영웅운빨타워디펜스
[EUD] 영웅 운빨 타워 디펜스([EUD] Hero Luck Tower Defense)는 스타크래프트 브루드워 유즈맵 중에서도 무작위 요소와 성장의 재미를 극대화한 독특한 장르의 타워 디펜스 맵이다. 이 맵은 사막 타일셋을 배경으로 펼쳐지며, 플레이어는 지정된 공간에서 무작위로 생성되는 타워들을 활용해 맵을 한 바퀴 회전하며 다가오는 적들을 막아내야 하는 명확한 목표를 가지고 진행된다. 단순한 배치에서 끝나는 것이 아니라 획득한 타워를 지속적으로 강화하며 한계를 돌파하는 구조를 취하고 있어, 고유의 중독성과 몰입감을 선사한다. 맵의 진행 방식은 기본적으로 운과 전략의 조화가 핵심이다. 게임이 시작되면 플레이어는 무작위로 주어지는 타워 유닛들을 바탕으로 방어선을 구축하게 되는데, 어떤 유닛이 등장하느냐에 따라 초반 운영과 중후반 빌드가 크게 달라진다. 적들은 정해진 경로를 따라 한 바퀴를 돌며 진군하기 때문에, 경로 동선을 고려한 효율적인 위치 선정과 자원 배분이 승패를 가르는 중요한 요인으로 작용한다. 특히 EUD 시스템이 적용되어 기존 스타크래프트 엔진의 한계를 넘어선 다양한 영웅 유닛들과 특수 능력이 구현되어 있어, 플레이어에게 시각적 즐거움과 함께 다채로운 전투 경험을 제공한다. 또한, 내부 설명에 따르면 게임 내에서 특수 단축키를 이용해 게임 배속을 자유롭게 조절할 수 있는 편의 기능이 포함되어 있어, 플레이 호흡을 조절하며 쾌적하게 즐길 수 있는 점도 큰 특징이다. 플레이어는 매 판마다 새롭게 주어지는 무작위 상황 속에서 최선의 조합을 찾아내야 하므로 매번 색다른 판세를 경험할 수 있다. 타워를 강화하고 상위 단계로 도약하는 과정에서 오는 성취감은 이 맵이 가진 가장 큰 매력 포인트다. 정형화된 빌드오더보다는 주어진 자원과 운에 맞춰 유연하게 대처하는 능력이 요구되므로, 가볍게 즐기면서도 깊이 있는 방어 전략을 고민하는 유저들에게 안성맞춤이다. 평소 무작위 요소가 가미된 디펜스 유즈맵을 선호하거나, 영웅 유닛들을 키우며 몰려오는 적을 소탕하는 쾌감을 즐기는 플레이어라면 한 번쯤 도전해 볼 만한 완성도 높은 작품이다. 플레이 전에는 게임 내 배속 조절 단축키와 타워 강화 시스템의 특성을 미리 파악해 두면 더욱 원활하게 방어선을 구축하고 장기적인 생존을 도모할 수 있을 것이다. [EUD] Hero Luck Tower Defense is a unique tower defense map in StarCraft: Brood War custom maps that maximizes the fun of random elements and growth. Set against a desert tileset, players have a clear objective to utilize randomly generated towers in designated areas to fend off enemies approaching while making a full loop around the map. Rather than ending with simple placement, it adopts a structure where acquired towers are continuously upgraded to break through limits, providing its own unique addiction and immersion. The progression of the map fundamentally centers on a combination of luck and strategy. When the game begins, players establish a defense line based on randomly provided tower units, and the initial management and mid-to-late game builds vary greatly depending on which units appear. Because enemies advance along a predetermined path making a full loop, efficient positioning considering the route and resource allocation act crucial factors determining victory or defeat. In particular, with the EUD system applied, various hero units and special abilities surpassing the limitations of the classic StarCraft engine are implemented, offering players visual pleasure along with diverse combat experiences. Additionally, according to internal descriptions, a convenience feature is included allowing players to freely adjust the game speed using special hotkeys within the game, making it a major feature that allows for smooth enjoyment by controlling the pacing of play. Players must find the optimal combination amidst newly given random situations in every match, allowing them to experience a different game flow each time. The sense of accomplishment derived from upgrading towers and leaping to higher stages is the map's greatest charm point. Since the ability to flexibly cope according to given resources and luck is required rather than standardized build orders, it is perfectly suited for users who want to enjoy lightly while contemplating deep defensive strategies. For players who usually prefer defense custom maps infused with random elements or enjoy the thrill of raising hero units to wipe out swarming enemies, it is a high-quality work worth challenging at least once. Before playing, grasping in-game speed adjustment hotkeys and the characteristics of the tower upgrade system in advance will help establish a defense line more smoothly and promote long-term survival.
--- M A T R I X - 3.7 ---
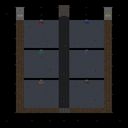
스타크래프트 브루드워의 유즈맵으로 유명한 ‘--- M A T R I X - 3.7 ---’은 우주 배경의 디펜스 장르 맵으로, 플레이어는 외계 세력의 침공을 방어하는 임무를 맡습니다. 맵의 전체적인 구조는 가로 3072, 세로 4096의 넓은 필드에 펼쳐져 있으며, 타일셋은 우주 테마로 구성되어 atmosferic한 분위기를 연출합니다. 맵의 특징은 중앙에 위치한 거대한 적 기지 주변으로 여러 개의 방어 타워가 배치되어 있으며, 플레이어는 자원을 확보해 방어 건물과 병력을 생산해 적의 공격을 막아야 합니다. 맵의 진행은 주로 적의 웨이브가 지속적으로 몰려오는 형태로, 각 웨이브마다 다양한 유닛과 조합을 상대해야 합니다. 방어에 성공할 때마다 보상을 얻으며, 이를 바탕으로 더 강력한 방어 체계를 구축할 수 있습니다. 맵의 난이도는 중간 정도로 설정되어 있지만, 후반부로 갈수록 적의 공격력이 급증하므로 전략적인 자원 관리와 방어선 구축이 중요합니다. 특히, 맵의 넓은 공간을 활용한 멀티 위치 선정과Resource gathering의 효율성이 승패를 좌우할 수 있습니다. 초보 플레이어는 방어 우선순위를 잘못 잡는 경우가 많으므로, 초반 자원 확보와 방어 건물의 초기 배치에 신경 써야 합니다. 또한, 후속 웨이브의 공격을 예측하고 미리 대비할 수 있도록 맵의 지형을 숙지하는 것이 중요합니다. 이 맵은 넓은 필드와 지속적인 공격 패턴으로 인해 긴장감과 전략적 깊이를 동시에 제공하며, 특히 디펜스 장르를 좋아하는 플레이어에게 추천할 만합니다. 다만, 넓은 맵 특성상 자원 gathering에 시간이 소요될 수 있으니, 이를 고려한 플레이가 필요합니다. 맵의 인코딩은 cp949로 한국어 환경에서 문제없이 구동될 수 있도록 지원합니다. 플레이 전에는 맵의 기본 구조와 방어 건물의 배치 위치를 미리 확인해 두는 것이 좋습니다. 또한, 후속 업데이트 버전이 존재하는 만큼 최신 버전을 사용하는 것이 바람직합니다. This Brood War custom map, ‘--- M A T R I X - 3.7 ---’, is a space-themed defense game where players must protect their base from relentless alien invasions. The map spans a vast 3072x4096 grid with a cosmic tileset, creating an immersive sci-fi atmosphere. Players start with limited resources and must strategically expand their territory while constructing defenses and producing units to fend off enemy waves. The gameplay revolves around surviving progressively stronger enemy assaults, with each successful defense granting rewards to upgrade fortifications. Mid-game presents a balanced challenge, but later stages require careful resource management and adaptive strategies as enemy compositions become more complex. Beginners often struggle with initial base layouts and priority defenses, so early preparations are crucial. The map’s spacious design demands smart multi-positioning and efficient resource gathering to maintain momentum. While the open terrain offers strategic depth, it can also slow down new players unfamiliar with space-themed defenses. This title is ideal for fans of tower defense mechanics who enjoy a mix of tension and tactical planning. Always check for the latest version (3.7) to ensure compatibility and balance improvements. Reviewing the map’s terrain and defense hotspots before play helps optimize early-game decisions.
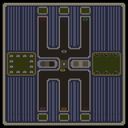
터렛 디펜스 2004 (Turret Defense 2004)
터렛 디펜스 2004는 사막 타일셋을 기반으로 한 1024×1024 크기의 유즈맵으로, 플레이어는 중앙에 위치한 기지를 둘러싼 제한된 영역에 터렛을 건설하여 점점 강해지는 적 파동을 막아야 한다. 게임 시작 시 기본 자원이 주어지고, 첫 웨이브에서 나오는 저글링과 젤럿을 처치하며 미네랄과 가스를 모아 다양한 타입의 터렛을 업그레이드하거나 새로 설치할 수 있다. 터렛은 사거리와 피해량이 다르며, 일부는 스플래시 데미지를 주어 군집된 적에게 효과적이며, 다른 유닛은 단일 대상에 높은 관통력을 갖는다. 맵 전체는 라인 기반이 아닌 자유 배치 형태여서 지형의 좁은 통로를 활용한 입구막기 전략이나, 높은 지대를 차지한 사격 towers를 통해 효율적인 방어 라인을 구성할 수 있다. 웨이브가 진행될수록 적의 체력과 수가 기하급수적으로 증가하며, 특수한 유닛인 거머리나 히드라리스크가 등장해 항공을 무시하는 지상 전용 터렛의 한계를 드러내므로, 플레이어는 지상과 공중을 모두 커버할 수 있는 혼합 구성을 고민해야 한다. 최종 웨이브를 살아남으면 vittoria 조건이 충족되며, 실패 시는 기지가 파괴되어 패배 처리된다. 이 맵은 전략적 배치와 자원 타이밍이 승부를 가르는 전형적인 타워 디펜스 유즈맵으로, 초보자에게는 기본 터렛의 사거리와 데미지 값을 익히는 연습장이 되며, 숙련자들에게는 제한된 건설 공간 속에서 최적의 효율을 내는 퍼즐 같은 요소를 제공한다. 플레이 전에는 확인해야 할 점이 몇 가지 있다. 첫째, 시작 자원이 제한적이므로 초기 웨이브에서 과도한 건조를 피하고 필수 터렛만 먼저 설치하는 것이 중요하다. 둘째, 지형의 높은 곳을 선점하면 사거리 이점을 크게 얻을 수 있으므로, 맵 전체를 살펴보고 유리한 위치를 미리 파악해 두는 것이 좋다. 셋째, 공중 유닛이 등장하는 시점을 미리 파악하고, 그에 맞는 대공 터렛을 준비해 두면 후속 웨이브에서의 붕괴를 방지할 수 있다. 전반적으로 터렛 디펜스 2004는 깔끔한 사막 배경과 직관적인 터렛 시스템으로 스타크래프트 브루드워 유즈맵 중에서도 손꼽히는 방어 전략 경험을 제공한다. Turret Defense 2004 is a use map set on a desert tileset with a size of 1024×1024, where players must build turrets in the limited area surrounding their central base to fend off increasingly powerful enemy waves. At the start, basic resources are given, and by defeating the initial Zerglings and Zealots in the first wave, players gather minerals and gas to upgrade or construct various turret types. Turrets differ in range and damage; some deal splash damage effective against clustered enemies, while others deliver high single‑target penetration. The map does not follow a fixed lane layout; instead, turrets can be placed freely, allowing strategies such as chokepoint blocking using narrow terrain or occupying high ground for superior firing lines. As waves progress, enemy health and numbers increase exponentially, and special units like lurkers or hydralisks appear, exposing the weakness of ground‑only turrets that ignore air. Consequently, players must consider a mixed composition that covers both ground and air threats. Surviving the final wave fulfills the victory condition; failure results in the base being destroyed and a defeat. This map exemplifies a classic tower‑defense use map where victory hinges on strategic placement and timing of resources. Beginners can practice learning the range and damage of basic turrets, while experienced players enjoy a puzzle‑like challenge of maximizing efficiency within tight construction limits. Before playing, keep a few points in mind. First, because starting resources are limited, avoid over‑building early and prioritize essential turrets only. Second, securing high ground greatly extends turret range, so scout the map beforehand to identify advantageous spots. Third, anticipate when air units appear and prepare appropriate anti‑air turrets to prevent collapse in later waves. Overall, Turret Defense 2004 offers a clean desert backdrop and an intuitive turret system, providing one of the most memorable defensive strategy experiences among StarCraft: Brood War use maps.
![[2]사면매복 (Four Sides Ambush) 맵 미리보기](https://cdn-star-data.huzy.net/thumbnail_557836def2d3457caa34bead0f0f5387.jpg)
[2]사면매복 (Four Sides Ambush)
스타크래프트 브루드워의 유즈맵 [2]四面埋伏는 플레이어가 혼자서 컴퓨터 상대를 상대하는 컴까기 스타일의 디펜스 맵이다. 맵의 제목과 내부 설명에서 드러나듯, 플레이어는 스토리 라인을 따라遗留据点(남겨진 거점)을 파괴하고 적 세력을 제압하는 임무를 수행한다. 맵의 이름은 '사면매복(四面埋伏)'으로, 네 방향에서 적의 공격이 끊임없이 쏟아지는 디펜스 형식을 띠고 있다. 사막 테마의 타일셋을 기반으로 한 배경은 넓은 평원과 협곡으로 구성되어 있으며, 중앙에 위치한 플레이어 기지 주변으로 적의Spawn지역이 빙 둘러 배치되어 있다. 맵의 구조상 적의 공격 루트는 총 4방향으로 나뉘며, 각 방향에서 주기적으로 적 유닛이 출현한다. 플레이어는 초반부터 강력한 방어 타워를 건설할 수 있는 자원을 확보하며, 맵의 광활한 공간을 활용해 방어선을 구축해야 한다. 특히, 맵의 너비(8192x3072 해상도)가 넓기 때문에 초보 플레이어는 자원 확보와 방어선 구축에 어려움을 느낄 수 있다. 반면, 익숙한 플레이어는 다수의 멀티 멀티태스킹을 통해 효율적인 자원 관리와 타워 배치를 통해 장기전에 대비할 수 있다. 맵의 난이도는 설정된 트리거에 따라 좌우되지만, 일반적으로는 '보통' 수준으로 평가된다. 추천 대상은 스타크래프트의 디펜스 맵을 즐기는 플레이어, 특히 넓은 공간에서의 타워 디펜스 전략을 선호하는 유저에게 적합하다. 플레이 전에는 자원 확보와 초기 방어선 구축에 신경을 써야 하며, 각 방향의 공격 패턴을 숙지하는 것이 중요하다. 맵의 특성상 플레이 시간이 길어질 수 있으므로, 충분한 시간을 투자할 준비가 되어 있어야 한다. 또한, 맵의 해상도가 크기 때문에 저사양 PC에서는 렉이 발생할 수 있어 사양 점검도 추천한다. StarCraft: Brood War's custom map [2]四面埋伏 is a defense-style map where players face off against AI opponents in a solo "comp-ka" (computer-kill) format. As the title and in-game description suggest, players follow the storyline by destroying abandoned outposts (遗留据点) and suppressing enemy forces. The map's name, "사면매복 (Four-Sided Ambush)," reflects its defense structure, where relentless enemy attacks come from all four directions. The desert-themed tileset features vast plains and canyons, with the player's base centrally located and enemy spawn points encircling it. The map is divided into four distinct enemy attack routes, each spawning units periodically. Players start by securing resources to build powerful defensive towers and must construct defensive lines across the expansive terrain. Due to the map's large scale (8192x3072 resolution), beginners may struggle with resource gathering and base defense, while experienced players can optimize resource management and tower placement through multitasking for long-term survival. The difficulty varies based on triggers but is generally rated as "normal." This map is recommended for players who enjoy StarCraft defense maps, especially those who prefer tower defense strategies in wide-open spaces. Before playing, focus on securing resources and setting up early defenses, and familiarize yourself with each direction's attack patterns. Expect lengthy play sessions, so allocate sufficient time. Additionally, the map's high resolution may cause lag on low-end PCs, so checking system requirements is advised.
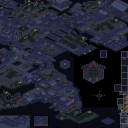
왕의기사 Antibirth
스타크래프트 브루드워의 대표적인 타워 디펜스 유즈맵인 '왕의기사 Antibirth'는 화산 테마의 광활한 맵 위에서 펼쳐지는 전략적 방어전을 경험할 수 있는 작품이다. 맵은 중앙의 넓은 평야를 중심으로 양측에서 끊임없이 몰려드는 적의 웨이브를 막아내는 구조로 설계되어 있으며, 플레이어는 각자의 위치에서 타워를 건설하고 업그레이드하여 방어선을 구축해야 한다. 맵 중앙에는 넓은 통로와 협소한 틈새가 조화롭게 배치되어 있어, 적의 공격 패턴에 따라 타워 배치 전략을 유동적으로 변경할 수 있다. 특히, 맵 좌우측에는Resource가 배치된 지역이 보이며, 이를 활용한 자원 수집과 타워 건설의 균형이 게임의 핵심 포인트로 작용한다. 맵의 난이도는 상대적으로 높은 편으로, 초보자가 처음 접하기에는 다소 어려운 구조를 가지고 있어 충분한 사전 숙지가 필요하다. 또한, 맵의 진행 방식은 웨이브가 점점 강해지는 방식으로, 후속 웨이브에서 등장하는 적의 종류와 수가 점차 증가하여 플레이어의 긴장감을 지속적으로 유도한다. 추천 대상은 타워 디펜스 장르를 즐기는 플레이어이며, 특히 전략적 사고와 빠른 판단력이 요구되는 맵을 선호하는 경우 필수적으로 플레이해볼 만한 작품이다. 플레이 전에는 맵의Resource 배치와 주요 통로, 그리고 적의 웨이브 패턴을 미리 숙지하는 것이 좋으며, 타워의 효율적인 배치와 업그레이드 타이밍을 carefully 계획해야 한다. 맵의 난이도를 낮추기 위해 초반에는 방어에 중점을 두고, 자원을 충분히 확보한 후 강력한 타워를 건설하는 전략을 추천한다. Starcraft: Brood War's iconic tower defense custom map, "King's Knight Antibirth," offers a strategic defensive battle set across a vast volcanic-themed map. Designed with a central open plain, the map challenges players to defend against endless waves of enemies approaching from both sides, requiring them to construct and upgrade towers from their respective positions. The map balances wide pathways and narrow gaps, allowing for flexible tower placement strategies depending on enemy attack patterns. Notably, resource-rich areas on the left and right sides of the map play a crucial role, as balancing resource gathering with tower construction becomes a key aspect of gameplay. The difficulty is relatively high, with a structure that may be challenging for beginners, necessitating thorough preparation beforehand. The progression system escalates with increasingly powerful waves, where later stages introduce more numerous and varied enemies to keep players on edge. This map is highly recommended for fans of the tower defense genre, especially those who enjoy maps demanding strategic thinking and quick decision-making. Before playing, it's advisable to familiarize yourself with resource distribution, key pathways, and enemy wave patterns. Efficient tower placement and timely upgrades are essential, so planning ahead is crucial. For a smoother experience, prioritize defense early on, secure ample resources, and then focus on building powerful towers.
최근 등록된 맵
새로 추가된 파일과 버전을 확인하세요.
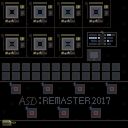
공중 스플래시 디펜스 R Final (Air Splash Def : R Final)
공중 스플래시 디펜스 R Final은 우주 타일셋을 바탕으로 한 128x128 타일 크기의 대규모 유즈맵으로, 최대 7명이 동시에 참여할 수 있는 협동형 타워 디펜스 게임이다. 맑은 밤하늘을 배경으로 한 우주 공간에 플레이어는 기지를 지키면서 공중 유닛에게 특화된 스플래시 데미지를 주는 방어 tower를 건설해야 한다. 초반에는 저글링 수준의 약한 공중 유닛이 등장하지만, 시간이 지날수록 베틀크루저와 캐리어와 같은 중장갑 공중 유닛이 파도를 이루며 공격해 오므로, 플레이어는 타워의 사거리와 공격 속도를 균형 있게 업그레이드해야 한다. 자원은 맵 중앙에 배치된 광물과 가스 지점을 점령하여 지속적으로 공급받으며, 점령 시마다 제공되는 보너스 자원이 전략적 선택을 중요하게 만든다. 또한, 특정 파도마다 pojawляться 보스 유닛이 존재하여, 이를 처치하면 특별한 기술 포인트를 획득할 수 있어 타워에 독특한 능력을 부여할 수 있다. 이러한 진행 방식은 단순히 타워를 배치하는 것 이상의 깊이 있는 의사결정을 요구하며, 멀티플레이 시에는 역할을 분담하여 전선 방어를 담당하는 플레이어와 후방 지원을 담당하는 플레이어로 나누어 협력하면 효율이 크게 상승한다. 초보자에게는 초기 파도가 비교적 느려 기본 메커니즘을 익히기에 적합하고, 숙련자는 고난도 파도와 보스전에서 최적의 타워 조합을 찾는 재미를 느낄 수 있다. 플레이 전에는 맵 내의 자원 분포와 타워 사거리 표시를 확인하고, 팀원과의 소통을 위한 채널을 마련하는 것이 좋다. Air Splash Def : R Final is a large-scale UMS map based on the space tileset with 128x128 tiles, allowing up to seven players to cooperate in a tower defense format. Set against a clear night sky in outer space, players must defend their base by constructing towers that deal splash damage specifically to air units. Early waves feature weak air units comparable to zerglings, but as time progresses, heavily armored air units such as battlecruisers and carriers appear in waves, forcing players to balance tower range and attack speed through upgrades. Resources are supplied continuously by capturing mineral and gas vents located at the map’s center, and each capture grants bonus resources that make strategic positioning crucial. Certain waves also spawn boss units; defeating them awards special skill points that can grant unique abilities to towers. This progression demands deeper decision‑making beyond mere tower placement, and in multiplayer, assigning roles—such as frontline defenders and rear supporters—greatly improves efficiency. Beginners benefit from the slower initial waves to learn core mechanics, while experienced players enjoy the challenge of optimizing tower compositions against high‑difficulty waves and boss encounters. Before playing, check the distribution of resources and tower range indicators on the map, and establish a communication channel with teammates for better coordination.
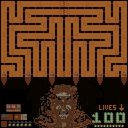
놀라운 터렛: 크래시임팩트 (Amazing Turret: CrashImpact)
Amazing Turret: CrashImpact는 황혼 타일셋을 활용한 4096x4096 규모의 맵으로, 터렛을 배치하여 적의 파도를 막는 전형적인 타워 디펜스 유즈맵이다. 본 맵은 베타 버전으로 제공되며, 설명에 따르면 버그나 난이도 편차가 클 수 있다고 명시되어 있어 실제 플레이 시 예상치 못한 상황이 발생할 수 있다. 플레이어는 최대 6명이 동시에 참여할 수 있으며, 팀 구분이 없어 각자 개별적으로 터렛을 건설하고 업그레이드하는 방식으로 진행된다. 자원은 일정 간격으로 공급되며, 이를 활용해 기본 포탑부터 고급 레이저 포탑까지 다양한 방어 시설을 짓고, 적 유닛이 경로를 따라 다가올 때마다 사격을 가한다. 맵 중앙에 마련된 긴 길은 적의 이동 경로를 정형화시켜, 플레이어는 길 양쪽에 타워를 배치해 효율적인 사격 구역을 만들 수 있다. 베타 특성상 일부 트리거가 미완성되어 자원 공급이 끊기거나 적 스폰이 과도해지는 현상이 나타날 수 있으며, 이는 난이도를 지나치게 쉽게 또는 어렵게 만든다. 따라서 플레이 전에는 최신 버전 패치 여부를 확인하고, 가능한 경우 친구들과 협력해 자원을 공유하며 전략을 조정하는 것이 권장된다. 초보자에게는 터렛 기본 업그레이드 경로를 먼저 익히고, 숙련자라면 제한된 자원으로 최대 효율을 내는 조합을 실험해 보는 재미가 있다. 전반적으로 빠른 판단과 공간 활용 능력이 요구되는 이 맵은 타워 디펜스 팬과 전략적 배치를 즐기는 유저에게 적합하며, 베타 특성을 감안해 오류에 대한 인내심을 가진 플레이어가 도전하기에 좋다. Amazing Turret: CrashImpact is a tower defense UMS map set on a 4096x4096 map using the Twilight tileset, where players place turrets to block waves of enemies. As a beta version, the description warns of possible bugs and large difficulty swings, so unexpected issues may arise during play. Up to six players can join simultaneously with no team division; each player independently builds and upgrades turrets. Resources are supplied at regular intervals, allowing construction of everything from basic cannons to advanced laser turrets to fire on enemy units that travel along a set path. A long central corridor formalizes enemy movement, enabling players to place towers on both sides for efficient firing zones. Due to its beta status, some triggers may be incomplete, causing resource cut‑offs or excessive enemy spawns that can make the difficulty feel too easy or too hard. Before playing, check for any available patches and, if possible, cooperate with friends to share resources and adjust strategies. Beginners should first learn the basic turret upgrade paths, while experienced players can experiment with combinations that maximize efficiency under limited resource conditions. Overall, the map demands quick thinking and spatial management, making it suitable for tower defense fans and users who enjoy strategic placement, provided they have tolerance for beta‑era bugs.
터렛 디펜스 3oooo1-Final- (Turret Defense 3oooo1-Final-)
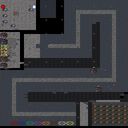
터렛 디펜스 3oooo1-Final-은 우주 타일셋을 바탕으로 한 넓은 2048×2048 크기의 맵으로, 최대 6명이 동시에 참여할 수 있는 협동식 방어 유즈맵이다. 이미지에서 확인할 수 있는 구조는 중앙에 위치한 메인 기지 주변으로 다양한 타워 건설 가능한 구역이 radially 퍼져 있고, 외부에서 지속적으로 다가오는 적 유닛 파동에 맞춰 플레이어는 자원을 수집하고 타워를 설치·업그레이드한다. 추정되는 진행 방식은 초반에 기본 자원을 주어 간단한 포탑을 세우고, 파드가 지나갈 때마다 얻는 미네랄이나 가스를 바탕으로 더 강력한 레이저 turret나 미사일 배터리를 해금하는 형태이며, 최종 웨이브를 클리어하면 승리 조건을 만족하는 것으로 보인다. 맵 내부 설명에 따르면 수정이 반복되어 최종 버전이므로 밸런스 조정이 꽤 이루어진 것으로 추정되며, 우주 특유의 어두운 배경과 반짝이는 별빛 타일이 방어 전망을 강조한다. 플레이어는 각자 독립적인 자원 구역을 가질 수도 있고, 혹은 공유 자원을 두고 협의하면서 타워 배치를 최적화해야 하는데, 이는 전략적인 분담과 즉각적인 응답력이 중요한 포인트다. 추천 대상은 타워 디펜스와 유즈맵을 즐기는 스타크래프트 브루드워 팬이며, 특히 협동 플레이를 선호하거나 친지와 함께 긴 시간 동안 전략을 짜고 싶은 그룹에 적합하다. 플레이 전 확인해야 할 점은 맵이 넓은 만큼 초기 자원 분배가 균등하지 않을 수 있으므로 시작 위치와 자원 유입 위치를 미리 살피고, 필요 시 채팅을 통해 역할을 정하는 것이 좋다. Turret Defense 3oooo1-Final- is a spacious 2048×2048 map based on the space tileset, allowing up to six players to participate in a cooperative defense UMS. As seen in the images, the layout features a central main base surrounded by radially arranged zones where various towers can be built, and players must respond to continuous waves of enemy units approaching from the outskirts by gathering resources and constructing and upgrading towers. The inferred gameplay begins with a modest amount of resources to set up basic turrets; as each wave passes, players earn minerals or gas that can be spent to unlock more powerful laser turrets or missile batteries, and surviving the final wave appears to satisfy the victory condition. The map description notes repeated revisions, suggesting that considerable balance tuning has been applied in this final version, and the dark space backdrop with glittering star tiles emphasizes the defensive outlook. Players may each have independent resource zones or share a common pool, requiring negotiation and optimal tower placement; this calls for strategic division of labor and quick responsiveness. The map is recommended for fans of StarCraft: Brood War who enjoy tower defense and UMS maps, especially those who prefer cooperative play or want to spend extended sessions with friends devising tactics. Before playing, it is worth checking that, due to the map’s large size, initial resource distribution may not be perfectly even, so reviewing starting positions and resource inflow points in advance—and, if needed, assigning roles via chat—can help ensure a smooth start.
터렛 디펜스 =Nuclear= (Turret Defense =Nuclear=)
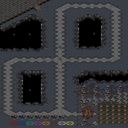
터렛 디펜스 =Nuclear=은 우주 타일셋을 배경으로 한 전형적인 타워 디펜스 유즈맵으로, 최대 7명의 플레이어가協力하여 점점 강해지는 적 웨이브에 맞서 터렛을 건설하고 업그레이드하는 방식으로 진행된다. 지도 중앙에 위치한 시작 지점에서 각 플레이어는 자원을 모아 기본 터렛을 설치하고, 특정 지점에 추가 포탑을 배치하여 적의 경로를 차단하거나 피해를 줄이는 전략을 세워야 한다. 적들은 일정 간격으로 등장하며, 웨이브가 진행될수록 체력과 공격력이 증가하고, 특수 유닛이나 보스가 나타나기도 한다. 자원은 적을 처치하거나 맵 곳곳에散布된 광물과 가스를 채취하여 얻으며, 이를 통해 터렛의 사거리, 데미지, 발사 속도를 강화하거나 새로운 유형의 포탑을 잠금 해제할 수 있다. 게임은 모든 웨이브를 클리어하거나 모든 플레이어가 생존할 때 vittoria를 선언하며, 웨이브 도중에 전원이 sconfitta되면 게임이 종료된다. 협동 플레이가 핵심이라서 역할 분담과 실시간 소통이胜利의 열쇠가 되며, 초보자도 기본적인 타워 디펜스 메커니즘을 쉽게 이해할 수 있지만, 고난도 웨이브에서는 최적의 터렛 조합과 타이밍이 요구되어 숙련된 플레이어에게도 도전 요소가 된다. 따라서 전략적 사고와 팀워크를 좋아하는 유저에게 추천하며, 플레이 전에는 자원 관리와 터렛 업그레이드 우선순위를 미리 고민해 보는 것이 좋다. Turret Defense =Nuclear= is a classic tower defense UMS map set on a space tileset, where up to seven players cooperate to build and upgrade turrets against increasingly strong enemy waves. Starting from a central spawn point, each player gathers resources to place basic turrets and strategically adds additional turrets at key points to block enemy paths or reduce damage. Enemies appear at regular intervals, gaining health and attack power as waves progress, with special units or bosses occasionally spawning. Resources are earned by killing enemies or harvesting minerals and gas scattered across the map, allowing players to increase turret range, damage, fire rate, or unlock new turret types. Victory is declared after clearing all waves or when all players survive; if all players are defeated during a wave, the game ends. Success hinges on role division and real‑time communication, making it accessible to newcomers familiar with basic tower defense mechanics while still challenging veterans who must optimize turret combinations and timing on higher difficulty waves. The map is recommended for players who enjoy strategic thinking and teamwork; before playing, consider resource management and turret upgrade priorities in advance.
성큰 18웨이 파이널 (Sunken 18 Way_Final)
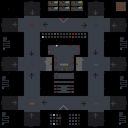
성큰 18웨이 파이널은 성큰 colony를 이용해 18개의 진로를 방어하는 타워 디펜스 유즈맵이다. 맵은 우주 타일셋을 배경으로 1024×1024 크기의 지도에 18개의 직선형 길이 배치되어 있고, 각 길 끝에 적 유닛이 지속적으로 파도처럼 밀어붙인다. 플레이어는 초반에 주어진 제한된 자원을 이용해 성큰을 건설하고, 업그레이드 또는 추가 건물을 통해 공격력을 높여야 한다. 적의 유닛 종류는 저글링, 히드라리스크, 뮤탈리스크 등으로 파도가 진행될수록 체력과 공격력이 상승하며, 특수 웨이브에서는 초거대 유닛이 등장해 순간적인 집중 방어를 요구한다. 게임은 협동 모드와 자유 경쟁 모드를 지원하며, 최대 6명이 동시에 참여해 각자 맡은 길이나 공동 방어 구역을 운영할 수 있다. 승 조건은 설정한 웨이브 수를 모두 생존하는 것이며, 실패 시는 어느 하나의 길이 뚫려 기지가 파괴될 때이다. 맵은 초보자도 쉽게 이해할 수 있는 직관적인 아이콘과 tooltip을 제공하지만, 높은 난이도 웨이브에서는 자원 효율과 타이밍이 승패를 좌우하므로 중급 이상의 플레이어가 전략적인 배치를 연습하기에 적합하다. 플레이 전에는 성큰의 사거리와 건물 제약을 확인하고, 초기 자원 분배 계획을 세워두는 것이 좋다. 또한, 멀티플레이 시에는 역할 분담과 의사소통이 승리에 큰 영향을 미치므로 음성 채팅이나 빠른 채팅을 활용하는 것이 권장된다. Sunken 18 Way_Final is a tower defense UMS map that uses sunken colonies to defend 18 lanes. Set on a space tileset, the 1024×1024 map features 18 straight lanes, with enemy units continuously streaming from the ends of each lane. Players start with limited resources, building sunken colonies and upgrading or adding structures to increase firepower. Enemy units include zerglings, hydralisks, and mutalisks, gaining health and damage as waves progress, while special waves spawn massive units that demand focused defense. The map supports both cooperative and free‑for‑all modes, allowing up to six players to each take a lane or share a defense zone. Victory is achieved by surviving all set waves; defeat occurs when any lane is breached and the base is destroyed. The map provides intuitive icons and tooltips for beginners, but higher waves require efficient resource management and timing, making it suitable for intermediate‑plus players who want to practice strategic placement. Before playing, check the range and placement limits of sunken colonies and plan an initial resource distribution. In multiplayer, role division and communication greatly affect victory, so using voice chat or quick chat is recommended.
신전부수기6 : 新바람의행진곡 (New Wind March v5.04)
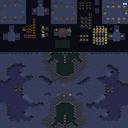
‘신전부수기6 : 新바람의행진곡’은 스타크래프트 브루드워의 대표적인 타워 디펜스형 유즈맵으로, 신전부수기 시리즈의 여섯 번째 작품이다. 이 맵은 플레이어가 적의 끊임없는 공격을 방어하면서 서서히 전진해 신전을 파괴하는 전략적 재미를 제공한다. 맵의 중앙에는 플레이어의 본진이 위치하며, 사방으로 뻗어나가는 길목마다 다양한 종류의 방어 건물을 설치할 수 있는 구조로 설계되어 있다. 특히 맵 상단의 핵 사용 가능 여부나 드랍쉽 자폭 버그 등 과거 버전에서 발견되었던 문제점이 v5.04에서 대부분 수정되어 안정적인 플레이 환경을 보장한다. 미네랄 캐서의 초반 물량 조절을 통해 게임의 밸런스를 맞췄다는 설명에서 알 수 있듯이, 플레이어는 초반부터 중반까지의 전략적 자원 관리와 방어 타워 배치에 주목해야 한다. 맵의 배경은 화산 타일셋으로 구성되어 있어 화산 지형이 주는 웅장한 분위기가 게임의 긴장감을 더한다. 맵의 진행 방식은 단순하면서도 깊이 있는 전략적 선택을 요구하며, 특히 전진기지에 방어 타워를 건설할 경우 발생하던 유닛 생산 위치 문제 등이 개선되어 플레이어의 전략적 선택지가 더욱 넓어졌다. 이 맵은 초보자부터 숙련자까지 모두 즐길 수 있는 난이도 균형을 갖추고 있으며, 특히 팀플레이보다는 개인 또는 소규모 팀 단위의 플레이에 최적화되어 있다. 맵을 처음 플레이하는 경우, 방어 타워의 종류와 배치 전략, 자원 관리 방법 등을 미리 숙지하고 시작하는 것이 좋다. 또한 맵 상단에서 핵을 사용할 수 없도록 제한되어 있어 핵을 통한 일방적인 승리가 불가능하다는 점도 특징적이다. 맵의 플레이 시간은 맵의 진행 속도와 플레이어의 전략에 따라 다르지만, 일반적으로 20분에서 40분 내외로 예상된다. 이 맵은 타워 디펜스 장르의 정석을 보여주는 동시에, 신전부수기 시리즈만의 독특한 재미와 전략적 깊이를 제공한다. 특히 v5.04 버전에서는 여러 가지 버그와 밸런스 문제가 개선되어 더욱 안정적이고 즐거운 플레이 경험을 제공한다. 맵의 구조상 방어 타워의 배치와 자원 관리가 게임의 승패를 좌우할 수 있으므로, 플레이어는 신중하게 전략을 세워야 한다. 또한 맵의 해상도가 4096 x 3072로 비교적 크기 때문에, 초반에는 맵의 전체 구조를 빠르게 파악하는 것이 중요하다. 이 맵은 타워 디펜스라는 장르에 익숙하지 않은 플레이어에게도 추천할 만한 맵으로, 전략적 사고와 실시간 방어 능력을 동시에 키울 수 있는 기회를 제공한다. 맵의 난이도는 중간 정도로 설정되어 있지만, 플레이어의 전략과 팀워크에 따라 난이도가 크게 달라질 수 있다. 특히 방어 타워의 배치와 업그레이드 타이밍을 잘 맞추는 것이 승리를 결정짓는 핵심 요소다. 맵의 변동성도 크지 않아서, 반복 플레이를 통해 최적의 전략을 찾아낼 수 있다는 점도 장점이다. 이 맵을 즐기기 위해서는 타워 디펜스라는 장르에 대한 기본적인 이해와 스타크래프트의 기본 조작법에 익숙해야 한다. 또한 맵의 버전 업데이트 내역을 확인하여 최신 버전에서 제공되는 기능과 밸런스를 확인하는 것도 중요하다. 맵의 전체적인 구조는 단순하지만, 전략적 깊이가 있어 여러 번 플레이해도 지루하지 않다. 특히 맵의 배경 음악이나 효과음 등이 게임의 분위기를 한층 끌어올려 주기 때문에, 몰입감 있는 플레이를 즐길 수 있다. "Temple Destruction 6: 'March of the New Wind' is a classic tower defense custom map in *StarCraft: Brood War* and the sixth installment in the Temple Destruction series. Players must defend against endless waves of enemies while advancing to destroy the enemy temple, offering a strategic challenge. The map features a central player base with branching paths where various defensive structures can be built. Most issues from past versions—such as the top-side nuke availability or the dropship suicide bug—have been fixed in v5.04, ensuring a stable and balanced gameplay experience. Balanced by adjusting early-game mineral income, the map emphasizes resource management and tower placement from the start to mid-game. The volcanic tile set creates a grand atmosphere that heightens the tension. While the core gameplay is straightforward, it demands deep strategic choices, especially with improvements to unit production positioning when building forward bases. Suitable for both beginners and experts, the map excels in solo or small-team play rather than large-scale team battles. First-time players should familiarize themselves with tower types, placement strategies, and resource management before starting. A key feature is the top-side nuke restriction, preventing one-sided victories via nuclear strikes. Playtime varies by strategy and pace but typically ranges from 20 to 40 minutes. This map exemplifies the tower defense genre while adding unique depth through the Temple Destruction series. The v5.04 update addresses numerous bugs and balance issues, delivering a smoother and more enjoyable experience. Victory often hinges on tower placement and resource efficiency, requiring careful planning. With a high resolution of 4096 x 3072, quickly grasping the map’s layout early on is crucial. Recommended even for players unfamiliar with tower defense, it hones both strategic thinking and real-time defensive skills. While set to a moderate difficulty, the actual challenge depends heavily on player strategy and teamwork. Success often comes down to optimal tower placement and upgrade timing. The map’s low variability makes it replayable, allowing players to refine their strategies over time. To fully enjoy it, players should understand tower defense basics and *StarCraft* mechanics, while checking update logs ensures access to the latest features and balance. Despite its simple structure, the map offers deep strategy, preventing monotony even after multiple plays. The background music and sound effects further enhance immersion, making for an engaging experience."
Amazing 터렛 디펜스 2020 파이널 (Amazing Turret Defense 2020 Final)
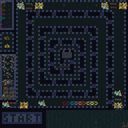
‘AmazingTurretDefense 2020 Final’은 스타크래프트: 브루드워의 대표적인 타워 디펜스 장르 유즈맵으로, 2010년 버전에서 출발해 2020년 최종 버전으로 거듭난 작품이다. 맵 이름은 ‘Amazing Turret Defense’로, 플레이어는 중앙 기지에서 적의 끊임없는 웨이브를 막아내며 타워를 건설하고 업그레이드하는 방식으로 진행된다. 맵의 특징은 ‘Spiral’이라는 이름에 걸맞게, 적의 이동 경로가 나선형으로 배치되어 있어 타워 배치의 전략적 깊이가 요구된다. 내부 설명에서도 ‘이제야말로 진정한 도전’이라는 문구가 강조되듯, 난이도가 높게 설계되어 있어 숙련자들에게도 흥미로운 경험을 제공한다. 이미지가 없지만 맵 제목과 파일명, 내부 설명을 종합했을 때 ‘화산’ 타일셋을 사용하여 화산 지형 위의 기지와 퍼져 있는 적 웨이브가 인상적인 맵으로 추정된다. 타워 디펜스 장르의 특성상, 플레이어는Resource Management(자원 관리)와 Positioning(위치 선정)을 중시해야 하며, 특히 스파이럴 형태의 길목에서 적의 공세를 효과적으로 저지할 수 있는 타워 조합을 신중히 선택해야 한다. 추천 대상은 타워 디펜스를 любители(좋아하는) 플레이어, 전략적 사고를 즐기는 게이머, 그리고 브루드워 유즈맵의 깊이를 경험하고자 하는 이들에게 적합하다. 플레이 전에는 맵의 특성상 타워의 사거리와 업그레이드 경로, 적의 웨이브 타이밍을 미리 숙지하고 임하는 것이 좋다. 특히 ‘Final’이라는 이름에 걸맞게 밸런스가 finely tuned(미세 조정)되어 있어, 초보자의 경우 난이도 조절이나 튜토리얼 모드를 찾아보는 것도 좋은 전략이다. AmazingTurretDefense 2020 Final is a renowned tower defense custom map for StarCraft: Brood War, evolving from the 2010 version into its 2020 final release. The map title, Amazing Turret Defense, reflects its core gameplay: players defend a central base against relentless enemy waves by strategically placing and upgrading towers. The name "Spiral" hints at the map's unique design, where enemy paths twist in a spiral pattern, demanding precise tower placement for optimal defense. The internal description's emphasis on "now it's actually a TRUE challenge" underscores the map's high difficulty, catering to experienced players seeking depth and strategy. While the image is unavailable, the title, filename, and description suggest a volcanic tileset, with the base situated on rugged terrain and enemy waves spreading across the spiral paths. As a tower defense map, core mechanics revolve around resource management and strategic positioning, particularly in the spiral sections where efficient tower placement is critical to withstand enemy assaults. This map is ideal for fans of tower defense games, players who enjoy strategic thinking, and those looking to experience the intricate depth of Brood War custom maps. Before playing, it's advisable to familiarize yourself with tower ranges, upgrade paths, and enemy wave timings. Given the "Final" designation, the balance is finely tuned, so beginners may benefit from seeking difficulty adjustments or tutorial modes to ease into the experience.
터렛 디펜스 2004 (Turret Defense 2004)
터렛 디펜스 2004는 사막 타일셋을 기반으로 한 1024×1024 크기의 유즈맵으로, 플레이어는 중앙에 위치한 기지를 둘러싼 제한된 영역에 터렛을 건설하여 점점 강해지는 적 파동을 막아야 한다. 게임 시작 시 기본 자원이 주어지고, 첫 웨이브에서 나오는 저글링과 젤럿을 처치하며 미네랄과 가스를 모아 다양한 타입의 터렛을 업그레이드하거나 새로 설치할 수 있다. 터렛은 사거리와 피해량이 다르며, 일부는 스플래시 데미지를 주어 군집된 적에게 효과적이며, 다른 유닛은 단일 대상에 높은 관통력을 갖는다. 맵 전체는 라인 기반이 아닌 자유 배치 형태여서 지형의 좁은 통로를 활용한 입구막기 전략이나, 높은 지대를 차지한 사격 towers를 통해 효율적인 방어 라인을 구성할 수 있다. 웨이브가 진행될수록 적의 체력과 수가 기하급수적으로 증가하며, 특수한 유닛인 거머리나 히드라리스크가 등장해 항공을 무시하는 지상 전용 터렛의 한계를 드러내므로, 플레이어는 지상과 공중을 모두 커버할 수 있는 혼합 구성을 고민해야 한다. 최종 웨이브를 살아남으면 vittoria 조건이 충족되며, 실패 시는 기지가 파괴되어 패배 처리된다. 이 맵은 전략적 배치와 자원 타이밍이 승부를 가르는 전형적인 타워 디펜스 유즈맵으로, 초보자에게는 기본 터렛의 사거리와 데미지 값을 익히는 연습장이 되며, 숙련자들에게는 제한된 건설 공간 속에서 최적의 효율을 내는 퍼즐 같은 요소를 제공한다. 플레이 전에는 확인해야 할 점이 몇 가지 있다. 첫째, 시작 자원이 제한적이므로 초기 웨이브에서 과도한 건조를 피하고 필수 터렛만 먼저 설치하는 것이 중요하다. 둘째, 지형의 높은 곳을 선점하면 사거리 이점을 크게 얻을 수 있으므로, 맵 전체를 살펴보고 유리한 위치를 미리 파악해 두는 것이 좋다. 셋째, 공중 유닛이 등장하는 시점을 미리 파악하고, 그에 맞는 대공 터렛을 준비해 두면 후속 웨이브에서의 붕괴를 방지할 수 있다. 전반적으로 터렛 디펜스 2004는 깔끔한 사막 배경과 직관적인 터렛 시스템으로 스타크래프트 브루드워 유즈맵 중에서도 손꼽히는 방어 전략 경험을 제공한다. Turret Defense 2004 is a use map set on a desert tileset with a size of 1024×1024, where players must build turrets in the limited area surrounding their central base to fend off increasingly powerful enemy waves. At the start, basic resources are given, and by defeating the initial Zerglings and Zealots in the first wave, players gather minerals and gas to upgrade or construct various turret types. Turrets differ in range and damage; some deal splash damage effective against clustered enemies, while others deliver high single‑target penetration. The map does not follow a fixed lane layout; instead, turrets can be placed freely, allowing strategies such as chokepoint blocking using narrow terrain or occupying high ground for superior firing lines. As waves progress, enemy health and numbers increase exponentially, and special units like lurkers or hydralisks appear, exposing the weakness of ground‑only turrets that ignore air. Consequently, players must consider a mixed composition that covers both ground and air threats. Surviving the final wave fulfills the victory condition; failure results in the base being destroyed and a defeat. This map exemplifies a classic tower‑defense use map where victory hinges on strategic placement and timing of resources. Beginners can practice learning the range and damage of basic turrets, while experienced players enjoy a puzzle‑like challenge of maximizing efficiency within tight construction limits. Before playing, keep a few points in mind. First, because starting resources are limited, avoid over‑building early and prioritize essential turrets only. Second, securing high ground greatly extends turret range, so scout the map beforehand to identify advantageous spots. Third, anticipate when air units appear and prepare appropriate anti‑air turrets to prevent collapse in later waves. Overall, Turret Defense 2004 offers a clean desert backdrop and an intuitive turret system, providing one of the most memorable defensive strategy experiences among StarCraft: Brood War use maps.
맵 선택 가이드
태그는 맵의 핵심 특징을 빠르게 설명하지만 제작 버전마다 규칙이 다를 수 있습니다. 상세 설명에서 권장 인원, 난이도, 플레이 시간과 버전을 함께 확인한 뒤 다운로드하세요.