
타워 스타크래프트 맵 모음
'타워' 태그가 등록된 맵을 모았습니다. 장르 하나로 찾기 어려운 플레이 방식, 난이도와 특징을 중심으로 인기 맵과 최신 맵을 비교해 보세요.
- 등록 맵
- 12개
- 누적 다운로드
- 0
- 누적 조회
- 614
인기 맵
다운로드와 조회 반응이 높은 맵입니다.
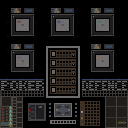
뉴 포커 디펜스 0.7 (New Poker Defence 0.7)
‘뉴 포커 디펜스 0.7’은 스타크래프트: 브루드워의 유즈맵으로, 디펜스 장르의 특징을 살린 전략형 커스텀 맵이다. 맵의 전체적인 분위기는 우주 테마로 구성되어 있으며, 중앙에 위치한 방어 거점을 중심으로 적 유닛이 끊임없이 몰려오는 구조를 갖추고 있다. 플레이어는 시작 지점에서 자원과 건물을 관리하면서 방어선을 구축하고, 적의 공격을 효율적으로 막아내야 한다. 맵 곳곳에 배치된 방어 타워와 유닛 생산 건물을 활용해 튼튼한 방어를 구축하는 것이 핵심이며, 적의 공격을 버텨내면서 일정 조건을 만족하면 승리할 수 있는 방식으로 진행된다. 특히, 맵의 하단과 좌우 측면에 위치한 입구는 적의 주 공격 경로로 예상되며, 이곳을 집중 방어하는 것이 중요하다. 맵의 난이도는 보통 수준으로 설정되어 있으며, 적의 공격 패턴과 타이밍을 숙지하고 방어 전략을 세우는 것이 관건이다. 초보 플레이어의 경우 방어 라인을 안정적으로 구축하는 데 어려움을 느낄 수 있지만, 점차 적응해 나가면서 방어 효율성을 높일 수 있다. 게임의 재미 요소는 방어 구조의 최적화와 자원 관리, 그리고 적의 공격 타이밍을 예측하는 전략적 사고에 있다. 또한, 맵의 우주 테마와 어울리는 시각적 요소들이 플레이어의 몰입감을 높이는 데 기여한다. 이 맵은 디펜스 장르를 좋아하는 플레이어들에게 특히 추천되며, 방어 전략을 세우고 자원을 효율적으로 관리하는 능력을 키우는 데 도움이 될 것이다. 또한, 팀 플레이가 가능한 구조로 디자인되어 있어 팀원과의 협력이 중요한 포인트이기도 하다. 플레이 전에는 맵의 입구 위치와 방어 타워의 배치, 그리고 적의 예상 공격 경로를 미리 확인해 두는 것이 좋다. 이 맵은 스타크래프트의 기본 메커니즘을 활용하면서도 디펜스 장르의 특성을 잘 살린 작품으로, 반복 플레이를 통해 점점 더 높은 난이도와 다양한 전략을 시도해 볼 수 있는 재미가 있다. 특히, 방어 라인을 강화하고 적의 공격을 효율적으로 막아내는 순간은 상당한 성취감을 느낄 수 있다. 이 맵을 즐기기 위해서는 방어 전략과 자원 관리에 대한 기본적인 이해가 필요하며, 이를 바탕으로 점차 숙련도를 높여 나갈 수 있다. "Neo Poker Defense 0.7" is a custom map for *StarCraft: Brood War* that embodies the strategic depth of the defense genre. Set in a cosmic theme, the map centers around a core defense point where enemies continuously swarm in waves. Players must manage resources and structures from their starting position, building a strong defense while efficiently repelling attacks. The key to success lies in strategically placing defensive towers and production buildings to fortify your lines, and victory is achieved by surviving until certain conditions are met. The lower and side entrances are expected to be the primary attack routes, making them critical focal points for defense. The map is designed with moderate difficulty, requiring players to study enemy attack patterns and timing to develop effective strategies. While beginners may struggle to establish stable defense lines at first, they can gradually improve their efficiency through repeated play. The game’s appeal comes from optimizing defenses, managing resources wisely, and strategizing around enemy attack timings. The immersive visuals, themed to match the cosmic setting, further enhance the experience. This map is especially recommended for fans of the defense genre, as it helps hone skills in strategic planning and resource management. Its design also supports team play, making cooperation with teammates a vital aspect. Before starting, it’s wise to familiarize yourself with the entrance locations, tower placements, and likely enemy attack paths. By leveraging *StarCraft*’s core mechanics while staying true to the defense genre, the map offers replayability with escalating challenges and varied tactics. The satisfaction of reinforcing your lines and successfully fending off waves is well worth the effort, though a basic grasp of defense strategies and resource management is essential to progress and improve over time.
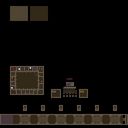
링 디펜스 프로페셔널 (Ling Def Professional)
스타크래프트 브루드워의 대표적인 디펜스 유즈맵인 '링 디펜스 프로페셔널(Ling Def Professional)'은 저글링을 상대로 한 방어전을 펼치는 맵으로, 프로페셔널급 난이도를 자랑하는 작품이다. 맵의 구조는 중앙에 위치한 본진을 중심으로 네 방향에서 쏟아지는 저글링 웨이브를 막아내는 방식으로 구성되어 있으며, 방어에 성공할 때마다 보상을 얻으며 점차 난이도가 상승하는 구조를 가지고 있다. 플레이어는 기본적으로 저글링을 막아내야 하지만, 특정 조건을 만족하면 추가적인 유닛이나 건물을 확보할 수 있는 기회가 주어지며, 이를 통해 방어력을 강화하거나 공격적인 플레이로 전환할 수 있다. 맵의 특징 중 하나는 맵 중앙에 위치한 '방어 타워'로, 이 타워를 업그레이드하여 저글링의 진격을 저지할 수 있는 추가적인 방어선을 구축할 수 있다는 점이다. 또한, 맵의 가장자리에 위치한 '보급 기지'에서는 자원을 채집할 수 있으며, 이를 통해 추가적인 유닛이나 건물을 구매할 수 있어 전략적인 선택이 요구된다. 맵의 진행은 웨이브별로 나뉘며, 각 웨이브마다 저글링의 수가 증가하고 공격 패턴이 복잡해지므로 플레이어는 지속적인 대비를 해야 한다. 이 맵은 단일 플레이어 또는 팀 플레이로 즐길 수 있으며, 특히 저글링의 압박을 버텨내고 최후까지 살아남는 플레이어에게 높은 만족감을 제공한다. 초보자의 경우 방어 타워와 자원의 관리, 그리고 저글링의 패턴을 익히는 데 시간이 걸릴 수 있으므로, 맵의 구조와 기본 전략을 충분히 숙지한 후 플레이하는 것이 좋다. 또한, 맵의 난이도가 높기 때문에 팀플레이를 권장하며, 팀원 간의 원활한 소통과 역할 분담이 성공의 열쇠가 된다. 맵의 분위기는 잔인한 저글링의 공격과 본진의 방어라는 다소 무거운 테마이지만, 이를 극복하고 승리를 거머쥐는 순간의 쾌감은 다른 맵에서는 느낄 수 없는 매력이다. 맵의 전체적인 밸런스는 프로페셔널급답게 잘 짜여져 있으며, 초반의 여유로운 자원 관리와 중반의 방어 전략, 후반의Resource Management, strategic tower placement, and adaptive unit control are essential to overcoming the increasing waves of zerglings. The map's atmosphere is intense, with the constant pressure of zergling hordes testing your defenses, but the sense of achievement upon successfully repelling each wave is unparalleled in other defense maps. The professional difficulty ensures a challenging experience, making it ideal for players seeking a tough yet rewarding challenge that demands both skill and strategy.
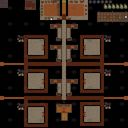
점령 방어전 (Squatting Defenders)
스타크래프트 브루드워의 숨은 보석 중 하나인 'Squatting Defenders'는 디펜스 장르의 유즈맵으로, 플레이어들이 적의 끊임없는 공격을 방어하며 생존을 다투는 긴장감 넘치는 게임입니다. 맵은 중앙에 위치한 본진과 이를 둘러싼 방어 시설, 그리고 끊임없이 쏟아지는 적의 웨이브로 구성되어 있습니다. 플레이어는 본진을 지키기 위해 건물을 건설하고 유닛을 배치해야 하며, 각 웨이브가 끝날 때마다 새로운 적의 공격 패턴을 경험할 수 있습니다. 맵의 특징은 방어 시설의 배치와 업그레이드 시스템으로, 이를 통해 플레이어는 전략적인 선택을 강요받습니다. 예를 들어, 특정 위치에 포격을 집중하거나, 방어 타워의 레벨을 올려 적의 공격을 효과적으로 차단할 수 있습니다. 또한, 맵의 디자인과 색상 구성은 황혼 테마를 사용하여 시각적으로도 매력적입니다. 이 맵은 특히 디펜스 장르를 좋아하는 플레이어들에게 추천되며, 초보자와 숙련자 모두 즐길 수 있도록 난이도 조절이 가능한 구조로 설계되었습니다. 플레이 전에는 방어 시설의 배치와 업그레이드 우선순위를 carefully하게 계획하는 것이 중요합니다. 적의 공격 패턴을 미리 파악하고, 보완할 수 있는 방어 체계를 구축하는 것이 승리의 열쇠가 될 것입니다. 또한, 맵의 중앙 본진을 중심으로 한 공격 루트는 거의 고정되어 있으므로, 이를 바탕으로 방어 전략을 수립하는 것이 좋습니다. 이 맵은 6인 플레이를 지원하며, 각 플레이어는 개별적인 본진을 방어해야 합니다. 팀 플레이를 통해 협동하는 것도 가능하며, 이를 통해 더욱 전략적인 플레이가 가능해집니다. 맵의 긴장감과 연속된 전투는 플레이어에게 끊임없는 긴장감을 제공하며, 한 번 플레이하면 빠져들 수밖에 없는 매력이 있습니다. 이 맵은 디펜스 유즈맵의 정석을 보여주며, 스타크래프트 브루드워의 유즈맵 중에서도 손꼽히는佳作입니다. Squatting Defenders is one of the hidden gems in StarCraft: Brood War's custom maps, offering an intense defensive experience where players must protect their main base from relentless enemy waves. The map features a central base surrounded by defensive structures, with waves of enemies continuously attacking from multiple directions. Players must strategically place buildings and units, upgrading defenses to withstand progressively stronger assaults. The map's design emphasizes strategic placement of defensive towers and resource management, requiring players to make critical decisions at each stage. The twilight-themed aesthetics enhance the visual appeal, creating a moody and immersive atmosphere. This map is highly recommended for fans of the defense genre, catering to both beginners and experienced players with adjustable difficulty. Before playing, it's essential to plan your defense layout and prioritize upgrades to counter specific enemy patterns. The fixed attack routes from the map's center allow for focused defensive strategies, making preparation key to survival. Supporting up to 6 players, the map can be played individually or cooperatively, adding a layer of teamwork and strategy. The constant pressure from enemy waves creates an adrenaline-filled experience that keeps players engaged. Squatting Defenders exemplifies the pinnacle of defense custom maps in StarCraft: Brood War, standing out as a must-play title for genre enthusiasts.
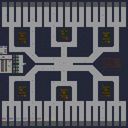
루러커 방어 36길 (Lurker Defense 36 Way)
이 맵은 4096×4096 타일 규모의 대형 디펜스 유즈맵으로, 6인 플레이를 기준으로 설계되었습니다. 전체 맵은 네 개의 대칭적인 구역으로 나뉘어 있으며, 각 구역마다 중앙에 방어진 초석과 주변에 여러 방어 타워가 배치된 구조를 가지고 있습니다. 플레이어는 각 구역의 입구에서 적물의 물결을 방어하며, 타워와 유닛을 전략적으로 배치하고 이동시켜 파동을 무력화해야 합니다. 방어 타워는 다양한 레벨과 스킬을 보유하고 있어 플레이어가 적의 종류와 파동 강도에 맞춰 조정할 수 있습니다. 맵은 비교적 균형 잡힌 진행 흐름을 보여주며, 초반에는 방어선을 구축하고 중반에는 여러 구역을 오가며 다각적인 전략을 구사해야 합니다. 특히 36개의 방어 라인이 존재하는 점에서 전략적 깊이와 리플레이 가치가 높습니다. 초보자에게는 조작 습득과 타워 배치가 수월하지만, 고수에게는 타이밍과 자원 관리 능력이 핵심입니다. 맵 내부에 존재하는 다양한 타워 유형과 유닛 스킬은 플레이어가 상황에 맞춰 맞춤 전략을 구사하도록 돕습니다. 또한, 각 구역의 입구와 출구에 배치된 트리거와 트리거 효과는 파동 발생 시점을 조절하여 전략적 타이밍을 조정할 수 있게 합니다. 이러한 요소들은 팀 협력과 개인 기술 모두를 테스트하는 풍부한 경험을 제공합니다. 따라서 이 맵은 6인 팀플레이를 선호하며, 방어 전략을 즐기는 플레이어에게 강력히 추천합니다. 맵을 시작하기 전에는 타워 배치와 유닛 스킬을 미리 점검하고, 적의 파동 패턴을 숙지하는 것이 승리의 관건이 됩니다. This map is a large defense custom map with a 4096×4096 tile size, designed for 6 players. The entire map is divided into four symmetric sectors, each featuring a central fortified base and surrounding defensive towers. Players start at the entrance of each sector and must defend against waves of units by strategically placing and moving towers and units to neutralize the attacks. The towers have multiple levels and skills, allowing players to adjust their strategy according to unit types and wave intensity. The map offers a balanced progression flow; early game focuses on building defenses, while mid‑late game requires moving across sectors and employing diverse tactics. Notably, the presence of 36 defense lines adds significant strategic depth and replay value. Beginners find unit control and tower placement easy, but experts rely on timing and resource management. The various tower types and unit skills available within the map enable players to devise customized strategies for different situations. Additionally, triggers placed at the entrances and exits of each sector allow the timing of wave spawns to be adjusted, providing opportunities for strategic timing adjustments. These elements together create a rich experience that tests both team cooperation and individual skill. Therefore, this map is highly recommended for 6‑player team play and for players who enjoy defensive strategy. Before starting, players should review tower placements and unit skills and become familiar with enemy wave patterns, which are key to victory.
스파이더 마이너 디펜스 2.2 (Spider Mine Defense 2.2)
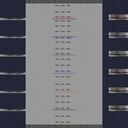
Spider Mine Defense 2.2는 640×8192 타일 규모의 대형 맵으로, 플레이어는 지정된 방어 지점에 광물을 배치하고 CPU가 일정 거리까지 도달하지 못하게 차단하는 디펜스 장르의 유저맵이다. 전체 흐름은 5개의 레벨을 진행하며, 각 레벨마다 방어 위치와 CPU 경로가 달라져 전략적 배치가 요구된다. 타일 단위는 20×256으로 설정되어 있어 스크롤 가능한 장대한 플레이 경험을 제공한다. 게임은 싱글 플레이를 기준으로 하며, 6명의 CPU 적을 동시에 관리해야 하므로 마이크로 및宏观 전략이 필요하다. 난이도는 보통 수준으로, 초보자는 레벨 1~2를, 경험자는 레벨 4~5를 통해 고난도 전략을 시험할 수 있다. 핵심 포인트는 적절한 타워 배치와 지형 활용이며, 타이밍에 광물 폭파를 조절하면 승리가 쉬워진다. 따라서 디펜스 장르를 즐기고 CPU와의 전략적 전투를 선호하는 플레이어에게 적합하다. 이 맵은 타일셋이 플랫폼으로 지정돼 있어 시각적인 일관성을 유지하며, 각 레벨마다 다양한 고저차와 장애물을 배치해 전략적 깊이를 더한다. 플레이어는 광물 배치를 통해 방어선을 구축하고, 필요 시 타워를 추가해 방어력을 강화해야 한다. 레벨 진행 시 CPU의 이동 속도와 행동 패턴이 변하므로, 초반에는 방어 기지를 먼저 확립하고, 중반에는 공격적인 포지션을 취하는 것이 효과적이다. 예상 플레이 시간은 30분 정도로, 6명 CPU 적을 동시에 견제해야 하므로 적절한 자원 관리와 타이밍이 승부를 좌우한다. Spider Mine Defense 2.2 is a large map measuring 640×8192 tiles, belonging to the defense genre where players place minerals at designated defense points to block CPU units from reaching a certain distance. The map consists of five levels, each with different defensive positions and CPU paths, requiring strategic placement. Tiles are set at 20×256, providing a scrollable, expansive play area. The game is designed for single‑player, and you must manage six CPU enemies simultaneously, demanding both micro‑ and macro‑strategic thinking. Difficulty is moderate; beginners can test themselves on levels 1‑2, while experienced players can challenge their high‑level tactics on levels 4‑5. Success hinges on proper tower placement and terrain use, and timing mineral explosions makes victory easier. Thus, the map suits fans of defense games who enjoy strategic combat against CPU opponents. The tileset is fixed as a platform, preserving visual consistency, and each level features varied elevation changes and obstacles that add strategic depth. Players build defensive lines by placing minerals and may add towers as needed to strengthen their defenses. As levels progress, CPU movement speed and behavior patterns shift, so establishing a solid base early and adopting an aggressive stance mid‑game is effective. Expected playtime is about thirty minutes; managing resources and timing while fending off six CPU foes simultaneously determines the outcome.
Amazing 터렛 비사곳 with 밴 (Amazing Turret Visagot with Ban)
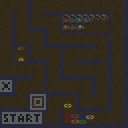
스타크래프트 브루드워의 유즈맵계에서 독특한 개성을 지닌 ‘Amazing Turret Visagot with Ban’은 디펜스와 타워 디펜스 요소가 조합된 흥미로운 구조를 자랑합니다. 맵 제목에서 느껴지듯, ‘타워’와 ‘Visagot’이라는 단어가 포함되어 있어 타워를 중심으로 방어전을 펼치는 장르임을 예상할 수 있지만, 내부 설명에 ‘rimjob’이라는 다소 생소한 단어가 등장하며 기존의 디펜스 맵과는 차별화된 컨셉을 제공합니다. 맵 이미지를 보면 중앙에 타워가 배치되어 있으며, 주변에 방어가 필요한 요소가 확인됩니다. 또한, ‘Ban’이라는 문구가 포함되어 있어 특정 유닛이나 전략을 제한하는 규칙이 존재할 가능성이 높습니다. 이러한 요소들은 플레이어에게 전략적 깊이를 더하고, 다양한 조합을 시도해 볼 수 있는 기회를 제공합니다. 이 맵은 7명의 플레이어가 동시에 참여할 수 있도록 설계되었으며, 황무지 타일셋을 사용하여 황량한 분위기를 연출합니다. 맵의 크기는 2048x2048로 достаточно 넓어 전략적 이동과 배치에 유연성을 제공합니다. 내부 설명에 따르면 이 맵은 다수의 제작자에 의해 수정 및 보완되었으며, 특히 ‘Foxy Ban’이라는 추가 요소가 포함되어 있어 전략의 다양성을 극대화합니다. 방어와 공격의 균형을 맞추는 것이 핵심인 이 맵은, 초보 플레이어부터 숙련자까지 즐길 수 있도록 난이도 조절이 가능할 것으로 보입니다. 다만, ‘rimjob’이라는 표현이 다소 모호한 만큼, 실제 플레이에서는 맵의 규칙과 목표를 미리 숙지하는 것이 중요합니다. 추천 대상으로는 타워 디펜스를 즐기는 플레이어는 물론, 새로운 전략과 조합을 시도해 보고 싶은 유저들에게 적합합니다. 또한, 7명이 동시에 참여할 수 있는 구조이기 때문에多人 협력 플레이를 선호하는 유저들에게도 흥미로운 경험을 제공할 것입니다. 이 맵을 즐기기 위해서는 타워의 배치와 업그레이드, 그리고 적절한 유닛의 선택이 필수적입니다. 특히 ‘Ban’이라는 규칙이 포함되어 있어, 특정 유닛이나 전략을 배제하는 등 제한적인 조건 하에서 플레이해야 한다는 점을 유념해야 합니다. Amazing Turret Visagot with Ban stands out in the Brood War custom map scene with its unique blend of defense and tower defense elements. As suggested by its title, the map revolves around tower-based combat, but the inclusion of terms like "Visagot" and the unfamiliar "rimjob" hints at a fresh take that sets it apart from traditional defense maps. A glance at the map image reveals a central tower structure surrounded by key defensive points, while the mention of "Ban" implies built-in restrictions on certain units or strategies, adding strategic depth and encouraging experimentation with different compositions. Designed for seven players, the map employs a desolate terrain tileset to evoke a barren, harsh atmosphere. With a size of 2048x2048, it offers ample space for flexible movement and positioning. According to its description, the map has undergone multiple revisions by several creators, with the "Foxy Ban" feature further enhancing strategic variety. Balancing defense and offense is central to the experience, and the map appears to be scalable in difficulty, making it accessible to both beginners and veterans. However, the vague term "rimjob" may require players to thoroughly review the map’s rules and objectives before diving in. This map is ideal for fans of tower defense, players eager to test new strategies, and those who enjoy cooperative multiplayer. Success hinges on smart tower placement, upgrades, and unit selection, all while navigating the constraints of the "Ban" system—which may restrict certain units or tactics.
터렛 디 스택 프로 (Turret D STACK PRO)
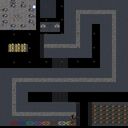
스타크래프트 브루드워의 대표적인 디펜스 유즈맵인 'Turret D STACK PRO v1.7'은 플레이어들이 끊임없이 몰려드는 적군을 상대하며 방어선을 구축하는 전략적 재미를 제공합니다. 맵은 중앙에 위치한 방어 타워를 중심으로 여러 층의 성벽과 물자 기지가 배치되어 있으며, 플레이어는 자원 채취와 방어 시설 건설을 통해 적의 공격을 지속적으로 방어해야 합니다. 맵의 특징은 방어 타워와 성벽을 '스택' 방식으로 배치할 수 있어 전략적 깊이를 더한다는 점입니다. 터렛과 포탑을 조합하여 최적의 방어 라인을 구축하지 않으면 몇 분 만에 게임이 끝나기도 하므로, 신중한 배치와 빠른 판단이 요구됩니다. 또한, 맵의 규모가 2048x2048 크기인 만큼 넓은 시야를 활용한 전략적 시도가 중요합니다. 초보자에게는 어려울 수 있지만, 디펜스 게임의 기본기를 익히고자 하는 플레이어에게는 훌륭한 학습 도구가 될 것입니다. 한정된 자원으로 최대한의 효과를 내야 한다는 점에서Resource Management와 함께 긴장감 넘치는 전투가 펼쳐집니다. 특히, 후반부로 갈수록 쏟아지는 적의 물량을 상대해야 하므로, 방어 시설의 유지와 보강이 핵심입니다. 맵의 인기는 오랜 기간 지속되어 왔으며, 'Hard Turret D Stack Pro v2.8'과 같은 후속 버전도 출시되었을 정도로 꾸준한 관심을 받고 있습니다. 방어형 유즈맵을 즐기면서 전략적 사고를 키우고 싶은 유저들에게 강력히 추천합니다. 플레이 전에는 필히 방어 타워의 위치를 숙지하고, 자원 채취의 효율성을 고려해야 합니다. 또한, 팀 플레이가 가능하다면 각 팀원의 역할 분담을 미리 정해두는 것이 좋습니다. 맵의 난이도는 대체로 '보통' 수준으로, 초심자도 튜토리얼과 연습을 통해 쉽게 접근할 수 있습니다. 디펜스 게임의 기본기를 다지고 싶거나, 팀원과의 협동 플레이를 경험하고자 한다면 이 맵만큼 알맞은 선택은 없을 것입니다. Turret D STACK PRO v1.7 is one of the most iconic defense custom maps in StarCraft: Brood War, offering players strategic fun by building and upgrading defenses against relentless enemy waves. The map centers around a core defense tower surrounded by layered walls and resource bases, requiring players to gather resources and construct defensive structures to withstand continuous attacks. A standout feature is the 'stacking' system for placing turrets and towers, adding depth to strategy as players must optimize their layouts to counter incoming threats. Without careful planning, a single lapse in defense can lead to quick defeat within minutes. The map's 2048x2048 scale demands players utilize the vast battlefield for tactical positioning and resource management. While challenging for beginners, it serves as an excellent tool for learning the fundamentals of defense mechanics. The core challenge lies in balancing limited resources with maximum efficiency to sustain long-term survival. The map's enduring popularity is evident in its longevity and the release of sequels like Hard Turret D Stack Pro v2.8. For those seeking a mix of strategic thinking and intense combat, this UMS map is a perfect fit. Before diving in, players should familiarize themselves with tower placements and resource collection routes. Team play adds another layer of strategy, where roles must be clearly defined. The difficulty is generally rated as 'medium,' making it accessible to newcomers with some practice. Whether refining defense mechanics or enjoying collaborative teamwork, this map delivers a satisfying experience for both casual and hardcore players.
마린 디펜스 10웨이 V8 (Marine Defense 10-Way V8)
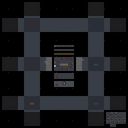
스타크래프트 브루드워의 대표적인 디펜스 유즈맵인 'Marine Defense 10-Way V8'은 마린 유닛을 중심으로 적의 공격을 방어하는 구조로 구성된 맵입니다. 맵 중앙에 위치한 커맨드 센터를 중심으로 10방향으로 뻗어 있는 길목에 플레이어가 방어 타워나 유닛을 배치해 적의 웨이브를 막아내는 방식입니다. 각각의 길목은 좁고 길게 설계되어 있어 전략적인 배치와 자원 관리가 중요하며, 특히 중앙 커맨드 센터의 보호가 승리 조건으로 추정됩니다. 맵의 타일셋은 우주 테마로 디자인되어 있으며, 어두운 배경과 함께 은은한 조명이 전체적인 분위기를 한층 더 깊게 만듭니다. 방어 라인은 고정형 타워와 소환형 구조물로 나뉘어 있으며, 일부 구간은 랜덤한 위치에서 적이 등장하기도 해 플레이어의 대응력을 시험합니다. 맵의 핵심은 방어 라인의 효율성과 자원의 적절한 분배에 있으며, 초보자의 경우 방어 라인을 쉽게 무너뜨릴 수 있어 난이도가 있는 편입니다. 6인까지 플레이 가능한 이 맵은 팀 플레이보다는 개인별 방어 라인 관리에 중점을 두고 있으며, 특히 10방향의 길목이 동시에 공격을 받는 상황이 발생할 수 있어 긴장감 있는 플레이가 요구됩니다. 맵을 플레이하기 전에 방어 타워의 종류와 배치 위치, 자원 수급 방법 등을 충분히 숙지하는 것이 중요합니다. 또한, 중앙 커맨드 센터의 체력을 관리하는 것도 승리 조건에 직결되므로, 자원과 유닛 배치에 신중을 기해야 합니다. 이 맵은 디펜스 유즈맵의 전형적인 구조를 따르지만, 10방향의 길목을 동시에 방어해야 한다는 점이 독특한 특징이며, 반복 플레이를 통해 방어 전략을 최적화할 수 있습니다. 특히, 방어 라인의 균형과 자원의 효율적 사용이 승패를 좌우하기 때문에, 경험이 쌓일수록 더 안정적인 플레이가 가능해집니다. 마린 디펜스 10웨이 시리즈의 한 버전으로, 과거 버전들과 비교했을 때 밸런스와 디자인적 개선이 눈에 띄며, 유즈맵 커뮤니티에서 오랫동안 사랑받아 온 맵 중 하나입니다. "Marine Defense 10-Way V8" is a classic *StarCraft: Brood War* defense custom map where players defend against waves of enemies by strategically placing Marines and defensive structures. The map features a Command Center at the center with ten narrow pathways radiating outward, each requiring players to set up towers or units to block enemy advances. The tight design of these paths demands careful resource management and tactical placement, with protecting the central Command Center likely being key to victory. The map's tile set follows a space theme, with a dark ambiance illuminated by subtle lighting that enhances the overall atmosphere. Defensive lines consist of fixed towers and summoning structures, though some sections spawn enemies at random locations, testing players' adaptability. The core challenge lies in balancing efficient defenses with resource allocation—beginners may struggle as poorly built defenses can collapse easily. While the map supports up to six players, it emphasizes individual defense line management over team coordination, as all ten pathways can come under simultaneous attack, creating high-pressure situations. Before playing, it's crucial to familiarize yourself with tower types, optimal placement strategies, and resource-gathering methods. Maintaining the Command Center's health is also vital, as its survival directly impacts victory. Though this map adheres to typical defense custom map structures, its defining feature is the need to defend all ten paths at once, rewarding repeated play as players refine their strategies. Over time, mastery of defense line balance and resource efficiency becomes essential, as these factors often determine success or failure. As part of the *Marine Defense 10-Way* series, this version stands out for its improved balance and design compared to earlier iterations, making it a long-standing favorite in the custom map community.
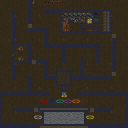
Amazin T D Duo Krazy
스타크래프트 브루드워의 대표적인 유즈맵 장르 중 하나인 타워 디펜스(Tower Defense) 장르의 맵으로, Amazin T D Duo Krazy는 6명의 플레이어가 참여할 수 있는 듀오 기반의 협동 디펜스 맵이다. 맵의 전체적인 분위기는 황무지 타일셋을 기반으로 하며, 중앙에 위치한 주요 방어 거점을 중심으로 적의 끊임없는 웨이브가 몰려온다. 플레이어는 듀오 팀을 이루어 각자의 타워를 건설하고 업그레이드하여 방어선을 구축해야 한다. 맵은 2048x2048 해상도와 64x64 타일 단위로 구성되어 있으며, 타일셋은 황무지로 설정되어 있어 황량한 사막이나 폐허 같은 분위기를 연출한다. 맵의 구조는 중앙 방어 거점 주변으로 침공로가 펼쳐져 있으며, 듀오 팀은 각자의 위치에서 타워를 건설하고 적의 공격을 방어하는 동시에 자원을 관리해야 한다. 듀오 기반의 플레이 방식은 팀워크를 강조하며, 각 플레이어의 타워 배치와 전략적 선택이 매우 중요하다. 맵의 특징은 타워의 종류와 업그레이드 옵션이 다양하다는 점으로, 플레이어는 상황에 따라 최적의 조합을 선택해야 한다. 또한, 적의 웨이브는 점차 강해지므로 방어 전략을 지속적으로 업데이트해야 한다. 맵의 난이도는 중간 정도로 예상되며, 초보 플레이어는 듀오 파트너와의 협력과 기본적인 타워 배치 전략을 익히는 데 집중해야 한다. 듀오 팀의 경우, 각자의 역할을 분담하여 효율적인 방어 전략을 수립하는 것이 중요하다. 맵을 플레이하기 전에는 듀오 파트너와의 역할 분담, 타워의 종류와 성능, 자원 관리 방법을 충분히 숙지하는 것이 좋다. 또한, 적의 웨이브 패턴과 주요 침공로를 분석하여 방어선을 구축하는 전략을 미리 준비하는 것이 성공적인 플레이의 열쇠가 될 것이다. Amazin T D Duo Krazy is a tower defense map from StarCraft: Brood War, one of the most popular user-made map genres in the game. This cooperative defense map supports six players in duo-based teams, where two players work together to build and upgrade towers to defend against endless enemy waves. The map features a desolate wasteland tile set, with a central defensive stronghold at its core. The layout is structured on a 2048x2048 resolution with 64x64 tiles, creating a barren desert or ruined atmosphere. Multiple invasion paths radiate from the central stronghold, and each duo team must construct towers from their designated positions while managing resources to fend off attacks. The duo format emphasizes teamwork, making tower placement and strategic decisions critical to success. The map offers a variety of tower types and upgrade options, requiring players to adapt their builds based on evolving threats. Enemy waves grow progressively stronger, demanding continuous adjustments to defense strategies. While the difficulty is moderate, beginners should focus on coordinating with their duo partner and mastering basic tower placement tactics. For duo teams, dividing roles and establishing an efficient defense plan is essential. Before playing, it’s important to thoroughly understand role assignments, tower types and their performance, and resource management. Analyzing enemy wave patterns and key invasion routes will help players build a strong defensive strategy, which is key to achieving victory.
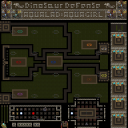
공룡 디펜스 파이널 (Dinosaur Defense - Final)
스타크래프트 브루드워의 대표적인 디펜스 장르 유즈맵인 〈Dinosaur Defense - Final〉은 공룡 테마의 대규모 방어전을 경험할 수 있는 작품이다. 맵은 사막 타일셋을 기반으로 펼쳐지며, 플레이어는 끊임없이 몰려오는 적 유닛을 막아내야 한다. 화면 중앙에는 큰 원형 진영이 배치되어 있으며, 그 주위를 따라 방어 건물이 배치된 구조로 보인다. 적의 진입로를 크게 세 갈래로 나눌 수 있는 지형이 특징적이며, 각 진입로 앞에는 방어 타워나 건물을 설치할 수 있는 여백이 넓게 확보되어 있다. 맵의 네 모서리에는 각각의 방어 거점이 존재하며, 여기에서 추가 자원을 확보하거나 보급로를 확보할 수 있을 것으로 추정된다. 맵의 가장자리는 자연스러운 지형으로 막혀 있어 외부에서의 공격은 제한적이지만, 중앙으로 몰려드는 적 유닛을 효과적으로 방어해야 한다. 맵 제목과 설명에서 확인되는 ‘공룡 전쟁’이라는 콘셉트는 맵의 분위기를 한층 더 흥미롭게 만든다. 방어에 성공할수록 점차 강해지는 적의 공세를 버텨내며, 전략적으로 건물을 배치하고 자원을 관리하는 것이 핵심이다. 초보자도 쉽게 접근할 수 있는 구조이지만, 방어선의 균형을 유지하지 못하면 쉽게 무너질 수 있어 게임의 재미와 긴장감을 높인다. 이 맵은 디펜스 장르의 기본 틀로 돌아가면서도, 공룡이라는 독특한 테마로 차별화를 시도한 작품이다.Public players engage in a thrilling dinosaur-themed defense battle in the classic Starcraft: Brood War custom map, Dinosaur Defense - Final. The map is built on a desert tileset, featuring a large circular central area surrounded by multiple defensive structures. The terrain naturally divides the enemy approach into three main paths, each offering space for tower placements and strategic building layouts. Four corner outposts likely provide resource gathering or supply routes, while the outer edges are blocked by natural barriers, funneling enemies toward the core defenses. The map’s title and description, highlighting a 'war of dinosaurs,' add a unique thematic layer to the traditional defense gameplay. Players must balance resource management and base expansion while fending off increasingly powerful enemy waves. The straightforward yet engaging structure makes it accessible for beginners, though maintaining a stable defense line requires careful planning. This map revitalizes the defense genre with its dinosaur theme while adhering to familiar mechanics.
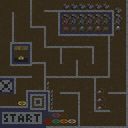
터렛 D 2008 (Turret D 2008)
스타크래프트 브루드워의 유즈맵 장르 중 디펜스(방어) 계열에 속하는 ‘Turret D 2008’은 해상도 2048x2048의 황무지 타일셋을 사용한 방어형 맵으로, 플레이어는 7인의 인원으로 각자의 기지를 지키며 끊임없이 몰려오는 적의 공세를 막아내야 한다. 맵 중앙에는 커다란 방어 타워가 배치되어 있으며, 이 타워는 공격력과 방어력을 동시에 제공하는 핵심 구조물로 보인다. 각 플레이어는 기지 주변에 포탑을 건설하고 자원을 확보하여 방어력을 강화할 수 있으며, 적의 공격 패턴은 appears to be 랜덤한 유닛 구성으로 추정된다. 맵의 이름 ‘Turret D’는 방어용 포탑(Turret)을 뜻하는 것으로 보이며, ‘2008’이라는 연도는 제작 시기를 반영한 것으로 보인다. 맵의 디자인상으로는 기지 보호와 포탑 관리가 주된 전략 포인트이며, 맵의 구조는 상대적으로 간소한 편이지만 방어와 자원 관리의 균형이 중요하다. 맵의 난이도는 제작자의 의도에 따라 보통 수준으로 설정되었을 가능성이 높으며, 7인의 플레이어가 각자의 포지션을 지키며 협력하는 플레이 스타일이 요구된다. 이 맵은 디펜스 장르에 익숙한 유저들에게는 흥미로운 도전 과제가 될 수 있으며, 특히 포탑 관리에 중점을 둔 전략적 플레이를 선호하는 유저들에게 추천된다. 플레이 전에는 기지 배치, 포탑 건설 순서, 자원 확보 타이밍 등을 미리 계획하는 것이 중요할 것으로 보인다. Turret D 2008 is a defense-oriented custom map from StarCraft: Brood War, set in a 2048x2048 wasteland tileset where seven players defend their bases against relentless enemy waves. The map features a central turret structure that appears to provide both offensive and defensive capabilities. Players must gather resources to build turrets and upgrade their defenses while countering randomized enemy unit compositions. The name ‘Turret D’ suggests a focus on turret-based defense, with ‘2008’ likely indicating the year of creation. The map’s design prioritizes base protection and turret management, offering a balanced challenge where teamwork and strategic positioning are key. While the layout is relatively straightforward, the difficulty lies in maintaining a strong defense while efficiently allocating resources. This map is ideal for players who enjoy defense mechanics and tactical turret placement, requiring careful planning of base layout and turret construction timing before engaging in gameplay.
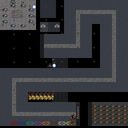
터렛 디펜스 스택 인핸스드 (Turret Defense Stack Enhanced)
스타크래프트 브루드워의 디펜스 장르 유즈맵인 《터렛 디펜스 스택 인핸스드(Turret Defense Stack Enhanced)》는 강력한 터렛을 쌓아가며 끊임없이 몰려오는 적의 공세를 방어하는 전략적 재미를 제공합니다. 맵은 우주 타일셋을 기반으로 2048x2048 크기의 넓은 공간에 펼쳐져 있으며, 플레이어는 초반부터 제공되는 제한된 자원으로 방어 타워를 건설하고 강화해야 합니다. 맵의 특징은 '스택' 시스템으로, 같은 종류의 터렛을 인접하게 배치하면 공격력이나 방어력이 상승하는 메커니즘이 있다는 점입니다. 이를 통해 플레이어는 단순히 타워를 짓는 것뿐 아니라, 효율적인 배치를 고민해야 하며, 적의 공격 패턴과 지형에 맞춰 전략을 유동적으로 변화시켜야 합니다. 공격 루트는 크게 세 갈래로 나뉘며, 각 루트마다 적의 종류와 공격 패턴이 조금씩 다릅니다. 중앙 루트는 가장 많은 수의 적들이 몰려오는 주요 루트로, 빠르게 방어선을 구축하지 않으면 금세 뚫리게 됩니다. 좌우 루트는 상대적으로 적은 수의 적이 오지만, 일부는 공중 유닛이나 특수 능력을 지닌 적들이 포함되어 있어 방어 전략을 달리해야 합니다. 또한, 후반부로 갈수록 적의 종류가 다양해지고 공격력이 강해지므로, 초반에 안정적인 자원 관리와 타워 배치에 신경 써야 합니다. 이 맵의 가장 큰 매력은 '스택' 시스템의 전략적 깊이에 있습니다. 예를 들어, 미사일 터렛을 세로로 배치하면 관통력이 상승하거나, 대공 터렛을 집중 배치하면 공중 유닛에 대한 방어력이 크게 향상되는 등, 단순히 숫자에 의존하는 것이 아니라 배치의 중요성이 극대화됩니다. 또한, 맵 곳곳에 흩어져 있는 미네랄과 가스 채취 지역을 활용해 자원을 확보하고, 이를 바탕으로 더 강력한 터렛을 건설하거나 연구를 진행할 수 있습니다. 다만, 자원 채취 지역이 맵 중앙에 밀집되어 있어 초반 방어 라인을 구축하는 동안에는 자원 확보가 다소 어려운 편입니다. 이 맵은 디펜스 장르를 любителей이면서, 타워의 배치와 스택 시스템에 대한 전략적 깊이를 원하는 플레이어에게 특히 추천됩니다. 초보자의 경우, 적의 공격 패턴을 숙지하고 자원 관리에 집중하는 것이 중요하며, 숙련자의 경우라면 스택 시스템을 최대한 활용해 효율적인 방어 라인을 구축하는 것에 도전해 볼 만합니다. 또한, 팀 플레이가 가능한 맵이 아니기 때문에 1인 플레이에 최적화되어 있으며, 혼자서도 긴장감 넘치는 플레이를 즐길 수 있습니다. 맵을 플레이하기 전에는 반드시 제공되는 터렛의 종류와 스택 효과를 숙지하고, 맵의 주요 공격 루트를 미리 파악해 두는 것이 좋습니다. 특히, 중앙 루트의 방어 라인을 튼튼히 구축하지 않으면 게임이 쉽게 무너질 수 있으니 주의가 필요합니다. Turret Defense Stack Enhanced is a StarCraft: Brood War defense custom map that offers strategic fun by stacking powerful turrets to defend against endless waves of enemy attacks. Built on a space-themed tileset with a 2048x2048 grid, the map challenges players to construct and upgrade defensive towers while managing limited resources. A key feature is the stacking system, where placing the same type of turret adjacent to each other boosts their attack or defense power, forcing players to think beyond simple tower construction and consider efficient placement. The map features three main attack paths, each with distinct enemy types and attack patterns. The central path sees the heaviest traffic, requiring a robust early defense to prevent breakthroughs. The left and right paths, while less frequented, include air units and special enemies that demand varied defensive strategies. As the game progresses, enemies become stronger and more diverse, making early resource management and tower placement critical for survival. The stacking system is the heart of this map's strategic depth. For example, vertically stacking missile turrets enhances piercing power, while concentrating anti-air turrets significantly improves defense against aerial threats. Resources scattered across the map can be mined, but they are concentrated near the center, making early tower construction challenging. Players must balance tower upgrades with resource collection to build a resilient defense. This map is ideal for defense genre enthusiasts who seek strategic depth in tower placement and stacking mechanics. Beginners should focus on understanding enemy patterns and resource management, while advanced players can experiment with maximizing stacking efficiency. As a single-player experience, it delivers intense, tension-filled gameplay. Before playing, review the tower types and stacking effects, and map out the main attack routes—especially the central path, which is critical to maintaining a strong defense.
최근 등록된 맵
새로 추가된 파일과 버전을 확인하세요.
터렛 디펜스 스택 인핸스드 (Turret Defense Stack Enhanced)
스타크래프트 브루드워의 디펜스 장르 유즈맵인 《터렛 디펜스 스택 인핸스드(Turret Defense Stack Enhanced)》는 강력한 터렛을 쌓아가며 끊임없이 몰려오는 적의 공세를 방어하는 전략적 재미를 제공합니다. 맵은 우주 타일셋을 기반으로 2048x2048 크기의 넓은 공간에 펼쳐져 있으며, 플레이어는 초반부터 제공되는 제한된 자원으로 방어 타워를 건설하고 강화해야 합니다. 맵의 특징은 '스택' 시스템으로, 같은 종류의 터렛을 인접하게 배치하면 공격력이나 방어력이 상승하는 메커니즘이 있다는 점입니다. 이를 통해 플레이어는 단순히 타워를 짓는 것뿐 아니라, 효율적인 배치를 고민해야 하며, 적의 공격 패턴과 지형에 맞춰 전략을 유동적으로 변화시켜야 합니다. 공격 루트는 크게 세 갈래로 나뉘며, 각 루트마다 적의 종류와 공격 패턴이 조금씩 다릅니다. 중앙 루트는 가장 많은 수의 적들이 몰려오는 주요 루트로, 빠르게 방어선을 구축하지 않으면 금세 뚫리게 됩니다. 좌우 루트는 상대적으로 적은 수의 적이 오지만, 일부는 공중 유닛이나 특수 능력을 지닌 적들이 포함되어 있어 방어 전략을 달리해야 합니다. 또한, 후반부로 갈수록 적의 종류가 다양해지고 공격력이 강해지므로, 초반에 안정적인 자원 관리와 타워 배치에 신경 써야 합니다. 이 맵의 가장 큰 매력은 '스택' 시스템의 전략적 깊이에 있습니다. 예를 들어, 미사일 터렛을 세로로 배치하면 관통력이 상승하거나, 대공 터렛을 집중 배치하면 공중 유닛에 대한 방어력이 크게 향상되는 등, 단순히 숫자에 의존하는 것이 아니라 배치의 중요성이 극대화됩니다. 또한, 맵 곳곳에 흩어져 있는 미네랄과 가스 채취 지역을 활용해 자원을 확보하고, 이를 바탕으로 더 강력한 터렛을 건설하거나 연구를 진행할 수 있습니다. 다만, 자원 채취 지역이 맵 중앙에 밀집되어 있어 초반 방어 라인을 구축하는 동안에는 자원 확보가 다소 어려운 편입니다. 이 맵은 디펜스 장르를 любителей이면서, 타워의 배치와 스택 시스템에 대한 전략적 깊이를 원하는 플레이어에게 특히 추천됩니다. 초보자의 경우, 적의 공격 패턴을 숙지하고 자원 관리에 집중하는 것이 중요하며, 숙련자의 경우라면 스택 시스템을 최대한 활용해 효율적인 방어 라인을 구축하는 것에 도전해 볼 만합니다. 또한, 팀 플레이가 가능한 맵이 아니기 때문에 1인 플레이에 최적화되어 있으며, 혼자서도 긴장감 넘치는 플레이를 즐길 수 있습니다. 맵을 플레이하기 전에는 반드시 제공되는 터렛의 종류와 스택 효과를 숙지하고, 맵의 주요 공격 루트를 미리 파악해 두는 것이 좋습니다. 특히, 중앙 루트의 방어 라인을 튼튼히 구축하지 않으면 게임이 쉽게 무너질 수 있으니 주의가 필요합니다. Turret Defense Stack Enhanced is a StarCraft: Brood War defense custom map that offers strategic fun by stacking powerful turrets to defend against endless waves of enemy attacks. Built on a space-themed tileset with a 2048x2048 grid, the map challenges players to construct and upgrade defensive towers while managing limited resources. A key feature is the stacking system, where placing the same type of turret adjacent to each other boosts their attack or defense power, forcing players to think beyond simple tower construction and consider efficient placement. The map features three main attack paths, each with distinct enemy types and attack patterns. The central path sees the heaviest traffic, requiring a robust early defense to prevent breakthroughs. The left and right paths, while less frequented, include air units and special enemies that demand varied defensive strategies. As the game progresses, enemies become stronger and more diverse, making early resource management and tower placement critical for survival. The stacking system is the heart of this map's strategic depth. For example, vertically stacking missile turrets enhances piercing power, while concentrating anti-air turrets significantly improves defense against aerial threats. Resources scattered across the map can be mined, but they are concentrated near the center, making early tower construction challenging. Players must balance tower upgrades with resource collection to build a resilient defense. This map is ideal for defense genre enthusiasts who seek strategic depth in tower placement and stacking mechanics. Beginners should focus on understanding enemy patterns and resource management, while advanced players can experiment with maximizing stacking efficiency. As a single-player experience, it delivers intense, tension-filled gameplay. Before playing, review the tower types and stacking effects, and map out the main attack routes—especially the central path, which is critical to maintaining a strong defense.
터렛 디 스택 프로 (Turret D STACK PRO)
스타크래프트 브루드워의 대표적인 디펜스 유즈맵인 'Turret D STACK PRO v1.7'은 플레이어들이 끊임없이 몰려드는 적군을 상대하며 방어선을 구축하는 전략적 재미를 제공합니다. 맵은 중앙에 위치한 방어 타워를 중심으로 여러 층의 성벽과 물자 기지가 배치되어 있으며, 플레이어는 자원 채취와 방어 시설 건설을 통해 적의 공격을 지속적으로 방어해야 합니다. 맵의 특징은 방어 타워와 성벽을 '스택' 방식으로 배치할 수 있어 전략적 깊이를 더한다는 점입니다. 터렛과 포탑을 조합하여 최적의 방어 라인을 구축하지 않으면 몇 분 만에 게임이 끝나기도 하므로, 신중한 배치와 빠른 판단이 요구됩니다. 또한, 맵의 규모가 2048x2048 크기인 만큼 넓은 시야를 활용한 전략적 시도가 중요합니다. 초보자에게는 어려울 수 있지만, 디펜스 게임의 기본기를 익히고자 하는 플레이어에게는 훌륭한 학습 도구가 될 것입니다. 한정된 자원으로 최대한의 효과를 내야 한다는 점에서Resource Management와 함께 긴장감 넘치는 전투가 펼쳐집니다. 특히, 후반부로 갈수록 쏟아지는 적의 물량을 상대해야 하므로, 방어 시설의 유지와 보강이 핵심입니다. 맵의 인기는 오랜 기간 지속되어 왔으며, 'Hard Turret D Stack Pro v2.8'과 같은 후속 버전도 출시되었을 정도로 꾸준한 관심을 받고 있습니다. 방어형 유즈맵을 즐기면서 전략적 사고를 키우고 싶은 유저들에게 강력히 추천합니다. 플레이 전에는 필히 방어 타워의 위치를 숙지하고, 자원 채취의 효율성을 고려해야 합니다. 또한, 팀 플레이가 가능하다면 각 팀원의 역할 분담을 미리 정해두는 것이 좋습니다. 맵의 난이도는 대체로 '보통' 수준으로, 초심자도 튜토리얼과 연습을 통해 쉽게 접근할 수 있습니다. 디펜스 게임의 기본기를 다지고 싶거나, 팀원과의 협동 플레이를 경험하고자 한다면 이 맵만큼 알맞은 선택은 없을 것입니다. Turret D STACK PRO v1.7 is one of the most iconic defense custom maps in StarCraft: Brood War, offering players strategic fun by building and upgrading defenses against relentless enemy waves. The map centers around a core defense tower surrounded by layered walls and resource bases, requiring players to gather resources and construct defensive structures to withstand continuous attacks. A standout feature is the 'stacking' system for placing turrets and towers, adding depth to strategy as players must optimize their layouts to counter incoming threats. Without careful planning, a single lapse in defense can lead to quick defeat within minutes. The map's 2048x2048 scale demands players utilize the vast battlefield for tactical positioning and resource management. While challenging for beginners, it serves as an excellent tool for learning the fundamentals of defense mechanics. The core challenge lies in balancing limited resources with maximum efficiency to sustain long-term survival. The map's enduring popularity is evident in its longevity and the release of sequels like Hard Turret D Stack Pro v2.8. For those seeking a mix of strategic thinking and intense combat, this UMS map is a perfect fit. Before diving in, players should familiarize themselves with tower placements and resource collection routes. Team play adds another layer of strategy, where roles must be clearly defined. The difficulty is generally rated as 'medium,' making it accessible to newcomers with some practice. Whether refining defense mechanics or enjoying collaborative teamwork, this map delivers a satisfying experience for both casual and hardcore players.
터렛 D 2008 (Turret D 2008)
스타크래프트 브루드워의 유즈맵 장르 중 디펜스(방어) 계열에 속하는 ‘Turret D 2008’은 해상도 2048x2048의 황무지 타일셋을 사용한 방어형 맵으로, 플레이어는 7인의 인원으로 각자의 기지를 지키며 끊임없이 몰려오는 적의 공세를 막아내야 한다. 맵 중앙에는 커다란 방어 타워가 배치되어 있으며, 이 타워는 공격력과 방어력을 동시에 제공하는 핵심 구조물로 보인다. 각 플레이어는 기지 주변에 포탑을 건설하고 자원을 확보하여 방어력을 강화할 수 있으며, 적의 공격 패턴은 appears to be 랜덤한 유닛 구성으로 추정된다. 맵의 이름 ‘Turret D’는 방어용 포탑(Turret)을 뜻하는 것으로 보이며, ‘2008’이라는 연도는 제작 시기를 반영한 것으로 보인다. 맵의 디자인상으로는 기지 보호와 포탑 관리가 주된 전략 포인트이며, 맵의 구조는 상대적으로 간소한 편이지만 방어와 자원 관리의 균형이 중요하다. 맵의 난이도는 제작자의 의도에 따라 보통 수준으로 설정되었을 가능성이 높으며, 7인의 플레이어가 각자의 포지션을 지키며 협력하는 플레이 스타일이 요구된다. 이 맵은 디펜스 장르에 익숙한 유저들에게는 흥미로운 도전 과제가 될 수 있으며, 특히 포탑 관리에 중점을 둔 전략적 플레이를 선호하는 유저들에게 추천된다. 플레이 전에는 기지 배치, 포탑 건설 순서, 자원 확보 타이밍 등을 미리 계획하는 것이 중요할 것으로 보인다. Turret D 2008 is a defense-oriented custom map from StarCraft: Brood War, set in a 2048x2048 wasteland tileset where seven players defend their bases against relentless enemy waves. The map features a central turret structure that appears to provide both offensive and defensive capabilities. Players must gather resources to build turrets and upgrade their defenses while countering randomized enemy unit compositions. The name ‘Turret D’ suggests a focus on turret-based defense, with ‘2008’ likely indicating the year of creation. The map’s design prioritizes base protection and turret management, offering a balanced challenge where teamwork and strategic positioning are key. While the layout is relatively straightforward, the difficulty lies in maintaining a strong defense while efficiently allocating resources. This map is ideal for players who enjoy defense mechanics and tactical turret placement, requiring careful planning of base layout and turret construction timing before engaging in gameplay.
점령 방어전 (Squatting Defenders)
스타크래프트 브루드워의 숨은 보석 중 하나인 'Squatting Defenders'는 디펜스 장르의 유즈맵으로, 플레이어들이 적의 끊임없는 공격을 방어하며 생존을 다투는 긴장감 넘치는 게임입니다. 맵은 중앙에 위치한 본진과 이를 둘러싼 방어 시설, 그리고 끊임없이 쏟아지는 적의 웨이브로 구성되어 있습니다. 플레이어는 본진을 지키기 위해 건물을 건설하고 유닛을 배치해야 하며, 각 웨이브가 끝날 때마다 새로운 적의 공격 패턴을 경험할 수 있습니다. 맵의 특징은 방어 시설의 배치와 업그레이드 시스템으로, 이를 통해 플레이어는 전략적인 선택을 강요받습니다. 예를 들어, 특정 위치에 포격을 집중하거나, 방어 타워의 레벨을 올려 적의 공격을 효과적으로 차단할 수 있습니다. 또한, 맵의 디자인과 색상 구성은 황혼 테마를 사용하여 시각적으로도 매력적입니다. 이 맵은 특히 디펜스 장르를 좋아하는 플레이어들에게 추천되며, 초보자와 숙련자 모두 즐길 수 있도록 난이도 조절이 가능한 구조로 설계되었습니다. 플레이 전에는 방어 시설의 배치와 업그레이드 우선순위를 carefully하게 계획하는 것이 중요합니다. 적의 공격 패턴을 미리 파악하고, 보완할 수 있는 방어 체계를 구축하는 것이 승리의 열쇠가 될 것입니다. 또한, 맵의 중앙 본진을 중심으로 한 공격 루트는 거의 고정되어 있으므로, 이를 바탕으로 방어 전략을 수립하는 것이 좋습니다. 이 맵은 6인 플레이를 지원하며, 각 플레이어는 개별적인 본진을 방어해야 합니다. 팀 플레이를 통해 협동하는 것도 가능하며, 이를 통해 더욱 전략적인 플레이가 가능해집니다. 맵의 긴장감과 연속된 전투는 플레이어에게 끊임없는 긴장감을 제공하며, 한 번 플레이하면 빠져들 수밖에 없는 매력이 있습니다. 이 맵은 디펜스 유즈맵의 정석을 보여주며, 스타크래프트 브루드워의 유즈맵 중에서도 손꼽히는佳作입니다. Squatting Defenders is one of the hidden gems in StarCraft: Brood War's custom maps, offering an intense defensive experience where players must protect their main base from relentless enemy waves. The map features a central base surrounded by defensive structures, with waves of enemies continuously attacking from multiple directions. Players must strategically place buildings and units, upgrading defenses to withstand progressively stronger assaults. The map's design emphasizes strategic placement of defensive towers and resource management, requiring players to make critical decisions at each stage. The twilight-themed aesthetics enhance the visual appeal, creating a moody and immersive atmosphere. This map is highly recommended for fans of the defense genre, catering to both beginners and experienced players with adjustable difficulty. Before playing, it's essential to plan your defense layout and prioritize upgrades to counter specific enemy patterns. The fixed attack routes from the map's center allow for focused defensive strategies, making preparation key to survival. Supporting up to 6 players, the map can be played individually or cooperatively, adding a layer of teamwork and strategy. The constant pressure from enemy waves creates an adrenaline-filled experience that keeps players engaged. Squatting Defenders exemplifies the pinnacle of defense custom maps in StarCraft: Brood War, standing out as a must-play title for genre enthusiasts.
스파이더 마이너 디펜스 2.2 (Spider Mine Defense 2.2)
Spider Mine Defense 2.2는 640×8192 타일 규모의 대형 맵으로, 플레이어는 지정된 방어 지점에 광물을 배치하고 CPU가 일정 거리까지 도달하지 못하게 차단하는 디펜스 장르의 유저맵이다. 전체 흐름은 5개의 레벨을 진행하며, 각 레벨마다 방어 위치와 CPU 경로가 달라져 전략적 배치가 요구된다. 타일 단위는 20×256으로 설정되어 있어 스크롤 가능한 장대한 플레이 경험을 제공한다. 게임은 싱글 플레이를 기준으로 하며, 6명의 CPU 적을 동시에 관리해야 하므로 마이크로 및宏观 전략이 필요하다. 난이도는 보통 수준으로, 초보자는 레벨 1~2를, 경험자는 레벨 4~5를 통해 고난도 전략을 시험할 수 있다. 핵심 포인트는 적절한 타워 배치와 지형 활용이며, 타이밍에 광물 폭파를 조절하면 승리가 쉬워진다. 따라서 디펜스 장르를 즐기고 CPU와의 전략적 전투를 선호하는 플레이어에게 적합하다. 이 맵은 타일셋이 플랫폼으로 지정돼 있어 시각적인 일관성을 유지하며, 각 레벨마다 다양한 고저차와 장애물을 배치해 전략적 깊이를 더한다. 플레이어는 광물 배치를 통해 방어선을 구축하고, 필요 시 타워를 추가해 방어력을 강화해야 한다. 레벨 진행 시 CPU의 이동 속도와 행동 패턴이 변하므로, 초반에는 방어 기지를 먼저 확립하고, 중반에는 공격적인 포지션을 취하는 것이 효과적이다. 예상 플레이 시간은 30분 정도로, 6명 CPU 적을 동시에 견제해야 하므로 적절한 자원 관리와 타이밍이 승부를 좌우한다. Spider Mine Defense 2.2 is a large map measuring 640×8192 tiles, belonging to the defense genre where players place minerals at designated defense points to block CPU units from reaching a certain distance. The map consists of five levels, each with different defensive positions and CPU paths, requiring strategic placement. Tiles are set at 20×256, providing a scrollable, expansive play area. The game is designed for single‑player, and you must manage six CPU enemies simultaneously, demanding both micro‑ and macro‑strategic thinking. Difficulty is moderate; beginners can test themselves on levels 1‑2, while experienced players can challenge their high‑level tactics on levels 4‑5. Success hinges on proper tower placement and terrain use, and timing mineral explosions makes victory easier. Thus, the map suits fans of defense games who enjoy strategic combat against CPU opponents. The tileset is fixed as a platform, preserving visual consistency, and each level features varied elevation changes and obstacles that add strategic depth. Players build defensive lines by placing minerals and may add towers as needed to strengthen their defenses. As levels progress, CPU movement speed and behavior patterns shift, so establishing a solid base early and adopting an aggressive stance mid‑game is effective. Expected playtime is about thirty minutes; managing resources and timing while fending off six CPU foes simultaneously determines the outcome.
마린 디펜스 10웨이 V8 (Marine Defense 10-Way V8)
스타크래프트 브루드워의 대표적인 디펜스 유즈맵인 'Marine Defense 10-Way V8'은 마린 유닛을 중심으로 적의 공격을 방어하는 구조로 구성된 맵입니다. 맵 중앙에 위치한 커맨드 센터를 중심으로 10방향으로 뻗어 있는 길목에 플레이어가 방어 타워나 유닛을 배치해 적의 웨이브를 막아내는 방식입니다. 각각의 길목은 좁고 길게 설계되어 있어 전략적인 배치와 자원 관리가 중요하며, 특히 중앙 커맨드 센터의 보호가 승리 조건으로 추정됩니다. 맵의 타일셋은 우주 테마로 디자인되어 있으며, 어두운 배경과 함께 은은한 조명이 전체적인 분위기를 한층 더 깊게 만듭니다. 방어 라인은 고정형 타워와 소환형 구조물로 나뉘어 있으며, 일부 구간은 랜덤한 위치에서 적이 등장하기도 해 플레이어의 대응력을 시험합니다. 맵의 핵심은 방어 라인의 효율성과 자원의 적절한 분배에 있으며, 초보자의 경우 방어 라인을 쉽게 무너뜨릴 수 있어 난이도가 있는 편입니다. 6인까지 플레이 가능한 이 맵은 팀 플레이보다는 개인별 방어 라인 관리에 중점을 두고 있으며, 특히 10방향의 길목이 동시에 공격을 받는 상황이 발생할 수 있어 긴장감 있는 플레이가 요구됩니다. 맵을 플레이하기 전에 방어 타워의 종류와 배치 위치, 자원 수급 방법 등을 충분히 숙지하는 것이 중요합니다. 또한, 중앙 커맨드 센터의 체력을 관리하는 것도 승리 조건에 직결되므로, 자원과 유닛 배치에 신중을 기해야 합니다. 이 맵은 디펜스 유즈맵의 전형적인 구조를 따르지만, 10방향의 길목을 동시에 방어해야 한다는 점이 독특한 특징이며, 반복 플레이를 통해 방어 전략을 최적화할 수 있습니다. 특히, 방어 라인의 균형과 자원의 효율적 사용이 승패를 좌우하기 때문에, 경험이 쌓일수록 더 안정적인 플레이가 가능해집니다. 마린 디펜스 10웨이 시리즈의 한 버전으로, 과거 버전들과 비교했을 때 밸런스와 디자인적 개선이 눈에 띄며, 유즈맵 커뮤니티에서 오랫동안 사랑받아 온 맵 중 하나입니다. "Marine Defense 10-Way V8" is a classic *StarCraft: Brood War* defense custom map where players defend against waves of enemies by strategically placing Marines and defensive structures. The map features a Command Center at the center with ten narrow pathways radiating outward, each requiring players to set up towers or units to block enemy advances. The tight design of these paths demands careful resource management and tactical placement, with protecting the central Command Center likely being key to victory. The map's tile set follows a space theme, with a dark ambiance illuminated by subtle lighting that enhances the overall atmosphere. Defensive lines consist of fixed towers and summoning structures, though some sections spawn enemies at random locations, testing players' adaptability. The core challenge lies in balancing efficient defenses with resource allocation—beginners may struggle as poorly built defenses can collapse easily. While the map supports up to six players, it emphasizes individual defense line management over team coordination, as all ten pathways can come under simultaneous attack, creating high-pressure situations. Before playing, it's crucial to familiarize yourself with tower types, optimal placement strategies, and resource-gathering methods. Maintaining the Command Center's health is also vital, as its survival directly impacts victory. Though this map adheres to typical defense custom map structures, its defining feature is the need to defend all ten paths at once, rewarding repeated play as players refine their strategies. Over time, mastery of defense line balance and resource efficiency becomes essential, as these factors often determine success or failure. As part of the *Marine Defense 10-Way* series, this version stands out for its improved balance and design compared to earlier iterations, making it a long-standing favorite in the custom map community.
루러커 방어 36길 (Lurker Defense 36 Way)
이 맵은 4096×4096 타일 규모의 대형 디펜스 유즈맵으로, 6인 플레이를 기준으로 설계되었습니다. 전체 맵은 네 개의 대칭적인 구역으로 나뉘어 있으며, 각 구역마다 중앙에 방어진 초석과 주변에 여러 방어 타워가 배치된 구조를 가지고 있습니다. 플레이어는 각 구역의 입구에서 적물의 물결을 방어하며, 타워와 유닛을 전략적으로 배치하고 이동시켜 파동을 무력화해야 합니다. 방어 타워는 다양한 레벨과 스킬을 보유하고 있어 플레이어가 적의 종류와 파동 강도에 맞춰 조정할 수 있습니다. 맵은 비교적 균형 잡힌 진행 흐름을 보여주며, 초반에는 방어선을 구축하고 중반에는 여러 구역을 오가며 다각적인 전략을 구사해야 합니다. 특히 36개의 방어 라인이 존재하는 점에서 전략적 깊이와 리플레이 가치가 높습니다. 초보자에게는 조작 습득과 타워 배치가 수월하지만, 고수에게는 타이밍과 자원 관리 능력이 핵심입니다. 맵 내부에 존재하는 다양한 타워 유형과 유닛 스킬은 플레이어가 상황에 맞춰 맞춤 전략을 구사하도록 돕습니다. 또한, 각 구역의 입구와 출구에 배치된 트리거와 트리거 효과는 파동 발생 시점을 조절하여 전략적 타이밍을 조정할 수 있게 합니다. 이러한 요소들은 팀 협력과 개인 기술 모두를 테스트하는 풍부한 경험을 제공합니다. 따라서 이 맵은 6인 팀플레이를 선호하며, 방어 전략을 즐기는 플레이어에게 강력히 추천합니다. 맵을 시작하기 전에는 타워 배치와 유닛 스킬을 미리 점검하고, 적의 파동 패턴을 숙지하는 것이 승리의 관건이 됩니다. This map is a large defense custom map with a 4096×4096 tile size, designed for 6 players. The entire map is divided into four symmetric sectors, each featuring a central fortified base and surrounding defensive towers. Players start at the entrance of each sector and must defend against waves of units by strategically placing and moving towers and units to neutralize the attacks. The towers have multiple levels and skills, allowing players to adjust their strategy according to unit types and wave intensity. The map offers a balanced progression flow; early game focuses on building defenses, while mid‑late game requires moving across sectors and employing diverse tactics. Notably, the presence of 36 defense lines adds significant strategic depth and replay value. Beginners find unit control and tower placement easy, but experts rely on timing and resource management. The various tower types and unit skills available within the map enable players to devise customized strategies for different situations. Additionally, triggers placed at the entrances and exits of each sector allow the timing of wave spawns to be adjusted, providing opportunities for strategic timing adjustments. These elements together create a rich experience that tests both team cooperation and individual skill. Therefore, this map is highly recommended for 6‑player team play and for players who enjoy defensive strategy. Before starting, players should review tower placements and unit skills and become familiar with enemy wave patterns, which are key to victory.
링 디펜스 프로페셔널 (Ling Def Professional)
스타크래프트 브루드워의 대표적인 디펜스 유즈맵인 '링 디펜스 프로페셔널(Ling Def Professional)'은 저글링을 상대로 한 방어전을 펼치는 맵으로, 프로페셔널급 난이도를 자랑하는 작품이다. 맵의 구조는 중앙에 위치한 본진을 중심으로 네 방향에서 쏟아지는 저글링 웨이브를 막아내는 방식으로 구성되어 있으며, 방어에 성공할 때마다 보상을 얻으며 점차 난이도가 상승하는 구조를 가지고 있다. 플레이어는 기본적으로 저글링을 막아내야 하지만, 특정 조건을 만족하면 추가적인 유닛이나 건물을 확보할 수 있는 기회가 주어지며, 이를 통해 방어력을 강화하거나 공격적인 플레이로 전환할 수 있다. 맵의 특징 중 하나는 맵 중앙에 위치한 '방어 타워'로, 이 타워를 업그레이드하여 저글링의 진격을 저지할 수 있는 추가적인 방어선을 구축할 수 있다는 점이다. 또한, 맵의 가장자리에 위치한 '보급 기지'에서는 자원을 채집할 수 있으며, 이를 통해 추가적인 유닛이나 건물을 구매할 수 있어 전략적인 선택이 요구된다. 맵의 진행은 웨이브별로 나뉘며, 각 웨이브마다 저글링의 수가 증가하고 공격 패턴이 복잡해지므로 플레이어는 지속적인 대비를 해야 한다. 이 맵은 단일 플레이어 또는 팀 플레이로 즐길 수 있으며, 특히 저글링의 압박을 버텨내고 최후까지 살아남는 플레이어에게 높은 만족감을 제공한다. 초보자의 경우 방어 타워와 자원의 관리, 그리고 저글링의 패턴을 익히는 데 시간이 걸릴 수 있으므로, 맵의 구조와 기본 전략을 충분히 숙지한 후 플레이하는 것이 좋다. 또한, 맵의 난이도가 높기 때문에 팀플레이를 권장하며, 팀원 간의 원활한 소통과 역할 분담이 성공의 열쇠가 된다. 맵의 분위기는 잔인한 저글링의 공격과 본진의 방어라는 다소 무거운 테마이지만, 이를 극복하고 승리를 거머쥐는 순간의 쾌감은 다른 맵에서는 느낄 수 없는 매력이다. 맵의 전체적인 밸런스는 프로페셔널급답게 잘 짜여져 있으며, 초반의 여유로운 자원 관리와 중반의 방어 전략, 후반의Resource Management, strategic tower placement, and adaptive unit control are essential to overcoming the increasing waves of zerglings. The map's atmosphere is intense, with the constant pressure of zergling hordes testing your defenses, but the sense of achievement upon successfully repelling each wave is unparalleled in other defense maps. The professional difficulty ensures a challenging experience, making it ideal for players seeking a tough yet rewarding challenge that demands both skill and strategy.
맵 선택 가이드
태그는 맵의 핵심 특징을 빠르게 설명하지만 제작 버전마다 규칙이 다를 수 있습니다. 상세 설명에서 권장 인원, 난이도, 플레이 시간과 버전을 함께 확인한 뒤 다운로드하세요.