
컴퓨터 디펜스 스타크래프트 맵 모음
'컴퓨터 디펜스' 태그가 등록된 맵을 모았습니다. 장르 하나로 찾기 어려운 플레이 방식, 난이도와 특징을 중심으로 인기 맵과 최신 맵을 비교해 보세요.
- 등록 맵
- 47개
- 누적 다운로드
- 2
- 누적 조회
- 1,655
인기 맵
다운로드와 조회 반응이 높은 맵입니다.
QWER 운빨 디펜스
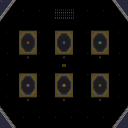
스타크래프트 브루드워의 대표적인 유즈맵 장르 중 하나인 ‘컴퓨터 상대 디펜스’ 맵으로, 제목에서부터 ‘운빨’이라는 키워드가 눈에 띄며, 디펜스라는 장르와 결합되어 흥미로운 플레이 경험을 제공한다. 맵 내부에서 확인되는 설명 문구는 ‘방제 배속, 싱글, UDP 금지’ 등으로 보아 멀티플레이를 전제로 한 맵으로 추정되며, 호스트가 배속과 게임 모드를 선택할 수 있는 구조로 보인다. 맵의 중앙에는 본진과 방어 건물이 배치되어 있으며, 외부에는 다수의 적 기지 또는 웨이브가 존재할 것으로 예상된다. 맵의 제목과 설명, 그리고 이미지 상에서 확인되는 구조적 특징을 종합해 보면, 플레이어는 방어 건물을 건설하고 적의 공격을 막아내며, 배속과 난이도, 그리고 맵의 특수 조건을 활용해 생존을 도모하는 방식의 게임이다. ‘운빨’이라는 단어는 랜덤 요소나 예측 불가능한 상황이 많다는 점을 시사하며, 이는 맵의 난이도나 진행 방식에서 큰 비중을 차지할 가능성이 높다. 또한, UDP 금지 조항은 네트워크 지연이나 핵 사용 방지를 위한 규정으로 보이며, 싱글 모드와 배속 옵션은 플레이어의 숙련도나 플레이 스타일에 따라 게임의 난이도를 조절할 수 있도록 설계된 기능으로 추정된다. 맵의 전체적인 분위기는 황무지 타일셋을 활용한 디스토피아적 배경으로, 방어 건물이 위치한 본진과 외부 지역 간의 대비가 인상적이다. 이 맵을 플레이하기 위해서는 방어 건물의 배치와 업그레이드, 그리고 적의 공격 패턴에 대한 이해가 필수적이며, 배속과 난이도 조절을 통해 초보자부터 숙련자까지 폭넓은 플레이어층을 타겟으로 삼고 있다. 특히 ‘운빨’이라는 요소는 게임의 재미를 한층 더하는 핵심 요소로 작용할 가능성이 크며, 랜덤한 보너스나 장애물이 등장할 가능성도 배제할 수 없다. 플레이 전에는 호스트가 배속과 게임 모드를 신중히 선택해야 하며, 방어 건물의 초기 배치와 자원 관리 전략을 미리 숙지하는 것이 중요하다. 이 맵은 디펜스 장르의 기본 틀을 유지하면서도 ‘운빨’이라는 독특한 요소를 도입해, 반복 플레이를 하더라도 매번 새로운 경험을 제공할 수 있도록 설계된 것으로 보인다. 특히, 다인 플레이를 염두에 둔 구조이기 때문에 팀워크와 전략적 협력이 중요한 요소로 작용할 가능성이 높다. 초보자라면 기본적인 방어 전략을 익히면서 배속을 낮춰 천천히 적응해 나가는 것이 좋으며, 숙련자라면 높은 배속과 난이도를 선택해 도전적인 플레이를 즐길 수 있을 것이다. 맵의 구조적 특징과 디자인적 요소, 그리고 제공되는 게임 모드를 종합해 볼 때, 이 맵은 디펜스 장르의 재미와 ‘운빨’이라는 예측 불가능한 요소의 조합을 통해 플레이어들에게 긴장감과 excitement를 동시에 제공할 수 있는佳作으로 평가된다. This StarCraft: Brood War custom map falls under the popular 'computer opponent defense' genre, often abbreviated as a 'comp-defense' map. The title 'QWER 운빨 디펜스' immediately evokes curiosity, blending the 'luck-based' Korean slang '운빨'(un-ppal, short for 운명+행운) with the defense genre, promising a unique and unpredictable gameplay experience. The internal map description hints at multiplayer functionality, with options for speed adjustments (싱글, UDP 금지), suggesting a structured host-controlled lobby where players can fine-tune game settings before starting. The central hub features the player's base, likely surrounded by defensive structures, while the outer sections appear to contain enemy bases or attack waves, typical of defense maps. The term '운빨' strongly implies that randomness or unpredictable elements play a significant role, possibly through randomized enemy spawns, bonus objectives, or environmental hazards, adding layers of challenge and excitement. The network restrictions (UDP 금지) likely aim to prevent lag exploits or cheating, ensuring a fair and smooth experience for all players. The wasteland tileset sets a gritty, post-apocalyptic tone, contrasting the player's fortified base with the chaotic exterior. To succeed, players must master defensive tower placements, resource management, and adapt to the map's dynamic elements, which may include sudden reinforcements or unexpected obstacles. The speed and difficulty settings allow for a tailored experience, catering to both beginners and veterans. Beginners are advised to start with lower speeds and simpler settings to grasp core mechanics, while advanced players can push their limits with higher speeds and randomized challenges. The map's design suggests a focus on replayability, as the 'luck' factor ensures varied outcomes even after multiple playthroughs. Team coordination and strategic planning are likely crucial in multiplayer modes, making this map not just a test of individual skill but also of collective effort. Overall, 'QWER 운빨 디펜스' stands out as a well-crafted comp-defense map that blends traditional defense mechanics with the thrill of unpredictability, offering an engaging and fresh experience for StarCraft: Brood War enthusiasts.
Impossible Continuum 3.2o
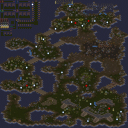
‘Impossible Continuum 3.2o’는 스타크래프트 브루드워의 유즈맵으로, ‘Impossible Longation’의 후속작이자 bushwack과 hahaha666에 의해 만들어진 컴까기 장르의 맵이다. 맵은 4096x4096 크기의 거대한 사막 타일셋을 바탕으로 구성되어 있으며, 5명의 플레이어가 동시에 참여할 수 있다. 게임의 핵심은 ‘Impossible’이라는 이름에서 짐작할 수 있듯이, 끊임없이 쏟아지는 적의 공격을 방어하며 마지막까지 살아남는 ‘컴퓨터 상대 디펜스’ 형식이다. 맵의 구조는 중앙을 가로지르는 좁은 통로와 그 주변의 넓은 평지로 나뉘며, 플레이어는 각자 할당된 위치에 건물을 건설하고 병력을 양성해 적의 공격을 막아내야 한다. 적의 유닛은 끊임없이 몰려오며, 그 수와 종류는 시간이 지날수록 점점 강력해진다. 특히 후반부로 갈수록 고급 유닛과 다수의 조합된 공격이 빈번해지므로, efficient한 자원 관리와 전략적 터렛 배치, 그리고 순간적인 판단력이 요구된다. 맵의 난이도는 ‘보통’ 정도로, 초보자도 쉽게 접근할 수 있지만 숙련자라면 더 높은 점수를 노릴 수 있는 구조로 설계되어 있다. 플레이어는 시작 시 기본 자원과 건물 몇 개를 제공받지만, 추가 자원은 주로 미네랄과 가스를 채취해 확보해야 한다. 또한, 맵 곳곳에 배치된 보너스 자원 지역을 활용하면 더 빠르게 병력을 양성할 수 있다. 방어 건물로는 주로 테란의 포톤 캐논이나 프로토스의 포톤 캐논에 해당하는 ‘디펜스 타워’를 사용할 수 있으며, 필요에 따라 추가 병력을 생산하거나 업그레이드를 진행할 수 있다. 맵의 분위기는 사막의 황량한 풍경과 적의 끊임없는 공격으로 긴장감이 지속되며, 플레이어는 자신의 생존과 더불어 다른 플레이어와의 경쟁도 고려해야 한다. 이 맵의 가장 큰 특징은 ‘Impossible’이라는 타이틀에 걸맞게, 적의 공격이 매우 치열하다는 점이다. 초반에는 저글링과 히드라리스크가 주를 이루지만, 중반 이후로는 뮤탈리스크, 울트라리스크, 그리고 캐리어까지 등장한다. 이러한 적의 조합을 efficiently 방어하기 위해서는 맵의 지형과 보너스 자원의 위치를 정확히 파악하고, 각 플레이어 간의 협력이 필수적이다. 또한, 맵의 후반부에는 갑자기 쏟아지는 적의 대군에 대처할 수 있는 ‘최후의 방어선’을 구축하는 것이 관건이다. 이러한 요소들이 결합되어 ‘Impossible Continuum 3.2o’는 단순한 디펜스 맵을 넘어, 전략과 집중력, 그리고 순간적인 판단력이 요구되는 고난이도의 유즈맵으로 자리매김하고 있다. 이 맵은 초보자에게는 다소 어려울 수 있지만, 디펜스 장르에 익숙한 플레이어라면 재미있게 즐길 수 있는 맵이다. 또한, 맵의 구조와 적의 공격 패턴이 일정하지 않기 때문에, 매 판마다 새로운 전략을 시도해 볼 수 있어 반복 플레이에도 지루하지 않다. 특히, 팀 플레이를 통해 다른 플레이어와의 협력을 연습할 수 있는 점도 큰 장점 중 하나다. 그러나 맵의 난이도가 높기 때문에, 초보자라면 먼저 쉬운 디펜스 맵으로 연습을 한 후 도전하는 것이 좋다. ‘Impossible Continuum 3.2o’는 디펜스 유즈맵을 좋아하는 플레이어들에게 강력히 추천할 만한 맵이다. 'Impossible Continuum 3.2o' is a user-created custom map for *StarCraft: Brood War*, serving as the sequel to *Impossible Longation*. Developed by bushwack and hahaha666, it belongs to the "compete against AI" genre. The map features a massive 4096x4096 desert tileset and supports up to five players simultaneously. As the name suggests, the core gameplay revolves around defending against relentless enemy waves in a "computer opponent defense" format until the last player remains. The map is divided into a narrow central corridor flanked by wide open areas. Players must build structures and train units in their assigned positions to fend off continuous enemy assaults. The enemy's forces grow increasingly stronger over time, both in number and unit composition. By the late game, high-tier units and coordinated attacks become frequent, demanding efficient resource management, strategic turret placement, and quick decision-making. While the difficulty is set to "normal," making it accessible for beginners, experienced players can aim for higher scores with its well-designed structure. Upon starting, players receive basic resources and a few buildings, but additional minerals and gas must be gathered through mining. Utilizing bonus resource spots scattered across the map can accelerate unit production. For defense, players can deploy 'defense towers' similar to Terran photon cannons or Protoss shield batteries, with options to produce extra units or research upgrades as needed. The map’s atmosphere—set against a barren desert backdrop under constant enemy pressure—creates a tense experience where players must balance survival with competition against others. What truly embodies the "Impossible" in its title is the map’s intense enemy onslaught. Early waves consist mainly of zerglings and hydralisks, but later stages introduce mutalisks, ultralisks, and even carriers. To defend effectively, players must master the terrain, leverage bonus resources, and coordinate closely with teammates. A critical challenge arises in the late game, where sudden massive enemy waves test the strength of the players' final defensive lines. These elements elevate 'Impossible Continuum 3.2o' beyond a simple defense map, transforming it into a high-stakes custom game that demands strategy, focus, and sharp reflexes. While the map may pose a challenge for beginners, it offers an engaging experience for those familiar with the defense genre. Its dynamic structure and unpredictable enemy patterns allow for fresh strategies with each playthrough, preventing monotony. The emphasis on teamwork also provides valuable practice in coordination with other players. However, due to its high difficulty, newcomers are advised to hone their skills on easier defense maps first. Overall, 'Impossible Continuum 3.2o' comes highly recommended for fans of the defense genre seeking a demanding and rewarding custom map.
![김태희 누드 II [Hard] 맵 미리보기](https://cdn-star-data.huzy.net/thumbnail_f3c99742537c4682b0dc9af61721a910.jpg)
김태희 누드 II [Hard]
이 맵은 스타크래프트 브루드워의 유즈맵으로, 공격과 방어가 혼합된 ‘컴퓨터 상대 디펜스’ 장르에 속한다. 맵 중앙에 위치한 본진 근처에서 시작하는 플레이어는 끊임없이 몰려드는 적군 웨이브를 상대해야 하며, 주어진 건물과 유닛을 활용해 방어선을 구축하는 것이 핵심이다. 맵은 4096x4096의 넓은 황무지 타일셋으로 구성되어 있으며, 주변을 가로지르는 협소한 길과 여러 개의 입구로 인해 진형 구축과 자원 운용이 전략적으로 중요해진다. 특히, 협소한 길목에서는 적의 다수 유닛을 효과적으로 저지할 수 있는 방어 구조물을 설치하거나, 미리 배치된 방어 건물을 활용해 효율적으로 웨이브를 막아내야 한다. 맵의 난이도는 'Hard'로 표기되어 있지만, 초보자가 접근하기에는 다소 어려운 구조로 구성되어 있다. 방어에 실패하면 순식간에 본진이 무너질 수 있어, 끊임없는 상황 판단과 신속한 판단력이 요구된다. 또한, 맵의 넓은 공간을 활용한 멀티태스킹과 자원 관리 능력이 승패를 가를 수 있는 포인트로 보인다. 추천 대상은 디펜스 장르에 익숙한 유저나, 전략적인 플레이를 즐기는 게이머이며, 특히 컴퓨터 상대 디펜스에 자신 있는 플레이어에게 적합하다. 플레이 전에는 맵의 주요 길목과 방어 포인트를 미리 숙지하고, 방어 건물의 배치와 유닛 생산 타이밍을 철저히 계획하는 것이 중요하다. 또한, 협소한 길목에서 발생할 수 있는 유닛 밀집 현상을 미리 대비하여, 방어 건물의 종류와 업그레이드 우선순위를 신중히 고려해야 한다. 이 맵은 넓은 공간과 복잡한 지형으로 인해, 단순히 방어만으로는 승리를 장담할 수 없으며, 능동적인 공격과 방어의 균형이 필수적이다. 이러한 특성 때문에, 플레이어의 전략적 사고와 적응력이 크게 발휘되는 맵으로 평가된다. This StarCraft: Brood War custom map blends attack and defense mechanics in a computer-versus-player defense genre. Players start near the central base and must fend off endless enemy waves by strategically building and upgrading defensive structures. The 4096x4096 map, set in a barren terrain tileset, features narrow pathways and multiple entry points that demand careful formation and resource management. Narrow passages allow players to efficiently block large enemy forces with defensive structures or pre-placed buildings. While labeled 'Hard,' this map is particularly challenging for beginners due to its intricate layout. Failure to defend effectively can lead to a swift base collapse, requiring constant situational awareness and quick decision-making. The map’s expansive space encourages multitasking and resource management as key factors for victory. This custom map is ideal for players familiar with defense genres or those who enjoy strategic gameplay, particularly those experienced in computer-based defense scenarios. Before playing, it’s essential to study key pathways and defense points, plan defensive structure placements, and carefully time unit production. Narrow bottlenecks can lead to unit congestion, so prioritizing defensive building types and upgrades is crucial. Success hinges not just on defense but on balancing offensive and defensive strategies, making this map a test of strategic thinking and adaptability.
컴퓨터 버전 HELL (Computer Ver.HELL)
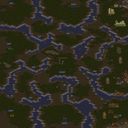
스타크래프트 브루드워의 유즈맵 ‘Computer Ver.HELL’은 컴퓨터 상대 디펜스 장르의 맵으로, 이름에서 느껴지듯 일반적인 디펜스와는 차별화된 극한의 방어 플레이를 요구하는 작품이다. 맵의 전체적인 구조는 사막 타일셋을 배경으로 펼쳐지며, 중앙에 위치한 본진을 중심으로 적의 공격을 방어하는 방식으로 진행된다. 맵의 특징은 ‘HELL’이라는 제목답게 초반부터 끊임없는 적의 다중 러시와 강력한 유닛 조합을 상대해야 한다는 점으로, 방어에 실패하면 순식간에 본진이 무너질 수 있는 극한의 긴장감을 제공한다. 특히, 방어선이 복잡하게 배치되어 있으며, 지형적 이점을 살리기 위한 섬세한 배치와 자원 관리, 유닛 생산 전략이 요구된다. 초보 유저보다는 중급 이상의 실력을 갖춘 플레이어에게 적합한 맵으로, 방어 타워의 배치와 유닛 컨트롤, 그리고 자원의 효율적 사용이 승패를 좌우한다. 또한, 맵의 난이도가 높아질수록 적의 공격 패턴이 다양해지고 강해지므로, 반복 플레이를 통해 대처법을 익히는 것이 중요하다. 이 맵은 디펜스 장르의 깊이를 한층 더 끌어올린 작품으로, 방어 플레이의 정석을 경험해 보고 싶은 유저들에게 강력히 추천한다. 다만, 초반 자원의 부족으로 인한 어려움을 극복하기 위한 전략적 준비가 필요하다는 점은 유념해야 한다. This Brood War custom map, ‘Computer Ver.HELL’, falls under the defense genre against AI opponents, offering a uniquely challenging experience distinct from typical defense maps. Set against a desert tileset, the map centers around defending your main base from relentless enemy waves. The ‘HELL’ in its title reflects the extreme difficulty, as players face continuous, multi-pronged assaults with powerful enemy unit compositions from the outset, where even a single mistake can lead to a swift defeat. The defensive lines are intricately designed, demanding strategic tower placements, efficient resource management, and precise unit control. While the map is accessible to intermediate players, mastering its mechanics requires experience and adaptability, especially as enemy patterns grow more complex and intense with higher difficulty levels. Ideal for players seeking to refine their defense strategies, this map rewards patience and practice. However, newcomers should prepare for initial resource scarcity and steep learning curves.
2제곱디팬스 (2Squared Defense)
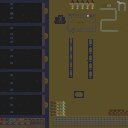
스타크래프트 브루드워의 대표적인 컴퓨팅 디펜스 유즈맵인 〈2제곱디팬스〉는 플레이어가 적의 끊임없는 공격을 방어하는 동시에 성장형 메커니즘을 통해 성을 강화하는 전략성이 돋보이는 맵입니다. 맵 중앙에 위치한 플레이어 기지와 주위에서 끊임없이 몰려드는 적 유닛을 상대로 방어선을 구축해야 하는데, 기본 베이스를 지키면서 동시에 미네랄과 가스를 확보해 방어 건물을 지속적으로 업그레이드하고 보충할 수 있습니다. 맵의 특징은 ‘2제곱’이라는 이름에서 알 수 있듯, 적의 공격 패턴이 단계적으로 강화되면서 난이도가 기하급수적으로 상승한다는 점입니다. 초반에는 약한 저글링과 히드라리스크가 주를 이루지만, 후반으로 갈수록 울트라리스크, 디바우러,甚至 공중 유닛까지 동원되는 혼종 부대가 등장해 방어가 increasingly 어려워집니다. 특히 맵의 왼쪽과 오른쪽에서 동시에 공격을 펼치는 패턴이 자주 등장하는데, 이 때문에 멀티태스킹 능력이 필수적입니다. 또한, 맵에 배치된 방어 건물 슬롯과 자원 분포가 전략적 선택을 요구하는 요소로 작용합니다. 방어 건물의 종류와 배치 위치를 잘못 선택하면 적의 공격을 버티지 못하고 금방 무너질 수 있으며, 반대로 효율적인 배치와 업그레이드는 후반까지 버틸 수 있는 튼튼한 성을 구축할 수 있습니다. 플레이어는 초반 자원 관리와 건물 배치 타이밍을 잘 잡아야 하며, 후반으로 갈수록 공격 패턴을 예측하고 방어선을 재구축하는 능력이 중요해집니다. 〈2제곱디팜스〉는 초보 플레이어에게는 다소 어려운 진입 장벽이 있지만, 적절한 전략과 꾸준한 연습을 통해 점차 숙련도를 높일 수 있는 맵입니다. 특히 팀 플레이가 가능하다는 점도 특징으로, 팀원 간의 역할 분담과 실시간 커뮤니케이션이 승패를 좌우할 수 있습니다. 이 맵을 즐기는 유저들에게는 방어 전략의 깊이를 느낄 수 있는 매력이 있으며, 적절한 난이도 조절과 흥미로운 성장 메커니즘이 특징입니다. 추천 대상은 전략 게임과 디펜스 장르를 선호하는 플레이어이며, 특히 ‘컴퓨터 상대 디펜스’ 유형의 맵을 즐기는 유저들에게 적합합니다. 플레이 전에는 기본 방어 건물의 종류와 특성을 숙지하고, 자원 관리와 건물 배치의 중요성을 인지하는 것이 좋습니다. 또한, 후반으로 갈수록 예측하기 어려운 적의 공격 패턴에 대비해 유연한 전략 수립이 필요합니다. StarCraft: Brood War’s classic computing defense custom map, 〈2제곱디팬스〉, challenges players to defend their base against relentless enemy waves while growing stronger through an upgrade system. The map centers around a player’s main base, surrounded by waves of Zerg units that escalate in difficulty exponentially—starting with basic Zerglings and Hydralisks before culminating in Ultralisks, Devourers, and even mixed air units. The name ‘2제곱디팜스’ hints at the geometric difficulty increase, where each phase of the attack grows more complex and destructive. Players must manage resources efficiently to build and upgrade defensive structures, with limited slots forcing strategic placement decisions. Left and right flanks often face simultaneous assaults, demanding multitasking and adaptability. The map’s appeal lies in its blend of resource management, defensive architecture, and escalating challenge, making it a test of both foresight and quick decision-making. While the learning curve is steep for beginners, mastery rewards players with a satisfying sense of progression and resilience. Team play is supported, allowing coordinated defenses and shared responsibilities. Ideal for fans of strategy and defense genres, this map rewards preparation—understanding defensive structures, resource allocation, and adaptive tactics are key to survival. Players should familiarize themselves with building types and enemy patterns early on to maximize their chances in later, unpredictable assaults.
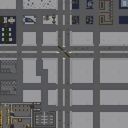
트로이안스 시뮬레이션 아이스 (Trojans SIMS ICE)
‘트로이안스 시뮬레이션 아이스(Trojans SIMS ICE)’는 스타크래프트 브루드워의 UMS 유즈맵으로, 얼어붙은 설원 지형에서 펼쳐지는 독특한 전략과 생존 요소를 조합한 디펜스 장르의 맵이다. 맵의 전체적인 구조는 4096x4096의 넓은 맵 크기를 기반으로 하며, 플랫폼 타일셋을 사용하여 지형과 배경이 얼음과 설원으로 구성되어 있다. 맵의 중앙에는 거대한 빙하가 가로지르며, 양측 플레이어가 점령할 수 있는Resource 위치와 방어 거점을 배치한 forsvars line이 존재한다. 얼음 지형은 일부 지역에서 깨지거나 무너질 수 있는 특징이 있으며, 이는 플레이어의 기동성과 전술에 영향을 미친다. 이 맵은 기본적으로 컴퓨터 상대 디펜스 유형으로 추정되며, 다수의 적 유닛이 주기적으로 몰려오는 웨이브 기반의 공격을 방어하는 것이 주요 목표로 보인다. 맵의 배치상으로는 중앙 빙하를 사이에 두고 좌우 대칭 구조를 띄고 있으며, 각 플레이어는 시작 지점에서 가까운 Resource 건물을 확보해 자원을 모으고 방어선을 구축할 수 있다. 얼음 지형의 특성상 일부 길목은 좁아지며, 이로 인해 유닛의 이동 경로가 제한되고 병력 운용 전략이 달라질 수 있다. 또한, 빙하의 일부 구역은 유닛이 지나갈 때 파괴되거나 지형이 변화하는 트리거가 포함되어 있을 가능성이 있다. 공격 패턴은 일정 주기로 강해지는 경향이 있을 것으로 보이며, 초반에는 약한 유닛들이 몰려오지만 후반으로 갈수록 강력한 조합의 적들이 등장할 것이다. 방어에 성공하려면 초반 자원 관리와 방어 건물 배치, 그리고 유닛 조합 최적화가 중요할 것이다. 맵의 난이도는 보통 이상으로 예상되며, 넓은 맵과 제한된 자원으로 인해 플레이어의 실력이 요구된다. 특히 얼음 지형의 파괴 가능성과 좁아진 길목은 방어 전략의 핵심 요소로 작용할 것이다. 이 맵은 디펜스 장르를 선호하는 플레이어나, 넓은 맵에서 펼쳐지는 전략적 대결을 즐기는 유저들에게 추천된다. 또한, 얼음과 설원의 조화로운 배경은 시각적 몰입감을 높이는 데 기여할 것이다. 플레이를 시작하기 전에 맵의Resource 위치와 얼음 지형의 파괴 가능성을 미리 확인하는 것이 중요하다. 또한, 초반에 자원을 확보하고 방어선을 미리 구축하는 습관이 필요하다. 유닛의 이동 경로를 제한하는 좁은 길목과 빙하의 변화는 예상치 못한 상황으로 이어질 수 있으므로, 게임 내내 맵의 변화를 주의 깊게 관찰해야 한다. 만약 디펜스와 얼음 지형의 특성을 모두 활용할 수 있는 전략을 구사한다면, 높은 승률을 기대할 수 있을 것이다. ‘Trojans SIMS ICE’ is a UMS custom map from *StarCraft: Brood War*, blending unique strategy and survival elements in a defense genre set on a frozen snowy terrain. The map is built on a massive 4096x4096 grid, featuring a platform tileset where icy and snowy terrain make up the landscape. A massive glacier runs through the center of the map, with resource points and defensive strongholds positioned along the frontline where both players can claim them. The ice terrain can crack or collapse in certain areas, affecting player mobility and tactical decisions. The map appears to be a computer-based defense type, where the main objective is to withstand waves of enemies that periodically surge toward your base. The layout is symmetrical on both sides of the central glacier, allowing each player to secure nearby resource buildings to gather supplies and build their defenses early. Due to the ice terrain, some paths narrow significantly, restricting unit movement and forcing players to adapt their troop deployment strategies. Additionally, certain sections of the glacier may include triggers that alter the terrain or destroy parts of it when units pass through. The enemy attack patterns seem to escalate over time, starting with weaker units and gradually introducing stronger, more complex compositions as the game progresses. Success depends on efficient early resource management, strategic defensive building placement, and optimized unit compositions. The map is expected to be of medium to high difficulty, requiring strong player skill due to the large scale and limited resources. The destructible ice terrain and narrow passages play a crucial role in shaping defensive strategies. This map is recommended for players who enjoy defense genres or strategic battles unfolding across expansive maps. The harmonious blend of ice and snow also enhances visual immersion. Before starting, it’s important to scout resource locations and identify sections of the ice that can collapse. Establishing a strong early economy and defensive lines is essential. Since narrow paths and shifting glaciers can lead to unexpected situations, players must remain vigilant throughout the match. If you can incorporate both the defense mechanics and the unique ice terrain into your strategy, you’ll have a much higher chance of securing victory.
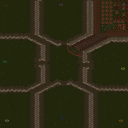
7vs1 하드 컴퓨터 (7vs1 Hard Computer)
스타크래프트 브루드워 유즈맵 '7vs1 hard computer'는 7명의 플레이어가 단 한 명의 '매우 어려운 컴퓨터' 플레이어를 상대로 방어전을 펼치는 디펜스 장르의 협동형 맵이다. 맵의 핵심은 극한의 러시 타이밍을 잡아오는 AI의 공격을 효과적으로 방어하고, 이를 기반으로 역공을 노리는 전략적 균형에 있다. 맵은 사막 타일셋으로 구성되어 있으며, 넓은 평야와 중앙 언덕 지형이 특징적이다. 중앙 언덕은 방어 거점을 확보하기 좋은 위치로, 다수의 건물을 배치해 병력을 생산하고 요새화할 수 있는 공간이 제공된다. 플레이어들은 시작 지점에서 건물을 건설하고 자원을 채취할 수 있으며, AI는 주로 저그 종족으로 등장해 빠른 타이밍 러시를 시도하는 것으로 보인다. 방어에 실패하면 순식간에 건물이 파괴되고 게임이 끝나므로, 초반 자원 관리와 방어 시설 구축이 무엇보다 중요하다. 또한, AI의 공격 패턴은 상대적으로 예측 가능한 편이지만, '매우 어려움' 난이도답게 병력 규모가 크고 속도가 빨라서 방심할 수 없다. 이 맵은 협동심이 중요한데, 각 플레이어가 맡은 구역을 방어하지 못하면 전체가 무너질 수 있어 팀웍이 필수적이다. 초보자에게는 다소 어려운 편이지만, 방어 구조와 병력 운용에 익숙해지면 점차 재미를 느낄 수 있는 맵이다. 추천 플레이어는 적어도 중급 이상으로, 스타크래프트의 기본적인 빌드와 전략을 이해하고 있는 플레이어들이 즐기기 좋다. 맵을 시작하기 전에는 방어 거점의 확보와 초기 자원 배분을 carefully 해야 하며, AI의 공격 루트를 미리 예상해 대비하는 것이 중요하다. 또한, 협동 채팅을 통해 방어 계획과 병력 공유를 원활히 하는 것이 승리의 열쇠가 될 것이다. 이 맵은 디펜스 장르의 정수를 느낄 수 있는 동시에, 플레이어 간의 화합과 전략적 사고를 요구하는 흥미로운 경험을 선사할 것이다. 특히, AI의 공격 패턴을 분석하고 이를 바탕으로 방어 전략을 발전시키는 재미가 있다. 한정된 자원과 넓은 맵 공간을 활용해 어떻게 효율적으로 방어선을 구축할 것인지 고민해 보는 것도 이 맵의 묘미 중 하나다. 초반에는 방어에 집중하되, AI의 공격을 성공적으로 막아낸 후에는 역공을 노려볼 수도 있다. 하지만 역공 타이밍을 잡는 것은 매우 어려우므로, 기본적으로는 방어에 중점을 두고 플레이하는 것이 좋다. 이 맵을 즐기기 위해서는 스타크래프트의 기본적인 메커니즘을 잘 이해하고 있어야 하며, 특히 저그의 공격 패턴과 방어 건물의 배치에 대한 지식이 helpful 하다. 또한, 팀원 간의 원활한 소통이 없으면 방어에 구멍이 생길 수 있으므로, 협동심을 키우는 것도 중요하다. 이 맵은 단순히 방어만 하는 것이 아니라, 어떻게 하면 AI의 공격을 효과적으로 막아내고 역전을 노릴 수 있는지를 끊임없이 고민하게 만드는 매력이 있다. 따라서, 디펜스 장르를 좋아하는 플레이어라면 반드시 한 번쯤 도전해 볼 만한 가치가 있는 맵이라 할 수 있다. 이 맵을 통해 협동의 중요성과 전략적 사고의 필요성을 느낄 수 있을 것이다. 또한, AI의 공격 패턴을 분석하고 이를 바탕으로 한 방어 전략을 세워보는 것은 스타크래프트의 기본기를 다지는 데에도 큰 도움이 될 것이다. 이 맵은 단순히 재미뿐만 아니라, 실력 향상에도 도움이 되는 유용한 맵으로 평가할 수 있다. 마지막으로, 이 맵을 플레이할 때는 각자의 역할 분담을 명확히 하고, 팀원 간의 호흡을 맞추는 것이 무엇보다 중요하다는 점을 잊지 말아야 한다.只有这样,才能在激烈的防守战中取得最终的胜利。 This StarCraft: Brood War custom map, *"7 vs. 1 Hard Computer,"* is a cooperative defense-style map where seven players must defend against a single, extremely difficult AI opponent. The core challenge lies in effectively countering the AI's relentless rush timing and maintaining a strategic balance to launch a counterattack. The map features a desert tileset with expansive plains and a central hill terrain, which provides an ideal defensive position. The elevated ground allows players to establish strongholds, construct multiple buildings, and fortify their defenses. Players begin by building structures and gathering resources at their starting points, while the AI, typically playing as the Zerg, launches rapid early-game rushes. Failing to defend properly results in buildings being destroyed almost instantly, ending the game—making early resource management and defensive infrastructure crucial. Though the AI's attack patterns are somewhat predictable, its "very hard" difficulty ensures overwhelming force with fast-moving units, leaving no room for complacency. Teamwork is essential here; if any player fails to hold their sector, the entire defense collapses, making coordination vital. While challenging for beginners, the map becomes more enjoyable as players master defensive structures and unit control. It's best suited for intermediate to advanced players who understand basic builds and strategies. Before starting, careful planning is needed to secure defensive positions and allocate initial resources, while anticipating the AI's attack routes is key. Effective use of in-game chat for strategy discussions and shared reinforcements is often the difference between victory and defeat. This map offers a pure defense experience while demanding teamwork and strategic thinking, rewarding players who analyze the AI's patterns and adapt their defenses accordingly. The limited resources and vast map space encourage creative solutions for building efficient defensive lines. Early focus should be on defense, but successful stops can open opportunities for counterattacks—though timing these pushes is extremely difficult, so defense should remain the priority. To fully enjoy the map, players should have a solid grasp of StarCraft's mechanics, especially Zerg attack patterns and defensive building placements. Strong communication among teammates is also critical, as gaps in coordination can lead to critical failures. Beyond just defense, the map challenges players to constantly refine their strategies to not only withstand the AI's onslaught but also turn the tide in their favor. For fans of the defense genre, it's a must-try experience that highlights the importance of teamwork and tactical thinking. Analyzing the AI's behavior and adjusting defenses accordingly also serves as excellent practice for improving fundamental StarCraft skills. Ultimately, this map is valuable not just for its entertainment value but also for its role in skill development. When playing, players should clearly define roles, synchronize with teammates, and never forget that only through unity can they achieve victory in this intense defensive battle.
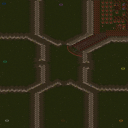
7vs1 하드 컴퓨터 (7vs1 Hard Computer)
스타크래프트 브루드워의 <7vs1 hard computer>는 7명의 플레이어가 한 명의 매우 강력한 컴퓨터를 상대하는 디펜스형 유즈맵으로, 방어 건물을 빠르게 구축하지 않으면 순식간에 전멸할 수 있는 긴장감 넘치는 구조가 특징이다. 사막 타일셋의 넓은 맵에서 시작하는 플레이어들은 중앙 지역을 중심으로 병력을 생산해Computer의 끊임없는 러시를 방어해야 한다. 컴퓨터는 초반부터 강력한 유닛들을 끊임없이 보내며, 이를 막기 위해 플레이어는 입구에 요새를 건설하거나, 방어 건물을 배치하는 등 전략적인 대비를 요구받는다. 맵의 핵심은 '빠르고 튼튼한 방어'에 있으며, 개개인의 반응 속도와 조합 정비가 승부를 가르는 요소로 보인다. 초보자에게는 다소 어려운 난이도를 자랑하지만, 팀원과의 Effective한 협력이 성공의 열쇠가 될 것으로 추정된다. 방어에 성공한 후에는 반격의 기회를 노릴 수도 있지만, 기본적으로는Computer의 공격을 버텨내는 '생존'에 중점을 둔 디자인이다. 맵의 분위기는 사막의 황량한 배경과 어우러져 긴장감을 한층 더해주며, 플레이어는 끊임없이 밀려오는 적의 물량을 상대해야 하는 짜릿함을 느낄 수 있다. 특히Computer의 공격 패턴이 예측 가능한 부분도 있지만, 초반 세팅을 잘못하면 순식간에 무너질 수 있어 신중한 플레이가 요구된다. 7인의 플레이어가 모두 살아남기 위해선 개개인의 판단력이 무엇보다 중요하며, 이는 마치 '7명이 한 명의 보스를 상대하는 보스 러시'와 같은 재미를 선사한다. 방어에 성공한다면 큰 성취감을 느낄 수 있지만, 한번 무너지면 그대로 게임이 끝나는 만큼 긴장감과 몰입도가 높은 편이다. StarCraft: Brood War’s *7 vs. 1 Hard Computer* is a defense-focused custom map where seven players face off against a single, overwhelmingly powerful AI opponent. The map’s structure is tense and unforgiving—if players fail to quickly establish defenses, they risk being wiped out in no time. Set on a vast desert tileset, the match begins with players positioned around the central area, where they must produce units and fend off the AI’s relentless waves of assaults. From the very start, the AI sends out strong units in rapid succession, forcing players to strategize—building fortresses at key entrances or positioning defensive structures—to hold the line. The core of the map lies in *fast, sturdy defense*, with individual reaction speed and unit coordination often determining the outcome. While the difficulty may be steep for newcomers, effective teamwork appears to be the key to success. After surviving the initial onslaught, players may find opportunities to counterattack, but the map’s design fundamentally prioritizes *survival* against the AI’s relentless pressure. The atmosphere, enhanced by the barren desert backdrop, amplifies the tension, immersing players in the thrill of constantly battling overwhelming enemy numbers. Though the AI’s attack patterns are somewhat predictable, a poor early setup can lead to an instant collapse, demanding careful, strategic play. For all seven players to survive, individual decision-making is crucial—making the experience akin to a "boss rush" where seven players take on a single, formidable foe. While victory brings a strong sense of accomplishment, the map’s high stakes mean that a single mistake can end the game abruptly, ensuring a gripping, high-intensity experience.
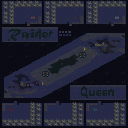
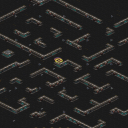
데저트 스트라이크 나이트 HALF2 (Desert Strike Night HALF2)
《데저트 스트라이크 나이트 HALF2》는 스타크래프트 브루드워의 유즈맵으로, 사막 지형을 배경으로 한 디펜스 장르의 맵이다. 맵의 특징은 밤하늘과 사막의 조합으로 어두운 분위기를 연출하며, 플레이어는 적의 끊임없는 공격을 방어해야 한다. 맵의 구조는 중앙에 넓은 평지가 있고, 그 주위를 둘러싼 언덕과 협곡이 주요 방어 포인트로 활용된다. 플레이어는 이 지형을 이용해 방어선을 구축하고, 적의 유닛이 몰려오는 타이밍을 예측하며 전략적으로 대처해야 한다. 맵의 분위기는 어둡고 긴장감 넘치며, 특히 밤하늘의 별과 달이 맵 전체에 흩뿌려져 있어 시각적인 아름다움도 갖추고 있다. 맵의 진행 방식은 주로 컴퓨터 상대 디펜스로, 플레이어는 제한된 자원으로 적의 공격을 막아내며 생존을 목표로 한다. 맵의 장르는 디펜스이지만, 단순히 방어만 하는 것이 아니라 지형과 자원을 활용한 전략적 플레이가 요구된다. 특히Night HALF2라는 제목에서 알 수 있듯이, 밤 시간대라는 설정이 맵의 분위기와 플레이 경험에 큰 영향을 미친다. 추천 대상은 디펜스 장르를 좋아하는 플레이어이며, 특히 전략적이고 긴장감 넘치는 플레이를 즐기는 유저들에게 적합하다. 플레이 전에는 맵의 지형과 방어 포인트를 꼼꼼히 파악하는 것이 중요하며, 자원의 배치와 적의 공격 패턴을 미리 숙지하고 준비하는 것이 승리의 열쇠가 될 것이다. 《Desert Strike Night HALF2》 is a user-made custom map for *StarCraft: Brood War*, set in a desert terrain with a defense genre. The map’s key feature is its combination of night skies and deserts, creating a dark and tense atmosphere where players must fend off relentless enemy attacks. The layout centers around a wide open plain surrounded by hills and canyons, which serve as key defensive points. Players must use these terrains to build their defenses, predict enemy unit rushes, and respond strategically. The overall mood is dark and high-stakes, enhanced by scattered stars and a moon across the night sky, adding visual beauty. The gameplay primarily involves defending against AI-controlled enemies, where players must survive by managing limited resources. While it’s a defense map, it requires more than just passive blocking—players must utilize terrain and resources strategically. As suggested by the title *Night HALF2*, the nighttime setting deeply influences both the map’s atmosphere and gameplay experience. It’s recommended for players who enjoy defense games, especially those who prefer strategic and high-tension gameplay. Before playing, it’s crucial to study the map’s terrain and defensive points, familiarize yourself with resource placement, and understand enemy attack patterns—the key to victory lies in preparation.
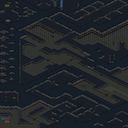
고스트 태그 고스트 (Ghost Tag Ghost)
스타크래프트 브루드워의 대표적인 유즈맵 장르 중 하나인 '컴퓨터 상대 디펜스'에 속하는Ghost Tag Ghost는, 7명의 플레이어가 각자의 거점에서 적의 공격을 방어하는 동시에 상대를 섬멸하는 전략적 재미를 제공하는 맵입니다. 맵의 전체적인 분위기는 도시를 배경으로 한 ‘Urban Style Snipers’라는 콘셉트가 반영되어 있으며, 2005년에 제작된 유서 깊은 맵 중 하나로 알려져 있습니다.Ghost Tag Ghost는 플레이어 각자에게 독립된 기지가 제공되며, 이곳에서 미네랄과 가스를 채취해 유닛을 생산하고 방어 시설을 구축할 수 있습니다. 맵 중앙에는 넓은 개활지가 펼쳐져 있어 저격 유닛이나 스나이퍼 계열 유닛의 활약이 두드러지며, 지형상 요충지에는 언덕과 좁은 통로가 있어 방어와 공격의 균형을 맞추는 전략이 중요합니다. 특히, 맵의 이름에서 유추할 수 있듯이 ‘유령(ghost)’을 연상시키는 은밀한 이동이나 기습 공격이 가능하도록 설계되어 있어, 플레이어는 자신의 위치를 숨기며 적의 후방이나 보급로를 교란할 수 있습니다. 이 맵은 단순히 방어만 하는 것이 아니라, 상대의 기지를 파괴하거나 주요 자원 지역을 점령하는 동시에 자신의 기지를 지키며 다채로운 전술을 펼칠 수 있도록 구성되어 있습니다. 초보자도 쉽게 접근할 수 있는 구조이지만, 고수층에게는 치밀한 타이밍과 위치 선정, 다중 전선 관리 등 복잡한 전략이 요구되는 매력을 지녔습니다.Ghost Tag Ghost는 7명의 플레이어가 참여할 수 있는 대규모 디펜스 유즈맵으로, 각자의 기지에서 자원을 채취하고 유닛을 생산해 적을 공격하거나 방어하는 동시에, 상대의 기지를 파괴하는 것이 주요 목표로 보입니다. 맵의 디자인상으로는 도시를 배경으로 한 ‘Urban Style Snipers’라는 컨셉트가 반영된 것으로 보이며, 넓은 개활지와 언덕, 좁은 통로 등이 플레이어의 전략적 선택지를 넓혀주고 있습니다. 맵 이름에 등장하는 ‘Ghost’는 은밀한 기습이나 후방 교란을 연상시키는 요소로 작용하며, 이는 맵의 진행 방식에도 반영된 전략적 장치로 보입니다. 이 맵은 초보자도 쉽게 따라할 수 있도록 비교적 간단한 구조를 가지고 있지만, 고수층에게는 세밀한 타이밍과 다중 전선 관리, 위치 선정 등 복잡한 전략이 요구되는 매력을 지녔습니다. 또한, 2005년에 제작된 유서 깊은 맵으로, 오랜 시간 동안 많은 유저들에게 사랑받아 온 것으로 추정됩니다. Ghost Tag Ghost is a classic *StarCraft: Brood War* custom map in the "defend against AI" genre, where seven players defend their bases while simultaneously eliminating opponents. The map’s aesthetic is inspired by an urban setting, following the "Urban Style Snipers" theme, and it has been a beloved map since its release in 2005. Each player starts with their own independent base, where they can gather minerals and gas to produce units and build defenses. The map features a wide open central area, ideal for sniper-style units, while key terrain points include hills and narrow pathways that demand strategic balance between defense and offense. As the name suggests, the map is designed to allow stealthy movements and ambushes reminiscent of "ghosts," enabling players to hide their positions and disrupt enemy supply lines or strike from behind. While the core objective is to defend your base, the map also rewards aggressive play—destroying enemy bases or securing key resource areas while maintaining your own defenses. The structure is accessible to beginners, but advanced players will appreciate the depth, requiring precise timing, smart positioning, and multi-front management. Ghost Tag Ghost supports up to seven players in this large-scale defense custom map, where resource gathering, unit production, and base destruction are central to victory. The urban sniper theme is reflected in its design, with open fields, hills, and choke points expanding strategic options. The "Ghost" in its name hints at the stealth and rear-area disruption that play a key role in its gameplay. Though the layout is straightforward enough for newcomers, skilled players will find depth in managing multiple fronts, timing attacks, and choosing optimal positions. Dating back to 2005, it remains a time-tested favorite among many players.
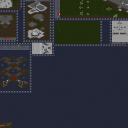
더 락 v2 (The Rock v2)
스타크래프트 브루드워의 유즈맵 ‘더 락 v2(The Rock v2)’는 플레이어가 거대한 바위 지형을 중심으로 펼쳐지는 디펜스형 맵에서 컴퓨터 유닛의 공격을 막아내는 ‘컴퓨터 상대 디펜스’ 장르의 유즈맵으로 추정된다. 맵의 전체 지형은 얼음과 설원으로 구성되어 있으며, 중앙에 위치한 커다란 바위 모양의 구조물이 주요 방어 포인트로 보인다. 플레이어는 이 바위를 중심으로 주변의 방어선을 구축하며, 끊임없이 몰려오는 적의 웨이브 공격을 버텨내야 한다. 맵의 타일셋과 배경은 서리 가득한 혹한의 환경을 연출하며, 어두운 색조의 조명이 전체적인 분위기를 더 어둡고 긴장감 있게 만든다. 바위 주변으로는 좁은 길목과 협곡이 배치되어 있어 방어 전략을 세우는 데 중요한 역할을 할 것으로 보인다. 맵의 구조상 플레이어는 방어 포인트를 사수하는 동시에, 지형을 활용한 지뢰나 터렛 배치 등으로 적의 진격을 지연시키는 플레이가 요구될 것으로 추정된다. 맵의 전체 크기가 4096x4096으로 상당히 넓은 편이지만, 주요 전투가 벌어지는 지역은 중앙 바위 주변으로 집중되어 있어 플레이 흐름은 비교적 명확한 편이다. 이 맵은 초보 플레이어보다는 중간 이상의 맵 이해도와 전략적 사고가 필요한 편으로 보이며, 방어 포인트를 지키면서도 자원 관리와 유닛 생산 타이밍을 잘 조절해야 성공할 수 있을 것으로 예상된다. 특히 바위 주변의 좁은 입구와 협곡을 활용한 방어 라인 구축이 승패를 좌우할 가능성이 높다. 이 맵은 컴퓨터 상대 디펜스 장르의 특성상 지속적인 적의 공격을 버텨내는 재미와 긴장감을 동시에 제공할 것으로 보이며, 긴 플레이 시간보다는 한 판당 20~30분 내외의 플레이 타임이 적절할 것으로 추정된다. 추천 대상은 주로 디펜스 장르를 선호하는 플레이어이며, 전략적 플레이와 긴장감 있는 전투를 즐길 수 있는 유저들에게 적합할 것으로 판단된다. 플레이 전에는 바위 주변의 지형과 주요 통로, 협곡의 구조를 미리 숙지하고, 방어 라인의 효율적인 구축 방법을 충분히 고민해 보는 것이 중요하다. 또한, 컴퓨터의 공격 패턴과 스웜 타이밍을 분석하는 데에도 충분한 시간을 투자하는 것이 좋다. StarCraft: Brood War’s custom map *The Rock v2* appears to be a defense-style map where players must fend off waves of enemy units centered around a massive rocky terrain. The map’s terrain consists of ice and snow, with a large rock formation at its core serving as the primary defensive point. Players build their defenses around this rock, enduring relentless waves of enemy attacks. The tileset and background evoke a harsh, frostbitten environment, with dim lighting adding to the tense and oppressive atmosphere. Narrow paths and canyons surround the rock, playing a crucial role in shaping defensive strategies. Given the map’s layout, players must not only hold key positions but also strategically place mines or turrets to delay enemy advances. While the map spans a large 4096x4096 area, most combat is concentrated around the central rock, keeping the gameplay flow relatively straightforward. This map seems better suited for intermediate to advanced players, requiring a solid understanding of strategy, resource management, and precise unit production timing. The narrow entrances and canyons near the rock will likely determine victory or defeat, as they shape the effectiveness of defensive lines. As a computer-based defense map, it delivers both fun and tension by challenging players to withstand continuous assaults, with recommended playtimes of 20 to 30 minutes per match. It’s ideal for players who enjoy defense genres and strategic, high-stakes battles. Before playing, it’s important to study the terrain around the rock, key pathways, and canyon structures, and thoroughly plan how to optimize defensive lines. Additionally, dedicating time to analyze the computer’s attack patterns and swarm timings will be essential for success.
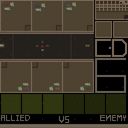
임파서블 (Impossible v.Beta)
‘Impossible v.Beta’는 스타크래프트: 브루드워의 유즈맵으로, 이름 그대로 ‘가능한가’에 대한 도전 정신을 담은 디펜스 장르의 맵이다. 맵의 전체적인 구조는 거대한 원형 경기장 형태로, 중앙에 위치한Resource Area(자원 지역)를 중심으로 적의 공격을 방어해야 한다. 플레이어는 6명의 인원으로 구성되어 있으며, 각 플레이어는 시작 지점에서Resource Area로 이어지는 좁은 통로를 통해 이동하며 방어선을 구축해야 한다. 맵의 특징 중 하나는 제한된 공간과 좁은 길목으로, 적은 수의 유닛만으로도 방어가 용이하도록 설계되어 있다는 점이다. 특히Resource Area 주변에는 다수의 미네랄과 가스가 배치되어 있으며, 플레이어는 이를 활용해 유닛을 생산하고 방어선을 강화할 수 있다. 맵의 전체적인 분위기는 어둡고 압박감이 느껴지며,Resource Area 주변의 지형은 복잡하고 입체적인 구조를 띠고 있어 전략적인 플레이가 요구된다. 방어에 실패하면Resource Area가 파괴되어 패배하게 되며, 이를 방지하기 위해 플레이어는 끊임없이 유닛을 생산하고 방어선을 유지해야 한다. 맵의 난이도는 보통 수준으로 추정되며, 적의 공격 패턴과 맵의 구조를 빠르게 파악할 수 있는 능력이 중요하다. ‘Impossible v.Beta’는Resource Area를 중심으로 한 방어전이라는 점에서 ‘컴퓨터 상대 디펜스’ 장르에 속하며, 좁은 통로와 제한된 공간을 활용한 전략적인 플레이가 핵심이다. 이 맵은Resource Area를 보호하는 데 중점을 두고 있으며,Resource Area 주변의 지형과 자원 배치, 그리고 좁은 길목을 활용한 방어 전략이 플레이 경험을 좌우한다. 특히Resource Area의 파괴를 방지하는 것이 승리 조건으로 보이며, 이를 위해 플레이어는Resource Area 주변의 방어선을 강화하고 끊임없이 유닛을 생산해야 한다.Resource Area의 중요성과 좁은 통로의 구조는Resource Area를 중심으로 한 전투가 치열할 수밖에 없음을 시사하며,Resource Area의 파괴를 방지하는 것이 맵의 핵심 목표로 보인다. 또한Resource Area 주변의 자원 배치는Resource Area를 중심으로 한 전투에서Resource Area의 중요성을 한층 더 부각시킨다. 이 맵은Resource Area를 중심으로 한 방어전이라는 점에서Resource Area의 중요성과Resource Area 주변의 지형, 그리고Resource Area를 보호하기 위한 전략적인 플레이가 요구된다.Resource Area의 파괴를 방지하고Resource Area 주변의 방어선을 유지하는 것이 이 맵의 핵심 목표로 보이며,Resource Area의 중요성과Resource Area 주변의 자원 배치가Resource Area를 중심으로 한 전투를 더욱 흥미롭게 만든다.Resource Area의 파괴를 방지하기 위해Resource Area 주변의 방어선을 강화하고Resource Area 주변의 자원을 활용한 유닛 생산이Resource Area를 중심으로 한 전투의 성패를 좌우할 것이다. 플레이 전Resource Area의 위치와Resource Area 주변의 지형, 그리고Resource Area로 이어지는 통로의 구조를 미리 확인하는 것이 중요하다. 또한Resource Area 주변의 자원 배치를 활용한 유닛 생산 계획을 세워두는 것이Resource Area의 방어에 큰 도움이 된다.Resource Area의 파괴를 방지하는 것이Resource Area를 중심으로 한 전투의 핵심 목표임을 기억하고,Resource Area 주변의 방어선을 강화하는 데 주력해야 한다.Resource Area의 중요성을 간과하지 말고,Resource Area를 중심으로 한 전투에서Resource Area의 파괴를 방지하는 전략을 세우는 것이Resource Area를 중심으로 한 전투의 성공을 좌우할 것이다. 이 맵은Resource Area를 중심으로 한 방어전이라는 점에서Resource Area의 중요성과Resource Area 주변의 지형, 그리고Resource Area를 보호하기 위한 전략적인 플레이가 요구되는 맵으로,Resource Area의 파괴를 방지하고Resource Area 주변의 방어선을 유지하는 것이Resource Area를 중심으로 한 전투의 핵심 목표로 보인다.Resource Area의 파괴를 방지하기 위해Resource Area 주변의 방어선을 강화하고Resource Area 주변의 자원을 활용한 유닛 생산이Resource Area를 중심으로 한 전투의 성패를 좌우할 것이다. Resource Area를 중심으로 한 전투에서Resource Area의 파괴를 방지하는 것이Resource Area를 중심으로 한 전투의 핵심 목표로 보이며,Resource Area 주변의 지형과Resource Area로 이어지는 통로의 구조, 그리고Resource Area 주변의 자원 배치를 활용한 전략적인 플레이가Resource Area를 중심으로 한 전투의 성공을 좌우할 것이다.Resource Area의 중요성을 간과하지 말고,Resource Area를 중심으로 한 전투에서Resource Area의 파괴를 방지하는 전략을 세우는 것이Resource Area를 중심으로 한 전투의 성공을 결정짓는 중요한 요소로 보인다.
최근 등록된 맵
새로 추가된 파일과 버전을 확인하세요.
컴퓨터 디펜스 6.13 (Computer Defense 6.13)
스타크래프트 브루드워 맵을 즐기는 유저들 사이에서 디펜스 장르는 언제나 큰 인기를 끌어왔으며, 그중에서도 독특한 규칙과 협동 플레이를 요구하는 작품들은 오래도록 회자되곤 합니다. 이번에 소개할 스타크래프트 맵은 컴퓨터 디펜스 6.13(Computer Defense 6.13)이라는 타이틀을 가진 유즈맵으로, 사막 타일셋을 배경으로 펼쳐지는 흥미로운 방어전입니다. 다수의 플레이어가 힘을 합쳐 몰려오는 적들을 막아내야 하는 구조를 가지고 있어, 동료들과의 호흡과 전략적인 유닛 배치 유무가 승패를 가르는 핵심 요소로 작용합니다. 게임이 시작되면 플레이어들은 각자 주어진 위치에서 자원을 관리하고 방어 라인을 구축하게 되며, 웨이브 형태로 거세게 밀려오는 적의 공세를 효과적으로 차단해야 합니다. 일반적인 밀리 전투와는 완전히 다른 플레이 경험을 선사하기 때문에, 평소 색다른 방식의 유즈맵을 선호하는 이들에게 매력적인 선택지가 될 수 있습니다. 특히 여러 명이 함께 협력하여 거대한 공세를 막아내는 재미를 찾고 있는 사용자라면 한 번쯤 플레이해 볼 가치가 있는 맵입니다. 플레이를 진행하기 전, 맵의 전반적인 구조와 아군과의 협동 필요성을 미리 숙지하고 들어가는 것이 원활한 방어선 구축에 큰 도움이 됩니다. Among users who enjoy StarCraft: Brood War maps, the defense genre has always enjoyed great popularity, and works that require unique rules and cooperative play among them are often talked about for a long time. The StarCraft map to be introduced this time is a usemap with the title Computer Defense 6.13, which is an interesting defense battle unfolding against the background of a desert tileset. It has a structure where multiple players must join forces to stop enemies rushing in, so the breath with colleagues and the presence or absence of strategic unit placement act as key factors that determine victory or defeat. When the game starts, players manage resources in their given positions and build defense lines, and must effectively block the enemy's offensive rushing in the form of waves. Because it provides a completely different playing experience from general melee battles, it can be an attractive choice for those who usually prefer different ways of usemaps. Especially if you are a user looking for the fun of cooperating with multiple people to block a huge offensive, it is a map worth playing at least once. Before proceeding with the play, it is a great help to build a smooth defense line by familiarizing yourself with the overall structure of the map and the need for cooperation with allies in advance.
치트 크래프트 (Cheet Craft)
‘치트 크래프트’(Cheet Craft)는 스타크래프트 브루드워 유즈맵 장르 중 하나로, 6명의 플레이어가 한 팀을 이뤄 컴퓨터를 상대로Resource를 관리하고 건물을 건설하는 동시에, 기지를 방어하며 적군을 격파하는 ‘컴퓨터 상대 디펜스’ 형식의 맵이다. 내부 제목과 파일명에서 확인되는 ‘Cheet’는 ‘치트’로 읽히며, 제작자 ‘Upgrade_Mania’의 개성 있는 네이밍이 돋보인다. 해상도 4096x4096의 넓은 맵에서 화산 타일셋을 활용한 배경과 지형이 펼쳐지며, 중앙과 외곽에 배치된 Mineral Field 및 Gas Geyser가Resource 확보의 핵심 포인트가 된다. 플레이어는 시작과 동시에 커맨드 센터를 건설하고 SCV를 생산해 Mineral Field를 채취해야 하며, 동시에 방어 건물을 건설해 적의 공격을 방어하는 동시에 자원 동선을 확보하는 전략적 균형이 요구된다. 맵은 다수의 Mineral Field와 Gas Geyser가 배치되어 있어Resource 확보가 비교적 용이하지만, 외부에서 침입하는 적 유닛(주로 저글링, 질럿, 마린)의 빈도가 높아 초반 방어 라인 구축이 중요하다. 특히, 맵의 구조상 왼쪽과 오른쪽 외곽 지역이 상대적으로 Resource가 풍부한 대신 방어에 취약한 구조로 보이므로, Resource 확보와 방어 라인 구축을 동시에 진행하는 멀티태스킹 능력이 필요하다. 중반 이후에는 플레이어 간 협력이 필수적으로 요구되며,Resource를 모아 강력한 유닛(마린, 벌쳐, 탱크 등)을 양산해 적의 기지를 공격하는 동시에, 방어 건물의 유지와Resource 확보를 위한 SCV 관리가 지속되어야 한다. 맵의 진행은 ‘Resource 확보 → 방어 라인 구축 → 공격 및Resource 재확보’의 사이클이 반복되는 구조로,Resource 관리와 전술적 판단이 victory를 좌우하는 핵심 요소로 작용한다. 이러한 특징은 ‘치트 크래프트’가Resource 관리와 디펜스, 공격의 밸런스를 동시에 요구하는 ‘컴퓨터 상대 디펜스’ 장르에 속함을 명확히 한다. 특히, 넓은 맵과 풍부한Resource 덕분에Resource 확보 경쟁이 치열해질 수 있으며, 방어 라인 구축의 중요성이 부각되는 맵으로 평가된다. 초보 플레이어는Resource 확보와 SCV 관리에 집중하되, 방어 건물의 배치와Resource 동선을 최적화하는 연습이 필요하며, 숙련자는Resource 확보 속도와 방어 라인의 효율성을 극대화해 적의 공격을 최소화하는 플레이를 추천한다. 또한, 팀원 간의Resource 분배와 협력 플레이가 부족할 경우Resource 확보 경쟁에서 뒤처질 수 있으므로, 팀원과의 소통과 역할 분배가 중요하다. 마지막으로, 맵의Resource 배치와 방어 라인의 중요성을 숙지하고,Resource 확보와 방어 라인 구축의 균형을 맞추는 것이 ‘치트 크래프트’의 핵심 성공 전략이다. Cheet Craft is a custom StarCraft: Brood War game mode designed for 6 players, centering on resource management, base construction, and defense against AI-controlled enemy forces. The map, titled internally as [Cheet Craft] with its file name recorded as ‘치트 크래프트 (Cheet).scx’, utilizes a volcanic tileset across a 4096x4096 resolution terrain. Players begin by constructing a Command Center and producing SCVs to harvest mineral patches and vespene geysers scattered across the map. The layout features multiple external mineral fields and gas geysers, making resource acquisition relatively accessible but also exposing players to frequent early-game raids by enemy units such as Zerglings, Zealots, and Marines. The left and right outer regions appear resource-rich yet defensively vulnerable, necessitating a balanced approach between resource gathering and base fortification. As the game progresses, players must coordinate resource allocation, defensive structure placement, and periodic offensive strikes using units like Marines, Vultures, or Tanks. The gameplay revolves around a cyclical rhythm of resource accumulation, defensive reinforcement, and counterattacks, making efficient resource management and tactical decision-making pivotal to victory. This structure firmly places Cheet Craft within the ‘computer-defense’ subgenre of custom maps. Novice players are advised to prioritize resource efficiency and SCV production while optimizing defensive tower placements and resource paths. Advanced players may focus on maximizing resource income speed and minimizing enemy incursions through precise base layout and team coordination. Strong communication among teammates is essential, as poor resource distribution or lack of coordinated defense can lead to early setbacks. Ultimately, mastering the balance between resource gathering and defensive strategy is the key to dominating in Cheet Craft.
![파오캐Ver15.0-2[노쿨] 맵 미리보기](https://cdn-star-data.huzy.net/thumbnail_a4e4794cc74d41209ba480e3f1ea1ed8.jpg)
파오캐Ver15.0-2[노쿨]
스타크래프트 브루드워 유즈맵 '파오캐Ver15.0-2[노쿨]'은 6인용 컴퓨터 상대 디펜스 맵으로, SFOC Fan-Sjrnfl Fam이라는 제작진에 의해 개발되었다. 맵 제목에서 '노쿨'은 쿨타임이 없는 시스템을 의미하며, 이는 플레이어에게 지속적인 액션과 전략적 선택의 기회를 제공하는 핵심 요소로 보인다. 맵의 배경은 사막 타일셋으로 구성되어 있으며, 넓은 맵 공간을 활용한 입구 방어 구조가 특징적이다. 플레이어는 컴퓨터의 끊임없는 공격을 방어하면서 자원을 관리하고 유닛을 보강해야 한다. 맵의 구조상 중앙 입구와 보조 입구가 분리되어 있어, 방어 전략을 다양화할 수 있는 가능성이 높다. 또한, 노쿨 시스템 덕분에 빠른 판단과 대응이 요구되며, 초보자와 숙련자 모두에게 도전적인 밸런스를 제공할 것으로 추정된다. 맵의 난이도는 제작자의 의도에 따라 보통 수준으로 설정되었을 가능성이 크며, 플레이 시간은 맵의 규모와 방어 구조를 고려했을 때 약 30분 내외로 예상된다. 이 맵은 특히 컴퓨터 상대 디펜스 유즈맵을 선호하는 유저들에게 추천되며, 지속적인 공격과 방어의 균형을 맞추는 전략적 재미를 느낄 수 있다. 플레이 전에는 맵의 입구 수와 방어 포인트를 미리 확인하여, 자신의 스타일과 맞는 전략을 준비하는 것이 중요하다. 또한, 자원 관리와 유닛 조합의 효율성을 고려한 빌드 오더를 연습한다면 더 원활한 플레이가 가능할 것이다. 맵의 사막 배경은 시각적으로도 몰입감을 높여주며, 긴장감 있는 디펜스 플레이에 잘 어울린다. 다채로운 유닛과 스킬을 활용할 수 있는 시스템이 구축되어 있다면, 반복 플레이 시에도 질리지 않는 재미를 제공할 것으로 기대된다. 이 맵은 특히 팀 플레이보다는 개인 혹은 경쟁적 방어 전략을 중시하는 플레이어에게 적합하다. 맵의 난이도 조절이 잘 되어 있다면, 초보자도 постепен하게 숙련도를 높일 수 있는 구조로 설계되었을 가능성이 크다. 마지막으로, 맵의 노쿨 시스템은 빠른 판단력을 요구하므로, 실시간 전략 게임의 감각을 즐기고자 하는 유저들에게도 좋은 선택지가 될 것이다. 맵의 제작 의도와 시스템을 충분히 이해한 후 플레이한다면, 더욱 즐겁고 의미 있는 경험을 얻을 수 있을 것이다. 각 플레이어의 전략과 적응력이 중요한 이 맵은, 디펜스 맵의 매력을 극대화하는 요소들을 두루 갖추고 있다. 미리 사용 가능한 유닛과 스킬을 숙지하고, 맵의 지형을 분석한다면 더 뛰어난 성과를 거둘 수 있을 것이다. 이 맵은 단순히 방어만 하는 것이 아니라, 끊임없는 전략적 선택과 리스크 관리가 요구되는 깊이 있는 게임 경험을 제공한다. SFOC Fan-Sjrnfl Fam의 노력이 깃든 이 맵은, 스타크래프트 유즈맵 커뮤니티에서 오랫동안 사랑받을 만한 가치를 지닌다. 특히 컴퓨터 상대 디펜스 맵으로서의 완성도가 높다면, 많은 유저들에게 꾸준한 관심을 받을 수 있을 것이다. 플레이어는 이 맵을 통해 전략적 사고와 빠른 대응력을 동시에 단련할 수 있으며, 이는 다른 스타크래프트 맵이나 실전 게임에서도 유용한 역량으로 작용할 것이다. 이 맵을 disfrutar al máximo, 각 플레이어의 개성 있는 전략과 창의적인 플레이가 빛을 발할 수 있는 기회를 제공한다. 맵의 구조와 시스템을 충분히 이해하고, 자신만의 스타일을 개발한다면, 이 맵은 단순히 게임이 아니라 하나의 전략적 예술 작품으로 느껴질 수도 있을 것이다. SFOC Fan-Sjrnfl Fam의 노력이 깃든 이 맵은, 스타크래프트 유즈맵의 역사에서 빼놓을 수 없는 작품으로 자리매김할 가능성이 크다. 플레이어 각자가 느끼는 재미와 성취감이 바로 이 맵의 진정한 가치를 결정할 것이다. 이제부터 펼쳐질 긴장감 넘치는 방어戦을 즐기기 위해, 준비는 되었는가? StarCraft: Brood War custom map 'PaoCafe Ver15.0-2 [No Cool]' is a 6-player versus AI defense map developed by the team SFOC Fan-Sjrnfl Fam. The "No Cool" in the title refers to a system with no cooldowns, a core feature that provides players with continuous action and strategic decision-making opportunities. The map features a desert tileset with a wide open space, allowing for varied entrance defense structures. Players must defend against relentless AI attacks while managing resources and reinforcing their units. The map's design separates the central entrance from auxiliary ones, enabling diverse defensive strategies. Thanks to the No Cool system, quick judgment and responses are essential, offering a challenging balance for both beginners and veterans. The difficulty is likely set to a moderate level as intended by the creator, with an estimated playtime of around 30 minutes based on the map's scale and defensive structures. This map is especially recommended for users who prefer AI versus defense custom maps, offering strategic enjoyment in balancing continuous attacks and defenses. Before playing, it's important to check the number of entrances and defensive points to prepare a strategy that suits your style. Practicing efficient resource management and unit composition build orders will also lead to smoother gameplay. The desert setting enhances immersion visually and fits well with the tense defense gameplay. If the system allows for diverse units and skills, it promises replayability without losing interest. This map is particularly suited for players who prioritize solo or competitive defensive strategies over team play. If the difficulty is well balanced, beginners can gradually improve their skills. Lastly, the No Cool system demands quick decision-making, making it a great choice for users who enjoy the feel of real-time strategy games. Understanding the map's intended design and system thoroughly before playing will lead to a more enjoyable and meaningful experience. Each player's strategy and adaptability are crucial in this map, which maximizes the appeal of defense maps with its well-rounded features. Familiarizing yourself with available units and skills and analyzing the terrain will yield even better results. This map isn't just about defense—it offers a deep gaming experience that requires constant strategic choices and risk management. The effort put into this map by SFOC Fan-Sjrnfl Fam gives it lasting value within the StarCraft custom map community. If its completion as an AI versus defense map is high, it will likely garner consistent attention from many users. Players can train both strategic thinking and quick responses through this map, skills that are useful in other StarCraft maps and real matches. To enjoy this map to the fullest, each player's unique strategies and creative plays will shine through. If you fully understand the map's structure and systems and develop your own style, it may feel less like a game and more like a work of strategic art. The effort of SFOC Fan-Sjrnfl Fam ensures this map has the potential to become an unforgettable work in the history of StarCraft custom maps. The true value of this map will be determined by each player's enjoyment and sense of accomplishment. Are you ready to dive into the thrilling defense battles ahead?
죽음의 카운터 03 (The Death Counters 03)
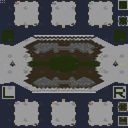
스타크래프트 브루드워의 유즈맵 ‘The_Death_Counters 03’은 6인용 컴퓨터 상대 디펜스 장르로, 플레이어는 끊임없이 몰려오는 적 유닛을 방어하며 생존을 목표로 한다. 맵은 중앙에 넓은 전투 공간이 펼쳐져 있으며, 외곽에는 방어 건물이 배치되어 있어 초보자와 숙련자 모두에게 전략적 깊이를 제공한다. 화면 아래쪽에서 확인되는 ‘shop & fxPass: 65324’는 presumably 맵 내 상점 시스템과 특수 효과를 관리하는 트리거로 보이며, 전투 중 업그레이드나 아이템 구매가 가능한 것으로 추정된다. 맵 제목에 포함된 ‘Death Counters’는 presumably 사망 횟수나 점수 시스템을 의미하는 듯하다. 플레이 방식은 디펜스 게임의 기본 틀을 따르지만, 맵 구조상 적의 공격 루트가 비교적 명확하게 나뉘어 있어 방어 라인을 효율적으로 구축할 수 있다. 플레이어는 시작 지점에서 건물을 건설하고 유닛을 생산해 적의 진격을 저지해야 하며, 일정 시간이 지나면 더 강력한 적군이 등장하는 것으로 보인다. 맵의 전체적인 분위기는 dark하고 strategically challenging한 편으로, 특히 후반부로 갈수록 적의 공세 강도가 급격히 상승하는 구조로 추정된다. 초보자의 경우 초반 방어 라인 구축에 집중해야 하며, 숙련자는 업그레이드와 자원 관리를 통해 더 효과적인 방어 전략을 구사할 수 있을 것이다. 이 맵은 디펜스 유즈맵을 선호하는 플레이어들에게 적합하며, 특히 다인용 컴퓨터 상대 전투를 즐기는 유저들에게 추천된다. 맵의 특징인 ‘Death Counters’ 시스템은 presumably 플레이어의 실력을 측정하거나 점수를 부여하는 방식으로 활용될 가능성이 높다. 플레이 전 맵 구조와 방어 루트를 미리 숙지하는 것이 중요하며, 특히 상점 시스템의 활용 여부가 게임의 승패를 가를 수 있는 핵심 요소가 될 것으로 보인다. This StarCraft: Brood War custom map, titled 'The_Death_Counters 03', is a 6-player defensive UMS game where players must fend off relentless enemy waves to survive. The map features a spacious central combat arena surrounded by outer defenses, offering strategic depth suitable for both beginners and experienced players. The 'shop & fxPass: 65324' visible at the bottom likely indicates an in-game shop system and special effect triggers, allowing players to purchase upgrades or items during combat. The term 'Death Counters' in the title suggests a scoring or death-tracking mechanism. The gameplay follows classic defense mechanics but with a structured layout that divides enemy attack routes, enabling efficient base building and defense line establishment. Players start by constructing buildings and producing units to block enemy advances, with progressively stronger enemy waves appearing as the game progresses. The map exudes a dark, strategically challenging atmosphere, particularly in later stages where enemy aggression intensifies significantly. Beginners should focus on early defense line construction, while advanced players can leverage upgrades and resource management for more effective strategies. This map is ideal for players who enjoy defense UMS games, especially those who prefer multiplayer versus computer battles. The 'Death Counters' feature likely serves as a skill measurement or scoring system. Before playing, it's crucial to study the map layout and defense routes, as the shop system's utilization may determine the game's outcome. The map's dark aesthetic and escalating difficulty provide a satisfying challenge for defense enthusiasts seeking a rewarding experience.
클랜 테스트 맵 (Clan Testing Map)
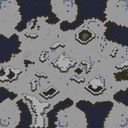
이 맵은 스타크래프트 브루드워의 유즈맵으로, 8명의 플레이어가 참여하는 대규모 테스트형 디펜스 맵이다. 내부 제목과 설명이 ‘Clan testing map’, ‘You are being tested’로 표기되어 있어, 플레이어들이 협동하거나 경쟁하며 특정 목표를 달성하는 구조임을 추정할 수 있다. 맵은 1024×1024 크기의 플랫폼 타일셋으로 구성되어 있으며, 6144×4096 해상도에서 192×128 단위의 타일을 사용해 넓은 맵 공간을 제공한다. 'RECRUIT_MAP.scx'라는 파일명은 이 맵이 신규 플레이어나 클랜원을 위한 테스트용으로 제작되었음을 시사한다. 맵의 주요 특징은 다수의 플레이어가 동시에 전투를 벌이는 ‘컴퓨터 상대 디펜스’ 장르로 추정된다는 점이다. 내부 설명이 테스트를 강조하고 있어, 플레이어는 AI의 공격을 방어하거나 특정 조건을 달성하는 방식으로 진행될 가능성이 높다. 맵의 넓은 공간과 8인의 인원 수는 대규모 전투와 전략적 협동이 필요한 구조를 예상하게 한다. 또한, 플랫폼 타일셋은 건물 배치와 기지 운영의 자유도를 높여, 다양한 전술과 빌드 오더가 가능한 환경을 제공할 것으로 보인다. 추천 대상은 스타크래프트의 기본 전투와 협동에 익숙한 플레이어로, 특히 클랜 활동이나 신규 멤버 테스트를 목적으로 제작된 맵이므로 팀 플레이 경험이 있는 유저에게 적합하다. 맵을 플레이하기 전에는 내부 설명과 승리 조건을 확인하는 것이 중요하며, 건물 배치와 자원 관리, 병력 생산 계획 등을 미리 세워두면 더욱 원활한 진행이 가능하다. 넓은 맵 공간을 활용한 기습 공격이나 기지 방어 전술을 준비한다면 더 재미있는 경험을 즐길 수 있을 것이다. This StarCraft: Brood War custom map, titled 'Clan testing map', is a large-scale defense-focused UMS designed for eight players. The internal title and description—'Clan testing map' and 'You are being tested'—strongly suggest a cooperative or competitive structure where players must defend against AI assaults or meet specific test objectives. The map utilizes a 1024×1024 platform tileset with a high resolution of 6144×4096 using 192×128 tiles, offering ample space for strategic gameplay. The map likely falls under the 'team defense' or 'computer opponent defense' genre, where players work together to fend off waves of enemy forces. The emphasis on 'testing' in the description hints at a structured challenge, possibly evaluating teamwork, build orders, or adaptability under pressure. The spacious layout and eight-player cap make it ideal for large-scale battles requiring coordination and quick decision-making. Target players include those familiar with StarCraft’s core mechanics and team-based strategies, particularly clan members or newcomers undergoing evaluation. Prior to playing, reviewing the internal objectives and victory conditions is recommended. Players should plan their base layouts, resource management, and troop production in advance to optimize defense and counterattacks. Leveraging the map’s expansive terrain for ambushes or multi-front defenses can significantly enhance the experience.
BAD ASS 4 Insane CPU's
‘BAD ASS 4 Insane CPU's’는 스타크래프트 브루드워의 유즈맵 중에서도 특히 CPU를 상대로 극한의 난이도를 자랑하는 4인용 맵이다. 맵 이름은 ‘BAD ASS’라는 강렬한 표현 그대로, 플레이어는 4명의CPU와 맞서야 하며, 모든 건물과 유닛의 생산 시간이 1/4로 줄어드는 극도의 압박 속에서Resources 부족을 걱정할 틈도 없이 몰아치는 공격을 버텨야 한다. 내부 설명에 따르면 모든 터렛, 대포, 벙커를 비롯한 방어 시설은 2/3 배속으로 생산되고, 미네랄과 가스는 자동 보급되며, 업그레이드 시간도 정상적으로 유지된다. 이는 단순 속도전 이상의 전략적 선택을 강제하는데, CPU는 빠르게 생산된 유닛을 동원해 끊임없이 밀어붙이기 때문이다. 맵의 구조는 중앙에 넓은 평지가 펼쳐져 있어 대규모 전투가 벌어질 수밖에 없으며, 양측의 기지는 비교적 평등한 위치에 배치되어 있다. 그러나 CPU의 생산 속도와 자동 보급 시스템 덕분에Resources 관리보다는 방어와 반격 타이밍에 더 집중해야 한다. 초반에는 소규모 유닛으로 버티며 자원을 확보하는 것이 중요하지만, 중반 이후에는 CPU의 압도적인 물량에 대응하기 위한Micro 컨트롤과 조합 선택이 승부를 좌우할 것이다. 특히 테란 플레이어라면 벙커링과 터렛 방어, 프로토스는 실드 배터리와 보호막 회복을 적극 활용해야 하며, 저그는 스포닝 풀과 히드라리스크 덴의 적절한 배치를 통해 CPU의 러시를 막아내야 한다. 이 맵은 기본적으로 ‘컴퓨터 상대 디펜스’ 장르에 속하지만, 단순히 방어만 하면 되는 것이 아니라 극한의 공세와Resources 관리까지 요구하는 만큼 ‘서바이벌’ 요소도 강하다. 또한 4명의 CPU가 동시에 공격을 퍼붓기 때문에 ‘랜덤 디펜스’보다는 ‘입구막기’에 가까운 구조로, 플레이어는 끊임없이 몰려오는 적을 상대로 방어선을 구축하고 반격을 계획해야 한다. 추천 대상은 브루드워의 기본 전략을 숙지한 플레이어이며, 특히Micro 컨트롤과 조합 운용에 자신 있는 유저라면 큰 재미를 느낄 수 있을 것이다. 반대로Resources 관리와 빌드 오더에 익숙하지 않다면 예상치 못한 상황으로 이어질 수 있으니, 사전 연습을 통해 CPU의 공격 패턴을 숙지하는 것이 중요하다. 플레이 전에는 맵의 특성을 정확히 이해하고, 자신의 종족에 맞는 방어 및 반격 전략을 미리 준비해두는 것이 좋다. 또한 자동 보급 시스템 덕분에Resources 걱정은 덜 수 있지만, 업그레이드와 유닛 생산 타이밍을 놓치지 않도록 주의해야 한다. 이 맵은 단순히 ‘CPU 상대하기’가 아니라, 급격한 속도와Resources 자동화라는 특수한 조건 속에서 자신의 실력을 시험하는 장이 될 것이다. ‘BAD ASS 4 Insane CPU's’ is a 4-player custom map in *StarCraft: Brood War* known for its extreme difficulty against CPU opponents. As the name ‘BAD ASS’ suggests, players must face four AI opponents while dealing with relentless pressure—build times for all structures and units are reduced to a quarter, leaving no room for resource shortages as you scramble to withstand the onslaught. According to the in-game description, all defensive structures like turrets, cannons, and bunkers are produced at two-thirds speed, minerals and gas are auto-supplied, and upgrade times remain normal. This forces strategic choices beyond a simple speed rush, as the AI rapidly deploys units in overwhelming waves. The map features a large central plain where large-scale battles are inevitable, with both sides’ bases positioned relatively evenly. However, due to the AI’s accelerated production and auto-supply system, players must focus more on defense and counterattack timing rather than resource management. Early on, surviving with small-scale units while securing resources is key, but mid-game onward, victory hinges on precise micro-control and smart unit composition choices to counter the AI’s sheer numbers. Terran players should prioritize bunker rushes and turret defenses, Protoss must leverage shield batteries and shield recharge, and Zerg need to position spawning pools and hydralisk dens effectively to fend off the AI’s rushes. While fundamentally a ‘computer defense’ genre map, this one demands more than just holding the line—it combines relentless aggression and resource management into a survival challenge. With four AI opponents attacking simultaneously, the structure leans closer to ‘doorway blocking’ than random defense, forcing players to constantly fortify their lines and plan counterattacks against waves of enemies. It’s recommended for players familiar with *Brood War*’s core strategies, especially those confident in micro-control and unit composition. For those less experienced with resource management or build orders, the unpredictable AI assaults can lead to unexpected setbacks, so pre-practice to learn the AI’s attack patterns is crucial. Before playing, it’s wise to fully grasp the map’s mechanics and prepare faction-specific defense and counterattack strategies. Though auto-supply eases resource concerns, players must still stay vigilant about upgrade timings and unit production schedules. This isn’t just about ‘fighting the AI’—it’s a test of skill under extreme speed and automated resource conditions, pushing your abilities to the limit.
고양이 대 쥐와 개미 (Cats vs Mice Ants)
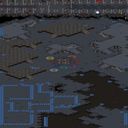
스타크래프트 브루드워의 인기 유즈맵 시리즈 ‘고양이 대 쥐와 개미’(Cats vs Mice Ants)는 플레이어 간의 전략적 대결을 극대화한 ‘컴퓨터 상대 디펜스’ 장르로, 7명의 플레이어가 각각 고양이, 쥐, 개미 세 종족 중 하나를 선택해 전투를 펼치는 흥미로운 구도를 갖추고 있다. 맵은 우주 테마의 넓은 공간에 배치되어 있으며, 각 종족은 고유한 건물과 유닛 구성을 바탕으로 상대 종족을 공격하거나 방어해야 한다. 내부 설명에 따르면 고양이 진영은 쥐를 사냥하는 임무를 맡고, 쥐와 개미 진영은 고양이를 공격하는 대립 구조로 설계되어 있어 종족 간의 상성 관계가 핵심 전략 포인트가 된다. 맵 제목과 설명에서 확인되는 ‘MADEBY:((regulas))’는 해당 맵의 제작자를 의미하지만, 구체적인 제작자 정보는 제공되지 않으므로 맵 자체의 구조와 재미에 집중해야 한다. 1024x1024 크기의 넓은 맵은 다양한 배치와 기동성을 제공하며, 우주 타일셋은 SF 분위기를 살려 플레이어의 몰입감을 높이는 역할을 한다. 이 맵의 가장 큰 특징은 종족별 상성 관계와 다중 플레이어 간의 협력/대결 구조에 있다. 예를 들어 고양이 진영은 쥐를 사냥하는 데 최적화되어 있지만, 쥐와 개미가 연합하면 보다 복잡한 전략을 요구하게 된다. 또한 넓은 맵 공간을 활용한 기습 공격, 자원 관리, 건물 방어 등 다층적인 전략 구사가 가능해 스타크래프트의 기본 메커니즘을 활용한 창의적인 플레이가 요구된다. 특히 초보자 입장에서는 각 종족의 유닛 특성과 건물 배치를 숙지하는 데 시간이 걸릴 수 있지만, 익숙해지면 종족별로 다른 스타일을 즐길 수 있어 반복 플레이의 재미가 크다. 또한 7인 동시 플레이가 가능한 구조는 팀워크와 개인 전략이 조화를 이룰 수 있는 장점을 제공한다. 추천 대상으로는 스타크래프트의 기본 메커니즘을 충분히 숙지한 중급자 이상 플레이어들이나, 다인용 맵의 전략적 깊이를 즐기고 싶어 하는 유저들에게 적합하다. 초보자의 경우 종족별 유닛 특성과 맵 구조를 충분히 이해한 후에 플레이하는 것이 바람직하며, 특히 고양이 진영의 경우 쥐 사냥에 특화된 전략을 구사해야 하기 때문에 집중력이 필요하다. 또한 맵의 넓은 공간을 활용한 기동성 있는 플레이를 선호하는 유저들에게도 추천할 만하다. 플레이 전에는 각 종족의 유닛 구성과 건물 배치, 맵의 주요 길목 등을 미리 숙지하고, 상대 종족과의 상성 관계를 고려한 전략을 준비하는 것이 중요하다. Cats vs Mice Ants is a popular StarCraft: Brood War custom map that falls under the 'computer-based defense' genre, where seven players choose between three factions—cats, mice, and ants—to engage in strategic battles. Set against a cosmic backdrop with a 1024x1024 tile layout, the map emphasizes factional synergy and counterplay, as cats hunt mice while mice and ants team up to fend off the felines. The internal description, including 'MADEBY:((regulas))', suggests the creator but lacks further details, so the focus remains on the map's design and gameplay experience. The map’s standout feature is its factional rock-paper-scissors mechanic, where each race has unique strengths and weaknesses that players must leverage. For instance, cats excel at hunting mice but struggle against coordinated ant and mouse alliances. The expansive map allows for diverse strategies, from ambush tactics to resource management and base defense, making it ideal for players who enjoy deep, multi-layered gameplay. While beginners may need time to master the unit compositions and factional interactions, intermediate and advanced players will appreciate the depth and replayability, especially in team-based scenarios. This map is best suited for mid to high-level StarCraft players familiar with the game’s core mechanics, particularly those who enjoy multiplayer custom maps with strategic depth. Beginners should take time to study factional units and map layouts before diving in, as cats require a focused hunting strategy, while mice and ants benefit from coordinated defense and counterattacks. The cosmic theme and wide-open spaces also appeal to players who prefer dynamic, mobile gameplay. Before playing, it’s crucial to review each faction’s units, building placements, and key map routes to formulate a cohesive strategy against opponents.
벙커 워즈 eL33t (Bunker Warz eL33t)
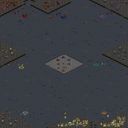
스타크래프트 브루드워의 대표적인 유즈맵 장르 중 하나인 ‘컴퓨터 상대 디펜스’ 계열로 추정되는 Bunker Warz eL33t는, 이름에서 느껴지듯 벙커를 중심으로 한 방어전략이 핵심인 맵이다. 내부 맵 설명에 따르면 ‘업그레이드’, ‘히어로 구매 가능 벙커’, ‘방어용 대포 불가 이동’ 같은 특수 기능이 추가되어 있으며, 특히 ‘Heroso Purchasable Bunkers’와 ‘Buildable Units (Increased Prices)’라는 설명을 통해 플레이어는 자원을 모아 더 강력한 유닛과 건물을 건설할 수 있는 전략적 깊이를 제공받는다. ‘Defence cannon can't leave!’라는 문구는 방어용 포탑이 고정되어 있어 기동성보다는 진형과 배치에 집중해야 한다는 점을 강조하며, 이는 디펜스 장르의 전형적인 특성인 타이밍과 자원 관리, 그리고 맵 리딩 능력을 요구한다. 플레이 방식은 8명의 플레이어가 참가하는 대규모 전투 형태로, 각 플레이어는 시작 지점에서 자원을 채취한 뒤 벙커와 방어 건물을 건설하고 업그레이드하여 끊임없이 밀려오는 적의 공격을 방어해야 한다. 내부 설명에 ‘Instant’ 업그레이드가 포함된 점으로 미루어 보아, 빠른 진행과 실시간 전략적 판단이 중요한 요소로 작용할 것으로 보인다. 또한 ‘Increased Prices’가 언급된 만큼, 자원 관리와 투자 효율성이 승패를 좌우할 가능성이 크며, 이는 플레이어 간의 협력과 경쟁이 동시에 발생하는 구조를 암시한다. 맵의 해상도와 크기는 1024x1024 타일(3072x3072 해상도)에 달해 넓은 전투 공간을 제공하며, 우주 타일셋을 사용한 어두운 배경은 긴장감을 조성하는 데 효과적이다. 이 맵은 초보 플레이어에게 다소 어려울 수 있지만, 방어 전략과 자원 관리에 익숙해진다면 충분히 재미를 느낄 수 있는 작품이다. 특히 벙커를 중심으로 한 방어구조와 업그레이드 시스템은 전략적 사고를 자극하며, 다수의 플레이어가 참여하는 만큼 팀워크와 의사소통이 중요해진다. 만약 디펜스 장르의 맵을 찾고 있거나, 새로운 전략적 도전을 원한다면 Bunker Warz eL33t를 시도해볼 만한 가치가 충분하다. 다만, 맵의 내부 설명이 다소 복잡하게 느껴질 수 있어, 플레이 전 업그레이드와 빌드 가능한 유닛에 대한 간단한 미리보기가 도움이 될 것이다. Bunker Warz eL33t is a map that appears to belong to the "computer opponent defense" genre, one of the representative custom map genres in *StarCraft: Brood War*. As the name suggests, the core of the gameplay revolves around bunker-based defensive strategies. According to the in-game description, special features such as "upgrades," "purchasable hero bunkers," and "defensive cannons that cannot move" have been added. The phrases "Hero-so Purchasable Bunkers" and "Buildable Units (Increased Prices)" indicate that players can gather resources to construct stronger units and buildings, adding strategic depth to the gameplay. The note "Defence cannon can't leave!" emphasizes that defensive turrets are fixed in place, requiring players to focus on positioning and formation rather than mobility—a hallmark of the defense genre that demands timing, resource management, and map reading skills. The gameplay involves a large-scale battle with eight players, where each participant gathers resources from the starting point, constructs bunkers and defensive structures, and upgrades them to fend off relentless enemy attacks. The inclusion of "Instant" upgrades suggests that fast-paced progression and real-time strategic decisions are key factors. Additionally, with "Increased Prices" mentioned, efficient resource management and investment will likely determine victory or defeat, hinting at a structure where both cooperation and competition among players come into play. The map's resolution and size reach 1024x1024 tiles (3072x3072 resolution), offering a vast battlefield, while the dark background using a space tileset effectively creates tension. While this map may be challenging for beginners, it offers plenty of fun once players become familiar with defensive strategies and resource management. The bunker-centered defensive structure and upgrade system stimulate strategic thinking, and with multiple players involved, teamwork and communication become crucial. If you're looking for a defense-genre map or seeking a new strategic challenge, Bunker Warz eL33t is definitely worth trying. However, since the in-game description can feel somewhat complex, a quick preview of the available upgrades and buildable units before playing would be helpful.
맵 선택 가이드
태그는 맵의 핵심 특징을 빠르게 설명하지만 제작 버전마다 규칙이 다를 수 있습니다. 상세 설명에서 권장 인원, 난이도, 플레이 시간과 버전을 함께 확인한 뒤 다운로드하세요.