
컴퓨터 스타크래프트 맵 모음
'컴퓨터' 태그가 등록된 맵을 모았습니다. 장르 하나로 찾기 어려운 플레이 방식, 난이도와 특징을 중심으로 인기 맵과 최신 맵을 비교해 보세요.
- 등록 맵
- 6개
- 누적 다운로드
- 3
- 누적 조회
- 237
인기 맵
다운로드와 조회 반응이 높은 맵입니다.
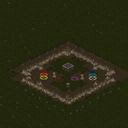
스포어 D 2003 (Spore D 2003)
스타크래프트 브루드워의 유즈맵 <스포어 D 2003>은 우주를 배경으로 한 디펜스 장르의 맵으로, 플레이어는 중앙에 위치한 기지에서 끊임없이 몰려드는 적들을 방어하는 임무를 수행합니다. 맵의 특징적인 구조는 중앙에 위치한 본진 주변을 다양한 지형과 요소가 둘러싸고 있으며, 각 구역은 빨간색과 파란색으로 나뉘어 있어 시야를 제한하거나 전략적 움직임을 유도합니다. 적들은 맵 가장자리에서 끊임없이 생성되어 본진으로 접근을 시도하며, 플레이어는 제한된 자원과 병력으로 이들을 처치해야 합니다. 플레이 방식은 크게 세 가지로 나뉘는데, 첫째는 적의 공격을 효과적으로 방어하는 것입니다. 중앙 본진 주변에는 방어용 건물이 배치되어 있지만, 플레이어는 직접 유닛을 생산하고 배치하여 전선을 유지해야 합니다. 둘째는 자원의 관리입니다. 미네랄과 가스는 제한되어 있으며, 이를 효율적으로 활용하여 유닛을 생산하고 업그레이드를 진행해야 합니다. 셋째는 맵의 특성을 활용한 전략적 플레이입니다. 맵 곳곳에 숨겨진 자원 지점이나 지형적 이점을 활용하여 적의 공격을 분산시키거나 방어선을 구축할 수 있습니다. 특히 맵의 빨간색과 파란색 구역은 시야를 가리는 효과가 있어, 적의 공격을 사전에 감지하거나 회피하는 데 유용합니다. 이 맵은 초보자보다는 중급 이상의 플레이어에게 적합한데, 자원 관리와 유닛 컨트롤, 맵 리딩 능력이 요구됩니다. 또한 팀플레이가 가능한 구조로 되어 있어, 협력 플레이를 중시하는 유저들에게도 좋은 선택이 될 수 있습니다. 맵의 난이도는 적의 공격 패턴과 생성 주기에 따라 크게 달라지며, 경험이 쌓일수록 더 효율적인 방어 전략을 세울 수 있습니다. 추천하는 플레이 방식은 초반에 자원을 충분히 확보한 후, 중반에는 방어선을 구축하며, 후반에는 강력한 유닛으로 반격을 준비하는 것입니다. 맵의 긴 플레이 시간과 전략적 깊이를 감안할 때, 한 번 플레이할 때마다 새로운 전략을 시도해 볼 수 있습니다. 이 맵을 즐기기 위해서는 스타크래프트 브루드워가 설치되어 있어야 하며, 유즈맵으로 분류되어 있어 별도의 설치 없이도 플레이할 수 있습니다. 또한, 맵의 특성상 높은 스펙의 PC가 필요하지 않지만, 부드러운 그래픽과 원활한 플레이를 위해서는 그래픽 설정을 조정하는 것이 좋습니다. 마지막으로, 이 맵은 디펜스 장르의 유즈맵 중에서 비교적 인기 있는 작품으로, 다양한 커뮤니티에서 공유되고 있습니다. 플레이 전에는 맵의 구조와 적의 공격 패턴을 충분히 숙지한 후, 전략을 세워 도전해 보기를 권장합니다. StarCraft: Brood War's custom map *Spore D 2003* is a defense genre map set in space, where players must defend a central base against endless waves of enemies. The map's distinctive layout features the main base surrounded by varied terrain and elements, with each area divided by red and blue zones that restrict visibility or guide strategic movement. Enemies spawn continuously at the map's edges and attempt to reach the player's base, requiring them to eliminate threats with limited resources and forces. The gameplay is divided into three key aspects: first, effectively defending against enemy attacks. While defensive structures are placed around the central base, players must produce and deploy units to maintain the frontline. Second is resource management—minerals and gas are scarce, so efficient use is essential for unit production and upgrades. Third is strategic play that leverages the map's features. Hidden resource points and terrain advantages can be used to disperse enemy attacks or reinforce defenses. The red and blue zones in particular obscure vision, aiding in early detection or evasion of enemy movements. This map is best suited for intermediate to advanced players, as it demands strong resource management, unit control, and map awareness. Its team-friendly design also makes it a great choice for cooperative play. Difficulty varies depending on enemy attack patterns and spawn rates, but experience allows for more refined defense strategies. A recommended approach is to secure resources early, establish defense lines in the mid-game, and prepare counterattacks with powerful units late in the game. Given its long playtime and strategic depth, each session offers opportunities to experiment with new tactics. To play this map, *StarCraft: Brood War* must be installed, though as a custom map, it can be played without additional downloads. While the map doesn't require high-end PC specs, adjusting graphics settings can enhance smoothness and visual clarity. As one of the more popular defense genre custom maps, it's widely shared across various communities. Before playing, it's advisable to study the map layout and enemy attack patterns to develop a solid strategy.
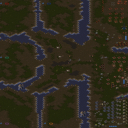
5:3헌터 컴퓨터255업 VERY HARD
5:3헌터 컴퓨터255업 VERY HARD는 5인용 UMS(유즈맵) 형태의 대전 맵으로, 사막 타일셋을 배경으로 합니다. 맵 전체가 4096×4096 픽셀 규모이며, 각 타일은 128×128 단위로 구성돼 있어 넓은 전장을 제공합니다. 주요 목표는 상대 기지를 파괴하는 것이지만, 이름에서 알 수 있듯이 컴퓨터(AI) 상대가 255레벨까지 강화된 상태로 등장해 매우 높은 난이도를 요구합니다. 따라서 초보자보다는 숙련된 플레이어에게 적합합니다. 플레이 흐름은 초기 자원 확보 후 빠른 유닛 생산과 공격 루트를 확보하는 것이 핵심이며, 사막 지형 특성상 시야 확보와 방어 건설이 중요합니다. 특히 중앙에 위치한 고지대는 전략적 요충지로, 여기서 유닛을 집중 배치하면 상대의 진격을 효과적으로 저지할 수 있습니다. 게임 시작 전에는 AI 레벨과 유닛 생산 속도를 확인하고, 방어 타워와 광산 배치를 미리 계획하는 것이 좋습니다. 또한, 5인 플레이이므로 팀워크가 중요한데, 각 플레이어가 역할을 분담해 전방 공격과 후방 지원을 균형 있게 수행해야 합니다. 전체 플레이 시간은 평균 30분 내외로 예상되며, 매 경기마다 AI의 행동 패턴이 다소 변동될 수 있어 반복 플레이 시 다양한 전략을 시험해볼 수 있습니다. 5:3 Hunter Computer 255 Up VERY HARD is a 5‑player UMS (use map) designed on a desert tileset. The map spans 4096×4096 pixels with tiles of 128×128, offering a large battlefield. The objective is to destroy the opponent’s base, but as the title suggests, the computer opponent is boosted to level 255, making the difficulty extremely high. Consequently, it suits experienced players rather than beginners. The flow of play involves securing early resources, rapidly producing units, and establishing attack routes; the desert terrain emphasizes vision control and defensive building placement. A central high ground serves as a strategic choke point—concentrating units there can effectively halt enemy advances. Before starting, check the AI level and unit production rates, and plan turret and mining placements in advance. Since the map supports five players, teamwork is crucial; each player should balance front‑line attacks with rear support. Typical match length is around 30 minutes, and the AI’s behavior may vary each game, allowing players to experiment with different strategies.
![옵저버 매드니스 [v4] (Observer Madness [v4]) 맵 미리보기](https://cdn-star-data.huzy.net/thumbnail_d22af9460c204bfba73fed6abdd7be70.jpg)
옵저버 매드니스 [v4] (Observer Madness [v4])
스타크래프트 브루드워의Observer Madness [v4]는 관전자(Observer)를 중심으로 펼쳐지는 독특한 디펜스형 유즈맵으로, 플레이어들이 끊임없이 몰려드는 적 유닛을 상대로 방어선을 구축하는 재미를 느낄 수 있는 맵이다. 맵 중앙에 위치한 관전자 오브젝트는 맵의 핵심으로, 이 주변에서 플레이어들이 배치한 방어 건물이나 유닛을 통해 적의 공격을 저지해야 한다. 화산 타일셋을 배경으로 한 어두운 분위기는 긴장감을 더하며, 맵 곳곳의 좁은 길목과 복잡한 지형이 방어 전략을 요구한다. 플레이어는 시작 시 제한된 자원으로 방어 건물을 건설하거나 유닛을 소환할 수 있으며, 관전자 주변으로 몰려드는 적들은随着时间的推移 점점 강력해진다. 특히 관전자 주변의 좁은 길목은 방어의 관건으로, here 지형을 활용한 병력 배치나 건물 간의 연계가 필수적이다. 관전자 자체는 파괴되지 않지만, 관전자 주변의 방어 라인이 무너지면 게임 오버가 되므로 신중한 플레이가 요구된다. 이 맵은 6명의 플레이어가 동시에 참여할 수 있으며, 각 플레이어는 개별적으로 방어에 참여하거나 팀을 이뤄 협력할 수 있다. 관전자의 위치와 맵의 구조상, 팀 플레이가 유리할 수 있지만, 개인의 방어 능력도 매우 중요하다. 난이도는 초보자에게는 다소 어려운 편이지만, 적의 패턴을 숙지하고 방어 건물을 효율적으로 배치한다면 점차 공략이 가능해진다. 관전자 주변의 좁은 길목과 화산 지형이 주는 압박감은 이 맵의 특징적인 재미 요소로, 디펜스 장르를 좋아하는 유저들에게 특히 추천할 만하다. 플레이 전 반드시 확인해야 할 점은 관전자의 위치와 맵의 주요 길목, 그리고 각 플레이어의 시작 위치와 자원 분배다. 또한 방어 건물을 건설할 수 있는 공간이 제한적이므로, 미리 빌드 오더를 계획하고 진행하는 것이 중요하다. 관전자 주변의 좁은 길목은 디펜스의 핵심 포인트이므로, here 지형을 활용한 방어 라인을 구축하는 연습을 해두면 좋다. 마지막으로, 적의 공격 패턴을 분석하고 유닛의 체력 관리를 철저히 한다면 더 오랫동안 버틸 수 있을 것이다. Observer Madness [v4] is a unique defense-style custom map in StarCraft: Brood War where players must defend a central Observer object against waves of enemy units. Set against a volcanic tileset, the map creates an intense atmosphere as players strategically place defensive structures and units around the Observer to fend off increasingly powerful enemy forces. The core gameplay revolves around the narrow pathways leading to the Observer, which act as chokepoints that players must fortify. Limited starting resources force players to make critical early-game decisions about unit production and building placement. As the game progresses, enemies become stronger and more numerous, testing the player's ability to adapt their defenses. While the Observer itself cannot be destroyed, failing to protect the surrounding area results in a game over, adding high stakes to every decision. Designed for up to six players, Observer Madness [v4] supports both solo and team-based play. The volcanic terrain and tight corridors create a claustrophobic feel, making teamwork essential for covering all angles of attack. The difficulty curve is steep for beginners, but mastering enemy patterns and optimizing building placement allows for steady progress. The map's tension stems from its chokepoints and the ever-increasing enemy pressure, making it a standout experience for fans of the defense genre. Before playing, it’s crucial to study the map’s layout, especially the Observer’s position and key pathways. Players should plan their early-game build order carefully, as space around the Observer is limited. Understanding the chokepoints and refining defensive strategies—such as focusing on high-damage units or strategic building placement—will significantly improve survival chances. The map rewards adaptability and quick decision-making, ensuring each playthrough feels fresh and challenging.
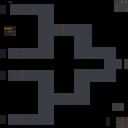
스나이퍼 듀얼스 락스 (Snipers Duels Locks 1.03)
스타크래프트 브루드워의 유즈맵 〈Snipers Duels Locks〉는 6인용 저격수 대결을 중심으로 구성된 컴뱃 맵으로, 좁고 복잡한 공간에서 펼치는 일대일 전투가 특징이다. 맵은 사막 타일셋으로 꾸며졌으며, 중앙에 위치한 작은 오브젝트와 주변의 장애물들이 저격전의 긴장감을 한층 높인다. 플레이어는 각자의 시작 지점에서 출발해 맵 중앙의 좁은 길목이나 터널을 통해 이동하며, 상대방과 마주치는 순간 저격전을 펼친다. 맵의 구조는 대칭적이면서도 일부 구역에서 복잡한 통로와 장애물이 배치되어 있어, 적의 움직임을 예측하고 기습을 당하지 않기 위한 전략적 플레이가 필요하다. 맵의 이름은 'Snipers Duels'로 저격수 대결을, 'Locks'는 좁고 제한된 공간을 뜻하는 것으로 보인다. 맵의 크기는 2048x2048이며, 타일 단위는 64x64로 깔끔하게 구성되어 있다. 내부 맵 설명에 따르면 'A More Condensed Way To Snipe'로, 좁고 밀집된 공간에서 저격을 연습할 수 있도록 디자인된 것으로 추정된다. 이 맵은 주로 6인용으로 제작되었지만, 팀 플레이보다는 개인전 또는 듀오전 중심으로 플레이할 수 있도록 설계된 듯하다. 저격수의 명중률과 반응 속도가 중요한 요소로, 맵의 좁은 길목에서 벌어지는 순간적인 교전이 관전 포인트다. 또한 맵의 장애물과 통로는 저격수 간의 거리를 조절하는 데 영향을 미치므로, 맵을 충분히 숙지하고 적의 움직임을 예측하는 능력이 필요하다. 초보자는 맵의 구조를 익히기 어렵고, 숙련자도 적의 기습에 대응하는 데 익숙해지기까지 시간이 걸릴 수 있다. 따라서 이 맵은 저격수 대결에 관심이 있는 플레이어나, 좁은 공간에서의 교전 경험을 쌓고 싶은 유저들에게 추천할 만하다. 다만, 맵의 복도와 터널이 다소 복잡해 초보자가 길을 잃기 쉽다는 점은 주의해야 한다. 맵의 플레이 시간은 저격전 한 판당 10~30분 정도로 추정되며, 난이도는 중간 정도로 평가된다. 이 맵을 즐기기 위해서는 저격수 유닛의 컨트롤과 맵 리딩 능력이 중요하다. 또한, 맵의 좁은 공간 때문에 실수로 아군을 공격하지 않도록 주의가 필요하다. 맵을 플레이하기 전에는 맵의 구조를 미리 확인하고, 저격수 간의 거리와 시야를 고려한 전략을 세우는 것이 좋다. 특히, 맵 중앙의 터널이나 좁은 길목에서는 순간적인 반응이 승패를 좌우할 수 있다. 이 맵은 주로 저격수 대결을 즐기는 플레이어들에게 인기가 있을 것으로 보이며, 좁은 공간에서의 교전Experience를 추구하는 유저들에게도 좋은 선택이 될 것이다. 맵의 디자인과 구조는 간결하면서도 효과적으로 저격전을 연출할 수 있도록 짜여져 있으며, 반복 플레이를 통해 맵의 패턴을 익히는 재미도 있다. 마지막으로, 맵의 이름은 'Snipers Duels Locks'로, 'Locks'가 좁은 공간을 뜻하는 만큼, 맵의 구조 자체가 이 맵의 핵심 아이디어임을 알 수 있다. 이 맵은 저격수 대결을 좋아하는 유저들에게는 필수적인 맵 중 하나로 자리매김할 수 있을 것이다. StarCraft: Brood War's custom map *Snipers Duels Locks* is a combat-focused 6-player map centered around sniper duels, featuring intense one-on-one battles in tight, maze-like spaces. The map is designed with a desert tile set, where a small central object and surrounding obstacles heighten the tension of sniper engagements. Players start at their respective bases and navigate through narrow paths or tunnels toward the center, where sudden encounters trigger sniper battles. The map’s layout is symmetrical overall but includes complex corridors and obstacles in certain areas, requiring strategic play to predict enemy movements and avoid ambushes. The name *Snipers Duels* clearly references the core sniper combat, while *Locks* likely refers to the narrow, confined spaces. The map measures 2048x2048 with a clean 64x64 tile layout. According to internal descriptions, it’s designed as *"A More Condensed Way To Snipe,"* emphasizing sniper practice in tightly packed areas. Though built for six players, it leans toward solo or duo matches rather than team play. Accuracy and reaction time are critical, as the map’s tight corridors force quick, decisive engagements. Obstacles and tunnels also influence sniper distance, so mastering the layout and predicting enemy behavior are essential. Beginners may struggle to navigate the complex structure, and even experienced players need time to adapt to ambushes. Thus, the map is best suited for players interested in sniper duels or honing close-quarters combat skills. However, its intricate hallways and tunnels can easily disorient newcomers. Each match typically lasts 10 to 30 minutes, with a moderate difficulty level. Success depends on precise sniper control and map awareness—mistakenly targeting allies in the cramped spaces is a real risk. Before playing, it’s wise to study the layout and plan strategies around sniper range and visibility. Central tunnels and narrow paths demand split-second reactions that can determine victory or defeat. The map’s straightforward yet effective design makes it a favorite among sniper-focused players and those seeking intense close-quarters combat. Repeated plays help uncover patterns, adding replay value. With *Locks* reinforcing the theme of confined spaces, the map’s structure itself embodies its core concept. For sniper enthusiasts, *Snipers Duels Locks* stands out as a must-try addition to the custom map roster.
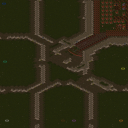
7vs1 하드 컴퓨터 (7vs1 Hard Computer)
스타크래프트 브루드워의 유즈맵 중 하나로, 7명의 플레이어가 한 명의Very Hard(최상급) 컴퓨터를 상대하는 디펜스 형식의 맵이다. 내부 맵 설명에 따르면 컴퓨터는 빠르게 러시를 감행하므로, 플레이어들은 신속한 방어 시설 건설과 전략적 배치로 대응해야 한다. 사막 타일셋으로 구성된 넓은 필드에서 펼쳐지는 전투는 치밀한Resource Management와 조율된 공격 타이밍이 핵심이며, 각 플레이어는 개별적으로 Mineral과 Gas를 확보해 방어 건물과 유닛을 생산해야 한다. 맵 중앙을 가로지르는 좁은 통로와 분산된 MineralField는 초반 방어선의 중요성을 강조하는데, 이곳을 효과적으로 방어하지 못하면 컴퓨터의 러시에 의해 전멸할 가능성이 크다. 컴퓨터의 Very Hard 난이도 특성상 초중반 러시뿐 아니라 후반까지 끊임없는 압박을 가해 오므로, 플레이어들은 균형 잡힌 유닛 조합과 지속적인Resource 확보가 필수적이다. 초보자보다는 중수 이상의 플레이어에게 적합하며, 특히 팀워크와 전략적 협력이 요구되는 맵으로 평가된다. 플레이 전에는 MineralField의 분포와 MineralField 사이의 통로 위치를 숙지하고, 초반 방어 건물의 건설 위치를 신중히 결정해야 한다. 또한 컴퓨터의 러시 타이밍과 패턴을 익히면 안정적인 방어가 가능해진다. 7명의 플레이어가 각자 역할 분담을 명확히 하고, Resource를 효율적으로 관리하는 것이 승리의 열쇠가 될 것이다. This is a defense-style custom map from *StarCraft: Brood War* where seven players face off against a single Very Hard (highest difficulty) AI opponent. According to the in-map description, the AI aggressively rushes early, forcing players to quickly build defenses and deploy units strategically. The battle unfolds on a vast desert tileset, where tight resource management and well-timed attacks are crucial—each player must gather minerals and vespene gas individually to construct defensive structures and produce units. The narrow central corridor and scattered mineral fields highlight the importance of early defense; failing to secure this area often leads to being overwhelmed by the AI’s rush. Due to the AI’s Very Hard difficulty, players face relentless pressure not just in the early and mid-game but even late into the match, making balanced unit compositions and continuous resource collection essential. This map is better suited for intermediate to advanced players, particularly those who excel in teamwork and strategic coordination. Before playing, it’s important to study the mineral field layouts and the chokepoints between them, as well as carefully plan where to place initial defensive structures. Familiarizing yourself with the AI’s rush timing and attack patterns will also help stabilize your defenses. With seven players sharing distinct roles and efficiently managing resources, teamwork and smart allocation of minerals and gas will be the key to victory.
리콜 디펜스 (Recall Defense)
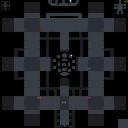
《리콜 디펜스》는 스타크래프트 브루드워의 디펜스 장르 유즈맵으로, 우주 테마의 맵 위에서 끊임없이 몰려드는 적의 공세를 방어해내는 것이 주된 목표다. 맵 중앙에 위치한 방어 포인트를 지키며, 외곽에서 끊임없이 생성되는 적 유닛들을 사전에 배치된 방어 건물이나 플레이어의 조작으로 섬멸하는 방식의 디펜스 게임이다. 맵의 구성은 비교적 단순하지만, 적의 공격 패턴과 생성 위치가 전략적으로 배치되어 있어 플레이어의 긴장감을 높인다. 방어 건물의 배치를 신중히 결정해야 하며, 자원 관리와 업그레이드가 중요하다. 특히, 맵의 우측 상단과 좌측 하단에 위치한 특수 포인트에서는 강력한 적들이 등장하므로, 이를 대비한 방어 전략을 세우는 것이 필수적이다. 맵의 특징 중 하나는 우주 테마의 배경으로, 어두운 톤의 우주 공간과 별들이 배경으로 깔려 있어 분위기를 한층 더 immersive하게 만든다. 또한, 맵의 크기가 4096x4096으로 비교적 넓은 편이지만, 방어 포인트가 중앙에 집중되어 있어 전투의 초점은 비교적 명확하다. 초보 플레이어의 경우 방어 건물의 배치와 자원 관리에 어려움을 느낄 수 있지만, 적절한 전략과 연습을 통해 점차 극복할 수 있다. 이 맵은 디펜스 장르에 익숙한 플레이어라면 즐겁게 플레이할 수 있으며, 특히 팀 플레이보다는 혼자서 방어에 집중하는 스타일이 강하다. 다만, 적의 공격 패턴이 반복적이므로, 이를 분석하고 대응하는 것이 핵심이다. 리플레이 감상이나 전략 공유를 위한 커뮤니티 활동도 활발할 것으로 예상된다. Recall Defense is a defense genre custom map in StarCraft: Brood War, where players must defend a central defense point from waves of enemy units emerging from the map's edges. The gameplay revolves around strategic placement of defensive structures and resource management to counter relentless enemy attacks. The map's layout features a central defense hub with outer perimeters generating enemies at multiple spawn points. Key challenges include managing special enemy spawns in the top-right and bottom-left corners, which unleash stronger units requiring careful defensive planning. The cosmic theme, with its dark space backdrop and scattered stars, enhances immersion and sets the tone for intense battles. The map's size (4096x4096) allows for strategic depth, though the focus remains on the central defense area. Newer players may struggle initially with structure placement and resource allocation, but consistent practice helps refine tactics. This map is ideal for those familiar with defense games, offering a solo-focused experience where pattern recognition and adaptive strategies are crucial. The repetitive yet escalating enemy waves make it replayable, and its mechanics encourage community engagement through replays and strategy discussions.
최근 등록된 맵
새로 추가된 파일과 버전을 확인하세요.
스포어 D 2003 (Spore D 2003)
스타크래프트 브루드워의 유즈맵 <스포어 D 2003>은 우주를 배경으로 한 디펜스 장르의 맵으로, 플레이어는 중앙에 위치한 기지에서 끊임없이 몰려드는 적들을 방어하는 임무를 수행합니다. 맵의 특징적인 구조는 중앙에 위치한 본진 주변을 다양한 지형과 요소가 둘러싸고 있으며, 각 구역은 빨간색과 파란색으로 나뉘어 있어 시야를 제한하거나 전략적 움직임을 유도합니다. 적들은 맵 가장자리에서 끊임없이 생성되어 본진으로 접근을 시도하며, 플레이어는 제한된 자원과 병력으로 이들을 처치해야 합니다. 플레이 방식은 크게 세 가지로 나뉘는데, 첫째는 적의 공격을 효과적으로 방어하는 것입니다. 중앙 본진 주변에는 방어용 건물이 배치되어 있지만, 플레이어는 직접 유닛을 생산하고 배치하여 전선을 유지해야 합니다. 둘째는 자원의 관리입니다. 미네랄과 가스는 제한되어 있으며, 이를 효율적으로 활용하여 유닛을 생산하고 업그레이드를 진행해야 합니다. 셋째는 맵의 특성을 활용한 전략적 플레이입니다. 맵 곳곳에 숨겨진 자원 지점이나 지형적 이점을 활용하여 적의 공격을 분산시키거나 방어선을 구축할 수 있습니다. 특히 맵의 빨간색과 파란색 구역은 시야를 가리는 효과가 있어, 적의 공격을 사전에 감지하거나 회피하는 데 유용합니다. 이 맵은 초보자보다는 중급 이상의 플레이어에게 적합한데, 자원 관리와 유닛 컨트롤, 맵 리딩 능력이 요구됩니다. 또한 팀플레이가 가능한 구조로 되어 있어, 협력 플레이를 중시하는 유저들에게도 좋은 선택이 될 수 있습니다. 맵의 난이도는 적의 공격 패턴과 생성 주기에 따라 크게 달라지며, 경험이 쌓일수록 더 효율적인 방어 전략을 세울 수 있습니다. 추천하는 플레이 방식은 초반에 자원을 충분히 확보한 후, 중반에는 방어선을 구축하며, 후반에는 강력한 유닛으로 반격을 준비하는 것입니다. 맵의 긴 플레이 시간과 전략적 깊이를 감안할 때, 한 번 플레이할 때마다 새로운 전략을 시도해 볼 수 있습니다. 이 맵을 즐기기 위해서는 스타크래프트 브루드워가 설치되어 있어야 하며, 유즈맵으로 분류되어 있어 별도의 설치 없이도 플레이할 수 있습니다. 또한, 맵의 특성상 높은 스펙의 PC가 필요하지 않지만, 부드러운 그래픽과 원활한 플레이를 위해서는 그래픽 설정을 조정하는 것이 좋습니다. 마지막으로, 이 맵은 디펜스 장르의 유즈맵 중에서 비교적 인기 있는 작품으로, 다양한 커뮤니티에서 공유되고 있습니다. 플레이 전에는 맵의 구조와 적의 공격 패턴을 충분히 숙지한 후, 전략을 세워 도전해 보기를 권장합니다. StarCraft: Brood War's custom map *Spore D 2003* is a defense genre map set in space, where players must defend a central base against endless waves of enemies. The map's distinctive layout features the main base surrounded by varied terrain and elements, with each area divided by red and blue zones that restrict visibility or guide strategic movement. Enemies spawn continuously at the map's edges and attempt to reach the player's base, requiring them to eliminate threats with limited resources and forces. The gameplay is divided into three key aspects: first, effectively defending against enemy attacks. While defensive structures are placed around the central base, players must produce and deploy units to maintain the frontline. Second is resource management—minerals and gas are scarce, so efficient use is essential for unit production and upgrades. Third is strategic play that leverages the map's features. Hidden resource points and terrain advantages can be used to disperse enemy attacks or reinforce defenses. The red and blue zones in particular obscure vision, aiding in early detection or evasion of enemy movements. This map is best suited for intermediate to advanced players, as it demands strong resource management, unit control, and map awareness. Its team-friendly design also makes it a great choice for cooperative play. Difficulty varies depending on enemy attack patterns and spawn rates, but experience allows for more refined defense strategies. A recommended approach is to secure resources early, establish defense lines in the mid-game, and prepare counterattacks with powerful units late in the game. Given its long playtime and strategic depth, each session offers opportunities to experiment with new tactics. To play this map, *StarCraft: Brood War* must be installed, though as a custom map, it can be played without additional downloads. While the map doesn't require high-end PC specs, adjusting graphics settings can enhance smoothness and visual clarity. As one of the more popular defense genre custom maps, it's widely shared across various communities. Before playing, it's advisable to study the map layout and enemy attack patterns to develop a solid strategy.
스나이퍼 듀얼스 락스 (Snipers Duels Locks 1.03)
스타크래프트 브루드워의 유즈맵 〈Snipers Duels Locks〉는 6인용 저격수 대결을 중심으로 구성된 컴뱃 맵으로, 좁고 복잡한 공간에서 펼치는 일대일 전투가 특징이다. 맵은 사막 타일셋으로 꾸며졌으며, 중앙에 위치한 작은 오브젝트와 주변의 장애물들이 저격전의 긴장감을 한층 높인다. 플레이어는 각자의 시작 지점에서 출발해 맵 중앙의 좁은 길목이나 터널을 통해 이동하며, 상대방과 마주치는 순간 저격전을 펼친다. 맵의 구조는 대칭적이면서도 일부 구역에서 복잡한 통로와 장애물이 배치되어 있어, 적의 움직임을 예측하고 기습을 당하지 않기 위한 전략적 플레이가 필요하다. 맵의 이름은 'Snipers Duels'로 저격수 대결을, 'Locks'는 좁고 제한된 공간을 뜻하는 것으로 보인다. 맵의 크기는 2048x2048이며, 타일 단위는 64x64로 깔끔하게 구성되어 있다. 내부 맵 설명에 따르면 'A More Condensed Way To Snipe'로, 좁고 밀집된 공간에서 저격을 연습할 수 있도록 디자인된 것으로 추정된다. 이 맵은 주로 6인용으로 제작되었지만, 팀 플레이보다는 개인전 또는 듀오전 중심으로 플레이할 수 있도록 설계된 듯하다. 저격수의 명중률과 반응 속도가 중요한 요소로, 맵의 좁은 길목에서 벌어지는 순간적인 교전이 관전 포인트다. 또한 맵의 장애물과 통로는 저격수 간의 거리를 조절하는 데 영향을 미치므로, 맵을 충분히 숙지하고 적의 움직임을 예측하는 능력이 필요하다. 초보자는 맵의 구조를 익히기 어렵고, 숙련자도 적의 기습에 대응하는 데 익숙해지기까지 시간이 걸릴 수 있다. 따라서 이 맵은 저격수 대결에 관심이 있는 플레이어나, 좁은 공간에서의 교전 경험을 쌓고 싶은 유저들에게 추천할 만하다. 다만, 맵의 복도와 터널이 다소 복잡해 초보자가 길을 잃기 쉽다는 점은 주의해야 한다. 맵의 플레이 시간은 저격전 한 판당 10~30분 정도로 추정되며, 난이도는 중간 정도로 평가된다. 이 맵을 즐기기 위해서는 저격수 유닛의 컨트롤과 맵 리딩 능력이 중요하다. 또한, 맵의 좁은 공간 때문에 실수로 아군을 공격하지 않도록 주의가 필요하다. 맵을 플레이하기 전에는 맵의 구조를 미리 확인하고, 저격수 간의 거리와 시야를 고려한 전략을 세우는 것이 좋다. 특히, 맵 중앙의 터널이나 좁은 길목에서는 순간적인 반응이 승패를 좌우할 수 있다. 이 맵은 주로 저격수 대결을 즐기는 플레이어들에게 인기가 있을 것으로 보이며, 좁은 공간에서의 교전Experience를 추구하는 유저들에게도 좋은 선택이 될 것이다. 맵의 디자인과 구조는 간결하면서도 효과적으로 저격전을 연출할 수 있도록 짜여져 있으며, 반복 플레이를 통해 맵의 패턴을 익히는 재미도 있다. 마지막으로, 맵의 이름은 'Snipers Duels Locks'로, 'Locks'가 좁은 공간을 뜻하는 만큼, 맵의 구조 자체가 이 맵의 핵심 아이디어임을 알 수 있다. 이 맵은 저격수 대결을 좋아하는 유저들에게는 필수적인 맵 중 하나로 자리매김할 수 있을 것이다. StarCraft: Brood War's custom map *Snipers Duels Locks* is a combat-focused 6-player map centered around sniper duels, featuring intense one-on-one battles in tight, maze-like spaces. The map is designed with a desert tile set, where a small central object and surrounding obstacles heighten the tension of sniper engagements. Players start at their respective bases and navigate through narrow paths or tunnels toward the center, where sudden encounters trigger sniper battles. The map’s layout is symmetrical overall but includes complex corridors and obstacles in certain areas, requiring strategic play to predict enemy movements and avoid ambushes. The name *Snipers Duels* clearly references the core sniper combat, while *Locks* likely refers to the narrow, confined spaces. The map measures 2048x2048 with a clean 64x64 tile layout. According to internal descriptions, it’s designed as *"A More Condensed Way To Snipe,"* emphasizing sniper practice in tightly packed areas. Though built for six players, it leans toward solo or duo matches rather than team play. Accuracy and reaction time are critical, as the map’s tight corridors force quick, decisive engagements. Obstacles and tunnels also influence sniper distance, so mastering the layout and predicting enemy behavior are essential. Beginners may struggle to navigate the complex structure, and even experienced players need time to adapt to ambushes. Thus, the map is best suited for players interested in sniper duels or honing close-quarters combat skills. However, its intricate hallways and tunnels can easily disorient newcomers. Each match typically lasts 10 to 30 minutes, with a moderate difficulty level. Success depends on precise sniper control and map awareness—mistakenly targeting allies in the cramped spaces is a real risk. Before playing, it’s wise to study the layout and plan strategies around sniper range and visibility. Central tunnels and narrow paths demand split-second reactions that can determine victory or defeat. The map’s straightforward yet effective design makes it a favorite among sniper-focused players and those seeking intense close-quarters combat. Repeated plays help uncover patterns, adding replay value. With *Locks* reinforcing the theme of confined spaces, the map’s structure itself embodies its core concept. For sniper enthusiasts, *Snipers Duels Locks* stands out as a must-try addition to the custom map roster.
리콜 디펜스 (Recall Defense)
《리콜 디펜스》는 스타크래프트 브루드워의 디펜스 장르 유즈맵으로, 우주 테마의 맵 위에서 끊임없이 몰려드는 적의 공세를 방어해내는 것이 주된 목표다. 맵 중앙에 위치한 방어 포인트를 지키며, 외곽에서 끊임없이 생성되는 적 유닛들을 사전에 배치된 방어 건물이나 플레이어의 조작으로 섬멸하는 방식의 디펜스 게임이다. 맵의 구성은 비교적 단순하지만, 적의 공격 패턴과 생성 위치가 전략적으로 배치되어 있어 플레이어의 긴장감을 높인다. 방어 건물의 배치를 신중히 결정해야 하며, 자원 관리와 업그레이드가 중요하다. 특히, 맵의 우측 상단과 좌측 하단에 위치한 특수 포인트에서는 강력한 적들이 등장하므로, 이를 대비한 방어 전략을 세우는 것이 필수적이다. 맵의 특징 중 하나는 우주 테마의 배경으로, 어두운 톤의 우주 공간과 별들이 배경으로 깔려 있어 분위기를 한층 더 immersive하게 만든다. 또한, 맵의 크기가 4096x4096으로 비교적 넓은 편이지만, 방어 포인트가 중앙에 집중되어 있어 전투의 초점은 비교적 명확하다. 초보 플레이어의 경우 방어 건물의 배치와 자원 관리에 어려움을 느낄 수 있지만, 적절한 전략과 연습을 통해 점차 극복할 수 있다. 이 맵은 디펜스 장르에 익숙한 플레이어라면 즐겁게 플레이할 수 있으며, 특히 팀 플레이보다는 혼자서 방어에 집중하는 스타일이 강하다. 다만, 적의 공격 패턴이 반복적이므로, 이를 분석하고 대응하는 것이 핵심이다. 리플레이 감상이나 전략 공유를 위한 커뮤니티 활동도 활발할 것으로 예상된다. Recall Defense is a defense genre custom map in StarCraft: Brood War, where players must defend a central defense point from waves of enemy units emerging from the map's edges. The gameplay revolves around strategic placement of defensive structures and resource management to counter relentless enemy attacks. The map's layout features a central defense hub with outer perimeters generating enemies at multiple spawn points. Key challenges include managing special enemy spawns in the top-right and bottom-left corners, which unleash stronger units requiring careful defensive planning. The cosmic theme, with its dark space backdrop and scattered stars, enhances immersion and sets the tone for intense battles. The map's size (4096x4096) allows for strategic depth, though the focus remains on the central defense area. Newer players may struggle initially with structure placement and resource allocation, but consistent practice helps refine tactics. This map is ideal for those familiar with defense games, offering a solo-focused experience where pattern recognition and adaptive strategies are crucial. The repetitive yet escalating enemy waves make it replayable, and its mechanics encourage community engagement through replays and strategy discussions.
옵저버 매드니스 [v4] (Observer Madness [v4])
스타크래프트 브루드워의Observer Madness [v4]는 관전자(Observer)를 중심으로 펼쳐지는 독특한 디펜스형 유즈맵으로, 플레이어들이 끊임없이 몰려드는 적 유닛을 상대로 방어선을 구축하는 재미를 느낄 수 있는 맵이다. 맵 중앙에 위치한 관전자 오브젝트는 맵의 핵심으로, 이 주변에서 플레이어들이 배치한 방어 건물이나 유닛을 통해 적의 공격을 저지해야 한다. 화산 타일셋을 배경으로 한 어두운 분위기는 긴장감을 더하며, 맵 곳곳의 좁은 길목과 복잡한 지형이 방어 전략을 요구한다. 플레이어는 시작 시 제한된 자원으로 방어 건물을 건설하거나 유닛을 소환할 수 있으며, 관전자 주변으로 몰려드는 적들은随着时间的推移 점점 강력해진다. 특히 관전자 주변의 좁은 길목은 방어의 관건으로, here 지형을 활용한 병력 배치나 건물 간의 연계가 필수적이다. 관전자 자체는 파괴되지 않지만, 관전자 주변의 방어 라인이 무너지면 게임 오버가 되므로 신중한 플레이가 요구된다. 이 맵은 6명의 플레이어가 동시에 참여할 수 있으며, 각 플레이어는 개별적으로 방어에 참여하거나 팀을 이뤄 협력할 수 있다. 관전자의 위치와 맵의 구조상, 팀 플레이가 유리할 수 있지만, 개인의 방어 능력도 매우 중요하다. 난이도는 초보자에게는 다소 어려운 편이지만, 적의 패턴을 숙지하고 방어 건물을 효율적으로 배치한다면 점차 공략이 가능해진다. 관전자 주변의 좁은 길목과 화산 지형이 주는 압박감은 이 맵의 특징적인 재미 요소로, 디펜스 장르를 좋아하는 유저들에게 특히 추천할 만하다. 플레이 전 반드시 확인해야 할 점은 관전자의 위치와 맵의 주요 길목, 그리고 각 플레이어의 시작 위치와 자원 분배다. 또한 방어 건물을 건설할 수 있는 공간이 제한적이므로, 미리 빌드 오더를 계획하고 진행하는 것이 중요하다. 관전자 주변의 좁은 길목은 디펜스의 핵심 포인트이므로, here 지형을 활용한 방어 라인을 구축하는 연습을 해두면 좋다. 마지막으로, 적의 공격 패턴을 분석하고 유닛의 체력 관리를 철저히 한다면 더 오랫동안 버틸 수 있을 것이다. Observer Madness [v4] is a unique defense-style custom map in StarCraft: Brood War where players must defend a central Observer object against waves of enemy units. Set against a volcanic tileset, the map creates an intense atmosphere as players strategically place defensive structures and units around the Observer to fend off increasingly powerful enemy forces. The core gameplay revolves around the narrow pathways leading to the Observer, which act as chokepoints that players must fortify. Limited starting resources force players to make critical early-game decisions about unit production and building placement. As the game progresses, enemies become stronger and more numerous, testing the player's ability to adapt their defenses. While the Observer itself cannot be destroyed, failing to protect the surrounding area results in a game over, adding high stakes to every decision. Designed for up to six players, Observer Madness [v4] supports both solo and team-based play. The volcanic terrain and tight corridors create a claustrophobic feel, making teamwork essential for covering all angles of attack. The difficulty curve is steep for beginners, but mastering enemy patterns and optimizing building placement allows for steady progress. The map's tension stems from its chokepoints and the ever-increasing enemy pressure, making it a standout experience for fans of the defense genre. Before playing, it’s crucial to study the map’s layout, especially the Observer’s position and key pathways. Players should plan their early-game build order carefully, as space around the Observer is limited. Understanding the chokepoints and refining defensive strategies—such as focusing on high-damage units or strategic building placement—will significantly improve survival chances. The map rewards adaptability and quick decision-making, ensuring each playthrough feels fresh and challenging.
7vs1 하드 컴퓨터 (7vs1 Hard Computer)
스타크래프트 브루드워의 유즈맵 중 하나로, 7명의 플레이어가 한 명의Very Hard(최상급) 컴퓨터를 상대하는 디펜스 형식의 맵이다. 내부 맵 설명에 따르면 컴퓨터는 빠르게 러시를 감행하므로, 플레이어들은 신속한 방어 시설 건설과 전략적 배치로 대응해야 한다. 사막 타일셋으로 구성된 넓은 필드에서 펼쳐지는 전투는 치밀한Resource Management와 조율된 공격 타이밍이 핵심이며, 각 플레이어는 개별적으로 Mineral과 Gas를 확보해 방어 건물과 유닛을 생산해야 한다. 맵 중앙을 가로지르는 좁은 통로와 분산된 MineralField는 초반 방어선의 중요성을 강조하는데, 이곳을 효과적으로 방어하지 못하면 컴퓨터의 러시에 의해 전멸할 가능성이 크다. 컴퓨터의 Very Hard 난이도 특성상 초중반 러시뿐 아니라 후반까지 끊임없는 압박을 가해 오므로, 플레이어들은 균형 잡힌 유닛 조합과 지속적인Resource 확보가 필수적이다. 초보자보다는 중수 이상의 플레이어에게 적합하며, 특히 팀워크와 전략적 협력이 요구되는 맵으로 평가된다. 플레이 전에는 MineralField의 분포와 MineralField 사이의 통로 위치를 숙지하고, 초반 방어 건물의 건설 위치를 신중히 결정해야 한다. 또한 컴퓨터의 러시 타이밍과 패턴을 익히면 안정적인 방어가 가능해진다. 7명의 플레이어가 각자 역할 분담을 명확히 하고, Resource를 효율적으로 관리하는 것이 승리의 열쇠가 될 것이다. This is a defense-style custom map from *StarCraft: Brood War* where seven players face off against a single Very Hard (highest difficulty) AI opponent. According to the in-map description, the AI aggressively rushes early, forcing players to quickly build defenses and deploy units strategically. The battle unfolds on a vast desert tileset, where tight resource management and well-timed attacks are crucial—each player must gather minerals and vespene gas individually to construct defensive structures and produce units. The narrow central corridor and scattered mineral fields highlight the importance of early defense; failing to secure this area often leads to being overwhelmed by the AI’s rush. Due to the AI’s Very Hard difficulty, players face relentless pressure not just in the early and mid-game but even late into the match, making balanced unit compositions and continuous resource collection essential. This map is better suited for intermediate to advanced players, particularly those who excel in teamwork and strategic coordination. Before playing, it’s important to study the mineral field layouts and the chokepoints between them, as well as carefully plan where to place initial defensive structures. Familiarizing yourself with the AI’s rush timing and attack patterns will also help stabilize your defenses. With seven players sharing distinct roles and efficiently managing resources, teamwork and smart allocation of minerals and gas will be the key to victory.
5:3헌터 컴퓨터255업 VERY HARD
5:3헌터 컴퓨터255업 VERY HARD는 5인용 UMS(유즈맵) 형태의 대전 맵으로, 사막 타일셋을 배경으로 합니다. 맵 전체가 4096×4096 픽셀 규모이며, 각 타일은 128×128 단위로 구성돼 있어 넓은 전장을 제공합니다. 주요 목표는 상대 기지를 파괴하는 것이지만, 이름에서 알 수 있듯이 컴퓨터(AI) 상대가 255레벨까지 강화된 상태로 등장해 매우 높은 난이도를 요구합니다. 따라서 초보자보다는 숙련된 플레이어에게 적합합니다. 플레이 흐름은 초기 자원 확보 후 빠른 유닛 생산과 공격 루트를 확보하는 것이 핵심이며, 사막 지형 특성상 시야 확보와 방어 건설이 중요합니다. 특히 중앙에 위치한 고지대는 전략적 요충지로, 여기서 유닛을 집중 배치하면 상대의 진격을 효과적으로 저지할 수 있습니다. 게임 시작 전에는 AI 레벨과 유닛 생산 속도를 확인하고, 방어 타워와 광산 배치를 미리 계획하는 것이 좋습니다. 또한, 5인 플레이이므로 팀워크가 중요한데, 각 플레이어가 역할을 분담해 전방 공격과 후방 지원을 균형 있게 수행해야 합니다. 전체 플레이 시간은 평균 30분 내외로 예상되며, 매 경기마다 AI의 행동 패턴이 다소 변동될 수 있어 반복 플레이 시 다양한 전략을 시험해볼 수 있습니다. 5:3 Hunter Computer 255 Up VERY HARD is a 5‑player UMS (use map) designed on a desert tileset. The map spans 4096×4096 pixels with tiles of 128×128, offering a large battlefield. The objective is to destroy the opponent’s base, but as the title suggests, the computer opponent is boosted to level 255, making the difficulty extremely high. Consequently, it suits experienced players rather than beginners. The flow of play involves securing early resources, rapidly producing units, and establishing attack routes; the desert terrain emphasizes vision control and defensive building placement. A central high ground serves as a strategic choke point—concentrating units there can effectively halt enemy advances. Before starting, check the AI level and unit production rates, and plan turret and mining placements in advance. Since the map supports five players, teamwork is crucial; each player should balance front‑line attacks with rear support. Typical match length is around 30 minutes, and the AI’s behavior may vary each game, allowing players to experiment with different strategies.
맵 선택 가이드
태그는 맵의 핵심 특징을 빠르게 설명하지만 제작 버전마다 규칙이 다를 수 있습니다. 상세 설명에서 권장 인원, 난이도, 플레이 시간과 버전을 함께 확인한 뒤 다운로드하세요.