
치유 스타크래프트 맵 모음
'치유' 태그가 등록된 맵을 모았습니다. 장르 하나로 찾기 어려운 플레이 방식, 난이도와 특징을 중심으로 인기 맵과 최신 맵을 비교해 보세요.
- 등록 맵
- 2개
- 누적 다운로드
- 0
- 누적 조회
- 68
인기 맵
다운로드와 조회 반응이 높은 맵입니다.
미니 타운 D 플러스 3 (Mini Town D Plus 3)
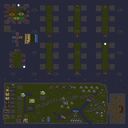
스타크래프트 브루드워의Mini Town D Plus 3는 컴까기 유즈맵으로, 5명의 플레이어가 각각의 healer(치유자) 역할을 맡아 최대한 오래 살아남는 것이 목표다. 맵 중앙에 위치한 healer는 초당 체력을 회복하는 능력을 갖고 있으며, 맵 곳곳에 배치된 구조물을 활용해 적대적인 유닛들로부터 자신을 보호해야 한다. 특히 추가된 lurker는 기존 버전보다 공격적인 요소를 강화했으며, AI가 조종하는 적 유닛들이 지속적으로 몰려들어 플레이어의 체력을 갉아먹는다. healer는 기본적으로 체력 회복이 빨라지지만, 맵 외곽에 위치한 추가 healer를 발견할 수 있어 전략적 선택지가 넓어졌다. 맵은 사막 테마로 구성되어 있으며, 건물을 건설하거나 유닛을 생산하는 대신 기지 방어와 자원 관리에 집중해야 한다. 맵의 난이도는 healer의 생존력과 AI의 공격 패턴에 따라 크게 좌우되며, 초보자의 경우 적 유닛의 패턴을 익히는 데 시간이 필요할 수 있다. 플레이어는 맵 중앙의 healer를 중심으로 방어선을 구축하거나, 추가 healer를 활용해 체력을 유지하는 등 다양한 전략을 세울 수 있다. 맵의 핵심은 체력 관리와 위치 선택에 있으며, 특히 lurker의 등장으로 인해 방어 태세를 더욱 강화해야 한다. 이 맵은 5명의 플레이어가 협력하거나 경쟁하는 방식으로 진행되며, healer의 생존 여부가 승패를 좌우한다. 또한, 맵의 구조상 중앙에서 멀리 떨어진 곳에 위치한 healer는 상대적으로 안전한 편이지만, 접근성이 떨어지는 만큼 신중하게 선택해야 한다. 플레이 전에는 healer의 체력 회복 속도와 AI의 공격 패턴을 미리 확인하는 것이 중요하며, 특히 lurker의 공격 범위와 이동 속도를 숙지하고 있어야 한다. 이 맵은 체력 관리와 전략적 위치 선택을 즐기는 플레이어에게 적합하며, 팀플레이보다는 개인 플레이에 가까운 성격을 지닌다. 맵의 분위기는 치유와 생존을 테마로 삼고 있으며, 사막의 황량한 배경과 상대적으로 밝은 healer의 색상이 대비를 이루어 시각적 재미를 더한다. healer의 디자인과 맵의 구조는 이전 버전의 Mini Town D를 계승하면서도 새로운 요소를 추가해 리메이크의 가치를 더하고 있다. StarCraft: Brood War's Mini Town D Plus 3 is a "compkagi" (comeback) custom map where five players each take on the role of a healer, aiming to survive as long as possible. The healer in the map's center has the ability to regenerate health per second, but must use the structures scattered throughout the map to protect themselves from hostile units. The added lurkers make the map more aggressive than the original version, with AI-controlled enemy units constantly swarming in to drain the player's health. Healers naturally regenerate health faster, but players can also find additional healers positioned around the map's edges, expanding strategic options. The map is set in a desert theme, focusing on base defense and resource management rather than building structures or producing units. The difficulty depends heavily on the healer's survivability and the AI's attack patterns, which beginners may need time to learn. Players can build defensive lines around the central healer or use the additional healers to sustain health, employing various strategies. The core challenge lies in health management and positioning, especially with lurkers forcing players to strengthen their defenses. The map can be played cooperatively or competitively among five players, with the healer's survival determining victory or defeat. Healers located far from the center are relatively safer but harder to access, requiring careful consideration. Before playing, it's important to check the healer's health regeneration speed and the AI's attack patterns, particularly the lurker's attack range and movement speed. This map suits players who enjoy health management and strategic positioning, leaning more toward individual play than teamwork. The atmosphere emphasizes healing and survival, with the healer's bright design contrasting against the desolate desert backdrop for added visual appeal. The healer's design and map structure carry over from the original Mini Town D while introducing new elements, enhancing its remake value.
미니타운 D 에어리어 힐 (MiniTown D AREA HEAL)
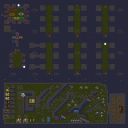
스타크래프트 브루드워의 유즈맵인 'MiniTown D AREA HEAL'은 이름 그대로 작은 마을 형태의 맵에 치유와 생존 요소가 결합된 디펜스 장르의 맵입니다. 맵 제목에 'HEAL'이 포함된 것처럼, 플레이어는 지속적인 체력 회복을 통해 적의 공격을 버텨내야 합니다. 맵의 구조는 중앙에 위치한 넓은 잔디 광장과 그 주변으로 배치된 건물, 샛길, 언덕 등으로 구성되어 있으며, 특히 광장 주변의 언덕과 건물 뒤는 страте적 요충지로 활용할 수 있습니다. 적들은 광장 중심에서 끊임없이 몰려오며, 플레이어는 건물을 지키거나 치유를 통해 체력을 유지해야 합니다. 맵의 지형은 사막 타일셋을 기반으로 하지만, 잔디와 도로가 조화를 이루어 마을 feel을 살리고 있습니다. 맵의 설명에 'Full house / mini town vets recommended'라는 문구가 있는 것으로 보아, 초보보다는 어느 정도 경험이 있는 플레이어에게 적합한 맵으로 보입니다. 또한 '2high @useast - April 4th 2013'은 맵의 제작일과 서버 지역을 의미하는 것으로 추정됩니다. 이 맵을 플레이하기 위해서는 건물을 지키면서 체력을 관리하는 전략과 동시에 끊임없이 몰려오는 적을 상대해야 하는 멀티태스킹 능력이 필요합니다. 치유가 가능한 구조물이 맵 곳곳에 배치되어 있어, 이를 잘 활용하는 것이 관건입니다. 초보 플레이어의 경우 적의 공격 패턴을 숙지하고, 건물의 보호와 자신의 체력 관리를 동시에 해내기 어려울 수 있어 어려움을 느낄 수 있습니다. 하지만 치유 요소가 있기 때문에 초보도 천천히 적응하며 할 만하다는 점이 특징입니다. MiniTown D AREA HEAL is a UMS (Use Map Settings) map in StarCraft: Brood War that combines healing mechanics with a defense-style gameplay in a small town setting. As suggested by the title, players must survive waves of enemies while maintaining their health through healing structures scattered across the map. The terrain features a central grassy plaza surrounded by buildings, pathways, and hills, creating strategic vantage points for defense. Enemies spawn near the plaza and continuously attack, requiring players to defend key structures or rely on healing to sustain their units. The map uses a desert tileset but incorporates grass and roads to enhance the town aesthetic. The description mentions that it is recommended for players experienced with "Full house" or "mini town" maps, indicating a moderate difficulty level. The '2high @useast - April 4th 2013' likely refers to the map's release date and server region. Success in this map depends on balancing defense strategy with effective use of healing points while managing incoming enemy waves. Beginners may struggle with the simultaneous demands of protecting structures and maintaining health, but the healing mechanics provide a forgiving element that allows for gradual adaptation.
최근 등록된 맵
새로 추가된 파일과 버전을 확인하세요.
미니 타운 D 플러스 3 (Mini Town D Plus 3)
스타크래프트 브루드워의Mini Town D Plus 3는 컴까기 유즈맵으로, 5명의 플레이어가 각각의 healer(치유자) 역할을 맡아 최대한 오래 살아남는 것이 목표다. 맵 중앙에 위치한 healer는 초당 체력을 회복하는 능력을 갖고 있으며, 맵 곳곳에 배치된 구조물을 활용해 적대적인 유닛들로부터 자신을 보호해야 한다. 특히 추가된 lurker는 기존 버전보다 공격적인 요소를 강화했으며, AI가 조종하는 적 유닛들이 지속적으로 몰려들어 플레이어의 체력을 갉아먹는다. healer는 기본적으로 체력 회복이 빨라지지만, 맵 외곽에 위치한 추가 healer를 발견할 수 있어 전략적 선택지가 넓어졌다. 맵은 사막 테마로 구성되어 있으며, 건물을 건설하거나 유닛을 생산하는 대신 기지 방어와 자원 관리에 집중해야 한다. 맵의 난이도는 healer의 생존력과 AI의 공격 패턴에 따라 크게 좌우되며, 초보자의 경우 적 유닛의 패턴을 익히는 데 시간이 필요할 수 있다. 플레이어는 맵 중앙의 healer를 중심으로 방어선을 구축하거나, 추가 healer를 활용해 체력을 유지하는 등 다양한 전략을 세울 수 있다. 맵의 핵심은 체력 관리와 위치 선택에 있으며, 특히 lurker의 등장으로 인해 방어 태세를 더욱 강화해야 한다. 이 맵은 5명의 플레이어가 협력하거나 경쟁하는 방식으로 진행되며, healer의 생존 여부가 승패를 좌우한다. 또한, 맵의 구조상 중앙에서 멀리 떨어진 곳에 위치한 healer는 상대적으로 안전한 편이지만, 접근성이 떨어지는 만큼 신중하게 선택해야 한다. 플레이 전에는 healer의 체력 회복 속도와 AI의 공격 패턴을 미리 확인하는 것이 중요하며, 특히 lurker의 공격 범위와 이동 속도를 숙지하고 있어야 한다. 이 맵은 체력 관리와 전략적 위치 선택을 즐기는 플레이어에게 적합하며, 팀플레이보다는 개인 플레이에 가까운 성격을 지닌다. 맵의 분위기는 치유와 생존을 테마로 삼고 있으며, 사막의 황량한 배경과 상대적으로 밝은 healer의 색상이 대비를 이루어 시각적 재미를 더한다. healer의 디자인과 맵의 구조는 이전 버전의 Mini Town D를 계승하면서도 새로운 요소를 추가해 리메이크의 가치를 더하고 있다. StarCraft: Brood War's Mini Town D Plus 3 is a "compkagi" (comeback) custom map where five players each take on the role of a healer, aiming to survive as long as possible. The healer in the map's center has the ability to regenerate health per second, but must use the structures scattered throughout the map to protect themselves from hostile units. The added lurkers make the map more aggressive than the original version, with AI-controlled enemy units constantly swarming in to drain the player's health. Healers naturally regenerate health faster, but players can also find additional healers positioned around the map's edges, expanding strategic options. The map is set in a desert theme, focusing on base defense and resource management rather than building structures or producing units. The difficulty depends heavily on the healer's survivability and the AI's attack patterns, which beginners may need time to learn. Players can build defensive lines around the central healer or use the additional healers to sustain health, employing various strategies. The core challenge lies in health management and positioning, especially with lurkers forcing players to strengthen their defenses. The map can be played cooperatively or competitively among five players, with the healer's survival determining victory or defeat. Healers located far from the center are relatively safer but harder to access, requiring careful consideration. Before playing, it's important to check the healer's health regeneration speed and the AI's attack patterns, particularly the lurker's attack range and movement speed. This map suits players who enjoy health management and strategic positioning, leaning more toward individual play than teamwork. The atmosphere emphasizes healing and survival, with the healer's bright design contrasting against the desolate desert backdrop for added visual appeal. The healer's design and map structure carry over from the original Mini Town D while introducing new elements, enhancing its remake value.
미니타운 D 에어리어 힐 (MiniTown D AREA HEAL)
스타크래프트 브루드워의 유즈맵인 'MiniTown D AREA HEAL'은 이름 그대로 작은 마을 형태의 맵에 치유와 생존 요소가 결합된 디펜스 장르의 맵입니다. 맵 제목에 'HEAL'이 포함된 것처럼, 플레이어는 지속적인 체력 회복을 통해 적의 공격을 버텨내야 합니다. 맵의 구조는 중앙에 위치한 넓은 잔디 광장과 그 주변으로 배치된 건물, 샛길, 언덕 등으로 구성되어 있으며, 특히 광장 주변의 언덕과 건물 뒤는 страте적 요충지로 활용할 수 있습니다. 적들은 광장 중심에서 끊임없이 몰려오며, 플레이어는 건물을 지키거나 치유를 통해 체력을 유지해야 합니다. 맵의 지형은 사막 타일셋을 기반으로 하지만, 잔디와 도로가 조화를 이루어 마을 feel을 살리고 있습니다. 맵의 설명에 'Full house / mini town vets recommended'라는 문구가 있는 것으로 보아, 초보보다는 어느 정도 경험이 있는 플레이어에게 적합한 맵으로 보입니다. 또한 '2high @useast - April 4th 2013'은 맵의 제작일과 서버 지역을 의미하는 것으로 추정됩니다. 이 맵을 플레이하기 위해서는 건물을 지키면서 체력을 관리하는 전략과 동시에 끊임없이 몰려오는 적을 상대해야 하는 멀티태스킹 능력이 필요합니다. 치유가 가능한 구조물이 맵 곳곳에 배치되어 있어, 이를 잘 활용하는 것이 관건입니다. 초보 플레이어의 경우 적의 공격 패턴을 숙지하고, 건물의 보호와 자신의 체력 관리를 동시에 해내기 어려울 수 있어 어려움을 느낄 수 있습니다. 하지만 치유 요소가 있기 때문에 초보도 천천히 적응하며 할 만하다는 점이 특징입니다. MiniTown D AREA HEAL is a UMS (Use Map Settings) map in StarCraft: Brood War that combines healing mechanics with a defense-style gameplay in a small town setting. As suggested by the title, players must survive waves of enemies while maintaining their health through healing structures scattered across the map. The terrain features a central grassy plaza surrounded by buildings, pathways, and hills, creating strategic vantage points for defense. Enemies spawn near the plaza and continuously attack, requiring players to defend key structures or rely on healing to sustain their units. The map uses a desert tileset but incorporates grass and roads to enhance the town aesthetic. The description mentions that it is recommended for players experienced with "Full house" or "mini town" maps, indicating a moderate difficulty level. The '2high @useast - April 4th 2013' likely refers to the map's release date and server region. Success in this map depends on balancing defense strategy with effective use of healing points while managing incoming enemy waves. Beginners may struggle with the simultaneous demands of protecting structures and maintaining health, but the healing mechanics provide a forgiving element that allows for gradual adaptation.
맵 선택 가이드
태그는 맵의 핵심 특징을 빠르게 설명하지만 제작 버전마다 규칙이 다를 수 있습니다. 상세 설명에서 권장 인원, 난이도, 플레이 시간과 버전을 함께 확인한 뒤 다운로드하세요.