
초보자 스타크래프트 맵 모음
'초보자' 태그가 등록된 맵을 모았습니다. 장르 하나로 찾기 어려운 플레이 방식, 난이도와 특징을 중심으로 인기 맵과 최신 맵을 비교해 보세요.
- 등록 맵
- 17개
- 누적 다운로드
- 0
- 누적 조회
- 516
인기 맵
다운로드와 조회 반응이 높은 맵입니다.
![김옥빈 벗기기 [매우쉬움] (Kim Ok-bin Strip [Very Easy]) 맵 미리보기](https://cdn-star-data.huzy.net/thumbnail_a95f209ed0354e8aa69fb091d0170f67.jpg)
김옥빈 벗기기 [매우쉬움] (Kim Ok-bin Strip [Very Easy])
‘김옥빈 벗기기[매우쉬움]’은 스타크래프트 브루드워의 유즈맵으로, 일명 ‘김옥빈 벗기기’ 시리즈 중 가장 쉬운 난이도를 자랑하는 버전이다. 플레이어는 7명의 인원으로 게임을 시작하며, 제목에서 짐작할 수 있듯이 게임의 핵심은 ‘김옥빈’이라는 캐릭터를 둘러싼 여러 단계의 상호작용을 통해 ‘벗기기’를 완료하는 것이다. 맵은 평범한 UMS 스타일의 필드 위에 배치되어 있으며, 시작 지점과 목표 지점이 뚜렷하게 나뉘어 있지 않지만, 맵 곳곳에Sanctum이나 수정탑과 같은 구조물이 확인된다. 게임 진행은 주로 ‘벗기기’라는 키워드에 맞춰 캐릭터의 외형을 변화시키거나 특정 조건을 만족시켜야 하며, 이는 마우스 클릭이나 단축키를 통한 인터페이스 조작으로 이루어진다. 게임의 재미는 순수한 ‘벗기기’라는 호기심 유발 요소 외에도, 캐릭터의 외형 변화나 스킨을 획득하는 즐거움에 중점을 두고 있는 것으로 보인다. 다만, 맵의 난이도가 ‘매우쉬움’으로 설정되어 있어 초보자도 쉽게 접근할 수 있지만, ‘벗기기’라는 다소 파격적인 컨셉 때문에 연령층에 따라 호불호가 갈릴 수 있다. 맵을 플레이하기 전에는 ‘김옥빈’이란 캐릭터의 정체나 벗기기의 목표가 무엇인지 미리 설명을 듣는 것이 좋다. 또한, 게임 진행 중 마우스 커서나 인터페이스 버튼의 위치를 주의 깊게 살펴야 하며, 맵 곳곳에 숨겨진 숨은 조건이나 상호작용 요소가 있을 수 있으므로 꼼꼼한 탐색이 필요하다. 이 맵은 주로 유머나 엔터테인먼트 목적의 유즈맵으로 즐기기에 적합하며, 밀리나 전략적 요소보다는 순수한 재미와 호기심 충족을 위한 플레이가 권장된다. This StarCraft: Brood War custom map, titled ‘김옥빈 벗기기[매우쉬움]’ (Kim Ok-bin Strip [Very Easy]), is part of the whimsical ‘Strip Kim Ok-bin’ series designed for casual entertainment. Players start in a group of seven, navigating a standard UMS-style map where the primary objective revolves around ‘stripping’—a process involving progressive visual changes to a character named Kim Ok-bin through mouse clicks or key commands. While the core mechanic is unconventional, the gameplay emphasizes simple interaction and discovery, with the map featuring familiar StarCraft structures like Sanctums or Pylons scattered across the terrain. The ‘Very Easy’ difficulty ensures accessibility for newcomers, though the risqué premise may not appeal to all audiences. Before playing, it’s advisable to clarify the stripping mechanics and objectives, as hidden interactions or interface nuances could impact enjoyment. The map thrives on humor and novelty rather than strategic depth, making it ideal for players seeking lighthearted, experimental gameplay over traditional UMS challenges.
적 건물 파괴하기 (Destroy Enemy Building)
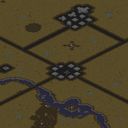
이 맵은 스타크래프트 브루드워의 유즈맵으로, 간단한 디펜스와 테란 유닛을 활용한 공격이 주를 이룬다. 내부 설명에서도 명시된 대로 적 건물 하나를 파괴하는 것이 목표로, 초보자도 쉽게 접근할 수 있는 구조로 설계되었다. 맵 중앙에는 테란의 주요 건물이 배치되어 있고, 주변에는 가시적인 장애물이 없어서 초보자가 전략을 세우기 용이하다. 다만, 적 건물의 위치나 방어 시설을 확인할 수 없기 때문에, 플레이어는 맵을 탐색하며 적의 위치를 파악해야 한다. 맵의 크기는 8192x8192로 넓지만, 실제 플레이 공간은 중앙에 집중되어 있어 큰 혼란 없이 진행할 수 있다. 테란 유닛을 적극 활용하여 적 건물을 파괴하는 것이 핵심인데, 초반에는 SCV를 모아 건설로봇으로 전환하고 테란 병력을 빠르게 확보하는 것이 중요하다. 맵의 밸런스는 비교적 평이한 수준으로, 초보자도 충분히 즐길 수 있지만, 적 건물의 위치를 빨리 찾는 플레이어에게는 더 수월한 플레이가 가능하다. 추천 대상은 스타크래프트 초보자 및 테란 유닛을 좋아하는 플레이어이며, 플레이 전에는 맵의 구조와 테란 유닛의 운영 방법을 숙지하는 것이 좋다. 적 건물의 위치를 빠르게 찾는 데 도움이 되는 탐색 전략을 미리 생각해두면 더 효과적으로 플레이할 수 있을 것이다. 맵의 난이도는 보통 정도로 설정되어 있지만, 적의 위치를 빨리 찾지 못하면 난이도가 높아질 수 있다. 따라서, 맵을 exploring하는 데 중점을 두는 것이 좋다. This map is a StarCraft: Brood War custom map focused on simple defense and Terran unit-based attacks. As stated in the in-game description, the objective is to destroy one enemy building, and the design prioritizes accessibility for beginners. The main Terran structure is placed at the center of the map, with no major obstacles around it, making it easy for new players to plan their strategy. However, since the enemy building's location and defensive structures are hidden, players must explore the map to locate them. While the map size is 8192x8192, the actual playable area is concentrated in the center, preventing excessive chaos during gameplay. The key to success is aggressively using Terran units to destroy the enemy building. Early on, gathering SCVs and converting them into construction workers to secure Terran forces quickly is crucial. The map’s balance is relatively straightforward, making it enjoyable for beginners, though players who find the enemy building faster will have an easier time. This map is recommended for StarCraft beginners and those who enjoy using Terran units. Before playing, it’s wise to familiarize yourself with the map layout and Terran unit management. Developing a scouting strategy to quickly locate the enemy building will make your playthrough more effective. The difficulty is set to moderate, but if you fail to find the enemy position early, the challenge increases significantly. Therefore, prioritizing exploration is essential for success.
20,000 드라군 디펜스 Easy (20KDragoon Defense Easy)
20KDragoon Defense Easy V1.02는 스타크래프트: 브루드워의 대표적인 디펜스 유즈맵으로, 정교한 구조와 균형 잡힌 난이도로 오랫동안 사랑받아 온 맵이다. 이 Easy 버전은 오리지널 버전보다 SCV의 빌드 타임을 3분의 2로 줄이고 벙커의 건설 시간을 3분의 1로 단축하는 등 초보자도 쉽게 접근할 수 있도록 난이도를 조정한 버전이다. 맵의 핵심은 끊임없이 몰려오는 적 드라군의 공격을 방어하는 것으로, 플레이어는fficient한 자원 관리와 건물 배치, 그리고 전략적 시야를 요구한다. 맵의 넓직한 2048x8192 해상도와 플랫폼 타일셋은 넓은 전장을 제공하며, 특히 하단과 상단의 대칭 구조가 인상적이다. 방어선으로는 주로 벙커와 터렛을 활용하게 되며, 적들의 공격 패턴에 따라 유연하게 대처해야 한다. Easy 버전의 특징으로는 초반 자원 확보가 용이해졌다는 점과 건물 건설 속도 향상으로 인해 더 빠른 전략 수립이 가능하다는 점이 있다. 이 맵은 디펜스 장르의 기본기를 익히기에 적합한 동시에, 7명의 플레이어가 동시에 참여할 수 있어 팀워크와 협동심을 키우는 데에도 도움이 된다. 초보자와 숙련자 모두에게 추천할 만한 맵으로, 특히 디펜스 유즈맵의 재미와 전략성을 경험하고 싶은 플레이어들에게 Sovet다. 플레이 전에는 맵의 구조와 방어 포인트를 충분히 숙지하고, Easy 버전의 특징인 빠른 빌드 타임을 활용한 초반 전략 수립이 중요하다는 점을 기억하자. 또한, 적들의 공격 패턴과 타이밍을 분석하여 방어선을 유동적으로 조정하는 것이 승리의 열쇠가 될 것이다. 이 맵은 오랜 기간 동안 많은 플레이어들에게 사랑받아 온 만큼, 디펜스 유즈맵의 역사를 느껴볼 수 있는 소중한 경험이 될 것이다. 20KDragoon Defense Easy V1.02 is a classic defense-style custom map in StarCraft: Brood War, known for its refined structure and balanced difficulty. This Easy version simplifies the original by reducing SCV build time by two-thirds and bunker construction time by one-third, making it more accessible for beginners. The core gameplay revolves around defending against relentless waves of enemy Dragoons, requiring efficient resource management, strategic building placement, and keen situational awareness. The map's expansive 2048x8192 resolution with a platform tileset provides a vast battlefield, featuring a striking symmetrical design between the lower and upper sections. Players primarily rely on bunkers and turrets to fortify their defenses, adapting their strategies to counter the enemy's attack patterns. The Easy version stands out for its easier early-game resource acquisition and faster building construction, allowing for quicker strategic planning. Suitable for both beginners and experienced players, this map is an excellent choice for those looking to grasp the fundamentals of defense maps while honing teamwork and coordination skills. It can accommodate up to 7 players, making it ideal for group play. Before diving in, familiarize yourself with the map's terrain and defensive key points. Utilize the Easy version's faster build times to establish an early strategy, and remain flexible in adjusting your defense lines based on enemy attack patterns and timing. As a long-standing favorite among players, this map offers a nostalgic yet engaging experience in the world of defense custom maps.
테란 템플 트릭 (Terran Temple Tricks)
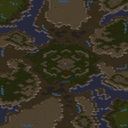
테란 템플 트릭스는 로스트 템플 맵을 무대로 테란 종족의 기본 운영과 전술적 요소를 단계별로 익히도록 구성된 단일 플레이어 UMS 맵이다. 사막 타일셋 위에 배치된 기지와 자원 지대는 원작 맵의 지형을 그대로 살리면서도 튜토리얼 목적에 맞게 단순화되어 있어 초보자가 부담 없이 진입할 수 있다. 진행 방식은 정해진 미션 순서에 따라 유닛 생산, 건물 배치, 업그레이드 타이밍 등을 안내 메시지와 함께 실습하게 되며, 각 단계가 완료되면 다음 과제로 자연스럽게 이어진다. 플레이 경험은 실전과 유사한 속도감 속에서 테란의 핵심 빌드 오더와 멀티태스킹을 체감할 수 있게 해주며, 실패 시 즉시 재시작이 가능해 반복 학습에 유리하다. 추천 대상은 테란을 처음 접하는 입문자나 빌드 오더를 체계적으로 정리하고 싶은 중급자이며, 이미 고급 전략을 숙지한 유저에게는 단순한 복습용으로만 의미가 있다. 플레이 전에는 맵 설명에 명시된 튜토리얼 목적을 숙지하고, 별도의 트리거나 승리 조건이 없으므로 자유롭게 연습 모드로 활용하면 된다. Terran Temple Tricks is a single‑player UMS map that uses the Lost Temple layout to teach the fundamentals of Terran play step by step. The desert tileset preserves the original terrain while simplifying bases and resource spots for tutorial purposes, allowing newcomers to jump in without pressure. Progression follows a fixed mission sequence that guides unit production, building placement, and upgrade timing through on‑screen prompts, each stage flowing naturally into the next. The experience delivers a near‑real‑time feel of core Terran build orders and multitasking, and instant restarts make repeated practice easy. It is best suited for beginners learning Terran or intermediate players wanting a structured build‑order review; advanced users will find it only a light refresher. Before playing, note that the map description states its tutorial aim and that there are no custom triggers or victory conditions, so it can be used freely as a practice sandbox.
옵저버피하기 초보용 (Observer Avoidance Beginner)
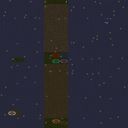
스타크래프트 브루드워의 숨은 재미를 찾는다면 ‘옵저버피하기 초보용’ 맵을 추천한다. 이 맵은 이름 그대로 옵저버(관전자) 역할을 피하는 미니게임으로, 플레이어는 옵저버의 시선을 피해 맵 여기저기를 신속히 이동해야 한다. 사막 타일셋을 배경으로 하며, 넓은 평지에서 옵저버의 시선이 닿지 않는 각도를 재빨리 계산하고 움직여야 한다. 맵 중앙의 옵저버는 주기적으로 시야를 확장하며 플레이어를 포착하려고 하는데, 이 시야 범위를 실시간으로 인지하고 피하는 감각이 필요하다. especially 초보자들이 도전하기 적합하도록 난이도가 조절되어 있지만, 옵저버의 패턴을 익히지 않으면 쉽게 잡히는 구조다. 옵저버의 시야가 붉은색으로 표시되어 있어 피하기 용이하다는 점도 특징이다. 이 맵은 짧은 플레이 타임을 목표로 설계되었을 가능성이 높으며, 한 판당 5분 내외로 즐길 수 있을 것으로 추정된다. 6명의 플레이어가 동시에 참여할 수 있어 친목이나 팀워크 테스트로도 활용할 수 있다. 다만, 옵저버의 이동 패턴과 시야 변화가 반복적이라면 지루함을 느낄 수도 있어, 지속적인 재미를 위해서는 시야 변화의 다양성이 중요할 것이다. 이 맵을 즐기기 위해서는 옵저버의 시야를 자주 확인하고, 맵의 주요 지점(예: 바위 뒤, 언덕)을 적극 활용하는 전략이 효과적이다. 초보자도 쉽게 접근할 수 있지만, 숙련될수록 더 빠른 반응과 전략적 움직임이 요구되는Points to check before playing include the observer's patrol path, the timing of vision expansion, and the layout of hiding spots like rocks or cliffs. 이 맵은 단순히 피하기 게임을 넘어, 시야 계산과 공간 감각을 키우는 데도 도움이 될 것이다. 특히 스타크래프트의 기본 메커닉을 익힌 후 가볍게 즐기기 좋은 선택지가 될 것이다.This map is ideal for players looking to test their reflexes and spatial awareness in a compact, fast-paced scenario. The desert-themed background adds a sense of urgency, as the open terrain leaves little room for mistakes. Players must memorize the observer's movement patterns and use the environment—such as rocks and cliffs—to their advantage. The red-highlighted vision cones make it easier for beginners to track threats, but the challenge lies in adapting to the observer's unpredictable changes in direction. While the map is designed for 6 players, it can also be enjoyed solo or with fewer participants by adjusting the observer's activity. The simplicity of the core mechanic ensures quick rounds, making it perfect for short gaming sessions or as a warm-up before longer matches. To fully enjoy this map, players should focus on timing their movements to coincide with the observer's vision gaps and avoid predictable routes.
탱크 디펜스 (Tank Defense :::EASY:::)
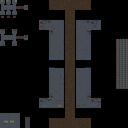
스타크래프트의 고전 디펜스 장르 유즈맵인 〈Tank Defense :::EASY:::〉은 탱크 유닛을 중심으로 적의 공격을 방어하는 구조로 설계된 맵이다. 맵의 중앙에 위치한 방어 거점이 있으며, 좌측 하단과 우측 하단에서 적 병력이 끊임없이 몰려온다. 플레이어는 초기 자원과 탱크를 제공받으며, 각 웨이브마다 점점 더 강력한 적군이 등장해 방어선을 위협한다. 맵은 사각형 형태의 넓은 평지로 구성되어 있으며, 중앙에는 보호해야 할 건물이 배치되어 있다. 방어 거점에서 탱크를 생산하거나 업그레이드할 수 있는 구조물이 배치되어 있으며, 적의 공격을 막아내는 것이 주요 목표다. 맵의 좌우측에는 좁은 통로가 있어 탱크가 진입할 수 있도록 배치되어 있어 전략적인 배치와 생산 타이밍이 중요하다. 이 맵은 초보자도 쉽게 접근할 수 있도록 ‘EASY’라는 난이도 표기가 붙어 있지만, 지속적인 적의 웨이브와 방어 거점의 중요성으로 인해 플레이어의 집중력이 요구된다. 탱크의 체력과 공격력은 기본적으로 제공되지만, 업그레이드를 통해 더욱 강력하게 만들 수 있어 리소스 관리와 생산 타이밍이 승패를 좌우한다. 맵의 구조는 단순하지만, 적의 공격 패턴이 다양해질수록 전략의 중요성이 커진다. 특히 탱크의 생산과 배치 위치를 신중히 결정해야 하며, 방어 거점을 잃지 않도록 주의해야 한다. 링크로 표시된 방어 거점을 보호하지 못하면 즉시 패배로 이어지기 때문에, 초보자는 물론 숙련자도 긴장감을 유지하며 플레이할 수 있는 구성이다. 이 맵은 스타크래프트의 유즈맵으로서 디펜스 장르의 기본을 충실히 따르고 있으며, 탱크 중심의 전투와 방어 거점 보호라는 명확한 목표로 인해 접근성이 높다. 하지만 단순해 보이는 구조에도 불구하고, 적의 웨이브가 끊임없이 밀려오기 때문에 플레이어의 손속에 따라 난이도가 크게 달라진다. 따라서 전략적인 자원 관리와 탱크의 효율적인 배치, 그리고 타이밍을 맞추는 것이 핵심이다. 맵의 분위기는 우주 테마로 설정되어 있으며, 넓은 평지와 중앙의 건물이 인상적인 디자인으로 구성되어 있다. 이 맵을 즐기는 플레이어는 방어의 중요성과 자원의 효율적 사용에 대해 다시 한번 생각해 볼 수 있을 것이다. 특히 디펜스 장르에 익숙하지 않은 초보자에게는 적절한 연습용 맵으로 추천할 만하다. Tank Defense :::EASY::: is a classic StarCraft defense-style custom map where players defend against waves of enemies using tank units. The map features a central defensive stronghold, with enemy forces continuously spawning from the bottom-left and bottom-right corners. Players start with basic resources and tanks, facing increasingly powerful enemy waves that threaten their defenses. The map consists of a wide, open rectangular terrain with a critical building at the center that must be protected. Defensive structures near the stronghold allow for tank production and upgrades, making strategic placement and timing essential for survival. Despite the "EASY" difficulty label aimed at beginners, the map demands constant attention due to relentless enemy waves and the importance of protecting the defensive stronghold. While tanks come with standard health and attack power, upgrading them significantly enhances their effectiveness, making resource management and production timing crucial to success. Although the map’s layout is simple, the increasing diversity of enemy attack patterns raises the importance of strategy. Players must carefully decide where to produce and position tanks, as losing the defensive stronghold results in an immediate defeat. This design keeps both beginners and experienced players engaged with its tense gameplay. As a StarCraft custom map, Tank Defense :::EASY::: adheres closely to the defense genre’s fundamentals, offering clear objectives centered on tank-based combat and stronghold protection. Despite its straightforward appearance, the continuous enemy waves mean that difficulty heavily depends on the player’s execution. Effective resource management, efficient tank placement, and precise timing are key to overcoming challenges. The map adopts a space-themed aesthetic, featuring an impressive design with an expansive plain and a central building. Players will gain a deeper appreciation for defense strategies and efficient resource use, making it a recommended practice map for those unfamiliar with the defense genre.
더 눈부Bound (The NOOB Bound)
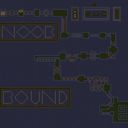
스타크래프트 브루드워의 유즈맵 ‘The NOOB Bound’는 초보 플레이어들을 위한 입문용 디펜스 맵으로, 비교적 단순한 구조와 직관적인 진행 방식을 제공한다. 맵은 사막 지형을 바탕으로 제작되었으며, 중앙에 위치한 주요 거점을 중심으로 적의 유닛들이 끊임없이 몰려드는 형식이다. 플레이어는 제한된 자원으로 방어선을 구축하고, 다수의 유닛을 효율적으로 배치하여 적의 공격을 방어해야 한다. 맵의 특징 중 하나는 초보자도 쉽게 이해할 수 있는 메커니즘으로, 자원 관리와 유닛 배치의 중요성을 강조한다는 점이다. 또한, 맵의 난이도는 점차 상승하는 방식으로 구성되어 있어, 플레이어는 점차적으로 전략을 숙련시킬 수 있다. 특히, 맵의 중앙에 위치한 넓은 평지는 유닛 배치와 방어선의 구축을 용이하게 하며, 초보자에게는 전략적 사고를 키울 수 있는 좋은 연습 opportunities를 제공한다. 다만, 맵의 난이도가 너무 낮거나 너무 어려울 경우, 플레이의 재미가 반감될 수 있으므로, 적절한 밸런스가 유지되는지가 관건이다. 이 맵은 초보자들에게 스타크래프트의 기본적인 전략과 디펜스 게임의 재미를 동시에 느낄 수 있도록 설계되었으므로, 스타크래프트에 처음 입문하는 유저들에게 강추할 만한 작품이다. 또한, 여러 명이 함께 플레이할 수 있도록 6인용으로 제작되어 있어, 친구들과의 협동 플레이 또한 즐길 수 있다. 맵을 시작하기 전에는 자신의 유닛 배치 전략을 미리 세워두는 것이 중요하며, 자원의 효율적인 사용을 통해 방어선을 강화하는 것이 핵심이다. 이 맵을 통해 디펜스 게임의 기본기와 전략적 사고를 키울 수 있을 것이다. The NOOB Bound is a beginner-friendly UMS defense map in StarCraft: Brood War, designed to introduce new players to the genre with a simple yet engaging structure. Set in a desert terrain, the map features a central hub where waves of enemy units continuously attack, challenging players to strategically build defenses with limited resources. Its intuitive mechanics make it accessible to novices, emphasizing resource management and unit placement as core skills. The difficulty gradually increases, allowing players to hone their strategies over time. The wide central plain facilitates easy unit deployment, offering newcomers a practical way to practice tactical thinking. However, the map’s balance is crucial—too easy or too hard, and the enjoyment diminishes. Ideal for StarCraft beginners, this 6-player map encourages both solo and cooperative play, making it a great choice for those learning the game’s basics. Before starting, players should plan their unit placement and resource allocation carefully, as efficient use of these elements is key to success. This map serves as an excellent introduction to defense games and strategic thinking in StarCraft.
드래곤볼 Z 배틀 아레나!! 루인 (DBZ Battle Arena!! *Rune*)
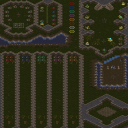
DBZ Battle Arena!! *Rune*는 드래곤볼 Z 팬들을 위한 아레나 형식의 스타크래프트 브루드워 유즈맵으로, 전투를 중심으로 한 액션 플레이에 특화되어 있다. 맵의 구조는 중앙에 넓은 전투장이 펼쳐져 있으며, 주변에는 각 플레이어의 시작 지점이 배치되어 있다. 이 시작 지점에는 전투 준비실과 같은 공간도 포함되어 있어, 전투 전 장비 업그레이드나 준비 시간을 가질 수 있다. 전투는 근접전을 중시하며, 각 플레이어는 두 명의 전투원을 시작으로 전투에 참여하게 된다. 맵 곳곳에는 벽화로 장식된 업그레이드 이미지가 배치되어 있어, 전투 분위기를 한층 더 살려준다. 전투는 실시간으로 진행되며, 플레이어는 상대방을 쓰러뜨리거나 특수 능력을 활용해 승리를 노린다. 맵의 디자인은 사막 테마로 이루어져 있으며, 광활한 평원과 절벽, 바위 지형이 전투를 돋보이게 한다. 맵의 중앙 전투장은 넓은 평야로 이루어져 있어, 전투원의 이동과 전투가 자유롭게 펼쳐질 수 있도록 설계되었다. 또한, 맵의 가장자리는 절벽으로 둘러싸여 있어, 전투원이 넘어질 위험이 있어 전략적 요소로 작용한다. 이 맵은 초기 버전보다 간소화되어 있어, 초보자도 쉽게 접근할 수 있도록 배려되어 있다. 가격이 저렴해졌으며, 버그도 수정되어 더욱 안정적으로 플레이할 수 있다. 또한, 'Mystic Gone Glitch'가 수정되었고, 'Ban'과 'Extra Life' 기능이 추가되어 게임의 재미와 공정성을 높였다. 전투원들은 시작 시 두 명을 보유하며, 벽면의 그림을 통해 업그레이드 상태를 확인할 수 있어 전투 전략을 세우는 데 도움이 된다. 준비실과 같은 공간도 있어, 전투 전 장비를 세팅하거나 전술을 논의할 수 있는 공간으로 활용된다. 이 맵은 드래곤볼 Z의 팬들이라면 누구나 즐길 수 있는 아레나 전투 게임으로, 전투의 박진감과 전략적 깊이를 동시에 제공한다. 전투원의 능력과 맵의 지형을 활용해, 상대방을 제압하는 재미를 느낄 수 있다. 특히, 전투 전 준비 시간을 가질 수 있어, 자신의 전투 전략을 세우는 데 집중할 수 있어 초보자도 쉽게 즐길 수 있는 구조로 만들어졌다. 전투가 활발히 펼쳐지는 넓은 공간과 절벽 지형은, 전투의 긴장감을 높이는 요소로 작용한다. 따라서, 이 맵은 드래곤볼 Z의 팬이라면 누구나 즐길 수 있는 재미있는 유즈맵으로 추천된다. 이 맵을 플레이하기 전에는, 전투 전 준비실에서 장비를 업그레이드하고, 전투원의 능력을 확인하는 것이 좋다. 또한, 중앙 전투장의 넓은 공간을 활용해, 상대방의 움직임과 지형을 고려한 전략을 세우는 것이 중요하다. 전투 중에는 절벽을 조심해, 넘어지거나 불리한 위치에 놓이지 않도록 주의해야 한다. 전투가 끝나면, 'Ban'과 'Extra Life' 기능을 활용해, 다음 전투를 더욱 재미있게 준비할 수 있다. DBZ Battle Arena!! *Rune* is a StarCraft: Brood War custom map designed as an arena-style battle for Dragon Ball Z fans, specializing in action-packed combat gameplay. The map features a wide central battlefield surrounded by each player's starting area, which includes a preparation room where players can upgrade equipment and prepare before battle. Combat emphasizes melee battles, with each player starting with two fighters. Decorative upgrade images painted on walls throughout the map enhance the battle atmosphere. The battles unfold in real time, with players aiming to defeat opponents or use special abilities to secure victory. The map's design follows a desert theme, featuring vast plains, cliffs, and rocky terrain that make combat stand out. The central battlefield is a wide open field, allowing fighters freedom of movement and combat. The edges of the map are surrounded by cliffs, adding a strategic element as fighters risk falling off. This map has been simplified from its earlier version, making it more accessible to beginners. The price has been reduced, bugs have been fixed for smoother gameplay, and issues like "Mystic Gone Glitch" have been addressed. New features such as "Ban" and "Extra Life" have been added to improve fun and fairness. Players start with two fighters, and upgrade status can be checked via wall paintings to help plan battle strategies. The preparation room also serves as a space to set up equipment or discuss tactics before combat. This map is an arena combat game that any Dragon Ball Z fan can enjoy, offering both thrilling action and strategic depth. Players can experience the fun of outmaneuvering opponents by leveraging fighter abilities and map terrain. The pre-battle preparation time allows beginners to focus on strategy, making it easy to enjoy. The wide open spaces and cliff terrain heighten tension during battles, making this a recommended custom map for any Dragon Ball Z fan. Before playing, it's a good idea to upgrade equipment in the preparation room and check fighter abilities. Utilizing the central battlefield's open space to plan strategies based on opponent movements and terrain is key. Be cautious of cliffs during combat to avoid falling or ending up in unfavorable positions. After battles, use features like "Ban" and "Extra Life" to make the next fight even more enjoyable.
리틀 헌터 (Little Hunter)
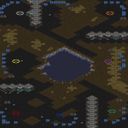
스타크래프트 브루드워의 유즈맵 〈리틀 헌터(Little Hunter)〉는 8명의 플레이어가 참여하는 디펜스 장르의 맵으로, 파일명과 내부 설명을 종합해 볼 때 적 건물 파괴를 목표로 하는 ‘컴까기’ 스타일로 추정된다. 맵의 이름은 ‘사냥꾼’이라는 뜻을 담고 있지만, 내부 제목은 ‘Untitled Scenario’로 표시되어 있어 정식 명칭이 불분명하다. 황무지 타일셋을 기반으로 한 넓은 평야 지형에서, 플레이어는 시작 지점에서 적 건물로 이어지는 경로를 따라 공격을 진행해야 한다. 맵 이미지에서는 중앙을 가로지르는 커다란 강과 주변 산림 지대가 확인되며, 이는 공격 루트를 방해하거나 전략적 요충지를 제공할 가능성이 있다. 다수의 플레이어가 한 팀으로 적을 상대하는 구조인지, 아니면 각자 독립적으로 싸우는 것인지 여부는Clear하게 드러나지 않지만, 파일명이 ‘Litle Hunter’이며 파일 번호가 붙어 있는 점으로 보아 특정 규칙에 맞춰진 팀 플레이가 예상된다. 초반에는 자원 수급과 병력 생산에 집중해야 하며, 후반으로 갈수록 방어선 구축과 공격 타이밍이 중요해질 것이다. 맵의 넓이와 지형적 특징을 고려할 때, 빠른 병력 생산과 효율적인 자원 관리 능력이 승리를 좌우할 핵심 요소로 보인다. 초보자의 경우 맵의 지형을 숙지하지 못해 병력이 분산될 위험이 있으니, 맵을 한 바퀴 둘러보며 주요 경로를 파악하는 것이 중요하다. 또한, 적 건물의 위치와 방어 구조를 미리 예상해 전략을 세우는 것이 좋다. 이 맵은 주로 8인전에서 즐길 수 있으며, 팀워크와 전략적 플레이가 요구되는 만큼 친구들과 함께 도전해 보는 것을 추천한다. 파일명과 내부 설명만으로는 명확한 승리 조건이나 밸런스 정보가 부족하지만, ‘적 건물 파괴’라는 간단한 목표를 기반으로 전략적 플레이를 즐길 수 있는 맵으로 보인다. StarCraft: Brood War's custom map *Little Hunter* is a defense genre map for eight players, and based on the filename and internal description, it appears to be a "compilation-style" map focused on destroying enemy buildings. While the map's name suggests "hunter," its internal title is displayed as *Untitled Scenario*, leaving its official name unclear. Set in a vast plain based on a wasteland tileset, players must advance along a path from their starting point to the enemy buildings. The map image reveals a large river cutting through the center, along with surrounding forest areas, which could obstruct attack routes or provide strategic vantage points. It’s unclear whether players fight as a team or independently, but the filename *Little Hunter* and its numbered file suggest structured team play. Early on, focus should be on resource gathering and unit production, while later stages will demand strong defense lines and precise attack timing. Given the map’s size and terrain, quick unit production and efficient resource management will be key to victory. Beginners should familiarize themselves with the terrain to avoid dispersing forces, and scouting the main paths is essential. Additionally, anticipating enemy building locations and defensive structures will help in forming a solid strategy. This map is best enjoyed in 8-player matches, requiring teamwork and strategic play, so trying it with friends is highly recommended. While the filename and internal description lack clear victory conditions or balance details, the simple goal of destroying enemy buildings makes it a fun map for strategic gameplay.
STF - 게릴라 (STF - Guerilla)
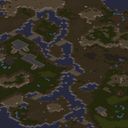
STF - Guerilla는 스타크래프트 브루드워의 밀리 맵으로, 4명의 플레이어가 좌측과 우측 진영으로 나뉘어 전투를 펼치는 컴까기 스타일의 맵입니다. 사막 테마의 넓은 평야가 펼쳐지며, 중앙에는 자원 멀티 지역과 좁은 통로가 있어 전략적인 움직임이 강제됩니다. 맵의 특징은 ‘집결과Expand(확장)’ 전략으로, 병력을 뭉쳐 다니며 서서히 멀티를 확장해 나가야 한다는 점입니다. 미세 컨트롤이 필수적인 이 맵은 초보자가 잡기엔 다소 난해할 수 있지만, 미니맵을 적극 활용하고 병력 관리에 신경 쓰면 재미를 느낄 수 있습니다. 특히 중앙 통로에서의 싸움에서 유리한 위치를 선점하는 것이 승리의 열쇠가 됩니다. 사막 지형답게 시야가 넓고, 자원 멀티가 중앙에 밀집되어 있어Resource Control(자원 관리)과Terrain Control(지형 장악)이 중요합니다. 초보자라도 연습을 통해 조금씩 실력이 향상될 수 있는 구조로, 스타크래프트의 기본기와 전략적 사고를 동시에 요구하는 매력적인 맵입니다. 다만, 팀 플레이보다는 1:1:1:1 또는 2:2 대결에서 더 재미를 느낄 수 있으며, 맵의 평면 구조상 병력이 모이지 않으면 쉽게 밀릴 수 있어 주의가 필요합니다. 추천 대상은 스타크래프트의 기본기를 다지고 싶거나, 좁은 공간에서의 전투와 자원 관리를 연습하고 싶은 플레이어입니다. 맵을 플레이하기 전에는 미니맵을 자주 확인하고, 병력을 뭉쳐 다니며Expand를 서두르지 않는 것이 중요합니다. 또한, 상대방의 전략에 따라 중앙 교전이나 멀티 방어 타이밍을 잘 조절해야 합니다. 이 맵은 스타크래프트의 고전적인 밸런스를 유지하면서도, 좁은 공간에서의 전투와 전략적 사고를 동시에 요구하는 매력적인 구조를 가지고 있습니다. STF - Guerilla is a *Brood War* melee map in *StarCraft*, where four players are divided into left and right factions, engaging in a team-kill-style battle. The map features a vast desert plain with a central resource multibase and narrow pathways, forcing strategic movement. Its key mechanic revolves around "grouping and expanding," requiring players to move forces together while gradually securing additional bases. While precise micro-management is essential—making it somewhat challenging for beginners—actively using the minimap and managing troop movements can make the experience enjoyable. Securing advantageous positions in the central corridors is often the key to victory. With its open desert terrain, visibility is high, and resource clusters near the center emphasize *resource control* and *terrain dominance*. Even beginners can improve with practice, as the map demands both fundamental *StarCraft* skills and strategic thinking. However, it shines more in 1v1v1v1 or 2v2 matches rather than team play, and its flat layout means uncoordinated forces can be easily overwhelmed. It’s ideal for players looking to refine their basics or practice combat in tight spaces and resource management. Before playing, frequently check the minimap and avoid rushing expansions while keeping forces grouped. Adjust your central engagements and multibase defense timing based on the opponent’s strategy. STF - Guerilla maintains *StarCraft*’s classic balance while offering a compelling structure that blends close-quarters combat with deep strategic planning.
![데빌타워 7.5 (Devil Tower [Ver:7.5]Test) 맵 미리보기](https://cdn-star-data.huzy.net/thumbnail_c54e1b4eb61a4038b9c9308c0f6d0b8d.jpg)
데빌타워 7.5 (Devil Tower [Ver:7.5]Test)
‘데빌타워7.5버전(쉬운버전)’은 스타크래프트: 브루드워의 대표적인 타워 디펜스 유즈맵으로, 데빌 타워를 배경으로 한 방어전략 게임이다. 맵 중앙에 위치한 거대한 타워를 중심으로 적 병력이 끊임없이 몰려오며, 플레이어는 제한된 자원으로 다양한 유닛과 건물을 배치해 타워를 보호해야 한다. 화면 왼쪽과 오른쪽, 위아래에 배치된 시작 지점에서 유닛이 생산되어 타워로 향하는 길목에서 전투를 벌인다. 맵 곳곳에 보이는 푸른색과 붉은색의 보라색 꽃 무늬는 디자인적 특징이면서도 전략적 요충지를 표시하는 역할을 한다. 게임의 핵심은 자원 관리와 배치 타이밍으로, 초반에 충분한 방어선을 구축하지 못하면 타워가 쉽게 무너질 위험이 있다. 맵의 특징은_VERSION 7.5_라는 버전 표기가 명확히 드러나 있으며, ‘쉬운버전’이라는 명칭에서 알 수 있듯 난이도가 상대적으로 낮게 설정되어 초보자도 쉽게 접근할 수 있도록 구성되었다. 맵의 진행은 웨이브 형식으로, 각 웨이브가 끝날 때마다 잠시의 휴식 시간이 주어지며, 이를 활용해 방어력을 재정비할 수 있다. 또한, 맵 상단과 좌우에 배치된 꽃 무늬는 단순히 장식이 아니라, 플레이어의 시선을 분산시키거나 전략적 위치를 강조하는 역할을 한다. 추천 대상은 스타크래프트의 기본 조작법만 익힌 초보자부터 타워 디펜스에 익숙해지고자 하는 플레이어까지 폭넓다. 게임을 시작하기 전에는 자원 획득 방법과 유닛의 배치 가능 위치를 미리 확인하는 것이 중요하다. 특히, 맵의 중앙 타워 주변에는 방어 건물을 배치할 수 있는 공간이 제한적이므로, 초반 자원 사용 계획을 신중히 세워야 한다. 또한, 적의 공격 패턴을 숙지하고 유닛의 조합을 다양화하는 것이 게임의 승률을 높이는 핵심이다. Devil Tower [Ver:7.5]Test is a classic tower defense custom map in StarCraft: Brood War, set against the backdrop of a devil tower where players must defend the central structure from endless waves of enemy units. Players start from positions on the left, right, top, and bottom of the map, producing units to fend off attacks along the paths leading to the tower. The map features distinct purple and blue floral patterns that serve both as decorative elements and indicators of strategic chokepoints. The core gameplay revolves around resource management and timely unit placement, as failing to establish a strong defense early on can quickly lead to the tower’s collapse. The version number _7.5_ is prominently displayed, and the subtitle ‘easy version’ suggests a lower difficulty level, making it accessible for beginners. The game progresses in waves, with short breaks between each allowing players to reorganize their defenses. The floral patterns on the top and sides of the map are not merely aesthetic but also guide the player’s focus toward critical strategic locations. This map is ideal for players new to tower defense or those looking to refine their skills in the genre. Before starting, it’s crucial to familiarize yourself with resource collection methods and valid unit placement areas. Due to limited space around the central tower, careful planning of early-game resource allocation is essential. Additionally, understanding enemy attack patterns and diversifying unit compositions are key to increasing your chances of success.
저그 유닛 스택 연습하기 (Learn How To Stack Zerg Units)
스타크래프트 브루드워의 유즈맵 중 하나로, 저그 유닛 스택(stack) 기능을 익히도록 설계된 교육형 맵입니다. 이 맵은 저그 유닛을 쌓아 올리는 방법을 단계별로 안내하는 구조로, 초보자와 저그 플레이어들에게 유용한 연습 기회를 제공합니다. 맵의 주목할 점은 UI와 인터페이스를 통해 플레이어에게 명확한 지시와 피드백을 제공한다는 점인데, 스택이 성공적으로 완료될 때마다 시각적 또는 소리로 확인할 수 있도록 구성되어 있습니다. 또한, 맵의 배경은 황무지 타일셋을 사용하여 간결하면서도 집중력을 높이는 데 도움을 줍니다. 플레이 방식은 크게 세 가지 단계로 나뉘며, 각 단계에서 요구하는 스택 기술이 조금씩 달라져 점차 난이도가 상승합니다. 예를 들어 초기 단계에서는 저글링을 쌓는 방법부터 시작하여 후반부로 갈수록 히드라리스크, 뮤탈리스크 등 더 복잡한 유닛을 다루는 연습을 하게 됩니다. 맵의 평가는 플레이어의 진행 속도와 정확성에 따라 달라지며, 스택 성공률이 높을수록 더 높은 점수를 받을 수 있습니다. 이 맵은 단순히 스킬을 연습하는 것뿐만 아니라, 저그의 조합과 컨트롤 능력을 동시에 향상시킬 수 있는 장점이 있습니다. 초보자는 물론이고 저그 플레이어라면 누구나 한 번쯤 도전해볼 만한 가치가 있는 맵으로, 저그의 기본기와 전략적 사고를 동시에 기를 수 있습니다. 단, 이 맵은 오직 저그 유닛에만 초점을 맞추고 있으므로 프로토스나 테란 유닛을 다루는 방법은 별도로 학습해야 합니다. 또한, 맵의 진행이 다소 반복적일 수 있어 플레이어의 집중력을 요구한다는 점은 고려해야 합니다. nevertheless, 저그의 기본기를 다지기에 효과적인 맵으로 충분히 추천할 만합니다. 특히, 저그를 처음 시작하는 플레이어들에게는 필수적인 연습 공간이 될 것입니다. 이 맵을 통해 저그의 유닛 조합과 컨트롤에 대한 이해를 높이고, 더 나아가 경쟁전에서의 성적을 향상시킬 수 있을 것입니다. 마지막으로, 이 맵은 타 유즈맵에 비해 비교적 간단한 구조를 가지고 있어, 초보자도 쉽게 접근할 수 있다는 점도 장점입니다. This StarCraft: Brood War custom map is designed to teach players how to stack Zerg units effectively. The map guides players through the process of stacking units step by step, making it particularly useful for beginners and Zerg enthusiasts. One of the map's standout features is its user interface, which provides clear instructions and feedback. Players receive visual or auditory confirmation whenever they successfully stack units, ensuring a smooth learning experience. The map uses the Wasteland tile set, which creates a focused and distraction-free environment. The gameplay is divided into three main stages, each introducing more complex stacking techniques. Early stages focus on stacking Zerglings, while later stages challenge players with stacking Hydralisks and Mutalisks. Player performance is evaluated based on speed and accuracy, with higher stacking success rates leading to better scores. This map not only helps refine stacking skills but also enhances overall Zerg unit control and strategic thinking. While it is tailored for Zerg players, those looking to master Protoss or Terran units will need to explore other maps. The repetitive nature of the tasks may require sustained focus, but the map remains an excellent tool for building fundamental Zerg mechanics. It is especially recommended for new players eager to improve their Zerg gameplay. By mastering stacking techniques here, players can expect to see significant improvements in their competitive matches. Additionally, the map's straightforward design makes it accessible to players of all skill levels, ensuring a smooth and rewarding learning experience.
최근 등록된 맵
새로 추가된 파일과 버전을 확인하세요.
리틀 헌터 (Little Hunter)
스타크래프트 브루드워의 유즈맵 〈리틀 헌터(Little Hunter)〉는 8명의 플레이어가 참여하는 디펜스 장르의 맵으로, 파일명과 내부 설명을 종합해 볼 때 적 건물 파괴를 목표로 하는 ‘컴까기’ 스타일로 추정된다. 맵의 이름은 ‘사냥꾼’이라는 뜻을 담고 있지만, 내부 제목은 ‘Untitled Scenario’로 표시되어 있어 정식 명칭이 불분명하다. 황무지 타일셋을 기반으로 한 넓은 평야 지형에서, 플레이어는 시작 지점에서 적 건물로 이어지는 경로를 따라 공격을 진행해야 한다. 맵 이미지에서는 중앙을 가로지르는 커다란 강과 주변 산림 지대가 확인되며, 이는 공격 루트를 방해하거나 전략적 요충지를 제공할 가능성이 있다. 다수의 플레이어가 한 팀으로 적을 상대하는 구조인지, 아니면 각자 독립적으로 싸우는 것인지 여부는Clear하게 드러나지 않지만, 파일명이 ‘Litle Hunter’이며 파일 번호가 붙어 있는 점으로 보아 특정 규칙에 맞춰진 팀 플레이가 예상된다. 초반에는 자원 수급과 병력 생산에 집중해야 하며, 후반으로 갈수록 방어선 구축과 공격 타이밍이 중요해질 것이다. 맵의 넓이와 지형적 특징을 고려할 때, 빠른 병력 생산과 효율적인 자원 관리 능력이 승리를 좌우할 핵심 요소로 보인다. 초보자의 경우 맵의 지형을 숙지하지 못해 병력이 분산될 위험이 있으니, 맵을 한 바퀴 둘러보며 주요 경로를 파악하는 것이 중요하다. 또한, 적 건물의 위치와 방어 구조를 미리 예상해 전략을 세우는 것이 좋다. 이 맵은 주로 8인전에서 즐길 수 있으며, 팀워크와 전략적 플레이가 요구되는 만큼 친구들과 함께 도전해 보는 것을 추천한다. 파일명과 내부 설명만으로는 명확한 승리 조건이나 밸런스 정보가 부족하지만, ‘적 건물 파괴’라는 간단한 목표를 기반으로 전략적 플레이를 즐길 수 있는 맵으로 보인다. StarCraft: Brood War's custom map *Little Hunter* is a defense genre map for eight players, and based on the filename and internal description, it appears to be a "compilation-style" map focused on destroying enemy buildings. While the map's name suggests "hunter," its internal title is displayed as *Untitled Scenario*, leaving its official name unclear. Set in a vast plain based on a wasteland tileset, players must advance along a path from their starting point to the enemy buildings. The map image reveals a large river cutting through the center, along with surrounding forest areas, which could obstruct attack routes or provide strategic vantage points. It’s unclear whether players fight as a team or independently, but the filename *Little Hunter* and its numbered file suggest structured team play. Early on, focus should be on resource gathering and unit production, while later stages will demand strong defense lines and precise attack timing. Given the map’s size and terrain, quick unit production and efficient resource management will be key to victory. Beginners should familiarize themselves with the terrain to avoid dispersing forces, and scouting the main paths is essential. Additionally, anticipating enemy building locations and defensive structures will help in forming a solid strategy. This map is best enjoyed in 8-player matches, requiring teamwork and strategic play, so trying it with friends is highly recommended. While the filename and internal description lack clear victory conditions or balance details, the simple goal of destroying enemy buildings makes it a fun map for strategic gameplay.
적 건물 파괴하기 (Destroy Enemy Building)
이 맵은 스타크래프트 브루드워의 유즈맵으로, 간단한 디펜스와 테란 유닛을 활용한 공격이 주를 이룬다. 내부 설명에서도 명시된 대로 적 건물 하나를 파괴하는 것이 목표로, 초보자도 쉽게 접근할 수 있는 구조로 설계되었다. 맵 중앙에는 테란의 주요 건물이 배치되어 있고, 주변에는 가시적인 장애물이 없어서 초보자가 전략을 세우기 용이하다. 다만, 적 건물의 위치나 방어 시설을 확인할 수 없기 때문에, 플레이어는 맵을 탐색하며 적의 위치를 파악해야 한다. 맵의 크기는 8192x8192로 넓지만, 실제 플레이 공간은 중앙에 집중되어 있어 큰 혼란 없이 진행할 수 있다. 테란 유닛을 적극 활용하여 적 건물을 파괴하는 것이 핵심인데, 초반에는 SCV를 모아 건설로봇으로 전환하고 테란 병력을 빠르게 확보하는 것이 중요하다. 맵의 밸런스는 비교적 평이한 수준으로, 초보자도 충분히 즐길 수 있지만, 적 건물의 위치를 빨리 찾는 플레이어에게는 더 수월한 플레이가 가능하다. 추천 대상은 스타크래프트 초보자 및 테란 유닛을 좋아하는 플레이어이며, 플레이 전에는 맵의 구조와 테란 유닛의 운영 방법을 숙지하는 것이 좋다. 적 건물의 위치를 빠르게 찾는 데 도움이 되는 탐색 전략을 미리 생각해두면 더 효과적으로 플레이할 수 있을 것이다. 맵의 난이도는 보통 정도로 설정되어 있지만, 적의 위치를 빨리 찾지 못하면 난이도가 높아질 수 있다. 따라서, 맵을 exploring하는 데 중점을 두는 것이 좋다. This map is a StarCraft: Brood War custom map focused on simple defense and Terran unit-based attacks. As stated in the in-game description, the objective is to destroy one enemy building, and the design prioritizes accessibility for beginners. The main Terran structure is placed at the center of the map, with no major obstacles around it, making it easy for new players to plan their strategy. However, since the enemy building's location and defensive structures are hidden, players must explore the map to locate them. While the map size is 8192x8192, the actual playable area is concentrated in the center, preventing excessive chaos during gameplay. The key to success is aggressively using Terran units to destroy the enemy building. Early on, gathering SCVs and converting them into construction workers to secure Terran forces quickly is crucial. The map’s balance is relatively straightforward, making it enjoyable for beginners, though players who find the enemy building faster will have an easier time. This map is recommended for StarCraft beginners and those who enjoy using Terran units. Before playing, it’s wise to familiarize yourself with the map layout and Terran unit management. Developing a scouting strategy to quickly locate the enemy building will make your playthrough more effective. The difficulty is set to moderate, but if you fail to find the enemy position early, the challenge increases significantly. Therefore, prioritizing exploration is essential for success.
더 눈부Bound (The NOOB Bound)
스타크래프트 브루드워의 유즈맵 ‘The NOOB Bound’는 초보 플레이어들을 위한 입문용 디펜스 맵으로, 비교적 단순한 구조와 직관적인 진행 방식을 제공한다. 맵은 사막 지형을 바탕으로 제작되었으며, 중앙에 위치한 주요 거점을 중심으로 적의 유닛들이 끊임없이 몰려드는 형식이다. 플레이어는 제한된 자원으로 방어선을 구축하고, 다수의 유닛을 효율적으로 배치하여 적의 공격을 방어해야 한다. 맵의 특징 중 하나는 초보자도 쉽게 이해할 수 있는 메커니즘으로, 자원 관리와 유닛 배치의 중요성을 강조한다는 점이다. 또한, 맵의 난이도는 점차 상승하는 방식으로 구성되어 있어, 플레이어는 점차적으로 전략을 숙련시킬 수 있다. 특히, 맵의 중앙에 위치한 넓은 평지는 유닛 배치와 방어선의 구축을 용이하게 하며, 초보자에게는 전략적 사고를 키울 수 있는 좋은 연습 opportunities를 제공한다. 다만, 맵의 난이도가 너무 낮거나 너무 어려울 경우, 플레이의 재미가 반감될 수 있으므로, 적절한 밸런스가 유지되는지가 관건이다. 이 맵은 초보자들에게 스타크래프트의 기본적인 전략과 디펜스 게임의 재미를 동시에 느낄 수 있도록 설계되었으므로, 스타크래프트에 처음 입문하는 유저들에게 강추할 만한 작품이다. 또한, 여러 명이 함께 플레이할 수 있도록 6인용으로 제작되어 있어, 친구들과의 협동 플레이 또한 즐길 수 있다. 맵을 시작하기 전에는 자신의 유닛 배치 전략을 미리 세워두는 것이 중요하며, 자원의 효율적인 사용을 통해 방어선을 강화하는 것이 핵심이다. 이 맵을 통해 디펜스 게임의 기본기와 전략적 사고를 키울 수 있을 것이다. The NOOB Bound is a beginner-friendly UMS defense map in StarCraft: Brood War, designed to introduce new players to the genre with a simple yet engaging structure. Set in a desert terrain, the map features a central hub where waves of enemy units continuously attack, challenging players to strategically build defenses with limited resources. Its intuitive mechanics make it accessible to novices, emphasizing resource management and unit placement as core skills. The difficulty gradually increases, allowing players to hone their strategies over time. The wide central plain facilitates easy unit deployment, offering newcomers a practical way to practice tactical thinking. However, the map’s balance is crucial—too easy or too hard, and the enjoyment diminishes. Ideal for StarCraft beginners, this 6-player map encourages both solo and cooperative play, making it a great choice for those learning the game’s basics. Before starting, players should plan their unit placement and resource allocation carefully, as efficient use of these elements is key to success. This map serves as an excellent introduction to defense games and strategic thinking in StarCraft.
테란 템플 트릭 (Terran Temple Tricks)
테란 템플 트릭스는 로스트 템플 맵을 무대로 테란 종족의 기본 운영과 전술적 요소를 단계별로 익히도록 구성된 단일 플레이어 UMS 맵이다. 사막 타일셋 위에 배치된 기지와 자원 지대는 원작 맵의 지형을 그대로 살리면서도 튜토리얼 목적에 맞게 단순화되어 있어 초보자가 부담 없이 진입할 수 있다. 진행 방식은 정해진 미션 순서에 따라 유닛 생산, 건물 배치, 업그레이드 타이밍 등을 안내 메시지와 함께 실습하게 되며, 각 단계가 완료되면 다음 과제로 자연스럽게 이어진다. 플레이 경험은 실전과 유사한 속도감 속에서 테란의 핵심 빌드 오더와 멀티태스킹을 체감할 수 있게 해주며, 실패 시 즉시 재시작이 가능해 반복 학습에 유리하다. 추천 대상은 테란을 처음 접하는 입문자나 빌드 오더를 체계적으로 정리하고 싶은 중급자이며, 이미 고급 전략을 숙지한 유저에게는 단순한 복습용으로만 의미가 있다. 플레이 전에는 맵 설명에 명시된 튜토리얼 목적을 숙지하고, 별도의 트리거나 승리 조건이 없으므로 자유롭게 연습 모드로 활용하면 된다. Terran Temple Tricks is a single‑player UMS map that uses the Lost Temple layout to teach the fundamentals of Terran play step by step. The desert tileset preserves the original terrain while simplifying bases and resource spots for tutorial purposes, allowing newcomers to jump in without pressure. Progression follows a fixed mission sequence that guides unit production, building placement, and upgrade timing through on‑screen prompts, each stage flowing naturally into the next. The experience delivers a near‑real‑time feel of core Terran build orders and multitasking, and instant restarts make repeated practice easy. It is best suited for beginners learning Terran or intermediate players wanting a structured build‑order review; advanced users will find it only a light refresher. Before playing, note that the map description states its tutorial aim and that there are no custom triggers or victory conditions, so it can be used freely as a practice sandbox.
테크 헬프 (Tech Help)
테크 헬프(Tech Help)는 스타크래프트 브루드워에서 볼 수 있는 독특한 유즈맵으로, 일반적인 대전이나 미션 수행이 아닌 플레이어 지원과 정보 제공을 목적으로 제작된 맵이다. 맵 설명에 따르면 '테크 헬프 오피서' 팀이 호스팅, 맵 제작, 그리고 플레이어가 겪을 수 있는 다양한 문제를 돕는다고 명시되어 있어, 커뮤니티 도움말 센터나 기술 지원소 역할을 하는 공간으로 추정된다. 황무지 타일셋 위에 64×64 타일 크기로 구성된 이 맵은 8인용으로 설정되어 있으나, 실제 게임플레이보다는 채팅과 안내, 자료 공유가 주된 활동이 될 것으로 보인다. 일반적인 유즈맵처럼 트리거로 구현된 미션이나 전투 시스템이 있는지 여부는 이미지만으로는 확인하기 어렵지만, 설명 문구로 미루어 볼 때 별도의 승리 조건이나 점수 체계보다는 자유로운 소통과 질문 답변이 중심이 되는 구조일 가능성이 높다. 이러한 맵은 스타크래프트 초보자나 맵 제작 입문자, 배틀넷 호스팅에 어려움을 겪는 유저에게 실질적인 도움을 줄 수 있는 공간으로 기능했을 것이다. 플레이 전에는 맵 내부에 어떤 형태의 안내 텍스트나 인터페이스가 배치되어 있는지, 실제 운영진이 상주하는 방식인지 아니면 정적 정보만 제공되는지 확인이 필요하다. 현재 버전 정보나 난이도, 예상 플레이 타임 같은 메타데이터가 비어 있는 점도 이 맵이 일반적인 게임플레이 지표와는 거리가 먼 특수 목적 맵임을 시사한다. 추천 대상은 스타크래프트 기술적 문제 해결이 필요한 유저, 맵 제작 기초를 배우고 싶은 입문자, 과거 커뮤니티 지원 문화를 체험해보고 싶은 플레이어다. Tech Help is a unique StarCraft Brood War use map created not for typical combat or mission gameplay but for player support and information sharing. According to the map description, a team of "Tech Help Officers" assists with hosting, map making, and various other problems players may encounter, suggesting this functions as a community help center or technical support hub. Built on the Badlands tileset at 64×64 tiles, the map supports eight players, though actual activity likely centers on chat, guidance, and resource exchange rather than traditional gameplay. While it is unclear from the image alone whether scripted triggers, missions, or combat systems exist, the description implies a structure focused on free communication and Q&A rather than win conditions or scoring. Such a map would have served as a practical aid for beginners, aspiring map makers, and users struggling with Battle.net hosting. Before playing, one should verify what guide texts or interfaces are placed inside, whether live staff operate it, or if it only provides static information. The absence of metadata like version, difficulty, or estimated play time further indicates this is a special-purpose map far removed from standard gameplay metrics. Recommended for users needing technical troubleshooting, beginners learning map creation basics, and players wanting to experience historical community support culture.
탱크 디펜스 (Tank Defense :::EASY:::)
스타크래프트의 고전 디펜스 장르 유즈맵인 〈Tank Defense :::EASY:::〉은 탱크 유닛을 중심으로 적의 공격을 방어하는 구조로 설계된 맵이다. 맵의 중앙에 위치한 방어 거점이 있으며, 좌측 하단과 우측 하단에서 적 병력이 끊임없이 몰려온다. 플레이어는 초기 자원과 탱크를 제공받으며, 각 웨이브마다 점점 더 강력한 적군이 등장해 방어선을 위협한다. 맵은 사각형 형태의 넓은 평지로 구성되어 있으며, 중앙에는 보호해야 할 건물이 배치되어 있다. 방어 거점에서 탱크를 생산하거나 업그레이드할 수 있는 구조물이 배치되어 있으며, 적의 공격을 막아내는 것이 주요 목표다. 맵의 좌우측에는 좁은 통로가 있어 탱크가 진입할 수 있도록 배치되어 있어 전략적인 배치와 생산 타이밍이 중요하다. 이 맵은 초보자도 쉽게 접근할 수 있도록 ‘EASY’라는 난이도 표기가 붙어 있지만, 지속적인 적의 웨이브와 방어 거점의 중요성으로 인해 플레이어의 집중력이 요구된다. 탱크의 체력과 공격력은 기본적으로 제공되지만, 업그레이드를 통해 더욱 강력하게 만들 수 있어 리소스 관리와 생산 타이밍이 승패를 좌우한다. 맵의 구조는 단순하지만, 적의 공격 패턴이 다양해질수록 전략의 중요성이 커진다. 특히 탱크의 생산과 배치 위치를 신중히 결정해야 하며, 방어 거점을 잃지 않도록 주의해야 한다. 링크로 표시된 방어 거점을 보호하지 못하면 즉시 패배로 이어지기 때문에, 초보자는 물론 숙련자도 긴장감을 유지하며 플레이할 수 있는 구성이다. 이 맵은 스타크래프트의 유즈맵으로서 디펜스 장르의 기본을 충실히 따르고 있으며, 탱크 중심의 전투와 방어 거점 보호라는 명확한 목표로 인해 접근성이 높다. 하지만 단순해 보이는 구조에도 불구하고, 적의 웨이브가 끊임없이 밀려오기 때문에 플레이어의 손속에 따라 난이도가 크게 달라진다. 따라서 전략적인 자원 관리와 탱크의 효율적인 배치, 그리고 타이밍을 맞추는 것이 핵심이다. 맵의 분위기는 우주 테마로 설정되어 있으며, 넓은 평지와 중앙의 건물이 인상적인 디자인으로 구성되어 있다. 이 맵을 즐기는 플레이어는 방어의 중요성과 자원의 효율적 사용에 대해 다시 한번 생각해 볼 수 있을 것이다. 특히 디펜스 장르에 익숙하지 않은 초보자에게는 적절한 연습용 맵으로 추천할 만하다. Tank Defense :::EASY::: is a classic StarCraft defense-style custom map where players defend against waves of enemies using tank units. The map features a central defensive stronghold, with enemy forces continuously spawning from the bottom-left and bottom-right corners. Players start with basic resources and tanks, facing increasingly powerful enemy waves that threaten their defenses. The map consists of a wide, open rectangular terrain with a critical building at the center that must be protected. Defensive structures near the stronghold allow for tank production and upgrades, making strategic placement and timing essential for survival. Despite the "EASY" difficulty label aimed at beginners, the map demands constant attention due to relentless enemy waves and the importance of protecting the defensive stronghold. While tanks come with standard health and attack power, upgrading them significantly enhances their effectiveness, making resource management and production timing crucial to success. Although the map’s layout is simple, the increasing diversity of enemy attack patterns raises the importance of strategy. Players must carefully decide where to produce and position tanks, as losing the defensive stronghold results in an immediate defeat. This design keeps both beginners and experienced players engaged with its tense gameplay. As a StarCraft custom map, Tank Defense :::EASY::: adheres closely to the defense genre’s fundamentals, offering clear objectives centered on tank-based combat and stronghold protection. Despite its straightforward appearance, the continuous enemy waves mean that difficulty heavily depends on the player’s execution. Effective resource management, efficient tank placement, and precise timing are key to overcoming challenges. The map adopts a space-themed aesthetic, featuring an impressive design with an expansive plain and a central building. Players will gain a deeper appreciation for defense strategies and efficient resource use, making it a recommended practice map for those unfamiliar with the defense genre.
STF - 게릴라 (STF - Guerilla)
STF - Guerilla는 스타크래프트 브루드워의 밀리 맵으로, 4명의 플레이어가 좌측과 우측 진영으로 나뉘어 전투를 펼치는 컴까기 스타일의 맵입니다. 사막 테마의 넓은 평야가 펼쳐지며, 중앙에는 자원 멀티 지역과 좁은 통로가 있어 전략적인 움직임이 강제됩니다. 맵의 특징은 ‘집결과Expand(확장)’ 전략으로, 병력을 뭉쳐 다니며 서서히 멀티를 확장해 나가야 한다는 점입니다. 미세 컨트롤이 필수적인 이 맵은 초보자가 잡기엔 다소 난해할 수 있지만, 미니맵을 적극 활용하고 병력 관리에 신경 쓰면 재미를 느낄 수 있습니다. 특히 중앙 통로에서의 싸움에서 유리한 위치를 선점하는 것이 승리의 열쇠가 됩니다. 사막 지형답게 시야가 넓고, 자원 멀티가 중앙에 밀집되어 있어Resource Control(자원 관리)과Terrain Control(지형 장악)이 중요합니다. 초보자라도 연습을 통해 조금씩 실력이 향상될 수 있는 구조로, 스타크래프트의 기본기와 전략적 사고를 동시에 요구하는 매력적인 맵입니다. 다만, 팀 플레이보다는 1:1:1:1 또는 2:2 대결에서 더 재미를 느낄 수 있으며, 맵의 평면 구조상 병력이 모이지 않으면 쉽게 밀릴 수 있어 주의가 필요합니다. 추천 대상은 스타크래프트의 기본기를 다지고 싶거나, 좁은 공간에서의 전투와 자원 관리를 연습하고 싶은 플레이어입니다. 맵을 플레이하기 전에는 미니맵을 자주 확인하고, 병력을 뭉쳐 다니며Expand를 서두르지 않는 것이 중요합니다. 또한, 상대방의 전략에 따라 중앙 교전이나 멀티 방어 타이밍을 잘 조절해야 합니다. 이 맵은 스타크래프트의 고전적인 밸런스를 유지하면서도, 좁은 공간에서의 전투와 전략적 사고를 동시에 요구하는 매력적인 구조를 가지고 있습니다. STF - Guerilla is a *Brood War* melee map in *StarCraft*, where four players are divided into left and right factions, engaging in a team-kill-style battle. The map features a vast desert plain with a central resource multibase and narrow pathways, forcing strategic movement. Its key mechanic revolves around "grouping and expanding," requiring players to move forces together while gradually securing additional bases. While precise micro-management is essential—making it somewhat challenging for beginners—actively using the minimap and managing troop movements can make the experience enjoyable. Securing advantageous positions in the central corridors is often the key to victory. With its open desert terrain, visibility is high, and resource clusters near the center emphasize *resource control* and *terrain dominance*. Even beginners can improve with practice, as the map demands both fundamental *StarCraft* skills and strategic thinking. However, it shines more in 1v1v1v1 or 2v2 matches rather than team play, and its flat layout means uncoordinated forces can be easily overwhelmed. It’s ideal for players looking to refine their basics or practice combat in tight spaces and resource management. Before playing, frequently check the minimap and avoid rushing expansions while keeping forces grouped. Adjust your central engagements and multibase defense timing based on the opponent’s strategy. STF - Guerilla maintains *StarCraft*’s classic balance while offering a compelling structure that blends close-quarters combat with deep strategic planning.
RP - Station 37 (v1.37)
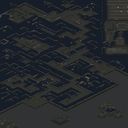
RP - Station 37은 초보자를 위한 UMS 맵으로, 설원/얼음 타일셋을 활용한 넓은 8192×8192 맵 위에 6명의 플레이어가 동시에 전투를 벌이는 구조를 가지고 있다. 맵 중앙에 위치한 주요 기지는 비교적 작은 규모이며, 주변에 여러 개의 고지대와 좁은 통로가 흩어져 있어 초기 정찰과 빠른 진입이 승패를 좌우한다. 초반에는 자원을 빠르게 확보하고, 적의 기지를 향해 전진하는 ‘컴까기’ 형태의 플레이가 강조된다. 방어 설비는 최소화돼 있어 방어보다는 공격적인 움직임이 유리하며, 눈덮인 지형 때문에 시야가 제한돼 적을 찾기 위해 정찰 유닛을 적극 활용해야 한다. 또한, 맵 곳곳에 배치된 중립 건물이나 자원 포인트는 초반 자원 경쟁을 촉진하고, 이를 장악한 팀이 후반에 유리한 위치를 확보한다. 플레이 전 확인해야 할 포인트는(1) 초기 스폰 위치가 서로 멀리 떨어져 있어 초반 교전이 늦게 시작될 수 있다는 점, (2) 눈 지형으로 인해 이동 속도가 감소하므로 유닛 이동 경로를 미리 계획해야 한다는 점, (3) 자원 포인트가 제한적이므로 효율적인 수집과 방어가 필요하다는 점이다. 이러한 요소들 덕분에 RP - Station 37은 초보자에게 공격적인 전술 연습과 맵 이해도를 높일 수 있는 좋은 연습장이 된다. 초보자뿐 아니라 빠른 템포의 전투를 선호하는 숙련 플레이어에게도 짧은 라운드와 다채로운 전투 상황을 제공한다. RP - Station 37 is a beginner-friendly UMS map that places up to six players on a large 8192×8192 snow and ice tileset. The central base is relatively small, surrounded by several high grounds and narrow passages, making early scouting and rapid advancement crucial. The early game emphasizes a “rush” style play where grabbing resources quickly and pushing toward the enemy base is key. Defensive structures are minimal, favoring aggressive maneuvers, and the snowy terrain limits vision, requiring active use of scouting units. Scattered neutral buildings and resource points intensify early resource competition, and controlling them grants a strategic edge later. Before playing, note that (1) spawn points are spread out, so early engagements may be delayed, (2) movement speed is reduced on snow, so plan unit routes in advance, and (3) limited resource nodes demand efficient gathering and protection. These characteristics make RP - Station 37 an excellent training ground for newcomers to practice aggressive tactics and map awareness, while also offering fast‑paced battles for experienced players seeking quick, varied skirmishes.
맵 선택 가이드
태그는 맵의 핵심 특징을 빠르게 설명하지만 제작 버전마다 규칙이 다를 수 있습니다. 상세 설명에서 권장 인원, 난이도, 플레이 시간과 버전을 함께 확인한 뒤 다운로드하세요.