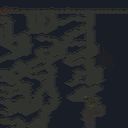
빠른 승리 (the fast win)
스타크래프트 브루드워의 얼음 타일셋을 기반으로 한 정제되지 않은 밀리 맵, 'Untitled Scenario'는 파일명 'the fast win.scx'에서 느껴지듯 극단적인 초반 교전과 일방적인 승리를 위한 구조로 설계되었습니다. 4096x4096의 넓은 필드 중앙에는 자원 멀티와 건물이 거의 배치되지 않아, 시작하자마자 바로 본진 인근에서 전투가 벌어질 수밖에 없습니다. 이 맵의 특징은 '빠른 승리'라는 이름처럼 테란의 벙커 러시, 프로토스의 광전사 러시, 저그의 러커 드랍 등 초반 전략이 매우 강력하게 작용한다는 점입니다. 특히 설원 타일셋의 어두운 배경은 시야를 제한하여 초반 정찰의 중요성을 높이고, 맵의 균형이 무너지기 쉬운 구조를 부여합니다. 플레이어는 시작 직후 자신의 스타팅Area를 벗어나지 않고도 적의 기지를 바로 공격할 수 있는 위치에 있으며, 이는 맵의 긴장감을 극대화합니다. 다만, 중앙 멀티와 같은 자원 분배 구역이 없어서 후반 자원 전쟁이 발생하지 않으며, 오로지 초반 교전과 빠른 건물 파괴에 모든 것이 집중됩니다. 이러한 구조는 초보 플레이어에게는 학습 효과가 크지만, 숙련자들에게는 전략의 깊이가 부족하게 느껴질 수 있습니다. 맵의 승리 조건은 단순하게 모든 적 건물을 파괴하는 것으로, 이를 위해 플레이어는 자신이 가진 모든 유닛을 즉시 전선에 투입하는 극한의 공격적 플레이가 요구됩니다. 초반 빌드오더와 테크 선택의 차이가 승패를 좌우하는 이 맵은, 말 그대로 '빠른 승리'를 목표로 하는 밀리 맵의 정석을 보여줍니다. 다만, 맵의 밸런스가 오로지 초반 교전에만 치중되어 있어, 다양한 전략과 테크트리를 시도해 보고 싶은 플레이어들에게는 다소 아쉬운 부분으로 남습니다. 이 맵을 즐기기 위해서는 초반 유닛 생산과 진출 타이밍을 철저히 계산해야 하며, 가능한 한 빠른 시간 내에 적 기지를 파괴하는 것이 핵심입니다. 또한, 설원 타일셋의 어두운 조명과 제한된 시야를 고려하여, 유닛 컨트롤과 정찰을 동시에 수행할 수 있는 능력이 필요합니다. 초보자와 숙련자 모두에게 흥미로운 경험을 제공하지만, 특히 초보자에게는 스타크래프트의 기본적인 전투와 빌드 개념을 빠르게 습득할 수 있는 좋은 연습용 맵으로 활용될 수 있을 것입니다. 다만, 이 맵이 제공하는 전략의 다양성은 제한적이므로, 다양한 맵을 접하고자 하는 플레이어에게는 추천하기 어려운 점도 있습니다. 이 맵을 플레이하기 전에, 자신의 스타일과 전략이 초반 교전에 특화되어 있는지, 그리고 빠른 승리를 목표로 할 수 있는 준비가 되어 있는지를 먼저 생각해 보는 것이 좋습니다. 또한, 맵의dark한 조명과 제한된 시야를 극복하기 위해, 가능한 한 빠른 정찰과 맵 리딩 능력을 키우는 연습을 병행하는 것이 좋습니다. 이 맵은 단순히 '승리'만을 목표로 하기보다는, 스타크래프트의 기본기와 전투 감각을 다듬는 데에 중점을 두는 것이 바람직합니다. 초보자와 숙련자 모두에게 유용한 맵이지만, 그 활용 방법은 분명히 구분되어야 합니다. 초보자는 이 맵을 통해 빠른 전투와 빌드오더의 중요성을 배울 수 있으며, 숙련자는 자신의 초반 전략과 테크 선택 능력을 검증할 수 있는 좋은 기회로 삼을 수 있습니다. 다만, 이 맵이 제공하는 전략적 깊이의 한계는 반드시 염두에 두어야 합니다. 이 맵을 즐기면서도, 동시에 다른 전략적 깊이를 가진 맵들도 함께 플레이하여 스타크래프트의 다양한 재미를 경험하는 것이 좋습니다. This untitled melee map, set on the frozen tundra tileset of StarCraft: Brood War, is a raw and unrefined design that prioritizes instant early-game aggression under the filename 'the fast win.scx'. The 4096x4096 expansive field deliberately omits mid-game resources and expansions, forcing immediate confrontation near starting positions regardless of race. The dark, snow-covered environment restricts visibility, amplifying the role of scouting in the opening minutes. The map’s balance hinges entirely on rapid base destruction through early rushes — Terran bunkers, Protoss zealot charges, or Zerg lurker drops all thrive in this compressed battlefield. Central resource nodes are nonexistent, eliminating late-game macro play and reducing the match to a swift, decisive clash. While the simplicity aids new players in grasping core combat dynamics, it offers limited strategic depth for veterans seeking extended build orders or multi-stage strategies. Victory requires destroying all enemy structures, compelling players to commit every unit to the frontline immediately. The map’s balance revolves around optimizing initial unit production and timing, but its narrow focus on early aggression may feel repetitive for those seeking diverse tactical play. The dim lighting and obscured vision demand sharp micro-management and constant map awareness. Beginners will find this map useful for practicing fundamental combat and build orders, but its lack of variety makes it less ideal for players seeking broader strategic experiences. Before playing, assess whether your strategy aligns with early-game dominance and prepare for quick victories. The map’s constraints also serve as an exercise in efficient scouting and unit control under limited visibility. While it serves as a practical tool for refining basic mechanics, its limited depth means supplementing play with more complex maps is advisable for sustained enjoyment. Both beginners and experts can benefit, but their engagement with the map should differ — novices to learn pace, veterans to test rush strategies — always mindful of its strategic limitations.
다운로드 0 · 조회 20 · 댓글 0