
지형 전투 스타크래프트 맵 모음
'지형 전투' 태그가 등록된 맵을 모았습니다. 장르 하나로 찾기 어려운 플레이 방식, 난이도와 특징을 중심으로 인기 맵과 최신 맵을 비교해 보세요.
- 등록 맵
- 7개
- 누적 다운로드
- 0
- 누적 조회
- 223
인기 맵
다운로드와 조회 반응이 높은 맵입니다.
Droht - 킬러 협곡 (Droht - Killer Gorge)
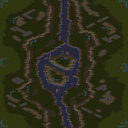
《Droht - Killer Gorge》는 스타크래프트: 브루드워의 대표적인 유즈맵 시리즈인 ‘Droht’의 최신작으로, 거대한 협곡 지형을 배경으로 펼쳐지는 밀리 맵이다. 맵 이름은 독일어로 ‘죽음’이란 뜻을 지닌 ‘Tod’에서 유래한 ‘Droht’ 시리즈의 전통을 잇고 있으며, ‘Killer Gorge’는 ‘살해자의 협곡’이라는 다소 과격한 제목이지만 사실상 맵의 지형을 묘사한 것에 가깝다. 맵의 전체 크기는 6144x6144로 매우 넓고, 협곡을 따라 중앙에 좁은 다리가 놓여 있어 병력의 교전이 자연스럽게 발생하는 구조를 가지고 있다. 협곡 양쪽에는 넓은 평지가 펼쳐져 있으며, 다리 주변은 지형이 복잡하여 시야 확보와 병력 운용이 중요한 요소가 된다. 특히 다리 위와 협곡 양쪽 언덕은 전략적 요충지로, здесь에서 전투가 벌어지면 맵의 승패가 갈릴 수 있다. 협곡 양쪽 끝에는 미네랄과 가스 멀티가 배치되어 있어 자원 확보 경쟁도 치열해진다. 플레이어는 6인으로 구성되며, 각각의 플레이어는 시작 위치에서 협곡을 건너 상대방의 본진을 향해 진격하거나, 협곡을 방어하며 자원을 확보하는 두 가지 선택을 할 수 있다. 맵의 특징은 지형이 복잡하여 시야가 제한되는 부분이 많다는 점으로, 이는 미니맵을 적극 활용하고, 정찰 유닛을 통한 정보 수집이 필수적임을 의미한다. 또한, 협곡 중앙의 다리나 언덕 지형은 진형 싸움에서 큰 영향을 미치므로, 맵에 익숙해지려면 여러 번 플레이를 통해 길목을 장악하는 법을 익혀야 한다. 맵의 분위기는 사막 지형답게 황량하고 웅장한 느낌이 강하며, 협곡의 협소한 공간과 넓은 평지가 어우러져 전략적 깊이를 더한다. 이 맵은 밀리 경기에 최적화되어 있으며, 특히 ‘Droht’ 시리즈 특유의 긴장감과 전략적 깊이를 즐기고 싶은 플레이어들에게 추천할 만한 작품이다. 다만, 넓은 맵 크기 때문에 초보자의 경우 자원 관리와 멀티 확보, 그리고 지형 이해에 시간이 걸릴 수 있으니, 먼저 싱글 플레이 모드나 연습 모드를 통해 맵에 익숙해지는 것이 좋다. 또한, 협곡을 건너는 도중 적의 기습을 받을 위험이 있으니, 항상 주변을 살피며 플레이하는 것이 중요하다. 《Droht - Killer Gorge》 is the latest installment in the "Droht" series of user-created maps for *StarCraft: Brood War*, set against the backdrop of a massive canyon terrain in a melee map. Following the tradition of the "Droht" series, whose name derives from the German word *"Tod"* meaning "death," *Killer Gorge* lives up to the name with its dramatic title, though it primarily reflects the map's dramatic canyon geography. The map spans a vast 6144x6144 size, featuring a narrow bridge running through the center of the gorge, which naturally funnels forces into combat. Flanking the gorge are wide open plains, while the area around the bridge is cluttered with complex terrain, making vision control and troop positioning crucial. The bridge itself and the hills on either side of the gorge serve as strategic chokepoints where battles can decide the outcome of the match. At both ends of the gorge, mineral and gas expansions are positioned, intensifying resource competition. The map is designed for six players, each facing a choice between charging across the gorge toward the opponent's base or defending the gorge while securing resources. A defining feature of the map is its complex terrain, which restricts visibility in many areas, making frequent use of the minimap and scouting units essential. The central bridge and elevated terrain also play a major role in formation battles, so mastering control of these key points requires repeated play. The atmosphere of the map, with its desert terrain, conveys a sense of desolation and grandeur, blending narrow canyon passages with vast open plains to add strategic depth. Optimized for melee matches, this map is highly recommended for players who enjoy the *Droht* series' signature tension and strategic complexity. However, due to its large size, beginners may struggle with resource management, expansion securing, and terrain understanding, so it's advisable to familiarize oneself with the map through single-player or practice modes first. Additionally, crossing the gorge carries the risk of ambushes, so constant vigilance is key to success.
헬름스 딥 랜덤 히어로즈 1.7 (Helms Deep Random Heroes 1.7)
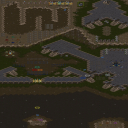
스타크래프트 브루드워의 유즈맵 <헬름스 딥 랜덤 히어로즈 1.7(Helms Deep Random Heroes 1.7)>은 8명의 플레이어가 협동하거나 경쟁하는 대규모 디펜스 장르의 맵이다. 맵은 가운데를 가로지르는 거대한 산맥과 계곡으로 나뉘어 있으며, 각 플레이어는 고유한 시작 지역과 방어 시설을 확보하게 된다. 디펜스 요소 외에도 랜덤 히어로 시스템이 특징으로, 전투에서 승리하거나 특정 조건을 달성하면 무작위로 영웅 유닛이 보상으로 주어지며, 이를 활용해 전략을 펼칠 수 있다. 맵의 지형은 험난한 산맥과 협곡으로 둘러싸여 있어 초반부터 방어선을 구축하고 병력 보충이 필수적이다. 산맥의 협곡을 중심으로 전투가 벌어지며, 중앙 지역으로 진출해 적을 제압하거나 방어에 집중하는 플레이가 가능하다. 맵의 규모가 크고 지형이 복잡해 전략적 깊이가 뛰어나며, 특히 팀플레이 시의 협동과 영웅의 활용이 승패를 가를 것으로 예상된다. 초보자보다는 중간 이상의 실력을 가진 플레이어들이 Enjoy할 수 있는 구조로, 다채로운 전략과 다양한 영웅의 조합을 활용해 승리를 노려볼 만하다. 플레이 전에는 맵의 지형과 영웅 시스템을 충분히 숙지하는 것이 중요하며, 중앙 지역에서의 전투와 방어선의 유지에 중점을 두는 것이 좋다. 맵의 디자인과 규모를 고려할 때, 플레이 시간은 약 30분에서 40분 정도로 예상된다. рекомен드 플레이어 수는 8명으로, 각 플레이어의 역할 분담과 영웅의 선택이 게임의 재미와 난이도를 크게 좌우할 것이다. StarCraft: Brood War's custom map *Helms Deep Random Heroes 1.7* is an 8-player cooperative or competitive large-scale defense genre map. The map is divided by a massive mountain range and valleys running through the center, with each player securing a unique starting area and defensive structures. In addition to defense, the map features a random hero system where victorious battles or meeting certain conditions grant a randomly awarded hero unit, allowing for strategic gameplay. The terrain is surrounded by rugged mountains and canyons, requiring players to establish defensive lines and reinforce forces from the start. Battles primarily occur along the mountain canyons, with players able to advance toward the central area to suppress enemies or focus on defense. The map's large scale and complex terrain offer deep strategic gameplay, with team coordination and hero utilization likely determining victory or defeat. The structure is better suited for intermediate to advanced players rather than beginners, offering a variety of strategies and hero combinations to pursue victory. Before playing, it's important to thoroughly understand the map's terrain and hero system, with a focus on maintaining defensive lines and central area battles. Considering the map's design and scale, the expected playtime is around 30 to 40 minutes. The recommended number of players is eight, with each player's role distribution and hero selection greatly influencing the game's enjoyment and difficulty.
썬크라인 2웨이 v5.x (Sunken Line 2 Way v5.x)
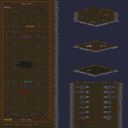
스타크래프트 브루드워의 유즈맵 ‘썬크라인 2웨이 v5.x(Sunken Line 2 Way v5.x)’는 적의 공격을 저지하는 디펜스 장르의 맵으로, 지형의 특징을 살린 전략적 플레이가 요구된다. 맵은 거대한 수중 지형 위에 섬들이 배치되어 있으며, 플레이어는 중앙 통로를 따라 진행하는 적을 저지하거나 섬을 방어하는 역할을 맡는다. 맵의 이름은 ‘썬크라인(Sunken Line)’으로 수중 지형을 의미하며, ‘2웨이’는 적의 진로가 두 갈래로 나뉘는 구조를 반영하고 있다. 맵의 주요 특징은 맵 중앙에 위치한 좁은 통로로, 이곳을 지나려는 적을 효율적으로 방어해야 한다. 섬들은 각 플레이어에게 할당된 시작 지점으로, here에서 스폰된 유닛을 조합하여 적을 저지하는 전략을 짜야 한다. 맵의 디자인상으로는 섬 간의 간격이 좁아 유닛의 이동 경로가 제한적이며, 이는_DEFENSE_ 장르 특유의 긴장감을 조성한다. 또한, 맵의 대칭 구조는 플레이어 간의 경쟁을 부추기며, 섬의 배치와 자원 분포가 균형 있게 설계되어 있어 초보자와 숙련자 모두 플레이할 수 있도록 배려된 것으로 보인다. 추천하는 플레이 방식은 기본 유닛을 조합하여 적의 통로를 막는 ‘막기’ 전략과, 섬을 점령해 추가 자원을 확보하는 ‘확장’ 전략을 적절히 혼용하는 것이다. 맵의 난이도는 맵의 구조상 방어 포인트가 명확하기 때문에 초보자도 쉽게 접근할 수 있으나, 적의 공격 패턴을 예측하고 유닛을 효율적으로 배치하는 전략적 깊이가 있어 숙련자들에게도 충분히 매력적이다. 플레이 전에는 맵의 통로와 섬의 배치, 그리고 시작 지점의 유닛 생산 가능 여부를 반드시 확인할 필요가 있다. 특히, 섬에 배치된 건물과 유닛 생산 건물이 맵의 승리 조건과 밀접한 관련이 있을 수 있으므로, 이를 미리 숙지하고 전략을 짜는 것이 중요하다. 또한, 맵의 대칭 구조상 팀 플레이가 유리할 수 있으므로, 팀원과의 협력이 원활한 경우 더욱 재미있게 즐길 수 있을 것이다. "Sunken Line 2 Way v5.x" is a defensive-style custom map in *StarCraft: Brood War* that emphasizes strategic play based on the terrain's unique features. The map features islands scattered across a vast submerged landscape, where players must either block enemies advancing along the central passage or defend their assigned islands. The name "Sunken Line" reflects the underwater terrain, while "2 Way" highlights the dual-path structure that splits enemy routes into two directions. The map’s defining trait is the narrow central corridor, where players must efficiently block enemies attempting to pass through. Each island serves as a starting point, where players combine spawned units to devise defensive strategies. Due to the tight spacing between islands, unit movement paths are restricted, amplifying the tense, defensive nature of the genre. The symmetrical design fosters competition between players, and the balanced distribution of islands and resources ensures accessibility for both beginners and experienced players. Recommended strategies include a "blocking" approach—using basic units to seal off enemy pathways—and an "expansion" tactic, securing islands to gain additional resources. While the map’s clear defensive points make it easy for beginners to grasp, its depth lies in predicting enemy attack patterns and optimizing unit placement, offering a satisfying challenge for veterans. Before playing, it’s crucial to study the corridors, island layouts, and unit production capabilities at starting points, as buildings and production facilities on islands may directly influence victory conditions. The symmetrical structure also lends itself well to team play, making coordination with teammates especially rewarding.
슈퍼 스매시 브라더스 메리 (Super Smash Brothers Melee)
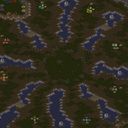
「슈퍼 스매시 브라더스 메리」는 스타크래프트: 브루드워의 유즈맵으로, 닌텐도의 인기 대전 액션 게임 「슈퍼 스매시 브라더스 메리」를 스타크래프트 플랫폼에 재현한 작품이다. 맵은 3072x3072의 넓은 사막 지형을 배경으로 하며, 각 플레이어는 개성 있는 캐릭터를 조작해 전투를 펼친다. 전투는 맵 내의 다양한 지형과 장애물을 활용한 액션 중심의 전투가 특징으로, 한 명의 플레이어가 탈락할 때까지 지속된다. 맵의 구조는 중앙에 넓은 개방형 공간이 있으며, 주변으로 언덕, 협곡, 바위 지형이 분포해 있어 전투 시 전략적 움직임을 요구한다. 캐릭터 간 밸런스는 물론이고, 맵의 특성상 대각선 공격이나 지형 활용이 중요한 포인트로 보인다. 맵의 Atmosphere는 격렬한 전투를 연상시키는 붉은 노을과 모래 먼지가 visual 효과로 표현되어 있어, 플레이어에게 긴장감과 excitement를 전달한다. 제작자 Nate_dca가 제공한 설명에 따르면, 이 맵은 「슈퍼 스매시 브라더스 메리」의 전투 시스템과 캐릭터성을 스타크래프트 환경에 최대한 반영하기 위해 노력했다고 하며, 특히 「Madness」라는 키워드에서 알 수 있듯이 난전과 빠른 판단력이 요구되는 플레이 스타일을 강조하고 있다. 이 맵은 「슈퍼 스매시 브라더스」 팬들에게는 물론이고, 스타크래프트의 유즈맵을 즐기는 플레이어들에게도 새로운 경험을 제공할 것으로 예상된다. 플레이 전, 맵의 지형과 캐릭터별 스킬, 탈출 경로를 미리 숙지하는 것이 중요할 것이며, 특히 넓은 맵에서 발생하는 대각선 공격과 지형 활용에 대한 이해가 승패를 좌우할 가능성이 높다. 또한, 8명의 플레이어가 동시에 전투를 벌이기 때문에, 원활한 커뮤니케이션과 팀워크가 필수적이다. 이 맵은 「슈퍼 스매시 브라더스」의 팬이라면 반드시 플레이해볼 만한 작품이며, 액션과 전략이 조화된 스타크래프트 유즈맵의 새로운 장르를 개척했다는 점에서 주목할 만하다. Super Smash Bros. Merry is a StarCraft: Brood War custom map that recreates Nintendo’s popular fighting game Super Smash Bros. Merry within the StarCraft platform. The map features a vast 3072x3072 desert terrain where players control unique characters in fast-paced battles that continue until one player is eliminated. The layout includes a wide open central area surrounded by hills, canyons, and rocky formations, encouraging strategic movement and dynamic combat. Balancing the characters and leveraging the terrain—especially diagonal attacks and environmental features—are key to success. The atmosphere is heightened by visual effects like a fiery sunset and swirling sand, creating tension and excitement. According to creator Nate_dca, the map was designed to faithfully adapt Super Smash Bros. Merry’s combat system and character traits to StarCraft, emphasizing chaotic, high-stakes gameplay as suggested by the keyword “Madness.” While it will appeal to fans of the original series, it also offers a fresh experience for StarCraft custom map enthusiasts. Before playing, it’s crucial to study the terrain, character abilities, and escape routes, as understanding diagonal attacks and terrain usage on the large map can determine victory. With eight players battling simultaneously, clear communication and teamwork are essential. This map is a must-play for Super Smash Bros. fans and stands out for pioneering a new genre of action-strategy custom maps in StarCraft.
티거의 잔혹한 전투 2 (Tigger's Brutal 2)
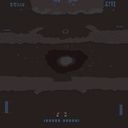
이 맵은 스타크래프트: 브루드워의 유즈맵으로, 내부 설명에 따르면 '모든 적 건물 파괴'가 승리 조건으로 보인다. 맵 제목이 'Untitled Scenario'로 표시되어 있지만, 파일명은 'tigger-brutal2.scx'이며 내부 제목도 동일하다. 맵의 전체 크기는 8x8km로 매우 넓은 정글 타일셋을 기반으로 제작되었는데, 정글 타일셋의 울퉁불퉁한 지형이 전장 분위기를 조성하며 전면전이 벌어지기 어려운 환경을 만든다. 보인다시피 넓은 평야보다는 곳곳에 나무와 언덕이 배치되어 있으며, 중앙에는 커다란 원형 언덕이 존재해 양측의 본진을 연결하는 주요 통로 역할을 할 것으로 추정된다. 이러한 지형적 특징 때문에 플레이어는 자연스럽게 소규모 교전이나 기동전을 펼치게 되며, 대규모 군단이 한꺼번에 움직이기 어려운 구조다. 맵의 목표가 단순 건물 파괴임에도 불구하고, 정글 지형의 복잡성은 전술적 깊이를 더할 것으로 예상된다. 초보 플레이어는 넓은 맵과 제한된 시야로 인한 전략 수립의 어려움을 느낄 수 있으며, 경험 많은 플레이어는 지형을 활용한 기습이나 방어 라인 구축에 주안점을 두고 플레이해야 할 것이다. 맵의 난이도는 맵 자체의 복잡성 때문에 보통 이상으로 느껴질 수 있으며, 특히 브루드워의 기본 유닛 조합만으로는 승리를 장담하기 어려운 구조다. 따라서 이 맵은 밀리 기반의 유즈맵이지만, 순수한 건물 파괴보다도 지형 활용과 소규모 전술이 중요한 포인트가 될 것으로 보인다. 플레이 전에는 맵의 전체적인 흐름과 주요 길목을 파악하는 것이 중요하며, 언덕과 나무가 제공하는 시야 차단과 방어 효율성을 미리 숙지해야 한다. 또한, 넓은 맵에서 자원 수집과 병력 운용의 타이밍을 맞추는 연습이 필요할 것이다. 추천 대상은 브루드워의 기본 전략을 숙지한 플레이어로, 지형 활용과 소규모 교전 능력을 연마하고자 하는 유저에게 적합하다. 초보자도 도전해볼 수 있지만, 기본적인 맵 리딩과 전술 이해도가 요구된다. 이 맵은 넓은 전장과 지형적 특징으로 인해 밸런스가 다소 복잡할 수 있으며, 맵 제작자의 의도대로라면 플레이어 간의 소통과 협력이 중요해질 것으로 보인다. 따라서 팀플레이에서도 유용하게 활용될 수 있을 것이다. This is a custom map for *StarCraft: Brood War*, where the victory condition appears to be "destroying all enemy buildings" based on the internal description. Although the map is labeled as "Untitled Scenario," the filename is "tigger-brutal2.scx," and the internal title matches the filename. The entire map spans 8x8 kilometers, featuring a vast jungle tile set with rugged terrain that creates an environment where large-scale battles are difficult to execute. As seen, the map is not dominated by open plains but instead has scattered trees and hills, with a large circular hill in the center that likely serves as the main path connecting both players' starting bases. Due to these terrain features, players will naturally engage in small-scale skirmishes or mobile warfare rather than large-scale coordinated attacks. Despite the simple objective of destroying buildings, the complexity of the jungle terrain adds tactical depth. Novice players may struggle with the vast map and limited vision when formulating strategies, while experienced players will need to focus on ambushes and defensive positioning using the terrain. The map’s difficulty feels above average due to its complexity, and even with Brood War’s standard unit compositions, victory isn’t guaranteed. While it’s a custom map based on the original game, terrain utilization and small-scale tactics are more critical than simply destroying buildings. Before playing, it’s important to understand the overall flow of the map and identify key pathways. Players should also familiarize themselves with how hills and trees block vision and provide defensive advantages. Additionally, mastering resource gathering and troop movement timing on such a large map will be essential. This map is best suited for players familiar with Brood War’s basic strategies who want to refine their terrain usage and small-scale combat skills. While beginners can try it, a solid understanding of map reading and tactics is required. Due to its expansive battlefield and terrain features, balancing may be complex, and if the creator’s intent holds, communication and teamwork between players will become crucial—making it a useful choice for team-based play as well.
정글 랜드 (Jungle Land)
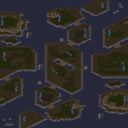
스타크래프트 브루드워의 정글 테마를 배경으로 한 1:1 밀리전 맵인 ‘Jungle Land’는 넓은 맵 곳곳에 vegetation과 지형의 고저차가 특징적인 맵으로, 중앙에 위치한 넓은 평지와 주변의 나무가 빽빽한 지역이 자연스럽게 진영을 구분짓는 구조를 가지고 있다. 초반 자원 수급은 비교적 안전하게 이루어질 수 있지만, 중앙 지역을 차지하기 위한 초반 교전이 발생할 가능성이 높아 전략의 중요성이 크다. 지형상으로는 좁은 길목을 따라 공격로가 형성되어 있어, 탱크나 골리앗 같은 대형 유닛을 동원한 진영 방어가 유리한 편이며, 저글링이나 질럿 같은 근접 유닛을 적극 활용하여 맵 장악을 노려야 한다. 또한, 맵의 여기저기에 배치된 vegetation은 시야 차단과 동시에 유닛의 진격을 방해하는 요소로 작용할 수 있어, 정찰과 시야 확보가 승패를 가를 수 있는 중요한 포인트가 된다. 이 맵은 기본적인 밀리 전략을 응용하면서도 자연 지형의 복잡성을 활용한 전투가 가능하다는 점에서 플레이어들에게 색다른 경험을 제공한다. 초보 플레이어라면 중앙 교전에서의 손실을 최소화하는 데 중점을 두고, 실력이 있는 플레이어라면 vegetation을 활용한 기습 공격이나 주변 자원 지역을 미리 확보하는 전략을 구사할 필요가 있다. 맵의 난이도는 일반적인 1:1 밀리전과 비슷하여 초보부터 숙련자까지 폭넓게 즐길 수 있지만, 지형의 복잡성 때문에 실수 한 번이 승패로 직결될 수 있으니 신중한 플레이가 요구된다. This 1:1 melee map set in a jungle-themed environment, titled 'Jungle Land,' features a vast play area with vegetation and varied terrain elevations that naturally divide the two starting bases. The central flat region and surrounding dense foliage create strategic choke points, making early resource control and map dominance crucial. The terrain favors ranged units like tanks and goliaths for defense, while melee units such as zerglings or zealots can be effective for aggressive map control. Scattered vegetation provides cover and obscures vision, adding an extra layer of strategy to scouting and engagements. Players must balance resource collection with early map control, as controlling the central area can dictate the flow of the game. Suitable for both beginners and experienced players, the map rewards careful positioning and map awareness, though its complexity means mistakes can quickly lead to defeat. Optimal play involves leveraging the terrain for ambushes or securing side resources early to gain an advantage.
마이크로 홀 (MICRO HOLE)
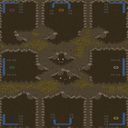
스타크래프트 브루드워의 아레나 맵 '마이크로 홀(MICRO HOLE)'은 지형과 전략이 조화를 이룬 흥미로운 대결을 제공하는 유즈맵입니다. 맵 제목에서부터 느껴지듯, 지상과 지하를 오가며 펼쳐지는 전투가 핵심으로, 좁은 통로와 복잡한 구조가 플레이어의 기민한 컨트롤과 상황 판단을 요구합니다. 내부 설명에 언급된 'Hole in ground'는 지하로 통하는 좁은 입구를 의미하며, 'insane komps'는 높은 난이도의 컴퓨터 상대를 뜻하는 것으로 추정됩니다. 맵 중앙에는 넓은 개방형 지역이 있으며, 이곳에서 대규모 전투가 벌어질 가능성이 큽니다. 반면, 맵 가장자리로 갈수록 좁은 통로와 구불구불한 길이 등장해, 소규모 전투와 기습 공격이 빈번해질 수 있습니다. 이러한 지형적 특징은 메카닉 유닛의 효율성을 감소시키고, 보병 유닛의 중요성을 높이는 경향이 있습니다. 플레이어는 지형을 적극 활용해 적을 유인하거나, 좁은 길목을 방어하며 유리한 위치를 선점해야 합니다. 맵의 난이도가 'insane' 수준으로 명시된 만큼, 초보자는 적응하기 어려운 구조일 수 있습니다. 이 맵은 특히 아레나 장르의 특성을 살려, 1:1 또는 소규모 팀전으로 즐기는 것을 추천합니다. 지형의 복잡성과 예상치 못한 전투 상황에 대비할 수 있는 플레이어가 승리할 가능성이 높습니다. 게임을 시작하기 전, 맵의 주요 통로와 underground 입구 위치를 숙지하는 것이 중요합니다. 또한, 컴퓨터 상대가 'insane' 난이도로 설정되어 있어, AI의 전략적 움직임을 예측하고 대응할 준비를 갖추는 것이 좋습니다. Micro Hole (MICRO HOLE) is a StarCraft: Brood War arena map that combines terrain and strategy to deliver an engaging battle experience. The name 'Micro Hole' hints at the central mechanic of navigating between ground and underground passages, where tight corridors and complex structures demand quick reflexes and tactical awareness from players. The internal description 'Hole in ground' refers to the narrow entrances leading underground, while 'insane komps' likely indicates a high-difficulty computer opponent. The map features a central open area where large-scale battles may erupt, while the edges are lined with winding paths and narrow passages that encourage skirmishes and ambushes. This terrain setup reduces the effectiveness of mechanical units and emphasizes the importance of infantry, forcing players to adapt their strategies accordingly. Given the 'insane' difficulty level, this map may prove challenging for beginners, making it ideal for experienced players or those seeking a tougher challenge. The arena-style gameplay is best enjoyed in 1v1 or small team matches, where the map's intricate layout and unpredictable combat situations can be fully leveraged. Before diving in, players should familiarize themselves with key pathways and underground entrances to gain a strategic advantage. Additionally, the high difficulty of the AI opponent requires careful preparation to anticipate and counter its movements effectively.
최근 등록된 맵
새로 추가된 파일과 버전을 확인하세요.
티거의 잔혹한 전투 2 (Tigger's Brutal 2)
이 맵은 스타크래프트: 브루드워의 유즈맵으로, 내부 설명에 따르면 '모든 적 건물 파괴'가 승리 조건으로 보인다. 맵 제목이 'Untitled Scenario'로 표시되어 있지만, 파일명은 'tigger-brutal2.scx'이며 내부 제목도 동일하다. 맵의 전체 크기는 8x8km로 매우 넓은 정글 타일셋을 기반으로 제작되었는데, 정글 타일셋의 울퉁불퉁한 지형이 전장 분위기를 조성하며 전면전이 벌어지기 어려운 환경을 만든다. 보인다시피 넓은 평야보다는 곳곳에 나무와 언덕이 배치되어 있으며, 중앙에는 커다란 원형 언덕이 존재해 양측의 본진을 연결하는 주요 통로 역할을 할 것으로 추정된다. 이러한 지형적 특징 때문에 플레이어는 자연스럽게 소규모 교전이나 기동전을 펼치게 되며, 대규모 군단이 한꺼번에 움직이기 어려운 구조다. 맵의 목표가 단순 건물 파괴임에도 불구하고, 정글 지형의 복잡성은 전술적 깊이를 더할 것으로 예상된다. 초보 플레이어는 넓은 맵과 제한된 시야로 인한 전략 수립의 어려움을 느낄 수 있으며, 경험 많은 플레이어는 지형을 활용한 기습이나 방어 라인 구축에 주안점을 두고 플레이해야 할 것이다. 맵의 난이도는 맵 자체의 복잡성 때문에 보통 이상으로 느껴질 수 있으며, 특히 브루드워의 기본 유닛 조합만으로는 승리를 장담하기 어려운 구조다. 따라서 이 맵은 밀리 기반의 유즈맵이지만, 순수한 건물 파괴보다도 지형 활용과 소규모 전술이 중요한 포인트가 될 것으로 보인다. 플레이 전에는 맵의 전체적인 흐름과 주요 길목을 파악하는 것이 중요하며, 언덕과 나무가 제공하는 시야 차단과 방어 효율성을 미리 숙지해야 한다. 또한, 넓은 맵에서 자원 수집과 병력 운용의 타이밍을 맞추는 연습이 필요할 것이다. 추천 대상은 브루드워의 기본 전략을 숙지한 플레이어로, 지형 활용과 소규모 교전 능력을 연마하고자 하는 유저에게 적합하다. 초보자도 도전해볼 수 있지만, 기본적인 맵 리딩과 전술 이해도가 요구된다. 이 맵은 넓은 전장과 지형적 특징으로 인해 밸런스가 다소 복잡할 수 있으며, 맵 제작자의 의도대로라면 플레이어 간의 소통과 협력이 중요해질 것으로 보인다. 따라서 팀플레이에서도 유용하게 활용될 수 있을 것이다. This is a custom map for *StarCraft: Brood War*, where the victory condition appears to be "destroying all enemy buildings" based on the internal description. Although the map is labeled as "Untitled Scenario," the filename is "tigger-brutal2.scx," and the internal title matches the filename. The entire map spans 8x8 kilometers, featuring a vast jungle tile set with rugged terrain that creates an environment where large-scale battles are difficult to execute. As seen, the map is not dominated by open plains but instead has scattered trees and hills, with a large circular hill in the center that likely serves as the main path connecting both players' starting bases. Due to these terrain features, players will naturally engage in small-scale skirmishes or mobile warfare rather than large-scale coordinated attacks. Despite the simple objective of destroying buildings, the complexity of the jungle terrain adds tactical depth. Novice players may struggle with the vast map and limited vision when formulating strategies, while experienced players will need to focus on ambushes and defensive positioning using the terrain. The map’s difficulty feels above average due to its complexity, and even with Brood War’s standard unit compositions, victory isn’t guaranteed. While it’s a custom map based on the original game, terrain utilization and small-scale tactics are more critical than simply destroying buildings. Before playing, it’s important to understand the overall flow of the map and identify key pathways. Players should also familiarize themselves with how hills and trees block vision and provide defensive advantages. Additionally, mastering resource gathering and troop movement timing on such a large map will be essential. This map is best suited for players familiar with Brood War’s basic strategies who want to refine their terrain usage and small-scale combat skills. While beginners can try it, a solid understanding of map reading and tactics is required. Due to its expansive battlefield and terrain features, balancing may be complex, and if the creator’s intent holds, communication and teamwork between players will become crucial—making it a useful choice for team-based play as well.
슈퍼 스매시 브라더스 메리 (Super Smash Brothers Melee)
「슈퍼 스매시 브라더스 메리」는 스타크래프트: 브루드워의 유즈맵으로, 닌텐도의 인기 대전 액션 게임 「슈퍼 스매시 브라더스 메리」를 스타크래프트 플랫폼에 재현한 작품이다. 맵은 3072x3072의 넓은 사막 지형을 배경으로 하며, 각 플레이어는 개성 있는 캐릭터를 조작해 전투를 펼친다. 전투는 맵 내의 다양한 지형과 장애물을 활용한 액션 중심의 전투가 특징으로, 한 명의 플레이어가 탈락할 때까지 지속된다. 맵의 구조는 중앙에 넓은 개방형 공간이 있으며, 주변으로 언덕, 협곡, 바위 지형이 분포해 있어 전투 시 전략적 움직임을 요구한다. 캐릭터 간 밸런스는 물론이고, 맵의 특성상 대각선 공격이나 지형 활용이 중요한 포인트로 보인다. 맵의 Atmosphere는 격렬한 전투를 연상시키는 붉은 노을과 모래 먼지가 visual 효과로 표현되어 있어, 플레이어에게 긴장감과 excitement를 전달한다. 제작자 Nate_dca가 제공한 설명에 따르면, 이 맵은 「슈퍼 스매시 브라더스 메리」의 전투 시스템과 캐릭터성을 스타크래프트 환경에 최대한 반영하기 위해 노력했다고 하며, 특히 「Madness」라는 키워드에서 알 수 있듯이 난전과 빠른 판단력이 요구되는 플레이 스타일을 강조하고 있다. 이 맵은 「슈퍼 스매시 브라더스」 팬들에게는 물론이고, 스타크래프트의 유즈맵을 즐기는 플레이어들에게도 새로운 경험을 제공할 것으로 예상된다. 플레이 전, 맵의 지형과 캐릭터별 스킬, 탈출 경로를 미리 숙지하는 것이 중요할 것이며, 특히 넓은 맵에서 발생하는 대각선 공격과 지형 활용에 대한 이해가 승패를 좌우할 가능성이 높다. 또한, 8명의 플레이어가 동시에 전투를 벌이기 때문에, 원활한 커뮤니케이션과 팀워크가 필수적이다. 이 맵은 「슈퍼 스매시 브라더스」의 팬이라면 반드시 플레이해볼 만한 작품이며, 액션과 전략이 조화된 스타크래프트 유즈맵의 새로운 장르를 개척했다는 점에서 주목할 만하다. Super Smash Bros. Merry is a StarCraft: Brood War custom map that recreates Nintendo’s popular fighting game Super Smash Bros. Merry within the StarCraft platform. The map features a vast 3072x3072 desert terrain where players control unique characters in fast-paced battles that continue until one player is eliminated. The layout includes a wide open central area surrounded by hills, canyons, and rocky formations, encouraging strategic movement and dynamic combat. Balancing the characters and leveraging the terrain—especially diagonal attacks and environmental features—are key to success. The atmosphere is heightened by visual effects like a fiery sunset and swirling sand, creating tension and excitement. According to creator Nate_dca, the map was designed to faithfully adapt Super Smash Bros. Merry’s combat system and character traits to StarCraft, emphasizing chaotic, high-stakes gameplay as suggested by the keyword “Madness.” While it will appeal to fans of the original series, it also offers a fresh experience for StarCraft custom map enthusiasts. Before playing, it’s crucial to study the terrain, character abilities, and escape routes, as understanding diagonal attacks and terrain usage on the large map can determine victory. With eight players battling simultaneously, clear communication and teamwork are essential. This map is a must-play for Super Smash Bros. fans and stands out for pioneering a new genre of action-strategy custom maps in StarCraft.
썬크라인 2웨이 v5.x (Sunken Line 2 Way v5.x)
스타크래프트 브루드워의 유즈맵 ‘썬크라인 2웨이 v5.x(Sunken Line 2 Way v5.x)’는 적의 공격을 저지하는 디펜스 장르의 맵으로, 지형의 특징을 살린 전략적 플레이가 요구된다. 맵은 거대한 수중 지형 위에 섬들이 배치되어 있으며, 플레이어는 중앙 통로를 따라 진행하는 적을 저지하거나 섬을 방어하는 역할을 맡는다. 맵의 이름은 ‘썬크라인(Sunken Line)’으로 수중 지형을 의미하며, ‘2웨이’는 적의 진로가 두 갈래로 나뉘는 구조를 반영하고 있다. 맵의 주요 특징은 맵 중앙에 위치한 좁은 통로로, 이곳을 지나려는 적을 효율적으로 방어해야 한다. 섬들은 각 플레이어에게 할당된 시작 지점으로, here에서 스폰된 유닛을 조합하여 적을 저지하는 전략을 짜야 한다. 맵의 디자인상으로는 섬 간의 간격이 좁아 유닛의 이동 경로가 제한적이며, 이는_DEFENSE_ 장르 특유의 긴장감을 조성한다. 또한, 맵의 대칭 구조는 플레이어 간의 경쟁을 부추기며, 섬의 배치와 자원 분포가 균형 있게 설계되어 있어 초보자와 숙련자 모두 플레이할 수 있도록 배려된 것으로 보인다. 추천하는 플레이 방식은 기본 유닛을 조합하여 적의 통로를 막는 ‘막기’ 전략과, 섬을 점령해 추가 자원을 확보하는 ‘확장’ 전략을 적절히 혼용하는 것이다. 맵의 난이도는 맵의 구조상 방어 포인트가 명확하기 때문에 초보자도 쉽게 접근할 수 있으나, 적의 공격 패턴을 예측하고 유닛을 효율적으로 배치하는 전략적 깊이가 있어 숙련자들에게도 충분히 매력적이다. 플레이 전에는 맵의 통로와 섬의 배치, 그리고 시작 지점의 유닛 생산 가능 여부를 반드시 확인할 필요가 있다. 특히, 섬에 배치된 건물과 유닛 생산 건물이 맵의 승리 조건과 밀접한 관련이 있을 수 있으므로, 이를 미리 숙지하고 전략을 짜는 것이 중요하다. 또한, 맵의 대칭 구조상 팀 플레이가 유리할 수 있으므로, 팀원과의 협력이 원활한 경우 더욱 재미있게 즐길 수 있을 것이다. "Sunken Line 2 Way v5.x" is a defensive-style custom map in *StarCraft: Brood War* that emphasizes strategic play based on the terrain's unique features. The map features islands scattered across a vast submerged landscape, where players must either block enemies advancing along the central passage or defend their assigned islands. The name "Sunken Line" reflects the underwater terrain, while "2 Way" highlights the dual-path structure that splits enemy routes into two directions. The map’s defining trait is the narrow central corridor, where players must efficiently block enemies attempting to pass through. Each island serves as a starting point, where players combine spawned units to devise defensive strategies. Due to the tight spacing between islands, unit movement paths are restricted, amplifying the tense, defensive nature of the genre. The symmetrical design fosters competition between players, and the balanced distribution of islands and resources ensures accessibility for both beginners and experienced players. Recommended strategies include a "blocking" approach—using basic units to seal off enemy pathways—and an "expansion" tactic, securing islands to gain additional resources. While the map’s clear defensive points make it easy for beginners to grasp, its depth lies in predicting enemy attack patterns and optimizing unit placement, offering a satisfying challenge for veterans. Before playing, it’s crucial to study the corridors, island layouts, and unit production capabilities at starting points, as buildings and production facilities on islands may directly influence victory conditions. The symmetrical structure also lends itself well to team play, making coordination with teammates especially rewarding.
마이크로 홀 (MICRO HOLE)
스타크래프트 브루드워의 아레나 맵 '마이크로 홀(MICRO HOLE)'은 지형과 전략이 조화를 이룬 흥미로운 대결을 제공하는 유즈맵입니다. 맵 제목에서부터 느껴지듯, 지상과 지하를 오가며 펼쳐지는 전투가 핵심으로, 좁은 통로와 복잡한 구조가 플레이어의 기민한 컨트롤과 상황 판단을 요구합니다. 내부 설명에 언급된 'Hole in ground'는 지하로 통하는 좁은 입구를 의미하며, 'insane komps'는 높은 난이도의 컴퓨터 상대를 뜻하는 것으로 추정됩니다. 맵 중앙에는 넓은 개방형 지역이 있으며, 이곳에서 대규모 전투가 벌어질 가능성이 큽니다. 반면, 맵 가장자리로 갈수록 좁은 통로와 구불구불한 길이 등장해, 소규모 전투와 기습 공격이 빈번해질 수 있습니다. 이러한 지형적 특징은 메카닉 유닛의 효율성을 감소시키고, 보병 유닛의 중요성을 높이는 경향이 있습니다. 플레이어는 지형을 적극 활용해 적을 유인하거나, 좁은 길목을 방어하며 유리한 위치를 선점해야 합니다. 맵의 난이도가 'insane' 수준으로 명시된 만큼, 초보자는 적응하기 어려운 구조일 수 있습니다. 이 맵은 특히 아레나 장르의 특성을 살려, 1:1 또는 소규모 팀전으로 즐기는 것을 추천합니다. 지형의 복잡성과 예상치 못한 전투 상황에 대비할 수 있는 플레이어가 승리할 가능성이 높습니다. 게임을 시작하기 전, 맵의 주요 통로와 underground 입구 위치를 숙지하는 것이 중요합니다. 또한, 컴퓨터 상대가 'insane' 난이도로 설정되어 있어, AI의 전략적 움직임을 예측하고 대응할 준비를 갖추는 것이 좋습니다. Micro Hole (MICRO HOLE) is a StarCraft: Brood War arena map that combines terrain and strategy to deliver an engaging battle experience. The name 'Micro Hole' hints at the central mechanic of navigating between ground and underground passages, where tight corridors and complex structures demand quick reflexes and tactical awareness from players. The internal description 'Hole in ground' refers to the narrow entrances leading underground, while 'insane komps' likely indicates a high-difficulty computer opponent. The map features a central open area where large-scale battles may erupt, while the edges are lined with winding paths and narrow passages that encourage skirmishes and ambushes. This terrain setup reduces the effectiveness of mechanical units and emphasizes the importance of infantry, forcing players to adapt their strategies accordingly. Given the 'insane' difficulty level, this map may prove challenging for beginners, making it ideal for experienced players or those seeking a tougher challenge. The arena-style gameplay is best enjoyed in 1v1 or small team matches, where the map's intricate layout and unpredictable combat situations can be fully leveraged. Before diving in, players should familiarize themselves with key pathways and underground entrances to gain a strategic advantage. Additionally, the high difficulty of the AI opponent requires careful preparation to anticipate and counter its movements effectively.
헬름스 딥 랜덤 히어로즈 1.7 (Helms Deep Random Heroes 1.7)
스타크래프트 브루드워의 유즈맵 <헬름스 딥 랜덤 히어로즈 1.7(Helms Deep Random Heroes 1.7)>은 8명의 플레이어가 협동하거나 경쟁하는 대규모 디펜스 장르의 맵이다. 맵은 가운데를 가로지르는 거대한 산맥과 계곡으로 나뉘어 있으며, 각 플레이어는 고유한 시작 지역과 방어 시설을 확보하게 된다. 디펜스 요소 외에도 랜덤 히어로 시스템이 특징으로, 전투에서 승리하거나 특정 조건을 달성하면 무작위로 영웅 유닛이 보상으로 주어지며, 이를 활용해 전략을 펼칠 수 있다. 맵의 지형은 험난한 산맥과 협곡으로 둘러싸여 있어 초반부터 방어선을 구축하고 병력 보충이 필수적이다. 산맥의 협곡을 중심으로 전투가 벌어지며, 중앙 지역으로 진출해 적을 제압하거나 방어에 집중하는 플레이가 가능하다. 맵의 규모가 크고 지형이 복잡해 전략적 깊이가 뛰어나며, 특히 팀플레이 시의 협동과 영웅의 활용이 승패를 가를 것으로 예상된다. 초보자보다는 중간 이상의 실력을 가진 플레이어들이 Enjoy할 수 있는 구조로, 다채로운 전략과 다양한 영웅의 조합을 활용해 승리를 노려볼 만하다. 플레이 전에는 맵의 지형과 영웅 시스템을 충분히 숙지하는 것이 중요하며, 중앙 지역에서의 전투와 방어선의 유지에 중점을 두는 것이 좋다. 맵의 디자인과 규모를 고려할 때, 플레이 시간은 약 30분에서 40분 정도로 예상된다. рекомен드 플레이어 수는 8명으로, 각 플레이어의 역할 분담과 영웅의 선택이 게임의 재미와 난이도를 크게 좌우할 것이다. StarCraft: Brood War's custom map *Helms Deep Random Heroes 1.7* is an 8-player cooperative or competitive large-scale defense genre map. The map is divided by a massive mountain range and valleys running through the center, with each player securing a unique starting area and defensive structures. In addition to defense, the map features a random hero system where victorious battles or meeting certain conditions grant a randomly awarded hero unit, allowing for strategic gameplay. The terrain is surrounded by rugged mountains and canyons, requiring players to establish defensive lines and reinforce forces from the start. Battles primarily occur along the mountain canyons, with players able to advance toward the central area to suppress enemies or focus on defense. The map's large scale and complex terrain offer deep strategic gameplay, with team coordination and hero utilization likely determining victory or defeat. The structure is better suited for intermediate to advanced players rather than beginners, offering a variety of strategies and hero combinations to pursue victory. Before playing, it's important to thoroughly understand the map's terrain and hero system, with a focus on maintaining defensive lines and central area battles. Considering the map's design and scale, the expected playtime is around 30 to 40 minutes. The recommended number of players is eight, with each player's role distribution and hero selection greatly influencing the game's enjoyment and difficulty.
Droht - 킬러 협곡 (Droht - Killer Gorge)
《Droht - Killer Gorge》는 스타크래프트: 브루드워의 대표적인 유즈맵 시리즈인 ‘Droht’의 최신작으로, 거대한 협곡 지형을 배경으로 펼쳐지는 밀리 맵이다. 맵 이름은 독일어로 ‘죽음’이란 뜻을 지닌 ‘Tod’에서 유래한 ‘Droht’ 시리즈의 전통을 잇고 있으며, ‘Killer Gorge’는 ‘살해자의 협곡’이라는 다소 과격한 제목이지만 사실상 맵의 지형을 묘사한 것에 가깝다. 맵의 전체 크기는 6144x6144로 매우 넓고, 협곡을 따라 중앙에 좁은 다리가 놓여 있어 병력의 교전이 자연스럽게 발생하는 구조를 가지고 있다. 협곡 양쪽에는 넓은 평지가 펼쳐져 있으며, 다리 주변은 지형이 복잡하여 시야 확보와 병력 운용이 중요한 요소가 된다. 특히 다리 위와 협곡 양쪽 언덕은 전략적 요충지로, здесь에서 전투가 벌어지면 맵의 승패가 갈릴 수 있다. 협곡 양쪽 끝에는 미네랄과 가스 멀티가 배치되어 있어 자원 확보 경쟁도 치열해진다. 플레이어는 6인으로 구성되며, 각각의 플레이어는 시작 위치에서 협곡을 건너 상대방의 본진을 향해 진격하거나, 협곡을 방어하며 자원을 확보하는 두 가지 선택을 할 수 있다. 맵의 특징은 지형이 복잡하여 시야가 제한되는 부분이 많다는 점으로, 이는 미니맵을 적극 활용하고, 정찰 유닛을 통한 정보 수집이 필수적임을 의미한다. 또한, 협곡 중앙의 다리나 언덕 지형은 진형 싸움에서 큰 영향을 미치므로, 맵에 익숙해지려면 여러 번 플레이를 통해 길목을 장악하는 법을 익혀야 한다. 맵의 분위기는 사막 지형답게 황량하고 웅장한 느낌이 강하며, 협곡의 협소한 공간과 넓은 평지가 어우러져 전략적 깊이를 더한다. 이 맵은 밀리 경기에 최적화되어 있으며, 특히 ‘Droht’ 시리즈 특유의 긴장감과 전략적 깊이를 즐기고 싶은 플레이어들에게 추천할 만한 작품이다. 다만, 넓은 맵 크기 때문에 초보자의 경우 자원 관리와 멀티 확보, 그리고 지형 이해에 시간이 걸릴 수 있으니, 먼저 싱글 플레이 모드나 연습 모드를 통해 맵에 익숙해지는 것이 좋다. 또한, 협곡을 건너는 도중 적의 기습을 받을 위험이 있으니, 항상 주변을 살피며 플레이하는 것이 중요하다. 《Droht - Killer Gorge》 is the latest installment in the "Droht" series of user-created maps for *StarCraft: Brood War*, set against the backdrop of a massive canyon terrain in a melee map. Following the tradition of the "Droht" series, whose name derives from the German word *"Tod"* meaning "death," *Killer Gorge* lives up to the name with its dramatic title, though it primarily reflects the map's dramatic canyon geography. The map spans a vast 6144x6144 size, featuring a narrow bridge running through the center of the gorge, which naturally funnels forces into combat. Flanking the gorge are wide open plains, while the area around the bridge is cluttered with complex terrain, making vision control and troop positioning crucial. The bridge itself and the hills on either side of the gorge serve as strategic chokepoints where battles can decide the outcome of the match. At both ends of the gorge, mineral and gas expansions are positioned, intensifying resource competition. The map is designed for six players, each facing a choice between charging across the gorge toward the opponent's base or defending the gorge while securing resources. A defining feature of the map is its complex terrain, which restricts visibility in many areas, making frequent use of the minimap and scouting units essential. The central bridge and elevated terrain also play a major role in formation battles, so mastering control of these key points requires repeated play. The atmosphere of the map, with its desert terrain, conveys a sense of desolation and grandeur, blending narrow canyon passages with vast open plains to add strategic depth. Optimized for melee matches, this map is highly recommended for players who enjoy the *Droht* series' signature tension and strategic complexity. However, due to its large size, beginners may struggle with resource management, expansion securing, and terrain understanding, so it's advisable to familiarize oneself with the map through single-player or practice modes first. Additionally, crossing the gorge carries the risk of ambushes, so constant vigilance is key to success.
정글 랜드 (Jungle Land)
스타크래프트 브루드워의 정글 테마를 배경으로 한 1:1 밀리전 맵인 ‘Jungle Land’는 넓은 맵 곳곳에 vegetation과 지형의 고저차가 특징적인 맵으로, 중앙에 위치한 넓은 평지와 주변의 나무가 빽빽한 지역이 자연스럽게 진영을 구분짓는 구조를 가지고 있다. 초반 자원 수급은 비교적 안전하게 이루어질 수 있지만, 중앙 지역을 차지하기 위한 초반 교전이 발생할 가능성이 높아 전략의 중요성이 크다. 지형상으로는 좁은 길목을 따라 공격로가 형성되어 있어, 탱크나 골리앗 같은 대형 유닛을 동원한 진영 방어가 유리한 편이며, 저글링이나 질럿 같은 근접 유닛을 적극 활용하여 맵 장악을 노려야 한다. 또한, 맵의 여기저기에 배치된 vegetation은 시야 차단과 동시에 유닛의 진격을 방해하는 요소로 작용할 수 있어, 정찰과 시야 확보가 승패를 가를 수 있는 중요한 포인트가 된다. 이 맵은 기본적인 밀리 전략을 응용하면서도 자연 지형의 복잡성을 활용한 전투가 가능하다는 점에서 플레이어들에게 색다른 경험을 제공한다. 초보 플레이어라면 중앙 교전에서의 손실을 최소화하는 데 중점을 두고, 실력이 있는 플레이어라면 vegetation을 활용한 기습 공격이나 주변 자원 지역을 미리 확보하는 전략을 구사할 필요가 있다. 맵의 난이도는 일반적인 1:1 밀리전과 비슷하여 초보부터 숙련자까지 폭넓게 즐길 수 있지만, 지형의 복잡성 때문에 실수 한 번이 승패로 직결될 수 있으니 신중한 플레이가 요구된다. This 1:1 melee map set in a jungle-themed environment, titled 'Jungle Land,' features a vast play area with vegetation and varied terrain elevations that naturally divide the two starting bases. The central flat region and surrounding dense foliage create strategic choke points, making early resource control and map dominance crucial. The terrain favors ranged units like tanks and goliaths for defense, while melee units such as zerglings or zealots can be effective for aggressive map control. Scattered vegetation provides cover and obscures vision, adding an extra layer of strategy to scouting and engagements. Players must balance resource collection with early map control, as controlling the central area can dictate the flow of the game. Suitable for both beginners and experienced players, the map rewards careful positioning and map awareness, though its complexity means mistakes can quickly lead to defeat. Optimal play involves leveraging the terrain for ambushes or securing side resources early to gain an advantage.
맵 선택 가이드
태그는 맵의 핵심 특징을 빠르게 설명하지만 제작 버전마다 규칙이 다를 수 있습니다. 상세 설명에서 권장 인원, 난이도, 플레이 시간과 버전을 함께 확인한 뒤 다운로드하세요.