
지뢰 스타크래프트 맵 모음
'지뢰' 태그가 등록된 맵을 모았습니다. 장르 하나로 찾기 어려운 플레이 방식, 난이도와 특징을 중심으로 인기 맵과 최신 맵을 비교해 보세요.
- 등록 맵
- 5개
- 누적 다운로드
- 0
- 누적 조회
- 161
인기 맵
다운로드와 조회 반응이 높은 맵입니다.
Mine Dodger V.4
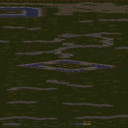
마인 도저 V.4는 6명의 플레이어가 세로로 긴 사막 지형(2048x8192)에서 지뢰밭을 뚫고 최상단 목표 지점까지 도달하는 생존 미니게임이다. 맵 제목과 내부 설명(Get to the top of the map but make sure you survive)이 그대로 핵심 규칙이 된다. 화면 하단에서 시작해 위로 이동하며 무작위로 떨어지거나 발사되는 지뢰, 혹은 지형에 매설된 폭발물을 피하는 '피하기' 장르 특유의 긴장감이 주를 이룬다. 타일셋은 사막으로, 넓은 맵 높이만큼 여러 구간으로 나뉘어 난이도가 단계적으로 상승하는 구조로 추정된다. 6인 개인전 또는 협동 생존 방식으로 진행되며, 별도의 유닛 생산이나 자원 관리 없이 주어진 유닛(주로 마린이나 시빌리언 등)의 컨트롤만으로 생존을 겨룬다. 지뢰의 패턴을 외우고 안전 지대를 찾아 순발력 있게 움직이는 것이 승부의 열쇠다. 플레이 타임은 한 판당 10~15분 내외로 짧고, 부담 없이 즐기기 좋은 파티용 맵으로 적합하다. 고전 유즈맵 특유의 단순한 재미와 극한의 컨트롤을 원하는 유저에게 추천한다. 맵 파일명은 (6)Mine Dodger.scx이며 버전 표기는 V.4다. Mine Dodger V.4 is a survival mini-game where six players navigate a vertically long desert terrain (2048x8192) to reach the top goal while dodging a minefield. The map title and internal description ("Get to the top of the map but make sure you survive") serve as the core rules. Starting from the bottom and moving upward, the tension characteristic of the 'avoidance' genre dominates as players evade randomly falling or fired mines and explosives buried in the terrain. The tileset is Desert, and given the map's height, it is presumed to be structured in multiple sections with escalating difficulty. It plays as a 6-player free-for-all or cooperative survival, requiring no unit production or resource management—only control of given units (often Marines or Civilians). Memorizing mine patterns and finding safe zones with quick reflexes is key to victory. A single round takes roughly 10-15 minutes, making it a great party map for casual fun. Recommended for users seeking classic UMS simplicity and extreme control challenges. The map filename is (6)Mine Dodger.scx with version V.4.
벌처 컨트롤 쇼다운 2 (VultureControl.Showdown2)
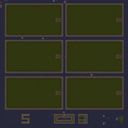
스타크래프트 브루드워의 유즈맵 ‘벌처 컨트롤 쇼다운 2(VultureControl.Showdown2)’는 벌처 유닛을 조종하는 미니게임 스타일로, 플레이어들이 기계화 병력을 효율적으로 컨트롤하며 목표를 달성하는 방식으로 구성된 맵입니다. 맵의 구조는 넓은 평지 위에 중앙을 가로지르는 길을 중심으로 배치되어 있으며, 벌처의 기동성과 공격력을 최대한 활용할 수 있는 디자인으로 보입니다. 벌처는 스파이더 마인 설치와 빠른 기동력으로 적을 제압하는 유닛인 만큼, 맵 곳곳에는 트리거로 제작된 적 기지나 방해 요소가 배치되어 있을 것으로 추정됩니다. 메인 미션은 벌처를 조종해 특정 목표물을 파괴하거나, 적 병력을 격파하는 방식으로 진행되는 ‘컴까기’와 유사한 구조를 띄고 있지만, 미니게임 특성상 제한된 시간 내에 높은 점수를 획득하는 방식일 수도 있습니다. 플레이 방식은 6명의 플레이어가 각자 벌처를 조종하거나, 팀을 이뤄 협력하는 방식으로 보입니다. 벌처의 특성상 빠른 이동과 지뢰 설치가 핵심 전략이 될 텐데, 맵의 넓은 공간을 활용한 기동전과 트릭 플레이가 가능하도록 디자인되었을 가능성이 큽니다. 내부 맵 설명에서 ‘Creator: Open.ClosedServer: AsiaChnnel: 헉’이라는 문구가 확인되는데, 이는 개발자나 배포 채널에 대한 힌트로 보입니다. 또한, 맵 제목에 ‘Showdown’이라는 단어가 포함된 만큼, 결전이나 대결을 콘셉트로 삼았을 가능성이 높습니다. 이 맵은 벌처의 컨트롤 실력을 길러주고자 하는 유저나, 미니게임 형식의 빠른 플레이를 즐기는 유저들에게 추천할 만합니다. 벌처의 기동성과 지뢰 설치 능력을 최대한 활용할 수 있는 맵이기 때문에, 벌처 운용에 익숙한 플레이어라면 재미있게 플레이할 수 있을 것입니다. 다만, 미니게임 특성상 한정된 목표와 짧은 플레이 시간으로 구성되어 있을 가능성이 높으므로, 플레이 전 맵의 구체적인 승리 조건이나 진행 방식을 미리 확인하는 것이 좋습니다. 벌처를 단독으로 조종하는 맵이지만, 팀 플레이가 가능하다면 협력형 미션도 있을 수 있으니 팀원과의 사전 전략 수립이 중요할 수 있습니다. 이 맵은 넓은 평지에서 벌처의 기동력을 십분 활용할 수 있도록 설계되어 있어, 넓은 맵에서 벌처를 활용한 전투를 경험해 보고 싶은 유저들에게 적합합니다. 또한, 벌처의 컨트롤 실력을 테스트하는 데에도 효과적일 것으로 보입니다. 벌처의 지뢰 설치와 빠른 이동을 활용한 전략을 연습하고자 한다면 이 맵을 시도해 보는 것을 추천합니다. *Starcraft: Brood War*'s custom map *Vulture Control Showdown 2* is a mini-game-style map where players control Vulture units, tasked with efficiently managing mechanized forces to achieve objectives. The map is designed with a wide open plain bisected by a central path, seemingly optimized to maximize the Vulture’s mobility and firepower. Given that Vultures excel at deploying spider mines and quickly outmaneuvering enemies, the map likely features trigger-created enemy bases or obstacles scattered throughout. The core gameplay resembles a "campaign-style" mission where players destroy specific targets or eliminate enemy forces, though as a mini-game, it may also involve scoring high points within a time limit. The mode appears to support six players, either controlling Vultures individually or teaming up for cooperative play. With Vultures, speed and mine deployment are key strategies, so the map likely encourages mobile warfare and trick plays across its expansive terrain. A note in the internal map description—*"Creator: Open.ClosedServer: AsiaChannel: 헉"*—hints at the developer or distribution channel. Additionally, the word *"Showdown"* in the title suggests a competitive or decisive battle concept. This map is ideal for players looking to sharpen their Vulture control skills or those who enjoy quick-paced mini-games. Its design maximizes the Vulture’s mobility and mine-laying potential, making it especially fun for experienced players. However, as a mini-game, it may feature limited objectives and short playtimes, so checking the exact victory conditions and mechanics beforehand is wise. While the map centers on solo Vulture control, team-based missions could exist if multiplayer is supported, making pre-game strategy discussions with teammates valuable. Perfect for players wanting to experience Vulture-centric battles on a large scale, the map also serves as an effective test of Vulture micro-management. If you're looking to practice mine deployment and rapid movement tactics, trying out this map is highly recommended.
루커 D 18 웨이 FINAL HARD (Lurker D 18 Way FINAL HARD)
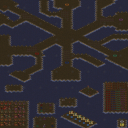
스타크래프트 브루드워의 유즈맵 중 하나로, ‘Lurker D 18 Way FINAL HARD’는 다중 지뢰와 프로브를 활용한Resource Management(자원 관리)형 디펜스 맵으로 주목받고 있다. 맵의 중앙에는 거대한 둥근 성역이 자리하고 있으며, 그 주변을 따라 18개의 지뢰가 배치되어 있는데, 이 지뢰들은 일정 시간마다 자동으로 보급되는 프로브를 통해 추가 자원을 확보할 수 있는 구조로 설계되어 있다. 플레이어는 이 자원을 활용해 업그레이드와 방어 시설을 강화해야 하는데, 특히 30초 단위의 라운드가 지나면서 자원 확보 속도가 빨라지며, 업그레이드 한도가 255까지 허용되어 långvarig(장기적인) 전략 구사가 가능하다. 공격을 받기 전까지는 비교적 안정적인 자원 수급이 가능하지만, 방어선을 구축하지 못하면 순식간에 자원이 고갈되어 게임이 어렵게 전개될 수 있다. 맵의 난이도는 ‘HARD’로 명시되어 있지만, 자원 관리와 타이밍 감각이 뛰어난 플레이어라면 충분히 극복할 수 있는 수준으로 보인다. 또한, 맵의 규모는 4096x4096의 넓은 공간을 자랑하며, 황무지 타일셋을 기반으로 한 황량한 분위기가 전체적인 플레이感(감)을 더해준다. 이 맵은 특히Resource Management(자원 관리)와Defense(방어) 요소가 결합된 하이브리드 스타일의 유즈맵으로, 초보자와 숙련자 모두에게 흥미로운 도전을 제공할 것으로 예상된다. 플레이를 시작하기 전에는 자원 확보 루틴과 방어 시설의 배치 타이밍을 충분히 숙지하는 것이 중요하다. This StarCraft: Brood War custom map, ‘Lurker D 18 Way FINAL HARD’, stands out as a Resource Management defense title where players must strategically handle multiple mines and Probes. The map features a central circular zone surrounded by 18 mines, which can be upgraded and supplied with resources through Probes that appear at regular intervals. Players earn resources that can be invested in upgrades, with the cap set at 255, allowing for long-term strategic planning as rounds progress every 30 seconds. While the map starts with steady income, neglecting defense lines can quickly deplete resources and escalate difficulty. Although labeled ‘HARD’, the challenge is balanced for players with strong resource management and timing skills. The 4096x4096 map size, set in a barren wasteland tile, adds to the immersive experience. This hybrid custom map blends Resource Management and Defense mechanics, offering engaging gameplay for both beginners and veterans. Prior to playing, familiarizing oneself with resource income patterns and optimal defense setups is crucial for success.
IQ Test
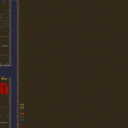
스타크래프트 브루드워의 유즈맵 <IQ Test>는 플레이어가 맵 상의 장애물을 빠르게 통과하며 최단 시간을 기록하는 퍼즐형 맵입니다. 내부 설명에서도 알 수 있듯이 '코스를 가능한 한 빠르게 통과하라'는 목표가 명확하며, 좁은 길목과 함정, 지뢰, 함정 건물 등이 복잡하게 배치된 구조가 특징입니다. 맵의 전체적인 분위기는 어두운 황무지 타일셋을 기반으로 하여 침울하고 긴장감이 느껴지지만, 밝은 색상의 시작 지점과 엔딩 지점이 대비되어 진행 과정을 시각적으로 구분할 수 있습니다. 플레이어는 시작 지점에서 출발하여 지정된 루트를 따라 이동해야 하며, 도중에 등장하는 장애물이나 함정을 피하거나 제거하는 방식으로 시간을 단축해야 합니다. 맵의 난이도는 장애물의 밀도와 복잡도에 따라 달라질 수 있으며, 특히 좁은 통로나 연속된 함정 구간에서 실수가 발생하기 쉽습니다. 제한된 공간 안에서 빠른 판단과 정확한 조작이 요구되는 만큼, 전략적인 움직임과 타이밍이 승패를 좌우합니다. 초보 플레이어는 맵의 구조를 숙지하지 못해 여러 번 실패할 가능성이 높으므로, 반복 플레이를 통해 루트를 암기하는 것이 중요합니다. 또한, 맵의 특성상 단일 플레이어나 소규모 팀 플레이에 적합하며, 6인까지 참여할 수 있는 구조로 설계되었습니다. 맵의 완성도는 간결하면서도 도전적인 퍼즐 요소와 시각적 디자인으로 구성되어 있으며, 스타크래프트 유즈맵의 특색을 잘 살린 작품 중 하나로 평가됩니다. 특히, 짧은 플레이 타임과 높은 재플레이 가치를 제공하는 점에서 유즈맵爱好者들에게 인기 있을 만한 요소들이 포함되어 있습니다. 플레이 전에는 맵의 전체적인 구조를 미리 파악하고, 가능한 한 빠른 루트를 찾는 연습을 추천합니다. 또한, 함정이나 장애물의 패턴을 분석하여 효율적인 통과 방법을 찾아내는 것이 핵심입니다. 맵의 난이도는 초반에는 쉬울 수 있으나, 후반부로 갈수록 복잡해지는 구조로 인해 숙련된 플레이어에게 더 적합하다는 점도 고려해야 합니다. StarCraft: Brood War's custom map *IQ Test* is a puzzle-style map where players navigate through obstacles on the map to record the fastest possible time. As indicated in the in-game description, the clear objective is to "pass through the course as quickly as possible," and the map features a complex layout with narrow passages, traps, landmines, and hazardous buildings. The overall atmosphere is based on a dark, desolate tileset, giving it a somber and tense feel, though the bright-colored start and end points contrast sharply, visually separating the progression stages. Players must begin at the starting point and follow the designated route, shortening their time by either avoiding or eliminating obstacles and traps encountered along the way. The difficulty varies depending on the density and complexity of the obstacles, with mistakes being especially easy to make in tight corridors or sequences of traps. Since quick decision-making and precise control are required within limited space, strategic movement and timing determine victory or defeat. Novice players may struggle due to unfamiliarity with the map’s layout and fail repeatedly, so memorizing the route through repeated play is essential. Given the map’s nature, it is best suited for solo play or small team formats, though it is designed to accommodate up to six players. The map’s polished design combines concise yet challenging puzzle elements with strong visual aesthetics, earning recognition as a well-crafted custom map that captures the essence of StarCraft’s custom map scene. Its short playtime and high replay value make it particularly appealing to custom map enthusiasts. Before playing, it’s recommended to familiarize yourself with the overall structure and practice finding the fastest route possible. Analyzing trap and obstacle patterns to discover efficient passage methods is also key. While the early sections may seem easier, the increasing complexity toward the later stages makes this map more suitable for experienced players.
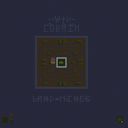
지뢰밭 v3.0 (Land Mines v3.0)
스타크래프트 브루드워의 대표적인 유즈맵 장르 중 하나인 디펜스 장르의 맵으로, 'Land Mines v3.0'은 지뢰를 활용한 전략적인 방어 플레이를 강조하는 맵이다. 8명의 플레이어가 참여하는 이 맵은 맵 중앙에 배치된 광물 지대를 중심으로 적의 공격을 방어하면서 자원을 확보하는 방식으로 진행된다. 플레이어는 맵의 외부에서 시작하며, 중앙으로 이동하는 길목에 지뢰를 설치할 수 있는 구조로 구성되어 있어, 적의 유닛이 지나가도록 유도한 뒤 지뢰로 제거하는 플레이가 핵심이다. 맵의 지형은 사막 타일셋을 기반으로 하며, 넓은 개활지와 일부 협소한 통로가 혼합되어 있어 전략적 위치 선정이 중요하다. 특히 중앙 광물 지대 주변의 좁은 길목은 방어 포인트로 활용하기에 최적이며, 플레이어는 이곳을 활용해 적의 공격을 효과적으로 차단해야 한다. 맵의 분위기는 전쟁터를 연상시키며, 긴장감 있는 플레이가 요구된다. 초보 플레이어는 지뢰의 설치 위치와 타이밍을 익히는 데 다소 어려움을 느낄 수 있으나, 익숙해지면 방어 전략을 세우는 재미가 considerable하다. 숙련된 플레이어는 적의 움직임을 예측해 지뢰를 최적의 위치에 배치하는 테크닉을 활용할 수 있으며, 팀 플레이 시에는 역할 분담을 통한 효율적인 방어가 가능하다. 맵의 볼륨이 크고 전략적 깊이가 있어, 디펜스 매니아들에게 추천할 만한 작품이다. 다만, 지뢰의 설치와 제거에 대한 명확한 규칙이 제공되지 않으므로, 플레이 전 미리 게임 내 메뉴얼을 숙지하는 것이 중요하다. 또한, 맵의 밸런스가 8인 기준인지 여부는 확인되지 않지만, 넓은 맵 크기와 지형 특성상 적절한 균형을 유지할 것으로 추정된다. 전체적으로 전략적 사고와 순간 판단력이 요구되는 맵으로, 반복 플레이를 통해 실력을 향상시킬 수 있는 장점이 있다. StarCraft: Brood War's classic defense genre map, *Land Mines v3.0*, emphasizes strategic defensive play centered around mines. With eight players participating, the game unfolds by defending against enemy attacks while securing resources around the mineral field located in the map's center. Players start outside the map and can place mines along the paths leading to the center, luring enemy units to trigger them for elimination. The terrain features a desert tile set, blending open areas with narrow passages, making strategic positioning crucial. The tight choke points around the central mineral field are ideal defensive spots, where players must effectively block enemy advances. The map evokes a battlefield atmosphere, demanding tense and high-stakes gameplay. Beginner players may struggle initially with mine placement and timing, but once accustomed, the map offers considerable enjoyment in crafting defensive strategies. Skilled players can predict enemy movements and optimize mine placements, while team play allows for efficient role distribution. With its large scale and deep strategy, this map is highly recommended for defense enthusiasts. However, since clear rules for mine placement and removal aren't provided, players should review the in-game manual before starting. Although balance for eight players hasn't been officially confirmed, the map's size and terrain suggest a well-maintained equilibrium. Overall, this map demands strategic thinking and quick decision-making, offering players the advantage of improving through repeated plays.
최근 등록된 맵
새로 추가된 파일과 버전을 확인하세요.
벌처 컨트롤 쇼다운 2 (VultureControl.Showdown2)
스타크래프트 브루드워의 유즈맵 ‘벌처 컨트롤 쇼다운 2(VultureControl.Showdown2)’는 벌처 유닛을 조종하는 미니게임 스타일로, 플레이어들이 기계화 병력을 효율적으로 컨트롤하며 목표를 달성하는 방식으로 구성된 맵입니다. 맵의 구조는 넓은 평지 위에 중앙을 가로지르는 길을 중심으로 배치되어 있으며, 벌처의 기동성과 공격력을 최대한 활용할 수 있는 디자인으로 보입니다. 벌처는 스파이더 마인 설치와 빠른 기동력으로 적을 제압하는 유닛인 만큼, 맵 곳곳에는 트리거로 제작된 적 기지나 방해 요소가 배치되어 있을 것으로 추정됩니다. 메인 미션은 벌처를 조종해 특정 목표물을 파괴하거나, 적 병력을 격파하는 방식으로 진행되는 ‘컴까기’와 유사한 구조를 띄고 있지만, 미니게임 특성상 제한된 시간 내에 높은 점수를 획득하는 방식일 수도 있습니다. 플레이 방식은 6명의 플레이어가 각자 벌처를 조종하거나, 팀을 이뤄 협력하는 방식으로 보입니다. 벌처의 특성상 빠른 이동과 지뢰 설치가 핵심 전략이 될 텐데, 맵의 넓은 공간을 활용한 기동전과 트릭 플레이가 가능하도록 디자인되었을 가능성이 큽니다. 내부 맵 설명에서 ‘Creator: Open.ClosedServer: AsiaChnnel: 헉’이라는 문구가 확인되는데, 이는 개발자나 배포 채널에 대한 힌트로 보입니다. 또한, 맵 제목에 ‘Showdown’이라는 단어가 포함된 만큼, 결전이나 대결을 콘셉트로 삼았을 가능성이 높습니다. 이 맵은 벌처의 컨트롤 실력을 길러주고자 하는 유저나, 미니게임 형식의 빠른 플레이를 즐기는 유저들에게 추천할 만합니다. 벌처의 기동성과 지뢰 설치 능력을 최대한 활용할 수 있는 맵이기 때문에, 벌처 운용에 익숙한 플레이어라면 재미있게 플레이할 수 있을 것입니다. 다만, 미니게임 특성상 한정된 목표와 짧은 플레이 시간으로 구성되어 있을 가능성이 높으므로, 플레이 전 맵의 구체적인 승리 조건이나 진행 방식을 미리 확인하는 것이 좋습니다. 벌처를 단독으로 조종하는 맵이지만, 팀 플레이가 가능하다면 협력형 미션도 있을 수 있으니 팀원과의 사전 전략 수립이 중요할 수 있습니다. 이 맵은 넓은 평지에서 벌처의 기동력을 십분 활용할 수 있도록 설계되어 있어, 넓은 맵에서 벌처를 활용한 전투를 경험해 보고 싶은 유저들에게 적합합니다. 또한, 벌처의 컨트롤 실력을 테스트하는 데에도 효과적일 것으로 보입니다. 벌처의 지뢰 설치와 빠른 이동을 활용한 전략을 연습하고자 한다면 이 맵을 시도해 보는 것을 추천합니다. *Starcraft: Brood War*'s custom map *Vulture Control Showdown 2* is a mini-game-style map where players control Vulture units, tasked with efficiently managing mechanized forces to achieve objectives. The map is designed with a wide open plain bisected by a central path, seemingly optimized to maximize the Vulture’s mobility and firepower. Given that Vultures excel at deploying spider mines and quickly outmaneuvering enemies, the map likely features trigger-created enemy bases or obstacles scattered throughout. The core gameplay resembles a "campaign-style" mission where players destroy specific targets or eliminate enemy forces, though as a mini-game, it may also involve scoring high points within a time limit. The mode appears to support six players, either controlling Vultures individually or teaming up for cooperative play. With Vultures, speed and mine deployment are key strategies, so the map likely encourages mobile warfare and trick plays across its expansive terrain. A note in the internal map description—*"Creator: Open.ClosedServer: AsiaChannel: 헉"*—hints at the developer or distribution channel. Additionally, the word *"Showdown"* in the title suggests a competitive or decisive battle concept. This map is ideal for players looking to sharpen their Vulture control skills or those who enjoy quick-paced mini-games. Its design maximizes the Vulture’s mobility and mine-laying potential, making it especially fun for experienced players. However, as a mini-game, it may feature limited objectives and short playtimes, so checking the exact victory conditions and mechanics beforehand is wise. While the map centers on solo Vulture control, team-based missions could exist if multiplayer is supported, making pre-game strategy discussions with teammates valuable. Perfect for players wanting to experience Vulture-centric battles on a large scale, the map also serves as an effective test of Vulture micro-management. If you're looking to practice mine deployment and rapid movement tactics, trying out this map is highly recommended.
지뢰밭 v3.0 (Land Mines v3.0)
스타크래프트 브루드워의 대표적인 유즈맵 장르 중 하나인 디펜스 장르의 맵으로, 'Land Mines v3.0'은 지뢰를 활용한 전략적인 방어 플레이를 강조하는 맵이다. 8명의 플레이어가 참여하는 이 맵은 맵 중앙에 배치된 광물 지대를 중심으로 적의 공격을 방어하면서 자원을 확보하는 방식으로 진행된다. 플레이어는 맵의 외부에서 시작하며, 중앙으로 이동하는 길목에 지뢰를 설치할 수 있는 구조로 구성되어 있어, 적의 유닛이 지나가도록 유도한 뒤 지뢰로 제거하는 플레이가 핵심이다. 맵의 지형은 사막 타일셋을 기반으로 하며, 넓은 개활지와 일부 협소한 통로가 혼합되어 있어 전략적 위치 선정이 중요하다. 특히 중앙 광물 지대 주변의 좁은 길목은 방어 포인트로 활용하기에 최적이며, 플레이어는 이곳을 활용해 적의 공격을 효과적으로 차단해야 한다. 맵의 분위기는 전쟁터를 연상시키며, 긴장감 있는 플레이가 요구된다. 초보 플레이어는 지뢰의 설치 위치와 타이밍을 익히는 데 다소 어려움을 느낄 수 있으나, 익숙해지면 방어 전략을 세우는 재미가 considerable하다. 숙련된 플레이어는 적의 움직임을 예측해 지뢰를 최적의 위치에 배치하는 테크닉을 활용할 수 있으며, 팀 플레이 시에는 역할 분담을 통한 효율적인 방어가 가능하다. 맵의 볼륨이 크고 전략적 깊이가 있어, 디펜스 매니아들에게 추천할 만한 작품이다. 다만, 지뢰의 설치와 제거에 대한 명확한 규칙이 제공되지 않으므로, 플레이 전 미리 게임 내 메뉴얼을 숙지하는 것이 중요하다. 또한, 맵의 밸런스가 8인 기준인지 여부는 확인되지 않지만, 넓은 맵 크기와 지형 특성상 적절한 균형을 유지할 것으로 추정된다. 전체적으로 전략적 사고와 순간 판단력이 요구되는 맵으로, 반복 플레이를 통해 실력을 향상시킬 수 있는 장점이 있다. StarCraft: Brood War's classic defense genre map, *Land Mines v3.0*, emphasizes strategic defensive play centered around mines. With eight players participating, the game unfolds by defending against enemy attacks while securing resources around the mineral field located in the map's center. Players start outside the map and can place mines along the paths leading to the center, luring enemy units to trigger them for elimination. The terrain features a desert tile set, blending open areas with narrow passages, making strategic positioning crucial. The tight choke points around the central mineral field are ideal defensive spots, where players must effectively block enemy advances. The map evokes a battlefield atmosphere, demanding tense and high-stakes gameplay. Beginner players may struggle initially with mine placement and timing, but once accustomed, the map offers considerable enjoyment in crafting defensive strategies. Skilled players can predict enemy movements and optimize mine placements, while team play allows for efficient role distribution. With its large scale and deep strategy, this map is highly recommended for defense enthusiasts. However, since clear rules for mine placement and removal aren't provided, players should review the in-game manual before starting. Although balance for eight players hasn't been officially confirmed, the map's size and terrain suggest a well-maintained equilibrium. Overall, this map demands strategic thinking and quick decision-making, offering players the advantage of improving through repeated plays.
IQ Test
스타크래프트 브루드워의 유즈맵 <IQ Test>는 플레이어가 맵 상의 장애물을 빠르게 통과하며 최단 시간을 기록하는 퍼즐형 맵입니다. 내부 설명에서도 알 수 있듯이 '코스를 가능한 한 빠르게 통과하라'는 목표가 명확하며, 좁은 길목과 함정, 지뢰, 함정 건물 등이 복잡하게 배치된 구조가 특징입니다. 맵의 전체적인 분위기는 어두운 황무지 타일셋을 기반으로 하여 침울하고 긴장감이 느껴지지만, 밝은 색상의 시작 지점과 엔딩 지점이 대비되어 진행 과정을 시각적으로 구분할 수 있습니다. 플레이어는 시작 지점에서 출발하여 지정된 루트를 따라 이동해야 하며, 도중에 등장하는 장애물이나 함정을 피하거나 제거하는 방식으로 시간을 단축해야 합니다. 맵의 난이도는 장애물의 밀도와 복잡도에 따라 달라질 수 있으며, 특히 좁은 통로나 연속된 함정 구간에서 실수가 발생하기 쉽습니다. 제한된 공간 안에서 빠른 판단과 정확한 조작이 요구되는 만큼, 전략적인 움직임과 타이밍이 승패를 좌우합니다. 초보 플레이어는 맵의 구조를 숙지하지 못해 여러 번 실패할 가능성이 높으므로, 반복 플레이를 통해 루트를 암기하는 것이 중요합니다. 또한, 맵의 특성상 단일 플레이어나 소규모 팀 플레이에 적합하며, 6인까지 참여할 수 있는 구조로 설계되었습니다. 맵의 완성도는 간결하면서도 도전적인 퍼즐 요소와 시각적 디자인으로 구성되어 있으며, 스타크래프트 유즈맵의 특색을 잘 살린 작품 중 하나로 평가됩니다. 특히, 짧은 플레이 타임과 높은 재플레이 가치를 제공하는 점에서 유즈맵爱好者들에게 인기 있을 만한 요소들이 포함되어 있습니다. 플레이 전에는 맵의 전체적인 구조를 미리 파악하고, 가능한 한 빠른 루트를 찾는 연습을 추천합니다. 또한, 함정이나 장애물의 패턴을 분석하여 효율적인 통과 방법을 찾아내는 것이 핵심입니다. 맵의 난이도는 초반에는 쉬울 수 있으나, 후반부로 갈수록 복잡해지는 구조로 인해 숙련된 플레이어에게 더 적합하다는 점도 고려해야 합니다. StarCraft: Brood War's custom map *IQ Test* is a puzzle-style map where players navigate through obstacles on the map to record the fastest possible time. As indicated in the in-game description, the clear objective is to "pass through the course as quickly as possible," and the map features a complex layout with narrow passages, traps, landmines, and hazardous buildings. The overall atmosphere is based on a dark, desolate tileset, giving it a somber and tense feel, though the bright-colored start and end points contrast sharply, visually separating the progression stages. Players must begin at the starting point and follow the designated route, shortening their time by either avoiding or eliminating obstacles and traps encountered along the way. The difficulty varies depending on the density and complexity of the obstacles, with mistakes being especially easy to make in tight corridors or sequences of traps. Since quick decision-making and precise control are required within limited space, strategic movement and timing determine victory or defeat. Novice players may struggle due to unfamiliarity with the map’s layout and fail repeatedly, so memorizing the route through repeated play is essential. Given the map’s nature, it is best suited for solo play or small team formats, though it is designed to accommodate up to six players. The map’s polished design combines concise yet challenging puzzle elements with strong visual aesthetics, earning recognition as a well-crafted custom map that captures the essence of StarCraft’s custom map scene. Its short playtime and high replay value make it particularly appealing to custom map enthusiasts. Before playing, it’s recommended to familiarize yourself with the overall structure and practice finding the fastest route possible. Analyzing trap and obstacle patterns to discover efficient passage methods is also key. While the early sections may seem easier, the increasing complexity toward the later stages makes this map more suitable for experienced players.
루커 D 18 웨이 FINAL HARD (Lurker D 18 Way FINAL HARD)
스타크래프트 브루드워의 유즈맵 중 하나로, ‘Lurker D 18 Way FINAL HARD’는 다중 지뢰와 프로브를 활용한Resource Management(자원 관리)형 디펜스 맵으로 주목받고 있다. 맵의 중앙에는 거대한 둥근 성역이 자리하고 있으며, 그 주변을 따라 18개의 지뢰가 배치되어 있는데, 이 지뢰들은 일정 시간마다 자동으로 보급되는 프로브를 통해 추가 자원을 확보할 수 있는 구조로 설계되어 있다. 플레이어는 이 자원을 활용해 업그레이드와 방어 시설을 강화해야 하는데, 특히 30초 단위의 라운드가 지나면서 자원 확보 속도가 빨라지며, 업그레이드 한도가 255까지 허용되어 långvarig(장기적인) 전략 구사가 가능하다. 공격을 받기 전까지는 비교적 안정적인 자원 수급이 가능하지만, 방어선을 구축하지 못하면 순식간에 자원이 고갈되어 게임이 어렵게 전개될 수 있다. 맵의 난이도는 ‘HARD’로 명시되어 있지만, 자원 관리와 타이밍 감각이 뛰어난 플레이어라면 충분히 극복할 수 있는 수준으로 보인다. 또한, 맵의 규모는 4096x4096의 넓은 공간을 자랑하며, 황무지 타일셋을 기반으로 한 황량한 분위기가 전체적인 플레이感(감)을 더해준다. 이 맵은 특히Resource Management(자원 관리)와Defense(방어) 요소가 결합된 하이브리드 스타일의 유즈맵으로, 초보자와 숙련자 모두에게 흥미로운 도전을 제공할 것으로 예상된다. 플레이를 시작하기 전에는 자원 확보 루틴과 방어 시설의 배치 타이밍을 충분히 숙지하는 것이 중요하다. This StarCraft: Brood War custom map, ‘Lurker D 18 Way FINAL HARD’, stands out as a Resource Management defense title where players must strategically handle multiple mines and Probes. The map features a central circular zone surrounded by 18 mines, which can be upgraded and supplied with resources through Probes that appear at regular intervals. Players earn resources that can be invested in upgrades, with the cap set at 255, allowing for long-term strategic planning as rounds progress every 30 seconds. While the map starts with steady income, neglecting defense lines can quickly deplete resources and escalate difficulty. Although labeled ‘HARD’, the challenge is balanced for players with strong resource management and timing skills. The 4096x4096 map size, set in a barren wasteland tile, adds to the immersive experience. This hybrid custom map blends Resource Management and Defense mechanics, offering engaging gameplay for both beginners and veterans. Prior to playing, familiarizing oneself with resource income patterns and optimal defense setups is crucial for success.
Mine Dodger V.4
마인 도저 V.4는 6명의 플레이어가 세로로 긴 사막 지형(2048x8192)에서 지뢰밭을 뚫고 최상단 목표 지점까지 도달하는 생존 미니게임이다. 맵 제목과 내부 설명(Get to the top of the map but make sure you survive)이 그대로 핵심 규칙이 된다. 화면 하단에서 시작해 위로 이동하며 무작위로 떨어지거나 발사되는 지뢰, 혹은 지형에 매설된 폭발물을 피하는 '피하기' 장르 특유의 긴장감이 주를 이룬다. 타일셋은 사막으로, 넓은 맵 높이만큼 여러 구간으로 나뉘어 난이도가 단계적으로 상승하는 구조로 추정된다. 6인 개인전 또는 협동 생존 방식으로 진행되며, 별도의 유닛 생산이나 자원 관리 없이 주어진 유닛(주로 마린이나 시빌리언 등)의 컨트롤만으로 생존을 겨룬다. 지뢰의 패턴을 외우고 안전 지대를 찾아 순발력 있게 움직이는 것이 승부의 열쇠다. 플레이 타임은 한 판당 10~15분 내외로 짧고, 부담 없이 즐기기 좋은 파티용 맵으로 적합하다. 고전 유즈맵 특유의 단순한 재미와 극한의 컨트롤을 원하는 유저에게 추천한다. 맵 파일명은 (6)Mine Dodger.scx이며 버전 표기는 V.4다. Mine Dodger V.4 is a survival mini-game where six players navigate a vertically long desert terrain (2048x8192) to reach the top goal while dodging a minefield. The map title and internal description ("Get to the top of the map but make sure you survive") serve as the core rules. Starting from the bottom and moving upward, the tension characteristic of the 'avoidance' genre dominates as players evade randomly falling or fired mines and explosives buried in the terrain. The tileset is Desert, and given the map's height, it is presumed to be structured in multiple sections with escalating difficulty. It plays as a 6-player free-for-all or cooperative survival, requiring no unit production or resource management—only control of given units (often Marines or Civilians). Memorizing mine patterns and finding safe zones with quick reflexes is key to victory. A single round takes roughly 10-15 minutes, making it a great party map for casual fun. Recommended for users seeking classic UMS simplicity and extreme control challenges. The map filename is (6)Mine Dodger.scx with version V.4.
맵 선택 가이드
태그는 맵의 핵심 특징을 빠르게 설명하지만 제작 버전마다 규칙이 다를 수 있습니다. 상세 설명에서 권장 인원, 난이도, 플레이 시간과 버전을 함께 확인한 뒤 다운로드하세요.