
중앙 점령 스타크래프트 맵 모음
'중앙 점령' 태그가 등록된 맵을 모았습니다. 장르 하나로 찾기 어려운 플레이 방식, 난이도와 특징을 중심으로 인기 맵과 최신 맵을 비교해 보세요.
- 등록 맵
- 10개
- 누적 다운로드
- 1
- 누적 조회
- 415
인기 맵
다운로드와 조회 반응이 높은 맵입니다.
Death Star
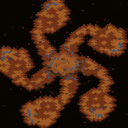
데스 스타(Death Star)는 5인용 밀리 맵으로, 황혼 타일셋을 기반으로 한 128x96 타일 크기의 전장이다. 맵 제목과 내부 설명인 '중심부로 나아가되 적들을 경계하라'는 문구에서 알 수 있듯, 맵 중앙 지역을 차지하는 것이 승부의 열쇠가 되는 구조로 보인다. 일반적인 밀리 맵과 달리 중앙을 향한 진출로와 수비 거점이 명확히 구분되어 있어, 초반 확장 싸움에서부터 중앙 장악을 위한 다툼이 치열하게 전개될 것으로 추정된다. 5인 자유대전(FFA) 구도라면 외교와 타이밍 싸움이 더욱 중요해지며, 2대2 팀전이나 3대2 비대칭 팀 구성에서도 중앙 통제가 핵심 변수가 된다. 황혼 타일셋 특유의 어두운 분위기와 우주 정거장을 연상시키는 지형 배치가 몰입감을 더한다. 표준 밀리 규칙을 따르되 중앙 집중형 맵 설계를 선호하는 플레이어, 다인전 외교전을 즐기는 유저에게 적합하다. 플레이 전에는 시작 위치별 중앙 진출 거리와 자원 분포, 좁은 초크 포인트 여부를 확인하는 것이 좋다. 특히 중앙 지역이 넓게 열려 있는지, 혹은 좁은 통로로만 연결되어 있는지에 따라 공성전 양상이 크게 달라질 수 있다. Death Star is a 5-player melee map built on the Twilight tileset with a 128x96 tile battlefield. As the map title and internal description—'Work your way to the center, but watch out for your foes'—suggest, controlling the central region appears to be the key to victory. Unlike standard melee maps, the approach routes and defensive positions toward the center seem clearly separated, so fierce contention over central control is expected from the early expansion phase. In a 5-player free-for-all, diplomacy and timing become even more critical, while in 2v2 or asymmetric team setups, central control remains the pivotal variable. The Twilight tileset's dark atmosphere and terrain layout reminiscent of a space station add immersion. This map suits players who prefer standard melee rules with a center-focused design and those who enjoy multiplayer diplomacy. Before playing, check the distance from each start location to the center, resource distribution, and choke point width. The openness or narrowness of the central connections will significantly change the siege dynamics.
보제스트 (Beau Geste)
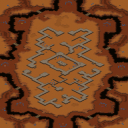
‘Beau Geste’는 팀플을 중심으로 설계된 스타크래프트 브루드워의 유즈맵으로, 사막의 고원 지형을 배경으로 4팀이 동맹을 맺고 중앙의 폐허가 된 기지를 차지하기 위한 전략적 전투를 펼치는 맵이다. 맵의 이름은 프랑스 소설 ‘보제스트’에서 유래했으며, 사막 한가운데에 위치한 이 고원은 맵의 중앙에 위치한 폐허를 둘러싼 언덕과 협곡으로 나뉘어 있으며, 각 팀은 출발 지점에서 시작해 이 폐허를 점령하거나 파괴해야 한다. 맵의 지형은 완만한 언덕과 좁은 통로로 구성되어 있어 기동성과 방어 전략이 중요하며, 특히 중앙의 폐허는 전투의 핵심으로, 이곳을 차지한 팀이 유리한 고지를 점할 수 있다. 맵의 구성은 인공물로 가득한 폐허와 이를 둘러싼 사막 지형이 대조적으로 배치되어 있으며, 각 팀의 출발 지점은 맵의 네 모서리에 위치해 있어 초반 진출과 방어 라인이 뚜렷하게 나뉜다. 플레이어는 제한된 자원으로 동맹을 맺고, 중앙의 리소스를 두고 경쟁하거나, 방어선을 구축해 적의 공격을 차단하는 전략을 구사해야 한다. 맵의 볼륨은 넓고 개방적이지만, 협소한 통로와 언덕 지형이 전투의 흐름을 조절하는 역할을 한다. 이 맵은 특히 팀플레이와 동맹의 중요성이 강조되는 구조로, 개인의 능력뿐만 아니라 팀의 전략적 협력이 승리를 좌우한다. 초보자도 쉽게 접근할 수 있지만, 고수들은 지형과 자원 분배를 고려한 복잡한 전략을 펼칠 수 있는 깊이 있는 맵으로 평가된다. 플레이 전에는 팀원 간의 호흡과 초기 진출 전략을 사전에 논의하는 것이 중요하며, 중앙 폐허의 점령 여부가 승패를 가를 가능성이 크다. 또한, 맵의 사막 지형은 시야를 제한하는 요소는 없지만, 언덕을 활용한 시야 확보와 방어 라인 구축이 핵심 포인트다. ‘Beau Geste’ is a *StarCraft: Brood War* custom map designed around team play, set against a desert plateau where four teams ally to compete for control of the central ruined base. The map’s name is inspired by the French novel *Beau Geste*, and the plateau, located in the middle of the desert, is divided into hills and canyons surrounding the central ruins. Each team starts from the map’s edges and must either capture or destroy the ruins. The terrain features gentle slopes and narrow pathways, making mobility and defensive tactics crucial, with the central ruins serving as the focal point of battle—whoever holds them gains a significant advantage. The map contrasts man-made ruins with the surrounding desert terrain, and each team’s starting position is located in one of the four corners, creating clear early-game expansion and defensive lines. Players must manage limited resources, form alliances, compete for central resources, or build defenses to block enemy advances. While the map is vast and open, its narrow passages and hilly terrain regulate the flow of combat. Its structure emphasizes teamwork and alliances, where victory depends not just on individual skill but on coordinated strategy. Though accessible to beginners, it offers depth for advanced players who can devise complex tactics based on terrain and resource distribution. Before playing, discussing team coordination and initial expansion strategies is essential, as controlling the central ruins often determines the outcome. While the desert terrain doesn’t inherently restrict vision, securing high ground with hills and establishing defensive lines are key priorities.
메두사 1.1 (Medusa 1.1)
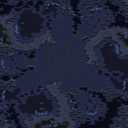
스타크래프트 브루드워의 classic 맵인 | iCCup | Medusa 1.1은 3인용 밀리 맵으로, 독특한 맵 디자인과 중립 건물을 활용한 전략적 요소가 돋보이는 작품이다. 맵은 전체적으로 대칭형 구조를 띄며, 중앙에 위치한 중립 건물 '메두사'를 중심으로 세 플레이어의 본진이 배치되어 있다. 각 플레이어는 본진에서 자원 채취와 병력 생산을 진행하며, 메두사를 차지하기 위한 전투가 자연스럽게 전개된다. 메두사는 일시적으로 점령할 수 있는 중립 건물로, 점령 시 일정 시간 동안 강력한 버프를 제공하거나 자원 채취량을 증가시키는 등 전략적 이점을 준다. 맵의 지형은 화산 지형을 기반으로 하여, 언덕과 평지, 바위 지형이 조화를 이루며, 이러한 지형적 특징은 병력 이동과 전투 시 전략적 우위를 제공한다. 특히, 메두사 주변의 좁은 길목은 방어와 공세를 동시에 고려해야 하는 핵심 지역으로, 플레이어는 이곳을 어떻게 활용하느냐에 따라 승패가 갈릴 수 있다. 또한, 각 플레이어의 본진은 입구와 언덕으로 보호되어 있어 초기 방어가 다소 수월한 편이지만, 반대로 중앙 진출이 늦어질 경우 메두사 점유 경쟁에서 밀릴 위험도 존재한다. 맵의 플레이 스타일은 중앙 메두사 점유를 두고 벌어지는 전투와, 본진 방어를 중심으로 한 자원 관리, 그리고 지형적 이점을 활용한 기습 공격 등이 주가 된다. 이러한 구조는 밀리 맵 특유의 긴장감과 전략적 깊이를 제공하며, 특히 초보자와 숙련자 모두에게 흥미로운 플레이 경험을 선사한다. 메두사의 점령 여부가 게임의 흐름을 결정짓는 만큼, 플레이어는 메두사 주변의 전투를 면밀히 관찰하고, 필요 시 동맹을 맺거나 배신하는 등 심리적 요소를 고려해야 한다. 이 맵은 3인용 밀리 맵으로서의 정체성을 강하게 드러내며, 특히 iCCup에서 공식 대회용으로 사용된 경력이 있어 그 완성도가 검증된 작품이라 할 수 있다. 메두사의 버프 효과나 지속 시간 등은 맵 내 트리거로 조정될 수 있지만, 기본적으로는 중앙 건물을 둘러싼 전략적 전투가 주된 재미 요소다. 본진 방어와 메두사 점령의 균형을 잘 맞춰야만 승리를 차지할 수 있는 이 맵은, 스타크래프트 브루드워 밀리 맵의 정수를 느낄 수 있는佳作이다. 플레이 전에는 메두사의 버프 효과와 맵의 지형적 특징, 그리고 각 플레이어의 본진 구조를 미리 숙지하고, 중앙 진출 타이밍을 계산하는 연습이 필요하다. StarCraft: Brood War's classic map | iCCup | Medusa 1.1 is a three-player melee map renowned for its unique design and strategic use of neutral buildings. The map features a symmetrical structure with three players' main bases arranged around the central neutral building, Medusa. Players gather resources and produce units from their bases, naturally leading to battles over control of Medusa. Medusa is a temporary neutral structure that grants powerful buffs when occupied, such as increased resource gathering or temporary combat advantages, providing significant strategic benefits. The terrain is based on a volcanic landscape, blending hills, flatlands, and rocky formations. This varied terrain offers strategic advantages in movement and combat. The narrow paths around Medusa are critical zones where players must balance defense and offense, as control here can determine the outcome of the game. Each player's main base is protected by entrances and elevated terrain, making initial defense easier, but delayed central expansion risks falling behind in the race for Medusa. The gameplay revolves around fighting for Medusa, resource management centered on base defense, and utilizing terrain advantages for surprise attacks. This structure delivers the tense, deep strategy characteristic of melee maps, offering an engaging experience for both beginners and veterans. Since control of Medusa often dictates the game's flow, players must closely monitor the area, form alliances, or betray others as needed, adding psychological depth to the match. As a three-player melee map, Medusa 1.1 strongly embodies its identity, and its proven track record—including use in official iCCup tournaments—confirms its polished design. While the buff effects and duration of Medusa can be adjusted via in-map triggers, the core appeal lies in the strategic battles surrounding the central structure. Victory requires balancing base defense with Medusa control, making this map a masterpiece that captures the essence of Brood War melee maps. Before playing, it's essential to understand Medusa's buff effects, the map's terrain features, and the layout of each player's base, as well as to practice timing your central expansion.
이볼브스 6웨이 v.2 (E V O L V E S 6 W A Y v.2)
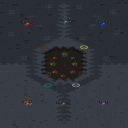
스타크래프트: 브루드워의 유즈맵 ‘이볼브스 6웨이 v.2’는 3대3 팀전 구도로 펼쳐지는 흥미로운 디펜스 및 생존형 맵이다. 맵의 중심에는 커다란 큐브 형태의 섬이 있으며, 이 섬을 중심으로 여섯 방향의 길목이 뻗어 있어 각 팀이 중앙을 차지하기 위해 경쟁하는 구조다. 각 길목은 좁고 복잡한 지형을 이루고 있어 방어와 진격이 동시에 고려되어야 한다. 맵의 이름은 ‘E V O L V E S 6 W A Y’라는 제목에서 유추할 수 있듯이, 진화와 변화의 6방향 진행을 테마로 삼고 있는 듯하다. 플레이어는 각 팀의 일원으로서 중앙의 리소스를 확보하거나 상대방을 제압하면서 승리를 노리게 된다. 맵의 디자인상으로는 우주 테마가 적용되어 있으며, 타일셋과 배경이 어두운 톤으로 이루어져 우주 공간 feel을 강조하고 있다. 각 길목은 좁고 구불구불한 구조로 인해 전략적인 움직임이 요구되며, 중앙의 큐브는 여러 개의 소규모 건물을 배치할 수 있는 공간으로 보인다. 맵의 난이도는 팀 간의 균형과 플레이어의 숙련도에 따라 달라질 수 있으며, 초보 플레이어의 경우 중앙 점령과 방어에 어려움을 느낄 수 있다. 경험이 많은 유저라면 중앙의 리소스를 빠르게 확보하고, 상대방의 진격을 효율적으로 차단할 수 있는 전략을 세울 수 있을 것이다. 특히, 좁은 길목을 활용한 매복이나 sudden push는 이 맵의 주요 재미 요소로 작용한다. 추천 대상은 팀 플레이를 즐기는 유저나 디펜스 및 점령형 맵을 선호하는 플레이어들이다. 중앙의 리소스 관리와 길목 방어에 중점을 둔 플레이 스타일이 매력적으로 느껴질 것이다. 다만, 넓은 맵 크기 대비 좁은 길목으로 인해 팀 간의 소통과 협력이 매우 중요하다는 점을 염두에 두어야 한다. 플레이 전에는 각 길목의 지형과 중앙의 공간 활용 가능성을 미리 확인하는 것이 좋다. 또한, 팀원 간의 역할 분배(공격수, 방어수, 탐색자 등)를 명확히 하는 것이 승리에 도움이 될 것이다. 이 맵은 브루드워의 유즈맵 커뮤니티에서 상대적으로 마이너한 장르이지만, 전략성과 팀워크를 강조하는 맵으로 충분히 재밌게 즐길 수 있다. StarCraft: Brood War's custom map "Evolves 6 Way v.2" is a thrilling defense and survival-style team game set in a 3v3 format. At the center of the map lies a large cube-shaped island, with six narrow paths branching out in different directions, forcing teams to compete for control of the middle. The maze-like paths demand both defensive positioning and strategic advances. As the title "E V O L V E S 6 W A Y" suggests, the map revolves around themes of evolution and progression in six distinct directions. Players work as a team to secure central resources or eliminate opponents to secure victory. The map features a cosmic theme, with dark-toned tiles and backgrounds enhancing the sense of space. The winding, cramped paths require careful maneuvering, while the central cube offers space for multiple small structures. Difficulty varies depending on team balance and player skill—beginners may struggle with securing and defending the center, while experienced players can quickly claim resources and block enemy advances. Narrow paths make ambushes and sudden pushes key elements of fun, rewarding players who master the terrain. Ideal for team players or fans of defense and control maps, the map shines when focusing on resource management and path defense. However, the map's wide-open spaces paired with tight pathways make communication and coordination essential. Before playing, it's wise to scout the paths and central layout, and assigning clear roles (attacker, defender, scout, etc.) among teammates will greatly improve chances of winning. Though not a mainstream genre in Brood War’s custom map community, this map delivers strong strategy and teamwork, making it a fun and engaging experience.
Requiem
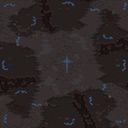
스타크래프트 브루드워의 <Requiem>은 4인용 밀리 맵으로, 그 이름에서 느껴지듯 장엄하고 무거운 분위기의 전투를 경험할 수 있는 맵이다. 내부 맵 설명에 ‘Dirge for Deads... Oh Lord, Be with them always...’라는 문구가 삽입되어 있어, 플레이어는 마치 전장 한복판에 서 있는 듯한 느낌을 받을 것이다. 맵의 전체적인 분위기는 정글 타일셋을 기반으로 하며, 중간 중간 붉은색과 파란색의 건물 잔해가 scattered되어 있어 격전지의 분위기를 한층 더해준다. 맵의 크기는 4096x4096으로 넓은 편이지만, 밀리 맵답게 주요 전투 지역은 중앙과 각 구석에 배치되어 있어 초보와 숙련자 모두에게 공정한 경쟁을 제공한다. 이 맵은 4명의 플레이어가 각자 네크로스의 시작 지점에서 출발하여 중앙 지역을 차지하기 위한 혈투를 벌이는 구조로 되어 있다. 시작 지역은 각각의 플레이어에게 동등한 자원과 건물 배치 공간을 제공하며, 중앙 지역은 자원과 건물을 확보하기 위한 핵심 지역으로 기능한다. 맵의 지형은 비교적 평평한 편이지만, 곳곳에 잔해와 지형적 장애물이 있어 전략적인 움직임을 요구한다. 특히, 중앙 지역은 넓은 평야로 이루어져 있어 대규모 전투가 자주 발생하며, 이 과정에서 플레이어는 자신의 병력 운용 능력과 타이밍 감각을 발휘할 수 있다. <Requiem>은 단순히 전투력만으로는 승리를 장담할 수 없는 맵이다. 중앙 지역을 차지하기 위한 초반 러시, 상대방의 자원 라인을 끊기 위한 게릴라 전술, 그리고 중앙에서의 대규모 전투에서 승리를 이끌어내는 전략적 사고가 요구된다. 또한, 맵의 지형적 특징을 잘 활용하여 적을 유인하거나 방어선을 구축하는 것이 중요하다. 초보 플레이어의 경우, 중앙 지역을 차지하기 위한 기본적인 전술과 병력 운용법을 익히는 데 중점을 둬야 하며, 숙련자라면 보다 복잡한 전략과 타이밍을 요구하는 전술을 구사할 수 있을 것이다. 이 맵은 1.1 버전으로,DreamReaver에 의해 최초 제작된 후 Rose.of.Dream에 의해 수정되었다. 내부 설명에서 ‘Through good or bad, and at all times through the happy and sad. Amen.’이라는 문구는 플레이어들에게 전장에서의 인고와 승리를 함께 경험하라는 메시지를 전달하는 듯하다.Requiem은 밀리 맵이지만, 그 이름과 분위기만큼은 유독 감동적이고 인상적인 맵으로, 플레이어들에게 전략적 깊이와 togetherness를 동시에 느낄 수 있는 기회를 제공한다. 특히, 친구들과 함께 플레이할 때 그 진가를 발휘할 수 있을 것으로 보인다. 플레이 전 반드시 확인해야 할 사항은 맵의 중앙 지역과 각 플레이어의 시작 지점 사이의 거리, 그리고 잔해와 장애물의 배치다. 또한, 중앙 지역을 차지하기 위한 초반 러시 타이밍과 병력 조합을 미리 연습해두면 게임에서 큰 이점을 얻을 수 있다.Requiem은 단순히 전투력만으로는 승리를 장담할 수 없는 맵이므로, 전략적 사고와 지형 활용 능력을 키우고자 하는 플레이어들에게 강력히 추천한다. Requiem is a 4-player melee map in StarCraft: Brood War that offers a solemn and intense battle experience, as suggested by its name. The internal map description includes the phrase ‘Dirge for Deads... Oh Lord, Be with them always...’, immersing players in the atmosphere of a battlefield. The map utilizes a jungle tileset, with scattered red and blue building debris enhancing the sense of a fierce struggle. With a size of 4096x4096, the map is spacious, but its key battle zones—central and corner areas—are well-balanced for fair competition among players of all skill levels. The map is designed for four players, each starting at a Necros spawn point, competing to control the central region. The starting areas provide equal resources and building space, while the central zone serves as the critical region for securing resources and establishing dominance. The terrain is relatively flat but includes debris and obstacles, demanding strategic movement. The central area, in particular, is a vast plain where large-scale battles frequently occur, testing players' troop management and timing. Requiem is not a map where raw combat power alone guarantees victory. Players must employ tactics such as early rushes to secure the central region, guerrilla strikes to disrupt opponents' resource lines, and strategic maneuvering during large-scale battles. Understanding the terrain and leveraging it to lure enemies or fortify defenses is crucial. Beginners should focus on mastering basic tactics and troop management, while advanced players can experiment with more complex strategies and timing. This map is version 1.1, originally created by DreamReaver and later modified by Rose.of.Dream. The internal description’s phrase ‘Through good or bad, and at all times through the happy and sad. Amen.’ conveys a message of enduring both hardship and victory on the battlefield. Requiem stands out among melee maps for its emotional depth and atmosphere, offering players a unique blend of strategic depth and camaraderie, especially when played with friends. Before playing, players should familiarize themselves with the distance between the central region and each player’s starting point, as well as the placement of debris and obstacles. Practicing early rush timings and troop compositions for securing the central zone can provide a significant advantage. Requiem is highly recommended for players seeking to enhance their strategic thinking and terrain utilization skills, rather than relying solely on combat power.
뉴 리모트 아웃포스트 (New Remote Outpost)
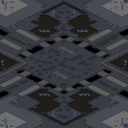
스타크래프트: 브루드워의 유즈맵으로, 「New Remote Outpost GameRu」는 우주 테마의 넓은 평면 지형을 바탕으로 한 디펜스 및 전략형 맵입니다. 맵의 중심부는 거대한 중앙 건물이 자리 잡고 있으며, 이를 둘러싼 4개의 외곽 지역이 각각의 기지 역할을 수행합니다. 각 기지는 프로토스, 테란, 저그, 그리고 제3세력의 건물로 구성되어 있으며, 맵의 구조상 symmetrical(대칭) 디자인으로 균형 잡힌 전투가 가능합니다. 플레이어는 각자 고유한 시작 자원과 건물을 보유한 채 상대방을 제압하거나 중앙 건물을 점령하는 전략을 펼치게 됩니다. 맵의 특징은 넓은 시야와 복잡한 길목으로, 빠른 판단과micro컨트롤이 요구되는 전투가 자주 벌어집니다. 또한, 중앙 건물을 두고 벌어지는 대치전은 맵의 하이라이트로, 이를 차지하는 플레이어가 우위를 점할 가능성이 높습니다. 초보자는 다소 어렵게 느낄 수 있지만, symmetrical 디자인 덕분에 밸런스가 잘 잡혀 있어 반복 플레이를 통해 전략을 다듬기에 적합한 맵입니다. 추천하는 플레이 방식은 초반 자원 확보와 중앙 건물 장악에 중점을 두는 것이며, 상대방의 움직임을 유심히 관찰하며 대비를 준비하는 것이 중요합니다. 맵의 난이도는 보통 수준으로, 초보자와 숙련자 모두 즐길 수 있지만, symmetrical 구조를 적극 활용하는 전략적 플레이가 필요합니다. StarCraft: Brood War's custom map, "New Remote Outpost GameRu," is a defense and strategy map set on a vast, space-themed flat terrain. At the center of the map stands a massive central building, surrounded by four outer regions that each function as a base. These bases are composed of buildings from the Protoss, Terran, Zerg, and a third faction, and the map's symmetrical design ensures balanced combat. Players begin with unique starting resources and structures, employing strategies to either eliminate opponents or seize control of the central building. The map features wide visibility and intricate pathways, often leading to fast-paced battles that demand quick judgment and precise micro-management. The standout moments occur during the tense standoffs over the central building, with the player who claims it gaining a significant advantage. While beginners may find it challenging, the symmetrical design ensures strong balance, making it ideal for refining strategies through repeated play. Recommended strategies focus on securing early resources and controlling the central building, with careful observation of opponents' movements and preparation for counterplay. The map offers moderate difficulty, enjoyable for both beginners and experts, though effective use of the symmetrical structure requires strategic play.
울트라마라톤 바운드 (Ultramarathon Bound)
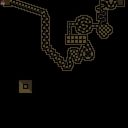
Ultramarathon Bound는 6명의 플레이어가 동시에 참여할 수 있는 유즈맵으로, 넓은 4096×4096 황무지 타일셋을 배경으로 한 대규모 전투를 제공한다. 맵 전체가 하나의 거대한 경기장처럼 설계되어 있어 플레이어들은 초반에 기지를 구축하고 자원을 확보한 뒤, 상대 진영을 향해 지속적으로 전진한다. 주요 목표는 적 유닛을 물리치며 맵 중앙에 위치한 핵심 지점을 점령하는 것으로, 점령 후에도 주변에 남아 있는 적군을 방어해야 하는 구조다. 전투는 주로 대규모 유닛 군단을 활용한 전면전 형태이며, 좁은 통로보다는 넓은 평야가 많아 기동성이 중요한 요소로 작용한다. 따라서 유닛 조합과 마이크로 관리보다는 매크로 자원 관리와 전투 흐름을 파악하는 능력이 승패를 좌우한다. 플레이 전에는 각 플레이어가 사용할 종족과 유닛 구성을 미리 정하고, 초반 자원 채집 위치와 방어 라인을 계획하는 것이 좋다. 특히, 맵 중앙에 접근하기 전후로 발생하는 전투가 치열하므로, 충분한 방어 유닛을 배치하고, 필요 시 빠르게 재배치할 수 있는 이동 루트를 확보하는 것이 중요하다. 초보자보다는 기본적인 전술을 이해하고 있는 플레이어에게 적합하며, 팀 플레이보다는 개인 간의 경쟁을 즐기는 유저에게 특히 추천한다. Ultramarathon Bound is a user-made map that supports up to six players simultaneously, featuring a massive 4096×4096 desert tileset as the battlefield. The map is designed as a single large arena where players establish bases, gather resources, and then push forward toward the opponent's side. The primary objective is to capture a central point located in the middle of the map after eliminating enemy units, and then defend that point against any remaining foes. Combat primarily involves large-scale army engagements rather than tight choke points, emphasizing mobility across the expansive plains. Consequently, macro resource management and strategic flow control are more decisive than micro unit control. Before playing, participants should decide on their chosen race and unit composition, plan early resource gathering spots, and set up defensive lines. Since battles around the central area become intense, it is advisable to station sufficient defensive units and maintain clear retreat routes for rapid redeployment. This map suits players who have a solid grasp of basic tactics rather than beginners, and it is especially recommended for those who enjoy head-to-head competition over team-based play.
트와일라이트 스타 (Twilight Star)
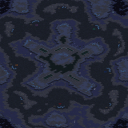
《트와일라이트 스타》는 스타크래프트 브루드워의 6144×6144 화산 타일셋을 활용한 5인용 밀리 맵으로, 넓은 평야와 중앙의 분화구가 특징적인 맵입니다. 맵의 이름은 ‘Twilight Star’로, ‘황혼의 별’이라는 뜻을 담고 있어 밤과 낮의 경계가 어우러지는 분위기를 연상시킵니다. 이미지에서 확인되는 중앙의 커다란 분화구는 경기의 초점을 잡아주며, 주변으로 펼쳐진 평야는 빠른 확장과 전략적 병력 운용을 요구합니다. 맵의 구조는 2~5명의 플레이어가 각자의 기지를 지키며 자원을 확보하고, 중앙의 분화구를 차지하기 위한 경쟁을 펼치는 데 최적화되어 있습니다. 이 맵의 가장 큰 특징은 넓은 맵 크기와 화산 타일셋의 조화로, 맵의 개방성과 togetherness가 동시에 느껴집니다. 중앙 분화구 주변은 비교적 평탄한 지형이지만, 곳곳에 있는 언덕과 협곡은 시야 확보와 병력 이동 경로를 제한하는 요소로 작용합니다. 또한, 맵의 구석에 위치한 리소스 지역은 초기 자원 확보 경쟁을 치열하게 만들며, 이를 바탕으로 한 빠른 팩토리나 스타포트 건설이 승패를 좌우할 수 있습니다. 플레이어는 초반부터 중앙 분화구 주변의 미네랄과 가스 지역을 확보하기 위해 분주히 움직이며, 동시에 상대방의 확장을 저지하거나 병력을 파견해 중앙을 차지하기 위한 게임이 펼쳐집니다. 《트와일라이트 스타》는 주로 3~4명의 플레이어가 참여하는 것이 이상적이지만, 2인용으로도 사용될 수 있으며, 5인까지도 플레이 가능한 구성을 갖추고 있습니다. 맵의 밸런스는 중앙 분화구의 중요성을 과하게 부각시키지 않으면서도, 각 플레이어의 기지 접근성을 균형 있게 유지하도록 설계되어 있습니다. 초보자와 숙련자 모두 즐길 수 있는 구조이지만, 넓은 맵을 효율적으로 활용하기 위해서는 맵 리딩과 자원 관리 능력이 필수적입니다. 또한, 맵의 이름만큼이나 분위기 있는 배경과 함께, 밤과 낮의 조명이 맵의 아름다움을 더하는 요소로 작용합니다. 이 맵을 플레이하기 전에는 중앙 분화구의 중요성과 리소스 지역의 분포를 미리 숙지하고, 빠른 초기 진출과 방어 전략을 준비하는 것이 중요합니다. Twilight Star is a 5-player Brood War melee map set on a 6144×6144 volcanic tileset, featuring wide open terrain and a central caldera that defines the battlefield. The map’s name, translating to "Twilight Star," evokes a sense of dusk and dawn, blending the contrast between light and dark. The central caldera serves as a focal point, while the surrounding plains demand strategic expansion and troop movement. The map’s most striking feature is its balance between open space and strategic chokepoints. The caldera’s perimeter offers relatively flat ground, but scattered hills and ravines limit vision and complicate troop movements. Corner mineral patches spark early-game resource competition, forcing players to secure expansions quickly. Victory often hinges on controlling the central region while denying opponents access or launching timely offensives. While Twilight Star supports 2 to 5 players, optimal balance is achieved with 3–4 players, though the layout remains fair for 5. The design avoids overemphasizing the caldera’s dominance while maintaining equitable base accessibility. Suitable for both beginners and veterans, the map rewards map awareness, resource management, and adaptable strategies. The atmospheric lighting, enhanced by the map’s name, adds to its visual appeal. Before playing, familiarize yourself with resource locations and the caldera’s strategic value, and prepare early expansion and defense tactics.
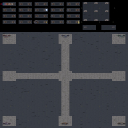
E V O L V E S 2007 Choice
스타크래프트: 브루드워의 유즈맵계에서 독특한 개성을 지닌 ‘E V O L V E S 2007 Choice’는 6인 플레이를 전제로 제작된 UMS 맵으로, 중앙에 위치한 거대한 둥근 지형과 주변을 에워싼 방해물들이 특징적인 디자인으로 시선을 사로잡는다. 맵의 구조는 중앙 광장과 같은 넓은 공간을 중심으로, 각 플레이어는 자신의 시작 지점에서 맵 외곽으로 뻗어나가는 다리를 통해 이동할 수 있으며, 중앙 광장 주변에는 다양한 장애물과 자원 기지들이 배치되어 있다. 특히, 중앙 광장은 맵의 핵심 교전 지역으로, Here be Dragons!이나 Doodad 설치형 디펜스 맵에서 볼 수 있는 ‘중앙 점령’ 개념이 강하게 느껴진다. 각 플레이어는 시작 후 중앙으로 진출해 자원을 확보하거나 적을 견제하는 전략을 펼칠 수 있으며, 맵의 외곽과 내부를 오가는 다리 구조는 진형 싸움과 기동전 양면에서 흥미로운 전투를 유도한다. 맵의 분위기는 우주 테마를 기반으로 한 어두운 청색과 검은색 톤으로 통일되어 있으며, 곳곳에 배치된 소규모 구조물들과 장애물들은 시야를 가리고 기습을 유도하는 역할을 한다. 플레이어들은 시작 지점에서 중앙으로 진출하는 과정에서 다리나 좁은 통로를 통과해야 하므로, 맵의 특성을 잘 이해하지 못하면 예상치 못한 기습에 당할 위험이 크다. 또한, 중앙 광장 주변의 자원 기지들은 비교적 밀집되어 있어, 초반 자원 확보 경쟁이 치열해질 가능성이 높다. 이 맵은 초보보다는 어느 정도의 전략적 감각과 맵 리딩 능력을 갖춘 플레이어들에게 더 어울리며, 특히 중앙 점령과 기동전을 중시하는 플레이 스타일을 선호하는 유저들에게 추천할 만하다. 다만, 맵의 복잡한 구조 때문에 처음 플레이할 때는 길을 잃거나 적의 위치를 잘못 판단하기 쉬우므로, 한 번씩 맵을 둘러보며 주요 경로와 위협 요소를 미리 파악하는 것이 중요하다. Evolves 2007 Choice is a unique UMS map from the StarCraft: Brood War custom map scene, designed for six players. Its standout feature is the large circular terrain at the center, surrounded by obstructive elements that create a distinctive layout. The map is structured around a central open space, with each player starting at a base connected to the outer edges via bridges, allowing movement toward the center. The central area serves as the primary engagement zone, reminiscent of maps like Here be Dragons! or doodad-based defense maps, where controlling the center is crucial. Players must balance resource collection with strategic maneuvers, as the bridges and narrow pathways between the outer and inner areas create opportunities for ambushes and tactical skirmishes. The map’s aesthetic is unified by a dark blue and black space-themed palette, with scattered small structures and obstacles designed to obscure vision and encourage flanking maneuvers. Early gameplay involves navigating bridges or tight corridors to reach the center, making map awareness essential to avoid unexpected attacks. The clustered resource bases around the central area also heighten competition for early-game resource dominance. This map is best suited for players with strategic foresight and map-reading skills, particularly those who enjoy central control and mobile combat strategies. However, its intricate design can be disorienting for newcomers, so taking time to familiarize oneself with key paths and potential threats is highly recommended before diving into full matches.
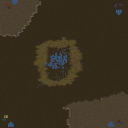
더 써클 오브 라이프 (The Circle Of Life)
스타크래프트 브루드워의 고전 디펜스 맵으로 유명한 'The Circle Of Life'는 중앙에 위치한 거대한 원형 구조물을 중심으로 전투가 펼쳐지는 독특한 디자인으로 주목받고 있다. 이 맵은 중앙의 'Circle'을 차지하는 것이 핵심 전략 요소로, 원을 차지한 플레이어는 추가적인Resources나 버프를 획득하여 전투에서 우위를 점할 수 있도록 설계되어 있다. 초보자와 숙련자 모두 즐길 수 있도록 밸런스가 조절된 이 맵은 4명의 플레이어가 중앙을 둘러싼 4개의 진영에서 시작하며, 각 진영은Resources와 방어 시설이 배치되어 있어 치열한 공방전이 벌어질 수밖에 없다. 중앙의 Circle을 차지하기 위한 전투는 물론, 상대방의Resource를 빼앗거나 방어선을 무너뜨리는 전략도 중요하다. 맵의 구조상 중앙 지역은 좁고 복잡한 지형으로 이루어져 있어 전차나 공중 유닛의 활용이 제한적이므로, 지상군과 생산 건물의 효율적인 배치와 병력 조합이 승패를 좌우할 것이다. 또한, Resources를 확보하여 병력을 지속적으로 생산하고 업그레이드하는 것이 필수적이므로, 초반 Resource 확보 경쟁도 치열할 수밖에 없다. 이 맵은 특히Resource 관리와 중앙 점령 경쟁이라는 독특한 메커니즘으로 인해 단순히 전투력만으로는 승리하기 어려운 구조를 지니고 있다. 따라서Resource 확보와 központ 점령 타이밍을 잘 조절하는 플레이어가 유리하며, 초보자의 경우Resource 확보와 방어의 중요성을 먼저 숙지하는 것이 좋다. 또한, 맵의 중앙 지역은 좁고 복잡한 지형이므로, 대규모 병력보다는 소규모 정찰과 기습이 더 효과적일 수 있다. 이러한 특징 덕분에 'The Circle Of Life'는 전략적 깊이와 재미를 동시에 추구하는 유즈맵으로 자리매김하고 있다. 이 맵을 플레이하기 전에 확인해야 할 주요 포인트는Resource 확보와 중앙 Circle의 점령 타이밍이다. Resources를 최대한 빠르게 확보하고, 상대방의Resource 확보를 방해하는 동시에 중앙 Circle을 차지하기 위한 전략을 세우는 것이 핵심이다. 또한, 맵의 지형적 특성상 지상군과 방어 건물의 배치도 중요하므로, 이러한 부분들을 연습해두면 더 좋은 플레이 경험을 얻을 수 있을 것이다. 초보자라면Resource 확보와 방어의 기본기를 다지는 데 중점을 두고, 숙련자라면Resource 확보 경쟁과 중앙 점령 타이밍을 잘 조절하는 전략을 연습해보길 권장한다. "The Circle of Life" is a classic defense map from *StarCraft: Brood War*, renowned for its unique design centered around a massive circular structure in the middle where most of the action takes place. The core strategic element revolves around controlling this central "Circle," as the player who secures it gains additional resources or buffs, giving them a significant advantage in battle. The map is balanced to appeal to both beginners and experienced players, with four starting positions arranged around the Circle, each equipped with resources and defensive structures, ensuring intense attacks and counterattacks. Fighting for control of the Circle is only part of the strategy—plundering the opponent’s resources or breaking through their defenses are equally critical. Due to the map’s narrow and intricate central terrain, heavy use of siege tanks or air units is restricted, making efficient ground force deployment and unit composition vital to victory. Securing resources is essential for continuous production and upgrades, so the early-game scramble for resources is often fierce. This map stands out for its emphasis on resource management and central control, creating a structure where raw combat strength alone isn’t enough to guarantee success. Players who excel at balancing resource collection and timing their Circle captures hold a major edge, and beginners should prioritize mastering resource securing and defensive play. The cramped and complex central terrain also favors small-scale scouting and ambush tactics over large-scale engagements. These features combine to make *The Circle of Life* a highly strategic and engaging custom map. Before playing, key points to focus on are resource acquisition and timing the capture of the central Circle. Prioritize securing as many resources as possible early, disrupting your opponent’s resource collection while formulating a plan to seize the Circle. The terrain also demands smart placement of ground forces and defensive structures, so practicing these elements will enhance your experience. Beginners should concentrate on mastering resource securing and basic defense, while advanced players should refine their strategies around resource competition and central control timing.
최근 등록된 맵
새로 추가된 파일과 버전을 확인하세요.
울트라마라톤 바운드 (Ultramarathon Bound)
Ultramarathon Bound는 6명의 플레이어가 동시에 참여할 수 있는 유즈맵으로, 넓은 4096×4096 황무지 타일셋을 배경으로 한 대규모 전투를 제공한다. 맵 전체가 하나의 거대한 경기장처럼 설계되어 있어 플레이어들은 초반에 기지를 구축하고 자원을 확보한 뒤, 상대 진영을 향해 지속적으로 전진한다. 주요 목표는 적 유닛을 물리치며 맵 중앙에 위치한 핵심 지점을 점령하는 것으로, 점령 후에도 주변에 남아 있는 적군을 방어해야 하는 구조다. 전투는 주로 대규모 유닛 군단을 활용한 전면전 형태이며, 좁은 통로보다는 넓은 평야가 많아 기동성이 중요한 요소로 작용한다. 따라서 유닛 조합과 마이크로 관리보다는 매크로 자원 관리와 전투 흐름을 파악하는 능력이 승패를 좌우한다. 플레이 전에는 각 플레이어가 사용할 종족과 유닛 구성을 미리 정하고, 초반 자원 채집 위치와 방어 라인을 계획하는 것이 좋다. 특히, 맵 중앙에 접근하기 전후로 발생하는 전투가 치열하므로, 충분한 방어 유닛을 배치하고, 필요 시 빠르게 재배치할 수 있는 이동 루트를 확보하는 것이 중요하다. 초보자보다는 기본적인 전술을 이해하고 있는 플레이어에게 적합하며, 팀 플레이보다는 개인 간의 경쟁을 즐기는 유저에게 특히 추천한다. Ultramarathon Bound is a user-made map that supports up to six players simultaneously, featuring a massive 4096×4096 desert tileset as the battlefield. The map is designed as a single large arena where players establish bases, gather resources, and then push forward toward the opponent's side. The primary objective is to capture a central point located in the middle of the map after eliminating enemy units, and then defend that point against any remaining foes. Combat primarily involves large-scale army engagements rather than tight choke points, emphasizing mobility across the expansive plains. Consequently, macro resource management and strategic flow control are more decisive than micro unit control. Before playing, participants should decide on their chosen race and unit composition, plan early resource gathering spots, and set up defensive lines. Since battles around the central area become intense, it is advisable to station sufficient defensive units and maintain clear retreat routes for rapid redeployment. This map suits players who have a solid grasp of basic tactics rather than beginners, and it is especially recommended for those who enjoy head-to-head competition over team-based play.
Requiem
스타크래프트 브루드워의 <Requiem>은 4인용 밀리 맵으로, 그 이름에서 느껴지듯 장엄하고 무거운 분위기의 전투를 경험할 수 있는 맵이다. 내부 맵 설명에 ‘Dirge for Deads... Oh Lord, Be with them always...’라는 문구가 삽입되어 있어, 플레이어는 마치 전장 한복판에 서 있는 듯한 느낌을 받을 것이다. 맵의 전체적인 분위기는 정글 타일셋을 기반으로 하며, 중간 중간 붉은색과 파란색의 건물 잔해가 scattered되어 있어 격전지의 분위기를 한층 더해준다. 맵의 크기는 4096x4096으로 넓은 편이지만, 밀리 맵답게 주요 전투 지역은 중앙과 각 구석에 배치되어 있어 초보와 숙련자 모두에게 공정한 경쟁을 제공한다. 이 맵은 4명의 플레이어가 각자 네크로스의 시작 지점에서 출발하여 중앙 지역을 차지하기 위한 혈투를 벌이는 구조로 되어 있다. 시작 지역은 각각의 플레이어에게 동등한 자원과 건물 배치 공간을 제공하며, 중앙 지역은 자원과 건물을 확보하기 위한 핵심 지역으로 기능한다. 맵의 지형은 비교적 평평한 편이지만, 곳곳에 잔해와 지형적 장애물이 있어 전략적인 움직임을 요구한다. 특히, 중앙 지역은 넓은 평야로 이루어져 있어 대규모 전투가 자주 발생하며, 이 과정에서 플레이어는 자신의 병력 운용 능력과 타이밍 감각을 발휘할 수 있다. <Requiem>은 단순히 전투력만으로는 승리를 장담할 수 없는 맵이다. 중앙 지역을 차지하기 위한 초반 러시, 상대방의 자원 라인을 끊기 위한 게릴라 전술, 그리고 중앙에서의 대규모 전투에서 승리를 이끌어내는 전략적 사고가 요구된다. 또한, 맵의 지형적 특징을 잘 활용하여 적을 유인하거나 방어선을 구축하는 것이 중요하다. 초보 플레이어의 경우, 중앙 지역을 차지하기 위한 기본적인 전술과 병력 운용법을 익히는 데 중점을 둬야 하며, 숙련자라면 보다 복잡한 전략과 타이밍을 요구하는 전술을 구사할 수 있을 것이다. 이 맵은 1.1 버전으로,DreamReaver에 의해 최초 제작된 후 Rose.of.Dream에 의해 수정되었다. 내부 설명에서 ‘Through good or bad, and at all times through the happy and sad. Amen.’이라는 문구는 플레이어들에게 전장에서의 인고와 승리를 함께 경험하라는 메시지를 전달하는 듯하다.Requiem은 밀리 맵이지만, 그 이름과 분위기만큼은 유독 감동적이고 인상적인 맵으로, 플레이어들에게 전략적 깊이와 togetherness를 동시에 느낄 수 있는 기회를 제공한다. 특히, 친구들과 함께 플레이할 때 그 진가를 발휘할 수 있을 것으로 보인다. 플레이 전 반드시 확인해야 할 사항은 맵의 중앙 지역과 각 플레이어의 시작 지점 사이의 거리, 그리고 잔해와 장애물의 배치다. 또한, 중앙 지역을 차지하기 위한 초반 러시 타이밍과 병력 조합을 미리 연습해두면 게임에서 큰 이점을 얻을 수 있다.Requiem은 단순히 전투력만으로는 승리를 장담할 수 없는 맵이므로, 전략적 사고와 지형 활용 능력을 키우고자 하는 플레이어들에게 강력히 추천한다. Requiem is a 4-player melee map in StarCraft: Brood War that offers a solemn and intense battle experience, as suggested by its name. The internal map description includes the phrase ‘Dirge for Deads... Oh Lord, Be with them always...’, immersing players in the atmosphere of a battlefield. The map utilizes a jungle tileset, with scattered red and blue building debris enhancing the sense of a fierce struggle. With a size of 4096x4096, the map is spacious, but its key battle zones—central and corner areas—are well-balanced for fair competition among players of all skill levels. The map is designed for four players, each starting at a Necros spawn point, competing to control the central region. The starting areas provide equal resources and building space, while the central zone serves as the critical region for securing resources and establishing dominance. The terrain is relatively flat but includes debris and obstacles, demanding strategic movement. The central area, in particular, is a vast plain where large-scale battles frequently occur, testing players' troop management and timing. Requiem is not a map where raw combat power alone guarantees victory. Players must employ tactics such as early rushes to secure the central region, guerrilla strikes to disrupt opponents' resource lines, and strategic maneuvering during large-scale battles. Understanding the terrain and leveraging it to lure enemies or fortify defenses is crucial. Beginners should focus on mastering basic tactics and troop management, while advanced players can experiment with more complex strategies and timing. This map is version 1.1, originally created by DreamReaver and later modified by Rose.of.Dream. The internal description’s phrase ‘Through good or bad, and at all times through the happy and sad. Amen.’ conveys a message of enduring both hardship and victory on the battlefield. Requiem stands out among melee maps for its emotional depth and atmosphere, offering players a unique blend of strategic depth and camaraderie, especially when played with friends. Before playing, players should familiarize themselves with the distance between the central region and each player’s starting point, as well as the placement of debris and obstacles. Practicing early rush timings and troop compositions for securing the central zone can provide a significant advantage. Requiem is highly recommended for players seeking to enhance their strategic thinking and terrain utilization skills, rather than relying solely on combat power.
메두사 1.1 (Medusa 1.1)
스타크래프트 브루드워의 classic 맵인 | iCCup | Medusa 1.1은 3인용 밀리 맵으로, 독특한 맵 디자인과 중립 건물을 활용한 전략적 요소가 돋보이는 작품이다. 맵은 전체적으로 대칭형 구조를 띄며, 중앙에 위치한 중립 건물 '메두사'를 중심으로 세 플레이어의 본진이 배치되어 있다. 각 플레이어는 본진에서 자원 채취와 병력 생산을 진행하며, 메두사를 차지하기 위한 전투가 자연스럽게 전개된다. 메두사는 일시적으로 점령할 수 있는 중립 건물로, 점령 시 일정 시간 동안 강력한 버프를 제공하거나 자원 채취량을 증가시키는 등 전략적 이점을 준다. 맵의 지형은 화산 지형을 기반으로 하여, 언덕과 평지, 바위 지형이 조화를 이루며, 이러한 지형적 특징은 병력 이동과 전투 시 전략적 우위를 제공한다. 특히, 메두사 주변의 좁은 길목은 방어와 공세를 동시에 고려해야 하는 핵심 지역으로, 플레이어는 이곳을 어떻게 활용하느냐에 따라 승패가 갈릴 수 있다. 또한, 각 플레이어의 본진은 입구와 언덕으로 보호되어 있어 초기 방어가 다소 수월한 편이지만, 반대로 중앙 진출이 늦어질 경우 메두사 점유 경쟁에서 밀릴 위험도 존재한다. 맵의 플레이 스타일은 중앙 메두사 점유를 두고 벌어지는 전투와, 본진 방어를 중심으로 한 자원 관리, 그리고 지형적 이점을 활용한 기습 공격 등이 주가 된다. 이러한 구조는 밀리 맵 특유의 긴장감과 전략적 깊이를 제공하며, 특히 초보자와 숙련자 모두에게 흥미로운 플레이 경험을 선사한다. 메두사의 점령 여부가 게임의 흐름을 결정짓는 만큼, 플레이어는 메두사 주변의 전투를 면밀히 관찰하고, 필요 시 동맹을 맺거나 배신하는 등 심리적 요소를 고려해야 한다. 이 맵은 3인용 밀리 맵으로서의 정체성을 강하게 드러내며, 특히 iCCup에서 공식 대회용으로 사용된 경력이 있어 그 완성도가 검증된 작품이라 할 수 있다. 메두사의 버프 효과나 지속 시간 등은 맵 내 트리거로 조정될 수 있지만, 기본적으로는 중앙 건물을 둘러싼 전략적 전투가 주된 재미 요소다. 본진 방어와 메두사 점령의 균형을 잘 맞춰야만 승리를 차지할 수 있는 이 맵은, 스타크래프트 브루드워 밀리 맵의 정수를 느낄 수 있는佳作이다. 플레이 전에는 메두사의 버프 효과와 맵의 지형적 특징, 그리고 각 플레이어의 본진 구조를 미리 숙지하고, 중앙 진출 타이밍을 계산하는 연습이 필요하다. StarCraft: Brood War's classic map | iCCup | Medusa 1.1 is a three-player melee map renowned for its unique design and strategic use of neutral buildings. The map features a symmetrical structure with three players' main bases arranged around the central neutral building, Medusa. Players gather resources and produce units from their bases, naturally leading to battles over control of Medusa. Medusa is a temporary neutral structure that grants powerful buffs when occupied, such as increased resource gathering or temporary combat advantages, providing significant strategic benefits. The terrain is based on a volcanic landscape, blending hills, flatlands, and rocky formations. This varied terrain offers strategic advantages in movement and combat. The narrow paths around Medusa are critical zones where players must balance defense and offense, as control here can determine the outcome of the game. Each player's main base is protected by entrances and elevated terrain, making initial defense easier, but delayed central expansion risks falling behind in the race for Medusa. The gameplay revolves around fighting for Medusa, resource management centered on base defense, and utilizing terrain advantages for surprise attacks. This structure delivers the tense, deep strategy characteristic of melee maps, offering an engaging experience for both beginners and veterans. Since control of Medusa often dictates the game's flow, players must closely monitor the area, form alliances, or betray others as needed, adding psychological depth to the match. As a three-player melee map, Medusa 1.1 strongly embodies its identity, and its proven track record—including use in official iCCup tournaments—confirms its polished design. While the buff effects and duration of Medusa can be adjusted via in-map triggers, the core appeal lies in the strategic battles surrounding the central structure. Victory requires balancing base defense with Medusa control, making this map a masterpiece that captures the essence of Brood War melee maps. Before playing, it's essential to understand Medusa's buff effects, the map's terrain features, and the layout of each player's base, as well as to practice timing your central expansion.
E V O L V E S 2007 Choice
스타크래프트: 브루드워의 유즈맵계에서 독특한 개성을 지닌 ‘E V O L V E S 2007 Choice’는 6인 플레이를 전제로 제작된 UMS 맵으로, 중앙에 위치한 거대한 둥근 지형과 주변을 에워싼 방해물들이 특징적인 디자인으로 시선을 사로잡는다. 맵의 구조는 중앙 광장과 같은 넓은 공간을 중심으로, 각 플레이어는 자신의 시작 지점에서 맵 외곽으로 뻗어나가는 다리를 통해 이동할 수 있으며, 중앙 광장 주변에는 다양한 장애물과 자원 기지들이 배치되어 있다. 특히, 중앙 광장은 맵의 핵심 교전 지역으로, Here be Dragons!이나 Doodad 설치형 디펜스 맵에서 볼 수 있는 ‘중앙 점령’ 개념이 강하게 느껴진다. 각 플레이어는 시작 후 중앙으로 진출해 자원을 확보하거나 적을 견제하는 전략을 펼칠 수 있으며, 맵의 외곽과 내부를 오가는 다리 구조는 진형 싸움과 기동전 양면에서 흥미로운 전투를 유도한다. 맵의 분위기는 우주 테마를 기반으로 한 어두운 청색과 검은색 톤으로 통일되어 있으며, 곳곳에 배치된 소규모 구조물들과 장애물들은 시야를 가리고 기습을 유도하는 역할을 한다. 플레이어들은 시작 지점에서 중앙으로 진출하는 과정에서 다리나 좁은 통로를 통과해야 하므로, 맵의 특성을 잘 이해하지 못하면 예상치 못한 기습에 당할 위험이 크다. 또한, 중앙 광장 주변의 자원 기지들은 비교적 밀집되어 있어, 초반 자원 확보 경쟁이 치열해질 가능성이 높다. 이 맵은 초보보다는 어느 정도의 전략적 감각과 맵 리딩 능력을 갖춘 플레이어들에게 더 어울리며, 특히 중앙 점령과 기동전을 중시하는 플레이 스타일을 선호하는 유저들에게 추천할 만하다. 다만, 맵의 복잡한 구조 때문에 처음 플레이할 때는 길을 잃거나 적의 위치를 잘못 판단하기 쉬우므로, 한 번씩 맵을 둘러보며 주요 경로와 위협 요소를 미리 파악하는 것이 중요하다. Evolves 2007 Choice is a unique UMS map from the StarCraft: Brood War custom map scene, designed for six players. Its standout feature is the large circular terrain at the center, surrounded by obstructive elements that create a distinctive layout. The map is structured around a central open space, with each player starting at a base connected to the outer edges via bridges, allowing movement toward the center. The central area serves as the primary engagement zone, reminiscent of maps like Here be Dragons! or doodad-based defense maps, where controlling the center is crucial. Players must balance resource collection with strategic maneuvers, as the bridges and narrow pathways between the outer and inner areas create opportunities for ambushes and tactical skirmishes. The map’s aesthetic is unified by a dark blue and black space-themed palette, with scattered small structures and obstacles designed to obscure vision and encourage flanking maneuvers. Early gameplay involves navigating bridges or tight corridors to reach the center, making map awareness essential to avoid unexpected attacks. The clustered resource bases around the central area also heighten competition for early-game resource dominance. This map is best suited for players with strategic foresight and map-reading skills, particularly those who enjoy central control and mobile combat strategies. However, its intricate design can be disorienting for newcomers, so taking time to familiarize oneself with key paths and potential threats is highly recommended before diving into full matches.
더 써클 오브 라이프 (The Circle Of Life)
스타크래프트 브루드워의 고전 디펜스 맵으로 유명한 'The Circle Of Life'는 중앙에 위치한 거대한 원형 구조물을 중심으로 전투가 펼쳐지는 독특한 디자인으로 주목받고 있다. 이 맵은 중앙의 'Circle'을 차지하는 것이 핵심 전략 요소로, 원을 차지한 플레이어는 추가적인Resources나 버프를 획득하여 전투에서 우위를 점할 수 있도록 설계되어 있다. 초보자와 숙련자 모두 즐길 수 있도록 밸런스가 조절된 이 맵은 4명의 플레이어가 중앙을 둘러싼 4개의 진영에서 시작하며, 각 진영은Resources와 방어 시설이 배치되어 있어 치열한 공방전이 벌어질 수밖에 없다. 중앙의 Circle을 차지하기 위한 전투는 물론, 상대방의Resource를 빼앗거나 방어선을 무너뜨리는 전략도 중요하다. 맵의 구조상 중앙 지역은 좁고 복잡한 지형으로 이루어져 있어 전차나 공중 유닛의 활용이 제한적이므로, 지상군과 생산 건물의 효율적인 배치와 병력 조합이 승패를 좌우할 것이다. 또한, Resources를 확보하여 병력을 지속적으로 생산하고 업그레이드하는 것이 필수적이므로, 초반 Resource 확보 경쟁도 치열할 수밖에 없다. 이 맵은 특히Resource 관리와 중앙 점령 경쟁이라는 독특한 메커니즘으로 인해 단순히 전투력만으로는 승리하기 어려운 구조를 지니고 있다. 따라서Resource 확보와 központ 점령 타이밍을 잘 조절하는 플레이어가 유리하며, 초보자의 경우Resource 확보와 방어의 중요성을 먼저 숙지하는 것이 좋다. 또한, 맵의 중앙 지역은 좁고 복잡한 지형이므로, 대규모 병력보다는 소규모 정찰과 기습이 더 효과적일 수 있다. 이러한 특징 덕분에 'The Circle Of Life'는 전략적 깊이와 재미를 동시에 추구하는 유즈맵으로 자리매김하고 있다. 이 맵을 플레이하기 전에 확인해야 할 주요 포인트는Resource 확보와 중앙 Circle의 점령 타이밍이다. Resources를 최대한 빠르게 확보하고, 상대방의Resource 확보를 방해하는 동시에 중앙 Circle을 차지하기 위한 전략을 세우는 것이 핵심이다. 또한, 맵의 지형적 특성상 지상군과 방어 건물의 배치도 중요하므로, 이러한 부분들을 연습해두면 더 좋은 플레이 경험을 얻을 수 있을 것이다. 초보자라면Resource 확보와 방어의 기본기를 다지는 데 중점을 두고, 숙련자라면Resource 확보 경쟁과 중앙 점령 타이밍을 잘 조절하는 전략을 연습해보길 권장한다. "The Circle of Life" is a classic defense map from *StarCraft: Brood War*, renowned for its unique design centered around a massive circular structure in the middle where most of the action takes place. The core strategic element revolves around controlling this central "Circle," as the player who secures it gains additional resources or buffs, giving them a significant advantage in battle. The map is balanced to appeal to both beginners and experienced players, with four starting positions arranged around the Circle, each equipped with resources and defensive structures, ensuring intense attacks and counterattacks. Fighting for control of the Circle is only part of the strategy—plundering the opponent’s resources or breaking through their defenses are equally critical. Due to the map’s narrow and intricate central terrain, heavy use of siege tanks or air units is restricted, making efficient ground force deployment and unit composition vital to victory. Securing resources is essential for continuous production and upgrades, so the early-game scramble for resources is often fierce. This map stands out for its emphasis on resource management and central control, creating a structure where raw combat strength alone isn’t enough to guarantee success. Players who excel at balancing resource collection and timing their Circle captures hold a major edge, and beginners should prioritize mastering resource securing and defensive play. The cramped and complex central terrain also favors small-scale scouting and ambush tactics over large-scale engagements. These features combine to make *The Circle of Life* a highly strategic and engaging custom map. Before playing, key points to focus on are resource acquisition and timing the capture of the central Circle. Prioritize securing as many resources as possible early, disrupting your opponent’s resource collection while formulating a plan to seize the Circle. The terrain also demands smart placement of ground forces and defensive structures, so practicing these elements will enhance your experience. Beginners should concentrate on mastering resource securing and basic defense, while advanced players should refine their strategies around resource competition and central control timing.
이볼브스 6웨이 v.2 (E V O L V E S 6 W A Y v.2)
스타크래프트: 브루드워의 유즈맵 ‘이볼브스 6웨이 v.2’는 3대3 팀전 구도로 펼쳐지는 흥미로운 디펜스 및 생존형 맵이다. 맵의 중심에는 커다란 큐브 형태의 섬이 있으며, 이 섬을 중심으로 여섯 방향의 길목이 뻗어 있어 각 팀이 중앙을 차지하기 위해 경쟁하는 구조다. 각 길목은 좁고 복잡한 지형을 이루고 있어 방어와 진격이 동시에 고려되어야 한다. 맵의 이름은 ‘E V O L V E S 6 W A Y’라는 제목에서 유추할 수 있듯이, 진화와 변화의 6방향 진행을 테마로 삼고 있는 듯하다. 플레이어는 각 팀의 일원으로서 중앙의 리소스를 확보하거나 상대방을 제압하면서 승리를 노리게 된다. 맵의 디자인상으로는 우주 테마가 적용되어 있으며, 타일셋과 배경이 어두운 톤으로 이루어져 우주 공간 feel을 강조하고 있다. 각 길목은 좁고 구불구불한 구조로 인해 전략적인 움직임이 요구되며, 중앙의 큐브는 여러 개의 소규모 건물을 배치할 수 있는 공간으로 보인다. 맵의 난이도는 팀 간의 균형과 플레이어의 숙련도에 따라 달라질 수 있으며, 초보 플레이어의 경우 중앙 점령과 방어에 어려움을 느낄 수 있다. 경험이 많은 유저라면 중앙의 리소스를 빠르게 확보하고, 상대방의 진격을 효율적으로 차단할 수 있는 전략을 세울 수 있을 것이다. 특히, 좁은 길목을 활용한 매복이나 sudden push는 이 맵의 주요 재미 요소로 작용한다. 추천 대상은 팀 플레이를 즐기는 유저나 디펜스 및 점령형 맵을 선호하는 플레이어들이다. 중앙의 리소스 관리와 길목 방어에 중점을 둔 플레이 스타일이 매력적으로 느껴질 것이다. 다만, 넓은 맵 크기 대비 좁은 길목으로 인해 팀 간의 소통과 협력이 매우 중요하다는 점을 염두에 두어야 한다. 플레이 전에는 각 길목의 지형과 중앙의 공간 활용 가능성을 미리 확인하는 것이 좋다. 또한, 팀원 간의 역할 분배(공격수, 방어수, 탐색자 등)를 명확히 하는 것이 승리에 도움이 될 것이다. 이 맵은 브루드워의 유즈맵 커뮤니티에서 상대적으로 마이너한 장르이지만, 전략성과 팀워크를 강조하는 맵으로 충분히 재밌게 즐길 수 있다. StarCraft: Brood War's custom map "Evolves 6 Way v.2" is a thrilling defense and survival-style team game set in a 3v3 format. At the center of the map lies a large cube-shaped island, with six narrow paths branching out in different directions, forcing teams to compete for control of the middle. The maze-like paths demand both defensive positioning and strategic advances. As the title "E V O L V E S 6 W A Y" suggests, the map revolves around themes of evolution and progression in six distinct directions. Players work as a team to secure central resources or eliminate opponents to secure victory. The map features a cosmic theme, with dark-toned tiles and backgrounds enhancing the sense of space. The winding, cramped paths require careful maneuvering, while the central cube offers space for multiple small structures. Difficulty varies depending on team balance and player skill—beginners may struggle with securing and defending the center, while experienced players can quickly claim resources and block enemy advances. Narrow paths make ambushes and sudden pushes key elements of fun, rewarding players who master the terrain. Ideal for team players or fans of defense and control maps, the map shines when focusing on resource management and path defense. However, the map's wide-open spaces paired with tight pathways make communication and coordination essential. Before playing, it's wise to scout the paths and central layout, and assigning clear roles (attacker, defender, scout, etc.) among teammates will greatly improve chances of winning. Though not a mainstream genre in Brood War’s custom map community, this map delivers strong strategy and teamwork, making it a fun and engaging experience.
보제스트 (Beau Geste)
‘Beau Geste’는 팀플을 중심으로 설계된 스타크래프트 브루드워의 유즈맵으로, 사막의 고원 지형을 배경으로 4팀이 동맹을 맺고 중앙의 폐허가 된 기지를 차지하기 위한 전략적 전투를 펼치는 맵이다. 맵의 이름은 프랑스 소설 ‘보제스트’에서 유래했으며, 사막 한가운데에 위치한 이 고원은 맵의 중앙에 위치한 폐허를 둘러싼 언덕과 협곡으로 나뉘어 있으며, 각 팀은 출발 지점에서 시작해 이 폐허를 점령하거나 파괴해야 한다. 맵의 지형은 완만한 언덕과 좁은 통로로 구성되어 있어 기동성과 방어 전략이 중요하며, 특히 중앙의 폐허는 전투의 핵심으로, 이곳을 차지한 팀이 유리한 고지를 점할 수 있다. 맵의 구성은 인공물로 가득한 폐허와 이를 둘러싼 사막 지형이 대조적으로 배치되어 있으며, 각 팀의 출발 지점은 맵의 네 모서리에 위치해 있어 초반 진출과 방어 라인이 뚜렷하게 나뉜다. 플레이어는 제한된 자원으로 동맹을 맺고, 중앙의 리소스를 두고 경쟁하거나, 방어선을 구축해 적의 공격을 차단하는 전략을 구사해야 한다. 맵의 볼륨은 넓고 개방적이지만, 협소한 통로와 언덕 지형이 전투의 흐름을 조절하는 역할을 한다. 이 맵은 특히 팀플레이와 동맹의 중요성이 강조되는 구조로, 개인의 능력뿐만 아니라 팀의 전략적 협력이 승리를 좌우한다. 초보자도 쉽게 접근할 수 있지만, 고수들은 지형과 자원 분배를 고려한 복잡한 전략을 펼칠 수 있는 깊이 있는 맵으로 평가된다. 플레이 전에는 팀원 간의 호흡과 초기 진출 전략을 사전에 논의하는 것이 중요하며, 중앙 폐허의 점령 여부가 승패를 가를 가능성이 크다. 또한, 맵의 사막 지형은 시야를 제한하는 요소는 없지만, 언덕을 활용한 시야 확보와 방어 라인 구축이 핵심 포인트다. ‘Beau Geste’ is a *StarCraft: Brood War* custom map designed around team play, set against a desert plateau where four teams ally to compete for control of the central ruined base. The map’s name is inspired by the French novel *Beau Geste*, and the plateau, located in the middle of the desert, is divided into hills and canyons surrounding the central ruins. Each team starts from the map’s edges and must either capture or destroy the ruins. The terrain features gentle slopes and narrow pathways, making mobility and defensive tactics crucial, with the central ruins serving as the focal point of battle—whoever holds them gains a significant advantage. The map contrasts man-made ruins with the surrounding desert terrain, and each team’s starting position is located in one of the four corners, creating clear early-game expansion and defensive lines. Players must manage limited resources, form alliances, compete for central resources, or build defenses to block enemy advances. While the map is vast and open, its narrow passages and hilly terrain regulate the flow of combat. Its structure emphasizes teamwork and alliances, where victory depends not just on individual skill but on coordinated strategy. Though accessible to beginners, it offers depth for advanced players who can devise complex tactics based on terrain and resource distribution. Before playing, discussing team coordination and initial expansion strategies is essential, as controlling the central ruins often determines the outcome. While the desert terrain doesn’t inherently restrict vision, securing high ground with hills and establishing defensive lines are key priorities.
트와일라이트 스타 (Twilight Star)
《트와일라이트 스타》는 스타크래프트 브루드워의 6144×6144 화산 타일셋을 활용한 5인용 밀리 맵으로, 넓은 평야와 중앙의 분화구가 특징적인 맵입니다. 맵의 이름은 ‘Twilight Star’로, ‘황혼의 별’이라는 뜻을 담고 있어 밤과 낮의 경계가 어우러지는 분위기를 연상시킵니다. 이미지에서 확인되는 중앙의 커다란 분화구는 경기의 초점을 잡아주며, 주변으로 펼쳐진 평야는 빠른 확장과 전략적 병력 운용을 요구합니다. 맵의 구조는 2~5명의 플레이어가 각자의 기지를 지키며 자원을 확보하고, 중앙의 분화구를 차지하기 위한 경쟁을 펼치는 데 최적화되어 있습니다. 이 맵의 가장 큰 특징은 넓은 맵 크기와 화산 타일셋의 조화로, 맵의 개방성과 togetherness가 동시에 느껴집니다. 중앙 분화구 주변은 비교적 평탄한 지형이지만, 곳곳에 있는 언덕과 협곡은 시야 확보와 병력 이동 경로를 제한하는 요소로 작용합니다. 또한, 맵의 구석에 위치한 리소스 지역은 초기 자원 확보 경쟁을 치열하게 만들며, 이를 바탕으로 한 빠른 팩토리나 스타포트 건설이 승패를 좌우할 수 있습니다. 플레이어는 초반부터 중앙 분화구 주변의 미네랄과 가스 지역을 확보하기 위해 분주히 움직이며, 동시에 상대방의 확장을 저지하거나 병력을 파견해 중앙을 차지하기 위한 게임이 펼쳐집니다. 《트와일라이트 스타》는 주로 3~4명의 플레이어가 참여하는 것이 이상적이지만, 2인용으로도 사용될 수 있으며, 5인까지도 플레이 가능한 구성을 갖추고 있습니다. 맵의 밸런스는 중앙 분화구의 중요성을 과하게 부각시키지 않으면서도, 각 플레이어의 기지 접근성을 균형 있게 유지하도록 설계되어 있습니다. 초보자와 숙련자 모두 즐길 수 있는 구조이지만, 넓은 맵을 효율적으로 활용하기 위해서는 맵 리딩과 자원 관리 능력이 필수적입니다. 또한, 맵의 이름만큼이나 분위기 있는 배경과 함께, 밤과 낮의 조명이 맵의 아름다움을 더하는 요소로 작용합니다. 이 맵을 플레이하기 전에는 중앙 분화구의 중요성과 리소스 지역의 분포를 미리 숙지하고, 빠른 초기 진출과 방어 전략을 준비하는 것이 중요합니다. Twilight Star is a 5-player Brood War melee map set on a 6144×6144 volcanic tileset, featuring wide open terrain and a central caldera that defines the battlefield. The map’s name, translating to "Twilight Star," evokes a sense of dusk and dawn, blending the contrast between light and dark. The central caldera serves as a focal point, while the surrounding plains demand strategic expansion and troop movement. The map’s most striking feature is its balance between open space and strategic chokepoints. The caldera’s perimeter offers relatively flat ground, but scattered hills and ravines limit vision and complicate troop movements. Corner mineral patches spark early-game resource competition, forcing players to secure expansions quickly. Victory often hinges on controlling the central region while denying opponents access or launching timely offensives. While Twilight Star supports 2 to 5 players, optimal balance is achieved with 3–4 players, though the layout remains fair for 5. The design avoids overemphasizing the caldera’s dominance while maintaining equitable base accessibility. Suitable for both beginners and veterans, the map rewards map awareness, resource management, and adaptable strategies. The atmospheric lighting, enhanced by the map’s name, adds to its visual appeal. Before playing, familiarize yourself with resource locations and the caldera’s strategic value, and prepare early expansion and defense tactics.
맵 선택 가이드
태그는 맵의 핵심 특징을 빠르게 설명하지만 제작 버전마다 규칙이 다를 수 있습니다. 상세 설명에서 권장 인원, 난이도, 플레이 시간과 버전을 함께 확인한 뒤 다운로드하세요.