
중앙 교전 스타크래프트 맵 모음
'중앙 교전' 태그가 등록된 맵을 모았습니다. 장르 하나로 찾기 어려운 플레이 방식, 난이도와 특징을 중심으로 인기 맵과 최신 맵을 비교해 보세요.
- 등록 맵
- 5개
- 누적 다운로드
- 0
- 누적 조회
- 121
인기 맵
다운로드와 조회 반응이 높은 맵입니다.
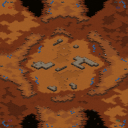
아이 오브 더 스톰 (Eye of the Storm)
‘Eye of the Storm(아이 오브 더 스톰)’은 스타크래프트: 브루드워의 밀리 맵으로, 2~4인용 전투가 벌어지는 격전지입니다. 맵의 핵심은 중앙에 위치한 거대한 눈 모양의 눈폭풍 중심부로, 이곳을 둘러싼 좁은 통로와 평야가 플레이어 간의 전투를 유도합니다. 맵은 황혼 테마의 타일셋으로 구성되어 있으며, 전체 크기는 4096x4096으로 넓은 개활지를 제공합니다. terrain의 특징은 중앙의 눈 모양 구조물이 눈에 띄며, 주변으로 평평한 지형과 언덕이 적절히 분포되어 있습니다. 이러한 지형은 테란의 벙커링, 저그의 러커 활용, 프로토스의 다크 템플러 전략 등 다양한 빌드와 전술을 시도할 수 있는 공간을 제공합니다. 특히 중앙의 좁은 길목은 빠른 접전과 견제 플레이가 가능하도록 설계되어 있어, 초보자와 숙련자 모두에게 흥미로운 대결을 선사합니다.Eye of the Storm은 밀리 장르의 클래식한 정석 맵으로, 전면전과 소규모 교전을 모두 고려한 밸런스가 특징입니다. 맵의 구조상 중앙 교전이 많기 때문에, 빠른 자원 수급과 병력 생산, 그리고 적절한 시기의 진출 타이밍이 승패를 좌우할 수 있습니다. 또한, 언덕과 평야의 조화로 인해 지상군과 공중 유닛의 역할도 중요해집니다. 초보 플레이어는Central Island를 중심으로 한 방어와 진출 타이밍을 익히는 데 집중해야 하며, 숙련자는 상대방의 자원 수급과 빌드 오더를 읽어낸 뒤 중앙을 장악하거나 사이드 러시를 감행하는 전략을 구사할 수 있습니다. 맵의 난이도는 전면전을 중심으로 한 밀리 전투에 익숙한 플레이어에게 적합하며, 팀플레이보다는 1vs1 또는 2vs2에서 더욱 빛을 발합니다.Eye of the Storm is a classic melee map for StarCraft: Brood War, designed for 2 to 4 players. The map features a central eye-shaped storm area surrounded by open terrain and strategic high grounds, making it ideal for intense battles. The Twilight tileset gives the map a dark, dramatic atmosphere, enhancing the sense of a stormy battlefield. The narrow paths leading to the center encourage quick engagements and harassment, while the surrounding plains allow for macro-focused play and large-scale battles. The balanced terrain supports diverse strategies for all three races, making it a versatile choice for both casual and competitive play. Players should focus on controlling the center, timing their attacks, and adapting to the opponent's build order. The map is particularly well-suited for 1v1 or 2v2 matches, where quick decision-making and efficient resource management are key to victory.
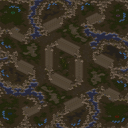
Ridge to Ridge (리짓 투 리지)
이 맵은 스타크래프트 브루드워의 사막 지형을 배경으로 한 4인용 밀리 맵으로, ‘Ridge to Ridge’라는 제목에서 알 수 있듯이 지형의 능선(Ridge)을 중심으로 전투가 펼쳐지는 특징을 가지고 있다. 맵의 중앙지역에는 넓은 평지가 펼쳐져 있으며, 능선 주변으로는 좁은 통로와 고지대가 형성되어 있어 각 플레이어의 시작 위치가 명확히 구분된다. 시작 지점은 사각형 형태로 배치되어 있으며, 각 플레이어의 본진은 능선의 안쪽에 자리 잡고 있어 초반 러시가 활발히 발생할 가능성이 높다. 능선 위의 좁은 길목은 병력 이동의 bottleneck이 될 수 있어, 중앙에서 벌어지는 전투는 물론이고 테란의 벙커링, 프로토스의 질럿 러시, 저그의 러커 전략 등 다양한 전술이 자연스럽게 시도될 수 있도록 설계되어 있다. 특히 능선의 고지대에서 시야가 확보되는 구조이기 때문에, 시야 싸움과 정찰이 중요한 역할을 할 것으로 보인다. 사막 지형의 특성상 Mineral Field가 비교적 멀리 배치되어 있어 자원 관리에도 신경을 써야 하며, 초반 자원 확보가 승패를 좌우할 가능성이 크다. 이 맵은 4인의 플레이어가 각자의 시작 지점에서 중앙 평지를 두고 경쟁하는 구조로, 밀리 맵으로서의 밸런스가 중요하다. 중앙 지역의 Mineral Field와 Gas Geyser의 분포는 비교적 공평하게 배치되어 있어,_resource gathering_에서 유불리가 발생하지 않도록 설계된 것으로 추정된다. 다만, 능선의 높이 차이로 인해 고지대에서 내려다보이는 시야와 이동 경로의 제약이 있을 수 있어, 플레이어는 지형을 최대한 활용한 전략을 세울 필요가 있다. 이 맵을 플레이하기 전에는 사막 지형의 특성을 잘 이해하고, 능선 위의 고지대를 점령하는 것이 중요하다는 점을 염두에 둬야 한다. 또한, 초반 러시 타이밍과 중앙 평지에서 벌어지는 전투의 양상을 잘 조율해야 하므로, 다양한 전략을 연습해보는 것이 좋다. 주로 중수 이상의 플레이어에게 추천되는 맵으로, 능선과 평지 간의 지형적 이점을 얼마나 잘 활용하느냐가 승패를 가를 것이다. This map is a four-player melee map set in the desert terrain of *StarCraft: Brood War*, where battles unfold around ridges, as suggested by its title, *Ridge to Ridge*. The central area features a wide open plain, while the surrounding ridges create narrow passages and elevated positions, clearly separating each player’s starting location. The starting bases are arranged in a square formation, with each player’s main base tucked inside the ridge, making early rushes highly likely. The narrow paths atop the ridges can act as bottlenecks for troop movements, shaping not only the central battles but also enabling Terran bunker rushes, Protoss Zealot rushes, and Zerg Lurker strategies. The elevated ridges provide clear sightlines, making scouting and vision control critical. Given the desert setting, Mineral Fields are spaced relatively far apart, requiring careful resource management—early resource control could heavily influence the outcome. Designed for four players competing over the central plain from their starting positions, balance is key for a competitive melee map. The distribution of Mineral Fields and Vespene Geysers in the center appears fair, avoiding any inherent advantage in resource gathering. However, height differences on the ridges may limit visibility and movement, so players must leverage the terrain strategically. Before playing, it’s important to understand the desert terrain’s nuances and prioritize securing the high ground on the ridges. Early rush timing and coordination in central battles are crucial, so practicing diverse strategies is recommended. Best suited for intermediate to advanced players, this map’s outcome hinges on how effectively players exploit the ridges and plains.
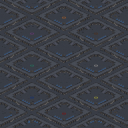
The Grid 1.1a (그리드 1.1a)
스타크래프트 브루드워의 고전 밀리 맵으로 유명한 'The Grid 1.1a'는 8명의 플레이어가 각자의 자원을 확보한 뒤 중앙의 넓은 평원에서 전투를 펼치는 구조를 가지고 있다. 맵의 특징은 중앙 광장과 이를 둘러싼 8개의 시작 위치가 깔끔한 대칭형으로 배치되어 있어 초보자와 숙련자 모두에게 공정한 전투를 제공한다는 점이다. 맵 중앙에는 광물 지대와 가스 기지가 배치되어 있어 자원 확보 경쟁이 치열해지며, 이로 인해 빠른 mineral gathering과 strategic gas control이 승리의 핵심 요소로 작용한다. 맵의 지형은 비교적 평평하여 이동 방해 요소가 적지만, 일부 시작 지점 주변의 언덕은 시야 확보와 초기 방어에 유리한 위치를 제공한다. 전투 시에는 중앙에서 마주치는 대규모 교전이 빈번하게 발생하며, 이로 인해 빠른 병력 생산과 효율적인 컨트롤이 요구된다. 특히 테란의 경우, 초기 SCV 생산과 베럭-팩토리-스타포트 체제를 빠르게 구축하여 중앙을 장악하는 것이 중요하며, 저그의 경우 초반 러시 방어와speedling skirmish를 통한 이득 창출이 승률을 좌우한다. 프로토스의 경우, 빠른 넥서스 확장을 바탕으로 다수의 질럿과 드라군을 배치하여 중앙을 장악하는 전략이 유효하다. 맵의 밸런스는 대체로 공정한 편이지만, 특정 종족의 특성과 맵의 대칭성 덕분에 누가 유리하다고 단정 짓기는 어려운 편이다. 이 맵은 1:1 밀리 매치에서 주로 사용되며, 중앙 교전을 통한 전술적 판단과micro management가 승부를 가르는 주요 포인트다. 초보자에게는 맵의 대칭성과 평범한 지형 덕분에 적응이 용이하지만, 숙련자들에게는 중앙에서의 빠른 교전과 효율적인 자원 운용이 관건이 된다. 따라서 이 맵을 플레이하기 전에는 각 종족별로 초반 빌드와 중앙 교전 전략을 숙지하는 것이 중요하다. 또한, 맵의 넓이가 넓기 때문에 시야 확보와 정찰을 소홀히 하지 않도록 주의해야 한다. 이 맵은 스타크래프트의 고전 밀리 맵답게 오랜 시간 동안 많은 플레이어들에게 사랑받아 왔으며, 그 안정적인 밸런스와 명확한 승리 조건 덕분에 지금도 정기적으로 플레이되고 있다. "The Grid 1.1a" is a classic Brood War melee map famous for its eight-player setup, where players secure their own resources before engaging in combat across a wide central battlefield. The map’s design features a clean symmetrical layout, with eight starting positions evenly spaced around a central plaza, ensuring fair conditions for both beginners and veterans. At the heart of the map lie mineral fields and gas geysers, making resource control a high-stakes race where efficient mineral gathering and strategic gas management can decide the match. The terrain is mostly flat, minimizing movement obstacles, though small hills near certain starting points provide early scouting and defensive advantages. Battles often culminate in large-scale clashes in the center, demanding quick unit production and precise micro-management. For Terran, establishing a fast Barracks-Factory-Starport build order to seize the center is crucial, while Zerg must focus on early rush defense and leveraging speedlings for early-game advantages. Protoss players benefit from rapid Nexus expansions, fielding Zealots and Dragoons to dominate the central area. While the map’s symmetry and balance make it fair overall, no single race holds a definitive advantage due to the varied strengths each brings. Primarily used in 1v1 melee matches, the map rewards tactical decision-making and micro in central engagements. Beginners appreciate its straightforward symmetry and terrain, while advanced players must master quick engagements and resource optimization. Before playing, it’s essential to study each race’s early builds and central combat strategies. Given the map’s size, maintaining scouting and vision control is also critical. A timeless classic in Brood War’s melee scene, "The Grid 1.1a" remains popular for its stable balance and clear win conditions, continuing to see regular play decades after its release.
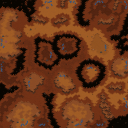
Firestorm (파이어스톰)
스타크래프트 브루드워의 대표적인 멀티플레이어 대전용 맵인 'Firestorm'은Controller 6)Firestorm.scx'로 파일명이 지정되어 있으며, 내부 제목 역시 동일하게 'Firestorm'으로 확인된다. 이 맵은 황혼 타일셋을 기반으로 제작된 6인용 맵으로, 6144x4096 크기의 넓은 평야가 펼쳐져 있어 중앙 교전과 멀티 지역을 동시에 활용할 수 있는 구조가 특징이다. 맵의 중앙부는 비교적 평탄한 지형으로 구성되어 있어 빠른 교전이 가능하며, 양측 멀티 지역은 약간의 언덕과 가시적인 장애물이 있어 초반 러시 방어에 유리한 요소를 제공한다. 'Don't get toasted!'라는 캐치프레이즈는 맵의 분위기를 표현하며, 이름 그대로 뜨거운 한판 승부를 예고한다. 2~6명의 플레이어가 추천되며, 특히 4~6인 풀방에서 최적의 밸런스를 발휘할 것으로 추정된다. 넓은 공간을 활용한 치고 빠지기, 중앙 점령 싸움, 멀티 방어와 견제 등 다양한 전략적 선택지가 존재하는데, 이는 맵의 넓은 타일과 평탄한 지형이 뒷받침해준다. 초보자부터 숙련자까지 모두 즐길 수 있지만, 넓은 공간을 활용한 컨트롤과 멀티 관리에 익숙해질수록 더 높은 승률을 기대할 수 있을 것이다. 단, 맵의 인코딩이 cp949로 되어 있어 한글 환경에서 구동 시 깨짐 현상이 발생할 수 있으니, 복구 도구나 환경 설정을 미리 점검하는 것이 좋다. 또한, 맵의 중앙부가 지나치게 넓어 초반 러시 타이밍이 늦어질 수 있으니, 빠른 확장을 노리는 전략보다는 중앙 점령과 멀티 방어에 중점을 둔 플레이가 권장된다. Firestorm is a classic multiplayer battle map in StarCraft: Brood War, distributed as 'Controller 6)Firestorm.scx' with the internal title matching the filename. Built on the Twilight tileset, this 6-player map features a vast 6144x4096 terrain designed for dynamic mid-game engagements and simultaneous multi-base control. The central area is relatively flat, enabling swift early confrontations, while each side's expansion bases are elevated with minor obstacles, offering natural defensive advantages during initial rushes. The map's tagline, 'Don't get toasted!', reflects its fiery competitive spirit. Recommended for 2 to 6 players, it delivers optimal balance in full 4 to 6-player matches. Strategic depth stems from its expansive layout, allowing players to employ hit-and-run tactics, central territory control, and multi-base defense maneuvers. While accessible to all skill levels, mastery requires familiarity with space control and multi-tasking. Players should be cautious of potential display corruption in Korean environments due to cp949 encoding, suggesting the use of repair tools or system adjustments. Additionally, the vast central space may delay early rush timing, making strategies focused on central dominance and multi-defense more viable than early expansion pushes.
•Fa§te§t Po§§ible Map• Jungle
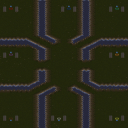
스타크래프트 브루드워의 전장 가운데 하나로, ‘•Fa§te§t Po§§ible Map• Jungle’이란 제목을 지닌 이 맵은 밀리 장르에 속하며, 8명의 플레이어가 전투를 펼치는 전장이다. 맵 내부 제목과 파일명에서도 확인되듯, ‘Jungle’이라는 이름은 Jungle 테마의 맵 디자인과 맞물려 이국적이고 울창한 정글 분위기를 연상시킨다. 내부 설명에 따르면, 각 플레이어에게는 -50개의 미네랄과 10개의 베스핀 가스가 주어지며, 맵 제작자는 AfroOp이며 같은 레이아웃을 공유하는 ‘Space’ 맵과의 연관성도 언급된다. 맵의 타일셋은 사막으로 지정되어 있지만, Jungle이라는 이름과 설정상 정글 분위기를 고려할 때, 실제로는 밀림이나 정글을 연상시키는 다채로운 지형을 갖추고 있을 가능성이 높다. 맵의 구조는 대칭형으로, 중앙에는 넓은 평야가 펼쳐져 있으며, 각 플레이어 기지 주변에는 자연스럽게 배치된 언덕과 나무, 또는 바위 지형이 방어와 전략적 움직임을 제약하는 역할을 할 것으로 추정된다. 이 맵의 가장 큰 특징은 밀리 장르의 기본 틀을 유지하면서도, Jungle이라는 테마에 맞춰 지형을 전략적으로 배치했다는 점이다. 중앙 평야는 빠른 교전과 병력 이동의 주요 통로로 활용될 수 있으며, 언덕과 장애물은 시야 확보와 기습 공격에 영향을 미칠 수 있다. 내부 설명에서 언급된 ‘-50 Stacked Minerals/Player’는 플레이어에게 초기 자원이 다소 여유롭게 주어졌음을 뜻하며, 이는 초반 빌드와 병력 구축에서 조금 더 공격적인 전략을 취할 수 있도록 지원한다. 반면, ‘10 Vespene Geysers/Player’는 가스 자원이 풍부하다는 점을 강조하며, 테란의 경우 서플라이 디팟과 배럭, 그리고 테크 트리를 빠르게 구축할 수 있는 기회를 제공할 것이다. 프로토스의 경우, 초기 포톤 캐논이나 실드 배터리 배치로 방어선을 강화할 수 있으며, 저그의 경우 초반의 풍부한 가스를 바탕으로 빠르게 뮤탈리스크나 히드라리스크로 전환할 수 있는 전략을 구사할 수 있다. 이 맵은 밀리 장르의 전형적인 요소인 중앙 교전과 기지 방어, 자원 관리와 테크 트리 구축을 중심으로 플레이가 전개될 것으로 예상된다. Jungle이라는 테마는 단순히 지형적 특징에 그치지 않고, 전장의 분위기와도 맞물려 플레이어들에게 시각적 즐거움을 제공할 것이다. 또한, 같은 레이아웃을 공유하는 ‘Space’ 맵과의 비교를 통해, Jungle 맵의 전략적 깊이를 더 깊게 느낄 수 있을 것이다. 이 맵을 즐기는 플레이어들은 각 종족의 특징을 살려 지형과 자원을 최대한 활용하는 전략적 플레이를 즐길 수 있을 것이다. 특히 밀리 초보자보다는 중간 수준의 플레이어들에게 적합한 맵으로, 중앙 교전과 기지 방어의 균형을 맞추는 연습에 도움이 될 것으로 보인다. 이 맵을 플레이하기 전에 반드시 확인해야 할 요소는 각 플레이어의 초기 자원량과 가스 geyser의 위치, 그리고 지형의 특징이다. 특히 언덕과 장애물의 위치가 시야와 공격 루트에 어떤 영향을 미치는지 미리 파악해두면, 게임 초반의 빌드와 전략 수립에 큰 도움이 될 것이다. This Brood War map, titled ‘•Fa§te§t Po§§ible Map• Jungle’, is a Melee-style battlefield where eight players engage in combat. The name ‘Jungle’ suggests a dense, jungle-themed design, though the tileset is officially set to desert, implying a blend of terrain elements. According to the internal description, each player starts with -50 stacked minerals and 10 vespene geysers, crafted by AfroOp, and shares a layout similarity with the ‘Space’ map. The map’s symmetrical structure features a central plain, surrounded by player bases with strategically placed hills, trees, or rocks that likely restrict movement and visibility. A defining feature of this map is its integration of the Jungle theme within the Melee genre, creating a visually engaging battlefield. The central plain serves as a key route for rapid engagements, while the terrain obstacles influence flanking maneuvers and defensive positioning. The abundance of vespene geysers per player hints at a gameplay emphasis on gas-dependent strategies, such as mutalisks for Zerg, dragoons or high templars for Protoss, and siege tanks or battlecruisers for Terran. The -50 stacked minerals suggest a slightly resource-rich start, allowing players to adopt more aggressive early-game strategies. Players of this map will experience classic Melee elements—central confrontations, base defense, resource management, and tech tree progression—while immersing themselves in a jungle-like atmosphere. The Jungle theme enhances the visual appeal, making the battlefield feel more dynamic and immersive. Compared to the ‘Space’ map, which shares the same layout, Jungle offers a fresh thematic experience while maintaining strategic depth. This map is ideal for intermediate players who enjoy balancing central clashes with base defense, leveraging terrain and resources to outmaneuver opponents. Beginners may find it challenging due to the need for quick decision-making in resource allocation and positioning. Before diving into the game, players should familiarize themselves with the starting resources, vespene geyser locations, and terrain features. Understanding how hills and obstacles affect vision and attack paths is crucial for early build orders and strategic planning.
최근 등록된 맵
새로 추가된 파일과 버전을 확인하세요.
•Fa§te§t Po§§ible Map• Jungle
스타크래프트 브루드워의 전장 가운데 하나로, ‘•Fa§te§t Po§§ible Map• Jungle’이란 제목을 지닌 이 맵은 밀리 장르에 속하며, 8명의 플레이어가 전투를 펼치는 전장이다. 맵 내부 제목과 파일명에서도 확인되듯, ‘Jungle’이라는 이름은 Jungle 테마의 맵 디자인과 맞물려 이국적이고 울창한 정글 분위기를 연상시킨다. 내부 설명에 따르면, 각 플레이어에게는 -50개의 미네랄과 10개의 베스핀 가스가 주어지며, 맵 제작자는 AfroOp이며 같은 레이아웃을 공유하는 ‘Space’ 맵과의 연관성도 언급된다. 맵의 타일셋은 사막으로 지정되어 있지만, Jungle이라는 이름과 설정상 정글 분위기를 고려할 때, 실제로는 밀림이나 정글을 연상시키는 다채로운 지형을 갖추고 있을 가능성이 높다. 맵의 구조는 대칭형으로, 중앙에는 넓은 평야가 펼쳐져 있으며, 각 플레이어 기지 주변에는 자연스럽게 배치된 언덕과 나무, 또는 바위 지형이 방어와 전략적 움직임을 제약하는 역할을 할 것으로 추정된다. 이 맵의 가장 큰 특징은 밀리 장르의 기본 틀을 유지하면서도, Jungle이라는 테마에 맞춰 지형을 전략적으로 배치했다는 점이다. 중앙 평야는 빠른 교전과 병력 이동의 주요 통로로 활용될 수 있으며, 언덕과 장애물은 시야 확보와 기습 공격에 영향을 미칠 수 있다. 내부 설명에서 언급된 ‘-50 Stacked Minerals/Player’는 플레이어에게 초기 자원이 다소 여유롭게 주어졌음을 뜻하며, 이는 초반 빌드와 병력 구축에서 조금 더 공격적인 전략을 취할 수 있도록 지원한다. 반면, ‘10 Vespene Geysers/Player’는 가스 자원이 풍부하다는 점을 강조하며, 테란의 경우 서플라이 디팟과 배럭, 그리고 테크 트리를 빠르게 구축할 수 있는 기회를 제공할 것이다. 프로토스의 경우, 초기 포톤 캐논이나 실드 배터리 배치로 방어선을 강화할 수 있으며, 저그의 경우 초반의 풍부한 가스를 바탕으로 빠르게 뮤탈리스크나 히드라리스크로 전환할 수 있는 전략을 구사할 수 있다. 이 맵은 밀리 장르의 전형적인 요소인 중앙 교전과 기지 방어, 자원 관리와 테크 트리 구축을 중심으로 플레이가 전개될 것으로 예상된다. Jungle이라는 테마는 단순히 지형적 특징에 그치지 않고, 전장의 분위기와도 맞물려 플레이어들에게 시각적 즐거움을 제공할 것이다. 또한, 같은 레이아웃을 공유하는 ‘Space’ 맵과의 비교를 통해, Jungle 맵의 전략적 깊이를 더 깊게 느낄 수 있을 것이다. 이 맵을 즐기는 플레이어들은 각 종족의 특징을 살려 지형과 자원을 최대한 활용하는 전략적 플레이를 즐길 수 있을 것이다. 특히 밀리 초보자보다는 중간 수준의 플레이어들에게 적합한 맵으로, 중앙 교전과 기지 방어의 균형을 맞추는 연습에 도움이 될 것으로 보인다. 이 맵을 플레이하기 전에 반드시 확인해야 할 요소는 각 플레이어의 초기 자원량과 가스 geyser의 위치, 그리고 지형의 특징이다. 특히 언덕과 장애물의 위치가 시야와 공격 루트에 어떤 영향을 미치는지 미리 파악해두면, 게임 초반의 빌드와 전략 수립에 큰 도움이 될 것이다. This Brood War map, titled ‘•Fa§te§t Po§§ible Map• Jungle’, is a Melee-style battlefield where eight players engage in combat. The name ‘Jungle’ suggests a dense, jungle-themed design, though the tileset is officially set to desert, implying a blend of terrain elements. According to the internal description, each player starts with -50 stacked minerals and 10 vespene geysers, crafted by AfroOp, and shares a layout similarity with the ‘Space’ map. The map’s symmetrical structure features a central plain, surrounded by player bases with strategically placed hills, trees, or rocks that likely restrict movement and visibility. A defining feature of this map is its integration of the Jungle theme within the Melee genre, creating a visually engaging battlefield. The central plain serves as a key route for rapid engagements, while the terrain obstacles influence flanking maneuvers and defensive positioning. The abundance of vespene geysers per player hints at a gameplay emphasis on gas-dependent strategies, such as mutalisks for Zerg, dragoons or high templars for Protoss, and siege tanks or battlecruisers for Terran. The -50 stacked minerals suggest a slightly resource-rich start, allowing players to adopt more aggressive early-game strategies. Players of this map will experience classic Melee elements—central confrontations, base defense, resource management, and tech tree progression—while immersing themselves in a jungle-like atmosphere. The Jungle theme enhances the visual appeal, making the battlefield feel more dynamic and immersive. Compared to the ‘Space’ map, which shares the same layout, Jungle offers a fresh thematic experience while maintaining strategic depth. This map is ideal for intermediate players who enjoy balancing central clashes with base defense, leveraging terrain and resources to outmaneuver opponents. Beginners may find it challenging due to the need for quick decision-making in resource allocation and positioning. Before diving into the game, players should familiarize themselves with the starting resources, vespene geyser locations, and terrain features. Understanding how hills and obstacles affect vision and attack paths is crucial for early build orders and strategic planning.
The Grid 1.1a (그리드 1.1a)
스타크래프트 브루드워의 고전 밀리 맵으로 유명한 'The Grid 1.1a'는 8명의 플레이어가 각자의 자원을 확보한 뒤 중앙의 넓은 평원에서 전투를 펼치는 구조를 가지고 있다. 맵의 특징은 중앙 광장과 이를 둘러싼 8개의 시작 위치가 깔끔한 대칭형으로 배치되어 있어 초보자와 숙련자 모두에게 공정한 전투를 제공한다는 점이다. 맵 중앙에는 광물 지대와 가스 기지가 배치되어 있어 자원 확보 경쟁이 치열해지며, 이로 인해 빠른 mineral gathering과 strategic gas control이 승리의 핵심 요소로 작용한다. 맵의 지형은 비교적 평평하여 이동 방해 요소가 적지만, 일부 시작 지점 주변의 언덕은 시야 확보와 초기 방어에 유리한 위치를 제공한다. 전투 시에는 중앙에서 마주치는 대규모 교전이 빈번하게 발생하며, 이로 인해 빠른 병력 생산과 효율적인 컨트롤이 요구된다. 특히 테란의 경우, 초기 SCV 생산과 베럭-팩토리-스타포트 체제를 빠르게 구축하여 중앙을 장악하는 것이 중요하며, 저그의 경우 초반 러시 방어와speedling skirmish를 통한 이득 창출이 승률을 좌우한다. 프로토스의 경우, 빠른 넥서스 확장을 바탕으로 다수의 질럿과 드라군을 배치하여 중앙을 장악하는 전략이 유효하다. 맵의 밸런스는 대체로 공정한 편이지만, 특정 종족의 특성과 맵의 대칭성 덕분에 누가 유리하다고 단정 짓기는 어려운 편이다. 이 맵은 1:1 밀리 매치에서 주로 사용되며, 중앙 교전을 통한 전술적 판단과micro management가 승부를 가르는 주요 포인트다. 초보자에게는 맵의 대칭성과 평범한 지형 덕분에 적응이 용이하지만, 숙련자들에게는 중앙에서의 빠른 교전과 효율적인 자원 운용이 관건이 된다. 따라서 이 맵을 플레이하기 전에는 각 종족별로 초반 빌드와 중앙 교전 전략을 숙지하는 것이 중요하다. 또한, 맵의 넓이가 넓기 때문에 시야 확보와 정찰을 소홀히 하지 않도록 주의해야 한다. 이 맵은 스타크래프트의 고전 밀리 맵답게 오랜 시간 동안 많은 플레이어들에게 사랑받아 왔으며, 그 안정적인 밸런스와 명확한 승리 조건 덕분에 지금도 정기적으로 플레이되고 있다. "The Grid 1.1a" is a classic Brood War melee map famous for its eight-player setup, where players secure their own resources before engaging in combat across a wide central battlefield. The map’s design features a clean symmetrical layout, with eight starting positions evenly spaced around a central plaza, ensuring fair conditions for both beginners and veterans. At the heart of the map lie mineral fields and gas geysers, making resource control a high-stakes race where efficient mineral gathering and strategic gas management can decide the match. The terrain is mostly flat, minimizing movement obstacles, though small hills near certain starting points provide early scouting and defensive advantages. Battles often culminate in large-scale clashes in the center, demanding quick unit production and precise micro-management. For Terran, establishing a fast Barracks-Factory-Starport build order to seize the center is crucial, while Zerg must focus on early rush defense and leveraging speedlings for early-game advantages. Protoss players benefit from rapid Nexus expansions, fielding Zealots and Dragoons to dominate the central area. While the map’s symmetry and balance make it fair overall, no single race holds a definitive advantage due to the varied strengths each brings. Primarily used in 1v1 melee matches, the map rewards tactical decision-making and micro in central engagements. Beginners appreciate its straightforward symmetry and terrain, while advanced players must master quick engagements and resource optimization. Before playing, it’s essential to study each race’s early builds and central combat strategies. Given the map’s size, maintaining scouting and vision control is also critical. A timeless classic in Brood War’s melee scene, "The Grid 1.1a" remains popular for its stable balance and clear win conditions, continuing to see regular play decades after its release.
Firestorm (파이어스톰)
스타크래프트 브루드워의 대표적인 멀티플레이어 대전용 맵인 'Firestorm'은Controller 6)Firestorm.scx'로 파일명이 지정되어 있으며, 내부 제목 역시 동일하게 'Firestorm'으로 확인된다. 이 맵은 황혼 타일셋을 기반으로 제작된 6인용 맵으로, 6144x4096 크기의 넓은 평야가 펼쳐져 있어 중앙 교전과 멀티 지역을 동시에 활용할 수 있는 구조가 특징이다. 맵의 중앙부는 비교적 평탄한 지형으로 구성되어 있어 빠른 교전이 가능하며, 양측 멀티 지역은 약간의 언덕과 가시적인 장애물이 있어 초반 러시 방어에 유리한 요소를 제공한다. 'Don't get toasted!'라는 캐치프레이즈는 맵의 분위기를 표현하며, 이름 그대로 뜨거운 한판 승부를 예고한다. 2~6명의 플레이어가 추천되며, 특히 4~6인 풀방에서 최적의 밸런스를 발휘할 것으로 추정된다. 넓은 공간을 활용한 치고 빠지기, 중앙 점령 싸움, 멀티 방어와 견제 등 다양한 전략적 선택지가 존재하는데, 이는 맵의 넓은 타일과 평탄한 지형이 뒷받침해준다. 초보자부터 숙련자까지 모두 즐길 수 있지만, 넓은 공간을 활용한 컨트롤과 멀티 관리에 익숙해질수록 더 높은 승률을 기대할 수 있을 것이다. 단, 맵의 인코딩이 cp949로 되어 있어 한글 환경에서 구동 시 깨짐 현상이 발생할 수 있으니, 복구 도구나 환경 설정을 미리 점검하는 것이 좋다. 또한, 맵의 중앙부가 지나치게 넓어 초반 러시 타이밍이 늦어질 수 있으니, 빠른 확장을 노리는 전략보다는 중앙 점령과 멀티 방어에 중점을 둔 플레이가 권장된다. Firestorm is a classic multiplayer battle map in StarCraft: Brood War, distributed as 'Controller 6)Firestorm.scx' with the internal title matching the filename. Built on the Twilight tileset, this 6-player map features a vast 6144x4096 terrain designed for dynamic mid-game engagements and simultaneous multi-base control. The central area is relatively flat, enabling swift early confrontations, while each side's expansion bases are elevated with minor obstacles, offering natural defensive advantages during initial rushes. The map's tagline, 'Don't get toasted!', reflects its fiery competitive spirit. Recommended for 2 to 6 players, it delivers optimal balance in full 4 to 6-player matches. Strategic depth stems from its expansive layout, allowing players to employ hit-and-run tactics, central territory control, and multi-base defense maneuvers. While accessible to all skill levels, mastery requires familiarity with space control and multi-tasking. Players should be cautious of potential display corruption in Korean environments due to cp949 encoding, suggesting the use of repair tools or system adjustments. Additionally, the vast central space may delay early rush timing, making strategies focused on central dominance and multi-defense more viable than early expansion pushes.
Ridge to Ridge (리짓 투 리지)
이 맵은 스타크래프트 브루드워의 사막 지형을 배경으로 한 4인용 밀리 맵으로, ‘Ridge to Ridge’라는 제목에서 알 수 있듯이 지형의 능선(Ridge)을 중심으로 전투가 펼쳐지는 특징을 가지고 있다. 맵의 중앙지역에는 넓은 평지가 펼쳐져 있으며, 능선 주변으로는 좁은 통로와 고지대가 형성되어 있어 각 플레이어의 시작 위치가 명확히 구분된다. 시작 지점은 사각형 형태로 배치되어 있으며, 각 플레이어의 본진은 능선의 안쪽에 자리 잡고 있어 초반 러시가 활발히 발생할 가능성이 높다. 능선 위의 좁은 길목은 병력 이동의 bottleneck이 될 수 있어, 중앙에서 벌어지는 전투는 물론이고 테란의 벙커링, 프로토스의 질럿 러시, 저그의 러커 전략 등 다양한 전술이 자연스럽게 시도될 수 있도록 설계되어 있다. 특히 능선의 고지대에서 시야가 확보되는 구조이기 때문에, 시야 싸움과 정찰이 중요한 역할을 할 것으로 보인다. 사막 지형의 특성상 Mineral Field가 비교적 멀리 배치되어 있어 자원 관리에도 신경을 써야 하며, 초반 자원 확보가 승패를 좌우할 가능성이 크다. 이 맵은 4인의 플레이어가 각자의 시작 지점에서 중앙 평지를 두고 경쟁하는 구조로, 밀리 맵으로서의 밸런스가 중요하다. 중앙 지역의 Mineral Field와 Gas Geyser의 분포는 비교적 공평하게 배치되어 있어,_resource gathering_에서 유불리가 발생하지 않도록 설계된 것으로 추정된다. 다만, 능선의 높이 차이로 인해 고지대에서 내려다보이는 시야와 이동 경로의 제약이 있을 수 있어, 플레이어는 지형을 최대한 활용한 전략을 세울 필요가 있다. 이 맵을 플레이하기 전에는 사막 지형의 특성을 잘 이해하고, 능선 위의 고지대를 점령하는 것이 중요하다는 점을 염두에 둬야 한다. 또한, 초반 러시 타이밍과 중앙 평지에서 벌어지는 전투의 양상을 잘 조율해야 하므로, 다양한 전략을 연습해보는 것이 좋다. 주로 중수 이상의 플레이어에게 추천되는 맵으로, 능선과 평지 간의 지형적 이점을 얼마나 잘 활용하느냐가 승패를 가를 것이다. This map is a four-player melee map set in the desert terrain of *StarCraft: Brood War*, where battles unfold around ridges, as suggested by its title, *Ridge to Ridge*. The central area features a wide open plain, while the surrounding ridges create narrow passages and elevated positions, clearly separating each player’s starting location. The starting bases are arranged in a square formation, with each player’s main base tucked inside the ridge, making early rushes highly likely. The narrow paths atop the ridges can act as bottlenecks for troop movements, shaping not only the central battles but also enabling Terran bunker rushes, Protoss Zealot rushes, and Zerg Lurker strategies. The elevated ridges provide clear sightlines, making scouting and vision control critical. Given the desert setting, Mineral Fields are spaced relatively far apart, requiring careful resource management—early resource control could heavily influence the outcome. Designed for four players competing over the central plain from their starting positions, balance is key for a competitive melee map. The distribution of Mineral Fields and Vespene Geysers in the center appears fair, avoiding any inherent advantage in resource gathering. However, height differences on the ridges may limit visibility and movement, so players must leverage the terrain strategically. Before playing, it’s important to understand the desert terrain’s nuances and prioritize securing the high ground on the ridges. Early rush timing and coordination in central battles are crucial, so practicing diverse strategies is recommended. Best suited for intermediate to advanced players, this map’s outcome hinges on how effectively players exploit the ridges and plains.
아이 오브 더 스톰 (Eye of the Storm)
‘Eye of the Storm(아이 오브 더 스톰)’은 스타크래프트: 브루드워의 밀리 맵으로, 2~4인용 전투가 벌어지는 격전지입니다. 맵의 핵심은 중앙에 위치한 거대한 눈 모양의 눈폭풍 중심부로, 이곳을 둘러싼 좁은 통로와 평야가 플레이어 간의 전투를 유도합니다. 맵은 황혼 테마의 타일셋으로 구성되어 있으며, 전체 크기는 4096x4096으로 넓은 개활지를 제공합니다. terrain의 특징은 중앙의 눈 모양 구조물이 눈에 띄며, 주변으로 평평한 지형과 언덕이 적절히 분포되어 있습니다. 이러한 지형은 테란의 벙커링, 저그의 러커 활용, 프로토스의 다크 템플러 전략 등 다양한 빌드와 전술을 시도할 수 있는 공간을 제공합니다. 특히 중앙의 좁은 길목은 빠른 접전과 견제 플레이가 가능하도록 설계되어 있어, 초보자와 숙련자 모두에게 흥미로운 대결을 선사합니다.Eye of the Storm은 밀리 장르의 클래식한 정석 맵으로, 전면전과 소규모 교전을 모두 고려한 밸런스가 특징입니다. 맵의 구조상 중앙 교전이 많기 때문에, 빠른 자원 수급과 병력 생산, 그리고 적절한 시기의 진출 타이밍이 승패를 좌우할 수 있습니다. 또한, 언덕과 평야의 조화로 인해 지상군과 공중 유닛의 역할도 중요해집니다. 초보 플레이어는Central Island를 중심으로 한 방어와 진출 타이밍을 익히는 데 집중해야 하며, 숙련자는 상대방의 자원 수급과 빌드 오더를 읽어낸 뒤 중앙을 장악하거나 사이드 러시를 감행하는 전략을 구사할 수 있습니다. 맵의 난이도는 전면전을 중심으로 한 밀리 전투에 익숙한 플레이어에게 적합하며, 팀플레이보다는 1vs1 또는 2vs2에서 더욱 빛을 발합니다.Eye of the Storm is a classic melee map for StarCraft: Brood War, designed for 2 to 4 players. The map features a central eye-shaped storm area surrounded by open terrain and strategic high grounds, making it ideal for intense battles. The Twilight tileset gives the map a dark, dramatic atmosphere, enhancing the sense of a stormy battlefield. The narrow paths leading to the center encourage quick engagements and harassment, while the surrounding plains allow for macro-focused play and large-scale battles. The balanced terrain supports diverse strategies for all three races, making it a versatile choice for both casual and competitive play. Players should focus on controlling the center, timing their attacks, and adapting to the opponent's build order. The map is particularly well-suited for 1v1 or 2v2 matches, where quick decision-making and efficient resource management are key to victory.
맵 선택 가이드
태그는 맵의 핵심 특징을 빠르게 설명하지만 제작 버전마다 규칙이 다를 수 있습니다. 상세 설명에서 권장 인원, 난이도, 플레이 시간과 버전을 함께 확인한 뒤 다운로드하세요.