
정찰 스타크래프트 맵 모음
'정찰' 태그가 등록된 맵을 모았습니다. 장르 하나로 찾기 어려운 플레이 방식, 난이도와 특징을 중심으로 인기 맵과 최신 맵을 비교해 보세요.
- 등록 맵
- 7개
- 누적 다운로드
- 1
- 누적 조회
- 341
인기 맵
다운로드와 조회 반응이 높은 맵입니다.
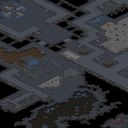
The Big Push
The Big Push 맵은 스타크래프트 브루드워의 UMS(유즈맵) 형태로, 주로 1인 플레이어가 상대 진영을 전면적으로 공격해 전멸시키는 목표를 가지고 있다. 맵 전체가 4096×4096 타일로 구성돼 넓은 전투 구역을 제공하며, 우주 타일셋을 사용해 시각적으로 넓은 공간감을 준다. 내부 설명에 “Eliminate all Confederate Forces.”라고 명시돼 있어, 기본적인 밀리(밀리터리) 스타일의 전투 진행 방식임을 추정할 수 있다. 시작 시 플레이어는 기본 테란 유닛과 건물을 배치할 수 있는 베이스가 주어지고, 상대 진영은 지도 반대편에 배치돼 있다. 목표는 적 기지를 파괴하거나 모든 적 유닛을 제거하는 것으로, 별도의 방어 라인이나 파괴 불가능한 목표물이 존재하지 않는다. 따라서 전술 선택의 자유도가 높으며, 빠른 공격과 지속적인 압박을 통해 승리를 도모한다. 플레이 전 확인해야 할 포인트는 초기 자원 배분과 유닛 생산 순서이다. 자원을 효율적으로 모아 병력을 빠르게 확장하지 않으면 상대가 먼저 전진해 방어를 구축할 수 있다. 또한, 지도 규모가 크기 때문에 정찰 유닛을 활용해 적 위치와 방어 상황을 파악하는 것이 중요하다. 초보자보다는 기본적인 전투 흐름을 이해하고, 공격과 방어를 균형 있게 운영할 수 있는 플레이어에게 적합하다. 빠른 템포의 전투를 즐기고, 다양한 유닛 조합을 시험해보고 싶은 유저에게 추천한다. The Big Push map is a UMS (Use Map System) style map for StarCraft: Brood War, primarily designed for a single player to launch a full‑scale assault against an opposing force. The map spans a large 4096×4096 tile area using a space tileset, which gives a broad battlefield feel. The internal description “Eliminate all Confederate Forces.” indicates a classic melee‑type objective where the player must destroy the enemy base or eliminate all enemy units. At the start, the player receives a Terran base with standard units and structures, while the enemy is positioned on the opposite side of the map. There are no permanent defensive structures or invincible objectives, allowing high tactical freedom and encouraging aggressive, continuous pressure to secure victory. Before playing, it is essential to manage initial resource allocation and unit production order; gathering resources efficiently and expanding the army quickly prevents the opponent from establishing a strong defense. Because of the map’s size, scouting units are valuable for locating enemy positions and assessing their defenses. This map suits players who have a solid grasp of basic combat flow and can balance offense and defense, rather than complete beginners. It is recommended for those who enjoy fast‑paced battles and want to experiment with various unit compositions.
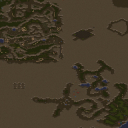
-When Angry Bears Attack- v1.50Final
-When Angry Bears Attack- v1.50Final는 사막 타일셋을 기반으로 한 UMS 서바이벌 맵이다. 플레이어는 7명의 인원을 자유롭게 배치하고, 맵 중앙에 위치한 레인저 스테이션을 찾아야 한다. 스테이션까지 가는 길은 넓은 사막 평야와 산악 지형으로 나뉘며, 곳곳에 자연 장애물과 은신처가 배치돼 있다. 적 유닛은 주로 곰과 같은 야생 동물 형태로 등장하며, 일정 시간마다 스폰되어 플레이어를 압박한다. 따라서 초반에는 방어 시설을 간단히 구축하고, 자원을 효율적으로 수집해 이동 경로를 확보하는 것이 핵심이다. 맵은 시야가 제한된 지역이 많아 정찰 유닛을 활용해 위험 구역을 미리 파악하는 것이 좋다. 또한, 레인저 스테이션 주변에는 보급품이 숨겨져 있어, 해당 지역을 장악하면 생존 확률이 크게 상승한다. 플레이 전에는 자원 채취 위치와 적 스폰 지점을 대략 파악하고, 방어 타워나 벽을 적절히 배치해 방어선을 구축하는 것이 추천된다. 빠른 움직임과 지속적인 정찰이 가능한 플레이어, 혹은 팀 없이 혼자서도 목표를 달성하고 싶은 서바이벌 매니아에게 적합한 맵이다. -When Angry Bears Attack- v1.50Final is a UMS survival map built on a desert tileset. Up to seven players can freely position themselves and must locate the ranger station placed near the map’s center. The route to the station traverses wide desert plains and mountainous terrain, dotted with natural obstacles and hideouts. Hostile units appear mainly as bear‑like wildlife that spawn periodically and pressure the players, so early on it is essential to set up simple defenses and gather resources efficiently to secure a safe path. The map contains many fog‑of‑war areas, making reconnaissance units valuable for scouting dangerous zones in advance. Supply caches are hidden around the ranger station; controlling this area greatly increases survival chances. Before playing, it is advisable to roughly identify resource spots and enemy spawn points, then place towers or walls to form a defensive line. Quick movement and continuous scouting are key, making this map suitable for players who enjoy solo survival challenges or those who prefer a fast‑paced, tactical experience.
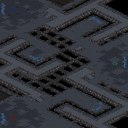
오버룩 (Overlook)
‘오버룩(Overlook)’은 스타크래프트: 브루드워의 맵 파일명 ‘(3)Overlook.scm’과 내부 제목, 그리고 우주 타일셋을 바탕으로 제작된 정밀한 3인용 밀리 맵입니다. 맵의 전체적인 배치는 사각형 형태의 중앙 평지 주위에 세 개의 언덕이 삼각형으로 배치되어 있으며, 각 언덕은 미네랄과 가스 멀티를 중심으로 한 작은 평지로 연결됩니다. 이 구조는 플레이어들이 언덕 위에서 시야를 확보하고 적의 움직임을 미리 감지할 수 있도록 설계되어 있습니다. 맵의 이름은 ‘ 내려다보다’라는 뜻의 ‘오버룩’이지만, 맵 이미지 상으로는 언덕의 고지대뿐만 아니라 중앙 평지에서도 시야가 원활하게 확보되는 특징을 보입니다. 내부 설명에 ‘당신은 감시당하고 있는 듯한 느낌이 들지 않나요?’라는 문구가 포함되어 있어, 시야와 정찰의 중요성을 강조하는 분위기를 느낍니다. 플레이어는 각 언덕에 위치한 본진에서 시작하며, 이 언덕들은 각각의 미네랄 멀티와 가스 멀티로 연결되어 있어 초기 자원 확보가 중요합니다. 중앙 평지는 비교적 평탄한 지형이지만, 언덕의 고지대와는 달리 시야가 제한적인 구간이 존재합니다. 이러한 지형적 특성은 초반 정찰과 시야 싸움, 그리고 멀티 테크 전략의 중요성을 부각시키며, 특히 언덕 고지대에서의 전투에서 유리한 고지를 차지하는 것이 승리의 관건이 됩니다. 또한, 맵의 크기는 3072x3072 픽셀로 비교적 넓은 편이지만, 언덕과 중앙 평지의 균형 있는 배치로 인해 밸런스가 잘 맞춰져 있습니다. 이 맵은 초보와 중급자 모두 즐길 수 있는 밸런스형 밀리 맵으로, 시야 관리와 멀티 운영을 중시하는 플레이어들에게 특히 추천됩니다. 초반에는 언덕 고지대에서 정찰을 통해 상대의 전략을 파악하고, 중앙 평지에서 벌어지는 전투에서 유리한 위치를 점유하는 것이 중요합니다. 또한, 가스 멀티 확보와 테크 트리의 적절한 타이밍도 승패를 좌우할 수 있는 요소로 작용합니다. 이 맵을 플레이하기 전에는 언덕과 중앙 평지의 시야 차이를 충분히 숙지하고, 정찰 유닛을 적극 활용하여 상대의 움직임을 끊임없이 확인하는 것이 좋습니다. 특히, 언덕 고지대에서 벌이는 전투에서는 시야 우위의 이점을 최대한 활용하여 상대방을 압박하는 전략을 구사하는 것이 중요합니다. ‘Overlook’ is a meticulously designed three-player melee map from StarCraft: Brood War, based on the map file name ‘(3)Overlook.scm,’ its internal title, and its space tile set. The map features a rectangular central lowland surrounded by three triangularly arranged hills, each connected to a small plateau centered around mineral and gas expansions. This layout allows players to secure vision from the high ground and anticipate enemy movements. Though the map’s name means “overlook,” its design ensures clear sightlines not only from the hilltops but also across the central lowland. The internal description includes the line, “Don’t you feel like you’re being watched?” underscoring the map’s emphasis on vision control and scouting. Players begin in their main bases on the hills, each linked to mineral and gas expansions, making early resource collection critical. While the central lowland is relatively flat, certain sections offer limited visibility compared to the high ground. These terrain features heighten the importance of early scouting, vision battles, and multi-base tech strategies, with controlling the high ground in hilltop engagements often proving decisive. Despite its size of 3072x3072 pixels, the balanced distribution of hills and central lowland ensures a well-matched experience. Suitable for both beginners and intermediate players, this balanced melee map is especially recommended for those who value vision management and multi-base play. Early on, scouting from the hilltops to gauge opponents’ strategies and securing advantageous positions in central engagements are key. Gas expansions and timely tech progression also play pivotal roles in determining victory. Before playing, it’s crucial to understand the vision differences between the hills and central lowland, actively using scouting units to continuously monitor enemy movements. In hilltop battles, leveraging vision advantages to pressure opponents is essential.
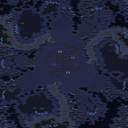
네오메두사2.0 OBs (NeoMedusa2.0 OBs)
NeoMedusa2.0 OBs는 스타크래프트 브루드워의 클래식 밀리 맵을 현대적인 균형감과 레이아웃으로 재구성한 유즈맵이다. 맵 전체가 4096×4096 화산 타일셋으로 채워져 있어 고지대와 저지대가 자연스럽게 섞여 있으며, 양측 베이스는 중앙을 향해 대칭적으로 배치돼 있다. 초반에는 자원 채취와 정찰이 핵심이며, 중반부터는 고지대에 위치한 중립 정크와 파워드 스폰 포인트를 차지하기 위한 전투가 빈번해진다. 특히 화산 지형의 좁은 협곡과 넓은 평야가 교차하면서 기동성을 활용한 전술과 방어 라인 구축이 동시에 요구된다. 플레이어는 적의 진입로를 예측해 타워와 유닛 배치를 조정해야 하며, 중간에 나타나는 중립 유닛을 효과적으로 이용하면 전투 흐름을 뒤집을 수 있다. 맵은 8명의 플레이어가 자유롭게 대전할 수 있도록 설계돼 있어, 4대 4 혹은 자유분배 형태 모두에 적합하다. 팀 플레이가 아닌 순수 밀리 경험을 원하는 유저에게 특히 추천한다. 경기 시작 전에는 베이스 주변의 정크 위치와 고지대 스폰 타이밍을 확인하고, 초기 빌드 순서를 미리 정해두면 초반 압박을 피하기 쉽다. 또한, 화산 타일셋 특성상 시야가 제한되는 구역이 많으니 정찰 유닛을 꾸준히 운용해 적의 움직임을 파악하는 것이 중요하다. NeoMedusa2.0 OBs is a user map for StarCraft: Brood War that reimagines a classic melee layout with modern balance and design. The entire map is built on a 4096×4096 volcanic tileset, featuring a mix of high ground and low ground that creates natural choke points and open fields. Both bases are placed symmetrically toward the center, making early resource gathering and scouting essential. Around the mid‑game, control of neutral junk and powered spawn points on the high ground becomes a focal point, leading to frequent skirmishes. The narrow volcanic corridors combined with wide plains demand both mobility‑based tactics and solid defensive line placement. Players must anticipate enemy entry routes, adjust tower and unit placements accordingly, and make effective use of neutral units that appear mid‑match to swing the battle. Designed for up to eight players, the map supports 4‑vs‑4 or free‑for‑all configurations, but it shines most in pure melee scenarios without team restrictions. It is especially recommended for players seeking a traditional melee experience. Before starting, check the locations of neutral junk and high‑ground spawn timings, and decide on an early build order to avoid early pressure. Due to many sight‑blocked volcanic areas, continuous scouting is crucial for tracking opponent movements.
Bombastoid
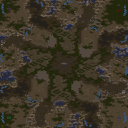
Bombastoid은 사막 타일셋을 사용한 4096×4096 규모의 MELEE(밀리) 맵으로, 4명의 플레이어가 자유롭게 전투를 벌이는 구조를 가지고 있다. 맵 중앙에 넓은 오아시스와 주변에 여러 개의 고지대가 배치돼 있어, 초반에는 자원을 확보하고 위치를 잡는 것이 핵심이다. 고지대를 점령하면 시야가 넓어지고 방어력이 상승하는 효과가 있어, 전투가 진행될수록 전략적 이동과 포지션 교환이 빈번히 일어난다. 맵의 주요 경로는 사막 지형 특성상 시야가 제한돼 있어, 정찰 유닛을 활용한 정보 수집이 중요하다. 또한, 일부 지역에 배치된 작은 오염 구역은 이동 속도를 감소시키므로, 유닛 이동 경로를 신중히 계획해야 한다. 전투는 주로 중·후반에 치열해지며, 고지대와 오아시스를 둘러싼 다툼이 게임의 승패를 좌우한다. 초보자보다는 기본적인 마이크로와 맵 이해도가 있는 플레이어에게 적합하며, 빠른 전투와 포지션 싸움을 즐기는 유저에게 추천한다. 플레이 전에는 고지대와 오아시스 위치를 파악하고, 정찰 유닛을 충분히 확보한 뒤 전투를 시작하는 것이 좋다. Bombastoid is a large 4096×4096 desert‑tileset MELEE map designed for four players to fight freely. The centre of the map features a wide oasis surrounded by several high‑ground positions; securing resources and establishing footholds early is essential. Controlling the high ground expands vision and grants defensive bonuses, leading to frequent positional swaps as the battle progresses. Because desert terrain limits sight along the main routes, scouting units are crucial for gathering information. Small contamination zones scattered around the map slow unit movement, so careful path planning is required. Combat intensifies in the mid‑to‑late game, with fights over the high ground and oasis determining the outcome. The map suits players with basic micro‑skill and map awareness rather than complete beginners, and is recommended for those who enjoy fast‑paced battles and positional warfare. Before starting, identify the locations of the high ground and oasis, secure enough scouts, and then engage the fight.
정찰 임무 (Reconnaissance Mission)
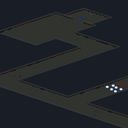
이 맵은 스타크래프트 브루드워의 유즈맵으로, 한 플레이어가 적의 공격을 막아내며 목표를 달성하는 디펜스 장르의 맵이다. 내부 제목과 설명을 보면 러시아어와 영어가 혼용되어 있으며, ‘Разведывательная миссия’라는 제목은 ‘정찰 임무’라는 의미를 지닌다. 맵은 설원/얼음 타일셋을 배경으로 하며, 넓은 평야와 언덕 지형이 마치 눈 덮인 평원처럼 펼쳐져 있다. 가운데에 위치한 디스크를 보호하거나 확보하는 것이 주요 목표로 보이며, 적의 웨이브가 끊임없이 밀려오는 디펜스 형식의 진행이 예상된다. 플레이어는 중앙의 디스크를 지키거나奪取(탈취)해야 하며, 이를 위해 방어 건물이나 유닛을 배치하고 자원을 효율적으로 관리해야 한다. 맵의 지형은 비교적 평탄한 편이지만, 일부 언덕 지형이 있어 시야 확보와 배치 전략에 영향을 줄 수 있다. 적의 공격 패턴은 랜덤하거나 특정 패턴을 가질 가능성이 있으며, 플레이어는 이를 예측하고 대비해야 한다. 또한, 맵의 규모가 크고 타일셋이 특수하다는 점에서 시각적 몰입감을 느낄 수 있을 것이다. 이 맵은 초보 플레이어에게는 다소 난해할 수 있지만, 디펜스 장르에 익숙한 유저라면 충분히 즐길 수 있는 구성이다. 특히, 방어 전략과 자원 관리 능력을 키우고 싶은 플레이어에게 추천할 만하다. 플레이 전에는 맵의 목표와 지형 특성을 숙지하고, 적의 공격 패턴을 분석하는 연습이 필요할 것이다. This StarCraft: Brood War custom map belongs to the defense genre, where a single player must withstand enemy waves to achieve the objective. The internal title 'Разведывательная миссия' translates to 'Reconnaissance Mission,' suggesting a focus on defensive strategy and resource control. The map features a snowy/ice tileset, with a vast plain and gentle hills creating a visually immersive winter landscape. The primary goal appears to be securing or protecting a central disk, requiring players to deploy defenses, manage resources, and adapt to incoming enemy attacks. The terrain is mostly flat but includes elevated areas that influence sightlines and unit positioning. Enemy waves likely follow a set pattern or random spawns, demanding strategic foresight and efficient unit placement. While the map's scale and unique tileset enhance immersion, its complexity may challenge beginners. However, players familiar with defense maps will find it engaging. Prior to playing, it’s crucial to understand the objective, analyze terrain advantages, and prepare for varied enemy tactics. Ideal for those looking to refine their defensive strategies and resource management skills in StarCraft UMS maps.
반지의 제왕 - 화이트 문 (LotR - White Moon)
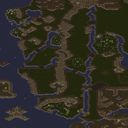
LotR - White Moon은 사막 타일셋을 활용한 대규모 UMS 맵으로, 7명의 플레이어가 동시에 전투를 벌일 수 있도록 설계되었습니다. 맵 전체가 넓은 평야와 작은 오아시스로 구분돼 있어 초기 전투는 빠른 이동과 정찰이 핵심이 됩니다. 중앙에 위치한 거대한 석상 주변은 자연스럽게 전투의 초점이 되며, 여기서 양측이 교전하면서 점차 주변 지역을 장악해 나갑니다. 각 진영은 자원 배치가 고르게 분포돼 있어 초반에 베이스를 구축하기보다는 전방에서 적을 압박하는 전략이 유리합니다. 특히 사막 지형 특성상 시야가 넓고 장애물이 적어, 유닛 이동과 스킬 사용이 자유롭지만 동시에 적의 기습에 취약하므로 정찰 유닛을 꾸준히 운영하는 것이 중요합니다. 맵에는 몇 개의 작은 언덕과 바위가 흩어져 있어, 방어 진지를 마련하거나 고지점을 점령해 시야를 확보하는 데 활용할 수 있습니다. 전투가 진행될수록 중앙 석상 주변에 생성되는 중립 유닛이 전황에 변수를 제공하며, 이를 적절히 이용하면 전투 흐름을 뒤집을 수 있습니다. 플레이 전 확인해야 할 포인트는 초기 스폰 위치와 자원 배치, 그리고 중립 유닛 스폰 타이밍입니다. 초보자보다는 어느 정도 경험이 있는 플레이어에게 적합하며, 팀을 이루어 협동하거나 개인 플레이어가 자유롭게 전술을 펼치는 데 모두 재미를 느낄 수 있습니다. 전반적으로 넓은 맵 규모와 사막 특유의 개방형 전장은 빠른 전투와 전략적 움직임을 동시에 요구하므로, 빠른 판단과 지속적인 정찰이 승패를 좌우합니다. LotR - White Moon is a large-scale UMS map that utilizes a desert tileset, allowing up to seven players to battle simultaneously. The map is divided into expansive plains and small oases, making early scouting and rapid movement essential. A massive statue at the center naturally becomes the focal point of combat, where both sides clash and gradually seize surrounding areas. Resources are evenly scattered, favoring aggressive forward tactics over early base building. The open desert terrain offers wide sightlines and minimal obstacles, granting freedom of unit movement and spell casting, yet it also leaves players vulnerable to ambushes, so maintaining reconnaissance units is crucial. Scattered hills and rocks provide opportunities to establish defensive positions or capture high ground for vision. As the battle progresses, neutral units spawn near the central statue, adding dynamic elements that can turn the tide when leveraged effectively. Before playing, check spawn locations, resource distribution, and neutral unit spawn timings. The map suits players with some experience rather than beginners, offering enjoyment both in coordinated team play and solo tactical maneuvers. Overall, the vast map size and open desert environment demand swift decision‑making and constant scouting, making these factors decisive for victory.
최근 등록된 맵
새로 추가된 파일과 버전을 확인하세요.
정찰 임무 (Reconnaissance Mission)
이 맵은 스타크래프트 브루드워의 유즈맵으로, 한 플레이어가 적의 공격을 막아내며 목표를 달성하는 디펜스 장르의 맵이다. 내부 제목과 설명을 보면 러시아어와 영어가 혼용되어 있으며, ‘Разведывательная миссия’라는 제목은 ‘정찰 임무’라는 의미를 지닌다. 맵은 설원/얼음 타일셋을 배경으로 하며, 넓은 평야와 언덕 지형이 마치 눈 덮인 평원처럼 펼쳐져 있다. 가운데에 위치한 디스크를 보호하거나 확보하는 것이 주요 목표로 보이며, 적의 웨이브가 끊임없이 밀려오는 디펜스 형식의 진행이 예상된다. 플레이어는 중앙의 디스크를 지키거나奪取(탈취)해야 하며, 이를 위해 방어 건물이나 유닛을 배치하고 자원을 효율적으로 관리해야 한다. 맵의 지형은 비교적 평탄한 편이지만, 일부 언덕 지형이 있어 시야 확보와 배치 전략에 영향을 줄 수 있다. 적의 공격 패턴은 랜덤하거나 특정 패턴을 가질 가능성이 있으며, 플레이어는 이를 예측하고 대비해야 한다. 또한, 맵의 규모가 크고 타일셋이 특수하다는 점에서 시각적 몰입감을 느낄 수 있을 것이다. 이 맵은 초보 플레이어에게는 다소 난해할 수 있지만, 디펜스 장르에 익숙한 유저라면 충분히 즐길 수 있는 구성이다. 특히, 방어 전략과 자원 관리 능력을 키우고 싶은 플레이어에게 추천할 만하다. 플레이 전에는 맵의 목표와 지형 특성을 숙지하고, 적의 공격 패턴을 분석하는 연습이 필요할 것이다. This StarCraft: Brood War custom map belongs to the defense genre, where a single player must withstand enemy waves to achieve the objective. The internal title 'Разведывательная миссия' translates to 'Reconnaissance Mission,' suggesting a focus on defensive strategy and resource control. The map features a snowy/ice tileset, with a vast plain and gentle hills creating a visually immersive winter landscape. The primary goal appears to be securing or protecting a central disk, requiring players to deploy defenses, manage resources, and adapt to incoming enemy attacks. The terrain is mostly flat but includes elevated areas that influence sightlines and unit positioning. Enemy waves likely follow a set pattern or random spawns, demanding strategic foresight and efficient unit placement. While the map's scale and unique tileset enhance immersion, its complexity may challenge beginners. However, players familiar with defense maps will find it engaging. Prior to playing, it’s crucial to understand the objective, analyze terrain advantages, and prepare for varied enemy tactics. Ideal for those looking to refine their defensive strategies and resource management skills in StarCraft UMS maps.
The Big Push
The Big Push 맵은 스타크래프트 브루드워의 UMS(유즈맵) 형태로, 주로 1인 플레이어가 상대 진영을 전면적으로 공격해 전멸시키는 목표를 가지고 있다. 맵 전체가 4096×4096 타일로 구성돼 넓은 전투 구역을 제공하며, 우주 타일셋을 사용해 시각적으로 넓은 공간감을 준다. 내부 설명에 “Eliminate all Confederate Forces.”라고 명시돼 있어, 기본적인 밀리(밀리터리) 스타일의 전투 진행 방식임을 추정할 수 있다. 시작 시 플레이어는 기본 테란 유닛과 건물을 배치할 수 있는 베이스가 주어지고, 상대 진영은 지도 반대편에 배치돼 있다. 목표는 적 기지를 파괴하거나 모든 적 유닛을 제거하는 것으로, 별도의 방어 라인이나 파괴 불가능한 목표물이 존재하지 않는다. 따라서 전술 선택의 자유도가 높으며, 빠른 공격과 지속적인 압박을 통해 승리를 도모한다. 플레이 전 확인해야 할 포인트는 초기 자원 배분과 유닛 생산 순서이다. 자원을 효율적으로 모아 병력을 빠르게 확장하지 않으면 상대가 먼저 전진해 방어를 구축할 수 있다. 또한, 지도 규모가 크기 때문에 정찰 유닛을 활용해 적 위치와 방어 상황을 파악하는 것이 중요하다. 초보자보다는 기본적인 전투 흐름을 이해하고, 공격과 방어를 균형 있게 운영할 수 있는 플레이어에게 적합하다. 빠른 템포의 전투를 즐기고, 다양한 유닛 조합을 시험해보고 싶은 유저에게 추천한다. The Big Push map is a UMS (Use Map System) style map for StarCraft: Brood War, primarily designed for a single player to launch a full‑scale assault against an opposing force. The map spans a large 4096×4096 tile area using a space tileset, which gives a broad battlefield feel. The internal description “Eliminate all Confederate Forces.” indicates a classic melee‑type objective where the player must destroy the enemy base or eliminate all enemy units. At the start, the player receives a Terran base with standard units and structures, while the enemy is positioned on the opposite side of the map. There are no permanent defensive structures or invincible objectives, allowing high tactical freedom and encouraging aggressive, continuous pressure to secure victory. Before playing, it is essential to manage initial resource allocation and unit production order; gathering resources efficiently and expanding the army quickly prevents the opponent from establishing a strong defense. Because of the map’s size, scouting units are valuable for locating enemy positions and assessing their defenses. This map suits players who have a solid grasp of basic combat flow and can balance offense and defense, rather than complete beginners. It is recommended for those who enjoy fast‑paced battles and want to experiment with various unit compositions.
반지의 제왕 - 화이트 문 (LotR - White Moon)
LotR - White Moon은 사막 타일셋을 활용한 대규모 UMS 맵으로, 7명의 플레이어가 동시에 전투를 벌일 수 있도록 설계되었습니다. 맵 전체가 넓은 평야와 작은 오아시스로 구분돼 있어 초기 전투는 빠른 이동과 정찰이 핵심이 됩니다. 중앙에 위치한 거대한 석상 주변은 자연스럽게 전투의 초점이 되며, 여기서 양측이 교전하면서 점차 주변 지역을 장악해 나갑니다. 각 진영은 자원 배치가 고르게 분포돼 있어 초반에 베이스를 구축하기보다는 전방에서 적을 압박하는 전략이 유리합니다. 특히 사막 지형 특성상 시야가 넓고 장애물이 적어, 유닛 이동과 스킬 사용이 자유롭지만 동시에 적의 기습에 취약하므로 정찰 유닛을 꾸준히 운영하는 것이 중요합니다. 맵에는 몇 개의 작은 언덕과 바위가 흩어져 있어, 방어 진지를 마련하거나 고지점을 점령해 시야를 확보하는 데 활용할 수 있습니다. 전투가 진행될수록 중앙 석상 주변에 생성되는 중립 유닛이 전황에 변수를 제공하며, 이를 적절히 이용하면 전투 흐름을 뒤집을 수 있습니다. 플레이 전 확인해야 할 포인트는 초기 스폰 위치와 자원 배치, 그리고 중립 유닛 스폰 타이밍입니다. 초보자보다는 어느 정도 경험이 있는 플레이어에게 적합하며, 팀을 이루어 협동하거나 개인 플레이어가 자유롭게 전술을 펼치는 데 모두 재미를 느낄 수 있습니다. 전반적으로 넓은 맵 규모와 사막 특유의 개방형 전장은 빠른 전투와 전략적 움직임을 동시에 요구하므로, 빠른 판단과 지속적인 정찰이 승패를 좌우합니다. LotR - White Moon is a large-scale UMS map that utilizes a desert tileset, allowing up to seven players to battle simultaneously. The map is divided into expansive plains and small oases, making early scouting and rapid movement essential. A massive statue at the center naturally becomes the focal point of combat, where both sides clash and gradually seize surrounding areas. Resources are evenly scattered, favoring aggressive forward tactics over early base building. The open desert terrain offers wide sightlines and minimal obstacles, granting freedom of unit movement and spell casting, yet it also leaves players vulnerable to ambushes, so maintaining reconnaissance units is crucial. Scattered hills and rocks provide opportunities to establish defensive positions or capture high ground for vision. As the battle progresses, neutral units spawn near the central statue, adding dynamic elements that can turn the tide when leveraged effectively. Before playing, check spawn locations, resource distribution, and neutral unit spawn timings. The map suits players with some experience rather than beginners, offering enjoyment both in coordinated team play and solo tactical maneuvers. Overall, the vast map size and open desert environment demand swift decision‑making and constant scouting, making these factors decisive for victory.
네오메두사2.0 OBs (NeoMedusa2.0 OBs)
NeoMedusa2.0 OBs는 스타크래프트 브루드워의 클래식 밀리 맵을 현대적인 균형감과 레이아웃으로 재구성한 유즈맵이다. 맵 전체가 4096×4096 화산 타일셋으로 채워져 있어 고지대와 저지대가 자연스럽게 섞여 있으며, 양측 베이스는 중앙을 향해 대칭적으로 배치돼 있다. 초반에는 자원 채취와 정찰이 핵심이며, 중반부터는 고지대에 위치한 중립 정크와 파워드 스폰 포인트를 차지하기 위한 전투가 빈번해진다. 특히 화산 지형의 좁은 협곡과 넓은 평야가 교차하면서 기동성을 활용한 전술과 방어 라인 구축이 동시에 요구된다. 플레이어는 적의 진입로를 예측해 타워와 유닛 배치를 조정해야 하며, 중간에 나타나는 중립 유닛을 효과적으로 이용하면 전투 흐름을 뒤집을 수 있다. 맵은 8명의 플레이어가 자유롭게 대전할 수 있도록 설계돼 있어, 4대 4 혹은 자유분배 형태 모두에 적합하다. 팀 플레이가 아닌 순수 밀리 경험을 원하는 유저에게 특히 추천한다. 경기 시작 전에는 베이스 주변의 정크 위치와 고지대 스폰 타이밍을 확인하고, 초기 빌드 순서를 미리 정해두면 초반 압박을 피하기 쉽다. 또한, 화산 타일셋 특성상 시야가 제한되는 구역이 많으니 정찰 유닛을 꾸준히 운용해 적의 움직임을 파악하는 것이 중요하다. NeoMedusa2.0 OBs is a user map for StarCraft: Brood War that reimagines a classic melee layout with modern balance and design. The entire map is built on a 4096×4096 volcanic tileset, featuring a mix of high ground and low ground that creates natural choke points and open fields. Both bases are placed symmetrically toward the center, making early resource gathering and scouting essential. Around the mid‑game, control of neutral junk and powered spawn points on the high ground becomes a focal point, leading to frequent skirmishes. The narrow volcanic corridors combined with wide plains demand both mobility‑based tactics and solid defensive line placement. Players must anticipate enemy entry routes, adjust tower and unit placements accordingly, and make effective use of neutral units that appear mid‑match to swing the battle. Designed for up to eight players, the map supports 4‑vs‑4 or free‑for‑all configurations, but it shines most in pure melee scenarios without team restrictions. It is especially recommended for players seeking a traditional melee experience. Before starting, check the locations of neutral junk and high‑ground spawn timings, and decide on an early build order to avoid early pressure. Due to many sight‑blocked volcanic areas, continuous scouting is crucial for tracking opponent movements.
오버룩 (Overlook)
‘오버룩(Overlook)’은 스타크래프트: 브루드워의 맵 파일명 ‘(3)Overlook.scm’과 내부 제목, 그리고 우주 타일셋을 바탕으로 제작된 정밀한 3인용 밀리 맵입니다. 맵의 전체적인 배치는 사각형 형태의 중앙 평지 주위에 세 개의 언덕이 삼각형으로 배치되어 있으며, 각 언덕은 미네랄과 가스 멀티를 중심으로 한 작은 평지로 연결됩니다. 이 구조는 플레이어들이 언덕 위에서 시야를 확보하고 적의 움직임을 미리 감지할 수 있도록 설계되어 있습니다. 맵의 이름은 ‘ 내려다보다’라는 뜻의 ‘오버룩’이지만, 맵 이미지 상으로는 언덕의 고지대뿐만 아니라 중앙 평지에서도 시야가 원활하게 확보되는 특징을 보입니다. 내부 설명에 ‘당신은 감시당하고 있는 듯한 느낌이 들지 않나요?’라는 문구가 포함되어 있어, 시야와 정찰의 중요성을 강조하는 분위기를 느낍니다. 플레이어는 각 언덕에 위치한 본진에서 시작하며, 이 언덕들은 각각의 미네랄 멀티와 가스 멀티로 연결되어 있어 초기 자원 확보가 중요합니다. 중앙 평지는 비교적 평탄한 지형이지만, 언덕의 고지대와는 달리 시야가 제한적인 구간이 존재합니다. 이러한 지형적 특성은 초반 정찰과 시야 싸움, 그리고 멀티 테크 전략의 중요성을 부각시키며, 특히 언덕 고지대에서의 전투에서 유리한 고지를 차지하는 것이 승리의 관건이 됩니다. 또한, 맵의 크기는 3072x3072 픽셀로 비교적 넓은 편이지만, 언덕과 중앙 평지의 균형 있는 배치로 인해 밸런스가 잘 맞춰져 있습니다. 이 맵은 초보와 중급자 모두 즐길 수 있는 밸런스형 밀리 맵으로, 시야 관리와 멀티 운영을 중시하는 플레이어들에게 특히 추천됩니다. 초반에는 언덕 고지대에서 정찰을 통해 상대의 전략을 파악하고, 중앙 평지에서 벌어지는 전투에서 유리한 위치를 점유하는 것이 중요합니다. 또한, 가스 멀티 확보와 테크 트리의 적절한 타이밍도 승패를 좌우할 수 있는 요소로 작용합니다. 이 맵을 플레이하기 전에는 언덕과 중앙 평지의 시야 차이를 충분히 숙지하고, 정찰 유닛을 적극 활용하여 상대의 움직임을 끊임없이 확인하는 것이 좋습니다. 특히, 언덕 고지대에서 벌이는 전투에서는 시야 우위의 이점을 최대한 활용하여 상대방을 압박하는 전략을 구사하는 것이 중요합니다. ‘Overlook’ is a meticulously designed three-player melee map from StarCraft: Brood War, based on the map file name ‘(3)Overlook.scm,’ its internal title, and its space tile set. The map features a rectangular central lowland surrounded by three triangularly arranged hills, each connected to a small plateau centered around mineral and gas expansions. This layout allows players to secure vision from the high ground and anticipate enemy movements. Though the map’s name means “overlook,” its design ensures clear sightlines not only from the hilltops but also across the central lowland. The internal description includes the line, “Don’t you feel like you’re being watched?” underscoring the map’s emphasis on vision control and scouting. Players begin in their main bases on the hills, each linked to mineral and gas expansions, making early resource collection critical. While the central lowland is relatively flat, certain sections offer limited visibility compared to the high ground. These terrain features heighten the importance of early scouting, vision battles, and multi-base tech strategies, with controlling the high ground in hilltop engagements often proving decisive. Despite its size of 3072x3072 pixels, the balanced distribution of hills and central lowland ensures a well-matched experience. Suitable for both beginners and intermediate players, this balanced melee map is especially recommended for those who value vision management and multi-base play. Early on, scouting from the hilltops to gauge opponents’ strategies and securing advantageous positions in central engagements are key. Gas expansions and timely tech progression also play pivotal roles in determining victory. Before playing, it’s crucial to understand the vision differences between the hills and central lowland, actively using scouting units to continuously monitor enemy movements. In hilltop battles, leveraging vision advantages to pressure opponents is essential.
-When Angry Bears Attack- v1.50Final
-When Angry Bears Attack- v1.50Final는 사막 타일셋을 기반으로 한 UMS 서바이벌 맵이다. 플레이어는 7명의 인원을 자유롭게 배치하고, 맵 중앙에 위치한 레인저 스테이션을 찾아야 한다. 스테이션까지 가는 길은 넓은 사막 평야와 산악 지형으로 나뉘며, 곳곳에 자연 장애물과 은신처가 배치돼 있다. 적 유닛은 주로 곰과 같은 야생 동물 형태로 등장하며, 일정 시간마다 스폰되어 플레이어를 압박한다. 따라서 초반에는 방어 시설을 간단히 구축하고, 자원을 효율적으로 수집해 이동 경로를 확보하는 것이 핵심이다. 맵은 시야가 제한된 지역이 많아 정찰 유닛을 활용해 위험 구역을 미리 파악하는 것이 좋다. 또한, 레인저 스테이션 주변에는 보급품이 숨겨져 있어, 해당 지역을 장악하면 생존 확률이 크게 상승한다. 플레이 전에는 자원 채취 위치와 적 스폰 지점을 대략 파악하고, 방어 타워나 벽을 적절히 배치해 방어선을 구축하는 것이 추천된다. 빠른 움직임과 지속적인 정찰이 가능한 플레이어, 혹은 팀 없이 혼자서도 목표를 달성하고 싶은 서바이벌 매니아에게 적합한 맵이다. -When Angry Bears Attack- v1.50Final is a UMS survival map built on a desert tileset. Up to seven players can freely position themselves and must locate the ranger station placed near the map’s center. The route to the station traverses wide desert plains and mountainous terrain, dotted with natural obstacles and hideouts. Hostile units appear mainly as bear‑like wildlife that spawn periodically and pressure the players, so early on it is essential to set up simple defenses and gather resources efficiently to secure a safe path. The map contains many fog‑of‑war areas, making reconnaissance units valuable for scouting dangerous zones in advance. Supply caches are hidden around the ranger station; controlling this area greatly increases survival chances. Before playing, it is advisable to roughly identify resource spots and enemy spawn points, then place towers or walls to form a defensive line. Quick movement and continuous scouting are key, making this map suitable for players who enjoy solo survival challenges or those who prefer a fast‑paced, tactical experience.
Bombastoid
Bombastoid은 사막 타일셋을 사용한 4096×4096 규모의 MELEE(밀리) 맵으로, 4명의 플레이어가 자유롭게 전투를 벌이는 구조를 가지고 있다. 맵 중앙에 넓은 오아시스와 주변에 여러 개의 고지대가 배치돼 있어, 초반에는 자원을 확보하고 위치를 잡는 것이 핵심이다. 고지대를 점령하면 시야가 넓어지고 방어력이 상승하는 효과가 있어, 전투가 진행될수록 전략적 이동과 포지션 교환이 빈번히 일어난다. 맵의 주요 경로는 사막 지형 특성상 시야가 제한돼 있어, 정찰 유닛을 활용한 정보 수집이 중요하다. 또한, 일부 지역에 배치된 작은 오염 구역은 이동 속도를 감소시키므로, 유닛 이동 경로를 신중히 계획해야 한다. 전투는 주로 중·후반에 치열해지며, 고지대와 오아시스를 둘러싼 다툼이 게임의 승패를 좌우한다. 초보자보다는 기본적인 마이크로와 맵 이해도가 있는 플레이어에게 적합하며, 빠른 전투와 포지션 싸움을 즐기는 유저에게 추천한다. 플레이 전에는 고지대와 오아시스 위치를 파악하고, 정찰 유닛을 충분히 확보한 뒤 전투를 시작하는 것이 좋다. Bombastoid is a large 4096×4096 desert‑tileset MELEE map designed for four players to fight freely. The centre of the map features a wide oasis surrounded by several high‑ground positions; securing resources and establishing footholds early is essential. Controlling the high ground expands vision and grants defensive bonuses, leading to frequent positional swaps as the battle progresses. Because desert terrain limits sight along the main routes, scouting units are crucial for gathering information. Small contamination zones scattered around the map slow unit movement, so careful path planning is required. Combat intensifies in the mid‑to‑late game, with fights over the high ground and oasis determining the outcome. The map suits players with basic micro‑skill and map awareness rather than complete beginners, and is recommended for those who enjoy fast‑paced battles and positional warfare. Before starting, identify the locations of the high ground and oasis, secure enough scouts, and then engage the fight.
맵 선택 가이드
태그는 맵의 핵심 특징을 빠르게 설명하지만 제작 버전마다 규칙이 다를 수 있습니다. 상세 설명에서 권장 인원, 난이도, 플레이 시간과 버전을 함께 확인한 뒤 다운로드하세요.