
정글 맵 스타크래프트 맵 모음
'정글 맵' 태그가 등록된 맵을 모았습니다. 장르 하나로 찾기 어려운 플레이 방식, 난이도와 특징을 중심으로 인기 맵과 최신 맵을 비교해 보세요.
- 등록 맵
- 11개
- 누적 다운로드
- 0
- 누적 조회
- 521
인기 맵
다운로드와 조회 반응이 높은 맵입니다.
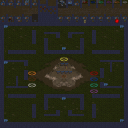
랜덤 캣 앤 마우스 정글 3.0 (Random Cat n Mouse Jungle 3.0)
스타크래프트 브루드워의 ‘랜덤 캣 앤 마우스 정글(Random Cat n Mouse Jungle 3.0)’은 정글 지형을 배경으로 한 유즈맵으로, 플레이어들이 고양이와 쥐의 역할로 나뉘어 숨바꼭질과 추격전을 펼치는 디펜스 장르의 재미를 제공한다. 이 맵은 2048x2048 크기의 넓은 사막 타일셋 맵으로, 7명의 플레이어가 참가해 각자 할당된 기지나據點에서 시작하거나 랜덤하게 배치된다. 맵 중앙의 넓은 정글 지역은 시야를 가리는 울창한 숲으로 구성되어 있어, 쥐 플레이어들은 숨기 쉽고 고양이 플레이어들은 정글 내부를 수색하며 추적해야 한다.Version 3.0에서는 기지가 높은 지대에 배치되어 страте적 우위를 제공하며, 이전 버전(2.2)까지는 저지대 배치였다는 점에서 맵 밸런스가 개선되었다고 추정된다. 플레이어는 맵 곳곳에 있는 아이템이나 함정, 혹은 기지 주변의 지형을 활용해 상대방을 따돌리거나 포획하는 전술을 구사할 수 있으며, 특히 쥐 플레이어는 기지로 돌아가면 승리하는 조건을 달성할 수 있는 구조로 보인다. 맵의 랜덤 배치 시스템은 매 게임마다 새로운 전략을 요구해, 반복 플레이에서도 신선한 재미를 느낄 수 있도록 한다. 초보자도 쉽게 접근할 법한 비교적 친절한 맵 디자인과, 숨바꼭질의 긴장감을 유지하는 ‘숨기’와 ‘찾기’의 균형을 맞추려는 노력은 이 맵의 큰 장점으로 보인다. 다만, 쥐 플레이어의 경우 기지까지의 귀환 루트가 길고 복잡해, 고양이 플레이어의 추격이 예상되는 상황이라면 전략적 판단이 필요할 것으로 예상된다. 이 맵을 즐기기 위해서는 넓은 시야와 좁은 시야를 번갈아 경험하는 맵의 특성을 충분히 이해하고, 각자의 역할에 맞게 지형을 활용하는 능력이 중요하다. 특히Version 3.0의 높은 지대 배치 개선은 고양이 플레이어에게는 맵 이해도가, 쥐 플레이어에게는 귀환 루트의 안전성이 더해졌으므로, 플레이 전 맵의 주요 지형과 숨기 가능한 지점을 미리 확인하는 것이 좋다. 추천 대상은 숨바꼭질과 추격전의 재미를 좋아하는 플레이어, 넓은 공간에서 전략을 펼치고 싶어 하는 유저, 그리고 팀플레이보다는 개인의 판단력이 중요시되는 이 맵의 특성을 즐기고 싶은 유저들이다. StarCraft: Brood War’s *Random Cat n Mouse Jungle 3.0* is a user-made defense map set in a jungle terrain, where players are divided into cats and mice to play hide-and-seek and chase in a thrilling defense-style game. The map spans a vast 2048x2048 desert tileset, accommodating up to seven players who either start at assigned bases or spawn randomly. The central jungle area is dense with trees that block vision, giving mice an easier time hiding while forcing cats to search through the thick foliage. In Version 3.0, the bases are positioned on elevated terrain, providing a strategic advantage—unlike Version 2.2, where they were placed in lower areas, suggesting improved map balance. Players can use items, traps, or the terrain near bases to evade or capture opponents. Mice win by returning to their base, and the map’s random spawn system demands new strategies each game, keeping replayability fresh. The map’s design is relatively beginner-friendly, balancing the tension of hiding and seeking while maintaining an accessible structure. However, mice may face challenges due to long, complex return paths to their bases, requiring careful strategy when cats are nearby. To fully enjoy the map, players should understand its mix of wide and narrow vision zones and leverage the terrain according to their roles. The elevation changes in Version 3.0 enhance map understanding for cats and safety for mice returning to base, so scouting key terrain and hiding spots beforehand is crucial. This map is recommended for players who enjoy hide-and-seek and chase gameplay, those who prefer strategizing in open spaces, and users who value individual decision-making over teamwork.
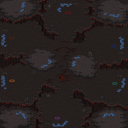
펀럴 파이어 (Funeral Pyre)
스타크래프트의 고전 맵 <펀럴 파이어(Funeral Pyre)>는 말 그대로 '장작더미'라는 뜻을 담은 이름처럼, 전쟁의 참혹함을 상징하는 듯한 분위기의 밀리 맵이다. 내부 설명에서도 짐작할 수 있듯이 2~6인용으로 설계되어 있으며, 넓은 정글 타일셋의 지형이 특징적이다. 맵 중앙에는 거대한 장작더미가 놓여 있어, 전투가 벌어질 때마다 불길이 치솟는 듯한 연출이 보인다. 정글 지형은 시야를 가리는 높은 풀숲과 좁은 길목을 제공하며, 이는 플레이어 간의 눈치 싸움과 전략적 기습을 유도한다. 초보 입장에서는 넓은 맵과 복잡한 지형 때문에 진입장벽이 느껴질 수 있지만, 익숙해지면 적의 동선을 차단하고 치고 빠지는 플레이가 가능해진다. 특히, 후방에서 기습을 당하지 않도록 주의해야 하며, 중앙 장작더미 주변의 좁은 통로에서 다수의 유닛이 충돌하는 경우가 많다. 공격과 방어의 균형을 맞추는 것이 관건인 이 맵은, 전면전보다는 소규모 교전과 기습이 승패를 좌우할 가능성이 높다. 초보보다는 중급 이상의 플레이어에게 어울리며, 팀플레이에서는 각자의 역할을 명확히 나눌 필요가 있다. 맵의 분위기와는 달리 실제 게임은 치열한 전투로 진행되며, 넓은 시야와 지형 활용이 무엇보다 중요하다. 플레이 전에는 맵의 지형과 중앙 장작더미의 위치를 숙지하고, 초반 자원 관리와 유닛 조합을 미리 계획하는 것이 좋다. 또한, 맵의 넓은 공간을 활용한Resource Denial(자원 차단) 전략도 고려해볼 만하다. 이 맵은 단순히 밀리 맵을 넘어, 전략적 깊이가 있는 공간이기 때문에, 한 번 익숙해지면 여러 번 플레이해도 질리지 않는 매력이 있다. Funeral Pyre, a classic StarCraft map, lives up to its name—"funeral pyre" or "bonfire"—with a grim atmosphere that evokes the horrors of war. Designed for 2 to 6 players, the map features expansive jungle terrain with tall grass that obscures vision and narrow pathways that force players into close-quarters confrontations. At its center stands a massive pyre that erupts in flames during battles, adding dramatic flair to the chaos. The map’s size and complex layout can feel daunting to beginners, but once mastered, it rewards players with opportunities for ambushes and hit-and-run tactics. Central to success is avoiding rear assaults while navigating the tight corridors around the pyre, where large-scale unit clashes frequently occur. Rather than favoring all-out warfare, Funeral Pyre thrives on small-scale skirmishes and opportunistic strikes, making it better suited for intermediate or advanced players. In team games, clear role division is essential. Despite its somber aesthetic, the gameplay is intense, demanding sharp awareness of map control and terrain exploitation. Before jumping in, study the layout—especially the pyre’s location—and plan your early-game resource management and unit compositions. Strategies like Resource Denial (blocking enemy access to resources) can also turn the tide. With its strategic depth and replayability, Funeral Pyre is far more than just a melee map; once you get the hang of it, you’ll keep coming back for more.
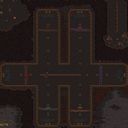
썬켄 디펜스 6웨이 10.0 (Sunken Defense 6 Way 10.0)
‘썬켄 디펜스 6웨이 10.0(Sunken D 6 way 10.0)’은 스타크래프트: 브루드워의 유즈맵 중에서도 정글 지형을 배경으로 한 디펜스 장르의 대표작으로, 플레이어는 맵 중앙에 위치한 기지 주변으로 몰려드는 다수의 적 웨이브를 방어하는 것이 주된 목표다. 맵은 6개의 진출로(웨이)가 방사형으로 배치되어 있어 각 방향에서 끊임없이 몰려드는 적을 상대해야 하며, 이 때문에 맵을 빙 둘러싼 방어 시설과 유닛 관리 능력이 핵심 포인트가 된다. 해상도와 타일셋은 일반 정글 지형을 사용해 시각적 몰입감을 높였고, 맵 중앙의 넓은 공간은 방어 타워나 건물을 배치할 수 있는 전략적 요충지로 기능한다. 플레이 방식은 크게 세 가지로 나뉜다. 첫째, 각 웨이(6방향)에 배치된 방어선을 유지하며 적의 공격을 막아내는 ‘기본 디펜스’ 단계다. 둘째, 일정 웨이브가 지나면 더 강력한 적들이 등장하거나 진형이 변화하는 ‘난이도 상승’ 단계로, 이때는 방어 자원과 유닛을 재배치해야 생존이 가능하다. 셋째, 보스급 유닛이 등장하는 ‘최종 웨이브’로, 이 단계에서는 모든 방어선을 통합해 보스를 상대해야 한다. 특히 6개의 웨이가 동시에 공격을 받기 때문에 멀티태스킹 능력이 요구되며, 방어 타워의 배치와 업그레이드 타이밍이 승패를 좌우한다. 이 맵의 가장 큰 특징은 ‘랜덤성과 변동성’이다. 각 웨이브마다 등장하는 적의 조합이 달라지며, 때로는 공중 유닛이나 특수 유닛이 다수 포함되어 기존의 방어 라인을 무력화시킬 수 있다. 또한 맵 중앙의 넓은 공간을 활용한 ‘보스 사냥’이나 ‘후퇴-재정비’ 전략도 가능해, 숙련된 플레이어는 단순히 방어에 머무르지 않고 능동적으로 플레이를 전개할 수 있다. 반면 초보자의 경우, 방어 라인의 중요성을 간과하고 중앙에만 집중하다가 웨이의 균형이 무너지는 경우가 많다. ‘썬켄 디펜스 6웨이 10.0’을 추천하는 대상은 크게 두 부류다. 첫째, 디펜스 장르를 좋아하는 유저들로, 특히 다중 웨이와 랜덤한 웨이브가 주는 긴장감을 즐기는 플레이어에게 적합하다. 둘째, 스타크래프트의 기본 전략과 유닛 조합을 익히고 싶어 하는 유저들로, 이 맵을 통해 방어 시설의 배치, 자원 관리, 유닛 업그레이드 등 다양한 전략적 요소들을 실전처럼 경험할 수 있다. 반면, 한 번의 실수로 모든 것이 무너질 수 있는 높은 난이도와 긴 플레이 시간(예상 40분 내외)을 감당할 수 있는 체력이 요구된다. 플레이 전에는 반드시 방어 라인의 균형을 점검하고, 각 웨이의 특징(예: 공중 유닛 비중, 속도優位 유닛 등)을 숙지한 뒤 임하는 것이 좋다. 또한, 맵 에디터의 특성상_VERSION_이나_EDIT_ 태그가 포함된 내부 설명은 버전 관리와 개선 이력을 확인하는 데 도움이 된다. ‘Sunken Defense 6-Way 10.0’ is one of the most iconic defense maps in *StarCraft: Brood War*, set in a jungle terrain where players must defend their base from waves of enemies swarming from the map’s center. The map features six radial paths (ways) spreading outward, forcing players to constantly fend off attacks from all directions. This makes perimeter defense and unit management the key to survival. The resolution and tileset use a standard jungle aesthetic to enhance immersion, while the wide central area serves as a strategic zone for placing defensive towers and structures. The gameplay is divided into three main phases. First is the ‘Basic Defense’ stage, where players maintain the six-way perimeter and repel enemy attacks. Next is the ‘Difficulty Escalation’ phase, triggered after certain waves, where stronger enemies appear or formations change—requiring players to reorganize their defenses and units to survive. Finally, the ‘Final Wave’ introduces elite boss units, demanding a coordinated defense across all six paths. Since all six ways can be attacked simultaneously, multitasking is essential, and the timing of tower placements and upgrades often determines victory or defeat. The map’s standout feature is its ‘randomness and variability.’ Each wave introduces different enemy compositions, sometimes overwhelming existing defenses with air units or specialized units. The central area also enables advanced strategies like ‘boss hunting’ or ‘retreat and regroup,’ allowing skilled players to go beyond passive defense. Beginners, however, often focus too much on the center while neglecting the perimeters, leading to imbalanced defenses. This map is recommended for two main groups. First, fans of the defense genre who enjoy the tension of multi-directional waves and unpredictable enemy compositions. Second, players looking to master *StarCraft*’s core strategies and unit synergies—this map lets them practice defensive positioning, resource management, and unit upgrades in a dynamic, real-time setting. However, the high difficulty—where a single mistake can collapse everything—and the lengthy playtime (around 40 minutes) demand stamina. Before playing, it’s crucial to balance the perimeter defenses and study each path’s characteristics (e.g., air unit ratios, speed advantages). Additionally, internal notes tagged with _VERSION_ or _EDIT_ in the map editor can help track updates and improvements.
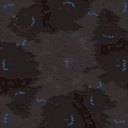
네오 레퀴엠 2.1 (Neo Requiem 2.1)
스타크래프트 브루드워의 유즈맵인 <네오 레퀴엠 2.1(Neo Requiem 2.1)>은 밀리 기반의 팀 전투를 중심으로 진행되는 맵으로, 최대 4명의 플레이어가 한 팀을 이루어 상대방과 대결을 펼치는 구조를 갖고 있다. 맵은 정글 타일셋으로 구성되어 있으며, 초원과 나무, 바위가 조화를 이루는 자연스러운 지형이 특징이다. 맵 중앙에는 넓은 개방 공간이 펼쳐져 있어 빠른 교전과 전략적 움직임이 가능한 반면, 각 구석에는Resource Vespene Geyser가 배치되어 자원 확보를 위한 경쟁이 예상된다. 맵의 symmetrical design 덕분에 양 팀 간의 형평성이 비교적 잘 맞춰져 있으며, 초보자와 숙련자 모두 즐길 수 있는 밸런스를 갖췄다는 평가가 많다. 또한, 맵의 규모가 4096x4096로 достаточно 넓어 기동성과 전술적 플레이가 요구되는 만큼, 플레이어는 맵의 지형을 활용한 시야 싸움과 자원 관리, 유닛 조합을 신중히 고려해야 한다. 이 맵은 맵 제작자 DreamReaver에 의해 처음 제작되었고, OGN 맵 아키텍트 팀에 의해 수정된 버전으로 알려져 있다. 맵의 분위기는 ‘어둠과 희망’이라는 테마를 담고 있어, 플레이어들에게 긴장감과 몰입감을 동시에 제공할 것으로 추정된다. 특히, 팀워크와 전략이 중요한 만큼 혼자서 플레이하는 것보다 팀원과의 원활한 소통이 승리를 좌우할 수 있다. 초보자라면 기본적인 빌드와 유닛 운용을 숙지한 뒤 도전하는 것이 좋으며, 숙련자라면 보다 복잡한 전략과 타이밍 공격을 시도해 볼 수 있을 것이다. 맵의 분위기와는 대조적으로, 플레이 자체는 밀리 기반의 빠른 템포로 진행되므로 실시간 전략과 판단력이 요구된다. 맵을 플레이하기 전에 맵의 symmetrical 구조와 Resource Vespene Geyser의 위치를 미리 숙지하고, 적절한 초반 빌드와 테크 트리를 준비하는 것이 중요하다. 또한, 팀원의 역할 분배(탱커, 딜러, 서포트 등)를 명확히 하고, 상대방의 움직임을 예측하는 능력을 키우는 것이 승리의 열쇠가 될 것이다. 이 맵은 정글 타일셋의 자연스러운 조화와 symmetrical design을 통해 시각적 아름다움과 전략적 깊이를 동시에 갖춘佳作으로 평가된다. 다만, 맵의 규모가 크기 때문에 시작 직후의 초기 자원 확보와 빠른 시야 확보가 관건이 될 수 있으며, 특히 초보자의 경우 맵의 전체적인 흐름을 파악하는 데 시간이 걸릴 수 있다. 이러한 점들을 고려하여 플레이한다면, 누구나 즐겁게 즐길 수 있는 유즈맵 중 하나로 손꼽힐 것이다. Starcraft: Brood War's custom map *Neo Requiem 2.1* is a team-based melee combat-focused map where up to four players form a team to battle opponents. The map features a jungle tileset with natural terrain, blending grass, trees, and rocks. A large open space in the center allows for quick engagements and strategic movement, while Resource Vespene Geysers in the corners create competition for resource control. Thanks to its symmetrical design, the map maintains balanced fairness between teams, making it enjoyable for both beginners and experienced players. At 4096x4096 in scale, the map demands strong mobility and tactical play, requiring players to carefully consider vision control, resource management, and unit compositions based on the terrain. Originally created by mapmaker DreamReaver, this version was later refined by the OGN Map Architect team. The map’s dark and hopeful theme enhances tension and immersion, making teamwork and strategy crucial—communication with teammates often determines victory over solo play. Beginners should master basic builds and unit control before attempting it, while veterans can experiment with advanced strategies and timing attacks. Despite its thematic atmosphere, gameplay remains fast-paced and mill-based, demanding quick real-time strategy and decision-making. Before playing, it’s important to memorize the symmetrical layout and locations of Resource Vespene Geysers, prepare an effective early build order, and plan your tech tree. Clearly assigning team roles (tank, damage dealer, support, etc.) and predicting opponent movements are key to success. *Neo Requiem 2.1* stands out as a masterpiece, blending the visual harmony of its jungle tileset with deep strategic gameplay. However, its large scale means securing early resources and vision quickly is critical—especially for beginners who may need time to grasp the map’s overall flow. With these considerations in mind, it remains one of the most enjoyable custom maps to play.
강의 불길 (River of Flames)
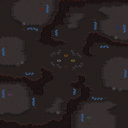
‘River of Flames’는 8명의 플레이어가 참여하는 스타크래프트: 브루드워의 컴까기(컴퓨터 상대 유즈맵) 장르로, 넓은 정글 타일셋의 맵에서 펼쳐지는 전략적인 전투가 특징입니다. 맵 중앙을 가로지르는 강을 따라 다수의 Mineral Field가 배치되어 있으며, 각 플레이어는 시작 지점에서부터 중앙 강을 중심으로 퍼지는 자원과 병력을 확보하며 Expansion을 확충해야 합니다. 맵의 특이한 점은 강 양측에 흩어져 있는 Mineral Field가 특정 플레이어에게 유리한 위치에 배치되어 있어, 초반 자원 확보 전략이 승패를 좌우할 수 있다는 점입니다. 또한, 맵 곳곳에 배치된 Creep이 일부 Mineral Field를 둘러싸고 있어, 초반 정찰과 방어가 중요한 포인트로 작용합니다. 4096x4096의 넓은 맵 크기 덕분에 플레이어들은 넓은 시야를 확보할 수 있지만, 동시에 빠른 결정과 자원 관리가 요구됩니다. 맵의 디자인은 정글 타일셋을 활용하여 자연스러운 지형감을 살리면서도, 전투가 벌어질 수 있는 넓은 평야와 협소한 길목을 적절히 배치하여 전략적 선택을 강제합니다. 초보자의 경우 Mineral Field 확보 경쟁에서 뒤처지기 쉽기 때문에, 중간 이상의 난이도에서 안정적인 플레이가 가능합니다. 추천하는 플레이 방식은 초반 Mineral Field 확보 후, 빠르게 Expansion을 확보하고 중앙 강을 따라 병력을 진출시키는 것입니다. Mineral Field의 분산 배치와 Creep의 영향을 고려하여, 각 플레이어의 시작 위치와 자원 분포를 분석하는 것이 중요합니다. 또한, 강을 건너는 다리 역할을 할 수 있는 건물을 건설하는 것도 전략적 장점입니다. 이 맵은 8인의 플레이어가 경쟁하는 컴까기 장르이므로, 각 플레이어의 전략과 실력이 승패를 가르는 주요 요소가 됩니다. 특히 Mineral Field의 위치와 Creep의 배치에 따라 초반 전략이 달라질 수 있으므로, 맵을 처음 플레이할 때는 이러한 지형을 면밀히 관찰하는 것이 좋습니다. River of Flames is a StarCraft: Brood War user-made map (UMS) in the computer-killing (comp-killing) genre, designed for 8 players. Set on a vast jungle-themed 4096x4096 map, the gameplay revolves around strategic combat centered around a central river, where Mineral Fields are scattered along both banks. A key feature is the uneven distribution of resources, with some Mineral Fields positioned advantageously for specific players, making early resource management and expansion crucial to success. The map also includes Creep zones that encircle certain Mineral Fields, adding an extra layer of challenge for early scouting and defense. The large map size provides ample visibility but demands quick decision-making and efficient resource allocation. The jungle tileset enhances the natural terrain aesthetic while offering strategic choke points and open battlefields. Beginners may struggle with resource competition, so intermediate-level play is recommended. A recommended strategy involves securing early Mineral Fields, expanding rapidly, and advancing units along the central river. Players should analyze starting positions and resource distribution, as the layout of Mineral Fields and Creep significantly impacts early-game tactics. Building bridges or pathways across the river can also serve as a strategic advantage. As an 8-player comp-killing map, victory depends heavily on individual strategy and execution. For first-time players, closely examining the terrain and resource layout is essential for adapting to the map’s unique challenges.
데빌스 플레이그라운드 (Devil's Playground)
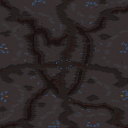
《Devil's Playground》는 스타크래프트: 브루드워의 공식 맵으로, 8명의 플레이어가 격돌하는 밀리(MLEE) 장르의 맵입니다. 정글 타일셋으로 구성된 넓은 평야와 중앙을 가로지르는 협곡, 그리고 곳곳에 흩어져 있는 소규모 언덕들이 특징적인 맵으로, 지형적 특징을 최대한 활용한 전투가 가능합니다. 맵의 이름은 '악마의 놀이터'라는 뜻으로, 전쟁터를 연상시키는 험난한 지형을 배경으로 한 만큼 전투의 긴장감을 잘 표현하고 있습니다. 이 맵은 플레이어들이 중앙 협곡을 중심으로 펼쳐지는 전투에 집중할 수 있도록 설계되었습니다. 넓은 개활지와 소규모 언덕들은 시야 확보와 전략적 이동경로 선택에 영향을 미치며, 특히 언덕 지형은 상대방의 시야를 차단하거나 방어 진지를 구축하는 데 유용합니다. 맵의 중앙부는 비교적 평탄한 지형이지만, 곳곳에 배치된 바위와 나무들은 엄폐물 역할을 하며, 전면전보다는 strategic한 포지셔닝과 기지 방어가 중요한 요소로 작용합니다. 또한, 맵의 테두리 near the edges는 비교적 개방되어 있어 빠른 이동과 기습 공격이 가능하다는 점도 특징입니다. 《Devil's Playground》는 특히 테란과 저그 유저들에게 유리한 지형을 제공합니다. 테란의 경우, 언덕을 활용한 방어 진지 구축이 용이하며, 마린이나 탱크의 시야 밖에서 공격을 펼칠 수 있습니다. 저그의 경우,Creep 확장이 용이한 지역이 곳곳에 분포되어 있으며, 오버로드나 러커를 통한 기습 공격이 가능합니다. 프로토스의 경우, 시야 확보와 하이템플러의 활용이 중요한데, 중앙 협곡의 시야가 제한된 구간에서는 암흑 기사나Observer의 활용이 전략적 우위를 점할 수 있습니다. 다만, 넓은 맵 특성상 자원 분포가 균등하지 않다는 점은 플레이어들에게 자원 관리와 확장 전략의 중요성을 더합니다. 이 맵은 초보자보다는 중급 이상의 플레이어들에게 적합한데, 넓은 지형과 다양한 전략적 선택지 때문에 초보자는 맵 이해와 전략 수립에 어려움을 느낄 수 있습니다. 또한, 팀플레이보다는 1:1 또는 2:2 이상의 소규모 전투에 최적화되어 있으며, 특히 4:4 이상의 팀전에서는 전략적 협력과 포지셔닝이 승패를 좌우할 수 있습니다. 맵의 이름에서도 느껴지듯, 전투는 치열하고 예측 불가능한 요소들이 많으므로, 플레이어는 항상 상황에 맞게 전투 방식을 유연하게 변화시켜야 합니다. 플레이 전에는 맵의 중앙 협곡과 언덕 지형의 특징을 숙지하고, 각 종족의 강점을 최대한 살릴 수 있는 전략을 미리 구상하는 것이 중요합니다. 또한, 상대방의 기지 위치와 자원 분포를 빠르게 파악하여 확장과 방어 전략을 수립해야 합니다. 《Devil's Playground》는 단순히 넓은 지형에서의 전투가 아니라, 전략적 깊이와 지형 활용이 승패를 가르는 맵이므로, 플레이어의 역량과 준비가 관건입니다. Devil's Playground is a StarCraft: Brood War official map designed for 8-player melee battles. Set in a jungle tileset, the map features wide open plains, a central canyon, and scattered hills—offering a terrain-rich battlefield where positioning and strategy are key. The map’s name, translating to 'the devil’s playground,' reflects its harsh and chaotic nature. The central canyon acts as the focal point for engagements, while the varied terrain—including hills, rocks, and trees—creates opportunities for ambushes, flanking maneuvers, and defensive setups. The edges of the map are more open, allowing for swift movements and high-speed attacks, while the interior offers cover and vantage points for tactical play. Devil's Playground favors Terran and Zerg players with its mix of open fields and defensive chokepoints. Terran players can leverage elevated positions for siege tanks and bunkers, while Zerg can exploit creep spread and lurker ambushes. Protoss players must rely on scouting and dark templar tactics, especially in areas with limited visibility. Resource distribution is uneven, requiring careful expansion and management—adding a layer of strategic depth beyond pure combat. This map is best suited for intermediate or advanced players due to its size and complexity. While ideal for 1v1 or small-team battles like 2v2 or 4v4, it demands strong map awareness and adaptability. The chaotic nature of engagements rewards players who can anticipate enemy movements and adjust strategies on the fly. Before playing, familiarize yourself with the canyon’s choke points and hill placements. Assess your opponent’s base locations and resource availability to plan expansions and defensive setups. Devil's Playground isn’t just about brute force—it’s about outmaneuvering your opponent in a terrain that rewards preparation, foresight, and adaptability.
스나이퍼 정글 엘리트 (Sniper Jungle Elite)
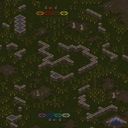
스타크래프트 브루드워의 유즈맵 'Sniper Jungle Elite'는 8명의 플레이어가 참여하는 섬멸전 형식의 맵이다. 맵 제목에서 알 수 있듯이 정글 지형 위에 요새와 방어시설이 배치되어 있으며, 적군을 모두 섬멸하고 깃발을 회수하는 것이 목표로 보인다. 내부 설명에 'Kill all Enemies, Bring Flag back'이라고 명시된 점에서, 단순한 섬멸전 이상의 전략적 요소가 포함된 것으로 추정된다. 맵의 디자인과 배치된 구조물들을 보아 공중 유닛보다는 지상 유닛의 활용이 강조될 가능성이 높으며, 특히 스나이퍼 계열 유닛의 활용을 고려한 디자인으로 보인다. 플레이어들은 각자 개별적인 시작 위치를 확보하며, 맵 중앙과 외곽에 위치한 요새들과 방어시설들을 활용해 적을 제압해야 한다. 맵의 지형은 정글과 오아시스, 바위 지형이 혼합되어 있어 시야 확보와 기동성 확보가 중요할 것으로 예상된다. 또한, 깃발을 회수하기 위한 이동 루트를 보호하거나 차단하는 전략적 선택이 게임의 승패를 좌우할 수 있다. 맵의 크기가 2048x2048로 상당히 넓은 편이므로, 빠른 이동과 효율적인 자원 관리가 필수적일 것이다. 이 맵은 초보자보다는 중급 이상의 플레이어들에게 적합할 것으로 보인다. 복잡한 지형과 전략적 요소들이 요구되기 때문에, 기본적인 스타크래프트 컨트롤과 맵리딩 능력이 충분하지 않다면 상대하기 어려울 수 있다. 또한, 팀플레이보다는 개인전 또는 소규모 팀전으로 진행될 가능성이 높아 보인다. 맵의 디자인과 목표를 고려할 때, 전장 전체를 활용한 기동성과 시야 싸움, 그리고 효율적인 자원 활용이 게임의 핵심 포인트가 될 것이다. 플레이 전에는 맵의 주요 길목과 요새 위치, 깃발의 위치 등을 미리 숙지하는 것이 중요하다. 또한, 스나이퍼 계열 유닛의 활용 가능성과 방어시설의 배치 상태를 확인하여 전략을 세우는 것이 승리의 열쇠가 될 것이다. 맵의 난이도는 보통 수준으로 예상되지만, 적절한 전략과 컨트롤이 뒷받침되지 않는다면 승리를 장담하기 어려울 수 있다. Sniper Jungle Elite is a custom StarCraft: Brood War map designed for 8 players, featuring a jungle-themed terrain with fortresses and defensive structures. The map appears to be a modified elimination mode where the objective is to defeat all enemies and retrieve a flag, as indicated by the internal description 'Kill all Enemies, Bring Flag back'. The layout suggests a focus on ground units rather than air units, with potential emphasis on sniper-type units due to the map's title. Players begin in isolated positions scattered across the map, surrounded by strategically placed fortresses and defensive structures. The terrain includes dense jungles, oases, and rocky areas, which likely require careful consideration of visibility and mobility. The wide-open spaces and mixed terrain mean that controlling key routes to the flag and defending against enemy advances will be crucial for victory. With a map size of 2048x2048, efficient resource management and quick movement are essential. This map seems best suited for intermediate to advanced players. The complex terrain and strategic elements demand solid StarCraft control skills and map-reading abilities; beginners may struggle without sufficient practice. While the map layout suggests a free-for-all or small-team format, the dense jungle areas and defensive structures encourage strategic positioning and tactical combat rather than chaotic rushes. Before playing, it's important to study the map's key paths, fortress locations, and flag positions. Understanding the potential use of sniper units and the layout of defensive structures will help in forming an effective strategy. While the difficulty is estimated to be moderate, success will heavily depend on proper planning and execution, as a lack of strategy or control could easily lead to defeat.
리추얼 (Ritual)
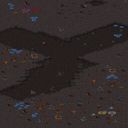
‘리추얼’은 스타크래프트: 브루드워의 유즈맵으로, 단일 플레이어를 위한 디펜스와 생존형 게임플레이가 조화를 이룬 맵이다. 맵은 넓은 정글 타일셋으로 구성되어 있으며, 적대적인 이웃과 끊임없이 대립하는 상황을 배경으로 플레이어는 점차 참을성을 잃어가며 반격에 나서는 스토리가 담겨 있다. 플레이어는 중앙의 기지에서 출발해 주기적으로 쏟아지는 적군과 구조물을 파괴하는 목표를 수행해야 하며, 맵 곳곳에 배치된 방어 시설과 자원 수집을 통해 지속적인 반격을 준비해야 한다. 맵의 특징은 넓은 맵 크기와 복잡한 구조로, 플레이어는 맵을 정찰하며 적의 위치를 파악하고 방어선을 구축해야 한다. 특히, 적군은 다수의 웨이브로 공격해 오며, 일부는 주요 건물을 노리기 때문에 주의가 필요하다. 또한, 맵 곳곳에 흩어져 있는 자원을 수집해 방어 시설이나 공격 유닛을 보강하는 전략적 요소도 포함되어 있다. 맵의 디자인상으로는 중앙 기지와 외곽 지역 간의 격차가 크기 때문에, 초반에는 방어에 집중하다가 점차 반격으로 전환하는 플레이는 필수적이다. 이 맵은 단일 플레이어용이기 때문에 플레이어 개인의 판단력과 전략이 중요하며, 특히 방어선 유지와 자원 관리를 얼마나 효율적으로 수행하느냐가 승패를 좌우한다. 맵의 난이도는 보통 수준으로, 초보 플레이어는 방어 시설의 배치와 자원 관리에 어려움을 느낄 수 있지만, 숙련된 플레이어는 적군의 패턴을 분석해 더 효율적인 strategies를 구사할 수 있다. 맵을 처음 플레이할 때는 맵의 규모와 적군의 공격 패턴을 숙지하는 것이 중요하며, 특히 외곽 지역의 탐험과 자원 수집을 게을리하지 않도록 주의해야 한다. 이 맵은 스타크래프트의 유즈맵 중에서도 디펜스와 생존형 게임플레이를 좋아하는 플레이어들에게 추천할 만한 작품이다. Ritual is a StarCraft: Brood War custom map designed for single-player defense and survival gameplay, blending strategic planning with intense action. Set against a jungle-themed backdrop, the map immerses players in a narrative where they grow increasingly intolerant of hostile neighbors and must strike back against relentless waves of enemies. Players start from a central base, gathering resources and fortifying defenses while preparing to counterattack the opposition. The map stands out for its expansive size and intricate layout, requiring players to scout the terrain, locate enemy positions, and strategically place defensive structures. Enemies attack in waves, targeting key buildings, which demands constant vigilance and adaptability. Scattered across the map are resources essential for upgrading defenses or reinforcing attack units, adding a layer of resource management to the gameplay. The central base and outer regions are distinctly separated, making early defense critical before transitioning to a more aggressive stance. As a single-player experience, Ritual emphasizes individual decision-making and strategy, with success hinging on efficient resource management and defensive positioning. The difficulty is moderate, posing a challenge for beginners who may struggle with resource allocation and base defense, while offering seasoned players opportunities to exploit enemy patterns for optimal strategies. New players should prioritize familiarizing themselves with the map's scale and enemy attack patterns, ensuring they explore outer regions for resources without neglecting base security. This map is highly recommended for fans of StarCraft custom maps that focus on defense and survival mechanics.
캠페인 6 (Campagne 6)
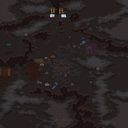
‘Campagne 6’은 스타크래프트: 브루드워의 밀리 맵으로, 섬세한 정글 타일셋 위에 배치된Resource Location을 중심으로 한 전략적 배치와 좁은 길목을 방어하는 요소들이 돋보이는 맵이다. 맵의 전체적인 구도는 4096×4096의 넓은 공간을 활용하되, 초반부터 좁은 길목을 통해 진출하거나 방어 지점을 확보해야 하는 구조로 구성되어 있다. 특히, 정글 타일셋의 어두운 색감과 붉은 지형이 어우러져 독특한 분위기를 연출하며, 플레이어는 이 공간에서Resource gathering과 초반 방어, 그리고Resource Location 확보를 두고 치열한 경쟁을 펼치게 된다. 맵의 중앙부에 위치한Resource Location은 양측이 동등하게 접근할 수 있도록 배치되어 있으며, 좁은 길목은 초반 러시나 방어 страте지를 유도할 가능성이 높아 밸런스 면에서도 흥미로운 포인트를 제공한다. 또한, 맵의 넓은 공간을 활용한 회전력과 기동성, 그리고Resource Location 확보를 통한Resource advantage가 승패를 가르는 주요 요소가 될 것으로 예상된다. 초보자보다는 약간의 미니맵 판독력과Resource management 능력이 요구되는 이 맵은, 좁은 길목에서의 전투와Resource Location 확보를 동시에 고려해야 하는 플레이어에게 도전적인 경험을 제공할 것이다. 특히Resource Location이 중앙에 가까울수록Resource gathering의 효율성이 높아지므로, 초반 진출과 방어 포인트를 어떻게 설정하느냐가 관건이 될 것이다.Resource Location 확보를 위해서는Resource gathering 유닛의 보호와Resource gathering 건물의 배치 전략이 필수적이며, 좁은 길목에서의 전투는Resource advantage를 좌우하는 결정적 요소로 작용할 것이다.Resource gathering과Resource management가 밀접하게 연관된 이 맵은,Resource gathering 건물의 전략적 배치와Resource gathering 유닛의 보호,Resource gathering 루트의 확보가 승리의 열쇠를 쥐고 있는 셈이다.Resource gathering의 중요성과Resource gathering 건물의 배치 전략을 동시에 고려해야 하는 이 맵은,Resource gathering과Resource management의 균형을 잡는 데 중점을 둔 플레이어에게 적극 권장된다.
티거의 잔혹한 전투 2 (Tigger's Brutal 2)
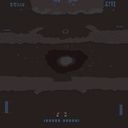
이 맵은 스타크래프트: 브루드워의 유즈맵으로, 내부 설명에 따르면 '모든 적 건물 파괴'가 승리 조건으로 보인다. 맵 제목이 'Untitled Scenario'로 표시되어 있지만, 파일명은 'tigger-brutal2.scx'이며 내부 제목도 동일하다. 맵의 전체 크기는 8x8km로 매우 넓은 정글 타일셋을 기반으로 제작되었는데, 정글 타일셋의 울퉁불퉁한 지형이 전장 분위기를 조성하며 전면전이 벌어지기 어려운 환경을 만든다. 보인다시피 넓은 평야보다는 곳곳에 나무와 언덕이 배치되어 있으며, 중앙에는 커다란 원형 언덕이 존재해 양측의 본진을 연결하는 주요 통로 역할을 할 것으로 추정된다. 이러한 지형적 특징 때문에 플레이어는 자연스럽게 소규모 교전이나 기동전을 펼치게 되며, 대규모 군단이 한꺼번에 움직이기 어려운 구조다. 맵의 목표가 단순 건물 파괴임에도 불구하고, 정글 지형의 복잡성은 전술적 깊이를 더할 것으로 예상된다. 초보 플레이어는 넓은 맵과 제한된 시야로 인한 전략 수립의 어려움을 느낄 수 있으며, 경험 많은 플레이어는 지형을 활용한 기습이나 방어 라인 구축에 주안점을 두고 플레이해야 할 것이다. 맵의 난이도는 맵 자체의 복잡성 때문에 보통 이상으로 느껴질 수 있으며, 특히 브루드워의 기본 유닛 조합만으로는 승리를 장담하기 어려운 구조다. 따라서 이 맵은 밀리 기반의 유즈맵이지만, 순수한 건물 파괴보다도 지형 활용과 소규모 전술이 중요한 포인트가 될 것으로 보인다. 플레이 전에는 맵의 전체적인 흐름과 주요 길목을 파악하는 것이 중요하며, 언덕과 나무가 제공하는 시야 차단과 방어 효율성을 미리 숙지해야 한다. 또한, 넓은 맵에서 자원 수집과 병력 운용의 타이밍을 맞추는 연습이 필요할 것이다. 추천 대상은 브루드워의 기본 전략을 숙지한 플레이어로, 지형 활용과 소규모 교전 능력을 연마하고자 하는 유저에게 적합하다. 초보자도 도전해볼 수 있지만, 기본적인 맵 리딩과 전술 이해도가 요구된다. 이 맵은 넓은 전장과 지형적 특징으로 인해 밸런스가 다소 복잡할 수 있으며, 맵 제작자의 의도대로라면 플레이어 간의 소통과 협력이 중요해질 것으로 보인다. 따라서 팀플레이에서도 유용하게 활용될 수 있을 것이다. This is a custom map for *StarCraft: Brood War*, where the victory condition appears to be "destroying all enemy buildings" based on the internal description. Although the map is labeled as "Untitled Scenario," the filename is "tigger-brutal2.scx," and the internal title matches the filename. The entire map spans 8x8 kilometers, featuring a vast jungle tile set with rugged terrain that creates an environment where large-scale battles are difficult to execute. As seen, the map is not dominated by open plains but instead has scattered trees and hills, with a large circular hill in the center that likely serves as the main path connecting both players' starting bases. Due to these terrain features, players will naturally engage in small-scale skirmishes or mobile warfare rather than large-scale coordinated attacks. Despite the simple objective of destroying buildings, the complexity of the jungle terrain adds tactical depth. Novice players may struggle with the vast map and limited vision when formulating strategies, while experienced players will need to focus on ambushes and defensive positioning using the terrain. The map’s difficulty feels above average due to its complexity, and even with Brood War’s standard unit compositions, victory isn’t guaranteed. While it’s a custom map based on the original game, terrain utilization and small-scale tactics are more critical than simply destroying buildings. Before playing, it’s important to understand the overall flow of the map and identify key pathways. Players should also familiarize themselves with how hills and trees block vision and provide defensive advantages. Additionally, mastering resource gathering and troop movement timing on such a large map will be essential. This map is best suited for players familiar with Brood War’s basic strategies who want to refine their terrain usage and small-scale combat skills. While beginners can try it, a solid understanding of map reading and tactics is required. Due to its expansive battlefield and terrain features, balancing may be complex, and if the creator’s intent holds, communication and teamwork between players will become crucial—making it a useful choice for team-based play as well.
용암의 각성: 테라우스 프라임 (Rising Tensions)
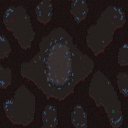
스타크래프트 브루드워의 classic한 맵이자 유즈맵으로도 손색이 없는 Rising Tensions는 2~4명 플레이어들이 각각 자원을 확보하며Expand를 펼칠 수 있는 넓은 공간과 전략적 요충지를 제공한다. 맵의 중심부에는 중앙 자원 지역이 위치해 있으며, 각 플레이어의 시작 지점은 맵 외곽에 배치되어 있다. 맵의 테마는 정글 타일셋을 기반으로 하며, вулкан 지형과 자원 광맥이 산재해 있어 mineral gathering의 재미를 더한다. 미네랄과 가스가 풍부한 테라우스 프라임의 특성을 살려, 초반 자원 확보 경쟁이 치열해질 수밖에 없는 구조다. 특히나 적대적 플레이어들이 같은 목표를 갖고 있다는 설정 덕분에, 중립 미네랄 지역을 둘러싼 초반 교전이나 방어전이 자연스럽게 발생한다. 맵의 넓이(6144x3072)와 타일셋의 복잡성 덕분에 초보자에게는 넓은 시야와 길찾기에서 다소 어려움을 느낄 수 있으나, 익숙해지면 멀티태스킹과 자원 관리 능력을 크게 끌어올릴 수 있는 장점이 있다. Rising Tensions는 밀리 맵으로 분류되어 있지만, 사실상 유즈맵으로도 즐기기에 부족함이 없다. 플레이어들은 각자의 전략에 따라 메인 베이스를 보호하면서 추가 확장 기지를 확보하거나, 중앙 자원 지역을 선점하기 위한 초반 러시, 또는 방어와 견제 플레이를 펼칠 수 있다. 또한, 맵의 지형적 특징상 공중 유닛의 활용도가 높아지며, 특히나 맵의 높낮이 차이를 활용한 전략적 시야 확보가 중요해진다. 초반 mineral gathering을 어떻게 하느냐에 따라 중반 이후의 게임 흐름이 크게 달라질 수 있으니, 자원 확보 우선 순위를 신중히 결정해야 한다. 추천 대상은 스타크래프트의 기본 전략을 익히고자 하는 초보자부터, 넓은 맵과 복잡한 지형을 즐기는 숙련자까지 폭넓게 활용할 수 있는 맵이다. 특히나 팀플레이가 가능한 2~4인용 맵이기 때문에, 팀원과의 협력과 전략적 의사소통이 중요한 요소로 작용한다. 플레이 전에는 맵의 중앙 자원 지역과 각 플레이어의 시작 지점 주변의 mineral field 분포를 미리 확인해 두는 것이 좋다. 또한, 맵의 높은 지형과 낮은 지형의 차이를 빠르게 파악하여, 공중 유닛이나 지상 유닛의 이동 경로를 미리 예상해두면 게임 초반의 자원 확보 경쟁에서 우위를 점할 수 있을 것이다. Rising Tensions is a classic *Brood War* map that also excels as a custom map, offering 2–4 players ample space to secure resources and expand while providing key strategic locations. The map features a central resource area surrounded by player starting positions along the outer edges. Its jungle-themed tileset, complete with volcanic terrain and scattered mineral veins, enhances the mineral gathering experience. Leveraging the mineral-rich Terran Prime terrain, the map naturally fosters intense early-game resource competition, particularly as hostile players vie for control of neutral mineral fields. While its vast size (6144x3072) and intricate tileset may pose challenges for beginners—especially in terms of visibility and pathfinding—the map rewards players who adapt by sharpening their multitasking and resource management skills. Though classified as a *Brood War* map, Rising Tensions is just as enjoyable as a custom map. Players can adopt strategies ranging from securing their main base while expanding to rushing central resources, executing defensive plays, or applying pressure on opponents. The terrain also favors aerial units, with elevation differences playing a critical role in vision control. The early-game mineral gathering phase significantly influences the mid-to-late game flow, making careful prioritization of resource collection essential. This map caters to a wide range of players, from beginners learning core *StarCraft* strategies to veterans who thrive on expansive, complex terrains. Its 2–4 player format also emphasizes teamwork and strategic communication. Before starting, it’s wise to scout the central resource area and the mineral fields near starting positions. Quickly identifying high and low ground differences allows players to anticipate movement paths for both air and ground units, giving them an edge in the opening resource race.
최근 등록된 맵
새로 추가된 파일과 버전을 확인하세요.
리추얼 (Ritual)
‘리추얼’은 스타크래프트: 브루드워의 유즈맵으로, 단일 플레이어를 위한 디펜스와 생존형 게임플레이가 조화를 이룬 맵이다. 맵은 넓은 정글 타일셋으로 구성되어 있으며, 적대적인 이웃과 끊임없이 대립하는 상황을 배경으로 플레이어는 점차 참을성을 잃어가며 반격에 나서는 스토리가 담겨 있다. 플레이어는 중앙의 기지에서 출발해 주기적으로 쏟아지는 적군과 구조물을 파괴하는 목표를 수행해야 하며, 맵 곳곳에 배치된 방어 시설과 자원 수집을 통해 지속적인 반격을 준비해야 한다. 맵의 특징은 넓은 맵 크기와 복잡한 구조로, 플레이어는 맵을 정찰하며 적의 위치를 파악하고 방어선을 구축해야 한다. 특히, 적군은 다수의 웨이브로 공격해 오며, 일부는 주요 건물을 노리기 때문에 주의가 필요하다. 또한, 맵 곳곳에 흩어져 있는 자원을 수집해 방어 시설이나 공격 유닛을 보강하는 전략적 요소도 포함되어 있다. 맵의 디자인상으로는 중앙 기지와 외곽 지역 간의 격차가 크기 때문에, 초반에는 방어에 집중하다가 점차 반격으로 전환하는 플레이는 필수적이다. 이 맵은 단일 플레이어용이기 때문에 플레이어 개인의 판단력과 전략이 중요하며, 특히 방어선 유지와 자원 관리를 얼마나 효율적으로 수행하느냐가 승패를 좌우한다. 맵의 난이도는 보통 수준으로, 초보 플레이어는 방어 시설의 배치와 자원 관리에 어려움을 느낄 수 있지만, 숙련된 플레이어는 적군의 패턴을 분석해 더 효율적인 strategies를 구사할 수 있다. 맵을 처음 플레이할 때는 맵의 규모와 적군의 공격 패턴을 숙지하는 것이 중요하며, 특히 외곽 지역의 탐험과 자원 수집을 게을리하지 않도록 주의해야 한다. 이 맵은 스타크래프트의 유즈맵 중에서도 디펜스와 생존형 게임플레이를 좋아하는 플레이어들에게 추천할 만한 작품이다. Ritual is a StarCraft: Brood War custom map designed for single-player defense and survival gameplay, blending strategic planning with intense action. Set against a jungle-themed backdrop, the map immerses players in a narrative where they grow increasingly intolerant of hostile neighbors and must strike back against relentless waves of enemies. Players start from a central base, gathering resources and fortifying defenses while preparing to counterattack the opposition. The map stands out for its expansive size and intricate layout, requiring players to scout the terrain, locate enemy positions, and strategically place defensive structures. Enemies attack in waves, targeting key buildings, which demands constant vigilance and adaptability. Scattered across the map are resources essential for upgrading defenses or reinforcing attack units, adding a layer of resource management to the gameplay. The central base and outer regions are distinctly separated, making early defense critical before transitioning to a more aggressive stance. As a single-player experience, Ritual emphasizes individual decision-making and strategy, with success hinging on efficient resource management and defensive positioning. The difficulty is moderate, posing a challenge for beginners who may struggle with resource allocation and base defense, while offering seasoned players opportunities to exploit enemy patterns for optimal strategies. New players should prioritize familiarizing themselves with the map's scale and enemy attack patterns, ensuring they explore outer regions for resources without neglecting base security. This map is highly recommended for fans of StarCraft custom maps that focus on defense and survival mechanics.
캠페인 6 (Campagne 6)
‘Campagne 6’은 스타크래프트: 브루드워의 밀리 맵으로, 섬세한 정글 타일셋 위에 배치된Resource Location을 중심으로 한 전략적 배치와 좁은 길목을 방어하는 요소들이 돋보이는 맵이다. 맵의 전체적인 구도는 4096×4096의 넓은 공간을 활용하되, 초반부터 좁은 길목을 통해 진출하거나 방어 지점을 확보해야 하는 구조로 구성되어 있다. 특히, 정글 타일셋의 어두운 색감과 붉은 지형이 어우러져 독특한 분위기를 연출하며, 플레이어는 이 공간에서Resource gathering과 초반 방어, 그리고Resource Location 확보를 두고 치열한 경쟁을 펼치게 된다. 맵의 중앙부에 위치한Resource Location은 양측이 동등하게 접근할 수 있도록 배치되어 있으며, 좁은 길목은 초반 러시나 방어 страте지를 유도할 가능성이 높아 밸런스 면에서도 흥미로운 포인트를 제공한다. 또한, 맵의 넓은 공간을 활용한 회전력과 기동성, 그리고Resource Location 확보를 통한Resource advantage가 승패를 가르는 주요 요소가 될 것으로 예상된다. 초보자보다는 약간의 미니맵 판독력과Resource management 능력이 요구되는 이 맵은, 좁은 길목에서의 전투와Resource Location 확보를 동시에 고려해야 하는 플레이어에게 도전적인 경험을 제공할 것이다. 특히Resource Location이 중앙에 가까울수록Resource gathering의 효율성이 높아지므로, 초반 진출과 방어 포인트를 어떻게 설정하느냐가 관건이 될 것이다.Resource Location 확보를 위해서는Resource gathering 유닛의 보호와Resource gathering 건물의 배치 전략이 필수적이며, 좁은 길목에서의 전투는Resource advantage를 좌우하는 결정적 요소로 작용할 것이다.Resource gathering과Resource management가 밀접하게 연관된 이 맵은,Resource gathering 건물의 전략적 배치와Resource gathering 유닛의 보호,Resource gathering 루트의 확보가 승리의 열쇠를 쥐고 있는 셈이다.Resource gathering의 중요성과Resource gathering 건물의 배치 전략을 동시에 고려해야 하는 이 맵은,Resource gathering과Resource management의 균형을 잡는 데 중점을 둔 플레이어에게 적극 권장된다.
티거의 잔혹한 전투 2 (Tigger's Brutal 2)
이 맵은 스타크래프트: 브루드워의 유즈맵으로, 내부 설명에 따르면 '모든 적 건물 파괴'가 승리 조건으로 보인다. 맵 제목이 'Untitled Scenario'로 표시되어 있지만, 파일명은 'tigger-brutal2.scx'이며 내부 제목도 동일하다. 맵의 전체 크기는 8x8km로 매우 넓은 정글 타일셋을 기반으로 제작되었는데, 정글 타일셋의 울퉁불퉁한 지형이 전장 분위기를 조성하며 전면전이 벌어지기 어려운 환경을 만든다. 보인다시피 넓은 평야보다는 곳곳에 나무와 언덕이 배치되어 있으며, 중앙에는 커다란 원형 언덕이 존재해 양측의 본진을 연결하는 주요 통로 역할을 할 것으로 추정된다. 이러한 지형적 특징 때문에 플레이어는 자연스럽게 소규모 교전이나 기동전을 펼치게 되며, 대규모 군단이 한꺼번에 움직이기 어려운 구조다. 맵의 목표가 단순 건물 파괴임에도 불구하고, 정글 지형의 복잡성은 전술적 깊이를 더할 것으로 예상된다. 초보 플레이어는 넓은 맵과 제한된 시야로 인한 전략 수립의 어려움을 느낄 수 있으며, 경험 많은 플레이어는 지형을 활용한 기습이나 방어 라인 구축에 주안점을 두고 플레이해야 할 것이다. 맵의 난이도는 맵 자체의 복잡성 때문에 보통 이상으로 느껴질 수 있으며, 특히 브루드워의 기본 유닛 조합만으로는 승리를 장담하기 어려운 구조다. 따라서 이 맵은 밀리 기반의 유즈맵이지만, 순수한 건물 파괴보다도 지형 활용과 소규모 전술이 중요한 포인트가 될 것으로 보인다. 플레이 전에는 맵의 전체적인 흐름과 주요 길목을 파악하는 것이 중요하며, 언덕과 나무가 제공하는 시야 차단과 방어 효율성을 미리 숙지해야 한다. 또한, 넓은 맵에서 자원 수집과 병력 운용의 타이밍을 맞추는 연습이 필요할 것이다. 추천 대상은 브루드워의 기본 전략을 숙지한 플레이어로, 지형 활용과 소규모 교전 능력을 연마하고자 하는 유저에게 적합하다. 초보자도 도전해볼 수 있지만, 기본적인 맵 리딩과 전술 이해도가 요구된다. 이 맵은 넓은 전장과 지형적 특징으로 인해 밸런스가 다소 복잡할 수 있으며, 맵 제작자의 의도대로라면 플레이어 간의 소통과 협력이 중요해질 것으로 보인다. 따라서 팀플레이에서도 유용하게 활용될 수 있을 것이다. This is a custom map for *StarCraft: Brood War*, where the victory condition appears to be "destroying all enemy buildings" based on the internal description. Although the map is labeled as "Untitled Scenario," the filename is "tigger-brutal2.scx," and the internal title matches the filename. The entire map spans 8x8 kilometers, featuring a vast jungle tile set with rugged terrain that creates an environment where large-scale battles are difficult to execute. As seen, the map is not dominated by open plains but instead has scattered trees and hills, with a large circular hill in the center that likely serves as the main path connecting both players' starting bases. Due to these terrain features, players will naturally engage in small-scale skirmishes or mobile warfare rather than large-scale coordinated attacks. Despite the simple objective of destroying buildings, the complexity of the jungle terrain adds tactical depth. Novice players may struggle with the vast map and limited vision when formulating strategies, while experienced players will need to focus on ambushes and defensive positioning using the terrain. The map’s difficulty feels above average due to its complexity, and even with Brood War’s standard unit compositions, victory isn’t guaranteed. While it’s a custom map based on the original game, terrain utilization and small-scale tactics are more critical than simply destroying buildings. Before playing, it’s important to understand the overall flow of the map and identify key pathways. Players should also familiarize themselves with how hills and trees block vision and provide defensive advantages. Additionally, mastering resource gathering and troop movement timing on such a large map will be essential. This map is best suited for players familiar with Brood War’s basic strategies who want to refine their terrain usage and small-scale combat skills. While beginners can try it, a solid understanding of map reading and tactics is required. Due to its expansive battlefield and terrain features, balancing may be complex, and if the creator’s intent holds, communication and teamwork between players will become crucial—making it a useful choice for team-based play as well.
썬켄 디펜스 6웨이 10.0 (Sunken Defense 6 Way 10.0)
‘썬켄 디펜스 6웨이 10.0(Sunken D 6 way 10.0)’은 스타크래프트: 브루드워의 유즈맵 중에서도 정글 지형을 배경으로 한 디펜스 장르의 대표작으로, 플레이어는 맵 중앙에 위치한 기지 주변으로 몰려드는 다수의 적 웨이브를 방어하는 것이 주된 목표다. 맵은 6개의 진출로(웨이)가 방사형으로 배치되어 있어 각 방향에서 끊임없이 몰려드는 적을 상대해야 하며, 이 때문에 맵을 빙 둘러싼 방어 시설과 유닛 관리 능력이 핵심 포인트가 된다. 해상도와 타일셋은 일반 정글 지형을 사용해 시각적 몰입감을 높였고, 맵 중앙의 넓은 공간은 방어 타워나 건물을 배치할 수 있는 전략적 요충지로 기능한다. 플레이 방식은 크게 세 가지로 나뉜다. 첫째, 각 웨이(6방향)에 배치된 방어선을 유지하며 적의 공격을 막아내는 ‘기본 디펜스’ 단계다. 둘째, 일정 웨이브가 지나면 더 강력한 적들이 등장하거나 진형이 변화하는 ‘난이도 상승’ 단계로, 이때는 방어 자원과 유닛을 재배치해야 생존이 가능하다. 셋째, 보스급 유닛이 등장하는 ‘최종 웨이브’로, 이 단계에서는 모든 방어선을 통합해 보스를 상대해야 한다. 특히 6개의 웨이가 동시에 공격을 받기 때문에 멀티태스킹 능력이 요구되며, 방어 타워의 배치와 업그레이드 타이밍이 승패를 좌우한다. 이 맵의 가장 큰 특징은 ‘랜덤성과 변동성’이다. 각 웨이브마다 등장하는 적의 조합이 달라지며, 때로는 공중 유닛이나 특수 유닛이 다수 포함되어 기존의 방어 라인을 무력화시킬 수 있다. 또한 맵 중앙의 넓은 공간을 활용한 ‘보스 사냥’이나 ‘후퇴-재정비’ 전략도 가능해, 숙련된 플레이어는 단순히 방어에 머무르지 않고 능동적으로 플레이를 전개할 수 있다. 반면 초보자의 경우, 방어 라인의 중요성을 간과하고 중앙에만 집중하다가 웨이의 균형이 무너지는 경우가 많다. ‘썬켄 디펜스 6웨이 10.0’을 추천하는 대상은 크게 두 부류다. 첫째, 디펜스 장르를 좋아하는 유저들로, 특히 다중 웨이와 랜덤한 웨이브가 주는 긴장감을 즐기는 플레이어에게 적합하다. 둘째, 스타크래프트의 기본 전략과 유닛 조합을 익히고 싶어 하는 유저들로, 이 맵을 통해 방어 시설의 배치, 자원 관리, 유닛 업그레이드 등 다양한 전략적 요소들을 실전처럼 경험할 수 있다. 반면, 한 번의 실수로 모든 것이 무너질 수 있는 높은 난이도와 긴 플레이 시간(예상 40분 내외)을 감당할 수 있는 체력이 요구된다. 플레이 전에는 반드시 방어 라인의 균형을 점검하고, 각 웨이의 특징(예: 공중 유닛 비중, 속도優位 유닛 등)을 숙지한 뒤 임하는 것이 좋다. 또한, 맵 에디터의 특성상_VERSION_이나_EDIT_ 태그가 포함된 내부 설명은 버전 관리와 개선 이력을 확인하는 데 도움이 된다. ‘Sunken Defense 6-Way 10.0’ is one of the most iconic defense maps in *StarCraft: Brood War*, set in a jungle terrain where players must defend their base from waves of enemies swarming from the map’s center. The map features six radial paths (ways) spreading outward, forcing players to constantly fend off attacks from all directions. This makes perimeter defense and unit management the key to survival. The resolution and tileset use a standard jungle aesthetic to enhance immersion, while the wide central area serves as a strategic zone for placing defensive towers and structures. The gameplay is divided into three main phases. First is the ‘Basic Defense’ stage, where players maintain the six-way perimeter and repel enemy attacks. Next is the ‘Difficulty Escalation’ phase, triggered after certain waves, where stronger enemies appear or formations change—requiring players to reorganize their defenses and units to survive. Finally, the ‘Final Wave’ introduces elite boss units, demanding a coordinated defense across all six paths. Since all six ways can be attacked simultaneously, multitasking is essential, and the timing of tower placements and upgrades often determines victory or defeat. The map’s standout feature is its ‘randomness and variability.’ Each wave introduces different enemy compositions, sometimes overwhelming existing defenses with air units or specialized units. The central area also enables advanced strategies like ‘boss hunting’ or ‘retreat and regroup,’ allowing skilled players to go beyond passive defense. Beginners, however, often focus too much on the center while neglecting the perimeters, leading to imbalanced defenses. This map is recommended for two main groups. First, fans of the defense genre who enjoy the tension of multi-directional waves and unpredictable enemy compositions. Second, players looking to master *StarCraft*’s core strategies and unit synergies—this map lets them practice defensive positioning, resource management, and unit upgrades in a dynamic, real-time setting. However, the high difficulty—where a single mistake can collapse everything—and the lengthy playtime (around 40 minutes) demand stamina. Before playing, it’s crucial to balance the perimeter defenses and study each path’s characteristics (e.g., air unit ratios, speed advantages). Additionally, internal notes tagged with _VERSION_ or _EDIT_ in the map editor can help track updates and improvements.
스나이퍼 정글 엘리트 (Sniper Jungle Elite)
스타크래프트 브루드워의 유즈맵 'Sniper Jungle Elite'는 8명의 플레이어가 참여하는 섬멸전 형식의 맵이다. 맵 제목에서 알 수 있듯이 정글 지형 위에 요새와 방어시설이 배치되어 있으며, 적군을 모두 섬멸하고 깃발을 회수하는 것이 목표로 보인다. 내부 설명에 'Kill all Enemies, Bring Flag back'이라고 명시된 점에서, 단순한 섬멸전 이상의 전략적 요소가 포함된 것으로 추정된다. 맵의 디자인과 배치된 구조물들을 보아 공중 유닛보다는 지상 유닛의 활용이 강조될 가능성이 높으며, 특히 스나이퍼 계열 유닛의 활용을 고려한 디자인으로 보인다. 플레이어들은 각자 개별적인 시작 위치를 확보하며, 맵 중앙과 외곽에 위치한 요새들과 방어시설들을 활용해 적을 제압해야 한다. 맵의 지형은 정글과 오아시스, 바위 지형이 혼합되어 있어 시야 확보와 기동성 확보가 중요할 것으로 예상된다. 또한, 깃발을 회수하기 위한 이동 루트를 보호하거나 차단하는 전략적 선택이 게임의 승패를 좌우할 수 있다. 맵의 크기가 2048x2048로 상당히 넓은 편이므로, 빠른 이동과 효율적인 자원 관리가 필수적일 것이다. 이 맵은 초보자보다는 중급 이상의 플레이어들에게 적합할 것으로 보인다. 복잡한 지형과 전략적 요소들이 요구되기 때문에, 기본적인 스타크래프트 컨트롤과 맵리딩 능력이 충분하지 않다면 상대하기 어려울 수 있다. 또한, 팀플레이보다는 개인전 또는 소규모 팀전으로 진행될 가능성이 높아 보인다. 맵의 디자인과 목표를 고려할 때, 전장 전체를 활용한 기동성과 시야 싸움, 그리고 효율적인 자원 활용이 게임의 핵심 포인트가 될 것이다. 플레이 전에는 맵의 주요 길목과 요새 위치, 깃발의 위치 등을 미리 숙지하는 것이 중요하다. 또한, 스나이퍼 계열 유닛의 활용 가능성과 방어시설의 배치 상태를 확인하여 전략을 세우는 것이 승리의 열쇠가 될 것이다. 맵의 난이도는 보통 수준으로 예상되지만, 적절한 전략과 컨트롤이 뒷받침되지 않는다면 승리를 장담하기 어려울 수 있다. Sniper Jungle Elite is a custom StarCraft: Brood War map designed for 8 players, featuring a jungle-themed terrain with fortresses and defensive structures. The map appears to be a modified elimination mode where the objective is to defeat all enemies and retrieve a flag, as indicated by the internal description 'Kill all Enemies, Bring Flag back'. The layout suggests a focus on ground units rather than air units, with potential emphasis on sniper-type units due to the map's title. Players begin in isolated positions scattered across the map, surrounded by strategically placed fortresses and defensive structures. The terrain includes dense jungles, oases, and rocky areas, which likely require careful consideration of visibility and mobility. The wide-open spaces and mixed terrain mean that controlling key routes to the flag and defending against enemy advances will be crucial for victory. With a map size of 2048x2048, efficient resource management and quick movement are essential. This map seems best suited for intermediate to advanced players. The complex terrain and strategic elements demand solid StarCraft control skills and map-reading abilities; beginners may struggle without sufficient practice. While the map layout suggests a free-for-all or small-team format, the dense jungle areas and defensive structures encourage strategic positioning and tactical combat rather than chaotic rushes. Before playing, it's important to study the map's key paths, fortress locations, and flag positions. Understanding the potential use of sniper units and the layout of defensive structures will help in forming an effective strategy. While the difficulty is estimated to be moderate, success will heavily depend on proper planning and execution, as a lack of strategy or control could easily lead to defeat.
랜덤 캣 앤 마우스 정글 3.0 (Random Cat n Mouse Jungle 3.0)
스타크래프트 브루드워의 ‘랜덤 캣 앤 마우스 정글(Random Cat n Mouse Jungle 3.0)’은 정글 지형을 배경으로 한 유즈맵으로, 플레이어들이 고양이와 쥐의 역할로 나뉘어 숨바꼭질과 추격전을 펼치는 디펜스 장르의 재미를 제공한다. 이 맵은 2048x2048 크기의 넓은 사막 타일셋 맵으로, 7명의 플레이어가 참가해 각자 할당된 기지나據點에서 시작하거나 랜덤하게 배치된다. 맵 중앙의 넓은 정글 지역은 시야를 가리는 울창한 숲으로 구성되어 있어, 쥐 플레이어들은 숨기 쉽고 고양이 플레이어들은 정글 내부를 수색하며 추적해야 한다.Version 3.0에서는 기지가 높은 지대에 배치되어 страте적 우위를 제공하며, 이전 버전(2.2)까지는 저지대 배치였다는 점에서 맵 밸런스가 개선되었다고 추정된다. 플레이어는 맵 곳곳에 있는 아이템이나 함정, 혹은 기지 주변의 지형을 활용해 상대방을 따돌리거나 포획하는 전술을 구사할 수 있으며, 특히 쥐 플레이어는 기지로 돌아가면 승리하는 조건을 달성할 수 있는 구조로 보인다. 맵의 랜덤 배치 시스템은 매 게임마다 새로운 전략을 요구해, 반복 플레이에서도 신선한 재미를 느낄 수 있도록 한다. 초보자도 쉽게 접근할 법한 비교적 친절한 맵 디자인과, 숨바꼭질의 긴장감을 유지하는 ‘숨기’와 ‘찾기’의 균형을 맞추려는 노력은 이 맵의 큰 장점으로 보인다. 다만, 쥐 플레이어의 경우 기지까지의 귀환 루트가 길고 복잡해, 고양이 플레이어의 추격이 예상되는 상황이라면 전략적 판단이 필요할 것으로 예상된다. 이 맵을 즐기기 위해서는 넓은 시야와 좁은 시야를 번갈아 경험하는 맵의 특성을 충분히 이해하고, 각자의 역할에 맞게 지형을 활용하는 능력이 중요하다. 특히Version 3.0의 높은 지대 배치 개선은 고양이 플레이어에게는 맵 이해도가, 쥐 플레이어에게는 귀환 루트의 안전성이 더해졌으므로, 플레이 전 맵의 주요 지형과 숨기 가능한 지점을 미리 확인하는 것이 좋다. 추천 대상은 숨바꼭질과 추격전의 재미를 좋아하는 플레이어, 넓은 공간에서 전략을 펼치고 싶어 하는 유저, 그리고 팀플레이보다는 개인의 판단력이 중요시되는 이 맵의 특성을 즐기고 싶은 유저들이다. StarCraft: Brood War’s *Random Cat n Mouse Jungle 3.0* is a user-made defense map set in a jungle terrain, where players are divided into cats and mice to play hide-and-seek and chase in a thrilling defense-style game. The map spans a vast 2048x2048 desert tileset, accommodating up to seven players who either start at assigned bases or spawn randomly. The central jungle area is dense with trees that block vision, giving mice an easier time hiding while forcing cats to search through the thick foliage. In Version 3.0, the bases are positioned on elevated terrain, providing a strategic advantage—unlike Version 2.2, where they were placed in lower areas, suggesting improved map balance. Players can use items, traps, or the terrain near bases to evade or capture opponents. Mice win by returning to their base, and the map’s random spawn system demands new strategies each game, keeping replayability fresh. The map’s design is relatively beginner-friendly, balancing the tension of hiding and seeking while maintaining an accessible structure. However, mice may face challenges due to long, complex return paths to their bases, requiring careful strategy when cats are nearby. To fully enjoy the map, players should understand its mix of wide and narrow vision zones and leverage the terrain according to their roles. The elevation changes in Version 3.0 enhance map understanding for cats and safety for mice returning to base, so scouting key terrain and hiding spots beforehand is crucial. This map is recommended for players who enjoy hide-and-seek and chase gameplay, those who prefer strategizing in open spaces, and users who value individual decision-making over teamwork.
데빌스 플레이그라운드 (Devil's Playground)
《Devil's Playground》는 스타크래프트: 브루드워의 공식 맵으로, 8명의 플레이어가 격돌하는 밀리(MLEE) 장르의 맵입니다. 정글 타일셋으로 구성된 넓은 평야와 중앙을 가로지르는 협곡, 그리고 곳곳에 흩어져 있는 소규모 언덕들이 특징적인 맵으로, 지형적 특징을 최대한 활용한 전투가 가능합니다. 맵의 이름은 '악마의 놀이터'라는 뜻으로, 전쟁터를 연상시키는 험난한 지형을 배경으로 한 만큼 전투의 긴장감을 잘 표현하고 있습니다. 이 맵은 플레이어들이 중앙 협곡을 중심으로 펼쳐지는 전투에 집중할 수 있도록 설계되었습니다. 넓은 개활지와 소규모 언덕들은 시야 확보와 전략적 이동경로 선택에 영향을 미치며, 특히 언덕 지형은 상대방의 시야를 차단하거나 방어 진지를 구축하는 데 유용합니다. 맵의 중앙부는 비교적 평탄한 지형이지만, 곳곳에 배치된 바위와 나무들은 엄폐물 역할을 하며, 전면전보다는 strategic한 포지셔닝과 기지 방어가 중요한 요소로 작용합니다. 또한, 맵의 테두리 near the edges는 비교적 개방되어 있어 빠른 이동과 기습 공격이 가능하다는 점도 특징입니다. 《Devil's Playground》는 특히 테란과 저그 유저들에게 유리한 지형을 제공합니다. 테란의 경우, 언덕을 활용한 방어 진지 구축이 용이하며, 마린이나 탱크의 시야 밖에서 공격을 펼칠 수 있습니다. 저그의 경우,Creep 확장이 용이한 지역이 곳곳에 분포되어 있으며, 오버로드나 러커를 통한 기습 공격이 가능합니다. 프로토스의 경우, 시야 확보와 하이템플러의 활용이 중요한데, 중앙 협곡의 시야가 제한된 구간에서는 암흑 기사나Observer의 활용이 전략적 우위를 점할 수 있습니다. 다만, 넓은 맵 특성상 자원 분포가 균등하지 않다는 점은 플레이어들에게 자원 관리와 확장 전략의 중요성을 더합니다. 이 맵은 초보자보다는 중급 이상의 플레이어들에게 적합한데, 넓은 지형과 다양한 전략적 선택지 때문에 초보자는 맵 이해와 전략 수립에 어려움을 느낄 수 있습니다. 또한, 팀플레이보다는 1:1 또는 2:2 이상의 소규모 전투에 최적화되어 있으며, 특히 4:4 이상의 팀전에서는 전략적 협력과 포지셔닝이 승패를 좌우할 수 있습니다. 맵의 이름에서도 느껴지듯, 전투는 치열하고 예측 불가능한 요소들이 많으므로, 플레이어는 항상 상황에 맞게 전투 방식을 유연하게 변화시켜야 합니다. 플레이 전에는 맵의 중앙 협곡과 언덕 지형의 특징을 숙지하고, 각 종족의 강점을 최대한 살릴 수 있는 전략을 미리 구상하는 것이 중요합니다. 또한, 상대방의 기지 위치와 자원 분포를 빠르게 파악하여 확장과 방어 전략을 수립해야 합니다. 《Devil's Playground》는 단순히 넓은 지형에서의 전투가 아니라, 전략적 깊이와 지형 활용이 승패를 가르는 맵이므로, 플레이어의 역량과 준비가 관건입니다. Devil's Playground is a StarCraft: Brood War official map designed for 8-player melee battles. Set in a jungle tileset, the map features wide open plains, a central canyon, and scattered hills—offering a terrain-rich battlefield where positioning and strategy are key. The map’s name, translating to 'the devil’s playground,' reflects its harsh and chaotic nature. The central canyon acts as the focal point for engagements, while the varied terrain—including hills, rocks, and trees—creates opportunities for ambushes, flanking maneuvers, and defensive setups. The edges of the map are more open, allowing for swift movements and high-speed attacks, while the interior offers cover and vantage points for tactical play. Devil's Playground favors Terran and Zerg players with its mix of open fields and defensive chokepoints. Terran players can leverage elevated positions for siege tanks and bunkers, while Zerg can exploit creep spread and lurker ambushes. Protoss players must rely on scouting and dark templar tactics, especially in areas with limited visibility. Resource distribution is uneven, requiring careful expansion and management—adding a layer of strategic depth beyond pure combat. This map is best suited for intermediate or advanced players due to its size and complexity. While ideal for 1v1 or small-team battles like 2v2 or 4v4, it demands strong map awareness and adaptability. The chaotic nature of engagements rewards players who can anticipate enemy movements and adjust strategies on the fly. Before playing, familiarize yourself with the canyon’s choke points and hill placements. Assess your opponent’s base locations and resource availability to plan expansions and defensive setups. Devil's Playground isn’t just about brute force—it’s about outmaneuvering your opponent in a terrain that rewards preparation, foresight, and adaptability.
펀럴 파이어 (Funeral Pyre)
스타크래프트의 고전 맵 <펀럴 파이어(Funeral Pyre)>는 말 그대로 '장작더미'라는 뜻을 담은 이름처럼, 전쟁의 참혹함을 상징하는 듯한 분위기의 밀리 맵이다. 내부 설명에서도 짐작할 수 있듯이 2~6인용으로 설계되어 있으며, 넓은 정글 타일셋의 지형이 특징적이다. 맵 중앙에는 거대한 장작더미가 놓여 있어, 전투가 벌어질 때마다 불길이 치솟는 듯한 연출이 보인다. 정글 지형은 시야를 가리는 높은 풀숲과 좁은 길목을 제공하며, 이는 플레이어 간의 눈치 싸움과 전략적 기습을 유도한다. 초보 입장에서는 넓은 맵과 복잡한 지형 때문에 진입장벽이 느껴질 수 있지만, 익숙해지면 적의 동선을 차단하고 치고 빠지는 플레이가 가능해진다. 특히, 후방에서 기습을 당하지 않도록 주의해야 하며, 중앙 장작더미 주변의 좁은 통로에서 다수의 유닛이 충돌하는 경우가 많다. 공격과 방어의 균형을 맞추는 것이 관건인 이 맵은, 전면전보다는 소규모 교전과 기습이 승패를 좌우할 가능성이 높다. 초보보다는 중급 이상의 플레이어에게 어울리며, 팀플레이에서는 각자의 역할을 명확히 나눌 필요가 있다. 맵의 분위기와는 달리 실제 게임은 치열한 전투로 진행되며, 넓은 시야와 지형 활용이 무엇보다 중요하다. 플레이 전에는 맵의 지형과 중앙 장작더미의 위치를 숙지하고, 초반 자원 관리와 유닛 조합을 미리 계획하는 것이 좋다. 또한, 맵의 넓은 공간을 활용한Resource Denial(자원 차단) 전략도 고려해볼 만하다. 이 맵은 단순히 밀리 맵을 넘어, 전략적 깊이가 있는 공간이기 때문에, 한 번 익숙해지면 여러 번 플레이해도 질리지 않는 매력이 있다. Funeral Pyre, a classic StarCraft map, lives up to its name—"funeral pyre" or "bonfire"—with a grim atmosphere that evokes the horrors of war. Designed for 2 to 6 players, the map features expansive jungle terrain with tall grass that obscures vision and narrow pathways that force players into close-quarters confrontations. At its center stands a massive pyre that erupts in flames during battles, adding dramatic flair to the chaos. The map’s size and complex layout can feel daunting to beginners, but once mastered, it rewards players with opportunities for ambushes and hit-and-run tactics. Central to success is avoiding rear assaults while navigating the tight corridors around the pyre, where large-scale unit clashes frequently occur. Rather than favoring all-out warfare, Funeral Pyre thrives on small-scale skirmishes and opportunistic strikes, making it better suited for intermediate or advanced players. In team games, clear role division is essential. Despite its somber aesthetic, the gameplay is intense, demanding sharp awareness of map control and terrain exploitation. Before jumping in, study the layout—especially the pyre’s location—and plan your early-game resource management and unit compositions. Strategies like Resource Denial (blocking enemy access to resources) can also turn the tide. With its strategic depth and replayability, Funeral Pyre is far more than just a melee map; once you get the hang of it, you’ll keep coming back for more.
맵 선택 가이드
태그는 맵의 핵심 특징을 빠르게 설명하지만 제작 버전마다 규칙이 다를 수 있습니다. 상세 설명에서 권장 인원, 난이도, 플레이 시간과 버전을 함께 확인한 뒤 다운로드하세요.