
전면전 스타크래프트 맵 모음
'전면전' 태그가 등록된 맵을 모았습니다. 장르 하나로 찾기 어려운 플레이 방식, 난이도와 특징을 중심으로 인기 맵과 최신 맵을 비교해 보세요.
- 등록 맵
- 10개
- 누적 다운로드
- 0
- 누적 조회
- 461
인기 맵
다운로드와 조회 반응이 높은 맵입니다.
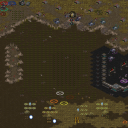
다물군vs부여군 Ver1.2
다물군과 부여군의 가치 있는 역사적 대립을 스타크래프트 브루드워 맵 환경으로 재해석한 유즈맵, 다물군vs부여군 Ver1.2(Damul-gun vs Buyeo-gun Ver1.2)는 고대 세력 간의 전면전을 다루고 있는 독특한 시나리오 기반의 스타크래프트 맵입니다. 황무지 타일셋을 배경으로 펼쳐지는 이 맵은 두 세력이 맞붙는 거대한 전장을 시각적으로 잘 구현해 내었으며, 플레이어는 특정 진영에 소속되어 상대 세력과 치열한 자원 싸움 및 병력 운용을 경험할 수 있도록 설계되어 있습니다. 전통적인 밀리 규칙과는 다른 방식으로 진행되는 유즈맵의 특성을 살려, 고대 국가 간의 영토 분쟁이라는 테마에 걸맞은 대규모 전투 상황이 연출되는 것이 이 맵의 가장 큰 특징이라고 볼 수 있습니다. 전체적인 맵 구조를 살펴보면, 각 진영이 전개할 수 있는 넓은 기지 공간과 함께 중앙의 중립 지역 및 격전지가 배치되어 있어 양측의 세력이 부딪히기 좋은 지형적 요소를 갖추고 있습니다. 황무지 테마 특유의 거친 지형은 단순한 평지 전투를 넘어 지형지물을 활용한 전략적 요충지 싸움을 유도하며, 다수 인원이 참여하는 멀티플레이 환경에서 각자의 역할을 분담하여 전선을 형성하는 재미를 제공합니다. 제작자가 의도한 전면전의 양상에 따라 플레이어는 초반의 빌드업 과정부터 병력을 조합하고 진격 타이밍을 조율하는 운영의 재미를 느낄 수 있으며, 아군과의 유기적인 협동 플레이가 승패를 가르는 중요한 요소를 차지합니다. 고대 삼국 시대 이전의 독특한 세력 구도를 바탕으로 한 유즈맵을 찾고 있는 유저들이나, 일반적인 래더 전장 외에 색다른 역사적 배경의 시나리오 전장을 즐기고 싶은 이들에게 적합한 플레이 경험을 선사합니다. 본격적인 게임을 시작하기 앞서, 각 진영에 주어진 초기 자원과 기지 배치 상황을 파악하고 아군 플레이어들과의 전술적 합을 미리 맞춰두는 것이 맵을 원활하게 즐기는 데 큰 도움이 됩니다. 특히 다인전 기준으로 구성된 전장인 만큼 팀원 간의 소통과 역할 분담이 중요하며, 대규모 병력이 충돌하는 타이밍을 놓치지 않고 집중력을 발휘하는 것이 승리의 지름길이 될 것입니다. 스타크래프트 브루드워의 클래식한 유즈맵 감성을 느끼며 친구들과 함께 색다른 세력전의 묘미를 만끽하고 싶다면 이번 주말에 다물군vs부여군 Ver1.2를 통해 치밀한 전략 대결을 펼쳐보시기를 권장합니다. Damul-gun vs Buyeo-gun Ver1.2 is a unique scenario-based StarCraft Brood War use map that reinterprets the historical confrontation between the Damul-gun and Buyeo-gun forces. Set against a wasteland tileset, this map visually implements a massive battlefield where two historical factions clash, allowing players to experience intense resource battles and troop management within a specific faction. Unlike traditional melee rules, the map delivers large-scale combat situations fitting the theme of territorial disputes between ancient states, which stands out as its primary characteristic. Examining the overall map structure, it features ample base space for each faction to deploy, along with neutral areas and battlegrounds situated in the center, providing geographical elements ideal for both sides to collide. The rugged terrain characteristic of the wasteland theme encourages strategic choke-point fights beyond simple flat-ground combat, offering the fun of forming frontlines through distributed roles in a multiplayer environment. Following the all-out warfare aspect intended by the creator, players can enjoy operational depth from the early build-up phase to combining forces and timing their advances, where organic cooperation with allies becomes a crucial factor determining victory. It delivers a fitting gameplay experience for users looking for use maps based on unique faction dynamics prior to the Three Kingdoms era, or those who want to enjoy a different historical scenario battlefield outside of standard ladder maps. Before starting the game, it is helpful to understand the initial resources and base layout given to each faction and coordinate tactical synergy with allied players beforehand. Because the battlefield is designed around multiplayer standards, communication and role distribution among teammates are essential, and maintaining focus during massive unit clashes is the key to securing victory. If you want to enjoy the classic StarCraft Brood War use map vibe and relish the charm of a unique faction war with your friends, we recommend engaging in a meticulous strategic showdown through Damul-gun vs Buyeo-gun Ver1.2.
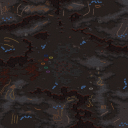
다크 크리스탈 (Dark Crystal)
스타크래프트 브루드워의 정글 테마를 배경으로 한 맵 'Dark Crystal'은 4인용 밀리 맵으로, 어두운 분위기의 맵에서 보석을 둘러싼 치열한 전투를 펼치게 된다. 맵 중앙에는 거대한 크리스탈이 자리 잡고 있으며, 각 플레이어는Starting Location(시작 위치)에서 시작해 맵 곳곳에 흩어져 있는 보석을 확보하거나 상대방을 제압하는 방식으로 승리를 노리게 된다. 보석은 맵 중앙뿐만 아니라 각 진영 near(근처) 지점에 배치되어 있어 초반Resource Collection(자원 채집)과정에서 전략적 선택이 요구된다. 맵의 정글 타일셋은 시각적으로 독특한 분위기를 연출하며, 좁은 길목과 넓은 평지, 언덕 지형이 혼합되어 있어 다양한 전술적 플레이가 가능하다. 특히, 크리스탈 주변은 밀집된 언덕과 협곡으로 구성되어 있어 전투 시 진형 유지와 기동력이 중요해진다. 맵의 난이도는 맵 구조 자체는 복잡하지 않지만, 보석을 둘러싼 경쟁이 치열해질수록 전략적 판단과 빠른 판단력이 요구된다. 초보자들은 초반 자원 확보와 크리스탈 주변의 방어에 집중하는 것이 좋으며, 숙련자들은 보석 확보와 동시에 상대방의 움직임을 차단하는 플레이를 시도해 볼 만하다. 맵의 플레이 시간은 대략 20~30분 정도로 예상되며, 2인 또는 4인 플레이 모두 가능하도록 설계되어 있지만 4인의 경쟁이 더욱 흥미로운 전투를 연출할 수 있다. 크리스탈 주변의 좁은 길목에서 벌어지는 전면전은 이 맵의 백미로, 적절한 유닛 조합과 타이밍이 승패를 좌우할 것이다. 플레이 전에는 크리스탈 주변의 지형과 보석의 배치 위치를 숙지하는 것이 중요하다. 또한, 언덕과 협곡을 활용한 기습이나 방어 전략을 미리 계획해 두면 전투에서 큰 이점을 얻을 수 있다.Dark Crystal은 단순히Resource Collection(자원 채집)과 전투를 반복하는 맵이 아니라, 크리스탈 주변의 전략적 지형과 보석 확보를 통한Resource Management(자원 관리)가 핵심인 맵이다. 맵의 어두운 분위기와 조화로운 정글 타일셋은 플레이어들에게 색다른 스타크래프트 경험을 제공하며, 특히 밀리 경험이 있는 플레이어들에게는Classic(클래식)한 밀리 게임의 재미를 느낄 수 있도록 구성되어 있다. 맵의 난이도는 맵 구조 자체는 복잡하지 않지만, 보석을 둘러싼 경쟁이 치열해질수록 전략적 판단과 빠른 판단력이 요구된다. 초보자들은 초반 자원 확보와 크리스탈 주변의 방어에 집중하는 것이 좋으며, 숙련자들은 보석 확보와 동시에 상대방의 움직임을 차단하는 플레이를 시도해 볼 만하다. 맵의 플레이 시간은 대략 20~30분 정도로 예상되며, 2인 또는 4인 플레이 모두 가능하도록 설계되어 있지만 4인의 경쟁이 더욱 흥미로운 전투를 연출할 수 있다. 크리스탈 주변의 좁은 길목에서 벌어지는 전면전은 이 맵의 백미로, 적절한 유닛 조합과 타이밍이 승패를 좌우할 것이다. 플레이 전에는 크리스탈 주변의 지형과 보석의 배치 위치를 숙지하는 것이 중요하다. 또한, 언덕과 협곡을 활용한 기습이나 방어 전략을 미리 계획해 두면 전투에서 큰 이점을 얻을 수 있다. Set in the jungle-themed backdrop of *StarCraft: Brood War*, the 4-player melee map *Dark Crystal* plunges players into fierce battles over rare gems amid a dark, atmospheric setting. At the heart of the map lies a massive crystal, and victory is achieved by securing gems scattered across the battlefield or eliminating opponents. Gems appear not only near the central crystal but also in designated locations near each player’s starting point, forcing strategic decisions during the early stages of resource collection. The jungle-themed tileset lends a visually distinct mood, blending narrow pathways, open plains, and elevated terrain to create a dynamic battleground. Around the crystal, dense hills and ravines dominate, making formation control and mobility crucial during engagements. While the map’s layout isn’t overly complex, the intense competition over gems demands sharp strategic thinking and quick decision-making. Beginners should focus on early resource gathering and defending the crystal’s surroundings, while experienced players can attempt to block opponents while securing gems. Designed for both 2- and 4-player matches, the map shines brightest in four-player games, offering thrilling combat that unfolds in roughly 20 to 30 minutes. The standout moments come from large-scale confrontations in the crystal’s cramped corridors, where victory hinges on well-timed unit compositions and tactical execution. Before diving in, study the terrain around the crystal and the placement of gems to gain an edge. Leveraging hills and ravines for ambushes or defensive setups can turn the tide of battle. *Dark Crystal* isn’t just about mindless resource hoarding and combat—it’s a map where mastering crystal-adjacent terrain and gem management defines success. The dark, jungle-inspired aesthetic delivers a fresh *StarCraft* experience, appealing especially to veterans seeking a classic melee thrill.
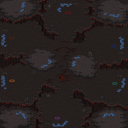
펀럴 파이어 (Funeral Pyre)
스타크래프트의 고전 맵 <펀럴 파이어(Funeral Pyre)>는 말 그대로 '장작더미'라는 뜻을 담은 이름처럼, 전쟁의 참혹함을 상징하는 듯한 분위기의 밀리 맵이다. 내부 설명에서도 짐작할 수 있듯이 2~6인용으로 설계되어 있으며, 넓은 정글 타일셋의 지형이 특징적이다. 맵 중앙에는 거대한 장작더미가 놓여 있어, 전투가 벌어질 때마다 불길이 치솟는 듯한 연출이 보인다. 정글 지형은 시야를 가리는 높은 풀숲과 좁은 길목을 제공하며, 이는 플레이어 간의 눈치 싸움과 전략적 기습을 유도한다. 초보 입장에서는 넓은 맵과 복잡한 지형 때문에 진입장벽이 느껴질 수 있지만, 익숙해지면 적의 동선을 차단하고 치고 빠지는 플레이가 가능해진다. 특히, 후방에서 기습을 당하지 않도록 주의해야 하며, 중앙 장작더미 주변의 좁은 통로에서 다수의 유닛이 충돌하는 경우가 많다. 공격과 방어의 균형을 맞추는 것이 관건인 이 맵은, 전면전보다는 소규모 교전과 기습이 승패를 좌우할 가능성이 높다. 초보보다는 중급 이상의 플레이어에게 어울리며, 팀플레이에서는 각자의 역할을 명확히 나눌 필요가 있다. 맵의 분위기와는 달리 실제 게임은 치열한 전투로 진행되며, 넓은 시야와 지형 활용이 무엇보다 중요하다. 플레이 전에는 맵의 지형과 중앙 장작더미의 위치를 숙지하고, 초반 자원 관리와 유닛 조합을 미리 계획하는 것이 좋다. 또한, 맵의 넓은 공간을 활용한Resource Denial(자원 차단) 전략도 고려해볼 만하다. 이 맵은 단순히 밀리 맵을 넘어, 전략적 깊이가 있는 공간이기 때문에, 한 번 익숙해지면 여러 번 플레이해도 질리지 않는 매력이 있다. Funeral Pyre, a classic StarCraft map, lives up to its name—"funeral pyre" or "bonfire"—with a grim atmosphere that evokes the horrors of war. Designed for 2 to 6 players, the map features expansive jungle terrain with tall grass that obscures vision and narrow pathways that force players into close-quarters confrontations. At its center stands a massive pyre that erupts in flames during battles, adding dramatic flair to the chaos. The map’s size and complex layout can feel daunting to beginners, but once mastered, it rewards players with opportunities for ambushes and hit-and-run tactics. Central to success is avoiding rear assaults while navigating the tight corridors around the pyre, where large-scale unit clashes frequently occur. Rather than favoring all-out warfare, Funeral Pyre thrives on small-scale skirmishes and opportunistic strikes, making it better suited for intermediate or advanced players. In team games, clear role division is essential. Despite its somber aesthetic, the gameplay is intense, demanding sharp awareness of map control and terrain exploitation. Before jumping in, study the layout—especially the pyre’s location—and plan your early-game resource management and unit compositions. Strategies like Resource Denial (blocking enemy access to resources) can also turn the tide. With its strategic depth and replayability, Funeral Pyre is far more than just a melee map; once you get the hang of it, you’ll keep coming back for more.

티거-메제이 (tigger-mezei)
스타크래프트 브루드워의 클래식한 밀리 맵인 〈tigger-mezei〉는 8인용으로 설계된 맵으로, 전체가 뼈로 이루어진 메제(Mezei)라는 이름처럼 독특한 지형을 자랑한다. 맵은 거대한 뼈 구조물이 마치 생체 조직처럼 얽혀 있는 모습으로, 중앙의 넓은 개방 공간을 surrounded by 좁은 길목과 언덕 지대가 둘러싼 구조를 가지고 있다. 이 지형적 특징은 전면전을 펼치기에 최적화되어 있으며, 각 플레이어의 본진은 뼈 구조물 사이로 배치되어 있어 초반 자원 수집과 진출이 다소 까다로운 편이다. 특히 뼈 언덕과 좁은 길목은 시야 차단과 기습에 유리한 지형을 제공하며, 중앙의 넓은 평원은 대규모 전투가 벌어질 수 있는 장소가 된다. 이 맵의 가장 큰 특징은 뼈로 이루어진 지형이 주는 시각적 독특함과 함께, 밀리 맵으로서의 밸런스를 고려한 배치다. 각 플레이어의 본진은 중앙 평원에서 멀리 떨어져 있어 초반 정찰과 진출 타이밍이 중요하며, 좁은 길목과 언덕을 활용한 방어와 기습이 게임의 승패를 좌우할 수 있다. 또한, 뼈 구조물은 단순한 장식에 그치지 않고, 시야 차단과 이동 경로 제약이라는 전략적 요소를 제공한다. 예를 들어, 뼈 언덕 위에서 아군을 지원하거나, 좁은 길목을 통해 적의 배후로 기습하는 플레이가 가능하다. 초보 플레이어의 경우 좁은 길목과 언덕 지형에 익숙하지 않을 수 있어, 초반 정찰과 진출 타이밍을 잘 잡는 것이 중요하다. 반면, 숙련된 플레이어는 이러한 지형적 특징을 활용해 적의 움직임을 예측하고, 전략적으로 advantageous 한 위치에서 전투를 펼칠 수 있다. 맵의 난이도는 중간 정도로, 초반 자원 수집과 진출 타이밍을 잘 조율하면 중반 이후 대규모 전투에서 우위를 점할 수 있다. 특히, 뼈 언덕과 좁은 길목은 방어와 공격 모두에서 유용한 지형이기 때문에, 맵의 특성을 잘 이해하고 활용하는 것이 중요하다. 이 맵은 8인 밀리 게임에서 팀워크와 전략적 사고가 중요한 맵으로, 뼈로 이루어진 독특한 지형이 주는 시각적 재미와 함께 전략적 깊이를 제공한다. 뼈 구조물 사이로 펼쳐지는 전투는 마치 생체 조직 내에서의 전쟁처럼 느껴질 정도로 인상적이며, 플레이어들에게 새로운 전략적 경험을 선사할 것이다. 특히, 좁은 길목과 언덕을 활용한 기습과 방어는 이 맵의 핵심 전략 요소로, 이를 잘 활용할 수 있는 플레이어에게는 큰 이점이 된다. 이 맵을 플레이하기 전에는 뼈 구조물의 배치와 각 플레이어의 본진 위치, 좁은 길목과 언덕의 시야 차단 효과를 미리 숙지하는 것이 좋다. 또한, 초반에는 정찰을 통해 적의 진출 경로를 파악하고, 중반 이후에는 대규모 전투를 대비한 자원과 유닛 조합을 신중히 계획해야 한다. 뼈로 이루어진 맵의 특성상, 시야 차단과 이동 경로 제약이 게임의 흐름을 크게 좌우할 수 있으므로, 이러한 요소들을 잘 이해하고 활용하는 것이 중요하다. Starcraft: Brood War’s classic melee map *Tigger-Mezei* is an 8-player design that boasts a unique terrain inspired by the name Mezei, meaning “bone.” The entire map is dominated by massive skeletal structures that twist and intertwine like living tissue. At its core lies a wide open central plain, encircled by narrow corridors and elevated hillside zones. This layout is tailor-made for full-scale engagements, with each player’s main base tucked between the bony formations, making early resource gathering and expansion slightly tricky. The bone hills and narrow passages offer excellent cover and ambush spots, while the central expanse becomes the stage for large-scale battles. What sets this map apart is the striking visual identity of its skeletal terrain, paired with a layout that carefully balances competitive play. Players start far from the central plain, so scouting and timing your early push are critical. Narrow corridors and elevated ground reward smart defensive setups and surprise attacks, often deciding the outcome of the match. The bone structures aren’t just decoration—they actively shape strategy by blocking vision and restricting movement. Commanders can support allies from elevated bone ridges or slip behind enemy lines through tight passages to launch devastating strikes. Novice players may struggle with the confined corridors and elevated terrain, so nailing early scouting and expansion timing is key. Experienced players, however, can read the terrain like a chessboard, predicting enemy moves and seizing advantageous positions. The map sits at a moderate difficulty level: if you manage early resource flow and expansion timing, you can dominate the mid-game’s large-scale clashes. Both defense and offense benefit from the bone hills and narrow paths, so mastering the map’s quirks is essential. As an 8-player melee arena, *Tigger-Mezei* demands teamwork and tactical foresight. Its eerie skeletal framework delivers visual flair while layering deep strategic options—combat unfolding between the bones feels like a war waged inside living tissue, offering a fresh tactical experience. Ambushes through narrow corridors and defensive stands on elevated ridges are the map’s defining mechanics, giving players who exploit them a decisive edge. Before jumping in, study how the bones are arranged, where each base sits, and how the hills and corridors block sight. Early on, scout to map enemy pathways, and later, plan your unit compositions and resource flow with large battles in mind. Because vision and movement are so heavily restricted here, understanding—and leveraging—those constraints will shape the entire flow of the game.
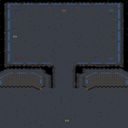
OMFG 더 링스 패스트 빌드 (OMFG The Lings Fast Build)
스타크래프트 브루드워의 유즈맵 'OMFG THE LINGS FAST BUILD'는 저글링의 빠른 빌드를 기반으로 한 전면전 양상의 디펜스 맵이다. 맵 중앙의 넓은 개활지와 사방으로 뻗은 좁은 통로, 그리고 각 진영의 확장 기지가 특징적이며, 플레이어는 초반부터 저글링을 대량 생산해 적 기지를 파괴하는 데 집중해야 한다. 맵 상단과 하단에 위치한 확장 기지를 빠르게 확보하고, 중립 미네랄과 가스를 확보하는 것이 승리의 열쇠로 보인다. 특히 좁은 통로에서 벌어지는 대규모 난전은 저글링의 빠른 속도와 공격력을 십분 활용할 수 있도록 설계되어 있으며, 상대방의 넥서스나 커맨드 센터를 빠르게 파괴하는 것이 목표다. 이 맵은 7인용으로 구성되어 있으며, 각 플레이어는 독립적인 기지를 보유하고 있다. 중앙에서 벌어지는 대규모 전투 외에도, 상대방의 후방 기지를 공격하거나, 확장 기지를 확보해 자원을 안정적으로 확보하는 전략이 중요하다. 맵의 넓은 개활지는 저글링의 기동성을 살릴 수 있게 해주지만, 반대로 후방 침투나 기습 공격에도 취약할 수 있어 플레이어의 판단력이 요구된다. 맵의 분위기는 우주 테마를 사용하고 있으며, 맵의 구조상으로는 방어보다는 공격과 속공이 중시되는 편이다. 저글링의 빠른 빌드업과 대규모 전투가 매력 포인트인 만큼, 저글링을 다루는 능력이 이 맵의 핵심 역량으로 작용할 것이다. 이 맵을 즐기기 위해서는 저글링의 빠른 생산과 기동성을 최적화하는 빌드 오더를 숙지하는 것이 중요하며, 상대방의 전략에 따라 확장 기지 확보와 후방 교란이 필요할 수 있다. 또한, 맵의 좁은 통로에서 벌어지는 전투에서는 저글링의 물량과 속도를 최대한 살려 적을 압도하는 플레이가 요구된다. 이 맵은 초보 플레이어보다는 저글링의 특성과 스타크래프트의 기본 전략을 어느 정도 숙지한 플레이어에게 더 적합할 것으로 보인다. This Brood War custom map, 'OMFG THE LINGS FAST BUILD', is a defense-style title centered around rapid zergling production and large-scale combat. The map features a wide central battlefield with narrow pathways branching out, connecting each player's starting base. Players must quickly secure resources, expand to side expansions, and leverage zerglings' speed and aggression to overwhelm opponents by destroying their main structures—likely Nexus or Command Centers. The map's layout emphasizes frontal assaults and base raids, with opportunities for hit-and-run tactics through side passages. Designed for 7 players, each operates independently with their own base, competing for control of neutral mineral fields and gas geysers scattered across the battlefield. The open center allows for large-scale zergling engagements, while the narrow corridors enable quick flanking maneuvers or ambushes against exposed expansions. The map's space-themed tileset enhances the visual experience, supporting its fast-paced, aggressive gameplay. Mastery of zergling production timings, efficient pathing, and resource management is crucial for success. Players should prioritize building a steady stream of zerglings while balancing expansion control and map awareness. The map rewards aggressive playstyles and punishes hesitation, making it ideal for those who enjoy high-tempo, micro-intensive encounters. While accessible to intermediate players, beginners might find the zergling-centric mechanics challenging without prior experience in controlling swarms efficiently.
미국 독립전쟁: 1776 Vb (American Conflict: 1776 Vb)
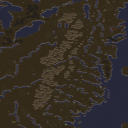
스타크래프트 브루드워의 유즈맵인 <American Conflict: 1776 Vb>는 미국 독립전쟁을 배경으로 한 전략 디펜스 장르의 맵으로, 플레이어는 영국군 또는 미국군 중 하나를 선택하여 승리를 목표로 전투를 펼치게 된다. 맵은 전면전을 상정한 넓은 평야 지형으로 펼쳐져 있으며, 중앙에는 하천과 숲 지대가 배치되어 있어 방어와 공격을 위한 전략적 요충지를 제공한다. 영국군으로 플레이할 경우 미국 반군의 반란을 진압해야 하며, 미국군으로 플레이할 경우 영국군의 침공을 방어하거나 반격을 가해야 한다. 전투는 주로 유닛 생산과 자원 관리, 그리고 지형 활용을 통해 진행되며, 맵 곳곳에 scattered resources(산개된 자원 지점)이 배치되어 있어 자원 확보가 병목 현상을 일으킬 수 있다. 또한, središnje lokacije(중앙 지역) 주변의 고지대는 시야와 공격 범위를 넓히는 데 유리한 위치를 제공한다. 특히, 상대방의 주요 생산 건물이나 보급선 파괴가 승리의 열쇠가 되며, 초반의 유닛 구성과 생산 타이밍이 승패를 좌우할 가능성이 높다. 맵은 8인 대전이 가능하도록 설계되어 있으며, 팀플레이보다는 개인전 성향이 강하지만, 일부 지역에서는 협력이 필요한 상황도 발생할 수 있다. 추천 대상은 전략적 사고와 자원 관리 능력이 뛰어난 플레이어이며, 특히 디펜스와 전면전 경험이 있는 유저에게 적합하다. 플레이 전에는 맵의 주요 자원 지점과 고지대의 위치를 미리 숙지하고, 초반 유닛 구성과 생산 라인을 신중히 계획할 필요가 있다. 또한, 상대방의 전략을 예측하고 유연한 대처가 가능한 플레이어에게 더욱 흥미로운 경험을 제공할 것이다. American Conflict: 1776 Vb is a StarCraft: Brood War custom map set during the American Revolutionary War. Players choose to command either British forces or American rebels, aiming to secure victory through strategic combat. The map unfolds across vast open plains designed for large-scale warfare, with rivers and forests positioned centrally to create key tactical points for defense and offense. British players must suppress rebel uprisings, while American players defend against British invasions or launch counterattacks. Combat revolves around unit production, resource management, and terrain utilization, with scattered resource points distributed across the map that can create bottlenecks in resource gathering. Elevated central locations provide advantageous positions for vision and attack range. Destroying the opponent’s main production buildings or supply lines is often critical to victory, and early unit compositions and production timing heavily influence the outcome. Designed for eight-player battles, the map leans toward individual competition but includes situations where cooperation is necessary in certain areas. It is best suited for players with strong strategic thinking and resource management skills, particularly those experienced in defense and large-scale engagements. Before playing, it’s essential to familiarize yourself with key resource points and the positions of elevated terrain, carefully planning your initial unit composition and production lines. The map will offer an engaging experience especially for players who can anticipate opponent strategies and adapt flexibly.
탱크 디펜스 SE v4.1 (Tank Defense SE v4.1)
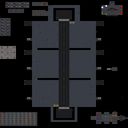
스타크래프트 브루드워의 디펜스 장르 유즈맵 'Tank Defense SE v4.1'은 전면전을 중심으로 한 방어형 맵으로, 6명의 플레이어가 하나의 팀을 이루어 적의 공격을 막아내는 구조로 구성되어 있다. 맵은 넓은 평야와 중앙에 위치한 주요 방어 거점, 그리고 이를 둘러싼 외곽 지역으로 나뉘며, 플레이어들은 맵 곳곳에 배치된 방어 건물과 유닛을 활용해 적의 공세를 차단해야 한다. 이미지에서 확인되는 바와 같이, 맵 중앙에는 튼튼한 방어 시설이 자리 잡고 있으며, 외곽 지역은 산개된 적 유닛들이 끊임없이 몰려드는 형태로 보인다. 방어 건물 외에도 플레이어는 전차를 비롯한 다양한 유닛을 생산하고 배치할 수 있으며, 적의 공격을 효율적으로 방어하기 위한 전략적 포인트를 확보해야 한다. 맵의 특징은 복잡한 길목과 요충지를 중심으로 한 방어 라인 구축에 있으며, 이는 플레이어 간의 협력이 필수적임을 강조한다. 초보자와 숙련자 모두 즐길 수 있도록 난이도가 조절 가능한 것으로 보이며, 특히 팀워크가 중요한 만큼 파티 플레이에 최적화되어 있다. 플레이 전에는 맵의 주요 방어 지점을 미리 숙지하고, 팀원과의 전략적 호흡을 맞추는 것이 중요하다. 또한, 적의 공세가 시작되는 시점을 파악해 사전에 대비할 수 있도록 맵의 흐름을 익혀두는 것이 좋다. 이 맵은 디펜스 장르의 정석을 따르면서도, 넓은 맵과 다양한 유닛 활용을 통해 전략적 깊이를 더하고 있다. 특히 전면전 중심의 전투는 플레이어들에게 긴장감과 긴박감을 동시에 제공한다. 맵의 전체적인 밸런스는 방어 시설의 배치와 유닛 생산의 균형을 맞추어, 공세와 수비 간의 긴장감을 유지하도록 설계된 것으로 추정된다. 초보자의 경우 방어 건물의 배치와 유닛 관리에서 어려움을 느낄 수 있지만, 숙련된 플레이어는 보다 공격적인 방어 전략을 구사할 수 있다. 맵의 분위기는 우주 타일셋을 활용해 우주전을 연상시키는 SF 분위기로 연출되어 있으며, 이는 디펜스 장르에 새로운 시각적 재미를 더한다. 이 맵은 팀플레이를 즐기는 유저들에게 특히 추천되며, 방어와 공격의 균형을 맞추는 전략적 사고를 길러줄 수 있는 훌륭한 훈련용 맵으로 활용될 수 있다. 다만, 넓은 맵 특성상 맵 전체를 빠르게 인지하고 대응하는 능력이 요구된다. StarCraft: Brood War's defense genre custom map *Tank Defense SE v4.1* is a defensive map centered around large-scale battles, where six players form a team to fend off enemy attacks. The map is divided into open plains, a central key defensive stronghold, and outer regions surrounding it. Players must block enemy offensives by utilizing defensive structures and units placed across the map. As seen in the images, the central area features sturdy defensive facilities, while the outer regions are constantly swarmed by scattered enemy units. In addition to defensive buildings, players can produce and deploy various units, including tanks, and secure strategic points to defend more effectively. The map's defining feature is its emphasis on establishing defensive lines around complex paths and key junctions, highlighting the necessity of teamwork. The difficulty appears adjustable to accommodate both beginners and experienced players, making it ideal for party play where coordination is crucial. Before starting, it's important to familiarize yourself with the map's key defensive points and align strategies with your team. Understanding the flow of the map to anticipate enemy offensives will also help you prepare in advance. While adhering to the classic defense genre, this map enhances strategic depth through its expansive layout and varied unit utilization. The large-scale battles provide players with both tension and urgency. The overall balance is designed to maintain a tightrope between offense and defense by carefully placing defensive structures and managing unit production. Beginners may struggle with defensive building placement and unit management, while experienced players can adopt more aggressive defensive strategies. The map's atmosphere, rendered with a space-themed tileset, evokes a sci-fi feel reminiscent of space warfare, adding fresh visual appeal to the defense genre. This map is especially recommended for users who enjoy team play and serves as an excellent training ground for developing strategic thinking in balancing offense and defense. However, the large map size demands quick perception and responsiveness to handle the entire battlefield effectively.
미제 시나리오 (Untitled Scenario)
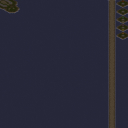
스타크래프트 브루드워의 유즈맵 〈Untitled Scenario〉는 ‘파괴하기’ 컨셉을 기반으로 한 5인용 디펜스형 맵으로, ‘적 건물 모두 파괴하기’가 승리 조건으로 보인다. 맵명은 파일명과 내부 제목 그대로지만, ‘Untitled’는 임시 명칭으로 추정되며 한글로 ‘미제 시나리오’ 또는 ‘제목 없는 시나리오’로도 불릴 수 있다. 사막 타일셋을 기반으로 한 넓은 맵에서 플레이어는 각자 시작 지점에서 출발해 적 기지를 향해 진출해야 한다. 맵 중앙에는 넓은 평원이 펼쳐져 있으며, 맵 가장자리로 갈수록 언덕과 산맥이 배치되어 있어 방어와 공격 루트를 전략적으로 선택할 수 있도록 설계된 것으로 보인다. 미네랄과 가스 분포는 비교적 균등한 듯하며, 주요 자원은 각 플레이어의 기지 주변에 배치되어 초반Resource 수급 경쟁을 유도할 가능성이 있다. 승리 조건이 ‘적 건물 모두 파괴하기’로 명시되어 있어, 전면전을 중심으로 한 플레이가 예상되며, 방어 시설이나 보너스 유닛 배치 여부는 이미지로 확인되지 않는다. 초보자도 쉽게 접근할 수 있는 기본적인 전략의 반복이 주가 되겠지만, 5인이라는 인원 수가 조율에 따라 난이도 변동이 클 것으로 예상된다. 적절한 타이밍에 공격을 감행하거나 방어선을 구축하는 것이 핵심 포인트로 보이며, 특히 맵 중앙의 평원은 교전과 기습의 주요 무대가 될 가능성이 크다. 이 맵은 ‘적 건물 파괴’라는 단순한 승리 조건을 기반으로 하지만, 플레이어 간 협력과 전략적 판단이 요구되는 디펜스형 유즈맵으로 분류된다. 5인용이라는 점에서 팀플레이보다는 개별 플레이어가 경쟁하는 구조가 강할 것으로 보이며, 이는 맵 크기와 자원 분포에서도 반영된다. 또한, 맵이 사막 타일셋으로 구성되어 있어 시각적 간결함이 특징으로, 플레이어는 지형과 자원 분포를 빠르게 파악할 수 있을 것이다. 이 맵을 플레이하기 전에는 맵의 승리 조건과 자원 분포를 정확히 숙지하는 것이 중요하며, 특히 5인 플레이 시에는 각 플레이어의 기지 위치와 진출 경로를 사전에 계획하는 것이 승리의 관건이 될 것이다. Untitled Scenario is a 5-player UMS-style defense map in StarCraft: Brood War, where the victory condition appears to be 'Destroy all enemy buildings'. The map uses a desert tileset with a large open central plain surrounded by hills and mountain ranges, allowing strategic maneuvering for both offense and defense. Resources seem evenly distributed near starting positions, encouraging early game competition for control. While the victory condition is straightforward, the map’s 5-player setup suggests a competitive rather than cooperative experience, requiring individual strategy and timing. The desert tileset provides clear visual contrast, making terrain and resource distribution easy to assess. Players should familiarize themselves with the map’s victory condition and resource layout before starting, as planning attack and defense routes will be crucial, especially given the open central area that serves as a likely battleground. This map is best suited for those who enjoy strategic, resource-driven gameplay with a focus on direct confrontation and map control.
브레이커 캠프 (Breaker Camp)
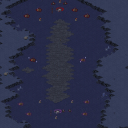
스타크래프트 브루드워의Breaker Camp는 컴까기 장르의 유즈맵으로, 2명의 플레이어가 대결을 펼치는 양상적인 구조가 특징이다. 맵 이름은 Breaker Camp로, 내부 설명에 'Break the Storm'이라는 문구가 포함되어 있어 폭풍을 돌파하거나 격파하는 전투적 임무를 암시한다. 맵은 화산 타일셋으로 구성되어 있으며, 중앙에 넓은 평지 공간이 펼쳐져 있어 전투가 벌어지기 용이한 환경을 제공한다. 이미지 상으로는 양측 플레이어의 시작 지점이 맵의 좌우 양끝에 배치되어 있으며, 중앙에는 소규모의 고지대와 각 플레이어의 기지 건물( presumably 커맨드 센터 또는 넥서스)가 배치된 것으로 보인다. 맵의 전체적인 분위기는 컴까기답게 전략적 배치와 빠른 전투 응전이 요구되는 구조로 보인다. 이 맵의 핵심은 빠른 전투와 효율적인 자원 관리, 그리고 상대방의 기지 파괴에 있다. 플레이어는 시작과 동시에 자원을 확보하여 유닛을 생산하고, 중앙 평지 또는 상대방 기지 방향으로 진격할 전략을 세워야 한다. 맵의 크기는 2048x2048로, 넓은 простор에서 전면전을 펼치거나 기습 작전을 펼치는 등 다양한 전략을 구사할 수 있는 여지가 많다. 맵의 타일셋이 화산인 점, 그리고 내부 설명에 제작자 정보가 포함된 점으로 보아 비교적 오래된 맵이지만, 여전히 컴까기 팬들에게는 인기 있는 장르의 하나로 자리매김하고 있다. 이 맵을 즐기기 위해서는 빠른 판단력과 유닛 컨트롤 능력이 요구된다. 상대방의 움직임에 대응하여 기지를 방어하거나, 또는 먼저 기지를 공격하여 승리를 거두는 것이 관건이다. 또한, 맵의 중앙에 위치한 고지대와 평지는 전투의 주요 무대가 되므로, 이 곳을 어떻게 활용할 것인지에 따라 승패가 갈릴 수 있다. 초보자의 경우, 기본적인 유닛 생산과 컨트롤을 익힌 후 도전하는 것이 좋으며, 숙련자라면 더 빠른 전투와 전략적 시너지를 통해 상대방을 압도하는 플레이가 가능할 것이다. Breaker Camp는 컴까기 장르의 유즈맵으로서, 2인 대결을 중심으로 전면전과 기습 작전을 즐길 수 있는 맵이다. 맵의 구조는 중앙 평지와 양측 기지를 중심으로 이루어져 있으며, 넓은 공간에서 벌어지는 전투가 특징이다. 맵의 타일셋은 화산으로, 전장의 분위기를 한층 더 화끈하게 연출한다. 플레이어는 시작과 동시에 자원을 확보하고, 유닛을 생산하여 상대방의 기지를 파괴하는 데 집중해야 한다. 중앙의 고지대와 평지는 전투의 핵심 지역으로, 이곳을 얼마나 잘 활용하는지가 승패를 좌우할 수 있다. 초보자의 경우 기본적인 전략과 컨트롤을 익힌 후 도전하는 것이 좋으며, 숙련자라면 더 빠른 전투와 전략적 시너지를 통해 상대방을 제압할 수 있다. 이 맵은 컴까기 팬들에게는 필수적인 경험으로, 전략적 깊이와 전투의 재미를 동시에 느낄 수 있는佳作이다. Breaker Camp is a custom *StarCraft: Brood War* "compkki" (command center destruction) map where two players face off in a symmetrical structure. The map’s name, Breaker Camp, hints at its combat-focused mission, as the internal description includes the phrase "Break the Storm," suggesting a battle to overcome or shatter a storm. Set in a volcanic tileset, the map features a wide central plain ideal for combat, with player starting positions on opposite ends. Between them lie small high ground areas and each player’s base structures (likely Command Centers or Nexuses). The design emphasizes the *compkki* genre’s need for strategic positioning and quick tactical responses. The core of this map revolves around rapid combat, efficient resource management, and destroying the opponent’s base. Players must secure resources immediately, produce units, and plan whether to advance toward the central plain or the enemy base. With a map size of 2048x2048, the expansive battlefield allows for full-scale engagements or surprise attacks, offering diverse strategic options. Though its volcanic tileset and creator credits suggest it’s an older map, it remains a popular choice among *compkki* fans. To enjoy Breaker Camp, players need sharp decision-making skills and strong unit control. Success hinges on defending your base against enemy movements or launching a preemptive strike to seize victory. The central high ground and plains serve as the main battlegrounds, making their strategic use crucial to the outcome. Beginners should first master basic unit production and control before attempting this map, while advanced players can dominate with faster engagements and synergistic strategies. Breaker Camp stands out as a quintessential *compkki* custom map for two-player battles, blending large-scale confrontations with ambush tactics. Its volcanic tileset amplifies the battlefield’s intensity, while the layout—centered around a vast plain and paired bases—creates dynamic combat scenarios. Players must gather resources quickly, build units, and focus on annihilating the opponent’s base. The central high ground and open fields are pivotal, often deciding the match’s outcome. Beginners should hone their fundamentals first, while veterans can overwhelm foes with rapid, coordinated assaults. A standout in the *compkki* genre, this map delivers both strategic depth and thrilling combat, making it a must-play experience for fans.
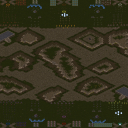
FF2 vs. FF7
‘FF2 vs. FF7’은 스타크래프트: 브루드워의 유즈맵으로, 두 팀이 전면전을 벌이는 근접 전투형 디펜스 맵이다. 맵의 배경은 사막 지형으로 구성되어 있으며, 4096x4096의 넓은 공간에서 펼쳐지는 전투는 대규모 유닛 대 유닛 전투가 주를 이룬다. 내부 맵 설명에 따르면 ‘모든 적 건물과 유닛을 파괴하라’는 간단한 목표가 주어지며, 이는 밀리전의 축소판과도 같은 전투를 연출한다. 맵의 구조는 중앙에 넓은 평지가 펼쳐져 있어 대규모 병력이 충돌할 수 있는 공간이 마련되어 있으며, 주변부는 언덕과 협곡으로 나뉘어 전략적인 기동이 필요한 요소로 작용한다. 전투는 주로 지상군 위주로 진행되며, 공중 유닛의 역할은 제한적으로 보인다. 맵의 디자인상으로는 초반부터 적극적인 공세가 가능하도록 배치되어 있어, 빠른 속도로 전투가 전개될 것으로 예상된다. 이러한 구조는 플레이어에게 끊임없는 압박과 긴장감을 제공하며, 특히 팀전으로 진행될 경우 협동과 전술적 판단력이 요구된다. 이 맵은 스타크래프트의 기본 메커니즘을 최대한 활용한 유즈맵으로, 초보자와 숙련자 모두 즐길 수 있는 접근성 높은 전투 환경을 제공한다. 또한, 맵의 크기와 지형이 대규모 전투를 가능케 하므로, 팀플레이 시 전략의 다양성과 재미를 극대화할 수 있다. 이 맵을 플레이하기 위해서는 사전 준비가 필요하며, 특히 유닛의 생산과 관리가 중요하다. 테란의 경우 보급고와 벙커를 적극 활용한 방어 라인을 구축할 수 있으며, 저그와 프로토스는Creep과 포톤 캐논을 통한 방어 전략을 펼칠 수 있다. 맵의 특성상 유닛의 조합과 업그레이드가 승패를 좌우할 수 있으므로, 플레이 전 충분한 전략 수립이 필요하다. 이 맵은 스타크래프트 유즈맵의 장르 중에서도 ‘컴까기’에 가까운 성격을 띠고 있지만, 엄밀히 말해 밀리전의 변형에 가깝다. 따라서 밀리전을 좋아하거나 대규모 전투를 즐기는 플레이어에게 강추할 만한 작품이다. 특히 팀전으로 플레이할 경우, 각 플레이어의 역할 분담과 전략적 협동이 중요해지기 때문에 팀워크가 빛을 발하는 경험을 제공한다. 맵의 난이도는 기본 밀리전의 수준과 비슷하므로, 초보 플레이어는 난이도를 낮춰서 진행하는 것이 좋겠다. ‘FF2 vs. FF7’ is a *StarCraft: Brood War* custom map where two teams engage in large-scale close-quarters combat defense battles. The map features a desert terrain background and unfolds across a vast 4096x4096 space, with the core gameplay centered on massive unit-versus-unit battles. According to the in-map description, the simple objective is to "destroy all enemy buildings and units," creating a condensed version of a standard melee battle. The map’s layout includes a wide central plain ideal for large-scale troop clashes, while the surrounding areas are divided by hills and ravines, adding strategic maneuvering elements. Combat primarily revolves around ground forces, with aerial units playing a limited role. Designed for aggressive early-game pushes, the map is expected to unfold rapidly, subjecting players to constant pressure and tension—especially in team matches, where coordination and tactical decision-making are crucial. As a custom map that maximizes *StarCraft*’s core mechanics, it offers an accessible combat experience enjoyable for both beginners and veterans. The map’s scale and terrain enable large-scale battles, maximizing strategic variety and fun in team play. To play effectively, players must prepare in advance, with unit production and management being key factors. Terran players can build strong defensive lines using supply depots and bunkers, while Zerg and Protoss can employ creep and photon cannons for defense. Given the map’s nature, unit compositions and upgrades often determine victory or defeat, so solid pre-game strategy is essential. While it shares traits with "commander-killing" (*komkagi*) custom maps, it’s technically closer to a melee variant. Thus, it’s highly recommended for fans of melee or large-scale battles. In team mode, the experience shines as players must divide roles and coordinate strategies, showcasing the power of teamwork. The difficulty is comparable to standard melee, so beginners may want to adjust the settings accordingly.
최근 등록된 맵
새로 추가된 파일과 버전을 확인하세요.
탱크 디펜스 SE v4.1 (Tank Defense SE v4.1)
스타크래프트 브루드워의 디펜스 장르 유즈맵 'Tank Defense SE v4.1'은 전면전을 중심으로 한 방어형 맵으로, 6명의 플레이어가 하나의 팀을 이루어 적의 공격을 막아내는 구조로 구성되어 있다. 맵은 넓은 평야와 중앙에 위치한 주요 방어 거점, 그리고 이를 둘러싼 외곽 지역으로 나뉘며, 플레이어들은 맵 곳곳에 배치된 방어 건물과 유닛을 활용해 적의 공세를 차단해야 한다. 이미지에서 확인되는 바와 같이, 맵 중앙에는 튼튼한 방어 시설이 자리 잡고 있으며, 외곽 지역은 산개된 적 유닛들이 끊임없이 몰려드는 형태로 보인다. 방어 건물 외에도 플레이어는 전차를 비롯한 다양한 유닛을 생산하고 배치할 수 있으며, 적의 공격을 효율적으로 방어하기 위한 전략적 포인트를 확보해야 한다. 맵의 특징은 복잡한 길목과 요충지를 중심으로 한 방어 라인 구축에 있으며, 이는 플레이어 간의 협력이 필수적임을 강조한다. 초보자와 숙련자 모두 즐길 수 있도록 난이도가 조절 가능한 것으로 보이며, 특히 팀워크가 중요한 만큼 파티 플레이에 최적화되어 있다. 플레이 전에는 맵의 주요 방어 지점을 미리 숙지하고, 팀원과의 전략적 호흡을 맞추는 것이 중요하다. 또한, 적의 공세가 시작되는 시점을 파악해 사전에 대비할 수 있도록 맵의 흐름을 익혀두는 것이 좋다. 이 맵은 디펜스 장르의 정석을 따르면서도, 넓은 맵과 다양한 유닛 활용을 통해 전략적 깊이를 더하고 있다. 특히 전면전 중심의 전투는 플레이어들에게 긴장감과 긴박감을 동시에 제공한다. 맵의 전체적인 밸런스는 방어 시설의 배치와 유닛 생산의 균형을 맞추어, 공세와 수비 간의 긴장감을 유지하도록 설계된 것으로 추정된다. 초보자의 경우 방어 건물의 배치와 유닛 관리에서 어려움을 느낄 수 있지만, 숙련된 플레이어는 보다 공격적인 방어 전략을 구사할 수 있다. 맵의 분위기는 우주 타일셋을 활용해 우주전을 연상시키는 SF 분위기로 연출되어 있으며, 이는 디펜스 장르에 새로운 시각적 재미를 더한다. 이 맵은 팀플레이를 즐기는 유저들에게 특히 추천되며, 방어와 공격의 균형을 맞추는 전략적 사고를 길러줄 수 있는 훌륭한 훈련용 맵으로 활용될 수 있다. 다만, 넓은 맵 특성상 맵 전체를 빠르게 인지하고 대응하는 능력이 요구된다. StarCraft: Brood War's defense genre custom map *Tank Defense SE v4.1* is a defensive map centered around large-scale battles, where six players form a team to fend off enemy attacks. The map is divided into open plains, a central key defensive stronghold, and outer regions surrounding it. Players must block enemy offensives by utilizing defensive structures and units placed across the map. As seen in the images, the central area features sturdy defensive facilities, while the outer regions are constantly swarmed by scattered enemy units. In addition to defensive buildings, players can produce and deploy various units, including tanks, and secure strategic points to defend more effectively. The map's defining feature is its emphasis on establishing defensive lines around complex paths and key junctions, highlighting the necessity of teamwork. The difficulty appears adjustable to accommodate both beginners and experienced players, making it ideal for party play where coordination is crucial. Before starting, it's important to familiarize yourself with the map's key defensive points and align strategies with your team. Understanding the flow of the map to anticipate enemy offensives will also help you prepare in advance. While adhering to the classic defense genre, this map enhances strategic depth through its expansive layout and varied unit utilization. The large-scale battles provide players with both tension and urgency. The overall balance is designed to maintain a tightrope between offense and defense by carefully placing defensive structures and managing unit production. Beginners may struggle with defensive building placement and unit management, while experienced players can adopt more aggressive defensive strategies. The map's atmosphere, rendered with a space-themed tileset, evokes a sci-fi feel reminiscent of space warfare, adding fresh visual appeal to the defense genre. This map is especially recommended for users who enjoy team play and serves as an excellent training ground for developing strategic thinking in balancing offense and defense. However, the large map size demands quick perception and responsiveness to handle the entire battlefield effectively.
OMFG 더 링스 패스트 빌드 (OMFG The Lings Fast Build)
스타크래프트 브루드워의 유즈맵 'OMFG THE LINGS FAST BUILD'는 저글링의 빠른 빌드를 기반으로 한 전면전 양상의 디펜스 맵이다. 맵 중앙의 넓은 개활지와 사방으로 뻗은 좁은 통로, 그리고 각 진영의 확장 기지가 특징적이며, 플레이어는 초반부터 저글링을 대량 생산해 적 기지를 파괴하는 데 집중해야 한다. 맵 상단과 하단에 위치한 확장 기지를 빠르게 확보하고, 중립 미네랄과 가스를 확보하는 것이 승리의 열쇠로 보인다. 특히 좁은 통로에서 벌어지는 대규모 난전은 저글링의 빠른 속도와 공격력을 십분 활용할 수 있도록 설계되어 있으며, 상대방의 넥서스나 커맨드 센터를 빠르게 파괴하는 것이 목표다. 이 맵은 7인용으로 구성되어 있으며, 각 플레이어는 독립적인 기지를 보유하고 있다. 중앙에서 벌어지는 대규모 전투 외에도, 상대방의 후방 기지를 공격하거나, 확장 기지를 확보해 자원을 안정적으로 확보하는 전략이 중요하다. 맵의 넓은 개활지는 저글링의 기동성을 살릴 수 있게 해주지만, 반대로 후방 침투나 기습 공격에도 취약할 수 있어 플레이어의 판단력이 요구된다. 맵의 분위기는 우주 테마를 사용하고 있으며, 맵의 구조상으로는 방어보다는 공격과 속공이 중시되는 편이다. 저글링의 빠른 빌드업과 대규모 전투가 매력 포인트인 만큼, 저글링을 다루는 능력이 이 맵의 핵심 역량으로 작용할 것이다. 이 맵을 즐기기 위해서는 저글링의 빠른 생산과 기동성을 최적화하는 빌드 오더를 숙지하는 것이 중요하며, 상대방의 전략에 따라 확장 기지 확보와 후방 교란이 필요할 수 있다. 또한, 맵의 좁은 통로에서 벌어지는 전투에서는 저글링의 물량과 속도를 최대한 살려 적을 압도하는 플레이가 요구된다. 이 맵은 초보 플레이어보다는 저글링의 특성과 스타크래프트의 기본 전략을 어느 정도 숙지한 플레이어에게 더 적합할 것으로 보인다. This Brood War custom map, 'OMFG THE LINGS FAST BUILD', is a defense-style title centered around rapid zergling production and large-scale combat. The map features a wide central battlefield with narrow pathways branching out, connecting each player's starting base. Players must quickly secure resources, expand to side expansions, and leverage zerglings' speed and aggression to overwhelm opponents by destroying their main structures—likely Nexus or Command Centers. The map's layout emphasizes frontal assaults and base raids, with opportunities for hit-and-run tactics through side passages. Designed for 7 players, each operates independently with their own base, competing for control of neutral mineral fields and gas geysers scattered across the battlefield. The open center allows for large-scale zergling engagements, while the narrow corridors enable quick flanking maneuvers or ambushes against exposed expansions. The map's space-themed tileset enhances the visual experience, supporting its fast-paced, aggressive gameplay. Mastery of zergling production timings, efficient pathing, and resource management is crucial for success. Players should prioritize building a steady stream of zerglings while balancing expansion control and map awareness. The map rewards aggressive playstyles and punishes hesitation, making it ideal for those who enjoy high-tempo, micro-intensive encounters. While accessible to intermediate players, beginners might find the zergling-centric mechanics challenging without prior experience in controlling swarms efficiently.
FF2 vs. FF7
‘FF2 vs. FF7’은 스타크래프트: 브루드워의 유즈맵으로, 두 팀이 전면전을 벌이는 근접 전투형 디펜스 맵이다. 맵의 배경은 사막 지형으로 구성되어 있으며, 4096x4096의 넓은 공간에서 펼쳐지는 전투는 대규모 유닛 대 유닛 전투가 주를 이룬다. 내부 맵 설명에 따르면 ‘모든 적 건물과 유닛을 파괴하라’는 간단한 목표가 주어지며, 이는 밀리전의 축소판과도 같은 전투를 연출한다. 맵의 구조는 중앙에 넓은 평지가 펼쳐져 있어 대규모 병력이 충돌할 수 있는 공간이 마련되어 있으며, 주변부는 언덕과 협곡으로 나뉘어 전략적인 기동이 필요한 요소로 작용한다. 전투는 주로 지상군 위주로 진행되며, 공중 유닛의 역할은 제한적으로 보인다. 맵의 디자인상으로는 초반부터 적극적인 공세가 가능하도록 배치되어 있어, 빠른 속도로 전투가 전개될 것으로 예상된다. 이러한 구조는 플레이어에게 끊임없는 압박과 긴장감을 제공하며, 특히 팀전으로 진행될 경우 협동과 전술적 판단력이 요구된다. 이 맵은 스타크래프트의 기본 메커니즘을 최대한 활용한 유즈맵으로, 초보자와 숙련자 모두 즐길 수 있는 접근성 높은 전투 환경을 제공한다. 또한, 맵의 크기와 지형이 대규모 전투를 가능케 하므로, 팀플레이 시 전략의 다양성과 재미를 극대화할 수 있다. 이 맵을 플레이하기 위해서는 사전 준비가 필요하며, 특히 유닛의 생산과 관리가 중요하다. 테란의 경우 보급고와 벙커를 적극 활용한 방어 라인을 구축할 수 있으며, 저그와 프로토스는Creep과 포톤 캐논을 통한 방어 전략을 펼칠 수 있다. 맵의 특성상 유닛의 조합과 업그레이드가 승패를 좌우할 수 있으므로, 플레이 전 충분한 전략 수립이 필요하다. 이 맵은 스타크래프트 유즈맵의 장르 중에서도 ‘컴까기’에 가까운 성격을 띠고 있지만, 엄밀히 말해 밀리전의 변형에 가깝다. 따라서 밀리전을 좋아하거나 대규모 전투를 즐기는 플레이어에게 강추할 만한 작품이다. 특히 팀전으로 플레이할 경우, 각 플레이어의 역할 분담과 전략적 협동이 중요해지기 때문에 팀워크가 빛을 발하는 경험을 제공한다. 맵의 난이도는 기본 밀리전의 수준과 비슷하므로, 초보 플레이어는 난이도를 낮춰서 진행하는 것이 좋겠다. ‘FF2 vs. FF7’ is a *StarCraft: Brood War* custom map where two teams engage in large-scale close-quarters combat defense battles. The map features a desert terrain background and unfolds across a vast 4096x4096 space, with the core gameplay centered on massive unit-versus-unit battles. According to the in-map description, the simple objective is to "destroy all enemy buildings and units," creating a condensed version of a standard melee battle. The map’s layout includes a wide central plain ideal for large-scale troop clashes, while the surrounding areas are divided by hills and ravines, adding strategic maneuvering elements. Combat primarily revolves around ground forces, with aerial units playing a limited role. Designed for aggressive early-game pushes, the map is expected to unfold rapidly, subjecting players to constant pressure and tension—especially in team matches, where coordination and tactical decision-making are crucial. As a custom map that maximizes *StarCraft*’s core mechanics, it offers an accessible combat experience enjoyable for both beginners and veterans. The map’s scale and terrain enable large-scale battles, maximizing strategic variety and fun in team play. To play effectively, players must prepare in advance, with unit production and management being key factors. Terran players can build strong defensive lines using supply depots and bunkers, while Zerg and Protoss can employ creep and photon cannons for defense. Given the map’s nature, unit compositions and upgrades often determine victory or defeat, so solid pre-game strategy is essential. While it shares traits with "commander-killing" (*komkagi*) custom maps, it’s technically closer to a melee variant. Thus, it’s highly recommended for fans of melee or large-scale battles. In team mode, the experience shines as players must divide roles and coordinate strategies, showcasing the power of teamwork. The difficulty is comparable to standard melee, so beginners may want to adjust the settings accordingly.
브레이커 캠프 (Breaker Camp)
스타크래프트 브루드워의Breaker Camp는 컴까기 장르의 유즈맵으로, 2명의 플레이어가 대결을 펼치는 양상적인 구조가 특징이다. 맵 이름은 Breaker Camp로, 내부 설명에 'Break the Storm'이라는 문구가 포함되어 있어 폭풍을 돌파하거나 격파하는 전투적 임무를 암시한다. 맵은 화산 타일셋으로 구성되어 있으며, 중앙에 넓은 평지 공간이 펼쳐져 있어 전투가 벌어지기 용이한 환경을 제공한다. 이미지 상으로는 양측 플레이어의 시작 지점이 맵의 좌우 양끝에 배치되어 있으며, 중앙에는 소규모의 고지대와 각 플레이어의 기지 건물( presumably 커맨드 센터 또는 넥서스)가 배치된 것으로 보인다. 맵의 전체적인 분위기는 컴까기답게 전략적 배치와 빠른 전투 응전이 요구되는 구조로 보인다. 이 맵의 핵심은 빠른 전투와 효율적인 자원 관리, 그리고 상대방의 기지 파괴에 있다. 플레이어는 시작과 동시에 자원을 확보하여 유닛을 생산하고, 중앙 평지 또는 상대방 기지 방향으로 진격할 전략을 세워야 한다. 맵의 크기는 2048x2048로, 넓은 простор에서 전면전을 펼치거나 기습 작전을 펼치는 등 다양한 전략을 구사할 수 있는 여지가 많다. 맵의 타일셋이 화산인 점, 그리고 내부 설명에 제작자 정보가 포함된 점으로 보아 비교적 오래된 맵이지만, 여전히 컴까기 팬들에게는 인기 있는 장르의 하나로 자리매김하고 있다. 이 맵을 즐기기 위해서는 빠른 판단력과 유닛 컨트롤 능력이 요구된다. 상대방의 움직임에 대응하여 기지를 방어하거나, 또는 먼저 기지를 공격하여 승리를 거두는 것이 관건이다. 또한, 맵의 중앙에 위치한 고지대와 평지는 전투의 주요 무대가 되므로, 이 곳을 어떻게 활용할 것인지에 따라 승패가 갈릴 수 있다. 초보자의 경우, 기본적인 유닛 생산과 컨트롤을 익힌 후 도전하는 것이 좋으며, 숙련자라면 더 빠른 전투와 전략적 시너지를 통해 상대방을 압도하는 플레이가 가능할 것이다. Breaker Camp는 컴까기 장르의 유즈맵으로서, 2인 대결을 중심으로 전면전과 기습 작전을 즐길 수 있는 맵이다. 맵의 구조는 중앙 평지와 양측 기지를 중심으로 이루어져 있으며, 넓은 공간에서 벌어지는 전투가 특징이다. 맵의 타일셋은 화산으로, 전장의 분위기를 한층 더 화끈하게 연출한다. 플레이어는 시작과 동시에 자원을 확보하고, 유닛을 생산하여 상대방의 기지를 파괴하는 데 집중해야 한다. 중앙의 고지대와 평지는 전투의 핵심 지역으로, 이곳을 얼마나 잘 활용하는지가 승패를 좌우할 수 있다. 초보자의 경우 기본적인 전략과 컨트롤을 익힌 후 도전하는 것이 좋으며, 숙련자라면 더 빠른 전투와 전략적 시너지를 통해 상대방을 제압할 수 있다. 이 맵은 컴까기 팬들에게는 필수적인 경험으로, 전략적 깊이와 전투의 재미를 동시에 느낄 수 있는佳作이다. Breaker Camp is a custom *StarCraft: Brood War* "compkki" (command center destruction) map where two players face off in a symmetrical structure. The map’s name, Breaker Camp, hints at its combat-focused mission, as the internal description includes the phrase "Break the Storm," suggesting a battle to overcome or shatter a storm. Set in a volcanic tileset, the map features a wide central plain ideal for combat, with player starting positions on opposite ends. Between them lie small high ground areas and each player’s base structures (likely Command Centers or Nexuses). The design emphasizes the *compkki* genre’s need for strategic positioning and quick tactical responses. The core of this map revolves around rapid combat, efficient resource management, and destroying the opponent’s base. Players must secure resources immediately, produce units, and plan whether to advance toward the central plain or the enemy base. With a map size of 2048x2048, the expansive battlefield allows for full-scale engagements or surprise attacks, offering diverse strategic options. Though its volcanic tileset and creator credits suggest it’s an older map, it remains a popular choice among *compkki* fans. To enjoy Breaker Camp, players need sharp decision-making skills and strong unit control. Success hinges on defending your base against enemy movements or launching a preemptive strike to seize victory. The central high ground and plains serve as the main battlegrounds, making their strategic use crucial to the outcome. Beginners should first master basic unit production and control before attempting this map, while advanced players can dominate with faster engagements and synergistic strategies. Breaker Camp stands out as a quintessential *compkki* custom map for two-player battles, blending large-scale confrontations with ambush tactics. Its volcanic tileset amplifies the battlefield’s intensity, while the layout—centered around a vast plain and paired bases—creates dynamic combat scenarios. Players must gather resources quickly, build units, and focus on annihilating the opponent’s base. The central high ground and open fields are pivotal, often deciding the match’s outcome. Beginners should hone their fundamentals first, while veterans can overwhelm foes with rapid, coordinated assaults. A standout in the *compkki* genre, this map delivers both strategic depth and thrilling combat, making it a must-play experience for fans.
미국 독립전쟁: 1776 Vb (American Conflict: 1776 Vb)
스타크래프트 브루드워의 유즈맵인 <American Conflict: 1776 Vb>는 미국 독립전쟁을 배경으로 한 전략 디펜스 장르의 맵으로, 플레이어는 영국군 또는 미국군 중 하나를 선택하여 승리를 목표로 전투를 펼치게 된다. 맵은 전면전을 상정한 넓은 평야 지형으로 펼쳐져 있으며, 중앙에는 하천과 숲 지대가 배치되어 있어 방어와 공격을 위한 전략적 요충지를 제공한다. 영국군으로 플레이할 경우 미국 반군의 반란을 진압해야 하며, 미국군으로 플레이할 경우 영국군의 침공을 방어하거나 반격을 가해야 한다. 전투는 주로 유닛 생산과 자원 관리, 그리고 지형 활용을 통해 진행되며, 맵 곳곳에 scattered resources(산개된 자원 지점)이 배치되어 있어 자원 확보가 병목 현상을 일으킬 수 있다. 또한, središnje lokacije(중앙 지역) 주변의 고지대는 시야와 공격 범위를 넓히는 데 유리한 위치를 제공한다. 특히, 상대방의 주요 생산 건물이나 보급선 파괴가 승리의 열쇠가 되며, 초반의 유닛 구성과 생산 타이밍이 승패를 좌우할 가능성이 높다. 맵은 8인 대전이 가능하도록 설계되어 있으며, 팀플레이보다는 개인전 성향이 강하지만, 일부 지역에서는 협력이 필요한 상황도 발생할 수 있다. 추천 대상은 전략적 사고와 자원 관리 능력이 뛰어난 플레이어이며, 특히 디펜스와 전면전 경험이 있는 유저에게 적합하다. 플레이 전에는 맵의 주요 자원 지점과 고지대의 위치를 미리 숙지하고, 초반 유닛 구성과 생산 라인을 신중히 계획할 필요가 있다. 또한, 상대방의 전략을 예측하고 유연한 대처가 가능한 플레이어에게 더욱 흥미로운 경험을 제공할 것이다. American Conflict: 1776 Vb is a StarCraft: Brood War custom map set during the American Revolutionary War. Players choose to command either British forces or American rebels, aiming to secure victory through strategic combat. The map unfolds across vast open plains designed for large-scale warfare, with rivers and forests positioned centrally to create key tactical points for defense and offense. British players must suppress rebel uprisings, while American players defend against British invasions or launch counterattacks. Combat revolves around unit production, resource management, and terrain utilization, with scattered resource points distributed across the map that can create bottlenecks in resource gathering. Elevated central locations provide advantageous positions for vision and attack range. Destroying the opponent’s main production buildings or supply lines is often critical to victory, and early unit compositions and production timing heavily influence the outcome. Designed for eight-player battles, the map leans toward individual competition but includes situations where cooperation is necessary in certain areas. It is best suited for players with strong strategic thinking and resource management skills, particularly those experienced in defense and large-scale engagements. Before playing, it’s essential to familiarize yourself with key resource points and the positions of elevated terrain, carefully planning your initial unit composition and production lines. The map will offer an engaging experience especially for players who can anticipate opponent strategies and adapt flexibly.
티거-메제이 (tigger-mezei)
스타크래프트 브루드워의 클래식한 밀리 맵인 〈tigger-mezei〉는 8인용으로 설계된 맵으로, 전체가 뼈로 이루어진 메제(Mezei)라는 이름처럼 독특한 지형을 자랑한다. 맵은 거대한 뼈 구조물이 마치 생체 조직처럼 얽혀 있는 모습으로, 중앙의 넓은 개방 공간을 surrounded by 좁은 길목과 언덕 지대가 둘러싼 구조를 가지고 있다. 이 지형적 특징은 전면전을 펼치기에 최적화되어 있으며, 각 플레이어의 본진은 뼈 구조물 사이로 배치되어 있어 초반 자원 수집과 진출이 다소 까다로운 편이다. 특히 뼈 언덕과 좁은 길목은 시야 차단과 기습에 유리한 지형을 제공하며, 중앙의 넓은 평원은 대규모 전투가 벌어질 수 있는 장소가 된다. 이 맵의 가장 큰 특징은 뼈로 이루어진 지형이 주는 시각적 독특함과 함께, 밀리 맵으로서의 밸런스를 고려한 배치다. 각 플레이어의 본진은 중앙 평원에서 멀리 떨어져 있어 초반 정찰과 진출 타이밍이 중요하며, 좁은 길목과 언덕을 활용한 방어와 기습이 게임의 승패를 좌우할 수 있다. 또한, 뼈 구조물은 단순한 장식에 그치지 않고, 시야 차단과 이동 경로 제약이라는 전략적 요소를 제공한다. 예를 들어, 뼈 언덕 위에서 아군을 지원하거나, 좁은 길목을 통해 적의 배후로 기습하는 플레이가 가능하다. 초보 플레이어의 경우 좁은 길목과 언덕 지형에 익숙하지 않을 수 있어, 초반 정찰과 진출 타이밍을 잘 잡는 것이 중요하다. 반면, 숙련된 플레이어는 이러한 지형적 특징을 활용해 적의 움직임을 예측하고, 전략적으로 advantageous 한 위치에서 전투를 펼칠 수 있다. 맵의 난이도는 중간 정도로, 초반 자원 수집과 진출 타이밍을 잘 조율하면 중반 이후 대규모 전투에서 우위를 점할 수 있다. 특히, 뼈 언덕과 좁은 길목은 방어와 공격 모두에서 유용한 지형이기 때문에, 맵의 특성을 잘 이해하고 활용하는 것이 중요하다. 이 맵은 8인 밀리 게임에서 팀워크와 전략적 사고가 중요한 맵으로, 뼈로 이루어진 독특한 지형이 주는 시각적 재미와 함께 전략적 깊이를 제공한다. 뼈 구조물 사이로 펼쳐지는 전투는 마치 생체 조직 내에서의 전쟁처럼 느껴질 정도로 인상적이며, 플레이어들에게 새로운 전략적 경험을 선사할 것이다. 특히, 좁은 길목과 언덕을 활용한 기습과 방어는 이 맵의 핵심 전략 요소로, 이를 잘 활용할 수 있는 플레이어에게는 큰 이점이 된다. 이 맵을 플레이하기 전에는 뼈 구조물의 배치와 각 플레이어의 본진 위치, 좁은 길목과 언덕의 시야 차단 효과를 미리 숙지하는 것이 좋다. 또한, 초반에는 정찰을 통해 적의 진출 경로를 파악하고, 중반 이후에는 대규모 전투를 대비한 자원과 유닛 조합을 신중히 계획해야 한다. 뼈로 이루어진 맵의 특성상, 시야 차단과 이동 경로 제약이 게임의 흐름을 크게 좌우할 수 있으므로, 이러한 요소들을 잘 이해하고 활용하는 것이 중요하다. Starcraft: Brood War’s classic melee map *Tigger-Mezei* is an 8-player design that boasts a unique terrain inspired by the name Mezei, meaning “bone.” The entire map is dominated by massive skeletal structures that twist and intertwine like living tissue. At its core lies a wide open central plain, encircled by narrow corridors and elevated hillside zones. This layout is tailor-made for full-scale engagements, with each player’s main base tucked between the bony formations, making early resource gathering and expansion slightly tricky. The bone hills and narrow passages offer excellent cover and ambush spots, while the central expanse becomes the stage for large-scale battles. What sets this map apart is the striking visual identity of its skeletal terrain, paired with a layout that carefully balances competitive play. Players start far from the central plain, so scouting and timing your early push are critical. Narrow corridors and elevated ground reward smart defensive setups and surprise attacks, often deciding the outcome of the match. The bone structures aren’t just decoration—they actively shape strategy by blocking vision and restricting movement. Commanders can support allies from elevated bone ridges or slip behind enemy lines through tight passages to launch devastating strikes. Novice players may struggle with the confined corridors and elevated terrain, so nailing early scouting and expansion timing is key. Experienced players, however, can read the terrain like a chessboard, predicting enemy moves and seizing advantageous positions. The map sits at a moderate difficulty level: if you manage early resource flow and expansion timing, you can dominate the mid-game’s large-scale clashes. Both defense and offense benefit from the bone hills and narrow paths, so mastering the map’s quirks is essential. As an 8-player melee arena, *Tigger-Mezei* demands teamwork and tactical foresight. Its eerie skeletal framework delivers visual flair while layering deep strategic options—combat unfolding between the bones feels like a war waged inside living tissue, offering a fresh tactical experience. Ambushes through narrow corridors and defensive stands on elevated ridges are the map’s defining mechanics, giving players who exploit them a decisive edge. Before jumping in, study how the bones are arranged, where each base sits, and how the hills and corridors block sight. Early on, scout to map enemy pathways, and later, plan your unit compositions and resource flow with large battles in mind. Because vision and movement are so heavily restricted here, understanding—and leveraging—those constraints will shape the entire flow of the game.
펀럴 파이어 (Funeral Pyre)
스타크래프트의 고전 맵 <펀럴 파이어(Funeral Pyre)>는 말 그대로 '장작더미'라는 뜻을 담은 이름처럼, 전쟁의 참혹함을 상징하는 듯한 분위기의 밀리 맵이다. 내부 설명에서도 짐작할 수 있듯이 2~6인용으로 설계되어 있으며, 넓은 정글 타일셋의 지형이 특징적이다. 맵 중앙에는 거대한 장작더미가 놓여 있어, 전투가 벌어질 때마다 불길이 치솟는 듯한 연출이 보인다. 정글 지형은 시야를 가리는 높은 풀숲과 좁은 길목을 제공하며, 이는 플레이어 간의 눈치 싸움과 전략적 기습을 유도한다. 초보 입장에서는 넓은 맵과 복잡한 지형 때문에 진입장벽이 느껴질 수 있지만, 익숙해지면 적의 동선을 차단하고 치고 빠지는 플레이가 가능해진다. 특히, 후방에서 기습을 당하지 않도록 주의해야 하며, 중앙 장작더미 주변의 좁은 통로에서 다수의 유닛이 충돌하는 경우가 많다. 공격과 방어의 균형을 맞추는 것이 관건인 이 맵은, 전면전보다는 소규모 교전과 기습이 승패를 좌우할 가능성이 높다. 초보보다는 중급 이상의 플레이어에게 어울리며, 팀플레이에서는 각자의 역할을 명확히 나눌 필요가 있다. 맵의 분위기와는 달리 실제 게임은 치열한 전투로 진행되며, 넓은 시야와 지형 활용이 무엇보다 중요하다. 플레이 전에는 맵의 지형과 중앙 장작더미의 위치를 숙지하고, 초반 자원 관리와 유닛 조합을 미리 계획하는 것이 좋다. 또한, 맵의 넓은 공간을 활용한Resource Denial(자원 차단) 전략도 고려해볼 만하다. 이 맵은 단순히 밀리 맵을 넘어, 전략적 깊이가 있는 공간이기 때문에, 한 번 익숙해지면 여러 번 플레이해도 질리지 않는 매력이 있다. Funeral Pyre, a classic StarCraft map, lives up to its name—"funeral pyre" or "bonfire"—with a grim atmosphere that evokes the horrors of war. Designed for 2 to 6 players, the map features expansive jungle terrain with tall grass that obscures vision and narrow pathways that force players into close-quarters confrontations. At its center stands a massive pyre that erupts in flames during battles, adding dramatic flair to the chaos. The map’s size and complex layout can feel daunting to beginners, but once mastered, it rewards players with opportunities for ambushes and hit-and-run tactics. Central to success is avoiding rear assaults while navigating the tight corridors around the pyre, where large-scale unit clashes frequently occur. Rather than favoring all-out warfare, Funeral Pyre thrives on small-scale skirmishes and opportunistic strikes, making it better suited for intermediate or advanced players. In team games, clear role division is essential. Despite its somber aesthetic, the gameplay is intense, demanding sharp awareness of map control and terrain exploitation. Before jumping in, study the layout—especially the pyre’s location—and plan your early-game resource management and unit compositions. Strategies like Resource Denial (blocking enemy access to resources) can also turn the tide. With its strategic depth and replayability, Funeral Pyre is far more than just a melee map; once you get the hang of it, you’ll keep coming back for more.
미제 시나리오 (Untitled Scenario)
스타크래프트 브루드워의 유즈맵 〈Untitled Scenario〉는 ‘파괴하기’ 컨셉을 기반으로 한 5인용 디펜스형 맵으로, ‘적 건물 모두 파괴하기’가 승리 조건으로 보인다. 맵명은 파일명과 내부 제목 그대로지만, ‘Untitled’는 임시 명칭으로 추정되며 한글로 ‘미제 시나리오’ 또는 ‘제목 없는 시나리오’로도 불릴 수 있다. 사막 타일셋을 기반으로 한 넓은 맵에서 플레이어는 각자 시작 지점에서 출발해 적 기지를 향해 진출해야 한다. 맵 중앙에는 넓은 평원이 펼쳐져 있으며, 맵 가장자리로 갈수록 언덕과 산맥이 배치되어 있어 방어와 공격 루트를 전략적으로 선택할 수 있도록 설계된 것으로 보인다. 미네랄과 가스 분포는 비교적 균등한 듯하며, 주요 자원은 각 플레이어의 기지 주변에 배치되어 초반Resource 수급 경쟁을 유도할 가능성이 있다. 승리 조건이 ‘적 건물 모두 파괴하기’로 명시되어 있어, 전면전을 중심으로 한 플레이가 예상되며, 방어 시설이나 보너스 유닛 배치 여부는 이미지로 확인되지 않는다. 초보자도 쉽게 접근할 수 있는 기본적인 전략의 반복이 주가 되겠지만, 5인이라는 인원 수가 조율에 따라 난이도 변동이 클 것으로 예상된다. 적절한 타이밍에 공격을 감행하거나 방어선을 구축하는 것이 핵심 포인트로 보이며, 특히 맵 중앙의 평원은 교전과 기습의 주요 무대가 될 가능성이 크다. 이 맵은 ‘적 건물 파괴’라는 단순한 승리 조건을 기반으로 하지만, 플레이어 간 협력과 전략적 판단이 요구되는 디펜스형 유즈맵으로 분류된다. 5인용이라는 점에서 팀플레이보다는 개별 플레이어가 경쟁하는 구조가 강할 것으로 보이며, 이는 맵 크기와 자원 분포에서도 반영된다. 또한, 맵이 사막 타일셋으로 구성되어 있어 시각적 간결함이 특징으로, 플레이어는 지형과 자원 분포를 빠르게 파악할 수 있을 것이다. 이 맵을 플레이하기 전에는 맵의 승리 조건과 자원 분포를 정확히 숙지하는 것이 중요하며, 특히 5인 플레이 시에는 각 플레이어의 기지 위치와 진출 경로를 사전에 계획하는 것이 승리의 관건이 될 것이다. Untitled Scenario is a 5-player UMS-style defense map in StarCraft: Brood War, where the victory condition appears to be 'Destroy all enemy buildings'. The map uses a desert tileset with a large open central plain surrounded by hills and mountain ranges, allowing strategic maneuvering for both offense and defense. Resources seem evenly distributed near starting positions, encouraging early game competition for control. While the victory condition is straightforward, the map’s 5-player setup suggests a competitive rather than cooperative experience, requiring individual strategy and timing. The desert tileset provides clear visual contrast, making terrain and resource distribution easy to assess. Players should familiarize themselves with the map’s victory condition and resource layout before starting, as planning attack and defense routes will be crucial, especially given the open central area that serves as a likely battleground. This map is best suited for those who enjoy strategic, resource-driven gameplay with a focus on direct confrontation and map control.
맵 선택 가이드
태그는 맵의 핵심 특징을 빠르게 설명하지만 제작 버전마다 규칙이 다를 수 있습니다. 상세 설명에서 권장 인원, 난이도, 플레이 시간과 버전을 함께 확인한 뒤 다운로드하세요.