
전략적 스타크래프트 맵 모음
'전략적' 태그가 등록된 맵을 모았습니다. 장르 하나로 찾기 어려운 플레이 방식, 난이도와 특징을 중심으로 인기 맵과 최신 맵을 비교해 보세요.
- 등록 맵
- 13개
- 누적 다운로드
- 6
- 누적 조회
- 787
인기 맵
다운로드와 조회 반응이 높은 맵입니다.
![매트[9.1]완전판 (MATRIX 9.1) 맵 미리보기](https://cdn-star-data.huzy.net/thumbnail_417c450255b64fc9b9e3c6d967240e00.jpg)
매트[9.1]완전판 (MATRIX 9.1)
스타크래프트 브루드워의 정교한 유즈맵으로 유명한 MATRIX 9.1은 우주 배경의 디펜스 장르 맵이다. 맵의 중앙에는 거대한 구조물이 자리 잡고 있으며, 플레이어는 이 구조물을 보호하거나 공격하는 형태로 전투를 펼쳐야 한다. 맵 구조는 복잡한 길이와 방어 시설로 구성되어 있어, 전략적인 플레이가 요구된다. 맵의 하단과 상단에는 각각의 플레이어 기지가 배치되어 있으며, 기지 주변에는 방어 건물이 배치되어 있다. 맵의 상단과 하단에 위치한 광물 지대와 가스 채취 지역은 자원 관리를 통해 지속적인 전투를 가능하게 한다. MATRIX 9.1은Hardcore 모드와 같이 어려운 난이도를 자랑하며, 플레이어는 끊임없이 다가오는 적의 물량을 상대해야 한다. 맵의 디자인과 전투 시스템은 마치 영화 '매트릭스'의 세계관을 연상시키며, 플레이어는 마치 가상 현실 속에서 전투를 펼치는 듯한 경험을 느낄 수 있다. 이 맵은 주로 6인 플레이를 상정하고 있으며, 팀 플레이보다는 개인별 전투와 전략이 emphasized된다. MATRIX 9.1을 플레이하기 위해서는 맵의 구조와 방어 전략을 충분히 숙지하는 것이 중요하다. 특히, 기지 방어와 자원 관리, 그리고 적의 공격 패턴을 예측하는 능력이 요구된다. 맵의 난이도가 높기 때문에 초보 플레이어보다는 숙련된 플레이어에게 더 적합한 맵으로 평가된다. 또한, 맵의 Hardcore 모드는 일반적인 디펜스 맵과는 차별화된 긴장감을 제공한다. MATRIX 9.1은 단순히 방어하는 것을 넘어, 적극적인 공격과 전략을 요구하는 맵으로, 스타크래프트 유즈맵의 진수를 경험할 수 있는 작품 중 하나이다. MATRIX 9.1 is a sophisticated custom map in StarCraft: Brood War, renowned for its defense genre set in a cosmic environment. The map centers around a massive structure that players must either protect or attack, depending on the game mode. The layout features intricate pathways and defensive structures, demanding strategic thinking from players. Bases for each player are situated at the top and bottom of the map, surrounded by defensive buildings. Mineral fields and gas geysers at the top and bottom allow for resource management to sustain ongoing battles. Known for its Hardcore mode, MATRIX 9.1 presents a challenging difficulty, requiring players to fend off relentless enemy waves. The design and combat system evoke the cinematic world of 'The Matrix,' immersing players in a virtual reality-like battlefield. Designed primarily for 6 players, the map emphasizes individual combat and strategy over team play. To excel, players should thoroughly understand the map's layout, defensive tactics, resource management, and enemy attack patterns. The high difficulty makes it more suitable for experienced players rather than beginners. The Hardcore mode adds a layer of tension, distinguishing it from standard defense maps. MATRIX 9.1 transcends mere defense by incorporating proactive attacks and strategy, offering a quintessential experience of StarCraft custom maps.
트로이 SE 2.0 (Troy SE 2.0)
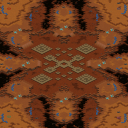
《Troy SE 2.0》는 스타크래프트: 브루드워의 전장 맵으로, ASL 17 공식 맵으로도 채택된 classic한 밀리 유즈맵이다. 이 맵은 기존 《Troy》 시리즈의 후속작으로, 황혼 테마의 넓은 평야와 숲 지형이 조화를 이루며 전략적 깊이를 더한 것이 특징이다. 맵 중앙에는 넓은 평지가 펼쳐져 있어macro와 micro 모두 중요하게 작용하며, 양 측면에 위치한 언덕과 숲은 시야 확보와 병력 기습에 유리한 환경을 제공한다. 특히, 맵의 symmetrical 구조는 양 팀의 균형을 맞추는 데 도움을 주며, 초보자와 숙련자 모두에게 공정한 경쟁을 가능하게 한다. 전체적인 맵의 흐름은 중앙 평지를 둘러싼 언덕과 숲을 중심으로 전개된다. 초반에는 멀티테스크와 빠른 자원 채취가 중요하며, 중반에는 중앙 평지를 장악하기 위한 싸움으로 이어진다. 후반으로 갈수록 넓은 맵의 이점을 살려 후방 테러나 다수 멀티 운영이 관전 포인트로 떠오른다. 맵의 symmetrical한 설계 덕분에 양 팀의 전략이 대칭적으로 펼쳐지며, 이는 밸런스 측면에서 상당한 장점으로 작용한다. 이 맵은 ASL 공식 맵으로 채택되었을 만큼 전략적 깊이가 뛰어나며, 특히 프로게이머들 사이에서 인기가 많다. 또한, 넓은 평지에서의 대규모 전투는 시원시원한 진행 feel을 제공하며, 숲과 언덕의 지형적 이점을 활용한 전략적 플레이가 가능하다는 점에서도 매력적이다. 《Troy SE 2.0》는 단순히 맵을 넘어서, 전장이라는 공간 자체가 경기의 승패를 좌우하는 핵심 요소로 작용하는 맵이라 할 수 있다. 플레이어는 맵의 특성을 잘 이해하고, 자신의 스타일에 맞는 전략을 펼치는 것이 중요하다. 초보자의 경우, 중앙 평지에서의 전투와 멀티 운영을 중심으로 연습해 보는 것을 추천한다. 전체적으로 《Troy SE 2.0》는 스타크래프트: 브루드워의 classic한 밀리 맵 중 하나로, ASL 공식 맵으로서의 입지를 굳건히 하고 있다. symmetrical한 구조와 넓은 평지, 숲과 언덕의 조화로운 지형이 어우러져, 전략적 깊이를 더한 맵으로 평가받는다.—Especially for those who enjoy classic melee maps with balanced terrain—this map offers a fair and engaging experience suitable for both beginners and advanced players alike. 《Troy SE 2.0》 is a classic melee map in *StarCraft: Brood War*, also adopted as an official map for ASL 17. As a sequel to the original *Troy* series, this map features a harmonious blend of vast plains and forested terrain under a twilight theme, adding strategic depth. The wide central plain makes macro and micro play crucial, while the hills and forests on both sides provide advantageous vantage points and ambush opportunities. The map’s symmetrical design ensures balanced competition, offering fair conditions for both beginners and experienced players. The flow of the match revolves around the central plain, with hills and forests playing key roles. Early game emphasizes multitasking and efficient resource gathering, while mid-game shifts to battles for control of the central area. As the game progresses, the map’s size allows for late-game strategies like backline harassment or multi-base operations to shine. The symmetrical layout ensures that both teams deploy symmetric strategies, contributing to its strong balance. Renowned for its strategic depth, this map was selected as an ASL official map and enjoys popularity among professional players. The large-scale battles on the open plains deliver a satisfying pace, while the terrain’s hills and forests enable diverse tactical plays. More than just a map, *Troy SE 2.0* makes the battlefield itself a decisive factor in victory. Players must understand the map’s nuances and adapt their strategies accordingly—beginners are especially advised to focus on central combat and multi-base management. Overall, *Troy SE 2.0* stands as a classic *Brood War* melee map with a firm foothold as an ASL official title. Its balanced terrain, featuring symmetrical design, wide plains, and harmonious forests, elevates its strategic depth—ideal for fans of classic melee maps seeking a fair and engaging experience for all skill levels.
헬름즈 딥: 코디아카이 1.8v2 (Helms Deep: Kodiakai 1.8v2)
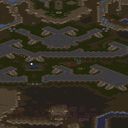
스타크래프트 브루드워의 디펜스 장르 유즈맵 '헬름즈 딥: 코디아카이 1.8v2'는 사막 테마의 광활한 맵에서 펼쳐지는 대규모 방어전을 경험할 수 있는 작품이다. 맵의 이름은 '헬름즈 딥'으로, 반지의 제왕 세계관의 유명한 방어전인 '헬름즈 딥 전투'를 모티브로 삼은 것으로 추정된다. 맵은 7명이 플레이할 수 있도록 설계되었으며, 사막 타일셋을 기반으로 한 황량한 지형과 절묘한 구조물이 방어전의 긴장감을 극대화한다. 맵의 중앙에는 거대한 요새가 위치하고 있으며, 그 주변으로는 적의 공격을 방어할 수 있는 성벽과 요새가 복잡하게 배치되어 있다. 플레이어는 이러한 방어 시설을 보수하고 강화하는 동시에, 끊임없이 몰려오는 적군으로부터 본진을 지켜내야 한다. 맵의 구조는 방어선의 중요성을 강조하며, 플레이어 간 협력이 필수적인 만큼 팀워크가 중요한 요소로 작용할 것이다. 맵의 배경 음악과 효과음은 사막의 분위기를 살리기 위해 디자인된 것으로 보이며, 이는 플레이어의 몰입감을 높이는 데 기여한다. 특히 맵의 규모가 크고 세부적인 구조물이 많아, 한 번의 실수가 승패를 가를 수 있는 긴장감이 특징이다. 이 맵은 디펜스 장르를 любителей 대규모 방어전과 전략적 협동 플레이를 즐기는 유저들에게 강력히 추천한다. 방어 시설을 효율적으로 관리하고, 적의 패턴을 분석하는 능력이 요구되므로, 초보자보다는 어느 정도의 전략적 이해와 팀워크가 있는 플레이어에게 더 적합할 것이다. 또한, 맵의 특성상 지속적인 플레이로 적의 패턴을 익히고 방어 전술을 연마할 수 있는 장점이 있다.Helms Deep: Kodiakai's 1.8v2 is a defense-type custom map in StarCraft: Brood War set in a vast desert-themed battlefield, inspired by the Helm's Deep battle from The Lord of the Rings universe. Designed for seven players, the map features intricate defensive structures including walls, fortresses, and outposts centered around a large main stronghold. Players must collaborate closely to reinforce structures, manage resources, and repel relentless enemy waves that attack from multiple directions. The map's large scale and detailed layout demand strategic foresight and team coordination, as a single mistake can lead to a breach in defenses. The immersive atmosphere is enhanced by sound design that complements the desert setting, creating a tense and engaging experience. This map is ideal for players who enjoy large-scale defense scenarios with cooperative elements. While accessible to beginners, it rewards players with strategic depth and the opportunity to refine defensive tactics through repeated play. The complex layout and dynamic enemy AI make it a challenging yet rewarding experience for those seeking a deep defense challenge.
스나이퍼 발드 + 파이널 베타 (Sniper Bald + Final BETA)
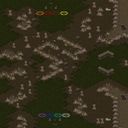
스타크래프트 브루드워의 숨은 보석 중 하나인 ‘스나이퍼 발드 + 파이널 베타’는 유즈맵의 진수를 느낄 수 있는 작품으로, 특히 컴까기 장르에 특화된 맵으로 유명하다. 맵의 전체적인 분위기는 사막 테마로 통일되어 있으며, 광활한 평야와 절벽, 협곡이 조화를 이뤄 독특한 지형을 제공한다. 맵의 중앙에는 거대한 구조물이 위치하고 있는데, 이 구조물은 방어 거점으로 활용되며 플레이어의 전략적 선택을 강요한다. 맵 곳곳에 배치된 바위와 협곡은 시야를 가리고 이동 경로를 제한하는 요소로 작용해 전투 시 예측 불가능한 상황을 연출한다. 이 맵의 핵심은 다수의 적을 상대하는 ‘컴퓨터 상대 컴까기’로, 플레이어는 미네랄과 가스를 확보해 병력을 생산하고 방어선을 구축해야 한다. 맵 중앙의 요충지를 차지하기 위한 공격 타이밍과 방어 전략이 매우 중요하며, 초반에는 자원 확보와 초반 러시 방어가, 중반 이후로는 강력한 유닛 조합과 방어 시설의 구축이 승패를 좌우한다. 특히, 맵의 지형적 특징을 살린 ‘지뢰밭’이나 ‘협곡Ambush’ 패턴은 숙련된 플레이어에게는 카운터 전략이 될 수 있지만, 초보자에게는 큰 혼란을 안겨줄 수 있어 carefully한 플레이가 요구된다. ‘스나이퍼 발드 + 파이널 베타’는 초보자보다는 중급 이상의 플레이어에게 적합한 맵으로, 전략적 깊이와 긴장감을 동시에 제공한다. 맵의 볼륨과 진행 방식은 8인 플레이를 기준으로 설계된 것으로 보이며, 팀플레이보다는 개인전이 주를 이루지만, 때로는 동맹을 맺어 공동 방어나 공격 타이밍을 맞춰야 하는 순간도 존재한다. 맵의 구조상 ‘입구막기’ 또는 ‘협곡 방어’가 주요 전략 포인트로, 플레이 전에는 반드시 맵의 주요 길목과 자원 위치, 방어 거점의 위치를 숙지하고 있어야 한다. 또한, 맵의 후반부로 갈수록 적의 공격 패턴이 강화되므로, 초중반에 충분한 준비를 갖추는 것이 중요하다. 유닛의 조합과 업그레이드 타이밍, 방어 시설의 배치 등 모든 요소가 시너지를 일으켜야만 최종 승리를 거머쥘 수 있는 맵이다. 특히, ‘사이언스 베슬’이나 ‘고스트’ 유닛의 활용 여부가 승패를 가를 수 있어, 다양한 전략을 시도해보는 것이 좋다. 이 맵의 가장 큰 장점은 바로 ‘재플레이 가치’에 있다. 맵의 지형과 전략적 선택지가 다양해 초회 플레이 시의 경험만으로는 모든 전략을 파악하기 어렵기 때문에, 반복적인 플레이를 통해 새로운 전술을 발견할 수 있다. 또한, 맵의 밸런스가 잘 잡혀 있어 초보자와 숙련자 모두에게 공정한 경쟁을 제공한다는 점도 매력적이다. 만약 당신이 스타크래프트의 전략적 깊이를 즐기는 플레이어라면, ‘스나이퍼 발드 + 파이널 베타’는 반드시 시도해볼 만한 가치가 있는 맵이다. 단, 이 맵은 초보자에게는 다소 난이도가 높을 수 있으니, 기본적인 컴까기 경험을 쌓은 후 도전하는 것이 좋다. 맵의 구조와 전략적 깊이를 충분히 이해한다면, 스타크래프트 유즈맵의 새로운 경지를 경험할 수 있을 것이다. Sniper Bald + Final BETA is one of the hidden gems in StarCraft: Brood War’s custom maps, offering a deep and immersive experience tailored for the computer-killing (comp-killing) genre. The map features a cohesive desert theme, with vast plains, cliffs, and canyons that create a unique and strategic landscape. At the center of the map stands a massive structure, serving as a key defensive point that forces players to make critical strategic decisions. The scattered rocks and canyons not only obscure vision but also restrict movement paths, adding an element of unpredictability to battles. The core gameplay revolves around surviving waves of enemy AI units as a solo player, focusing on resource gathering, unit production, and base defense. Securing the central chokepoint is essential, and players must balance early-game rushes with mid-to-late game unit compositions and defensive fortifications. The map’s terrain encourages the use of ambushes in canyons or minefields, which can be devastating if exploited but also pose a challenge for beginners who may struggle with the map’s complexity. This map is designed for intermediate to advanced players rather than beginners, offering a blend of strategic depth and high-stakes tension. While it supports eight players, the gameplay leans toward individual survival rather than strict team play, though temporary alliances for shared defense or coordinated attacks can be advantageous. Key strategic points include choke-point defense and canyon ambushes, so players should familiarize themselves with the map’s critical paths, resource locations, and defensive strongholds before diving in. As the game progresses, enemy AI becomes more aggressive, making early preparation and resource management crucial for success. One of the map’s standout features is its replay value. The diverse terrain and strategic options mean that even after multiple plays, players can still discover new tactics and approaches. The balanced design ensures fair competition for both casual and competitive players. If you enjoy the strategic depth and challenge of StarCraft’s custom maps, Sniper Bald + Final BETA is a must-try. However, due to its complexity, it may be daunting for beginners, so building a foundation in comp-killing strategies before attempting this map is highly recommended. With a thorough understanding of its mechanics, this map promises to deliver a fresh and engaging experience in StarCraft’s custom map landscape.
변형된 스타크래프트 TWO (Altered Starcraft TWO)
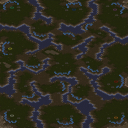
스타크래프트 브루드워의 유즈맵 중 하나로, 'Altered Starcraft TWO'는 종족별로 특화된 스탯과 비용이 조정된 RPG 스타일의 맵이다. 내부 맵 설명에 따르면 저그는 스탯이 2배이고 비용이 절반, 프로토스는 비용이 5분의 1에_BUILD TIME_이 절반, 테란은 스탯이 3배로 설정되어 있어 각 종족의 특징을 극대화한 플레이가 가능하다. 맵 제목과 설명에서 'Altered Starcraft'라는 단어는 스타크래프트의 변형 또는 개조된 버전을 의미하며, TWO는 후속작임을 암시한다. 4096x4096의 넓은 맵 크기와 사막 타일셋을 활용해 광활한 맵을 배경으로 진행되며, 플레이어는 8인으로 구성된 팀으로 참여해 종족별 특화 능력을 살려 진행하는 구조로 보인다. 내부 설명에 포함된 'Neo'BP~[HI]'는 제작자의 서명이나 특별한 시스템을 암시하는 부분으로, 맵 내부의 독특한 규칙이나 밸런스 조절 요소가 포함되었을 가능성이 있다. 여러 종족의 밸런스를 조절해가며 플레이하는 경험이 주된 매력으로, 각 종족의 장단점을 활용하는 전략적 깊이가 돋보이는 맵이다. 초보자가 접근하기에는 종족별 스탯과 비용 차이가 복잡하게 느껴질 수 있어, 적응을 위한 사전 학습이 필요한 편이다. 또한, 메일 주소로 피드백을 받을 수 있도록 제작된 점은 커뮤니티 피드백을 중시한 맵임을 시사한다. Altered Starcraft TWO is a custom StarCraft: Brood War map that adopts an RPG-style gameplay with adjusted stats and costs for each race. According to the internal description, the Zerg have doubled stats at half the cost, Protoss have one-fifth the cost and half the build time, and Terran have tripled stats—highlighting unique strategic advantages per race. The map title 'Altered Starcraft TWO' suggests it is a modified or enhanced version of the original 'Altered Starcraft,' with 'TWO' indicating a sequel. The 4096x4096 tile layout and desert tileset create an expansive environment, while the 8-player structure encourages team-based progression using race-specific strengths. The phrase 'Neo'BP~[HI]' in the description hints at a custom system or signature by the creator, possibly introducing unique mechanics or balancing elements. Balancing gameplay across races with distinct stat and cost advantages offers strategic depth, though beginners may need time to adapt to the differences. The inclusion of an email for feedback reflects the creator's engagement with the community, aiming to refine and improve the map based on player input.
The Trouble Trio (T³)
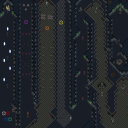
스타크래프트: 브루드워의 유즈맵 장르 중에서도 특이한 개성을 지닌 〈The Trouble Trio (T³)〉는 ‘세 명의 최악의 특수 요원’이라는 컨셉으로 플레이어에게 색다른 재미를 선사하는 RPG형 맵이다. 맵 제목에서부터 느껴지는 괴짜스러운 분위기와 달리, 내부 설명문에서도 강조하듯 ‘세계에서 가장 엉망진창인’ 요원들이 펼치는 활약을 따라가며 진행되는 스토리 및 전투 시스템은 플레이어의 몰입을 유도한다. 내부 맵 제목과 파일명이 모두 동일한 이 맵은 4096×2048 크기의 넓은 설원 타일셋 맵으로 구성되어 있으며, 3명의 플레이어가 각기 다른 역할을 맡아 진행하는 방식인 것으로 추정된다. 스크린샷에서 확인되는 광범위한 필드와 중앙에 배치된 구조물을 중심으로 벌어지는 전투 상황은 다수의 유닛이 동원되는 대규모 전투보다는 각 플레이어의 개별 스킬과 전략이 중요시되는 구조로 보이며, 이는 RPG 장르의 특징을 잘 반영한 설계로 판단된다. 맵의 배경과 배치된 유닛, 건물을 고려할 때 플레이어는 각각의 유닛을 관리하고 성장시키며 목표를 향해 나아가야 할 것으로 보이며, 이는 일반적인 디펜스나 컴까기 맵과는 차별화된 플레이 경험을 제공할 것이다. 특히 ‘세 명의 요원’이라는 컨셉이 반영된 만큼, 각 플레이어의 역할과 스킬 트리가 개성 있게 구성되어 있을 가능성이 높으며, 세_player 간의 협력과 경쟁 요소가 게임의 재미를 크게 좌우할 것으로 예상된다. 맵의 난이도와 플레이 시간은 명확히 제시되지 않았지만, 넓은 맵 크기와 복잡한 구조물을 고려했을 때 초보 플레이어보다는 경험 있는 유저에게 더 어울릴 가능성이 높다. 또한, 내부 설명문에서 ‘crappiest, weirdest, stupidest’라는 표현이 사용된 만큼, 가볍고 코믹한 분위기 속에서 진행되는 플레이가 예상되며, 이는 일반적인 경쟁형 맵과는 또 다른 매력을 제공할 것이다. 이 맵을 플레이하기 전에는 맵 내부의 목표와 스킬 시스템, 그리고 각 요원의 역할 분담을 미리 숙지하는 것이 중요할 것이다. 또한, 넓은 맵에서 벌어지는 전투와 자원 관리, 팀 간의 협력 방식에 대한 이해가 필요할 것으로 보인다. 이 맵은 특히 RPG 장르를 선호하는 플레이어나, 팀 기반의 전략적 플레이를 즐기는 유저에게 적합할 것으로 보이며, 세_player 간의 조화로운 플레이가 victory를 좌우할 가능성이 크다. StarCraft: Brood War’s custom map genre includes a unique title called *The Trouble Trio (T³)*, an RPG-style map that offers players a fresh experience with its concept of "three of the worst special agents." Despite the quirky vibe suggested by the title, the internal description emphasizes a story and combat system driven by the chaotic actions of "the most disorganized" agents in the world, designed to immerse players. With identical internal and file names, this map spans a vast 4096×2048 snowy tileset, likely featuring three players each taking on distinct roles. The expansive fields and central structures seen in screenshots suggest a focus on individual unit management and strategy over large-scale battles, aligning well with RPG mechanics. Given the map’s background, units, and buildings, players will likely need to control and grow their units while progressing toward objectives, offering an experience distinct from typical defense or mission-ending maps. The "three agents" concept hints at distinct roles and skill trees for each player, with cooperation and competition likely shaping the game’s appeal. While difficulty and playtime aren’t specified, the map’s size and complexity suggest it’s better suited for experienced players than beginners. The internal description’s use of terms like "crappiest, weirdest, stupidest" hints at a lighthearted, comedic tone, adding charm beyond standard competitive maps. Before playing, it’s crucial to understand the map’s objectives, skill systems, and each agent’s role distribution. Players will also need to grasp combat in the vast map, resource management, and teamwork dynamics. This map is ideal for RPG enthusiasts or those who enjoy strategic team-based play, where harmonious teamwork among the three players may determine victory.
애쉬월드 헌터즈 (Ashworld Hunters)
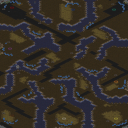
이 맵은 황무지 맵에서 영감을 받은 8인 팀 밀리 맵으로, 넓은 개활지와 복잡한 지형이 어우러진 전투 공간을 제공한다. 맵 중앙을 가로지르는 도로가 주요 전투 지역으로, 양측 플레이어는 이곳을 중심으로 교전을 펼치며 적의 넥서스를 파괴하는 승리를 노리게 된다. 넓은 도로 주변으로는 언덕과 협곡이 배치되어 있어, 시야 확보와 기습, 후방 공격 등 다양한 전술적 선택지가 제공된다. 특히 도로 양쪽의 언덕은 초반 자원 확보와 멀티 테란의 경우 추가적인 방어 구조물 설치에 유리한 지점으로 활용될 수 있다. 공격과 수비의 균형이 중요한데, 도로 중앙은 교전과 기동의 핵심 루트이기 때문에 양측이 치열한 교전을 벌일 가능성이 높다. 또한 언덕과 협곡을 활용한 기습 플레이가 가능해, 초보자에게는 다소 난해할 수 있지만 숙련된 플레이어에게는 전략적 깊이를 더해준다. 맵의 넓은 공간은 빠른 확장과 다수 멀티 플레이를 장려하지만, 반대로 자원 선점과 초반 정찰이 승패를 좌우할 수도 있다. 이 맵은 8인의 플레이어가 2개 이상의 팀으로 나뉘어 경쟁하는 팀 밀리 형식으로, 팀워크와 전략적 협력이 요구된다. 넓은 맵과 다양한 지형은 팀 간의 연합 공격과 방어 전략을 다양화할 수 있게 해주며, 특히 도로 주변의 언덕과 협곡은 팀 간의 연계를 강화하는 주요 포인트로 작용한다. 맵의 난이도는 맵의 크기와 복잡성 때문에 초보자보다는 어느 정도의 경험과 전략적 사고가 필요한 편이다. 맵을 플레이하기 전에는 자신의 종족에 맞는 초반 빌드와 멀티 테란 전략을 숙지하고, 팀원과의 소통을 통해 효과적인 전투 계획을 세우는 것이 중요하다. 추천 대상은 팀 밀리 경험이 있는 플레이어 또는 넓은 맵에서 전략적 깊이를 즐기고 싶은 유저들로, 팀워크와 종족별 특성을 잘 살릴 수 있는 맵이다. 또한, 다양한 전술적 선택지를 즐기고 싶은 플레이어에게도 적합한 맵으로 평가된다. This map is an 8-player team melee inspired by the Wasteland map, offering a combat space where vast open areas and intricate terrain come together. A road running through the center serves as the primary battleground, with players clashing around it while aiming to destroy the enemy’s nexus. Surrounding the wide road are hills and ravines that provide tactical options like scouting, ambushes, and rear attacks. The hills on either side of the road are especially advantageous for early resource gathering and, in the case of Terran players, for placing additional defensive structures. Balancing offense and defense is crucial, as the central road is the key route for both engagements and mobility—making intense battles likely. Meanwhile, the hills and ravines enable ambush plays, which may be tricky for beginners but add strategic depth for experienced players. The map’s expansive layout encourages quick expansions and multiple bases, though controlling resources early and scouting effectively can determine the outcome. Designed for 8 players split into two or more teams, this team melee format demands teamwork and coordinated strategies. The large map and varied terrain allow for diverse allied attack and defense tactics, with the hills and ravines near the road serving as key points for team coordination. Due to its size and complexity, the map favors players with some experience and strategic thinking over complete beginners. Before playing, it’s important to master early builds and multi-base strategies suited to your race, and to communicate effectively with teammates to devise battle plans. Recommended for players experienced in team melees or those who enjoy strategic depth on large maps, this map excels at leveraging teamwork and race-specific strengths. It also suits players looking to explore a wide range of tactical options.
아르마게돈 배틀 vXAR-Swarm (Armageddon Battle vXAR-Swarm)
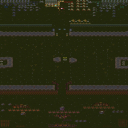
‘아르마게돈 배틀 vXAR-Swarm’는 스타크래프트: 브루드워의 유즈맵으로서, 대규모 병력 동시 공격을 가능하게 하는 독특한 ‘Swarm Switch’라는 메커니즘을 도입한 디펜스 및 컴까기 장르의 혼합형 맵이다. 맵의 중심에는 거대한 중앙 건물이 자리하고 있으며, 이 건물 주변으로 8명의 플레이어가 각자 기지를 구축해 방어선을 펼친다. 맵의 특징인 Swarm Switch는 플레이어가 버튼을 활성화하면 일시적으로 모든 유닛의 공격력이 대폭 상승하거나 공격 속도가 증가하는 효과를 제공한다. 이를 통해 플레이어는 적의 대규모 공세에 맞서거나 역공을 펼칠 수 있는 전략적 선택권을 갖게 된다. 맵의 배경은 사막 타일셋으로 구성되어 있으며, 지형은 비교적 평탄한 편이지만 일부 고지대와 협곡이 있어 위치 선정이 중요하다. 맵의 진행은 주로 중앙 건물을 둘러싼 전투가 주를 이루며, Swarm Switch의 타이밍을 노려 적을 제압하는 것이 핵심 전략이다. 초보자의 경우 중앙 건물을 지키며 방어에 집중하는 것이 중요하며, 숙련자라면 Swarm Switch를 적극 활용한 공격과 방어를 조합하는 플레이가 요구된다. 맵의 밸런스는 Swarm Switch의 효과가 강력하기 때문에, 이를 적절히 활용하지 못할 경우 손쉽게 패배할 수 있어 strategic depth가 높은 편이다. 플레이 전에는 맵의 구조와 Swarm Switch의 효과를 충분히 숙지하고, 팀원과의 협력이 원활히 이루어질 수 있도록 준비하는 것이 중요하다. ‘Armaggedon Battle vXAR-Swarm’ is a custom map for *StarCraft: Brood War* that blends defense and elimination modes by introducing a unique ‘Swarm Switch’ mechanism, enabling large-scale simultaneous attacks. At the center of the map stands a massive central building, surrounded by eight players each establishing their own bases and defensive lines. The Swarm Switch, a defining feature of the map, temporarily boosts all units’ attack power or attack speed when activated, allowing players to counter large enemy offensives or launch counterattacks. The map’s desert-themed tileset features relatively flat terrain, though key high ground and chokepoints make positioning crucial. Battles primarily revolve around the central building, with the Swarm Switch’s timing serving as the key strategic element for overwhelming opponents. Beginners should focus on defending the central structure, while advanced players must combine aggressive and defensive plays around the Swarm Switch. Due to the Switch’s powerful effects, mismanaging it can lead to quick defeats, giving the map high strategic depth. Before playing, it’s essential to thoroughly understand the map layout and Swarm Switch mechanics and ensure smooth coordination with teammates.
신화의 잔재 RPG (Remains of Mythology RP)
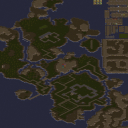
스타크래프트: 브루드워의 유즈맵 장르 중에서도 독특한 RPG 요소를 결합한 -=Remains of Mythology RP=-는, 플레이어들에게 전략적 깊이와 흥미로운 시스템을 동시에 제공하는 흥미로운 작품이다. 맵의 이름은 '신화의 잔재'라는 뜻으로, 고대 신화나 전설에 등장하는 요소들이 게임内에 녹아들어 있음을 암시한다. 이 맵은 기본적으로 6인용 맵으로 설계되어 있으며, 중앙에 위치한 넓은 평야와 이를 둘러싼 지형들이 특징적이다. 플레이어는 각각의 시작 지점에서Resource spawns(자원 생성지) 주변을 점령하거나 방어하면서 자원을 모아 병력을 키우거나 건물을 건설해야 한다. 특히 'Bombs(폭탄)'과 'Nydus canal spawn(니아더스 운하 생성)'은 이 맵의 큰 특징으로, 폭탄은 적의 건물을 파괴하거나 전략적 우위를 점하는 데 사용되며, 니아더스는突然间 적의 배후로 병력을 보내거나 후퇴할 때 유용한 수단으로 활용된다. 또한 'Banning feature(밴 기능)'은 특정 유닛이나 건물을 일시적으로 사용할 수 없게 막아 전략의 다양성을 높이는 시스템으로 보인다. 게임의 진행 방식은 초반Resource 확보와 지역 점령에 중점을 두며, 중반부터는 폭탄과 니아더스를 활용한 기습이나 방어전을 펼치게 된다. 맵의 지형은 비교적 평탄한 편이지만, 곳곳에 배치된 언덕이나 협곡은 시야 확보와 병력 운용에 영향을 미치므로, 지형의 중요성을 간과해서는 안 된다. 또한Resource spawns는 일정 주기로 재생되기 때문에, 이를 얼마나 효율적으로 관리하느냐가 승리의 열쇠가 될 것이다. 이 맵은 특히Resource 관리와 전략적 플레이를 좋아하는 유저들에게 추천할 만하다. 초보자도 쉽게 접근할 수 있지만,Resource와 니아더스를 활용한 복잡한 전략을 구사하려면 어느 정도의 경험이 필요하다. 또한, 폭탄과 밴 시스템은 맵의 재미를 한층 끌어올리는 요소이므로, 다양한 전략을 시도해 보는 재미가 쏠쏠하다. 다만,Resource spawns의 위치가 너무 가까우면 초반 균형이 쉽게 무너질 수 있으므로,Resource 배치에 따라 게임의 난이도가 크게 달라질 수 있음을 유념해야 한다. This StarCraft: Brood War custom map, -=Remains of Mythology RP=-, stands out for blending RPG elements with traditional strategy gameplay, offering players a unique and engaging experience. The title translates to 'Remains of Mythology,' hinting at the mythological or legendary themes woven into the gameplay. Designed as a 6-player map, -=Remains of Mythology RP=- features a central expanse of flat terrain surrounded by varied landscapes. Players begin at distinct starting points, focusing on securing and defending Resource spawns to gather materials for building armies or constructing structures. The map’s signature features include Bombs, which can demolish enemy buildings or gain tactical advantages, and Nydus canal spawns, allowing sudden reinforcements or retreats to the enemy’s rear. Additionally, the Banning feature temporarily restricts certain units or buildings, adding depth to strategic planning. The gameplay emphasizes early-game Resource management and territory control, transitioning into mid-game strategies involving Bombs and Nydus canals for ambushes or defensive maneuvers. While the terrain is mostly flat, scattered hills and ravines affect vision and troop movement, making terrain control crucial. Efficient management of Resource spawns, which regenerate periodically, is key to maintaining an edge in the game. This map is ideal for players who enjoy Resource management and strategic depth. While accessible to beginners, mastering the map’s complexities—such as leveraging Bombs and the Banning system—requires experience. The variety of strategies possible, from explosive assaults to stealthy Nydus-based tactics, keeps the gameplay fresh and engaging. However, Resource spawns placed too closely together can unbalance the early game, so their arrangement significantly impacts difficulty.
드롯트 숲 능선 (Droht- Forest Ridge)
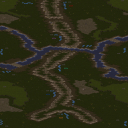
스타크래프트 브루드워의 고전 맵 'Droht- Forest Ridge'는 독특한 지형과 전략적인 배치로 밀리 유저들에게 memorable한 경험을 제공하는 5인용 맵이다. 맵 중앙을 가로지르는 거대한 숲 능선 'Great Forest Ridge of Droht'가 맵을 양분하면서 각 플레이어의 스타팅 포인트를 분리하고, 이 능선을 둘러싼 좁은 길목과 넓은 평지가 혼합된 구조로 인해 전투는 물론 자원 관리와 멀티 확보 전략이 더욱 중요해진다. 특히 능선을 넘어 진격하거나 방어선을 구축하는 선택이 게임의 승부를 좌우할 수 있으며, 숲의 존재로 인해 시야 확보가 제한되는 구간이 많기 때문에 정찰과 컨트롤의 중요성이 부각된다. 이 맵의 가장 큰 특징은 바로 'Great Forest Ridge'의 중앙 능선으로, 맵의 절반을 차지하는 이 지형은 단순히 장식용이 아니라 전략적 요충지다. 능선 위는 시야가 탁 트여 있지만 접근성이 떨어지고, 능선 아래 평지는 넓은 시야를 확보하기 어려운 대신 빠른 이동이 가능하다. 초반 러시부터 후반 전투까지 능선의 통제 여부가 승패를 가를 수 있으며, 능선을 넘어가려는 시도를 저지하거나 능선 위에서 방어선을 구축하는 플레이가 핵심 전략이 된다. 또한, 각 스타팅 지역이 완전히 분리되어 있어 초반 자원 확보와 멀티 확장이 독립적으로 이뤄질 수 있지만, 반대로 중앙 능선을 장악하지 못하면 자원 확보가 어려워지는 역설적인 구조도 가지고 있다. 이 맵의 또 다른 특징은 맵의vast한 크기다. 4096x6144라는 거대한 사이즈는 넓은 전장과 긴 전투 거리를 제공하며, 맵의 절반을 차지하는 숲 능선은 시야를 가리는 동시에 지형을 활용한 전략을 가능하게 한다. 이렇듯 복잡한 지형과 넓은 전장은 초보자가 플레이하기에는 다소 어렵지만, 숙련된 유저들에게는 다양한 전략적 선택지와 전술적 깊이를 제공하는 매력적인 맵으로 평가된다. 특히 능선 주변의 좁은 길목이나 평지에서의 전투는 타이밍과 컨트롤이 중요한데, 이를 숙지하고 있다면 이 맵에서 승률을 높일 수 있을 것이다. 추천 대상은 스타크래프트 밀리 플레이어 중에서도 넓은 전장과 복잡한 지형에서의 전투를 즐기는 유저들이다. 특히 능선 주변의 전투와 중앙 장악 전략을 좋아하는 플레이어라면 이 맵에서 큰 재미를 느낄 수 있을 것이다. 또한, 초보자의 경우 능선의 중요성과 시야 확보의 어려움을 충분히 숙지한 뒤 플레이하는 것이 좋다. 맵의vast한 크기와 복잡한 지형은 초보자에게는 진입 장벽이 될 수 있지만, 숙련된 유저에게는 새로운 전략적 깊이를 제공하는 훌륭한 맵이라 할 수 있다. The classic Brood War map *Droht-Forest Ridge* is a memorable 5v5 map known for its unique terrain and strategic layout, offering Mill players a distinctive experience. The map is divided by the massive forest ridge "Great Forest Ridge of Droht," which separates each player's starting positions while creating a mix of narrow chokepoints and wide open plains around it. This structure forces players to carefully manage resources, secure expansions, and plan their battles, as the choice to attack across the ridge or fortify defenses often decides the game. The dense forest also limits visibility in many areas, emphasizing the importance of scouting and precise control. The central feature of this map is the *Great Forest Ridge*, which dominates half the map and serves as more than just a decorative element—it’s a critical strategic point. The ridge itself offers clear sightlines but is difficult to access, while the flatlands below provide quick movement but poor visibility. Controlling the ridge can determine the outcome of battles from the early rush to the late-game, making it essential to either block enemy advances or establish defensive lines atop it. Additionally, the map’s isolated starting positions allow for independent early resource gathering and expansion, but failing to secure the ridge can paradoxically hinder resource collection. Another defining trait of *Droht-Forest Ridge* is its vast scale. At 4096x6144, the enormous battlefield stretches combat distances and forces long engagements, while the ridge—occupying half the map—obscures vision and enables terrain-based strategies. Though this complex terrain and sprawling design can be daunting for beginners, experienced players appreciate the depth and variety of strategic options it offers. Battles around the ridge’s narrow passages or open plains hinge on timing and micro, so mastering these elements can significantly boost your win rate. This map is best suited for Mill players who enjoy wide battlefields and intricate terrain. Those who favor ridge-side combat and central control strategies will find it particularly engaging. Beginners should familiarize themselves with the ridge’s importance and the challenges of vision control before diving in. While the map’s size and complexity may pose a barrier for new players, for veterans, it delivers exceptional strategic depth and a rewarding experience.
Lurker 8 Way Death (리커 8방향 데스)
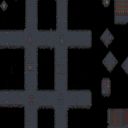
스타크래프트 브루드워의 유즈맵 'Lurker 8 Way Death'는 다중 방향의 리커를 상대해야 하는 치열한 디펜스 장르의 맵이다. 맵 중앙에 위치한 플레이어 기지 주변으로 8방향의 길들이 뻗어나가 있으며, 각 길마다 끊임없이 리커가 몰려온다. 플레이어는 제한된 자원으로 기지를 방어하며, 리커의 끊임없는 공격을 막아내야만 승리할 수 있다. 맵의 특징은 8방향에서 동시에 적의 공격이 오는 점으로, 한 방향으로만 집중 방어하는 전략으로는 버틸 수 없다. 플레이어는 각 방향의 입구를 효과적으로 방어하거나, 리커의 이동 경로를 방해하는 구조물을 설치해야 한다. 맵의 긴 길이와 넓은 공간은 리커의 대량 침공을 허용하며, 한 번 방어선이 무너지면 기지 전체가 위험해진다. 또한, 리커의 공격 패턴이 일정하지 않고 때로는 예상치 못한 방향으로 몰려오기도 한다. 이러한 특성 덕분에 맵은 플레이어의 전략적 사고와 긴장감을 요구하며, 반복 플레이 시 새로운 방어 전술을 시도해볼 수 있다. 초보자는 리커의 물량에 밀리기 쉽지만, 경험을 쌓아 방어 라인을 효율적으로 배치하고 자원 관리를 잘한다면 충분히 클리어할 수 있다. 추천 대상은 디펜스 맵을 즐기며 전략적 플레이를 좋아하는 유저들로, 특히 팀플레이보다는 1인 플레이에 최적화되어 있다. 플레이 전에는 리커의 공격 루트와 방어 가능한 지점을 미리 파악하고, 자원 확보 및 방어 건물 배치 계획을 세워두는 것이 중요하다. Lurker 8 Way Death is a challenging defense-style custom map in StarCraft: Brood War where players must withstand relentless attacks from lerkers approaching from all eight directions. The map features a central player base with eight distinct paths extending outward, each serving as a potential invasion route for the lerkers. Players are tasked with strategically placing defenses to fend off the constant stream of enemies, as focusing on a single direction is insufficient to survive. The unique challenge lies in the simultaneous multi-directional assaults, requiring players to create balanced defensive setups or disrupt the lerkers' movement patterns. The map's expansive layout and long corridors allow for large-scale larker rushes, and a single breach in the defense can jeopardize the entire base. The unpredictable attack waves add an element of tension, making each playthrough a test of adaptability and foresight. While beginners may struggle with the sheer volume of enemies, seasoned players can refine their tactics, optimize resource management, and experiment with new defensive strategies to overcome the challenge. This map is best suited for players who enjoy defense-oriented gameplay and strategic depth, particularly those who prefer solo play over team-based strategies. Before diving in, it’s crucial to study the larker attack routes, identify key defensive points, and plan resource allocation and building placement to maximize survival chances.
검과 화살 (Swords and Arrows)
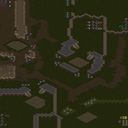
스타크래프트 브루드워의 유즈맵 'Swords and Arrows'는 빌드 앤 디펜스(B&D) 장르의 대표적인 작품으로, 전략적 자원 관리와 방어전을 조합한 재미있는 게임플레이를 제공한다. 맵은 4096x4096의 넓은 사막 타일셋 위에서 펼쳐지며, 플레이어는 건물을 건설하여 매 분마다 유닛을 생산할 수 있는 독특한 시스템을 활용하게 된다. 각 플레이어는 시작 지점에서 건물을 짓기 시작하며, 인공지능이 조종하는 적대적 유닛들이 끊임없이 공격해 온다. 건물에서 생산되는 유닛으로 방어선을 구축하고, 적의 공격을 막아내며 동시에 자원을 관리하는 것이 핵심 전략이다. 맵의 특징은 건물 건설만으로도 유닛이 지속적으로 공급된다는 점으로, 이는 일반적인 디펜스 맵과는 차별화된 시스템이다. 플레이어는 건물을 어디에 배치할지, 어떤 유닛을 우선적으로 생산할지 고민해야 하며, 이는 단순한 방어뿐 아니라 전략적 깊이를 더해준다. 맵은 8명의 플레이어가 각자 독립된 시작 지점에서 시작하며, 팀 플레이보다는 개인전 성향이 강하다. 방어뿐 아니라 공격적인 플레이도 가능해, 건물을 적극적으로 활용하여 적의 본진을 공격하는 전략도 고려해볼 수 있다. 초보자에게는 다소 어려울 수 있지만, 건물을 효율적으로 배치하고 유닛 생산을 최적화하면 재미와 성취감을 느낄 수 있는 맵이다. 특히 건물을 통해 유닛을 생산하는 시스템은 타 Б&D 맵들과 차별화되는 요소로, 전략적 사고를 요구하는 플레이어에게 추천할 만하다. 다만, 적의 공격 패턴이나 맵의 디자인에 따라 난이도가 크게 달라질 수 있어, 여러 번 플레이해보는 것이 중요하다. 건물을 짓는 위치와 유닛 생산 타이밍을 잘 조절한다면, 방어뿐 아니라 공격에서도 우위를 점할 수 있을 것이다. 이 맵을 즐기기 위해서는 건물을 꾸준히 관리하고, 적절한 타이밍에 유닛을 생산하여 방어선을 유지하는 것이 중요하다. 또한, 건물을 통해 얻는 유닛으로 적을 공격하는 것도 전략의 한 부분으로, 공격과 방어를 균형 있게 처리할 수 있어야 한다. 이런 특징 때문에, 이 맵은 전략적 사고와 자원 관리를 좋아하는 플레이어에게 특히 인기가 높다. 건물을 통한 유닛 생산 시스템은 단순하지만, 이를 통해 다양한 전략을 구사할 수 있어 반복 플레이가 가능한 장점이 있다. 맵의 넓은 공간과 사막 타일셋은 시각적으로도 흥미로우며, 플레이어의 전략적 선택에 따라 게임의 양상이 크게 달라진다. 건물을 효율적으로 배치하고, 유닛 생산을 최적화한다면, 이 맵의 재미를 극대화할 수 있을 것이다. *Swords and Arrows* is a classic custom map in *StarCraft: Brood War* that epitomizes the Build and Defend (B&D) genre, blending strategic resource management with tense defensive gameplay. Set on a vast 4096x4096 desert tileset, the map introduces a unique system where players can construct buildings to continuously produce units every minute. Starting from designated spawn points, players must erect structures while AI-controlled enemy forces relentlessly assault their defenses. The core strategy revolves around fortifying a defensive line with produced units, fending off waves of attacks, and managing limited resources—all while deciding where to place buildings and which units to prioritize. This system sets it apart from traditional defense maps, adding layers of strategy beyond mere survival. The map supports up to eight players, each beginning in isolated starting zones, making it more of a free-for-all than a team-based experience. While defense is critical, aggressive play is also viable—players can leverage their buildings to launch assaults on enemy bases, turning the tide of battle. Though the learning curve may be steep for newcomers, mastering efficient building placement and optimized unit production unlocks deep strategic depth and a rewarding sense of achievement. What truly distinguishes *Swords and Arrows* is its unit production mechanic, which relies entirely on building construction rather than traditional resource gathering. This design demands careful planning and adaptability, as enemy attack patterns and map layout can drastically alter difficulty. Repeated playthroughs are essential to refine strategies, especially in timing unit production and adjusting building positions to counter evolving threats. Ultimately, the map thrives on balancing offense and defense. Players must constantly manage their buildings, produce units at opportune moments, and decide whether to reinforce their own defenses or press the advantage elsewhere. Its blend of strategic depth, resource management, and dynamic gameplay makes it a standout choice for those who enjoy tactical thinking and iterative improvement. The expansive desert setting adds visual flair, while the flexible mechanics ensure that no two games play out the same way—making *Swords and Arrows* a standout experience for fans of B&D maps.
최근 등록된 맵
새로 추가된 파일과 버전을 확인하세요.
매트[9.1]완전판 (MATRIX 9.1)
스타크래프트 브루드워의 정교한 유즈맵으로 유명한 MATRIX 9.1은 우주 배경의 디펜스 장르 맵이다. 맵의 중앙에는 거대한 구조물이 자리 잡고 있으며, 플레이어는 이 구조물을 보호하거나 공격하는 형태로 전투를 펼쳐야 한다. 맵 구조는 복잡한 길이와 방어 시설로 구성되어 있어, 전략적인 플레이가 요구된다. 맵의 하단과 상단에는 각각의 플레이어 기지가 배치되어 있으며, 기지 주변에는 방어 건물이 배치되어 있다. 맵의 상단과 하단에 위치한 광물 지대와 가스 채취 지역은 자원 관리를 통해 지속적인 전투를 가능하게 한다. MATRIX 9.1은Hardcore 모드와 같이 어려운 난이도를 자랑하며, 플레이어는 끊임없이 다가오는 적의 물량을 상대해야 한다. 맵의 디자인과 전투 시스템은 마치 영화 '매트릭스'의 세계관을 연상시키며, 플레이어는 마치 가상 현실 속에서 전투를 펼치는 듯한 경험을 느낄 수 있다. 이 맵은 주로 6인 플레이를 상정하고 있으며, 팀 플레이보다는 개인별 전투와 전략이 emphasized된다. MATRIX 9.1을 플레이하기 위해서는 맵의 구조와 방어 전략을 충분히 숙지하는 것이 중요하다. 특히, 기지 방어와 자원 관리, 그리고 적의 공격 패턴을 예측하는 능력이 요구된다. 맵의 난이도가 높기 때문에 초보 플레이어보다는 숙련된 플레이어에게 더 적합한 맵으로 평가된다. 또한, 맵의 Hardcore 모드는 일반적인 디펜스 맵과는 차별화된 긴장감을 제공한다. MATRIX 9.1은 단순히 방어하는 것을 넘어, 적극적인 공격과 전략을 요구하는 맵으로, 스타크래프트 유즈맵의 진수를 경험할 수 있는 작품 중 하나이다. MATRIX 9.1 is a sophisticated custom map in StarCraft: Brood War, renowned for its defense genre set in a cosmic environment. The map centers around a massive structure that players must either protect or attack, depending on the game mode. The layout features intricate pathways and defensive structures, demanding strategic thinking from players. Bases for each player are situated at the top and bottom of the map, surrounded by defensive buildings. Mineral fields and gas geysers at the top and bottom allow for resource management to sustain ongoing battles. Known for its Hardcore mode, MATRIX 9.1 presents a challenging difficulty, requiring players to fend off relentless enemy waves. The design and combat system evoke the cinematic world of 'The Matrix,' immersing players in a virtual reality-like battlefield. Designed primarily for 6 players, the map emphasizes individual combat and strategy over team play. To excel, players should thoroughly understand the map's layout, defensive tactics, resource management, and enemy attack patterns. The high difficulty makes it more suitable for experienced players rather than beginners. The Hardcore mode adds a layer of tension, distinguishing it from standard defense maps. MATRIX 9.1 transcends mere defense by incorporating proactive attacks and strategy, offering a quintessential experience of StarCraft custom maps.
검과 화살 (Swords and Arrows)
스타크래프트 브루드워의 유즈맵 'Swords and Arrows'는 빌드 앤 디펜스(B&D) 장르의 대표적인 작품으로, 전략적 자원 관리와 방어전을 조합한 재미있는 게임플레이를 제공한다. 맵은 4096x4096의 넓은 사막 타일셋 위에서 펼쳐지며, 플레이어는 건물을 건설하여 매 분마다 유닛을 생산할 수 있는 독특한 시스템을 활용하게 된다. 각 플레이어는 시작 지점에서 건물을 짓기 시작하며, 인공지능이 조종하는 적대적 유닛들이 끊임없이 공격해 온다. 건물에서 생산되는 유닛으로 방어선을 구축하고, 적의 공격을 막아내며 동시에 자원을 관리하는 것이 핵심 전략이다. 맵의 특징은 건물 건설만으로도 유닛이 지속적으로 공급된다는 점으로, 이는 일반적인 디펜스 맵과는 차별화된 시스템이다. 플레이어는 건물을 어디에 배치할지, 어떤 유닛을 우선적으로 생산할지 고민해야 하며, 이는 단순한 방어뿐 아니라 전략적 깊이를 더해준다. 맵은 8명의 플레이어가 각자 독립된 시작 지점에서 시작하며, 팀 플레이보다는 개인전 성향이 강하다. 방어뿐 아니라 공격적인 플레이도 가능해, 건물을 적극적으로 활용하여 적의 본진을 공격하는 전략도 고려해볼 수 있다. 초보자에게는 다소 어려울 수 있지만, 건물을 효율적으로 배치하고 유닛 생산을 최적화하면 재미와 성취감을 느낄 수 있는 맵이다. 특히 건물을 통해 유닛을 생산하는 시스템은 타 Б&D 맵들과 차별화되는 요소로, 전략적 사고를 요구하는 플레이어에게 추천할 만하다. 다만, 적의 공격 패턴이나 맵의 디자인에 따라 난이도가 크게 달라질 수 있어, 여러 번 플레이해보는 것이 중요하다. 건물을 짓는 위치와 유닛 생산 타이밍을 잘 조절한다면, 방어뿐 아니라 공격에서도 우위를 점할 수 있을 것이다. 이 맵을 즐기기 위해서는 건물을 꾸준히 관리하고, 적절한 타이밍에 유닛을 생산하여 방어선을 유지하는 것이 중요하다. 또한, 건물을 통해 얻는 유닛으로 적을 공격하는 것도 전략의 한 부분으로, 공격과 방어를 균형 있게 처리할 수 있어야 한다. 이런 특징 때문에, 이 맵은 전략적 사고와 자원 관리를 좋아하는 플레이어에게 특히 인기가 높다. 건물을 통한 유닛 생산 시스템은 단순하지만, 이를 통해 다양한 전략을 구사할 수 있어 반복 플레이가 가능한 장점이 있다. 맵의 넓은 공간과 사막 타일셋은 시각적으로도 흥미로우며, 플레이어의 전략적 선택에 따라 게임의 양상이 크게 달라진다. 건물을 효율적으로 배치하고, 유닛 생산을 최적화한다면, 이 맵의 재미를 극대화할 수 있을 것이다. *Swords and Arrows* is a classic custom map in *StarCraft: Brood War* that epitomizes the Build and Defend (B&D) genre, blending strategic resource management with tense defensive gameplay. Set on a vast 4096x4096 desert tileset, the map introduces a unique system where players can construct buildings to continuously produce units every minute. Starting from designated spawn points, players must erect structures while AI-controlled enemy forces relentlessly assault their defenses. The core strategy revolves around fortifying a defensive line with produced units, fending off waves of attacks, and managing limited resources—all while deciding where to place buildings and which units to prioritize. This system sets it apart from traditional defense maps, adding layers of strategy beyond mere survival. The map supports up to eight players, each beginning in isolated starting zones, making it more of a free-for-all than a team-based experience. While defense is critical, aggressive play is also viable—players can leverage their buildings to launch assaults on enemy bases, turning the tide of battle. Though the learning curve may be steep for newcomers, mastering efficient building placement and optimized unit production unlocks deep strategic depth and a rewarding sense of achievement. What truly distinguishes *Swords and Arrows* is its unit production mechanic, which relies entirely on building construction rather than traditional resource gathering. This design demands careful planning and adaptability, as enemy attack patterns and map layout can drastically alter difficulty. Repeated playthroughs are essential to refine strategies, especially in timing unit production and adjusting building positions to counter evolving threats. Ultimately, the map thrives on balancing offense and defense. Players must constantly manage their buildings, produce units at opportune moments, and decide whether to reinforce their own defenses or press the advantage elsewhere. Its blend of strategic depth, resource management, and dynamic gameplay makes it a standout choice for those who enjoy tactical thinking and iterative improvement. The expansive desert setting adds visual flair, while the flexible mechanics ensure that no two games play out the same way—making *Swords and Arrows* a standout experience for fans of B&D maps.
스폰 디펜스 4.7 (Spawn Defense 4.7)
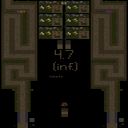
스타크래프트 브루드워의 대표적인 디펜스 장르 유즈맵인 <스폰 디펜스 4.7>은 적의 끊임없는 공격을 방어하며 자신의 기지를 지켜내는 긴장감 넘치는 플레이가 특징입니다. 맵은 넓은 사막 지형을 배경으로 펼쳐지며, 중앙에 위치한 플레이어 기지 주변으로 다수의 스폰 포인트가 배치되어 있습니다. 각 스폰 포인트에서 끊임없이 몰려드는 저그 유닛들을 상대로 방어 타워를 건설하고, 유닛을 배치하여 전략적으로 대응해야 합니다. 특히 맵의 좌우 대칭 구조와 중앙 통로의 중요성이 부각되며, 플레이어는 자원 관리와 타워 배치 타이밍을 carefully 조절해야 합니다. 게임의 난이도는 스폰 포인트의 위치와 출현하는 유닛의 조합에 따라 크게 달라지는데, 초반에는 상대적으로 쉬운 저글링과 히드라리스크가 주를 이루지만, 후반으로 갈수록 뮤탈리스크, 디바우러, 울트라리스크 등 다양한 조합이 등장합니다. 또한, ‘핸디캡’ 모드가 지원되어 특정 플레이어에게 추가적인 리소스나 유닛을 제공할 수 있어 초보자와 숙련자 간의 밸런스를 맞출 수 있습니다. 맵의 또 다른 특징은 ‘inf 버전’이라는 점으로, 제한된 리소스 내에서 끊임없이 적을 상대해야 하는 인피니티 모드가 포함되어 있어 플레이어의 전략적 깊이가 한층 더해집니다. 이 맵은 6인 플레이를 지원하며, 팀전보다는 개별 플레이어가 각자의 기지를 방어하는 구조로 설계되어 있습니다. 넓은 맵 크기와 다양한 스폰 포인트는 플레이어 간의 협력이 아닌 개인의 판단력과 순간적인 대처 능력을 요구합니다. 특히 중앙 통로의 중요성은 말할 것도 없는데, 이곳을 장악하지 못하면 기지 방어가 불가능에 가까울 정도로 전략적 요충지가 됩니다. 따라서 플레이어는 타워의 효율적인 배치와 함께, 중앙 통로의 방어선을 강화하는 것이 관건입니다. 추천 대상으로는 디펜스 장르를 즐기는 플레이어는 물론, 전략적 사고와 긴장감을 좋아하는 유저들에게 적합합니다. 초보자의 경우 핸디캡 모드를 활용하여 gradually 적응해 나가는 것이 좋으며, 숙련자의 경우 인피니티 모드에서 자신의 전략을 테스트해 볼 수 있습니다. 다만, 넓은 맵과 끊임없는 적의 공격을 감당해야 하기 때문에 플레이 시간이 상대적으로 길어질 수 있음을 염두에 두어야 합니다. 플레이 전 확인해야 할 포인트는 스폰 포인트의 위치와 중앙 통로의 형태입니다. 스폰 포인트가 가까울수록 초반 방어가 용이하지만, 반대로 중앙 통로가 좁거나 장벽이 많을 경우 방어가 보다 수월해질 수 있습니다. 또한, 핸디캡 모드와 인피니티 모드의 선택 여부를 미리 결정하여 게임의 난이도를 조정하는 것도 중요합니다. 마지막으로, 리소스 관리를 철저히 하여 타워의 지속적인 업그레이드와 유닛의 보충을 잊지 않도록 주의해야 합니다. StarCraft: Brood War's classic defense genre custom map, *Spawn Defense 4.7*, features intense gameplay where players must defend their base against relentless enemy attacks. The map unfolds across a vast desert terrain, with multiple spawn points scattered around the player's base at the center. Players must strategically construct defense towers and deploy units to counter waves of Zerg units constantly emerging from these spawn points. The map's left-right symmetry and the importance of the central corridor stand out, requiring players to carefully manage resources and time their tower placements. The difficulty varies significantly based on the spawn point locations and the types of units that appear. Early waves consist mostly of relatively easy Zerglings and Hydralisks, but later stages introduce diverse combinations like Mutalisks, Devourers, and Ultralisks. The map also supports a "Handicap" mode, which allows for additional resources or units to be provided to certain players, helping balance the game between beginners and experts. Another key feature is the "Infinity" version, which includes an endless mode where players must face waves of enemies with limited resources, adding another layer of strategic depth. *Spawn Defense 4.7* supports up to six players and is designed for individual play, where each player defends their own base rather than working in teams. The map's large size and numerous spawn points demand quick decision-making and personal adaptability rather than cooperation. The central corridor is especially critical—controlling it is often essential, as failing to do so can make base defense nearly impossible. Therefore, players must focus on efficiently placing towers and reinforcing defenses along this strategic bottleneck. This map is ideal for those who enjoy defense games, strategic thinking, and high-pressure situations. Beginners can ease into the game using the Handicap mode, while experienced players can test their strategies in the Infinity mode. However, due to the map's size and the constant enemy assaults, matches can be quite lengthy, so players should be prepared for extended sessions. Before playing, it's important to familiarize yourself with the spawn point locations and the layout of the central corridor. Spawn points closer to your base make early defense easier, while a narrow or heavily obstructed central corridor can simplify defense. Players should also decide in advance whether to use the Handicap or Infinity modes to adjust the game's difficulty. Finally, managing resources carefully is crucial—don't forget to continuously upgrade towers and replenish units.
스나이퍼 발드 + 파이널 베타 (Sniper Bald + Final BETA)
스타크래프트 브루드워의 숨은 보석 중 하나인 ‘스나이퍼 발드 + 파이널 베타’는 유즈맵의 진수를 느낄 수 있는 작품으로, 특히 컴까기 장르에 특화된 맵으로 유명하다. 맵의 전체적인 분위기는 사막 테마로 통일되어 있으며, 광활한 평야와 절벽, 협곡이 조화를 이뤄 독특한 지형을 제공한다. 맵의 중앙에는 거대한 구조물이 위치하고 있는데, 이 구조물은 방어 거점으로 활용되며 플레이어의 전략적 선택을 강요한다. 맵 곳곳에 배치된 바위와 협곡은 시야를 가리고 이동 경로를 제한하는 요소로 작용해 전투 시 예측 불가능한 상황을 연출한다. 이 맵의 핵심은 다수의 적을 상대하는 ‘컴퓨터 상대 컴까기’로, 플레이어는 미네랄과 가스를 확보해 병력을 생산하고 방어선을 구축해야 한다. 맵 중앙의 요충지를 차지하기 위한 공격 타이밍과 방어 전략이 매우 중요하며, 초반에는 자원 확보와 초반 러시 방어가, 중반 이후로는 강력한 유닛 조합과 방어 시설의 구축이 승패를 좌우한다. 특히, 맵의 지형적 특징을 살린 ‘지뢰밭’이나 ‘협곡Ambush’ 패턴은 숙련된 플레이어에게는 카운터 전략이 될 수 있지만, 초보자에게는 큰 혼란을 안겨줄 수 있어 carefully한 플레이가 요구된다. ‘스나이퍼 발드 + 파이널 베타’는 초보자보다는 중급 이상의 플레이어에게 적합한 맵으로, 전략적 깊이와 긴장감을 동시에 제공한다. 맵의 볼륨과 진행 방식은 8인 플레이를 기준으로 설계된 것으로 보이며, 팀플레이보다는 개인전이 주를 이루지만, 때로는 동맹을 맺어 공동 방어나 공격 타이밍을 맞춰야 하는 순간도 존재한다. 맵의 구조상 ‘입구막기’ 또는 ‘협곡 방어’가 주요 전략 포인트로, 플레이 전에는 반드시 맵의 주요 길목과 자원 위치, 방어 거점의 위치를 숙지하고 있어야 한다. 또한, 맵의 후반부로 갈수록 적의 공격 패턴이 강화되므로, 초중반에 충분한 준비를 갖추는 것이 중요하다. 유닛의 조합과 업그레이드 타이밍, 방어 시설의 배치 등 모든 요소가 시너지를 일으켜야만 최종 승리를 거머쥘 수 있는 맵이다. 특히, ‘사이언스 베슬’이나 ‘고스트’ 유닛의 활용 여부가 승패를 가를 수 있어, 다양한 전략을 시도해보는 것이 좋다. 이 맵의 가장 큰 장점은 바로 ‘재플레이 가치’에 있다. 맵의 지형과 전략적 선택지가 다양해 초회 플레이 시의 경험만으로는 모든 전략을 파악하기 어렵기 때문에, 반복적인 플레이를 통해 새로운 전술을 발견할 수 있다. 또한, 맵의 밸런스가 잘 잡혀 있어 초보자와 숙련자 모두에게 공정한 경쟁을 제공한다는 점도 매력적이다. 만약 당신이 스타크래프트의 전략적 깊이를 즐기는 플레이어라면, ‘스나이퍼 발드 + 파이널 베타’는 반드시 시도해볼 만한 가치가 있는 맵이다. 단, 이 맵은 초보자에게는 다소 난이도가 높을 수 있으니, 기본적인 컴까기 경험을 쌓은 후 도전하는 것이 좋다. 맵의 구조와 전략적 깊이를 충분히 이해한다면, 스타크래프트 유즈맵의 새로운 경지를 경험할 수 있을 것이다. Sniper Bald + Final BETA is one of the hidden gems in StarCraft: Brood War’s custom maps, offering a deep and immersive experience tailored for the computer-killing (comp-killing) genre. The map features a cohesive desert theme, with vast plains, cliffs, and canyons that create a unique and strategic landscape. At the center of the map stands a massive structure, serving as a key defensive point that forces players to make critical strategic decisions. The scattered rocks and canyons not only obscure vision but also restrict movement paths, adding an element of unpredictability to battles. The core gameplay revolves around surviving waves of enemy AI units as a solo player, focusing on resource gathering, unit production, and base defense. Securing the central chokepoint is essential, and players must balance early-game rushes with mid-to-late game unit compositions and defensive fortifications. The map’s terrain encourages the use of ambushes in canyons or minefields, which can be devastating if exploited but also pose a challenge for beginners who may struggle with the map’s complexity. This map is designed for intermediate to advanced players rather than beginners, offering a blend of strategic depth and high-stakes tension. While it supports eight players, the gameplay leans toward individual survival rather than strict team play, though temporary alliances for shared defense or coordinated attacks can be advantageous. Key strategic points include choke-point defense and canyon ambushes, so players should familiarize themselves with the map’s critical paths, resource locations, and defensive strongholds before diving in. As the game progresses, enemy AI becomes more aggressive, making early preparation and resource management crucial for success. One of the map’s standout features is its replay value. The diverse terrain and strategic options mean that even after multiple plays, players can still discover new tactics and approaches. The balanced design ensures fair competition for both casual and competitive players. If you enjoy the strategic depth and challenge of StarCraft’s custom maps, Sniper Bald + Final BETA is a must-try. However, due to its complexity, it may be daunting for beginners, so building a foundation in comp-killing strategies before attempting this map is highly recommended. With a thorough understanding of its mechanics, this map promises to deliver a fresh and engaging experience in StarCraft’s custom map landscape.
헬름즈 딥: 코디아카이 1.8v2 (Helms Deep: Kodiakai 1.8v2)
스타크래프트 브루드워의 디펜스 장르 유즈맵 '헬름즈 딥: 코디아카이 1.8v2'는 사막 테마의 광활한 맵에서 펼쳐지는 대규모 방어전을 경험할 수 있는 작품이다. 맵의 이름은 '헬름즈 딥'으로, 반지의 제왕 세계관의 유명한 방어전인 '헬름즈 딥 전투'를 모티브로 삼은 것으로 추정된다. 맵은 7명이 플레이할 수 있도록 설계되었으며, 사막 타일셋을 기반으로 한 황량한 지형과 절묘한 구조물이 방어전의 긴장감을 극대화한다. 맵의 중앙에는 거대한 요새가 위치하고 있으며, 그 주변으로는 적의 공격을 방어할 수 있는 성벽과 요새가 복잡하게 배치되어 있다. 플레이어는 이러한 방어 시설을 보수하고 강화하는 동시에, 끊임없이 몰려오는 적군으로부터 본진을 지켜내야 한다. 맵의 구조는 방어선의 중요성을 강조하며, 플레이어 간 협력이 필수적인 만큼 팀워크가 중요한 요소로 작용할 것이다. 맵의 배경 음악과 효과음은 사막의 분위기를 살리기 위해 디자인된 것으로 보이며, 이는 플레이어의 몰입감을 높이는 데 기여한다. 특히 맵의 규모가 크고 세부적인 구조물이 많아, 한 번의 실수가 승패를 가를 수 있는 긴장감이 특징이다. 이 맵은 디펜스 장르를 любителей 대규모 방어전과 전략적 협동 플레이를 즐기는 유저들에게 강력히 추천한다. 방어 시설을 효율적으로 관리하고, 적의 패턴을 분석하는 능력이 요구되므로, 초보자보다는 어느 정도의 전략적 이해와 팀워크가 있는 플레이어에게 더 적합할 것이다. 또한, 맵의 특성상 지속적인 플레이로 적의 패턴을 익히고 방어 전술을 연마할 수 있는 장점이 있다.Helms Deep: Kodiakai's 1.8v2 is a defense-type custom map in StarCraft: Brood War set in a vast desert-themed battlefield, inspired by the Helm's Deep battle from The Lord of the Rings universe. Designed for seven players, the map features intricate defensive structures including walls, fortresses, and outposts centered around a large main stronghold. Players must collaborate closely to reinforce structures, manage resources, and repel relentless enemy waves that attack from multiple directions. The map's large scale and detailed layout demand strategic foresight and team coordination, as a single mistake can lead to a breach in defenses. The immersive atmosphere is enhanced by sound design that complements the desert setting, creating a tense and engaging experience. This map is ideal for players who enjoy large-scale defense scenarios with cooperative elements. While accessible to beginners, it rewards players with strategic depth and the opportunity to refine defensive tactics through repeated play. The complex layout and dynamic enemy AI make it a challenging yet rewarding experience for those seeking a deep defense challenge.
Lurker 8 Way Death (리커 8방향 데스)
스타크래프트 브루드워의 유즈맵 'Lurker 8 Way Death'는 다중 방향의 리커를 상대해야 하는 치열한 디펜스 장르의 맵이다. 맵 중앙에 위치한 플레이어 기지 주변으로 8방향의 길들이 뻗어나가 있으며, 각 길마다 끊임없이 리커가 몰려온다. 플레이어는 제한된 자원으로 기지를 방어하며, 리커의 끊임없는 공격을 막아내야만 승리할 수 있다. 맵의 특징은 8방향에서 동시에 적의 공격이 오는 점으로, 한 방향으로만 집중 방어하는 전략으로는 버틸 수 없다. 플레이어는 각 방향의 입구를 효과적으로 방어하거나, 리커의 이동 경로를 방해하는 구조물을 설치해야 한다. 맵의 긴 길이와 넓은 공간은 리커의 대량 침공을 허용하며, 한 번 방어선이 무너지면 기지 전체가 위험해진다. 또한, 리커의 공격 패턴이 일정하지 않고 때로는 예상치 못한 방향으로 몰려오기도 한다. 이러한 특성 덕분에 맵은 플레이어의 전략적 사고와 긴장감을 요구하며, 반복 플레이 시 새로운 방어 전술을 시도해볼 수 있다. 초보자는 리커의 물량에 밀리기 쉽지만, 경험을 쌓아 방어 라인을 효율적으로 배치하고 자원 관리를 잘한다면 충분히 클리어할 수 있다. 추천 대상은 디펜스 맵을 즐기며 전략적 플레이를 좋아하는 유저들로, 특히 팀플레이보다는 1인 플레이에 최적화되어 있다. 플레이 전에는 리커의 공격 루트와 방어 가능한 지점을 미리 파악하고, 자원 확보 및 방어 건물 배치 계획을 세워두는 것이 중요하다. Lurker 8 Way Death is a challenging defense-style custom map in StarCraft: Brood War where players must withstand relentless attacks from lerkers approaching from all eight directions. The map features a central player base with eight distinct paths extending outward, each serving as a potential invasion route for the lerkers. Players are tasked with strategically placing defenses to fend off the constant stream of enemies, as focusing on a single direction is insufficient to survive. The unique challenge lies in the simultaneous multi-directional assaults, requiring players to create balanced defensive setups or disrupt the lerkers' movement patterns. The map's expansive layout and long corridors allow for large-scale larker rushes, and a single breach in the defense can jeopardize the entire base. The unpredictable attack waves add an element of tension, making each playthrough a test of adaptability and foresight. While beginners may struggle with the sheer volume of enemies, seasoned players can refine their tactics, optimize resource management, and experiment with new defensive strategies to overcome the challenge. This map is best suited for players who enjoy defense-oriented gameplay and strategic depth, particularly those who prefer solo play over team-based strategies. Before diving in, it’s crucial to study the larker attack routes, identify key defensive points, and plan resource allocation and building placement to maximize survival chances.
신화의 잔재 RPG (Remains of Mythology RP)
스타크래프트: 브루드워의 유즈맵 장르 중에서도 독특한 RPG 요소를 결합한 -=Remains of Mythology RP=-는, 플레이어들에게 전략적 깊이와 흥미로운 시스템을 동시에 제공하는 흥미로운 작품이다. 맵의 이름은 '신화의 잔재'라는 뜻으로, 고대 신화나 전설에 등장하는 요소들이 게임内에 녹아들어 있음을 암시한다. 이 맵은 기본적으로 6인용 맵으로 설계되어 있으며, 중앙에 위치한 넓은 평야와 이를 둘러싼 지형들이 특징적이다. 플레이어는 각각의 시작 지점에서Resource spawns(자원 생성지) 주변을 점령하거나 방어하면서 자원을 모아 병력을 키우거나 건물을 건설해야 한다. 특히 'Bombs(폭탄)'과 'Nydus canal spawn(니아더스 운하 생성)'은 이 맵의 큰 특징으로, 폭탄은 적의 건물을 파괴하거나 전략적 우위를 점하는 데 사용되며, 니아더스는突然间 적의 배후로 병력을 보내거나 후퇴할 때 유용한 수단으로 활용된다. 또한 'Banning feature(밴 기능)'은 특정 유닛이나 건물을 일시적으로 사용할 수 없게 막아 전략의 다양성을 높이는 시스템으로 보인다. 게임의 진행 방식은 초반Resource 확보와 지역 점령에 중점을 두며, 중반부터는 폭탄과 니아더스를 활용한 기습이나 방어전을 펼치게 된다. 맵의 지형은 비교적 평탄한 편이지만, 곳곳에 배치된 언덕이나 협곡은 시야 확보와 병력 운용에 영향을 미치므로, 지형의 중요성을 간과해서는 안 된다. 또한Resource spawns는 일정 주기로 재생되기 때문에, 이를 얼마나 효율적으로 관리하느냐가 승리의 열쇠가 될 것이다. 이 맵은 특히Resource 관리와 전략적 플레이를 좋아하는 유저들에게 추천할 만하다. 초보자도 쉽게 접근할 수 있지만,Resource와 니아더스를 활용한 복잡한 전략을 구사하려면 어느 정도의 경험이 필요하다. 또한, 폭탄과 밴 시스템은 맵의 재미를 한층 끌어올리는 요소이므로, 다양한 전략을 시도해 보는 재미가 쏠쏠하다. 다만,Resource spawns의 위치가 너무 가까우면 초반 균형이 쉽게 무너질 수 있으므로,Resource 배치에 따라 게임의 난이도가 크게 달라질 수 있음을 유념해야 한다. This StarCraft: Brood War custom map, -=Remains of Mythology RP=-, stands out for blending RPG elements with traditional strategy gameplay, offering players a unique and engaging experience. The title translates to 'Remains of Mythology,' hinting at the mythological or legendary themes woven into the gameplay. Designed as a 6-player map, -=Remains of Mythology RP=- features a central expanse of flat terrain surrounded by varied landscapes. Players begin at distinct starting points, focusing on securing and defending Resource spawns to gather materials for building armies or constructing structures. The map’s signature features include Bombs, which can demolish enemy buildings or gain tactical advantages, and Nydus canal spawns, allowing sudden reinforcements or retreats to the enemy’s rear. Additionally, the Banning feature temporarily restricts certain units or buildings, adding depth to strategic planning. The gameplay emphasizes early-game Resource management and territory control, transitioning into mid-game strategies involving Bombs and Nydus canals for ambushes or defensive maneuvers. While the terrain is mostly flat, scattered hills and ravines affect vision and troop movement, making terrain control crucial. Efficient management of Resource spawns, which regenerate periodically, is key to maintaining an edge in the game. This map is ideal for players who enjoy Resource management and strategic depth. While accessible to beginners, mastering the map’s complexities—such as leveraging Bombs and the Banning system—requires experience. The variety of strategies possible, from explosive assaults to stealthy Nydus-based tactics, keeps the gameplay fresh and engaging. However, Resource spawns placed too closely together can unbalance the early game, so their arrangement significantly impacts difficulty.
드롯트 숲 능선 (Droht- Forest Ridge)
스타크래프트 브루드워의 고전 맵 'Droht- Forest Ridge'는 독특한 지형과 전략적인 배치로 밀리 유저들에게 memorable한 경험을 제공하는 5인용 맵이다. 맵 중앙을 가로지르는 거대한 숲 능선 'Great Forest Ridge of Droht'가 맵을 양분하면서 각 플레이어의 스타팅 포인트를 분리하고, 이 능선을 둘러싼 좁은 길목과 넓은 평지가 혼합된 구조로 인해 전투는 물론 자원 관리와 멀티 확보 전략이 더욱 중요해진다. 특히 능선을 넘어 진격하거나 방어선을 구축하는 선택이 게임의 승부를 좌우할 수 있으며, 숲의 존재로 인해 시야 확보가 제한되는 구간이 많기 때문에 정찰과 컨트롤의 중요성이 부각된다. 이 맵의 가장 큰 특징은 바로 'Great Forest Ridge'의 중앙 능선으로, 맵의 절반을 차지하는 이 지형은 단순히 장식용이 아니라 전략적 요충지다. 능선 위는 시야가 탁 트여 있지만 접근성이 떨어지고, 능선 아래 평지는 넓은 시야를 확보하기 어려운 대신 빠른 이동이 가능하다. 초반 러시부터 후반 전투까지 능선의 통제 여부가 승패를 가를 수 있으며, 능선을 넘어가려는 시도를 저지하거나 능선 위에서 방어선을 구축하는 플레이가 핵심 전략이 된다. 또한, 각 스타팅 지역이 완전히 분리되어 있어 초반 자원 확보와 멀티 확장이 독립적으로 이뤄질 수 있지만, 반대로 중앙 능선을 장악하지 못하면 자원 확보가 어려워지는 역설적인 구조도 가지고 있다. 이 맵의 또 다른 특징은 맵의vast한 크기다. 4096x6144라는 거대한 사이즈는 넓은 전장과 긴 전투 거리를 제공하며, 맵의 절반을 차지하는 숲 능선은 시야를 가리는 동시에 지형을 활용한 전략을 가능하게 한다. 이렇듯 복잡한 지형과 넓은 전장은 초보자가 플레이하기에는 다소 어렵지만, 숙련된 유저들에게는 다양한 전략적 선택지와 전술적 깊이를 제공하는 매력적인 맵으로 평가된다. 특히 능선 주변의 좁은 길목이나 평지에서의 전투는 타이밍과 컨트롤이 중요한데, 이를 숙지하고 있다면 이 맵에서 승률을 높일 수 있을 것이다. 추천 대상은 스타크래프트 밀리 플레이어 중에서도 넓은 전장과 복잡한 지형에서의 전투를 즐기는 유저들이다. 특히 능선 주변의 전투와 중앙 장악 전략을 좋아하는 플레이어라면 이 맵에서 큰 재미를 느낄 수 있을 것이다. 또한, 초보자의 경우 능선의 중요성과 시야 확보의 어려움을 충분히 숙지한 뒤 플레이하는 것이 좋다. 맵의vast한 크기와 복잡한 지형은 초보자에게는 진입 장벽이 될 수 있지만, 숙련된 유저에게는 새로운 전략적 깊이를 제공하는 훌륭한 맵이라 할 수 있다. The classic Brood War map *Droht-Forest Ridge* is a memorable 5v5 map known for its unique terrain and strategic layout, offering Mill players a distinctive experience. The map is divided by the massive forest ridge "Great Forest Ridge of Droht," which separates each player's starting positions while creating a mix of narrow chokepoints and wide open plains around it. This structure forces players to carefully manage resources, secure expansions, and plan their battles, as the choice to attack across the ridge or fortify defenses often decides the game. The dense forest also limits visibility in many areas, emphasizing the importance of scouting and precise control. The central feature of this map is the *Great Forest Ridge*, which dominates half the map and serves as more than just a decorative element—it’s a critical strategic point. The ridge itself offers clear sightlines but is difficult to access, while the flatlands below provide quick movement but poor visibility. Controlling the ridge can determine the outcome of battles from the early rush to the late-game, making it essential to either block enemy advances or establish defensive lines atop it. Additionally, the map’s isolated starting positions allow for independent early resource gathering and expansion, but failing to secure the ridge can paradoxically hinder resource collection. Another defining trait of *Droht-Forest Ridge* is its vast scale. At 4096x6144, the enormous battlefield stretches combat distances and forces long engagements, while the ridge—occupying half the map—obscures vision and enables terrain-based strategies. Though this complex terrain and sprawling design can be daunting for beginners, experienced players appreciate the depth and variety of strategic options it offers. Battles around the ridge’s narrow passages or open plains hinge on timing and micro, so mastering these elements can significantly boost your win rate. This map is best suited for Mill players who enjoy wide battlefields and intricate terrain. Those who favor ridge-side combat and central control strategies will find it particularly engaging. Beginners should familiarize themselves with the ridge’s importance and the challenges of vision control before diving in. While the map’s size and complexity may pose a barrier for new players, for veterans, it delivers exceptional strategic depth and a rewarding experience.
맵 선택 가이드
태그는 맵의 핵심 특징을 빠르게 설명하지만 제작 버전마다 규칙이 다를 수 있습니다. 상세 설명에서 권장 인원, 난이도, 플레이 시간과 버전을 함께 확인한 뒤 다운로드하세요.