
전략 대결 스타크래프트 맵 모음
'전략 대결' 태그가 등록된 맵을 모았습니다. 장르 하나로 찾기 어려운 플레이 방식, 난이도와 특징을 중심으로 인기 맵과 최신 맵을 비교해 보세요.
- 등록 맵
- 13개
- 누적 다운로드
- 0
- 누적 조회
- 518
인기 맵
다운로드와 조회 반응이 높은 맵입니다.
배틀크래프트 아레나 (BattleCraft ARENA)
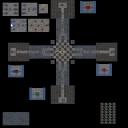
스타크래프트 브루드워 유즈맵 <배틀크래프트 아레나(BattleCraft ARENA)>는 실전 감각을 시험하는 아레나 형식의 맵으로, 플레이어们의 전략적 판단력과 실시간 전투 능력을 동시에 요구하는 흥미로운 대결 구조를 자랑한다. 맵 중앙에는 거대한 원형 전투장이 펼쳐지며, 각 플레이어는 시작 지점에서 출발해 중앙으로 모여든다. 전투는 개방형 맵에서 벌어지며, 지형은 비교적 평탄하지만 곳곳에 고지대나 장애물이 배치되어 있어 치고 빠지기나 엄폐물을 활용한 전술을 유도한다. 특히 맵 가장자리의 붉은색 테두리 부분은 전투 지역과는 분리된 구역으로 보이며, 이곳은 전투 중 이탈하거나 후방에서 지원하는 역할을 위한 공간으로 추정된다. 이 맵의 핵심은 '실전 같은 전투 감각'을 강조하는 데 있다. 내부 설명에서도 '좋은 스타크래프트 플레이어라면 반드시 플레이해야 한다'고 언급된 것처럼, 단순 무빙이나 컨트롤만이 아니라 다중 유닛을 효율적으로 조합하고 타이밍을 잡는 능력이 요구된다. 맵 중앙의 대결 지역은 비교적 좁아 소규모 교전이 자주 발생할 수밖에 없으며, 이로 인해 플레이어들은 자연스럽게 소규모 전투에 집중하게 된다. 또한, 유닛 생산이나 업그레이드는 맵 외부에서 진행되는 것으로 보이며, 전투는 생산이 완료된 유닛을 즉시 전장으로 투입하는 방식으로 이루어진다. 초보자의 경우 개별 유닛의 컨트롤과 맵의 흐름을 익히는 데 다소 시간이 걸릴 수 있지만, 한 번 그 흐름을 grasped하면 빠른 판도를 즐길 수 있다. 반대로 숙련된 플레이어들에게는 치밀한 전략과 순간 판단력이 요구되는 흥미로운 대결이 될 것이다. 맵의 타일셋은 우주 테마로 구성되어 있어 은하계 한복판에서 벌어지는 전투 같은 분위기를 연출하며, 시각적으로도 맵의 개방감을 강조하고 있다. 이처럼 <배틀크래프트 아레나>는 실전성을 중시하는 아레나 맵으로서, 스타크래프트의 기본기와 전략적 깊이를 동시에 즐기고 싶은 유저들에게 강력히 추천할 만한 작품이다. 플레이 전에는 반드시 맵의 전투 지역과 후방 지원 구역을 구분하는 방법, 그리고 유닛 생산과 전투 투입의 타이밍을 숙지하는 것이 중요하다. This StarCraft: Brood War custom map, BattleCraft ARENA, is an arena-style map designed to test players' real-time combat skills and strategic decision-making. The map features a large circular battlefield at its center, where all players converge from their starting positions. The terrain is mostly flat but includes elevated areas and obstacles that encourage hit-and-run tactics and cover usage. The red-bordered edges around the map appear to serve as separate zones, likely designated for retreat or support roles during combat. The core appeal of BattleCraft ARENA lies in its emphasis on 'real combat feel.' As noted in the internal description—'any good Starcraft player should play this'—the map focuses not just on micro-management but also on multi-unit coordination and precise timing. The central battlefield is relatively compact, which naturally leads to frequent small-scale skirmishes, pushing players to prioritize efficient unit control and tactical positioning. Unit production and upgrades seem to occur outside the battlefield, with completed units immediately deployed into combat. For beginners, mastering basic unit control and understanding the map's flow may take some time, but once grasped, the game unfolds in fast-paced, engaging rounds. For experienced players, the map demands sharp strategy and split-second decision-making, making it a compelling challenge. The space-themed tileset enhances the immersive atmosphere, evoking a sense of battles taking place in a distant galaxy. Overall, BattleCraft ARENA stands out as a top-tier arena map for those seeking to refine their Starcraft fundamentals and strategic depth. Before playing, it's crucial to familiarize yourself with the combat zone layout, the separation between combat and support areas, and the optimal timing for unit production and deployment.
목점 (Choke Point)
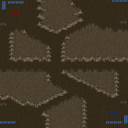
‘Choke Point’는 스타크래프트: 브루드워의 2인용 밀리맵으로, 좁은 길목을 사이에 두고 두 플레이어가 전투를 펼치는 빠른 속도의 대결을 지향합니다. 맵 중앙에 위치한 좁은 길목이 주요 전투 지역으로, 이곳에서 벌어지는 빠른 교전이 이 맵의 핵심입니다. 좁은 통로를 활용한 전략적 움직임과 순간적인 판단력이 승부를 좌우하며, 좁은 공간에서 벌어지는 ‘치킨 게임’과 같은 긴장감이 특징입니다. 이 맵은 특히 빠른 템포와 긴장감을 좋아하는 플레이어들에게 인기가 있습니다. 두 플레이어가 서로의 움직임을 읽고, 좁은 공간에서 효율적으로 유닛을 컨트롤해야 하기 때문에, 전략적인 깊이와 순간적인 판단력이 요구됩니다. 또한, 맵의 구조상 프로토스 대 저그, 테란 대 프로토스 등 다양한 종족 간의 조합으로도 플레이할 수 있어 종족 간 밸런스도 고려해 볼 필요가 있습니다. 맵의 크기는 2048x2048이며, 황무지 타일셋을 사용한 깔끔한 디자인으로 시각적인 만족감도 높습니다. 추천 대상은 밀리맵을 즐겨하는 플레이어, 좁은 공간에서의 전투를 좋아하는 유저, 그리고 빠른 속도의 대결을 선호하는 게이머입니다. 초보자의 경우 좁은 공간에서 벌어지는 전투에 적응하기 어려울 수 있으므로, 기본적인 밀리맵 플레이 경험을 쌓은 후 도전하는 것이 좋습니다. 또한, 팀플레이가 아닌 1:1 대결이므로 상대방의 플레이 스타일을 빠르게 파악하고 대응하는 능력이 중요합니다. 플레이 전 확인해야 할 포인트는 좁은 길목의 중요성과 각 종족의 유닛 조합입니다. 프로토스의 경우 질럿과 드라군을, 저그의 경우 히드라리스크와 러커, 테란의 경우 마린과 탱크와 같은 유닛들이 좁은 공간에서 효과적으로 활용될 수 있는지 미리 생각해 보는 것이 좋습니다. 또한, 맵의 중앙 통로가 좁기 때문에 빠른 이동과 컨트롤이 승패를 좌우할 수 있음을 기억해야 합니다. ‘Choke Point’ is a two-player melee map in *StarCraft: Brood War* designed for fast-paced battles where players fight across a narrow passage between them. The central chokepoint serves as the primary battleground, where rapid exchanges define the map’s core gameplay. Victory hinges on strategic use of the tight corridors and split-second decision-making, with the intense "chicken game" dynamics of confined spaces adding to the thrill. This map is especially popular among players who enjoy quick tempo and high tension. Success requires reading opponents’ movements and efficiently controlling units in cramped areas, demanding both strategic depth and sharp reflexes. Its layout also accommodates diverse matchups like Protoss vs. Zerg or Terran vs. Protoss, making race balance an important consideration. The map measures 2048x2048, featuring a sleek design with a wasteland tileset that enhances visual appeal. Ideal for players who love melee maps, those who thrive in close-quarters combat, and gamers seeking fast-paced duels. Beginners may struggle with the confined battles, so it’s best to build basic melee experience before attempting this map. Since it’s a 1v1 format, quickly recognizing and adapting to an opponent’s playstyle is crucial. Key points to check before playing include the chokepoint’s role and optimal unit compositions for each race. Protoss should consider Zealots and Dragoons, Zerg Hydralisks and Lurkers, and Terran Marines and Tanks—all of which excel in tight spaces. Given the narrow central corridor, swift movement and precise control can turn the tide of battle.
개인넥서스부수기 플러스1.1 (Individual Nexus Destruction Plus 1.1)
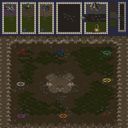
‘개인넥서스부수기 플러스1.1’은 스타크래프트 브루드워의 인기 UMS 유즈맵 시리즈 중 하나로, 8명의 플레이어가 각각의 넥서스를 방어하면서 상대방의 건물을 파괴하는 전략 대결을 펼치는 맵이다. 맵은 사막 타일셋을 기반으로 제작되었으며, 넓은 평지 위에 각 플레이어의 기지가 배치되어 있다. 맵 중앙에는 중립 건물이 배치되어 있어 자원 확보와 방어 전략을 동시에 고려해야 한다. 영웅 유닛이 추가되어 전술의 다양성을 높였고, 물량 유닛들의 비중이 높아져 대규모 전투가 자주 발생한다. 특히 리버의 스캐럽이 다수 배치되어 있어, 이를 적절히 활용하는 플레이어가 승리의 열쇠를 잡을 수 있다. 맵의 난이도는 주로 플레이어의 조합과 컨트롤에 따라 달라지며, 빌드 오더와 맵리딩 능력이 중요한 요소로 작용한다. 초보자의 경우 기본적인 빌드와 방어 전략을 숙지한 후 도전하는 것이 좋으며, 숙련자의 경우 영웅의 스킬과 유닛 조합을 최적화하여 상대방을 압박하는 전략을 구사할 수 있다. 맵의 인기는 대규모 전투와 영웅 시스템의 조화에서 비롯되며, 플레이어 간의 심리戦이 승패를 좌우하는 경우가 많다. 맵을 플레이하기 전에는 각 플레이어의 시작 위치와 중앙 자원 분포를 숙지하고, 영웅의 스킬과 유닛의 상성을 미리 확인해 두는 것이 좋다. 또한, 리버의 스캐럽 채우기 버그 수정 사항이 반영되어 있어 안정적인 플레이가 가능하다는 점도 특징이다. 이 맵은 팀플레이보다는 개인전 위주의 플레이가 강제되며, 각 플레이어의 빌드와 전략이 승패를 좌우하는 만큼, 끊임없는 연습과 연구가 필요한 작품이다. 특히 초보자가 도전할 때는 상대방의 빌드에 대응할 수 있는 기본기를 먼저 다지는 것이 중요하다. 맵의 재플레이 가치는 높은 편으로, 다양한 전략과 빌드를 시도해 볼 수 있어 매번 다른 플레이 경험을 제공한다. UMS 유즈맵의 특징상 맵 제작자의 의도와는 다르게 플레이어 간의 협력과 배신이 동시에 발생할 수 있어, 순수한 전략 대결을 즐기고자 하는 플레이어에게 추천할 만한 작품이다. 맵의 평가는 주로 플레이어의 실력과 전략에 따라 달라지므로, 자신의 실력에 맞는 난이도를 선택하여 즐기는 것이 좋다. 맵의 밸런스는 제작자의 지속적인 수정과 피드백을 통해 점차 개선되고 있으며, comunidad 내에서도 꾸준한 인기를 누리고 있는 작품이다. ‘Personal Nexus Destruction Plus 1.1’ is a popular UMS custom map in *StarCraft: Brood War*, where eight players defend their own Nexuses while destroying their opponents’ buildings in a strategic battle. The map is set on a desert tileset, with each player’s base positioned across a vast plain. Neutral buildings are placed in the center, requiring players to balance resource gathering with defensive tactics. The addition of hero units enhances tactical variety, while the increased presence of swarm units leads to frequent large-scale battles. Notably, the map features numerous Reaver Scarabs, making their effective use a key factor in securing victory. Difficulty primarily depends on player coordination and micro-management, with build orders and map awareness playing crucial roles. Beginners should familiarize themselves with basic builds and defensive strategies before attempting the map, while experienced players can optimize hero skills and unit compositions to pressure opponents. The map’s popularity stems from its blend of large-scale combat and the hero system, often making psychological warfare a decisive factor in matches. Before playing, it’s advisable to study each player’s starting positions and the distribution of central resources, as well as to review hero skills and unit matchups. The map also includes fixes for Reaver Scarab bugs, ensuring stable gameplay. While the focus is on individual play rather than teamwork, each player’s build and strategy directly influence the outcome, making constant practice and experimentation essential. Beginners should prioritize mastering basic counters to common builds before diving deeper. With high replay value, the map offers diverse strategies and builds, delivering unique experiences in each match. As a UMS custom map, unexpected cooperation or betrayal among players can occur, making it ideal for those seeking pure strategic battles. Ratings vary based on player skill and strategy, so choosing a difficulty suited to your level is recommended. The map’s balance continues to improve through the creator’s updates and community feedback, maintaining its steady popularity.
트라이벌 컨플릭트 (Tribal Conflict)
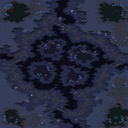
‘트라이벌 컨플릭트(Tribal Conflict)’는 스타크래프트 브루드워의 멀티플레이어 맵으로, 네 개의 부족이 울자라(Ul' Jahara) 지역에서 각축을 벌이는 전략 대결을 펼치는 작품이다. 맵은 4096×4096 크기의 거대한 화산 지형을 배경으로 펼쳐지며, 각 부족의 기지 주변에는 독특한 지형과 자원 분포가 배치되어 있다. 맵의 핵심은 부족 간 충돌이 불가피한 구조로, 2~4명의 플레이어가 각자 자원을 확보하고 병력을 생산한 뒤 상대 부족을 정복하는 목표를 가지고 전투를 펼친다. 이 맵의 가장 큰 특징은 부족별로 고유한 시작 위치를 제공한다는 점이다. 각 부족의 기지 주변에는 초반 자원과 건물이 배치되어 있으며, 지형상 요충지를 두고 전략적 교전이 발생한다. 특히 중앙 지역은 넓은 평야가 펼쳐져 있어 대규모 병력 교전이 자주 벌어지며, 협곡이나 언덕 지형은 방어와 기습에 유리한 환경을 조성한다. 맵의 밸런스를 고려한다면, 초반 자원 확보와 병력 생산의 속도가 승패를 좌우할 가능성이 높다. 플레이어는 부족의 지도자로서 자원 채취, 건물 건설, 유닛 생산을 신중히 계획해야 한다. 부족의 고유한 특성이나 유닛 조합에 대한 추가 설명은 없지만, 맵의 구조상 테란, 저그, 프로토스 등 종족 간의 조합이 중요한 요소로 작용할 것으로 추정된다. 맵의 난이도는 일반적인 멀티플레이어 맵 수준으로, 초보자도 손쉽게 접근할 수 있지만 숙련자라면 더 전략적인 플레이가 요구된다. 이 맵은 특히 부족 간의 동맹과 배신, 협상과 전투가 혼재된 긴장감이 특징인 만큼, 다인 플레이에서 뛰어난 재미를 제공할 것이다. 또한, 화산 지형과 독특한 색채감을 지닌 맵 디자인이 시각적으로도 매력적이다. 초보자가 처음 플레이한다면 부족별 시작 위치와 자원 분포를 숙지한 뒤, 빠르게 자원을 확보하고 병력을 생산하는 데 주력하는 것이 좋다. 숙련자라면 중앙 지역을 차지하고 방어선을 구축하는 전략을 구사해 보자. Tribal Conflict is a multiplayer map for StarCraft: Brood War, where four tribes battle for dominance in the volcanic region of Ul' Jahara. Set on a massive 4096×4096 terrain featuring volcanic landscapes, the map forces players into strategic clashes as they gather resources, build armies, and conquer rival factions. A standout feature is the distinct starting positions for each tribe, each equipped with initial resources and structures. The central plains serve as a hotspot for large-scale battles, while canyons and elevated areas offer tactical advantages for defense and ambushes. Early resource management and army production speed are likely decisive factors in determining the outcome. Players take on the role of tribal leaders, balancing resource harvesting, base expansion, and unit production. While the map lacks explicit faction-specific traits, its design suggests that Terran, Zerg, and Protoss unit combinations will play a critical role in gameplay. The difficulty level aligns with standard multiplayer maps, accessible to beginners yet demanding strategic depth from experienced players. The map excels in multiplayer scenarios, blending alliances, betrayals, and negotiation with intense combat. Its visually striking volcanic terrain and color palette add to the immersive experience. Beginners should focus on securing resources and building a strong early army, while advanced players can test their skills by controlling the central area and fortifying defensive lines.
랜덤 캣 앤 마우스 정글! (Random Cat n Mouse Jungle!)
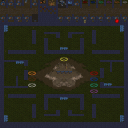
스타크래프트 브루드워의 숨은 재미 중 하나인 ‘고양이와 쥐’는 predator와 prey의 대결 구도를 재미있게 재해석한 유즈맵이다. <Random Cat n Mouse Jungle!>은 이름 그대로 야생의 정글을 배경으로 고양이와 쥐가 무작위 배치된 맵으로, 플레이어는 각각 고양이와 쥐 진영 중 하나를 선택해 전투를 펼친다. 맵 중앙의 넓은 평지에는 무작위로 생성되는 쥐 굴이 위치하며, 고양이 진영은 이 굴을 파괴해 쥐를 모두 제거하는 것이 주요 목표로 보인다. 반면 쥐 진영은 굴을 방어하거나 고양이의 공격을 피하면서 살아남는 데 집중해야 한다. 맵의 특징은 무작위 배치 시스템으로, 각 플레이어의 시작 위치와 쥐 굴의 위치는 매 게임마다 달라진다. 이는 전략의 다양성을 극대화하며, 특히 초보자와 숙련자 간의 체감 난이도 차이가 크다는 점에서 흥미로운 요소로 작용한다. 맵의 디자인 자체는 단순하지만, 무작위 배치와 생존/파괴라는 단순한 목표가 ‘누가 더 잘 숨고, 공격하고, 방어하는가’라는 긴장감을 끊임없이 유지한다. 추천 대상은 전략적 사고와 반사신경을 동시에 요구하는 맵을 좋아하는 플레이어들로, 특히 고양이와 쥐의 생태적 대결을 즐기는 유저들에게 적합할 것으로 보인다. 플레이 전에는 무작위 배치의 영향을 받으므로, 각 진영의 특성과 맵의 주요 지형(굴 위치, 돌출부, 시야)을 미리 확인하는 것이 중요하다. 또한, 쥐 굴의 방어 및 파괴 타이밍을 잘 계산해야만 승리를 이끌어낼 수 있다. 맵의 난이도는 중상으로 평가되며, 팀 플레이보다는 개인전이나 1:1 대결에 더 어울리는 구조다. 다만, 7인의 플레이가 가능한 구조이지만, 실질적인 전략적 깊이는 4~6인 전에서 가장 빛을 발할 것으로 추정된다. 맵의 플레이 시간은 개인전 기준으로 15~30분 내외로 예상되며, 팀전에서는 약간 더 길어질 수 있다. 맵의 밸런스는 무작위 배치의 공정성에 달려 있지만, 대체로 쥐 진영이 조금 더 유리한 것으로 보인다. 그러나 이는 플레이어의 숙련도에 따라 얼마든지 뒤집힐 수 있는 부분이다. 마지막으로, 맵의 제목에 포함된 ‘Random’이라는 단어가 시사하듯, 이 맵의 핵심은 예측 불가능한 요소와 전략적 유연성에 있다. 고정적인 맵이 아니라면 매번 새로운 경험을 제공한다는 점에서 재플레이 가치가 매우 높은 작품이다. "Cat and Mouse" in *StarCraft: Brood War* is one of the hidden gems that reimagines the classic predator-prey dynamic in a fun way. *<Random Cat n Mouse Jungle!>* lives up to its name by placing players in a wild jungle setting where cats and mice are randomly positioned at the start. Each player chooses to be either a cat or a mouse and engages in battle. At the center of the map lies a wide open plain where mouse burrows spawn randomly. The cats' main objective is to destroy these burrows to eliminate all the mice, while the mice must defend their burrows or evade the cats to survive. The map’s standout feature is its random placement system—both players' starting positions and the burrows' locations change every game, maximizing strategic variety. This also creates a noticeable skill gap between beginners and veterans, making it an intriguing challenge. Though the map’s design is simple, the core mechanics of survival and destruction create constant tension over who can hide better, attack more effectively, or defend smarter. It’s ideal for players who enjoy maps requiring both quick reflexes and strategic thinking, especially those who appreciate the ecological showdown between cats and mice. Before playing, keep in mind that random placement plays a big role, so familiarizing yourself with each faction’s strengths and key terrain features (burrow locations, high ground, and sightlines) is crucial. Timing your burrow defenses or attacks is also vital for securing victory. The difficulty is rated as moderate, and the map works best in 1v1 or solo matches rather than team play, though it can support up to seven players. However, the real strategic depth shines in games with four to six players. For solo matches, expect a playtime of 15 to 30 minutes, with team games potentially running a bit longer. Balance depends heavily on the fairness of the random placement, though mice generally have a slight edge—but this can shift entirely based on player skill. As the word "Random" in the title suggests, the map’s core appeal lies in its unpredictability and the need for flexible strategies. Since no two games are the same, it offers high replay value and fresh experiences every time you play.
시나리오 상스 놈 (Scenario Sans Nom)
〈시나리오 상스 놈〉은 스타크래프트 브루드워의 밀리 맵으로, 네 명의 플레이어가 각자 넥서스를 건설한 후 적의 건물을 모두 파괴하는 것이 목표인 전략 대결 맵이다. 맵의 이름인 ‘상스 놈(Scenario Sans Nom)’은 프랑스어로 ‘이름 없는 시나리오’라는 뜻으로, 단순한 yet 치열한 전투를 강조하는 듯하다. 황무지 타일셋을 기반으로 한 넓은 평야에서 펼쳐지는 전투는 맵의 중앙을 가로지르는 강과 잔디밭이 특징적이다. 강은 시야를 가리며 자원 수급을 방해하는 요소로 작용할 수 있어, 플레이어는Resource Location을 carefully 선택해야 한다. 초반 자원 확보와 진출 타이밍이 승부를 가르는 핵심 포인트이며, 좁은 길목에서는 소수 병력이라도 전략적 우위를 점할 수 있는 구조로 설계되어 있다. 특히, 맵의 symmetrical design은 모든 플레이어에게 동일한 조건을 제공하여, 실력과 전략의 차이를 극명하게 드러낸다. 초보자에게는 자원 채취와 병력 생산의 균형 잡기가 쉽지 않지만, 적절한 타이밍에 적의 넥서스에 공격을 감행하는 ‘러시’ 전략이 효과적일 수 있다. 반면 숙련자들에게는 미세한 컨트롤과 멀티태스킹이 요구되는 맵으로,Resource Location 관리와 정찰을 통한 상대의 전략 예측이 필수적이다. 맵의 symmetrical design 덕분에 누구나 동일한 기회를 가질 수 있지만, 중앙 강을 사이에 둔 전투는 예측 불가능한 변수를 만들어낸다. 이 맵은 밀리 초보자와 숙련자 모두에게 흥미로운 도전 과제를 제공하며, 특히 ‘Destruction Victory’를 목표로 하는 플레이어들에게 강력히 추천할 만하다. 플레이 전에는Resource Location의 위치와 강의 흐름을 먼저 숙지하고, 초반 병력 생산 라인을 최대한 효율적으로 배치하는 것이 중요하다. 또한, 시야 확보와 정찰의 중요성을 잊지 말아야 한다. 맵의 symmetrical design 덕분에 어떤 플레이어도 불리한 입장에 놓이지 않지만, 반대로 말하면 실수 하나가 승리를 좌우할 수 있는 치열한 전투가 펼쳐질 수 있음을 염두에 둬야 한다. Scenario Sans Nom is a StarCraft: Brood War melee map designed for four players, where the objective is to destroy all enemy buildings after establishing your own Nexus. The map’s name, "Scenario Sans Nom" (French for "Nameless Scenario"), hints at its straightforward yet intense battle-focused design. Set on a barren terrain tile, the expansive battlefield features a central river and patches of grass, adding strategic depth. The river obstructs vision and complicates resource gathering, forcing players to carefully select their starting locations. Early-game resource management and timing are crucial, as narrow pathways allow smaller forces to gain a tactical edge. The symmetrical layout ensures all players start on equal footing, emphasizing the importance of skill and strategy. For beginners, balancing resource collection and unit production can be challenging, but a well-timed rush attack on the enemy Nexus can be effective. Advanced players will appreciate the map’s demand for precise micro-management and multitasking, where efficient resource management and scouting are essential. The symmetrical design levels the playing field, but the central river introduces unpredictable variables in combat. This map offers a compelling challenge for both beginners and veterans, particularly those aiming for a "Destruction Victory." Before playing, familiarize yourself with the starting locations and river flow, prioritize efficient early-game unit production, and never underestimate the value of vision control and scouting. While the symmetrical design prevents any player from being at a disadvantage, a single mistake can swing the tide of battle in this high-stakes melee experience.
고양이와 쥐, Mouse N' Bird V.2 (Cat N' Dog, Mouse N' Bird V.2)
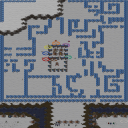
‘고양이와 쥐,Mouse N' Bird V.2’라는 부제가 붙은 이 맵은 스타크래프트 브루드워의 유즈맵으로, 플레이어들이 서로 다른 종족과species을 대표하는 유닛을 조종하며 펼치는 흥미로운 대결 구조가 특징이다. 맵의 중앙에는 거대한 체력 바가 있으며, 좌측과 우측에 각각 ‘Cat(고양이)’와 ‘Dog(개)’ 진영이 배치되어 있다. 반면 상단에는 ‘Mouse(쥐)’와 ‘Bird(새)’ 진영이 자리 잡고 있는데, 이 네 진영은 맵 곳곳에 배치된Resource들로 인해 독특한 플레이 패턴을 강제한다. 특히 맵의 테두리에는 여러 개의 ‘Silo’가 존재하며, 플레이어들은 이를 파괴하거나 지켜내야 하는 임무를 수행하게 된다. 맵의 지형은 비교적 평탄하지만, 곳곳에 배치된 좁은 통로와 장애물들이 strategic movement를 요구하며, 특히 중간에 위치한 넓은 공간은 대규모 전투가 벌어질 수 있는 ‘Hotspot’으로 기능한다. 플레이어들은 각 진영의 특성을 살려Resource를 확보하고, 상대방을 견제하며 승리를 차지해야 하는데,Mouse와Bird 진영은 공중 유닛을 주로 사용하고,Cat과Dog 진영은 지상 유닛을 중심으로 전투를 벌이는 구도가 보인다. 맵의 진행은 비교적 빠른 템포로 흘러가며, 초반Resource 확보 경쟁이 치열한 반면, 후반부로 갈수록 대규모 전투가 벌어지는 양상을 띤다. 이 맵은 7명의 플레이어가 한 팀으로 활동하는 구조로 보이며, 각 진영 간의 밸런스와 초반 Resource 분배가 승패를 좌우할 가능성이 높다. 초보 플레이어에게는 진영별 특성과Resource 관리법에 익숙해지는 것이 중요하며, 숙련된 플레이어에게는 전략적 협력과Resource 견제가 핵심 포인트가 될 것이다. 또한 맵의 중앙부에 위치한 ‘Core’ 건물을 파괴하는 것이 승리 조건일 가능성이 높지만, 맵의 구조상Resource 확보와 방어선을 구축하는 것이 더 중요하게 작용할 것으로 추정된다. This map, subtitled "Mouse N' Bird V.2," is a *StarCraft: Brood War* custom map where players control units representing different species in an engaging battle structure. At the center of the map is a massive health bar, with the "Cat" and "Dog" factions positioned on the left and right sides, respectively. Meanwhile, the "Mouse" and "Bird" factions occupy the top of the map, and all four factions are forced into unique playstyles due to the distribution of resources scattered across the battlefield. Along the map's edges are multiple "Silo" structures, which players must either destroy or defend as part of their objectives. The terrain is relatively flat, though narrow pathways and obstacles demand strategic movement. The wide central area serves as a hotspot for large-scale battles. Players must leverage each faction's strengths—Mouse and Bird rely on aerial units, while Cat and Dog focus on ground forces—to secure resources, pressure opponents, and secure victory. The game flows at a fast pace, with intense early-game resource competition giving way to massive late-game clashes. The map appears to support seven players per team, and the balance between factions and initial resource allocation likely plays a major role in determining the outcome. Beginners should focus on mastering each faction's traits and resource management, while experienced players will need strong teamwork and resource denial strategies. Although destroying the "Core" building in the map's center may be the victory condition, maintaining resource control and fortifying defenses will likely prove even more critical due to the map's layout.
프로게이머 테란vs플토 공평 (Pro-Gamer Terran vs Protoss Fair)
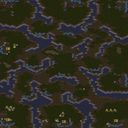
‘프로게이머 테란vs플토 공평’은 스타크래프트 브루드워의 UMS(유즈맵) 장르로, 프로게이머의 특징을 활용한 전략 대결을 펼치는 맵입니다. 8명의 플레이어가 참전하는 이 맵은 테란과 프로토스의 프로게이머를 각각 선택해 대결할 수 있도록 설계되어 있습니다. 내부 설명에서도 알 수 있듯이 ‘프로게이머의 특징을 이용’하라는 목표가 강조되며, 단순히 유닛을 모아 싸우는 것이 아니라 각 종족의 특징을 살린 플레이가 요구됩니다. 화면은 사막 타일셋으로 구성되어 있으며, 넓은 평야가 펼쳐져 있어 대규모 전투가 벌어질 가능성이 높은 구조입니다. 맵의 중앙부는 비교적 평탄한 지형이지만, 곳곳에 언덕이나 건물이 배치되어 있어 전략적 포지셔닝이 중요한 요소로 작용할 것으로 보입니다. 8명의 플레이어가 한정된 공간에서 경쟁을 벌이는 만큼, 초반 자원 수급과 병력 구성 타이밍이 승패를 좌우할 가능성이 큽니다. 또한, 프로게이머의 특징을 살린 플레이가 요구된다는 점에서, 단순히 강력한 유닛을 뽑는 것이 아니라 각 종족의 특화 전략을 구사해야 합니다. 예를 들어 테란의 경우 시즈 탱크와 벌처를 조합한 방어 및 기동전, 프로토스의 경우 질럿과 드라군 위주의 중거리 전투가 유효할 것입니다. 맵을 플레이하기 전에 각 종족의 프로게이머 스타일을 분석하고, 그에 맞는 전략을 준비하는 것이 중요합니다. 특히, 넓은 맵에서 벌어지는 전투에서는 시야 확보와 정찰이 필수적이며, 자원 관리와 테크 트리의 속도를 조절하는 것이 승리의 열쇠가 될 것입니다. 이 맵은 프로게이머의 전략적 감각을 시험하는 동시에, 넓은 공간을 활용한 전투에서 승부를 가르는 재미가 있는 유즈맵입니다. 초보자보다는 중급 이상의 플레이어에게 적합하며, 특히 각 종족의 특성을 잘 이해하고 있는 플레이어에게 추천할 만합니다. 넓은 맵에서 벌어지는 대규모 전투를 즐기고자 하는 플레이어라면, 이 맵에서 자신의 전략적 역량을 발휘해 보세요. This UMS (User-Made Scenario) map, '프로게이머 테란vs플토 공평' (Pro-Gamer Terran vs Protoss Fair), delivers a strategic showdown where players choose between Terran and Protoss pro-gamer styles. Designed for 8 players, the map emphasizes utilizing the unique characteristics of each race as outlined in its internal description—'utilize the pro-gamer's traits to secure victory.' The desert tile set creates an expansive battlefield with a mix of flat terrain and strategic high ground structures, forcing players to engage in careful positioning and tactical planning. Given the limited space for 8 players, early resource management and troop composition timing are critical factors in determining the outcome. Players are expected to adopt specialized strategies tailored to their chosen race; Terran players might focus on siege tanks and vultures for defensive maneuvers and mobility, while Protoss players could leverage zealots and dragoons for mid-range combat. Before diving into the match, analyzing the playstyles of pro-gamers for each race and preparing corresponding strategies is essential. Wide-field combat demands strong scouting and vision control, with efficient resource management and tech tree progression serving as key determinants of success. This map offers a thrilling experience for players seeking strategic depth and large-scale battles, making it particularly suitable for intermediate to advanced players. If you enjoy testing your tactical prowess in expansive arenas, this map provides the perfect platform to showcase your skills against others.
스타 트렉 아마다 II (Star Trek Armada II)
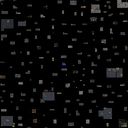
스타크래프트 브루드워의 우주 테마 유즈맵 ‘스타 트렉 아마다 II’는 우주를 배경으로 한 전략 대전을 즐길 수 있는 맵으로, 플레이어는 각각의 세력으로 우주 공간을 정복하기 위해 전투를 벌인다. 이 맵은 7명의 플레이어가 참여할 수 있으며, 각 플레이어는 고유한 시작 지점에서 출발해 자원을 확보하고 병력을 생산하며, 상대의 기지를 파괴하는 것이 주요 목표가 된다. 우주 공간의 광활한 맵은 넓은 시야와 전략적 움직임을 요구하며, 행성과 소행성, 우주 정거장 등이 배치되어 있어 전투뿐만 아니라 자원 관리와 위치 선정이 중요하다. 맵 중앙에는 중립 지역이 펼쳐져 있어 각 플레이어의 전투가 격렬해질 수 있는 요충지가 된다. 또한, 맵 곳곳에 배치된 자원 타일은 추가 자원을 확보할 수 있는 기회를 제공하며, 이를 활용해 병력을 지속적으로 확장할 수 있다. 전투는 주로 우주 함선과 전투기, 지상 병력이 조합된 형태로 이루어지며, 각 세력의 특성에 따라 전략이 달라질 수 있다. 우주 테마답게 맵의 분위기는 장대하고 전략적이며, 긴장감 넘치는 전투를 즐길 수 있다. 초보자는 넓은 맵과 복잡한 전투에 어려움을 느낄 수 있지만, 적응하면 우주 정복을 위한 흥미로운 여정을 경험할 수 있다. 이 맵을 플레이하기 전에는 맵의 주요 자원 지역과 전투 가능 지역을 미리 숙지하는 것이 좋으며, 자원 관리와 병력 생산 타이밍을 잘 조절하는 것이 승리의 핵심이다. 또한, 상대의 움직임을 끊임없이 관찰하고, 전략적 후퇴와 기습 공격을 적절히 활용해야 한다. 이 맵은 우주를 배경으로 한 전략적 깊이와 긴장감을 동시에 느낄 수 있는 훌륭한 유즈맵으로, 스타크래프트의 유즈맵 커뮤니티에서 오랫동안 사랑받아 온 작품 중 하나다. StarCraft: Brood War’s space-themed custom map *Star Trek Armada II* offers a strategic battle set in the cosmos, where players compete as different factions to conquer the vast expanse of space. The map supports up to seven players, each starting from unique positions to gather resources, build armies, and destroy enemy bases. The expansive starfield demands wide vision and strategic movement, with planets, asteroids, and space stations scattered across the battlefield, making resource management and positioning as critical as combat itself. The neutral zone at the center serves as a hotspot for intense clashes, while resource tiles scattered throughout provide opportunities for extra income to sustain military expansion. Combat primarily involves fleets of starships, fighters, and ground units, with strategies varying by faction. True to its space theme, the map exudes grandeur and tactical depth, delivering high-stakes battles filled with tension. While beginners may struggle with the vast scale and complex engagements, mastering the map rewards players with an engaging journey of cosmic conquest. Before diving in, it’s wise to familiarize yourself with key resource areas and combat zones, as efficient resource allocation and timely troop production are vital to victory. Constantly monitoring opponents, executing well-timed retreats, and leveraging surprise attacks are essential tactics. Combining strategic depth with thrilling action, *Star Trek Armada II* stands as a beloved custom map in the StarCraft community, celebrated for its immersive space warfare experience.
HoLY TuG O WaR
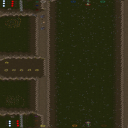
스타크래프트 브루드워의 유즈맵으로 유명한 HoLY TuG O WaR는 이름 그대로 '성스러운 줄다리기 전쟁'을 모티브로 한 흥미로운 전략 대결 맵이다. 맵 제목에서 느낄 수 있듯, 이 맵은 지옥과 천국을 상징하는 두 진영이 줄다리기를 벌이는 형식으로 진행되며,gem으로 대표되는 건물 파괴와 병력 운영을 통해 승리를 겨룬다. 맵 중앙에는 거대한 줄다리기가 그려진 구조물이 있으며, 양 진영은 이 줄을 중심으로 대칭을 이루며 배치되어 있다. 게임의 핵심은 상대방의 건물을 파괴하거나 주요 거점을 점령하는 방식으로, 단순한 줄다리기가 아니라 전략적 자원 관리와 전투력이 요구되는 구조로 설계되었다. 맵의 배경은 사막 타일셋을 활용해 넓은 평원과 절벽이 조화를 이루며, 시야 확보와 병력 기동에 영향을 주는 지형적 특징을 제공한다. 플레이어는 각자 중앙 줄다리기를 중심으로 배치된 본진 건물을 보호하면서, 상대방의 본진으로 진격하거나 주요據点을 차지해야 한다. 전투는 주로 지상 유닛 중심으로 이루어지며, 맵의 넓고 개방적인 공간에서 벌이는 대규모 교전이 특징적이다. 맵의 밸런스는Gem의 파괴와 점령을 통한 승리 조건이 명확하게 설정되어 있어, 초보자와 숙련자 모두 즐길 수 있는 난이도 조절이 предполага된다. 또한, 맵의 symmetrical 구조는 양 진영의 공정한 대결을 보장하며, 플레이어 간의 실력 차이를 좁히는 데 기여한다. 이 맵은Gem 파괴와 점령을 통한 전략적 플레이가 중요하기 때문에,gem 관리와 병력 조합에 대한 이해가 필요하다. 추천하는 플레이 방식은gem을 보호하면서 상대방의 gem을 집중 공격하거나, 주요據点을 점령하는 방식으로 승리를 노리는 것이다. 초보자의 경우gem을 지키며 천천히 확장하는 전략을, 숙련자의 경우 빠른 gem 파괴와據点 점령을 노리는 공격적인 플레이가 효과적일 것이다. 맵의 넓이와 지형적 특징을 고려할 때,gem을 파괴하거나據点을 점령하기 위한 효율적인 병력 운용과 시야 확보가 승리를 좌우할 것이다. HoLY TuG O WaR는Gem 파괴와據点 점령을 통한 전략적 대결을 즐기고 싶은 플레이어들에게 특히 추천할 만한 맵이다. symmetrical한 구조와 넓은 평원은Gem 관리와 병력 운용 능력을 시험하며,Gem 파괴와據点 점령을 통한 다양한 전략적 선택지를 제공한다.gem 파괴와據点 점령을 통한 승리 조건은gem 관리와 병력 조합에 대한 이해를 높이는 데 도움이 된다. 이 맵은Gem 파괴와據点 점령을 즐기는 플레이어들에게 최적의 선택일 것이다. 게임의 난이도는 초보자도Gem을 보호하는 기본 전략을 익히면 쉽게 접근할 수 있으며, 숙련자의 경우Gem 파괴와據点 점령을 위한 공격적인 플레이를 구사할 수 있다. gem 관리에 대한 이해와 병력 운용 능력이 이 맵의 핵심이 될 것이다. HoLY TuG O WaR is a popular custom map in StarCraft: Brood War that stands out for its unique "Holy Tug-of-War" theme, blending strategy and intense competition. As the name suggests, the map features two factions—one representing heaven and the other hell—engaged in a literal tug-of-war, where victory is determined by destroying enemy buildings (represented by gems) and securing key locations. At the center of the map lies a massive tug-of-war structure, with both sides symmetrically positioned around it. The core gameplay revolves around attacking the opponent’s buildings or capturing vital points rather than just pulling the rope. This adds depth, requiring players to manage resources and coordinate forces effectively. The map’s desert-themed tileset features vast plains and cliffs, influencing vision and unit mobility. Players must defend their base near the central rope while advancing toward the enemy’s territory or securing strategic points. Combat primarily involves ground units, with large-scale battles unfolding in the open terrain. The balanced victory conditions—destroying or capturing gems—ensure accessibility for both beginners and experienced players. The symmetrical layout guarantees fair competition, reducing the impact of skill disparities. Mastery of gem management and unit composition is crucial, as strategic play revolves around protecting your gems while aggressively targeting the opponent’s. For beginners, a defensive and expansion-focused approach works best, while advanced players thrive on rapid gem destruction and point captures. Efficient unit deployment, vision control, and terrain utilization are key to success. HoLY TuG O WaR is ideal for those seeking a strategic tug-of-war experience, offering varied tactical options through its symmetrical design and open battlefield. Whether protecting gems or seizing control, this map tests and refines your strategic and operational skills.
히어로 워즈 3.0X (Hero Wars 3.0X)
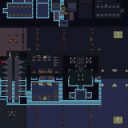
히어로 워즈 3.0X는 스타크래프트 브루드워의 대표적인 유즈맵으로, 총 6명의 플레이어가 참가하는 전략 대결 맵이다. 화산 타일셋으로 구성된 넓은 맵 중앙에는 각 플레이어의 기지가 배치되어 있으며, 시작 직후부터Resource Vespene Geyser가 주변에 배치되어 자원 확보가 용이하다. 맵의 특징은 각 플레이어의 기지 주변에 존재하는 '히어로' 유닛으로, 이 히어로를 직접 조종하거나 강화 아이템을 획득해 레벨업을 시키는 시스템에 있다. 히어로의 레벨에 따라 공격력, 체력, 스킬 등이 성장하며, 팀원과 협력해 적 기지를 파괴하거나 히어로를 보호하는 것이 주요 목표로 보인다. 맵 상단과 하단에는 중앙으로 연결되는 통로가 존재해 진영 간의 충돌이 자주 발생할 수 있으며, 중앙 지역은 넓은 평지 형태로 되어 있어 대규모 전투가 벌어질 가능성이 높다. 또한, 맵 좌우 양측에는 자원 멀티 지역이 배치되어 있어 초반 자원 확보 경쟁이 치열해질 수 있다. 히어로의 레벨업 시스템과 팀워크가 중요한 만큼, 개별 플레이어의 판단력과 협동심이 victoria point를 결정짓는 핵심 요소로 작용할 것이다. 특히, 히어로의 스킬 콤보를 얼마나 잘 활용하느냐가 승패를 가를 가능성이 크며, 초보자는 히어로의 관리와 팀원과의 소통을 우선적으로 숙지해야 한다. 게임의 진행은 주로 중반부터 본격화되며, 후반으로 갈수록 히어로의 레벨이 높아지면서 치열한 공방전이 펼쳐질 것으로 추정된다. 맵의 밸런스는 히어로의 능력치와 자원 분배에 따라 크게 좌우될 수 있으므로, 제작자의 의도대로 플레이하기 위해서는 맵 내부의 자원 배치와 히어로의 특성을 충분히 이해해야 한다. Hero Wars 3.0X is a renowned custom map for StarCraft: Brood War, designed for six players to engage in strategic battles. The map, featuring a volcanic tileset, places each player’s base at the center of the map, surrounded by Resource Vespene Geysers for easy early-game resource gathering. The core mechanic revolves around controlling or upgrading 'Hero' units, which gain experience and level up to enhance their stats and abilities. Players must strategize whether to focus on direct hero control, item acquisition, or team-based coordination to either destroy enemy bases or protect their own. The map’s design includes narrow pathways connecting the top and bottom sections to the central area, fostering frequent clashes between factions. Additionally, multi-resource nodes on the left and right sides of the map intensify early-game competition for resources. The hero-leveling system and teamwork are critical, as individual decision-making and coordination directly influence the game’s outcome. Mastery of hero skill combos and effective communication with teammates are essential, especially for beginners who should prioritize hero management and team synergy. The game intensifies in the mid-to-late stages, with high-level heroes driving fierce battles. Balance hinges on hero stats and resource distribution, so players must thoroughly understand the map’s internal mechanics to align with the creator’s intent.
스폰워즈! 파이널 (SpawnWars! FINAL!)
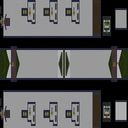
스폰워즈! 파이널은 스타크래프트 브루드워의 3:3 대전을 중심으로 설계된 UMS 유즈맵으로, 맵의 이름과 설명에서 알 수 있듯이 스폰 위치와 전투를 핵심으로 하는 팀 대전의 재미를 극대화한 작품이다. 맵의 전체적인 구조는 중앙에 넓은 평지가 펼쳐져 있으며, 양쪽 끝에는 각각 세 개의 시작 지역이 배치되어 있다. 각 팀은 본진에서 출발해 중앙 평지를 차지하거나 상대방의 본진을 공격하는 두 가지 전략을 선택할 수 있으며, 맵의 지형을 활용한 기습이나 방어가 중요한 역할을 한다. 특히 시작 지역과 중앙 평지 사이의 좁은 통로는 병력의 이동을 제약하여 전략적 깊이를 더하고, 지형을 활용한 암살이나 우회 공격이 가능하도록 디자인되어 있다. 플레이어는 초반부터 상대방의 움직임을 예측하며 자원 관리와 병력 구성을 신중히 해야 하며, 중앙 평지에서 벌어지는 소규모 접전은 맵의 승패를 좌우하는 분수령이 된다. 맵의 디자인상 방어 시에는 좁은 통로를 활용한 병력 집중이 유리하고, 공격 시에는 기동성을 살린 우회가 효과적이다. 또한, 맵의 전체 크기가 넓어 병력의 이동 시간이 길기 때문에, 초중반의 타이밍 싸움과 자원 확보가 중요하다. 스폰워즈! 파이널은 이러한 구조를 통해 팀워크와 전략적 사고를 요구하는 재미있는 대전을 제공하며, 특히 3:3이라는 팀 구성은 팀원 간의 호흡과 역할 분담이 승패를 가르는 핵심 요소로 작용한다. 이 맵은 초보 플레이어보다는 어느 정도 스타크래프트의 기본기를 습득한 유저들이 즐기기에 적합하며, 팀플레이 경험을 쌓고 싶은 유저들에게도 좋은 연습 기회가 된다. 또한, 맵의 디자인상 지형을 활용한 전략적 플레이가 중요하므로, 단순히 병력을 모아 밀어붙이는 것보다도 맵의 특징을 잘 이해하고 활용하는 것이 중요하다. 스폰워즈! 파이널은 이러한 점에서 다소 어렵게 느껴질 수 있지만, 그만큼 전략적 깊이가 있는 맵으로 평가된다. 이 맵을 플레이하기 전에는 팀원과의 원활한 소통이 필수이며, 각자의 역할을 명확히 분담하는 것이 중요하다. 또한, 맵의 지형을 미리 숙지하고, 상대방의 움직임을 예측하며 자원과 병력을 효율적으로 관리하는 연습을 해야 한다. 이러한 준비가 뒷받침될 때, 스폰워즈! 파이널은 팀원들과의 호흡을 맞추며 즐길 수 있는 훌륭한 유즈맵이다. SpawnWars! FINAL! is a UMS custom map in StarCraft: Brood War designed around 3vs3 battles, focusing on spawn positions and combat as core mechanics. The map features a wide central plain with three starting bases on each side, allowing teams to either control the center or launch direct assaults on the enemy’s main base. The narrow passages between starting areas and the central plain add strategic depth by forcing players to either commit forces early or execute flanking maneuvers. Players must balance resource management and unit composition from the start, as early engagements in the central area often determine the flow of the game. Defensively, controlling choke points is crucial, while offensively, mobility and outmaneuvering opponents through side routes can be decisive. The map’s large scale means timing and resource control are vital, making early to mid-game skirmishes pivotal for victory. SpawnWars! FINAL! is best suited for players with a solid grasp of StarCraft fundamentals, as teamwork and strategic planning are essential. The map rewards players who understand and utilize the terrain effectively, rather than relying solely on brute force. While it may pose a challenge for beginners, its depth makes it a rewarding experience for those looking to refine their team-based strategies. Effective communication and clear role assignment among teammates are critical, and pre-match preparation—such as studying the terrain and predicting enemy movements—greatly enhances the enjoyment of this map.
최근 등록된 맵
새로 추가된 파일과 버전을 확인하세요.
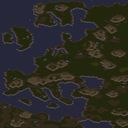
세계대전 III (WWIII Version 1.0)
‘WWIII Version 1.0’은Axis와 Allies 진영의 대결을 중심으로 펼쳐지는 8인용 스타크래프트 브루드워 유즈맵으로, 자유경쟁(FFA)과 팀전(FoW) 모드를 모두 지원하는 전략 대결형 맵이다. 맵의 전체적인 분위기는 제2차 세계대전을 배경으로 한 전쟁 시뮬레이션을 연상시키며, 사막 타일셋으로 구성된 넓은 평야에서Resources와 건물을 확보하며 세력을 확장하는 플레이가 핵심이다. 내부 설명에 따르면 ‘WORLD POWER’를 차지하기 위한 선택지가 주어지며, 플레이어는 자신의 전략적 판단에 따라 동맹을 맺거나 단독으로 승리를 노릴 수 있다. 맵의 구조는 중앙에 위치한 ‘자원 지역’이 균등하게 배치되어 있으며, 각 플레이어는 시작 지점에서 가까운 자원 지역을 확보한 후 본진으로 귀환해 본격적인 확장 플레이를 시작한다.Resources는 주로 미네랄과 가스로 구성되며, 이를 바탕으로 유닛 생산과 방어 시설 구축이 이루어진다. 특히 방어 시설의 경우, 적의 공격을 방어하기 위한 요충지인 ‘전략적 거점’이 맵 여기저기에 배치되어 있으며, 이를 두고 일어나는 공격과 방어의 공방전이 게임의 백미를 이룬다. 또한, 맵 곳곳에는 ‘보급로’라는 보너스 자원이 존재하는데, 이를 확보하면 일시적인 생산 능력 향상이나 유닛 강화와 같은 혜택을 받을 수 있다. 플레이 방식은 크게 두 가지로 나뉜다. 첫 번째는 ‘자유경쟁(FFA) 모드’로, 모든 플레이어가 서로 경쟁하며 승리를 차지하는 방식이다. 두 번째는 ‘팀전(FoW) 모드’로, 2~4개의 팀으로 나뉘어 동맹을 맺고 상대 팀을 상대로 전투를 벌이는 방식이다. 팀전 모드에서는 동맹 간의 협력이 필수적이며, 팀원 간의 전략적 조율과 분배가 승패를 좌우한다. 맵의 특성상 ‘랜덤한 초기 위치 배치’와 ‘균등한 자원 분배’를 바탕으로 누구나 경쟁력을 가질 수 있도록 설계되어 있지만, 초반 자원 확보와 전략적 거점 점령이 승패를 가르는 주요 요소가 된다. 이 맵을 추천하는 대상은 우선 ‘전략적 대결’을 선호하는 플레이어다. 특히 스타크래프트의 기본적인 빌드 오더와 유닛 운용 능력을 바탕으로 승리를 쟁취하고자 하는 플레이어에게 적합하다. 또한, 팀전에 참여하고자 하는 경우, 팀원 간의 호흡과 전략적 의사소통이 중요한 만큼, 팀플레이 경험이 있는 플레이어에게도 추천할 만하다. 반면, 빠른 템포의 액션이나 단순 반복 플레이를 선호하는 플레이어는 다소 지루하게 느낄 수 있으며, 초보자라면 맵의 구조와 승리 조건을 충분히 숙지한 후 플레이하는 것이 좋다. 맵의 난이도는 ‘보통’ 수준으로 평가되지만, 초반 자원 관리와 거점 점령 타이밍에 따라 승패가 급격히 뒤집힐 수 있으므로, 신중한 플레이가 요구된다. ‘WWIII Version 1.0’을 플레이하기 전에는 반드시 맵의 초기 배치와 Resources의 위치를 숙지해야 한다. 또한, 승리 조건이 ‘상대방을 전멸시키는 것’이라는 점을 고려하여, 방어 시설과 유닛 생산 라인을 적절히 관리해야 한다. Resources 확보와 거점 점령의 균형을 맞추는 것이 이 맵의 핵심 전략이므로, 초반Resources 확보에 실패하면 게임을 뒤집기 어려운 구조로 되어 있음을 명심해야 한다. 마지막으로, 팀전 모드를 플레이할 경우, 팀원 간의 역할 분담을 미리 정해두고 플레이하는 것이 좋다. ‘WWIII Version 1.0’ is a StarCraft: Brood War custom map for eight players that centers on a conflict between the Axis and Allies factions. It supports both Free-for-All (FFA) and team-based Fog of War (FoW) modes, making it a strategic battle-type map. The overall feel of the map evokes a World War II-style war simulation, set on a vast desert tile with wide plains where players secure resources and expand their bases. According to the in-game description, players are given choices to seize “WORLD POWER,” allowing them to form alliances or pursue victory alone based on their strategic judgment. The map features a central distribution of resource areas, with each player starting close to one. After claiming nearby resources, players return to their main bases to begin expanding. Resources consist mainly of minerals and vespene gas, which fuel unit production and the construction of defensive structures. Key defensive positions called “strategic strongpoints” are scattered across the map, and the clashes over these locations form the highlights of the game. Scattered throughout the map are also “supply routes,” bonus resources that grant temporary production boosts or unit enhancements when secured. There are two main play modes. In Free-for-All (FFA), all players compete directly for victory. In Fog of War (FoW) team mode, players split into teams of two to four, forming alliances and fighting against opposing teams. Team play requires cooperation, with strategy, coordination, and role distribution among teammates often deciding the outcome. Designed with random starting positions and balanced resource distribution, the map ensures competitive fairness, though early resource control and securing strategic strongpoints remain the primary factors in determining victory. This map is recommended for players who enjoy strategic battles, especially those looking to win through solid build orders and unit management. It’s also a good fit for those interested in team play, as success relies heavily on teamwork and communication—making prior team experience beneficial. On the other hand, players who prefer fast-paced action or repetitive play may find it slow, and beginners should familiarize themselves with the map layout and victory conditions before jumping in. Though rated as moderate in difficulty, the game can shift rapidly depending on early resource management and strongpoint timing, so careful play is essential. Before playing ‘WWIII Version 1.0,’ it’s crucial to learn the starting positions and resource locations. Since victory hinges on eliminating opponents, managing defensive structures and production lines is key. Balancing resource collection with strongpoint control is the core strategy—failing to secure early resources can make comebacks extremely difficult. When playing in team mode, it’s wise to prearrange team roles and responsibilities for smoother coordination.
프로게이머 테란vs플토 공평 (Pro-Gamer Terran vs Protoss Fair)
‘프로게이머 테란vs플토 공평’은 스타크래프트 브루드워의 UMS(유즈맵) 장르로, 프로게이머의 특징을 활용한 전략 대결을 펼치는 맵입니다. 8명의 플레이어가 참전하는 이 맵은 테란과 프로토스의 프로게이머를 각각 선택해 대결할 수 있도록 설계되어 있습니다. 내부 설명에서도 알 수 있듯이 ‘프로게이머의 특징을 이용’하라는 목표가 강조되며, 단순히 유닛을 모아 싸우는 것이 아니라 각 종족의 특징을 살린 플레이가 요구됩니다. 화면은 사막 타일셋으로 구성되어 있으며, 넓은 평야가 펼쳐져 있어 대규모 전투가 벌어질 가능성이 높은 구조입니다. 맵의 중앙부는 비교적 평탄한 지형이지만, 곳곳에 언덕이나 건물이 배치되어 있어 전략적 포지셔닝이 중요한 요소로 작용할 것으로 보입니다. 8명의 플레이어가 한정된 공간에서 경쟁을 벌이는 만큼, 초반 자원 수급과 병력 구성 타이밍이 승패를 좌우할 가능성이 큽니다. 또한, 프로게이머의 특징을 살린 플레이가 요구된다는 점에서, 단순히 강력한 유닛을 뽑는 것이 아니라 각 종족의 특화 전략을 구사해야 합니다. 예를 들어 테란의 경우 시즈 탱크와 벌처를 조합한 방어 및 기동전, 프로토스의 경우 질럿과 드라군 위주의 중거리 전투가 유효할 것입니다. 맵을 플레이하기 전에 각 종족의 프로게이머 스타일을 분석하고, 그에 맞는 전략을 준비하는 것이 중요합니다. 특히, 넓은 맵에서 벌어지는 전투에서는 시야 확보와 정찰이 필수적이며, 자원 관리와 테크 트리의 속도를 조절하는 것이 승리의 열쇠가 될 것입니다. 이 맵은 프로게이머의 전략적 감각을 시험하는 동시에, 넓은 공간을 활용한 전투에서 승부를 가르는 재미가 있는 유즈맵입니다. 초보자보다는 중급 이상의 플레이어에게 적합하며, 특히 각 종족의 특성을 잘 이해하고 있는 플레이어에게 추천할 만합니다. 넓은 맵에서 벌어지는 대규모 전투를 즐기고자 하는 플레이어라면, 이 맵에서 자신의 전략적 역량을 발휘해 보세요. This UMS (User-Made Scenario) map, '프로게이머 테란vs플토 공평' (Pro-Gamer Terran vs Protoss Fair), delivers a strategic showdown where players choose between Terran and Protoss pro-gamer styles. Designed for 8 players, the map emphasizes utilizing the unique characteristics of each race as outlined in its internal description—'utilize the pro-gamer's traits to secure victory.' The desert tile set creates an expansive battlefield with a mix of flat terrain and strategic high ground structures, forcing players to engage in careful positioning and tactical planning. Given the limited space for 8 players, early resource management and troop composition timing are critical factors in determining the outcome. Players are expected to adopt specialized strategies tailored to their chosen race; Terran players might focus on siege tanks and vultures for defensive maneuvers and mobility, while Protoss players could leverage zealots and dragoons for mid-range combat. Before diving into the match, analyzing the playstyles of pro-gamers for each race and preparing corresponding strategies is essential. Wide-field combat demands strong scouting and vision control, with efficient resource management and tech tree progression serving as key determinants of success. This map offers a thrilling experience for players seeking strategic depth and large-scale battles, making it particularly suitable for intermediate to advanced players. If you enjoy testing your tactical prowess in expansive arenas, this map provides the perfect platform to showcase your skills against others.
스타 트렉 아마다 II (Star Trek Armada II)
스타크래프트 브루드워의 우주 테마 유즈맵 ‘스타 트렉 아마다 II’는 우주를 배경으로 한 전략 대전을 즐길 수 있는 맵으로, 플레이어는 각각의 세력으로 우주 공간을 정복하기 위해 전투를 벌인다. 이 맵은 7명의 플레이어가 참여할 수 있으며, 각 플레이어는 고유한 시작 지점에서 출발해 자원을 확보하고 병력을 생산하며, 상대의 기지를 파괴하는 것이 주요 목표가 된다. 우주 공간의 광활한 맵은 넓은 시야와 전략적 움직임을 요구하며, 행성과 소행성, 우주 정거장 등이 배치되어 있어 전투뿐만 아니라 자원 관리와 위치 선정이 중요하다. 맵 중앙에는 중립 지역이 펼쳐져 있어 각 플레이어의 전투가 격렬해질 수 있는 요충지가 된다. 또한, 맵 곳곳에 배치된 자원 타일은 추가 자원을 확보할 수 있는 기회를 제공하며, 이를 활용해 병력을 지속적으로 확장할 수 있다. 전투는 주로 우주 함선과 전투기, 지상 병력이 조합된 형태로 이루어지며, 각 세력의 특성에 따라 전략이 달라질 수 있다. 우주 테마답게 맵의 분위기는 장대하고 전략적이며, 긴장감 넘치는 전투를 즐길 수 있다. 초보자는 넓은 맵과 복잡한 전투에 어려움을 느낄 수 있지만, 적응하면 우주 정복을 위한 흥미로운 여정을 경험할 수 있다. 이 맵을 플레이하기 전에는 맵의 주요 자원 지역과 전투 가능 지역을 미리 숙지하는 것이 좋으며, 자원 관리와 병력 생산 타이밍을 잘 조절하는 것이 승리의 핵심이다. 또한, 상대의 움직임을 끊임없이 관찰하고, 전략적 후퇴와 기습 공격을 적절히 활용해야 한다. 이 맵은 우주를 배경으로 한 전략적 깊이와 긴장감을 동시에 느낄 수 있는 훌륭한 유즈맵으로, 스타크래프트의 유즈맵 커뮤니티에서 오랫동안 사랑받아 온 작품 중 하나다. StarCraft: Brood War’s space-themed custom map *Star Trek Armada II* offers a strategic battle set in the cosmos, where players compete as different factions to conquer the vast expanse of space. The map supports up to seven players, each starting from unique positions to gather resources, build armies, and destroy enemy bases. The expansive starfield demands wide vision and strategic movement, with planets, asteroids, and space stations scattered across the battlefield, making resource management and positioning as critical as combat itself. The neutral zone at the center serves as a hotspot for intense clashes, while resource tiles scattered throughout provide opportunities for extra income to sustain military expansion. Combat primarily involves fleets of starships, fighters, and ground units, with strategies varying by faction. True to its space theme, the map exudes grandeur and tactical depth, delivering high-stakes battles filled with tension. While beginners may struggle with the vast scale and complex engagements, mastering the map rewards players with an engaging journey of cosmic conquest. Before diving in, it’s wise to familiarize yourself with key resource areas and combat zones, as efficient resource allocation and timely troop production are vital to victory. Constantly monitoring opponents, executing well-timed retreats, and leveraging surprise attacks are essential tactics. Combining strategic depth with thrilling action, *Star Trek Armada II* stands as a beloved custom map in the StarCraft community, celebrated for its immersive space warfare experience.
스폰워즈! 파이널 (SpawnWars! FINAL!)
스폰워즈! 파이널은 스타크래프트 브루드워의 3:3 대전을 중심으로 설계된 UMS 유즈맵으로, 맵의 이름과 설명에서 알 수 있듯이 스폰 위치와 전투를 핵심으로 하는 팀 대전의 재미를 극대화한 작품이다. 맵의 전체적인 구조는 중앙에 넓은 평지가 펼쳐져 있으며, 양쪽 끝에는 각각 세 개의 시작 지역이 배치되어 있다. 각 팀은 본진에서 출발해 중앙 평지를 차지하거나 상대방의 본진을 공격하는 두 가지 전략을 선택할 수 있으며, 맵의 지형을 활용한 기습이나 방어가 중요한 역할을 한다. 특히 시작 지역과 중앙 평지 사이의 좁은 통로는 병력의 이동을 제약하여 전략적 깊이를 더하고, 지형을 활용한 암살이나 우회 공격이 가능하도록 디자인되어 있다. 플레이어는 초반부터 상대방의 움직임을 예측하며 자원 관리와 병력 구성을 신중히 해야 하며, 중앙 평지에서 벌어지는 소규모 접전은 맵의 승패를 좌우하는 분수령이 된다. 맵의 디자인상 방어 시에는 좁은 통로를 활용한 병력 집중이 유리하고, 공격 시에는 기동성을 살린 우회가 효과적이다. 또한, 맵의 전체 크기가 넓어 병력의 이동 시간이 길기 때문에, 초중반의 타이밍 싸움과 자원 확보가 중요하다. 스폰워즈! 파이널은 이러한 구조를 통해 팀워크와 전략적 사고를 요구하는 재미있는 대전을 제공하며, 특히 3:3이라는 팀 구성은 팀원 간의 호흡과 역할 분담이 승패를 가르는 핵심 요소로 작용한다. 이 맵은 초보 플레이어보다는 어느 정도 스타크래프트의 기본기를 습득한 유저들이 즐기기에 적합하며, 팀플레이 경험을 쌓고 싶은 유저들에게도 좋은 연습 기회가 된다. 또한, 맵의 디자인상 지형을 활용한 전략적 플레이가 중요하므로, 단순히 병력을 모아 밀어붙이는 것보다도 맵의 특징을 잘 이해하고 활용하는 것이 중요하다. 스폰워즈! 파이널은 이러한 점에서 다소 어렵게 느껴질 수 있지만, 그만큼 전략적 깊이가 있는 맵으로 평가된다. 이 맵을 플레이하기 전에는 팀원과의 원활한 소통이 필수이며, 각자의 역할을 명확히 분담하는 것이 중요하다. 또한, 맵의 지형을 미리 숙지하고, 상대방의 움직임을 예측하며 자원과 병력을 효율적으로 관리하는 연습을 해야 한다. 이러한 준비가 뒷받침될 때, 스폰워즈! 파이널은 팀원들과의 호흡을 맞추며 즐길 수 있는 훌륭한 유즈맵이다. SpawnWars! FINAL! is a UMS custom map in StarCraft: Brood War designed around 3vs3 battles, focusing on spawn positions and combat as core mechanics. The map features a wide central plain with three starting bases on each side, allowing teams to either control the center or launch direct assaults on the enemy’s main base. The narrow passages between starting areas and the central plain add strategic depth by forcing players to either commit forces early or execute flanking maneuvers. Players must balance resource management and unit composition from the start, as early engagements in the central area often determine the flow of the game. Defensively, controlling choke points is crucial, while offensively, mobility and outmaneuvering opponents through side routes can be decisive. The map’s large scale means timing and resource control are vital, making early to mid-game skirmishes pivotal for victory. SpawnWars! FINAL! is best suited for players with a solid grasp of StarCraft fundamentals, as teamwork and strategic planning are essential. The map rewards players who understand and utilize the terrain effectively, rather than relying solely on brute force. While it may pose a challenge for beginners, its depth makes it a rewarding experience for those looking to refine their team-based strategies. Effective communication and clear role assignment among teammates are critical, and pre-match preparation—such as studying the terrain and predicting enemy movements—greatly enhances the enjoyment of this map.
개인넥서스부수기 플러스1.1 (Individual Nexus Destruction Plus 1.1)
‘개인넥서스부수기 플러스1.1’은 스타크래프트 브루드워의 인기 UMS 유즈맵 시리즈 중 하나로, 8명의 플레이어가 각각의 넥서스를 방어하면서 상대방의 건물을 파괴하는 전략 대결을 펼치는 맵이다. 맵은 사막 타일셋을 기반으로 제작되었으며, 넓은 평지 위에 각 플레이어의 기지가 배치되어 있다. 맵 중앙에는 중립 건물이 배치되어 있어 자원 확보와 방어 전략을 동시에 고려해야 한다. 영웅 유닛이 추가되어 전술의 다양성을 높였고, 물량 유닛들의 비중이 높아져 대규모 전투가 자주 발생한다. 특히 리버의 스캐럽이 다수 배치되어 있어, 이를 적절히 활용하는 플레이어가 승리의 열쇠를 잡을 수 있다. 맵의 난이도는 주로 플레이어의 조합과 컨트롤에 따라 달라지며, 빌드 오더와 맵리딩 능력이 중요한 요소로 작용한다. 초보자의 경우 기본적인 빌드와 방어 전략을 숙지한 후 도전하는 것이 좋으며, 숙련자의 경우 영웅의 스킬과 유닛 조합을 최적화하여 상대방을 압박하는 전략을 구사할 수 있다. 맵의 인기는 대규모 전투와 영웅 시스템의 조화에서 비롯되며, 플레이어 간의 심리戦이 승패를 좌우하는 경우가 많다. 맵을 플레이하기 전에는 각 플레이어의 시작 위치와 중앙 자원 분포를 숙지하고, 영웅의 스킬과 유닛의 상성을 미리 확인해 두는 것이 좋다. 또한, 리버의 스캐럽 채우기 버그 수정 사항이 반영되어 있어 안정적인 플레이가 가능하다는 점도 특징이다. 이 맵은 팀플레이보다는 개인전 위주의 플레이가 강제되며, 각 플레이어의 빌드와 전략이 승패를 좌우하는 만큼, 끊임없는 연습과 연구가 필요한 작품이다. 특히 초보자가 도전할 때는 상대방의 빌드에 대응할 수 있는 기본기를 먼저 다지는 것이 중요하다. 맵의 재플레이 가치는 높은 편으로, 다양한 전략과 빌드를 시도해 볼 수 있어 매번 다른 플레이 경험을 제공한다. UMS 유즈맵의 특징상 맵 제작자의 의도와는 다르게 플레이어 간의 협력과 배신이 동시에 발생할 수 있어, 순수한 전략 대결을 즐기고자 하는 플레이어에게 추천할 만한 작품이다. 맵의 평가는 주로 플레이어의 실력과 전략에 따라 달라지므로, 자신의 실력에 맞는 난이도를 선택하여 즐기는 것이 좋다. 맵의 밸런스는 제작자의 지속적인 수정과 피드백을 통해 점차 개선되고 있으며, comunidad 내에서도 꾸준한 인기를 누리고 있는 작품이다. ‘Personal Nexus Destruction Plus 1.1’ is a popular UMS custom map in *StarCraft: Brood War*, where eight players defend their own Nexuses while destroying their opponents’ buildings in a strategic battle. The map is set on a desert tileset, with each player’s base positioned across a vast plain. Neutral buildings are placed in the center, requiring players to balance resource gathering with defensive tactics. The addition of hero units enhances tactical variety, while the increased presence of swarm units leads to frequent large-scale battles. Notably, the map features numerous Reaver Scarabs, making their effective use a key factor in securing victory. Difficulty primarily depends on player coordination and micro-management, with build orders and map awareness playing crucial roles. Beginners should familiarize themselves with basic builds and defensive strategies before attempting the map, while experienced players can optimize hero skills and unit compositions to pressure opponents. The map’s popularity stems from its blend of large-scale combat and the hero system, often making psychological warfare a decisive factor in matches. Before playing, it’s advisable to study each player’s starting positions and the distribution of central resources, as well as to review hero skills and unit matchups. The map also includes fixes for Reaver Scarab bugs, ensuring stable gameplay. While the focus is on individual play rather than teamwork, each player’s build and strategy directly influence the outcome, making constant practice and experimentation essential. Beginners should prioritize mastering basic counters to common builds before diving deeper. With high replay value, the map offers diverse strategies and builds, delivering unique experiences in each match. As a UMS custom map, unexpected cooperation or betrayal among players can occur, making it ideal for those seeking pure strategic battles. Ratings vary based on player skill and strategy, so choosing a difficulty suited to your level is recommended. The map’s balance continues to improve through the creator’s updates and community feedback, maintaining its steady popularity.
히어로 워즈 3.0X (Hero Wars 3.0X)
히어로 워즈 3.0X는 스타크래프트 브루드워의 대표적인 유즈맵으로, 총 6명의 플레이어가 참가하는 전략 대결 맵이다. 화산 타일셋으로 구성된 넓은 맵 중앙에는 각 플레이어의 기지가 배치되어 있으며, 시작 직후부터Resource Vespene Geyser가 주변에 배치되어 자원 확보가 용이하다. 맵의 특징은 각 플레이어의 기지 주변에 존재하는 '히어로' 유닛으로, 이 히어로를 직접 조종하거나 강화 아이템을 획득해 레벨업을 시키는 시스템에 있다. 히어로의 레벨에 따라 공격력, 체력, 스킬 등이 성장하며, 팀원과 협력해 적 기지를 파괴하거나 히어로를 보호하는 것이 주요 목표로 보인다. 맵 상단과 하단에는 중앙으로 연결되는 통로가 존재해 진영 간의 충돌이 자주 발생할 수 있으며, 중앙 지역은 넓은 평지 형태로 되어 있어 대규모 전투가 벌어질 가능성이 높다. 또한, 맵 좌우 양측에는 자원 멀티 지역이 배치되어 있어 초반 자원 확보 경쟁이 치열해질 수 있다. 히어로의 레벨업 시스템과 팀워크가 중요한 만큼, 개별 플레이어의 판단력과 협동심이 victoria point를 결정짓는 핵심 요소로 작용할 것이다. 특히, 히어로의 스킬 콤보를 얼마나 잘 활용하느냐가 승패를 가를 가능성이 크며, 초보자는 히어로의 관리와 팀원과의 소통을 우선적으로 숙지해야 한다. 게임의 진행은 주로 중반부터 본격화되며, 후반으로 갈수록 히어로의 레벨이 높아지면서 치열한 공방전이 펼쳐질 것으로 추정된다. 맵의 밸런스는 히어로의 능력치와 자원 분배에 따라 크게 좌우될 수 있으므로, 제작자의 의도대로 플레이하기 위해서는 맵 내부의 자원 배치와 히어로의 특성을 충분히 이해해야 한다. Hero Wars 3.0X is a renowned custom map for StarCraft: Brood War, designed for six players to engage in strategic battles. The map, featuring a volcanic tileset, places each player’s base at the center of the map, surrounded by Resource Vespene Geysers for easy early-game resource gathering. The core mechanic revolves around controlling or upgrading 'Hero' units, which gain experience and level up to enhance their stats and abilities. Players must strategize whether to focus on direct hero control, item acquisition, or team-based coordination to either destroy enemy bases or protect their own. The map’s design includes narrow pathways connecting the top and bottom sections to the central area, fostering frequent clashes between factions. Additionally, multi-resource nodes on the left and right sides of the map intensify early-game competition for resources. The hero-leveling system and teamwork are critical, as individual decision-making and coordination directly influence the game’s outcome. Mastery of hero skill combos and effective communication with teammates are essential, especially for beginners who should prioritize hero management and team synergy. The game intensifies in the mid-to-late stages, with high-level heroes driving fierce battles. Balance hinges on hero stats and resource distribution, so players must thoroughly understand the map’s internal mechanics to align with the creator’s intent.
HoLY TuG O WaR
스타크래프트 브루드워의 유즈맵으로 유명한 HoLY TuG O WaR는 이름 그대로 '성스러운 줄다리기 전쟁'을 모티브로 한 흥미로운 전략 대결 맵이다. 맵 제목에서 느낄 수 있듯, 이 맵은 지옥과 천국을 상징하는 두 진영이 줄다리기를 벌이는 형식으로 진행되며,gem으로 대표되는 건물 파괴와 병력 운영을 통해 승리를 겨룬다. 맵 중앙에는 거대한 줄다리기가 그려진 구조물이 있으며, 양 진영은 이 줄을 중심으로 대칭을 이루며 배치되어 있다. 게임의 핵심은 상대방의 건물을 파괴하거나 주요 거점을 점령하는 방식으로, 단순한 줄다리기가 아니라 전략적 자원 관리와 전투력이 요구되는 구조로 설계되었다. 맵의 배경은 사막 타일셋을 활용해 넓은 평원과 절벽이 조화를 이루며, 시야 확보와 병력 기동에 영향을 주는 지형적 특징을 제공한다. 플레이어는 각자 중앙 줄다리기를 중심으로 배치된 본진 건물을 보호하면서, 상대방의 본진으로 진격하거나 주요據点을 차지해야 한다. 전투는 주로 지상 유닛 중심으로 이루어지며, 맵의 넓고 개방적인 공간에서 벌이는 대규모 교전이 특징적이다. 맵의 밸런스는Gem의 파괴와 점령을 통한 승리 조건이 명확하게 설정되어 있어, 초보자와 숙련자 모두 즐길 수 있는 난이도 조절이 предполага된다. 또한, 맵의 symmetrical 구조는 양 진영의 공정한 대결을 보장하며, 플레이어 간의 실력 차이를 좁히는 데 기여한다. 이 맵은Gem 파괴와 점령을 통한 전략적 플레이가 중요하기 때문에,gem 관리와 병력 조합에 대한 이해가 필요하다. 추천하는 플레이 방식은gem을 보호하면서 상대방의 gem을 집중 공격하거나, 주요據点을 점령하는 방식으로 승리를 노리는 것이다. 초보자의 경우gem을 지키며 천천히 확장하는 전략을, 숙련자의 경우 빠른 gem 파괴와據点 점령을 노리는 공격적인 플레이가 효과적일 것이다. 맵의 넓이와 지형적 특징을 고려할 때,gem을 파괴하거나據点을 점령하기 위한 효율적인 병력 운용과 시야 확보가 승리를 좌우할 것이다. HoLY TuG O WaR는Gem 파괴와據点 점령을 통한 전략적 대결을 즐기고 싶은 플레이어들에게 특히 추천할 만한 맵이다. symmetrical한 구조와 넓은 평원은Gem 관리와 병력 운용 능력을 시험하며,Gem 파괴와據点 점령을 통한 다양한 전략적 선택지를 제공한다.gem 파괴와據点 점령을 통한 승리 조건은gem 관리와 병력 조합에 대한 이해를 높이는 데 도움이 된다. 이 맵은Gem 파괴와據点 점령을 즐기는 플레이어들에게 최적의 선택일 것이다. 게임의 난이도는 초보자도Gem을 보호하는 기본 전략을 익히면 쉽게 접근할 수 있으며, 숙련자의 경우Gem 파괴와據点 점령을 위한 공격적인 플레이를 구사할 수 있다. gem 관리에 대한 이해와 병력 운용 능력이 이 맵의 핵심이 될 것이다. HoLY TuG O WaR is a popular custom map in StarCraft: Brood War that stands out for its unique "Holy Tug-of-War" theme, blending strategy and intense competition. As the name suggests, the map features two factions—one representing heaven and the other hell—engaged in a literal tug-of-war, where victory is determined by destroying enemy buildings (represented by gems) and securing key locations. At the center of the map lies a massive tug-of-war structure, with both sides symmetrically positioned around it. The core gameplay revolves around attacking the opponent’s buildings or capturing vital points rather than just pulling the rope. This adds depth, requiring players to manage resources and coordinate forces effectively. The map’s desert-themed tileset features vast plains and cliffs, influencing vision and unit mobility. Players must defend their base near the central rope while advancing toward the enemy’s territory or securing strategic points. Combat primarily involves ground units, with large-scale battles unfolding in the open terrain. The balanced victory conditions—destroying or capturing gems—ensure accessibility for both beginners and experienced players. The symmetrical layout guarantees fair competition, reducing the impact of skill disparities. Mastery of gem management and unit composition is crucial, as strategic play revolves around protecting your gems while aggressively targeting the opponent’s. For beginners, a defensive and expansion-focused approach works best, while advanced players thrive on rapid gem destruction and point captures. Efficient unit deployment, vision control, and terrain utilization are key to success. HoLY TuG O WaR is ideal for those seeking a strategic tug-of-war experience, offering varied tactical options through its symmetrical design and open battlefield. Whether protecting gems or seizing control, this map tests and refines your strategic and operational skills.
시나리오 상스 놈 (Scenario Sans Nom)
〈시나리오 상스 놈〉은 스타크래프트 브루드워의 밀리 맵으로, 네 명의 플레이어가 각자 넥서스를 건설한 후 적의 건물을 모두 파괴하는 것이 목표인 전략 대결 맵이다. 맵의 이름인 ‘상스 놈(Scenario Sans Nom)’은 프랑스어로 ‘이름 없는 시나리오’라는 뜻으로, 단순한 yet 치열한 전투를 강조하는 듯하다. 황무지 타일셋을 기반으로 한 넓은 평야에서 펼쳐지는 전투는 맵의 중앙을 가로지르는 강과 잔디밭이 특징적이다. 강은 시야를 가리며 자원 수급을 방해하는 요소로 작용할 수 있어, 플레이어는Resource Location을 carefully 선택해야 한다. 초반 자원 확보와 진출 타이밍이 승부를 가르는 핵심 포인트이며, 좁은 길목에서는 소수 병력이라도 전략적 우위를 점할 수 있는 구조로 설계되어 있다. 특히, 맵의 symmetrical design은 모든 플레이어에게 동일한 조건을 제공하여, 실력과 전략의 차이를 극명하게 드러낸다. 초보자에게는 자원 채취와 병력 생산의 균형 잡기가 쉽지 않지만, 적절한 타이밍에 적의 넥서스에 공격을 감행하는 ‘러시’ 전략이 효과적일 수 있다. 반면 숙련자들에게는 미세한 컨트롤과 멀티태스킹이 요구되는 맵으로,Resource Location 관리와 정찰을 통한 상대의 전략 예측이 필수적이다. 맵의 symmetrical design 덕분에 누구나 동일한 기회를 가질 수 있지만, 중앙 강을 사이에 둔 전투는 예측 불가능한 변수를 만들어낸다. 이 맵은 밀리 초보자와 숙련자 모두에게 흥미로운 도전 과제를 제공하며, 특히 ‘Destruction Victory’를 목표로 하는 플레이어들에게 강력히 추천할 만하다. 플레이 전에는Resource Location의 위치와 강의 흐름을 먼저 숙지하고, 초반 병력 생산 라인을 최대한 효율적으로 배치하는 것이 중요하다. 또한, 시야 확보와 정찰의 중요성을 잊지 말아야 한다. 맵의 symmetrical design 덕분에 어떤 플레이어도 불리한 입장에 놓이지 않지만, 반대로 말하면 실수 하나가 승리를 좌우할 수 있는 치열한 전투가 펼쳐질 수 있음을 염두에 둬야 한다. Scenario Sans Nom is a StarCraft: Brood War melee map designed for four players, where the objective is to destroy all enemy buildings after establishing your own Nexus. The map’s name, "Scenario Sans Nom" (French for "Nameless Scenario"), hints at its straightforward yet intense battle-focused design. Set on a barren terrain tile, the expansive battlefield features a central river and patches of grass, adding strategic depth. The river obstructs vision and complicates resource gathering, forcing players to carefully select their starting locations. Early-game resource management and timing are crucial, as narrow pathways allow smaller forces to gain a tactical edge. The symmetrical layout ensures all players start on equal footing, emphasizing the importance of skill and strategy. For beginners, balancing resource collection and unit production can be challenging, but a well-timed rush attack on the enemy Nexus can be effective. Advanced players will appreciate the map’s demand for precise micro-management and multitasking, where efficient resource management and scouting are essential. The symmetrical design levels the playing field, but the central river introduces unpredictable variables in combat. This map offers a compelling challenge for both beginners and veterans, particularly those aiming for a "Destruction Victory." Before playing, familiarize yourself with the starting locations and river flow, prioritize efficient early-game unit production, and never underestimate the value of vision control and scouting. While the symmetrical design prevents any player from being at a disadvantage, a single mistake can swing the tide of battle in this high-stakes melee experience.
맵 선택 가이드
태그는 맵의 핵심 특징을 빠르게 설명하지만 제작 버전마다 규칙이 다를 수 있습니다. 상세 설명에서 권장 인원, 난이도, 플레이 시간과 버전을 함께 확인한 뒤 다운로드하세요.