
전략 게임 스타크래프트 맵 모음
'전략 게임' 태그가 등록된 맵을 모았습니다. 장르 하나로 찾기 어려운 플레이 방식, 난이도와 특징을 중심으로 인기 맵과 최신 맵을 비교해 보세요.
- 등록 맵
- 44개
- 누적 다운로드
- 0
- 누적 조회
- 1,672
인기 맵
다운로드와 조회 반응이 높은 맵입니다.
9999 랜덤 유닛 40픽 (9999 RANDOM Unit 40 Pick)
스타크래프트 브루드워의 유즈맵 중 하나로, ‘9999 RANDOM Unit 40 Pick’이라는 제목에서 알 수 있듯이 무작위로 40종의 서로 다른 유닛을 선택하여 플레이하는 형식의 맵이다. 맵 제목에 포함된 ‘RANDOM’과 ‘Pick’이라는 단어는 무작위 선택과 전략적 선택의 중요성을 강조하며, ‘40’의 숫자는 제공되는 다양한 유닛 풀을 나타낸다. 내부 설명에 따르면, 맵 제작자는 BroodWarDerigged by Mr.Kirbycode774이며, ‘Derigged’라는 단어는 맵의 밸런스나 기능을 조정했다는 의미를 내포하고 있어, 단순히 무작위 선택뿐만 아니라 플레이어의 전략적 판단이 필요한 구조로 제작되었음을 추측할 수 있다. 이 맵의 핵심은 무작위로 제공되는 40종의 유닛을 어떻게 활용하느냐에 있다. 플레이어는 시작과 동시에 무작위로 선택된 유닛을 받아 사용하게 되며, 각 유닛의 특성과 조합을 고려하여 전투를 진행해야 한다. 맵의 배경은 평지 형태로 구성되어 있으며, 몇몇 장애물이나 지형적 특징이 존재할 수 있지만, 전체적인 맵 구조는 비교적 단순하여 유닛의 배치와 전투에만 집중할 수 있도록 설계되었다. 맵의 오른쪽 상단과 하단에 위치한 아이콘은 맵의 기능을 제어하거나 추가적인 정보를 제공하는 역할을 할 가능성이 있으며, 예를 들어 유닛 선택 재시도, 전략 전환, 팀별 협력 기능 등이 포함될 수 있다. 플레이어는 7명의 인원으로 구성되며, 각 플레이어는 무작위로 할당된 유닛을 바탕으로 상대방과 교전을 벌이게 된다. 게임의 목적은 상대방의 유닛을 모두 파괴하거나, 특정 조건을 달성하는 것으로 추정된다. 무작위성으로 인해 초보자와 숙련자 모두에게 공정한 기회가 제공되지만, 유닛의 특성과 조합에 대한 이해도가 높을수록 더 유리한 위치에 설 수 있다. 맵의 난이도는 제작자나 커스터마이징에 따라 달라질 수 있지만, 내부 설명에 난이도 정보가 없으므로 ‘보통’으로 추정된다. 이 맵은 무작위성과 전략적 선택의 조합을 통해 플레이어에게 새로운 재미와 도전을 제공하며, 특히 스타크래프트의 다양한 유닛을 활용하고자 하는 플레이어들에게 추천할 만한 작품이다. 또한, 40종의 유닛이 무작위로 제공되므로, 매 플레이마다 새로운 경험을 할 수 있어 반복 플레이의 재미를 높일 수 있다. 단, 무작위성이 강하기 때문에 특정 유닛 조합에 대한 대비는 필요하지 않으며, 유연한 전략 수립이 중요하다. 플레이 전에는 맵의 기능 아이콘과 제공되는 유닛 풀을 미리 확인하여, 예상치 못한 상황에 대비하는 것이 좋다. This StarCraft: Brood War custom map, titled ‘9999 RANDOM Unit 40 Pick,’ offers a unique gameplay experience where players are randomly assigned 40 different units at the start of the game. The title itself—with keywords like ‘RANDOM’ and ‘Pick’—highlights the core mechanic: strategic selection from a diverse pool of units. According to the internal description, the map was created by BroodWarDerigged by Mr.Kirbycode774, suggesting that the map has undergone balance adjustments to ensure fair and engaging gameplay. The gameplay revolves around utilizing the randomly assigned units effectively. Players must quickly assess the strengths and weaknesses of their units and adapt their strategies accordingly. The map features a relatively open terrain with minimal obstacles, allowing players to focus on unit positioning and combat. The icons located in the upper right and lower sections of the map likely provide additional functionalities, such as rerolling unit selections, switching strategies, or coordinating with teammates. With a player count of 7, this map encourages direct competition, where the goal is to eliminate opposing units or achieve specific objectives. The randomness ensures a fresh experience with each playthrough, though understanding unit synergies can provide a significant advantage. While the internal description does not specify the difficulty, it is reasonable to assume a moderate level due to the strategic depth required. This map is ideal for players who enjoy experimenting with diverse unit combinations and adapting to unpredictable scenarios. The randomness ensures replayability, while the strategic depth caters to both casual and competitive players. Before playing, it is advisable to familiarize oneself with the map’s icons and the types of units available to prepare for unexpected situations.
Gods (신)
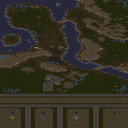
고대의 신들의 세계를 경험할 수 있는 유즈맵 'Gods'를 소개합니다. 이 맵은 스타크래프트 브루드워에서 플레이할 수 있는 UMS 장르의 맵으로, 4인용 플레이를 지원합니다. 맵의 내부 설명에서 말해듯이, 플레이어는 신으로 등장하며 다양한 힘과 지위, 그리고 충성심이 있는 신의 종교와 같은 요소를 지닙니다. 그러나 신으로서의 존재는 주변 신들과의 경쟁에서 생존하는 것에 달려 있습니다. 따라서 플레이어는 신들을 파괴하고 자신의 지위를 확립하는 과정을 trải볼 수 있습니다. 맵의 장르와 플레이 인원은 UMS로, 4인용 플레이를 지원하는 것을 알 수 있습니다. 하지만 예상 플레이 시간이나 난이도는 제공되지 않았습니다. 버전은 V1.0으로, green_meklar이라는 제작자가 제작한 것을 알 수 있습니다. 태그나 타일셋은 제공되지 않았습니다. 사막 타일셋을 사용한 'Gods'는 신들의 세계를 경험할 수 있는 유익한 유즈맵으로, 신들의 세계를 경험하는 플레이어에게 적합한 맵입니다. You are a god. Like most gods, you have extraordinary powers, followers who don't always do what you say, and plenty of rival gods- whom it is now time to destroy once and for all. This map is a UMS map designed for 4-player gameplay. The map's internal description tells us that players are gods, with various powers, followers, and rival gods. As a god, players must survive in a world where rival gods are trying to destroy them. The map's genre and player count are UMS, supporting 4-player gameplay. However, the expected playtime and difficulty are not provided. The map is version V1.0, created by green_meklar. Tags and tilesets are not provided. The desert tileset used in 'Gods' is a useful map for players who want to experience the world of gods. It provides a unique gameplay experience where players must compete with other gods to survive.
SHARED BASES
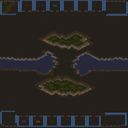
SHARED BASES는 스타크래프트 브루드워의 멀티 플레이를 위한 partager형 맵으로, 시작 시 인접한 플레이어와 동맹을 맺을 수 있는 독특한 시스템을 채용한 유즈맵이다. 평범한 4096x4096 크기의 사막 타일셋 맵이지만, 초반 동맹 시스템 덕분에 전형적인 밀리맵과는 다른 전략적 재미를 느낄 수 있다. 각 플레이어는 시작 지점에서 가까운 상대와 자동으로 동맹을 맺으며, 이 동맹은 게임 초반 자원 분배와 방어 전략에 큰 영향을 미친다. 맵 중앙에는 넓은 평지 공간이 펼쳐져 있어 조기 대치나 기지 확장 시 유리한 위치를 선점할 수 있으며, 전체적으로는 협력과 경쟁이 혼합된 플레이 경험을 제공한다. 동맹의 중요성 때문에 초보자들은 동맹 상대 선택과 초기 자원 관리에 주의해야 하며, 숙련자들은 동맹을 활용한 전략적 이득과 배신 가능성을 고려한 플레이를 시도해 볼 수 있다. 맵의 구조상으로는 비교적 평이한 편이지만, 동맹 시스템 덕분에 단순히 멀티 플레이를 즐기는 것보다 더 깊은 전략적 선택지가 제공된다는 점이 큰 특징이다. 특히 동맹 상대와의 협력과 배신 가능성을 염두에 둔 플레이가 이 맵의 재미를 좌우한다. 공략 팁으로는, 시작 시 동맹 상대가 같은 진영일 경우 초반 자원 분배를 최대한 활용하고, 다른 진영일 경우 동맹의 동맹까지 고려한 광역 전략을 세우는 것이 중요하다. 또한, 맵 중앙의 넓은 공간을 차지하는 타이밍과 동맹의 움직임을 예측하는 능력이 승패를 가를 수 있다. 이 맵은 스타크래프트의 기본 멀티 플레이를 любитель 수준에서 벗어나고 싶은 유저들에게 적합하며, 동맹 시스템을 통해 보다 전략적인 멀티 플레이를 경험해 보고 싶은 플레이어들에게 추천할 만하다. 다만, 동맹 시스템의 특성상 운에 의존하는 요소가 다소 있어 숙련된 플레이어와 초보자 간의 실력 차이를 좁히기 위한 밸런스 조정은 필요할 수 있다. 전체적으로는 협력과 배신, 전략과 운이 혼합된 재미있는 멀티 플레이 경험을 제공하는 맵이라고 할 수 있다. 특히 같은 팀 내에서도 동맹이 달라질 수 있는 가능성을 염두에 두고 플레이한다면, 이 맵의 전략적 깊이가 더 높아질 것이다. SHARED BASES is a custom map for StarCraft: Brood War multiplayer that adopts a shared-base system, allowing players to form alliances with nearby opponents at the start. Despite being a standard 4096x4096 desert tileset map, its unique early-game alliance system offers a different strategic experience compared to typical melee maps. Players automatically ally with the closest opponent at the starting location, which significantly impacts early resource distribution and defensive strategies. A wide open plain in the center of the map provides an advantageous position for early skirmishes or base expansions, blending cooperation and competition into the gameplay. Beginners should pay close attention to ally selection and initial resource management due to the importance of alliances, while experienced players can explore strategic advantages and potential betrayals. While the map's structure is relatively simple, the alliance system introduces deeper strategic choices beyond casual multiplayer. The fun of this map largely depends on cooperation with allies and the potential for betrayal. For optimal play, maximize early resource sharing if your ally is of the same race, or plan a broader strategy considering allies of allies if they are of a different race. Controlling the central open space and predicting ally movements can often decide the outcome. This map is ideal for players looking to move beyond basic multiplayer and experience more strategic gameplay through its alliance system. However, due to the reliance on the alliance mechanic, some luck-based elements may affect balance, potentially narrowing the skill gap between experienced and novice players. Overall, it offers an engaging multiplayer experience where cooperation, betrayal, strategy, and luck intertwine. Players who consider the possibility of shifting alliances within the same team will find even greater depth in the map's strategy.
라이즈 오브 더 트루 로마 (Rise of the True Rome)
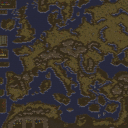
스타크래프트 브루드워의 유즈맵 <Rise of the True Rome>은 고대 문명의 흥망성쇠를 테마로 한 대규모 전략 디펜스 맵이다. 이 맵은 로마, 이스라엘, 그리스, 이집트, 갈리아, 게르만, 슬라브, 앵글로색슨, 카르타고, 트로이, 이베리아, 다키아 등 12개의 고대 문명을 배경으로 펼쳐진다. 플레이어는 각 문명의 주요 도시와 군사 기지를 방어하며, 끊임없이 몰려오는 적의 공격을 막아내야 한다. 맵 중앙의 넓은 평야 지대는 주요 전투가 벌어지는 전장이 되며, 주변의 산지와 숲은 방어 거점으로 활용된다. 적의 공격 패턴은 문명별로 차이를 보이며, 특히 로마와 카르타고의 공격은 강한 함대와 기병대를 앞세워 오는 경우가 많다. 맵의 디자인 특성은 넓은 시야와 다양한 지형으로 구성되어 있어, 전략적인 위치 선정이 중요하다. 또한, 문명 간 동맹 시스템이 있어 특정 문명을 지원하거나 적대할 수 있으며, 이는 게임의 역동성을 높이는 요소로 작용한다. 플레이어는 자원 관리와 병력 생산, 방어 시설 건설을 동시에 신경 써야 하며, 지속적인 적의 공격을 버텨내며 문명을 성장시키는 것이 핵심 목표다. 초보자의 경우 문명의 특성과 공격 패턴을 숙지하는 데 시간이 필요할 수 있지만, 반복 플레이를 통해 점차 전략을 다듬어 나갈 수 있다. 추천 대상은 고대 문명에 관심이 있거나 대규모 전략 디펜스 맵을 즐기는 플레이어이며, 특히 팀 플레이가 가능한 경우 문명 간 협력이 게임의 재미를 배가시킨다. 플레이 전에는 각 문명의 특성, 동맹 시스템, 주요 방어 거점의 위치를 미리 확인하는 것이 좋다. 또한, 넓은 맵을 원활히 탐색하기 위해 시야 확장을 위한 업그레이드와 방어 시설의 배치 계획을 사전에 세워두는 것이 유리하다. This Brood War custom map, <Rise of the True Rome>, is a large-scale strategic defense game centered on the rise and fall of ancient civilizations. The map features 12 ancient civilizations including Rome, Israel, Greece, Egypt, Gaul, German, Slav, Anglo-Saxon, Carthage, Troy, Iberia, and Dacia. Players must defend the major cities and military bases of their chosen civilization against relentless enemy attacks. The central plain serves as the primary battlefield, while surrounding mountains and forests provide strategic defensive positions. Each civilization has distinct attack patterns, with Rome and Carthage often leading with powerful fleets and cavalry. The map's design incorporates wide visibility and varied terrain, emphasizing the importance of strategic positioning. A unique alliance system allows players to support or oppose specific civilizations, adding dynamic layers to gameplay. Players must manage resources, produce units, construct defenses, and withstand continuous assaults while growing their civilization. Beginners may need time to understand each civilization's traits and attack patterns, but repeated plays help refine strategies. Recommended for players interested in ancient civilizations or large-scale strategic defense maps, especially those who enjoy team play where alliances enhance the experience. Before starting, it's advisable to review each civilization's traits, the alliance system, and key defensive positions. Planning sight expansions and defense layouts in advance will significantly improve performance on this expansive map.
리스크 II (RISK) II v1.4
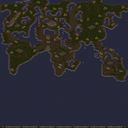
스타크래프트 브루드워의 대표적인 전략형 유즈맵으로 유명한 〈RISK〉 시리즈의 최신 버전인 〈(RISK) II v1.4〉는 세계 정복이라는 콘셉트를 바탕으로 한 턴제 전략 게임이다. 맵의 중앙에 위치한 세계 지도가 대륙과 영토로 나뉘어 있으며, 각 플레이어는 시작 영토를 할당받아 영토 확장과 병력 관리를 통해 세계를 정복하는 것이 목표다. 맵의 구조는 육각형 타일로 이루어져 있어 영토 경계가 명확하고 전략적 이동이 용이하다. 각 영토는 고유한 보너스를 제공하며, 병력 강화, 자원 수집, 적 세력의 약화 등 다양한 요소를 고려해야 한다. 게임은 턴제로 진행되며, 각 턴마다 플레이어는 병력 배치, 공격, 방어, 영토 교환 등을 통해 전략을 펼친다. 〈RISK〉 시리즈의 특징인 공격 보너스 시스템이 적용되어 있어, 공격 시 유리한 조건이 부여된다. 또한, 중립 영토의 강화와 균형 잡힌 유닛 밸런스가 게임의 공정성을 높이는 요소로 작용한다. 맵 곳곳에 배치된 특수 영토나 자원 포인트는 게임의 판도를 바꿀 수 있는 변수가 된다. 이 맵은 7명의 플레이어가 참여할 수 있으며, 각 플레이어는 독립적인 세력으로 활동한다. 게임의 난이도는 보통 수준으로 설정되어 있어, 초보자와 숙련자 모두 즐길 수 있는 균형 잡힌 난이도를 제공한다. 〈(RISK) II v1.4〉는 〈RISK〉 시리즈의 정점을 찍은 버전으로, 과거 버전들에 비해 밸런스가 더욱 개선되었으며, 새로운 소리와 그래픽 요소가 추가되어 게임의 몰입감을 높였다. 특히, агре션 보너스 시스템과 공정한 보너스 배분이 게임의 전략적 깊이를 더한다. 추천 대상은 턴제 전략 게임을 좋아하는 플레이어, 친구들과의 긴밀한 협상과 경쟁을 즐기는 유저, 그리고 스타크래프트의 유즈맵 생태계에서 오랫동안 사랑받아 온 〈RISK〉 시리즈의 팬들이다. 플레이 전에는 맵의 영토 분포와 보너스 시스템을 숙지하는 것이 중요하며, 중립 영토의 강화와 적 세력의 움직임을 주의 깊게 관찰해야 한다. 또한, 팀 플레이가 아닌 개인전이라는 점을 고려하여, 동맹과 배신을 적절히 활용하는 전략을 세워야 한다. World Conquest Game series’ latest entry, 〈(RISK) II v1.4〉, is a turn-based strategy map where players compete to conquer the world through territorial expansion and tactical warfare. The map features a hexagonal tile-based world divided into continents and territories, each offering unique bonuses to influence gameplay. Players begin with assigned starting territories and must strategically deploy forces, launch attacks, and defend their holdings to dominate the globe. Gameplay revolves around turn-based mechanics where players manage troop movements, resource gathering, and territorial exchanges. The Aggression Bonus system enhances combat outcomes, rewarding aggressive playstyles while ensuring balanced unit strengths. Neutral territories scattered across the map act as critical strategic points that can shift the game’s balance depending on control. The map’s design emphasizes clear territorial boundaries and fluid movement, making it accessible yet deep for both casual and competitive players. Designed for up to 7 players, 〈(RISK) II v1.4〉 delivers a standalone experience where each player operates as an independent faction. With a moderate difficulty curve, the map appeals to both newcomers and veterans of the series, thanks to refined balance and immersive visuals. Updated sound effects and visual enhancements further elevate the experience, while the Aggression Bonus and fair territorial bonuses ensure fair yet challenging gameplay. Ideal for fans of turn-based strategy, negotiation-heavy gameplay, and longstanding 〈RISK〉 series enthusiasts, this map thrives on player interaction, alliances, and betrayals. Before diving in, players should study territory distributions and bonus effects, monitor neutral territory strengths, and adapt strategies based on opponent movements. While no team play is involved, mastering diplomatic maneuvering and tactical foresight will be key to victory.
토탈 디펜스 III 1.5 (Tower Defense III 1.5)
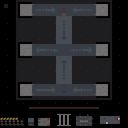
스타크래프트 브루드워의 대표적인 타워 디펜스 유즈맵인 <토탈 디펜스 III 1.5>는 우주 테마의 광활한 맵에서 적의 끊임없는 공격을 방어하는 재미와 긴장감을 동시에 느낄 수 있는 작품이다. 맵의 구조는 크게 세 구역으로 나뉘며, 중앙에 위치한 본진 보호 구역을 중심으로 좌·우에 각각의 플레이어가 배치되어 타워를 건설하고 적을 막아내는 방식으로 진행된다. 적들은 미리 정해진 경로를 따라 끊임없이 몰려오며, 플레이어는 제한된 자원으로 다양한 종류의 방어 타워를 건설하고 업그레이드하여 생존을 도모해야 한다. 맵의 특징 중 하나는 우주 테마에 걸맞게 배경과 타일셋이 어두운 우주 공간과 행성으로 구성되어 있어, 적들의 공격이 다가오는 순간은 마치 우주 전장 한복판에 있는 듯한 분위기를 연출한다는 점이다. 또한, 타워의 배치 공간이 넓고 여러 경로가 존재하기 때문에 전략적인 타워 배치가 무엇보다 중요하다. 초보 플레이어는 방어 라인을 단순하게 구성하기 쉽지만, 숙련된 플레이어는 타워의 효율성과 자원 관리, 적의 패턴을 분석하는 능력이 요구된다. 맵의 난이도는 초반에는 비교적 쉬운 편이지만, 후반부로 갈수록 적의 공격 강도와 종류가 다양해지면서 어려운 국면에 직면하게 된다. 이 맵은 혼자서도 충분히 즐길 수 있지만, 팀플레이를 통해 협력하여 방어하는 재미도 있으며, 특히 타워 디펜스 장르를 좋아하는 유저들에게는 필수적으로 추천할 만한 작품이다. 플레이 전에는 맵의 구조와 타워의 종류, 적의 공격 패턴을 충분히 숙지하는 것이 중요하며, 자원 관리와 타워의 배치 각도에 주의해야 한다. 또한, 업그레이드와 방어 전략을 빠르게 판단할 수 있는 상황 판단력이 요구된다. 이 맵은 단순히 방어하는 재미뿐만 아니라, 타워의 조합과 전략에 따라 vittoria의 느낌이 달라지기 때문에, 매 게임마다 새로운 재미를 느낄 수 있다. 특히 우주라는 테마가 주는 미려한 배경과 긴박한 전투의 조화는 타워 디펜스 장르의 정점을 보여준다. Tower Defense III 1.5 is a classic tower defense custom map in StarCraft: Brood War, offering players an engaging experience of defending a central base against endless waves of enemies in a vast cosmic-themed map. The map is divided into three main sections: the central base defense zone and two side lanes where players can construct and upgrade towers. Enemies follow predetermined paths, continuously attacking the base, and players must strategically place various tower types to fend them off. The map's space-themed design, with dark cosmic backgrounds and planetary tiles, enhances the immersive feel of defending a space battlefield. With ample space for tower placement and multiple paths, strategic tower positioning becomes crucial. While beginners can easily set up basic defensive lines, experienced players will need to optimize tower efficiency, manage resources, and analyze enemy patterns. The difficulty ramps up significantly in later stages as enemy attacks grow stronger and more varied. This map is enjoyable both solo and in team play, making it a must-try for tower defense enthusiasts. Before playing, it's essential to understand the map layout, tower types, enemy patterns, and resource management. Quick decision-making in tower upgrades and defensive strategies is vital. The seamless blend of stunning space-themed visuals and intense combat creates an unforgettable gaming experience, with each playthrough offering unique strategic challenges and victories.
빌더스 앤 파이터스 9000 (Builders and Fighters 9000)
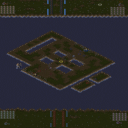
스타크래프트 브루드워의 ‘빌더스 앤 파이터스 9000’은 디펜스와 빌드 관리 전략이 결합된 역동적인 유즈맵으로, 플레이어는 건물을 건설하고 방어하는 동시에 적의 공격을 방어해야 한다. 맵은 넓은 사막 지형을 배경으로 펼쳐지며, 중앙에는 주요 건물이 배치되어 있고 외곽은 자원과 방어 시설로 둘러싸인 구조를 보인다. 플레이어는 미네랄과 가스를 채취해 건물을 짓고 업그레이드할 수 있지만, 동시에 적의 끊임없는 러시와 공격을 방어해야 하기 때문에 자원 관리와 방어 전략이 무엇보다 중요하다. 맵의 특징은 다수의 입구와 좁은 통로가 있어 방어 라인을 구축하기 쉬운 반면, 넓은 개활지에서는 대규모 병력을 동원한 공격이 가능하다는 점이다. 이 때문에 초보자는 방어에 치중하기 쉽지만, 숙련자는 미리 자원을 확보해 빠르게 공격형 빌드를 갖추는 전략을 구사한다. 또한 맵 곳곳에 숨겨진 자원 지역이 있어 이를 확보하는 것이 승리의 관건 중 하나로 작용한다. 이 맵은 6명의 플레이어가 경쟁하는 구조로, 팀전보다는 개인이 страте기를 발휘할 수 있는 환경이지만, 협력과 커뮤니케이션이 부족하면 쉽게 무너질 수 있다. 초심자에게는 다소 난해할 수 있지만, 전략적인 플레이와 빠른 판단력이 요구되는 만큼 반복 플레이를 통해 실력을 키울 수 있는 매력이 있다. 특히 방어와 공격의 균형을 맞추는 것이 관건으로, 자원 관리와 병력 생산 타이밍을 잘 조절해야만 승리를 거머쥐는 짜릿한 경험을 느낄 수 있다. 추천 대상은 스타크래프트의 빌드 오더와 전략적 플레이에 관심이 있는 유저들이며, 특히 디펜스와 디펜스+빌드 관리형 맵을 선호하는 플레이어에게 적합하다. 플레이 전에는 맵의 주요 입구와 자원 분포를 숙지하는 것이 중요하며, 방어 시설의 배치와 병력 생산 우선순위를 미리 계획해두면 훨씬 수월하게 진행할 수 있다. 초보자는 방어에 중점을 두고 천천히 확장하는 전략을, 숙련자는 공격과 방어의 균형을 맞춰 빠르게 승리를 노리는 플레이 스타일을 추천한다. StarCraft: Brood War’s *Builders & Fighters 9000* is a dynamic custom map that blends defense and build management strategies, where players must construct buildings and defend them while also fending off enemy attacks. Set against a vast desert landscape, the map features key structures in the center, surrounded by resources and defensive installations along the outskirts. Players gather minerals and gas to construct and upgrade buildings, but must simultaneously defend against relentless enemy rushes and assaults, making resource management and strategic defense crucial. The map’s design includes multiple entrances and narrow passages, making it easy to establish defensive lines, while open areas allow for large-scale troop movements. Beginners may focus heavily on defense, but experienced players quickly secure resources to adopt aggressive build strategies. Hidden resource zones scattered across the map also play a key role in securing victory. Designed for six players, the map encourages individual strategy over team play, though poor cooperation and communication can lead to collapse. While it may be challenging for newcomers, the map’s emphasis on strategic play and quick decision-making makes repeated sessions rewarding. Balancing defense and offense is essential—mastering resource allocation and troop production timing is the key to securing a thrilling victory. Ideal for players interested in build orders and strategic gameplay, it particularly suits those who enjoy defense-focused or hybrid defense-and-build maps. Before playing, familiarizing yourself with the map’s key entrances and resource distribution is vital. Planning defensive layouts and prioritizing troop production in advance will make the experience much smoother. Beginners are advised to prioritize defense and gradual expansion, while experienced players should aim for a balanced approach, combining offense and defense to secure quick victories.
하이랄: 카타스트로프 SE (Hyrule: Catastrophe SE)
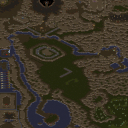
스타크래프트 브루드워의 유즈맵 '하이랄: 카타스트로프 SE(Hyrule: Catastrophe SE)'는 젤다의 전설 시리즈를 모티브로 한 대규모 디펜스 장르의 맵으로, 플레이어는 8인으로 구성된 팀을 이루어 맵 중앙에 위치한 요새를 방어하는 동시에 적의 공격을 막아내야 한다. 맵은 사막 타일셋을 기반으로 제작되었으며, 넓은 평야와 건물을 보호할 수 있는 전략적 요충지들이 배치되어 있어 팀워크와 순간 판단력이 중요한 요소로 작용한다. 맵 중앙의 요새는 여러 개의 건물이 모여 구성되어 있으며, 이 건물들을 보호하면서 동시에 외부에서 끊임없이 몰려드는 적을 상대해야 한다. 맵의 구도는 비교적 평탄한 지형이지만, 곳곳에 estratégic한 언덕과 협곡이 존재해 시야 확보와 방어 라인 구축에 영향을 미친다. 특히 맵의 좌측과 우측에 위치한 넓은 평야 지역은 적의 주요 진입로로 활용될 가능성이 높으므로, 방어 병력의 배치와 자원 관리, 건물 업그레이드에 신중한 계획이 필요하다. 이 맵의 특징은 맵의 규모가 매우 크고, 요새를 중심으로 한Circle의 방어 구조가 인상적이며, 적의 공격 패턴이 시간에 따라 변화한다는 점이다. 초반에는 소규모의 적들이 끊임없이 몰려오지만, 시간이 지나면서 대규모의 적들이 등장하여 방어 라인을 위협하기 때문에, 플레이어는 초반부터 꾸준한 자원 수집과 방어 시설 구축을 병행해야 한다. 또한, 맵의 디자인상 요새 주변의 언덕이나 협곡을 적극 활용하여 적의 접근을 차단하는 전략이 효과적일 것으로 보인다. 이 맵은 초보자에게는 다소 난해할 수 있지만, 팀워크와 전략적 사고가 뛰어난 플레이어들에게는 즐거운 도전 과제가 될 것이다. 특히 맵의 규모가 크기 때문에, 팀원 간의 원활한 소통과 역할 분담이 승리를 좌우할 가능성이 높다. 마지막으로, 이 맵을 플레이하기 전에는 팀원 간의 역할 분담을 사전에 협의하고, 방어 라인 구축에 필요한 자원을 충분히 확보하는 것이 중요하다. 또한, 맵의 구조를 숙지하여 요새 주변의 주요 진입로를 미리 파악해두는 것이 좋다. 이러한 준비가 뒷받침된다면, 하이랄: 카타스트로프 SE는 스타크래프트 유즈맵의 재미와 전략성을 동시에 느낄 수 있는 훌륭한 선택지가 될 것이다. 이 맵은 젤다의 전설의 세계관을 사랑하는 팬들에게 특히 매력적으로 다가갈 것이며, 디펜스 장르를 좋아하는 플레이어들에게도 강력히 추천할 만한 작품이다. Hyrule: Catastrophe SE is a large-scale defense-type custom map in StarCraft: Brood War, inspired by The Legend of Zelda series. Players form teams of 8 and must defend a central fortress while fending off relentless enemy attacks. The map is built on a desert tileset, featuring expansive plains and strategic high-ground positions that play a crucial role in defense planning. The central fortress consists of multiple buildings that require collective protection, while enemies continuously spawn from various entry points around the map. The terrain is relatively flat but includes hills and valleys that impact visibility and line of sight, making them key elements for positioning defenses. The left and right sides of the map are wide open plains, likely serving as primary enemy routes, so careful allocation of defensive forces and resource management is essential. One of the map's standout features is its massive scale and circular defensive structure centered around the fortress. Enemy attack patterns intensify over time, starting with small groups and escalating to large-scale assaults that threaten defensive lines. Players must balance early resource gathering with fortress upgrades and defensive structure construction to withstand these waves. The map's design encourages creative use of hills and valleys to block enemy advances, rewarding strategic thinking and teamwork. While the map may pose a challenge for beginners, it offers an engaging experience for players who excel in cooperation and strategic planning. Given its size, effective communication and role distribution among team members are critical to success. Before playing, it is advisable to coordinate roles, secure sufficient resources for defense, and familiarize yourself with the map's structure to identify key entry points around the fortress. With proper preparation, Hyrule: Catastrophe SE delivers an immersive blend of StarCraft's strategic depth and the nostalgic appeal of Zelda's universe, making it a top recommendation for defense map enthusiasts and Zelda fans alike.
Impossible Scenarios Desert2 (불가능한 시나리오: 황무지2)
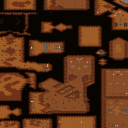
‘Impossible Scenarios Desert2’는 스타크래프트 브루드워의 유즈맵으로, ‘Fadetoblack’이 제작한 ‘Impossible Scenarios’ 시리즈의 Desert 스타일을 계승한 맵이다. 이 맵은 황무지 지형과 섬세한 타일셋을 기반으로 삼아 플레이어에게 끊임없는 도전과 긴장감을 제공하는 디펜스 장르의 유즈맵으로 분류된다. 맵의 전체적인 분위기는 어두운 황무지와 붉은 노을이 어우러져 있으며, 맵 중앙에는 거대한 요새와 같은 구조물이 자리 잡고 있다. 이를 둘러싼 길목과 협소한 통로들은 적의 물량 공격을 효과적으로 방어할 수 있는 구조로 설계되어 있으며, 플레이어는 제한된 자원으로 끊임없이 밀려오는 적을 상대로 전략을 세워야 한다. 플레이 방식은 기본적으로 컴퓨터(저그, 테란, 프로토스)의 지속적인 러시를 방어하는 ‘컴까기’ 형식으로 진행된다. 맵 곳곳에 배치된 방어 건물과 유닛 생산 시설은 플레이어의 전략에 따라 자유롭게 활용할 수 있으며, 지형 특성을 살려 요새화할 수 있는 위치가 다수 존재한다. 특히 맵의 가장자리와 중앙 요새 주변은 방어 포인트로 활용하기 좋은 지형으로, 플레이어는 이들을 중심으로 방어 라인을 구축하는 것이 핵심이다. 또한, 맵의 일부 구역은 협소한 통로로 연결되어 있어 방어에 유리한 지형을 만들 수 있지만, 반대로 적의 진입로를 한 곳에 집중시킬 수 있어 위험하기도 하다. 이 맵의 가장 큰 특징은 ‘불가능한 시나리오’라는 컨셉에 맞게 극한의 난이도를 자랑한다는 점이다. 시리즈의 이름에서 알 수 있듯이, 이 맵은 단순히 방어하는 것을 넘어 플레이어의 전략적 사고와 순발력을 끊임없이 시험한다. 맵 곳곳에는 숨겨진 트리거나 특수한 조건이 있을 가능성이 있으며, 이를 파악하고 대비하는 것이 승리의 열쇠가 될 수 있다. 또한, 맵의 전체적인 규모가 크고 복잡한 구조를 가지고 있어 초보자는 물론 경험자도 쉽게 적응하기 어려운 구조로 설계되어 있다. 이 맵을 추천하는 대상은 스타크래프트 유즈맵 중에서도 도전적인 플레이를 즐기는 유저들이다. 특히 디펜스 장르에 익숙하지 않거나, 새로운 전략을 시도해 보고 싶은 플레이어에게 적합하다. 또한, 팀 플레이보다는 혼자서도 충분히 즐길 수 있는 구조지만, 팀원과의 협동 플레이가 필요하다면 팀원 간의 원활한 소통이 필수적일 것이다. 플레이 전에는 맵의 구조를 꼼꼼히 분석하고, 방어 라인 구축에 필요한 자원의 배치를 미리 계획하는 것이 중요하다. 또한, 예상치 못한 적의 공격 패턴에 대비해 유연하게 대처할 수 있는 준비를 갖춰야 한다. ‘Impossible Scenarios Desert2’ is a custom map for *StarCraft: Brood War*, inheriting the Desert style from the *Impossible Scenarios* series created by Fadetoblack. This map is classified as a defense genre custom map, offering players endless challenges and tension through its barren terrain and intricate tileset. The overall atmosphere blends a dark wasteland with a crimson sunset, and at the center of the map stands a massive fortress-like structure. The narrow paths and constricted passages surrounding it are designed to effectively counter waves of enemy attacks, forcing players to strategize with limited resources against relentless enemy forces. The gameplay follows a "comp-scumming" format, where players must defend against continuous rushes from AI-controlled factions (Zerg, Terran, and Protoss). Defense buildings and unit production facilities scattered across the map can be freely utilized based on the player’s strategy, with multiple locations that allow for fortification by leveraging the terrain. Key defensive spots include the edges of the map and areas around the central fortress, where players should focus on establishing strong defensive lines. Some zones are connected by tight corridors, which can create advantageous defensive terrain but also concentrate enemy entry points, posing risks. The map’s defining feature is its extreme difficulty, living up to the "impossible scenarios" concept. Beyond mere defense, it constantly tests the player’s strategic thinking and quick decision-making. Hidden triggers or special conditions may exist throughout the map, and uncovering and preparing for them could be the key to victory. The map’s large scale and complex structure make it difficult for both beginners and experienced players to adapt to easily. This map is recommended for players who enjoy challenging custom maps in *StarCraft*. It suits those looking to try new strategies or unfamiliar with the defense genre. While it can be enjoyed solo, team coordination is essential if playing cooperatively. Before starting, it’s important to carefully analyze the map’s layout, plan resource distribution for defense lines, and prepare flexible responses to unexpected enemy attack patterns.
스타 트렉 디플로메시 15.8 (Star-Trek Diplomacy 15.8)
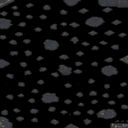
스타크래프트 브루드워의 유즈맵 《스타 트렉 디플로메시 15.8(Star-Trek Diplomacy 15.8)》은 우주를 배경으로 한 전략 디플로메시 장르의 대표작으로, 플레이어는 각각의 세력 대표가 되어 행성을 정복하고 새로운 생명체를 만나는 등 우주 탐험의 스릴을 느낄 수 있는 맵입니다. 8192x8192의 넓은 맵 크기와 우주 타일셋을 활용한 아름다운 배경이 인상적이며, 특히 행성 간의 외교와 전투가 조화를 이루는 디플로메시의 핵심을 경험할 수 있습니다. 이 맵은 7명의 플레이어가 각자의 시작 행성에서 출발해 우주를 탐험하며 영토를 확장하고 자원을 관리하는 방식으로 진행됩니다. 행성을 정복하고 새로운 생명체를 발견하는 것은 물론, 외교를 통해 동맹을 맺거나 배신을 당하는 등 플레이어 간의 상호작용이 게임의 재미를 극대화합니다. 넓은 맵에서 펼쳐지는 전투는 필연적으로 멀티태스킹과 전략적 판단을 요구하며, 초보자에게는 다소 복잡하게 느껴질 수 있지만 숙련된 플레이어에게는 긴장감 넘치는 전략적 깊이를 제공합니다. 특히 우주 배경의 디자인과 행성 간의 이동 경로, 전투 시의 미묘한 밸런스가 이 맵의 특징으로, 우주 탐험의 로망을 느낄 수 있도록 구성되어 있습니다. 다만, 넓은 맵 크기 때문에 초보자가 조작과 전략을 익히는 데 다소 시간이 걸릴 수 있으며, 팀플레이보다는 개인 플레이가 중심이 되는 구조입니다. 우주를 무대로 한 전략적 대결을 즐기고 싶은 플레이어들에게 강력히 추천할 수 있는 맵입니다. 플레이 전에는 행성 간의 거리와 자원 분포를 미리 확인하고, 동맹을 맺을 상대와 전투를 펼칠 대상을 신중히 결정하는 것이 중요합니다. 또한, 넓은 맵에서 펼쳐지는 긴장감 있는 전투를 즐기기 위해 충분한 시간을 확보하는 것이 좋습니다. Star-Trek Diplomacy 15.8 is a classic UMS map in the strategy diplomacy genre set in space, where players take on the role of different factions to conquer planets, encounter new life forms, and explore the cosmos. The map stands out with its vast 8192x8192 size and space-themed tileset, creating an immersive backdrop for diplomatic and combat interactions. The gameplay involves seven players starting from their respective home planets, expanding territories, managing resources, and navigating the vast expanse of space. Players must balance exploration, conquest, and diplomacy, forging alliances or betraying them to gain the upper hand. The large map ensures that engagements require multitasking and strategic foresight, which may be challenging for beginners but offers deep strategic satisfaction for experienced players. The space-themed design, intricate pathways between planets, and balanced combat mechanics are key highlights, delivering a sense of cosmic adventure. However, the expansive map size can be daunting for newcomers, and the gameplay leans more toward individual strategy rather than teamwork. This map is highly recommended for players seeking a thrilling strategic challenge in a space setting. Before playing, it's crucial to study the distances between planets, resource distribution, and potential allies or adversaries. Allocating sufficient time is essential to fully enjoy the tense, strategic battles that unfold across the vast map.
더 헌터스 (The Hunters) (Money$-Tung Clan)
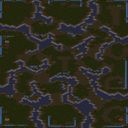
‘더 헌터스(Money$-Tung Clan)’는 스타크래프트 브루드워의 팀 밀리(TEAM_MELEE) 기반 유즈맵으로, 2~8명의 플레이어가 사막 지형을 배경으로 펼쳐지는 전투에서 승리를 겨루는 게임이다. 맵의 제목과 내부 설명에서 볼 수 있듯이, 이 맵은 ‘퀘이크’, ‘레드얼럿’, ‘커맨드 앤 컨커’, ‘스파이더스’ 등 다양한 FPS나 RTS 게임의 요소와 분위기를 조합해 만든 것이 특징이다. 내부 설명에 언급된 ‘Tung Clan’이라는 이름과 달러 표시 ‘$’는 제작 그룹의 개성을 반영한 것으로, 플레이어는 팀을 이뤄 상대 팀을 섬멸하거나 특정 목표를 달성하는 방식으로 승리 조건을 맞춰야 한다. 맵의 크기는 4096x4096으로 상당히 넓고, 사막 타일셋을 사용해 건조한 분위기의 전장이 펼쳐진다. 맵의 구조는 중앙에 넓은 개활지가 있고, 여기저기 흩어진 언덕과 협곡이 주요 교전 포인트로 활용된다. 이러한 지형은 기동전 위주로 플레이할 수 있도록 설계되어 있으며, 팀원 간의 협력이 부족하면 중과부적으로 밀릴 수밖에 없다. 특히 넓은 맵에서는 자원 채취와 병력 생산이 중요해지므로, 초반 자원 관리와 테크트리가 승패를 좌우할 수 있다. 플레이어는 각각의 팀으로 나뉘어 전투를 벌이지만, 개별적으로 동선을 설정할 수 있어 전략적 선택지가 많다. 내부 설명에 ‘Playground of Tung Clan’이라는 문구가 있는 만큼, 제작 그룹의 개성을 강조한 맵이지만, 팀 밀리라는 장르의 특성상 밸런스가 중요하다. 넓은 맵에서 벌어지는 교전은 소규모 전투가 반복되는 경우가 많아, 순간적인 판단력과 팀워크가 요구된다. 추천 플레이 인원은 4~8명으로, 인원이 적을수록 개인의 역할이 중요해지고, 많을수록 팀 전략이 중요해진다. 난이도는 ‘보통’ 정도로 설정하는 것이 적합할 것으로 추정되며, 초보자보다는 중간 이상의 실력을 가진 플레이어에게 어울린다. 이 맵을 플레이하기 전에는 팀원과의 사전 협의와 맵의 주요 지점(언덕, 협곡, 자원 위치)을 숙지하는 것이 좋다. 또한, 넓은 맵에서 벌어지는 전투 특성상 자원 관리와 생산 효율에 신경 써야 하며, 팀원 간의 통신이 원활하지 않으면 전략적 손실을 입을 수 있다. 맵의 제작 의도가 다양한 게임 장르의 요소를 혼합한 만큼, 플레이어는 개방적인 마음으로 접근하는 것이 좋다. ‘The Hunters (Money$-Tung Clan)’ is a custom *StarCraft: Brood War* map based on the team melee mode (TEAM_MELEE), where 2 to 8 players compete in battles set against a desert landscape. As the title and in-game description suggest, the map uniquely blends elements and atmospheres from various FPS and RTS games, such as *Quake*, *Red Alert*, *Command & Conquer*, and *Spiders*. The name ‘Tung Clan’ and the dollar sign ‘$’ in the description reflect the identity of the map’s creators. Players must team up to eliminate the opposing side or achieve specific objectives to win. The map spans a vast 4096x4096 grid, featuring a dry, desert tile set that sets the tone for the battlefield. Its layout includes a large central open area, with scattered hills and canyons serving as key engagement points. Designed for mobile warfare, the terrain encourages maneuver-based combat, and without strong teamwork, players will struggle against superior numbers. Given the map’s size, resource gathering and unit production become critical, making early resource management and tech progression pivotal to victory. Players are divided into teams but can individually plan their movements, offering diverse strategic options. While the in-game description emphasizes the ‘Playground of Tung Clan,’ balancing remains essential due to the team melee format. Battles often unfold as repeated skirmishes across the vast expanse, demanding quick decision-making and strong teamwork. The recommended player count is 4 to 8—fewer players increase the importance of individual roles, while larger groups shift focus to team strategy. The difficulty is likely moderate, making it more suitable for intermediate to advanced players rather than beginners. Before playing, it’s wise to coordinate with teammates and familiarize yourself with key locations like hills, canyons, and resource spots. Given the map’s scale, efficient resource management and production are vital, and poor communication can lead to strategic setbacks. Since the map intentionally merges elements from multiple game genres, approaching it with an open mind will enhance the experience.
팀 마이크로 초이스 2009 (Team Micro Choice 2009)
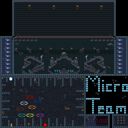
스타크래프트 브루드워의 유즈맵 'Team Micro Choice 2009'는 6명의 플레이어가 경쟁하는 아레나 스타일의 맵으로, 각 플레이어가 시작 지점에서 전투를 벌이며 승부를 겨루는 구조를 갖추고 있다. 맵은 화산 타일셋을 활용한 2048x2048 크기의 공간에 배치되어 있으며, 중앙에는 각 플레이어의 시작 지점이 대칭으로 배치되어 있다. 맵의 특징은 개별 전투에 중점을 둔 micro 컨트롤을 요구한다는 점으로, 플레이어는 미네랄과 가스를 확보한 후 병력을 생산하고 이를 조합해 상대방을 제압하는 전략을 구사해야 한다. 맵의 디자인은 비교적 간소한 편이지만, 전투가 벌어지는 공간이 넓고 지형이 평평해 전략적인 움직임이 중요하다. 맵의 제목과 설명에서 알 수 있듯, 이 맵은 2009년에 제작되었으며 'tomcatgt'에 의해 만들어졌다. 'ChronicDCJ'와 'Dk_Zeratul'이 배포와 감수에 기여했다는 점도 흥미로운 점이다. 이 맵의 가장 큰 특징은 micro 컨트롤에 대한 훈련을 중시한다는 점이다. 각 플레이어는 빠르게 자원을 확보하고, 효율적으로 병력을 생산하며, 상대방의 전략을 읽고 대응하는 능력을 키워야 한다. 맵의 구조상 중앙 교전 지역이 넓고, 각 플레이어의 시작 지점이 분리되어 있어 전략적 움직임이 중요하다. 따라서 micro 컨트롤에 익숙한 플레이어에게는 훌륭한 연습 공간이 될 수 있지만, 초보자는 다소 어려운 경험을 하게 될 수 있다. 이 맵은 아레나라는 장르에 걸맞게 1대1 또는 다대다 전투에 최적화되어 있으며, 특히 팀 플레이보다는 개인의 micro 컨트롤과 전략적 판단이 중요한 맵으로 평가된다. 맵의 디자인과 배치된 자원은 비교적 평범한 수준이지만, 전투의 흐름과 병력 조합에 따라 승패가 갈리는 만큼 전략적 깊이를 느낄 수 있는 맵이다. 따라서 micro 컨트롤을 연습하고자 하거나, 아레나 스타일의 맵을 즐기는 플레이어들에게 추천할 만한 작품이다. 플레이 전에는 미네랄과 가스의 분포, 병력 생산 건물의 위치, 시작 지점 간의 거리 등을 미리 확인해 두는 것이 좋다. 또한, 맵의 구조상 중앙 교전 지역이 넓고 지형이 평평해 전투가 벌어질 가능성이 높으므로, 전략적 움직임과 micro 컨트롤을 연습하는 데 중점을 두는 것이 좋다. StarCraft: Brood War's custom map *Team Micro Choice 2009* is an arena-style map where six players compete, featuring a structure where each player starts in a separate location and battles for dominance. The map is set on a 2048x2048 volcanic tileset, with symmetrical starting positions for all players. Its key feature is its emphasis on micro control, requiring players to gather minerals and gas, produce units, and combine forces to outmaneuver opponents. While the design is relatively simple, the wide, flat combat zones demand strategic movement. As the name and description suggest, the map was created in 2009 by *tomcatgt*, with contributions to distribution and oversight from *ChronicDCJ* and *Dk_Zeratul*. The map’s defining trait is its focus on micro control training. Players must secure resources quickly, produce units efficiently, and adapt to opponents’ strategies. The central battlefield’s openness and isolated starting positions make strategic positioning crucial. While skilled micro players will find this an excellent training ground, beginners may struggle with its demands. Tailored for arena-style gameplay, the map excels in 1v1 or multiplayer battles, prioritizing individual micro control and strategic decision-making over team coordination. Though its design and resource distribution are straightforward, victory hinges on battle flow and unit composition, offering meaningful strategic depth. As such, it’s a strong choice for players looking to refine their micro skills or enjoy arena-style maps. Before playing, check mineral and gas distribution, building placement, and distances between starting positions. Given the map’s wide central battlefield and flat terrain, focus on practicing strategic movement and micro control to maximize your performance.
최근 등록된 맵
새로 추가된 파일과 버전을 확인하세요.
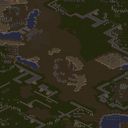
십자군전쟁 HolyCross
《십자군전쟁 HolyCross》는 스타크래프트: 브루드워의 유즈맵으로, 역사적 배경인 십자군 전쟁을 배경으로 한 디펜스 장르의 전략 게임이다. 맵은 넓은 평야와 도시를 배경으로 펼쳐지며, 이슬람군과 십자군 간의 공격과 방어가 주요 콘텐츠로 구성되어 있다. 플레이어는 이슬람군을 선택해 예루살렘을 지키거나, 십자군을 선택해 예루살렘을 공격하는 두 가지 주요 목표 중 하나를 수행해야 한다. 맵의 중앙에 위치한 예루살렘은 전략적 요충지로, here를 중심으로 여러 개의 입구가 배치되어 있어 방어와 공격의 균형을 맞추는 것이 중요하다. 특히, 맵의 지형은 도시와 평야가 조화를 이루며, 각 지역의 타일 배치와 고저차가 공격 루트와 방어 전략에 큰 영향을 미친다. 맵의 디자인에서 돋보이는 점은 사막 타일셋을 활용한 사실적인 분위기와 함께, 유닛 배치와 방어 시설의 구성이 플레이어의 전략적 선택을 유도한다는 것이다. 예를 들어, 예루살렘 주변의 성벽과 탑은 방어의 핵심이 되며, 여기에서 보병과 궁수 유닛을 배치해 적의 공격을 견뎌내야 한다. 반면, 십자군이라면 예루살렘을 향해 진군하는 루트를 carefully 설계해야 하며, 보급로와 후방 지원 유닛의 활용이 승패를 가를 수 있다. 이 게임은 단일 플레이어 또는 다중 플레이어로 진행할 수 있으며, 특히 7인 플레이를 지원하는 것으로 추정된다. 맵의 난이도는 보통 수준으로, 초보자는 방어와 공격의 기본을 익히는 데 집중해야 하며, 숙련자는 전략적 심화와 유닛 조합을 통해 승률을 높일 수 있다. 《십자군전쟁 HolyCross》는 역사적 스토리와 전략적 깊이를 결합한 유즈맵으로, 스타크래프트의 클래식한 디펜스 장르의 매력을 느낄 수 있는 작품이다. 특히, 넓은 맵과 다양한 전략적 선택지가 제공되어 반복 플레이 시에도 질리지 않는 재미를 선사한다. 추천하는 대상은 전략 게임과 역사물을 좋아하는 플레이어로, 팀워크와 전략적 사고가 중요한 만큼 친구들과 함께 플레이하는 것을 권장한다. 또한, 맵을 처음 플레이하기 전에는 예루살렘 주변의 방어 시설과 공격 루트를 미리 살펴보는 것이 중요하다. 맵의 인코딩이 cp949로 되어 있어 한글 표시가 정상적으로 작동한다는 점도 고려할 때, 한국어 사용자에게는 더욱 친숙한 환경에서 즐길 수 있다. HolyCross is a UMS (User-Made Scenario) map for StarCraft: Brood War, set in the historical context of the Crusades. The game blends defense mechanics with strategic depth, challenging players to either defend Jerusalem as the Islamic forces or attack it as the Crusaders. The map features a vast open plain interspersed with urban structures, creating a dynamic battlefield where terrain and elevation play crucial roles in gameplay. Jerusalem, located centrally, serves as the focal point of the conflict, surrounded by multiple entry points that demand careful defensive or offensive planning. The map’s design leverages the desert tileset to evoke a sense of authenticity, with strategic elements like walls and towers around Jerusalem acting as key defensive structures. Players must deploy infantry and ranged units effectively to withstand enemy assaults. For the Crusaders, advancing toward Jerusalem requires meticulous route planning, supply line management, and tactical unit deployment to secure a victory. The map supports single-player or multiplayer modes, with an estimated player count of 7, though team configurations are not explicitly defined. The difficulty is moderate, making it accessible to beginners who can focus on mastering basic defense and attack strategies, while advanced players can experiment with unit synergies and deeper strategic nuances. HolyCross stands out for its historical narrative and strategic complexity, offering a fresh take on classic defense-themed UMS maps in StarCraft. Its expansive map design and varied strategic options ensure replayability, appealing to fans of strategy games and historical themes alike. For optimal gameplay, players are advised to familiarize themselves with the defensive structures around Jerusalem and potential attack routes before diving into the action. The map’s cp949 encoding ensures seamless Korean language support, enhancing accessibility for Korean-speaking players.
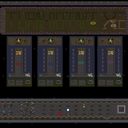
턴 디펜스 X-2 V-4.6 (Turn Defense X-2 V-4.6)
「턴 디펜스 X-2 V-4.6」은 스타크래프트: 브루드워의 유즈맵으로, 디펜스 장르의 턴 방식 게임입니다. 맵의 중앙에 위치한 수정을 보호하며 끊임없이 몰려드는 적 웨이브를 방어하는 것이 목표입니다. 턴이 지나면서 자원이 축적되고, 이를 바탕으로 방어 건물이나 유닛을 배치할 수 있는 구조로 설계되어 있습니다. 특히 ‘Micro Money Management’라는 시스템이 특징으로, 매 턴마다 자원을 효율적으로 배분하지 않으면 금방 자원이 고갈되어 방어가 무너질 수 있습니다. 또한 ‘Vision System’이 추가되어 시야가 제한된 상태에서 적의 움직임을 예측해야 하는 전략적 깊이가 있습니다. 맵의 난이도는 ‘Very Hard’로 명시되어 있으며, ‘Strong Learning Curve’를 강조하고 있어 초보자는 물론 숙련자도 쉽게 осво하기 어려운 도전적인 난이도를 자랑합니다. 사막 타일셋을 사용한 맵 디자인은 건조한 분위기를 연출하며, 방어 시설의 배치와 턴 관리, 자원 운용의 균형을 맞추는 것이 핵심 포인트입니다. 현재 4인용 맵으로 제작되었지만, 팀 플레이보다는 개별 플레이어의 전략과 판단력이 중요하게 작용하는 구조입니다. 플레이 전 반드시 확인해야 할 점은 시야 시스템과 자원 관리입니다. 시야가 제한되어 있으면 적의 움직임을 제대로 파악하지 못해 방어 라인이 무너질 가능성이 높습니다. 또한, 매 턴마다 자원을 배분하는 타이밍과 양을 신중히 결정해야 하며, 방어 건물의 배치 위치와 업그레이드 우선순위를 신중히 고려해야 합니다. 맵의 난이도가 높기 때문에, 처음 플레이 시에는 난이도를 낮추거나 연습 모드를 활용해보는 것도 좋은 방법입니다. 이 맵은 디펜스 장르를 любители сложных стратегических 게임들에게 적극 추천합니다. 특히 턴 방식의 전략성과 자원 관리의 깊이가 매력적인 유즈맵으로, 반복 플레이를 통해 새로운 전략을 발견할 수 있는 재미가 있습니다. This map, Turn Defense X-2 V-4.6, is a tower defense-style custom map for StarCraft: Brood War, featuring a turn-based gameplay system. The objective is to protect a central crystal from incoming enemy waves by strategically placing defensive structures and units each turn. A key mechanic is the 'Micro Money Management' system, where players must allocate limited resources each turn to avoid depletion before the next wave arrives. The 'Vision System' adds another layer of challenge by restricting visibility, forcing players to anticipate enemy movements without full awareness. The map is rated 'Very Hard' with a 'Strong Learning Curve,' making it suitable for experienced players seeking a tough tactical challenge. The desert-themed tileset enhances the atmosphere, while the core gameplay revolves around balancing turn-based resource allocation, defensive positioning, and upgrades. Designed for four players, the map emphasizes individual strategy over team coordination, as each player manages their own resources and defensive lines. Before playing, it's crucial to understand the vision system and resource mechanics—limited visibility can lead to unexpected enemy breakthroughs, while poor resource allocation can cripple your defenses. Players should carefully plan upgrade priorities and defensive placements to maximize efficiency. Given its high difficulty, newcomers may benefit from starting with lower difficulty settings or practice modes. This map is highly recommended for fans of deep strategic tower defense games, offering replayability and the thrill of discovering new tactics through repeated play.
토탈 디펜스 III 1.5 (Tower Defense III 1.5)
스타크래프트 브루드워의 대표적인 타워 디펜스 유즈맵인 <토탈 디펜스 III 1.5>는 우주 테마의 광활한 맵에서 적의 끊임없는 공격을 방어하는 재미와 긴장감을 동시에 느낄 수 있는 작품이다. 맵의 구조는 크게 세 구역으로 나뉘며, 중앙에 위치한 본진 보호 구역을 중심으로 좌·우에 각각의 플레이어가 배치되어 타워를 건설하고 적을 막아내는 방식으로 진행된다. 적들은 미리 정해진 경로를 따라 끊임없이 몰려오며, 플레이어는 제한된 자원으로 다양한 종류의 방어 타워를 건설하고 업그레이드하여 생존을 도모해야 한다. 맵의 특징 중 하나는 우주 테마에 걸맞게 배경과 타일셋이 어두운 우주 공간과 행성으로 구성되어 있어, 적들의 공격이 다가오는 순간은 마치 우주 전장 한복판에 있는 듯한 분위기를 연출한다는 점이다. 또한, 타워의 배치 공간이 넓고 여러 경로가 존재하기 때문에 전략적인 타워 배치가 무엇보다 중요하다. 초보 플레이어는 방어 라인을 단순하게 구성하기 쉽지만, 숙련된 플레이어는 타워의 효율성과 자원 관리, 적의 패턴을 분석하는 능력이 요구된다. 맵의 난이도는 초반에는 비교적 쉬운 편이지만, 후반부로 갈수록 적의 공격 강도와 종류가 다양해지면서 어려운 국면에 직면하게 된다. 이 맵은 혼자서도 충분히 즐길 수 있지만, 팀플레이를 통해 협력하여 방어하는 재미도 있으며, 특히 타워 디펜스 장르를 좋아하는 유저들에게는 필수적으로 추천할 만한 작품이다. 플레이 전에는 맵의 구조와 타워의 종류, 적의 공격 패턴을 충분히 숙지하는 것이 중요하며, 자원 관리와 타워의 배치 각도에 주의해야 한다. 또한, 업그레이드와 방어 전략을 빠르게 판단할 수 있는 상황 판단력이 요구된다. 이 맵은 단순히 방어하는 재미뿐만 아니라, 타워의 조합과 전략에 따라 vittoria의 느낌이 달라지기 때문에, 매 게임마다 새로운 재미를 느낄 수 있다. 특히 우주라는 테마가 주는 미려한 배경과 긴박한 전투의 조화는 타워 디펜스 장르의 정점을 보여준다. Tower Defense III 1.5 is a classic tower defense custom map in StarCraft: Brood War, offering players an engaging experience of defending a central base against endless waves of enemies in a vast cosmic-themed map. The map is divided into three main sections: the central base defense zone and two side lanes where players can construct and upgrade towers. Enemies follow predetermined paths, continuously attacking the base, and players must strategically place various tower types to fend them off. The map's space-themed design, with dark cosmic backgrounds and planetary tiles, enhances the immersive feel of defending a space battlefield. With ample space for tower placement and multiple paths, strategic tower positioning becomes crucial. While beginners can easily set up basic defensive lines, experienced players will need to optimize tower efficiency, manage resources, and analyze enemy patterns. The difficulty ramps up significantly in later stages as enemy attacks grow stronger and more varied. This map is enjoyable both solo and in team play, making it a must-try for tower defense enthusiasts. Before playing, it's essential to understand the map layout, tower types, enemy patterns, and resource management. Quick decision-making in tower upgrades and defensive strategies is vital. The seamless blend of stunning space-themed visuals and intense combat creates an unforgettable gaming experience, with each playthrough offering unique strategic challenges and victories.
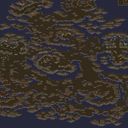
더 제네시스 (The Genesis)
스타크래프트 브루드워의 유즈맵 《더 제네시스》는 사막 테마의 광대한 맵에서 펼쳐지는 디펜스 장르의 게임으로, 8명의 플레이어가 한 팀이 되어 끊임없이 몰려드는 적을 방어하는 구조로 구성되어 있다. 맵 중앙에는 거대한 요새가 자리 잡고 있으며, 주변으로는 좁고 복잡한 협곡과 평지가 펼쳐진다. 플레이어는 요새를 중심으로 배치된 방어 시설과 유닛을 활용해 끊임없이 쏟아지는 적의 공격을 버텨내야 한다. 맵의 특징은 사막 지형에 맞게 지형이 평탄하지 않고 언덕과 계곡이 복잡하게 얽혀 있어, 유닛의 이동 경로가 제한되고 전략적인 배치와 선택이 중요하다는 점이다. 또한, 맵의 규모가 크고 지형이 복잡해 시야 확보가 어려우며, 적의 공격 패턴도 다양해 예상치 못한 위기가 자주 발생한다. 초반에는 비교적 약한 적들이 규칙적으로 몰려오지만, 시간이 지나면서 강력한 유닛들이 포함된 조합으로 공격이 강화되므로, 플레이어는 자원 관리와 유닛 업그레이드를 효율적으로 진행해야 한다. 방어에 성공하면 보상을 받을 수 있지만, 한 번 무너지면 복구가 쉽지 않으므로 긴장감과 집중력이 요구되는 맵이다. 초보 플레이어는 맵의 복잡한 지형을 이해하는 데 시간이 걸릴 수 있지만, 익숙해지면 전략적 깊이를 느낄 수 있는佳作이다. 특히 사막 테마의 시각적 효과가 뛰어나며, 디펜스 장르를 좋아하는 유저들에게 강력히 추천할 만하다. 플레이 전에는 맵의 주요 길목과 방어 포인트를 미리 숙지하고, 자원 분배와 유닛 조합을 신중히 계획하는 것이 중요하다. 또한, 팀원과의 원활한 소통과 협력이 승리를 좌우할 수 있으니, 팀 플레이에 익숙하지 않다면 연습이 필요할 수 있다. 이 맵은 디펜스 장르의 묘미를 느낄 수 있는佳作로, 반복 플레이를 통해 점차 공략법을 익힐 수 있을 것이다. The Genesis is a UMS defense-type custom map in StarCraft: Brood War, set in a vast desert-themed landscape where eight players form a single team to defend against relentless enemy waves. The map centers around a massive fortress, surrounded by winding canyons and uneven terrain. Players must strategically place defenses and units to withstand continuous assaults. The desert terrain features hills and valleys that restrict unit movement, making positioning and pathfinding critical. The map's size and complexity limit visibility, adding unpredictability to enemy attacks. Early waves consist of weaker units, but later stages introduce stronger compositions, requiring efficient resource management and upgrades. Success brings rewards, but failure can be devastating, demanding high concentration and adaptability. While the intricate terrain may challenge beginners, it offers strategic depth for experienced players. The desert aesthetic enhances immersion, making it a standout in the defense genre. New players should study key chokepoints and defense placements, plan unit compositions carefully, and coordinate with teammates—teamwork is essential for victory. With practice, this map rewards persistence, offering a satisfying challenge for defense enthusiasts seeking replayability and skill progression.
팀 마이크로 초이스 2009 (Team Micro Choice 2009)
스타크래프트 브루드워의 유즈맵 'Team Micro Choice 2009'는 6명의 플레이어가 경쟁하는 아레나 스타일의 맵으로, 각 플레이어가 시작 지점에서 전투를 벌이며 승부를 겨루는 구조를 갖추고 있다. 맵은 화산 타일셋을 활용한 2048x2048 크기의 공간에 배치되어 있으며, 중앙에는 각 플레이어의 시작 지점이 대칭으로 배치되어 있다. 맵의 특징은 개별 전투에 중점을 둔 micro 컨트롤을 요구한다는 점으로, 플레이어는 미네랄과 가스를 확보한 후 병력을 생산하고 이를 조합해 상대방을 제압하는 전략을 구사해야 한다. 맵의 디자인은 비교적 간소한 편이지만, 전투가 벌어지는 공간이 넓고 지형이 평평해 전략적인 움직임이 중요하다. 맵의 제목과 설명에서 알 수 있듯, 이 맵은 2009년에 제작되었으며 'tomcatgt'에 의해 만들어졌다. 'ChronicDCJ'와 'Dk_Zeratul'이 배포와 감수에 기여했다는 점도 흥미로운 점이다. 이 맵의 가장 큰 특징은 micro 컨트롤에 대한 훈련을 중시한다는 점이다. 각 플레이어는 빠르게 자원을 확보하고, 효율적으로 병력을 생산하며, 상대방의 전략을 읽고 대응하는 능력을 키워야 한다. 맵의 구조상 중앙 교전 지역이 넓고, 각 플레이어의 시작 지점이 분리되어 있어 전략적 움직임이 중요하다. 따라서 micro 컨트롤에 익숙한 플레이어에게는 훌륭한 연습 공간이 될 수 있지만, 초보자는 다소 어려운 경험을 하게 될 수 있다. 이 맵은 아레나라는 장르에 걸맞게 1대1 또는 다대다 전투에 최적화되어 있으며, 특히 팀 플레이보다는 개인의 micro 컨트롤과 전략적 판단이 중요한 맵으로 평가된다. 맵의 디자인과 배치된 자원은 비교적 평범한 수준이지만, 전투의 흐름과 병력 조합에 따라 승패가 갈리는 만큼 전략적 깊이를 느낄 수 있는 맵이다. 따라서 micro 컨트롤을 연습하고자 하거나, 아레나 스타일의 맵을 즐기는 플레이어들에게 추천할 만한 작품이다. 플레이 전에는 미네랄과 가스의 분포, 병력 생산 건물의 위치, 시작 지점 간의 거리 등을 미리 확인해 두는 것이 좋다. 또한, 맵의 구조상 중앙 교전 지역이 넓고 지형이 평평해 전투가 벌어질 가능성이 높으므로, 전략적 움직임과 micro 컨트롤을 연습하는 데 중점을 두는 것이 좋다. StarCraft: Brood War's custom map *Team Micro Choice 2009* is an arena-style map where six players compete, featuring a structure where each player starts in a separate location and battles for dominance. The map is set on a 2048x2048 volcanic tileset, with symmetrical starting positions for all players. Its key feature is its emphasis on micro control, requiring players to gather minerals and gas, produce units, and combine forces to outmaneuver opponents. While the design is relatively simple, the wide, flat combat zones demand strategic movement. As the name and description suggest, the map was created in 2009 by *tomcatgt*, with contributions to distribution and oversight from *ChronicDCJ* and *Dk_Zeratul*. The map’s defining trait is its focus on micro control training. Players must secure resources quickly, produce units efficiently, and adapt to opponents’ strategies. The central battlefield’s openness and isolated starting positions make strategic positioning crucial. While skilled micro players will find this an excellent training ground, beginners may struggle with its demands. Tailored for arena-style gameplay, the map excels in 1v1 or multiplayer battles, prioritizing individual micro control and strategic decision-making over team coordination. Though its design and resource distribution are straightforward, victory hinges on battle flow and unit composition, offering meaningful strategic depth. As such, it’s a strong choice for players looking to refine their micro skills or enjoy arena-style maps. Before playing, check mineral and gas distribution, building placement, and distances between starting positions. Given the map’s wide central battlefield and flat terrain, focus on practicing strategic movement and micro control to maximize your performance.
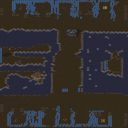
적 건물 파괴 미션 (Untitled Scenario)
이 맵은 스타크래프트 브루드워에서 볼 수 있는 밀리 맵의 기본 틀을 따르지만, 적 건물 파괴를 목표로 한다는 점에서 다소 특이한 구성을 가지고 있다. 맵 이미지를 살펴보면 중앙에 넓은 평지가 펼쳐져 있으며, 맵 가장자리로 갈수록 언덕과Various structures are scattered around the map, including what appears to be starting bases for players. The map seems designed for a symmetrical multiplayer experience, though the absence of clear team starting points suggests it may function as a free-for-all or custom UMS scenario rather than a traditional team-based melee. 플레이어는 맵 상단에 배치된 것으로 보이는 시작 위치에서 출발하며, 적 건물 파괴를 목표로 삼는다. 맵의 구조상 중앙 평지는 교전 지점으로 활용될 가능성이 높으며, 언덕 지형은 방어 거점으로 활용될 수 있다. 다만, 시작 지점과 건물 배치의 명확성이 떨어지는 점은 이 맵이 단순한 밀리 맵이 아니라 사용자 지정 맵(UMS)으로 재구성되었을 가능성을 시사한다. 또한 맵의 해상도와 크기가 4096x4096로 상당히 크기 때문에, 전장 전체를 한눈에 파악하기 어려운 구조로 보인다. 이러한 맵은 주로 커스텀 게임이나 사용자 지정 맵에서 활용될 것으로 보이며, 건물 파괴에 중점을 둔 플레이 방식은 전략적 선택지를 넓혀준다. 다만, 시작 위치와 건물 파괴 조건의 명확성이 떨어지는 점은 초보 플레이어에게 혼란을 줄 수 있으므로, 사전 설명이나 맵 에디터를 통한 사전 확인을 권장한다. 또한, 넓은 맵 크기상 적절한 자원 관리와 병력 동선이 중요해질 수 있으며, 이는 플레이어의 전략적 깊이를 더할 것으로 예상된다. 이 맵을 즐기기에 가장 적합한 대상은 스타크래프트의 커스텀 게임을 즐기는 유저들로, 특히 건물 파괴에 중점을 둔 새로운 게임 플레이를 경험하고자 하는 이들에게 추천된다. 또한 넓은 맵 크기와 복잡한 지형은 숙련된 플레이어들에게는 전략적 깊이를 제공할 수 있지만, 초보자의 경우 맵의 전체적인 구조를 파악하는 데 시간이 걸릴 수 있다.
스타 트렉 디플로메시 15.8 (Star-Trek Diplomacy 15.8)
스타크래프트 브루드워의 유즈맵 《스타 트렉 디플로메시 15.8(Star-Trek Diplomacy 15.8)》은 우주를 배경으로 한 전략 디플로메시 장르의 대표작으로, 플레이어는 각각의 세력 대표가 되어 행성을 정복하고 새로운 생명체를 만나는 등 우주 탐험의 스릴을 느낄 수 있는 맵입니다. 8192x8192의 넓은 맵 크기와 우주 타일셋을 활용한 아름다운 배경이 인상적이며, 특히 행성 간의 외교와 전투가 조화를 이루는 디플로메시의 핵심을 경험할 수 있습니다. 이 맵은 7명의 플레이어가 각자의 시작 행성에서 출발해 우주를 탐험하며 영토를 확장하고 자원을 관리하는 방식으로 진행됩니다. 행성을 정복하고 새로운 생명체를 발견하는 것은 물론, 외교를 통해 동맹을 맺거나 배신을 당하는 등 플레이어 간의 상호작용이 게임의 재미를 극대화합니다. 넓은 맵에서 펼쳐지는 전투는 필연적으로 멀티태스킹과 전략적 판단을 요구하며, 초보자에게는 다소 복잡하게 느껴질 수 있지만 숙련된 플레이어에게는 긴장감 넘치는 전략적 깊이를 제공합니다. 특히 우주 배경의 디자인과 행성 간의 이동 경로, 전투 시의 미묘한 밸런스가 이 맵의 특징으로, 우주 탐험의 로망을 느낄 수 있도록 구성되어 있습니다. 다만, 넓은 맵 크기 때문에 초보자가 조작과 전략을 익히는 데 다소 시간이 걸릴 수 있으며, 팀플레이보다는 개인 플레이가 중심이 되는 구조입니다. 우주를 무대로 한 전략적 대결을 즐기고 싶은 플레이어들에게 강력히 추천할 수 있는 맵입니다. 플레이 전에는 행성 간의 거리와 자원 분포를 미리 확인하고, 동맹을 맺을 상대와 전투를 펼칠 대상을 신중히 결정하는 것이 중요합니다. 또한, 넓은 맵에서 펼쳐지는 긴장감 있는 전투를 즐기기 위해 충분한 시간을 확보하는 것이 좋습니다. Star-Trek Diplomacy 15.8 is a classic UMS map in the strategy diplomacy genre set in space, where players take on the role of different factions to conquer planets, encounter new life forms, and explore the cosmos. The map stands out with its vast 8192x8192 size and space-themed tileset, creating an immersive backdrop for diplomatic and combat interactions. The gameplay involves seven players starting from their respective home planets, expanding territories, managing resources, and navigating the vast expanse of space. Players must balance exploration, conquest, and diplomacy, forging alliances or betraying them to gain the upper hand. The large map ensures that engagements require multitasking and strategic foresight, which may be challenging for beginners but offers deep strategic satisfaction for experienced players. The space-themed design, intricate pathways between planets, and balanced combat mechanics are key highlights, delivering a sense of cosmic adventure. However, the expansive map size can be daunting for newcomers, and the gameplay leans more toward individual strategy rather than teamwork. This map is highly recommended for players seeking a thrilling strategic challenge in a space setting. Before playing, it's crucial to study the distances between planets, resource distribution, and potential allies or adversaries. Allocating sufficient time is essential to fully enjoy the tense, strategic battles that unfold across the vast map.
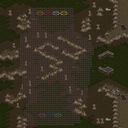
스나이퍼 발드 + 엑스트라 v314 (Sniper Bald + Extras v314)
스타크래프트 브루드워의 유즈맵 《Sniper Bald + Extras v314》는 저격수 포지션에 특화된 디펜스형 맵으로, 사막 지형을 배경으로 펼쳐지는 긴장감 넘치는 전투가 특징이다. 맵 중앙에 위치한 넓은 개활지는 저격수끼리의 일대일 대결을 유도하며, 양측 진영은 각각의 저격 포인트에서 적을 포착해야 한다. 맵 곳곳에 배치된 바위와 언덕은 시야를 차단하는 장애물 역할을 하며, strategic한 포지션 선택이 승패를 좌우한다. 특히, 맵의 좌우에 배치된 고지대는 저격수에게 유리한 위치이지만, 반대로 적의 사정권에 노출되기도 쉽기 때문에 신중한 움직임이 요구된다. 추가 요소로 추정되는 'Extras'는 저격 이외의 전투나 보조 기능을 제공할 가능성이 있으며, 이는 플레이어의 전략적 선택을 더욱 다양하게 만든다. 초보 플레이어의 경우 적응하기 어려운 맵 구조이지만, 숙련된 저격수라면 각 포지션의 특성과 적의 움직임을 읽어내 승리를 이끌어낼 수 있다. 이 맵은 주로 1:1 또는 2:2 팀전으로 즐기는 것을 추천하며, 저격수 간의 심리전이 핵심인 만큼 집중력과 순발력이 요구되는 유즈맵이다. 플레이 전에는 맵의 시야 차단 요소와 저격 포지션의 특징을 미리 숙지하는 것이 중요하다. 또한, 맵의 추가 요소인 'Extras'가 어떤 기능을 제공하는지 확인하여 전략을 다양화할 수 있도록 준비하는 것이 좋다. Sniper Bald + Extras v314 is a StarCraft: Brood War custom map designed for sniper-focused defense gameplay, set against a desert terrain. The expansive central area encourages intense one-on-one or team-based sniper duels, where players must strategically position themselves to eliminate opponents. Natural obstacles like rocks and hills obstruct line of sight, adding depth to the tactical choices available. The high-ground positions on either side of the map offer advantageous sniping spots but also expose players to enemy fire, requiring careful positioning and awareness. The 'Extras' component, while not fully verified from the image, likely introduces additional combat mechanics or support features, enriching the strategic options. This map demands precision and quick reflexes, making it more suited for experienced players who can adapt to its nuanced terrain. It is best enjoyed in 1v1 or 2v2 team formats, where sniper psychology and map control play crucial roles. Before playing, it is essential to familiarize yourself with the line-of-sight obstacles and sniper positions. Additionally, understanding the role of 'Extras' can provide a strategic edge by diversifying gameplay approaches.
맵 선택 가이드
태그는 맵의 핵심 특징을 빠르게 설명하지만 제작 버전마다 규칙이 다를 수 있습니다. 상세 설명에서 권장 인원, 난이도, 플레이 시간과 버전을 함께 확인한 뒤 다운로드하세요.