
적 방어 스타크래프트 맵 모음
'적 방어' 태그가 등록된 맵을 모았습니다. 장르 하나로 찾기 어려운 플레이 방식, 난이도와 특징을 중심으로 인기 맵과 최신 맵을 비교해 보세요.
- 등록 맵
- 19개
- 누적 다운로드
- 2
- 누적 조회
- 885
인기 맵
다운로드와 조회 반응이 높은 맵입니다.
헌터 SandBox
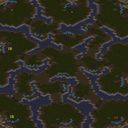
헌터 SandBox는 스타크래프트 브루드워의 유즈맵으로, 모래 사막 지형을 배경으로 한 샌드박스형 디펜스 맵입니다. 맵 곳곳에 흩어져 있는Hunter(사냥꾼) 유닛을 조합하여 끊임없이 몰려오는 적들을 방어하는 것이 주된 목표입니다. 맵 중앙의 넓은 개활지와 곳곳의 협곡, 언덕 지형이 특징으로, 사냥꾼의 이동 경로와 시야 확보가 전략의 핵심입니다.Hunter는 기본적으로 근접 공격을 하지만, 특정 조건에서 원거리 공격이나 특수 능력이 발동되는 것으로 추정됩니다. 플레이어는 초기 자원을 확보한 후, 사냥꾼을 생산해 방어 라인을 구축하거나, 자원을 투자해 강력한 유닛으로 업그레이드할 수 있습니다. 적의 공격 패턴은 랜덤으로 생성되는 것으로 보이며, 난이도가 높아질수록 적의 숫자와 체력이 증가합니다.맵의 구조상, 초기 방어 라인을 구축하는 것이 중요합니다. 중앙 개활지는 넓은 시야를 제공하지만, 적의 접근로가 많아 신속한 대응이 요구됩니다. 반면, 협곡과 언덕 지형은 적의 접근을 지연시킬 수 있는 요충지이므로, 방어 병력을 배치하는 데 유리합니다. 또한, 맵 곳곳에 흩어진 자원 채취 지역을 확보하여 지속적인 자원 공급을 유지하는 것이 게임의 장기전을 좌우합니다.헌터 SandBox는 비교적 높은 난이도를 자랑하는 디펜스 유즈맵으로, 전략적 사고와 빠른 판단력이 요구됩니다. 초기 자원 관리와 방어 라인 구축에 실패하면 게임이 순식간에 끝날 수 있으므로, 플레이어는 신중하게 판단을 내려야 합니다. 또한,Hunter의 특수 능력이나 업그레이드 시스템이 맵의 재미를 높이는 요소로 작용할 수 있습니다. 이 맵은 디펜스를 즐기는 플레이어뿐만 아니라, 전략적 사고를 테스트해보고 싶은 유저들에게도 추천할 만합니다. 특히, 사막 지형의 독특한 분위기와 조화로운 맵 디자인이 게임의 몰입감을 더해줍니다.플레이 전에는 Hunter의 공격 패턴과 특수 능력, 그리고 맵의 주요 자원 채취 지역을 미리 숙지하는 것이 좋습니다. 또한, 방어 라인을 구축할 때, 협곡이나 언덕 지형을 최대한 활용하여 적의 접근을 지연시키는 전략을 세워야 합니다. 초기 자원 관리에도 신경을 써서, 지속적인 자원 공급을 유지하는 것이 중요합니다. Hunter SandBox is a custom defense map from StarCraft: Brood War, set in a sandy desert landscape. The core objective is to defend against waves of enemies by combining Hunter units scattered across the map. The map features a wide open central area, canyons, and elevated terrain, making strategic positioning and visibility key to success. Hunters primarily engage in melee attacks, but they may also gain ranged or special abilities under certain conditions. Players start by securing resources, which can be used to produce Hunters for reinforcing defense lines or upgrading them into more powerful units. Enemy attack patterns appear to be randomly generated, with both their numbers and health increasing as difficulty rises. Given the map’s layout, establishing an early defense line is crucial. The central open area offers broad visibility but has many enemy approach routes, requiring quick reactions. Canyons and elevated terrain, however, can slow enemy advances, making them ideal defensive strongholds. Additionally, controlling resource-gathering spots scattered across the map is vital for sustaining long-term gameplay. Hunter SandBox is a challenging defense custom map that demands strategic thinking and rapid decision-making. A single misstep in early resource management or defense line setup can lead to a swift defeat, so players must make careful choices. The special abilities and upgrade system for Hunters further enhance the map’s appeal, making it enjoyable for both defense enthusiasts and players looking to test their strategic skills. The unique desert atmosphere and cohesive map design also contribute to an immersive experience. Before playing, it’s advisable to familiarize yourself with Hunter attack patterns, special abilities, and key resource locations. When building defense lines, leverage canyons and elevated terrain to delay enemy movements. Efficient early resource management is equally important to maintain a steady supply for upgrades and reinforcements.
로키 1.0 (Loki 1.0)
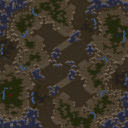
스타크래프트 브루드워의 유즈맵 <b>Loki 1.0</b>은 사막 배경의 넓은 평지에서 펼쳐지는 전략 디펜스 장르의 맵이다. 맵 중앙에 위치한 좁은 통로를 중심으로 적의 공격을 방어하는 구조로, 좁은 길목을 활용한 전략적 플레이가 핵심이다. 맵의 이름은 북유럽 신화의 변신술사 로키(Loki)에서 따왔으며, 변칙적이고 예측 불가능한 적의 움직임이 인상적이다. 맵의 전체적인 분위기는 사막의 황량한 beauty와 대비되는 화려한 색감의 적의 공격으로 가득 차 있어, 시각적으로도 흥미로운 경험을 제공한다. 플레이 방식은 중앙 통로를 지키는 데 초점을 맞추며, 좁은 길목을 통해 끊임없이 몰려드는 적을 상대로 방어전을 펼치게 된다. 맵의 디자인상 적의 공격 루트는 제한적이지만, 그로 인해 발생하는 좁은 통로에서의 집중 방어는 긴장감을 조성한다. 플레이어는 자원의 관리와 병력의 배치, 그리고 적절한 타이밍의 방어선 구축이 중요하며, 이는 초보자에게는 다소 어려운 과제가 될 수 있다. 반면에 디펜스에 익숙한 플레이어들에게는 전략적 깊이를 제공하는 요소로 작용할 것이다. 이 맵은 MBC게임 공식 맵으로 알려져 있으며, ‘MBC게임 공식 맵’이라는 표기에서 알 수 있듯 MBC게임의 공식적인 지원 아래 개발되었을 가능성이 크다. 맵의 제작자 ‘CarlSagan’과 Team M3, 그리고 Dezi가 참여했다는 정보는 맵의 품질과 완성도를 어느 정도 보장하는 요소로 볼 수 있다. 맵의 배경 음악이나 효과음 등은 없지만, 사막 배경의 시각적 요소와 긴박한 방어전이라는 구성 자체가 플레이어에게 몰입감을 높이는 데 충분하다. 추천하는 대상은 디펜스 장르에 익숙한 중급 플레이어 이상이며, 좁은 통로에서의 전략적 방어와 자원 관리를 즐길 수 있는 플레이어라면 충분히 매력을 느낄 수 있을 것이다. 플레이 전 반드시 확인해야 할 부분은 중앙 통로의 너비와 장애물의 배치다. 이 맵의 핵심은 좁은 길목에서의 방어이기 때문에, 통로의 너비가 좁거나 장애물이 많아 전략적 플레이가 제한될 수 있다. 또한, 맵의 맵 에디터 상의 설정이나 트리거가 복잡할 가능성이 있으므로, 미리 게임 내 설정이나 맵 설명을 꼼꼼히 확인하는 것이 좋다. 맵의 전체 크기는 매우 넓지만, 실제 플레이 가능한 구역은 제한적이므로, 맵의 스케일을 오해하지 않도록 주의해야 한다. 마지막으로, 이 맵은 MBC게임 공식 맵답게 한국어 커뮤니티에서 비교적 잘 알려진 편이므로, 관련 커뮤니티나 포럼에서 후기나 팁을 참고하는 것도 좋은 방법이다. This Brood War custom map, <b>Loki 1.0</b>, is a strategic defense game set in a vast desert landscape. The core gameplay revolves around defending a narrow central pathway from relentless enemy waves, utilizing the restricted space for tactical play. The name 'Loki' originates from Norse mythology, and the map's design reflects this theme through its unpredictable and dynamic enemy encounters. The gameplay focuses on protecting the central corridor, where enemy forces continuously attack through a confined route. While the limited attack paths create a sense of constraint, they also generate high tension during concentrated defense moments. Players must manage resources, strategically position units, and time their defenses effectively. This can be challenging for beginners but offers strategic depth for experienced defense map enthusiasts. Labeled as an official MBC Game map, 'Loki 1.0' was likely developed with the support of MBC Game, as indicated by the internal description. The involvement of creators like CarlSagan, Team M3, and Dezi suggests a high-quality production. Though the map lacks background music or sound effects, its desert-themed visuals and intense defense mechanics provide a deeply immersive experience. It is best suited for intermediate to advanced players who enjoy strategic defense gameplay and resource management. Before playing, check the width of the central corridor and the placement of obstacles, as these are critical to the core strategy. The map's large size may be misleading, but the actual playable area is concentrated around the central pathway. Players should also review in-game settings or map descriptions, as the map's editor settings or triggers may be complex. As an officially recognized map, 'Loki 1.0' is relatively well-known in Korean gaming communities, making it easy to find reviews or tips online for additional insights.
중앙미네랄디펜스1.5 (Central Mineral Defense 1.5)
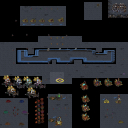
‘중앙미네랄디펜스1.5’는 스타크래프트: 브루드워의 대표적인 디펜스 장르 유즈맵으로, 중앙에 위치한 미네랄 지대에서 끊임없이 몰려드는 적을 방어하는 플레이에 초점을 맞춘 맵이다. 플레이어는 맵 중앙의 미네랄 지역을 사수하며, 일정 숫자 이상의 적이 도달하지 못하도록 막아야 한다. 맵의 구조는 비교적 단순하지만, 적의 유닛이 200마리 이상 도달하면 패배한다는 조건이 추가되어 긴장감을 높인다. 맵 중앙은 넓은 평지로 펼쳐져 있어 방어 진형을 잡기 용이하며, 주변 언덕과 협곡을 활용한 전략적 배치도 가능하다. 적의 공격 패턴은 지속적으로 변화하며, 초반에는 소규모 유닛이, 후반부로 갈수록 다수의 조합 유닛이 등장하는 구조로 보인다. 디펜스 장르의 특성상 방어 타워나 유닛을 배치하는 플레이가 주가 되며, 맵의 해상도와 타일셋(우주)은 넓은 시야와 전략적 깊이를 더해준다. 맵의 제목에서도 알 수 있듯이, 미네랄 지역을 중심으로 한 방어전이 핵심이며, 이 지역을 얼마나 효과적으로 사수하느냐가 승패를 좌우한다. 초보 플레이어에게는 기본적인 방어 전략과 유닛 관리 능력을 키울 수 있는 기회가 되며, 숙련된 플레이어에게는 더 빠른 판단과 효율적인 자원 관리가 요구된다. 맵의 특성상 팀플레이보다는 솔로 플레이에 최적화되어 있으며, 지속적인 적의 압박을 버텨내는 인내심과 전략적 사고가 필요하다. 플레이 전에는 적의 공격 패턴과 맵의 구조를 충분히 숙지하는 것이 중요하다. 특히 중앙 미네랄 지역 주변의 언덕이나 협곡을 활용한 방어선을 구축하는 것이 성공의 열쇠가 될 것이다. 또한, 게임 내 채널과 서버 정보가 제공되어 있어, 같은 장르의 다른 플레이어들과의 커뮤니케이션이나 공유가 용이하다는 점도 특징이다. 맵의 난이도는 내장된 설명에 따라 ‘도전적인’ 수준으로, 단순한 방어가 아니라 끊임없는 적의 공격을 버텨내야 하는 구조로 구성되어 있다. 이 맵은 디펜스 장르에 익숙한 플레이어뿐만 아니라, 브루드워의 기본 전략을 익히고자 하는 이들에게도 좋은 연습 opportunities를 제공할 것이다. 맵의 인코딩과 해상도 등 기술적 요소는 스타크래프트의 클래식한 환경을 그대로 재현하며, 이를 바탕으로 한 플레이 경험은 오래된 팬들에게도 친숙한 느낌을 준다. 마지막으로, 맵의 제작자 ‘Reign..MaSter’와 채널 정보가 포함되어 있어, 추가 콘텐츠나 업데이트 소식 등을 확인할 수 있는 장점이 있다. This is a classic StarCraft: Brood War defense custom map titled ‘중앙미네랄디펜스1.5,’ where players must defend the central mineral field from waves of enemy units. The primary objective is to prevent 200 or more enemy units from reaching the mineral line, which results in an instant loss. The map features a wide-open central area surrounded by strategic high ground and chokepoints, allowing for versatile defensive formations. Enemy units escalate in both quantity and complexity as the game progresses, beginning with basic swarms and advancing to mixed compositions in later stages. While the core gameplay revolves around placing defensive structures or units, the open layout encourages dynamic positioning and resource management. The map’s title and design clearly indicate its focus on mineral defense, making it ideal for players seeking to refine their defensive strategies or improve their unit control under pressure. It is best suited for solo play, as team coordination is not required, though the challenge lies in sustaining focus and adaptability throughout extended sessions. Before diving in, players should familiarize themselves with the map’s terrain, particularly the high ground near the mineral line, as this offers natural defensive advantages. The inclusion of creator and channel details in the map’s description also suggests an active community around this title, where players can share strategies or updates. The difficulty level leans toward the challenging side, demanding patience and quick decision-making to counter relentless enemy waves. For Brood War veterans, this map offers a nostalgic yet engaging experience that reinforces core defensive mechanics, while newcomers will find it a practical way to grasp the fundamentals of unit positioning and macro management. The map’s technical specifications, including its 2048x2048 resolution and space-themed tileset, contribute to a visually cohesive and immersive battlefield.
심즈 위드 울브스 (Sims With Wolves)
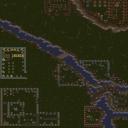
‘심즈 위드 울브스’는 스타크래프트 브루드워의 유즈맵으로, 전형적인 디펜스 장르의 핵심을 유쾌한 방식으로 재해석한 작품이다. 맵의 전체적인 구조는 중앙을 가로지르는 좁은 통로와 주변의 넓은 평지, 그리고 곳곳에 배치된 다수의 오브젝트들로 이루어져 있다. 플레이어는 맵의 하단에서 시작하며, 상단으로 이어지는 길목에 몰려드는 적들을 다양한 수단으로 저지해야 한다. 오브젝트는 건물 종류가 아닌 자연물이거나 장식용 구조물로 보이며, 이들을 활용해 진로를 차단하거나 방어 시설을 구축할 수 있다. 맵의 배경은 사막 타일셋으로 꾸며져 있어 건조하고 넓은 느낌을 주며, 이는 플레이어의 시야를 제한하지 않으면서도 전략적 선택을 강제하는 요소로 작용한다. 맵의 edges는 대부분 평지나 건조한 지형으로 이루어져 있으며, 일부는 절벽이나 언덕이 있는 것으로 보인다. 전투가 벌어지는 주요 지역은 맵의 중앙에서 상단으로 이어지는 좁은 길로, 이 곳에서 적의 공세가 집중된다. 맵의 특징상, 플레이어는 빠른 판단과 효율적인 자원 활용이 요구되며, 특히 오브젝트를 적극적으로 활용해 방어선을 구축하는 것이 핵심 전략이 될 것으로 추정된다. 초보 플레이어에게는 다소 어려운 난이도를 가질 수 있지만, 여러 번 플레이를 통해 맵의 패턴을 익히면 보다 수월하게 플레이할 수 있을 것이다. 추천 대상은 디펜스 장르를 люби하는 유저나, 전략적 깊이가 있는 맵을 선호하는 게이머들이다. 플레이 전에는 맵의 좁은 길목과 오브젝트의 배치에 주목해 방어 전략을 미리 구상해 보는 것이 좋다. 또한, 팀 플레이가 가능한 맵으로 추정되므로, 팀원과의 협력이 원활하게 이루어질 수 있도록 준비하는 것도 중요하다. 이 맵은 스타크래프트의 기본 메커니즘을 활용하되, 오브젝트와 지형의 활용도를 높인 점에서 유즈맵만의 참신함을 느낄 수 있다. Sims With Wolves is a user-made defense map in StarCraft: Brood War that reimagines the genre with a playful twist. The map features a narrow central corridor flanked by wide open areas dotted with various objects—likely natural or decorative structures rather than buildings. Players start at the bottom and must block waves of enemies advancing from the top, using the environment to create choke points or improvised defenses. The desert-themed tileset lends a dry, expansive feel to the battlefield, enhancing visibility while still requiring strategic positioning. The edges of the map appear mostly flat or gently sloped, with some cliffs or elevated terrain visible near key combat zones. The main action takes place along the narrow path leading upward from the center, where enemy forces converge. Players will need quick decision-making and efficient resource use, with the smart placement of objects being crucial to survival. While beginners may find the difficulty steep at first, repeated playthroughs should help refine strategies. This map is ideal for defense genre enthusiasts or those who enjoy maps with deep tactical elements. Before playing, it's wise to study the narrow paths and object placements to plan your defense. Since team play seems supported, coordination with teammates is key to success. What stands out is how this UMS map leverages StarCraft's mechanics and environmental design to offer a fresh, engaging experience within the defense genre.
터렛 디펜스 MIXED (Turret Defense MIXED)
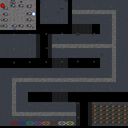
스타크래프트 브루드워의 유즈맵 ‘터렛 디펜스 MIXED’는 강력한 적과 업그레이드 가능한 영웅 유닛을 앞세운 전략적 디펜스 장르의 맵으로, 방어와 공격의 균형을 맞춰 적의 공세를 막아내는 플레이 경험을 제공한다. 맵의 핵심은 중앙에 위치한 방어 기지 주위에 배치된 터렛과 영웅 유닛으로, 플레이어는 이들을 효율적으로 배치하고 업그레이드하여 끊임없이 몰려드는 적을 상대해야 한다. 특히 ‘MIXED’라는 이름에서 알 수 있듯이 다양한 종류의 적과 방어 건물이 조합되어 있어, 전략적인 선택이 게임의 승패를 가른다. 맵의 구조는 비교적 넓고 복잡한 편으로, 중앙 지역을 중심으로 한 방어 라인과 외곽 지역을 잇는 길목이 있으며, 이 곳에서 병력을 배치하거나 전략적인 움직임을 펼칠 수 있다. 영웅 유닛은 게임 내내 꾸준히 활용할 수 있으며, 각 유닛의 특성과 장단점을 잘 이해하고 활용해야만 적의 강력한 공격 패턴을 이겨낼 수 있다. 맵의 난이도는 ‘적군이 더 강해졌지만 영웅도 더 유용해졌다’라는 설명에서 알 수 있듯이, 초보자보다는 중급 이상의 플레이어가 즐기기에 알맞은 수준으로 구성되어 있으며, 방어와 공격의 균형을 맞추는 데 집중할 필요가 있다. 또한, 맵의 제작자나 버전 정보가 복합적으로 포함되어 있어, 다양한 버전의 맵이 존재할 가능성이 높으므로, 플레이 전 자신이 선택한 버전의 특성을 미리 확인하는 것이 중요하다. 이 맵은 디펜스 장르를 좋아하는 플레이어들에게는 물론, 전략적인 사고를 요구하는 유즈맵을 즐기는 모든 게이머들에게 추천할 만하다. 특히, 팀 플레이보다는 혼자 또는 소수의 인원으로 플레이하는 경우가 많으므로, 개인의 전략적 역량을 시험해 볼 수 있는 좋은 기회가 될 것이다. StarCraft: Brood War’s custom map *Turret Defense MIXED* is a strategic defense genre map where players must balance offense and defense against powerful enemies using upgradable hero units. The core of the map revolves around turrets and hero units placed around a central defensive base—players must deploy and upgrade them efficiently to fend off relentless enemy waves. As the name *MIXED* suggests, the map combines various enemy types and defensive structures, making strategic choices crucial to victory. The map’s layout is relatively large and complex, featuring defensive lines centered around the middle region with pathways connecting to outer areas where players can position forces or execute maneuvers. Hero units remain useful throughout the game, and understanding their strengths and weaknesses is essential to overcoming the enemy’s strong attack patterns. The difficulty is tailored for intermediate to advanced players, as indicated by the description *"enemies have grown stronger, but heroes have become more useful."* Balancing defense and offense is key to success. Since the map includes multiple versions with different creators or updates, players should check the specific features of their chosen version before playing. This map is highly recommended for defense genre fans and gamers who enjoy strategic custom maps. It often favors solo or small-team play, making it a great opportunity to test individual strategic skills.
![하크 D 1339 (HaXoR D 1339 [Expert]) 맵 미리보기](https://cdn-star-data.huzy.net/thumbnail_fcb8d569c63341c19be68e9f5ee2729e.jpg)
하크 D 1339 (HaXoR D 1339 [Expert])
스타크래프트 브루드워의 유즈맵 'HaXoR D 1339 [Expert]'는 프로들과 전문가만을 위한 디펜스 맵으로, 그 이름처럼 강력한 방어와 치밀한 전략이 요구되는 고난이도 콘텐츠다. 맵의 구조는 중앙에 위치한 넓은 공간과 그 주위를 둘러싼 방어 건물이 특징적이며, 다수의 적 유닛이 끊임없이 공격해오는 구조로 구성되어 있다. 플레이어는 제한된 자원으로 방어선을 구축하고, 끊임없이 밀려오는 적을 상대로 버티며 생존해야 한다. 맵 제목에 '[Expert]'가 포함된 만큼 단순한 디펜스 맵을 넘어선 난이도를 자랑하며, 맵에 등장하는 적들은 매우 강력하고 다채로운 조합을 갖추고 있어 방심할 수 없다. 특히 방어 건물의 배치와 자원 관리, 그리고 순간적인 상황 판단력이 게임의 승패를 좌우한다. 맵의 분위기는 전체적으로 어두운 톤과 화려한 효과로 무장되어 있어 플레이어의 긴장감을 배가시킨다. 이 맵은 초보자들이 쉽게 접근하기 어려운 만큼, 충분히 연습한 숙련자나 프로 게이머에게 추천할 만한 작품이다. 플레이 전에는 맵의 구조와 방어 건물의 위치를 숙지하고, 자원과 유닛 생산 타이밍을 정확히 계산하는 것이 중요하다. 또한, 맵의 설명에서 'They tryin to get on your couch'라는 문구가 등장하는데, 이는 적들이 플레이어의 방어선을 뚫고 침입하려는 의도를 강조하는 동시에 게임의 긴장감을 고조시키는 요소로 작용한다. This StarCraft: Brood War custom map, 'HaXoR D 1339 [Expert]', is a high-difficulty defense game designed exclusively for professionals and experts. The map features a central open area surrounded by defensive structures, with waves of increasingly powerful enemy units relentlessly attacking. Players must strategically place limited resources to build defenses, manage resources wisely, and make split-second decisions to survive. The '[Expert]' designation in the title is no exaggeration—this is not a casual defense map but a challenging experience that demands precision and expertise. The enemies are not only numerous but also diverse in composition, requiring players to adapt their strategies dynamically. The map's dark, intense aesthetic with vibrant effects amplifies the tension, creating an immersive and high-stakes environment. Due to its complexity, this map is best suited for seasoned players or those looking to test their skills against extreme challenges. Before playing, it’s crucial to study the map layout, defensive structure placements, and resource management timings to maximize survival chances. The in-game description's phrase 'They tryin to get on your couch' humorously underscores the relentless enemy onslaught, adding both thematic depth and a sense of urgency to the gameplay.
프로텍트 유어셀프 4 (ProtectYourSelf4, PYS4)
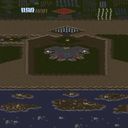
‘프로텍트 유어셀프 4 (ProtectYourSelf4, PYS4)’는 스타크래프트: 브루드워의 유즈맵으로, 플레이어가 생존을 목표로 적의 공격을 피해가며 맵 전체를 탐험하는 서바이벌 디펜스 장르의 맵이다. 맵은 넓은 사막 지형으로 펼쳐져 있으며, 곳곳에 배치된 적 건물과 유닛을 처리하지 않고서는 진행이 불가능한 구조로 설계되어 있다. 미니맵에서 확인되는 붉은색 지점들은 주요 방어 포인트로, 플레이어는 이 구역들을 안전하게 통과하거나 파괴해야 한다. 맵의 중앙 부근에 위치한 거대한 십자형 구조물은 보스전이나 중립 건물로 추정되며, 맵 하단부에는 방어선을 구축할 수 있는 요새가 보인다. 전체적으로 맵의 흐름이 일직선보다는 복합적인 루트로 구성되어 있어, 플레이어는 언제 어디서 적이 등장할지 예측하기 어려우며, 전략적인 움직임이 요구된다. 난이도는 플레이어의 조작 능력과 맵 이해도에 따라 크게 달라지며, 특히 좁은 통로나 다리 지형에서는 신속한 컨트롤이 필수적이다. 초보자는 시작 지점 주변의 안전한 구역에서 연습을 거친 후, 점차 맵의 외곽으로 나아가는 것이 좋다. 맵의 볼륨이 크고 복잡한 구조를 가지고 있어, 한 번 플레이로 모든 루트를 파악하기는 어려우므로, 반복 플레이를 통해 최적의 루트를 찾는 것이 중요하다. 추천 대상은 스타크래프트의 기본 조작에 익숙한 플레이어로, 특히 커맨드 앤 컨커 스타일의 디펜스 및 서바이벌 맵을 선호하는 유저들에게 적합하다. 맵을 플레이하기 전에는 미니맵과 맵 전체의 구조를 충분히 숙지하고, 자원 확보와 유닛 생산을 위한 빌드 오더를 미리 계획하는 것이 좋다. 또한, 적의 패턴을 미리 예상하고 대비할 수 있도록 여러 번의 플레이를 통해 데이터를 쌓는 것이 중요하다. 이 맵은 단순히 적을 무찌르는 것뿐만 아니라, 맵 전체를 효율적으로 탐험하고 위험 요소를 최소화하는 전략적 사고가 요구되는 작품이다. ‘Protect Your Self 4 (PYS4)’ is a StarCraft: Brood War custom map where players aim to survive by avoiding enemy attacks while exploring the entire map. It belongs to the survival defense genre, requiring players to navigate a vast desert terrain while dealing with scattered enemy buildings and units. The red markers on the minimap indicate key defense points—players must either safely pass through these areas or destroy them. A massive cross-shaped structure near the center of the map likely serves as a boss arena or neutral building, while a fortress at the bottom allows players to set up defensive lines. Unlike linear maps, PYS4 features a complex network of routes, making enemy appearances unpredictable and demanding strategic movement. Difficulty varies based on player skill and map knowledge, with tight corridors and bridge sections requiring quick reflexes. Beginners should practice in the safe zones near the starting area before venturing outward. Due to the map’s large scale and intricate design, fully exploring all paths in a single playthrough is nearly impossible—repetition is key to finding optimal routes. The map is best suited for players comfortable with StarCraft’s basic mechanics, particularly those who enjoy command-and-conquer-style defense and survival challenges. Before playing, thoroughly study the minimap and overall layout, and plan a build order for resource gathering and unit production. Repeated playthroughs help anticipate enemy patterns and refine strategies. This map isn’t just about defeating enemies—it rewards efficient exploration and minimizing risks through strategic thinking.
스파이럴 디펜스 (Spiral Defense)
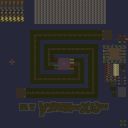
스타크래프트 브루드워의 유즈맵 <스파이럴 디펜스>는 디펜스 장르의 핵심을 '방어'와 '전략'에 맞추어 설계된 맵으로, 플레이어는 끊임없이 밀려오는 적 유닛으로부터 중앙의 핵심 건물을 지켜내야 한다. 맵은 사막 타일셋을 기반으로 4096x4096 크기의 넓은 공간을 차지하며, 나선형으로 배치된 길과 방어 포인트를 따라 적들이 진격해 온다. 내부 맵 설명에 따르면 '28기의 유닛이 끝까지 도달하지 못하게 막아야' 하는 것이 목표로, 이는 단순한 디펜스가 아니라 지속적인 압박과 효율적인 자원 관리가 요구되는 전략 게임이다. 플레이어는 시작 지점에서부터MapSettings를 통해 제공되는 방어 건물과 유닛을 배치할 수 있으며, 적들은 맵의 가장자리에서부터 서서히 움직이기 시작해 점차 중앙으로 접근한다. 방어 라인은 나선형 구조를 따라 형성되어 있어, 플레이어는 방어 건물을 효율적으로 배치하고 업그레이드를 통해 대응력을 높일 수 있다. 맵의 특징은 적의 공격 패턴이 일정하지 않고, 시간이 지날수록 더 많은 수의 유닛이 등장한다는 점이다. 이는 플레이어에게 끊임없는 긴장감을 제공하며, 방어 라인을 재구축하고 자원을 재분배하는 전략적 판단이 요구된다. 추천 대상은 스타크래프트의 디펜스 장르를 즐기는 플레이어, 특히 전략적 사고와 자원 관리에 자신 있는 유저들에게 적합하다. 또한, 팀 플레이를 지원하는 맵으로 보이지는 않지만, 다인 플레이를 통해 팀워크를 발휘할 수 있는 가능성도 열려 있다. 플레이 전에는 방어 건물의 배치 가능 범위와 업그레이드 경로, 적의 공격 타이밍과 패턴을 미리 숙지하는 것이 중요하다. 또한, 맵의 넓은 공간을 효율적으로 활용하기 위해 타일셋과 지형의 특징을 잘 이해해야 한다. Spiral Defense is a user-made defense map in StarCraft: Brood War, designed around the core mechanics of 'defense' and 'strategy.' Players must protect the central core building from waves of enemy units that continuously advance along spiral-shaped paths. Based on the internal map description, the objective is to prevent '28 units from reaching the end,' which elevates the challenge beyond a simple defense scenario, demanding efficient resource management and strategic planning. The map spans a large 4096x4096 desert-themed area, featuring spiral-structured paths and defense points where players can strategically place defensive buildings and units. Enemies emerge from the map's edges and gradually push toward the center, increasing in number over time. The spiral layout forces players to constantly adapt their defensive formations, reinforcing weak points and upgrading structures to withstand stronger assaults. One of the key challenges is the unpredictable enemy patterns, which require players to remain vigilant and make quick tactical decisions. This map is ideal for players who enjoy StarCraft's defense genre and excel in strategic thinking and resource allocation. While it doesn't explicitly support team play, the potential for multiplayer collaboration exists, especially if players coordinate their defense strategies. Before diving in, it's crucial to familiarize yourself with the placement range of defensive buildings, upgrade paths, enemy attack timings, and patterns. Understanding the tile set and terrain features will also help maximize efficiency during gameplay.
터렛 디펜스 20000 (Turret Defense 20000-Final-)
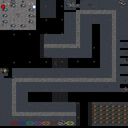
스타크래프트 브루드워의 인기 장르 중 하나인 디펜스 유즈맵인 <Turret Defense 20000-Final->은 적의 끊임없는 공격을 방어하며 생존을 목표로 하는 전략 게임입니다. 맵의 전체적인 구조는 중앙에 위치한 본진 건물을 중심으로 다수의 방어 타워가 배치되어 있으며, 맵 가장자리에서 적 유닛들이 끊임없이 몰려오는 방식입니다. 방어 타워의 종류로는 미사일 포탑, 레이저 포탑, 대공포 등이 확인되며, 각기 다른 공격 범위와 공격력을 보유하고 있어 적의 공세를 효율적으로 차단할 수 있도록 설계되어 있습니다. 특히, 맵의 좌우 대칭 구조와 중앙 본진의 보호가 핵심 전략 요소로 작용합니다. 플레이어는 제한된 자원으로 타워를 업그레이드하거나 추가 타워를 건설할 수 있으며, 적의 공격 패턴을 예측하며 방어 라인을 구축해야 합니다. 맵의 난이도는 중간 수준으로, 초반에는 비교적 수월하게 진행되지만 후반으로 갈수록 적의 공격 빈도와 강도가 증가하여 신중한 플레이가 요구됩니다. 추천 대상은 디펜스 장르를 좋아하는 플레이어이며, 특히 타워 배치와 자원 관리 능력을 키우고 싶은 유저들에게 적합합니다. 플레이 전에는 맵의 구조와 타워의 공격 범위를 숙지하는 것이 중요하며, 적의 공격 루트를 미리 예상하여 방어 라인을 구축하는 것이 관건입니다. 또한, 업그레이드 우선순위를 신중히 결정해야 하며, 자원 부족으로 인한 타워 건설 지연을 방지하기 위해 초반 자원 확보에 주의를 기울여야 합니다. Turret Defense 20000-Final- is a popular defense-style custom map in StarCraft: Brood War where players must survive by defending their base against endless enemy attacks. The map features a central base protected by multiple turrets, including missile launchers, laser turrets, and anti-air guns, each with distinct attack ranges and power levels. The symmetrical layout with pathways on both sides forces players to strategically place defenses to counter waves of incoming units. Players can upgrade existing turrets or construct new ones using limited resources, requiring careful planning to optimize defensive lines. The difficulty ramps up as the game progresses, with enemy attacks becoming more frequent and intense. This map is ideal for fans of the defense genre who want to refine their tower placement and resource management skills. Before playing, it's crucial to familiarize yourself with the map layout and turret ranges while anticipating enemy attack patterns. Prioritizing upgrades and ensuring a steady resource flow early on will significantly improve your chances of survival against relentless assaults.
썬크앤스포어 디펜스 (Sunken&Spore Defense)
《썬크앤스포어 디펜스》는 스타크래프트 브루드워의 디펜스 장르 유즈맵으로, 적의 유닛이 맵 끝까지 도달하지 못하도록 방어선을 구축하는 것이 핵심 목표다. 맵은 4096x4096 크기의 넓은 황무지 타일셋으로 구성되어 있으며, 중앙에 위치한 방어 루트를 따라 끊임없이 몰려드는 적을 저지해야 한다. 플레이어는 맵 하단에 위치한 본진을 보호하면서, 상단에서 끊임없이 쏟아지는 적의 공격을 효과적으로 차단해야 하는데, 특히 ‘썬크’와 ‘스포어’라는 두 가지 주요 적 유닛이 빠른 속도로 접근하기 때문에 신속한 반응과 전략적인 배치력이 요구된다. 방어선은São Paulo의 ‘썬크’와 ‘스포어’라는 이름의 유닛으로 구성되어 있으며, 이들은 각각의 특성을 지녀 방어 전술을 다양하게 적용할 수 있도록 설계되어 있다. 썬크는 느리지만 강력한 공격력을 지녔고, 스포어는 속도가 빠르며 공중 유닛을 공격할 수 있어, 플레이어는 이러한 특성을 고려해 방어 타워나 유닛을 배치해야 한다. 맵의 구조는 비교적 단순하지만, 적의 공세가 끊임없이 지속되므로 플레이어의 집중력과 전략적 사고가 중요하다. 초보자도 쉽게 접근할 수 있지만, 고난이도에서는 다중 방어 라인을 구축하고 자원 관리를 효율적으로 해야만 승리를 장담할 수 있다. 추천 플레이 인원은 6명으로, 팀 플레이를 통해 방어 라인을 공유하고 보완할 수 있으며, 팀원 간의 협력이 승패를 좌우할 수 있다. 특히 방어 라인의 중요 포인트를 분담하여 맡는 것이 효과적이다. 맵을 플레이하기 전에는 방어 타워의 배치 위치와 적의 공세 패턴을 미리 숙지하는 것이 중요하며, 빠른 반응 속도와 적절한 자원 관리가 필수적이다. 이 맵은 디펜스 장르를 좋아하는 플레이어뿐만 아니라, 전략적 사고와 팀워크를 연습하고 싶은 유저에게도 적합하다. 또한, 끊임없는 공세와 방어 라인의 중요성 때문에, 플레이어는 항상 긴장감을 유지하며 플레이해야 한다. 맵의 난이도는 보통 수준으로, 초보자도 충분히 즐길 수 있지만, 고수에게는 전략의 깊이를 제공하여 반복 플레이를 유도한다. 특히 방어 타워의 업그레이드와 유닛의 효율적인 배치에 따라 승패가 갈리기 때문에, 플레이어는 항상 최적의 전략을 고민해야 한다. 《Sunken Spore Defense》 is a defense-genre custom map in *StarCraft: Brood War*, where the core objective is to build defensive lines to prevent enemy units from reaching the end of the map. The map features a vast 4096x4096 wasteland tileset, and players must block relentless waves of enemies along the central defense route. While protecting their main base at the bottom of the map, players must also effectively intercept the constant attacks pouring down from the top. Two key enemy units—"Sunken" and "Spore"—approach rapidly, demanding quick reactions and strategic positioning. The defense lines consist of units named "Sunken" and "Spore," each with distinct traits that allow for varied defensive tactics. Sunken units are slow but pack powerful attacks, while Spore units are fast and can target air units, so players must consider these traits when placing defensive towers or units. Although the map’s structure is relatively simple, the continuous enemy assaults make sustained focus and strategic thinking essential. Beginners can easily pick it up, but higher difficulties require building multiple defense lines and managing resources efficiently to secure victory. The recommended player count is six, enabling team play where defense lines are shared and reinforced, with cooperation often determining the outcome. Assigning key defense points to different team members is particularly effective. Before playing, it’s crucial to familiarize yourself with tower placement and enemy attack patterns, as quick reactions and proper resource management are vital. This map suits both defense genre enthusiasts and players looking to refine their strategic thinking and teamwork. The constant pressure and emphasis on defense lines keep players on edge throughout. With an average difficulty level, it’s accessible to newcomers but offers enough depth for experienced players to warrant repeated playthroughs. Victory often hinges on tower upgrades and efficient unit placement, so players must always refine their strategies.
도지 더 래피스트 프로버전 (Dodge The Rapist ProVersion)
스타크래프트 브루드워의 디펜스 장르 유즈맵 〈Dodge The Rapist ProVersion〉은 플레이어가 끊임없이 쏟아지는 적 유닛을 피해 살아남는 도전형 맵이다. 맵 중앙에 위치한 플레이어는 좌우로 이동하며 적의 공격을 피해야 하며, 바닥에 설치된 방어 건물이나 특수 오브젝트를 활용해 진행을 유리하게 이끌어갈 수 있다. 적 유닛은 다수의 웨이브로 구성되어 있으며, 난이도가 점진적으로 상승하는 구조로 설계되어 있어 플레이어의 집중력과 반응 속도가 요구된다. 맵의 배경은 사막 타일셋으로 구성되어 있으며, 시야를 가리는 요소 없이 깔끔한 맵 디자인이 특징이다. 방어 건물이나 보조 오브젝트의 위치는 플레이어의 전략적 선택에 따라 결정되며, 맵의 난이도 조절을 위해 다양한 종류의 적 유닛이 등장한다. 또한, 맵의 중앙 통로와 좌우 бок 구역이 명확히 구분되어 있어, 플레이어는 자신의 위치와 이동 경로를 신중히 계획해야 한다. 이 맵은 특히 반응 속도와 손놀림이 중요한 요소로 작용하며, 초보자보다는 숙련된 플레이어에게 더 적합한 플레이 경험을 제공한다. 맵의 핵심은 적의 공격을 효과적으로 피하면서도, 방어 건물이나 보조 오브젝트를 활용해 최대한 오래 살아남는 것이다. 맵의 구성상, 방어 건물의 배치와 유닛의 이동 경로 간에 밸런스가 중요하며, 이를 통해 플레이어는 더 오랫동안 생존할 수 있는 전략을 구사할 수 있다. 이 맵은 디펜스 장르의 기본 틀을 유지하면서도, 피하기와 생존에 중점을 둔 독특한 플레이 경험을 제공하며, 같은 장르의 다른 맵들과 차별화되는 요소로 작용한다. 추천 대상은 스타크래프트의 디펜스 장르를 즐기는 플레이어이며, 특히 반응 속도와 손놀림이 뛰어난 분들에게 적합하다. 플레이 전에 맵의 구조와 적 유닛의 패턴을 숙지하는 것이 중요하며, 방어 건물이나 보조 오브젝트의 위치를 미리 확인해 두는 것이 좋다. 또한, 맵의 난이도가 점진적으로 상승하기 때문에, 초반 웨이브에서 최대한 많은 적을 제거하거나 피하는 전략을 세우는 것이 중요하다. 맵의 플레이 시간은 약 20~30분 정도로 예상되며, 난이도는 보통 수준이지만, 후반부로 갈수록 매우 어려워질 수 있어 집중력을 요한다. 이 맵은 디펜스 장르의 팬이라면 누구나 즐길 수 있지만, 특히 피하기와 생존에 중점을 둔 플레이 스타일을 선호하는 분들에게 추천한다. StarCraft: Brood War's defense-genre custom map *Dodge The Rapist ProVersion* challenges players to survive by dodging an endless onslaught of enemy units. Positioned in the center of the map, players must move left and right to evade attacks while using defensive structures or special objects on the ground to gain an advantage. The enemies arrive in waves, with difficulty escalating progressively, demanding sharp focus and quick reflexes. The map features a clean desert tile set with unobstructed visibility, allowing for strategic placement of defensive buildings and auxiliary objects. The central pathway and side areas are distinctly separated, requiring players to carefully plan their positioning and movement. The game prioritizes reaction speed and precision, making it more suited for experienced players than beginners. The core objective is to survive as long as possible by effectively dodging attacks and utilizing defensive structures or objects. Balancing building placement and movement routes is key to maximizing survival time. While maintaining the defense genre's framework, this map stands out by emphasizing evasion and survival, offering a unique experience compared to other maps in the genre. Ideal for players who enjoy defense maps, especially those with strong reflexes and hand-eye coordination. Before playing, familiarize yourself with the map layout and enemy patterns, and identify key defensive structures or objects in advance. Since difficulty ramps up gradually, a solid strategy for early waves—whether eliminating or dodging enemies—is crucial. The average playtime is around 20 to 30 minutes, with difficulty remaining moderate at first but becoming extremely challenging later, requiring sustained concentration. While accessible to all defense map fans, it is particularly recommended for those who prefer gameplay centered on evasion and survival.
썬켄 디펜스 6웨이 1.4 (Sunken Defense 6 way 1.4)
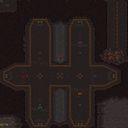
스타크래프트 브루드워의 대표적인 디펜스 유즈맵인 '썬켄 디펜스 6웨이 1.4'는 총 6방향에서 몰려오는 적들을 방어하는 구조로 구성되어 있다. 맵의 중앙에 위치한 본진 건물을 중심으로 여섯 갈래의 길로 적들이 끊임없이 침공해 오며, 플레이어는 각 길목에 배치된 방어 건물과 유닛을 활용해 이들을 물리쳐야 한다. 맵의 특징은 여섯 개의 동일한 방향성(6 way)을 가진 진입로로 균일한 난이도를 제공한다는 점으로, 각 방향의 밸런스가 잘 맞춰져 있어 초보부터 숙련자까지 즐길 수 있는 구조로 설계되었다고 추정된다. 정글 타일셋을 사용한 맵 분위기는Dark Reign이나 StarCraft의 원시적인Feel을 연상시키며,Dark Reign의 디자인 요소와 유사한 점이 보인다. 방어 건물의 배치와 유닛 생산 시스템은 전략적 선택의 폭을 넓히며, 특히 다수의 길목을 동시에 관리해야 하는 긴장감이 특징이다. 본진 주변의 좁은 공간과 각 방향의 좁은 진입로로 인해 방어가 비교적 수월한 편이지만, 동시에 여섯 방향의 공격을 모두 방어해야 한다는 압박감이 플레이어의 집중력을 요구한다. 추천 대상으로는 디펜스 유즈맵 초보자부터 숙련자까지 폭넓은 플레이어층을 고려할 수 있으며, 특히 1인 플레이로도 충분히 즐길 수 있는 구조다. 플레이 전에는 각 방향의 방어 건물 배치와 유닛 생산 타이밍을 미리 숙지하는 것이 중요하며, ресур스 관리와 유닛 조합 선택이 승패를 좌우할 수 있음을 유념해야 한다. 맵의 균형 잡힌 구조와 지속적인 적의 공격을 방어하는 재미는 디펜스 유즈맵의 정석을 느낄 수 있게 해준다. Sunken Defense 6 way 1.4 is a classic defense custom map in StarCraft: Brood War, featuring a six-directional layout where players must fend off waves of enemies approaching from all sides. The map is centered around a main base building, with six identical pathways leading to different attack fronts, ensuring balanced gameplay. The jungle-themed tileset gives the map a Dark Reign-inspired aesthetic, evoking a primitive yet strategic atmosphere similar to classic RTS games. While the narrow pathways and concentrated defense points make it easier to manage incoming attacks, the sheer number of fronts creates constant pressure, demanding sharp focus and quick decision-making. This map is suitable for both beginners and experienced players, as its balanced design allows for controlled progression and strategic depth. Before playing, it’s essential to understand the placement of defensive structures and the timing of unit production, as resource management and unit composition play critical roles in success. The map’s core appeal lies in its well-balanced structure and the satisfying challenge of defending against relentless assaults from all directions, making it a quintessential experience in the defense custom map genre.
최근 등록된 맵
새로 추가된 파일과 버전을 확인하세요.
헌터 SandBox
헌터 SandBox는 스타크래프트 브루드워의 유즈맵으로, 모래 사막 지형을 배경으로 한 샌드박스형 디펜스 맵입니다. 맵 곳곳에 흩어져 있는Hunter(사냥꾼) 유닛을 조합하여 끊임없이 몰려오는 적들을 방어하는 것이 주된 목표입니다. 맵 중앙의 넓은 개활지와 곳곳의 협곡, 언덕 지형이 특징으로, 사냥꾼의 이동 경로와 시야 확보가 전략의 핵심입니다.Hunter는 기본적으로 근접 공격을 하지만, 특정 조건에서 원거리 공격이나 특수 능력이 발동되는 것으로 추정됩니다. 플레이어는 초기 자원을 확보한 후, 사냥꾼을 생산해 방어 라인을 구축하거나, 자원을 투자해 강력한 유닛으로 업그레이드할 수 있습니다. 적의 공격 패턴은 랜덤으로 생성되는 것으로 보이며, 난이도가 높아질수록 적의 숫자와 체력이 증가합니다.맵의 구조상, 초기 방어 라인을 구축하는 것이 중요합니다. 중앙 개활지는 넓은 시야를 제공하지만, 적의 접근로가 많아 신속한 대응이 요구됩니다. 반면, 협곡과 언덕 지형은 적의 접근을 지연시킬 수 있는 요충지이므로, 방어 병력을 배치하는 데 유리합니다. 또한, 맵 곳곳에 흩어진 자원 채취 지역을 확보하여 지속적인 자원 공급을 유지하는 것이 게임의 장기전을 좌우합니다.헌터 SandBox는 비교적 높은 난이도를 자랑하는 디펜스 유즈맵으로, 전략적 사고와 빠른 판단력이 요구됩니다. 초기 자원 관리와 방어 라인 구축에 실패하면 게임이 순식간에 끝날 수 있으므로, 플레이어는 신중하게 판단을 내려야 합니다. 또한,Hunter의 특수 능력이나 업그레이드 시스템이 맵의 재미를 높이는 요소로 작용할 수 있습니다. 이 맵은 디펜스를 즐기는 플레이어뿐만 아니라, 전략적 사고를 테스트해보고 싶은 유저들에게도 추천할 만합니다. 특히, 사막 지형의 독특한 분위기와 조화로운 맵 디자인이 게임의 몰입감을 더해줍니다.플레이 전에는 Hunter의 공격 패턴과 특수 능력, 그리고 맵의 주요 자원 채취 지역을 미리 숙지하는 것이 좋습니다. 또한, 방어 라인을 구축할 때, 협곡이나 언덕 지형을 최대한 활용하여 적의 접근을 지연시키는 전략을 세워야 합니다. 초기 자원 관리에도 신경을 써서, 지속적인 자원 공급을 유지하는 것이 중요합니다. Hunter SandBox is a custom defense map from StarCraft: Brood War, set in a sandy desert landscape. The core objective is to defend against waves of enemies by combining Hunter units scattered across the map. The map features a wide open central area, canyons, and elevated terrain, making strategic positioning and visibility key to success. Hunters primarily engage in melee attacks, but they may also gain ranged or special abilities under certain conditions. Players start by securing resources, which can be used to produce Hunters for reinforcing defense lines or upgrading them into more powerful units. Enemy attack patterns appear to be randomly generated, with both their numbers and health increasing as difficulty rises. Given the map’s layout, establishing an early defense line is crucial. The central open area offers broad visibility but has many enemy approach routes, requiring quick reactions. Canyons and elevated terrain, however, can slow enemy advances, making them ideal defensive strongholds. Additionally, controlling resource-gathering spots scattered across the map is vital for sustaining long-term gameplay. Hunter SandBox is a challenging defense custom map that demands strategic thinking and rapid decision-making. A single misstep in early resource management or defense line setup can lead to a swift defeat, so players must make careful choices. The special abilities and upgrade system for Hunters further enhance the map’s appeal, making it enjoyable for both defense enthusiasts and players looking to test their strategic skills. The unique desert atmosphere and cohesive map design also contribute to an immersive experience. Before playing, it’s advisable to familiarize yourself with Hunter attack patterns, special abilities, and key resource locations. When building defense lines, leverage canyons and elevated terrain to delay enemy movements. Efficient early resource management is equally important to maintain a steady supply for upgrades and reinforcements.
터렛 디펜스 MIXED (Turret Defense MIXED)
스타크래프트 브루드워의 유즈맵 ‘터렛 디펜스 MIXED’는 강력한 적과 업그레이드 가능한 영웅 유닛을 앞세운 전략적 디펜스 장르의 맵으로, 방어와 공격의 균형을 맞춰 적의 공세를 막아내는 플레이 경험을 제공한다. 맵의 핵심은 중앙에 위치한 방어 기지 주위에 배치된 터렛과 영웅 유닛으로, 플레이어는 이들을 효율적으로 배치하고 업그레이드하여 끊임없이 몰려드는 적을 상대해야 한다. 특히 ‘MIXED’라는 이름에서 알 수 있듯이 다양한 종류의 적과 방어 건물이 조합되어 있어, 전략적인 선택이 게임의 승패를 가른다. 맵의 구조는 비교적 넓고 복잡한 편으로, 중앙 지역을 중심으로 한 방어 라인과 외곽 지역을 잇는 길목이 있으며, 이 곳에서 병력을 배치하거나 전략적인 움직임을 펼칠 수 있다. 영웅 유닛은 게임 내내 꾸준히 활용할 수 있으며, 각 유닛의 특성과 장단점을 잘 이해하고 활용해야만 적의 강력한 공격 패턴을 이겨낼 수 있다. 맵의 난이도는 ‘적군이 더 강해졌지만 영웅도 더 유용해졌다’라는 설명에서 알 수 있듯이, 초보자보다는 중급 이상의 플레이어가 즐기기에 알맞은 수준으로 구성되어 있으며, 방어와 공격의 균형을 맞추는 데 집중할 필요가 있다. 또한, 맵의 제작자나 버전 정보가 복합적으로 포함되어 있어, 다양한 버전의 맵이 존재할 가능성이 높으므로, 플레이 전 자신이 선택한 버전의 특성을 미리 확인하는 것이 중요하다. 이 맵은 디펜스 장르를 좋아하는 플레이어들에게는 물론, 전략적인 사고를 요구하는 유즈맵을 즐기는 모든 게이머들에게 추천할 만하다. 특히, 팀 플레이보다는 혼자 또는 소수의 인원으로 플레이하는 경우가 많으므로, 개인의 전략적 역량을 시험해 볼 수 있는 좋은 기회가 될 것이다. StarCraft: Brood War’s custom map *Turret Defense MIXED* is a strategic defense genre map where players must balance offense and defense against powerful enemies using upgradable hero units. The core of the map revolves around turrets and hero units placed around a central defensive base—players must deploy and upgrade them efficiently to fend off relentless enemy waves. As the name *MIXED* suggests, the map combines various enemy types and defensive structures, making strategic choices crucial to victory. The map’s layout is relatively large and complex, featuring defensive lines centered around the middle region with pathways connecting to outer areas where players can position forces or execute maneuvers. Hero units remain useful throughout the game, and understanding their strengths and weaknesses is essential to overcoming the enemy’s strong attack patterns. The difficulty is tailored for intermediate to advanced players, as indicated by the description *"enemies have grown stronger, but heroes have become more useful."* Balancing defense and offense is key to success. Since the map includes multiple versions with different creators or updates, players should check the specific features of their chosen version before playing. This map is highly recommended for defense genre fans and gamers who enjoy strategic custom maps. It often favors solo or small-team play, making it a great opportunity to test individual strategic skills.
터렛 디펜스 20000 (Turret Defense 20000-Final-)
스타크래프트 브루드워의 인기 장르 중 하나인 디펜스 유즈맵인 <Turret Defense 20000-Final->은 적의 끊임없는 공격을 방어하며 생존을 목표로 하는 전략 게임입니다. 맵의 전체적인 구조는 중앙에 위치한 본진 건물을 중심으로 다수의 방어 타워가 배치되어 있으며, 맵 가장자리에서 적 유닛들이 끊임없이 몰려오는 방식입니다. 방어 타워의 종류로는 미사일 포탑, 레이저 포탑, 대공포 등이 확인되며, 각기 다른 공격 범위와 공격력을 보유하고 있어 적의 공세를 효율적으로 차단할 수 있도록 설계되어 있습니다. 특히, 맵의 좌우 대칭 구조와 중앙 본진의 보호가 핵심 전략 요소로 작용합니다. 플레이어는 제한된 자원으로 타워를 업그레이드하거나 추가 타워를 건설할 수 있으며, 적의 공격 패턴을 예측하며 방어 라인을 구축해야 합니다. 맵의 난이도는 중간 수준으로, 초반에는 비교적 수월하게 진행되지만 후반으로 갈수록 적의 공격 빈도와 강도가 증가하여 신중한 플레이가 요구됩니다. 추천 대상은 디펜스 장르를 좋아하는 플레이어이며, 특히 타워 배치와 자원 관리 능력을 키우고 싶은 유저들에게 적합합니다. 플레이 전에는 맵의 구조와 타워의 공격 범위를 숙지하는 것이 중요하며, 적의 공격 루트를 미리 예상하여 방어 라인을 구축하는 것이 관건입니다. 또한, 업그레이드 우선순위를 신중히 결정해야 하며, 자원 부족으로 인한 타워 건설 지연을 방지하기 위해 초반 자원 확보에 주의를 기울여야 합니다. Turret Defense 20000-Final- is a popular defense-style custom map in StarCraft: Brood War where players must survive by defending their base against endless enemy attacks. The map features a central base protected by multiple turrets, including missile launchers, laser turrets, and anti-air guns, each with distinct attack ranges and power levels. The symmetrical layout with pathways on both sides forces players to strategically place defenses to counter waves of incoming units. Players can upgrade existing turrets or construct new ones using limited resources, requiring careful planning to optimize defensive lines. The difficulty ramps up as the game progresses, with enemy attacks becoming more frequent and intense. This map is ideal for fans of the defense genre who want to refine their tower placement and resource management skills. Before playing, it's crucial to familiarize yourself with the map layout and turret ranges while anticipating enemy attack patterns. Prioritizing upgrades and ensuring a steady resource flow early on will significantly improve your chances of survival against relentless assaults.
탱크 디펜스 V4.0 (Tank Defense V4.0)
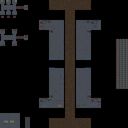
스타크래프트 브루드워의 <Tank Defense V4.0>은 적의 공세를 막아내야 하는 디펜스 장르의 유즈맵으로, 탱크와 방어 건물로 무장한 플레이어가 끊임없이 몰려오는 적들을 저지하는 것이 핵심 목표다. 맵 중앙에 위치한 본진을 중심으로 여러 방향으로 지형이 뻗어나가 있으며, 각 길목에는 적의 유닛들이 끊임없이 생성되어 공격해 온다. 플레이어는 제한된 자원으로 방어선을 구축하고, 탱크를 생산해 전선을 유지해야 한다. 맵의 특징은 지형이 복잡하고 길목이 여러 개로 나뉘어 있어 전략적인 방어 위치 선정과 자원 관리가 중요하다는 점이다. 적의 유닛 종류는 다양해 보이며, 특히 중장갑 유닛에 효과적인 방어 건물과 탱크의 조합이 필수적이다. 또한 맵 곳곳에 숨겨진 보급 지점이 있어 자원 확보의 기회를 제공한다. 초보자는 적의 공세에 당황하기 쉽지만, 방어 건물의 배치와 탱크 생산 타이밍을 잘 조절하면 안정적으로 진행할 수 있다. 숙련자라면 더 빠른 공세에 대비해 미리 방어선을 재구축하거나, 특정 길목에 집중 방어 전략을 펼칠 수 있다. 맵의 분위기는 군사 기지 방어라는 설정답게 단조롭지만, 끊임없는 공세와 제한된 자원의 균형을 맞추는 재미가 있다. 추천 대상은 디펜스 장르를 좋아하는 플레이어이며, 특히 전략성과 자원 관리에 중점을 두고 싶다면 도전해볼 만하다. 플레이 전 미리 방어 건물의 효과와 탱크의 특성을 숙지하고, 맵의 주요 길목을 파악하는 것이 중요하다. 또한 팀플레이가 가능할 경우, 각자의 역할을 분담해 방어 효율을 극대화할 수 있다. StarCraft: Brood War’s *Tank Defense V4.0* is a defense-style custom map where the core objective is to hold off enemy waves using tanks and defensive structures. The map centers around the player’s base, with terrain extending outward in multiple directions, each path spawning endless waves of enemy units. Players must construct defenses and produce tanks to maintain the frontline with limited resources. The map’s defining feature is its complex terrain with multiple branching paths, making strategic positioning and resource management crucial. The enemy units vary in type, and combining defensive structures with tanks—especially effective against heavy armor—is essential. Hidden supply points scattered throughout the map offer opportunities to secure additional resources. Beginners may struggle against the relentless assaults, but careful placement of defensive buildings and timely tank production can stabilize the defense. Experienced players can adapt by rebuilding lines faster or focusing defenses on high-priority paths to counter stronger waves. The atmosphere fits the theme of defending a military base, blending monotonous tension with the rewarding challenge of balancing limited resources against constant pressure. Ideal for fans of the defense genre, it rewards those who prioritize strategy and resource management. Before playing, it’s important to study defensive building effects and tank mechanics while mapping out key paths. If team play is an option, dividing roles among teammates can maximize defensive efficiency.
썬켄 디펜스 6웨이 1.4 (Sunken Defense 6 way 1.4)
스타크래프트 브루드워의 대표적인 디펜스 유즈맵인 '썬켄 디펜스 6웨이 1.4'는 총 6방향에서 몰려오는 적들을 방어하는 구조로 구성되어 있다. 맵의 중앙에 위치한 본진 건물을 중심으로 여섯 갈래의 길로 적들이 끊임없이 침공해 오며, 플레이어는 각 길목에 배치된 방어 건물과 유닛을 활용해 이들을 물리쳐야 한다. 맵의 특징은 여섯 개의 동일한 방향성(6 way)을 가진 진입로로 균일한 난이도를 제공한다는 점으로, 각 방향의 밸런스가 잘 맞춰져 있어 초보부터 숙련자까지 즐길 수 있는 구조로 설계되었다고 추정된다. 정글 타일셋을 사용한 맵 분위기는Dark Reign이나 StarCraft의 원시적인Feel을 연상시키며,Dark Reign의 디자인 요소와 유사한 점이 보인다. 방어 건물의 배치와 유닛 생산 시스템은 전략적 선택의 폭을 넓히며, 특히 다수의 길목을 동시에 관리해야 하는 긴장감이 특징이다. 본진 주변의 좁은 공간과 각 방향의 좁은 진입로로 인해 방어가 비교적 수월한 편이지만, 동시에 여섯 방향의 공격을 모두 방어해야 한다는 압박감이 플레이어의 집중력을 요구한다. 추천 대상으로는 디펜스 유즈맵 초보자부터 숙련자까지 폭넓은 플레이어층을 고려할 수 있으며, 특히 1인 플레이로도 충분히 즐길 수 있는 구조다. 플레이 전에는 각 방향의 방어 건물 배치와 유닛 생산 타이밍을 미리 숙지하는 것이 중요하며, ресур스 관리와 유닛 조합 선택이 승패를 좌우할 수 있음을 유념해야 한다. 맵의 균형 잡힌 구조와 지속적인 적의 공격을 방어하는 재미는 디펜스 유즈맵의 정석을 느낄 수 있게 해준다. Sunken Defense 6 way 1.4 is a classic defense custom map in StarCraft: Brood War, featuring a six-directional layout where players must fend off waves of enemies approaching from all sides. The map is centered around a main base building, with six identical pathways leading to different attack fronts, ensuring balanced gameplay. The jungle-themed tileset gives the map a Dark Reign-inspired aesthetic, evoking a primitive yet strategic atmosphere similar to classic RTS games. While the narrow pathways and concentrated defense points make it easier to manage incoming attacks, the sheer number of fronts creates constant pressure, demanding sharp focus and quick decision-making. This map is suitable for both beginners and experienced players, as its balanced design allows for controlled progression and strategic depth. Before playing, it’s essential to understand the placement of defensive structures and the timing of unit production, as resource management and unit composition play critical roles in success. The map’s core appeal lies in its well-balanced structure and the satisfying challenge of defending against relentless assaults from all directions, making it a quintessential experience in the defense custom map genre.
썬크앤스포어 디펜스 (Sunken&Spore Defense)
《썬크앤스포어 디펜스》는 스타크래프트 브루드워의 디펜스 장르 유즈맵으로, 적의 유닛이 맵 끝까지 도달하지 못하도록 방어선을 구축하는 것이 핵심 목표다. 맵은 4096x4096 크기의 넓은 황무지 타일셋으로 구성되어 있으며, 중앙에 위치한 방어 루트를 따라 끊임없이 몰려드는 적을 저지해야 한다. 플레이어는 맵 하단에 위치한 본진을 보호하면서, 상단에서 끊임없이 쏟아지는 적의 공격을 효과적으로 차단해야 하는데, 특히 ‘썬크’와 ‘스포어’라는 두 가지 주요 적 유닛이 빠른 속도로 접근하기 때문에 신속한 반응과 전략적인 배치력이 요구된다. 방어선은São Paulo의 ‘썬크’와 ‘스포어’라는 이름의 유닛으로 구성되어 있으며, 이들은 각각의 특성을 지녀 방어 전술을 다양하게 적용할 수 있도록 설계되어 있다. 썬크는 느리지만 강력한 공격력을 지녔고, 스포어는 속도가 빠르며 공중 유닛을 공격할 수 있어, 플레이어는 이러한 특성을 고려해 방어 타워나 유닛을 배치해야 한다. 맵의 구조는 비교적 단순하지만, 적의 공세가 끊임없이 지속되므로 플레이어의 집중력과 전략적 사고가 중요하다. 초보자도 쉽게 접근할 수 있지만, 고난이도에서는 다중 방어 라인을 구축하고 자원 관리를 효율적으로 해야만 승리를 장담할 수 있다. 추천 플레이 인원은 6명으로, 팀 플레이를 통해 방어 라인을 공유하고 보완할 수 있으며, 팀원 간의 협력이 승패를 좌우할 수 있다. 특히 방어 라인의 중요 포인트를 분담하여 맡는 것이 효과적이다. 맵을 플레이하기 전에는 방어 타워의 배치 위치와 적의 공세 패턴을 미리 숙지하는 것이 중요하며, 빠른 반응 속도와 적절한 자원 관리가 필수적이다. 이 맵은 디펜스 장르를 좋아하는 플레이어뿐만 아니라, 전략적 사고와 팀워크를 연습하고 싶은 유저에게도 적합하다. 또한, 끊임없는 공세와 방어 라인의 중요성 때문에, 플레이어는 항상 긴장감을 유지하며 플레이해야 한다. 맵의 난이도는 보통 수준으로, 초보자도 충분히 즐길 수 있지만, 고수에게는 전략의 깊이를 제공하여 반복 플레이를 유도한다. 특히 방어 타워의 업그레이드와 유닛의 효율적인 배치에 따라 승패가 갈리기 때문에, 플레이어는 항상 최적의 전략을 고민해야 한다. 《Sunken Spore Defense》 is a defense-genre custom map in *StarCraft: Brood War*, where the core objective is to build defensive lines to prevent enemy units from reaching the end of the map. The map features a vast 4096x4096 wasteland tileset, and players must block relentless waves of enemies along the central defense route. While protecting their main base at the bottom of the map, players must also effectively intercept the constant attacks pouring down from the top. Two key enemy units—"Sunken" and "Spore"—approach rapidly, demanding quick reactions and strategic positioning. The defense lines consist of units named "Sunken" and "Spore," each with distinct traits that allow for varied defensive tactics. Sunken units are slow but pack powerful attacks, while Spore units are fast and can target air units, so players must consider these traits when placing defensive towers or units. Although the map’s structure is relatively simple, the continuous enemy assaults make sustained focus and strategic thinking essential. Beginners can easily pick it up, but higher difficulties require building multiple defense lines and managing resources efficiently to secure victory. The recommended player count is six, enabling team play where defense lines are shared and reinforced, with cooperation often determining the outcome. Assigning key defense points to different team members is particularly effective. Before playing, it’s crucial to familiarize yourself with tower placement and enemy attack patterns, as quick reactions and proper resource management are vital. This map suits both defense genre enthusiasts and players looking to refine their strategic thinking and teamwork. The constant pressure and emphasis on defense lines keep players on edge throughout. With an average difficulty level, it’s accessible to newcomers but offers enough depth for experienced players to warrant repeated playthroughs. Victory often hinges on tower upgrades and efficient unit placement, so players must always refine their strategies.
스파이럴 디펜스 (Spiral Defense)
스타크래프트 브루드워의 유즈맵 <스파이럴 디펜스>는 디펜스 장르의 핵심을 '방어'와 '전략'에 맞추어 설계된 맵으로, 플레이어는 끊임없이 밀려오는 적 유닛으로부터 중앙의 핵심 건물을 지켜내야 한다. 맵은 사막 타일셋을 기반으로 4096x4096 크기의 넓은 공간을 차지하며, 나선형으로 배치된 길과 방어 포인트를 따라 적들이 진격해 온다. 내부 맵 설명에 따르면 '28기의 유닛이 끝까지 도달하지 못하게 막아야' 하는 것이 목표로, 이는 단순한 디펜스가 아니라 지속적인 압박과 효율적인 자원 관리가 요구되는 전략 게임이다. 플레이어는 시작 지점에서부터MapSettings를 통해 제공되는 방어 건물과 유닛을 배치할 수 있으며, 적들은 맵의 가장자리에서부터 서서히 움직이기 시작해 점차 중앙으로 접근한다. 방어 라인은 나선형 구조를 따라 형성되어 있어, 플레이어는 방어 건물을 효율적으로 배치하고 업그레이드를 통해 대응력을 높일 수 있다. 맵의 특징은 적의 공격 패턴이 일정하지 않고, 시간이 지날수록 더 많은 수의 유닛이 등장한다는 점이다. 이는 플레이어에게 끊임없는 긴장감을 제공하며, 방어 라인을 재구축하고 자원을 재분배하는 전략적 판단이 요구된다. 추천 대상은 스타크래프트의 디펜스 장르를 즐기는 플레이어, 특히 전략적 사고와 자원 관리에 자신 있는 유저들에게 적합하다. 또한, 팀 플레이를 지원하는 맵으로 보이지는 않지만, 다인 플레이를 통해 팀워크를 발휘할 수 있는 가능성도 열려 있다. 플레이 전에는 방어 건물의 배치 가능 범위와 업그레이드 경로, 적의 공격 타이밍과 패턴을 미리 숙지하는 것이 중요하다. 또한, 맵의 넓은 공간을 효율적으로 활용하기 위해 타일셋과 지형의 특징을 잘 이해해야 한다. Spiral Defense is a user-made defense map in StarCraft: Brood War, designed around the core mechanics of 'defense' and 'strategy.' Players must protect the central core building from waves of enemy units that continuously advance along spiral-shaped paths. Based on the internal map description, the objective is to prevent '28 units from reaching the end,' which elevates the challenge beyond a simple defense scenario, demanding efficient resource management and strategic planning. The map spans a large 4096x4096 desert-themed area, featuring spiral-structured paths and defense points where players can strategically place defensive buildings and units. Enemies emerge from the map's edges and gradually push toward the center, increasing in number over time. The spiral layout forces players to constantly adapt their defensive formations, reinforcing weak points and upgrading structures to withstand stronger assaults. One of the key challenges is the unpredictable enemy patterns, which require players to remain vigilant and make quick tactical decisions. This map is ideal for players who enjoy StarCraft's defense genre and excel in strategic thinking and resource allocation. While it doesn't explicitly support team play, the potential for multiplayer collaboration exists, especially if players coordinate their defense strategies. Before diving in, it's crucial to familiarize yourself with the placement range of defensive buildings, upgrade paths, enemy attack timings, and patterns. Understanding the tile set and terrain features will also help maximize efficiency during gameplay.
프로텍트 유어셀프 4 (ProtectYourSelf4, PYS4)
‘프로텍트 유어셀프 4 (ProtectYourSelf4, PYS4)’는 스타크래프트: 브루드워의 유즈맵으로, 플레이어가 생존을 목표로 적의 공격을 피해가며 맵 전체를 탐험하는 서바이벌 디펜스 장르의 맵이다. 맵은 넓은 사막 지형으로 펼쳐져 있으며, 곳곳에 배치된 적 건물과 유닛을 처리하지 않고서는 진행이 불가능한 구조로 설계되어 있다. 미니맵에서 확인되는 붉은색 지점들은 주요 방어 포인트로, 플레이어는 이 구역들을 안전하게 통과하거나 파괴해야 한다. 맵의 중앙 부근에 위치한 거대한 십자형 구조물은 보스전이나 중립 건물로 추정되며, 맵 하단부에는 방어선을 구축할 수 있는 요새가 보인다. 전체적으로 맵의 흐름이 일직선보다는 복합적인 루트로 구성되어 있어, 플레이어는 언제 어디서 적이 등장할지 예측하기 어려우며, 전략적인 움직임이 요구된다. 난이도는 플레이어의 조작 능력과 맵 이해도에 따라 크게 달라지며, 특히 좁은 통로나 다리 지형에서는 신속한 컨트롤이 필수적이다. 초보자는 시작 지점 주변의 안전한 구역에서 연습을 거친 후, 점차 맵의 외곽으로 나아가는 것이 좋다. 맵의 볼륨이 크고 복잡한 구조를 가지고 있어, 한 번 플레이로 모든 루트를 파악하기는 어려우므로, 반복 플레이를 통해 최적의 루트를 찾는 것이 중요하다. 추천 대상은 스타크래프트의 기본 조작에 익숙한 플레이어로, 특히 커맨드 앤 컨커 스타일의 디펜스 및 서바이벌 맵을 선호하는 유저들에게 적합하다. 맵을 플레이하기 전에는 미니맵과 맵 전체의 구조를 충분히 숙지하고, 자원 확보와 유닛 생산을 위한 빌드 오더를 미리 계획하는 것이 좋다. 또한, 적의 패턴을 미리 예상하고 대비할 수 있도록 여러 번의 플레이를 통해 데이터를 쌓는 것이 중요하다. 이 맵은 단순히 적을 무찌르는 것뿐만 아니라, 맵 전체를 효율적으로 탐험하고 위험 요소를 최소화하는 전략적 사고가 요구되는 작품이다. ‘Protect Your Self 4 (PYS4)’ is a StarCraft: Brood War custom map where players aim to survive by avoiding enemy attacks while exploring the entire map. It belongs to the survival defense genre, requiring players to navigate a vast desert terrain while dealing with scattered enemy buildings and units. The red markers on the minimap indicate key defense points—players must either safely pass through these areas or destroy them. A massive cross-shaped structure near the center of the map likely serves as a boss arena or neutral building, while a fortress at the bottom allows players to set up defensive lines. Unlike linear maps, PYS4 features a complex network of routes, making enemy appearances unpredictable and demanding strategic movement. Difficulty varies based on player skill and map knowledge, with tight corridors and bridge sections requiring quick reflexes. Beginners should practice in the safe zones near the starting area before venturing outward. Due to the map’s large scale and intricate design, fully exploring all paths in a single playthrough is nearly impossible—repetition is key to finding optimal routes. The map is best suited for players comfortable with StarCraft’s basic mechanics, particularly those who enjoy command-and-conquer-style defense and survival challenges. Before playing, thoroughly study the minimap and overall layout, and plan a build order for resource gathering and unit production. Repeated playthroughs help anticipate enemy patterns and refine strategies. This map isn’t just about defeating enemies—it rewards efficient exploration and minimizing risks through strategic thinking.
맵 선택 가이드
태그는 맵의 핵심 특징을 빠르게 설명하지만 제작 버전마다 규칙이 다를 수 있습니다. 상세 설명에서 권장 인원, 난이도, 플레이 시간과 버전을 함께 확인한 뒤 다운로드하세요.