
저글링 디펜스 스타크래프트 맵 모음
'저글링 디펜스' 태그가 등록된 맵을 모았습니다. 장르 하나로 찾기 어려운 플레이 방식, 난이도와 특징을 중심으로 인기 맵과 최신 맵을 비교해 보세요.
- 등록 맵
- 8개
- 누적 다운로드
- 0
- 누적 조회
- 371
인기 맵
다운로드와 조회 반응이 높은 맵입니다.
번식하는 저글링 막기 (Blocking Spawning Zerglings)
번식하는 저글링 막기는 스타크래프트 브루드워의 유즈맵으로, 저글링을 조종해 끊임없이 쏟아지는 적 저글링 웨이브를 방어하는 디펜스 장르의 맵이다. 맵 제목처럼 저글링을 직접 조작하며 미션을 수행하는 방식인데, 특이하게도 플레이어 자신이 저글링을 조종해 적 저글링을 막아낸다는 점이 핵심이다. 기존의 디펜스 맵이 주로 마린, 파이어뱃, 질럿 등 테란이나 프로토스 유닛을 중심으로 진행되는 것과는 달리, 이 맵은 저글링이라는 저렴하고 빠른 유닛을 앞세워 적의 공격을 버텨내야 한다는 점이 특징이다. 맵의 구조는 비교적 단순하면서도 효율적인 배치로 이루어져 있으며, 중앙에 위치한Spawn Location에서 끊임없이 적 저글링이 등장한다. 플레이어는 이 저글링을 조종해 적의 본진으로 진입하지 못하도록 저지하는 동시에, 일정 시간 동안 버텨내거나 특정 조건을 달성해야 승리를 거둘 수 있을 것으로 추정된다. 저글링의 빠른 속도와 낮은 체력을 고려할 때, strategic 하게 유닛을 배치하고 자원 관리를 효율적으로 해야 한다는 점에서 전략적인 사고가 요구된다. 또한, 자체 배속이 적용되어 있다는 점에서 플레이어의 반응 속도 또한 중요할 것으로 보인다. 초보자는 저글링의 컨트롤 및 배치에 익숙해지는 데 시간이 걸릴 수 있으며, 숙련된 플레이어는 보다 효율적인 Micro 컨트롤과 타임 어택을 노릴 수 있을 것이다. 이 맵은 저글링이라는 특정 유닛에 집중된 재미와 더불어, 디펜스 장르의 기본 틀을 유지하면서도 새로운 감각을 제공한다는 점에서 주목할 만하다. 특히, 저글링이라는 유닛의 특성을 십분 활용한 디자인으로 인해, 단순한 디펜스가 아닌 좀 더 전략적인 플레이가 요구되는 장르로 느껴진다. 전체적으로 저글링을 좋아하는 유저나 디펜스 장르에 익숙한 유저에게 추천할 만한 맵이며, 지속적인 업데이트를 통해 더 많은 재미 요소를 추가할 수 있을 것으로 기대된다. 다만, 버전 0.02라는 점에서 아직은 초기 개발 단계에 있어 밸런스나 추가 콘텐츠가 부족할 수 있으니, 플레이 전에는 이러한 점을 감안해야 할 것이다. 또한, EUD(Essential Unit Dead) 기능이 사용된 맵으로 알려져 있어, 일반적인 맵과는 다른 특수한 조건에서 플레이해야 한다는 점도 염두에 두어야 한다. 이 맵은 디펜스 장르에 새로운 재미를 더하고자 하는 플레이어들에게 좋은 선택이 될 것이다. 특히, 저글링의 빠른 움직임과 컨트롤을 즐기는 유저들에게는 더욱 흥미로운 경험을 제공할 수 있을 것이다. 기본적인 디펜스 맵의 틀을 유지하면서도, 저글링이라는 유닛을 중심으로 한 새로운 전략적 깊이를 제공한다는 점에서, 스타크래프트 유즈맵 커뮤니티 내에서 주목받을 만한 가치가 충분하다. "Breeding Zerglings" is a *StarCraft: Brood War* custom map where you control Zerglings to defend against endless waves of enemy Zerglings in a defense-style game. As the title suggests, you directly control the Zerglings to complete missions, with the unique twist of playing as the Zerglings themselves to block enemy Zergling attacks. Unlike traditional defense maps that revolve around Terran or Protoss units like Marines, Firebats, or Zealots, this map challenges you to hold the line using Zerglings—cheap, fast units that require strategic positioning and efficient resource management due to their low health and high speed. The map features a relatively simple yet efficient layout, with enemy Zerglings continuously spawning from a central location. Players must control their Zerglings to prevent the enemy from reaching their base while enduring for a set duration or meeting specific conditions to win. Given the Zerglings' speed and fragility, success depends on smart unit placement and micro-management, with the map's built-in speed adjustment making reaction time crucial. Beginners may struggle with Zergling control and positioning, while experienced players can aim for optimized micro-management and speed runs. The map stands out by focusing on Zerglings while keeping the core defense genre intact, offering a fresh experience that emphasizes strategy over simple blocking. It’s particularly recommended for Zergling enthusiasts or defense map veterans, with potential for more content through future updates. However, as it’s still in an early stage (version 0.02), balance and additional features may be lacking, so players should keep that in mind. Since it uses EUD (Essential Unit Dead) mechanics, special conditions apply, making it different from standard maps. Overall, this map adds exciting new elements to the defense genre and could be a great choice for players who enjoy Zergling mobility and control, offering deeper strategic gameplay while staying true to the defense map framework. It has strong potential to stand out in the *StarCraft* custom map community.
Sniper -Death Mission- (스나이퍼: 데스 미션)
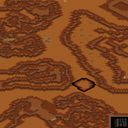
스타크래프트 브루드워의 유즈맵 'Sniper -Death Mission-'은 저격수들의 임무를 수행하는 독특한 디펜스형 플레이를 제공하는 맵이다. 맵은 6144x6144의 넓은 공간에 황혼 타일셋을 활용해 어두운 분위기 속에서 진행된다. 플레이어는 저격수 유닛을 조종하며 끊임없이 몰려오는 적들을 상대하게 되며, 맵 곳곳에 배치된 방어 시설과 전략적 요충지를 활용해 생존을 도모해야 한다. 저격수 특유의 장거리 공격과 함께, 맵 내의 구조물을 효과적으로 활용하지 않으면 빠르게 밀려오는 적의 물량에 무너질 수 있어 전략적 깊이가 요구된다. 저격수라는 컨셉에 맞게 맵은 넓은 시야를 제공하는 고지대와 엄폐물이 풍부한 지형을 중심으로 설계되어 있으며, 플레이어는 저격을 위해 적절한 위치를 선점하거나 후퇴하는 판단을 끊임없이 내려야 한다. 또한, 맵 우측 하단에 위치한 대형 구조물은 방어 거점 역할을 하며, 이곳을 지키느냐에 따라 플레이의 성패가 좌우될 수 있다. 적의 공격 패턴은 일정하지 않지만, 주로 근접 유닛과 소수의 원거리 유닛을 조합해 끊임없이 밀어붙이는 방식으로 진행된다. 플레이어는 자원의 제한 없이 시작하는 경우가 많으며, 맵 내의 보급품이나 아이템을 획득해 저격 능력을 강화하거나 방어력을 보충할 수 있는 구조로 보인다. 맵의 난이도는 초보자에게는 다소 어려울 수 있지만, 적절한 위치 선정과 효율적인 자원 관리를 통해 점차 극복해 나갈 수 있도록 설계되어 있다. 이 맵은 저격수라는 독특한 컨셉과 디펜스 형식을 결합해 새로운 재미를 제공하며, 특히 저격수의 긴 사정거리와 엄폐물의 활용이 핵심 전략이 되는 만큼, 플레이어의 위치 선정과 타이밍이 승패를 좌우할 것이다. 또한, 맵의 넓은 공간을 활용한 넓은 시야와 strategic depth는 반복 플레이를 통해 더욱 재미와 도전 과제를 제공할 것으로 예상된다. 저격수 팬이거나 디펜스 장르에 익숙한 플레이어에게는 강력한 추천 맵이다. 플레이 전에는 맵의 구조와 주요 방어 거점을 미리 파악해 두는 것이 중요하며, 저격수 유닛의 특성을 충분히 이해하고 활용할 수 있도록 준비하는 것이 좋다. StarCraft: Brood War's custom map *Sniper -Death Mission-* offers a unique defense-style gameplay where players take on the role of snipers completing critical missions. Set on a vast 6144x6144 map with a twilight tileset, the dark atmosphere enhances the intensity of the experience. Players control sniper units, fending off endless waves of enemies while leveraging scattered defensive structures and strategic chokepoints to survive. The map demands strategic depth, as relying solely on the snipers' long-range attacks—without effectively utilizing the terrain—can lead to being overwhelmed by the enemy's relentless assaults. Designed around the sniper theme, the map features high ground with expansive visibility and abundant cover, forcing players to constantly assess whether to position themselves for a clear shot or retreat to safety. The large structure in the bottom-right corner serves as a critical defensive stronghold; securing or losing this area can determine the outcome of the mission. While enemy attack patterns vary, they typically consist of waves of melee units mixed with a few ranged attackers, pushing forward in relentless waves. Players often start without resource constraints and can gather supplies or items scattered across the map to enhance their sniping capabilities or bolster defenses. Though the map may pose a challenge for beginners, its design encourages gradual mastery through smart positioning and efficient resource management. By blending the sniper concept with defense mechanics, *Sniper -Death Mission-* delivers a fresh and engaging experience where sniping range and terrain utilization become key strategic elements. Success hinges on precise positioning and impeccable timing. The map's vast open spaces and deep strategic elements are likely to provide lasting enjoyment and replayability, making it a standout choice for sniper enthusiasts and defense genre fans alike. Before jumping in, it's crucial to study the map layout and key defensive points, and to fully understand and leverage the sniper unit's unique strengths.
링 디펜스 프로페셔널 (Ling Def Professional)
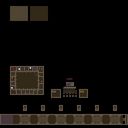
스타크래프트 브루드워의 대표적인 디펜스 유즈맵인 '링 디펜스 프로페셔널(Ling Def Professional)'은 저글링을 상대로 한 방어전을 펼치는 맵으로, 프로페셔널급 난이도를 자랑하는 작품이다. 맵의 구조는 중앙에 위치한 본진을 중심으로 네 방향에서 쏟아지는 저글링 웨이브를 막아내는 방식으로 구성되어 있으며, 방어에 성공할 때마다 보상을 얻으며 점차 난이도가 상승하는 구조를 가지고 있다. 플레이어는 기본적으로 저글링을 막아내야 하지만, 특정 조건을 만족하면 추가적인 유닛이나 건물을 확보할 수 있는 기회가 주어지며, 이를 통해 방어력을 강화하거나 공격적인 플레이로 전환할 수 있다. 맵의 특징 중 하나는 맵 중앙에 위치한 '방어 타워'로, 이 타워를 업그레이드하여 저글링의 진격을 저지할 수 있는 추가적인 방어선을 구축할 수 있다는 점이다. 또한, 맵의 가장자리에 위치한 '보급 기지'에서는 자원을 채집할 수 있으며, 이를 통해 추가적인 유닛이나 건물을 구매할 수 있어 전략적인 선택이 요구된다. 맵의 진행은 웨이브별로 나뉘며, 각 웨이브마다 저글링의 수가 증가하고 공격 패턴이 복잡해지므로 플레이어는 지속적인 대비를 해야 한다. 이 맵은 단일 플레이어 또는 팀 플레이로 즐길 수 있으며, 특히 저글링의 압박을 버텨내고 최후까지 살아남는 플레이어에게 높은 만족감을 제공한다. 초보자의 경우 방어 타워와 자원의 관리, 그리고 저글링의 패턴을 익히는 데 시간이 걸릴 수 있으므로, 맵의 구조와 기본 전략을 충분히 숙지한 후 플레이하는 것이 좋다. 또한, 맵의 난이도가 높기 때문에 팀플레이를 권장하며, 팀원 간의 원활한 소통과 역할 분담이 성공의 열쇠가 된다. 맵의 분위기는 잔인한 저글링의 공격과 본진의 방어라는 다소 무거운 테마이지만, 이를 극복하고 승리를 거머쥐는 순간의 쾌감은 다른 맵에서는 느낄 수 없는 매력이다. 맵의 전체적인 밸런스는 프로페셔널급답게 잘 짜여져 있으며, 초반의 여유로운 자원 관리와 중반의 방어 전략, 후반의Resource Management, strategic tower placement, and adaptive unit control are essential to overcoming the increasing waves of zerglings. The map's atmosphere is intense, with the constant pressure of zergling hordes testing your defenses, but the sense of achievement upon successfully repelling each wave is unparalleled in other defense maps. The professional difficulty ensures a challenging experience, making it ideal for players seeking a tough yet rewarding challenge that demands both skill and strategy.
OMFG 더 저글링 (OMFG THE ZERGLINGS)
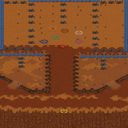
‘OMFG THE ZERGLINGS’는 스타크래프트: 브루드워의 대표적인 방어형 유즈맵으로, 끊임없이 밀려오는 저글링 무리를 상대로 강력한 방어선을 구축하는 것이 핵심 목표다. 맵은 황혼 테마의 넓은 평야와 중앙에 위치한 본진 구조물로 이루어져 있으며, 플레이어는 제한된 자원으로 적절한 방어 건물을 배치하고 업그레이드를 진행해야만 살아남을 수 있다. 초반에는 저글링이 소규모로 다가오지만, 시간이 지날수록 대군으로 변모하며 방어선을 압박하기 때문에 전략적인 건물 배치와 자원 관리가 필수적이다. 특히 입구 near한 곳에 포토캐논이나 미사일 터렛을 건설하는 것이 안정성을 높이는 핵심 포인트로 보인다. 맵의 아름다움을 더하는 황혼 테마는 황금빛 노을과 짙은 푸른 하늘의 조화로 플레이어에게 지친 전투의 피로를 조금이나마 덜어준다. 이 맵의 가장 큰 특징은 저글링의 끊임없는 공격과 방어선의 중요성, 그리고 자원과 시간에 대한 전략적 선택에 있다. 초보 플레이어는 방어선을 쉽게 무너뜨리기 쉽지만, 숙련된 플레이어는 효율적인 자원 활용과 업그레이드 타이밍을 통해 오랜 시간 동안 버틸 수 있다. 맵을 플레이하기 전에는 방어 건물의 효율성과 저글링의 공격 패턴을 미리 숙지하는 것이 중요하며, 특히 입구 near한 곳에 방어 건물을 배치하지 않을 경우 단번에 방어선이 무너질 위험이 있다. 추천 대상은 방어와 전략 게임을 좋아하는 플레이어로, 특히 타워 디펜스나 디펜스 장르에 익숙한 유저라면 손쉽게 적응할 수 있을 것이다. 이 맵은 단순한 방어 게임을 넘어, 전략적 사고와 긴장감을 동시에 제공하는 매력적인 유즈맵으로 평가된다. OMFG THE ZERGLINGS is a classic tower defense-style custom map in StarCraft: Brood War, where players must construct and maintain a strong defensive line against relentless waves of Zerglings. The map features a twilight-themed terrain with a central base structure, requiring players to strategically place defensive buildings and manage resources effectively to survive. Early waves consist of small Zergling groups, but as time progresses, the attacks escalate into massive onslaughts, making precise building placement and upgrades crucial. A key strategy involves positioning photon cannons or missile turrets near entry points to maximize defense efficiency. The twilight aesthetic, blending golden hues with deep blues, adds visual appeal, offering a refreshing contrast to the intense gameplay. The map’s core appeal lies in its balance of constant Zergling pressure, strategic building placement, and resource management. While novice players may struggle to maintain their defense lines, experienced players can extend their survival through efficient resource allocation and timely upgrades. Before playing, it’s essential to understand defensive building efficiency and Zergling attack patterns, as poor placement near entry points can lead to rapid base destruction. This map is ideal for fans of defensive and strategic gameplay, particularly those familiar with tower defense or defense genres, offering a blend of strategy and tension. The challenge and satisfaction of outlasting wave after wave of Zerglings make OMFG THE ZERGLINGS a standout custom map in the StarCraft community.
20,001 저글링을 막아라! (Can You Stop 20,001 Zergs?)
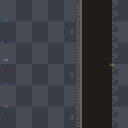
‘Can You Stop 20,001 Zergs?’는 스타크래프트 브루드워의 유즈맵 중에서도 독특한 디펜스 형식을 채용한 맵으로, ‘20,001’이라는 도전적인 목표가 주는 긴장감과 함께 끊임없이 몰려오는 저글링 무리를 상대하는 짜릿한 플레이 감각을 제공한다. 맵은 중앙에 본진이 위치한 구조로, 플레이어는 제한된 자원과 건물을 활용해 끊임없이 쏟아지는 저글링을 방어해야 한다. 저글링은 일정 시간마다 생성되어 맵 외곽에서부터 본진으로 접근하며, 플레이어는 초반에 주어지는 미네랄과 가스를 효율적으로 관리해 방어 타워나 유닛을 배치해야 한다. 맵의 특징 중 하나는 ‘20,001’이라는 숫자로, 이는 단순히 목표가 아니라 플레이어의 집중력과 전략적 선택을 끊임없이 시험하는 장치로 작용한다. 맵 곳곳에 배치된 오브젝트나 지형적 특징은 저글링의 진로를 분산시키거나 타워의 효율성을 높이도록 설계되어 있어, 한 번의 실수가 큰 손실로 이어질 수 있다. 또한, 맵의 규모가 크고 타일셋이 우주 테마로 되어 있어 시각적 몰입감을 높이는 동시에, 디자인 자체가 저글링의 끊임없는 공격 패턴을 강조하도록 구성되어 있다. 이 맵은 초보 플레이어에게는 다소 어려울 수 있지만, 디펜스 장르에 익숙한 유저라면 빠른 적응력을 요구받으면서도 끊임없는 긴장감 속에서 플레이할 수 있다. 추천하는 플레이 방식은 초반에 방어 타워를 신속히 건설해 저글링의 진입을 최소화하는 동시에, 자원 관리와 타워 배치의 균형을 유지하는 것이다. 또한, 맵의 특성상 저글링의 공세가 일정 주기로 강해지므로, 공세 간격을 예상해 여유 자원을 확보하는 것이 중요하다. 이 맵은 디펜스 유즈맵의 정석에 가까운 구조를 갖추고 있지만, ‘20,001’이라는 숫자가 주는 도전 과제와 함께 플레이어의 전략적 깊이를 극대화하는 요소로 작용한다. 특히, 타워의 종류나 배치 방법에 따라 난이도가 크게 달라질 수 있어, 다양한 시도를 통해 최적의 방어 전략을 찾는 재미가 있다. ‘Can You Stop 20,001 Zergs?’ is a unique defense-style custom map in *StarCraft: Brood War*, offering an intense challenge with its bold goal of stopping 20,001 Zerg units. The map delivers a thrilling experience as players face wave after wave of relentless zerglings, testing their reflexes and strategic thinking. The layout centers around a main base, where players must defend against continuous zergling rushes using limited resources and structures. Zerglings spawn periodically at the map’s edges and advance toward the player’s base, requiring efficient early-game mineral and gas management to place defensive towers or units strategically. The map’s defining feature is its "20,001" objective—not just a number, but a test of the player’s focus and decision-making under pressure. Terrain and obstacles are designed to disrupt zergling paths or optimize tower efficiency, so even a single mistake can lead to devastating losses. The expansive, space-themed tile set enhances immersion while reinforcing the relentless attack patterns of the zerglings. While the map may be tough for beginners, seasoned defense-map players will appreciate the fast-paced adaptation and sustained tension. A recommended strategy involves quickly constructing defensive towers to minimize early zergling incursions, balancing resource allocation with tower placement, and preparing for periodic surges by securing backup resources between attacks. Though it follows classic defense-map structure, the "20,001" challenge elevates the experience, pushing players to refine their tactics. The variety in tower types and placements means difficulty can vary widely, making the search for the perfect defense strategy an engaging and rewarding process.
Lurker Defense On Your Own!2.0 (라커 디펜스 온 유어 오운! 2.0)
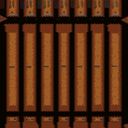
스타크래프트 브루드워의 대표적인 디펜스 유즈맵인 <Lurker Defense On Your Own!2.0>는 30단계에 걸쳐 끊임없이 몰려오는 적 유닛을 방어하는 하이브리드 디펜스 게임이다. 맵 이미지 상단은 방어 진영, 하단은 적의 시작 지점으로 확인되며, 중앙의 좁은 길목을 중심으로 리버, 캐리어, 스카웃 등 강력한 공중 유닛과 지상 유닛들이 끊임없이 진격해 온다. 플레이어는 각 단계마다 주어지는 제한된 자원으로 방어 건물을 배치하고, 유닛을 생산해 적을 저지해야 한다. 특히 저글링, 히드라리스크, 뮤탈리스크 같은 저렴하고 빠른 유닛들이 다수 등장해 초반 방어선을 무너뜨리기 쉽기 때문에 신중한 자원 관리와 배치 전략이 요구된다. 이 맵의 가장 큰 특징은 단계별로 점점 강화되는 적의 조합과 패턴이다. 초반에는 저글링과 히드라가 주를 이루지만, 후반부로 갈수록 캐리어, 디바우러, 울트라리스크 같은 고급 유닛들이 등장해 방어 난이도가 급격히 상승한다. 또한 특정 단계에서는 특수 유닛이나 버프가 주어지기도 하는데, 이는 맵 이미지에서 확인하기 어려운 부분이지만 게임 내 트리거로 구현된 것으로 추정된다. 방어 건물로는 성큰 콜로니, 포톤 캐논, 터렛, 미사일 터렛을 사용할 수 있으며, 각 건물이 가진 특성과 사정거리를 고려해 배치해야 한다. 플레이어는 7명의 인원으로 구성되며, 각자 독립된 미네랄과 가스 자원을 보유하고 있다. 하지만 중앙의 주요 방어 지점은 공유하기 때문에 팀원 간의 협력이 필수적이다. 자원의 분배와 건물 배치, 유닛 생산 타이밍을 조율하지 않으면 특정 단계에서 방어에 실패할 가능성이 크다. 맵의 전체 크기가 6144x6144로 넓고 황혼 타일셋을 사용해 시각적으로도 깔끔한 디자인을 자랑하지만, 디펜스 게임의 특성상 좁은 길목에 집중된 전투가 대부분이다. 또한 맵의 해상도가 높고 타일 단위가 192x192로 큰 편이어서 미세한 건물 배치가 어려울 수 있어, 초보자의 경우 어려움을 느낄 수 있다. 이 맵은 디펜스 유즈맵의 정석을 보여주는 작품으로, 단순한 방어 게임의 틀을 넘어서 전략적 깊이를 더한 점이 인상적이다. 각 단계마다 주어지는 제한된 자원으로 최적의 방어선을 구축해야 하며, 적의 패턴을 읽고 대응하는 능력이 요구된다. 특히 30단계에 걸쳐 진행되는 긴 플레이 시간 동안 지치지 않고 전략을 유지할 수 있는 인내심과 집중력이 필요하다. 초보자의 경우 처음 몇 단계는 무난하게 클리어할 수 있지만, 후반부로 갈수록 방어 난이도가 급격히 상승하기 때문에 꾸준한 연습과 팀원 간의 협력이 필수적이다. 디펜스 게임을 좋아하는 유저라면 한번쯤 도전해 볼 만한 작품이다. This classic StarCraft: Brood War defense custom map, <Lurker Defense On Your Own!2.0>, challenges players to hold the line against relentless waves of enemy units across 30 escalating stages. The map features a clear split between the player-controlled upper section and the enemy spawn zone below, connected by narrow chokepoints that force strategic engagements. Players must allocate limited resources to construct defensive structures like Sunken Colonies, Photon Cannons, and Missile Turrets while producing units to counter the onslaught of Zerg and Protoss forces. The map's hybrid defense system allows for both static defenses and active unit production, adding depth to the strategy required. A standout feature of this map is its progressive difficulty, where early stages are dominated by cost-effective units like Zerglings and Hydralisks, but later stages introduce elite units such as Carriers, Devourers, and Ultralisks, demanding precise micro-management and adaptive tactics. While the map's image doesn't reveal specific triggers or unique mechanics, internal descriptions suggest that certain stages may unlock special units or buffs, adding unpredictability to the challenge. The shared defensive chokepoint in the center of the map encourages coordination among the seven players, each controlling independent mineral and gas resources, making teamwork a critical factor in survival. Visually, the map utilizes the Twilight tileset with a high resolution of 6144x6144, providing a clean and immersive aesthetic, though the large tile size (192x192) can make fine adjustments to building placements tricky for newcomers. The gameplay revolves around narrow corridors and concentrated battles, typical of defense maps, but the map's hybrid nature—combining resource management, unit production, and strategic positioning—sets it apart from simpler tower defense variants. Players must balance immediate threats with long-term planning, as poor early-game decisions can cascade into failure in later stages. Ideal for defense map enthusiasts, <Lurker Defense On Your Own!2.0> offers a rewarding experience for those who enjoy strategic depth and escalating challenges. While the early stages are accessible, the later levels demand sharp reflexes, adaptive strategies, and strong team coordination. The map's longevity is evident in its 30-stage structure, which tests both patience and tactical acumen. For players seeking a robust defense experience that goes beyond basic tower placement, this map delivers a compelling and engaging challenge.
All랜덤저글링막기Hard BOSS
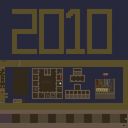
스타크래프트 브루드워의 유즈맵 장르 중에서도 독특한 재미를 자랑하는 ‘랜덤 저글링 막기’ 시리즈의 최신 버전, ‘All랜덤저글링막기Hard BOSS’를 만나보세요. 이 맵은 이름 그대로 무작위로 등장하는 저글링 무리를 막아내며, 끝판왕 급의 BOSS전을 포함하는 디펜스 게임입니다. 맵의 중앙에는 방어할 수 있는 요새가 배치되어 있으며, 주변에서는 끊임없이 저글링이 몰려오는데, 이들을 efficiently 제거하지 않으면 요새가 파괴될 위험에 처합니다. 특히 Hard 모드답게 보스가 등장하는 시점이 더 빨라지고 공격력이 강해지므로, 플레이어는 전략적인 자원 관리와 병력 배치에 더욱 신경 써야 합니다. 초반에는 소규모 병력으로 버티며 자원을 모아 강력한 유닛을 생산하는 것이 관건이며, BOSS전에서는 순간적인 반응력과 조합된 유닛의 활용이 승패를 가릅니다. 맵의 디자인도 깔끔한 황무지 타일셋을 기반으로 단순하면서도 중독성 있는 구조를 갖추고 있어, 집중력과 긴장감을 동시에 요구합니다. 초보자는 낮은 난이도에서 연습을 거친 후 Hard 모드로 도전해 보는 것을 권장하며, 숙련자는 빠른 클리어와 점수 경쟁을 즐길 수 있습니다. 플레이 전에는 맵의 구조와 주요 방어 포인트를 숙지하고, 자원 확보와 유닛 조합을 미리 계획해 두면 훨씬 수월하게 진행할 수 있습니다. 이 맵은 디펜스 장르에 익숙한 유저뿐만 아니라, 새로운 유즈맵을 찾아 헤매는 모든 스타크래프트 팬들에게 추천할 만한 작품입니다. Experience the latest installment in the uniquely fun "Random Zergling Stop" series of custom maps in StarCraft: Brood War—meet *All-Random Zergling Stop Hard BOSS*. As the name suggests, this is a defense game where you must fend off waves of randomly spawning zerglings, culminating in an epic boss battle. At the center of the map sits a fortress you must defend, while zerglings continuously swarm in from the surroundings; fail to eliminate them efficiently, and your fortress faces destruction. True to its Hard mode, bosses appear sooner with increased attack power, forcing players to focus even more on strategic resource management and troop positioning. Early on, the key is surviving with small forces, gathering resources, and producing powerful units. During boss fights, split-second reactions and smart unit composition determine victory or defeat. The map’s clean wasteland-themed tileset keeps the design simple yet addictive, demanding both focus and tension. Beginners are advised to practice on lower difficulties before tackling Hard mode, while veterans can enjoy speedruns and score competition. Before playing, familiarize yourself with the map layout and key defense points, and plan your resource gathering and unit builds ahead for smoother progression. This map is a great choice not only for defense genre fans but also for any StarCraft player searching for fresh custom map experiences.
랜덤 저글링 막기 HARD 5.2-Z (Random Zergling Block Hard 5.2-Z)
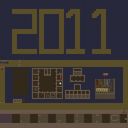
스타크래프트 브루드워의 유즈맵 장르 중에서도 비교적 복잡한 구조를 자랑하는 ‘랜덤 저글링 막기’ 시리즈의 최신 버전, ‘All랜덤저글링막기Hard5.2-Z’를 소개합니다. 이 맵은 디펜스 장르에 속하며, 특히 저글링을 주된 적으로 설정하고 플레이어의 방어 능력을 시험하는 콘텐츠로 구성되어 있습니다. 맵의 구조는 중앙에 위치한 플레이어 기지 주변으로 좁고 복잡한 길들이 이어져 있으며, 곳곳에 배치된 방어 시설이나 길목 막기 요소를 활용해 적의 진격을 저지하는 방식입니다. 이미지에서 확인되는 바와 같이, 맵의 대부분은 황무지 타일셋으로 이루어져 있으며, 지형은 비교적 평탄한 편이지만 길목의 배치와 좁은 통로들이 전략적 플레이를 요구합니다. 플레이어는 시작과 동시에 끊임없이 밀려오는 저글링 웨이브를 상대해야 하며, 각 웨이브마다 난이도가 점진적으로 상승하는 특징을 가지고 있습니다. 특히 ‘Hard’ 버전에 해당하는 만큼, 후반부로 갈수록 저글링의 체력과 공격력이 증가하며, 때로는 변칙적인 패턴으로 플레이어를 압박합니다. 이 맵의 핵심은 방어 시설의 배치와 자원의 관리, 그리고 실시간으로 변화하는 전황에 대응하는 능력입니다. 초보자의 경우 난이도 상승에 빠르게 압도당할 수 있으므로, 방어 라인을 튼튼히 구축하고 자원을 신중히 활용하는 연습이 필요합니다. 반면 숙련된 플레이어에게는 전략의 깊이를 느낄 수 있는 매력적인 콘텐츠로 다가올 것입니다. 추천 대상은 디펜스 장르를 любителей이며, 특히 저글링을 상대하는 전술을 연마하고 싶은 유저들에게 적합합니다. 플레이 전에는 맵의 길목과 방어 시설의 위치를 정확히 숙지하고, 각 웨이브별로 예상되는 적의 패턴을 분석하는 것이 중요합니다. 또한, 자원의 획득과 관리가 원활하지 않을 경우 게임이 어렵게 전개될 수 있으므로, 초반 자원 수집을 소홀히 하지 않도록 주의해야 합니다. This map, 'All랜덤저글링막기Hard5.2-Z,' falls under the defense genre in StarCraft: Brood War custom maps, offering a challenging experience focused on fending off relentless waves of zerglings. The layout features a central player base connected by narrow pathways interspersed with defensive choke points and strategic bottlenecks. Constructed primarily from the Badlands tileset, the terrain is mostly flat but punctuated by tight corridors that demand careful positioning and resource management. Players must defend against progressively harder waves of zerglings, with later stages introducing stronger variants and unpredictable attack patterns. The map’s difficulty ramps up significantly in the 'Hard' version, testing both the player’s ability to fortify defenses and their adaptability to dynamic combat scenarios. Beginners may struggle with the escalating challenge, so reinforcing early defenses and efficient resource allocation are critical. For experienced players, however, the map provides a deep strategic experience, rewarding precise base management and tactical foresight. Ideal for fans of defense-style custom maps, this title is particularly suited to those looking to refine their zergling-countering strategies. Before diving in, players should familiarize themselves with the map’s choke points and defensive structures, as well as the expected zergling patterns for each wave. Neglecting early resource gathering can severely hinder progress, so balancing expansion with immediate defense is key to success.
최근 등록된 맵
새로 추가된 파일과 버전을 확인하세요.
랜덤 저글링 막기 HARD 5.2-Z (Random Zergling Block Hard 5.2-Z)
스타크래프트 브루드워의 유즈맵 장르 중에서도 비교적 복잡한 구조를 자랑하는 ‘랜덤 저글링 막기’ 시리즈의 최신 버전, ‘All랜덤저글링막기Hard5.2-Z’를 소개합니다. 이 맵은 디펜스 장르에 속하며, 특히 저글링을 주된 적으로 설정하고 플레이어의 방어 능력을 시험하는 콘텐츠로 구성되어 있습니다. 맵의 구조는 중앙에 위치한 플레이어 기지 주변으로 좁고 복잡한 길들이 이어져 있으며, 곳곳에 배치된 방어 시설이나 길목 막기 요소를 활용해 적의 진격을 저지하는 방식입니다. 이미지에서 확인되는 바와 같이, 맵의 대부분은 황무지 타일셋으로 이루어져 있으며, 지형은 비교적 평탄한 편이지만 길목의 배치와 좁은 통로들이 전략적 플레이를 요구합니다. 플레이어는 시작과 동시에 끊임없이 밀려오는 저글링 웨이브를 상대해야 하며, 각 웨이브마다 난이도가 점진적으로 상승하는 특징을 가지고 있습니다. 특히 ‘Hard’ 버전에 해당하는 만큼, 후반부로 갈수록 저글링의 체력과 공격력이 증가하며, 때로는 변칙적인 패턴으로 플레이어를 압박합니다. 이 맵의 핵심은 방어 시설의 배치와 자원의 관리, 그리고 실시간으로 변화하는 전황에 대응하는 능력입니다. 초보자의 경우 난이도 상승에 빠르게 압도당할 수 있으므로, 방어 라인을 튼튼히 구축하고 자원을 신중히 활용하는 연습이 필요합니다. 반면 숙련된 플레이어에게는 전략의 깊이를 느낄 수 있는 매력적인 콘텐츠로 다가올 것입니다. 추천 대상은 디펜스 장르를 любителей이며, 특히 저글링을 상대하는 전술을 연마하고 싶은 유저들에게 적합합니다. 플레이 전에는 맵의 길목과 방어 시설의 위치를 정확히 숙지하고, 각 웨이브별로 예상되는 적의 패턴을 분석하는 것이 중요합니다. 또한, 자원의 획득과 관리가 원활하지 않을 경우 게임이 어렵게 전개될 수 있으므로, 초반 자원 수집을 소홀히 하지 않도록 주의해야 합니다. This map, 'All랜덤저글링막기Hard5.2-Z,' falls under the defense genre in StarCraft: Brood War custom maps, offering a challenging experience focused on fending off relentless waves of zerglings. The layout features a central player base connected by narrow pathways interspersed with defensive choke points and strategic bottlenecks. Constructed primarily from the Badlands tileset, the terrain is mostly flat but punctuated by tight corridors that demand careful positioning and resource management. Players must defend against progressively harder waves of zerglings, with later stages introducing stronger variants and unpredictable attack patterns. The map’s difficulty ramps up significantly in the 'Hard' version, testing both the player’s ability to fortify defenses and their adaptability to dynamic combat scenarios. Beginners may struggle with the escalating challenge, so reinforcing early defenses and efficient resource allocation are critical. For experienced players, however, the map provides a deep strategic experience, rewarding precise base management and tactical foresight. Ideal for fans of defense-style custom maps, this title is particularly suited to those looking to refine their zergling-countering strategies. Before diving in, players should familiarize themselves with the map’s choke points and defensive structures, as well as the expected zergling patterns for each wave. Neglecting early resource gathering can severely hinder progress, so balancing expansion with immediate defense is key to success.
All랜덤저글링막기Hard BOSS
스타크래프트 브루드워의 유즈맵 장르 중에서도 독특한 재미를 자랑하는 ‘랜덤 저글링 막기’ 시리즈의 최신 버전, ‘All랜덤저글링막기Hard BOSS’를 만나보세요. 이 맵은 이름 그대로 무작위로 등장하는 저글링 무리를 막아내며, 끝판왕 급의 BOSS전을 포함하는 디펜스 게임입니다. 맵의 중앙에는 방어할 수 있는 요새가 배치되어 있으며, 주변에서는 끊임없이 저글링이 몰려오는데, 이들을 efficiently 제거하지 않으면 요새가 파괴될 위험에 처합니다. 특히 Hard 모드답게 보스가 등장하는 시점이 더 빨라지고 공격력이 강해지므로, 플레이어는 전략적인 자원 관리와 병력 배치에 더욱 신경 써야 합니다. 초반에는 소규모 병력으로 버티며 자원을 모아 강력한 유닛을 생산하는 것이 관건이며, BOSS전에서는 순간적인 반응력과 조합된 유닛의 활용이 승패를 가릅니다. 맵의 디자인도 깔끔한 황무지 타일셋을 기반으로 단순하면서도 중독성 있는 구조를 갖추고 있어, 집중력과 긴장감을 동시에 요구합니다. 초보자는 낮은 난이도에서 연습을 거친 후 Hard 모드로 도전해 보는 것을 권장하며, 숙련자는 빠른 클리어와 점수 경쟁을 즐길 수 있습니다. 플레이 전에는 맵의 구조와 주요 방어 포인트를 숙지하고, 자원 확보와 유닛 조합을 미리 계획해 두면 훨씬 수월하게 진행할 수 있습니다. 이 맵은 디펜스 장르에 익숙한 유저뿐만 아니라, 새로운 유즈맵을 찾아 헤매는 모든 스타크래프트 팬들에게 추천할 만한 작품입니다. Experience the latest installment in the uniquely fun "Random Zergling Stop" series of custom maps in StarCraft: Brood War—meet *All-Random Zergling Stop Hard BOSS*. As the name suggests, this is a defense game where you must fend off waves of randomly spawning zerglings, culminating in an epic boss battle. At the center of the map sits a fortress you must defend, while zerglings continuously swarm in from the surroundings; fail to eliminate them efficiently, and your fortress faces destruction. True to its Hard mode, bosses appear sooner with increased attack power, forcing players to focus even more on strategic resource management and troop positioning. Early on, the key is surviving with small forces, gathering resources, and producing powerful units. During boss fights, split-second reactions and smart unit composition determine victory or defeat. The map’s clean wasteland-themed tileset keeps the design simple yet addictive, demanding both focus and tension. Beginners are advised to practice on lower difficulties before tackling Hard mode, while veterans can enjoy speedruns and score competition. Before playing, familiarize yourself with the map layout and key defense points, and plan your resource gathering and unit builds ahead for smoother progression. This map is a great choice not only for defense genre fans but also for any StarCraft player searching for fresh custom map experiences.
Sniper -Death Mission- (스나이퍼: 데스 미션)
스타크래프트 브루드워의 유즈맵 'Sniper -Death Mission-'은 저격수들의 임무를 수행하는 독특한 디펜스형 플레이를 제공하는 맵이다. 맵은 6144x6144의 넓은 공간에 황혼 타일셋을 활용해 어두운 분위기 속에서 진행된다. 플레이어는 저격수 유닛을 조종하며 끊임없이 몰려오는 적들을 상대하게 되며, 맵 곳곳에 배치된 방어 시설과 전략적 요충지를 활용해 생존을 도모해야 한다. 저격수 특유의 장거리 공격과 함께, 맵 내의 구조물을 효과적으로 활용하지 않으면 빠르게 밀려오는 적의 물량에 무너질 수 있어 전략적 깊이가 요구된다. 저격수라는 컨셉에 맞게 맵은 넓은 시야를 제공하는 고지대와 엄폐물이 풍부한 지형을 중심으로 설계되어 있으며, 플레이어는 저격을 위해 적절한 위치를 선점하거나 후퇴하는 판단을 끊임없이 내려야 한다. 또한, 맵 우측 하단에 위치한 대형 구조물은 방어 거점 역할을 하며, 이곳을 지키느냐에 따라 플레이의 성패가 좌우될 수 있다. 적의 공격 패턴은 일정하지 않지만, 주로 근접 유닛과 소수의 원거리 유닛을 조합해 끊임없이 밀어붙이는 방식으로 진행된다. 플레이어는 자원의 제한 없이 시작하는 경우가 많으며, 맵 내의 보급품이나 아이템을 획득해 저격 능력을 강화하거나 방어력을 보충할 수 있는 구조로 보인다. 맵의 난이도는 초보자에게는 다소 어려울 수 있지만, 적절한 위치 선정과 효율적인 자원 관리를 통해 점차 극복해 나갈 수 있도록 설계되어 있다. 이 맵은 저격수라는 독특한 컨셉과 디펜스 형식을 결합해 새로운 재미를 제공하며, 특히 저격수의 긴 사정거리와 엄폐물의 활용이 핵심 전략이 되는 만큼, 플레이어의 위치 선정과 타이밍이 승패를 좌우할 것이다. 또한, 맵의 넓은 공간을 활용한 넓은 시야와 strategic depth는 반복 플레이를 통해 더욱 재미와 도전 과제를 제공할 것으로 예상된다. 저격수 팬이거나 디펜스 장르에 익숙한 플레이어에게는 강력한 추천 맵이다. 플레이 전에는 맵의 구조와 주요 방어 거점을 미리 파악해 두는 것이 중요하며, 저격수 유닛의 특성을 충분히 이해하고 활용할 수 있도록 준비하는 것이 좋다. StarCraft: Brood War's custom map *Sniper -Death Mission-* offers a unique defense-style gameplay where players take on the role of snipers completing critical missions. Set on a vast 6144x6144 map with a twilight tileset, the dark atmosphere enhances the intensity of the experience. Players control sniper units, fending off endless waves of enemies while leveraging scattered defensive structures and strategic chokepoints to survive. The map demands strategic depth, as relying solely on the snipers' long-range attacks—without effectively utilizing the terrain—can lead to being overwhelmed by the enemy's relentless assaults. Designed around the sniper theme, the map features high ground with expansive visibility and abundant cover, forcing players to constantly assess whether to position themselves for a clear shot or retreat to safety. The large structure in the bottom-right corner serves as a critical defensive stronghold; securing or losing this area can determine the outcome of the mission. While enemy attack patterns vary, they typically consist of waves of melee units mixed with a few ranged attackers, pushing forward in relentless waves. Players often start without resource constraints and can gather supplies or items scattered across the map to enhance their sniping capabilities or bolster defenses. Though the map may pose a challenge for beginners, its design encourages gradual mastery through smart positioning and efficient resource management. By blending the sniper concept with defense mechanics, *Sniper -Death Mission-* delivers a fresh and engaging experience where sniping range and terrain utilization become key strategic elements. Success hinges on precise positioning and impeccable timing. The map's vast open spaces and deep strategic elements are likely to provide lasting enjoyment and replayability, making it a standout choice for sniper enthusiasts and defense genre fans alike. Before jumping in, it's crucial to study the map layout and key defensive points, and to fully understand and leverage the sniper unit's unique strengths.
OMFG 더 저글링 (OMFG THE ZERGLINGS)
‘OMFG THE ZERGLINGS’는 스타크래프트: 브루드워의 대표적인 방어형 유즈맵으로, 끊임없이 밀려오는 저글링 무리를 상대로 강력한 방어선을 구축하는 것이 핵심 목표다. 맵은 황혼 테마의 넓은 평야와 중앙에 위치한 본진 구조물로 이루어져 있으며, 플레이어는 제한된 자원으로 적절한 방어 건물을 배치하고 업그레이드를 진행해야만 살아남을 수 있다. 초반에는 저글링이 소규모로 다가오지만, 시간이 지날수록 대군으로 변모하며 방어선을 압박하기 때문에 전략적인 건물 배치와 자원 관리가 필수적이다. 특히 입구 near한 곳에 포토캐논이나 미사일 터렛을 건설하는 것이 안정성을 높이는 핵심 포인트로 보인다. 맵의 아름다움을 더하는 황혼 테마는 황금빛 노을과 짙은 푸른 하늘의 조화로 플레이어에게 지친 전투의 피로를 조금이나마 덜어준다. 이 맵의 가장 큰 특징은 저글링의 끊임없는 공격과 방어선의 중요성, 그리고 자원과 시간에 대한 전략적 선택에 있다. 초보 플레이어는 방어선을 쉽게 무너뜨리기 쉽지만, 숙련된 플레이어는 효율적인 자원 활용과 업그레이드 타이밍을 통해 오랜 시간 동안 버틸 수 있다. 맵을 플레이하기 전에는 방어 건물의 효율성과 저글링의 공격 패턴을 미리 숙지하는 것이 중요하며, 특히 입구 near한 곳에 방어 건물을 배치하지 않을 경우 단번에 방어선이 무너질 위험이 있다. 추천 대상은 방어와 전략 게임을 좋아하는 플레이어로, 특히 타워 디펜스나 디펜스 장르에 익숙한 유저라면 손쉽게 적응할 수 있을 것이다. 이 맵은 단순한 방어 게임을 넘어, 전략적 사고와 긴장감을 동시에 제공하는 매력적인 유즈맵으로 평가된다. OMFG THE ZERGLINGS is a classic tower defense-style custom map in StarCraft: Brood War, where players must construct and maintain a strong defensive line against relentless waves of Zerglings. The map features a twilight-themed terrain with a central base structure, requiring players to strategically place defensive buildings and manage resources effectively to survive. Early waves consist of small Zergling groups, but as time progresses, the attacks escalate into massive onslaughts, making precise building placement and upgrades crucial. A key strategy involves positioning photon cannons or missile turrets near entry points to maximize defense efficiency. The twilight aesthetic, blending golden hues with deep blues, adds visual appeal, offering a refreshing contrast to the intense gameplay. The map’s core appeal lies in its balance of constant Zergling pressure, strategic building placement, and resource management. While novice players may struggle to maintain their defense lines, experienced players can extend their survival through efficient resource allocation and timely upgrades. Before playing, it’s essential to understand defensive building efficiency and Zergling attack patterns, as poor placement near entry points can lead to rapid base destruction. This map is ideal for fans of defensive and strategic gameplay, particularly those familiar with tower defense or defense genres, offering a blend of strategy and tension. The challenge and satisfaction of outlasting wave after wave of Zerglings make OMFG THE ZERGLINGS a standout custom map in the StarCraft community.
Lurker Defense On Your Own!2.0 (라커 디펜스 온 유어 오운! 2.0)
스타크래프트 브루드워의 대표적인 디펜스 유즈맵인 <Lurker Defense On Your Own!2.0>는 30단계에 걸쳐 끊임없이 몰려오는 적 유닛을 방어하는 하이브리드 디펜스 게임이다. 맵 이미지 상단은 방어 진영, 하단은 적의 시작 지점으로 확인되며, 중앙의 좁은 길목을 중심으로 리버, 캐리어, 스카웃 등 강력한 공중 유닛과 지상 유닛들이 끊임없이 진격해 온다. 플레이어는 각 단계마다 주어지는 제한된 자원으로 방어 건물을 배치하고, 유닛을 생산해 적을 저지해야 한다. 특히 저글링, 히드라리스크, 뮤탈리스크 같은 저렴하고 빠른 유닛들이 다수 등장해 초반 방어선을 무너뜨리기 쉽기 때문에 신중한 자원 관리와 배치 전략이 요구된다. 이 맵의 가장 큰 특징은 단계별로 점점 강화되는 적의 조합과 패턴이다. 초반에는 저글링과 히드라가 주를 이루지만, 후반부로 갈수록 캐리어, 디바우러, 울트라리스크 같은 고급 유닛들이 등장해 방어 난이도가 급격히 상승한다. 또한 특정 단계에서는 특수 유닛이나 버프가 주어지기도 하는데, 이는 맵 이미지에서 확인하기 어려운 부분이지만 게임 내 트리거로 구현된 것으로 추정된다. 방어 건물로는 성큰 콜로니, 포톤 캐논, 터렛, 미사일 터렛을 사용할 수 있으며, 각 건물이 가진 특성과 사정거리를 고려해 배치해야 한다. 플레이어는 7명의 인원으로 구성되며, 각자 독립된 미네랄과 가스 자원을 보유하고 있다. 하지만 중앙의 주요 방어 지점은 공유하기 때문에 팀원 간의 협력이 필수적이다. 자원의 분배와 건물 배치, 유닛 생산 타이밍을 조율하지 않으면 특정 단계에서 방어에 실패할 가능성이 크다. 맵의 전체 크기가 6144x6144로 넓고 황혼 타일셋을 사용해 시각적으로도 깔끔한 디자인을 자랑하지만, 디펜스 게임의 특성상 좁은 길목에 집중된 전투가 대부분이다. 또한 맵의 해상도가 높고 타일 단위가 192x192로 큰 편이어서 미세한 건물 배치가 어려울 수 있어, 초보자의 경우 어려움을 느낄 수 있다. 이 맵은 디펜스 유즈맵의 정석을 보여주는 작품으로, 단순한 방어 게임의 틀을 넘어서 전략적 깊이를 더한 점이 인상적이다. 각 단계마다 주어지는 제한된 자원으로 최적의 방어선을 구축해야 하며, 적의 패턴을 읽고 대응하는 능력이 요구된다. 특히 30단계에 걸쳐 진행되는 긴 플레이 시간 동안 지치지 않고 전략을 유지할 수 있는 인내심과 집중력이 필요하다. 초보자의 경우 처음 몇 단계는 무난하게 클리어할 수 있지만, 후반부로 갈수록 방어 난이도가 급격히 상승하기 때문에 꾸준한 연습과 팀원 간의 협력이 필수적이다. 디펜스 게임을 좋아하는 유저라면 한번쯤 도전해 볼 만한 작품이다. This classic StarCraft: Brood War defense custom map, <Lurker Defense On Your Own!2.0>, challenges players to hold the line against relentless waves of enemy units across 30 escalating stages. The map features a clear split between the player-controlled upper section and the enemy spawn zone below, connected by narrow chokepoints that force strategic engagements. Players must allocate limited resources to construct defensive structures like Sunken Colonies, Photon Cannons, and Missile Turrets while producing units to counter the onslaught of Zerg and Protoss forces. The map's hybrid defense system allows for both static defenses and active unit production, adding depth to the strategy required. A standout feature of this map is its progressive difficulty, where early stages are dominated by cost-effective units like Zerglings and Hydralisks, but later stages introduce elite units such as Carriers, Devourers, and Ultralisks, demanding precise micro-management and adaptive tactics. While the map's image doesn't reveal specific triggers or unique mechanics, internal descriptions suggest that certain stages may unlock special units or buffs, adding unpredictability to the challenge. The shared defensive chokepoint in the center of the map encourages coordination among the seven players, each controlling independent mineral and gas resources, making teamwork a critical factor in survival. Visually, the map utilizes the Twilight tileset with a high resolution of 6144x6144, providing a clean and immersive aesthetic, though the large tile size (192x192) can make fine adjustments to building placements tricky for newcomers. The gameplay revolves around narrow corridors and concentrated battles, typical of defense maps, but the map's hybrid nature—combining resource management, unit production, and strategic positioning—sets it apart from simpler tower defense variants. Players must balance immediate threats with long-term planning, as poor early-game decisions can cascade into failure in later stages. Ideal for defense map enthusiasts, <Lurker Defense On Your Own!2.0> offers a rewarding experience for those who enjoy strategic depth and escalating challenges. While the early stages are accessible, the later levels demand sharp reflexes, adaptive strategies, and strong team coordination. The map's longevity is evident in its 30-stage structure, which tests both patience and tactical acumen. For players seeking a robust defense experience that goes beyond basic tower placement, this map delivers a compelling and engaging challenge.
링 디펜스 프로페셔널 (Ling Def Professional)
스타크래프트 브루드워의 대표적인 디펜스 유즈맵인 '링 디펜스 프로페셔널(Ling Def Professional)'은 저글링을 상대로 한 방어전을 펼치는 맵으로, 프로페셔널급 난이도를 자랑하는 작품이다. 맵의 구조는 중앙에 위치한 본진을 중심으로 네 방향에서 쏟아지는 저글링 웨이브를 막아내는 방식으로 구성되어 있으며, 방어에 성공할 때마다 보상을 얻으며 점차 난이도가 상승하는 구조를 가지고 있다. 플레이어는 기본적으로 저글링을 막아내야 하지만, 특정 조건을 만족하면 추가적인 유닛이나 건물을 확보할 수 있는 기회가 주어지며, 이를 통해 방어력을 강화하거나 공격적인 플레이로 전환할 수 있다. 맵의 특징 중 하나는 맵 중앙에 위치한 '방어 타워'로, 이 타워를 업그레이드하여 저글링의 진격을 저지할 수 있는 추가적인 방어선을 구축할 수 있다는 점이다. 또한, 맵의 가장자리에 위치한 '보급 기지'에서는 자원을 채집할 수 있으며, 이를 통해 추가적인 유닛이나 건물을 구매할 수 있어 전략적인 선택이 요구된다. 맵의 진행은 웨이브별로 나뉘며, 각 웨이브마다 저글링의 수가 증가하고 공격 패턴이 복잡해지므로 플레이어는 지속적인 대비를 해야 한다. 이 맵은 단일 플레이어 또는 팀 플레이로 즐길 수 있으며, 특히 저글링의 압박을 버텨내고 최후까지 살아남는 플레이어에게 높은 만족감을 제공한다. 초보자의 경우 방어 타워와 자원의 관리, 그리고 저글링의 패턴을 익히는 데 시간이 걸릴 수 있으므로, 맵의 구조와 기본 전략을 충분히 숙지한 후 플레이하는 것이 좋다. 또한, 맵의 난이도가 높기 때문에 팀플레이를 권장하며, 팀원 간의 원활한 소통과 역할 분담이 성공의 열쇠가 된다. 맵의 분위기는 잔인한 저글링의 공격과 본진의 방어라는 다소 무거운 테마이지만, 이를 극복하고 승리를 거머쥐는 순간의 쾌감은 다른 맵에서는 느낄 수 없는 매력이다. 맵의 전체적인 밸런스는 프로페셔널급답게 잘 짜여져 있으며, 초반의 여유로운 자원 관리와 중반의 방어 전략, 후반의Resource Management, strategic tower placement, and adaptive unit control are essential to overcoming the increasing waves of zerglings. The map's atmosphere is intense, with the constant pressure of zergling hordes testing your defenses, but the sense of achievement upon successfully repelling each wave is unparalleled in other defense maps. The professional difficulty ensures a challenging experience, making it ideal for players seeking a tough yet rewarding challenge that demands both skill and strategy.
20,001 저글링을 막아라! (Can You Stop 20,001 Zergs?)
‘Can You Stop 20,001 Zergs?’는 스타크래프트 브루드워의 유즈맵 중에서도 독특한 디펜스 형식을 채용한 맵으로, ‘20,001’이라는 도전적인 목표가 주는 긴장감과 함께 끊임없이 몰려오는 저글링 무리를 상대하는 짜릿한 플레이 감각을 제공한다. 맵은 중앙에 본진이 위치한 구조로, 플레이어는 제한된 자원과 건물을 활용해 끊임없이 쏟아지는 저글링을 방어해야 한다. 저글링은 일정 시간마다 생성되어 맵 외곽에서부터 본진으로 접근하며, 플레이어는 초반에 주어지는 미네랄과 가스를 효율적으로 관리해 방어 타워나 유닛을 배치해야 한다. 맵의 특징 중 하나는 ‘20,001’이라는 숫자로, 이는 단순히 목표가 아니라 플레이어의 집중력과 전략적 선택을 끊임없이 시험하는 장치로 작용한다. 맵 곳곳에 배치된 오브젝트나 지형적 특징은 저글링의 진로를 분산시키거나 타워의 효율성을 높이도록 설계되어 있어, 한 번의 실수가 큰 손실로 이어질 수 있다. 또한, 맵의 규모가 크고 타일셋이 우주 테마로 되어 있어 시각적 몰입감을 높이는 동시에, 디자인 자체가 저글링의 끊임없는 공격 패턴을 강조하도록 구성되어 있다. 이 맵은 초보 플레이어에게는 다소 어려울 수 있지만, 디펜스 장르에 익숙한 유저라면 빠른 적응력을 요구받으면서도 끊임없는 긴장감 속에서 플레이할 수 있다. 추천하는 플레이 방식은 초반에 방어 타워를 신속히 건설해 저글링의 진입을 최소화하는 동시에, 자원 관리와 타워 배치의 균형을 유지하는 것이다. 또한, 맵의 특성상 저글링의 공세가 일정 주기로 강해지므로, 공세 간격을 예상해 여유 자원을 확보하는 것이 중요하다. 이 맵은 디펜스 유즈맵의 정석에 가까운 구조를 갖추고 있지만, ‘20,001’이라는 숫자가 주는 도전 과제와 함께 플레이어의 전략적 깊이를 극대화하는 요소로 작용한다. 특히, 타워의 종류나 배치 방법에 따라 난이도가 크게 달라질 수 있어, 다양한 시도를 통해 최적의 방어 전략을 찾는 재미가 있다. ‘Can You Stop 20,001 Zergs?’ is a unique defense-style custom map in *StarCraft: Brood War*, offering an intense challenge with its bold goal of stopping 20,001 Zerg units. The map delivers a thrilling experience as players face wave after wave of relentless zerglings, testing their reflexes and strategic thinking. The layout centers around a main base, where players must defend against continuous zergling rushes using limited resources and structures. Zerglings spawn periodically at the map’s edges and advance toward the player’s base, requiring efficient early-game mineral and gas management to place defensive towers or units strategically. The map’s defining feature is its "20,001" objective—not just a number, but a test of the player’s focus and decision-making under pressure. Terrain and obstacles are designed to disrupt zergling paths or optimize tower efficiency, so even a single mistake can lead to devastating losses. The expansive, space-themed tile set enhances immersion while reinforcing the relentless attack patterns of the zerglings. While the map may be tough for beginners, seasoned defense-map players will appreciate the fast-paced adaptation and sustained tension. A recommended strategy involves quickly constructing defensive towers to minimize early zergling incursions, balancing resource allocation with tower placement, and preparing for periodic surges by securing backup resources between attacks. Though it follows classic defense-map structure, the "20,001" challenge elevates the experience, pushing players to refine their tactics. The variety in tower types and placements means difficulty can vary widely, making the search for the perfect defense strategy an engaging and rewarding process.
번식하는 저글링 막기 (Blocking Spawning Zerglings)
번식하는 저글링 막기는 스타크래프트 브루드워의 유즈맵으로, 저글링을 조종해 끊임없이 쏟아지는 적 저글링 웨이브를 방어하는 디펜스 장르의 맵이다. 맵 제목처럼 저글링을 직접 조작하며 미션을 수행하는 방식인데, 특이하게도 플레이어 자신이 저글링을 조종해 적 저글링을 막아낸다는 점이 핵심이다. 기존의 디펜스 맵이 주로 마린, 파이어뱃, 질럿 등 테란이나 프로토스 유닛을 중심으로 진행되는 것과는 달리, 이 맵은 저글링이라는 저렴하고 빠른 유닛을 앞세워 적의 공격을 버텨내야 한다는 점이 특징이다. 맵의 구조는 비교적 단순하면서도 효율적인 배치로 이루어져 있으며, 중앙에 위치한Spawn Location에서 끊임없이 적 저글링이 등장한다. 플레이어는 이 저글링을 조종해 적의 본진으로 진입하지 못하도록 저지하는 동시에, 일정 시간 동안 버텨내거나 특정 조건을 달성해야 승리를 거둘 수 있을 것으로 추정된다. 저글링의 빠른 속도와 낮은 체력을 고려할 때, strategic 하게 유닛을 배치하고 자원 관리를 효율적으로 해야 한다는 점에서 전략적인 사고가 요구된다. 또한, 자체 배속이 적용되어 있다는 점에서 플레이어의 반응 속도 또한 중요할 것으로 보인다. 초보자는 저글링의 컨트롤 및 배치에 익숙해지는 데 시간이 걸릴 수 있으며, 숙련된 플레이어는 보다 효율적인 Micro 컨트롤과 타임 어택을 노릴 수 있을 것이다. 이 맵은 저글링이라는 특정 유닛에 집중된 재미와 더불어, 디펜스 장르의 기본 틀을 유지하면서도 새로운 감각을 제공한다는 점에서 주목할 만하다. 특히, 저글링이라는 유닛의 특성을 십분 활용한 디자인으로 인해, 단순한 디펜스가 아닌 좀 더 전략적인 플레이가 요구되는 장르로 느껴진다. 전체적으로 저글링을 좋아하는 유저나 디펜스 장르에 익숙한 유저에게 추천할 만한 맵이며, 지속적인 업데이트를 통해 더 많은 재미 요소를 추가할 수 있을 것으로 기대된다. 다만, 버전 0.02라는 점에서 아직은 초기 개발 단계에 있어 밸런스나 추가 콘텐츠가 부족할 수 있으니, 플레이 전에는 이러한 점을 감안해야 할 것이다. 또한, EUD(Essential Unit Dead) 기능이 사용된 맵으로 알려져 있어, 일반적인 맵과는 다른 특수한 조건에서 플레이해야 한다는 점도 염두에 두어야 한다. 이 맵은 디펜스 장르에 새로운 재미를 더하고자 하는 플레이어들에게 좋은 선택이 될 것이다. 특히, 저글링의 빠른 움직임과 컨트롤을 즐기는 유저들에게는 더욱 흥미로운 경험을 제공할 수 있을 것이다. 기본적인 디펜스 맵의 틀을 유지하면서도, 저글링이라는 유닛을 중심으로 한 새로운 전략적 깊이를 제공한다는 점에서, 스타크래프트 유즈맵 커뮤니티 내에서 주목받을 만한 가치가 충분하다. "Breeding Zerglings" is a *StarCraft: Brood War* custom map where you control Zerglings to defend against endless waves of enemy Zerglings in a defense-style game. As the title suggests, you directly control the Zerglings to complete missions, with the unique twist of playing as the Zerglings themselves to block enemy Zergling attacks. Unlike traditional defense maps that revolve around Terran or Protoss units like Marines, Firebats, or Zealots, this map challenges you to hold the line using Zerglings—cheap, fast units that require strategic positioning and efficient resource management due to their low health and high speed. The map features a relatively simple yet efficient layout, with enemy Zerglings continuously spawning from a central location. Players must control their Zerglings to prevent the enemy from reaching their base while enduring for a set duration or meeting specific conditions to win. Given the Zerglings' speed and fragility, success depends on smart unit placement and micro-management, with the map's built-in speed adjustment making reaction time crucial. Beginners may struggle with Zergling control and positioning, while experienced players can aim for optimized micro-management and speed runs. The map stands out by focusing on Zerglings while keeping the core defense genre intact, offering a fresh experience that emphasizes strategy over simple blocking. It’s particularly recommended for Zergling enthusiasts or defense map veterans, with potential for more content through future updates. However, as it’s still in an early stage (version 0.02), balance and additional features may be lacking, so players should keep that in mind. Since it uses EUD (Essential Unit Dead) mechanics, special conditions apply, making it different from standard maps. Overall, this map adds exciting new elements to the defense genre and could be a great choice for players who enjoy Zergling mobility and control, offering deeper strategic gameplay while staying true to the defense map framework. It has strong potential to stand out in the *StarCraft* custom map community.
맵 선택 가이드
태그는 맵의 핵심 특징을 빠르게 설명하지만 제작 버전마다 규칙이 다를 수 있습니다. 상세 설명에서 권장 인원, 난이도, 플레이 시간과 버전을 함께 확인한 뒤 다운로드하세요.