
저그 웨이브 스타크래프트 맵 모음
'저그 웨이브' 태그가 등록된 맵을 모았습니다. 장르 하나로 찾기 어려운 플레이 방식, 난이도와 특징을 중심으로 인기 맵과 최신 맵을 비교해 보세요.
- 등록 맵
- 11개
- 누적 다운로드
- 12
- 누적 조회
- 323
인기 맵
다운로드와 조회 반응이 높은 맵입니다.
스타쉽 트루퍼스: SE (Starship Troopers: SE)
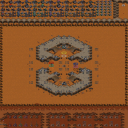
스타쉽 트루퍼스: SE(Starship Troopers: SE)는 영화 '스타쉽 트루퍼스'의 위스키 전초기지(Whiskey Outpost) 방어전을 모티브로 한 6인 협동 디펜스 유즈맵이다. 제작자 Panzer_Kavalier가 기존 SST 맵들을 기반으로 제작했으며, 황혼 타일셋의 96x96 대형 전장에서 펼쳐진다. 핵심 목표는 밀려드는 저그 무리로부터 전초기지를 사수하고 병력을 증강하며 탄약을 관리해 생존하는 것이다. 맵 구조는 중앙의 본진을 중심으로 다방면에서 적 웨이브가 몰려오는 전형적인 입구막기·서바이벌 형태다. '탄약이 떨어지지 않게 하라'는 설명대로 미네랄·가스 외에 탄약 개념이 트리거로 구현돼 있어, 무분별한 유닛 생산이나 공격 남발 시 보급 차질이 빚어진다. 플레이어는 마린, 파이어뱃, 메딕, 탱크 등 테란 병력을 조합해 진지를 구축하고, 벙커·터렛 등 고정 방어시설로 라인을 굳혀야 한다. 웨이브가 거듭될수록 울트라리스크·디파일러 등 고티어 저그가 등장하므로 업그레이드 타이밍과 병력 분배가 승패를 가른다. 6인 전원 협력이 필수라 한 명이 무너지면 연쇄 붕괴로 이어지기 쉽다. 음성·자막 미션 브리핑과 시네마틱 연출로 몰입감을 높였으며, 난이도는 탄약 관리 숙련도에 따라 보통~어려움 사이로 체감된다. 협동 디펜스와 자원 관리, 영화 팬 서비스까지 즐기고 싶은 유저에게 추천한다. 플레이 전 탄약 시스템 설명 트리거를 반드시 숙지하고, 팀원 간 역할 분담(탱커·딜러·수리·보급)을 논의한 뒤 시작하는 것이 좋다. Starship Troopers: SE is a 6-player cooperative defense UMS map based on the Whiskey Outpost siege from the film Starship Troopers. Created by Panzer_Kavalier using elements from previous SST maps, it plays out on a large 96x96 Twilight tileset. The core objective is to hold the outpost against endless Zerg waves, build up forces, and critically manage an ammunition system. The map structure centers on a main base with enemies attacking from multiple directions, typical of choke-point survival gameplay. As the description warns not to run out of ammo, a custom trigger-based ammunition mechanic exists alongside standard minerals and gas. Indiscriminate unit production or ability spam leads to supply failure. Players must compose Terran forces—Marines, Firebats, Medics, Tanks—and fortify lines with Bunkers and Turrets. As waves progress, high-tier Zerg like Ultralisks and Defilers appear, making upgrade timing and force distribution decisive. Full 6-player cooperation is essential; a single breach often cascades into total collapse. Voice-acted briefings and cinematic triggers enhance immersion. Difficulty feels Normal to Hard depending on ammo management mastery. Recommended for users seeking cooperative defense, resource management, and movie fanservice. Before starting, review the ammo system trigger tutorial and assign roles (tank, DPS, repair, logistics) with teammates.
마린 D. 18-웨이 (Marine D. 18-way - ver. 1)
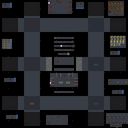
마린 D. 18-웨이(ver. 1)는 스타크래프트 브루드워의 유즈맵으로, 6명의 플레이어가 참가해 마린(해병)을 조종하는 컴까기(컴퓨터 상대 유즈맵) 장르의 맵이다. 18-웨이라는 명칭에서 알 수 있듯, 맵은 총 18개의 방향에서 적의 공격을 방어해야 하는 디펜스 형식으로 구성되어 있다. 중앙에 위치한 플레이어 기지 주변으로 총 18개의 입구가 배치되어 있으며, 각 입구는 일정 주기마다 저글링, 히드라리스크, 뮤탈리스크 등 다양한 저그 유닛으로 구성된 웨이브가 공격해 온다. 플레이어는 각 웨이브를 막아내며 기지를 방어해야 하며, 일정 주기마다 보너스 유닛이나 아이템이 등장하기도 한다. 맵의 특징은 18-웨이 구조로, 18방향에서 동시에 공격을 받기 때문에 방어선이 복잡하고 전략적인 플레이가 요구된다. 또한, 맵의 중앙에는 보호막이 설치되어 있어 기지 내부로의 직접적인 침입을 어느 정도 막아낸다. 방어에 성공할수록 난이도가 상승하는 구조로, 초반에는 저글링 위주로 공격해 오지만 점차 히드라리스크, 뮤탈리스크, 울트라리스크 등 강력해진 적들이 등장한다. 맵의 밸런스는 초심자도 쉽게 접근할 수 있도록 구성되어 있지만, 고수들은 더 빠른 웨이브나 다양한 패턴을 경험할 수 있어 반복 플레이가 가능한 구조다. 특히, 18-웨이 구조는 마린(해병)의 특성상 원거리 공격과 빠른 기동성을 활용해 방어해야 하므로, 유닛 관리가 중요하다. 마린 D. 18-웨이(ver. 1)는 컴까기 장르의 classic한 디펜스 유즈맵으로, 6인 플레이를 지원하며 방어선 관리와 전략적인 유닛 배치, 빠른 반응력이 요구되는 맵이다. 초보자도 쉽게 접근할 수 있지만, 고수들에게는 더 어려운 패턴을 제공하는 등 넓은 범위의 플레이어층을 아우르는 맵으로 평가된다. 플레이 전에는 맵의 18-웨이 구조와 웨이브 패턴, 중앙 보호막의 역할, 그리고 보너스 유닛의 등장 시점을 숙지하는 것이 중요하다. 또한, 마린의 카이팅(유닛 끌기) 기술과 지형 활용이 필수적이므로, 맵의 지형을 미리 확인해 두는 것이 좋다. 이 맵은 특히 마린을 좋아하는 유저들에게 추천하며, 컴까기 장르의 정석을 느낄 수 있는 작품이다. 마린 D. 18-웨이(ver. 1)는 다양한 저그 웨이브를 방어하는 컴까기 유즈맵으로, 6명의 플레이어가 참가해 중앙 기지를 방어하는 구조다. 18방향에서 동시에 공격을 받기 때문에 방어선이 복잡하고 전략적인 플레이가 요구되며, 웨이브가 진행될수록 적의 유닛이 강해지는 progression 시스템이 특징이다. 맵의 중앙 보호막은 기지 내부로의 직접적인 침입을 막아주며, 초반에는 저글링 위주로 공격해 오지만 점차 히드라리스크, 뮤탈리스크, 울트라리스크 등 강력한 적들이 등장한다. 보너스 유닛이나 아이템은 방어 성공 시 주기적으로 등장하며, 맵의 밸런스는 초심자도 쉽게 접근할 수 있도록 구성되어 있지만 고수들에게는 더 어려운 패턴을 제공한다. 마린의 카이팅 기술과 지형 활용이 필수적이므로, 플레이 전에 맵의 구조와 웨이브 패턴을 숙지하는 것이 중요하다. 이 맵은 마린을 좋아하는 유저들에게 특히 추천되며, 컴까기 장르의 classic한 디펜스를 경험할 수 있는 작품이다. Marine D. 18-Way (ver. 1) is a StarCraft: Brood War custom map where six players control Marines (Marines) in a defense-style game against AI opponents. As the name "18-Way" suggests, the map requires players to defend their base from attacks coming from 18 different directions. Around the central player base, there are 18 entrances, each periodically assaulted by waves of Zerg units such as Zerglings, Hydralisks, and Mutalisks. Players must hold their ground against these waves while also dealing with periodic appearances of bonus units or items. The map’s defining feature is its 18-way structure, forcing players to manage a complex and strategic defense line as attacks come from all directions simultaneously. Additionally, a protective shield in the center of the map helps block direct incursions into the base. The difficulty escalates with each successful defense—early waves consist mainly of Zerglings, but over time, stronger enemies like Hydralisks, Mutalisks, and Ultralisk appear. The map is designed with balanced difficulty, making it accessible to beginners while offering more challenging waves and patterns for advanced players to enjoy repeated playthroughs. The 18-way structure emphasizes the Marines’ strengths, such as their ranged attacks and mobility, making unit management critical. Marine D. 18-Way (ver. 1) is a classic defense-style custom map in the AI-vs-player genre, supporting six players and demanding strategic base defense, quick reactions, and smart unit positioning. While easy for newcomers to pick up, it provides tougher patterns for skilled players, catering to a wide range of skill levels. Before playing, it’s important to understand the 18-way structure, wave patterns, the role of the central shield, and when bonus units appear. Mastering Marine kiting (unit dragging) and using the terrain effectively are essential, so reviewing the map’s layout beforehand is highly recommended. This map is especially recommended for players who enjoy using Marines and want to experience the quintessential AI-vs-player defense gameplay. Marine D. 18-Way (ver. 1) is a custom map where six players defend their central base against waves of Zerg units, with attacks coming from 18 directions simultaneously. The complex defense lines require strategic play, and the game features a progression system where enemy units grow stronger with each wave—starting with Zerglings and escalating to Hydralisks, Mutalisks, and Ultralisk. The central shield helps prevent direct invasions, while bonus units or items appear periodically upon successful defenses. The map is balanced for beginners but offers more difficult patterns for advanced players. Effective Marine kiting and terrain utilization are key, so familiarizing yourself with the map’s structure and wave patterns before playing is crucial. This is a recommended title for Marine fans and those looking to experience a classic AI-vs-player defense map.
스폰 디펜스 HAX'D (Spawn Defense HAX'D)
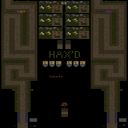
스타크래프트 브루드워의 유즈맵인 <스폰 디펜스 HAX'D (Spawn Defense HAX'D)>는 이름에서부터 느껴지는듯한 난이도 상승과 버그 수정을 기반으로 만들어진 컴까기 디펜스 맵이다. 맵의 핵심은 초반에 주어지는 적은 수의 기지를 지키며 끊임없이 몰려오는 저그 웨이브를 방어하는 것이며, 맵 곳곳에 배치된 방어 시설과 플레이어의 전략적 선택이 승패를 좌우한다. 내부 설명에서도 '공공 출시를 위해 버그를 수정하고 난이도를 높였다'고 언급되어 있어, 기존의 스폰 디펜스 시리즈에 비해 더 도전적인 플레이가 가능하도록 설계되었음을 알 수 있다. 사막 타일셋을 기반으로 한 광활한 맵은 시야를 제한하는 요소 없이 넓은 전장을 제공하며, 플레이어는 중앙의 주요 거점을 중심으로 방어선을 구축하거나, 외곽의 보조 거점을 활용해 기동전을 펼칠 수 있다. 맵의 구조상 초반 자원 수급이 제한적이기 때문에, 플레이어는 빠르게 mineral line을 확보하고 방어 시설을 최적 배치하는 것이 중요하다. 또한, 'handicap'이라는 표현이 내부 설명에 포함되어 있어, 플레이어 간 균형을 맞추기 위한 다양한 밸런스 조절 기능이 내장되어 있을 가능성이 높다. 맵의 난이도는 기본적으로 '보통' 수준으로 설정되어 있지만, 버그 수정과 난이도 상승으로 인해 초보자는 어려움을 느낄 수 있으며, 숙련된 플레이어에게는 적절한 난이도를 제공할 것으로 예상된다. 추천 대상은 방어와 전략적 플레이에 익숙한 유저이며, 특히 스폰 디펜스 시리즈의 팬이라면 새로운 도전을 즐길 수 있을 것이다. 플레이 전 반드시 확인해야 할 포인트는 초기 자원의Configurable한 배치 여부와 방어 시설의 건설 가능 지역, 그리고 플레이어 간 협력 여부이다. 또한, 맵의 광활한 크기로 인해 미니맵을 적극 활용하지 않으면 주요 거점의 방어 타이밍을 놓칠 수 있다. 맵의 특성상 긴 플레이 시간을 요구할 수 있으며, 공략을 공유하거나 스크린샷을 남기는 등 전략적 접근이 권장된다. StarCraft: Brood War's custom map <Spawn Defense HAX'D> is a command-based defense map designed around increased difficulty and bug fixes, as suggested by its name. The core gameplay involves defending a small number of starting bases from relentless Zerg waves while leveraging strategically placed defensive structures and player choices to determine victory. The internal description even notes that "bugs were fixed and difficulty raised for public release," indicating it was intentionally designed to be more challenging than previous entries in the Spawn Defense series. The vast desert-themed map provides a wide battlefield without visibility-limiting elements, allowing players to either establish defensive lines around central key points or use outer auxiliary bases for mobile tactics. Due to the map's structure, early resource gathering is limited, making it crucial to secure mineral lines quickly and optimally place defensive structures. The inclusion of terms like "handicap" in the internal description suggests built-in balance adjustments to equalize player advantages. While the default difficulty is set to "normal," the bug fixes and increased challenge may prove difficult for beginners, though experienced players should find it appropriately balanced. It’s best suited for users familiar with defense and strategic play, particularly fans of the Spawn Defense series looking for a fresh challenge. Before playing, check the configurable initial resource placement, available construction zones for defensive structures, and whether teamwork is required. The map’s large scale demands active use of the minimap to avoid missing critical defense timings. Given its nature, expect longer play sessions, and consider sharing strategies or screenshots for better tactical approaches.
해피 페이스 디펜스 18웨이 (HAPPY FACE Defense 18-way)
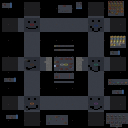
스타크래프트 브루드워의 대표적인 디펜스 장르 유즈맵인 <b>HAPPY FACE Defense 18-way</b>는, 이름 그대로 웃는 얼굴 모양의 기지 구조를 기반으로 한 다방향 공격 디펜스 맵이다. 맵의 중앙에는 커다란 웃는 얼굴 형상이 배치되어 있으며, 이 얼굴의 주변으로 총 18개의 입구가 펼쳐져 있어 플레이어는 어디서든 공격을 받게 된다. 얼굴의 입술 부분은 주로 방어 포인트로 활용되며, 눈과 코는 추가 보호막 역할을 한다. 맵의 구조는 매우 독특한 디자인으로 인해 시각적으로도 흥미를 유발하며, 동시에 방어 전략을 짜기에도 흥미로운 요소들을 제공한다. 이 맵의 가장 큰 특징은 바로 18방향의 공격 루트인데, 이는 기존 디펜스 맵에서 흔히 볼 수 있는 8방향이나 12방향과는 차별화된 요소로, 공격의 난이도를 한층 높인다. 플레이어는 얼굴 주변의 입구를 효과적으로 방어하기 위해 멀티 포지션의 배치와 방어 건물의 최적화를 carefully plan해야 한다. 또한, 맵 곳곳에 배치된 미네랄과 가스 멀티는 자원 확보를 위한 공간으로도 활용되며, 이를 통해 지속적인 방어력을 유지할 수 있다. 그러나 너무 공격에 치중하다가 리소스가 부족해지면 방어가 허술해질 수 있으므로 자원 관리가 중요하다. 이 맵은 주로 혼자서 플레이하는 싱글 디펜스 형식으로 진행되며, 플레이어는 계속해서 몰려오는 적군 웨이브를 방어해야 한다. 적군은 대부분 저그 종족의 유닛으로 구성되어 있으며, 후반부로 갈수록 점점 강해지는 웨이브를 상대해야 한다. 따라서 초반의 방어가 얼마나 안정적으로 이루어지느냐가 전체적인 승패를 좌우한다. 또한, 맵의 특성상 방어 건물의 업그레이드와 유닛의 생산 타이밍을 잘 맞춰야 하며, 특히 입구가 많은 만큼 방어 건물의 배치와 수비 병력의 구성이 중요하다. 이 맵은 디펜스 장르의 전형적인 재미 요소인 '방어의 묘미'와 더불어, 독특한 시각적 디자인과 다방향 공격 시스템으로 인해 많은 플레이어들에게 사랑받고 있다. 특히 스타크래프트 유즈맵의 클래식한 장르인 디펜스에 익숙한 유저라면 새로운 경험을 느낄 수 있을 것이다. 추천 대상은 디펜스 장르를 좋아하는 플레이어들로, 특히 방어와 자원 관리에 중점을 두고 전략을 세우고 싶은 유저들에게 적합하다. 또한, 맵의 구조와 입구 수를 고려할 때, 초보 플레이어보다는 조금 경험이 있는 플레이어에게 더 어울릴 수 있다. 맵을 시작하기 전에 얼굴 주변의 입구 수와 방어 포인트를 미리 확인해 두는 것이 좋다. HAPPY FACE Defense 18-way is a classic defense-style custom map in StarCraft: Brood War, featuring a unique design based on a smiling face structure. The map's central area is shaped like a large smiley face, surrounded by 18 entry points from which enemies attack from all directions. The lips of the face serve as key defensive positions, while the eyes and nose provide additional protection. The visual design is eye-catching, and the strategic depth of positioning defensive structures is engaging for players. The standout feature of this map is its 18-directional attack routes, which significantly increase the challenge compared to traditional 8 or 12-direction defense maps. Players must carefully plan multi-position defenses and optimize building placements to cover all entry points effectively. The map also includes scattered mineral and gas patches near the face structure, allowing for resource collection to maintain defensive capabilities. However, players must balance between resource gathering and defense, as neglecting one can lead to vulnerabilities. The gameplay follows a single-player defense format where the player must continuously fend off waves of enemy units, primarily consisting of Zerg units. As the game progresses, the enemy waves become stronger, making early-game defense crucial for long-term success. Upgrading defensive structures and timing unit production are essential strategies. The abundance of entry points requires careful planning of building placements and defensive unit compositions to maximize efficiency. This map combines the classic appeal of defense games with a visually distinctive design and a multi-directional attack system, making it a favorite among StarCraft custom map enthusiasts. Players familiar with the defense genre will find this map particularly engaging, especially those who enjoy strategic resource management and defense planning. While beginners can try the map, its complexity makes it more suitable for players with some experience in defense-style maps. Before starting, it’s advisable to study the 18 entry points and defensive hotspots around the smiley face structure.
단일 방어 (Single Total Defence 2)
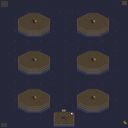
스타크래프트 브루드워의 대표적인 디펜스 장르 유즈맵인 〈Single Total Defence 2〉는 한 명의 플레이어가 수많은 웨이브의 적을 상대로 방어전을 펼치는 컴까기 형식의 맵이다. 맵은 사막 타일셋을 기반으로 제작되었으며, 중앙에 위치한 플레이어 기지 주변으로 적절한 길목이 마련되어 있다. 플레이어는 미네랄과 가스를 확보하면서 본진을 지키며, 주기적으로 공격해 오는 저글링, 히드라, 울트라리스크, 뮤탈리스크, 디파일러 등 다양한 종족 유닛을 상대해야 한다. 각 웨이브는 점점 강화되는 적군을 상대하기 때문에 전략적 자원 관리와 방어 타워의 배치, 유닛 조합이 핵심이다. 특히, 맵의 중앙 길목을 중심으로 방어선을 구축하는 것이 중요하며, 일부 구간에서는 적이 우회로를 통해 기지로 진입할 위험이 있어 이를 방지하기 위한 추가적인 방어 구조물이 필요하다. 맵의 난이도는 초반에는 비교적 여유롭지만, 후반부로 갈수록 적의 공격력이 급증하므로 신중한 대비를 요구한다. 초보 플레이어의 경우 방어 타워를 적절히 배치하고 기본 유닛으로 버티는 것이 중요하며, 숙련된 플레이어는 자원 효율과 타이밍을 중시한 플레이가 필요하다. 맵의 플레이 시간은 약 30분 내외로 예상되며, 6인까지 동시에 플레이할 수 있는 구조이지만, 실제로 1인 플레이를 상정하고 설계된 맵으로 보인다. 맵의 특성상 사막 타일셋의 황량한 분위기가 플레이어의 긴장감을 더해주며, 디펜스 장르에 익숙한 유저라면 즐길 수 있는 훌륭한 작품이다. 다만, 방어선을 잘못 구축하면 적의 공격을 버티기 힘들기 때문에 꼼꼼한 준비를 권장한다. Single Total Defence 2 is a classic defense genre custom map from StarCraft: Brood War where one player defends against countless waves of enemies in a tower defense-style format. The map is set in a desert tileset, featuring a player base at the center with well-designed pathways. Players must secure minerals and gas while protecting their main base, fending off periodic attacks from various Zerg units such as Zerglings, Hydralisks, Ultralisks, Mutalisks, and Defilers. Each wave escalates in difficulty, making strategic resource management, tower placement, and unit compositions crucial for survival. Establishing a strong defensive line around the central pathways is essential, though some sections require additional structures to prevent enemies from bypassing defenses through alternate routes. While the early stages are manageable, the later waves demand careful preparation as enemy firepower intensifies sharply. Beginners should focus on proper tower placement and relying on basic units, while advanced players need to optimize resource efficiency and timing. The typical playtime is around 30 minutes, and while the map supports up to six players, it is clearly designed with solo play in mind. The desolate atmosphere of the desert tileset enhances the tension, making it an excellent choice for fans of the defense genre. However, poor defensive setup can quickly lead to failure, so thorough preparation is highly recommended.
크리터 어택 99 (Critter Attack 99)
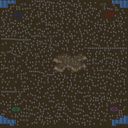
파일명 'CritterAttack99.scm'에서 알 수 있듯 이 맵은 크리터 어택(Critter Attack) 계열의 서바이벌 유즈맵으로 보인다. 사이트 표시 제목과 내부 제목이 모두 'Untitled Scenario'로 되어 있어 제작자가 별도 제목을 입력하지 않았거나 배포 과정에서 메타데이터가 손실된 것으로 추정된다. 타일셋은 황무지(Badlands)이며 맵 크기는 2048×2048 픽셀(64×64 타일)로 4인용 대형 맵에 해당한다. 설명문 'Destroy all enemy buildings'은 일반적인 밀리 승리 조건과 동일하지만, 파일명의 'CritterAttack'과 '99'라는 숫자가 저그 크리터(저글링, 히드라리스크 등) 웨이브를 막아내는 생존형 진행을 암시한다. 실제 플레이는 4명의 플레이어가 한 팀이 되어 중앙 또는 각자 기지에서 몰려드는 크리터 무리를 상대하는 협동 디펜스 방식으로 진행될 가능성이 높다. 황무지 타일셋 특유의 바위 지형과 좁은 통로가 천연 초크 포인트를 만들어 입구 막기 전략이 유효해 보이며, 웨이브가 거세질수록 공중 유닛과 탐지기가 섞여 나와 대공·탐지 병력 확보가 필수적일 것으로 보인다. 자원은 일반적인 밀리처럼 미네랄·가스를 채취하되, 웨이브 클리어 보상이나 트리거 보너스로 추가 자원을 지급하는 방식이 흔히 쓰인다. 플레이 경험은 초반 견제용 병력 소수 생산으로 시작해 중반 이후 대규모 병력 운용과 업그레이드 타이밍 싸움으로 이어진다. 4인 협력이 필수적이므로 음성 채팅이나 핑 신호로 역할 분담(탱커, 딜러, 수리/치유, 정찰)을 정하면 생존 확률이 크게 오른다. 난이도는 '99' 버전 표기로 미루어 볼 때 고난도 밸런싱이 적용됐을 수 있어 초보자보다는 유즈맵 디펜스 경험이 있는 중급 이상 유저에게 권장된다. 플레이 전 확인 사항: ① 맵 로딩 후 트리거 설명창이나 오브젝티브 패널에서 웨이브 수·보스 등장 여부 확인 ② 시작 위치별 자원 분배와 초크 포인트 위치 파악 ③ 팀원 간 종족 조합(테란·프로토스·저그 혼합 시 시너지) 논의 ④ 버전 표기 '99'가 최종 버전인지, 패치 노트가 별도 배포됐는지 커뮤니티 검색 권장. This map appears to be a Critter Attack–style survival UMS map, as suggested by the filename 'CritterAttack99.scm'. Both the site title and internal title read 'Untitled Scenario', indicating the author either left the title blank or metadata was lost during distribution. The tileset is Badlands with a 2048×2048 pixel (64×64 tile) size, making it a large four‑player map. The description 'Destroy all enemy buildings' matches the standard melee victory condition, yet the 'CritterAttack' prefix and the number '99' strongly imply a cooperative defense against waves of Zerg critters such as Zerglings and Hydralisks. Actual gameplay likely has four players on one team holding a central base or separate positions against increasingly difficult critter waves. Badlands' rocky terrain and narrow chokes create natural defensive lines, so wall‑in strategies should work well. As waves progress, air units and detectors typically appear, forcing players to secure anti‑air and detection. Resources follow normal mineral/gas gathering, with possible trigger‑based bonuses for clearing waves. The experience starts with light early‑game forces and evolves into large‑scale army management and upgrade timing. Four‑player coordination is essential; voice chat or pings to assign roles (tank, damage, repair/heal, scout) greatly improve survival. The '99' version hint suggests a high‑difficulty balance, so this map is recommended for intermediate or advanced UMS defense players rather than beginners. Pre‑play checklist: ① Check the trigger briefing or objectives panel for wave count and boss spawns. ② Identify each start location's resource layout and choke points. ③ Discuss race composition (Terran/Protoss/Zerg mix for synergy). ④ Verify whether '99' is the final version and search community channels for any patch notes.
썬큰 디펜스 10웨이 15.4 임파서블 (SunkenD 10Way 15.4 Impossible)
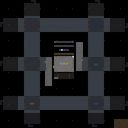
'썬큰 디펜스 10웨이 15.4 임파서블(SunkenD 10Way 15.4 Impossible)'은 스타크래프트 브루드워 유즈맵 중에서도 손꼽히는 고난도 협동 디펜스 맵으로, 최대 10인의 플레이어가 우주 타일셋 위에서 25단계 저그 웨이브를 상대로 생존을 겨루는 구조다. '10웨이(10Way)' 명칭대로 열 개의 독립 진입로가 'Even Mid' 대칭 배치로 구성되어 공평한 자원 분배와 난이도를 제공하며, '임파서블' 표기답게 일반 디펜스와는 차원이 다른 생존 압박이 지속된다. 플레이어는 감염된 커맨드 센터 또는 해처리를 거점으로 자원을 확보해 썬큰 콜로니 위주의 방진을 구축, 저글링부터 울트라리스크까지 진화하는 적 병력을 막아내야 한다. 'Backwash wont kill you' 설명은 후방 우회 병력(백워시)으로 인한 즉사 패널티를 완화해 전방 라인 유지와 업그레이드 타이밍에 집중하도록 유도한 트리거 설계로 보인다. 128x128 타일 기반 4096x4096 해상도는 10인 동시 플레이에 적절한 공간감을 주며, 버전 15.4까지 이어진 업데이트 이력과 'sc-maps.com' 출처는 지속적인 밸런스 검증이 있었음을 시사한다. 이 맵은 단순 타워 배치를 넘어 유닛 상성, 자원 관리, 10명 전원의 역할 분담과 웨이브 클리어 속도 조율이 유기적으로 맞물려야 하는 고차원적 협동을 요구한다. 입문자에게는 진입 장벽이 높으나, 정석 '입구 막기' 메커니즘을 익힌 숙련자 파티에게는 최적의 도전 과제다. 플레이 전 버전 호환성(리마스터/1.16.1), 팀원 간 의사소통 수단, 웨이브별 출현 유닛 공략 숙지 여부를 점검하고 진입하는 것이 생존의 열쇠가 된다. SunkenD 10Way 15.4 Impossible stands out as one of the highest-difficulty cooperative defense maps in the StarCraft Brood War UMS scene. Up to ten players face 25 stages of evolving Zerg waves on a space tileset. The "10Way" designation indicates ten independent lanes arranged in an "Even Mid" symmetrical layout, ensuring fair resource distribution and balanced difficulty. True to its "Impossible" label, the survival pressure far exceeds standard defense maps. Players establish bases around Infested Command Centers or Hatcheries, building Sunken Colony-centric defenses to stop enemies ranging from Zerglings to Ultralisks. The note "Backwash wont kill you" suggests triggers prevent instant loss from rear leaks, letting players focus on front-line upgrades and timing. The 4096x4096 resolution on 128x128 tiles provides ample room for ten players, while the v15.4 history and sc-maps.com origin imply long-term balance refinement. This map demands more than tower placement; it requires deep unit-counter knowledge, economy management, role assignment, and synchronized wave-clearing across all ten slots. The barrier is high for newcomers, but veteran parties mastering classic choke-point defense will find a rewarding challenge. Before starting, verify version compatibility (Remastered/1.16.1), ensure voice communication, and study wave compositions to maximize survival chances.
테란 디펜스 2 (Terran Defense 2)
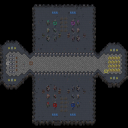
스타크래프트 브루드워의 대표적인 디펜스 유즈맵인 〈테란 디펜스 2〉는 보라색 테란 건물과 흰색 벙커를 중심으로 전개되는 긴장감 넘치는 방어전을 경험할 수 있는 맵입니다. 이 맵은 4인용으로 설계되어 있으며, 각 플레이어는 자신의 기지에서 끊임없이 몰려오는 저그 웨이브를 상대로 벙커와 포탑을 활용해 방어전을 펼쳐야 합니다. 맵 중앙의 넓은 공간에서 펼쳐지는 대규모 전투는 시각적으로도 압도적이며, 플레이어는 각자 주어진 자원을 바탕으로 건물을 짓고 업그레이드하며, 끊임없이 몰아치는 적을 상대해야 합니다. 게임의 진행은 크게 세 단계로 나뉩니다. 첫 번째는 초기 방어 단계로, 벙커와 미사일 터렛을 건설해 초반 저그 공격을 버텨내는 것이 중요합니다. 두 번째 단계에서는 테란의 강력한 유닛인 마린, 파이어뱃, 메딕을 조합해 중반 웨이브를 방어해야 하며, 이때는 업그레이드와กัน 유닛의 생산력이 관건이 됩니다. 마지막 단계에서는 저그의 강력한 유닛인 히드라리스크나 뮤탈리스크가 등장하며,在这时는 테란의 고급 유닛인 시즈 탱크나 골리앗을 활용해 효율적으로 대응해야 합니다. особенно重要的是, 플레이어들은 각자의 스타일에 맞춰 전략을 세울 수 있으며, 예를 들어 공중 방어에 중점을 둔다면 스파이더 마인을 배치하거나, 지상 방어에 집중한다면 벙커와 터렛을 조합하는 등의 다양한 전술을 시도할 수 있습니다. 이 맵의 가장 큰 특징은 맵의 구조와 밸런스에 있습니다. 맵 중앙의 넓은 공간은 대규모 전투를 가능하게 하며, 각 플레이어의 기지는 맵의 모서리에 위치해 있어 상대방의 공격을 받기 전에 미리 준비를 할 수 있는 구조입니다. 또한, 맵의 테두리에는 추가적인 방어 시설이 설치되어 있어, 초반 방어가 다소 수월하다는 장점이 있습니다. 그러나 게임이 진행될수록 저그의 공격 패턴이 변하고 강도가 세지기 때문에, 플레이어는 끊임없이 전략을 수정하고 자원을 효율적으로 관리해야 합니다. 〈테란 디펜스 2〉는 단순히 방어만을 요구하는 것이 아니라, 테란의 다양한 유닛과 업그레이드를 이해하고 활용할 수 있는 능력이 필요합니다. 초보자의 경우 처음에는 벙커와 터렛을 중심으로 방어하다가 점차 유닛 생산과 업그레이드에 익숙해져야 하며, 숙련자의 경우라면 최적의 전략을 구사해 적은 자원으로도 효율적인 방어전을 펼칠 수 있습니다. 특히, 팀 플레이가 중요한 맵이기 때문에, 팀원 간의 협력과 역할 분담이 게임의 성패를 좌우할 수 있습니다. 이 맵을 플레이하기 전에 확인해야 할 요소는 크게 세 가지입니다. 첫째, 자신의 기지와 방어 시설을 미리 준비해 초기 공격을 버텨내는 것입니다. 둘째, 끊임없이 몰려오는 저그의 웨이브에 맞춰 유닛을 생산하고 업그레이드하는 것입니다. 셋째, 팀원과의 원활한 소통을 통해 전략을 공유하고, 필요에 따라 역할을 분담하는 것입니다. 이러한 요소들을 염두에 두고 플레이한다면, 〈테란 디펜스 2〉는 단순한 디펜스 맵을 넘어 전략과 협력의 조화를 느낄 수 있는 매력적인 유즈맵으로 다가올 것입니다. Terran Defense 2 is a classic defense-style custom map in StarCraft: Brood War where players must defend their white bunkers against relentless waves of Zerg units. Designed for four players, the map challenges participants to strategically build and upgrade Terran structures while managing resources to withstand escalating enemy assaults. The gameplay unfolds in three distinct phases. The early game focuses on establishing a solid defense with bunkers and missile turrets to counter the initial Zerg swarms. In the mid-game, players must balance unit production—such as Marines, Firebats, and Medics—while upgrading their forces to handle stronger waves. The late game introduces high-tier Zerg units like Hydralisks and Mutalisks, requiring advanced Terran units such as Siege Tanks and Goliaths for effective counterplay. Players can tailor their strategies, whether prioritizing air defense with Spider Mines or reinforcing ground defenses with bunkers and turrets. A key strength of Terran Defense 2 lies in its map design and balance. The expansive central battlefield allows for large-scale engagements, while each player's cornered starting position provides ample time to prepare defenses. Additionally, the map's outer edges feature supplementary defensive structures, easing early-game pressure. However, as the game progresses, Zerg attacks intensify and diversify, demanding constant adaptation and resource management from players. This map isn't just about holding the line—it requires a deep understanding of Terran unit synergies and upgrades. Beginners may start with basic bunker and turret setups before gradually incorporating unit production, while advanced players can optimize strategies to defend efficiently with minimal resources. Teamwork is crucial, as coordinated efforts and role distribution among teammates significantly influence the outcome. Before diving in, players should focus on three preparation points: securing their base and defenses early, balancing unit production and upgrades against incoming waves, and maintaining clear communication with teammates to synchronize strategies. With these considerations in mind, Terran Defense 2 transforms from a straightforward defense map into a dynamic experience that highlights strategy, coordination, and adaptability.
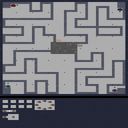
리얼 데빌 타워 v3.2b (Real Devil Tower v3.2b)
리얼 데빌 타워 v3.2b는 스타크래프트 브루드워에서 즐기는 고전적인 타워 디펜스 장르의 유즈맵으로, 플레이어는 적의 끊임없는 공격을 방어하는 동시에 strategic한 타워 배치와 자원 관리를 통해 승리를 노려야 한다. 맵의 중앙에는 거대한 중앙 타워가 자리하고 있으며, 이를 중심으로 사방에서 몰려드는 저그의 웨이브를 막아내야 한다. 맵의 외곽 주위에는 보호막 역할을 하는 벽이 배치되어 있어 무작정 밀어붙이기보다는 전략적인 방어 라인을 구축하는 것이 중요하다. 또한 맵 곳곳에 흩어져 있는 스팟에는 추가 자원이나 방어 보조 아이템이 배치되어 있어, 이를 활용하면 더 안정적인 플레이가 가능하다. 맵의 난이도는 초중반에는 비교적 수월하지만, 후반부로 갈수록 적의 공격 빈도와 강도가 급격히 상승하므로 신중한 타워 관리와 리소스 관리가 필수적이다. 특히, 플레이어 간의 협력이 중요한 팀플레이 맵으로 보이며, 각 플레이어는 고유한 시작 자원과 위치를 부여받아 역할을 분담할 수 있다. 맵의 구조상으로는 중앙 타워를 중심으로 한 방어선이 핵심 포인트이며, 각 플레이어의 타워가 중앙 타워와 얼마나 연계되는지가 승패를 좌우할 가능성이 크다. 또한, 적의 공격 패턴이 일정하지 않고 무작위로 변한다는 점에서, 맵을 여러 번 플레이해보며 적의 패턴을 익히는 것이 중요하다. 추천 대상으로는 타워 디펜스와 전략적 게임 플레이를 좋아하는 유저들이며, 특히 팀플레이를 즐기는 게이머들에게 적합하다. 플레이 전에는 맵의 자원 배치와 방어 라인, 그리고 각 플레이어의 시작 위치를 미리 확인하고 전략을 세워두는 것이 좋다. 초보자의 경우, 난이도가 높은 편이므로 난이도 설정을 낮춰가며 연습해보는 것도 좋은 방법이다. 맵의 인기는 오랜 기간 동안 꾸준히 사랑받아 왔으며, 다양한 버전 업데이트를 통해 지속적으로 개선되어 왔다는 점에서도 주목할 만하다. Real Devil Tower v3.2b is a classic tower defense custom map for *StarCraft: Brood War*, where players must defend against endless enemy waves while strategically placing towers and managing resources to secure victory. At the heart of the map lies a massive central tower, which serves as the focal point for repelling relentless Zerg attacks from all directions. Surrounding the map are protective walls that act as barriers, encouraging players to build strategic defensive lines rather than relying on brute force. Scattered across the map are various spots containing additional resources or defensive support items, allowing for more stable gameplay when utilized effectively. While the difficulty remains manageable in the early to mid-game, the late game ramps up significantly in both attack frequency and intensity, making careful tower management and resource allocation essential. Designed with team play in mind, cooperation between players is crucial, as each is assigned unique starting resources and positions to fulfill specific roles. The map’s structure revolves around the central tower, with the synergy between individual towers and the central hub often determining the outcome. Additionally, since enemy attack patterns are unpredictable and vary randomly, playing multiple times to learn these patterns is highly recommended. This map is ideal for players who enjoy tower defense and strategic gameplay, particularly those who favor team-based experiences. Before starting, it’s wise to study the resource distribution, defensive layouts, and each player’s starting positions to devise a solid strategy. Beginners may find the difficulty steep, so lowering the difficulty setting and practicing can help ease into the experience. Over the years, Real Devil Tower has maintained steady popularity, consistently improving through various version updates.
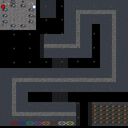
터렛 디펜스 10K -Final- (Turret Defense 10K -Final-)
스타크래프트 브루드워의 디펜스 장르 유즈맵인 《터렛 디펜스 10K -Final-》은 방어전 중심의 전략적인 플레이를 제공하는 맵입니다. 맵의 주요 특징은 수많은 적 웨이브를 상대하며 터렛과 방어 건물들을 배치하고 관리하는 것입니다. 게임 시작 후 중앙에 위치한 기지에서부터 서서히 밀려오는 저그 웨이브를 막아내야 하며, 각 웨이브마다 증가하는 적의 수와 공격 패턴을 예측하고 대처해야 합니다. 맵의 구조는 비교적 평평한 지형 위에 방어 건물이 설치될 수 있는 공간이 넓게 배치되어 있으며, 중앙 통로와 외곽을 따라 적들이 접근합니다. 플레이어는 제한된 자원으로 터렛을 건설하고 업그레이드할 수 있으며, 자원은 웨이브를 막아낼 때마다 획득할 수 있습니다. 또한, 맵 곳곳에 배치된 보너스 자원 지역을 확보하는 것이 중요합니다. 게임은 웨이브가 지속적으로 이어지며, 일정 횟수의 웨이브를 성공적으로 막아내면 승리합니다. 맵의 디자인과 밸런스는 초보자부터 숙련자까지 공정한 도전을 제공하도록 설계된 것으로 보입니다. 특히, 방어 건물의 효율적인 배치와 자원 관리가 승리의 열쇠가 되며, 각 웨이브의 패턴을 학습하며 전략을 수립하는 재미가 있습니다. 추천 대상은 디펜스 장르를 좋아하는 플레이어이며, 특히 방어 건물의 배치와 전략적 사고를 즐기는 유저들에게 적합합니다. 게임을 시작하기 전 방어 건물의 종류와 업그레이드 비용, 자원 획득 방법 등을 미리 숙지하는 것이 좋습니다. 또한, 빠른 반응과 정확한 클릭이 요구되므로 마우스 조작에 익숙한 플레이어가 유리할 수 있습니다. 《Turret Defense 10K -Final-》 is a defense-genre custom map in StarCraft: Brood War that offers strategic gameplay focused on defense. The main feature of the map is placing and managing turrets and defensive structures while facing numerous enemy waves. Starting from the central base, you must fend off Zerg waves that gradually advance, predicting and countering the increasing number and attack patterns of enemies in each wave. The map features a relatively flat terrain with ample space for defensive structures, and enemies approach through the central corridor and outer paths. Players can construct and upgrade turrets with limited resources, which are earned by successfully blocking waves. Securing bonus resource areas scattered throughout the map is also crucial. The game continues with waves persisting until you successfully defend a set number of them to win. The map’s design and balance appear to offer fair challenges for both beginners and experienced players. Efficient placement of defensive structures and resource management are key to victory, with the enjoyment of learning each wave’s patterns and devising strategies. It’s recommended for players who enjoy defense games, especially those who like strategizing and placing defensive buildings. Before starting, it’s advisable to familiarize yourself with the types of defensive structures, upgrade costs, and resource-gathering methods. Additionally, quick reactions and precise mouse control are essential, making it advantageous for players comfortable with fast-paced mouse operations.
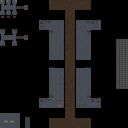
탱크 디펜스 V4.1 (Tank Defense V4.1)
스타크래프트 브루드워 유즈맵 '탱크 디펜스 V4.1'은 4인 협동 디펜스 장르로, 우주 타일셋을 배경으로 밀려오는 적 병력을 막아내는 전형적인 타워 디펜스 구조를 갖추고 있습니다. 맵 크기는 128x128 타일로 적당히 넓은 전장을 제공하며, 내부 설명인 'Don't let any enemies through!'가 직관적으로 승리 조건을 제시합니다. 플레이어는 각자 시작 지점에서 자원을 모아 탱크류 유닛이나 방어 시설을 생산, 업그레이드하며 점점 강해지는 웨이브를 견뎌야 합니다. V4.1 버전은 이전 버전들(V4.0, V4.23)에서 밸런스 조정과 버그 수정이 이루어졌을 것으로 보이며, 난이도 곡선이 비교적 완만해 초보자도 부담 없이 입문할 수 있는 편입니다. 협동 플레이가 핵심이므로 팀원 간의 역할 분담(자원 담당, 수리 담당, 화력 담당 등)이 승패를 가릅니다. 맵 곳곳에 배치된 지형지물과 좁은 통로를 활용한 병목 지점 방어가 공략의 열쇠입니다. 우주 타일셋 특유의 어두운 배경과 네온 빛 효과가 분위기를 더하며, 적 유닛 구성은 저글링, 히드라리스크, 울트라리스크 등 저그 위주로 구성되어 있어 대공 방어와 지상 화력 밸런스를 동시에 고려해야 합니다. 자원 채취는 미네랄과 가스 모두 제공되며, 일정 웨이브마다 보스급 유닛이 등장해 긴장감을 높입니다. 트리거로 구현된 웨이브 알림 시스템과 남은 적 수 표시 UI가 직관적이어서 초보자도 진행 상황을 파악하기 쉽습니다. 다만, 맵 크기가 큰 편이라 초반 확장 타이밍을 놓치면 자원 부족에 시달릴 수 있으니 초반 빌드 오더를 숙지하는 것이 유리합니다. 4인 풀파티 기준 클리어까지 약 30~40분 소요되며, 난이도 조절 옵션이 별도로 없어 숙련자는 자제력을 테스트하기에도 좋습니다. 커뮤니티에서 오랜 기간 사랑받아온 시리즈인 만큼 버전별 변경점을 비교하며 플레이하는 재미도 있습니다. 디펜스 입문용으로 추천하며, 짧은 시간 안에 몰입감 있는 방어전을 즐기고 싶은 유저에게 적합합니다. 플레이 전 버전 호환성과 트리거 작동 여부를 확인하고, 최신 패치 버전인 V4.1을 사용하는 것이 좋습니다. StarCraft Brood War use map 'Tank Defense V4.1' is a 4-player cooperative defense genre, featuring a classic tower defense structure set on a space tileset where players must stop incoming enemy forces. The map size of 128x128 tiles provides a moderately spacious battlefield, and the internal description 'Don't let any enemies through!' intuitively presents the victory condition. Players gather resources at their starting locations to produce and upgrade tank-type units or defensive facilities, enduring increasingly stronger waves. Version 4.1 likely includes balance adjustments and bug fixes from previous versions (V4.0, V4.23), with a relatively gentle difficulty curve allowing beginners to enter without burden. Cooperative play is key, so role division among teammates (resource manager, repair specialist, firepower dealer) determines victory or defeat. Utilizing terrain features and choke points placed throughout the map is the key to strategy. The dark background and neon light effects unique to the space tileset enhance the atmosphere, while enemy compositions centered around Zerg units such as Zerglings, Hydralisks, and Ultralisks require balancing anti-air and ground firepower. Both minerals and gas are provided for resource gathering, and boss-class units appear at certain waves to raise tension. The trigger-based wave notification system and remaining enemy count UI are intuitive, making it easy for beginners to grasp the situation. However, the large map size means missing early expansion timing can lead to resource shortages, so mastering early build orders is advantageous. With a full party of 4, clearance takes about 30-40 minutes, and the lack of separate difficulty options makes it a good test of restraint for veterans. As a series beloved by the community for a long time, comparing changes across versions adds extra enjoyment. Recommended for defense beginners and users wanting an immersive defense battle in a short time. Before playing, check version compatibility and trigger functionality, and using the latest patched version V4.1 is advised.
최근 등록된 맵
새로 추가된 파일과 버전을 확인하세요.
크리터 어택 99 (Critter Attack 99)
파일명 'CritterAttack99.scm'에서 알 수 있듯 이 맵은 크리터 어택(Critter Attack) 계열의 서바이벌 유즈맵으로 보인다. 사이트 표시 제목과 내부 제목이 모두 'Untitled Scenario'로 되어 있어 제작자가 별도 제목을 입력하지 않았거나 배포 과정에서 메타데이터가 손실된 것으로 추정된다. 타일셋은 황무지(Badlands)이며 맵 크기는 2048×2048 픽셀(64×64 타일)로 4인용 대형 맵에 해당한다. 설명문 'Destroy all enemy buildings'은 일반적인 밀리 승리 조건과 동일하지만, 파일명의 'CritterAttack'과 '99'라는 숫자가 저그 크리터(저글링, 히드라리스크 등) 웨이브를 막아내는 생존형 진행을 암시한다. 실제 플레이는 4명의 플레이어가 한 팀이 되어 중앙 또는 각자 기지에서 몰려드는 크리터 무리를 상대하는 협동 디펜스 방식으로 진행될 가능성이 높다. 황무지 타일셋 특유의 바위 지형과 좁은 통로가 천연 초크 포인트를 만들어 입구 막기 전략이 유효해 보이며, 웨이브가 거세질수록 공중 유닛과 탐지기가 섞여 나와 대공·탐지 병력 확보가 필수적일 것으로 보인다. 자원은 일반적인 밀리처럼 미네랄·가스를 채취하되, 웨이브 클리어 보상이나 트리거 보너스로 추가 자원을 지급하는 방식이 흔히 쓰인다. 플레이 경험은 초반 견제용 병력 소수 생산으로 시작해 중반 이후 대규모 병력 운용과 업그레이드 타이밍 싸움으로 이어진다. 4인 협력이 필수적이므로 음성 채팅이나 핑 신호로 역할 분담(탱커, 딜러, 수리/치유, 정찰)을 정하면 생존 확률이 크게 오른다. 난이도는 '99' 버전 표기로 미루어 볼 때 고난도 밸런싱이 적용됐을 수 있어 초보자보다는 유즈맵 디펜스 경험이 있는 중급 이상 유저에게 권장된다. 플레이 전 확인 사항: ① 맵 로딩 후 트리거 설명창이나 오브젝티브 패널에서 웨이브 수·보스 등장 여부 확인 ② 시작 위치별 자원 분배와 초크 포인트 위치 파악 ③ 팀원 간 종족 조합(테란·프로토스·저그 혼합 시 시너지) 논의 ④ 버전 표기 '99'가 최종 버전인지, 패치 노트가 별도 배포됐는지 커뮤니티 검색 권장. This map appears to be a Critter Attack–style survival UMS map, as suggested by the filename 'CritterAttack99.scm'. Both the site title and internal title read 'Untitled Scenario', indicating the author either left the title blank or metadata was lost during distribution. The tileset is Badlands with a 2048×2048 pixel (64×64 tile) size, making it a large four‑player map. The description 'Destroy all enemy buildings' matches the standard melee victory condition, yet the 'CritterAttack' prefix and the number '99' strongly imply a cooperative defense against waves of Zerg critters such as Zerglings and Hydralisks. Actual gameplay likely has four players on one team holding a central base or separate positions against increasingly difficult critter waves. Badlands' rocky terrain and narrow chokes create natural defensive lines, so wall‑in strategies should work well. As waves progress, air units and detectors typically appear, forcing players to secure anti‑air and detection. Resources follow normal mineral/gas gathering, with possible trigger‑based bonuses for clearing waves. The experience starts with light early‑game forces and evolves into large‑scale army management and upgrade timing. Four‑player coordination is essential; voice chat or pings to assign roles (tank, damage, repair/heal, scout) greatly improve survival. The '99' version hint suggests a high‑difficulty balance, so this map is recommended for intermediate or advanced UMS defense players rather than beginners. Pre‑play checklist: ① Check the trigger briefing or objectives panel for wave count and boss spawns. ② Identify each start location's resource layout and choke points. ③ Discuss race composition (Terran/Protoss/Zerg mix for synergy). ④ Verify whether '99' is the final version and search community channels for any patch notes.
터렛 디펜스 10K -Final- (Turret Defense 10K -Final-)
스타크래프트 브루드워의 디펜스 장르 유즈맵인 《터렛 디펜스 10K -Final-》은 방어전 중심의 전략적인 플레이를 제공하는 맵입니다. 맵의 주요 특징은 수많은 적 웨이브를 상대하며 터렛과 방어 건물들을 배치하고 관리하는 것입니다. 게임 시작 후 중앙에 위치한 기지에서부터 서서히 밀려오는 저그 웨이브를 막아내야 하며, 각 웨이브마다 증가하는 적의 수와 공격 패턴을 예측하고 대처해야 합니다. 맵의 구조는 비교적 평평한 지형 위에 방어 건물이 설치될 수 있는 공간이 넓게 배치되어 있으며, 중앙 통로와 외곽을 따라 적들이 접근합니다. 플레이어는 제한된 자원으로 터렛을 건설하고 업그레이드할 수 있으며, 자원은 웨이브를 막아낼 때마다 획득할 수 있습니다. 또한, 맵 곳곳에 배치된 보너스 자원 지역을 확보하는 것이 중요합니다. 게임은 웨이브가 지속적으로 이어지며, 일정 횟수의 웨이브를 성공적으로 막아내면 승리합니다. 맵의 디자인과 밸런스는 초보자부터 숙련자까지 공정한 도전을 제공하도록 설계된 것으로 보입니다. 특히, 방어 건물의 효율적인 배치와 자원 관리가 승리의 열쇠가 되며, 각 웨이브의 패턴을 학습하며 전략을 수립하는 재미가 있습니다. 추천 대상은 디펜스 장르를 좋아하는 플레이어이며, 특히 방어 건물의 배치와 전략적 사고를 즐기는 유저들에게 적합합니다. 게임을 시작하기 전 방어 건물의 종류와 업그레이드 비용, 자원 획득 방법 등을 미리 숙지하는 것이 좋습니다. 또한, 빠른 반응과 정확한 클릭이 요구되므로 마우스 조작에 익숙한 플레이어가 유리할 수 있습니다. 《Turret Defense 10K -Final-》 is a defense-genre custom map in StarCraft: Brood War that offers strategic gameplay focused on defense. The main feature of the map is placing and managing turrets and defensive structures while facing numerous enemy waves. Starting from the central base, you must fend off Zerg waves that gradually advance, predicting and countering the increasing number and attack patterns of enemies in each wave. The map features a relatively flat terrain with ample space for defensive structures, and enemies approach through the central corridor and outer paths. Players can construct and upgrade turrets with limited resources, which are earned by successfully blocking waves. Securing bonus resource areas scattered throughout the map is also crucial. The game continues with waves persisting until you successfully defend a set number of them to win. The map’s design and balance appear to offer fair challenges for both beginners and experienced players. Efficient placement of defensive structures and resource management are key to victory, with the enjoyment of learning each wave’s patterns and devising strategies. It’s recommended for players who enjoy defense games, especially those who like strategizing and placing defensive buildings. Before starting, it’s advisable to familiarize yourself with the types of defensive structures, upgrade costs, and resource-gathering methods. Additionally, quick reactions and precise mouse control are essential, making it advantageous for players comfortable with fast-paced mouse operations.
탱크 디펜스 V4.1 (Tank Defense V4.1)
스타크래프트 브루드워 유즈맵 '탱크 디펜스 V4.1'은 4인 협동 디펜스 장르로, 우주 타일셋을 배경으로 밀려오는 적 병력을 막아내는 전형적인 타워 디펜스 구조를 갖추고 있습니다. 맵 크기는 128x128 타일로 적당히 넓은 전장을 제공하며, 내부 설명인 'Don't let any enemies through!'가 직관적으로 승리 조건을 제시합니다. 플레이어는 각자 시작 지점에서 자원을 모아 탱크류 유닛이나 방어 시설을 생산, 업그레이드하며 점점 강해지는 웨이브를 견뎌야 합니다. V4.1 버전은 이전 버전들(V4.0, V4.23)에서 밸런스 조정과 버그 수정이 이루어졌을 것으로 보이며, 난이도 곡선이 비교적 완만해 초보자도 부담 없이 입문할 수 있는 편입니다. 협동 플레이가 핵심이므로 팀원 간의 역할 분담(자원 담당, 수리 담당, 화력 담당 등)이 승패를 가릅니다. 맵 곳곳에 배치된 지형지물과 좁은 통로를 활용한 병목 지점 방어가 공략의 열쇠입니다. 우주 타일셋 특유의 어두운 배경과 네온 빛 효과가 분위기를 더하며, 적 유닛 구성은 저글링, 히드라리스크, 울트라리스크 등 저그 위주로 구성되어 있어 대공 방어와 지상 화력 밸런스를 동시에 고려해야 합니다. 자원 채취는 미네랄과 가스 모두 제공되며, 일정 웨이브마다 보스급 유닛이 등장해 긴장감을 높입니다. 트리거로 구현된 웨이브 알림 시스템과 남은 적 수 표시 UI가 직관적이어서 초보자도 진행 상황을 파악하기 쉽습니다. 다만, 맵 크기가 큰 편이라 초반 확장 타이밍을 놓치면 자원 부족에 시달릴 수 있으니 초반 빌드 오더를 숙지하는 것이 유리합니다. 4인 풀파티 기준 클리어까지 약 30~40분 소요되며, 난이도 조절 옵션이 별도로 없어 숙련자는 자제력을 테스트하기에도 좋습니다. 커뮤니티에서 오랜 기간 사랑받아온 시리즈인 만큼 버전별 변경점을 비교하며 플레이하는 재미도 있습니다. 디펜스 입문용으로 추천하며, 짧은 시간 안에 몰입감 있는 방어전을 즐기고 싶은 유저에게 적합합니다. 플레이 전 버전 호환성과 트리거 작동 여부를 확인하고, 최신 패치 버전인 V4.1을 사용하는 것이 좋습니다. StarCraft Brood War use map 'Tank Defense V4.1' is a 4-player cooperative defense genre, featuring a classic tower defense structure set on a space tileset where players must stop incoming enemy forces. The map size of 128x128 tiles provides a moderately spacious battlefield, and the internal description 'Don't let any enemies through!' intuitively presents the victory condition. Players gather resources at their starting locations to produce and upgrade tank-type units or defensive facilities, enduring increasingly stronger waves. Version 4.1 likely includes balance adjustments and bug fixes from previous versions (V4.0, V4.23), with a relatively gentle difficulty curve allowing beginners to enter without burden. Cooperative play is key, so role division among teammates (resource manager, repair specialist, firepower dealer) determines victory or defeat. Utilizing terrain features and choke points placed throughout the map is the key to strategy. The dark background and neon light effects unique to the space tileset enhance the atmosphere, while enemy compositions centered around Zerg units such as Zerglings, Hydralisks, and Ultralisks require balancing anti-air and ground firepower. Both minerals and gas are provided for resource gathering, and boss-class units appear at certain waves to raise tension. The trigger-based wave notification system and remaining enemy count UI are intuitive, making it easy for beginners to grasp the situation. However, the large map size means missing early expansion timing can lead to resource shortages, so mastering early build orders is advantageous. With a full party of 4, clearance takes about 30-40 minutes, and the lack of separate difficulty options makes it a good test of restraint for veterans. As a series beloved by the community for a long time, comparing changes across versions adds extra enjoyment. Recommended for defense beginners and users wanting an immersive defense battle in a short time. Before playing, check version compatibility and trigger functionality, and using the latest patched version V4.1 is advised.
썬큰 디펜스 10웨이 15.4 임파서블 (SunkenD 10Way 15.4 Impossible)
'썬큰 디펜스 10웨이 15.4 임파서블(SunkenD 10Way 15.4 Impossible)'은 스타크래프트 브루드워 유즈맵 중에서도 손꼽히는 고난도 협동 디펜스 맵으로, 최대 10인의 플레이어가 우주 타일셋 위에서 25단계 저그 웨이브를 상대로 생존을 겨루는 구조다. '10웨이(10Way)' 명칭대로 열 개의 독립 진입로가 'Even Mid' 대칭 배치로 구성되어 공평한 자원 분배와 난이도를 제공하며, '임파서블' 표기답게 일반 디펜스와는 차원이 다른 생존 압박이 지속된다. 플레이어는 감염된 커맨드 센터 또는 해처리를 거점으로 자원을 확보해 썬큰 콜로니 위주의 방진을 구축, 저글링부터 울트라리스크까지 진화하는 적 병력을 막아내야 한다. 'Backwash wont kill you' 설명은 후방 우회 병력(백워시)으로 인한 즉사 패널티를 완화해 전방 라인 유지와 업그레이드 타이밍에 집중하도록 유도한 트리거 설계로 보인다. 128x128 타일 기반 4096x4096 해상도는 10인 동시 플레이에 적절한 공간감을 주며, 버전 15.4까지 이어진 업데이트 이력과 'sc-maps.com' 출처는 지속적인 밸런스 검증이 있었음을 시사한다. 이 맵은 단순 타워 배치를 넘어 유닛 상성, 자원 관리, 10명 전원의 역할 분담과 웨이브 클리어 속도 조율이 유기적으로 맞물려야 하는 고차원적 협동을 요구한다. 입문자에게는 진입 장벽이 높으나, 정석 '입구 막기' 메커니즘을 익힌 숙련자 파티에게는 최적의 도전 과제다. 플레이 전 버전 호환성(리마스터/1.16.1), 팀원 간 의사소통 수단, 웨이브별 출현 유닛 공략 숙지 여부를 점검하고 진입하는 것이 생존의 열쇠가 된다. SunkenD 10Way 15.4 Impossible stands out as one of the highest-difficulty cooperative defense maps in the StarCraft Brood War UMS scene. Up to ten players face 25 stages of evolving Zerg waves on a space tileset. The "10Way" designation indicates ten independent lanes arranged in an "Even Mid" symmetrical layout, ensuring fair resource distribution and balanced difficulty. True to its "Impossible" label, the survival pressure far exceeds standard defense maps. Players establish bases around Infested Command Centers or Hatcheries, building Sunken Colony-centric defenses to stop enemies ranging from Zerglings to Ultralisks. The note "Backwash wont kill you" suggests triggers prevent instant loss from rear leaks, letting players focus on front-line upgrades and timing. The 4096x4096 resolution on 128x128 tiles provides ample room for ten players, while the v15.4 history and sc-maps.com origin imply long-term balance refinement. This map demands more than tower placement; it requires deep unit-counter knowledge, economy management, role assignment, and synchronized wave-clearing across all ten slots. The barrier is high for newcomers, but veteran parties mastering classic choke-point defense will find a rewarding challenge. Before starting, verify version compatibility (Remastered/1.16.1), ensure voice communication, and study wave compositions to maximize survival chances.
스폰 디펜스 HAX'D (Spawn Defense HAX'D)
스타크래프트 브루드워의 유즈맵인 <스폰 디펜스 HAX'D (Spawn Defense HAX'D)>는 이름에서부터 느껴지는듯한 난이도 상승과 버그 수정을 기반으로 만들어진 컴까기 디펜스 맵이다. 맵의 핵심은 초반에 주어지는 적은 수의 기지를 지키며 끊임없이 몰려오는 저그 웨이브를 방어하는 것이며, 맵 곳곳에 배치된 방어 시설과 플레이어의 전략적 선택이 승패를 좌우한다. 내부 설명에서도 '공공 출시를 위해 버그를 수정하고 난이도를 높였다'고 언급되어 있어, 기존의 스폰 디펜스 시리즈에 비해 더 도전적인 플레이가 가능하도록 설계되었음을 알 수 있다. 사막 타일셋을 기반으로 한 광활한 맵은 시야를 제한하는 요소 없이 넓은 전장을 제공하며, 플레이어는 중앙의 주요 거점을 중심으로 방어선을 구축하거나, 외곽의 보조 거점을 활용해 기동전을 펼칠 수 있다. 맵의 구조상 초반 자원 수급이 제한적이기 때문에, 플레이어는 빠르게 mineral line을 확보하고 방어 시설을 최적 배치하는 것이 중요하다. 또한, 'handicap'이라는 표현이 내부 설명에 포함되어 있어, 플레이어 간 균형을 맞추기 위한 다양한 밸런스 조절 기능이 내장되어 있을 가능성이 높다. 맵의 난이도는 기본적으로 '보통' 수준으로 설정되어 있지만, 버그 수정과 난이도 상승으로 인해 초보자는 어려움을 느낄 수 있으며, 숙련된 플레이어에게는 적절한 난이도를 제공할 것으로 예상된다. 추천 대상은 방어와 전략적 플레이에 익숙한 유저이며, 특히 스폰 디펜스 시리즈의 팬이라면 새로운 도전을 즐길 수 있을 것이다. 플레이 전 반드시 확인해야 할 포인트는 초기 자원의Configurable한 배치 여부와 방어 시설의 건설 가능 지역, 그리고 플레이어 간 협력 여부이다. 또한, 맵의 광활한 크기로 인해 미니맵을 적극 활용하지 않으면 주요 거점의 방어 타이밍을 놓칠 수 있다. 맵의 특성상 긴 플레이 시간을 요구할 수 있으며, 공략을 공유하거나 스크린샷을 남기는 등 전략적 접근이 권장된다. StarCraft: Brood War's custom map <Spawn Defense HAX'D> is a command-based defense map designed around increased difficulty and bug fixes, as suggested by its name. The core gameplay involves defending a small number of starting bases from relentless Zerg waves while leveraging strategically placed defensive structures and player choices to determine victory. The internal description even notes that "bugs were fixed and difficulty raised for public release," indicating it was intentionally designed to be more challenging than previous entries in the Spawn Defense series. The vast desert-themed map provides a wide battlefield without visibility-limiting elements, allowing players to either establish defensive lines around central key points or use outer auxiliary bases for mobile tactics. Due to the map's structure, early resource gathering is limited, making it crucial to secure mineral lines quickly and optimally place defensive structures. The inclusion of terms like "handicap" in the internal description suggests built-in balance adjustments to equalize player advantages. While the default difficulty is set to "normal," the bug fixes and increased challenge may prove difficult for beginners, though experienced players should find it appropriately balanced. It’s best suited for users familiar with defense and strategic play, particularly fans of the Spawn Defense series looking for a fresh challenge. Before playing, check the configurable initial resource placement, available construction zones for defensive structures, and whether teamwork is required. The map’s large scale demands active use of the minimap to avoid missing critical defense timings. Given its nature, expect longer play sessions, and consider sharing strategies or screenshots for better tactical approaches.
단일 방어 (Single Total Defence 2)
스타크래프트 브루드워의 대표적인 디펜스 장르 유즈맵인 〈Single Total Defence 2〉는 한 명의 플레이어가 수많은 웨이브의 적을 상대로 방어전을 펼치는 컴까기 형식의 맵이다. 맵은 사막 타일셋을 기반으로 제작되었으며, 중앙에 위치한 플레이어 기지 주변으로 적절한 길목이 마련되어 있다. 플레이어는 미네랄과 가스를 확보하면서 본진을 지키며, 주기적으로 공격해 오는 저글링, 히드라, 울트라리스크, 뮤탈리스크, 디파일러 등 다양한 종족 유닛을 상대해야 한다. 각 웨이브는 점점 강화되는 적군을 상대하기 때문에 전략적 자원 관리와 방어 타워의 배치, 유닛 조합이 핵심이다. 특히, 맵의 중앙 길목을 중심으로 방어선을 구축하는 것이 중요하며, 일부 구간에서는 적이 우회로를 통해 기지로 진입할 위험이 있어 이를 방지하기 위한 추가적인 방어 구조물이 필요하다. 맵의 난이도는 초반에는 비교적 여유롭지만, 후반부로 갈수록 적의 공격력이 급증하므로 신중한 대비를 요구한다. 초보 플레이어의 경우 방어 타워를 적절히 배치하고 기본 유닛으로 버티는 것이 중요하며, 숙련된 플레이어는 자원 효율과 타이밍을 중시한 플레이가 필요하다. 맵의 플레이 시간은 약 30분 내외로 예상되며, 6인까지 동시에 플레이할 수 있는 구조이지만, 실제로 1인 플레이를 상정하고 설계된 맵으로 보인다. 맵의 특성상 사막 타일셋의 황량한 분위기가 플레이어의 긴장감을 더해주며, 디펜스 장르에 익숙한 유저라면 즐길 수 있는 훌륭한 작품이다. 다만, 방어선을 잘못 구축하면 적의 공격을 버티기 힘들기 때문에 꼼꼼한 준비를 권장한다. Single Total Defence 2 is a classic defense genre custom map from StarCraft: Brood War where one player defends against countless waves of enemies in a tower defense-style format. The map is set in a desert tileset, featuring a player base at the center with well-designed pathways. Players must secure minerals and gas while protecting their main base, fending off periodic attacks from various Zerg units such as Zerglings, Hydralisks, Ultralisks, Mutalisks, and Defilers. Each wave escalates in difficulty, making strategic resource management, tower placement, and unit compositions crucial for survival. Establishing a strong defensive line around the central pathways is essential, though some sections require additional structures to prevent enemies from bypassing defenses through alternate routes. While the early stages are manageable, the later waves demand careful preparation as enemy firepower intensifies sharply. Beginners should focus on proper tower placement and relying on basic units, while advanced players need to optimize resource efficiency and timing. The typical playtime is around 30 minutes, and while the map supports up to six players, it is clearly designed with solo play in mind. The desolate atmosphere of the desert tileset enhances the tension, making it an excellent choice for fans of the defense genre. However, poor defensive setup can quickly lead to failure, so thorough preparation is highly recommended.
리얼 데빌 타워 v3.2b (Real Devil Tower v3.2b)
리얼 데빌 타워 v3.2b는 스타크래프트 브루드워에서 즐기는 고전적인 타워 디펜스 장르의 유즈맵으로, 플레이어는 적의 끊임없는 공격을 방어하는 동시에 strategic한 타워 배치와 자원 관리를 통해 승리를 노려야 한다. 맵의 중앙에는 거대한 중앙 타워가 자리하고 있으며, 이를 중심으로 사방에서 몰려드는 저그의 웨이브를 막아내야 한다. 맵의 외곽 주위에는 보호막 역할을 하는 벽이 배치되어 있어 무작정 밀어붙이기보다는 전략적인 방어 라인을 구축하는 것이 중요하다. 또한 맵 곳곳에 흩어져 있는 스팟에는 추가 자원이나 방어 보조 아이템이 배치되어 있어, 이를 활용하면 더 안정적인 플레이가 가능하다. 맵의 난이도는 초중반에는 비교적 수월하지만, 후반부로 갈수록 적의 공격 빈도와 강도가 급격히 상승하므로 신중한 타워 관리와 리소스 관리가 필수적이다. 특히, 플레이어 간의 협력이 중요한 팀플레이 맵으로 보이며, 각 플레이어는 고유한 시작 자원과 위치를 부여받아 역할을 분담할 수 있다. 맵의 구조상으로는 중앙 타워를 중심으로 한 방어선이 핵심 포인트이며, 각 플레이어의 타워가 중앙 타워와 얼마나 연계되는지가 승패를 좌우할 가능성이 크다. 또한, 적의 공격 패턴이 일정하지 않고 무작위로 변한다는 점에서, 맵을 여러 번 플레이해보며 적의 패턴을 익히는 것이 중요하다. 추천 대상으로는 타워 디펜스와 전략적 게임 플레이를 좋아하는 유저들이며, 특히 팀플레이를 즐기는 게이머들에게 적합하다. 플레이 전에는 맵의 자원 배치와 방어 라인, 그리고 각 플레이어의 시작 위치를 미리 확인하고 전략을 세워두는 것이 좋다. 초보자의 경우, 난이도가 높은 편이므로 난이도 설정을 낮춰가며 연습해보는 것도 좋은 방법이다. 맵의 인기는 오랜 기간 동안 꾸준히 사랑받아 왔으며, 다양한 버전 업데이트를 통해 지속적으로 개선되어 왔다는 점에서도 주목할 만하다. Real Devil Tower v3.2b is a classic tower defense custom map for *StarCraft: Brood War*, where players must defend against endless enemy waves while strategically placing towers and managing resources to secure victory. At the heart of the map lies a massive central tower, which serves as the focal point for repelling relentless Zerg attacks from all directions. Surrounding the map are protective walls that act as barriers, encouraging players to build strategic defensive lines rather than relying on brute force. Scattered across the map are various spots containing additional resources or defensive support items, allowing for more stable gameplay when utilized effectively. While the difficulty remains manageable in the early to mid-game, the late game ramps up significantly in both attack frequency and intensity, making careful tower management and resource allocation essential. Designed with team play in mind, cooperation between players is crucial, as each is assigned unique starting resources and positions to fulfill specific roles. The map’s structure revolves around the central tower, with the synergy between individual towers and the central hub often determining the outcome. Additionally, since enemy attack patterns are unpredictable and vary randomly, playing multiple times to learn these patterns is highly recommended. This map is ideal for players who enjoy tower defense and strategic gameplay, particularly those who favor team-based experiences. Before starting, it’s wise to study the resource distribution, defensive layouts, and each player’s starting positions to devise a solid strategy. Beginners may find the difficulty steep, so lowering the difficulty setting and practicing can help ease into the experience. Over the years, Real Devil Tower has maintained steady popularity, consistently improving through various version updates.
마린 D. 18-웨이 (Marine D. 18-way - ver. 1)
마린 D. 18-웨이(ver. 1)는 스타크래프트 브루드워의 유즈맵으로, 6명의 플레이어가 참가해 마린(해병)을 조종하는 컴까기(컴퓨터 상대 유즈맵) 장르의 맵이다. 18-웨이라는 명칭에서 알 수 있듯, 맵은 총 18개의 방향에서 적의 공격을 방어해야 하는 디펜스 형식으로 구성되어 있다. 중앙에 위치한 플레이어 기지 주변으로 총 18개의 입구가 배치되어 있으며, 각 입구는 일정 주기마다 저글링, 히드라리스크, 뮤탈리스크 등 다양한 저그 유닛으로 구성된 웨이브가 공격해 온다. 플레이어는 각 웨이브를 막아내며 기지를 방어해야 하며, 일정 주기마다 보너스 유닛이나 아이템이 등장하기도 한다. 맵의 특징은 18-웨이 구조로, 18방향에서 동시에 공격을 받기 때문에 방어선이 복잡하고 전략적인 플레이가 요구된다. 또한, 맵의 중앙에는 보호막이 설치되어 있어 기지 내부로의 직접적인 침입을 어느 정도 막아낸다. 방어에 성공할수록 난이도가 상승하는 구조로, 초반에는 저글링 위주로 공격해 오지만 점차 히드라리스크, 뮤탈리스크, 울트라리스크 등 강력해진 적들이 등장한다. 맵의 밸런스는 초심자도 쉽게 접근할 수 있도록 구성되어 있지만, 고수들은 더 빠른 웨이브나 다양한 패턴을 경험할 수 있어 반복 플레이가 가능한 구조다. 특히, 18-웨이 구조는 마린(해병)의 특성상 원거리 공격과 빠른 기동성을 활용해 방어해야 하므로, 유닛 관리가 중요하다. 마린 D. 18-웨이(ver. 1)는 컴까기 장르의 classic한 디펜스 유즈맵으로, 6인 플레이를 지원하며 방어선 관리와 전략적인 유닛 배치, 빠른 반응력이 요구되는 맵이다. 초보자도 쉽게 접근할 수 있지만, 고수들에게는 더 어려운 패턴을 제공하는 등 넓은 범위의 플레이어층을 아우르는 맵으로 평가된다. 플레이 전에는 맵의 18-웨이 구조와 웨이브 패턴, 중앙 보호막의 역할, 그리고 보너스 유닛의 등장 시점을 숙지하는 것이 중요하다. 또한, 마린의 카이팅(유닛 끌기) 기술과 지형 활용이 필수적이므로, 맵의 지형을 미리 확인해 두는 것이 좋다. 이 맵은 특히 마린을 좋아하는 유저들에게 추천하며, 컴까기 장르의 정석을 느낄 수 있는 작품이다. 마린 D. 18-웨이(ver. 1)는 다양한 저그 웨이브를 방어하는 컴까기 유즈맵으로, 6명의 플레이어가 참가해 중앙 기지를 방어하는 구조다. 18방향에서 동시에 공격을 받기 때문에 방어선이 복잡하고 전략적인 플레이가 요구되며, 웨이브가 진행될수록 적의 유닛이 강해지는 progression 시스템이 특징이다. 맵의 중앙 보호막은 기지 내부로의 직접적인 침입을 막아주며, 초반에는 저글링 위주로 공격해 오지만 점차 히드라리스크, 뮤탈리스크, 울트라리스크 등 강력한 적들이 등장한다. 보너스 유닛이나 아이템은 방어 성공 시 주기적으로 등장하며, 맵의 밸런스는 초심자도 쉽게 접근할 수 있도록 구성되어 있지만 고수들에게는 더 어려운 패턴을 제공한다. 마린의 카이팅 기술과 지형 활용이 필수적이므로, 플레이 전에 맵의 구조와 웨이브 패턴을 숙지하는 것이 중요하다. 이 맵은 마린을 좋아하는 유저들에게 특히 추천되며, 컴까기 장르의 classic한 디펜스를 경험할 수 있는 작품이다. Marine D. 18-Way (ver. 1) is a StarCraft: Brood War custom map where six players control Marines (Marines) in a defense-style game against AI opponents. As the name "18-Way" suggests, the map requires players to defend their base from attacks coming from 18 different directions. Around the central player base, there are 18 entrances, each periodically assaulted by waves of Zerg units such as Zerglings, Hydralisks, and Mutalisks. Players must hold their ground against these waves while also dealing with periodic appearances of bonus units or items. The map’s defining feature is its 18-way structure, forcing players to manage a complex and strategic defense line as attacks come from all directions simultaneously. Additionally, a protective shield in the center of the map helps block direct incursions into the base. The difficulty escalates with each successful defense—early waves consist mainly of Zerglings, but over time, stronger enemies like Hydralisks, Mutalisks, and Ultralisk appear. The map is designed with balanced difficulty, making it accessible to beginners while offering more challenging waves and patterns for advanced players to enjoy repeated playthroughs. The 18-way structure emphasizes the Marines’ strengths, such as their ranged attacks and mobility, making unit management critical. Marine D. 18-Way (ver. 1) is a classic defense-style custom map in the AI-vs-player genre, supporting six players and demanding strategic base defense, quick reactions, and smart unit positioning. While easy for newcomers to pick up, it provides tougher patterns for skilled players, catering to a wide range of skill levels. Before playing, it’s important to understand the 18-way structure, wave patterns, the role of the central shield, and when bonus units appear. Mastering Marine kiting (unit dragging) and using the terrain effectively are essential, so reviewing the map’s layout beforehand is highly recommended. This map is especially recommended for players who enjoy using Marines and want to experience the quintessential AI-vs-player defense gameplay. Marine D. 18-Way (ver. 1) is a custom map where six players defend their central base against waves of Zerg units, with attacks coming from 18 directions simultaneously. The complex defense lines require strategic play, and the game features a progression system where enemy units grow stronger with each wave—starting with Zerglings and escalating to Hydralisks, Mutalisks, and Ultralisk. The central shield helps prevent direct invasions, while bonus units or items appear periodically upon successful defenses. The map is balanced for beginners but offers more difficult patterns for advanced players. Effective Marine kiting and terrain utilization are key, so familiarizing yourself with the map’s structure and wave patterns before playing is crucial. This is a recommended title for Marine fans and those looking to experience a classic AI-vs-player defense map.
맵 선택 가이드
태그는 맵의 핵심 특징을 빠르게 설명하지만 제작 버전마다 규칙이 다를 수 있습니다. 상세 설명에서 권장 인원, 난이도, 플레이 시간과 버전을 함께 확인한 뒤 다운로드하세요.