
저그 방어 스타크래프트 맵 모음
'저그 방어' 태그가 등록된 맵을 모았습니다. 장르 하나로 찾기 어려운 플레이 방식, 난이도와 특징을 중심으로 인기 맵과 최신 맵을 비교해 보세요.
- 등록 맵
- 21개
- 누적 다운로드
- 0
- 누적 조회
- 802
인기 맵
다운로드와 조회 반응이 높은 맵입니다.
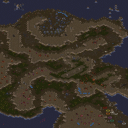
정복자들: 패배 (Conquistadores7)
스타크래프트 브루드워의 유즈맵 <정복자들: 패배>는 1인용 디펜스 장르로, 저그의 대규모 공격을 막아내며 살아남아야 하는 긴장감 넘치는 게임이다. 맵은 사막 테마의 넓은 지역으로 구성되어 있으며, 중앙에 위치한 자치령 기지에서 시작해 주변에서 끊임없이 몰려오는 저그 무리를 방어하는 것이 핵심이다. 미네랄과 가스가 제한적으로 배치되어 있어 자원 관리가 필요하며, 건설로봇을 적극 활용해 방어 건물을 신속히 건설하고 유지해야 한다. 저그의 공격 패턴은 랜덤하게 변동되며, 때로는 소규모 병력이 지속적으로 공격해오기도 하고, 때로는 대규모 웨이브가 밀어닥치기도 한다. 플레이어는 방어 건물 배치와 병력 조합을 신중히 결정해야 하며, 특히 공중 유닛 방어와 기지 입구 방어에 중점을 둬야 한다. 맵 곳곳에 scattered된 보너스 자원 지역을 확보하면 자원 수급에 도움이 된다. 초반에는 소규모 방어로 버티며 기지를 확장해 나가야 하며, 후반으로 갈수록 점점 강해지는 저그의 공격을 버텨내는 것이 관건이다. 추천 대상은 스타크래프트에서 디펜스 장르를 즐기는 플레이어이며, 특히 1인용 맵을 선호하는 유저들에게 적합하다. 플레이 전 방어 건물의 배치와 자원 관리 전략을 미리 세워두면 보다 수월한 진행이 가능하다. 실수 없이 방어선을 구축한다면 긴장감 넘치는 긴 플레이 시간을 즐길 수 있을 것이다. Conquistadores7.scx, also known as <정복자들: 패배> in Korean, is a single-player defense-style custom map in StarCraft: Brood War. Players must protect their Terran base from relentless waves of Zerg attacks on a vast desert-themed map. Resource management is crucial, as minerals and vespene gas are limited, requiring efficient use of SCVs to build and maintain defenses. The Zerg's attack patterns vary unpredictably—sometimes small groups raid repeatedly, while other times overwhelming swarms surge in. Strategic placement of defensive structures and unit compositions is essential, with special focus on air defense and choke point control. Scattered bonus resource spots across the map can be secured for extra income. Early game survival hinges on minimal defense and base expansion, while late-game endurance becomes the main challenge. This map is ideal for StarCraft fans of the defense genre and those seeking engaging solo experiences. Players should plan their defense layout and resource strategy in advance for smoother gameplay. Mastering base fortification leads to a tense and satisfying long playthrough.
히드라리스크 어택 10k v0.999o (Hydralisk Attack 10k v0.999o)
히드라리스크 어택 10k v0.999o는 스타크래프트 브루드워의 대표적인 디펜스 유즈맵으로, 플레이어는 끊임없이 몰려드는 저그 유닛들을 방어하며 최대한 오랫동안 생존해야 하는 챌린지형 맵이다. 맵의 이름은 저그의 히드라리스크가 1만 마리 공격한다는 컨셉에서 유래했으며, 하드 버전으로 제작되어 난이도가 상당히 높다. 내부 설명에서 보듯이 보너스로 4천 마리의 저글링과 666마리의 저글링이 추가로 등장하는 등, 극한의 방어 능력을 요구하는 구조로 설계되었다. 맵의 해상도는 2048 x 8192로 매우 넓은 구성을 자랑하며, 타일셋은 플랫폼을 사용해 시각적 안정성을 높였다. 방어 건물로는 주로 프로토스 포톤 캐논과 테란 터렛이 배치되어 있으며, 맵의 디자인상 방어 포인트가 여러 곳에 분산되어 있어 전략적인 배치와 자원 관리가 필수적이다. 플레이어는 시작 지점에서 조금씩 후퇴하며 방어선을 구축해야 하며, 지속적인 공격으로 인해 자원 소모가 크고 입구도 여러 곳이라 실수가 치명적이다. 특히 하드 버전답게 워커와 히드라리스크의 비중이 높아져 방어 난이도가 배가된다. 이 맵은 초보 플레이어보다는 중수 이상의 유저들에게 적합하며, 점진적으로 난이도를 높이는 방식으로 반복 플레이를 유도한다. 추천하는 플레이 방식은 방어 건물의 효율적 배치와 자원 관리, 그리고 빠른 반응 속도를 키우는 데 집중하는 것이다. 맵의 구조상 한 번 실수하면 금방 밀리기 때문에, 철저한 준비와 경험이 요구된다. 또한, 보너스 유닛들이 추가되는 시점이 있으니 그 타이밍을 잘 노려야 한다. 이 맵은 스타크래프트 유즈맵 커뮤니티에서 오랫동안 사랑받아온 classic 디펜스 게임으로, 넓은 맵과 높은 난이도, 그리고 끊임없는 도전 정신을 자극하는 플레이 경험을 제공한다. 특히 방어 건물의 종류가 제한적이면서도 적의 공격 패턴이 다양해져, 순수한 전략성과 긴장감을 동시에 느낄 수 있다. Hydralisk Attack 10k v0.999o is a classic defense-style custom map in *StarCraft: Brood War* where players must defend against endless waves of Zerg units and survive as long as possible. The map’s name comes from its premise—10,000 Hydralisks attacking—but it’s designed as a hard version with significantly higher difficulty. As mentioned in the in-game description, the challenge is amplified by bonus waves, including an additional 4,000 Zerglings and 666 Zerglings, pushing players to their absolute limits. The map boasts an enormous resolution of 2048 x 8192, featuring a vast layout with a platform-based tileset for visual stability. Defense structures like Protoss Photon Cannons and Terran Turrets are strategically placed across multiple defensive points, requiring careful resource management and smart positioning. Players begin by slowly retreating from their starting point to build a defense line, but constant attacks drain resources quickly, and the presence of multiple entrances means mistakes are unforgiving. True to its hard difficulty, the map emphasizes Hydralisks and Zerglings, drastically increasing the challenge. It’s best suited for intermediate to advanced players, encouraging repeated play by gradually ramping up the difficulty. To succeed, focus on efficient building placement, resource control, and quick reflexes—one misstep can lead to an immediate loss. Timing is also crucial, as bonus units appear at specific moments, so players must be ready to adapt. A long-time favorite in the *StarCraft* custom map community, *Hydralisk Attack 10k* delivers a classic defense experience with its expansive map, punishing difficulty, and relentless challenge. The limited defensive options combined with the Zerg’s varied attack patterns create a tense, high-stakes battle where pure strategy and quick thinking are essential.
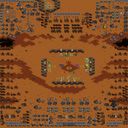
테스트 오브 서바이벌 - 프로토스 X (Test of Survival - Protoss X)
스타크래프트 브루드워 유즈맵 <테스트 오브 서바이벌 - 프로토스 X>는 서바이벌 장르의 맵으로, 플레이어가 프로토스 유닛을 조종하며 끊임없이 몰려드는 저그의 공격을 버텨내고 승리를 쟁취하는 것이 목표다. 맵 중앙에 위치한 프로토스 기지 주변으로 여러 개의 입구가 배치되어 있으며, 각 입구에서 끊임없이 저글링과 히드라리스크가 생산되어 공격해 온다. 플레이어는 초반 자원 수급을 통해 포토캐논과 미사일 터렛을 건설해 방어선을 구축해야 하며, 동시에 조이포나 아둔의 성지 같은 방어 건물들을 활용해 체력을 유지해야 한다. 맵의 특징은 입구마다 일정 주기로 적의 생산량이 증가하는 시스템으로, 초반에는 수월하게 느껴지지만 시간이 지날수록 압박이 심해지면서 방어 전략을 신중히 세워야 한다. 또한, 맵 곳곳에 흩어져 있는 추가 자원 지역을 확보하면 방어 건물의 업그레이드와 유닛 생산에 도움이 된다. 초보 플레이어는 방어 건물의 건설 우선순위를 신중히 고려해야 하며, 중급 이상 플레이어는 적의 생산 주기나 유닛 조합을 예측해 효율적인 대처가 필요하다. 추천 대상은 방어와 자원 관리에 익숙한 플레이어이며, 맵의 특성상 긴장감을 유지하며 플레이할 수 있어 서바이벌 장르를 좋아하는 유저들에게 적합하다. 플레이 전에는 맵의 입구 위치와 자원 분포를 미리 파악해 두는 것이 중요하다. 이 맵은 프로토스 유닛을 조종하는 것이 특징이지만, 테란이나 저그로도 플레이 가능한지는 내부 설명이나 이미지에서 확인되지 않으므로 유의해야 한다. StarCraft: Brood War custom map *Test of Survival - Protoss X* is a survival-style map where players control Protoss units, enduring endless waves of Zerg attacks to secure victory. Multiple entrances surround the central Protoss base, each continuously spawning Zerglings and Hydralisks to assault the player. Early on, players must gather resources to build Photon Cannons and Missile Turrets to establish defensive lines while maintaining health using structures like the Shield Battery or Templar Archives. A key feature is the periodic increase in enemy production at each entrance—initially manageable but growing increasingly oppressive over time, demanding careful defensive planning. Scattered resource points across the map can be secured to upgrade defenses and bolster unit production. Beginners should prioritize defensive structures wisely, while intermediate and advanced players must anticipate enemy production cycles and unit compositions for efficient counterplay. Ideal for players comfortable with defense and resource management, this map’s high-tension gameplay suits survival genre enthusiasts. Before playing, it’s crucial to study entrance locations and resource distribution. While the map emphasizes Protoss control, it’s unclear from descriptions or visuals whether Terran or Zerg can also be played, so players should verify this beforehand.
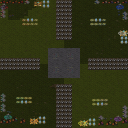
히드라 랜처즈 v7.1 (Hydra Rancherz v7.1)
스타크래프트 브루드워의 대표적인 디펜스형 유즈맵인 'Hydra Rancherz v7.1'은 플레이어가 히드라리스크를 관리하며 끊임없이 쏟아지는 적의 공격을 방어하는 구조로 짜여 있다. 맵 중앙에 위치한 본진 건물을 중심으로, 사방에서 몰려오는 저글링, 히드라리스크, 뮤탈리스크 등 다양한 저그의 병력과 occasional한 울트라리스크, 데바우어링까지 상대해야 한다. 히드라리스크를 키우고 진화시키는 시스템이 핵심인데, 미네랄과 가스를 확보한 플레이어는 히드라리스크를 사냥해 경험치를 얻고, 일정 조건에 도달하면 더 강한 유닛으로 진화시킬 수 있다. 예를 들어 히드라리스크에서 뮤탈리스크로, 또는 디파일러로 변신시킬 수 있으며, 이 과정에서의 전략적 선택이 승패를 가른다. 맵 디자인은 사막 타일셋을 활용해 넓은 평원과 협소한 통로, 그리고 본진 주변의 방어 시설 배치 등으로 상당히 전략적인 공간 활용을 요구한다. 특히 본진 주변의 방어 타워와 성큰 콜로니를 적절히 배치하고, 히드라리스크의 위치와 진화 타이밍을 조절하는 것이 중요하다. 8명의 플레이어가 각자 본진을 차지한 상태로 경쟁하며, 마지막까지 살아남는 플레이어 또는 팀이 승리하는 방식으로 진행된다. 맵의 밸런스는 히드라리스크의 성장 곡선과 적의 공격 패턴이 절묘하게 맞아떨어져, 초보자부터 숙련자까지 모두 즐길 수 있도록 설계되어 있다. 이 맵을 플레이하기 전에는 히드라리스크의 진화 루트와 필요한 업그레이드 조건, 그리고 방어 시설의 효율적인 배치 방법을 미리 숙지하는 것이 좋다. 또한, 맵의 난이도를 조절할 수 있는 옵션이 있는지 사전에 확인하고, 팀 플레이를 원한다면 팀원과의 전략 조율도 필수적이다. 이 맵은 히드라리스크의 성장과 방어 전략이 조화를 이룰 때 비로소 진정한 재미를 느낄 수 있는 유즈맵으로, 여러 번 플레이할수록 새로운 전략과 인사이트를 발견할 수 있을 것이다. Hydra Rancherz v7.1 is a standout defense-style custom map in StarCraft: Brood War, where players manage Hydralisks while fending off relentless waves of enemy attacks. The central base, surrounded by desert tiles, faces constant assaults from Zerg units like Zerglings, Hydralisks, Mutalisks, and occasionally Ultralisk and Devouring One. The core mechanic revolves around hunting, leveling, and evolving Hydralisks into stronger units such as Mutalisks or Defilers by collecting minerals and gas. Strategic decisions in evolution paths and timing significantly impact the outcome. The map design leverages a desert tileset, featuring open plains, narrow passages, and strategically placed defensive structures around the main base. Players must balance tower placements, manage Hydralisk positioning, and time their evolutions carefully. With 8 players competing for control of individual bases, the last surviving player or team wins. The balance is well-crafted, blending Hydralisk growth curves with enemy attack patterns, making it accessible yet challenging for both beginners and veterans. Before playing, familiarize yourself with the Hydralisk evolution routes, required upgrades, and optimal defensive structure placements. Check for difficulty adjustment options and coordinate strategies with teammates if playing in teams. Hydra Rancherz v7.1 shines when players harmonize growth and defense, offering deeper strategies and insights with each playthrough, ensuring long-term enjoyment.
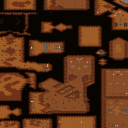
Impossible Scenarios Desert2 (불가능한 시나리오: 황무지2)
‘Impossible Scenarios Desert2’는 스타크래프트 브루드워의 유즈맵으로, ‘Fadetoblack’이 제작한 ‘Impossible Scenarios’ 시리즈의 Desert 스타일을 계승한 맵이다. 이 맵은 황무지 지형과 섬세한 타일셋을 기반으로 삼아 플레이어에게 끊임없는 도전과 긴장감을 제공하는 디펜스 장르의 유즈맵으로 분류된다. 맵의 전체적인 분위기는 어두운 황무지와 붉은 노을이 어우러져 있으며, 맵 중앙에는 거대한 요새와 같은 구조물이 자리 잡고 있다. 이를 둘러싼 길목과 협소한 통로들은 적의 물량 공격을 효과적으로 방어할 수 있는 구조로 설계되어 있으며, 플레이어는 제한된 자원으로 끊임없이 밀려오는 적을 상대로 전략을 세워야 한다. 플레이 방식은 기본적으로 컴퓨터(저그, 테란, 프로토스)의 지속적인 러시를 방어하는 ‘컴까기’ 형식으로 진행된다. 맵 곳곳에 배치된 방어 건물과 유닛 생산 시설은 플레이어의 전략에 따라 자유롭게 활용할 수 있으며, 지형 특성을 살려 요새화할 수 있는 위치가 다수 존재한다. 특히 맵의 가장자리와 중앙 요새 주변은 방어 포인트로 활용하기 좋은 지형으로, 플레이어는 이들을 중심으로 방어 라인을 구축하는 것이 핵심이다. 또한, 맵의 일부 구역은 협소한 통로로 연결되어 있어 방어에 유리한 지형을 만들 수 있지만, 반대로 적의 진입로를 한 곳에 집중시킬 수 있어 위험하기도 하다. 이 맵의 가장 큰 특징은 ‘불가능한 시나리오’라는 컨셉에 맞게 극한의 난이도를 자랑한다는 점이다. 시리즈의 이름에서 알 수 있듯이, 이 맵은 단순히 방어하는 것을 넘어 플레이어의 전략적 사고와 순발력을 끊임없이 시험한다. 맵 곳곳에는 숨겨진 트리거나 특수한 조건이 있을 가능성이 있으며, 이를 파악하고 대비하는 것이 승리의 열쇠가 될 수 있다. 또한, 맵의 전체적인 규모가 크고 복잡한 구조를 가지고 있어 초보자는 물론 경험자도 쉽게 적응하기 어려운 구조로 설계되어 있다. 이 맵을 추천하는 대상은 스타크래프트 유즈맵 중에서도 도전적인 플레이를 즐기는 유저들이다. 특히 디펜스 장르에 익숙하지 않거나, 새로운 전략을 시도해 보고 싶은 플레이어에게 적합하다. 또한, 팀 플레이보다는 혼자서도 충분히 즐길 수 있는 구조지만, 팀원과의 협동 플레이가 필요하다면 팀원 간의 원활한 소통이 필수적일 것이다. 플레이 전에는 맵의 구조를 꼼꼼히 분석하고, 방어 라인 구축에 필요한 자원의 배치를 미리 계획하는 것이 중요하다. 또한, 예상치 못한 적의 공격 패턴에 대비해 유연하게 대처할 수 있는 준비를 갖춰야 한다. ‘Impossible Scenarios Desert2’ is a custom map for *StarCraft: Brood War*, inheriting the Desert style from the *Impossible Scenarios* series created by Fadetoblack. This map is classified as a defense genre custom map, offering players endless challenges and tension through its barren terrain and intricate tileset. The overall atmosphere blends a dark wasteland with a crimson sunset, and at the center of the map stands a massive fortress-like structure. The narrow paths and constricted passages surrounding it are designed to effectively counter waves of enemy attacks, forcing players to strategize with limited resources against relentless enemy forces. The gameplay follows a "comp-scumming" format, where players must defend against continuous rushes from AI-controlled factions (Zerg, Terran, and Protoss). Defense buildings and unit production facilities scattered across the map can be freely utilized based on the player’s strategy, with multiple locations that allow for fortification by leveraging the terrain. Key defensive spots include the edges of the map and areas around the central fortress, where players should focus on establishing strong defensive lines. Some zones are connected by tight corridors, which can create advantageous defensive terrain but also concentrate enemy entry points, posing risks. The map’s defining feature is its extreme difficulty, living up to the "impossible scenarios" concept. Beyond mere defense, it constantly tests the player’s strategic thinking and quick decision-making. Hidden triggers or special conditions may exist throughout the map, and uncovering and preparing for them could be the key to victory. The map’s large scale and complex structure make it difficult for both beginners and experienced players to adapt to easily. This map is recommended for players who enjoy challenging custom maps in *StarCraft*. It suits those looking to try new strategies or unfamiliar with the defense genre. While it can be enjoyed solo, team coordination is essential if playing cooperatively. Before starting, it’s important to carefully analyze the map’s layout, plan resource distribution for defense lines, and prepare flexible responses to unexpected enemy attack patterns.
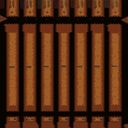
라커 디펜스 온 유어 오운! 2.0 (Lurker Defense On Your Own! 2.0)
「라커 디펜스 온 유어 오운! 2.0」은 스타크래프트: 브루드워의 디펜스 장르 유즈맵으로, 총 30단계의 레벨을 클리어하며 적의 모든 유닛이 맵 하단에 도달하지 못하게 저지하는 것이 목표인 맵이다. 맵의 전체적인 구성은 가로로 길게 펼쳐진 통로와 다수의 분기점으로 이루어져 있으며, 각 레벨마다 배치된 적 유닛들이 아군의 기지나 특정 지점에 도달하기 전에 모두 섬멸해야 한다. 적의 종류는 저글링, 히드라리스크, 뮤탈리스크, 벌처, 시즈 탱크, 울트라리스크 등 다양하며, 레벨이 올라갈수록 적의 규모와 조합이 복잡해지는 특징을 보인다. 맵의 디자인상으로는 중앙 통로가 좁아진 지점에 방어 포인트를 집중할 수 있도록 유도하고, 측면 통로에는 보조 방어 라인을 설정하는 등 전략적인 배치와 타이밍이 요구된다. 또한, 일부 레벨에서는 특정 유닛의 제한된 생산이나 자원 소모가 필요할 수 있어, 자원 관리와 병력 운용의 밸런스를 맞추는 것이 중요하다. 플레이어는 각 레벨에서 주어지는 제한된 유닛이나 건물로 적을 상대해야 하며, 실패 시 즉시 해당 레벨을 재도전하거나 초기화할 수 있는 구조로 보인다. 맵의 난이도는 레벨이 진행될수록 점차 상승하는 경향이 있으며, 후반부로 갈수록 적의 공격 패턴이 예측 불가능해지고 방어 라인의 밀집도가 높아진다. 초보 플레이어의 경우 낮은 레벨에서 기본적인 방어 패턴을 익히며 점차 난이도를 올려가는 것이 좋으며, 숙련된 플레이어는 고난이도 레벨에서 다중 방어 라인을 구축하고 효율적인 유닛 활용을 통해 클리어 시간을 단축시키는 전략을 세울 수 있다. 맵의 전체적인 분위기는 황혼 테마의 타일셋을 사용하여 어두운 톤의 색감으로 일관되어 있으며, 적의 유닛들이 하단으로 다가오는 긴장감 있는 연출이 특징이다. 맵을 플레이하기 전에 확인해야 할 사항으로는 각 레벨의 목표와 제한 사항, 적의 주력 유닛 조합, 그리고 방어에 유리한 지형적 특징을 꼼꼼히 살펴보는 것이다. 또한, 맵의 길이가 길고 레벨이 많으므로 플레이 시간과 집중력을 고려하여 플레이하는 것이 좋다. 이 맵은 디펜스 장르를 좋아하는 유저들에게는 새로운 도전 과제를 제공하며, 특히 적의 공격을 효율적으로 방어하고 병력을 최적화하는 전략적 사고를 기르기에 좋은 콘텐츠로 평가된다. 초보와 숙련자 모두에게 적절한 난이도 조절이 가능하다는 점에서 접근성이 높다는 장점도 있다. Lurker Defense On Your Own! 2.0 is a defense genre custom map for StarCraft: Brood War, where players must prevent all enemy units from reaching the bottom of the map across 30 levels. The map features a horizontally elongated layout with multiple branches, and each level requires the player to eliminate all approaching enemies before they reach the designated area or base. The enemy units vary by level and include zerglings, hydralisks, mutalisks, vultures, siege tanks, and ultralisks, with escalating scale and complexity as the levels progress. The map design encourages strategic placement of defenses, particularly at narrow choke points in the central corridor, while side routes may require auxiliary defensive lines. Some levels may impose restrictions on unit production or require resource expenditure, emphasizing the need for balanced resource management and troop deployment. Players are given limited units or buildings per level and can retry or reset upon failure. The difficulty gradually increases, with later levels featuring unpredictable attack patterns and densely packed defenses. Beginners should start with lower-level stages to master basic defense tactics, while experienced players can optimize multi-layered defenses and efficient unit utilization for faster completion. The map’s atmosphere is consistently dark and moody, utilizing a twilight-themed tileset that heightens the tension of enemy advances. Before playing, it’s essential to review each level’s objectives, restrictions, enemy compositions, and terrain advantages. Given the map’s length and numerous levels, players should plan for extended sessions to maintain focus. This map offers a fresh challenge for defense genre enthusiasts, fostering strategic thinking in unit optimization and defense tactics. Its adjustable difficulty and accessibility make it suitable for both beginners and experienced players alike.
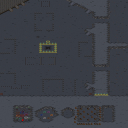
크립 태그 VI ver.Final (Creep Tag VI ver.Final)
‘크립 태그 VI ver.Final’은 스타크래프트 브루드워의 대표적인 유즈맵 중 하나로,Creep Tag 시리즈의 최신 버전이다. 맵의 주요 특징은Creep(크립, 잡몹)과의 전투에 중점을 둔 디펜스 장르로, 플레이어는 지속적으로 등장하는 적 유닛을 상대로 방어선을 구축하고 생존을 목표로 한다. 맵 중앙에 위치한 Creep 둥지에서 끊임없이 몰려드는 저그 유닛들을 상대하며, 각 플레이어는 제한된 자원과 유닛을 활용해 방어 전략을 세워야 한다. 특히Creep Tag IV의 후속작답게 다양한 유닛과 아이템, 그리고 ‘DTz Spwaning’과 같은 특수 이벤트가 포함되어 있어, 플레이어의 집중력과 전략을 끊임없이 요구한다. 1인 플레이로도 즐길 수 있지만, 7명의 플레이어가 함께 협력해Creep의 공세를 막아내는 팀플레이가 핵심이다. 맵의 난이도는 초보자에게는 다소 어려울 수 있지만,Creep의 패턴을 익히고 방어 전략을 숙지할수록 점차 극복할 수 있는 구조로 설계되어 있다.Creep Tag 시리즈의 특징인 ‘태그(Tag)’ 시스템은Creep의 움직임을 예측하고 타격하는 재미를 극대화하며, 특히Creep의 변종이나 특수 유닛이 등장할 때는 긴장감이 최고조에 달한다.Creep Tag VI ver.Final은Creep의 수가 많고 지속적으로 등장한다는 점에서 체력과 집중력이 요구되며,Creep의 이동 경로를 차단하거나Creep의 약점을 노려야 하기 때문에, 플레이어의 판단력과 반응 속도가 중요한 요소로 작용한다.Creep Tag 시리즈의 팬이라면 물론,Creep 디펜스 장르를 좋아하는 플레이어들에게도 강력히 추천할 만한 맵이다.Creep Tag VI ver.Final을 플레이하기 전에는Creep의 패턴과Creep의 약점을 미리 숙지하는 것이 좋다. 또한Creep의 공격 주기와 Creep의 이동 경로를 분석해 방어선을 효율적으로 배치해야 하며,Creep의 특수 유닛이 등장할 때의 대응책을 마련해 두는 것이 필수적이다.Creep Tag VI ver.Final은Creep의 수가 많고Creep의 패턴이 다양해질수록Creep의 방어 난이도가 급격히 상승하기 때문에,Creep의 움직임을 읽는 연습을 꾸준히 하는 것이Creep의 공격을 성공적으로 막아내는 비결이다. ‘Cree Tag VI ver.Final’ is one of the most representative custom maps in *StarCraft: Brood War*, serving as the latest installment in the *Creep Tag* series. The map’s key feature is its defense-focused gameplay centered on confrontations with *Creep* (mobs), where players must build defensive lines and survive against relentlessly spawning enemy units. Players battle waves of Zerg units emerging from the *Creep* nest at the map’s center, using limited resources and units to devise defensive strategies. Following in the footsteps of *Creep Tag IV*, this version introduces a variety of units, items, and special events—such as *DTz Spawning*—requiring players to stay highly focused and employ strategic thinking throughout. While the map can be enjoyed solo, its core experience lies in teamwork, where seven players collaborate to fend off *Creep* assaults. Though the difficulty may pose a challenge for beginners, the map is designed to become more manageable as players learn *Creep* patterns and refine their defensive tactics. The signature *Tag* system from the *Creep Tag* series enhances the fun by rewarding precise prediction and striking of *Creep* movements, with tension peaking during encounters against *Creep* variants or special units. *Cree Tag VI ver.Final* demands stamina and sharp focus due to the sheer number and constant arrival of *Creep*, requiring players to block their paths or exploit weaknesses. Judgment and reaction speed are crucial factors in overcoming its challenges. Whether you’re a fan of the *Creep Tag* series or enjoy creep defense maps in general, this title comes highly recommended. Before diving into the game, familiarize yourself with *Creep* patterns and vulnerabilities. Analyze their attack cycles and movement routes to optimize your defensive setup, and prepare specific countermeasures for special units. As *Creep* numbers swell and their patterns grow more complex, the difficulty escalates rapidly—so honing your ability to read their movements is the key to successfully thwarting their attacks.
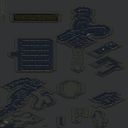
스나이퍼: 설치 고정 (Sniper - Installation Fixedv2)
스타크래프트 브루드워의 유즈맵 중 하나인 <Sniper - Installation Fixedv2>는 전투 중심의 디펜스 장르로, 플레이어는 적의 다채로운 공세를 방어해내야 하는 컴까기 형식의 맵이다. 맵은 설원 타일셋으로 꾸며져 있으며, 넓은 맵 중앙에 위치한 기지 방어가 주요 목표로 보인다. 게임 진행 중에는 저글링, 히드라리스크, 울트라리스크, 드론, 러커, 벌처, 탱크, 골리앗 등 다양한 유닛이 끊임없이 쏟아져 나오며, 플레이어는 초기 배치된 건물과 유닛을 활용해 침공을 막아내야 한다. 특히 맵의 구조상 중앙 기지 주변에 방어 건물을 배치하기 용이하지만, 일정 시간이 지나면 적의 공격 패턴이 강화되어 방어 난이도가 높아지는 구조로 보인다. 맵의 특징은 단순하면서도 방어 포인트가 명확하다는 점으로, 초보자와 숙련자 모두 즐길 수 있도록 설계된 듯하다. 다만, 맵의 난이도는 고정된 것이 아니라 플레이어의 방어 능력에 따라 달라지는 만큼, stratégique한 포지셔닝과 자원 관리가 무엇보다 중요하다. 추천 대상은 스타크래프트 유즈맵을 любитель с компом, 전략적 사고를 즐기는 플레이어, 그리고 디펜스 장르를 선호하는 유저들이다. 플레이 전에는 방어 건물의 배치 위치와 초기 유닛의 배치, 그리고 자원의 확보가 원활한지 반드시 확인할 필요가 있다. 또한, 맵의 넓이가 넓기 때문에 중앙 기지 주변의 길목에 방어선을 구축하는 것이 핵심 전략이 될 것이다. 이 맵은 특히 설원 분위기의 디자인과 긴장감 넘치는 방어 전투가 특징으로, 한 번 플레이하면 다시 도전하고 싶은 매력이 있다. 다만, 일부 플레이어는 반복되는 적의 공격 패턴에 지루함을 느낄 수도 있으니, 이를 보완하기 위해 플레이어 간 연습전을 고려해 볼 만하다. Sniper - Installation Fixedv2 is a combat-focused defense map from StarCraft: Brood War's custom maps, where players must fend off a constant stream of enemy attacks in a command-style format. The map features a snowy tile set and centers around defending a base located in the vast open space at the center of the map. Throughout the game, a variety of units—including Zerglings, Hydralisks, Ultralisks, Drones, Lurkers, Vultures, Tanks, and Goliaths—pour in relentlessly, requiring players to utilize their initially placed buildings and units to repel the assaults. The map’s structure makes it easy to position defensive buildings around the central base, but enemy attacks escalate over time, increasing the difficulty of defense. Its straightforward yet clearly defined defensive points make it accessible to both beginners and experienced players. However, since the difficulty isn’t fixed and depends on the player’s defensive skills, strategic positioning and resource management are crucial. This map is recommended for StarCraft custom map enthusiasts, players who enjoy strategic thinking, and fans of the defense genre. Before playing, it’s essential to check the placement of defensive buildings, initial unit arrangements, and resource accessibility. Given the map’s size, building a defensive line at key chokepoints around the central base is vital. The snowy aesthetic and intense defensive battles make this map replayable, though some players might find the repetitive enemy patterns monotonous—considering team practice matches could help mitigate this.
팬텀 모드 V4.0 맥스800 (Phantom Mode V4.0 Max800)
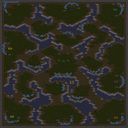
스타크래프트: 브루드워의 유즈맵 '팬텀 모드 V4.0 맥스800'은 다크 스웜과 시야 차단 효과를 적극 활용한 방어형 맵으로, 플레이어가phantom의 능력을 체험할 수 있도록 설계되었다. 맵의 대부분은 어두운 색조의 배경으로 이루어져 있으며, 플레이어는 각자의 기지에서 시작해 끊임없이 몰려드는 저그 무리를 상대해야 한다. 맵 중앙에는 넓은 시야를 확보할 수 있는 지형이 배치되어 있어 방어 전략 수립에 유리한 환경을 제공한다. 또한, 맵의 구석과 중앙에 위치한 좁은 통로는 적의 공격을 효율적으로 차단할 수 있는 포인트로 활용할 수 있다.phantom의 특징인 시야 차단 효과가 전투 전반에 걸쳐 큰 영향을 미치는데, 이를 이용해 적의 움직임을 예측하거나 기습 공격을 방어할 수 있으며, 다크 스웜을 적재적소에 활용해 저그의 밀집도를 조절하는 것이 핵심 전략이다. 맵의 지형은 대체로 평탄한 편이지만, 일부 구간은 언덕 지형으로 이루어져 있어 시야 우위나 방어 позиции 확보에 유리한 위치로 활용할 수 있다.phantom의 능력을 최대한 활용하기 위해서는 초반 방어선 구축과 자원 관리가 무엇보다 중요하며, 후반으로 갈수록 몰려오는 적의 물량이 증가하기 때문에 지속적인 업그레이드와 방어 시설 보강이 필수적이다. 이 맵은phantom을 처음 경험하는 유저들에게는 다소 복잡하게 느껴질 수 있지만, 점차 적응해가며 전략을 다듬어 나갈수록 흥미로운 도전 과제가 될 것이다.phantom 모드는phantom의 능력을 체험할 수 있는 유즈맵으로,phantom의 고유한 시야 차단과 다크 스웜 능력을 활용한 방어형 플레이가 핵심이다. 맵의 어두운 분위기와 넓은 시야 확보가 가능한 지형은 방어 전략 수립에 유리한 환경을 제공하며,phantom의 능력을 최대한 활용하기 위해서는 초반 방어선 구축과 자원 관리가 무엇보다 중요하다.phantom의 시야 차단 효과와 다크 스웜을 적재적소에 활용해 적의 움직임을 예측하고 공격을 방어하는 전략이 요구되며, 후반으로 갈수록 증가하는 적의 물량을 상대하기 위해 지속적인 업그레이드와 방어 시설 보강이 필수적이다.phantom 모드는phantom의 능력을 처음 경험하는 유저들에게는 다소 복잡하게 느껴질 수 있지만, 점차 적응해가며 전략을 다듬어 나갈수록 흥미로운 도전 과제가 될 것이다.phantom 모드는phantom의 능력을 체험할 수 있는 유즈맵으로,phantom의 고유한 시야 차단과 다크 스웜 능력을 활용한 방어형 플레이가 핵심이다. 맵의 어두운 분위기와 넓은 시야 확보가 가능한 지형은 방어 전략 수립에 유리한 환경을 제공하며,phantom의 능력을 최대한 활용하기 위해서는 초반 방어선 구축과 자원 관리가 무엇보다 중요하다. StarCraft: Brood War's custom map "Phantom Mode V4.0 Max800" is a defensive map that actively utilizes Dark Swarm and vision-blocking effects, designed to let players experience Phantom's abilities. Most of the map features a dark-toned background, and players start from their bases to fend off endless waves of Zerg. The central area offers wide vision, creating a favorable environment for formulating defense strategies. Narrow passages in the corners and center of the map serve as key points to efficiently block enemy attacks. Phantom's signature vision-blocking effect plays a major role throughout combat, allowing players to predict enemy movements or defend against ambushes. Using Dark Swarm at the right moments to control Zerg density is a core strategy. While the terrain is mostly flat, some sections feature elevated areas that provide advantages in vision control or securing defensive positions. To maximize Phantom's abilities, prioritizing early defensive line setup and resource management is crucial. As the game progresses, enemy waves grow stronger, making continuous upgrades and reinforcement of defenses essential. Though the map may feel complex to new Phantom users at first, it becomes an engaging challenge as players adapt and refine their strategies over time. Phantom Mode is a custom map where the focus lies on Phantom's unique vision-blocking and Dark Swarm abilities, with the dark atmosphere and wide-vision terrain supporting defensive strategy planning. Early defensive positioning and resource management are vital to leveraging Phantom's strengths, while effectively using vision-blocking and Dark Swarm to predict and counter enemy attacks is key. As enemy waves intensify later in the game, consistent upgrades and defense reinforcement become necessary. While Phantom Mode may seem daunting to newcomers, it evolves into an exciting challenge as players grow accustomed to its mechanics and develop their tactics. Phantom Mode is a custom map designed to let players experience Phantom's abilities, centered on defensive play utilizing Phantom's vision-blocking and Dark Swarm. The dark visuals and terrain with wide vision provide a strong foundation for defense strategies, and mastering Phantom's abilities hinges on early defensive setup and resource control.
스택드 캐논 M 디펜스 (Stacked-CANNON-M-Defense)
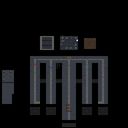
스타크래프트 브루드워의 유즈맵 〈Stacked-CANNON-M-Def (스택드 캐논 M 디펜스)〉는 이름에서 알 수 있듯이 캐논(포탑)을 중심으로 한 방어형 맵으로, 특히 ‘M’이라는 접미사에서 알 수 있듯이 미션형 디펜스를 지향합니다. 맵 상단에 위치한 적 기지에서는 끊임없이 저글링, 히드라리스크, 울트라리스크 등 다양한 저그 유닛이wave 형식으로 쏟아져 나오며, 플레이어는 주어진 자원으로 이들을 저지하고 최대한 오래 살아남아야 합니다. 맵 중앙에는 캐논이 설치 가능한 공간이 넓게 배치되어 있어 포탑을 조합해 방어선을 구축할 수 있으며, 오른쪽 하단에는 자원 채취를 위한 간단한 미네랄 멀티가 존재합니다. 맵의 난이도는 ‘Very Hard! Experts Only!’라는 설명에서 짐작할 수 있듯이 무척 높으며, 이는 적의 웨이브가 점점 강력해지고 빈도도 빨라지는 방식으로 구현되어 있습니다. 캐논 외에도 스파이더 마인, 스캐럽, 사이언스 베슬 등 다양한 유닛을 활용해 방어전을 펼칠 수 있지만, 자원과 시간의 제약이 심해 전략적 선택이 매우 중요합니다. 특히, 포탑의 배치 각도와 업그레이드 우선순위를 신중히 고려하지 않으면 순식간에 기지가 무너질 수 있습니다. 이 맵은 순수한 방어전뿐만 아니라, 자원의 제한된 상황에서 어떻게 효율적으로 포탑을 배치하고 유닛을 운용할지를 테스트하는 입문자에게는 다소 어렵지만, 숙련자에게는 짜릿한 긴장감을 선사합니다. 또한, 맵의 구성 자체가 ‘스택드’라는 이름처럼 포탑을 겹겹이 쌓아 방어선을 강화하는 재미가 있으며, 적의 웨이브가 밀려올 때마다 긴박한 순간을 느낄 수 있습니다. 초보 플레이어는 캐논의 특성과 적의 웨이브 패턴을 숙지한 뒤, 방어 실력과 자원 관리 능력을 동시에 키워야 이 맵을 공략할 수 있을 것입니다. 마지막으로, 맵의 배경은 우주 테마로 설정되어 있어 심우주에서 벌어지는 생존 전쟁이라는 분위기를 풍기며, 이는 시각적 몰입감을 더해줍니다. This StarCraft: Brood War custom map, Stacked-CANNON-M-Def, is a defense-focused UMS mission centered around cannon (turret) placement and strategic survival. The map features a top-side enemy base that continuously spawns waves of Zerg units including zerglings, hydralisks, and ultralisks, which players must fend off using limited resources. The central area offers wide open spaces ideal for deploying defensive cannons, while a small mineral-only expansion is located in the lower right corner for resource gathering. As indicated by its description ‘Very Hard! Experts Only!’, the difficulty ramps up significantly: enemy waves increase in strength and frequency over time, forcing players to adapt their turret placement and upgrade priorities quickly. Beyond cannons, players can utilize spore crawlers, spider mines, and science vessels, but tight resource constraints demand careful decision-making to avoid early map elimination. The stacking mechanic implied in the title encourages players to build layered defenses, adding both strategic depth and intense moments as waves crash against fortified walls. This map is unforgiving for beginners due to its punishing wave patterns and resource scarcity, but offers rewarding gameplay for experienced players who master cannon positioning and timing. The cosmic-themed background enhances immersion, making each defense scenario feel like a high-stakes survival mission in deep space. New players should focus on learning cannon mechanics and wave behaviors before attempting to tackle higher difficulties.
Chapter Six: Cutting the Cord
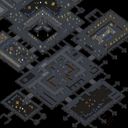
스타크래프트 브루드워의 유즈맵 ‘Chapter Six: Cutting the Cord’는 캠페인 형식의 디펜스 맵으로, 플레이어가Terran의 입장에서 Protoss 함대를 보호하며 Overmind의 공격을 방어하는 구조를 갖추고 있다. 맵 중앙의 Protoss 함대는 주요 보호 대상이지만, 게임 시작 직후부터 끊임없이 몰려오는 저그의 공격을 막아내야 한다. 맵은 넓은 우주 타일셋을 기반으로 하며, Protoss 함대 주변에 배치된 방어 건물과 유닛들을 활용해 저그의 침공을 저지하는 것이 핵심이다. 플레이어는 제한된 자원으로 매 waves마다 쏟아지는 저글링, 히드라리스크, 뮤탈리스크 등 다양한 저그 유닛을 상대해야 하며, 각 웨이브가 지나갈 때마다 새로운 공격 패턴이 등장하는 것으로 보인다. 맵의 난이도는 초반에는 비교적 쉬운 편이지만, 후반부로 갈수록 저그의 공격 규모와 다양성이 증가하여 전략적인 대처가 요구된다. 방어에 실패하면 Protoss 함대가 파괴되면서 게임 오버가 되므로, 지속적인 자원 관리와 유닛 배치, 그리고 효율적인 방어 전략이 필수적이다. 맵의 분위기는 테란의 절박한 상황과 저그의 위협적인 공세를 강조하며, 플레이어에게 긴장감과 성취감을 동시에 제공한다. 초보 플레이어는 방어 건물의 배치와 자원 수급에 집중해야 하며, 숙련된 플레이어는 효율적인 유닛 컨트롤과 다중 방어 라인 구축을 통해 더 높은 난이도에서도 승리를 노릴 수 있다. 특히 Protoss 함대의 보호는 필수적이므로, 함대 주변의 방어선을 견고히 유지하는 것이 중요하다. 맵의 진행은 자동으로 웨이브가 발생하는 방식으로 추정되며, 승리 조건은 모든 웨이브를 성공적으로 방어하는 것으로 보인다. 플레이 전에는 맵의 방어 건물과 유닛 구성을 숙지하고, 각 웨이브별로 등장하는 적 유닛의 패턴을 분석하는 것이 성공의 열쇠가 될 것이다. StarCraft: Brood War's custom map *Chapter Six: Cutting the Cord* is a defense-style map with a campaign structure where players take on the role of the Terran, protecting Protoss fleets while fending off attacks from the Overmind. The central Protoss fleet is the primary objective, but players must immediately defend against relentless Zerg assaults from the start. The map features a vast space-themed tileset, and the key strategy involves using defensive structures and units positioned around the Protoss fleet to repel the Zerg invasion. Players must manage limited resources to counter waves of Zerglings, Hydralisks, Mutalisks, and other Zerg units, with each wave introducing new attack patterns. While the early waves are relatively manageable, the difficulty escalates in later stages as the Zerg’s scale and variety of attacks grow, demanding strategic adaptation. Failing to defend results in the Protoss fleet being destroyed and a game over, making constant resource management, unit positioning, and effective defense tactics essential. The map’s atmosphere emphasizes the Terran’s desperate situation and the Zerg’s overwhelming threat, delivering both tension and a sense of accomplishment. Beginners should focus on placing defensive structures and resource gathering, while experienced players can aim for higher difficulties by mastering unit control and establishing multiple defensive lines. Protecting the Protoss fleet is critical, so maintaining a strong perimeter around it is vital. The map appears to progress with waves triggered automatically, and the victory condition likely involves successfully defending all waves. Before playing, it’s crucial to familiarize yourself with the map’s defensive structures and unit compositions, and analyzing the enemy patterns for each wave will be key to success.
테란 랩스 베타 (Terran Labs Beta)
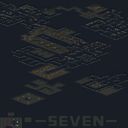
스타크래프트: 브루드워의 유즈맵 '테란 랩스 베타(Terran Labs Beta)'는 설정상 테란 과학 시설이 무대인 디펜스 장르의 맵으로, 플레이어는 테란 종족을 선택해 끊임없이 몰려오는 저그와 프로토스 적대 세력을 방어해야 한다. 맵 중앙에 위치한 거대한 테란 연구시설 건물 주변을 둘러싼 건물을 기반으로 방어선을 구축하며, 외부에서 끊임없이 공격해오는 적군을 상대로 건물을 보호하고 기지를 유지하는 것이 주 목표로 보인다. 맵은 4명의 플레이어가 동시에 참여할 수 있도록 설계되어 있으며, 각 플레이어는 독립된 기지 구역을 확보한 채 방어에 집중한다. 맵의 배경은 설원 지형으로, 하얀 눈과 얼음이 깔린 평원 위에 연구시설과 방어 건물이 배치되어 있어 시각적으로도 인상적인 분위기를 자아낸다. 적의 공격 패턴은 일정 주기로 생성되는 유닛들이 периодически 몰려오는 형태로 추정되며, 방어에 실패할 경우 기지가 파괴되고 패배하게 된다. 맵의 타일셋은 설원/얼음으로 설정되어 있으며, 맵 크기는 6144x8192로 대규모 전투가 가능한 공간이 제공된다. 플레이어는 각자 자신의 기지 주변에 있는 방어 건물과 유닛을 활용해 적의 공격을 막아내야 하며, 전략적 포지셔닝과 자원 관리가 중요해 보인다. 특히 맵의 규모가 크고 방어 지점이 여러 곳으로 나뉘어 있어, 각 플레이어 간의 협력이 필요한 구조로 보인다. 맵의 난이도는 보통으로 예상되며, 초보자는 방어 패턴을 익히는 데 시간이 필요할 수 있다. 테란 랩스 베타는 디펜스 게임의 기본 틀을 따르지만, 대규모 맵과 다양한 방어 포인트를 통해 전략적 깊이를 더한 점이 특징이다. 플레이 전에는 각자의 기지 위치와 주요 방어 포인트를 확인하고, 적의 공격 루트를 분석하는 것이 중요하다. 또한, 자원 수집과 건물을 보호하는 동시에 적의 공격을 효율적으로 차단할 수 있는 빌드를 준비해야 한다. 맵의 버전은 0.88로 아직 베타 버전인 만큼, 향후 업데이트로 밸런스나 디자인 변경이 있을 수 있음을 염두에 두는 것이 좋다. 테란 랩스 베타는 테란 종족을 선호하는 플레이어뿐만 아니라, 디펜스 게임의 전략적 재미를 추구하는 모든 스타크래프트 유즈맵 팬들에게 추천할 만한 작품이다. StarCraft: Brood War's custom map *Terran Labs Beta* is a defense genre map set in a Terran science facility, where players choose the Terran race and must defend against endless waves of Zerg and Protoss enemies. The main objective is to protect buildings and maintain your base by constructing defensive lines around the massive Terran research facility at the map's center, while fending off relentless attacks from the outside. Designed for four players to participate simultaneously, each controls an independent base area and focuses on defense. The map features a snowy terrain with white snow and ice plains, where research facilities and defensive structures create a visually striking atmosphere. Enemy attacks come in periodic waves of units, and losing your defenses results in base destruction and defeat. The tileset is set to snowy/icy terrain, and the map size of 6144x8192 provides ample space for large-scale battles. Players must utilize defensive buildings and units around their bases to repel attacks, with strategic positioning and resource management playing key roles. Given the map's large scale and multiple defensive points, cooperation among players appears essential. The difficulty is expected to be moderate, though beginners may need time to learn the attack patterns. While *Terran Labs Beta* follows the basic framework of defense games, its large scale and varied defense points add strategic depth. Before playing, it's important to check your base location and key defensive points, analyze enemy attack routes, and prepare builds that efficiently block attacks while gathering resources and protecting buildings. As version 0.88, it remains in beta, so balance or design changes may occur in future updates. *Terran Labs Beta* is a recommended title for players who prefer the Terran race as well as fans of defense games seeking strategic depth in StarCraft custom maps.
최근 등록된 맵
새로 추가된 파일과 버전을 확인하세요.
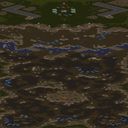
에피소드 06: 정화 (E06Purification)
스타크래프트 브루드워의 유즈맵 <E06Purification>은 단일 플레이어를 위한 디펜스 장르의 맵으로, 저그 세력이 아이어에 상륙했다는 설정 하에 적을 막아내는 것이 주된 목표다. 맵은 광활한 사막 지형을 배경으로 펼쳐지며, 중앙에 위치한 넥서스를 중심으로 저그 병력이 끊임없이 몰려온다. 플레이어는 프로토스 건물을 건설하고 자원을 확보한 뒤, 상주하는 적을 효과적으로 방어해야 한다. 맵의 특이한 점은 가로로 긴 타일 구조(3072x6144)로, 넓은 시야와 긴 전투 공간을 제공해 전략적 깊이를 더한다는 것이다. 미니맵은 좁고 긴 형태를 갖추고 있어 전체적인 상황 파악이 다소 어렵지만, 대신 맵의 좌우 양쪽에 위치한 리소스 지역을 빠르게 확보할 수 있는 장점이 있다. 방어 라인은 중앙 넥서스를 감싸는 형태로 구성되며, 여기에는 포토캐논, 실드 배터리, 파일런 등 프로토스 방어 건물들이 배치된다. 저그는 초반부터 다수의 저글링과 히드라리스크, 그리고 occasional한 뮤탈리스크까지 동원해 공격해 오며, 후반으로 갈수록 울트라리스크와 디파일러까지 등장해 방어 난이도를 높인다. 플레이어는 초반 자원 확보와 동시에 건물을 배치하는 타이밍을 잘 조절해야 하며, 특히 리소스 지역을 두고 벌어지는 초반 전투가 승패를 가를 수 있는 중요 포인트다. 또한, 맵의 넓은 공간을 활용해 적을 유인하거나, 건물을 일부러 희생해 병력을 보호하는 등 다양한 전략을 구사할 수 있다. 이 맵은 디펜스를 좋아하지만 넓은 맵의 긴장감을 즐기고 싶은 플레이어에게 추천된다. 특히 혼자서 긴 플레이 시간을 즐기며 전략적 깊이를 경험하고자 하는 유저에게 어울린다. 다만, 미니맵의 제한된 시야와 넓은 맵 크기 때문에 초보자는 다소 어려움을 느낄 수 있으니, 먼저 간단한 디펜스 맵으로 연습을 한 뒤 도전하는 것이 좋다. 맵의 음악과 사운드 이펙트는 사막 분위기를 잘 살려 긴장감을 고조시킨다. 플레이 전에 건물을 보호할 수 있는 최적의 위치와 리소스 확보 타이밍을 미리 계획해두면 훨씬 수월하게 진행할 수 있을 것이다. This Brood War custom map, E06Purification, is a single-player defense title where players must stop the Zerg from overrunning Aiur. Set against a vast desert backdrop, the map features a long horizontal layout (3072x6144) with a central Nexus surrounded by relentless Zerg swarms. Players start by gathering resources from the map's narrow side areas and constructing Protoss defenses, including photon cannons, shield batteries, and pylons, to hold the line. The Zerg forces escalate over time, beginning with early zerglings and hydralisks, progressing to mutalisks, ultralisks, and even defilers in later stages. The map's wide battlefield encourages strategic depth, allowing players to lure enemies, sacrifice buildings for timing advantages, or focus on resource control. The elongated minimap offers limited overview but rewards efficient scouting and rapid base expansion. Ideal for players who enjoy solo defense challenges with a mix of strategy and tension, E06Purification suits those seeking a long playtime experience. Beginners may find the map's scale intimidating, so practicing on simpler defense maps first is recommended. The soundtrack and sound effects enhance the desert ambiance, creating an immersive atmosphere. Planning building placement and resource timing before starting is crucial for success.
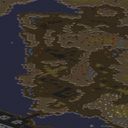
챕터 포: 리버스 (Chapter Four: Rebirth)
‘챕터 포: 리버스(Chapter Four: Rebirth)’는 스타크래프트 브루드워의 유즈맵으로, 캠페인 형식의 디펜스 장르에 속한다. 내부 맵 제목과 설명에서 확인할 수 있듯, 프로토스 기지인 타소니스가 침묵하고 저그가 숨은 곳을 기어 나오는 상황으로 전개된다. 맵은 황무지 타일셋을 기반으로 4096x6144 크기의 넓은 필드를 제공하며, 플레이어는 단독으로 저그의 침공을 방어하는 목표를 수행한다. 게임 시작 시 ‘USE MAP SETTINGS’를 통해 veteren(베테랑) 수준의 난이도가 적용되는 것으로 추정되며, 스토리 흐름상 저그의 공격 패턴과 프로토스 방어 시설의 효율성을 테스트하는 구조로 보인다. 플레이 방식은 기본적으로 디펜스 타입으로, 미네랄과 베스핀 가스를 확보한 후 방어 건물을 건설하고 유닛을 생산하여 waves(웨이브) 형태로 밀려오는 저그 유닛을 막아내는 방식이다. 맵 곳곳에 배치된 프로토스 방어 시설과 지형적 이점을 활용해 효율적인 전략을 수립해야 한다. 특히 넓은 맵 크기만큼이나 저그의 공격 루트가 다양하게 배치되어 있으므로, 초기 자원 관리와 건물 배치의 중요성이 크다. 또한 맵 제목에서 유추할 수 있듯이, ‘리버스’는 단순히 방어전을 펼치는 것만이 아니라 과거의 패배를 딛고 일어서는 스토리적 의미를 내포하고 있어 감성적 몰입감을 높이는 요소로 작용할 것으로 보인다. 이 맵은 스타크래프트의 캠페인 스타일을 재현하면서도 유즈맵만의 자유로운 플레이를 제공하는 점이 특징이다. 특히 베테랑 난이도답게 저그의 공격력이 강하고 패턴이 다양해 숙련도가 요구된다. 프로토스 유저라면 익숙한 건물과 유닛을 활용할 수 있지만, 좁은 시야와 지속적인 압박감을 주는 저그의 공격을 efficiently 막아내야 한다. 초보자는 공략을 숙지한 후 도전하는 것이 좋으며, 경험 있는 플레이어는 최적의 빌드 오더와 멀티 태스킹 능력을 테스트할 수 있을 것이다. 맵의 스케일과 몰입감 있는 스토리 덕분에 단독 플레이임에도 불구하고 타 유즈맵과는 차별화된 경험을 제공한다. 공략 팁으로는 초기 단계에서 프로브를 적극 활용해 지뢰(마인)나 포톤 캐논을 효율적으로 배치하는 것이 중요하다. 또한 자원 채취를 최적화하고, 저그의 주요 공격 루트를 사전에 파악해 방어선을 구축하는 전략이 필수적이다. 맵 곳곳에 숨겨진 자원이나 보너스 목표가 있는지 여부는 확인되지 않지만, 넓은 필드만큼이나 전략의 다양성이 보장된다는 점에서 반복 플레이의 가치가 있다. 저그의 공격 패턴을 익히고, 프로토스의 강력한 광선 무기와 보호막을 활용해 승리를 이끌어내야 한다. ‘Chapter Four: Rebirth’ is a custom map for *StarCraft: Brood War*, falling under the defense genre in a campaign-style format. As indicated in the internal map title and description, the scenario unfolds with the Protoss base of Tarsonis silenced and the Zerg emerging from their hidden lairs. The map features a vast 4096x6144 field based on a wasteland tileset, where the player must defend alone against waves of Zerg attacks. Based on the ‘USE MAP SETTINGS’ option, the difficulty appears to be set to veteran level, and the structure of the game tests both the Zerg’s attack patterns and the efficiency of the Protoss defensive structures. The gameplay revolves around a defense-type format, where players gather minerals and Vespene gas to construct defensive buildings and produce units to fend off Zerg waves. Strategic planning is essential, utilizing the Protoss defensive structures and terrain advantages scattered across the map. Given the map’s expansive size, the Zerg’s attack routes are varied, making early resource management and building placement critical. Additionally, the title ‘Rebirth’ suggests not just a defensive battle but a narrative of overcoming past defeat, adding emotional depth to the experience. This map stands out by blending *StarCraft*’s campaign style with the freedom of a custom map. The veteran difficulty ensures strong and diverse Zerg attacks, demanding player skill. While Protoss players can utilize familiar buildings and units, they must contend with the Zerg’s relentless pressure and limited visibility. Beginners should familiarize themselves with strategies before attempting, while experienced players can test optimal build orders and multitasking abilities. The map’s scale and immersive story provide a unique experience even in solo play, setting it apart from other custom maps. Tips for success include actively using Probes to efficiently place mines or photon cannons early on. Optimizing resource gathering and preemptively securing key attack routes are vital strategies. While hidden resources or bonus objectives remain unverified, the map’s vastness guarantees diverse strategic possibilities, making repeated play worthwhile. Mastering the Zerg’s attack patterns and leveraging the Protoss’s powerful beam weapons and shields are key to securing victory.
Chapter Six: Cutting the Cord
스타크래프트 브루드워의 유즈맵 ‘Chapter Six: Cutting the Cord’는 캠페인 형식의 디펜스 맵으로, 플레이어가Terran의 입장에서 Protoss 함대를 보호하며 Overmind의 공격을 방어하는 구조를 갖추고 있다. 맵 중앙의 Protoss 함대는 주요 보호 대상이지만, 게임 시작 직후부터 끊임없이 몰려오는 저그의 공격을 막아내야 한다. 맵은 넓은 우주 타일셋을 기반으로 하며, Protoss 함대 주변에 배치된 방어 건물과 유닛들을 활용해 저그의 침공을 저지하는 것이 핵심이다. 플레이어는 제한된 자원으로 매 waves마다 쏟아지는 저글링, 히드라리스크, 뮤탈리스크 등 다양한 저그 유닛을 상대해야 하며, 각 웨이브가 지나갈 때마다 새로운 공격 패턴이 등장하는 것으로 보인다. 맵의 난이도는 초반에는 비교적 쉬운 편이지만, 후반부로 갈수록 저그의 공격 규모와 다양성이 증가하여 전략적인 대처가 요구된다. 방어에 실패하면 Protoss 함대가 파괴되면서 게임 오버가 되므로, 지속적인 자원 관리와 유닛 배치, 그리고 효율적인 방어 전략이 필수적이다. 맵의 분위기는 테란의 절박한 상황과 저그의 위협적인 공세를 강조하며, 플레이어에게 긴장감과 성취감을 동시에 제공한다. 초보 플레이어는 방어 건물의 배치와 자원 수급에 집중해야 하며, 숙련된 플레이어는 효율적인 유닛 컨트롤과 다중 방어 라인 구축을 통해 더 높은 난이도에서도 승리를 노릴 수 있다. 특히 Protoss 함대의 보호는 필수적이므로, 함대 주변의 방어선을 견고히 유지하는 것이 중요하다. 맵의 진행은 자동으로 웨이브가 발생하는 방식으로 추정되며, 승리 조건은 모든 웨이브를 성공적으로 방어하는 것으로 보인다. 플레이 전에는 맵의 방어 건물과 유닛 구성을 숙지하고, 각 웨이브별로 등장하는 적 유닛의 패턴을 분석하는 것이 성공의 열쇠가 될 것이다. StarCraft: Brood War's custom map *Chapter Six: Cutting the Cord* is a defense-style map with a campaign structure where players take on the role of the Terran, protecting Protoss fleets while fending off attacks from the Overmind. The central Protoss fleet is the primary objective, but players must immediately defend against relentless Zerg assaults from the start. The map features a vast space-themed tileset, and the key strategy involves using defensive structures and units positioned around the Protoss fleet to repel the Zerg invasion. Players must manage limited resources to counter waves of Zerglings, Hydralisks, Mutalisks, and other Zerg units, with each wave introducing new attack patterns. While the early waves are relatively manageable, the difficulty escalates in later stages as the Zerg’s scale and variety of attacks grow, demanding strategic adaptation. Failing to defend results in the Protoss fleet being destroyed and a game over, making constant resource management, unit positioning, and effective defense tactics essential. The map’s atmosphere emphasizes the Terran’s desperate situation and the Zerg’s overwhelming threat, delivering both tension and a sense of accomplishment. Beginners should focus on placing defensive structures and resource gathering, while experienced players can aim for higher difficulties by mastering unit control and establishing multiple defensive lines. Protecting the Protoss fleet is critical, so maintaining a strong perimeter around it is vital. The map appears to progress with waves triggered automatically, and the victory condition likely involves successfully defending all waves. Before playing, it’s crucial to familiarize yourself with the map’s defensive structures and unit compositions, and analyzing the enemy patterns for each wave will be key to success.
테스트 오브 서바이벌 - 프로토스 X (Test of Survival - Protoss X)
스타크래프트 브루드워 유즈맵 <테스트 오브 서바이벌 - 프로토스 X>는 서바이벌 장르의 맵으로, 플레이어가 프로토스 유닛을 조종하며 끊임없이 몰려드는 저그의 공격을 버텨내고 승리를 쟁취하는 것이 목표다. 맵 중앙에 위치한 프로토스 기지 주변으로 여러 개의 입구가 배치되어 있으며, 각 입구에서 끊임없이 저글링과 히드라리스크가 생산되어 공격해 온다. 플레이어는 초반 자원 수급을 통해 포토캐논과 미사일 터렛을 건설해 방어선을 구축해야 하며, 동시에 조이포나 아둔의 성지 같은 방어 건물들을 활용해 체력을 유지해야 한다. 맵의 특징은 입구마다 일정 주기로 적의 생산량이 증가하는 시스템으로, 초반에는 수월하게 느껴지지만 시간이 지날수록 압박이 심해지면서 방어 전략을 신중히 세워야 한다. 또한, 맵 곳곳에 흩어져 있는 추가 자원 지역을 확보하면 방어 건물의 업그레이드와 유닛 생산에 도움이 된다. 초보 플레이어는 방어 건물의 건설 우선순위를 신중히 고려해야 하며, 중급 이상 플레이어는 적의 생산 주기나 유닛 조합을 예측해 효율적인 대처가 필요하다. 추천 대상은 방어와 자원 관리에 익숙한 플레이어이며, 맵의 특성상 긴장감을 유지하며 플레이할 수 있어 서바이벌 장르를 좋아하는 유저들에게 적합하다. 플레이 전에는 맵의 입구 위치와 자원 분포를 미리 파악해 두는 것이 중요하다. 이 맵은 프로토스 유닛을 조종하는 것이 특징이지만, 테란이나 저그로도 플레이 가능한지는 내부 설명이나 이미지에서 확인되지 않으므로 유의해야 한다. StarCraft: Brood War custom map *Test of Survival - Protoss X* is a survival-style map where players control Protoss units, enduring endless waves of Zerg attacks to secure victory. Multiple entrances surround the central Protoss base, each continuously spawning Zerglings and Hydralisks to assault the player. Early on, players must gather resources to build Photon Cannons and Missile Turrets to establish defensive lines while maintaining health using structures like the Shield Battery or Templar Archives. A key feature is the periodic increase in enemy production at each entrance—initially manageable but growing increasingly oppressive over time, demanding careful defensive planning. Scattered resource points across the map can be secured to upgrade defenses and bolster unit production. Beginners should prioritize defensive structures wisely, while intermediate and advanced players must anticipate enemy production cycles and unit compositions for efficient counterplay. Ideal for players comfortable with defense and resource management, this map’s high-tension gameplay suits survival genre enthusiasts. Before playing, it’s crucial to study entrance locations and resource distribution. While the map emphasizes Protoss control, it’s unclear from descriptions or visuals whether Terran or Zerg can also be played, so players should verify this beforehand.
테란 랩스 베타 (Terran Labs Beta)
스타크래프트: 브루드워의 유즈맵 '테란 랩스 베타(Terran Labs Beta)'는 설정상 테란 과학 시설이 무대인 디펜스 장르의 맵으로, 플레이어는 테란 종족을 선택해 끊임없이 몰려오는 저그와 프로토스 적대 세력을 방어해야 한다. 맵 중앙에 위치한 거대한 테란 연구시설 건물 주변을 둘러싼 건물을 기반으로 방어선을 구축하며, 외부에서 끊임없이 공격해오는 적군을 상대로 건물을 보호하고 기지를 유지하는 것이 주 목표로 보인다. 맵은 4명의 플레이어가 동시에 참여할 수 있도록 설계되어 있으며, 각 플레이어는 독립된 기지 구역을 확보한 채 방어에 집중한다. 맵의 배경은 설원 지형으로, 하얀 눈과 얼음이 깔린 평원 위에 연구시설과 방어 건물이 배치되어 있어 시각적으로도 인상적인 분위기를 자아낸다. 적의 공격 패턴은 일정 주기로 생성되는 유닛들이 периодически 몰려오는 형태로 추정되며, 방어에 실패할 경우 기지가 파괴되고 패배하게 된다. 맵의 타일셋은 설원/얼음으로 설정되어 있으며, 맵 크기는 6144x8192로 대규모 전투가 가능한 공간이 제공된다. 플레이어는 각자 자신의 기지 주변에 있는 방어 건물과 유닛을 활용해 적의 공격을 막아내야 하며, 전략적 포지셔닝과 자원 관리가 중요해 보인다. 특히 맵의 규모가 크고 방어 지점이 여러 곳으로 나뉘어 있어, 각 플레이어 간의 협력이 필요한 구조로 보인다. 맵의 난이도는 보통으로 예상되며, 초보자는 방어 패턴을 익히는 데 시간이 필요할 수 있다. 테란 랩스 베타는 디펜스 게임의 기본 틀을 따르지만, 대규모 맵과 다양한 방어 포인트를 통해 전략적 깊이를 더한 점이 특징이다. 플레이 전에는 각자의 기지 위치와 주요 방어 포인트를 확인하고, 적의 공격 루트를 분석하는 것이 중요하다. 또한, 자원 수집과 건물을 보호하는 동시에 적의 공격을 효율적으로 차단할 수 있는 빌드를 준비해야 한다. 맵의 버전은 0.88로 아직 베타 버전인 만큼, 향후 업데이트로 밸런스나 디자인 변경이 있을 수 있음을 염두에 두는 것이 좋다. 테란 랩스 베타는 테란 종족을 선호하는 플레이어뿐만 아니라, 디펜스 게임의 전략적 재미를 추구하는 모든 스타크래프트 유즈맵 팬들에게 추천할 만한 작품이다. StarCraft: Brood War's custom map *Terran Labs Beta* is a defense genre map set in a Terran science facility, where players choose the Terran race and must defend against endless waves of Zerg and Protoss enemies. The main objective is to protect buildings and maintain your base by constructing defensive lines around the massive Terran research facility at the map's center, while fending off relentless attacks from the outside. Designed for four players to participate simultaneously, each controls an independent base area and focuses on defense. The map features a snowy terrain with white snow and ice plains, where research facilities and defensive structures create a visually striking atmosphere. Enemy attacks come in periodic waves of units, and losing your defenses results in base destruction and defeat. The tileset is set to snowy/icy terrain, and the map size of 6144x8192 provides ample space for large-scale battles. Players must utilize defensive buildings and units around their bases to repel attacks, with strategic positioning and resource management playing key roles. Given the map's large scale and multiple defensive points, cooperation among players appears essential. The difficulty is expected to be moderate, though beginners may need time to learn the attack patterns. While *Terran Labs Beta* follows the basic framework of defense games, its large scale and varied defense points add strategic depth. Before playing, it's important to check your base location and key defensive points, analyze enemy attack routes, and prepare builds that efficiently block attacks while gathering resources and protecting buildings. As version 0.88, it remains in beta, so balance or design changes may occur in future updates. *Terran Labs Beta* is a recommended title for players who prefer the Terran race as well as fans of defense games seeking strategic depth in StarCraft custom maps.
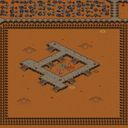
스타십 트룹스 아웃포스트 35 (Starship Troops Outpost 35)
스타크래프트 브루드워 유즈맵 '스타십 트룹스 아웃포스트 35'는 6인 협동 디펜스 장르로, 황혼 타일셋 위에서 전초 기지를 지키며 아라크니드(저그) 무리와 맞서는 맵이다. 제작자 갈락티무스 제로(Galactimus_Zero)가 만들고 헨듀드(HenDude)가 수정하여 완결판(Complete Version)으로 배포된 것으로 보인다. 맵 크기는 96×96 타일로 표준적인 중형 규모이며, 플레이어는 6명이 한 팀을 이루어 밀려드는 적 웨이브를 막아내는 구조로 추정된다. 내부 설명에 'Defend the Outpost from onslaughts of Aracnids'라는 문구가 있는 만큼, 저그 유닛을 모티브로 한 아라크니드 떼가 주기적으로 기지 입구나 주요 거점을 향해 몰려오는 방식일 가능성이 높다. 디펜스류 맵답게 자원 관리, 유닛 생산, 방어선 구축, 업그레이드 타이밍이 승패를 가르는 핵심 요소로 작용할 것으로 보인다. 6인 풀파티 기준 난이도는 보통 수준으로 예상되며, 초보자도 기본적인 디펜스 감각만 있으면 무난하게 즐길 수 있을 것이다. 다만 인원 수가 적을수록 난이도가 급격히 오를 수 있어 인원 확보가 중요해 보인다. 협동 플레이를 선호하는 유저, 클래식한 기지 방어 미션을 찾는 유저, 저그 테란전 구도를 즐기는 유저에게 추천한다. 플레이 전에는 버전 표기가 'Complete Version' 외에 별도 넘버링이 없으므로 파일 내 트리거나 제작자 메모를 통해 최신 패치 여부를 확인하는 것이 좋다. StarCraft Brood War UMS map 'Starship Troops Outpost 35' is a 6-player cooperative defense genre map where players defend an outpost against swarms of Arachnids (Zerg) on the Twilight tileset. It appears to have been created by Galactimus_Zero and modified by HenDude, released as a Complete Version. The map size is 96×96 tiles, a standard medium scale, and the structure is estimated to have 6 players forming a single team to hold off incoming enemy waves. Given the internal description 'Defend the Outpost from onslaughts of Aracnids', it is highly likely that waves of Arachnids modeled after Zerg units periodically rush toward the base entrance or key points. As a defense-type map, resource management, unit production, defensive line construction, and upgrade timing are expected to be the core elements determining victory or defeat. The difficulty for a full party of 6 is estimated to be normal, and beginners with basic defense sense should be able to enjoy it comfortably. However, difficulty may spike sharply with fewer players, making headcount important. Recommended for users who prefer cooperative play, those looking for classic base defense missions, and those who enjoy Zerg vs Terran dynamics. Before playing, since the version is only marked 'Complete Version' without a separate numbering, it is advisable to check triggers or author notes inside the file for the latest patch status.
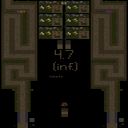
스폰 디펜스 4.7 (Spawn Defense 4.7)
스타크래프트 브루드워의 대표적인 디펜스 장르 유즈맵인 <스폰 디펜스 4.7>은 적의 끊임없는 공격을 방어하며 자신의 기지를 지켜내는 긴장감 넘치는 플레이가 특징입니다. 맵은 넓은 사막 지형을 배경으로 펼쳐지며, 중앙에 위치한 플레이어 기지 주변으로 다수의 스폰 포인트가 배치되어 있습니다. 각 스폰 포인트에서 끊임없이 몰려드는 저그 유닛들을 상대로 방어 타워를 건설하고, 유닛을 배치하여 전략적으로 대응해야 합니다. 특히 맵의 좌우 대칭 구조와 중앙 통로의 중요성이 부각되며, 플레이어는 자원 관리와 타워 배치 타이밍을 carefully 조절해야 합니다. 게임의 난이도는 스폰 포인트의 위치와 출현하는 유닛의 조합에 따라 크게 달라지는데, 초반에는 상대적으로 쉬운 저글링과 히드라리스크가 주를 이루지만, 후반으로 갈수록 뮤탈리스크, 디바우러, 울트라리스크 등 다양한 조합이 등장합니다. 또한, ‘핸디캡’ 모드가 지원되어 특정 플레이어에게 추가적인 리소스나 유닛을 제공할 수 있어 초보자와 숙련자 간의 밸런스를 맞출 수 있습니다. 맵의 또 다른 특징은 ‘inf 버전’이라는 점으로, 제한된 리소스 내에서 끊임없이 적을 상대해야 하는 인피니티 모드가 포함되어 있어 플레이어의 전략적 깊이가 한층 더해집니다. 이 맵은 6인 플레이를 지원하며, 팀전보다는 개별 플레이어가 각자의 기지를 방어하는 구조로 설계되어 있습니다. 넓은 맵 크기와 다양한 스폰 포인트는 플레이어 간의 협력이 아닌 개인의 판단력과 순간적인 대처 능력을 요구합니다. 특히 중앙 통로의 중요성은 말할 것도 없는데, 이곳을 장악하지 못하면 기지 방어가 불가능에 가까울 정도로 전략적 요충지가 됩니다. 따라서 플레이어는 타워의 효율적인 배치와 함께, 중앙 통로의 방어선을 강화하는 것이 관건입니다. 추천 대상으로는 디펜스 장르를 즐기는 플레이어는 물론, 전략적 사고와 긴장감을 좋아하는 유저들에게 적합합니다. 초보자의 경우 핸디캡 모드를 활용하여 gradually 적응해 나가는 것이 좋으며, 숙련자의 경우 인피니티 모드에서 자신의 전략을 테스트해 볼 수 있습니다. 다만, 넓은 맵과 끊임없는 적의 공격을 감당해야 하기 때문에 플레이 시간이 상대적으로 길어질 수 있음을 염두에 두어야 합니다. 플레이 전 확인해야 할 포인트는 스폰 포인트의 위치와 중앙 통로의 형태입니다. 스폰 포인트가 가까울수록 초반 방어가 용이하지만, 반대로 중앙 통로가 좁거나 장벽이 많을 경우 방어가 보다 수월해질 수 있습니다. 또한, 핸디캡 모드와 인피니티 모드의 선택 여부를 미리 결정하여 게임의 난이도를 조정하는 것도 중요합니다. 마지막으로, 리소스 관리를 철저히 하여 타워의 지속적인 업그레이드와 유닛의 보충을 잊지 않도록 주의해야 합니다. StarCraft: Brood War's classic defense genre custom map, *Spawn Defense 4.7*, features intense gameplay where players must defend their base against relentless enemy attacks. The map unfolds across a vast desert terrain, with multiple spawn points scattered around the player's base at the center. Players must strategically construct defense towers and deploy units to counter waves of Zerg units constantly emerging from these spawn points. The map's left-right symmetry and the importance of the central corridor stand out, requiring players to carefully manage resources and time their tower placements. The difficulty varies significantly based on the spawn point locations and the types of units that appear. Early waves consist mostly of relatively easy Zerglings and Hydralisks, but later stages introduce diverse combinations like Mutalisks, Devourers, and Ultralisks. The map also supports a "Handicap" mode, which allows for additional resources or units to be provided to certain players, helping balance the game between beginners and experts. Another key feature is the "Infinity" version, which includes an endless mode where players must face waves of enemies with limited resources, adding another layer of strategic depth. *Spawn Defense 4.7* supports up to six players and is designed for individual play, where each player defends their own base rather than working in teams. The map's large size and numerous spawn points demand quick decision-making and personal adaptability rather than cooperation. The central corridor is especially critical—controlling it is often essential, as failing to do so can make base defense nearly impossible. Therefore, players must focus on efficiently placing towers and reinforcing defenses along this strategic bottleneck. This map is ideal for those who enjoy defense games, strategic thinking, and high-pressure situations. Beginners can ease into the game using the Handicap mode, while experienced players can test their strategies in the Infinity mode. However, due to the map's size and the constant enemy assaults, matches can be quite lengthy, so players should be prepared for extended sessions. Before playing, it's important to familiarize yourself with the spawn point locations and the layout of the central corridor. Spawn points closer to your base make early defense easier, while a narrow or heavily obstructed central corridor can simplify defense. Players should also decide in advance whether to use the Handicap or Infinity modes to adjust the game's difficulty. Finally, managing resources carefully is crucial—don't forget to continuously upgrade towers and replenish units.
스나이퍼: 설치 고정 (Sniper - Installation Fixedv2)
스타크래프트 브루드워의 유즈맵 중 하나인 <Sniper - Installation Fixedv2>는 전투 중심의 디펜스 장르로, 플레이어는 적의 다채로운 공세를 방어해내야 하는 컴까기 형식의 맵이다. 맵은 설원 타일셋으로 꾸며져 있으며, 넓은 맵 중앙에 위치한 기지 방어가 주요 목표로 보인다. 게임 진행 중에는 저글링, 히드라리스크, 울트라리스크, 드론, 러커, 벌처, 탱크, 골리앗 등 다양한 유닛이 끊임없이 쏟아져 나오며, 플레이어는 초기 배치된 건물과 유닛을 활용해 침공을 막아내야 한다. 특히 맵의 구조상 중앙 기지 주변에 방어 건물을 배치하기 용이하지만, 일정 시간이 지나면 적의 공격 패턴이 강화되어 방어 난이도가 높아지는 구조로 보인다. 맵의 특징은 단순하면서도 방어 포인트가 명확하다는 점으로, 초보자와 숙련자 모두 즐길 수 있도록 설계된 듯하다. 다만, 맵의 난이도는 고정된 것이 아니라 플레이어의 방어 능력에 따라 달라지는 만큼, stratégique한 포지셔닝과 자원 관리가 무엇보다 중요하다. 추천 대상은 스타크래프트 유즈맵을 любитель с компом, 전략적 사고를 즐기는 플레이어, 그리고 디펜스 장르를 선호하는 유저들이다. 플레이 전에는 방어 건물의 배치 위치와 초기 유닛의 배치, 그리고 자원의 확보가 원활한지 반드시 확인할 필요가 있다. 또한, 맵의 넓이가 넓기 때문에 중앙 기지 주변의 길목에 방어선을 구축하는 것이 핵심 전략이 될 것이다. 이 맵은 특히 설원 분위기의 디자인과 긴장감 넘치는 방어 전투가 특징으로, 한 번 플레이하면 다시 도전하고 싶은 매력이 있다. 다만, 일부 플레이어는 반복되는 적의 공격 패턴에 지루함을 느낄 수도 있으니, 이를 보완하기 위해 플레이어 간 연습전을 고려해 볼 만하다. Sniper - Installation Fixedv2 is a combat-focused defense map from StarCraft: Brood War's custom maps, where players must fend off a constant stream of enemy attacks in a command-style format. The map features a snowy tile set and centers around defending a base located in the vast open space at the center of the map. Throughout the game, a variety of units—including Zerglings, Hydralisks, Ultralisks, Drones, Lurkers, Vultures, Tanks, and Goliaths—pour in relentlessly, requiring players to utilize their initially placed buildings and units to repel the assaults. The map’s structure makes it easy to position defensive buildings around the central base, but enemy attacks escalate over time, increasing the difficulty of defense. Its straightforward yet clearly defined defensive points make it accessible to both beginners and experienced players. However, since the difficulty isn’t fixed and depends on the player’s defensive skills, strategic positioning and resource management are crucial. This map is recommended for StarCraft custom map enthusiasts, players who enjoy strategic thinking, and fans of the defense genre. Before playing, it’s essential to check the placement of defensive buildings, initial unit arrangements, and resource accessibility. Given the map’s size, building a defensive line at key chokepoints around the central base is vital. The snowy aesthetic and intense defensive battles make this map replayable, though some players might find the repetitive enemy patterns monotonous—considering team practice matches could help mitigate this.
맵 선택 가이드
태그는 맵의 핵심 특징을 빠르게 설명하지만 제작 버전마다 규칙이 다를 수 있습니다. 상세 설명에서 권장 인원, 난이도, 플레이 시간과 버전을 함께 확인한 뒤 다운로드하세요.