
저그 디펜스 스타크래프트 맵 모음
'저그 디펜스' 태그가 등록된 맵을 모았습니다. 장르 하나로 찾기 어려운 플레이 방식, 난이도와 특징을 중심으로 인기 맵과 최신 맵을 비교해 보세요.
- 등록 맵
- 33개
- 누적 다운로드
- 2
- 누적 조회
- 1,084
인기 맵
다운로드와 조회 반응이 높은 맵입니다.
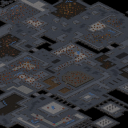
최종 결전 C (Final Battle C)
이 맵은 스타크래프트: 브루드워 유즈맵으로, UED(United Earth Directorate) 군대가 저그의 침공을 방어하는 디펜스 장르의 전투형 맵이다. 내부 설명에 따르면 지구에 상륙한 저그의 공격으로 인해 인간 거주지역이 10%로 줄어든 시점에서 UED가 반격을 준비하는 스토리가 전달된다. 맵의 전체적인 구조는 넓은 평야와 중앙에 위치한 주요 방어 거점이 특징으로, 플레이어는 제한된 자원으로 끊임없이 몰려오는 저그 웨이브를 막아내야 한다. 맵의 해상도가 6144x6144로 매우 크고 타일셋이 우주 기반이지만, 실제 진행은 지상 디펜스에 가까우며, 다양한 유닛과 건물을 배치할 수 있는 공간이 마련되어 있다. 방어선의 중요 거점마다 터렛이나 포탑 설치가 가능한 구조물이 보이며, 중앙 요새는 본진 역할을 하며 보급과 업그레이드가 가능한 것으로 추정된다. 플레이어는 초반 자원과 기술력을 바탕으로 방어선을 구축하고, 중후반에는 대규모 저그 군단을 상대해야 한다. 맵의 난이도는 내장된 설정이나 설명이 없어 명확하지 않지만, 'UED 조직 각지의 부대'라는 설명과 10% 남은 점령지라는 스토리상으로는 높은 난이도가 예상된다. 이 맵은 디펜스 장르를 선호하는 플레이어, 특히 저그 대처에 중점을 둔 전투형 유즈맵을 즐기는 유저들에게 추천할 만하다. 다만, 맵의 크기가 크고 디펜스 구조가 복잡한 만큼, 초보자는 게임 내 설정이나 팁을 참고하는 것이 좋다. 주요 플레이 전 확인 포인트는 중앙 요새의 방어력과 보급 능력, 그리고 저그 웨이브의 주기 및 강도다. 또한, 맵의 타일셋이 우주 기반이지만 실제 게임은 지상 기반이라는 점도 참고해야 한다. This map is a *StarCraft: Brood War* custom map where the United Earth Directorate (UED) defends against a Zerg invasion in a defense-focused combat scenario. According to the in-game description, the story takes place after the Zerg attack has reduced human settlements to just 10% of their original size, prompting the UED to launch a counteroffensive. The map features a vast open plain with a central stronghold as its core structure, requiring players to hold the line against relentless Zerg waves using limited resources. Despite its massive 6144x6144 resolution and space-themed tileset, the gameplay leans toward ground-based defense, offering ample space to deploy various units and structures. Key defensive positions include turrets and defensive towers, while the central fortress functions as a main base with supply and upgrade capabilities. Players must establish defenses early on with their starting resources and technology, later facing increasingly large Zerg armies in the mid-to-late game. While the difficulty isn’t explicitly defined in the map’s settings, the lore—such as "UED forces from across the galaxy" and the dire 10% remaining territory—suggests a high challenge level. This map is ideal for players who enjoy defense-focused custom maps, especially those who prefer strategies centered on countering the Zerg. However, due to its large scale and complex defensive structure, beginners should consult in-game tips or guides before playing. Key points to check before starting include the fortress’s defensive strength and supply capacity, as well as the frequency and intensity of Zerg waves. Additionally, keep in mind that despite its space-themed tileset, the gameplay is entirely ground-based.
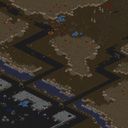
T3) Desperate Alliance (절체절명의 동맹)
스타크래프트 브루드워의 유즈맵 중 하나로 renowned되는 <T3) Desperate Alliance>는 테란 미션을 베이스로 한 서바이벌형 컴까기 맵이다. 맵의 제목에서 느껴지듯 절체절명의 위기 상황에 놓인 테란을 주인공으로 삼아, 저그의 끊임없는 공세를 버티며 생존을 도모하는 것이 핵심 목표로 보인다. 황무지 타일셋으로 구성된 넓은 맵 중앙에는 테란 본진이 배치되어 있으며, 주변으로는 저그 건물과 유닛들이 끊임없이 생산되어 공격해 오는 구조다. 플레이어는 제한된 자원으로 초반부터 끊임없이 밀려오는 저그 웨이브를 방어해야 하며, 방어에 성공할 때마다 보상이 주어지는 방식인 것으로 추정된다. 맵의 구성상 테란 본진을 지키면서도 외부로 진출해 자원 채취를 시도하거나, 방어선을 강화하는 선택지가 있는 듯하다. 초보 플레이어에게는 다소 어려운 난이도를 가질 가능성이 높으며, 경험이 많은 유저라면 효율적인 방어 전략과 자원 관리로 장기전에 대비해야 할 것이다. 특히 저그의 공격 패턴이 일정하지 않고 랜덤 요소도 포함된다면 게임의 재플레이 가치를 높일 수 있을 것으로 보인다. 이 맵을 플레이하기 전에는 테란의 초기 방어 시설 배치와 자원 채취 위치, 그리고 저그의 주요 공격 루트를 미리 숙지하는 것이 중요할 것이다. 또한, 맵의 난이도가 높다면 초반 자원 부족에 대비해 빠른 SCV 생산과 방어 시설 확충을 우선시해야 한다. 이 외에도 지속적인 업그레이드와 유닛 생산이 가능한지 여부도 확인해 두는 것이 좋다. 이 맵은 긴장감 넘치는 서바이벌 경험을 제공하며, 테란의 생존 본능을 자극하는 재미를 느낄 수 있을 것이다. One of the most renowned custom maps in StarCraft: Brood War, *<T3) Desperate Alliance>* is a survival-based Zerg rush map centered around Terran missions. As the title suggests, the core objective is to survive as the Terran protagonist in a desperate situation, enduring endless Zerg assaults while striving to stay alive. The map features a wide, barren tileset with the Terran base placed in the center, surrounded by Zerg structures and units that continuously spawn and attack. Players must defend against relentless Zerg waves with limited resources, likely earning rewards for successful defenses. The layout suggests options to either fortify the base or venture out to gather resources while maintaining defenses. The difficulty may pose a challenge for beginners, while experienced players will need efficient defense strategies and resource management to endure long battles. If the Zerg’s attack patterns are unpredictable and include random elements, the map’s replay value could be significantly enhanced. Before playing, it’s crucial to familiarize yourself with the Terran starting defenses, resource locations, and the Zerg’s primary attack routes. If the difficulty is high, prioritizing rapid SCV production and expanding defenses early to counter initial resource shortages is essential. Additionally, check whether continuous upgrades and unit production are possible. *Desperate Alliance* delivers a thrilling survival experience that taps into the Terran player’s survival instincts for an engaging challenge.
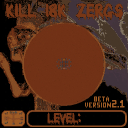
킬 18,000 저그 v2.1 (Kill 18,000 Zergs v2.1)
스타크래프트 브루드워의 유즈맵인 〈킬 18,000 저그〉는 한정된 자원으로 끊임없이 몰려드는 저그 무리를 상대하는 컴까기 스타일의 디펜스 맵이다. 맵 중앙에 위치한 본진을 중심으로 사방에서 저그가 끊임없이 생산되어 공격해 오며, 플레이어는 제한된 미네랄과 가스를 활용해 방어 건물을 건설하고 병력을 양성해야 한다. 섬세한 타워 배치와 멀티태스킹이 요구되는 이 맵은 초반부터 끊임없는 압박을 버텨내고 후반까지 안정된 수비를 유지하는 전략적 사고가 핵심이다. 맵의 대부분은 어두운 톤의 셰이딩으로 처리되어 있으며, 저그가 몰려오는 주요 루트는 밝은 색상의 타일로 구분되어 있어 시야를 확보하고 전략을 세우는 데 도움을 준다. 맵 우측 하단에는 제작자 정보와 버전 정보가 표시되어 있으며, 맵의 끝자락에는 ‘BETA’라는 표시가 확인된다. 초보자에게는 난이도가 높은 편이지만, 꾸준한 연습을 통해 방어 라인을 구축하고 병력 조합을 최적화하는 재미가 있는 맵으로 평가된다. 특히 타워를 통한 수비와 동시에 자원을 확보하는 균형 잡힌 플레이가 요구되며, 저그의 공격을 버티며 최종적으로 18,000마리의 저그를 처치하는 것이 목표로 추정된다. 맵의 구조상 중앙 본진 외곽에는 방어 건물을 짓기 어려운 공간이 있어, 초반부터 신중한 자원 관리와 멀티태스킹이 필수적이다. 저그의 공격 패턴은 일정하지 않지만, 특정 루트에서 집중적인 공격을 감행하는 경향이 보이므로 이를 예측하고 방어선을 재배치하는 것이 중요하다. 전체적으로는 디펜스와 리소스 관리, 그리고 전략적 플레이가 조합된 하드코어한 유즈맵으로, 숙련된 플레이어에게는 긴장감을 유발하는 재미있는 경험을 제공할 것으로 보인다. 초보자의 경우, 우선은 방어 타워의 위치와 병력 조합에 익숙해지는 것부터 시작하는 것이 좋다. 맵의 이름은 ‘킬 18,000 저그’로, 대량의 저그를 처치하는 것이 목표임을 명시하고 있으나, 실제 목표는 맵 내에서 확인된 정보에 따라 추정된 바이며, 제작자의 설명이나 내부 조건은 제공되지 않았다. nonetheless, 맵의 제목과 구조, 그리고 반복되는 저그의 공격 패턴을 고려할 때, 이 목표는 맵의 핵심 콘텐츠로 기능할 가능성이 높다. StarCraft: Brood War's custom map *Kill 18,000 Zerg* is a defense-style comp-stomping map where players must fend off endless waves of Zerg with limited resources. Zerg continuously spawn from all directions around the central main base, forcing the player to construct defenses and produce units using scarce minerals and gas. The map demands precise tower placement and multitasking, requiring players to withstand relentless early pressure while maintaining stable defenses into the late game. Most of the map is rendered in dark shading, but key Zerg attack routes are highlighted with bright tiles to help players secure vision and plan strategies. In the bottom right corner, the creator's information and version details are displayed, and a "BETA" label can be seen at the far edge of the map. While the difficulty is steep for beginners, consistent practice allows players to build defensive lines and optimize unit compositions, making it a rewarding challenge. The map requires a balanced approach—defending with towers while securing resources—and the goal appears to be defeating 18,000 Zerg units in total. Due to the map's layout, spaces around the central main base offer little room for defensive structures, making early resource management and multitasking essential. Though the Zerg's attack patterns aren't entirely predictable, they tend to focus on specific routes, so anticipating and adjusting defenses accordingly is crucial. Overall, *Kill 18,000 Zerg* is a hardcore custom map that blends defense, resource management, and strategic play, offering a tense and engaging experience for skilled players. Beginners should start by familiarizing themselves with tower placements and unit compositions. While the map's title explicitly states the goal of killing 18,000 Zerg, this objective is inferred from the map's structure and recurring attack patterns, as no official rules or internal conditions are provided—though it likely serves as the core gameplay focus.
오버마인드 디펜스 7:0 파이널 (Overmind Defence 7:0 Final)
스타크래프트 브루드워의 대표적인 UMS 디펜스 유즈맵인 ‘오버마인드 디펜스 7:0 파이널(Overmind Defence 7:0 Final)’은 8명의 플레이어가 하나의 팀을 이루어 끊임없이 몰려드는 저그 병력을 상대하는 전략적 디펜스 게임이다. 맵의 중심에는 파괴해야 할 오버마인드가 위치해 있으며, 플레이어들은 방어선을 구축하고 자원 관리, 병력 조합, 전략적 판단으로 끊임없는 웨이브를 버텨내야 한다. 맵은 3072x3072의 넓은 우주 타일셋으로 구성되어 있으며, 각 플레이어는 중앙 기지 주변의 입구에서부터 시작해 외곽 지역을 차지하며 방어선을 확장할 수 있다. 이미지에서는 우주 배경의 어두운 밤하늘과 함께 중앙에 위치한 오버마인드의 실루엣이 확인되며, 플레이어 기지 주변으로 방어 시설과 병력이 배치되어 있는 것이 보인다. 맵의 특징은 끊임없는 웨이브 디펜스로, 초반에는 소수 정예 병력으로 버티지만 후반으로 갈수록 저그의 화력이 급격히 강해지므로 플레이어 간 협력이 무엇보다 중요하다. 또한, 자원 관리와 생산 효율성 또한 승리를 좌우하는 핵심 요소로, 초반 자원이 부족한 상황에서 어떻게 병력을 조합하고 기지를 확장할지가 관건이다. 이 맵은 디펜스 게임을 즐기는 플레이어들에게 긴장감과 전략적 깊이를 제공하며, 특히 팀플레이를 중시하는 유저들에게 인기가 높다. 추천 대상은 디펜스 게임을 좋아하는 스타크래프트 유즈맵 플레이어이며, 초보자라도 팀의 흐름을 잘 따라가며 전략을 배우는 데 적합하다. 다만, 후반부로 갈수록 난이도가 급상승하므로 꾸준한 연습과 팀워크가 요구된다. 플레이 전에는 맵의 구조와 오버마인드의 위치, 자원 분포를 미리 숙지하고 각자의 역할(방어, 공격, 자원 관리)을 명확히 정하는 것이 중요하다. 또한, 병력 조합의 다양성과 방어선의 중요성을 인식하고, 끊임없이 웨이브가 밀려오므로 실수 없이 대처할 수 있는 준비를 갖추는 것이 필수다. "Overmind Defence 7:0 Final" is a classic Brood War UMS defense custom map where eight players team up to fend off endless waves of Zerg forces. At the center of the map lies the Overmind, which must be destroyed, and players must build defenses, manage resources, and make strategic decisions to survive wave after wave. The map features a vast 3072x3072 space-themed tileset, with each player starting near the central base and expanding outward to secure outer regions. The image shows a dark cosmic night sky with the Overmind’s silhouette at the center, while defensive structures and forces surround the player bases. The defining feature of this map is its relentless wave defense—players begin with elite forces but face increasingly intense Zerg attacks as the game progresses, making teamwork essential. Resource management and production efficiency are also critical to victory, as players must balance limited early resources, unit composition, and base expansion. This map offers thrilling challenge and deep strategy for defense game fans, especially those who enjoy team play. It’s recommended for Brood War custom map players who love defense games, including beginners who can follow team flow and learn strategies. However, difficulty spikes sharply in later waves, requiring consistent practice and strong teamwork. Before playing, familiarize yourself with the map layout, Overmind’s location, and resource distribution, and clearly assign roles (defense, offense, resource management). Understanding unit composition diversity and defensive line importance is key, as waves continuously assault your position—preparation and precision are a must.
타르핏 디펜스 3.3 FTW2 (TarPit Ðefense3.3 -FTW2-)
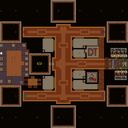
스타크래프트 브루드워의 대표적인 디펜스형 유즈맵인 《TarPit Ðefense3.3 -FTW2-》는 그 이름에서 알 수 있듯이 끈질기게 몰아치는 적을 방어하며 요새를 지켜내는 디펜스 장르에 속한다. 이 맵은 가로 32칸, 세로 32칸의 정사각형 공간으로 구성되어 있으며, 황혼 타일셋을 기반으로 깔끔한 시각적 느낌을 자아낸다. 플레이어는 중앙에 위치한 본진 건물을 지키며, 끊임없이 쏟아지는 저그 웨이브를 상대해야 하는데, 이 과정에서 타워를 건설하고 업그레이드하는 전략적 선택이 핵심으로 작용한다. 맵의 특징 중 하나는 상대적으로 넓은 맵 중앙을 가로질러 오는 적의 진로를 방해하는 장애물이나 지형이 배치되어 있어, 단순히 타워를 도배하는 것만으로는 승리를 장담할 수 없다는 점이다. 또한, FTW2 버전으로 표기된 이 맵은 이전 버전과의 밸런스 조절이나 레이아웃 개선이 있었음을 짐작할 수 있으며, 제작자 Speed[Fast]와 WiN-RaR가 참여했다는 점에서 신뢰성을 더한다. 디펜스라는 장르 특성상 이 맵은 실시간으로 몰려오는 적을 상대하는 긴장감이 특징이다. 7명의 플레이어가 동시에 참여할 수 있는 이 맵은 각자 본진을 방어하는 동시에, 서로의 협력이나 경쟁이 요구되는 구조로 보인다. 특히 FTW2 버전은 이전 버전보다 더 치밀한 방어 전략을 요구할 가능성이 높아, 숙련된 플레이어들에게는 도전적인 요소가 될 수 있다. 반면, 초보자들은 타워의 배치와 업그레이드 타이밍을 익히며 점차 숙련도를 높일 수 있는 구조로 설계되어 있다. 맵의 난이도를 조절하는 다양한 요소들이 내재되어 있지만, 기본적으로는 방어 타워의 최적 배치와 자원 관리가 승패를 좌우할 가능성이 크다. 맵의 중앙 지형이나 입구 구조는 방어선의 중요 위치를 결정짓는 요소로 작용하며, 이를 파악하지 못하면 예상치 못한 돌파구를 허용할 위험이 있다. 이 맵을 플레이하기 전에는 반드시 타워의 종류와 업그레이드 가능한 스펙, 그리고 각 웨이브별 등장하는 적의 종류와 패턴을 숙지해야 한다. 또한, 팀 플레이가 가능한 구조인지 여부를 확인하고, 혼자서 플레이할 것인지 아니면 협력 플레이를 중시할 것인지에 따라 전략이 달라질 수 있다. 맵의 중앙에 위치한 넓은 공간은 때로는 적의 진로를 교란하는 데 활용할 수 있는 지형적 이점을 제공하기도 하므로, 이를 적극 활용하는 것이 중요하다.TarPit Ðefense3.3 -FTW2- is a classic defense-style custom map in StarCraft: Brood War, where players must defend their base against relentless waves of enemies. The map is built on a 32x32 grid using the Twilight tileset, offering a clean and visually appealing design. Players are tasked with protecting their central base while strategically placing and upgrading towers to fend off incoming Zerg forces. Unlike straightforward tower-rush maps, this version features terrain obstacles that disrupt enemy pathways, adding a layer of complexity to the defense strategy. As a defense map, the core gameplay revolves around real-time strategy and adaptability. With support for up to seven players, the map can be played cooperatively or competitively, with each player responsible for their own base. The FTW2 iteration likely includes refined layouts or balance adjustments from previous versions, as suggested by the credits to Speed[Fast] and WiN-RaR. This makes the map more challenging for experienced players while still being accessible to newcomers who can learn tower placement and resource management over time. Before diving into a match, players should familiarize themselves with the tower types, their upgrade paths, and the enemy spawn patterns. The central terrain features strategic chokepoints and open spaces that can be leveraged to disrupt enemy advances. Whether playing solo or in a team, understanding the map's layout and enemy behavior is crucial for success. The balance between offense and defense, combined with the map's dynamic elements, ensures that each playthrough offers a fresh and engaging challenge.
데저트 스트라이크 v퀸 (Desert Strike vQueen)
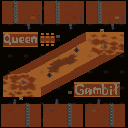
‘데저트 스트라이크 v퀸’은 스타크래프트 브루드워의 고전 유즈맵인 ‘데저트 스트라이크’를 퀸을 중심으로 재해석한 컴까기 디펜스 맵이다. 6명의 플레이어가 하나의 팀을 이루어 사막 지형을 배경으로 끊임없이 몰려드는 저그 부대를 상대하는 것이 핵심 콘텐츠다. 맵 중앙에는 퀸이 배치되어 있으며, 이를 보호하고 강화하는 동시에 강력한 스킬을 활용해 적을 제압하는 전략이 요구된다. 맵은 4096×4096 크기의 넓은 황혼 테마 사막 지형으로 구성되어 있으며, 곳곳에 배치된 minerals와 geysers는 자원 관리와 방어선 구축에 중요한 역할을 한다. 초반에는 소수의 저글링과 히드라리스크가 끊임없이 밀려오며, 중간부터는 뮤탈리스크 떼가 날아오고 후반에는 울트라리스크와 브루탈리스크가 등장해 방어선을 위협한다. 퀸의 스킬인Spawn Broodlings, Ensnare, Parasite, Transfusion 등을 적재적소에 활용해 적을 견제하고 아군의 생존력을 높이는 것이 관건이다. 맵 곳곳에 있는 방어 건물과 유닛 생산 건물을 적절히 배치해 방어선을 구축하는 동시에, 퀸의 스킬 콤보를 활용한 공격 타이밍을 노려야 한다. 특히, 퀸의Transfusion로 아군을 회복시키는 동시에 적을 약화시키는 전략은 게임의 승패를 좌우하는 핵심 요소로 보인다. 추천 대상은 퀸의 스킬과 맵 구조를 숙지하고자 하는 플레이어, 그리고 팀원과의 호흡이 중요한 팀 플레이를 선호하는 유저들이다. 초보자도 충분히 즐길 수 있지만, 퀸의 스킬 활용과 방어선 관리에 익숙해지기 전까지는 난이도가 느껴질 수 있다. 플레이 전에는 맵의 주요 스폰 지역과 퀸의 스킬 효과를 미리 숙지하고, 자원 관리와 방어 건물 배치를 어떻게 할지 전략을 세우는 것이 중요하다. 또한, 적의 공격 패턴을 예측하고 타이밍을 맞춰 스킬을 사용하는 연습이 필요하다. 플레이어는 맵의 넓고 복잡한 지형에서 적의 공격을 efficiently하게 방어하면서도, 퀸의 스킬을 활용한 반격 기회를 포착해야 한다. 맵 곳곳에 흩어져 있는 minerals와 geysers는 자원의 중요성을 더하며, 이를 바탕으로 방어 건물과 유닛을 지속적으로 보강해야 한다. 특히, 후반으로 갈수록 등장하는 강력한 적 유닛을 상대하기 위해서는 퀸의 스킬과 아군의 조합을 끊임없이 업그레이드하고, 방어선을 탄탄히 구축하는 것이 필수적이다. ‘Desert Strike vQueen’ is a classic Brood War custom map reimagined around the Queen, focusing on a team-based defense against relentless Zerg waves. Six players form a single team and battle through waves of enemies set in a vast desert terrain. At the center of the map sits the Queen, whose protection and empowerment, along with strategic use of her powerful abilities, are key to survival. The 4096×4096 map features a twilight-themed desert with scattered minerals and geysers that play a crucial role in resource management and fortifying defense lines. Early waves consist of small groups of Zerglings and Hydralisks, escalating to swarms of Mutalisks mid-game, and culminating in late-game threats like Ultralisks and Brutalisks that challenge your defenses. Mastering the Queen’s abilities—Spawn Broodlings, Ensnare, Parasite, and Transfusion—is essential for controlling the battlefield and boosting your team’s survivability. Balancing the placement of defensive structures and production buildings while timing attacks around the Queen’s skill combos is vital. Notably, using Transfusion to both heal allies and weaken enemies can often determine the outcome of the match. This map is ideal for players looking to deepen their understanding of the Queen’s abilities and the map’s layout, as well as those who enjoy team-based gameplay that relies on coordination. While beginners can still enjoy it, the learning curve can feel steep until they get comfortable with the Queen’s skills and managing defense lines. Before playing, study the key spawn locations and the effects of the Queen’s abilities, and plan your resource management and defensive structure placements carefully. Practicing prediction of enemy attack patterns and timing your skill usage will also go a long way. Players must defend against relentless attacks across the map’s wide, intricate terrain while seizing opportunities to counterattack using the Queen’s abilities. The scattered minerals and geysers heighten the importance of resources, requiring constant reinforcement of defensive structures and units. As the game progresses and stronger enemy units appear, upgrading the Queen’s skills and reinforcing defenses become essential to withstand the escalating threats.
최후의 전투 (Le Combat Final)
《Le Combat Final》은 스타크래프트 브루드워의 밀리 맵으로, 1인 플레이어의 전투에 초점을 맞춘 특수한 전투 환경을 제공합니다. 맵의 이름은 프랑스어로 '최후의 전투'를 의미하며, 내부 설명에 따르면 제라툴과 타이사다르가 제라드의 함정을 피해 최후의 저그 무리들과 맞서는 스토리가 배경으로 보입니다. 맵의 정글 타일셋과 넓은 4096x4096 크기는 전략적 깊이를 더하며, 중앙에 위치한 넓은 평지와 주변의 복잡한 지형은Resource를 확보하고 병력을 배치하는 데 영향을 미칩니다. 초반에는 자원 확보가 원활하게 진행되지만, 중반부로 접어들수록 좁아지는 길목과 다수의 적군 기지 배치로 인해 전투가 치열해집니다. 특히 제라툴과 타이사다르의 영웅 유닛이 등장하는 것으로 추정되는 이벤트는 플레이어에게 특별한 전투 경험을 제공할 것으로 보입니다. 맵의 난이도는 초반 자원 확보와 중반의 방어전, 후반의 집중 공격으로 구성되어 있어 종합적인 전략이 요구됩니다. 초보 플레이어는 자원 관리와 병력 운용에 주의해야 하며, 숙련된 플레이어는 영웅 유닛의 활용과 지형 활용을 통해 더 효율적인 전투를 펼칠 수 있습니다. 맵의 구조상으로는 1인용 전투형 밀리맵으로 분류되지만, 내부 설명의 스토리 요소가 플레이어의 전투 동기를 부여한다는 점에서 단순히Resource 확보와 전투의 반복을 넘어선 경험을 제공합니다. 맵을 플레이하기 전에는 자원 분배와 병력 생산 우선순위를 미리 계획하고, 영웅 유닛의 스킬 사용 타이밍을 연습하는 것이 중요합니다. 또한, 좁은 길목에서 벌어지는 전투는 병력 조합과 컨트롤이 승패를 좌우할 수 있으니, 다양한 전략을 준비하는 것이 좋습니다. This is a StarCraft: Brood War melee map called 《Le Combat Final》, featuring a single-player combat-focused experience. The French title translates to 'The Final Battle,' and the internal description suggests a storyline where Zeratul and Tassadar confront a trap set by Zerg leaders, leading to a climactic battle against the remaining Zerg forces. The 4096x4096 jungle-themed map provides strategic depth with its wide open spaces and dense terrain, which influences resource gathering and troop positioning. While early-game resource collection is straightforward, mid-game narrows down to choke points where multiple enemy bases create intense combat scenarios. The map likely includes hero units like Zeratul and Tassadar, adding a unique twist to the standard melee experience. The difficulty curve is designed around early resource management, mid-game defense, and late-game concentrated attacks, requiring players to balance strategy and execution. Beginners should focus on resource allocation and unit control, while experienced players can leverage hero abilities and terrain advantages for optimal combat efficiency. Before playing, it's crucial to plan resource distribution, prioritize unit production, and practice hero skill timings. The map’s narrow pathways demand careful troop composition and micro-management, as these factors often determine victory or defeat. Overall, 《Le Combat Final》 blends traditional melee mechanics with narrative-driven elements, offering a replayable and engaging single-player experience in StarCraft: Brood War.
라 리브레asion 드 타싸다르 (La libération de Tassadar)
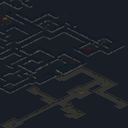
스타크래프트 브루드워의 유즈맵인 '라 리브레asion 드 타싸다르(La libération de Tassadar)'는 Jim Raynor와 UltraMarines가 지하에 갇힌 프로토스 테사다르를 구출하는 임무를 수행하는 디펜스형 UMS 맵이다. 맵은 설원 타일셋으로 구성되어 있으며, 어두운 분위기의 지하 통로와 미로 같은 구조가 특징적이다. 맵 중앙을 기준으로 다수의 적 기지가 배치되어 있어 플레이어는 끊임없이 몰려드는 저그 무리와 방어선을 구축해야 한다. 맵의 전체적인 레이아웃은 복잡하지 않지만, 곳곳에 위치한 좁은 통로와 십자형 교차로에서 적의 공격을 효과적으로 방어해야 한다. 특히, 맵의 상단과 하단에는 방어 거점이 마련되어 있어, 플레이어는 자원 채취와 방어 병력의 보강을 동시에 진행할 수 있다. 전투는 주로 프로토스와 테란 유닛이 혼합된 적군을 상대하게 되며, 랠리 포인트를 적절히 활용해 방어선을 유지하는 것이 핵심이다. 맵의 난이도는 적의 물량과 공격 패턴에 따라 크게 좌우되며, 초반 자원 확보와 유닛 생산 타이밍이 중요하다. 추천 대상은 디펜스와 UMS 맵을 선호하는 플레이어로, 긴장감 있는 전투와 전략적 방어 구축을 즐길 수 있다. 플레이 전에는 맵의 주요 교차로와 자원 지점을 미리 확인해 두는 것이 좋다. 특히, 좁은 길목에서는 탱크나 캐리어 같은 중장거리 유닛이 효과적이며, 빠른 스캔을 통해 적의 기습을 대비해야 한다. 맵의 분위기는 어두운 지하와 설원의 대조로 인해 긴장감을 높이며, 미로 같은 구조는 플레이어의 집중력을 요구한다. 전체적으로는 중규모 디펜스 맵으로, 1인 플레이에 최적화되어 있지만, 팀 플레이를 고려한 구조도 포함되어 있다. Jim Raynor and the UltraMarines must break through to rescue the Protoss hero Tassadar in *La Libération de Tassadar*, a defensive UMS map from StarCraft: Brood War. Set in a snowy tile theme, the map plunges players into a dimly lit underground maze of corridors and intersections. Enemy bases are scattered around the central area, forcing players to constantly fend off waves of Zerg while reinforcing their defenses. Though the layout is straightforward, tight passageways and crossroads demand careful positioning and smart rally-point use to hold the line. Secondary defensive hubs at the top and bottom let you harvest resources and reinforce troops simultaneously. Most engagements pit you against mixed Terran and Protoss armies, so timing your resource gathering and unit production is critical. The difficulty hinges on enemy numbers and attack patterns, rewarding players who adapt quickly. This map shines for fans of defensive UMS play, offering tense battles and strategic fortification. Before jumping in, scout the key choke points and resource zones—narrow corridors favor long-range units like Tanks or Carriers, while fast scans help counter surprise attacks. The contrast between the bleak underground and the snowy surface amplifies the atmosphere, and the maze-like design keeps you on your toes. Overall, it’s a mid-scale defensive challenge best suited for solo play, though its layout also supports team strategies.
저그 킬러 퍼펙트 버전!! (Zerg killer Perfect version!!)
스타크래프트 브루드워 유즈맵 'Zerg killer Perfect version!!'은 저그를 상대하는 디펜스형 유즈맵으로, 8명의 플레이어가 한 팀으로 모여 저그를 상대로 버티며 승리하는 것이 목표다. 맵은 중앙에 위치한 인간 진영과 주위를 둘러싼 저그 진영으로 나뉘어져 있으며, 저그의 끊임없는 공세를 막아내며 자원을 모아 방어선을 구축하는 전략적 요소가 강하다. 맵의 특징은 저그의 공격 루트가 여러 갈래로 나뉘어져 있어 방어를 분산시켜야 하며, 중간중간 등장하는 스폰 포인트에서 끊임없이 저그가 생성되어 플레이어의 집중력을 요구한다. 초반에는 저그의 공격이 약하게 느껴질 수 있지만, 시간이 갈수록 공격 빈도와 강도가 높아지므로 초반 자원 관리와 방어 시설 구축이 중요하다. 플레이어들은 저그의 공격을 방어하면서 자원을 채취해 업그레이드를 진행하거나 추가 병력을 모집할 수 있으며, 이러한 선택이 승패를 좌우할 수 있다. 맵의 밸런스는 저그의 난이도가 점차 상승하도록 설계되어 있어, 초보자는 물론 숙련자까지 긴장감을 유지할 수 있도록 구성되어 있다. 저그를 상대로 한 협동 플레이가 요구되는 이 맵은 전략적 사고와 팀워크가 중요한 유즈맵으로, 디펜스와 협동 플레이를 좋아하는 플레이어들에게 추천할 만하다. 특히 저그의 공격을 효과적으로 방어하기 위해 방어 시설의 배치와 병력 운용을 신중히 계획해야 하며, 실시간으로 변하는 상황에 대응하는 능력이 필요하다. 또한, 저그의 공격 패턴을 익히고 이를 바탕으로 방어 전략을 유동적으로 변화시키는 것이 승리의 핵심이다. 초보자라면 난이도가 다소 높을 수 있으므로, 낮은 난이도부터 시작해 점차 익숙해지는 것이 좋다. 이 맵은 저그를 상대로 한 도전 정신과 전략적 재치를 동시에 요구하는 재미있는 유즈맵으로, 브루드워의 매력을 다시 한번 느낄 수 있는 작품이다. 플레이 전에는 맵의 구조와 저그의 공격 패턴을 충분히 숙지하고, 팀원과의 원활한 소통을 통해 전략을 공유하는 것이 중요하다. 또한, 방어 시설의 업그레이드와 병력 생산 타이밍을 잘 조절하여 저그의 공격을 효과적으로 방어할 수 있도록 준비해야 한다. 이 맵은 다인 플레이를 전제로 제작되었으므로, 팀원과의 협동이 필수적이며, 개인의 실력뿐만 아니라 팀의 조화도 승패에 큰 영향을 미친다. 저그의 공격이 치열해질수록 긴장감도 높아지므로, 플레이어들은 항상 집중력을 유지하며 플레이해야 한다. 저그를 상대로 한 도전과 성취감을 느낄 수 있는 이 맵은 브루드워 유즈맵의 대표작 중 하나로 꼽힐 만하다. 저그의 공격 패턴을 익히고, 방어 전략을 끊임없이 진화시키며, 팀원과의 원활한 소통을 통해 승리를 쟁취해 보자. 이 맵을 플레이하면서 전략적 사고와 팀워크의 중요성을 깨닫게 될 것이다. 저그를 상대로 한 디펜스는 결코 쉽지 않지만, 그 도전 과정이 주는 짜릿함은 다른 어떤 유즈맵에서도 느낄 수 없는 매력이다. 저그의 공격을 효과적으로 방어하고, 승리를 쟁취하기 위해 끊임없이 노력해 보자. Zerg killer Perfect version!! is a UMS (Use Map Settings) defense map in StarCraft: Brood War where 8 players work together as a single team to survive against relentless Zerg attacks. The map is divided into the human base in the center and the surrounding Zerg territory, with multiple attack routes forcing players to spread their defenses strategically. Early on, the Zerg assaults are manageable, but the frequency and intensity escalate over time, demanding careful resource management and defensive preparations. Players can gather resources to upgrade facilities or recruit additional forces, with these decisions significantly impacting the outcome. The map’s balanced difficulty progression ensures that both beginners and veterans can enjoy the challenge, as teamwork and adaptability are crucial for success. Effective defense requires studying Zerg attack patterns, optimizing unit production, and maintaining real-time coordination with teammates. While the difficulty may be steep for newcomers, starting on lower settings can help players gradually adapt. This map offers a thrilling blend of strategy and teamwork, making it ideal for fans of cooperative defense games in StarCraft. Before playing, familiarize yourself with the map layout and Zerg behavior, communicate clearly with your team, and plan upgrades and unit production timings wisely. As the attacks intensify, maintaining focus becomes essential, and the satisfaction of overcoming Zerg waves is unparalleled. This map stands out as a classic UMS title, rewarding players with a sense of achievement and deeper appreciation for StarCraft’s tactical depth.
오버마인드 디펜스 8.1 Fixed (Overmind Defence 8.1 Fixed)
스타크래프트: 브루드워의 대표적인 유즈맵 장르인 ‘디펜스’ 맵 중 하나로, 8명의 플레이어가 하나의 팀을 이루어 적절한 전략과 협력을 바탕으로 적의 끊임없는 공세를 방어해내는 ‘컴퓨터 상대 디펜스’ 형식의 맵이다. 맵 제목에서 알 수 있듯이 ‘오버마인드 디펜스’는 저그의 핵심 건물인 오버마인드를 중심으로 펼쳐지는 전투를 컨셉으로 삼고 있으며, 외계의 침공을 물리치는 듯한 긴장감과 몰입감을 제공한다. 맵의 구조는 중앙에 위치한 오버마인드를 중심으로 사방으로 뻗어나가는 방어 라인이 체계적으로 설계되어 있으며, 각 플레이어는 자신에게 할당된 방어 타워나 유닛 생산 기지를 관리해야 한다. 전투는 초반부터 끊임없이 몰아치는 적 웨이브를 버텨내고, 차츰 강해지는 적군과의 전투를 통해 점차적으로 방어선을 확장해나가는 방식으로 진행된다. 특히 맵의 우측 하단과 좌측 상단에 위치한 ‘강화 구역’은 플레이어의 성장과 자원 관리에 큰 영향을 미치며, 이곳에서 획득한 아이템이나 업그레이드는 전투의 승패를 가르는 중요한 요소가 된다. 맵의 난이도는 기본적으로 ‘보통’ 정도로 설정되어 있지만, 적의 공격 패턴과 웨이브 간격이 시간이 지날수록 급격히 빨라지므로 신속한 판단과 유닛 조합이 요구된다. 초보자의 경우 방어 타워의 위치와 유닛 생산 타이밍을 숙지하지 못해 초반에 무너지기 쉽지만, 숙련된 플레이어는 방어 라인을 효율적으로 배치하고 자원을 분배하여 장기적인 전투를 유리하게 이끌 수 있다. 맵의 분위기는dark하고 전략적인 면이 강해 몰입감을 높이며, 특히 저그의 특징을 살린 디자인과 적절한 밸런스로 인기를 얻고 있는 유즈맵이다. 플레이 전에는 방어 타워의 종류와 강화 구역의 아이템 목록을 미리 확인하고, 팀원 간의 역할 분배(예: 메인 방어 담당, 자원 관리, 아이템 활용 등)를 명확히 하는 것이 중요하다. 또한, 맵의 타일셋이 우주로 구성되어dark한 분위기를 강조하며, 이는 게임의 긴장감을 한층 높이는 요소로 작용한다. 이 맵은 팀워크와 전략적 사고가 요구되는 만큼, 같은 팀원과의 소통이 원활하지 않으면 쉽게 무너질 수 있으므로 주의가 필요하다. Overmind Defence 8.1 Fixed is a classic defense-style custom map in StarCraft: Brood War, where eight players unite as one team to strategically fend off relentless enemy waves against a backdrop of the Zerg’s central Overmind. The map’s design revolves around a central Overmind structure, with defense lines meticulously laid out in all directions. Each player is tasked with managing assigned defense towers or unit production bases, creating a sense of urgency and immersion as waves of enemies continuously assault the defenses. The map introduces ‘enhancement zones’ located at the bottom right and top left corners, which play a pivotal role in player progression and resource management. Acquired items or upgrades from these zones can be game-changers, significantly influencing the outcome of battles. While the difficulty is set to ‘normal,’ the escalating pace and intensity of enemy attacks demand quick decision-making and optimal unit compositions. Novices may struggle with tower placement and unit production timing, leading to early collapses, but experienced players can strategically position defenses and allocate resources for long-term advantages. The map’s dark, strategic atmosphere enhances immersion, with its Zerg-centric design and balanced mechanics contributing to its popularity. Before playing, it’s crucial to review the types of defense towers and enhancement zone items, and clearly define team roles—such as main defense, resource management, and item utilization—to ensure smooth coordination. The map’s tile set, themed in space, amplifies the dark and tense atmosphere, reinforcing the game’s immersive experience. Given its teamwork and strategic depth, effective communication among teammates is essential to avoid early collapses.
데저트 스트라이크 나이트 Fixed 2.22 (Desert Strike Night Fixed 2.22)
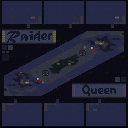
《데저트 스트라이크 나이트 Fixed 2.22》는 스타크래프트 브루드워의 유즈맵으로, 기존의 디저트 스트라이크 시리즈를 리메이크한 컴까기(컴퓨터 상대) 디펜스 장르의 맵입니다. 맵의 배경은 사막 지형으로 설정되어 있으며, 플레이어는 테란 종족을 사용해 끊임없이 몰려드는 저그의 공세를 막아내야 합니다. 맵의 특징 중 하나는 2x 미닝 모드가 기본으로 활성화되어 있어, 플레이어는 자원을 채취하며 병력을 강화할 수 있다는 점입니다. 또한 AI가 개선되어 더욱 현실적인 공격 패턴을 보여주며, 업그레이드가 자동으로 공유되는 시스템이 도입되어 플레이어 간 협력이 가능하다는 장점이 있습니다. 그래픽 효과도 새롭게 추가되어 사막의 밤 분위기를 한층 더 생동감 있게 연출합니다. 구조적으로는 중앙에 플레이어 기지가 위치하며, 사방으로 퍼져 있는 저그의 진영을 차례차례 점령하거나 파괴해야 합니다. 맵의 중앙 bölge는 비교적 안전하지만, 외곽으로 나아갈수록 저그의 공격 빈도가 높아지며, 방어선을 구축하지 않으면 순식간에 밀릴 수 있습니다. 특히 밤 시간대라는 설정이 반영되어 시야가 제한되는 부분이 있어, 센서를 설치하거나 방어 타워를 적극 활용해야 합니다. 플레이어는 초반에 자원과 병력을 모아 방어선을 강화한 뒤, 중반부터는 반격을 시도하거나 추가 자원을 확보하는 전략을 펼칠 수 있습니다. 이 맵은 초보 플레이어에게는 다소 난이도가 높을 수 있지만, 자동 업그레이드 시스템과 개선된 AI 덕분에 비교적 균형 잡힌 난이도를 유지합니다. 또한 다인 플레이를 지원하기 때문에 팀원과의 협력이 중요하며, 각자의 역할을 분담하여 효율적으로 자원을 관리하는 전략이 필요합니다. 맵의 볼륨이 크고 세부적인 밸런스 조정까지 이루어진 만큼, 디펜스 장르를 좋아하는 유저라면 오랫동안 즐길 수 있는佳作입니다. 특히 사막의 밤이라는 테마가 시각적으로도 매력적이어서 몰입감을 높이는 요소로 작용합니다. 플레이 전에는 반드시 미니맵을 확인하여 저그의 공격 패턴을 파악하고, 초기 방어 타워와 센서를 적절히 배치하는 것이 중요합니다. 또한 자원 채취와 병력 생산의 밸런스를 맞추기 위해 초반에는 신중히 자원을 사용해야 하며, 후반으로 갈수록 공격과 방어의 타이밍을 잘 조절해야 합니다. 맵의 특성상 긴 플레이 타임을 요구할 수 있으니, 충분한 시간을 확보하고 플레이하는 것이 좋습니다. insgesamt bietet die Karte eine spannende Mischung aus Strategie, Ressourcenmanagement und taktischem Denken, die sowohl Einzelspieler als auch Teams gleichermaßen herausfordert und unterhält. 《Desert Strike Night Fixed 2.22》 is a custom *StarCraft: Brood War* map, a remake of the classic *Desert Strike* series in the computer-defense (vs. AI) genre. Set against a desert backdrop, players take on the Terran race, defending against relentless Zerg assaults. A key feature is the default activation of 2x mining mode, allowing players to gather resources and strengthen their forces. The AI has been improved to exhibit more realistic attack patterns, and an automatic upgrade-sharing system fosters teamwork among players. New graphical effects enhance the nighttime desert atmosphere, making it feel more immersive. Structurally, the player’s base sits at the center, surrounded by Zerg outposts that must be captured or destroyed one by one. While the central region is relatively safe, the outskirts see increasingly frequent attacks—neglecting defenses here can lead to a swift collapse. The nighttime setting limits visibility, so deploying sensors and defensive towers is essential. Players start by consolidating resources and forces, then shift to counterattacks or securing additional resources in the mid-game. Though the difficulty may be steep for beginners, the auto-upgrade system and refined AI keep the challenge balanced. Designed for multiplayer, teamwork is crucial, with roles divided for efficient resource management. With its large scale and finely tuned balance, this map offers long-term enjoyment for defense genre fans. The desert-night theme further boosts immersion with its striking visuals. Before playing, study the minimap to track Zerg attack patterns and place initial towers and sensors wisely. Balance early resource spending carefully, as mismanagement can cripple progress. Later stages demand precise timing between offense and defense. Given its extended playtime, ensure you have ample time to fully experience the map. Overall, it delivers a compelling mix of strategy, resource management, and tactical depth that challenges and entertains both solo players and teams alike.
마린 VS 뮤탈 1.6 (Marine VS Mutal 1.6)
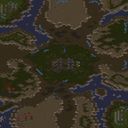
스타크래프트 브루드워의 숨겨진 명작 중 하나로 꼽히는 <마린 VS 뮤탈 1.6>은 유즈맵의 진수를 보여주는 디펜스 장르의 걸작이다. 이 맵은 8명의 플레이어가 한 팀을 이뤄 중앙의 넥서스와 커맨드 센터를 지키며 끊임없이 몰려드는 적의 공격을 방어하는 구조로 구성되어 있다. 맵 중앙에는 거대한 넥서스가 자리 잡고 있으며, 플레이어들은 각자의 배치 구역에서Resource Minerals를 채취해 유닛을 생산하고 방어선을 구축해야 한다. 적으로는 끊임없이 스폰되는 저그의 뮤탈리스크와 다수의 드론, 스커지가 등장하는데, 이들의 공격 패턴은 랜덤성이 강해 플레이어의 전략과 대처 능력이 요구된다. 맵의 지형은 사막 타일셋을 기반으로 펼쳐지며, 절벽과 평지, 언덕이 조화롭게 배치되어 있어 시야 확보와 유닛 배치 전략이 중요하다. 특히, 언덕 지형은 시야 싸움에서 우위를 점할 수 있게 해주며, 플레이어들은 이를 활용해 뮤탈리스크의 접근을 차단하거나 효율적으로 방어선을 형성할 수 있다. 방어에 성공하면Resource Minerals가 지속적으로 보충되어 더 강력한 유닛을 생산할 수 있지만, 실패하면 넥서스가 파괴되면서 패배하게 된다. 맵의 핵심은Resource Minerals 관리와 타워 건설, 그리고 뮤탈리스크의 공격 타이밍을 예측하는 것이다. 초보자는Resource Minerals를 충분히 확보하지 못해 유닛 생산이 늦어지기 쉽고, 경험이 부족한 경우 뮤탈리스크의 공세를 버티지 못하고 넥서스가 파괴될 위험이 크다. 반면 숙련된 플레이어는Resource Minerals를 효율적으로 관리하며 강력한 방어 타워를 건설하고, 뮤탈리스크의 움직임을 예측해 방어선을 구축할 수 있다. 이 맵은 단순히 방어만 하는 것이 아니라,Resource Minerals를 얼마나 잘 활용하느냐에 따라 승패가 갈리기 때문에Resource Minerals 관리 능력이 뛰어난 플레이어에게 유리하다. 추천 대상은Resource Minerals 관리에 익숙한 플레이어와 디펜스 장르를 좋아하는 유저들로,Resource Minerals를 효율적으로 관리하며 방어 타워를 건설하는 전략적 사고가 요구된다.Resource Minerals를 확보하는 타이밍과 뮤탈리스크의 공격 패턴을 분석하는 것이 승리 조건의 핵심이라고 할 수 있다.Resource Minerals를 확보하지 못한 상태에서 공격을 시작하면 유닛 생산이 지연되어 방어가 어려워지므로,Resource Minerals 관리에 주의를 기울여야 한다. 또한,Resource Minerals를 확보한 후에는Resource Minerals를 얼마나 효율적으로 사용하는지가 중요하다.Resource Minerals를 최대한 활용해 강력한 유닛을 생산하고,Resource Minerals를 절약하는 전략을 구사하는 것이 좋다.
최근 등록된 맵
새로 추가된 파일과 버전을 확인하세요.
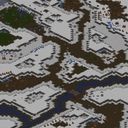
밀리샤 2: 더블 트러블 (Militia 2: Double Trouble)
스타크래프트: 브루드워의 유즈맵 ‘밀리샤 2: 더블 트러블(Militia 2: Double Trouble)’은 저그 기지 방어와 자원 채취를 핵심으로 하는 전략 디펜스 장르의 맵이다. 플레이어는 한 명의 인간(밀리샤) 유닛으로 시작하며, 주변에 있는 저그의 채취 부대(마이닝 브루드)를 파괴한 후 reinforcements(증원 병력)가 도착할 때까지 버텨야 한다. 맵 중앙의 넓은 평지에는 저그의 공격로가 열려 있으며, 지형은 비교적 평탄한 편이지만 곳곳에 배치된 크립과 언덕이 시야와 진군을 방해한다. ‘더블 트러블’이라는 제목에서 알 수 있듯, 단순히 채취 부대를 정리하는 것만으로는 부족하며, 이후에 등장하는 저그의 ‘형제’ 격인 워리어 브루드의 공격까지 방어해야 한다. 플레이의 핵심은 신속한 초반 자원 확보와 방어 시설 구축, 그리고 시야 확보를 통한 적 공격 타이밍 포착에 있다. 방어가 중심이지만, 채취 부대 파괴를 통한 보상 수집과 자원 관리도 전략적 선택을 요구한다. 초보자보다는 중간 이상의 컨트롤과 맵 리딩 능력이 요구되며, 특히 저그의 워리어 브루드가 등장하는 시점부터는 다수 유닛의 동시 컨트롤이 필수적이다. 맵의 밸런스는 저그의 공격 패턴과 플레이어의 방어 능력에 따라 크게 좌우되며, 피지컬뿐 아니라 전략적 판단력이 요구되는 구조다. 추천하는 플레이 방식은 초반부터 적극적인 정찰을 통해 저그의 움직임을 관찰하고, 방어선을 가능한 한 좁은 구역에 구축하는 것이다. 또한, 자원 채취가 가능한 위치에 따라 플레이 스타일이 달라질 수 있으므로, 맵의 구조를 미리 숙지하는 것이 중요하다. 이 맵은 저그와의 대결을 통한 긴장감과 전략적 깊이를 동시에 제공하며, 특히 디펜스와 리소스 관리라는 두 가지 요소가 결합된 점이 매력적이다. 다만, 저그의 공격 패턴이 반복적이기 때문에 숙련될수록 패턴을 익히는 것이 중요하다. 초보자라면 난이도를 ‘보통’ 정도로 설정하고 천천히 적응해 나가는 것이 좋으며, 숙련자라면 최단 시간 내 완수와 자원 최적화를 목표로 플레이해 볼 만하다. 이 맵은 ‘밀리샤’ 시리즈의 후속작답게 전작보다 더 높은 난이도와 복잡한 공격 패턴을 제공하며, 디펜스와 전략적 리소스 관리의 조합을 즐기고 싶은 유저들에게 강력히 추천할 만하다. StarCraft: Brood War's custom map *Militia 2: Double Trouble* is a strategy defense genre map centered around defending Zerg bases and resource gathering. Players begin as a single human (militia) unit, destroying nearby Zerg mining broods (Mining Brood) before reinforcements arrive. The map's wide central plain serves as the Zerg's main attack route, with relatively flat terrain that is occasionally interrupted by creep and hills blocking vision and movement. As the name *Double Trouble* suggests, simply clearing the mining broods isn't enough—players must also defend against the Zerg's "brother" units, the Warrior Brood, which appear later. The core strategy involves quickly securing early resources, constructing defenses, and using vision control to detect enemy attack timing. While defense is key, destroying mining broods for rewards and managing resources also require strategic decisions. This map demands above-average control and map awareness, especially when the Zerg's Warrior Brood appears, necessitating simultaneous control of multiple units. Balance shifts significantly based on the Zerg's attack patterns and the player's defensive capabilities, making it a test of both mechanical skill and strategic judgment. Recommended playstyle involves scouting aggressively from the start to observe the Zerg's movements and setting up defenses in the narrowest possible zones. Resource gathering locations also influence playstyle, so familiarizing yourself with the map layout is crucial. What makes this map appealing is its blend of tense Zerg battles and deep strategy, particularly the fusion of defense and resource management. However, since the Zerg's attack patterns can become repetitive, mastering them becomes essential over time. Beginners should set the difficulty to "normal" and adapt gradually, while experienced players can aim for speedruns and optimal resource use. As a sequel in the *Militia* series, it delivers higher difficulty and more complex attack patterns than its predecessor, making it highly recommended for players who enjoy defense maps and strategic resource management.
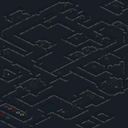
좀비 아웃?! (Who Let The Zerg Out?!)
‘Who Let The Zerg Out?!’은 스타크래프트: 브루드워 유즈맵으로, 플레이어들이 저그의 대군을 상대로 방어전을 펼치는 디펜스 장르의 맵이다. 맵 제목에서부터 느껴지듯이, 이 맵은 저그의 침공을 방어하는 것이 주 목표이며, 맵의 배경은 설원 타일셋으로 조성되어 있어 차가운 분위기 속에서 긴장감이 조성된다. 맵의 중앙에는 커다란 저그 둥지나 기지처럼 보이는 구조물이 배치되어 있으며, 주변에는 플레이어가 방어선을 구축할 수 있는 공간과 자원 채취 구역이 배치되어 있다. 저그의 공격은 주기적으로 일어나며, 플레이어는 자원을 모아 방어 건물이나 유닛을 생산하여 침공을 막아내야 한다. 맵의 특색 중 하나는 저그의 공격 패턴이 랜덤하다는 점으로, 플레이어는 매번 다른 조합의 저그 유닛에 대응해야 한다. 또한, 맵의 크기가 넓은 데다 설원 지형이 복잡하게 배치되어 있어, 초보자는 전략 수립이 다소 어려울 수 있다. 반면, 숙련된 플레이어에게는 다양한 전략을 구사할 수 있는 기회를 제공한다. 이 맵은 혼자서 플레이하는 싱글 플레이어 모드와 다인 플레이어 모드로 즐길 수 있으며, 특히 팀 플레이 시 협동이 중요하다. 추천 대상은 디펜스 장르를 좋아하는 플레이어, 저그를 상대하는 전략을 연습하고 싶은 유저, 그리고 팀플레이를 즐기는 게이머들이다. 플레이 전에는 맵의 구조와 저그의 공격 패턴을 충분히 숙지하고, 자원 관리를 철저히 해야 한다. 또한, 방어 건물의 배치와 유닛 조합을 미리 계획해 두는 것이 승리의 열쇠가 될 것이다. ‘Who Let The Zerg Out?!’ is a *StarCraft: Brood War* custom map where players defend against waves of Zerg forces in a defense-style game. As the title suggests, the main objective is to fend off the Zerg invasion, set against a snowy tileset that creates a tense, chilly atmosphere. At the center of the map lies a massive Zerg nest or base-like structure, surrounded by spaces where players can build defensive lines and resource-gathering zones. The Zerg attacks occur periodically, requiring players to gather resources, construct defenses, and produce units to repel the assaults. One of the map’s key features is that the Zerg’s attack patterns are random, forcing players to adapt to different unit compositions each time. Additionally, the map’s large size and intricate snowy terrain can make strategy formulation challenging for beginners. However, experienced players will find opportunities to employ a variety of tactics. The map supports both single-player and multiplayer modes, with teamwork being especially crucial in multiplayer. This map is recommended for players who enjoy defense-style games, those looking to practice strategies against the Zerg, and gamers who prefer team-based play. Before playing, it’s essential to thoroughly understand the map layout and Zerg attack patterns, manage resources carefully, and plan defensive structures and unit compositions in advance—these elements are key to securing victory.
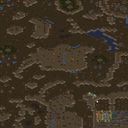
50000 D - Back&Forth 150%
‘50000 D - Back&Forth 150%’는 스타크래프트: 브루드워에서 플레이할 수 있는 유즈맵으로, 5명의 플레이어가 한 팀을 이루어 저그 침공을 방어하는 디펜스 장르의 맵이다. 맵 제목에 포함된 ‘Back&Forth’는 전투가 끊임없이 왕복하는 듯한 진행을 연상시키며, ‘150%’는 맵의 크기나 난이도가 150%로 확장되었음을 암시한다. 내부 설명에서도 ‘Kill all Zerg Invaders to win’이라는 문구가 명확히 나타나 있듯, 목표는 모든 저그 유닛을 섬멸하는 것이다. 맵은 사막 타일셋으로 구성되어 있으며, 넓은 평야와 소규모 언덕 지형이 적절히 분배되어 있어 공격로와 방어 포인트를 전략적으로 선택할 수 있도록 설계되었다고 추정된다. 플레이어는 중앙에 위치한 본진 건물을 방어하며, 끊임없이 생성되는 저그 웨이브를 상대해야 한다. 맵의 특징 중 하나는 ‘Back&Forth’라는 이름에 걸맞게, 저그의 공격 경로가 일정 부분 반복되면서도 중간중간 새로운 변수가 발생한다는 점이다. 예를 들어, 특정 타이밍에 저그의 공격 루트가 바뀌거나, 새로운 유닛 조합이 등장할 가능성이 있어 플레이어는 유동적인 대처가 요구된다. 또한, 맵의 확장된 크기(1024x1024 타일, 4096x4096 해상도) 덕분에 넓은 시야와 광역 스킬의 활용이 중요해진다.Fixed by X’라는 내부 설명은 맵의 밸런스나 버그 수정을 위해 누군가에 의해 수정된 버전임을 나타내며, 안정적인 플레이 환경을 제공한다는 점을 시사한다. 이 맵은 초보 플레이어부터 숙련자까지 모두 즐길 수 있도록 구성되었지만, 팀 간의 호흡이 중요하다는 점에서 초보자는 팀원과의 의사소통에 주의가 필요하다. 또한, 저그의 웨이브가 끊임없이 이어지므로 자원 관리가 필수적이며, 방어 건물과 유닛의 배치에 따라 난이도가 크게 달라질 수 있다. 맵의 난이도는 ‘보통’ 정도로 평가되며, 5인 팀플레이를 기본으로 설계되었으므로 팀워크가 핵심 성공 요인이다. 만약 혼자 플레이할 계획이라면 AI 팀원과의 호흡을 미리 점검해볼 필요가 있다. 50000 D - Back&Forth 150% is a StarCraft: Brood War custom map where five players form a team to defend against endless Zerg invasions. The title ‘Back&Forth’ suggests a back-and-forth dynamic in gameplay, while ‘150%’ implies an expanded scale or intensity compared to standard versions. The internal description—‘Kill all Zerg Invaders to win’—clearly defines the objective: eliminate all incoming Zerg units. The map utilizes a desert tileset, featuring flat plains and small hills that allow strategic placement of defensive structures and units. The core gameplay revolves around protecting a central base while fending off continuous waves of Zerg units. The ‘Back&Forth’ element likely introduces recurring attack patterns interspersed with unexpected variations, such as sudden shifts in attack routes or new unit compositions, forcing players to adapt dynamically. The expanded map size (1024x1024 tiles, 4096x4096 resolution) emphasizes the importance of wide vision control and area-of-effect abilities. The note ‘Fixed by X’ indicates the map has been modified for balance or bug fixes, ensuring a smoother experience. While accessible to players of all skill levels, the map demands strong teamwork, making it ideal for coordinated group play. Beginners should focus on communication with teammates, as miscoordination can lead to critical failures. Resource management is also crucial due to the relentless Zerg waves, and unit positioning significantly impacts difficulty. Designed for a standard difficulty level, the map rewards strategic foresight and adaptability. Players attempting solo mode should first test compatibility with AI teammates to ensure smooth progression.
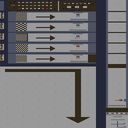
저그 37 디펜스 G New (Zerg 37 Defence G New)
스타크래프트 브루드워의 대표적인 디펜스 장르 유즈맵인 〈Zerg 37 Defence G New〉는 저그 유닛을 조종해 끊임없이 몰려드는 적군 기지를 파괴하는 과제에 도전하는 맵이다. 맵의 이름은 ‘37’이라는 숫자에 주목하게 하는데, 이는 총 37개의 적 건물을 파괴해야만 승리할 수 있는 구조로 설계되어 있기 때문이다. 1024x1024 크기의 넓은 필드에서 저글링, 히드라리스크, 뮤탈리스크 등 다양한 저그 유닛을 효율적으로 운용해야 하며, 적의 방어선을 뚫고 핵심 건물인 넥서스를 파괴하는 전략이 핵심이다. 맵의 배치 특성상 중앙과 외곽에 위치한 적 건물을 우선적으로 제거해야 하는데, 초반에는 저글링으로 빠르게 기지를 확보하고, 중반부터는 히드라리스크와 뮤탈리스크를 조합해 방어선을 무너뜨리는 것이 기본 전략으로 보인다. 적의 공격 패턴도 존재하기 때문에 유닛을 잃지 않도록 신중히 컨트롤해야 하며, 특히 후반부로 갈수록 적이 강력한 유닛을 배치하기 때문에 자원 관리와 유닛 업그레이드가 매우 중요하다. 이 맵의 가장 큰 매력은 반복 플레이를 통한 숙련도 향상과 함께, 저그의 특성을 살린 조합 플레이를 경험할 수 있다는 점이다. 저그 유닛의 장점인 빠른 기지 확장과 다수의 유닛 운용 능력을 테스트해 볼 수 있는 좋은 기회가 될 것이다. 초보자의 경우 저글링 위주로 빠르게 37개의 건물을 파괴하는 연습을, 숙련자라면 히드라와 뮤탈의 조합을 통해 효율적으로 클리어하는 플레이를 추천한다. 또한 적의 방어선을 뚫기 위해 시야 확보와 자원 확보를 동시에 신경 써야 하므로, 멀티태스킹 능력이 요구되는 맵이기도 하다. 맵의 구조상 적의 건물이 밀집된 지역에 접근할 때마다 병력이 소모되므로, 유닛의 손실을 최소화하는 것이 클리어의 핵심 포인트다. 이 외에도 적의 공격 타이밍을 예측하고, 미리 유닛을 배치하거나 방어 건물(예: 포톤 캐논)을 파괴하는 전략을 세우는 것이 중요하다. 저그 유닛의 특성을 최대한 살려서 효율적인 플레이를 구사한다면, 누구나 쉽게 클리어할 수 있는 맵은 아니지만 그만큼 성취감을 느낄 수 있는 맵이라고 할 수 있다. Zerg 37 Defence G New is a renowned defense-genre custom map in StarCraft: Brood War where players control Zerg units to destroy an enemy base. The name "37" hints at the core objective—destroying a total of 37 enemy buildings to secure victory. Set on a 1024x1024 field, the map challenges players to strategically deploy various Zerg units like Zerglings, Hydralisks, and Mutalisks to break through enemy defenses. The layout requires prioritizing key buildings in central and outer areas, with early Zergling rushes for quick expansion and mid-to-late-game Hydralisk-Mutalisk combinations to dismantle defenses. Enemy attacks escalate as the game progresses, demanding careful unit control and resource management. The map’s strength lies in its replayability and emphasis on Zerg’s strengths: rapid expansion and mass unit coordination. Beginners may focus on Zergling rushes to clear buildings, while advanced players can optimize Hydralisk-Mutalisk combos for efficiency. Successful play requires balancing vision control, resource gathering, and minimizing unit losses. Predicting enemy attack timings and strategically positioning units or destroying defensive structures (e.g., Photon Cannons) are critical to progression. Though challenging, mastering Zerg’s unit synergies here delivers a deeply satisfying sense of achievement.
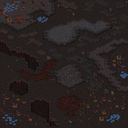
운명(Зов судьбы) (Navkratis)
이 맵은 ‘Î÷èùåíèå Äàããîòà’라는 제목을 가진 스타크래프트 브루드워 유즈맵으로, 내부 제목과 설명을 살펴보면 플레이어가 ‘퓨로르’라는 곳을 ‘즈르크’라는 저그의 적대 세력으로부터 구출하는 임무를 수행하는 내용으로 추정된다. 맵의 분위기는 정글 타일셋을 활용한 어두운 조명과 붉은색, 푸른색의 빛이 어우러진 독특한 색감으로 구성되어 있으며, 전체적으로는 유즈맵 특유의 복잡한 구조보다는 비교적 단순한 진행을 지향하는 듯 보인다. 맵의 크기는 3072x3072로 상당히 넓지만, 주요 진행 구간은 중앙을 중심으로 펼쳐져 있어 상대적으로 플레이어가 이동할 수 있는 공간은 제한적일 수 있다. 맵의 제목과 설명을 고려할 때, 이 맵은_DEFENSE_ 장르보다는_UMS(Use Map Settings)_ 장르에 가까운 ‘컴퓨터 상대 유즈맵’으로 분류되는 것이 타당해 보인다. 플레이 방식은 단일 플레이어로 진행되며, 컴퓨터가 조종하는 적대 세력(즈르크)을 상대로 방어하거나 특정 목표를 달성하는 방식으로 전개될 가능성이 크다. 맵의 색상이 다소 어둡고 붉은빛이 강해 시야가 제한될 수 있으니, 미리 밝기나 채도 설정을 조정하는 것이 플레이 경험을 향상시키는 데 도움이 될 것이다. 또한, 맵의 제목과 설명이 영어와 러시아어 혼합으로 되어 있어, 한국어 플레이어에게는 다소 낯설 수 있으니, 내부 설명이나 번역본을 참고하는 것이 좋다. 전체적으로는 ‘저그를 상대로 한 방어’ 또는 ‘구출 미션’이라는 핵심 콘셉트를 가진 유즈맵으로, 유닛 컨트롤보다는 전략적 판단과 효율적인 자원 관리가 중요할 것으로 보인다. This StarCraft: Brood War custom map, titled 'Î÷èùåíèå Äàããîòà', appears to be a UMS (Use Map Settings) genre where the player takes on a mission to rescue 'Furor' from the 'Zerg' enemy forces named 'Zurk'. The map employs a jungle tileset with a dark, moody atmosphere accented by red and blue lighting, creating a visually unique but somewhat constrained play area despite its large 3072x3072 size. The core gameplay likely revolves around defending against or neutralizing computer-controlled Zerg forces in a single-player experience. Given the map's title and description mix languages (English, Russian, and Korean), players may need to rely on internal guides or translations for clarity. The dim lighting and color palette suggest that adjusting brightness settings could enhance visibility during play. Overall, this map emphasizes strategic decision-making and resource management over micro-management, fitting into the broader UMS category with a focus on defensive or rescue-based missions against the Zerg.
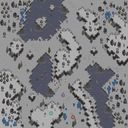
스노우바운드 (Snowbound)
스타크래프트 브루드워의 유즈맵 〈Snowbound〉는 동명의 다크 모드와 함께 겨울 테마의 디펜스 장르로 눈 덮인 행성 브락시스에서 프로토스 플레이어를 보호하는 임무를 수행하는 맵이다. 플레이어는 시작 지점에서 적대적인 저그 무리로부터 본진을 지켜내야 하며, 맵 중앙에는 거대한 눈보라 지역이 펼쳐져 있어 시야를 가리고 유닛의 이동을 방해하는 요소로 작용한다. 눈보라 지역은 맵 전체를 가로질러 있으며, 이곳을 지나가려면 추가적인 컨트롤이나 전략이 요구된다. 맵의 주요 특징은 눈보라 지역을 통과하는 길목에 위치한 방어 타워와 유닛 생산 건물로, 이를 활용해 적 저그의 침공을 막아내야 한다. 맵 우측 하단에는 프로토스 네트워크가 보이며, 이곳을 보호하는 것이 핵심 목표로 보인다. 맵의 분위기는 차갑고 삭막한 겨울 풍경으로 구성되어 있어 시각적 몰입감을 높이는 데 중점을 두고 있다. 플레이어는 초반에 자원을 확보한 후 방어선을 구축하며, 눈보라 지역의 시야 차단과 적의 다수 유닛 침공을 어떻게 효율적으로 방어할 것인지에 따라 난이도가 크게 달라진다. 추천 대상은 디펜스 게임을 즐기며 시야 조절과 유닛 컨트롤에 익숙한 플레이어로, 특히 겨울 테마의 분위기와 전략적 깊이를 좋아하는 유저들에게 적합하다. 플레이 전에는 맵의 눈보라 지역과 방어 타워의 위치를 정확히 숙지하고, 적은 자원으로도 방어선을 유지할 수 있는 효율적인 빌드 순서를 미리 계획해두는 것이 중요하다. 또한, 눈보라 지역을 통과하는 길목을 어떻게 활용할 것인지에 대한 전략적 사고가 필요하다. 맵을 처음 플레이한다면 어려움을 느낄 수 있지만, 점차 패턴을 익히며 방어 전략을 다듬어나갈 수 있다. 초보자는 난이도를 낮추고 연습 모드에서부터 시작하는 것이 좋으며, 숙련자는 맵의 숨은 길목이나 시야 차단을 활용한 심리전으로 적을 혼란스럽게 만드는 플레이를 시도해볼 만하다. The StarCraft: Brood War custom map *Snowbound*, along with its namesake Dark Mode, is a winter-themed defense game where players protect Protoss structures on the frozen planet Braxis from relentless Zerg hordes. Starting from a fortified position, players must fend off waves of hostile Zerg while navigating a massive blizzard that blankets the map, obscuring vision and hindering unit movement. The blizzard stretches across the entire battlefield, forcing players to employ precise control and strategic planning to traverse it safely. Key to survival are defensive towers and production buildings strategically placed along the blizzard’s paths—essential tools for repelling the Zerg’s relentless assaults. In the bottom-right corner of the map lies the Protoss Nexus, the primary objective that must be defended at all costs. The map’s bleak, desolate winter aesthetic enhances immersion, reinforcing the harsh, unforgiving environment. Players begin by securing resources to establish a defensive perimeter, but the real challenge lies in adapting to the blizzard’s vision impairment and countering large-scale Zerg invasions. The difficulty hinges on efficient resource management and tactical decision-making. This map is ideal for defense game enthusiasts who are comfortable with vision control and unit micro-management, particularly those who appreciate the chilling atmosphere and strategic depth. Before diving in, players should memorize the blizzard’s locations and tower placements, pre-planning an efficient build order to maintain defenses even with limited resources. Developing a strategy for navigating the blizzard’s paths is crucial, as is leveraging its vision-blocking effects to outmaneuver opponents. New players may struggle initially but can gradually refine their strategies as they learn the map’s patterns. Beginners are advised to start in practice mode with reduced difficulty, while experienced players can experiment with hidden paths and psychological tactics—such as exploiting the blizzard’s vision obstructions—to confuse and overwhelm their enemies.
![[ПВВ6] – 저그 공격 (Zerg Offensive) 맵 미리보기](https://cdn-star-data.huzy.net/thumbnail_4c872914ece144629eef9d2bc95887cf.jpg)
[ПВВ6] – 저그 공격 (Zerg Offensive)
스타크래프트 브루드워의 유즈맵으로 유명한 '[ПВВ6] – Наступление зергов'는 한 플레이어가 저그 군단을 이끌고 테란 기지를 공격하는 디펜스 게임입니다. 맵은 사막 지형을 배경으로 펼쳐지며, 중앙에 위치한 테란 기지를 향해 끊임없이 몰려드는 저그 웨이브를 방어해야 합니다. 게임의 핵심은 효율적인 자원 관리와 병력 배치로, 초반에는 소규모의 저글링과 히드라리스크가 끊임없이 출현하며, 시간이 지나면서 저그의 공격력이 점점 강해집니다. 플레이어는 미네랄과 가스를 확보해 병력을 강화하고, 방어 건물인 성큰 콜로니와 스포어 콜로니를 건설해 기지를 보호해야 합니다. 특히, 맵의 왼쪽과 오른쪽 하단에 위치한 입구는 저그의 주요 침입 경로로, 이곳을 집중 방어하지 않으면 기지가 순식간에 무너질 위험이 있습니다. 또한, 맵 내 곳곳에 흩어져 있는 보너스 미네랄을 수집해 자원을 절약하는 것이 관건입니다. 게임의 긴장감은 저그의 끊임없는 공격과 플레이어의 방어 능력 사이에서 오가며, 성공적인 방어는 저그의 공격을 막아내고 기지를 지켜내는 순간에 절정을 이룹니다. 초보자도 쉽게 접근할 수 있지만, 고수들은 더 효율적인 병력 운용과 전략으로 게임을 즐길 수 있는 구조입니다. 특히, 저그의 공격 패턴을 미리 예측하고 방어선을 구축하는 것이 중요합니다. 이 맵은 저그의 끊임없는 공격 속에서 플레이어의 전략적 사고와 순간 판단력을 시험하는 재미있는 유즈맵으로, 단일 플레이어용 디펜스 게임을 좋아하는 분들에게 강력히 추천합니다. 플레이 전에는 저그의 공격 패턴과 방어 건물의 배치 위치를 미리 숙지하는 것이 좋습니다. 또한, 자원 수급을 원활히 할 수 있도록 보너스 미네랄의 위치도 확인해 두는 것이 필수입니다. 게임의 난이도는 초보자도 즐길 수 있을 정도로 조절할 수 있지만, 고수들은 더 어려운 난이도로 도전해 볼 수 있습니다. 이 맵을 통해 저그의 공격과 방어의 묘미를 느낄 수 있을 것입니다. Zerg Offensive, a popular Brood War custom map, is a defense-style UMS where a single player controls the Zerg to attack a Terran base. Set in a desert terrain, the map features continuous waves of Zerg units advancing toward the central Terran base, which the player must defend. The core of the gameplay revolves around resource management and strategic unit placement. Initially, small waves of Zerglings and Hydralisks emerge, gradually increasing in strength over time. The player must gather minerals and vespene gas to upgrade their forces and construct defensive buildings like Sunken Colonies and Spore Colonies to protect the base. The lower-left and lower-right entrances are critical choke points where most Zerg attacks occur, making them priority defense zones. Scattered bonus minerals across the map provide additional resources to optimize economy. The tension builds as the player balances between holding off relentless Zerg assaults and expanding their defenses. While accessible to beginners, skilled players can leverage advanced tactics like predicting Zerg attack patterns and optimizing unit compositions. This map is ideal for fans of single-player defense games, testing strategic thinking and quick decision-making under pressure. Before playing, familiarize yourself with Zerg attack patterns, defensive structure placements, and bonus mineral locations. Adjusting difficulty allows both novices and veterans to enjoy the experience, making it a must-try for those seeking the thrill of Zerg versus Terran warfare.
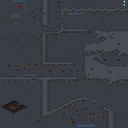
Nasa (나사)
스타크래프트 브루드워의 유즈맵 <Nasa>는 우주를 배경으로 한 디펜스 장르의 맵으로, 플레이어는 지구를 침공한 저그의 오버마인드를 파괴하는 임무를 맡습니다. 맵 전체가 어두운 우주 공간으로 구성되어 있으며, 중앙에 위치한 저그의 오버마인드를 중심으로 여러 방향에서 끊임없이 저글링과 히드라리스크가 쏟아져 나옵니다. 플레이어는 센터에 위치한 커맨드 센터 주변에 방어 건물을 설치하여 끊임없이 몰려드는 적을 상대해야 합니다. 맵의 특징은 우주라는 독특한 배경으로, 배경 이미지가 어두운 푸른색과 검은색 톤으로 이루어져 있어 긴장감을 조성합니다. 또한, 맵 중앙의 오버마인드는 지속적으로 에너지를 공급받아随着时间的推移, 점점 더 많은 유닛을 생산합니다. 방어선을 구축하는 동시에 자원의 확보가 필수적이며,fficient하게 건물을 배치하여 긴장감을 유지할 수 있도록 설계되었습니다. 이 맵은 일반적으로 초보자에게는 다소 난이도가 있을 수 있지만, 방어 건물을 효율적으로 배치하고 자원을 잘 관리한다면 충분히 클리어할 수 있습니다. 특히, 맵의 넓은 공간을 활용하여 방어선을 구축하는 전략이 중요합니다. 플레이어는 오버마인드를 파괴하는 데 성공하면 임무를 완수하게 되며, 이는 맵의 핵심 목표입니다. 또한, 지속적으로 몰려드는 적을 상대해야 하기 때문에, 플레이어의 집중력과 순간적인 판단력이 요구됩니다. 맵의 분위기는Dark한 우주 배경과 끊임없이 몰려드는 적의 조합으로 긴장감을 유지하게 만들며, 플레이어는 자신의 전략과 방어 능력을 시험해 볼 수 있습니다. 이 맵은 디펜스 장르의 유즈맵 중에서 비교적 긴 플레이 시간을 요구할 것으로 예상되며, 특히 방어 건물을 효율적으로 배치하고 자원을 관리하는 것이 중요합니다. 또한, 맵의 넓은 공간을 활용하여 방어선을 구축하는 전략이 핵심입니다. 플레이어는 오버마인드를 파괴하는 데 성공하면 임무를 완수하게 되며, 이는 맵의 핵심 목표입니다. Nasa는 우주를 배경으로 한 디펜스 유즈맵으로, 플레이어는 끊임없이 몰려드는 저그의 공격을 방어하며 오버마인드를 파괴하는 임무를 맡습니다. 맵의 넓은 공간과 어두운 우주 배경이 어우러져 긴장감을 조성하며, 방어 건물을 효율적으로 배치하고 자원을 관리하는 것이 성공의 열쇠입니다. 초보자에게는 다소 난이도가 있을 수 있지만, 전략적 사고와 집중력을 발휘한다면 충분히 클리어할 수 있습니다. 특히, 오버마인드의 에너지 공급을 끊고 방어선을 구축하는 것이 중요합니다. 플레이어는 끊임없이 몰려드는 적을 상대하며, 자신의 방어 능력을 시험해 볼 수 있습니다. In <Nasa>, a custom defense map in StarCraft: Brood War, players must defend against relentless Zerg attacks and destroy the Overmind in a space-themed setting. The map features a dark cosmic backdrop with a central Overmind that continuously spawns Zerglings and Hydralisks from multiple directions. Players must strategically place defensive structures around their Command Center while managing resources to counter the escalating waves of enemies. The map’s design emphasizes efficient base layout and resource allocation, as the Overmind’s energy supply grows stronger over time, increasing the challenge. This map is particularly suited for players who enjoy strategic depth and high-stakes defense gameplay. While the constant enemy waves demand quick decision-making and adaptability, the space-themed aesthetic enhances the immersive experience. Beginners may find the early waves manageable, but the difficulty ramps up significantly as the Overmind’s production accelerates. Success hinges on balancing defense, resource management, and timely upgrades. The map’s atmosphere, driven by its dark cosmic theme and relentless enemy pressure, makes it a compelling choice for those seeking a challenging yet rewarding defense challenge.
맵 선택 가이드
태그는 맵의 핵심 특징을 빠르게 설명하지만 제작 버전마다 규칙이 다를 수 있습니다. 상세 설명에서 권장 인원, 난이도, 플레이 시간과 버전을 함께 확인한 뒤 다운로드하세요.