
재건 스타크래프트 맵 모음
'재건' 태그가 등록된 맵을 모았습니다. 장르 하나로 찾기 어려운 플레이 방식, 난이도와 특징을 중심으로 인기 맵과 최신 맵을 비교해 보세요.
- 등록 맵
- 3개
- 누적 다운로드
- 0
- 누적 조회
- 133
인기 맵
다운로드와 조회 반응이 높은 맵입니다.
메가맨 X 골렘즈 (Megaman X Golems)
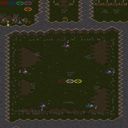
스타크래프트 브루드워 유즈맵으로 등장한 <메가맨 X 골렘즈>는 디펜스와 건설 요소가 결합된 독특한 게임 플레이를 제공합니다. 맵은 거대한 사막 평야를 배경으로 하며, централь에 위치한 주요 구조물을 파괴하고 재건하는 것이 주요 목표로 보입니다. 맵 곳곳에 scattered된 유닛들은 파괴 가능한 오브젝트나 방어 시설로 추정되며, 이를 조작해 적대적 유닛이나 구조물을 제어하거나 파괴해야 합니다. 맵 이미지에서 확인되는 수많은 잔해와 잔디 패턴은 파괴와 건설의 반복을 암시하며, 플레이어는 이를 통해 전술을 유동적으로 변화시켜야 할 것입니다. 5인 플레이를 지원하는 이 맵은 혼자서도 진행할 수 있지만, 협력 플레이가 유리할 것으로 보입니다. 특히 사막 타일셋의 황량한 분위기는 긴장감을 조성하며, 파괴와 재건의 반복 속에서 전략적 깊이를 느낄 수 있습니다. 초보자와 숙련자 모두 즐길 수 있도록 디자인된 이 맵은 파괴와 건설의 밸런스가 핵심이며, 맵의 복잡한 구조를 파악하기 전까지는 다소 난해할 수 있습니다. 따라서 플레이 전 맵의 각 구역별 기능을 미리 확인하고, 파괴와 재건의 우선순위를 신중히 결정해야 합니다. 추천 대상은 전략적 사고를 좋아하는 플레이어이며, 특히 디펜스와 건설 요소가 결합된 게임을 선호하는 유저에게 어울릴 것입니다. This StarCraft: Brood War custom map, Megaman X Golems, combines defense mechanics with construction elements to deliver a unique gameplay experience. Set against a vast desert backdrop, the map appears to revolve around destroying and rebuilding central structures as the primary objective. Scattered units throughout the map likely serve as destructible objects or defensive installations that players must manipulate to control or destroy. The scattered debris and grass patterns hint at the cycle of destruction and reconstruction, requiring players to adapt their strategies dynamically. Supporting up to five players, this map can be played solo but benefits significantly from cooperative play. The barren desert tileset enhances the tense atmosphere, immersing players in a strategic depth of destruction and rebuilding. Designed for both beginners and experienced players, the map emphasizes the balance between destruction and construction, though its complex structure may initially challenge players. Before diving in, it's advisable to familiarize yourself with the functions of each map zone and carefully decide the priority of destruction and reconstruction. Recommended for players who enjoy strategic thinking, particularly those who appreciate maps that blend defense and construction mechanics.
골렘 매드니스 with 매스 어택 v11 (Golem Madness with Mass Attack v11)
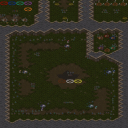
스타크래프트 브루드워의 유즈맵 〈골렘 매드니스 with 매스 어택 v11〉은 파괴와 건설의 조화를 통해 전략을 펼치는 독특한 디펜스 및 빌드업을 요구하는 맵이다. 맵의 중앙에는 거대한 골렘이 위치하고 있으며, 플레이어는 이를 파괴하거나 재건하는 두 가지 핵심 목표를 동시에 고민해야 한다. 골렘을 파괴하면 일정량의 자원이 제공되어 건물을 건설하거나 유닛을 생산할 수 있으며, 반대로 골렘을 재건하면 방어력을 강화하거나 추가 자원을 획득할 수 있는 구조로 추정된다. 맵의 사막 타일셋은 건조한 분위기를 연출하며, 넓은 개활지와 협소한 길목이 조화를 이루며 플레이어의 움직임과 전략을 제한한다. 골렘 주변의 좁은 통로는 유닛의 진입을 어렵게 만들어 방어 측에 유리한 환경을 제공하며, 이는 골렘을 지키려는 플레이어와 파괴하려는 플레이어 간의 긴장감을 고조시킨다. 맵의 난이도는 골렘의 체력과 방어력, 그리고 제공되는 자원의 양에 따라 크게 좌우되며, 초보자의 경우 골렘을 재건하는 데 중점을 두는 것이 효과적일 수 있다. 반면 숙련된 플레이어는 골렘을 신속히 파괴하여 자원을 확보한 뒤 방어선을 구축하는 전략을 선호할 가능성이 높다. 맵의 진행은 일정 주기 또는 조건에 따라 골렘이 재생성되는 시스템으로 보이며, 이를 예측하여 자원 확보와 방어 준비를 동시에 진행해야 한다. 게임의 승리는 골렘의 파괴와 재건을 두고 벌어지는 자원 경쟁과 방어戦略의 균형에 달려 있으며, 플레이어 간의 협력이나 경쟁이 예상된다. 〈골렘 매드니스 with 매스 어택 v11〉은 특히 파괴와 건설의 Trade-off를 즐기는 유저들에게 강력히 추천되며, 전략적 깊이와 빠른 진행이 어우러진 재미를 제공할 것으로 보인다. 플레이 전에는 골렘의 재생성 주기와 자원 획득 조건, 그리고 맵의 주요 통로와 지형지물을 미리 숙지하는 것이 중요하다. 또한, 팀플레이가 가능하다면 골렘 파괴와 방어 임무를 분담하여 효율성을 높일 수 있을 것이다. 이 맵은 단순한 디펜스가 아니라 골렘을 둘러싼 전략적 선택과 자원 관리 능력을 동시에 시험하는 유즈맵으로, 스타크래프트의Classic한 재미와 전략성을 동시에 느낄 수 있는佳作라 할 수 있다. 4인 이상의 플레이가 권장되며, 특히 5인 플레이 시 각 플레이어의 역할 분담이 게임의 승패를 가를 가능성이 높다. 맵의 난이도는 보통 수준으로, 골렘의 재생성 주기와 자원 획득량을 조절한다면 초보자도 충분히 즐길 수 있을 것이지만, 고난이도 모드로 전환하면 전략의 깊이가 한층 깊어질 것으로 예상된다. StarCraft: Brood War's custom map *Golem Madness with Mass Attack v11* is a unique defense and build-up map that demands a balance between destruction and construction to execute strategies. At the center of the map lies a massive golem, forcing players to constantly weigh two core objectives: destroying or rebuilding it. Destroying the golem grants a set amount of resources to construct buildings or produce units, while rebuilding it appears to strengthen defenses or yield additional resources. The desert-themed tileset creates a dry atmosphere, and the contrast between open spaces and narrow pathways restricts player movement and strategy. The tight corridors around the golem make unit entry difficult, favoring defenders and heightening the tension between those trying to protect the golem and those attempting to destroy it. The map's difficulty heavily depends on the golem's health, defense, and resource rewards. Beginners may find it effective to focus on rebuilding the golem, while experienced players likely prefer quickly destroying it to secure resources and establish defensive lines. The golem appears to regenerate at set intervals or under specific conditions, requiring players to anticipate its respawn to balance resource acquisition and defense preparation. Victory hinges on the strategic balance between golem destruction, reconstruction, resource competition, and defensive tactics, with both cooperation and competition among players expected. *Golem Madness with Mass Attack v11* is highly recommended for players who enjoy the trade-offs between destruction and construction, offering strategic depth and fast-paced fun. Before playing, it's crucial to familiarize yourself with the golem's respawn cycle, resource acquisition conditions, key pathways, and terrain features. If team play is possible, dividing roles between golem destruction and defense can boost efficiency. This isn't just a simple defense map—it's a custom game that tests both strategic decision-making around the golem and resource management skills, delivering classic StarCraft fun and depth. The map is best enjoyed with four or more players, and in five-player matches, role distribution among teammates can significantly impact the outcome. While the difficulty is moderate—adjusting the golem's respawn rate and resource rewards can make it accessible to beginners—switching to a high-difficulty mode would further deepen the strategic challenges.
더 리빌딩 오브 에오라 (The Rebuilding Of Eora)
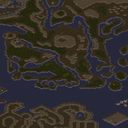
스타크래프트 브루드워의 대표적인 유즈맵 장르 중 하나인 ‘컴퓨터 상대 유즈맵’으로 분류되는 <더 리빌딩 오브 에오라>는 6명의 플레이어가 참여하는 대규모 전략 맵이다. 맵의 배경은 한때 아름답던 대지가 전쟁으로 초토화되면서 새로운 땅 ‘에오라 II’로 이주한 각 세력이 생존을 위해 재건에 나서는 시대를 담고 있다. 이미지 상으로는 넓은 사막 지형이 펼쳐져 있으며, 중앙을 가로지르는 강과 산맥이 자연스러운 방어선을 형성하고 있어 전략적 배치와 자원 관리가 핵심 포인트로 보인다. 맵 곳곳에 흩어져 있는 건물을 보호하거나 파괴하는Objective가 포함되어 있을 가능성이 높아, 플레이어는 자원 수집, 방어 시설 구축, 적절한 타이밍의 공격 등을 종합적으로 고려해야 한다. 진행 방식은 유닛 생산과 건물을 통한 테크트리를 발전시키며 적대적인 컴퓨터 세력을 상대로 영토를 확장하거나 방어하는 방식으로 추정된다. 맵의 규모가 크고 타일셋이 사막이기 때문에 시야 확보와 기동성이 중요한 요소로 작용할 것이다. 또한, 내전과 재건이라는 스토리적 배경이 게임 플레이에 몰입감을 더해줄 것으로 보인다. 초보자보다는 중급 이상의 플레이어에게 적합하며, 맵의 규모와 복잡도를 고려할 때 예상 플레이 시간은 40~60분 정도로 추정된다. 특히, 컴퓨터 상대의 AI가 난이도에 따라 난이도가 급격히 상승할 수 있으니 플레이 전 튜토리얼이나 AI 설정을 미리 확인하는 것이 좋다. 플레이 전 반드시 확인해야 할 사항은 맵의 주요 건물이 위치한 위치와 자원 분포다. 강과 산맥을 활용한 방어 전략, 초기 자원 수집 루트, 그리고 적 AI의 공격 패턴을 미리 숙지한다면 게임을 유리하게 시작할 수 있을 것이다. 또한, 맵의 넓은 공간을 효율적으로 활용하기 위한 적절한 유닛 조합과 테크트리도 전략의 핵심이다. 이 맵은 단순히 전투만 벌이는 것이 아니라, 생존과 재건이라는 스토리적 요소와 전략적 깊이가 조화를 이룬佳作이기 때문에, 전략 게임을 즐기는 플레이어라면 한번쯤 도전해볼 만한 가치가 있다. This StarCraft: Brood War custom map, <The Rebuilding Of Eora>, falls under the UMS (Use Map Settings) genre, designed for 6 players to engage in a large-scale strategic battle. Set against a backdrop of a war-torn desert landscape, the map depicts a narrative where factions migrate to a new land, Eora II, to rebuild their civilizations after their homelands are destroyed in conflicts. The vast terrain, featuring central rivers and mountain ranges, suggests a strategic layout where resource management, defensive positioning, and timely offensives are crucial. The gameplay likely revolves around expanding territory, constructing buildings, and advancing tech trees while battling against hostile AI-controlled factions. Given the map's scale and desert tile set, vision control and unit mobility are expected to play significant roles. The narrative of post-war reconstruction adds depth to the experience, making it particularly engaging for players who appreciate strategy with a thematic twist. While the map is accessible to intermediate players, its complexity may pose challenges for beginners, with an estimated playtime of 40 to 60 minutes depending on player coordination and AI difficulty. Before diving into the game, players should scout key locations such as major buildings and resource clusters. Strategically leveraging natural barriers like rivers and mountains, identifying optimal resource collection routes, and understanding AI attack patterns will provide a significant advantage. The map excels in blending survival mechanics with strategic depth, offering a rewarding experience for those who enjoy tactical challenges. It’s a compelling choice for fans of StarCraft custom maps who seek a blend of strategy, immersion, and replayability.
최근 등록된 맵
새로 추가된 파일과 버전을 확인하세요.
더 리빌딩 오브 에오라 (The Rebuilding Of Eora)
스타크래프트 브루드워의 대표적인 유즈맵 장르 중 하나인 ‘컴퓨터 상대 유즈맵’으로 분류되는 <더 리빌딩 오브 에오라>는 6명의 플레이어가 참여하는 대규모 전략 맵이다. 맵의 배경은 한때 아름답던 대지가 전쟁으로 초토화되면서 새로운 땅 ‘에오라 II’로 이주한 각 세력이 생존을 위해 재건에 나서는 시대를 담고 있다. 이미지 상으로는 넓은 사막 지형이 펼쳐져 있으며, 중앙을 가로지르는 강과 산맥이 자연스러운 방어선을 형성하고 있어 전략적 배치와 자원 관리가 핵심 포인트로 보인다. 맵 곳곳에 흩어져 있는 건물을 보호하거나 파괴하는Objective가 포함되어 있을 가능성이 높아, 플레이어는 자원 수집, 방어 시설 구축, 적절한 타이밍의 공격 등을 종합적으로 고려해야 한다. 진행 방식은 유닛 생산과 건물을 통한 테크트리를 발전시키며 적대적인 컴퓨터 세력을 상대로 영토를 확장하거나 방어하는 방식으로 추정된다. 맵의 규모가 크고 타일셋이 사막이기 때문에 시야 확보와 기동성이 중요한 요소로 작용할 것이다. 또한, 내전과 재건이라는 스토리적 배경이 게임 플레이에 몰입감을 더해줄 것으로 보인다. 초보자보다는 중급 이상의 플레이어에게 적합하며, 맵의 규모와 복잡도를 고려할 때 예상 플레이 시간은 40~60분 정도로 추정된다. 특히, 컴퓨터 상대의 AI가 난이도에 따라 난이도가 급격히 상승할 수 있으니 플레이 전 튜토리얼이나 AI 설정을 미리 확인하는 것이 좋다. 플레이 전 반드시 확인해야 할 사항은 맵의 주요 건물이 위치한 위치와 자원 분포다. 강과 산맥을 활용한 방어 전략, 초기 자원 수집 루트, 그리고 적 AI의 공격 패턴을 미리 숙지한다면 게임을 유리하게 시작할 수 있을 것이다. 또한, 맵의 넓은 공간을 효율적으로 활용하기 위한 적절한 유닛 조합과 테크트리도 전략의 핵심이다. 이 맵은 단순히 전투만 벌이는 것이 아니라, 생존과 재건이라는 스토리적 요소와 전략적 깊이가 조화를 이룬佳作이기 때문에, 전략 게임을 즐기는 플레이어라면 한번쯤 도전해볼 만한 가치가 있다. This StarCraft: Brood War custom map, <The Rebuilding Of Eora>, falls under the UMS (Use Map Settings) genre, designed for 6 players to engage in a large-scale strategic battle. Set against a backdrop of a war-torn desert landscape, the map depicts a narrative where factions migrate to a new land, Eora II, to rebuild their civilizations after their homelands are destroyed in conflicts. The vast terrain, featuring central rivers and mountain ranges, suggests a strategic layout where resource management, defensive positioning, and timely offensives are crucial. The gameplay likely revolves around expanding territory, constructing buildings, and advancing tech trees while battling against hostile AI-controlled factions. Given the map's scale and desert tile set, vision control and unit mobility are expected to play significant roles. The narrative of post-war reconstruction adds depth to the experience, making it particularly engaging for players who appreciate strategy with a thematic twist. While the map is accessible to intermediate players, its complexity may pose challenges for beginners, with an estimated playtime of 40 to 60 minutes depending on player coordination and AI difficulty. Before diving into the game, players should scout key locations such as major buildings and resource clusters. Strategically leveraging natural barriers like rivers and mountains, identifying optimal resource collection routes, and understanding AI attack patterns will provide a significant advantage. The map excels in blending survival mechanics with strategic depth, offering a rewarding experience for those who enjoy tactical challenges. It’s a compelling choice for fans of StarCraft custom maps who seek a blend of strategy, immersion, and replayability.
메가맨 X 골렘즈 (Megaman X Golems)
스타크래프트 브루드워 유즈맵으로 등장한 <메가맨 X 골렘즈>는 디펜스와 건설 요소가 결합된 독특한 게임 플레이를 제공합니다. 맵은 거대한 사막 평야를 배경으로 하며, централь에 위치한 주요 구조물을 파괴하고 재건하는 것이 주요 목표로 보입니다. 맵 곳곳에 scattered된 유닛들은 파괴 가능한 오브젝트나 방어 시설로 추정되며, 이를 조작해 적대적 유닛이나 구조물을 제어하거나 파괴해야 합니다. 맵 이미지에서 확인되는 수많은 잔해와 잔디 패턴은 파괴와 건설의 반복을 암시하며, 플레이어는 이를 통해 전술을 유동적으로 변화시켜야 할 것입니다. 5인 플레이를 지원하는 이 맵은 혼자서도 진행할 수 있지만, 협력 플레이가 유리할 것으로 보입니다. 특히 사막 타일셋의 황량한 분위기는 긴장감을 조성하며, 파괴와 재건의 반복 속에서 전략적 깊이를 느낄 수 있습니다. 초보자와 숙련자 모두 즐길 수 있도록 디자인된 이 맵은 파괴와 건설의 밸런스가 핵심이며, 맵의 복잡한 구조를 파악하기 전까지는 다소 난해할 수 있습니다. 따라서 플레이 전 맵의 각 구역별 기능을 미리 확인하고, 파괴와 재건의 우선순위를 신중히 결정해야 합니다. 추천 대상은 전략적 사고를 좋아하는 플레이어이며, 특히 디펜스와 건설 요소가 결합된 게임을 선호하는 유저에게 어울릴 것입니다. This StarCraft: Brood War custom map, Megaman X Golems, combines defense mechanics with construction elements to deliver a unique gameplay experience. Set against a vast desert backdrop, the map appears to revolve around destroying and rebuilding central structures as the primary objective. Scattered units throughout the map likely serve as destructible objects or defensive installations that players must manipulate to control or destroy. The scattered debris and grass patterns hint at the cycle of destruction and reconstruction, requiring players to adapt their strategies dynamically. Supporting up to five players, this map can be played solo but benefits significantly from cooperative play. The barren desert tileset enhances the tense atmosphere, immersing players in a strategic depth of destruction and rebuilding. Designed for both beginners and experienced players, the map emphasizes the balance between destruction and construction, though its complex structure may initially challenge players. Before diving in, it's advisable to familiarize yourself with the functions of each map zone and carefully decide the priority of destruction and reconstruction. Recommended for players who enjoy strategic thinking, particularly those who appreciate maps that blend defense and construction mechanics.
골렘 매드니스 with 매스 어택 v11 (Golem Madness with Mass Attack v11)
스타크래프트 브루드워의 유즈맵 〈골렘 매드니스 with 매스 어택 v11〉은 파괴와 건설의 조화를 통해 전략을 펼치는 독특한 디펜스 및 빌드업을 요구하는 맵이다. 맵의 중앙에는 거대한 골렘이 위치하고 있으며, 플레이어는 이를 파괴하거나 재건하는 두 가지 핵심 목표를 동시에 고민해야 한다. 골렘을 파괴하면 일정량의 자원이 제공되어 건물을 건설하거나 유닛을 생산할 수 있으며, 반대로 골렘을 재건하면 방어력을 강화하거나 추가 자원을 획득할 수 있는 구조로 추정된다. 맵의 사막 타일셋은 건조한 분위기를 연출하며, 넓은 개활지와 협소한 길목이 조화를 이루며 플레이어의 움직임과 전략을 제한한다. 골렘 주변의 좁은 통로는 유닛의 진입을 어렵게 만들어 방어 측에 유리한 환경을 제공하며, 이는 골렘을 지키려는 플레이어와 파괴하려는 플레이어 간의 긴장감을 고조시킨다. 맵의 난이도는 골렘의 체력과 방어력, 그리고 제공되는 자원의 양에 따라 크게 좌우되며, 초보자의 경우 골렘을 재건하는 데 중점을 두는 것이 효과적일 수 있다. 반면 숙련된 플레이어는 골렘을 신속히 파괴하여 자원을 확보한 뒤 방어선을 구축하는 전략을 선호할 가능성이 높다. 맵의 진행은 일정 주기 또는 조건에 따라 골렘이 재생성되는 시스템으로 보이며, 이를 예측하여 자원 확보와 방어 준비를 동시에 진행해야 한다. 게임의 승리는 골렘의 파괴와 재건을 두고 벌어지는 자원 경쟁과 방어戦略의 균형에 달려 있으며, 플레이어 간의 협력이나 경쟁이 예상된다. 〈골렘 매드니스 with 매스 어택 v11〉은 특히 파괴와 건설의 Trade-off를 즐기는 유저들에게 강력히 추천되며, 전략적 깊이와 빠른 진행이 어우러진 재미를 제공할 것으로 보인다. 플레이 전에는 골렘의 재생성 주기와 자원 획득 조건, 그리고 맵의 주요 통로와 지형지물을 미리 숙지하는 것이 중요하다. 또한, 팀플레이가 가능하다면 골렘 파괴와 방어 임무를 분담하여 효율성을 높일 수 있을 것이다. 이 맵은 단순한 디펜스가 아니라 골렘을 둘러싼 전략적 선택과 자원 관리 능력을 동시에 시험하는 유즈맵으로, 스타크래프트의Classic한 재미와 전략성을 동시에 느낄 수 있는佳作라 할 수 있다. 4인 이상의 플레이가 권장되며, 특히 5인 플레이 시 각 플레이어의 역할 분담이 게임의 승패를 가를 가능성이 높다. 맵의 난이도는 보통 수준으로, 골렘의 재생성 주기와 자원 획득량을 조절한다면 초보자도 충분히 즐길 수 있을 것이지만, 고난이도 모드로 전환하면 전략의 깊이가 한층 깊어질 것으로 예상된다. StarCraft: Brood War's custom map *Golem Madness with Mass Attack v11* is a unique defense and build-up map that demands a balance between destruction and construction to execute strategies. At the center of the map lies a massive golem, forcing players to constantly weigh two core objectives: destroying or rebuilding it. Destroying the golem grants a set amount of resources to construct buildings or produce units, while rebuilding it appears to strengthen defenses or yield additional resources. The desert-themed tileset creates a dry atmosphere, and the contrast between open spaces and narrow pathways restricts player movement and strategy. The tight corridors around the golem make unit entry difficult, favoring defenders and heightening the tension between those trying to protect the golem and those attempting to destroy it. The map's difficulty heavily depends on the golem's health, defense, and resource rewards. Beginners may find it effective to focus on rebuilding the golem, while experienced players likely prefer quickly destroying it to secure resources and establish defensive lines. The golem appears to regenerate at set intervals or under specific conditions, requiring players to anticipate its respawn to balance resource acquisition and defense preparation. Victory hinges on the strategic balance between golem destruction, reconstruction, resource competition, and defensive tactics, with both cooperation and competition among players expected. *Golem Madness with Mass Attack v11* is highly recommended for players who enjoy the trade-offs between destruction and construction, offering strategic depth and fast-paced fun. Before playing, it's crucial to familiarize yourself with the golem's respawn cycle, resource acquisition conditions, key pathways, and terrain features. If team play is possible, dividing roles between golem destruction and defense can boost efficiency. This isn't just a simple defense map—it's a custom game that tests both strategic decision-making around the golem and resource management skills, delivering classic StarCraft fun and depth. The map is best enjoyed with four or more players, and in five-player matches, role distribution among teammates can significantly impact the outcome. While the difficulty is moderate—adjusting the golem's respawn rate and resource rewards can make it accessible to beginners—switching to a high-difficulty mode would further deepen the strategic challenges.
맵 선택 가이드
태그는 맵의 핵심 특징을 빠르게 설명하지만 제작 버전마다 규칙이 다를 수 있습니다. 상세 설명에서 권장 인원, 난이도, 플레이 시간과 버전을 함께 확인한 뒤 다운로드하세요.