
자원 채취 스타크래프트 맵 모음
'자원 채취' 태그가 등록된 맵을 모았습니다. 장르 하나로 찾기 어려운 플레이 방식, 난이도와 특징을 중심으로 인기 맵과 최신 맵을 비교해 보세요.
- 등록 맵
- 5개
- 누적 다운로드
- 2
- 누적 조회
- 270
인기 맵
다운로드와 조회 반응이 높은 맵입니다.
![광산에서 광물캐기 1 [정식] (Mining in the Mine 1 [Official]) 맵 미리보기](https://cdn-star-data.huzy.net/thumbnail_ffe571a6c95c4f8dac2ecf32472a9a87.jpg)
광산에서 광물캐기 1 [정식] (Mining in the Mine 1 [Official])
스타크래프트 브루드워 유즈맵 '광산에서 광물캐기 1 [정식]'은 배드랜드 타일셋을 배경으로 6인용 자원 채취 및 전투 콘텐츠를 제공하는 UMS 맵이다. 제작자 Eregular이 버그 수정과 치트 위치 조정을 거쳐 정식 버전으로 배포한 만큼, 기존 버전에서 지적되던 안정성 문제가 상당 부분 해소된 것으로 보인다. 핵심 플레이는 제목 그대로 광산에서 미네랄을 캐며 자원을 축적하고, 이를 바탕으로 병력을 생산해 적을 제압하거나 임무를 완수하는 흐름으로 추정된다. 128x128 크기의 널찍한 전장은 다수의 플레이어가 동시에 채취 활동을 벌이기에 충분한 공간을 제공하며, 치트 키가 접근하기 쉬운 위치로 이동했다는 설명은 초보자나 캐주얼 유저도 부담 없이 자원 경쟁과 전투를 즐길 수 있도록 난이도 완화 장치를 마련했음을 시사한다. 트리거 기반의 이벤트와 치트 기능이 결합되어 있어 단순 반복 채취를 넘어선 전략적 판단이나 돌발 상황 대처가 요구될 여지가 있다. 6인 풀 인원 기준으로 협동 또는 팀 대결 구도가 형성될 가능성이 높으며, 혼자 즐기기에도 치트 지원을 통해 진행 속도를 조절할 수 있는 유연함이 강점이다. 플레이 전에는 치트 활성화 여부와 승리 조건(적 전멸, 특정 건물 파괴, 자원 목표량 달성 등)을 호스트 설정에서 확인하는 것이 좋다. 자원 관리와 대규모 전투를 가볍게 즐기고 싶은 유저, 고전 유즈맵 감성을 찾는 올드비 게이머에게 추천할 만한 맵이다. This StarCraft Brood War UMS map, "Mining in the Mine 1 [Official]," is set on the Badlands tileset and offers a 6-player resource gathering and combat experience. Released as an official version by creator Eregular after bug fixes and cheat position adjustments, it appears to have resolved stability issues found in earlier versions. The core gameplay loop, as the title suggests, likely revolves around mining minerals in the mine, accumulating resources, producing an army, and defeating enemies or completing objectives. The spacious 128x128 map provides ample room for multiple players to mine simultaneously. The note that cheat keys have been moved to more accessible locations suggests a difficulty relief mechanism allowing beginners or casual users to enjoy resource competition and combat without pressure. The combination of trigger-based events and cheat functions implies strategic decision-making or handling of unexpected situations beyond simple repetitive mining. With a full 6-player count, cooperative or team-versus-team structures are probable, while solo play is also flexible thanks to cheat support for pacing control. Before playing, it is advisable to check host settings for cheat activation and victory conditions (enemy annihilation, specific building destruction, resource goal achievement, etc.). This map is recommended for users who want to enjoy resource management and large-scale battles lightly, or for old-school gamers seeking classic UMS nostalgia.
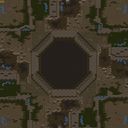
Octagon 1.0 SandBox
스타크래프트 브루드워의 유즈맵 'Octagon 1.0 SandBox'는 사각형의 맵 중앙에 거대한 거대 둥근 오각형 구조물이 자리 잡고 있는 독특한 디자인으로 주목받는 맵입니다. 맵의 가장 큰 특징은 중앙의 거대한 구멍으로, 플레이어들은 이 공간을 통해 자원을 채취하거나 전략적인 이동을 시도할 수 있습니다. 사막 타일셋을 기반으로 한 황량한 분위기는 맵의 전략적 깊이를 더하며, 중앙 구조물의 형태와 배치로 인해 다양한 전술이 가능한 샌드박스형 맵으로 분류됩니다. 이 맵은 4명의 플레이어가 동시에 참여할 수 있으며, 'Use Map Settings' 모드를 통해 맵의 환경을 자유롭게 설정할 수 있는 샌드박스 기능을 제공합니다. 제작자 주석에 따르면 버전 2.5.3까지 개발된 이 맵은 초기 디자인부터 사용자 정의가 가능한 요소들을 고려해 제작되었음을 알 수 있습니다. 중앙의 커다란 구멍은 단순히 시야를 가리는 역할뿐만 아니라, 자원 채취와 기지 방어, 또는突然间의 공격 루트로도 활용될 수 있어 전략적 선택의 폭을 넓혀줍니다. 플레이어들은 중앙 구조물의 외부와 내부를 오가며 자원을 확보하고, 상대방의 움직임을 방어하거나 공격할 수 있는 다채로운 플레이가 가능합니다. 특히 사막 지형의 황량한 분위기는 긴장감을 조성하며, 맵의 중앙 구조물은 단순히 장식적 요소가 아니라 전략적 요충지로 기능합니다. 샌드박스 모드에서 제공되는 맵 설정은 사용자마다 다른 환경을 경험할 수 있도록 하며, 이는 이 맵의 재플레이 가능성을 크게 높이는 요소입니다. 이 맵은 초보자부터 숙련자까지 모두 즐길 수 있는 유즈맵으로, 특히 전략적 사고와 적응력을 키우고자 하는 플레이어들에게 추천합니다. 맵의 구조상 중앙을 차지하는 것이 중요할 수 있으므로, 초기 자원 확보와 방어 전략을 신중히 계획해야 합니다. 또한 샌드박스 모드에서 제공되는 다양한 설정들을 활용해 자신에게 맞는 플레이 스타일을 찾아볼 수 있습니다. 이 맵을 플레이하기 전에는 중앙 구조물의 형태와 자원 배치, 그리고 샌드박스 설정을 미리 확인해 보는 것이 좋습니다. 맵의 중앙 구멍을 어떻게 활용할 것인지, 그리고 방어와 공격의 균형을 어떻게 맞출 것인지에 따라 게임의 결과가 크게 달라질 수 있습니다. 샌드박스 모드의 경우, 맵의 난이도와 자원량을 조정할 수 있으므로 자신에게 맞는 설정을 찾아보는 것도 중요합니다. Octagon 1.0 SandBox is a unique custom map for StarCraft: Brood War, featuring a massive pentagonal structure at the center of a square-shaped map. The most striking feature is the large circular hole in the middle, allowing players to gather resources or execute strategic movements. Based on the desert tile set, the barren atmosphere enhances the map's strategic depth, making it a versatile sandbox-style map where various tactics can be employed. Designed for four players, this map offers a sandbox mode where the environment can be customized through the 'Use Map Settings' feature. According to the creator's notes, the map has evolved up to version 2.5.3, incorporating elements that allow for user-defined settings from the outset. The central hole is not just a visual element but also serves as a critical strategic point for resource gathering, base defense, or sudden attacks. Players can move between the exterior and interior of the central structure to secure resources while defending against or attacking opponents. The desolate desert setting adds tension, and the central structure acts as more than just a decorative element—it is a key strategic point. The sandbox mode’s customizable settings enable each player to experience a unique environment, significantly enhancing the map’s replayability. This map is recommended for players of all skill levels, especially those looking to develop strategic thinking and adaptability. Securing the center is crucial, so careful planning of initial resource gathering and defense strategies is essential. Players can also explore different playstyles by utilizing the various settings provided in the sandbox mode. Before playing, it is advisable to familiarize yourself with the central structure’s layout, resource distribution, and sandbox settings. How you utilize the central hole for resources, defense, or attacks can greatly influence the game’s outcome. In sandbox mode, adjusting the map’s difficulty and resource quantity to suit your preferences is also important.
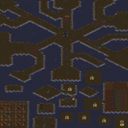
Lurker D 18 Way ~=FINAL=~
Lurker D 18 Way ~=FINAL=~는 4096×4096 타일 크기의 대형 유즈맵으로, 황무지 타일셋을 사용해广阔한 전장을 구현한다. 이 맵은 6인 플레이를 기준으로 설계되며, 팀 플레이보다는 개인 경기 방식을 권장한다. 게임 흐름은 30초마다 라운드가 진행되며, 각 라운드마다 미네랄을 채집하고 업그레이드를 진행한다.players는 각 라운드마다 자원을 모아 유닛을 강화하고, 최종적으로 상대방의 기지를 파괴하거나 생존을 유지해야 한다. map 구조는 여러 개의 섬과 연결된 육로로 구성되어 이동이 자유롭고, 다양한 고지점과 장애물을 활용한 전술적 포지셔닝이 가능하다. 각 섬마다 특화된 자원 채취 지점과 방어 터렛이 배치되어 있어, 플레이어는 지형 활용을 통해 우위를 점할 수 있다. 업그레이드 옵션은 공격력, 방어력, 이동 속도 등 다채롭게 제공되어 전략적 선택이 가능하다. 게임 종료는 30라운드 후 최종 점수가 가장 높은 팀(또는 개인)에게 주어지며, 점수는 채집한 미네랄량과 남은 유닛 수를 종합해 산출된다. 이 map은 빠른 경기 전개와 반복 가능한 라운드 시스템으로 인해 리플레이 가치가 높으며, 커스텀 게임 모드와 호환되어 다양한 변형이 가능하다. 유즈맵 특성상 커스터마이징된 규칙과 트리거가 존재하며, 플레이어의 마이크로 매니지먼트와 매크로 전략이 동시에 요구된다. 난이도는 보통 수준으로, 초보자는 라운드 타이밍과 자원 관리 습관을 익히는 데 어려움을 느낄 수 있지만, 경험이 쌓이면 고난도 전략을 구사하기에 충분한 깊이 제공한다. 이 맵을 즐기기에 적합한 플레이어는 빠른 판단력과 리소스 조율 능력이며, 특히 컴파クト한 전술과 타이밍 조작을 선호하는 유저에게 추천한다. 플레이 전에는 맵 파일을 최신 버전(v4) 확인하고, 6인 플레이 환경에서 테스트해 보는 것이 좋으며, 불필요한 모드나 트리거가 포함되지 않은지 확인해야 한다. Lurker D 18 Way ~=FINAL=~ is a large-scale custom map with a 4096×4096 tile size that utilizes the Wasteland tileset to create a vast battlefield. Designed primarily for 6-player matches, the map is better suited for individual play rather than team play. The gameplay follows a round-based system that progresses every 30 seconds, where players collect minerals and perform upgrades each round. Players must gather resources to strengthen their units, with the ultimate goal of destroying the opponent's base or being the last survivor. The map structure consists of several islands connected by land routes, allowing for free movement and tactical positioning using various high ground and obstacles. Each island features specialized resource gathering points and defensive turrets, allowing players to gain an advantage through terrain utilization. A variety of upgrade options—including attack, defense, and movement speed—allow for diverse strategic choices. The game ends after 30 rounds, and the winner is the team (or individual) with the highest score, calculated based on the total minerals collected and the number of remaining units. Due to its fast-paced progression and repeatable round system, the map offers high replay value and is compatible with custom game modes for various variations. As is typical for custom maps, it features customized rules and triggers, requiring players to master both micro-management and macro-strategy. The difficulty is moderate; while beginners may struggle with round timing and resource management, the map offers enough depth for experienced players to execute high-level strategies. This map is ideal for players with quick decision-making skills and resource management abilities, especially those who prefer compact tactics and precise timing. Before playing, it is recommended to ensure you are using the latest version (v4), test it in a 6-player environment, and verify that no unnecessary mods or triggers are active.
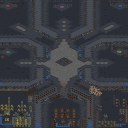
5v3 킬 4분 하드컴 (5v3 Kill4Min HardComp)
스타크래프트 브루드워의 유즈맵으로 유명한 《5v3 Kill4Min HardComp》는 5명의 플레이어가 3명의 컴퓨터를 상대로 펼치는 하드코어 디펜스 장르의 맵이다. 맵 제목에서 알 수 있듯이 4분 이내에 컴퓨터를 전멸시키는 것이 목표로, 극한의 속도와 전략이 요구되는 공격형 디펜스 맵으로 분류된다. 내부 설명에 'Insane CompKill 4 Min upgrade!Mine for Gas!'라는 문구가 포함되어 있어, 빠른 자원 채취와 효율적인 업그레이드, 그리고 치밀한 공격 타이밍이 승리의 ключ임을 유추할 수 있다. 맵의 구조는 중앙에 넓은 평야가 펼쳐져 있으며, 주변으로는 공격로가 좁고 복잡하게 배치되어 있어 컴퓨터의 공격을 방어하면서 동시에 신속히 자원을 확보해야 한다. 특히 4분의 제한 시간은 매우 촉박한 편으로, 초보자가 잡기에는 상당한 난이도를 자랑하며, 숙련된 플레이어라도 미세한 컨트롤과 타이밍이 요구된다. 플레이어는 초반에 자원을 빠르게 확보한 뒤, 업그레이드를 통해 유닛의 화력을 극대화시켜야 하며, 컴퓨터의 끊임없는 공격 패턴을 예측하고 방어선을 구축해야 한다. 맵의 특징상 다수의 유닛을 동원한 밀집 공격보다는 소수 정예 유닛을 통한 기습 공격이 더 효과적일 수 있으며, 자원 채취 속도와 업그레이드 우선순위가 승패를 좌우할 가능성이 크다. 이 맵을 즐기기 위해서는 빠른 판단력과 효율적인 자원 관리 능력이 필수적이며, 특히 컴퓨터의 공격 패턴을 숙지하고 대비하는 것이 중요하다. 초보자는 난이도에 적응하기 위해 연습 모드를 활용하는 것도 좋은 방법이다. 또한, 맵의 제한 시간이 짧기 때문에 팀원 간의 원활한 소통과 역할 분담이 필수적이며, 개개인의 실력이 맵의 성공 여부를 크게 좌우할 수 있다. 추천 대상은 빠른 속도감을 즐기는 플레이어나 디펜스 장르에 익숙한 숙련자이며, 초보자의 경우 난이도를 낮춘 버전이나 연습 모드를 먼저 시도해보는 것을 권장한다. 플레이 전에는 맵의 구조와 컴퓨터의 공격 패턴을 미리 숙지하고, 자원 채취와 업그레이드 우선순위를 충분히 계획하는 것이 중요하다. 특히, 4분의 제한 시간 내에 모든 컴퓨터를 전멸시키는 것이 목표이므로, 자원 채취와 공격 타이밍을 조율하는 데 주의를 기울여야 한다. 《5v3 Kill4Min HardComp》 is a famous custom map from *StarCraft: Brood War*, where five players face off against three computer opponents in a hardcore defense-style game. As the name suggests, the goal is to wipe out all three computers within four minutes, making it a fast-paced, high-stress attack-focused defense map. The internal description includes the phrase *"Insane CompKill 4 Min upgrade! Mine for Gas!"*, hinting that victory depends on rapid resource gathering, efficient upgrades, and precise timing. The map features a wide central plain surrounded by narrow, maze-like pathways where players must defend against relentless AI attacks while securing resources quickly. The four-minute time limit is extremely tight, posing a significant challenge for beginners and demanding fine-tuned control and timing even from experienced players. Players must secure resources early, maximize unit power through upgrades, and build defensive lines while predicting the AI’s attack patterns. Rather than relying on massed units, this map favors elite strikes with small groups, where resource collection speed and upgrade priorities often decide the outcome. Success requires quick decision-making, efficient resource management, and a deep understanding of the AI’s attack behaviors. Beginners may find practice mode helpful to adapt to the difficulty. Strong team communication and role distribution are also essential due to the short time limit, as individual skill heavily influences the map’s outcome. This map is best suited for players who enjoy fast-paced gameplay or have experience with defense-style games, while newcomers should try lower-difficulty versions or practice modes first. Before playing, it’s crucial to study the map layout and AI attack patterns, plan resource and upgrade priorities carefully, and carefully coordinate resource gathering with attack timing to ensure all three computers are eliminated within the four-minute window.
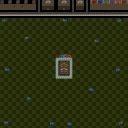
Cat&MouseMinWars Gas Stack
'캣 앤 마우스 오레 워즈 가스 스택(Cat & Mouse Ore Wars Gas Stack)'은 스타크래프트 브루드워 유즈맵 중 캣앤마우스 장르에 자원 채취와 스택 메커닉을 결합한 6인용 맵이다. 파일명 'Cat And Mice Ore Wars.scx'와 내부 제목에서 확인되듯, 쥐(Mice) 진영은 광물을 채취해 자금을 모으고 고양이(Cat) 진영은 이들을 사냥하며 승부를 가르는 비대칭 구도를 띤다. 사막 타일셋의 2048x2048 대형 맵에서 진행되며, '광물 채취로 돈 벌기', '살해로 돈 벌기', '모든 고양이와 새끼, 독수리 처치'라는 설명대로 생존과 사냥, 자원 관리가 동시에 요구된다. 플레이는 쥐 진영이 기지를 짓고 광물을 캐며 방어 타워를 올리는 한편, 고양이 진영은 강력한 유닛으로 쥐를 압박하는 방식으로 전개된다. '가스 스택'이라는 명칭에서 보듯 가스 자원 누적이나 유닛 강화 시스템이 변수로 작용할 것으로 보인다. 고양이 측은 킷튼(새끼)과 이글(독수리) 같은 추가 유닛을 운용하며, 쥐 측은 사망 시 게임에서 탈락하므로 생존이 최우선이다. 맵 크기가 넓어 초반 정찰과 멀티 태스킹이 중요하며, 자원 스택 한도나 업그레이드 트리거가 어떻게 설계됐느냐에 따라 후반 밸런스가 갈릴 수 있다. 이 맵은 캣앤마우스 기본 규칙에 익숙하면서도 자원 관리와 유닛 컨트롤을 동시에 즐기고 싶은 중급 이상 유저에게 적합하다. 6인 풀방 기준 20~40분 내외 소요되며, 고양이 1명 대 쥐 5명 구도일 때 밸런스가 가장 안정적일 것으로 추정된다. 플레이 전 트리거상 자원 상한선, 고양이 진영 강화 주기, 승리 조건(전멸 vs 시간제한) 여부를 확인하면 더 전략적으로 임할 수 있다. 고전 캣앤마우스 팬이라면 오레 워즈 시리즈 변종으로 한 번쯤 경험해 볼 만하다. 'Cat & Mouse Ore Wars Gas Stack' is a 6-player StarCraft Brood War UMS map that combines the Cat & Mouse genre with resource mining and stacking mechanics. As indicated by the filename 'Cat And Mice Ore Wars.scx' and internal title, the Mice faction mines minerals to earn funds while the Cat faction hunts them, creating an asymmetric structure. Played on a large 2048x2048 desert tileset, the map demands simultaneous survival, hunting, and resource management as described: 'get money for saving,' 'get money for killing,' 'mine for ore,' and 'kill all cats, kittens, and eagles.' Gameplay unfolds with Mice building bases, mining minerals, and erecting defensive towers, while Cats pressure them with powerful units. The 'Gas Stack' name suggests gas accumulation or unit upgrade systems act as variables. Cats control additional units like Kittens and Eagles, and Mice are eliminated upon death, making survival paramount. The large map size makes early scouting and multitasking critical, and late-game balance likely depends on how resource stack limits and upgrade triggers are designed. This map suits intermediate or higher players familiar with Cat & Mouse basics who want to enjoy resource management and unit control together. A full 6-player game takes roughly 20–40 minutes, and balance is estimated to be most stable with 1 Cat versus 5 Mice. Checking trigger details like resource caps, Cat upgrade cycles, and victory conditions (elimination vs. time limit) before playing allows a more strategic approach. Fans of classic Cat & Mouse maps may find this Ore Wars variant worth experiencing.
최근 등록된 맵
새로 추가된 파일과 버전을 확인하세요.
Octagon 1.0 SandBox
스타크래프트 브루드워의 유즈맵 'Octagon 1.0 SandBox'는 사각형의 맵 중앙에 거대한 거대 둥근 오각형 구조물이 자리 잡고 있는 독특한 디자인으로 주목받는 맵입니다. 맵의 가장 큰 특징은 중앙의 거대한 구멍으로, 플레이어들은 이 공간을 통해 자원을 채취하거나 전략적인 이동을 시도할 수 있습니다. 사막 타일셋을 기반으로 한 황량한 분위기는 맵의 전략적 깊이를 더하며, 중앙 구조물의 형태와 배치로 인해 다양한 전술이 가능한 샌드박스형 맵으로 분류됩니다. 이 맵은 4명의 플레이어가 동시에 참여할 수 있으며, 'Use Map Settings' 모드를 통해 맵의 환경을 자유롭게 설정할 수 있는 샌드박스 기능을 제공합니다. 제작자 주석에 따르면 버전 2.5.3까지 개발된 이 맵은 초기 디자인부터 사용자 정의가 가능한 요소들을 고려해 제작되었음을 알 수 있습니다. 중앙의 커다란 구멍은 단순히 시야를 가리는 역할뿐만 아니라, 자원 채취와 기지 방어, 또는突然间의 공격 루트로도 활용될 수 있어 전략적 선택의 폭을 넓혀줍니다. 플레이어들은 중앙 구조물의 외부와 내부를 오가며 자원을 확보하고, 상대방의 움직임을 방어하거나 공격할 수 있는 다채로운 플레이가 가능합니다. 특히 사막 지형의 황량한 분위기는 긴장감을 조성하며, 맵의 중앙 구조물은 단순히 장식적 요소가 아니라 전략적 요충지로 기능합니다. 샌드박스 모드에서 제공되는 맵 설정은 사용자마다 다른 환경을 경험할 수 있도록 하며, 이는 이 맵의 재플레이 가능성을 크게 높이는 요소입니다. 이 맵은 초보자부터 숙련자까지 모두 즐길 수 있는 유즈맵으로, 특히 전략적 사고와 적응력을 키우고자 하는 플레이어들에게 추천합니다. 맵의 구조상 중앙을 차지하는 것이 중요할 수 있으므로, 초기 자원 확보와 방어 전략을 신중히 계획해야 합니다. 또한 샌드박스 모드에서 제공되는 다양한 설정들을 활용해 자신에게 맞는 플레이 스타일을 찾아볼 수 있습니다. 이 맵을 플레이하기 전에는 중앙 구조물의 형태와 자원 배치, 그리고 샌드박스 설정을 미리 확인해 보는 것이 좋습니다. 맵의 중앙 구멍을 어떻게 활용할 것인지, 그리고 방어와 공격의 균형을 어떻게 맞출 것인지에 따라 게임의 결과가 크게 달라질 수 있습니다. 샌드박스 모드의 경우, 맵의 난이도와 자원량을 조정할 수 있으므로 자신에게 맞는 설정을 찾아보는 것도 중요합니다. Octagon 1.0 SandBox is a unique custom map for StarCraft: Brood War, featuring a massive pentagonal structure at the center of a square-shaped map. The most striking feature is the large circular hole in the middle, allowing players to gather resources or execute strategic movements. Based on the desert tile set, the barren atmosphere enhances the map's strategic depth, making it a versatile sandbox-style map where various tactics can be employed. Designed for four players, this map offers a sandbox mode where the environment can be customized through the 'Use Map Settings' feature. According to the creator's notes, the map has evolved up to version 2.5.3, incorporating elements that allow for user-defined settings from the outset. The central hole is not just a visual element but also serves as a critical strategic point for resource gathering, base defense, or sudden attacks. Players can move between the exterior and interior of the central structure to secure resources while defending against or attacking opponents. The desolate desert setting adds tension, and the central structure acts as more than just a decorative element—it is a key strategic point. The sandbox mode’s customizable settings enable each player to experience a unique environment, significantly enhancing the map’s replayability. This map is recommended for players of all skill levels, especially those looking to develop strategic thinking and adaptability. Securing the center is crucial, so careful planning of initial resource gathering and defense strategies is essential. Players can also explore different playstyles by utilizing the various settings provided in the sandbox mode. Before playing, it is advisable to familiarize yourself with the central structure’s layout, resource distribution, and sandbox settings. How you utilize the central hole for resources, defense, or attacks can greatly influence the game’s outcome. In sandbox mode, adjusting the map’s difficulty and resource quantity to suit your preferences is also important.
광산에서 광물캐기 1 [정식] (Mining in the Mine 1 [Official])
스타크래프트 브루드워 유즈맵 '광산에서 광물캐기 1 [정식]'은 배드랜드 타일셋을 배경으로 6인용 자원 채취 및 전투 콘텐츠를 제공하는 UMS 맵이다. 제작자 Eregular이 버그 수정과 치트 위치 조정을 거쳐 정식 버전으로 배포한 만큼, 기존 버전에서 지적되던 안정성 문제가 상당 부분 해소된 것으로 보인다. 핵심 플레이는 제목 그대로 광산에서 미네랄을 캐며 자원을 축적하고, 이를 바탕으로 병력을 생산해 적을 제압하거나 임무를 완수하는 흐름으로 추정된다. 128x128 크기의 널찍한 전장은 다수의 플레이어가 동시에 채취 활동을 벌이기에 충분한 공간을 제공하며, 치트 키가 접근하기 쉬운 위치로 이동했다는 설명은 초보자나 캐주얼 유저도 부담 없이 자원 경쟁과 전투를 즐길 수 있도록 난이도 완화 장치를 마련했음을 시사한다. 트리거 기반의 이벤트와 치트 기능이 결합되어 있어 단순 반복 채취를 넘어선 전략적 판단이나 돌발 상황 대처가 요구될 여지가 있다. 6인 풀 인원 기준으로 협동 또는 팀 대결 구도가 형성될 가능성이 높으며, 혼자 즐기기에도 치트 지원을 통해 진행 속도를 조절할 수 있는 유연함이 강점이다. 플레이 전에는 치트 활성화 여부와 승리 조건(적 전멸, 특정 건물 파괴, 자원 목표량 달성 등)을 호스트 설정에서 확인하는 것이 좋다. 자원 관리와 대규모 전투를 가볍게 즐기고 싶은 유저, 고전 유즈맵 감성을 찾는 올드비 게이머에게 추천할 만한 맵이다. This StarCraft Brood War UMS map, "Mining in the Mine 1 [Official]," is set on the Badlands tileset and offers a 6-player resource gathering and combat experience. Released as an official version by creator Eregular after bug fixes and cheat position adjustments, it appears to have resolved stability issues found in earlier versions. The core gameplay loop, as the title suggests, likely revolves around mining minerals in the mine, accumulating resources, producing an army, and defeating enemies or completing objectives. The spacious 128x128 map provides ample room for multiple players to mine simultaneously. The note that cheat keys have been moved to more accessible locations suggests a difficulty relief mechanism allowing beginners or casual users to enjoy resource competition and combat without pressure. The combination of trigger-based events and cheat functions implies strategic decision-making or handling of unexpected situations beyond simple repetitive mining. With a full 6-player count, cooperative or team-versus-team structures are probable, while solo play is also flexible thanks to cheat support for pacing control. Before playing, it is advisable to check host settings for cheat activation and victory conditions (enemy annihilation, specific building destruction, resource goal achievement, etc.). This map is recommended for users who want to enjoy resource management and large-scale battles lightly, or for old-school gamers seeking classic UMS nostalgia.
Lurker D 18 Way ~=FINAL=~
Lurker D 18 Way ~=FINAL=~는 4096×4096 타일 크기의 대형 유즈맵으로, 황무지 타일셋을 사용해广阔한 전장을 구현한다. 이 맵은 6인 플레이를 기준으로 설계되며, 팀 플레이보다는 개인 경기 방식을 권장한다. 게임 흐름은 30초마다 라운드가 진행되며, 각 라운드마다 미네랄을 채집하고 업그레이드를 진행한다.players는 각 라운드마다 자원을 모아 유닛을 강화하고, 최종적으로 상대방의 기지를 파괴하거나 생존을 유지해야 한다. map 구조는 여러 개의 섬과 연결된 육로로 구성되어 이동이 자유롭고, 다양한 고지점과 장애물을 활용한 전술적 포지셔닝이 가능하다. 각 섬마다 특화된 자원 채취 지점과 방어 터렛이 배치되어 있어, 플레이어는 지형 활용을 통해 우위를 점할 수 있다. 업그레이드 옵션은 공격력, 방어력, 이동 속도 등 다채롭게 제공되어 전략적 선택이 가능하다. 게임 종료는 30라운드 후 최종 점수가 가장 높은 팀(또는 개인)에게 주어지며, 점수는 채집한 미네랄량과 남은 유닛 수를 종합해 산출된다. 이 map은 빠른 경기 전개와 반복 가능한 라운드 시스템으로 인해 리플레이 가치가 높으며, 커스텀 게임 모드와 호환되어 다양한 변형이 가능하다. 유즈맵 특성상 커스터마이징된 규칙과 트리거가 존재하며, 플레이어의 마이크로 매니지먼트와 매크로 전략이 동시에 요구된다. 난이도는 보통 수준으로, 초보자는 라운드 타이밍과 자원 관리 습관을 익히는 데 어려움을 느낄 수 있지만, 경험이 쌓이면 고난도 전략을 구사하기에 충분한 깊이 제공한다. 이 맵을 즐기기에 적합한 플레이어는 빠른 판단력과 리소스 조율 능력이며, 특히 컴파クト한 전술과 타이밍 조작을 선호하는 유저에게 추천한다. 플레이 전에는 맵 파일을 최신 버전(v4) 확인하고, 6인 플레이 환경에서 테스트해 보는 것이 좋으며, 불필요한 모드나 트리거가 포함되지 않은지 확인해야 한다. Lurker D 18 Way ~=FINAL=~ is a large-scale custom map with a 4096×4096 tile size that utilizes the Wasteland tileset to create a vast battlefield. Designed primarily for 6-player matches, the map is better suited for individual play rather than team play. The gameplay follows a round-based system that progresses every 30 seconds, where players collect minerals and perform upgrades each round. Players must gather resources to strengthen their units, with the ultimate goal of destroying the opponent's base or being the last survivor. The map structure consists of several islands connected by land routes, allowing for free movement and tactical positioning using various high ground and obstacles. Each island features specialized resource gathering points and defensive turrets, allowing players to gain an advantage through terrain utilization. A variety of upgrade options—including attack, defense, and movement speed—allow for diverse strategic choices. The game ends after 30 rounds, and the winner is the team (or individual) with the highest score, calculated based on the total minerals collected and the number of remaining units. Due to its fast-paced progression and repeatable round system, the map offers high replay value and is compatible with custom game modes for various variations. As is typical for custom maps, it features customized rules and triggers, requiring players to master both micro-management and macro-strategy. The difficulty is moderate; while beginners may struggle with round timing and resource management, the map offers enough depth for experienced players to execute high-level strategies. This map is ideal for players with quick decision-making skills and resource management abilities, especially those who prefer compact tactics and precise timing. Before playing, it is recommended to ensure you are using the latest version (v4), test it in a 6-player environment, and verify that no unnecessary mods or triggers are active.
Cat&MouseMinWars Gas Stack
'캣 앤 마우스 오레 워즈 가스 스택(Cat & Mouse Ore Wars Gas Stack)'은 스타크래프트 브루드워 유즈맵 중 캣앤마우스 장르에 자원 채취와 스택 메커닉을 결합한 6인용 맵이다. 파일명 'Cat And Mice Ore Wars.scx'와 내부 제목에서 확인되듯, 쥐(Mice) 진영은 광물을 채취해 자금을 모으고 고양이(Cat) 진영은 이들을 사냥하며 승부를 가르는 비대칭 구도를 띤다. 사막 타일셋의 2048x2048 대형 맵에서 진행되며, '광물 채취로 돈 벌기', '살해로 돈 벌기', '모든 고양이와 새끼, 독수리 처치'라는 설명대로 생존과 사냥, 자원 관리가 동시에 요구된다. 플레이는 쥐 진영이 기지를 짓고 광물을 캐며 방어 타워를 올리는 한편, 고양이 진영은 강력한 유닛으로 쥐를 압박하는 방식으로 전개된다. '가스 스택'이라는 명칭에서 보듯 가스 자원 누적이나 유닛 강화 시스템이 변수로 작용할 것으로 보인다. 고양이 측은 킷튼(새끼)과 이글(독수리) 같은 추가 유닛을 운용하며, 쥐 측은 사망 시 게임에서 탈락하므로 생존이 최우선이다. 맵 크기가 넓어 초반 정찰과 멀티 태스킹이 중요하며, 자원 스택 한도나 업그레이드 트리거가 어떻게 설계됐느냐에 따라 후반 밸런스가 갈릴 수 있다. 이 맵은 캣앤마우스 기본 규칙에 익숙하면서도 자원 관리와 유닛 컨트롤을 동시에 즐기고 싶은 중급 이상 유저에게 적합하다. 6인 풀방 기준 20~40분 내외 소요되며, 고양이 1명 대 쥐 5명 구도일 때 밸런스가 가장 안정적일 것으로 추정된다. 플레이 전 트리거상 자원 상한선, 고양이 진영 강화 주기, 승리 조건(전멸 vs 시간제한) 여부를 확인하면 더 전략적으로 임할 수 있다. 고전 캣앤마우스 팬이라면 오레 워즈 시리즈 변종으로 한 번쯤 경험해 볼 만하다. 'Cat & Mouse Ore Wars Gas Stack' is a 6-player StarCraft Brood War UMS map that combines the Cat & Mouse genre with resource mining and stacking mechanics. As indicated by the filename 'Cat And Mice Ore Wars.scx' and internal title, the Mice faction mines minerals to earn funds while the Cat faction hunts them, creating an asymmetric structure. Played on a large 2048x2048 desert tileset, the map demands simultaneous survival, hunting, and resource management as described: 'get money for saving,' 'get money for killing,' 'mine for ore,' and 'kill all cats, kittens, and eagles.' Gameplay unfolds with Mice building bases, mining minerals, and erecting defensive towers, while Cats pressure them with powerful units. The 'Gas Stack' name suggests gas accumulation or unit upgrade systems act as variables. Cats control additional units like Kittens and Eagles, and Mice are eliminated upon death, making survival paramount. The large map size makes early scouting and multitasking critical, and late-game balance likely depends on how resource stack limits and upgrade triggers are designed. This map suits intermediate or higher players familiar with Cat & Mouse basics who want to enjoy resource management and unit control together. A full 6-player game takes roughly 20–40 minutes, and balance is estimated to be most stable with 1 Cat versus 5 Mice. Checking trigger details like resource caps, Cat upgrade cycles, and victory conditions (elimination vs. time limit) before playing allows a more strategic approach. Fans of classic Cat & Mouse maps may find this Ore Wars variant worth experiencing.
5v3 킬 4분 하드컴 (5v3 Kill4Min HardComp)
스타크래프트 브루드워의 유즈맵으로 유명한 《5v3 Kill4Min HardComp》는 5명의 플레이어가 3명의 컴퓨터를 상대로 펼치는 하드코어 디펜스 장르의 맵이다. 맵 제목에서 알 수 있듯이 4분 이내에 컴퓨터를 전멸시키는 것이 목표로, 극한의 속도와 전략이 요구되는 공격형 디펜스 맵으로 분류된다. 내부 설명에 'Insane CompKill 4 Min upgrade!Mine for Gas!'라는 문구가 포함되어 있어, 빠른 자원 채취와 효율적인 업그레이드, 그리고 치밀한 공격 타이밍이 승리의 ключ임을 유추할 수 있다. 맵의 구조는 중앙에 넓은 평야가 펼쳐져 있으며, 주변으로는 공격로가 좁고 복잡하게 배치되어 있어 컴퓨터의 공격을 방어하면서 동시에 신속히 자원을 확보해야 한다. 특히 4분의 제한 시간은 매우 촉박한 편으로, 초보자가 잡기에는 상당한 난이도를 자랑하며, 숙련된 플레이어라도 미세한 컨트롤과 타이밍이 요구된다. 플레이어는 초반에 자원을 빠르게 확보한 뒤, 업그레이드를 통해 유닛의 화력을 극대화시켜야 하며, 컴퓨터의 끊임없는 공격 패턴을 예측하고 방어선을 구축해야 한다. 맵의 특징상 다수의 유닛을 동원한 밀집 공격보다는 소수 정예 유닛을 통한 기습 공격이 더 효과적일 수 있으며, 자원 채취 속도와 업그레이드 우선순위가 승패를 좌우할 가능성이 크다. 이 맵을 즐기기 위해서는 빠른 판단력과 효율적인 자원 관리 능력이 필수적이며, 특히 컴퓨터의 공격 패턴을 숙지하고 대비하는 것이 중요하다. 초보자는 난이도에 적응하기 위해 연습 모드를 활용하는 것도 좋은 방법이다. 또한, 맵의 제한 시간이 짧기 때문에 팀원 간의 원활한 소통과 역할 분담이 필수적이며, 개개인의 실력이 맵의 성공 여부를 크게 좌우할 수 있다. 추천 대상은 빠른 속도감을 즐기는 플레이어나 디펜스 장르에 익숙한 숙련자이며, 초보자의 경우 난이도를 낮춘 버전이나 연습 모드를 먼저 시도해보는 것을 권장한다. 플레이 전에는 맵의 구조와 컴퓨터의 공격 패턴을 미리 숙지하고, 자원 채취와 업그레이드 우선순위를 충분히 계획하는 것이 중요하다. 특히, 4분의 제한 시간 내에 모든 컴퓨터를 전멸시키는 것이 목표이므로, 자원 채취와 공격 타이밍을 조율하는 데 주의를 기울여야 한다. 《5v3 Kill4Min HardComp》 is a famous custom map from *StarCraft: Brood War*, where five players face off against three computer opponents in a hardcore defense-style game. As the name suggests, the goal is to wipe out all three computers within four minutes, making it a fast-paced, high-stress attack-focused defense map. The internal description includes the phrase *"Insane CompKill 4 Min upgrade! Mine for Gas!"*, hinting that victory depends on rapid resource gathering, efficient upgrades, and precise timing. The map features a wide central plain surrounded by narrow, maze-like pathways where players must defend against relentless AI attacks while securing resources quickly. The four-minute time limit is extremely tight, posing a significant challenge for beginners and demanding fine-tuned control and timing even from experienced players. Players must secure resources early, maximize unit power through upgrades, and build defensive lines while predicting the AI’s attack patterns. Rather than relying on massed units, this map favors elite strikes with small groups, where resource collection speed and upgrade priorities often decide the outcome. Success requires quick decision-making, efficient resource management, and a deep understanding of the AI’s attack behaviors. Beginners may find practice mode helpful to adapt to the difficulty. Strong team communication and role distribution are also essential due to the short time limit, as individual skill heavily influences the map’s outcome. This map is best suited for players who enjoy fast-paced gameplay or have experience with defense-style games, while newcomers should try lower-difficulty versions or practice modes first. Before playing, it’s crucial to study the map layout and AI attack patterns, plan resource and upgrade priorities carefully, and carefully coordinate resource gathering with attack timing to ensure all three computers are eliminated within the four-minute window.
맵 선택 가이드
태그는 맵의 핵심 특징을 빠르게 설명하지만 제작 버전마다 규칙이 다를 수 있습니다. 상세 설명에서 권장 인원, 난이도, 플레이 시간과 버전을 함께 확인한 뒤 다운로드하세요.