
자원 관리 스타크래프트 맵 모음
'자원 관리' 태그가 등록된 맵을 모았습니다. 장르 하나로 찾기 어려운 플레이 방식, 난이도와 특징을 중심으로 인기 맵과 최신 맵을 비교해 보세요.
- 등록 맵
- 245개
- 누적 다운로드
- 89
- 누적 조회
- 10,302
인기 맵
다운로드와 조회 반응이 높은 맵입니다.
![파도 MAP (PADO MAP) [ver 1.5] 맵 미리보기](https://cdn-star-data.huzy.net/thumbnail_134ea0f04b0e4b348afb6a5dcc4fb3e5.jpg)
파도 MAP (PADO MAP) [ver 1.5]
PADO MAP [ver 1.5]는 스타크래프트 브루드워의 대표적인 유즈맵으로, 2004년 제작된 이후 오랫동안 아시아 서버에서 사랑받아 온 맵이다. 이 맵은 ‘파도파도’라는 클랜의 주도로 제작되었으며, ‘PADO’라는 이름 또한 해당 클랜의 약칭에서 유래한 것으로 추정된다. 맵의 구조는 중앙에 위치한 넓은 공간을 surrounded by 8개의 진영이 둘러싼 형태를 띠고 있으며, 각 진영은 고유의 방어 시설을 갖추고 있다. 플레이어는 각자 독립된 미네랄과 베스핀 가스를 확보한 상태에서 시작하며, 중앙을 두고 벌어지는 전투와 자원 관리가 핵심 포인트다. 맵의 테마는 군사적 대결에 가까운 디펜스와 리소스 관리형 전략으로, 밀집된 진영 간 전투와 더불어 자원 확보 경쟁이 치열할 것으로 보인다. 8명의 플레이어가 참여하는 이 맵은 팀플레이보다는 각자 독립된 목표를 달성하는 개별 경쟁형 구조로 보이며, 맵의 해상도와 타일셋은 당시로서는 대규모 전투를 표현하기에 충분한 수준이었다. 맵의 인코딩은 cp949로 한국어 환경에 최적화되어 있어, 내부 설명과 제목에서도 한글이 깨짐 없이 정상적으로 표시된다. PADO MAP [ver 1.5]는 오랜 시간 검증된 맵답게 밸런스와 재미 요소 모두에서 안정적인 평가를 받은 것으로 추정되며, 특히 클랜 활동이나 친목 중심의 플레이에 적합할 것이다. 다만, 8명의 플레이어가 참여하기 때문에 인원 모집이 다소 어려울 수 있으며, 각자 전략을 세우는 데 시간이 소요될 수 있음을 염두에 두어야 한다. 초기 자원 확보와 중앙 점령 타이밍이 승패를 좌우할 가능성이 높으므로, 자원 관리와 방어 시설 구축 계획을 미리 세워두는 것이 중요하다. 또한, 맵의 구조상 중앙 지역은 전투가 자주 발생할 수 있는 만큼, 전투 시뮬레이션이나 전략적 대응 능력이 요구될 것으로 보인다. 이 맵을 처음 플레이하는 유저는 맵의 특성을 충분히 이해한 후 참여하는 것이 좋으며, 특히 4명 이상의 인원이 모일 때 더욱 몰입도 높은 플레이가 가능할 것이다. 맵의 제작 시점이 2004년임을 고려할 때, 당시의 플레이 스타일과 밸런스를 반영하고 있으므로, 현대 유즈맵과는 다소 다른 감각을 느낄 수 있다. nevertheless, 이 맵은 스타크래프트 유즈맵의 역사와 문화를 느낄 수 있는 소중한 작품으로, 여전히 즐길 가치가 충분하다. 맵의 제목과 내부 설명에 등장하는 ‘파도파도’라는 클랜명은 한국 스타크래프트 커뮤니티의 한 시대를 상징하는 존재로, 이 맵을 통해 당시의 클랜 문화와 경쟁심을 간접적으로 체험할 수 있을 것이다. The PADO MAP [ver 1.5] is a classic custom map from StarCraft: Brood War, created in 2004 and beloved in Asian servers for many years. The map was developed under the leadership of the clan "PADO" (short for "파도파도"), whose name is derived from the clan's abbreviation. Its layout features a wide central area surrounded by eight player bases, each equipped with unique defensive structures. Players begin with their own mineral patches and Vespene gas, and the core gameplay revolves around battles in the center and resource management. The map leans into a military-style defense and resource-focused strategy, with intense combat between clustered bases and fierce competition for resources. Designed for eight players, it follows an individual competitive structure rather than team play, and its resolution and tileset were more than sufficient to depict large-scale battles at the time. The map uses CP949 encoding, optimized for Korean environments, ensuring that internal descriptions and titles display Korean text without corruption. As a long-standing, well-tested map, PADO MAP [ver 1.5] is likely to have a stable balance and engaging mechanics, making it ideal for clan activities or casual play. However, recruiting eight players can be challenging, and each player will need time to develop their own strategy. Early resource collection and timing for securing the center are crucial to victory, so planning your resource management and defensive structures in advance is essential. Given the map’s layout, the central area will see frequent combat, requiring strong combat simulation skills and strategic adaptability. New players should familiarize themselves with the map’s mechanics before joining, and games with four or more players tend to be more immersive. Considering its 2004 origins, the map reflects the playstyles and balance of that era, offering a different feel compared to modern custom maps. Still, it remains a valuable piece of StarCraft custom map history and culture, well worth experiencing. The clan name "파도파도" (PADO), featured in the map’s title and descriptions, symbolizes an era of Korean StarCraft communities, allowing players to indirectly relive the competitive spirit and clan culture of that time.
![개인 랜덤 디펜스 [Gold] 다크99 (Personal Random Defense [Gold] Dark99) 맵 미리보기](https://cdn-star-data.huzy.net/thumbnail_43ab35d6a0de45289d7667ae70cd48a2.jpg)
개인 랜덤 디펜스 [Gold] 다크99 (Personal Random Defense [Gold] Dark99)
이 맵은 스타크래프트: 브루드워의 개인전 랜덤 디펜스 유즈맵으로, 플레이어는 매 라운드마다 랜덤하게 배치되는 적들을 상대하며 건물을 보호하는 것이 주된 목표다. 맵 중앙에 위치한 건물이 보호 대상이 되며, 각 라운드가 시작될 때마다 다양한 종류의 적들이 지정된 경로를 따라 공격을 시도한다. 적들은 맵 상단과 하단에서 등장해 중앙 건물을 향해 이동하는데, 플레이어는 미네랄과 가스를 수집해 건물을 건설하고 유닛을 생산하거나 업그레이드할 수 있다. 미네랄과 가스가 맵 곳곳에 배치되어 있어 자원 관리가 중요하며, 잘못된 배치나 공격 타이밍은 맵을 위기로 몰아넣을 수 있다. 맵의 특징은 랜덤한 적 배치와 함께 각 라운드별로 증가하는 적의 수와 종류에 있다. 초반 라운드는 상대적으로 약한 저글링이나 질럿 위주로 구성되지만, 후반부로 갈수록 하이템플러, 울트라리스크, 캐리어 등 강력한 유닛들이 등장한다. 또한, 맵 곳곳에 배치된 방어 시설이나 포톤 캐논을 활용해 적을 저지하는 것도 중요하다. 이 맵은 특히 방어와 자원 관리에 중점을 둔 전략적 요소와 함께, 랜덤한 요소로 인해 매 플레이마다 다른 경험을 제공한다는 점이 매력적이다. 초보 플레이어는 방어선을 차근차근 구축하며 경험을 쌓는 것이 좋으며, 숙련자들은 자원 채취 효율과 라운드별 적 대응 전략을 최적화하는 데 중점을 두어야 한다. 맵의 디자인과 타일셋은 정글 테마로 구성되어 있어 시각적 즐거움도 제공한다. 다만, 랜덤성이Strongly Random으로 작용하기 때문에, 예측 불가능한 적 배치에 따라 플레이어의 전략이 크게 좌우될 수 있다. 따라서, 맵을 플레이하기 전에는 방어 시설의 배치와 자원 채취 경로를 미리 계획해 두는 것이 중요하다. 이 맵은 디펜스 장르에 익숙한 플레이어들이라면 즐겁게 플레이할 수 있으며, 특히 개인전으로 진행되는 만큼 각 플레이어의 능력과 전략이 직접적으로 반영된다는 점이 매력적이다. 최종적으로, 이 맵은 전략적 깊이와 랜덤한 재미를 동시에 제공하는 훌륭한 디펜스 유즈맵으로 평가할 수 있다. 초보자부터 숙련자까지 모두 즐길 수 있지만, 방어와 자원 관리의 중요성을 충분히 이해하고 있어야만 높은 점수를 얻을 수 있을 것이다. 맵의 난이도는 개인전 디펜스 장르답게 대체로 보통 수준으로 설정되어 있지만, 후반부로 갈수록 급격히 어려워지는 경향이 있다. 따라서, 플레이어는 초반 라운드에서 최대한의 자원을 확보하고, 방어선을 견고히 구축하는 데 주력해야 한다. This map is a custom *StarCraft: Brood War* personal random defense game where players defend a central building against waves of randomly spawned enemies each round. The main goal is to protect the central structure while managing resources and constructing defenses. Enemies spawn from the top and bottom of the map, moving toward the central building along designated paths, and players must gather minerals and gas to build structures, train units, or research upgrades. Resources are scattered across the map, making resource management crucial—poor placement or mistimed attacks can quickly turn the tide against the player. A key feature of the map is its random enemy spawns, with enemy numbers and types increasing each round. Early rounds consist mostly of weaker units like Zerglings and Zealots, but later rounds introduce powerful units such as High Templars, Ultralisks, and Carriers. Utilizing defensive structures like Photon Cannons placed throughout the map is also essential for holding off waves. The map’s appeal lies in its strategic focus on defense and resource management, combined with the unpredictable nature of each playthrough, offering a fresh experience every time. Beginners should gradually build their defenses while gaining experience, while advanced players should optimize resource collection and adapt their strategies for each round. The map’s jungle-themed design and tileset provide visual enjoyment, though the strong randomness means players must adapt quickly to unpredictable enemy placements. Planning defensive layouts and resource paths in advance is highly recommended before playing. This map is perfect for fans of the defense genre, especially since it’s a personal match where each player’s skill and strategy are directly reflected in their performance. Overall, it’s an excellent custom defense map that balances strategic depth with random fun, appealing to both beginners and experts alike. However, to achieve high scores, players must fully grasp the importance of defense and resource management. While the difficulty is generally moderate for a personal defense game, it escalates sharply in later rounds, so securing resources and reinforcing defenses early is critical for success.
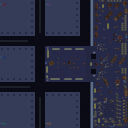
3-5 섬 컴까기 255업 (초당 100원) 완결 (3-5 Island Rush 255 Level Up (100 Resources per Second) Complete)
스타크래프트 브루드워의 유즈맵 가운데 독특한 시스템을 자랑하는 ‘3-5 섬 컴까기 255업(초당100원)완결’은 한정된 공간에서 끊임없이 쏟아지는 적을 상대하며 종족 건물을 255레벨까지 강화하는 컴까기 장르의 정수다. 맵은 4096×4096 크기의 거대한 화산 타일셋으로 구성되어 있으며, 플레이어는 초당 100원의 자원이 지속적으로 공급되는 환경에서 방어 타워를 건설하고 업그레이드하는 데 집중한다. 맵 좌측 하단과 우측 하단에 위치한 플레이어 기지에서 시작해, 중앙과 3~5개의 섬을 오가는 다리 구조를 통해 적의 공격로를 방어해야 한다. 적들은 끊임없이 몰려오며, 1킬당 500원의 추가 자원을 획득할 수 있어 Ekonomy(자원 관리)와 방어 전략이 동시에 요구된다. 일반 유닛의 체력은 3배, 기본 공격력은 2배로 상승하고 생산 속도는 절반으로 줄어드는 등 밸런스 조정을 통해 초당 100원의 자원 생성량을 최대한 활용할 수 있도록 설계되었다. 방어 타워는 각 섬에 배치된 포탑을 중심으로 구축할 수 있으며, 레벨이 오를수록 공격력과 내구력이 증가한다. 맵의 핵심은 ‘완결’이라는 이름에서 짐작할 수 있듯, 255레벨에 도달하는 순간을 목표로 하며 이는 장기간의 전략과 끈기 있는 플레이가 필요한 도전 과제다. 초보 플레이어는 자원의 흐름과 타워의 배치 위치를 우선적으로 숙지해야 하며, 후반부로 갈수록 쏟아지는 적의 물량과 맞서기 위해 효율적인 업그레이드 우선순위를 세워야 한다. 특히 다리 구조를 활용한 입체적인 방어와 섬별 자원 확보가 승리의 열쇠가 될 것이다. 이 맵은 장기간 플레이를 즐기는 유저들에게 적합하며, 자원 관리와 방어 전략의 조합을 통해 게임의 재미를 극대화할 수 있는 작품이다. 시스템의 복잡성 때문에 초보자는 다소 어려울 수 있지만, 익숙해지면 스타크래프트 유즈맵의 새로운 장을 경험할 수 있을 것이다. Among the custom maps of *StarCraft: Brood War*, *"3-5 Island Rushdown 255 Upgrades (100 Minerals/sec) Complete"* stands out for its unique system, blending a confined space with relentless enemy waves in a tower-defense-style "comp" genre where players max out their faction buildings to level 255. The map spans a massive 4096×4096 volcanic tileset, where players start in bases located at the bottom-left and bottom-right corners, connected by bridges to central and 3-5 scattered islands that must be defended. With a steady income of 100 minerals per second, the challenge lies in balancing economy and defense—every kill grants an additional 500 minerals, rewarding efficient resource management. Units are balanced to exploit the 100 minerals/sec flow: their HP is tripled, base attack doubled, and production speed halved, forcing players to optimize upgrades and tower placements. Defensive towers can be built around the cannons on each island, gaining power and durability with each level. The ultimate goal, as hinted by the name *"Complete,"* is reaching level 255—a grueling test of long-term strategy and perseverance. New players should focus on understanding the resource flow and tower positioning early on, while mid-to-late game demands prioritizing upgrades to withstand the escalating enemy waves. Strategic use of the bridge network for layered defenses and securing resources across islands becomes critical. Best suited for players who enjoy extended sessions, this map maximizes fun by merging resource management with tactical defense. While the system’s complexity may overwhelm beginners, mastering it opens up a new dimension of *StarCraft* custom maps.
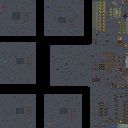
2020 섬노라드 컴까기 (2020 Island Norad Comp-Killing)
‘2020섬노라드컴까기’는 스타크래프트: 브루드워의 대표적인 컴까기 유즈맵으로, 섬 형태의 지형에서 컴퓨터의 끊임없는 공격을 방어하며 업그레이드와 자원 관리 능력을 테스트하는 게임이다. 맵은 우주 타일셋을 기반으로 4096x4096 크기의 거대한 섬 지형을 갖추고 있으며, 플레이어는 중앙 섬에서 건물을 짓고 병력을 생산해 끊임없이 몰려오는 적을 막아내야 한다. 맵 제목과 설명에서 확인할 수 있듯이, 2019년작 ‘신노라드’ 시리즈의 업그레이드 버전으로, 섬 지형으로 변화된 점과 2020년 6월 12일 기준 밸런스와 렉 수정, 인구 패치가 적용된 최신 버전임을 알 수 있다. 게임의 핵심은 효과적인 업그레이드와 건물 배치다. 맵 곳곳에 흩어져 있는 미네랄과 가스 자원을 최대한 활용해 방어 건물과 생산 건물을 전략적으로 배치해야 하며, 컴퓨터의 공격 패턴에 맞춰 업그레이드를 진행해야 한다. 특히 섬 지형이라는 특성상 자원 채취가 다소 제한적이므로, 자원 효율성을 높이는 것이 승리 조건의 핵심이다. 맵은 외부 섬에서 끊임없이 몰려오는 적을 방어하는 구조로, 방어 라인을 어떻게 구축하느냐에 따라 난이도가 크게 달라진다. 또한, 맵의 밸런스 패치로 인해 과거 버전에 비해 더 안정적인 진행이 가능하다는 특징이 있다. 이 맵은 컴까기 장르의 특성상 초보자와 숙련자 모두 즐길 수 있지만, 기본적인 스타크래프트 메커닉을 숙지하고 있어야 원활한 플레이가 가능하다. 초보자의 경우 방어 라인을 구축하는 데 어려움을 느낄 수 있지만, 반복 플레이를 통해 점차 적응할 수 있다. 숙련자라면 업그레이드와 자원 관리, 건물 배치의 최적화를 통해 더 높은 점수를 노릴 수 있다. 또한, 맵의 구조상 섬 지형이기 때문에 공중 유닛의 활용도 중요해진다. 플레이 전에는 맵의 자원 위치와 방어 가능한 지점을 미리 확인하고, 컴퓨터의 공격 패턴에 맞춰 대비를 하는 것이 좋다. The map ‘2020 Island Norad Defense’ is a classic computer-killing (comp-killing) custom map in StarCraft: Brood War, featuring an island terrain where players must defend against endless waves of AI-controlled enemy attacks while managing upgrades and resources. The map utilizes a space-themed tileset and spans a massive 4096x4096 grid, centered around a central island where players construct buildings and produce units to fend off relentless enemy assaults. As indicated by the title and description, this is an upgraded version of the 2019 ‘New Norad’ series, now set on an island terrain with balance adjustments and bug fixes applied as of June 12, 2020. The core gameplay revolves around strategic building placement and efficient upgrades. Players must gather scattered minerals and gas resources to build defensive and production structures, adapting to the AI’s attack patterns. The island terrain restricts resource collection, making resource efficiency crucial for success. The map’s structure forces players to defend against waves of enemies approaching from the outer islands, with the arrangement of defenses playing a decisive role in difficulty and success. Recent balance patches ensure a more stable and polished experience compared to earlier versions. This comp-killing map appeals to both beginners and experienced players, though familiarity with StarCraft mechanics is recommended for smooth gameplay. Beginners may struggle initially with setting up defense lines but can improve through repeated play. Advanced players will focus on optimizing upgrades, resource management, and building placement for higher scores. The island terrain also emphasizes the importance of air units in defense strategies. Before playing, it’s advisable to scout resource locations and potential defense points to prepare for the AI’s attack patterns.
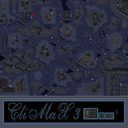
마린키우기 CliMaX 3 (Marine Growth CliMaX 3)
브루드워의 클래식한 유즈맵 장르인 ‘마린키우기’ 시리즈의 최신작, ‘마린키우기 CliMaX 3 1.7’은 전형적인 RPG 스타일의 성장형 디펜스 맵으로, 플레이어는 마린 유닛을 조종하며 끊임없이 몰려드는 적을 상대로 생존과 자원 관리, 업그레이드를 병행하는 전략을 펼쳐야 한다. 맵의 핵심은 초반 자원 수급과 마린의 레벨업을 통한 능력치 강화에 있으며, 적의 공격 패턴은 초반부터 후반까지 점차적으로 강화되어 긴장감을 유지한다. 특히 맵 중앙의 넓은 평야 지형은 전투 공간으로 활용되며, 적의 기지 주변에는 방어 시설을 건설할 수 있는 공간이 배치되어 있어 방어 라인을 구축할 수 있다. 플레이어는 마린을 강화하는 ‘경험치’와 자원을 획득해 ‘무기’, ‘방어구’, ‘능력치’를 업그레이드할 수 있으며, 이를 통해 점차적으로 적의 공격을 버텨내며 최종 목표를 향해 나아간다. 맵의 구조는 비교적 단순하지만, 레벨업과 아이템 시스템이 도입되어 있어 전략적 깊이가 있다. 초반에는 마린의 기본 능력만으로 버텨야 하지만, 일정 레벨을 달성하면 강력한 스킬이나 아이템을 사용할 수 있게 되며, 적의 공격 패턴도 다채로워진다. 또한 맵 곳곳에 숨겨진 자원이나 보너스 오브젝트가 있어, 이를 적극적으로 활용하는 플레이어가 유리한 고지를 점할 수 있다. 맵의 그래픽은 화산 테마의 타일셋을 사용하여 어둡고 긴장감 있는 분위기를 연출하며, 적 유닛의 디자인도 기존의 마린, 저글링, 히드라리스크 등 클래식한 조합을 유지하고 있다. 이 맵은 초보 플레이어에게는 다소 난해할 수 있지만, 마린 키우기의 기본 메커니즘을 익힌 유저라면 쉽게 적응할 수 있다. 특히 자원 관리와 레벨업 타이밍을 잡는 것이 핵심이며, 방어 시설을 어떻게 배치하느냐에 따라 난이도가 크게 달라진다. 추천하는 플레이 방식은 초반 자원 수급을 중시하며, 적의 공격을 방어하는 동시에 마린의 레벨을 꾸준히 올리는 것이다. 또한 맵의 숨겨진 자원을 찾기 위해 맵을 탐색하는 것도 중요하다. 마린키우기 시리즈의 fans이라면もちろん, RPG 장르의 성장형 디펜스 맵을 즐기는 플레이어에게도 좋은 선택지가 될 것이다. 플레이 전에는 맵의 자원 배치와 적의 공격 패턴을 숙지하는 것이 중요하며, 특히 레벨업 시스템과 아이템의 효과를 숙지하고 있어야 원활한 진행이 가능하다. Marine Growth is the latest installment in the classic Brood War custom map genre, 'Marine Growth CliMaX 3 1.7', a growth-type defense map in the RPG style where players control Marine units to survive against relentless waves of enemies while managing resources and upgrades. The core of the map revolves around early resource collection and leveling up Marines to strengthen their abilities, with enemy difficulty escalating progressively from start to finish. The central expansive plain serves as the primary combat zone, while spaces around enemy bases allow for constructing defensive structures to fortify your position. Players can upgrade Marines using experience points and resources to enhance weapons, armor, and abilities, gradually building the strength needed to overcome the final challenges. The map's structure is straightforward yet strategically deep due to its leveling and item systems. Early gameplay relies on basic Marine abilities, but reaching higher levels unlocks powerful skills and items, while enemy attack patterns diversify. Hidden resources and bonus objects scattered across the map offer advantages to players who actively explore and utilize them. The volcanic-themed tileset creates a dark and tense atmosphere, complemented by classic enemy unit designs like Marines, Zerglings, and Hydralisks. While this map may pose a challenge to beginners, players familiar with the Marine Growth genre will adapt quickly. Resource management and leveling timing are critical, and the strategic placement of defensive structures significantly impacts difficulty. Beginners should prioritize securing early resources while defending against enemy attacks and steadily leveling Marines. Exploring the map to uncover hidden resources is also highly recommended. Fans of the Marine Growth series will undoubtedly enjoy this map, as will those who prefer growth-type defense RPG maps. Before playing, it's essential to understand the map's resource distribution, enemy attack patterns, and the leveling and item systems to ensure smooth progression.
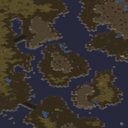
T7) Biting the Bullet (비밀 기지 방어: Antiga Prime Colony) (Biting the Bullet: Secret Staging Area)
스타크래프트 브루드워의 유즈맵 ‘T7) Biting the Bullet’는 테란 캠페인 미션을 재구성한 디펜스 스타일 유즈맵으로, 비밀 기지 방어와 자원 관리를 동시에 요구하는 흥미로운 구조를 자랑한다. 맵은 황무지 타일셋으로 구성되어 있으며, 4096×4096의 넓은 공간에서 진행된다. 플레이어는Single Player로 진행하며, 내부 맵 제목과 설명에서 확인할 수 있듯이 ‘Secret Staging Area’라는 비밀 기지 방어가 주된 목표로 보인다. 맵의 이름 ‘Biting the Bullet’은 ‘이를 악물고 버티다’라는 의미로, 방어전이라는 장르의 특징을 잘 반영하고 있다. 디펜스 요소 외에도 자원 관리와 유닛 생산이 병행되어야 하며, 맵의 넓은 공간은 방어선을 구축하고 strategic point를 확보하는 전략성을 높인다. 맵 곳곳에 배치된 자원 지역과 건물을 보호해야 하는 포인트가 분포되어 있어, 단순히 유닛을 생산해 방어하는 것만으로는 부족하고, 자원 확보와 균형 있는 유닛 조합이 필수적이다. 또한, 맵의 중앙과 외곽에 위치한 주요 거점은 방어의 핵심으로, 이곳을 지키지 못하면 전체 방어 라인이 무너질 위험이 있다. 맵의 구조상 초반 자원 확보가 중요하며, 초반 방어선을 구축하는 타이밍이 승패를 좌우할 가능성이 크다. 이 맵은 초보 플레이어보다는 어느 정도의 전략적 사고와 테란 유닛 운용에 익숙한 플레이어에게 더 어울리며, 특히 방어와 자원 관리, 타이밍을 중시하는 유즈맵爱好者에게 추천할 만하다. 맵의 난이도는 내부에 명시되어 있지 않지만, 캠페인 스타일의 방어전을 재현한 만큼 ‘보통’ 이상의 난이도를 예상할 수 있다. 플레이 전에는 초반 자원 확보와 방어선 구축 계획을 철저히 세우는 것이 중요하며, 유닛의 조합과 생산 우선순위를 신중히 결정해야 한다. 또한, 맵의 넓은 공간을 효율적으로 활용하기 위해 주요 거점을 선점하는 전략이 필요하다. Biting the Bullet is a StarCraft: Brood War UMS map that reimagines a Terran campaign mission into a defense-style game, requiring simultaneous base defense and resource management. The map is built on a wasteland tileset with a 4096×4096 expansive layout, emphasizing strategic depth through its vast terrain. The name ‘Biting the Bullet’ reflects the map’s core challenge—enduring and defending under pressure, which is central to its defense-focused gameplay. The map blends defense mechanics with resource gathering and unit production, making it more than just a straightforward tower defense. Players must secure key resource points and strategic locations scattered across the map to maintain a balanced economy while constructing defensive lines. Critical positions, particularly in the center and outer regions, act as chokepoints—losing them can collapse the entire defensive structure. Early-game resource management is vital, as the timing of base expansion and unit production significantly impacts the outcome. This map is best suited for players with experience in Terran unit control and strategic planning, rather than beginners. The difficulty is likely set to ‘medium’ or higher, given its campaign-inspired design. Before playing, it’s crucial to plan an efficient resource-gathering strategy and prioritize defensive unit compositions. Controlling key strategic points early on is essential to maximize map control and ensure a stable defense.
Z6) 다크 템플러 (Z6) The Dark Templar)
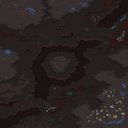
스타크래프트 브루드워의 유즈맵 《Z6) The Dark Templar》는 캠페인 형식을 띤 특수한 시나리오 맵으로, 테란 캠페인에 등장하는 저그의 케리건이 프로토스의 다크 템플러를 발견하는 스토리를 간접적으로 재현한 작품이다. 맵은 정글 타일셋을 기반으로 4096x4096 크기의 거대한 공간을 차지하며, 플레이어는 단일 유닛으로 시작해 광물과 가스를 채취하고 유닛을 생산하며 적을 상대해야 한다. 내부 설명에 따르면 프로토스가 차 행성에 잠복해 있었다는 설정으로, 맵 곳곳에 숨겨진 프로토스 건물을 발견하고 파괴하거나 회피하는 것이 주요 목표로 추정된다. 맵의 배경은 어두운 색감으로 처리되어 있어 탐험과 숨바꼭질 같은 플레이 요소가 강하게 느껴진다. 시야가 제한된 듯한 느낌을 주는 연출로, 플레이어는 맵 곳곳을 탐색하며 숨겨진 자원과 적의 위치를 찾아내야 한다. 특히 초반 자원 확보가 중요한데, 광물과 가스가 제각각 흩어져 있어 효율적인 자원 관리와 이동 경로 설계가 필수적이다. 유닛 생산은 테란과 저그 병력이 혼용되어 있으며, 프로토스 유닛도 일부 등장하는 것으로 보인다. 맵의 진행은 다소 길고 복잡한 편으로, 단순히 적을 물리치는 것보다 탐색과 자원 관리, 그리고 strategic한 판단력이 요구된다. 초보자보다는 중급 이상의 플레이어에게 어울리며, 캠페인 형식의 맵을 좋아하는 유저에게 추천할 만하다. 특히 프로토스와 저그의 조합이 주는 전략적 깊이를 즐길 수 있는 작품이다. 플레이 전에는 맵의 숨겨진 요소와 자원 배치, 그리고 승리 조건(제공되지 않음)을 미리 확인해두는 것이 좋다. 맵의 분위기는 어둡고 긴장감이 넘치며, 차 행성의 어두운 정글을 배경으로 한 듯한 디자인으로 플레이어의 몰입도를 높인다. 유닛의 이동과 전투는 브루드워의 기본 메커니즘을 따르지만, 맵의 규모와 구조가 이를 한층 더 복잡하게 만든다. 전체적으로는 전략적 탐험과 자원 관리가 주를 이루는 시나리오형 유즈맵으로, 캠페인 팬들에게는 흥미로운 경험이 될 것이다. StarCraft: Brood War’s custom map *Z6) The Dark Templar* is a unique scenario-style map with a campaign-inspired narrative, loosely reenacting the story of Kerrigan’s encounter with the Dark Templars from the Terran campaign. The map spans a massive 4096x4096 jungle-themed area, where players begin as a single unit, gathering minerals and gas while producing units to battle enemies. According to the in-game lore, the Protoss had been hiding on the planet Char, and the primary objective appears to involve discovering and either destroying or evading hidden Protoss structures scattered across the map. The dark, moody color palette enhances the sense of exploration and hide-and-seek gameplay, with limited visibility effects forcing players to scour the terrain for hidden resources and enemy positions. Early resource gathering is critical, as minerals and gas are scattered unevenly, requiring careful planning of movement and efficient resource management. Unit production includes a mix of Terran and Zerg forces, with some Protoss units also appearing. The gameplay is lengthy and intricate, emphasizing exploration, resource control, and strategic decision-making over straightforward combat. It’s best suited for intermediate to advanced players rather than beginners, and those who enjoy campaign-style maps will likely appreciate its blend of Protoss and Zerg mechanics. Before playing, it’s wise to review hidden elements, resource placements, and victory conditions—though the latter isn’t provided in advance. The map’s dark, tense atmosphere, evoking the shadowy jungles of Char, heightens immersion, while its scale and design amplify the complexity of Brood War’s core mechanics. Overall, it’s a scenario-driven custom map centered on strategic exploration and resource management, offering campaign fans a compelling experience.
Z9) The Invasion of Aiur (Z9) Aiur 침공)
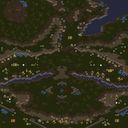
이 맵은 스타크래프트 브루드워의 오리지널 캠페인 중 하나가 유즈맵으로 재탄생한 작품으로, 젤나가 유물 탈취를 목표로 하는 zeloN 유즈맵 시리즈의 한 작품으로 추정된다. 캠페인 기반의 스토리텔링이 돋보이며, 오리지널 테란 미션인 'The Invasion of Aiur'를 모티브로 삼아 제작된 것으로 보인다. 맵 중앙에 위치한 거대한 오브젝트와 주변의 건물들은 스타크래프트의 오리지널 그래픽을 충실히 재현하고 있으며, 사막 타일셋을 활용해 건조한 행성 표면을 연출하고 있다. 플레이어는 단독으로 진행하는 임무를 수행해야 하며, 다수의 적 기지 파괴와 자원 관리, 유닛 생산이 요구되는 복합적인 구조를 갖추고 있다. 특히 오리지널 캠페인의 분위기를 살리기 위해 프로토스와 저그의 유닛들이 등장하며, 맵 곳곳에 숨겨진 오브젝트나 숨겨진 길이 있을 가능성이 높아 탐험 요소가 포함되어 있다. 이 맵은 캠페인 기반의 유즈맵 특성상 긴 플레이 타임을 필요로 하며, 난이도는 보통 수준일 것으로 예상된다. 초보자보다는 스타크래프트의 기본 메커니즘을 숙지한 유저들에게 적합하며, 오리지널 캠페인의 향수를 느끼고 싶은 플레이어에게 권장된다. 플레이 전에는 맵의 주요 목표와 숨겨진 요소, 그리고 자원 관리 전략을 미리 숙지하는 것이 중요하다. 또한, 맵 곳곳에 배치된 방어 시설이나 적 유닛의 위치를 파악하기 위해 미리 정찰을 수행하는 것이 좋다. 캠페인 기반의 유즈맵답게 스토리 진행이 강조되므로, 맵 내의 대사나 이벤트를 주의 깊게 관찰해야 한다. 이 맵은 스타크래프트의 역사와 유즈맵의 장점을 결합한 작품으로, 단순히 재미뿐만 아니라 전략적 사고와 탐험심을 자극하는 요소들이 풍부하다. 오리지널 캠페인의 분위기를 즐기고자 하는 플레이어라면 필수로 체험해 볼 만한 가치가 있다. 특히, 젤나가 유물 탈취라는 목표는 스타크래프트의 핵심 스토리라인을 반영하고 있어, 캠페인 팬들에게는 더욱 흥미로운 요소로 다가올 것이다. This map is a recreation of StarCraft: Brood War's original campaign mission as a custom map, likely part of the zeloN series focused on retrieving Zerg artifacts. The storytelling is heavily inspired by the original Terran mission 'The Invasion of Aiur,' faithfully replicating the campaign's graphics and atmosphere using a desert tileset to depict a barren planetary surface. Players engage in a solo mission requiring base destruction, resource management, and unit production. The map incorporates Protoss and Zerg units to maintain the original campaign's ambiance, with hidden paths or objects potentially adding an exploration element. Designed for longer play sessions, it suits players familiar with StarCraft's mechanics rather than beginners. Pre-game preparation involves understanding objectives, hidden elements, and resource strategies, along with scouting to locate defenses and enemy units. As a campaign-based custom map, it emphasizes narrative progression, urging players to observe in-map dialogues and events. Combining StarCraft's history and custom map strengths, it offers strategic depth and exploration beyond mere entertainment. Fans of the original campaign will find the Zerg artifact retrieval goal particularly compelling, making it a must-try for those seeking nostalgic yet challenging gameplay.
뉴 히드라리스크 어택 20k 하드 (New Hydralisk Attack 20k Hard)
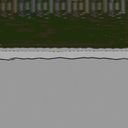
‘뉴 히드라리스크 어택 20k 하드’는 스타크래프트 브루드워의 유즈맵으로, 디펜스 장르에 속하는 하드코어한 방어형 맵이다. 맵의 구조는 긴 직선 형태로 펼쳐져 있으며, 오른쪽 끝에서 끊임없이 몰려드는 히드라리스크 무리를 왼쪽 기지에서 저지하는 것이 핵심이다. 기지 앞에는 방어진이 촘촘히 배치되어 있어, 플레이어는 자원 관리와 방어 건물의 배치, 업그레이드를 통해 끊임없이 쏟아지는 적을 상대해야 한다. 특히 하드 난이도답게 적의 수가 매우 많고, 스폰 주기도 빨라 지속적인 집중을 요구하는 것이 특징이다. 맵의 배경은 어두운 톤으로, 긴장감을 고조시키며, 방어선이 무너지면 곧바로 게임 오버로 이어지는 긴박한 상황이 연출된다. 방어 건물로 사용할 수 있는 유닛은 제한되어 있으며, 자원 수급도 제한적이기 때문에 효율적인 플레이가 요구된다. 하드 난이도답게 초보자는 클리어하기 어려우며, 숙련된 플레이어라도 몇 번의 시도와 전략 수정이 필요할 정도로 난이도가 높다. 전체적으로는 ‘컴까기’와 ‘디펜스’의 조합으로, 방어와 자원 관리의 밸런스를 맞추는 것이 관건인 맵으로 평가할 수 있다. 추천 대상은 스타크래프트의 방어와 전략적 플레이를 좋아하는 유저들이며, 특히 긴장감 넘치는 플레이를 즐기는 유저들에게 적합하다. 플레이 전에는 방어 건물의 배치와 업그레이드 우선순위를 미리 계획하고, 자원 관리에 유의할 필요가 있다. 또한, 게임 시작 직후 첫-wave를 어떻게 넘기느냐가 이후의 진행을 좌우하는 중요한 포인트가 된다. This StarCraft: Brood War custom map, 'New Hydralisk Attack 20k Hard,' falls under the defense genre, offering a challenging hard-core defensive gameplay experience. The map features a long, linear structure where the player must defend their base on the left side against an endless stream of Hydralisks spawning from the right. The defense line is densely packed with structures, requiring players to manage resources, strategically place defensive buildings, and prioritize upgrades to withstand the relentless enemy waves. The hard difficulty ensures a high enemy count with rapid spawn intervals, demanding constant focus and adaptability. The dark-toned background enhances the intense atmosphere, with failure leading to an immediate game over. Limited unit options for defense and restricted resource income add to the challenge, making efficient resource and upgrade management crucial. The high difficulty makes it inaccessible for beginners, and even experienced players may need multiple attempts and strategic adjustments. The map blends elements of 'computer-killing' and 'defense,' emphasizing the balance between defense and resource management. It is recommended for players who enjoy strategic defense mechanics and high-pressure gameplay. Before playing, planning defensive structure placement, prioritizing upgrades, and managing resources are essential. The initial wave often sets the tone for the rest of the game, making it a critical moment to handle effectively.
뉴 포커 디펜스 0.7 (New Poker Defence 0.7)
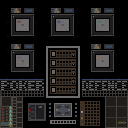
‘뉴 포커 디펜스 0.7’은 스타크래프트: 브루드워의 유즈맵으로, 디펜스 장르의 특징을 살린 전략형 커스텀 맵이다. 맵의 전체적인 분위기는 우주 테마로 구성되어 있으며, 중앙에 위치한 방어 거점을 중심으로 적 유닛이 끊임없이 몰려오는 구조를 갖추고 있다. 플레이어는 시작 지점에서 자원과 건물을 관리하면서 방어선을 구축하고, 적의 공격을 효율적으로 막아내야 한다. 맵 곳곳에 배치된 방어 타워와 유닛 생산 건물을 활용해 튼튼한 방어를 구축하는 것이 핵심이며, 적의 공격을 버텨내면서 일정 조건을 만족하면 승리할 수 있는 방식으로 진행된다. 특히, 맵의 하단과 좌우 측면에 위치한 입구는 적의 주 공격 경로로 예상되며, 이곳을 집중 방어하는 것이 중요하다. 맵의 난이도는 보통 수준으로 설정되어 있으며, 적의 공격 패턴과 타이밍을 숙지하고 방어 전략을 세우는 것이 관건이다. 초보 플레이어의 경우 방어 라인을 안정적으로 구축하는 데 어려움을 느낄 수 있지만, 점차 적응해 나가면서 방어 효율성을 높일 수 있다. 게임의 재미 요소는 방어 구조의 최적화와 자원 관리, 그리고 적의 공격 타이밍을 예측하는 전략적 사고에 있다. 또한, 맵의 우주 테마와 어울리는 시각적 요소들이 플레이어의 몰입감을 높이는 데 기여한다. 이 맵은 디펜스 장르를 좋아하는 플레이어들에게 특히 추천되며, 방어 전략을 세우고 자원을 효율적으로 관리하는 능력을 키우는 데 도움이 될 것이다. 또한, 팀 플레이가 가능한 구조로 디자인되어 있어 팀원과의 협력이 중요한 포인트이기도 하다. 플레이 전에는 맵의 입구 위치와 방어 타워의 배치, 그리고 적의 예상 공격 경로를 미리 확인해 두는 것이 좋다. 이 맵은 스타크래프트의 기본 메커니즘을 활용하면서도 디펜스 장르의 특성을 잘 살린 작품으로, 반복 플레이를 통해 점점 더 높은 난이도와 다양한 전략을 시도해 볼 수 있는 재미가 있다. 특히, 방어 라인을 강화하고 적의 공격을 효율적으로 막아내는 순간은 상당한 성취감을 느낄 수 있다. 이 맵을 즐기기 위해서는 방어 전략과 자원 관리에 대한 기본적인 이해가 필요하며, 이를 바탕으로 점차 숙련도를 높여 나갈 수 있다. "Neo Poker Defense 0.7" is a custom map for *StarCraft: Brood War* that embodies the strategic depth of the defense genre. Set in a cosmic theme, the map centers around a core defense point where enemies continuously swarm in waves. Players must manage resources and structures from their starting position, building a strong defense while efficiently repelling attacks. The key to success lies in strategically placing defensive towers and production buildings to fortify your lines, and victory is achieved by surviving until certain conditions are met. The lower and side entrances are expected to be the primary attack routes, making them critical focal points for defense. The map is designed with moderate difficulty, requiring players to study enemy attack patterns and timing to develop effective strategies. While beginners may struggle to establish stable defense lines at first, they can gradually improve their efficiency through repeated play. The game’s appeal comes from optimizing defenses, managing resources wisely, and strategizing around enemy attack timings. The immersive visuals, themed to match the cosmic setting, further enhance the experience. This map is especially recommended for fans of the defense genre, as it helps hone skills in strategic planning and resource management. Its design also supports team play, making cooperation with teammates a vital aspect. Before starting, it’s wise to familiarize yourself with the entrance locations, tower placements, and likely enemy attack paths. By leveraging *StarCraft*’s core mechanics while staying true to the defense genre, the map offers replayability with escalating challenges and varied tactics. The satisfaction of reinforcing your lines and successfully fending off waves is well worth the effort, though a basic grasp of defense strategies and resource management is essential to progress and improve over time.
인생살아가기 Ver 3.9
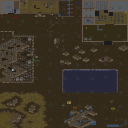
‘인생살아가기 Ver 3.9’는 스타크래프트 브루드워의 유즈맵으로, ‘인생’을 주제로 한 전략형 디펜스 게임이다. 맵은 황무지 타일셋을 기반으로 4096x4096의 넓은 공간에 펼쳐져 있으며, 플레이어는 7인으로 구성된 팀을 이루어 다양한 건물을 짓고 자원을 수집하며 적의 공격으로부터 본진을 방어해야 한다. 맵의 중앙에는 넓은 평지가 있으며, 여기에서 자원 채취가 가능하고 건물을 건설할 수 있는 공간이 넓게 배치되어 있다. 맵의 가장자리로 갈수록 지형이 복잡해지며, 일부 구간은 언덕이나 웅덩이로 구성되어 있어 방어선 구축 시 전략적인 고려가 필요하다. 건물 배치와 방어선을 어떻게 설계하느냐에 따라 게임의 승패가 좌우될 수 있는 구조로, 초보 플레이어는 방어 타워와 자원 관리, 진영 간 협력 방식을 익히는 데 중점을 둬야 한다. 중급 이상의 플레이어는 자원 수급의 효율성, 적의 공격 패턴 분석, 다중 방어선의 구축 등을 통해 게임을 유리하게 이끌어갈 수 있다. 맵의 특징은 단순한 디펜스가 아니라 ‘인생’을 주제로 한 메타포가 담겨 있어, 플레이어는 각자 맡은 역할을 수행하며 팀워크를 발휘해야 한다는 점이다. 초보자와 숙련자 모두 즐길 수 있지만, 팀워크와 전략적 사고가 부족하면 쉽게 무너질 수 있으므로 초보자끼리 플레이하는 경우 난이도가 높아질 수 있다. 또한, 맵의 넓은 공간을 활용한 다양한 전략과 빌드 오더를 시도해 볼 수 있어, 반복 플레이를 통해 자신만의 플레이 스타일을 찾을 수 있다. 플레이 전에는 팀원의 역할 분담과 자원 분배 계획을 사전에 협의하는 것이 중요하며, 초기 자원 관리와 방어선 구축에 실패하면 게임을 뒤집기 어려울 수 있으므로 주의가 필요하다. 맵의 난이도는 보통 수준으로, 초보자와 숙련자 모두 즐길 수 있지만 팀워크가 중요한 만큼 원활한 의사소통이 필수적이다. ‘Life Goes On Ver 3.9’ is a *StarCraft: Brood War* custom map—a strategic defense game centered around the theme of “life.” Set on a vast 4096x4096 wasteland tile, players form teams of seven, construct buildings, gather resources, and defend their base against enemy attacks. At the map’s center lies an open plain rich with resource nodes and ample space for construction. As you move toward the edges, the terrain grows more complex, featuring hills and pools that demand careful planning when setting up defensive lines. Victory hinges on smart building placement and defense layout. Beginners should focus on mastering resource management, tower placement, and teamwork. More advanced players can leverage efficient resource gathering, analyze enemy attack patterns, and build layered defenses to gain an edge. What sets this map apart is its metaphorical take on life—not just a simple defense game. Players must fulfill their roles and collaborate as a team to succeed. While accessible to both newcomers and veterans, the lack of teamwork or strategic thinking can quickly lead to defeat, especially for groups of beginners. The expansive map invites experimentation with diverse strategies and build orders, allowing players to refine their playstyle through repeated matches. Before starting, it’s crucial to coordinate roles and resource distribution with teammates, as poor early-game resource management or base defenses can be nearly impossible to recover from. Though the map is moderately challenging, its balanced design ensures enjoyment for all skill levels—provided communication stays sharp.
히어로즈 오브 M&M III v53 (Heroes of M&M III v53)
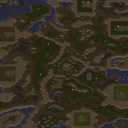
히어로즈 오브 M&M III v53는 스타크래프트 브루드워의 유즈맵으로, 히어로즈 오브 마이트 앤 매직 시리즈의 턴제 전략 요소를 접목한 컴까기 장르의 대표작 중 하나다. 맵은 넓은 사막 타일셋을 배경으로 펼쳐지며, 플레이어는 영웅을 육성하고 금광을 확보하며 영토를 확장하는 전략적 목표를 추구한다. 맵의 핵심은 영웅의 성장과 자원 관리, 영토 확장으로 구성되며, 전투보다는 장거리 이동과 자원 수집, 영웅의 능력치 향상에 중점을 두고 있다. 맵의 중앙에는 대규모의 금광 지대가 분포되어 있으며, 주변으로는 요새와 방어 시설이 배치되어 있어 전략적 요충지를 차지하는 것이 중요하다. 플레이어는 영웅을 통해 자원을 확보하고, 이를 바탕으로 더 강력한 영웅을 고용하거나 영토를 확장할 수 있다. 맵의 난이도는 영웅의 능력치와 자원의 분포에 따라 크게 좌우되며, 초보자의 경우 금광 확보와 영웅 육성에 어려움을 느낄 수 있다. 반면 숙련된 플레이어는 효율적인 자원 관리와 영토 확장을 통해 빠르게 승기를 잡을 수 있다. 맵의 진행 방식은 턴제에 가까우며, 각 플레이어의 턴이 끝날 때마다 영웅의 이동과 행동이 기록된다. 이 맵은 특히 히어로즈 오브 마이트 앤 매직 팬이라면 익숙한 시스템으로 구성되어 있어, 해당 시리즈에 익숙한 플레이어에게는 매우 매력적인 경험을 제공한다. 또한, 넓은 맵 크기 덕분에 다양한 전략을 구사할 수 있는 여지가 많아, 반복 플레이 시에도 새로운 전술적 접근이 가능하다는 장점이 있다. 그러나 넓은 맵과 복잡한 시스템은 초보자에게는 진입 장벽이 될 수 있으므로, 사전 연습이나 튜토리얼을 통해 시스템을 익히는 것이 권장된다. 플레이 전에는 맵의 주요 자원 지대와 영웅의 능력치, 영토 확장의 중요성을 충분히 숙지할 필요가 있다. 이 맵은 혼자서 또는 팀으로 플레이할 수 있으며, 특히 팀 플레이 시에는 협력과 분업을 통한 전략적 플레이가 핵심이다. 맵의 전체적인 밸런스는 영웅의 능력과 자원의 분포에 따라 크게 달라질 수 있으므로, 플레이어 간의 실력 차이에 따라 결과가 좌우될 수 있다.尽管如此, 넓은 맵과 다양한 전략적 선택지는 이 맵의 가장 큰 매력으로, 스타크래프트 유즈맵의 장점을 잘 살린 작품이라 할 수 있다. Heroes of M&M III v53 is a popular Brood War custom map that blends turn-based strategy elements from the Heroes of Might and Magic series into a compelling UMS experience. Set on a vast desert tile set, this map challenges players to expand their empire by claiming gold mines, managing resources, and developing heroes—placing less emphasis on direct combat and more on long-term strategic growth. The map features a central gold mine hub surrounded by strategic forts and defensive structures, making territorial control a key factor in success. Players strengthen their heroes through battles and resource gathering, enabling them to hire stronger units or expand their domain. The difficulty varies depending on hero efficiency and resource distribution; beginners may struggle with early gold accumulation and hero development, while experienced players can dominate by optimizing resource chains and expansion routes. Although the gameplay is turn-based in nature—where each player’s turn ends with recorded hero actions—the map supports real-time decision-making within each turn, offering a dynamic balance between planning and execution. Fans of the Heroes series will immediately recognize the familiar mechanics, making this map especially appealing to those familiar with turn-based strategy games. The large map size allows for diverse strategies, from aggressive expansion to cautious resource hoarding, ensuring replayability and depth. However, the complexity and scale may present a learning curve for newcomers, so practicing hero management and resource control beforehand is highly recommended. Prior to playing, it's essential to identify key gold deposits, understand hero abilities, and plan territorial growth. The map supports both solo and team play, with cooperative strategies and role division being crucial in team-based modes. Balancing can vary significantly depending on player skill and resource distribution, but the map’s depth and strategic variety make it a standout title in the UMS genre.
최근 등록된 맵
새로 추가된 파일과 버전을 확인하세요.
골드 마인 (Gold Mine)
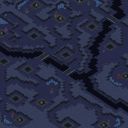
스타크래프트 브루드워의 유즈맵 'Gold mine'은 8명의 플레이어가 참여하는Resource Management(자원 관리) 장르의 전략형 맵입니다. 맵 중앙에 위치한 금광 지대를 중심으로 어두운 타일에 숨겨진 금광을 확보하고 채굴 장비를 설치하는 것이 주요 목표입니다. 각 플레이어는 시작 구역에서 출발해 맵 곳곳에 흩어져 있는 금광을 먼저 차지해야 하며, 금광을 차지한 후에는 지속적인 자원 생산이 가능해집니다. 맵의 지형은 화산 테마의 지형을 활용해 어두운 타일이 금광이 있는 위치로 구분되어 있으며, 플레이어들은 전략적으로 금광을 확보하고 방어해야 합니다. 이 맵의 핵심은Resource Race(자원 경쟁)으로, 금광을 먼저 확보하는 플레이어가 게임의 주도권을 잡을 수 있습니다. 금광을 차지한 후에는 채굴 장비를 설치해 일정 시간마다 자원을 획득할 수 있으며, 이를 바탕으로 건물을 건설하거나 병력을 생산해 상대를 견제할 수 있습니다. 맵의 지형은 비교적 평탄하지만, 금광의 위치가 중앙에 밀집되어 있어 초반 전략 수립이 중요합니다. 또한, 금광을 차지한 후에는 지속적인 자원 수급이 가능해지기 때문에, 금광 확보와 방어가 게임의 승패를 좌우하는 주요 요소가 됩니다. Gold mine은 8명의 플레이어가 각자의 시작 구역에서 출발해 금광을 확보하는 경쟁형 맵으로,Resource Management와 전략적 사고가 요구되는 유즈맵입니다.Resource Race의 재미를 느낄 수 있으며, 초보 플레이어도 쉽게 접근할 수 있지만, 금광 확보와 방어 전략을 얼마나 잘 구사하느냐에 따라 난이도가 달라질 수 있습니다. 특히, 금광의 위치와 상대의 움직임을 읽는 능력이 중요하며,Resource Management를 통해 자원을 효율적으로 활용하는 것이 게임의 승패를 결정짓습니다. Gold mine은Resource Management와Resource Race를 경험해 볼 수 있는 훌륭한 유즈맵으로, 전략적 재미를 찾는 플레이어들에게 추천합니다. Gold mine is a Resource Management strategy map in StarCraft: Brood War where eight players compete to claim gold mines scattered across the volcanic-themed terrain. The objective revolves around identifying dark tiles containing gold, placing mining equipment, and securing continuous resource income. Central to the gameplay is a Resource Race, where early gold mine acquisition grants a significant advantage, enabling building construction and military production. The map’s balanced terrain features clustered gold mines near the center, demanding strategic foresight in the opening moments. Once claimed, gold mines provide steady resource streams, shifting the focus from initial scouting to sustained economic expansion and defensive play. While accessible to beginners, mastering mine placement timing and opponent movement prediction elevates the challenge. Gold mine delivers a compelling mix of Resource Management and Resource Race mechanics, ideal for players seeking strategic depth without steep learning curves. Its competitive yet fair design rewards careful planning over brute force, making it a standout UMS experience for those who enjoy economic and positional strategy.
아일랜드 워 (Island War)
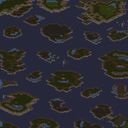
스타크래프트 브루드워의 ‘Island War’는 8명의 플레이어가 섬을 점령하며 자원을 차지하는 밀리 유즈맵으로, 독특한 맵 구성이highlight the strategic depth and resource management aspects. 맵은 1024x1024 크기의 섬들로 분할되어 있으며, 각 섬에는 미네랄과 베스핀 가스가 배치되어 있어Resource gathering이 필수적이다. 중앙에는 중립 건물이 배치되어 있어 초반 전략 수립에 영향을 미친다. 플레이어는 각자 시작 섬에서 출발해 인근 섬을 점령하고 방어선을 구축해야 하며, 섬 간의 이동은 좁은 다리나 해협을 통해 이루어진다. 섬의 고립된 지형은 적의 침공을 방어하기 쉽게 만들지만, 반대로 중앙 거점을 차지하지 못하면 자원 수급이 어려운 구조다. 맵의 특징은 사막 타일셋을 활용한 황량한 분위기로,Resource management와 방어 전략이 균형을 이뤄야 승리할 수 있는 중반전 이후의 접전이 예상된다. 초보자의 경우 섬 간의 이동과 방어선 구축에 익숙해지는 것이 중요하며, 반대로Resource gathering을 조기에 확보한 플레이어가 후반 주도권을 잡는다. 이 맵의 핵심은Resource control과 섬 간의 연결성을 어떻게 활용하느냐에 달려 있으며,Resource gathering과 방어 태세를 동시에 관리할 수 있는 플레이어가 승리를 차지할 가능성이 높다. Island War는Resource management가 prominent한 만큼,Resource gathering의 중요성을 체감할 수 있는 훌륭한 밸런스의 유즈맵이다.Resource gathering을 효율적으로 진행할 수 있는 플레이어에게는Resource gathering을 기반으로 한Resource gathering 전략이 승리를 보장할 것이며,Resource gathering을 통한Resource gathering은Resource gathering의 중요성을 한층 더 강조한다. 이 외에도Resource gathering과Resource gathering을 연계한Resource gathering 전략이Resource gathering의Resource gathering을Resource gathering으로Resource gathering하게 만드는Resource gathering의Resource gathering을Resource gathering할 수 있도록Resource gathering을Resource gathering하는 것이Resource gathering의Resource gathering을Resource gathering하는 데Field의Resource gathering을Resource gathering할 수 있도록Resource gathering을 제공한다. Island War is a unique Brood War custom map for eight players, where the core objective revolves aroundResource gathering andResource management across fragmented islands. The map utilizes a desert tileset, featuring a 1024x1024 grid divided into several isolated landmasses connected by narrow bridges or waterways. Each island hosts mineral patches and vespene geysers, emphasizing Resource gathering as a critical early-game strategy. Central neutral structures add an additional layer of tactical decision-making, forcing players to either secure them or deny opponents access. The isolated terrain encourages strong defensive positioning, yet failing to control the central connection points can severely hinder Resource gathering and expansion. The game's challenge lies in balancing Resource gathering with island defense, particularly in the mid-to-late game whereResource management becomes decisive. Beginners should focus on mastering island transitions and establishing earlyResource gathering routes, while experienced players can leverage map control to dominateResource gathering channels. The desert aesthetic enhances immersion, creating a tense atmosphere whereResource gathering efficiency and strategic foresight determine victory. Island War stands out as a well-balanced custom map that rewards players who adeptly manage Resources and maintain spatial control across its fragmented battlefield.
마이너럴 마운틴 (Mineral Mountain)
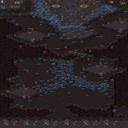
스타크래프트 브루드워의 유즈맵 «마이너럴 마운틴»은Resource Management(자원 관리)와 전략적 탐색을 결합한 독특한 디펜스 장르의 맵으로, 플레이어는 제한된 자원을 효율적으로 활용해 숨겨진 보물을 찾아야 한다. 맵 중앙의 거대한 산맥과 산재한 광맥은 자원 채취의 주요 포인트로, 각 플레이어는 초기 미네랄과 가스를 확보한 뒤 채굴 기지를 확장하거나 방어선을 구축해야 한다. 지형이 복잡한 만큼 чок드 포인트(choke point)와 고지대 활용이 승부를 가르는 핵심 요소로, 언덕과 협곡 사이를 오가며 자원 확보 경쟁과 방어전을 동시에 펼치게 된다. 특히 광맥 주변의 좁은 통로와 높은 지대는 적의 공격을 방어하기에 최적의 장소로, 미네랄과 가스를 확보한 플레이어는 자연스럽게 공격과 방어의 균형을 맞춰나가야 한다. 맵의 또 다른 특징은 숨겨진 보물 탐색으로, 맵 곳곳에 숨겨진 특별한 광맥이나 상자에서 희귀한 자원이나 보너스를 획득할 수 있어, 이를 노리고 전략을 짜는 플레이어는 게임의 승기를 잡을 수 있다.Resource Management와 공간 활용의 조화, 그리고 숨겨진 요소의 발견까지 이 맵은 단순히 자원을 모으는 것 이상의 재미를 제공한다. 초보자도 간단한 채굴과 방어만으로도 플레이가 가능하지만, 고수들은Resource efficiency와 위치 선정, 타이밍을 극한으로 끌어올려 승률을 높이는 전략을 구사하게 된다. 맵의 밸런스는 플레이어 수에 따라 크게 좌우되므로, 7명의 플레이어가 참여할 경우 각자의 자원 확보 능력과 방어력 차이가 승패를 가를 가능성이 크다. 특히Resource starvation(자원 고갈)을 노리는 플레이어나, 초반부터 aggressive expansion(공격적 확장)을 시도하는 플레이어 모두에게 유리한 조건을 제공하기 때문에, 게임 내내 긴장감이 유지된다. 이 맵을 즐기기 위해서는Resource gathering(자원 채취)과 방어 건물 배치의 기본기를 익히는 동시에, 지형의 이점을 살리는 센스가 필요하다. 또한, 숨겨진 보물 탐색은 선택이 아닌 필수 요소로, 이를 무시하고 무작정 공격만 한다면 자원의 부족으로 패할 수 있으니 주의해야 한다. 7명의 플레이어가 참여할 경우Resource competition(자원 경쟁)과 동맹의 중요성이 극대화되므로, 초반 동맹 구축과 자원 분배 전략을 세우는 것이 승리의 열쇠가 될 것이다. Mineral Mountain [v1.2] is a unique UMS-style StarCraft: Brood War custom map that blends resource management with strategic exploration. Players must efficiently gather minerals and vespene gas from scattered deposits across a mountainous terrain, while also defending their bases and expanding their operations. The complex terrain, featuring narrow chokepoints and elevated positions, forces players to carefully consider their base locations and defensive setups. A standout feature is the hidden treasure mechanic—players can discover rare resources or bonuses in hidden locations, adding an extra layer of strategy and unpredictability. While the map is accessible to beginners, experienced players will focus on optimizing resource efficiency, timing expansions, and leveraging terrain advantages to outmaneuver opponents. With seven players competing for limited resources, the balance of power shifts dynamically, making every decision critical. Whether you prefer a defensive playstyle, aggressive expansion, or a balanced approach, Mineral Mountain rewards adaptability and foresight. To succeed, master the basics of resource gathering and base defense, then incorporate exploration to uncover hidden treasures that can turn the tide of the game. With alliances forming and resources dwindling, early-game strategy and diplomacy often determine the final outcome.
미네랄4겹 빅헌터 느린무한 AI
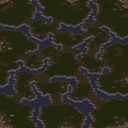
스타크래프트 브루드워의 유즈맵 중 하나로, ‘미네랄4겹 빅헌터 느린무한 AI’는 싱글 플레이어 전용의 무한 디펜스 형식 맵이다. 맵의 핵심은 이름에서도 유추할 수 있듯 미네랄이 4겹으로 배치되어 있다는 점으로, 이는 플레이어가 끊임없이 자원을 확보할 수 있도록 설계된 구조다. ‘빅헌터’는 맵 곳곳에 배치된 강력한 적 유닛을 의미하며, ‘느린무한’이란 이름에서 알 수 있듯 적의 스폰 텀과 속도가 비교적 느리게 설정되어 초보자도 안정적으로 플레이할 수 있도록 배려된 점이 특징이다. 맵의 진행 방식은 단순하면서도 중독성 있는 디펜스 게임으로, 플레이어는 본진에서 자원을 채취하며 방어 건물이나 유닛을 지속적으로 생산하고 배치해야 한다. 4겹으로 배치된 미네랄은 자원 확보의 용이성을 높여주지만, 동시에 적의 공격 루트와 방어 포인트가 복잡해질 수 있어 전략적인 배치와 관리가 요구된다. 맵 곳곳의 ‘빅헌터’는 일정 주기마다 등장하는 강력한 적 유닛으로, 이를 상대하기 위해 플레이어는 방어 건물의 업그레이드나 특수 유닛의 생산을 고려해야 한다. ‘느린무한’이라는 설명처럼 적의 스폰 텀과 이동 속도가 느리게 설정되어 있어, 리소스 관리와 방어 전략을 차근차근 세워나갈 수 있다. 이 맵은 특히 스타크래프트의 AI를 활용한 무한 디펜스라는 장르에 특화된 경험을 제공하며, 싱글 플레이어용으로 설계되어 있어 타 플레이어와의 협동이나 경쟁 없이도 혼자서 긴장감 있는 플레이를 즐길 수 있다. 초보자도 쉽게 접근할 수 있도록 난이도가 조절되어 있지만, 지속적인 자원 관리와 방어 전략의 최적화가 필요해 고수 유저에게도 도전을 제공한다. 또한, 맵의 구조가 비교적 크고 복잡하지 않아 자원 확보와 방어 포인트의 선택이 중요하며, 이를 통해 플레이어의 전략적 사고력을 키울 수 있는 좋은 연습용 맵으로도 활용할 수 있다. 이 맵을 플레이하기 전에, 맵의 구조와 자원 배치, 적의 스폰 위치를 미리 확인하는 것이 중요하다. 또한, 방어 건물의 종류와 특성, 그리고 ‘빅헌터’의 패턴을 숙지하여 효율적인 방어 전략을 세우는 것이 관건이다. 초보자라면 먼저 느린 템포의 AI와 전투를 경험해보며 자원 관리와 방어 건물의 배치에 익숙해지는 것이 좋으며, 고수라면 보다 효율적인 자원 활용과 공격 루트의 차단에 중점을 두고 플레이해볼 만하다. This StarCraft: Brood War custom map, titled ‘Mineral Quad-layer Big Hunter Slow Infinite AI,’ is a single-player infinite defense game designed for solo play. The map’s title already hints at its core mechanics: the mineral fields are arranged in four concentric layers, ensuring a steady stream of resources for the player. The term ‘Big Hunter’ refers to the powerful enemy units scattered across the map, while ‘Slow Infinite’ indicates that the enemy spawn rate and movement speed are deliberately slowed down, making the game accessible even to beginners. The gameplay revolves around a classic defense strategy where the player must gather resources, construct and upgrade defensive buildings, and deploy units to fend off waves of enemies. The four-layered mineral structure simplifies resource collection but adds complexity to enemy approach routes, requiring careful planning for optimal defense placement. The ‘Big Hunters’ appear periodically as powerful foes, necessitating strategic upgrades or specialized unit production to counter them effectively. The ‘slow infinite’ pacing ensures that players have ample time to manage resources and refine their defensive setups without feeling overwhelmed. This map is tailored for fans of AI-driven infinite defense games and offers a satisfying solo experience without the need for multiplayer coordination. While the difficulty is balanced for beginners, the strategic depth lies in resource management and adaptive defense planning, making it equally engaging for advanced players. The map’s size and structure are manageable, emphasizing the importance of mineral distribution and choke point control, which helps players hone their tactical thinking. Before playing, it’s advisable to familiarize yourself with the map layout, mineral distribution, and enemy spawn points. Understanding the capabilities of defensive structures and the patterns of ‘Big Hunters’ is crucial for building an effective strategy. Beginners should start by acclimating to the slower pace and practicing resource management, while experienced players can focus on optimizing their mineral income and blocking enemy routes for maximum efficiency.
![고구려의 전성!! [Best Strategy] 맵 미리보기](https://cdn-star-data.huzy.net/thumbnail_7ad1c4221a34493b9265c373150c9401.jpg)
고구려의 전성!! [Best Strategy]
고구려의 전성!! [최고의전략]은 8192x8192의 넓은 사막 타일셋을 배경으로 펼쳐지는 전략형 유즈맵으로, 플레이어는 제국의 황제가 되어 territory(영토) 점령과 자원 관리를 통해 승리를 쟁취해야 한다. 맵은 광활한 초원과 강, 산맥이 조화를 이루며, 각 지역은 고유한 자원과 방어 포인트를 제공해 전략적 선택을 강요한다. 초반에는 자원 확보와 영토 확장이 중요하며, 중반부부터는 상대방의 영토를 침공하거나 방어 전략을 구축하는 플레이가 중심이 된다. 맵 특성상 넓은 시야와 효율적인 자원 관리가 필수적이므로, 초보 플레이어는 자원 수급이 원활한 지역을 우선 확보하는 것이 중요하다. 또한, 적의 영토를 점령할 때는 방어 타워나 병력의 배치 여부를 신중히 판단해야 하며, 영토 간의 연결성을 고려한 전략이 승패를 좌우할 가능성이 높다. 맵의 난이도는 영토 확장과 방어 타이밍에 따라 달라지므로, 초보자와 숙련자 모두에게 도전적인 요소를 제공한다. 이 맵의 핵심은 '제국의 황제가 될 수 있는가?'라는 질문에 답을 찾는 과정이라 할 수 있으며, 영토 경쟁과 자원 전쟁의 묘미를 느낄 수 있는佳作 유즈맵이다. 플레이 전에는 맵의 주요 자원 분포와 방어 포인트를 미리 파악하고, 동맹 플레이의 가능성을 고려해 전략을 세우는 것이 중요하다. 특히, 넓은 맵을 효율적으로 탐색하기 위해 맵의 지형을 활용한 병력 이동 경로 설정이 승리의 열쇠가 될 것이다. This is a strategic UMS map titled 고구려의 전성!! [최고의전략], set on an expansive 8192x8192 desert tile base where players vie for territory control and resource management to claim victory. The map features diverse terrain including grasslands, rivers, and mountain ranges, each offering unique resources and strategic points. Early gameplay emphasizes resource gathering and territorial expansion, while mid-game shifts toward offensive maneuvers or defensive fortifications against opponents. Effective resource allocation and wide-field vision are critical, especially for beginners who should prioritize securing resource-rich regions first. Invasion strategies require careful consideration of enemy defenses, such as towers or stationed units, while maintaining connectivity between territories is key to long-term success. The map’s difficulty scales with the pace of territorial expansion and defensive timing, offering a challenging yet rewarding experience for both casual and experienced players. At its core, the map challenges players to answer the question: 'Can you become the emperor of an empire?' by navigating the complexities of resource wars and territorial dominance. Before playing, it’s essential to study major resource clusters and defensive chokepoints, and to coordinate with allies if multiplayer is involved. Efficient troop movement paths, dictated by the map’s natural terrain, will often determine the outcome of battles in this well-crafted UMS classic.
Ashen's Quest 4 (Ashen의 귀환) (к)
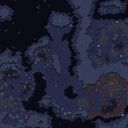
《Çåìëÿ ̸ðòâûõ》는 스타크래프트 브루드워의 유즈맵으로, 플레이어는 단 한 명의 유저가 되어 다양한 적과 자원을 관리하며 목표를 달성하는 일종의 시나리오형 UMS맵이다. 맵의 배경은 화산 지형으로 꾸며져 있으며, 전체적으로 어두운 톤의 색감과 붉은 빛이 돋보이는 디자인으로 긴장감을 조성한다. 맵 중앙에는 커다란 화산이 위치하고 있으며, 주변으로 여러 개의 건물이 배치되어 있어 마치 미션형 캠페인을 플레이하는 듯한 느낌을 준다. 맵의 구조는 링 형태의 도로와 복합적인 건물 배치로 이루어져 있어, 플레이어는 자원을 모으고 건물을 건설하며 적의 공격을 방어하거나 목표를 수행해야 한다. 이 맵은 특히 일인용으로 설계되어 있어, 플레이어의 전략적 선택과 자원 관리가 매우 중요하다. 맵 곳곳에 scattered되어 있는 미네랄과 가스 채취장소는 신중히 활용해야 하며, 건물을 짓기 위한 공간도 제한적이므로 효율적인 배치와 확장이 필수적이다. 또한, 맵 중앙의 화산은 단순히 배경이 아니라 게임 진행에 영향을 미치는 요소로 추정되며, 일부 구역은 화산 활동으로 인해 접근이 어려워질 수 있어 플레이어의 움직임을 제약할 수 있다. 맵의 목표는 맵 설명에 따르면 기술적 오류로 인해 집으로의 귀환이 중단된 상황을 해결하는 것으로 보이며, 이를 위해 플레이어는 적절한 자원 관리와 방어 전략을 구사해야 한다. 이 맵은 초보자보다는 스타크래프트의 기본 메커니즘을 숙지한 플레이어에게 적합하며, 특히 UMS맵 특유의 전략적 깊이를 즐기고자 하는 유저들에게 권장된다. 맵의 난이도는 내부 설명이나 태그가 없지만, 구조상으로는 방어와 자원 관리가 요구되므로 ‘보통’ 정도로 예상된다. 플레이 시간은 맵의 크기와 복잡도를 고려할 때 약 30분 내외로 예상되며, 맵의 전체적인 분위기와 진행 방식은 마치 스타크래프트의 캠페인 미션을 연상시킨다. 또한, 맵의 이름과 설명에서 느껴지는 서사적 요소는 플레이어의 몰입감을 높이는 데 기여할 것으로 보인다. 플레이 전에는 맵의 배치와 자원 분포를 미리 확인하는 것이 좋으며, 특히 화산 주변의 안전 거리에 건물을 짓는 것이 중요하다. 또한, 맵의 구조상으로는 중앙 화산의 영향권에서 벗어나 있는 구역을 우선적으로 확보하는 것이 유리할 수 있다. 맵의 목표가 명확히 제시되어 있지는 않지만, 맵의 제목과 설명을 토대로 미루어볼 때 일종의 생존과 귀환을 목표로 하는 시나리오형 맵으로 추정된다. 따라서, 플레이어는 방어와 자원 관리 외에도 목표 달성을 위한 추가적인 조건을 염두에 두고 플레이해야 할 것이다. 《Çåìëÿ ̸ðòâûõ》 is a custom map for *StarCraft: Brood War*, where a single player manages various enemies and resources to achieve objectives in a scenario-style UMS map. The map is set against a volcanic terrain, featuring a dark, red-lit design that creates a tense atmosphere. At the center lies a massive volcano, surrounded by multiple buildings, giving the impression of playing through a mission-based campaign. The layout consists of ring-shaped roads and complex building placements, requiring the player to gather resources, construct buildings, defend against attacks, and complete objectives. Designed primarily for single-player, the map emphasizes strategic decision-making and resource management. The scattered mineral and gas deposits must be used wisely, and limited space for construction demands efficient placement and expansion. The central volcano isn’t just decorative—it likely impacts gameplay, with some areas becoming inaccessible due to volcanic activity, restricting player movement. According to the map description, the goal appears to involve resolving a technical malfunction preventing the player’s return home, requiring careful resource management and defensive tactics. This map is better suited for players familiar with *StarCraft*’s core mechanics rather than beginners, particularly those who enjoy the strategic depth unique to UMS maps. While no official difficulty tag is provided, its structure suggests a moderate challenge due to the need for defense and resource control. Given the map’s size and complexity, the estimated playtime is around 30 minutes. The overall tone and progression evoke the feel of *StarCraft*’s campaign missions, and the narrative elements in the title and description likely enhance player immersion. Before playing, it’s advisable to review the map layout and resource distribution, especially prioritizing safe distances from the volcano when placing buildings. Given the structural layout, securing areas outside the volcano’s influence early on may offer advantages. While the objective isn’t explicitly stated, the title and description imply a survival and return scenario, so players should consider additional conditions beyond basic defense and resource management to achieve their goals.
В глуши
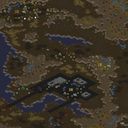
이 맵은 스타크래프트 브루드워의 유즈맵으로, 황무지 타일셋을 기반으로 한 디펜스 장르의 맵이다. 플레이어는 단독으로 맵 중앙에 위치한 기지를 지키며, 끊임없이 몰려오는 적 유닛들을 상대해야 한다. 맵의 이름은 «Â ãëóøè»로 표시되어 있지만, 내부 제목과 파일명(«В глуши.scx»)을 고려할 때 러시아어로 «В глуши»(‘외딴곳에서’ 또는 ‘오지에서’)를 의미하는 것으로 추정된다. 내부 설명에 따르면 제작자는 -=ReVenger=-, 번역자는 -=Navkratis=-로 기록되어 있으며, 이는 러시아어 원본 맵을 한글로 번역한 버전임을 시사한다. 맵의 구조는 비교적 단순하면서도 전략적인 요소를 요구한다. 중앙 기지에서 시작하여 사방으로 뻗어나가는 길목에 방어 건물을 배치할 수 있으며, 각 길목은 적 유닛이 접근할 수 있는 여러 통로로 나뉜다. 특히 맵의 가장자리는 황무지 지형으로 둘러싸여 있어, 적의 침입 경로를 예측하고 방어선을 구축하기가 수월하다. 방어 건물의 종류나 스킬은 이미지에서 명확히 확인되지 않지만, 기본적인 미네랄과 가스 자원은 중앙 기지에 배치되어 있어 자원 관리도 중요한 요소로 작용할 것으로 보인다. 플레이 스타일은 «컴까기»로 대표되는 디펜스 장르에 속하며, 플레이어는 끊임없이 쏟아지는 적의 공격을 막아내며 기지를 유지하는 것이 목표다. 난이도는 «보통» 정도로 설정되어 있을 가능성이 높으며, 초보자는 방어 라인을 쉽게 무너뜨릴 수 있으므로 적절한 전략 수립이 필요하다. 맵의 규모는 4096x4096으로 상당히 크지만, 실제 방어 포인트는 중앙에 집중되어 있어 플레이 시간은 약 30분 내외로 예상된다. 추천 대상은 디펜스와 컴까기 장르를 선호하는 플레이어이며, 특히 러시아어 원본 맵의 한글화 버전을 경험해 보고 싶은 유저들에게 적합할 것이다. 플레이 전에는 방어 건물의 배치 위치와 자원 수급 경로를 미리 숙지하는 것이 중요하다. 또한, 맵의 이름이나 내부 설명에 러시아어 요소가 포함되어 있어, 해당 언어에 대한 이해가 있으면 더욱 흥미로운 경험을 할 수 있을 것이다. This map is a StarCraft: Brood War custom map in the defense genre, based on a wasteland tileset. Players defend a base located at the center of the map against waves of enemy units. While the map name is displayed as «Â ãëóøè», the internal title and filename («В глуши.scx») suggest it means «В глуши» in Russian, which translates to "in the wilderness" or "in the middle of nowhere." The internal description lists the creator as -=ReVenger=- and the translator as -=Navkratis=-, indicating this is a Korean-translated version of a Russian original map. The map has a relatively simple structure but requires strategic planning. Players start at the central base and can place defensive structures along the paths that branch out in all directions. Each path splits into multiple routes where enemies can approach, making it easier to predict invasion paths and set up defensive lines thanks to the surrounding wasteland terrain. While the exact types of defensive buildings and skills aren't clearly visible in the image, basic mineral and gas resources are placed around the central base, making resource management an important aspect of the game. The playstyle fits the defense genre typified by "compilation kills" (comp-stomping), where the player must withstand endless enemy waves to maintain their base. The difficulty is likely set to "medium," though beginners may struggle to hold their defense lines without proper strategy. Despite the map's large scale (4096x4096), the actual focus remains on the central defense points, with an estimated playtime of around 30 minutes. It’s recommended for players who enjoy defense and comp-stomping maps, especially those interested in experiencing the Korean version of a Russian original map. Before playing, it’s crucial to familiarize yourself with defensive building placements and resource routes. Additionally, the map’s name and internal description incorporate Russian elements, so some knowledge of the language could enhance the experience.
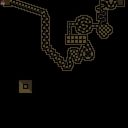
울트라마라톤 바운드 (Ultramarathon Bound)
Ultramarathon Bound는 6명의 플레이어가 동시에 참여할 수 있는 유즈맵으로, 넓은 4096×4096 황무지 타일셋을 배경으로 한 대규모 전투를 제공한다. 맵 전체가 하나의 거대한 경기장처럼 설계되어 있어 플레이어들은 초반에 기지를 구축하고 자원을 확보한 뒤, 상대 진영을 향해 지속적으로 전진한다. 주요 목표는 적 유닛을 물리치며 맵 중앙에 위치한 핵심 지점을 점령하는 것으로, 점령 후에도 주변에 남아 있는 적군을 방어해야 하는 구조다. 전투는 주로 대규모 유닛 군단을 활용한 전면전 형태이며, 좁은 통로보다는 넓은 평야가 많아 기동성이 중요한 요소로 작용한다. 따라서 유닛 조합과 마이크로 관리보다는 매크로 자원 관리와 전투 흐름을 파악하는 능력이 승패를 좌우한다. 플레이 전에는 각 플레이어가 사용할 종족과 유닛 구성을 미리 정하고, 초반 자원 채집 위치와 방어 라인을 계획하는 것이 좋다. 특히, 맵 중앙에 접근하기 전후로 발생하는 전투가 치열하므로, 충분한 방어 유닛을 배치하고, 필요 시 빠르게 재배치할 수 있는 이동 루트를 확보하는 것이 중요하다. 초보자보다는 기본적인 전술을 이해하고 있는 플레이어에게 적합하며, 팀 플레이보다는 개인 간의 경쟁을 즐기는 유저에게 특히 추천한다. Ultramarathon Bound is a user-made map that supports up to six players simultaneously, featuring a massive 4096×4096 desert tileset as the battlefield. The map is designed as a single large arena where players establish bases, gather resources, and then push forward toward the opponent's side. The primary objective is to capture a central point located in the middle of the map after eliminating enemy units, and then defend that point against any remaining foes. Combat primarily involves large-scale army engagements rather than tight choke points, emphasizing mobility across the expansive plains. Consequently, macro resource management and strategic flow control are more decisive than micro unit control. Before playing, participants should decide on their chosen race and unit composition, plan early resource gathering spots, and set up defensive lines. Since battles around the central area become intense, it is advisable to station sufficient defensive units and maintain clear retreat routes for rapid redeployment. This map suits players who have a solid grasp of basic tactics rather than beginners, and it is especially recommended for those who enjoy head-to-head competition over team-based play.
맵 선택 가이드
태그는 맵의 핵심 특징을 빠르게 설명하지만 제작 버전마다 규칙이 다를 수 있습니다. 상세 설명에서 권장 인원, 난이도, 플레이 시간과 버전을 함께 확인한 뒤 다운로드하세요.