
임파서블 스타크래프트 맵 모음
'임파서블' 태그가 등록된 맵을 모았습니다. 장르 하나로 찾기 어려운 플레이 방식, 난이도와 특징을 중심으로 인기 맵과 최신 맵을 비교해 보세요.
- 등록 맵
- 23개
- 누적 다운로드
- 2
- 누적 조회
- 730
인기 맵
다운로드와 조회 반응이 높은 맵입니다.
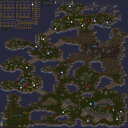
임파서블 컨티뉴엄 3.4a (Impossible Continuum 3.4a)
임파서블 컨티뉴엄 3.4a는 '임파서블 롱게이션(Impossible Longation)'에서 영감을 받아 제작된 4인용 퍼즐·미로형 유즈맵이다. 맵 제목에 '임파서블(Impossible)'이 붙은 만큼 일반적인 디펜스나 RPG와는 달리, 정교한 유닛 컨트롤과 맵 구조 파악이 필수적인 고난도 코스 공략이 핵심 플레이로 보인다. 사막 타일셋 위에 128×128 타일(4096×4096 픽셀) 크기로 펼쳐진 전장은 좁은 통로, 급격한 고저 차이, 시야 제한 구간 등이 연속돼 있어 한 번의 실수로도 유닛을 잃거나 진행이 막힐 수 있다. 제작자 부시웍(bushwack)이 기반을 만들고 하하666(hahaha666)이 편집한 버전 3.4a는 앞서 공개된 2.8, 3.2o, 3.2q, 3.2r, 3.3 등을 거치며 난이도 밸런스와 트리거 구성이 다듬어진 것으로 추정된다. 플레이는 4명이 한 팀으로 움직이거나 각자 경로를 분담해 협동하는 방식이 유력해 보인다. 맵 설명에 별도 승리 조건이 명시되지 않았으나, '임파서블' 계열 맵 특성상 최종 지점 도달 또는 특정 오브젝트 파괴가 클리어 조건일 가능성이 높다. 좁은 길목에서 대형 유닛 통과 여부, 고지·저지 시야 확보, 트리거 발동 타이밍 맞추기 등이 주요 난제로 작용하며, 반복 플레이를 통해 최적 경로와 컨트롤 요령을 익히는 '시행착오 학습' 재미가 중심이다. 난이도가 매우 높으므로 스타크래프트 유닛 이동 메커니즘에 익숙한 숙련자나, 고난도 퍼즐 맵을 즐기는 유저에게 적합하다. 초보자는 혼자 도전하기보다 숙련자와 함께 진입해 맵 구조를 익히는 편이 권장된다. 플레이 전 확인할 점은 다음과 같다. 첫째, 맵 파일명과 내부 제목이 'Impossible Continuum 3.4a'로 동일하므로 버전 혼동 없이 적용해야 한다. 둘째, 4인 전용으로 설계된 듯하므로 인원 미달 시 난이도가 급상승할 수 있다. 셋째, 사막 타일셋 특성상 모래 색상과 유닛 실루엣 구분이 어려울 수 있으니 밝기 설정을 조정하는 것이 좋다. 넷째, cp949 인코딩 환경에서 한글 채팅·트리거 텍스트가 깨지지 않는지 확인 후 시작한다. 다섯째, 앞서 배포된 3.3 이하 버전과 트리거·지형 차이가 있을 수 있으니 최신 버전인 3.4a 기준으로 공략 정보를 찾아야 한다. Impossible Continuum 3.4a is a four-player puzzle/maze-style UMS map inspired by "Impossible Longation." True to the "Impossible" name, the core gameplay revolves around precise unit control and memorizing map layout rather than typical defense or RPG mechanics. The 128×128-tile (4096×4096-pixel) desert terrain strings together narrow corridors, sharp elevation changes, and limited-vision sections, so a single mistake can lose a unit or halt progress entirely. Version 3.4a, originally created by bushwack and edited by hahaha666, appears to have refined difficulty balance and trigger logic through prior releases such as 2.8, 3.2o, 3.2q, 3.2r, and 3.3. Play likely has the four players cooperate as a single team or split routes, with the win condition presumably reaching a final waypoint or destroying a key object—common for the "Impossible" series. Main challenges include squeezing large units through tight chokes, managing high/low-ground vision, and timing trigger activations. The fun lies in trial-and-error learning of optimal paths and micro techniques. Difficulty is very high, so the map suits veterans comfortable with StarCraft's movement mechanics or fans of hardcore puzzle maps. Beginners should join experienced players to learn the layout rather than soloing. Pre-play checklist: (1) File name and internal title both read "Impossible Continuum 3.4a," so verify version consistency. (2) Designed for four players; fewer players will spike difficulty. (3) Desert tileset can blur unit silhouettes against sand—adjust brightness. (4) Confirm cp949 encoding displays Korean chat and trigger text correctly. (5) Earlier versions (3.3 and below) may have different triggers/terrain; base strategies on the latest 3.4a release.
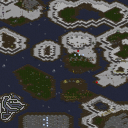
임파서블 (Impossible @GaVrUsH@)
스타크래프트 브루드워 유즈맵 '임파서블(Impossible @GaVrUsH@)'은 5인 협동 플레이를 전제로 한 하드코어 생존형 맵이다. 제작자 JuGGerNaunT가 2009~2010년경 '임파서블 플레이어'를 겨냥해 제작한 테스트 버전 v0.922로, 플랫폼 타일셋 위에 128×128 타일 크기의 넓은 전장을 구축했다. 맵 제목 그대로 '불가능'에 도전하는 컨셉으로, 일반 밀리나 입문용 유즈맵과는 결이 다른 극한의 난이도를 표방한다. 진행 방식은 5명의 플레이어가 한 팀이 되어 몰려드는 적 병력이나 트리거 이벤트를 버텨내는 서바이벌 형태일 것으로 보인다. 내부 설명에 'real impos players'라는 표현이 있는 점으로 미루어, 기존 임파서블 시리즈나 고난이도 컴까기·디펜스 맵에 익숙한 유저층을 타깃으로 삼았음을 알 수 있다. 테스트 버전이라는 표기에서 정식 릴리스 이전의 밸런스 검증 단계였음을 짐작할 수 있으며, 실제 플레이는 예상보다 더 가혹하거나 미완성된 요소가 남아 있을 가능성이 있다. 플레이 전 확인 포인트는 크게 세 가지다. 첫째, 5인 풀파티 구성이 필수적이며 인원 미달 시 클리어 확률이 급격히 떨어진다. 둘째, 플랫폼 타일셋 특성상 지형 활용·시야 차단·유닛 경로 계산이 일반 맵과 달라 초반 빌드 오더와 멀티태스킹 숙련도가 승패를 가른다. 셋째, v0.922 버전 표기상 추후 패치나 최종 버전이 존재할 수 있으므로 최신판 여부를 커뮤니티에서 확인 후 진입하는 편이 안전하다. 추천 대상은 고난이도 협동 서바이벌·디펜스 장르를 즐기는 숙련자, 임파서블류 맵 클리어 경험이 있는 유저, 5인 팀플레이 호흡을 맞춰보고 싶은 클랜·친구 그룹이다. 반면 캐주얼한 컴까기나 입문용 유즈맵을 찾는 플레이어에게는 진입 장벽이 지나치게 높다. 맵 해시 a34b33985999cc68로 아카이브 검색 시 동일 파일임을 확인할 수 있다. StarCraft Brood War UMS map 'Impossible (Impossible @GaVrUsH@)' is a hardcore survival map designed for 5-player cooperative play. Created by JuGGerNaunT around 2009-2010 targeting 'real impossible players,' this test version v0.922 builds a vast battlefield of 128×128 tiles on the Platform tileset. True to its name, the concept challenges the 'impossible,' boasting extreme difficulty distinct from standard melee or beginner UMS maps. The gameplay likely follows a survival format where five players form a single team to endure incoming enemy forces or trigger events. The phrase 'real impos players' in the internal description suggests it targets veterans familiar with existing Impossible-series or high-difficulty comp-stomp and defense maps. The test version label indicates it was in a balance-verification stage before official release, so actual play may be even more unforgiving or contain unfinished elements. Three key points to check before playing: First, a full 5-player party is essential; missing members drastically reduces clear chances. Second, the Platform tileset changes terrain utilization, sight blocking, and unit pathing compared to regular maps, making early build orders and multitasking proficiency decisive. Third, given the v0.922 version tag, later patches or a final version may exist, so verifying the latest build via community channels before diving in is advisable. Recommended for veterans who enjoy high-difficulty cooperative survival/defense genres, users with Impossible-type map clear experience, and clan or friend groups wanting to practice 5-man teamplay. Conversely, the entry barrier is prohibitively high for players seeking casual comp-stomp or beginner UMS maps. The map hash a34b33985999cc68 can confirm file identity when searching archives.
임파서블 파자 (Impossible Paja)
Impossible Paja는 우주 타일셋을 배경으로 한 5인용 유즈맵으로, 일반적인 대전 맵과는 달리 특수한 미션 구조와 제한된 자원 배치를 통해 협력과 경쟁이 동시에 요구되는 플레이를 유도한다. 맵 설명에 명시된 제작자 표기와 외부 사이트 링크 외에는 별도의 트리거나 승리 조건이 공개되지 않았으므로, 실제 게임 내에서는 플레이어가 직접 상황을 파악하며 목표를 설정해야 한다. 우주 공간 특유의 넓은 시야와 장애물 배치는 유닛 이동 경로를 예측하기 어렵게 만들며, 각 플레이어의 시작 위치가 비대칭적으로 배치되어 초반 전략 선택이 승패를 가르는 핵심 요소가 된다. 난이도나 예상 플레이 시간이 표기되지 않았기 때문에 초보자보다는 유즈맵 경험이 풍부하고 즉흥적인 전술 조정이 가능한 중급 이상 유저에게 적합하다. 플레이 전에는 맵 파일의 버전 호환성과 브루드워 패치 버전을 확인하고, 팀 구성 없이 자유로운 외교가 가능한지 여부를 미리 테스트하는 것이 좋다. 전체적으로 예측 불가능한 전개와 높은 자유도가 매력이지만, 명확한 가이드라인이 부족해 초기 혼란이 클 수 있다. 따라서 첫 판에서는 맵 전체를 탐색하며 자원 분포와 주요 교전 지점을 파악하는 데 시간을 할애하는 것이 유리하다. Impossible Paja is a five‑player UMS map set on a space tileset, and unlike standard melee maps it forces both cooperation and competition through a special mission structure and limited resource placement. Apart from the author credit and external site link shown in the map description, no triggers or victory conditions are disclosed, so players must infer objectives during play. The wide sightlines and obstacle layout typical of space maps make unit pathing hard to predict, and the asymmetrical start locations mean early strategic choices become decisive. Because difficulty and expected playtime are not listed, the map suits intermediate or advanced users who are comfortable with improvised tactics rather than beginners. Before playing, verify the map file’s version compatibility with your Brood War patch and test whether free diplomacy without fixed teams works as intended. The unpredictable flow and high freedom are appealing, yet the lack of clear guidelines can cause significant initial confusion. Consequently, spending the first game exploring the whole map to learn resource distribution and key battle zones is advisable.
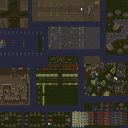
임파서블 옵션 2.8 (Impossible Options 2.8)
스타크래프트 브루드워 유즈맵 '임파서블 옵션 2.8'은 고전 명작 '임파서블 초이스' 계열을 계승한 생존 시나리오형 맵으로 보인다. 최대 5인이 협력해 종족과 유닛을 선택한 뒤, 연이어 출현하는 불가능에 가까운 전술적 상황을 돌파하며 생존 유닛을 보존해 나가는 방식이다. 맵은 사막 타일셋 위에서 128x96 타일 규모로 구성되어 있으며, 별도의 기지 건설이나 자원 채취 없이 주어진 병력만으로 마이크로 컨트롤과 상황 판단에 집중하게 만든다. 진행 방식은 라운드 단위 시나리오 클리어 형태로 추정된다. 각 라운드마다 서로 다른 조합의 적 유닛과 지형 기믹이 등장하며, 플레이어는 제한된 유닛으로 피해를 최소화하면서 적을 섬멸해야 한다. 생존한 유닛은 다음 라운드로 이어지므로 초반의 무리한 교전은 후반부 전력 손실로 직결된다. 종족별 특수 능력과 유닛 상성을 얼마나 정확히 이해하고 있느냐가 생존의 열쇠가 된다. 플레이 경험은 극한의 컨트롤과 팀워크를 요구하는 고난도 협동 미션에 가깝다. 난이도 표기 그대로 '임파서블'에 준하는 공략 난이도를 보여주며, 실수 한 번에 전멸할 수 있는 긴장감이 지속된다. 반면 클리어 시 느껴지는 성취감은 일반적인 디펜스나 컴까기류와 차별화된다. 난이도 곡선이 가파르므로 초보자보다는 유닛 상성과 마이크로에 익숙한 중상급자 팀에게 권장된다. 플레이 전 확인 사항으로는 버전 2.8 기준 밸런스 패치 내역과 트리거 작동 여부, 그리고 5인 풀파티 구성 시 난이도 조절 옵션 유무를 들 수 있다. 혼자서는 공략이 거의 불가능에 가까우므로 음성 채팅이 가능한 고정 파티로 도전하는 것이 바람직하다. StarCraft Brood War use map 'Impossible Options 2.8' appears to be a survival scenario map inheriting the classic 'Impossible Choice' series. Up to 5 players cooperate by selecting a race and units, then breaking through a series of near-impossible tactical situations while preserving surviving units. The map is built on a desert tileset at 128x96 tiles, focusing purely on micro control and decision-making without base building or resource gathering. Progression is estimated to follow a round-based scenario clear format. Each round presents different enemy compositions and terrain gimmicks, requiring players to annihilate foes with limited forces while minimizing losses. Surviving units carry over, so reckless early engagements lead to critical power shortages later. Mastery of racial abilities and unit counters becomes the key to survival. The gameplay experience resembles a high-difficulty cooperative mission demanding extreme control and teamwork. True to the 'Impossible' name, it presents a brutal challenge where a single mistake can wipe the squad, maintaining constant tension. However, the sense of achievement upon clearing differs from standard defense or comp-stomp maps. Due to the steep difficulty curve, it is recommended for intermediate to advanced teams familiar with unit counters and micro, rather than beginners. Pre-play checks include verifying balance patch notes for version 2.8, trigger functionality, and whether difficulty scaling options exist for a full 5-player party. Solo play is nearly impossible, so attempting with a fixed party using voice chat is advisable.
임파서블 시나리오 아주르 (Impossible Scenarios Azure)
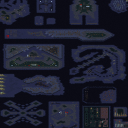
임파서블 시나리오 아주르(Impossible Scenarios Azure)는 스타크래프트 브루드워 맵 유저들 사이에서 도전적인 난이도로 잘 알려진 대표적인 UMS 시나리오 맵입니다. 이 스타크래프트 맵은 기존의 블루, 스노우, 아이스 시리즈의 계보를 잇는 고난도 버전으로 제작되었습니다. 내부 맵 설명에 따르면 제작자 Maverikk이 기존작들보다 훨씬 더 어렵게 설계했다고 명시하고 있어, 플레이어에게 극한의 전략적 판단과 정교한 컨트롤을 요구하는 것이 이 맵의 가장 큰 특징입니다. 전체적인 맵 구조를 살펴보면 화산 타일셋을 배경으로 다수의 독립된 구역과 복잡한 지형들이 섬처럼 배치되어 있습니다. 각 구역마다 유닛과 통계치가 새롭게 조정되어 있어, 기존 정형화된 빌드오더나 단순한 물량 공세로는 공략하기가 매우 까다롭습니다. 특히 적의 공세에 대비해 철저한 방어선을 구축하고, 제한된 자원을 효율적으로 운영하면서 단계별 목표를 달성해야 합니다. 플레이어는 동료들과의 긴밀한 협동을 바탕으로 각 지역의 특성을 파악하고 최적의 유닛 조합을 찾아내야 살아남을 수 있습니다. 다인용 플레이를 지원하는 만큼, 각자의 역할을 분담하고 전술적인 연계를 이루는 과정에서 깊은 재미를 느낄 수 있습니다. 고난도 컴까기나 서바이벌 장르의 유즈맵을 선호하는 유저들에게 안성맞춤인 맵이며, 평범한 플레이에 질렸거나 자신의 한계를 시험하고 싶은 숙련된 사용자들에게 강력히 추천합니다. 플레이를 시작하기 전에 내부 설명에 언급된 것처럼 기존 시리즈보다 훨씬 높게 조정된 난이도와 유닛 스펙 변화를 미리 인지하고, 철저한 사전 준비와 협력 전략을 세우는 것이 중요합니다. Impossible Scenarios Azure is a representative UMS scenario map well-known among Starcraft Brood War map users for its challenging difficulty. This Starcraft map was created as a high-difficulty version succeeding the lineage of the existing Blue, Snow, and Ice series. According to the internal map description, the creator Maverikk explicitly designed it to be much harder than the previous works, making the core characteristic of this map demand extreme strategic judgment and precise control from the players. Looking at the overall map structure, multiple independent areas and complex terrains are arranged like islands against a volcanic tileset background. Since units and statistics are newly adjusted in each zone, it is very difficult to conquer with conventional build orders or simple mass unit strategies. In particular, players must build thorough defense lines against enemy onslaughts, operate limited resources efficiently, and achieve step-by-step objectives. Survivors must understand the characteristics of each region and find the optimal unit combination based on close cooperation with teammates. As it supports multiplayer gameplay, players can experience deep fun in the process of dividing roles and forming tactical linkages. It is a well-suited map for users who prefer high-difficulty computer-opposed or survival genre use maps, and is strongly recommended for experienced users who are tired of ordinary play and want to test their limits. Before starting the game, as mentioned in the internal description, it is important to be aware of the much higher difficulty and unit stat changes adjusted compared to the previous series, and to establish thorough prior preparation and cooperative strategies.
썬큰D 10웨이 13.1 임파서블 (SunkenD 10Way 13.1 Impossible)
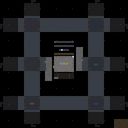
‘썬큰D 10웨이 13.1 임파서블’은 스타크래프트 브루드워의 유즈맵 시리즈 중에서도 손꼽히는 난이도와 긴장감을 자랑하는 디펜스 장르의 정점이라 할 수 있다. 맵의 핵심은 이름에서 짐작할 수 있듯 10방향으로 펼쳐진 입구에서 끊임없이 몰려드는 적들을 방어하는 것이며, 특히 ‘13.1’ 버전은 시리즈 내에서도 난이도가 ‘Even MidImpossible’로 표기될 정도로 극악의 난이도를 자랑한다. 맵은 우주 타일셋을 기반으로 하며, 중앙에 위치한 본진 건물을 중심으로 10개의 주요 입구가 방사형으로 배치되어 있다. 각 입구는 좁고 복잡한 통로를 거쳐 방어 타워가 설치 가능한 지점으로 이어지며, 방어 포인트를 놓치지 않고 최대한 효율적으로 배치해야만 살아남을 수 있는 구조로 설계되어 있다. 적들은 초반에는 약한 저글링과 히드라리스크로 시작하지만, 시간이 지날수록 스커지, 뮤탈리스크, 울트라리스크 등 고급 유닛들이 쏟아져 들어오며 플레이어의 대처 능력을 끊임없이 시험한다. 방어에 성공하려면 초반 자원 관리와 타워 배치 전략이 무엇보다 중요하며, 한 번의 실수가 모든 방어선을 무너뜨릴 수 있다. 맵의 특징 중 하나는 ‘10웨이’라는 이름에 걸맞게 모든 입구에서 동시다발적으로 공격이 들어오기 때문에 멀티태스킹 능력이 필수라는 점이다. 또한, 맵의 크기가 4096x4096으로 매우 크고 복잡한 구조를 가지고 있어, 초보자들은 난이도를 낮춰 연습 모드로 플레이하는 것이 좋겠다. 이 맵은 디펜스 유즈맵의 진수를 경험하고자 하는 숙련자들에게 강력히 추천하며, 특히 ‘임파서블’ 난이도에서 얻는 성취감은 상당한 가치를 지닌다. 플레이 전에는 본진과 주요 방어 포인트의 위치를 숙지하고, 자원과 유닛 생산을 효율적으로 관리할 수 있는 전략을 미리 세워두는 것이 중요하다. 한 번의 실수로 모든 노력이 물거품이 될 수 있기 때문이다. 이 맵은 스타크래프트 유즈맵의 역사에서 빼놓을 수 없는 명작으로, 디펜스 장르의 팬이라면 반드시 플레이해 볼 가치가 있다. This map, ‘SunkenD 10Way 13.1 Impossible,’ stands as one of the most challenging and intense defense-style custom maps in the StarCraft: Brood War modding community. The core gameplay revolves around defending your base from relentless waves of enemies approaching from 10 distinct directions, a concept reflected in both the title and the map’s design. The ‘13.1’ version is notably labeled as ‘Even MidImpossible,’ indicating an extreme difficulty tier that pushes even experienced players to their limits. The map utilizes a space-themed tileset, with your main base centrally located and connected to 10 radial entry points via narrow, maze-like corridors. Each entry point leads to strategic defensive positions where towers can be placed, requiring careful planning and resource management to maximize efficiency. While the early waves consist of weaker units like Zerglings and Hydralisks, the challenge escalates rapidly as time progresses, introducing advanced units such as Scourges, Mutalisks, and Ultralisks. Success hinges on early-game resource allocation and optimal tower placement, as even a single misstep can lead to a cascading failure across defensive lines. The ‘10Way’ aspect means enemies attack from all directions simultaneously, making multitasking a critical skill. The map’s massive 4096x4096 size and intricate layout demand thorough preparation, especially for newcomers who may benefit from practicing on lower difficulty settings first. This map is a must-play for defense genre enthusiasts seeking the ultimate challenge, particularly at the ‘Impossible’ difficulty level, where the sense of achievement is unparalleled. Before diving in, players should familiarize themselves with the base layout and key defensive points, ensuring they have a solid strategy for resource management and unit production. A single oversight can spell disaster, making every decision crucial in this unforgiving yet rewarding experience. ‘SunkenD 10Way 13.1 Impossible’ is a legendary custom map in the StarCraft modding scene, offering an unmatched test of skill and strategy for defense genre fans.
임파서블 시나리오 컴페티션 2 (Impossible Scen. Competition 2)
임파서블 시나리오 컴페티션 2는 짐99(Jim99)가 제작한 5인용 경쟁형 시나리오 맵으로, '마스터 전략가'의 칭호를 걸고 서로 불가능해 보이는 시나리오들을 돌파하며 경주하는 독특한 구성을 보인다. 화산 타일셋의 256×256 타일 크기 맵 위에서 펼쳐지는 이 맵은 기존 디펜스나 밀리와는 전혀 다른, 퍼즐과 미니게임 요소가 결합된 경쟁 시나리오 장르에 가깝다. 플레이어들은 각자 주어진 불가능해 보이는 과제들을 누가 더 빠르게, 더 효율적으로 해결하는지 겨루게 되며, 이는 순수한 전투력보다는 상황 판단력, 빌드 오더 최적화, 트리거 이해도 같은 전략적 사고를 시험한다. 내부 설명에 등장하는 'Impossible Scenarios Competition' 시리즈의 후속작으로 추정되며, 전작의 개념을 계승해 더 다양하고 까다로운 시나리오들을 배치했을 것으로 보인다. 5인 동시 플레이가 기본인 만큼 혼자서는 즐기기 어렵고, 친구나 클랜원들과 함께 음성 채팅을 켜고 도전할 때 진정한 재미가 드러날 맵이다. 난이도 표기는 없으나 '임파서블'이라는 타이틀답게 초보자에게는 진입 장벽이 높을 수 있으며, 숙련자들도 각 시나리오의 의도를 파악하는 데 시행착오가 필요해 보인다. 경쟁과 협력이 공존하는 독특한 규칙 아래에서 누가 진정한 마스터 전략가인지 가려보고 싶은 플레이어들에게 추천한다. 플레이 전에는 맵 내 트리거 설명이나 전작 공략을 미리 숙지하면 진행이 한결 수월할 것이다. Impossible Scen. Competition 2 is a five-player competitive scenario map created by Jim99, where players race through seemingly impossible scenarios competing for the title of master strategist. Built on a 256×256 tile volcanic tileset, this map diverges entirely from traditional defense or melee formats, leaning closer to a competitive scenario genre blended with puzzle and mini-game elements. Each player tackles a series of ostensibly impossible challenges, racing to solve them faster and more efficiently than opponents, testing strategic thinking—situational judgment, build-order optimization, and trigger comprehension—rather than raw combat skill. As a sequel to the 'Impossible Scenarios Competition' series referenced in the description, it likely inherits the predecessor's concept while introducing more varied and demanding scenarios. With five simultaneous players as the baseline, the map is difficult to enjoy solo; its true appeal emerges when tackling challenges with friends or clanmates over voice chat. Though no difficulty rating is provided, the 'Impossible' title suggests a high barrier for beginners, and even veterans will likely need trial and error to grasp each scenario's intent. It is recommended for players who want to prove themselves as master strategists under a unique ruleset where competition and cooperation coexist. Before playing, reviewing the map's trigger descriptions or guides for the previous installment will make progression considerably smoother.
스나이퍼스 RPG 임파서블 (Snipers Rpg "Impossible")
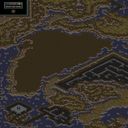
스나이퍼스 RPG 임파서블(Snipers Rpg "Impossible")은 스타크래프트 브루드워 유즈맵 중에서도 독특한 조작 시스템과 긴장감 넘치는 진행 방식으로 알려진 RPG 장르의 맵입니다. 이 스타크래프트 유즈맵은 황무지 타일셋을 배경으로 펼쳐지며, 일반적인 컨트롤 방식에서 벗어나 수동 사격 메커니즘을 적극 활용하는 것이 특징입니다. 내부 설명에 언급된 바와 같이 'a + left click'을 활용한 수동 조준 및 공격 시스템이 게임의 핵심을 이루며, 플레이어는 단순한 유닛 이동을 넘어 정밀한 사격과 위치 선점에 집중해야 합니다. 전체적인 맵 구조를 살펴보면 인공적인 기지 시설과 자연 지형이 복잡하게 얽혀 있어, 적의 공격을 피하고 은폐와 엄폐를 활용하기 좋은 환경을 제공합니다. 최대 7명이 함께 즐길 수 있는 이 맵은 협동 플레이의 중요성이 매우 높으며, 제목에 걸맞게 난이도가 상당할 것으로 추정되어 도전적인 플레이를 선호하는 유저들에게 적합합니다. 수동 조작에 익숙해지는 과정이 필수적이므로, 컨트롤 요소를 즐기는 스타크래프트 브루드워 팬들이나 색다른 액션 RPG 유즈맵을 찾는 이들에게 추천할 만한 작품입니다. 플레이를 시작하기 전에 조작 방식을 미리 숙지하고, 팀원들과의 역할 분담과 사격 타이밍을 맞추는 연습을 한다면 더욱 원활하게 게임을 진행할 수 있을 것입니다. Snipers Rpg "Impossible" is an RPG map in StarCraft: Brood War known for its unique control system and tense progression. Set against a badlands tileset, this StarCraft usemap stands out by actively utilizing a manual shooting mechanic rather than standard attack commands. As noted in the internal description, the core of the gameplay revolves around manual aiming and firing using 'a + left click', requiring players to focus on precise shooting and positioning beyond simple unit movement. Examining the overall map structure, artificial base facilities and natural terrain are intricately intertwined, providing an environment well-suited for avoiding enemy attacks and utilizing cover. Designed for up to seven players, this map places a high importance on cooperative play, and as the title suggests, it is presumed to offer a formidable difficulty, making it ideal for users who prefer challenging gameplay. Because mastering the manual control scheme is essential, it is recommended for StarCraft: Brood War fans who enjoy control-heavy elements or those looking for a distinctive action RPG usemap. Before starting a play, familiarizing oneself with the control method and practicing role division and firing timing with teammates will help facilitate a smoother gameplay experience.
임파서블 다크 갓 (Impossible Dark_GOD)
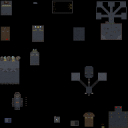
스타크래프트 브루드워 유즈맵 '임파서블 다크 갓'은 5인 협동 생존을 표방하는 임파서블 계열 맵이다. 우주 타일셋 위에서 192×192 타일 크기의 전장이 펼쳐지며, 최대 5명의 플레이어가 한 팀이 되어 몰려드는 적 공세를 막아내야 한다. 맵 설명에 'Typical Impossible Scenarios', 'Work Together', 'Dont Noob It'이라는 문구가 포함되어 있어, 일반적인 임파서블 시나리오의 문법을 따르면서도 팀워크를 강제하는 설계임을 알 수 있다. 임파서블 장르 특성상 초반부터 강력한 유닛이 끊임없이 생성되며, 자원 관리와 병력 분배, 진형 유지가 생존의 열쇠가 된다. 입구 막기나 타워 디펜스 방식이 혼용될 가능성이 높으며, 난이도 표기가 없지만 제목 그대로 '불가능'에 가까운 도전이 예상된다. 제작자 'XXxThe_GODdxXX'의 네이밍에서 고난도 맵 제작 의도가 뚜렷하다. 솔로 플레이는 사실상 불가능에 가깝고, 5인 파티가 음성 채팅을 하며 역할을 분담해야 클리어 가능성이 생긴다. 맵 구조는 중앙 본진과 여러 공격 루트가 존재하는 전형적인 생존형 레이아웃으로 보인다. 각 플레이어는 자원을 채취해 방어 시설과 병력을 생산하며 파도를 막는다. 트리거 웨이브 시스템은 시간이 지날수록 유닛 수와 업그레이드가 상승하며, 보스급 유닛이 전선을 노린다. 팀원 간 자원 공유와 병력 지원이 필수적이고, 한 명이 무너지면 연쇄 붕괴된다. 난이도는 '매우 어려움' 이상, 클리어까지 60분 내외가 소요될 수 있다. 추천 대상은 임파서블 경험이 풍부하고 팀 호흡이 맞는 5인 고정 파티다. 초보자는 난이도 장벽에 부딪혀 재미를 느끼기 어렵다. 플레이 전 확인 포인트는 파일명 오타('Imposible') 영향 여부, 트리거 오류 가능성, 5인 미만 시 난이도 조절 트리거 작동 여부다. StarCraft Brood War UMS map 'Impossible Dark God' is an Impossible-series map designed for 5-player cooperative survival. The battlefield unfolds on a space tileset at 192×192 tiles, where up to five players form a single team to fend off relentless enemy assaults. The map description includes 'Typical Impossible Scenarios', 'Work Together', and 'Dont Noob It', indicating it follows classic Impossible scenario conventions while enforcing teamwork. True to the genre, powerful units spawn continuously from the early game, making resource management, force distribution, and formation maintenance critical for survival. The layout likely mixes choke-point blocking and tower defense elements, and despite no explicit difficulty rating, the title suggests a near-impossible challenge. The creator tag 'XXxThe_GODdxXX' signals a clear intent for high difficulty. Solo play is practically unfeasible; a full 5-player party using voice chat to divide roles stands a chance. The map structure appears to be a typical survival layout with a central main base and multiple attack routes. Each player gathers resources at their start location to build defenses and produce units against waves. The trigger-based wave system increases unit count and upgrades over time, with boss-class units appearing at key waves to break the front line. Resource sharing and troop support among teammates are essential, as one player's collapse triggers a chain reaction. Difficulty is estimated at 'Very Hard' or higher, with a clear time around 60 minutes. The recommended audience is a fixed 5-player party experienced in Impossible maps with strong team synergy. Beginners will likely hit a difficulty wall and find little enjoyment. Pre-play checks should include whether the filename typo ('Imposible') affects the game, potential trigger bugs that halt progress, and whether difficulty scaling triggers activate when starting with fewer than five players.
임파서블 그리므 V1.3 (Impossible GriM V1.3)
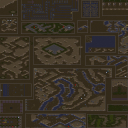
스타크래프트 브루드워 유즈맵 '임파서블 그리므 V1.3'은 제작자 Grim_ReeFaa가 2011년 선보인 '임파서블' 시리즈의 네 번째 작품으로, 앞서 출시된 '임파서블 위어드', '임파서블 리콜', '임파서블 스킬즈'의 계보를 잇는다. 맵 제목 그대로 '불가능에 가까운' 난이도를 표방하며, 총 18개의 스테이지와 마지막 보스 라운드로 구성된 단계별 도전 과제 형식을 띤다. 사막 타일셋 위에 256x256 타일, 8192x8192 크기의 광활한 전장이 펼쳐져 있으며, 최대 5인까지 입장 가능한 협동 플레이를 전제로 설계된 것으로 보인다. 진행 방식은 각 레벨마다 제시되는 정교한 트리거 장애물과 순발력 테스트를 돌파하며 다음 구역으로 나아가는 전형적인 '임파서블'류 피하기·퍼즐 구조다. 레벨이 올라갈수록 요구되는 컨트롤 정밀도와 패턴 암기량이 급격히 상승하며, 최종 보스 라운드에서는 그간 익힌 기량을 총동원해야 하는 종합 시험대가 기다린다. 혼자서는 클리어가 사실상 불가능에 가깝고, 5명이 역할을 분담하거나 서로의 실수를 커버하며 시도 횟수를 줄여야 현실적인 공략이 가능하다. 플레이 경험은 극한의 긴장감과 반복 학습의 쾌감이 교차한다. 사막 배경의 단조로운 색감 속에서 화려한 이펙트나 유닛 스킨이 아닌 순수한 트리거 기교로 승부하는 연출이 인상적이며, 2011년 제작 당시 기준에서도 높은 완성도를 자랑한다. 다만 난이도 장벽이 워낙 높아 초보자나 캐주얼 유저에게는 진입 자체가 부담스러울 수 있으며, 팀원 간 호흡이 맞지 않으면 무한 재시작의 굴레에 빠지기 쉽다. 추천 대상은 고난이도 컨트롤 맵, 피하기·퍼즐 장르를 즐기는 숙련자 그룹이다. 5인 파티를 꾸려 음성 채팅으로 호흡을 맞출 수 있는 환경이라면 도전 가치가 충분하다. 플레이 전 확인할 점은 맵 버전(V1.3.5 기준) 적용 여부와 트리거 작동 안정성, 그리고 팀원 전원이 '임파서블'류 특유의 즉사 패턴과 대기 시간 감내 의지가 있는지다. 고전 명작 유즈맵의 정수를 맛보고 싶은 하드코어 유저에게 권한다. StarCraft Brood War UMS map 'Impossible GriM V1.3' is the fourth installment in the 'Impossible' series created by Grim_ReeFaa in 2011, following 'Impossible Weird', 'Impossible Recall', and 'Impossible Skillz'. True to its title, it boasts near-impossible difficulty, structured as a stage-based challenge comprising 18 levels plus a final boss round. A vast 8192x8192 battlefield on the Desert tileset (256x256 tiles) unfolds, designed for cooperative play supporting up to 5 players. Gameplay follows the classic 'Impossible' style of dodge and puzzle mechanics: players must navigate intricate trigger-based obstacles and reflex tests in each level to advance. As levels progress, the required control precision and pattern memorization spike sharply, culminating in a final boss round that demands total mastery of acquired skills. Solo clearance is virtually impossible; a full party of five dividing roles and covering mistakes is essential for a realistic attempt. The experience oscillates between extreme tension and the satisfaction of mastery through repetition. The presentation relies on pure trigger craftsmanship rather than flashy effects or custom skins within the monotonous desert palette, showcasing high polish for a 2011 creation. However, the difficulty barrier is so high that beginners or casual users may find entry daunting, and poor team coordination leads to an endless cycle of restarts. Recommended for veteran groups who enjoy high-difficulty control maps and the dodge/puzzle genre. If you can assemble a 5-player party with voice communication, the challenge is well worth undertaking. Pre-play checks should include verifying the map version (based on V1.3.5), trigger stability, and whether all members possess the patience for instant-death patterns and waiting times characteristic of 'Impossible' maps. Recommended for hardcore users seeking the essence of classic masterpiece UMS.
썬큰 디펜스 10웨이 16.0 임파서블 (SunkenD 10Way 16.0 Impossible)
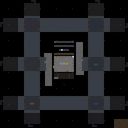
스타크래프트 브루드워 맵을 즐기는 유저들이라면 클래식 유즈맵 중에서도 독특한 방어 구성을 지닌 작품에 눈길이 가기 마련이다. 이번에 소개할 썬큰 디펜스 10웨이 16.0 임파서블(SunkenD 10Way 16.0 Impossible)은 다방면에서 몰려오는 적들을 상대하며 기지를 지켜내는 대표적인 디펜스 장르의 스타크래프트 맵이다. 전통적인 디펜스 유즈맵의 문법을 따르면서도 맵 구조와 레벨 디자인에서 차별화를 꾀한 것이 특징으로, 오랫동안 시리즈로 사랑받아 온 버전의 연장선에 있다. 이 맵의 가장 두드러진 진행 방식은 사방으로 뻗어나간 복잡한 경로를 통해 적들이 다가온다는 점이다. 플레이어는 중앙 혹은 지정된 거점에서 방어선을 구축하고, 끊임없이 몰려오는 공세를 막아내야 한다. 내부 설명에 언급된 것처럼 총 25개의 레벨로 구성되어 있으며, 브루드워 버전의 특성이 반영되어 럴커 같은 추가적인 위협 요소가 등장한다. 단순히 유닛을 배치하고 버티는 것을 넘어, 다중으로 진입하는 적들의 동선을 파악하고 효율적인 화력 배분을 고민해야 하는 플레이 경험을 선사한다. 특히 난이도 명칭에 걸맞게 후반부로 갈수록 압도적인 물량이 들이닥치기 때문에 철저한 빌드와 자원 관리가 필수적이다. 이러한 구조 덕분에 이 맵은 평소 타워 디펜스나 다방면 방어류 유즈맵을 선호하는 이들에게 알맞은 도전 과제를 제공한다. 동료들과 함께 협력하여 각자의 구역을 틀어막거나, 유기적인 방어 라인을 형성하는 재미를 느낄 수 있다. 다만 높은 난이도를 지향하는 만큼 초심자에게는 다소 버거울 수 있으며, 빌드 호흡을 맞출 수 있는 숙련된 플레이어들과 함께 도전하는 편이 몰입도를 높이는 방법이다. 진입 장벽이 존재하는 만큼 방어 유닛의 배치 효율과 웨이별 타이밍을 연구하는 재미를 즐기는 유저라면 한 번쯤 플레이해 볼 가치가 있는 클래식 디펜스 맵이다. For those who enjoy StarCraft: Brood War custom maps, titles with unique defensive layouts naturally catch the eye. SunkenD 10Way 16.0 Impossible is a quintessential defense genre map in which players must protect their base against enemies approaching from multiple directions. Following the grammar of traditional defense use maps while differentiating itself through map structure and level design, it sits as an extension of a beloved series that has endured for a long time. The most prominent gameplay mechanism of this map is that enemies approach through complex paths branching out in all directions. Players must establish defensive lines at central or designated outposts and withstand relentless waves of assaults. As noted in the internal description, the game consists of a total of 25 levels, reflecting the characteristics of the Brood War version with additional threats like Lurkers making an appearance. Rather than simply placing units and holding out, it offers a gameplay experience that requires understanding the movement routes of enemies entering from multiple fronts and planning efficient firepower distribution. True to its difficulty name, overwhelming numbers surge toward the later stages, making meticulous builds and resource management essential. Thanks to this structure, the map provides a fitting challenge for those who generally prefer tower defense or multi-directional defense custom maps. Players can cooperate with allies to seal off their respective sectors or experience the fun of forming organic defense lines. However, because it aims for high difficulty, it may feel somewhat burdensome for beginners, and challenging it alongside experienced players who can coordinate build pacing is a great way to increase immersion. Given the barrier to entry, it is a classic defense map well worth playing for users who enjoy studying placement efficiency and wave timing.
썬큰 디펜스 10웨이 15.8 임파서블 (SunkenD 10Way 15.8 Impossible)
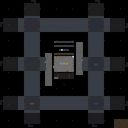
썬큰 디펜스 10웨이 15.8 임파서블(SunkenD 10Way 15.8 Impossible)은 스타크래프트 브루드워 맵 유즈맵 장르에서 오랫동안 사랑받아 온 대표적인 디펜스 계열의 스테디셀러입니다. 본작은 제목에서 유추할 수 있듯 다양한 방향에서 몰려오는 적들을 효과적으로 방어하는 구조를 가지고 있으며, 특히 10개의 방향이라는 독특한 지형적 특징을 통해 기존의 일자형이나 사방 방어와는 차별화된 몰입감을 선사합니다. 전체적인 진행 방식은 각 플레이어가 지정된 구역에서 주어진 유닛과 건물을 활용해 밀려오는 적의 공세를 저지하는 형태로 이루어집니다. 맵 구조를 살펴보면 중앙의 핵심 구역을 중심으로 여러 갈래의 길이 방사형 혹은 다중 축으로 뻗어 나가는 형태를 취하고 있으며, 이는 플레이어 간의 긴밀한 협동과 유기적인 자원 및 방어선 연계를 강하게 요구합니다. 특히 버전 명칭에 포함된 '임파서블'이라는 수식어에 걸맞게, 후반부로 갈수록 극도로 높아지는 난이도와 거세지는 적의 러시는 도전 의식을 강하게 자극합니다. 단순히 건물을 짓고 버티는 것을 넘어, 유닛의 배치 위치와 타이밍, 그리고 팀원 간의 방어선 공백을 메우는 전략적 판단이 승패를 가르는 핵심 요소로 작용합니다. 브루드워 특유의 유닛 조작 감각을 살리면서도 방어 전술의 재미를 극대화한 이 맵은, 고난도 디펜스 장르를 선호하는 유저들이나 친구들과 함께 협동 플레이의 극한을 경험하고 싶은 이들에게 매우 훌륭한 선택지가 됩니다. 다만 난이도가 매우 높기 때문에 초심자라면 사전에 공략 동선이나 방어 빌드를 충분히 숙지하고 도전하는 것을 권장합니다. SunkenD 10Way 15.8 Impossible is a steady-selling defense genre map that has long been loved in the StarCraft: Brood War UMS map category. As the title suggests, this map features a structure where players effectively defend against enemies rushing in from various directions, and in particular, it provides a unique immersion differentiated from traditional linear or four-way defenses through the distinct topographical feature of ten directions. The overall progression format involves each player blocking the offensive waves of enemies using given units and buildings within designated areas. Looking at the map structure, multiple paths extend radially or in multi-axes centered around the core area, which strongly demands close cooperation and organic resource and defense line linkage among players. True to the modifier 'Impossible' included in the version name, the extremely increasing difficulty and fierce enemy rushes toward the latter half strongly stimulate the sense of challenge. Beyond simply building structures and holding out, strategic judgments such as the placement positions and timing of units, and filling gaps in defense lines among teammates act as core factors determining victory or defeat. This map, which maximizes the fun of defense tactics while preserving the unique unit control feel of Brood War, serves as a very excellent choice for users who prefer high-difficulty defense genres or those who want to experience the limit of cooperative play with friends. However, because the difficulty is very high, beginners are recommended to sufficiently familiarize themselves with strategy routes and defense builds before challenging.
최근 등록된 맵
새로 추가된 파일과 버전을 확인하세요.
썬큰 디펜스 10웨이 16.0 임파서블 (SunkenD 10Way 16.0 Impossible)
스타크래프트 브루드워 맵을 즐기는 유저들이라면 클래식 유즈맵 중에서도 독특한 방어 구성을 지닌 작품에 눈길이 가기 마련이다. 이번에 소개할 썬큰 디펜스 10웨이 16.0 임파서블(SunkenD 10Way 16.0 Impossible)은 다방면에서 몰려오는 적들을 상대하며 기지를 지켜내는 대표적인 디펜스 장르의 스타크래프트 맵이다. 전통적인 디펜스 유즈맵의 문법을 따르면서도 맵 구조와 레벨 디자인에서 차별화를 꾀한 것이 특징으로, 오랫동안 시리즈로 사랑받아 온 버전의 연장선에 있다. 이 맵의 가장 두드러진 진행 방식은 사방으로 뻗어나간 복잡한 경로를 통해 적들이 다가온다는 점이다. 플레이어는 중앙 혹은 지정된 거점에서 방어선을 구축하고, 끊임없이 몰려오는 공세를 막아내야 한다. 내부 설명에 언급된 것처럼 총 25개의 레벨로 구성되어 있으며, 브루드워 버전의 특성이 반영되어 럴커 같은 추가적인 위협 요소가 등장한다. 단순히 유닛을 배치하고 버티는 것을 넘어, 다중으로 진입하는 적들의 동선을 파악하고 효율적인 화력 배분을 고민해야 하는 플레이 경험을 선사한다. 특히 난이도 명칭에 걸맞게 후반부로 갈수록 압도적인 물량이 들이닥치기 때문에 철저한 빌드와 자원 관리가 필수적이다. 이러한 구조 덕분에 이 맵은 평소 타워 디펜스나 다방면 방어류 유즈맵을 선호하는 이들에게 알맞은 도전 과제를 제공한다. 동료들과 함께 협력하여 각자의 구역을 틀어막거나, 유기적인 방어 라인을 형성하는 재미를 느낄 수 있다. 다만 높은 난이도를 지향하는 만큼 초심자에게는 다소 버거울 수 있으며, 빌드 호흡을 맞출 수 있는 숙련된 플레이어들과 함께 도전하는 편이 몰입도를 높이는 방법이다. 진입 장벽이 존재하는 만큼 방어 유닛의 배치 효율과 웨이별 타이밍을 연구하는 재미를 즐기는 유저라면 한 번쯤 플레이해 볼 가치가 있는 클래식 디펜스 맵이다. For those who enjoy StarCraft: Brood War custom maps, titles with unique defensive layouts naturally catch the eye. SunkenD 10Way 16.0 Impossible is a quintessential defense genre map in which players must protect their base against enemies approaching from multiple directions. Following the grammar of traditional defense use maps while differentiating itself through map structure and level design, it sits as an extension of a beloved series that has endured for a long time. The most prominent gameplay mechanism of this map is that enemies approach through complex paths branching out in all directions. Players must establish defensive lines at central or designated outposts and withstand relentless waves of assaults. As noted in the internal description, the game consists of a total of 25 levels, reflecting the characteristics of the Brood War version with additional threats like Lurkers making an appearance. Rather than simply placing units and holding out, it offers a gameplay experience that requires understanding the movement routes of enemies entering from multiple fronts and planning efficient firepower distribution. True to its difficulty name, overwhelming numbers surge toward the later stages, making meticulous builds and resource management essential. Thanks to this structure, the map provides a fitting challenge for those who generally prefer tower defense or multi-directional defense custom maps. Players can cooperate with allies to seal off their respective sectors or experience the fun of forming organic defense lines. However, because it aims for high difficulty, it may feel somewhat burdensome for beginners, and challenging it alongside experienced players who can coordinate build pacing is a great way to increase immersion. Given the barrier to entry, it is a classic defense map well worth playing for users who enjoy studying placement efficiency and wave timing.
썬큰 디펜스 10웨이 15.8 임파서블 (SunkenD 10Way 15.8 Impossible)
썬큰 디펜스 10웨이 15.8 임파서블(SunkenD 10Way 15.8 Impossible)은 스타크래프트 브루드워 맵 유즈맵 장르에서 오랫동안 사랑받아 온 대표적인 디펜스 계열의 스테디셀러입니다. 본작은 제목에서 유추할 수 있듯 다양한 방향에서 몰려오는 적들을 효과적으로 방어하는 구조를 가지고 있으며, 특히 10개의 방향이라는 독특한 지형적 특징을 통해 기존의 일자형이나 사방 방어와는 차별화된 몰입감을 선사합니다. 전체적인 진행 방식은 각 플레이어가 지정된 구역에서 주어진 유닛과 건물을 활용해 밀려오는 적의 공세를 저지하는 형태로 이루어집니다. 맵 구조를 살펴보면 중앙의 핵심 구역을 중심으로 여러 갈래의 길이 방사형 혹은 다중 축으로 뻗어 나가는 형태를 취하고 있으며, 이는 플레이어 간의 긴밀한 협동과 유기적인 자원 및 방어선 연계를 강하게 요구합니다. 특히 버전 명칭에 포함된 '임파서블'이라는 수식어에 걸맞게, 후반부로 갈수록 극도로 높아지는 난이도와 거세지는 적의 러시는 도전 의식을 강하게 자극합니다. 단순히 건물을 짓고 버티는 것을 넘어, 유닛의 배치 위치와 타이밍, 그리고 팀원 간의 방어선 공백을 메우는 전략적 판단이 승패를 가르는 핵심 요소로 작용합니다. 브루드워 특유의 유닛 조작 감각을 살리면서도 방어 전술의 재미를 극대화한 이 맵은, 고난도 디펜스 장르를 선호하는 유저들이나 친구들과 함께 협동 플레이의 극한을 경험하고 싶은 이들에게 매우 훌륭한 선택지가 됩니다. 다만 난이도가 매우 높기 때문에 초심자라면 사전에 공략 동선이나 방어 빌드를 충분히 숙지하고 도전하는 것을 권장합니다. SunkenD 10Way 15.8 Impossible is a steady-selling defense genre map that has long been loved in the StarCraft: Brood War UMS map category. As the title suggests, this map features a structure where players effectively defend against enemies rushing in from various directions, and in particular, it provides a unique immersion differentiated from traditional linear or four-way defenses through the distinct topographical feature of ten directions. The overall progression format involves each player blocking the offensive waves of enemies using given units and buildings within designated areas. Looking at the map structure, multiple paths extend radially or in multi-axes centered around the core area, which strongly demands close cooperation and organic resource and defense line linkage among players. True to the modifier 'Impossible' included in the version name, the extremely increasing difficulty and fierce enemy rushes toward the latter half strongly stimulate the sense of challenge. Beyond simply building structures and holding out, strategic judgments such as the placement positions and timing of units, and filling gaps in defense lines among teammates act as core factors determining victory or defeat. This map, which maximizes the fun of defense tactics while preserving the unique unit control feel of Brood War, serves as a very excellent choice for users who prefer high-difficulty defense genres or those who want to experience the limit of cooperative play with friends. However, because the difficulty is very high, beginners are recommended to sufficiently familiarize themselves with strategy routes and defense builds before challenging.
썬큰 디펜스 10웨이 14.7 임파서블 (SunkenD 10Way 14.7 Impossible)
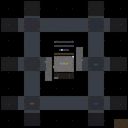
썬큰 디펜스 10웨이 14.7 임파서블(SunkenD 10Way 14.7 Impossible)은 스타크래프트 브루드워 맵에서 오랜 시간 사랑받아 온 클래식 디펜스 유즈맵 시리즈의 대표적인 후속 버전 중 하나입니다. 이 맵은 우주 테마의 타일셋을 바탕으로 하여 독특한 구조 속에서 끊임없이 몰려오는 적의 공세를 막아내는 재미를 선사합니다. 전체적인 맵 구조를 살펴보면, 중앙의 핵심 구역을 중심으로 사방으로 뻗어 나가는 다각도 방어 라인 형태를 띠고 있어 플레이어 간의 협동과 전략적인 배치가 매우 중요하게 작용합니다. 내부 정보와 타이틀에서 엿볼 수 있듯이 총 25개의 웨이로 구성된 레벨을 돌파해야 하며, 난이도가 임파서블로 설정되어 있어 초보자보다는 고난도 방어 게임을 선호하는 유저들에게 안성맞춤입니다. 다방면에서 동시에 적이 압박해 오는 진행 방식 덕분에 플레이어는 한순간도 긴장을 놓을 수 없으며, 각 진지의 위치와 유닛 조합을 정교하게 조율해야 승리에 다가갈 수 있습니다. 특히 6인 플레이를 지원하므로 여러 명이 함께 호흡을 맞추며 각자의 방어 구역을 사수하는 협동 플레이의 묘미를 극대화합니다. 친구들과 함께 고난도 디펜스 장르의 진수를 맛보고 싶거나, 극한의 상황에서 살아남는 서바이벌 형태의 도전적인 플레이를 즐기는 유저들에게 강력히 추천할 만한 맵입니다. 플레이를 시작하기 앞서 각 방향에서 몰려오는 적의 유형과 웨이마다의 타이밍을 파악하는 것이 클리어로 가는 지름길이 될 것입니다. SunkenD 10Way 14.7 Impossible is one of the representative successive versions of the classic defense Use Map series that has been loved for a long time in StarCraft: Brood War. Based on a space-themed tileset, this map delivers the fun of fending off relentlessly incoming enemy onslaughts within a unique structural layout. Looking at the overall map structure, it features a multi-directional defense line form extending outward from a central core area, making cooperation and strategic placement among players crucial. As glimpsed from internal information and the title, players must break through levels consisting of a total of 25 waves, and with the difficulty set to Impossible, it is well-suited for users who prefer high-difficulty defense games rather than beginners. Thanks to the progression method where enemies pressure from multiple directions simultaneously, players cannot let down their guard for a moment, and they must meticulously coordinate the position of each base and unit combination to approach victory. In particular, since it supports 6-player gameplay, it maximizes the charm of cooperative play where multiple people breathe together and defend their respective defensive zones. It is strongly recommended for users who want to taste the essence of the high-difficulty defense genre with friends or enjoy challenging gameplay in the form of survival where one survives extreme situations. Before starting play, grasping the types of enemies flocking from each direction and the timing of each wave will be the shortcut to clearing the game.
선큰 디펜스 10웨이 14.1 임파서블 (SunkenD 10Way 14.1 Impossible)
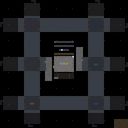
스타크래프트 브루드워 유즈맵 '선큰 디펜스 10웨이 14.1 임파서블'은 6인 협력 디펜스 장르의 대표적인 선큰 디펜스 계열 맵이다. 우주 타일셋의 128×128 타일(4096×4096) 맵에서 플레이어들은 10개 방향에서 몰려오는 적 웨이브를 선큰 콜로니와 유닛으로 막아내야 한다. 내부 설명에 따르면 총 25레벨로 구성되며 'Even Mid Impossible' 표기에서 볼 수 있듯 중앙 대칭형 배치와 극한 난이도를 지향한다. 버전 넘버 14.1은 오랜 기간 밸런스 조정이 이어졌음을 시사하며, 12.6부터 13.5까지 다수 버전이 존재하는 점도 검증된 인기 맵임을 보여준다. 진행 방식은 일반적인 선큰 디펜스와 유사하다. 게임 시작 시 각 플레이어는 지정된 진영에서 자원을 채취하며 선큰 콜로니를 배치하고 업그레이드를 통해 방어력을 높인다. 10방향(10Way)에서 동시에 적이 출현하므로 입구 막기식 단순 배치가 아닌, 다중 전선 커버와 자원 분배, 유닛 지원이 핵심이다. 레벨이 올라갈수록 저글링, 울트라리스크, 가디언 등 고티어 유닛이 등장하며, 'Impossible' 난이도답게 실수 한 번에 전멸할 수 있는 긴장감이 지속된다. 플레이 경험은 고난도 협력 디펜스를 즐기는 유저에게 적합하다. 6인 풀파티로 음성 채팅을 병행하며 역할 분담(자원 담당, 선큰 배치, 유닛 컨트롤)을 명확히 해야 클리어 가능성이 생긴다. 무작위 매칭으로는 난이도 장벽이 높아 초보자에게는 권장하지 않는다. 맵 크기가 넓어 미니맵 확인과 병력 이동 동선 관리가 중요하다. 추천 대상은 선큰 디펜스 메커니즘에 익숙하고 극한 난이도 도전을 원하는 중상급자 팀이다. 플레이 전 확인 포인트는 버전 14.1 기준 트리거 작동 여부, 6인 전원 입장 시 시작 위치 고정 여부, 그리고 'Even Mid' 설정으로 인한 자원 대칭성이다. 오랜 버전 역사를 가진 만큼 커뮤니티 자료나 기존 공략을 참고하면 초기 빌드 오더를 잡는 데 도움이 된다. StarCraft Brood War UMS map 'SunkenD 10Way 14.1 Impossible' is a classic Sunken Defense style cooperative defense map for six players. On a space tileset measuring 128×128 tiles (4096×4096), players must stop enemy waves spawning from ten directions using Sunken Colonies and units. The internal description notes 25 levels and an 'Even Mid Impossible' setting, indicating symmetrical starting positions and extreme difficulty. The version number 14.1 suggests long-term balance tuning, and the existence of prior versions from 12.6 to 13.5 shows a well-established map. Gameplay follows standard Sunken Defense mechanics. Each player gathers resources at a fixed base, places Sunken Colonies, and upgrades defenses. Because enemies attack from ten paths simultaneously, simple chokepoint blocking is insufficient; covering multiple fronts, resource allocation, and unit support are crucial. Higher tiers bring Ultralisks, Guardians, and other heavy units, and the 'Impossible' label means a single mistake can wipe the team. The experience suits players who enjoy high-difficulty cooperative defense. A full six-person party with voice chat and clear role division (economy, building, micro) is almost mandatory for clearance; random matchmaking is not recommended for beginners. The large map size demands constant minimap awareness and efficient army movement. Recommended for intermediate to advanced teams familiar with Sunken Defense mechanics seeking an extreme challenge. Pre-play checks include trigger functionality on version 14.1, fixed start locations for all six players, and resource symmetry from the 'Even Mid' setting. Given the long version history, community guides can help establish early build orders.
썬큰 디펜스 10웨이 13.8 임파서블 (SunkenD 10Way 13.8 Impossible)
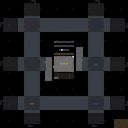
썬큰 디펜스 10웨이 13.8 임파서블은 스타크래프트 브루드워 유즈맵 중에서도 오랜 기간 버전 업을 거치며 고난이도 디펜스 장르의 정점에 오른 맵이다. 우주 타일셋의 128x128 타일 전장에서 6명의 플레이어가 10개 방향에서 몰려오는 적 웨이브를 막아내는 구조로, 제목 그대로 '임파서블(Impossible)' 난이도를 표방한다. 내부 설명에 'levelsEven MidImpossible'이라 적힌 점으로 미뤄 볼 때, 웨이브 레벨 설계가 균일하게 배분되어 있으며 중간 단계의 임파서블 난이도에 맞춰 밸런스가 조정되었음을 짐작할 수 있다. 핵심 플레이는 저그의 대표적 방어 건물인 썬큰 콜로니를 중심으로 유닛 생산과 업그레이드, 자원 관리를 병행하며 끝없이 쏟아지는 적을 소멸시키는 것이다. 10방향이라는 다중 진입로는 플레이어 간 역할 분담과 실시간 소통을 강제하며, 한 곳이라도 뚫리면 연쇄 붕괴로 이어지는 긴장감을 유지한다. 버전 13.8에 이르기까지 12.6, 12.7, 13.1, 13.5 등 지속적인 패치가 있었던 만큼, 초반 빌드 오더 최적화와 중반 이후 특수 웨이브 대처법이 공략의 핵심이 된다. 난이도가 극도로 높기 때문에 무작정 유닛을 뽑기보다는 업그레이드 타이밍과 가스 효율, 테크 트리 선택이 생존을 가른다. 추천 대상은 고난이도 협동 디펜스를 즐기는 숙련자 그룹이며, 입문자는 하위 버전으로 감각을 익힌 뒤 도전하는 것이 좋다. 플레이 전에는 트리거 랙 발생 여부, 버전별 웨이브 구성 차이, 동맹 간 자원 공유 설정 등을 확인해야 한다. Sunken Defense 10Way 13.8 Impossible stands at the pinnacle of high-difficulty defense maps in StarCraft Brood War UMS, having undergone continuous version updates over a long period. On a 128x128 tile space tileset battlefield, six players must stop enemy waves rushing from ten directions, living up to the "Impossible" difficulty in its title. The internal description "levelsEven MidImpossible" suggests that wave levels are evenly distributed and balanced around a mid-tier Impossible difficulty. Core gameplay revolves around the Zerg's iconic Sunken Colony, requiring players to manage unit production, upgrades, and economy simultaneously to annihilate endless hordes. The ten entry points enforce role division and real-time communication among players; a single breach often leads to a chain collapse, maintaining constant tension. With persistent patches up to version 13.8 following 12.6, 12.7, 13.1, and 13.5, optimizing early build orders and preparing for special mid-to-late game waves become the crux of strategy. Because the difficulty is extreme, survival depends less on massing units and more on upgrade timing, gas efficiency, and tech tree choices. It is recommended for veteran groups who enjoy hardcore cooperative defense; beginners should practice on lower versions first. Before playing, check for trigger lag, wave composition differences between versions, and allied resource sharing settings.
썬큰D 10웨이 13.1 임파서블 (SunkenD 10Way 13.1 Impossible)
‘썬큰D 10웨이 13.1 임파서블’은 스타크래프트 브루드워의 유즈맵 시리즈 중에서도 손꼽히는 난이도와 긴장감을 자랑하는 디펜스 장르의 정점이라 할 수 있다. 맵의 핵심은 이름에서 짐작할 수 있듯 10방향으로 펼쳐진 입구에서 끊임없이 몰려드는 적들을 방어하는 것이며, 특히 ‘13.1’ 버전은 시리즈 내에서도 난이도가 ‘Even MidImpossible’로 표기될 정도로 극악의 난이도를 자랑한다. 맵은 우주 타일셋을 기반으로 하며, 중앙에 위치한 본진 건물을 중심으로 10개의 주요 입구가 방사형으로 배치되어 있다. 각 입구는 좁고 복잡한 통로를 거쳐 방어 타워가 설치 가능한 지점으로 이어지며, 방어 포인트를 놓치지 않고 최대한 효율적으로 배치해야만 살아남을 수 있는 구조로 설계되어 있다. 적들은 초반에는 약한 저글링과 히드라리스크로 시작하지만, 시간이 지날수록 스커지, 뮤탈리스크, 울트라리스크 등 고급 유닛들이 쏟아져 들어오며 플레이어의 대처 능력을 끊임없이 시험한다. 방어에 성공하려면 초반 자원 관리와 타워 배치 전략이 무엇보다 중요하며, 한 번의 실수가 모든 방어선을 무너뜨릴 수 있다. 맵의 특징 중 하나는 ‘10웨이’라는 이름에 걸맞게 모든 입구에서 동시다발적으로 공격이 들어오기 때문에 멀티태스킹 능력이 필수라는 점이다. 또한, 맵의 크기가 4096x4096으로 매우 크고 복잡한 구조를 가지고 있어, 초보자들은 난이도를 낮춰 연습 모드로 플레이하는 것이 좋겠다. 이 맵은 디펜스 유즈맵의 진수를 경험하고자 하는 숙련자들에게 강력히 추천하며, 특히 ‘임파서블’ 난이도에서 얻는 성취감은 상당한 가치를 지닌다. 플레이 전에는 본진과 주요 방어 포인트의 위치를 숙지하고, 자원과 유닛 생산을 효율적으로 관리할 수 있는 전략을 미리 세워두는 것이 중요하다. 한 번의 실수로 모든 노력이 물거품이 될 수 있기 때문이다. 이 맵은 스타크래프트 유즈맵의 역사에서 빼놓을 수 없는 명작으로, 디펜스 장르의 팬이라면 반드시 플레이해 볼 가치가 있다. This map, ‘SunkenD 10Way 13.1 Impossible,’ stands as one of the most challenging and intense defense-style custom maps in the StarCraft: Brood War modding community. The core gameplay revolves around defending your base from relentless waves of enemies approaching from 10 distinct directions, a concept reflected in both the title and the map’s design. The ‘13.1’ version is notably labeled as ‘Even MidImpossible,’ indicating an extreme difficulty tier that pushes even experienced players to their limits. The map utilizes a space-themed tileset, with your main base centrally located and connected to 10 radial entry points via narrow, maze-like corridors. Each entry point leads to strategic defensive positions where towers can be placed, requiring careful planning and resource management to maximize efficiency. While the early waves consist of weaker units like Zerglings and Hydralisks, the challenge escalates rapidly as time progresses, introducing advanced units such as Scourges, Mutalisks, and Ultralisks. Success hinges on early-game resource allocation and optimal tower placement, as even a single misstep can lead to a cascading failure across defensive lines. The ‘10Way’ aspect means enemies attack from all directions simultaneously, making multitasking a critical skill. The map’s massive 4096x4096 size and intricate layout demand thorough preparation, especially for newcomers who may benefit from practicing on lower difficulty settings first. This map is a must-play for defense genre enthusiasts seeking the ultimate challenge, particularly at the ‘Impossible’ difficulty level, where the sense of achievement is unparalleled. Before diving in, players should familiarize themselves with the base layout and key defensive points, ensuring they have a solid strategy for resource management and unit production. A single oversight can spell disaster, making every decision crucial in this unforgiving yet rewarding experience. ‘SunkenD 10Way 13.1 Impossible’ is a legendary custom map in the StarCraft modding scene, offering an unmatched test of skill and strategy for defense genre fans.
스나이퍼스 RPG 임파서블 (Snipers Rpg "Impossible")
스나이퍼스 RPG 임파서블(Snipers Rpg "Impossible")은 스타크래프트 브루드워 유즈맵 중에서도 독특한 조작 시스템과 긴장감 넘치는 진행 방식으로 알려진 RPG 장르의 맵입니다. 이 스타크래프트 유즈맵은 황무지 타일셋을 배경으로 펼쳐지며, 일반적인 컨트롤 방식에서 벗어나 수동 사격 메커니즘을 적극 활용하는 것이 특징입니다. 내부 설명에 언급된 바와 같이 'a + left click'을 활용한 수동 조준 및 공격 시스템이 게임의 핵심을 이루며, 플레이어는 단순한 유닛 이동을 넘어 정밀한 사격과 위치 선점에 집중해야 합니다. 전체적인 맵 구조를 살펴보면 인공적인 기지 시설과 자연 지형이 복잡하게 얽혀 있어, 적의 공격을 피하고 은폐와 엄폐를 활용하기 좋은 환경을 제공합니다. 최대 7명이 함께 즐길 수 있는 이 맵은 협동 플레이의 중요성이 매우 높으며, 제목에 걸맞게 난이도가 상당할 것으로 추정되어 도전적인 플레이를 선호하는 유저들에게 적합합니다. 수동 조작에 익숙해지는 과정이 필수적이므로, 컨트롤 요소를 즐기는 스타크래프트 브루드워 팬들이나 색다른 액션 RPG 유즈맵을 찾는 이들에게 추천할 만한 작품입니다. 플레이를 시작하기 전에 조작 방식을 미리 숙지하고, 팀원들과의 역할 분담과 사격 타이밍을 맞추는 연습을 한다면 더욱 원활하게 게임을 진행할 수 있을 것입니다. Snipers Rpg "Impossible" is an RPG map in StarCraft: Brood War known for its unique control system and tense progression. Set against a badlands tileset, this StarCraft usemap stands out by actively utilizing a manual shooting mechanic rather than standard attack commands. As noted in the internal description, the core of the gameplay revolves around manual aiming and firing using 'a + left click', requiring players to focus on precise shooting and positioning beyond simple unit movement. Examining the overall map structure, artificial base facilities and natural terrain are intricately intertwined, providing an environment well-suited for avoiding enemy attacks and utilizing cover. Designed for up to seven players, this map places a high importance on cooperative play, and as the title suggests, it is presumed to offer a formidable difficulty, making it ideal for users who prefer challenging gameplay. Because mastering the manual control scheme is essential, it is recommended for StarCraft: Brood War fans who enjoy control-heavy elements or those looking for a distinctive action RPG usemap. Before starting a play, familiarizing oneself with the control method and practicing role division and firing timing with teammates will help facilitate a smoother gameplay experience.
스나이퍼즈 RPG 임파서블 3 (Snipers Rpg "Impossible" --3--)
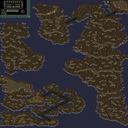
스타크래프트 브루드워 맵을 즐기는 유저들이라면 특유의 조작감과 긴장감을 요구하는 독특한 장르에 관심을 가지기 마련이다. 이번에 살펴볼 맵은 스나이퍼즈 RPG 임파서블 3 (Snipers Rpg "Impossible" --3--)라는 타이틀로 제작된 독창적인 유즈맵이다. 황무지 타일셋을 바탕으로 넓은 지형을 활용해 펼쳐지는 이 맵은 전통적인 밀리 방식과 완전히 차별화된 플레이 방식을 제공하며, 많은 플레이어들이 협동하여 난관을 돌파해야 하는 구조를 갖추고 있다. 내부 설명에 따르면 수동 사격 기능을 지원하는 시스템이 포함되어 있어 단순한 컨트롤을 넘어선 정밀한 조작 능력이 매우 중요하게 작용한다. 게임이 시작되면 플레이어들은 각자에게 주어진 유령 혹은 스나이퍼 계열의 유닛을 활용해 맵 전역에 배치된 적들과 마주하게 된다. 전체적인 진행 방식은 끊임없이 몰려오는 적의 공세 속에서 살아남는 동시에, 정밀한 수동 사격을 통해 위협적인 적을 제압하는 방식으로 이뤄진다. 특히 맵 제목에 '임파서블'이라는 수식어가 붙어 있는 만큼, 난이도가 상당히 높을 것으로 추정되며 일반적인 유즈맵보다 훨씬 유기적인 팀플레이와 개인의 피지컬이 요구된다. 혼자서 모든 것을 해결하기보다는 여러 플레이어가 역할을 분담하고 서로의 빈틈을 메워주는 협동 플레이가 승리의 핵심 열쇠가 된다. 이 맵은 고난도 서바이벌 요소와 정밀한 슈팅 감각을 동시에 느끼고 싶은 유저들에게 안성맞춤이다. 평소 컨트롤에 자신 있거나 친구들과 함께 머리를 맞대고 극한의 난이도를 깨나가는 재미를 선호하는 플레이어라면 한 번쯤 도전해 볼 만한 가치가 있다. 다만 난이도가 매우 높기 때문에 초보자라면 게임에 대한 사전 지식을 조금 쌓고 숙련된 인원들과 함께 시작하는 것을 추천하며, 수동 사격 조작 방식을 미리 숙지하고 플레이에 임하는 것이 원활한 진행을 위해 좋다. For users who enjoy StarCraft: Brood War maps, unique genres that require distinctive control feelings and high tension always attract attention. The map we are examining this time is an original use map created under the title Snipers Rpg Impossible 3 (Snipers Rpg "Impossible" --3--). Utilizing a wasteland tileset over a wide terrain, this map offers a gameplay style completely differentiated from traditional melee, featuring a structure where multiple players must cooperate to overcome various obstacles. According to the internal description, it includes a system that supports a manual shooting function, making precise control abilities beyond simple maneuvering very important. Once the game begins, players utilize the Ghost or Sniper-type units given to each of them, facing enemies deployed across the map. The overall progression revolves around surviving the endless enemy onslaughts while subduing threatening enemies through precise manual shots. Especially since the modifier 'Impossible' is attached to the map title, the difficulty is presumed to be quite high, requiring much more organic teamwork and individual physical skills than typical use maps. Rather than solving everything alone, cooperative play where multiple players divide roles and fill each other's gaps becomes the key to victory. This map is tailor-made for users who want to experience high-difficulty survival elements and a precise shooting sense at the same time. If you are usually confident in your control or prefer the fun of breaking through extreme difficulties with friends, it is definitely worth a try. However, because the difficulty is very high, beginners are advised to build some prior knowledge of the game and start with experienced members, and it is better to familiarize yourself with the manual shooting control method in advance for smooth progress.
맵 선택 가이드
태그는 맵의 핵심 특징을 빠르게 설명하지만 제작 버전마다 규칙이 다를 수 있습니다. 상세 설명에서 권장 인원, 난이도, 플레이 시간과 버전을 함께 확인한 뒤 다운로드하세요.