
유닛 테스트 스타크래프트 맵 모음
'유닛 테스트' 태그가 등록된 맵을 모았습니다. 장르 하나로 찾기 어려운 플레이 방식, 난이도와 특징을 중심으로 인기 맵과 최신 맵을 비교해 보세요.
- 등록 맵
- 2개
- 누적 다운로드
- 0
- 누적 조회
- 17
인기 맵
다운로드와 조회 반응이 높은 맵입니다.
무빙 샷 테스트.. (Moving Shot Test..)
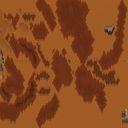
‘무빙 샷 테스트..’(Moving Shot Test..)는 스타크래프트: 브루드워의 유즈맵으로, 플레이어들이 원거리 유닛의 이동 사격을 직접 체험하고 테스트할 수 있도록 설계된 맵이다. 맵의 이름은 ‘무빙 샷’이란 용어에서 유래했는데, 이는 원거리 유닛이 이동하면서 사격하는 기동 사격(moving shot) 능력을 뜻한다. 맵의 전체적인 구조는 넓은 평야와 소규모 언덕, 그리고 중앙에 배치된 여러 개의 타워가 특징적이다. 맵의 너비는 상당히 넓고, 높이는 낮게 설계되어 있어 유닛의 기동성과 사정거리를 테스트하기에 알맞은 환경으로 보인다. 맵의 지형은 비교적 평탄한 편이지만 곳곳에 소규모 언덕과 장애물이 배치되어 있어 유닛의 시야와 기동성에 제약을 주는 요소로 작용할 수 있다. 맵의 타일셋은 황혼 테마를 사용하고 있으며, 이는 맵의 분위기를 어둡고 전략적인 느낌으로 연출한다. 이 맵의 핵심은 원거리 유닛의 이동 사격 능력을 테스트하는 데에 있으며, 플레이어는 다양한 유닛을 조작하여 해당 능력을 실전에서 확인할 수 있다. 맵에는 중앙에 위치한 타워나 장애물들이 배치되어 있어, 유닛들이 이동하면서 사격을 해야만 효과적으로 적을 공격할 수 있는 구조로 설계되어 있다. 또한, 맵의 넓은 공간을 활용하여 유닛의 기동성과 반응 속도를 테스트할 수 있도록 구성되어 있다. 플레이어는 7명으로 구성되어 있으며, 각 플레이어는 독립된 위치에서 시작하여 중앙으로 진격하거나, 또는 중앙의 타워를 방어하는 방식으로 진행할 수 있다. 맵의 제목에 ‘15판으로 수정되었다’는 설명이 포함되어 있어, 이전 버전과 비교하여 맵의 밸런스나 구조가 일부 수정되었음을 유추할 수 있다. 이 맵은 스타크래프트 유즈맵 커뮤니티에서 원거리 유닛의 기동 사격 능력을 중점적으로 다루는 맵으로, 특히 테란의 마린, 시즈 탱크, 골리앗이나 프로토스의 드라군, 다크 템플러, 리버 등 원거리 유닛을 주로 다루는 플레이어들에게 유용한 연습 공간으로 활용될 수 있다. 또한, 맵의 넓은 공간과 다양한 지형은 유닛의 시야 관리와 기동성, 그리고 사격 타이밍을 연습하는 데 도움이 될 것으로 보인다. 추천 대상은 스타크래프트의 원거리 유닛을 주로 사용하는 플레이어, 또는 유즈맵에서 원거리 전투를 연습하고 싶은 유저들이다. 플레이 전에는 맵의 전체적인 구조와 유닛 배치, 그리고 중앙의 타워나 장애물의 위치를 미리 확인하여 전략을 세우는 것이 중요하다. 특히, 이동 사격을 활용한 전투가 핵심인 만큼, 유닛의 기동성과 사정거리를 미리 숙지하고 플레이하는 것이 좋다. 맵의 난이도는 크게 존재하지 않으나, 원거리 유닛의 특성을 제대로 활용하지 못하면 전투에서 불리해질 수 있어 주의가 필요하다. Moving Shot Test.. is a custom map for StarCraft: Brood War designed to let players experience and test the moving shot abilities of ranged units. The name 'Moving Shot Test' comes from the term 'moving shot,' referring to the ability of ranged units to fire while moving. The map features a wide, flat terrain with small hills and central tower structures, making it ideal for testing unit mobility and range. The Twilight-themed tileset adds a dark, strategic atmosphere to the map. The core focus of this map is testing the moving shot capabilities of ranged units. Players can control various units to verify their ability to attack while moving. Central towers and obstacles force players to navigate and shoot simultaneously, testing both unit mobility and reaction speed. The map supports up to 7 players, each starting from separate positions and advancing toward the center or defending key structures like towers. The title mentions 'modified for 15 players,' suggesting balance or structural adjustments from a previous version. This map is particularly useful for StarCraft custom map communities focusing on ranged unit combat, especially for Terran units like Marines, Siege Tanks, or Goliaths, and Protoss units like Dragoons, Dark Templars, or Reavers. The expansive terrain and varied geography help players practice vision control, mobility, and timing in ranged combat. It is recommended for players who frequently use ranged units or those looking to improve their skills in custom maps involving long-range battles. Before playing, it is advisable to study the map's overall layout, unit placements, and central tower or obstacle positions to formulate a strategy. Since moving shot mechanics are crucial, understanding each unit's mobility and range beforehand will enhance the experience. While the map does not have a difficulty setting, improper use of ranged units' special abilities may lead to disadvantages in combat.
아포칼립스 유닛 테스터 (Apocalypse Unit Tester)
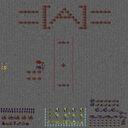
스타크래프트 브루드워의 유즈맵 중 하나로, 유닛 테스트에 특화된 =[A]= Apocalypse Unit Tester는 플레이어가 직접 여러 종족의 유닛을 생성하고 전투력을 비교할 수 있는 실험실 같은 공간이다. 맵 중앙의 테란 민간인 건물은 트리거의 핵심으로, 이곳을 통해 유닛을 생산하고 배치할 수 있으며, 주변의 넓은 공간에서 자유롭게 전투를 시연할 수 있다. 특히 유즈맵의 특성상 복잡한 UI 없이도 간단한 조작으로 다양한 시나리오를 재현할 수 있어, 유닛 밸런스나 전략 연구에 유용하게 활용된다. 맵 설명에 따르면 트리거가 테란 민간인 건물에 기반하고 있어, 유닛 생성 및 테스트 과정이 이 건물에 의존한다는 점이 특징이다. 또한 일정 수준의 게임 이해가 없으면 사용이 어려울 수 있으므로, 초보자의 경우 =[A]= 멤버에게 도움을 요청하라는 안내가 포함되어 있다. 이 맵은 단순히 유닛을 소환하는 것뿐만 아니라, 직접 전투 시뮬레이션을 진행할 수 있어 종족별 strengths와 weaknesses를 파악하는 데 탁월하다. 예를 들어 프로토스의 보호막과 사이오닉 스톰의 위력, 테란의 기계 유닛과 화력 지원, 저그의 다수 유닛 운영이나 버로우 전략 등을 실전처럼 테스트해볼 수 있다. 또한 맵의 넓은 평지 구조 덕분에 다양한 유닛 조합의 전투력을 검증하기에 적합하며, 특히 공중 유닛이나 스플래시 데미지 유닛의 효과를 확인하기에 최적의 환경이다. 맵의 트리거가 유닛 생성에 특화되어 있어, 사용자는 직접 유닛을 생산하고 배치하는 과정을 거쳐야 하므로, 단순히 관전하는 것보다 훨씬 몰입감 있는 경험을 제공한다. 단, 맵의 UI가 단순하다 보니 다수의 유닛을 동시에 관리하거나 복잡한 전략을 구사하는 데는 한계가 있으며, 오히려 유닛 간의 직접 대결을 통해 밸런스를 체크하는 데 초점을 맞추고 있다. 이 맵은 스타크래프트 유즈맵의 장점인 창의적이고 실험적인 플레이를 추구하는 유저들에게 특히 추천된다. 특히 프로토스, 테란, 저그의 유닛을 비교하고자 하는 플레이어나, 새로운 전략이나 빌드를 개발 중인 유저들에게 실용적인 도구로 활용될 수 있다. 또한 맵의 트리거가 테란 민간인 건물에 의존하고 있어, 해당 건물을 보호하거나 유지하는 전략적 요소도 포함되어 있을 가능성이 있다. 다만 맵의 설명이 다소 간결하고, 트리거 사용법에 대한 구체적인 가이드가 부족하다는 점은 단점으로 지적될 수 있다. 따라서 초보자의 경우 맵을 사용하기 전에 =[A]= 멤버에게 문의하거나, 사전 지식을 쌓아두는 것이 좋다. 전체적으로 이 맵은 유닛 테스트라는 명확한 목적을 가지고 있으며, 스타크래프트의 멀티플레이어 환경을 벗어나 개별 유닛의 성능을 검증하고자 하는 유저들에게 Sovet이다. One of the custom maps in *StarCraft: Brood War*, *=[A]= Apocalypse Unit Tester* is designed specifically for unit testing, allowing players to generate and compare the combat capabilities of different races in a lab-like environment. The core of the map’s triggers revolves around the Terran civilian building at the center, which serves as the hub for unit production and deployment, while the surrounding open space lets you freely stage battles. Thanks to its straightforward controls and lack of complex UI, this custom map makes it easy to recreate various scenarios—ideal for researching unit balance or testing strategies. According to the map description, the triggers are built around the Terran civilian building, meaning unit creation and testing depend entirely on this structure. However, it can be tricky to use without some prior game knowledge, so beginners are advised to ask for help from *=[A]= members. This map isn’t just about summoning units—it lets you run direct combat simulations to assess each race’s strengths and weaknesses. For example, you can test the power of Protoss shields and Psionic Storm, Terran mechanical units and fire support, or Zerg mass unit tactics and burrow strategies in a live setting. The wide, flat terrain is perfect for validating different unit compositions, especially for air units or splash-damage units. Since the map’s triggers focus on unit creation, you’ll need to actively produce and position units yourself, making the experience far more immersive than just spectating. That said, the simple UI makes it difficult to manage large numbers of units or execute complex strategies—instead, the map emphasizes checking unit balance through direct clashes. This custom map is especially recommended for players who enjoy creative and experimental gameplay in *StarCraft* custom maps. It’s particularly useful for those looking to compare units across all three races or for players developing new strategies and builds. The map’s triggers, tied to the Terran civilian building, may also introduce strategic elements like protecting or maintaining the structure. On the downside, the map’s description is somewhat brief, and there’s a lack of detailed guidance on how to use the triggers effectively. Beginners should either consult *=[A]= members before playing or build up some foundational knowledge first. Overall, this map delivers on its clear purpose of unit testing, serving as a valuable tool for players looking to verify individual unit performance outside of *StarCraft*’s multiplayer environment.
최근 등록된 맵
새로 추가된 파일과 버전을 확인하세요.
아포칼립스 유닛 테스터 (Apocalypse Unit Tester)
스타크래프트 브루드워의 유즈맵 중 하나로, 유닛 테스트에 특화된 =[A]= Apocalypse Unit Tester는 플레이어가 직접 여러 종족의 유닛을 생성하고 전투력을 비교할 수 있는 실험실 같은 공간이다. 맵 중앙의 테란 민간인 건물은 트리거의 핵심으로, 이곳을 통해 유닛을 생산하고 배치할 수 있으며, 주변의 넓은 공간에서 자유롭게 전투를 시연할 수 있다. 특히 유즈맵의 특성상 복잡한 UI 없이도 간단한 조작으로 다양한 시나리오를 재현할 수 있어, 유닛 밸런스나 전략 연구에 유용하게 활용된다. 맵 설명에 따르면 트리거가 테란 민간인 건물에 기반하고 있어, 유닛 생성 및 테스트 과정이 이 건물에 의존한다는 점이 특징이다. 또한 일정 수준의 게임 이해가 없으면 사용이 어려울 수 있으므로, 초보자의 경우 =[A]= 멤버에게 도움을 요청하라는 안내가 포함되어 있다. 이 맵은 단순히 유닛을 소환하는 것뿐만 아니라, 직접 전투 시뮬레이션을 진행할 수 있어 종족별 strengths와 weaknesses를 파악하는 데 탁월하다. 예를 들어 프로토스의 보호막과 사이오닉 스톰의 위력, 테란의 기계 유닛과 화력 지원, 저그의 다수 유닛 운영이나 버로우 전략 등을 실전처럼 테스트해볼 수 있다. 또한 맵의 넓은 평지 구조 덕분에 다양한 유닛 조합의 전투력을 검증하기에 적합하며, 특히 공중 유닛이나 스플래시 데미지 유닛의 효과를 확인하기에 최적의 환경이다. 맵의 트리거가 유닛 생성에 특화되어 있어, 사용자는 직접 유닛을 생산하고 배치하는 과정을 거쳐야 하므로, 단순히 관전하는 것보다 훨씬 몰입감 있는 경험을 제공한다. 단, 맵의 UI가 단순하다 보니 다수의 유닛을 동시에 관리하거나 복잡한 전략을 구사하는 데는 한계가 있으며, 오히려 유닛 간의 직접 대결을 통해 밸런스를 체크하는 데 초점을 맞추고 있다. 이 맵은 스타크래프트 유즈맵의 장점인 창의적이고 실험적인 플레이를 추구하는 유저들에게 특히 추천된다. 특히 프로토스, 테란, 저그의 유닛을 비교하고자 하는 플레이어나, 새로운 전략이나 빌드를 개발 중인 유저들에게 실용적인 도구로 활용될 수 있다. 또한 맵의 트리거가 테란 민간인 건물에 의존하고 있어, 해당 건물을 보호하거나 유지하는 전략적 요소도 포함되어 있을 가능성이 있다. 다만 맵의 설명이 다소 간결하고, 트리거 사용법에 대한 구체적인 가이드가 부족하다는 점은 단점으로 지적될 수 있다. 따라서 초보자의 경우 맵을 사용하기 전에 =[A]= 멤버에게 문의하거나, 사전 지식을 쌓아두는 것이 좋다. 전체적으로 이 맵은 유닛 테스트라는 명확한 목적을 가지고 있으며, 스타크래프트의 멀티플레이어 환경을 벗어나 개별 유닛의 성능을 검증하고자 하는 유저들에게 Sovet이다. One of the custom maps in *StarCraft: Brood War*, *=[A]= Apocalypse Unit Tester* is designed specifically for unit testing, allowing players to generate and compare the combat capabilities of different races in a lab-like environment. The core of the map’s triggers revolves around the Terran civilian building at the center, which serves as the hub for unit production and deployment, while the surrounding open space lets you freely stage battles. Thanks to its straightforward controls and lack of complex UI, this custom map makes it easy to recreate various scenarios—ideal for researching unit balance or testing strategies. According to the map description, the triggers are built around the Terran civilian building, meaning unit creation and testing depend entirely on this structure. However, it can be tricky to use without some prior game knowledge, so beginners are advised to ask for help from *=[A]= members. This map isn’t just about summoning units—it lets you run direct combat simulations to assess each race’s strengths and weaknesses. For example, you can test the power of Protoss shields and Psionic Storm, Terran mechanical units and fire support, or Zerg mass unit tactics and burrow strategies in a live setting. The wide, flat terrain is perfect for validating different unit compositions, especially for air units or splash-damage units. Since the map’s triggers focus on unit creation, you’ll need to actively produce and position units yourself, making the experience far more immersive than just spectating. That said, the simple UI makes it difficult to manage large numbers of units or execute complex strategies—instead, the map emphasizes checking unit balance through direct clashes. This custom map is especially recommended for players who enjoy creative and experimental gameplay in *StarCraft* custom maps. It’s particularly useful for those looking to compare units across all three races or for players developing new strategies and builds. The map’s triggers, tied to the Terran civilian building, may also introduce strategic elements like protecting or maintaining the structure. On the downside, the map’s description is somewhat brief, and there’s a lack of detailed guidance on how to use the triggers effectively. Beginners should either consult *=[A]= members before playing or build up some foundational knowledge first. Overall, this map delivers on its clear purpose of unit testing, serving as a valuable tool for players looking to verify individual unit performance outside of *StarCraft*’s multiplayer environment.
무빙 샷 테스트.. (Moving Shot Test..)
‘무빙 샷 테스트..’(Moving Shot Test..)는 스타크래프트: 브루드워의 유즈맵으로, 플레이어들이 원거리 유닛의 이동 사격을 직접 체험하고 테스트할 수 있도록 설계된 맵이다. 맵의 이름은 ‘무빙 샷’이란 용어에서 유래했는데, 이는 원거리 유닛이 이동하면서 사격하는 기동 사격(moving shot) 능력을 뜻한다. 맵의 전체적인 구조는 넓은 평야와 소규모 언덕, 그리고 중앙에 배치된 여러 개의 타워가 특징적이다. 맵의 너비는 상당히 넓고, 높이는 낮게 설계되어 있어 유닛의 기동성과 사정거리를 테스트하기에 알맞은 환경으로 보인다. 맵의 지형은 비교적 평탄한 편이지만 곳곳에 소규모 언덕과 장애물이 배치되어 있어 유닛의 시야와 기동성에 제약을 주는 요소로 작용할 수 있다. 맵의 타일셋은 황혼 테마를 사용하고 있으며, 이는 맵의 분위기를 어둡고 전략적인 느낌으로 연출한다. 이 맵의 핵심은 원거리 유닛의 이동 사격 능력을 테스트하는 데에 있으며, 플레이어는 다양한 유닛을 조작하여 해당 능력을 실전에서 확인할 수 있다. 맵에는 중앙에 위치한 타워나 장애물들이 배치되어 있어, 유닛들이 이동하면서 사격을 해야만 효과적으로 적을 공격할 수 있는 구조로 설계되어 있다. 또한, 맵의 넓은 공간을 활용하여 유닛의 기동성과 반응 속도를 테스트할 수 있도록 구성되어 있다. 플레이어는 7명으로 구성되어 있으며, 각 플레이어는 독립된 위치에서 시작하여 중앙으로 진격하거나, 또는 중앙의 타워를 방어하는 방식으로 진행할 수 있다. 맵의 제목에 ‘15판으로 수정되었다’는 설명이 포함되어 있어, 이전 버전과 비교하여 맵의 밸런스나 구조가 일부 수정되었음을 유추할 수 있다. 이 맵은 스타크래프트 유즈맵 커뮤니티에서 원거리 유닛의 기동 사격 능력을 중점적으로 다루는 맵으로, 특히 테란의 마린, 시즈 탱크, 골리앗이나 프로토스의 드라군, 다크 템플러, 리버 등 원거리 유닛을 주로 다루는 플레이어들에게 유용한 연습 공간으로 활용될 수 있다. 또한, 맵의 넓은 공간과 다양한 지형은 유닛의 시야 관리와 기동성, 그리고 사격 타이밍을 연습하는 데 도움이 될 것으로 보인다. 추천 대상은 스타크래프트의 원거리 유닛을 주로 사용하는 플레이어, 또는 유즈맵에서 원거리 전투를 연습하고 싶은 유저들이다. 플레이 전에는 맵의 전체적인 구조와 유닛 배치, 그리고 중앙의 타워나 장애물의 위치를 미리 확인하여 전략을 세우는 것이 중요하다. 특히, 이동 사격을 활용한 전투가 핵심인 만큼, 유닛의 기동성과 사정거리를 미리 숙지하고 플레이하는 것이 좋다. 맵의 난이도는 크게 존재하지 않으나, 원거리 유닛의 특성을 제대로 활용하지 못하면 전투에서 불리해질 수 있어 주의가 필요하다. Moving Shot Test.. is a custom map for StarCraft: Brood War designed to let players experience and test the moving shot abilities of ranged units. The name 'Moving Shot Test' comes from the term 'moving shot,' referring to the ability of ranged units to fire while moving. The map features a wide, flat terrain with small hills and central tower structures, making it ideal for testing unit mobility and range. The Twilight-themed tileset adds a dark, strategic atmosphere to the map. The core focus of this map is testing the moving shot capabilities of ranged units. Players can control various units to verify their ability to attack while moving. Central towers and obstacles force players to navigate and shoot simultaneously, testing both unit mobility and reaction speed. The map supports up to 7 players, each starting from separate positions and advancing toward the center or defending key structures like towers. The title mentions 'modified for 15 players,' suggesting balance or structural adjustments from a previous version. This map is particularly useful for StarCraft custom map communities focusing on ranged unit combat, especially for Terran units like Marines, Siege Tanks, or Goliaths, and Protoss units like Dragoons, Dark Templars, or Reavers. The expansive terrain and varied geography help players practice vision control, mobility, and timing in ranged combat. It is recommended for players who frequently use ranged units or those looking to improve their skills in custom maps involving long-range battles. Before playing, it is advisable to study the map's overall layout, unit placements, and central tower or obstacle positions to formulate a strategy. Since moving shot mechanics are crucial, understanding each unit's mobility and range beforehand will enhance the experience. While the map does not have a difficulty setting, improper use of ranged units' special abilities may lead to disadvantages in combat.
맵 선택 가이드
태그는 맵의 핵심 특징을 빠르게 설명하지만 제작 버전마다 규칙이 다를 수 있습니다. 상세 설명에서 권장 인원, 난이도, 플레이 시간과 버전을 함께 확인한 뒤 다운로드하세요.