
유닛 전투 스타크래프트 맵 모음
'유닛 전투' 태그가 등록된 맵을 모았습니다. 장르 하나로 찾기 어려운 플레이 방식, 난이도와 특징을 중심으로 인기 맵과 최신 맵을 비교해 보세요.
- 등록 맵
- 3개
- 누적 다운로드
- 0
- 누적 조회
- 110
인기 맵
다운로드와 조회 반응이 높은 맵입니다.
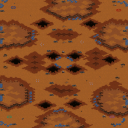
데저트 드롭 (Desert Drop)
Desert Drop은 4명의 플레이어가 동시에 전투를 벌이는 전형적인 밀리 맵으로, 사막 지형을 배경으로 한 넓은 전장이 특징이다. 맵 중앙에 위치한 고지대와 양쪽 끝에 배치된 작은 오아시스는 전략적 요충지 역할을 하며, 여기서 자원을 확보하고 상대를 견제하는 것이 승리의 핵심이다. 이동 경로가 비교적 자유로워 전술적 기동성이 높으며, 지형 자체에 방어용 건물이나 고정된 장애물이 거의 없어 순수한 유닛 전투에 집중할 수 있다. 초반에는 각 플레이어가 베이스 주변에서 기본 유닛을 생산해 전진하고, 중반 이후에는 고지대를 장악해 시야와 공격 범위를 확보하는 것이 유리하다. 특히, 사막의 넓은 평야는 대규모 전투를 유도하므로, 대규모 유닛 조합을 활용하거나 빠른 기동성을 갖춘 유닛으로 교전하는 플레이어에게 적합하다. 반면, 방어에 특화된 유닛만으로는 상대의 공격을 효과적으로 막기 어려우므로, 공격과 방어를 균형 있게 구성하는 것이 중요하다. 게임을 시작하기 전에는 초기 자원 배치와 유닛 생산 순서를 미리 계획하고, 고지대와 오아시스 위치를 파악해 빠르게 점령할 전략을 세우는 것이 좋다. Desert Drop is a classic melee map for four players set on a vast desert battlefield. The central hill and two small oasis points at opposite ends serve as strategic choke points where securing resources and pressuring opponents is key to victory. With relatively open movement paths, the map offers high tactical mobility and lacks fixed defensive structures, allowing pure unit combat to shine. Early game focuses on producing basic units near each base and advancing, while mid‑game control of the hill grants vision and attack range advantages. The expansive plains encourage large‑scale engagements, favoring players who use massed armies or highly mobile units. Purely defensive unit builds struggle to hold off attacks, so a balanced mix of offense and defense is essential. Before starting, plan your initial resource allocation and unit production order, and scout the hill and oasis locations to devise a swift capture strategy.
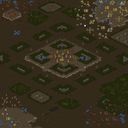
킹 오브 더 힐 (King of the Hill)
‘킹 오브 더 힐’(King of the Hill)은 스타크래프트 브루드워에서 즐기는 대표적인 1인용 유즈맵으로, 맵 중앙에 위치한 언덕 위에서 상대 진영을 몰아내고 자신의 자리를 지켜내는 것이 핵심 목표다. 맵은 사막 타일셋으로 구성되어 있으며, 중앙 언덕 주변으로 넓은 평지가 펼쳐져 있고, 각 플레이어는 시작 지점에서 언덕을 향해 빠르게 이동해야 한다. 맵의 특징은 언덕 중앙에 위치한 깃발(혹은 오브젝트)으로, 이 깃발을 차지하고 일정 시간 동안 유지하면 승리 조건이 충족된다. 상대방이 깃발을 차지하려고 시도하거나 언덕 위에서 밀어내려고 하면 전투가 벌어지며, 맵의 지형은 비교적 평평해 기동성과 공격력이 중요한 요소로 작용한다. 플레이어는 초반에 자원을 확보해 유닛을 생산하고, 중앙 언덕을 향해 빠르게 이동해야 한다. 언덕에 도착하면 상대방과 실시간으로 전투를 벌이면서 자리를 차지하거나 방어해야 하며, 지형을 활용한 기동전이나 유닛 조합이 승패를 좌우한다. 맵은 4096x4096 크기로 비교적 넓지만, 중앙 언덕 주변은 좁아져 있어 전투가 밀집되는 경향이 있다. 또한, 사막 타일셋의 특징상 시야가 넓고, 멀리서도 상대의 움직임을 확인할 수 있어 전략적인 플레이가 요구된다. 이 맵은 1인용으로 설계되어 있어 혼자서도 충분한 재미와 긴장감을 느낄 수 있으며, 상대 AI의 난이도나 전략에 따라 플레이 스타일이 달라진다. 초보자는 기본 유닛을 중심으로 방어와 공격을 병행하는 플레이가 권장되며, 숙련자는 기동성과 유닛 컨트롤을 극대화해 빠른 승리를 노릴 수 있다. 맵의 난이도는 상대 AI의 수준에 따라 달라지지만, 대체로 초보에서 숙련자까지 폭넓게 즐길 수 있는 구조다. 특히, 언덕 위에서 벌어지는 전투는 스타크래프트의 기본 메카닉을 최대한 살려낼 수 있어, 밀리 경험을 유즈맵으로 느낄 수 있는 매력이 있다. 플레이 전에는 맵의 중앙 언덕 위치와 지형을 미리 숙지하고, 시작 지점에서 빠르게 이동할 수 있는 루트를 плани하는 것이 중요하다. 또한, 상대 AI의 패턴을 파악해 유닛 생산과 컨트롤을 최적화해야 하며, 언덕 위에서 벌어지는 전투에서 지형 우위를 활용하는 전략이 필수적이다. 맵의 승리 조건은 단순히 깃발을 차지하는 것이 아니라, 일정 시간 동안 유지하는 것이기 때문에, 방어와 공격의 균형을 잘 맞춰야 한다. 이 맵은 스타크래프트 유즈맵의 classic한 장르인 ‘킹 오브 더 힐’ 장르의 대표작으로, 1인용으로도 충분히 재미있고 긴장감 넘치는 플레이가 가능하다. 특히, 스타크래프트의 기본 메커닉을 활용한 전투가 중심이 되기 때문에, 밀리 경험이 있는 플레이어라면 쉽게 적응할 수 있는 구조다. 또한, 맵의 지형과 타일셋이 시야를 넓게 제공해 전략적인 플레이가 가능하다는 점도 장점이다. 이 맵을 즐기기 위해서는Central Hill을 차지하고 유지하는 전략적 사고와 빠른 판단력이 요구된다. 특히, 상대방의 움직임을 미리 예측하고, 언덕의 좁은 지형을 활용한 방어 태세를 갖추는 것이 중요하다. 초보자라면 AI의 난이도를 낮춰 천천히 적응해 나가고, 숙련자라면 더 빠른 전투와 기동성을 바탕으로 승리를 노려볼 만하다. 맵의 특성상, 유닛의 생산과 컨트롤뿐만 아니라, 맵 리딩 능력도 중요하기 때문에, 반복 플레이를 통해 실력을 키우는 것이 좋다. 이 맵은 스타크래프트 브루드워의 classic한 UMS 유즈맵으로, 1인용으로도 충분히 재미있고 전략적인 플레이가 가능한 작품이다. 특히, 중앙 언덕을 차지하고 유지하는 것이 핵심인 만큼, 전투와 자원 관리를 동시에 신경 써야 한다. 맵의 구조와 규칙을 잘 이해하고, 상대 AI의 패턴을 분석한다면, 누구나 즐길 수 있는 매력적인 유즈맵이라 할 수 있다. "King of the Hill" is a classic single-player custom map in *StarCraft: Brood War*, where the core objective is to seize and hold the central hill, driving opponents away from your position. The map features a desert tileset with wide open plains surrounding the central hill, and players must quickly move from their starting points toward the hill. The defining feature is the flag (or objective) located at the top of the hill—holding it for a set duration fulfills the victory condition. Battles erupt when opponents attempt to take the flag or push you off the hill, and the relatively flat terrain emphasizes mobility and firepower. Players must secure resources early to produce units and rush toward the central hill. Once there, real-time combat ensues as you fight to claim or defend the position, with terrain-based maneuvers and unit compositions determining the outcome. Despite the map’s large 4096x4096 size, the area around the hill narrows, forcing concentrated battles. The desert tileset also provides long sightlines, allowing you to monitor enemy movements from afar, demanding strategic play. Designed for single-player, the map delivers both fun and tension, adapting to the AI’s difficulty and strategy. Beginners are advised to focus on balanced defense and offense with basic units, while advanced players can maximize mobility and unit control for quick victories. The difficulty scales with the AI’s level, making it enjoyable for players of all skill levels. The hilltop battles showcase *StarCraft*’s core mechanics, offering a way to experience melee-style combat through a custom map. Before playing, familiarize yourself with the hill’s location and terrain, and plan a fast route from your starting point. Study the AI’s patterns to optimize unit production and control, and leverage the hill’s terrain advantages in combat. Victory isn’t just about seizing the flag—holding it for the required time is key, so balancing offense and defense is crucial. As a quintessential example of the *King of the Hill* genre in *StarCraft* custom maps, this title shines in single-player with high tension and replayability. Its reliance on *StarCraft*’s fundamental mechanics makes it accessible to experienced players, while the open desert tileset encourages strategic depth. Success hinges on strategic thinking—securing and maintaining control of the Central Hill—requiring quick decisions and foresight. Predict enemy movements, fortify the narrow hilltop terrain, and adapt your playstyle: beginners should start with lower AI difficulty to ease into the mechanics, while veterans can aim for faster, more dynamic victories. Since unit production, control, and map awareness all play critical roles, repeated plays are essential for improving your skills. A classic UMS custom map in *StarCraft: Brood War*, this title offers engaging single-player experiences with strategic depth. The core challenge—taking and holding the central hill—demands a balance of combat and resource management. Understanding the map’s structure and rules, along with analyzing the AI’s tendencies, makes this an enjoyable experience for any player.
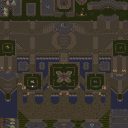
파이어 엠블럼: 레디언스 (Fire Emblem: Path of Radiance)
Fire Emblem: Path of Radiance 맵은 사막 타일셋을 배경으로 한 UMS(유즈맵) 형태의 멀티플레이 전투 맵이다. 베타 테스트 버전이라는 점에서 트리거와 승리 조건이 완전히 확정되지 않았으며, 일부 지역에서는 지형이 불균형하게 배치된 것이 보인다. 전체 맵은 4096×4096 픽셀 규모이며, 128×128 타일 단위로 구획되어 있어 이동 경로와 방어 위치를 자유롭게 설계할 수 있다. 플레이어는 최대 7명까지 동시에 참여할 수 있으며, 각자 개별 기지를 건설하거나 전장을 탐색하면서 상대를 격파한다. 전투는 주로 직접적인 유닛 충돌과 스킬 사용을 중심으로 진행되며, 특정 지점에 배치된 사막 지형이 이동 속도와 시야에 영향을 주어 전략적인 포지셔닝이 중요하다. 베타 버전 특성상 일부 스크립트가 예상대로 동작하지 않을 가능성이 있으며, 특히 초기 자원 배분과 유닛 생산 속도가 불안정하게 보인다. 따라서 첫 플레이 전에 맵 설정에서 시작 자원을 확인하고, 초반에 방어 라인을 빠르게 구축하는 것이 좋다. 전투 경험이 풍부한 유저보다는 다양한 상황에 대응할 수 있는 유연한 전략을 선호하는 플레이어에게 적합하며, 팀 플레이보다는 자유로운 솔로 혹은 소규모 자유 전투를 즐기는 유저에게 특히 추천한다. Fire Emblem: Path of Radiance is a user‑made map for StarCraft: Brood War that uses a desert tileset and follows a UMS (Use‑Map‑Set) format. As a beta version, its triggers and victory conditions are not fully finalized, and some areas appear to have uneven terrain placement. The map spans 4096×4096 pixels, divided into 128×128‑tile sections, allowing players to design movement paths and defensive positions freely. Up to seven players can join simultaneously, each establishing their own base or exploring the battlefield to eliminate opponents. Combat focuses on direct unit clashes and skill usage, with desert terrain affecting movement speed and line of sight, making strategic positioning crucial. Because it is a beta, certain scripts may behave unpredictably, especially regarding initial resource allocation and unit production rates. Players should verify starting resources in the map settings and prioritize building early defenses. The map suits players who enjoy adaptable strategies over rigid tactics, favoring solo or small‑scale free‑for‑all engagements rather than organized team battles.
최근 등록된 맵
새로 추가된 파일과 버전을 확인하세요.
킹 오브 더 힐 (King of the Hill)
‘킹 오브 더 힐’(King of the Hill)은 스타크래프트 브루드워에서 즐기는 대표적인 1인용 유즈맵으로, 맵 중앙에 위치한 언덕 위에서 상대 진영을 몰아내고 자신의 자리를 지켜내는 것이 핵심 목표다. 맵은 사막 타일셋으로 구성되어 있으며, 중앙 언덕 주변으로 넓은 평지가 펼쳐져 있고, 각 플레이어는 시작 지점에서 언덕을 향해 빠르게 이동해야 한다. 맵의 특징은 언덕 중앙에 위치한 깃발(혹은 오브젝트)으로, 이 깃발을 차지하고 일정 시간 동안 유지하면 승리 조건이 충족된다. 상대방이 깃발을 차지하려고 시도하거나 언덕 위에서 밀어내려고 하면 전투가 벌어지며, 맵의 지형은 비교적 평평해 기동성과 공격력이 중요한 요소로 작용한다. 플레이어는 초반에 자원을 확보해 유닛을 생산하고, 중앙 언덕을 향해 빠르게 이동해야 한다. 언덕에 도착하면 상대방과 실시간으로 전투를 벌이면서 자리를 차지하거나 방어해야 하며, 지형을 활용한 기동전이나 유닛 조합이 승패를 좌우한다. 맵은 4096x4096 크기로 비교적 넓지만, 중앙 언덕 주변은 좁아져 있어 전투가 밀집되는 경향이 있다. 또한, 사막 타일셋의 특징상 시야가 넓고, 멀리서도 상대의 움직임을 확인할 수 있어 전략적인 플레이가 요구된다. 이 맵은 1인용으로 설계되어 있어 혼자서도 충분한 재미와 긴장감을 느낄 수 있으며, 상대 AI의 난이도나 전략에 따라 플레이 스타일이 달라진다. 초보자는 기본 유닛을 중심으로 방어와 공격을 병행하는 플레이가 권장되며, 숙련자는 기동성과 유닛 컨트롤을 극대화해 빠른 승리를 노릴 수 있다. 맵의 난이도는 상대 AI의 수준에 따라 달라지지만, 대체로 초보에서 숙련자까지 폭넓게 즐길 수 있는 구조다. 특히, 언덕 위에서 벌어지는 전투는 스타크래프트의 기본 메카닉을 최대한 살려낼 수 있어, 밀리 경험을 유즈맵으로 느낄 수 있는 매력이 있다. 플레이 전에는 맵의 중앙 언덕 위치와 지형을 미리 숙지하고, 시작 지점에서 빠르게 이동할 수 있는 루트를 плани하는 것이 중요하다. 또한, 상대 AI의 패턴을 파악해 유닛 생산과 컨트롤을 최적화해야 하며, 언덕 위에서 벌어지는 전투에서 지형 우위를 활용하는 전략이 필수적이다. 맵의 승리 조건은 단순히 깃발을 차지하는 것이 아니라, 일정 시간 동안 유지하는 것이기 때문에, 방어와 공격의 균형을 잘 맞춰야 한다. 이 맵은 스타크래프트 유즈맵의 classic한 장르인 ‘킹 오브 더 힐’ 장르의 대표작으로, 1인용으로도 충분히 재미있고 긴장감 넘치는 플레이가 가능하다. 특히, 스타크래프트의 기본 메커닉을 활용한 전투가 중심이 되기 때문에, 밀리 경험이 있는 플레이어라면 쉽게 적응할 수 있는 구조다. 또한, 맵의 지형과 타일셋이 시야를 넓게 제공해 전략적인 플레이가 가능하다는 점도 장점이다. 이 맵을 즐기기 위해서는Central Hill을 차지하고 유지하는 전략적 사고와 빠른 판단력이 요구된다. 특히, 상대방의 움직임을 미리 예측하고, 언덕의 좁은 지형을 활용한 방어 태세를 갖추는 것이 중요하다. 초보자라면 AI의 난이도를 낮춰 천천히 적응해 나가고, 숙련자라면 더 빠른 전투와 기동성을 바탕으로 승리를 노려볼 만하다. 맵의 특성상, 유닛의 생산과 컨트롤뿐만 아니라, 맵 리딩 능력도 중요하기 때문에, 반복 플레이를 통해 실력을 키우는 것이 좋다. 이 맵은 스타크래프트 브루드워의 classic한 UMS 유즈맵으로, 1인용으로도 충분히 재미있고 전략적인 플레이가 가능한 작품이다. 특히, 중앙 언덕을 차지하고 유지하는 것이 핵심인 만큼, 전투와 자원 관리를 동시에 신경 써야 한다. 맵의 구조와 규칙을 잘 이해하고, 상대 AI의 패턴을 분석한다면, 누구나 즐길 수 있는 매력적인 유즈맵이라 할 수 있다. "King of the Hill" is a classic single-player custom map in *StarCraft: Brood War*, where the core objective is to seize and hold the central hill, driving opponents away from your position. The map features a desert tileset with wide open plains surrounding the central hill, and players must quickly move from their starting points toward the hill. The defining feature is the flag (or objective) located at the top of the hill—holding it for a set duration fulfills the victory condition. Battles erupt when opponents attempt to take the flag or push you off the hill, and the relatively flat terrain emphasizes mobility and firepower. Players must secure resources early to produce units and rush toward the central hill. Once there, real-time combat ensues as you fight to claim or defend the position, with terrain-based maneuvers and unit compositions determining the outcome. Despite the map’s large 4096x4096 size, the area around the hill narrows, forcing concentrated battles. The desert tileset also provides long sightlines, allowing you to monitor enemy movements from afar, demanding strategic play. Designed for single-player, the map delivers both fun and tension, adapting to the AI’s difficulty and strategy. Beginners are advised to focus on balanced defense and offense with basic units, while advanced players can maximize mobility and unit control for quick victories. The difficulty scales with the AI’s level, making it enjoyable for players of all skill levels. The hilltop battles showcase *StarCraft*’s core mechanics, offering a way to experience melee-style combat through a custom map. Before playing, familiarize yourself with the hill’s location and terrain, and plan a fast route from your starting point. Study the AI’s patterns to optimize unit production and control, and leverage the hill’s terrain advantages in combat. Victory isn’t just about seizing the flag—holding it for the required time is key, so balancing offense and defense is crucial. As a quintessential example of the *King of the Hill* genre in *StarCraft* custom maps, this title shines in single-player with high tension and replayability. Its reliance on *StarCraft*’s fundamental mechanics makes it accessible to experienced players, while the open desert tileset encourages strategic depth. Success hinges on strategic thinking—securing and maintaining control of the Central Hill—requiring quick decisions and foresight. Predict enemy movements, fortify the narrow hilltop terrain, and adapt your playstyle: beginners should start with lower AI difficulty to ease into the mechanics, while veterans can aim for faster, more dynamic victories. Since unit production, control, and map awareness all play critical roles, repeated plays are essential for improving your skills. A classic UMS custom map in *StarCraft: Brood War*, this title offers engaging single-player experiences with strategic depth. The core challenge—taking and holding the central hill—demands a balance of combat and resource management. Understanding the map’s structure and rules, along with analyzing the AI’s tendencies, makes this an enjoyable experience for any player.
파이어 엠블럼: 레디언스 (Fire Emblem: Path of Radiance)
Fire Emblem: Path of Radiance 맵은 사막 타일셋을 배경으로 한 UMS(유즈맵) 형태의 멀티플레이 전투 맵이다. 베타 테스트 버전이라는 점에서 트리거와 승리 조건이 완전히 확정되지 않았으며, 일부 지역에서는 지형이 불균형하게 배치된 것이 보인다. 전체 맵은 4096×4096 픽셀 규모이며, 128×128 타일 단위로 구획되어 있어 이동 경로와 방어 위치를 자유롭게 설계할 수 있다. 플레이어는 최대 7명까지 동시에 참여할 수 있으며, 각자 개별 기지를 건설하거나 전장을 탐색하면서 상대를 격파한다. 전투는 주로 직접적인 유닛 충돌과 스킬 사용을 중심으로 진행되며, 특정 지점에 배치된 사막 지형이 이동 속도와 시야에 영향을 주어 전략적인 포지셔닝이 중요하다. 베타 버전 특성상 일부 스크립트가 예상대로 동작하지 않을 가능성이 있으며, 특히 초기 자원 배분과 유닛 생산 속도가 불안정하게 보인다. 따라서 첫 플레이 전에 맵 설정에서 시작 자원을 확인하고, 초반에 방어 라인을 빠르게 구축하는 것이 좋다. 전투 경험이 풍부한 유저보다는 다양한 상황에 대응할 수 있는 유연한 전략을 선호하는 플레이어에게 적합하며, 팀 플레이보다는 자유로운 솔로 혹은 소규모 자유 전투를 즐기는 유저에게 특히 추천한다. Fire Emblem: Path of Radiance is a user‑made map for StarCraft: Brood War that uses a desert tileset and follows a UMS (Use‑Map‑Set) format. As a beta version, its triggers and victory conditions are not fully finalized, and some areas appear to have uneven terrain placement. The map spans 4096×4096 pixels, divided into 128×128‑tile sections, allowing players to design movement paths and defensive positions freely. Up to seven players can join simultaneously, each establishing their own base or exploring the battlefield to eliminate opponents. Combat focuses on direct unit clashes and skill usage, with desert terrain affecting movement speed and line of sight, making strategic positioning crucial. Because it is a beta, certain scripts may behave unpredictably, especially regarding initial resource allocation and unit production rates. Players should verify starting resources in the map settings and prioritize building early defenses. The map suits players who enjoy adaptable strategies over rigid tactics, favoring solo or small‑scale free‑for‑all engagements rather than organized team battles.
데저트 드롭 (Desert Drop)
Desert Drop은 4명의 플레이어가 동시에 전투를 벌이는 전형적인 밀리 맵으로, 사막 지형을 배경으로 한 넓은 전장이 특징이다. 맵 중앙에 위치한 고지대와 양쪽 끝에 배치된 작은 오아시스는 전략적 요충지 역할을 하며, 여기서 자원을 확보하고 상대를 견제하는 것이 승리의 핵심이다. 이동 경로가 비교적 자유로워 전술적 기동성이 높으며, 지형 자체에 방어용 건물이나 고정된 장애물이 거의 없어 순수한 유닛 전투에 집중할 수 있다. 초반에는 각 플레이어가 베이스 주변에서 기본 유닛을 생산해 전진하고, 중반 이후에는 고지대를 장악해 시야와 공격 범위를 확보하는 것이 유리하다. 특히, 사막의 넓은 평야는 대규모 전투를 유도하므로, 대규모 유닛 조합을 활용하거나 빠른 기동성을 갖춘 유닛으로 교전하는 플레이어에게 적합하다. 반면, 방어에 특화된 유닛만으로는 상대의 공격을 효과적으로 막기 어려우므로, 공격과 방어를 균형 있게 구성하는 것이 중요하다. 게임을 시작하기 전에는 초기 자원 배치와 유닛 생산 순서를 미리 계획하고, 고지대와 오아시스 위치를 파악해 빠르게 점령할 전략을 세우는 것이 좋다. Desert Drop is a classic melee map for four players set on a vast desert battlefield. The central hill and two small oasis points at opposite ends serve as strategic choke points where securing resources and pressuring opponents is key to victory. With relatively open movement paths, the map offers high tactical mobility and lacks fixed defensive structures, allowing pure unit combat to shine. Early game focuses on producing basic units near each base and advancing, while mid‑game control of the hill grants vision and attack range advantages. The expansive plains encourage large‑scale engagements, favoring players who use massed armies or highly mobile units. Purely defensive unit builds struggle to hold off attacks, so a balanced mix of offense and defense is essential. Before starting, plan your initial resource allocation and unit production order, and scout the hill and oasis locations to devise a swift capture strategy.
맵 선택 가이드
태그는 맵의 핵심 특징을 빠르게 설명하지만 제작 버전마다 규칙이 다를 수 있습니다. 상세 설명에서 권장 인원, 난이도, 플레이 시간과 버전을 함께 확인한 뒤 다운로드하세요.