
유닛 생산 스타크래프트 맵 모음
'유닛 생산' 태그가 등록된 맵을 모았습니다. 장르 하나로 찾기 어려운 플레이 방식, 난이도와 특징을 중심으로 인기 맵과 최신 맵을 비교해 보세요.
- 등록 맵
- 6개
- 누적 다운로드
- 0
- 누적 조회
- 127
인기 맵
다운로드와 조회 반응이 높은 맵입니다.
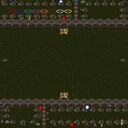
네덱스 디스트로이 Z 3.8 (Nexus Destroy Z 3.8)
스타크래프트 브루드워의 유즈맵 <네덱스 디스트로이 Z 3.8(Nexus Destroy Z 3.8)>은 네트워크 파괴를 주제로 한 디펜스 장르의 유즈맵으로, 플레이어는 적의 넥서스를 파괴하는 동시에 자신의 기지를 방어해야 하는 전략적 긴장감을 느낄 수 있다. 맵은 사막 타일셋으로 구성되어 있으며, 중앙에 위치한 주요 전투 지역을 중심으로 네 개의 플레이어 기지가 배치되어 있다. 각 기지 주변에는 방어 시설이 상주하며, 적의 공격 패턴에 따라 유동적으로 대응해야 한다. 게임은 크게 두 가지 목표로 나뉘는데, 하나는 적 넥서스의 체력을 0으로 만드는 것이고, 다른 하나는 자신의 넥서스가 파괴되지 않도록 보호하는 것이다. 맵 곳곳에 배치된 미네랄과 가스는Resource Management를 요구하며, 초반에는 자원 확보가 중요하지만 중반 이후에는 방어와 공격의 균형을 맞추는 것이 핵심이다. 특히 적의 대규모 공격 타이밍을 예측하고, 유닛을 효율적으로 배치하는 것이 승리 열쇠가 된다. 맵의 난이도는 중상급으로, 적의 공격 패턴이 랜덤하게 변화하기 때문에 플레이어의 전략적 사고와 적응력이 요구된다. 이 맵은 초보 플레이어보다는 중급 이상의 유저들에게 적합하며, 디펜스와 공격의 밸런스를 맞추는 재미가 있는 한편, 다수의 유닛을 동시에 조종해야 하는 복잡성도 갖추고 있다. 또한, 맵의 구조상 방어선이 무너지면 순식간에 역전이 가능하다는 점에서 긴장감 있는 플레이가 특징이다. 추천하는 플레이 방식은 방어塔와 유닛의 조합을 미리 준비하고, 적의 공격 루트를 차단하는 것이다. 자원 관리와 병력 생산 타이밍을 잘 조절하면 보다 수월하게 진행할 수 있다. 이 맵을 플레이하기 전에는 자신의 기지 주변의 방어 시설과 자원 분포를 미리 확인하는 것이 좋다. 또한, 적 넥서스의 위치와 접근 루트를 파악하여 효율적인 공격 루트를 설정하는 것이 중요하다. 맵의 디자인상 특정 위치에서만 공격을 집중하는 전략이 유효할 수 있으므로, 게임을 시작하기 전에 맵을 충분히 분석해 두는 것이 좋다. StarCraft: Brood War's custom map *Nexus Destroy Z 3.8* is a defense-style map centered around the theme of network destruction, where players must destroy the enemy's Nexus while simultaneously defending their own base, creating a strategic and tense experience. The map features a desert tileset with four player bases positioned around a central combat zone. Each base is equipped with defensive structures, requiring players to adapt dynamically to the enemy's attack patterns. The game has two main objectives: reducing the enemy Nexus's health to zero and preventing your own Nexus from being destroyed. Scattered throughout the map, minerals and gas demand effective resource management. While securing resources early is crucial, balancing defense and offense becomes key in the mid-game. Predicting large-scale enemy attacks and deploying units efficiently are vital to victory. With a difficulty rating of medium-high, the map challenges players with randomized enemy attack patterns, demanding strong strategic thinking and adaptability. This map is best suited for intermediate to advanced players, offering a satisfying balance between defense and offense while also requiring the management of multiple units simultaneously. Its structure allows for dramatic comebacks if defensive lines collapse, adding to the excitement. Recommended strategies include preparing defensive towers and unit compositions in advance and blocking enemy attack routes. Proper resource management and timely troop production can make the game significantly smoother. Before playing, it’s wise to scout your base’s defensive structures and resource distribution. Identifying the enemy Nexus’s location and access routes helps in planning efficient attack strategies. Since certain positions on the map may lend themselves to focused attacks, thoroughly analyzing the map beforehand is essential.
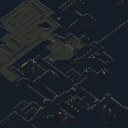
어둠 속의 고독 (Alone in the Dark)
스타크래프트 브루드워의 대표적인 공포 디펜스 유즈맵인 〈Alone in the Dark〉는 1.5 버전으로 업데이트된 후에도 여전히 플레이어들에게 긴장감 넘치는 밤을 선사합니다. 이 맵은 플레이어가 홀로 어둠 속에서 각종 유닛과 구조물을 활용해 야간을 버텨내야 하는 서바이벌 디펜스 장르로, 기본적으로는 5인의 플레이어가 협동하여 적의 공격을 방어하는 구조입니다. 맵의 배경은 어두운 숲과 얼어붙은 설원 지형으로 구성되어 있으며, 어두운 조명과 붉은 색조의 조명이 공포감을 더욱 고조시킵니다. 플레이 방식은 꽤 단순하면서도 전략적인데, 시작 지점에서 출발한 플레이어는 맵 중앙 부근에 위치한 방어 기지 주변을 중심으로 방어선을 구축해야 합니다. 적 유닛은 밤이 지나면서 점점 강력해지는 웨이브로 몰려오며, 플레이어는 제한된 자원으로 방어용 건물을 건설하고 유닛을 생산해 대응해야 합니다. 건물 건설은 제한 구역 내에만 가능하며, 자원은 맵 곳곳에 흩어져 있는 미네랄과 가스를 채취해 사용합니다. 특히 밤이 깊어질수록 적의 공격 패턴이 변하고, 더 강한 유닛들이 등장하기 때문에 방어 전략을 끊임없이 유동적으로 변경해야 합니다. 추천하는 플레이 방식은 초반에 최대한 빠른 자원 확보와 방어 건물 설치에 집중하는 것입니다. 건물이 파괴되면 회복이 불가능한 경우가 많기 때문에, 방어선 구축에 실패하면 곧장 게임 오버로 이어질 수 있습니다. 또한, 주기적으로 등장하는 보스급 적에 대비해 강력한 유닛을 배치하는 것도 중요합니다. 맵의 특성상 밤이 깊어질수록 시야가 제한되고, 맵 곳곳에 숨은 적들이 등장하기 때문에 맵의 구조를 잘 숙지하는 것이 필수입니다. 이 맵은 공포와 긴장감을 중시하는 플레이어들에게 특히 인기가 많으며, 5인 이상의 협동 플레이가 가장 효과적입니다. 혼자 플레이하는 것도 가능하지만, 방어의 안정성을 위해 최소 2인 이상의 팀 플레이를 추천합니다. 또한, 맵의 어두운 분위기를 최대한 살리기 위해 밝기 조절과 사운드 설정을 최적화하는 것이 좋습니다. Alone in the Dark is a classic survival defense custom map in StarCraft: Brood War, updated to version 1.5, offering players an intense night of survival against relentless enemy waves. Set in a dark forest and frozen tundra, the map immerses players in a tense atmosphere with dim lighting and eerie red hues. The gameplay is straightforward yet strategic: players must defend a central base from increasingly powerful enemy units as night progresses. Starting from their initial positions, players collect resources—minerals and gas—scattered across the map to build defensive structures and produce units. Construction is limited to designated zones, adding a layer of challenge to base management. A strong early-game strategy is essential, focusing on rapid resource gathering and the swift establishment of defensive buildings. Failure to secure the base early often leads to an inevitable game over, as destroyed structures cannot be recovered. Players must adapt their defenses dynamically, as enemy attack patterns intensify with nightfall, culminating in powerful boss units that require strategic unit placement to counter. The map shines in cooperative play, particularly with teams of 5 or more, though solo or smaller team play is possible with careful planning. Familiarity with the map layout is crucial, as obscured vision and hidden enemies become more prevalent as the night deepens. To fully experience the eerie atmosphere, optimizing brightness and sound settings is highly recommended. This map is ideal for players who thrive on tension and strategic depth in a survival defense setting.
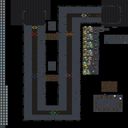
Corsair Defense 4
스타크래프트 브루드워의 디펜스 장르 유즈맵으로, ‘Corsair Defense 4’는 특히 6인용으로 구성된 방어형 맵이다. 맵의 구조는 중앙을 가로지르는 좁은 길목을 중심으로 양쪽에 기지 역할을 하는 건물이 배치되어 있으며, 각 플레이어는 자신의 베이스를 보호하면서 적의 공격을 방어해야 한다. 맵의 특징은 다양한 유닛 생산과 업그레이드가 가능하다는 점으로, ‘Build Units’와 ‘Upgrade’라는 시스템이 강조되어 있다. 또한 ‘Get heroes’라는 설명에서 영웅 유닛의 존재가 확인되며, 이 영웅들은 게임 내에서 강력한 스킬을 활용해 방어전을 지원하는 역할로 추정된다. 맵의 디자인에서 확인되는 ‘Ban Triggers’와 ‘Player 12 unit distribution’이라는 메모는likely 특정 유닛이나 전략의 제한 또는 밸런스 조절을 위한 요소로 보인다. 플레이어는 맵 중앙의 좁은 길목을 지키며, 다수의 적 유닛이 끊임없이 밀려오는 공격을 방어하는 것이 주요 목표로 보인다. 맵의 분위기는 우주 테마로 설정되어 있으며, 타일셋과 색상Palette가 어두운 톤으로 구성되어 있어 긴장감 있는 방어전을 연출한다. 특히 ‘Corsair’라는 제목은 우주 전함을 연상시키며, 방어형 맵의 컨셉과 잘 어우러진다. 이 맵은 방어 전술을 중시하는 플레이어에게 적합하며, 특히 팀 플레이보다는 각자 독립된 방어 라인을 유지하는 스타일이 요구된다. 자신의 기지를 지키면서 영웅 유닛을 활용한 전략적 플레이가 핵심 포인트로 보인다. 또한, 유닛 생산과 업그레이드 시스템이 있기 때문에 자원 관리와 타이밍 역시 중요하다. 초보자의 경우 방어 라인을 유지하는 데 집중하는 것이 좋으며, 업그레이드와 영웅의 활용을 통해 점차 난이도를 높일 수 있다. 이 맵은 디펜스 유저들에게는 물론, 스타크래프트의 전략적 측면을 경험하고 싶은 유저들에게도 추천할 만한 작품이다. 맵을 플레이하기 전에는 자신의 유닛 생산 빌드와 영웅 스킬의 조합을 미리 계획해 두는 것이 좋다. 또한, 맵의 좁은 길목 구조상 기동성 있는 유닛을 확보하는 것이 중요하며, 업그레이드를 통해 방어력을 높이는 전략이 효과적일 것이다. 맵의 밸런스는 유닛 분배와 트리거 설정에 따라 달라질 수 있으므로, ‘Player 12 unit distribution’이라는 메모가 있는 만큼, 각 플레이어의 유닛 분포와 제한 사항을 확인하는 것이 중요하다. 이 맵은 오랜 시간 동안 유즈맵 커뮤니티에서 사랑받아 온 디펜스 장르의 대표작 중 하나로, 꾸준한 인기를 얻고 있는 작품이다. Corsair Defense 4 is a defense-style custom map for StarCraft: Brood War, designed for up to 6 players. The map features a narrow central pathway flanked by base structures on both sides, where players must defend their bases against relentless enemy attacks. A standout feature is the ability to produce and upgrade units, as indicated by the 'Build Units' and 'Upgrade' systems. The mention of 'Get heroes' suggests the presence of hero units with special abilities to aid in defense. Additional notes like 'Ban Triggers' and 'Player 12 unit distribution' imply the inclusion of unit restrictions or balance adjustments. Players must hold the central chokepoint while managing waves of enemy forces. The cosmic theme of the map, reflected in its tile set and dark color palette, enhances the tense atmosphere of the defense scenario. The title 'Corsair' evokes imagery of space vessels, aligning well with the map's defensive theme. This map is ideal for players who enjoy tactical defense gameplay, where independent base management and strategic use of hero units are key. Resource management and timing are also critical, as the ability to produce and upgrade units plays a significant role. Beginners should focus on maintaining their defense lines while gradually incorporating upgrades and hero skills to increase difficulty. The map is recommended for both defense enthusiasts and those looking to experience StarCraft's strategic depth. Before playing, it's advisable to plan unit production builds and hero skill combinations. Due to the narrow chokepoint design, mobility-focused units are crucial, and upgrading defensive capabilities is an effective strategy. The map's balance may vary based on unit distribution and trigger settings, so players should pay attention to the 'Player 12 unit distribution' note. Corsair Defense 4 is a classic among custom defense maps, known for its enduring popularity in the StarCraft custom map community.
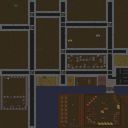
심즈 위드 펫샵 (Sims With Petshop) Ver 1.2
스타크래프트 브루드워 유즈맵 ‘심즈 위드 펫샵(Sims With Petshop)’은 심시티 스타일의 건물 관리와 펫샵 운영을 결합한 독특한 디펜스 게임입니다. 플레이어는 주어진 자원으로 건물을 건설하고 업그레이드하면서 유닛을 생산해 끊임없이 몰려오는 적의 공격을 방어해야 합니다. 맵 중앙에는 펫샵이 위치해 있으며, 펫샵에서 생산되는 특수 유닛들은 공격력과 방어력에서 큰 이점을 제공합니다. 건물 배치와 펫샵 운영의 밸런스를 맞추는 것이 핵심으로, 초반 자원 확보와 펫샵의 빠른 확장이 승리의 관건입니다. 적들은 맵 가장자리의 입구에서 끊임없이 생성되며, 플레이어는 방어선을 구축하고 펫샵을 중심으로 한 전략적 타워와 유닛 조합으로 공격을 막아야 합니다. 맵 내에는 도로와 장애물이 배치되어 있어 유닛의 이동 경로를 제한하고, 방어의 난이도를 높입니다. 특히 1.2 버전에서 추가된 ‘Homeless Player’는 자원이 부족한 플레이어에게 추가 자원을 제공해 게임의 균형을 맞추는 역할을 합니다. 건물과 펫샵의 업그레이드 시스템은 게임 후반으로 갈수록 더욱 중요해지며, 적의 공격 패턴이 강화되면서 전략의 깊이가 더해집니다. 이 맵은 건물 관리와 디펜스의 조합을 좋아하는 플레이어들에게 특히 추천됩니다. 펫샵의 특수 유닛들과 건물 업그레이드의 조합을 통해 다양한 전략을 구사할 수 있으며, 맵의 난이도는 초보부터 상급자까지 폭넓게 즐길 수 있도록 조절되어 있습니다. 다만, 건물과 펫샵의 배치, 그리고 자원 관리에 신경을 써야 하므로 세심한 플레이가 요구됩니다. 초기 버전인 1.2에서는 일부 건물과 유닛의 스탯이 조정되어 밸런스가 개선되었으므로, 최신 버전을 플레이하는 것이 좋습니다. 플레이 전에는 맵의 구조와 펫샵의 위치를 정확히 파악하고, 건물 배치와 업그레이드 우선순위를 미리 계획하는 것이 중요합니다. 또한, 적의 공격 패턴과 유닛 종류를 숙지해 방어 라인을 효율적으로 구축할 필요가 있습니다. 펫샵의 특수 유닛들은 공격력과 방어력이 뛰어나지만, 생산 비용이 비싸므로 신중한 사용이 필요합니다. 맵의 전체적인 구조는 심시티 스타일이지만, 디펜스 요소가 강해 전략적 플레이가 필수적입니다. StarCraft: Brood War custom map *Sims With Petshop* is a unique defense game that combines SimCity-style building management with a pet shop operation. Players must construct and upgrade buildings with limited resources, produce units, and defend against endless waves of enemy attacks. At the center of the map lies the pet shop, where special units are produced that offer significant advantages in attack and defense. Balancing building placement and pet shop operations is key, with early resource gathering and rapid pet shop expansion determining victory. Enemies spawn continuously at entrances along the map’s edges, forcing players to establish defensive lines and combine strategic towers and units centered around the pet shop to fend off attacks. The map features roads and obstacles that restrict unit movement paths, increasing the difficulty of defense. Notably, the *Homeless Player* mechanic introduced in version 1.2 provides additional resources to struggling players, helping to balance the game. As the game progresses, the upgrade systems for buildings and the pet shop become increasingly vital, with enemy attacks growing stronger and adding depth to strategic play. This map is especially recommended for players who enjoy building management combined with defense gameplay. The combination of special pet shop units and building upgrades allows for diverse strategies, and the difficulty is carefully adjusted to cater to both beginners and advanced players. However, players must pay close attention to building and pet shop placement, as well as resource management, requiring careful and precise play. In the initial version 1.2, some buildings and units had their stats adjusted to improve balance, so playing the latest version is advisable. Before starting, it’s important to thoroughly understand the map layout and the pet shop’s location, pre-planning building placements and upgrade priorities. Players should also familiarize themselves with enemy attack patterns and unit types to efficiently construct defensive lines. While the pet shop’s special units boast exceptional attack and defense, they come at a high production cost, demanding cautious use. Though the map’s overall structure follows a SimCity style, its strong defense elements make strategic play essential.
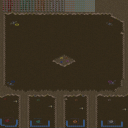
빌더 앤 파이터즈 /w 매스 (Builders and Fighters /w mass)
스타크래프트 브루드워의 유즈맵 "빌더 앤 파이터즈 /w 매스(Builders and Fighters /w mass)"는 전투와 건물을 동시에 관리하는 전략적 재미가 돋보이는 UMS 맵이다. 8명의 플레이어가 각자 빌더 유닛을 보유하며, 이 빌더를 통해 전투 유닛을 생산하고 상대방의 전투 건물인 '파이터 버나'를 파괴하는 것이 목표로 보인다. 맵은 황무지 타일셋을 기반으로 구성되어 있으며, 중앙에 넓은 평지가 펼쳐져 있어 전투가 벌어질 가능성이 높다. 맵의 가장 큰 특징은 빌더를 통한 능동적인 유닛 생산으로, 단순히 전투만 벌이는 것이 아니라 자원과 건물을 관리하는 전략적 요소가 추가되어 있다. 전투 유닛 생산뿐만 아니라 상대방을 견제하거나 자신의 기지를 보호하는 플레이도 중요할 것으로 추정된다.ター의 설명에 따르면 빌더는 전투 유닛을 생산하는 동시에 자신의 기지를 강화하는 역할도 담당하는 것으로 보이며, 이는 초보자부터 숙련자까지 다양한 플레이 스타일을 요구할 수 있는 구조다. 초보자는 빌더 관리와 전투에 집중해야 하며, 숙련자는 빌더를 활용한 빠른 유닛 생산과 기지 방어 전략을 구사할 수 있을 것이다. 다만 맵의 밸런스가 어떻게 맞춰졌는지는 확인되지 않지만, 빌더의 역할이 크기 때문에 빌더의 생산성이나 전투 유닛의 스펙에 따라 전략이 크게 달라질 수 있을 것으로 보인다. 플레이 전에는 빌더의 생산 속도와 전투 유닛의 성능, 그리고 상대방의 전략을 읽는 능력을 키우는 것이 중요할 것으로 판단된다. 특히 빌더 관리와 전투 동시 진행의 어려움이 이 맵의 핵심 난관으로 작용할 가능성이 높다. Builders and Fighters /w mass is a UMS custom map in StarCraft: Brood War that offers a unique blend of building management and real-time combat. The map allows up to 8 players, each controlling a builder unit that can construct combat units to attack and destroy the enemy's Fighter's Bunker. The central terrain is mostly flat, providing ample space for large-scale battles. The key mechanic revolves around the builder unit, which not only produces combat units but also manages resources and base defenses, adding a strategic layer beyond simple combat. Players must balance between expanding their army, defending their base, and launching offensives. The map seems designed to cater to both beginners and experienced players, as beginners can focus on basic builder and combat management, while advanced players can exploit builder efficiency and base defense strategies. However, the balance of unit production speed and combat effectiveness remains unclear without further testing. Players should prepare for the challenge of multitasking between building units and engaging in combat simultaneously, as this dual responsibility forms the core difficulty of the map.
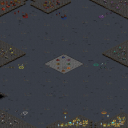
벙커 워즈 X: 언리개블 (Bunker Warz-X: UnRiggable)
《Bunker Warz-X>UnRiggable!》는 스타크래프트: 브루드워의 유즈맵으로, 8명의 플레이어가 참여하는 대규모 전략 디펜스 맵이다. 맵은 중앙에 위치한 거대한 건물을 중심으로 펼쳐지며, 플레이어는 각자의 진영을 지키면서 적의 공격을 방어해야 한다. 맵 좌우 양측에는 다수의 입구가 존재하여 다방향에서 적의 침공이 예상되며, 이를 대비하기 위해 플레이어는 방어 건물과 유닛을 효율적으로 배치해야 한다. 맵의 특징 중 하나는 유닛 업그레이드 시스템으로, ‘255o Heroes’와 ‘Weak Dragons’가 언급된 것으로 보아 다양한 유닛의 능력치를 강화할 수 있는 것으로 추정된다. 또한 ‘Buildable Units...For a price’라는 설명은 일정 비용을 지불해 유닛을 생산할 수 있음을 시사하며, ‘Unriggable’이라는 단어는 맵의 버그나 꼼수가 불가능하도록 설계되었음을 강조한다. 맵의 분위기는 우주 테마로 설정되어 있으며, 타일셋과 인코딩 정보로 보아 한국어 환경에서 제작된 맵으로 보인다. 이 맵은 디펜스와 전략적 배치에 중점을 둔 만큼, 플레이어의 손빠르고 전략적인 판단력이 요구된다. 초보자는 방어선을 구축하는 기본기를 익히는 데 집중하고, 숙련자는 업그레이드와 자원 관리를 통해 더 효율적인 플레이를 노려야 할 것이다. 맵을 플레이하기 전에는 방어 건물의 위치와 각 입구의 중요도를 사전에 파악하는 것이 중요하다. 특히 ‘UnRiggable’이라는 설명대로 버그가 발생하지 않도록 공식적인 패치를 통해 최신 버전을 사용하는 것이 권장된다. Bunker Warz-X>UnRiggable! is a StarCraft: Brood War custom map designed for 8 players, featuring a large-scale strategy defense gameplay. The map centers around a massive central structure, with multiple entry points on both sides, requiring players to strategically place defenses against multidirectional enemy attacks. One of the key features is the unit upgrade system, hinted by terms like '255o Heroes' and 'Weak Dragons,' suggesting that players can enhance their units' capabilities. The phrase 'Buildable Units...For a price' implies that players can recruit units at a cost. The 'Unriggable' label indicates that the map is designed to prevent exploits or bugs, ensuring fair gameplay. Set in a space-themed tile set, the map is likely created for a Korean-speaking audience, as suggested by the encoding and tile set details. This map emphasizes defense and strategic placement, demanding quick reflexes and tactical thinking from players. Beginners should focus on mastering basic defensive structures, while experienced players can optimize upgrades and resource management. Before playing, it's essential to understand the location of defensive buildings and the significance of each entry point. Given the 'Unriggable' description, using the latest official patch is highly recommended to avoid potential bugs.
최근 등록된 맵
새로 추가된 파일과 버전을 확인하세요.
심즈 위드 펫샵 (Sims With Petshop) Ver 1.2
스타크래프트 브루드워 유즈맵 ‘심즈 위드 펫샵(Sims With Petshop)’은 심시티 스타일의 건물 관리와 펫샵 운영을 결합한 독특한 디펜스 게임입니다. 플레이어는 주어진 자원으로 건물을 건설하고 업그레이드하면서 유닛을 생산해 끊임없이 몰려오는 적의 공격을 방어해야 합니다. 맵 중앙에는 펫샵이 위치해 있으며, 펫샵에서 생산되는 특수 유닛들은 공격력과 방어력에서 큰 이점을 제공합니다. 건물 배치와 펫샵 운영의 밸런스를 맞추는 것이 핵심으로, 초반 자원 확보와 펫샵의 빠른 확장이 승리의 관건입니다. 적들은 맵 가장자리의 입구에서 끊임없이 생성되며, 플레이어는 방어선을 구축하고 펫샵을 중심으로 한 전략적 타워와 유닛 조합으로 공격을 막아야 합니다. 맵 내에는 도로와 장애물이 배치되어 있어 유닛의 이동 경로를 제한하고, 방어의 난이도를 높입니다. 특히 1.2 버전에서 추가된 ‘Homeless Player’는 자원이 부족한 플레이어에게 추가 자원을 제공해 게임의 균형을 맞추는 역할을 합니다. 건물과 펫샵의 업그레이드 시스템은 게임 후반으로 갈수록 더욱 중요해지며, 적의 공격 패턴이 강화되면서 전략의 깊이가 더해집니다. 이 맵은 건물 관리와 디펜스의 조합을 좋아하는 플레이어들에게 특히 추천됩니다. 펫샵의 특수 유닛들과 건물 업그레이드의 조합을 통해 다양한 전략을 구사할 수 있으며, 맵의 난이도는 초보부터 상급자까지 폭넓게 즐길 수 있도록 조절되어 있습니다. 다만, 건물과 펫샵의 배치, 그리고 자원 관리에 신경을 써야 하므로 세심한 플레이가 요구됩니다. 초기 버전인 1.2에서는 일부 건물과 유닛의 스탯이 조정되어 밸런스가 개선되었으므로, 최신 버전을 플레이하는 것이 좋습니다. 플레이 전에는 맵의 구조와 펫샵의 위치를 정확히 파악하고, 건물 배치와 업그레이드 우선순위를 미리 계획하는 것이 중요합니다. 또한, 적의 공격 패턴과 유닛 종류를 숙지해 방어 라인을 효율적으로 구축할 필요가 있습니다. 펫샵의 특수 유닛들은 공격력과 방어력이 뛰어나지만, 생산 비용이 비싸므로 신중한 사용이 필요합니다. 맵의 전체적인 구조는 심시티 스타일이지만, 디펜스 요소가 강해 전략적 플레이가 필수적입니다. StarCraft: Brood War custom map *Sims With Petshop* is a unique defense game that combines SimCity-style building management with a pet shop operation. Players must construct and upgrade buildings with limited resources, produce units, and defend against endless waves of enemy attacks. At the center of the map lies the pet shop, where special units are produced that offer significant advantages in attack and defense. Balancing building placement and pet shop operations is key, with early resource gathering and rapid pet shop expansion determining victory. Enemies spawn continuously at entrances along the map’s edges, forcing players to establish defensive lines and combine strategic towers and units centered around the pet shop to fend off attacks. The map features roads and obstacles that restrict unit movement paths, increasing the difficulty of defense. Notably, the *Homeless Player* mechanic introduced in version 1.2 provides additional resources to struggling players, helping to balance the game. As the game progresses, the upgrade systems for buildings and the pet shop become increasingly vital, with enemy attacks growing stronger and adding depth to strategic play. This map is especially recommended for players who enjoy building management combined with defense gameplay. The combination of special pet shop units and building upgrades allows for diverse strategies, and the difficulty is carefully adjusted to cater to both beginners and advanced players. However, players must pay close attention to building and pet shop placement, as well as resource management, requiring careful and precise play. In the initial version 1.2, some buildings and units had their stats adjusted to improve balance, so playing the latest version is advisable. Before starting, it’s important to thoroughly understand the map layout and the pet shop’s location, pre-planning building placements and upgrade priorities. Players should also familiarize themselves with enemy attack patterns and unit types to efficiently construct defensive lines. While the pet shop’s special units boast exceptional attack and defense, they come at a high production cost, demanding cautious use. Though the map’s overall structure follows a SimCity style, its strong defense elements make strategic play essential.
Corsair Defense 4
스타크래프트 브루드워의 디펜스 장르 유즈맵으로, ‘Corsair Defense 4’는 특히 6인용으로 구성된 방어형 맵이다. 맵의 구조는 중앙을 가로지르는 좁은 길목을 중심으로 양쪽에 기지 역할을 하는 건물이 배치되어 있으며, 각 플레이어는 자신의 베이스를 보호하면서 적의 공격을 방어해야 한다. 맵의 특징은 다양한 유닛 생산과 업그레이드가 가능하다는 점으로, ‘Build Units’와 ‘Upgrade’라는 시스템이 강조되어 있다. 또한 ‘Get heroes’라는 설명에서 영웅 유닛의 존재가 확인되며, 이 영웅들은 게임 내에서 강력한 스킬을 활용해 방어전을 지원하는 역할로 추정된다. 맵의 디자인에서 확인되는 ‘Ban Triggers’와 ‘Player 12 unit distribution’이라는 메모는likely 특정 유닛이나 전략의 제한 또는 밸런스 조절을 위한 요소로 보인다. 플레이어는 맵 중앙의 좁은 길목을 지키며, 다수의 적 유닛이 끊임없이 밀려오는 공격을 방어하는 것이 주요 목표로 보인다. 맵의 분위기는 우주 테마로 설정되어 있으며, 타일셋과 색상Palette가 어두운 톤으로 구성되어 있어 긴장감 있는 방어전을 연출한다. 특히 ‘Corsair’라는 제목은 우주 전함을 연상시키며, 방어형 맵의 컨셉과 잘 어우러진다. 이 맵은 방어 전술을 중시하는 플레이어에게 적합하며, 특히 팀 플레이보다는 각자 독립된 방어 라인을 유지하는 스타일이 요구된다. 자신의 기지를 지키면서 영웅 유닛을 활용한 전략적 플레이가 핵심 포인트로 보인다. 또한, 유닛 생산과 업그레이드 시스템이 있기 때문에 자원 관리와 타이밍 역시 중요하다. 초보자의 경우 방어 라인을 유지하는 데 집중하는 것이 좋으며, 업그레이드와 영웅의 활용을 통해 점차 난이도를 높일 수 있다. 이 맵은 디펜스 유저들에게는 물론, 스타크래프트의 전략적 측면을 경험하고 싶은 유저들에게도 추천할 만한 작품이다. 맵을 플레이하기 전에는 자신의 유닛 생산 빌드와 영웅 스킬의 조합을 미리 계획해 두는 것이 좋다. 또한, 맵의 좁은 길목 구조상 기동성 있는 유닛을 확보하는 것이 중요하며, 업그레이드를 통해 방어력을 높이는 전략이 효과적일 것이다. 맵의 밸런스는 유닛 분배와 트리거 설정에 따라 달라질 수 있으므로, ‘Player 12 unit distribution’이라는 메모가 있는 만큼, 각 플레이어의 유닛 분포와 제한 사항을 확인하는 것이 중요하다. 이 맵은 오랜 시간 동안 유즈맵 커뮤니티에서 사랑받아 온 디펜스 장르의 대표작 중 하나로, 꾸준한 인기를 얻고 있는 작품이다. Corsair Defense 4 is a defense-style custom map for StarCraft: Brood War, designed for up to 6 players. The map features a narrow central pathway flanked by base structures on both sides, where players must defend their bases against relentless enemy attacks. A standout feature is the ability to produce and upgrade units, as indicated by the 'Build Units' and 'Upgrade' systems. The mention of 'Get heroes' suggests the presence of hero units with special abilities to aid in defense. Additional notes like 'Ban Triggers' and 'Player 12 unit distribution' imply the inclusion of unit restrictions or balance adjustments. Players must hold the central chokepoint while managing waves of enemy forces. The cosmic theme of the map, reflected in its tile set and dark color palette, enhances the tense atmosphere of the defense scenario. The title 'Corsair' evokes imagery of space vessels, aligning well with the map's defensive theme. This map is ideal for players who enjoy tactical defense gameplay, where independent base management and strategic use of hero units are key. Resource management and timing are also critical, as the ability to produce and upgrade units plays a significant role. Beginners should focus on maintaining their defense lines while gradually incorporating upgrades and hero skills to increase difficulty. The map is recommended for both defense enthusiasts and those looking to experience StarCraft's strategic depth. Before playing, it's advisable to plan unit production builds and hero skill combinations. Due to the narrow chokepoint design, mobility-focused units are crucial, and upgrading defensive capabilities is an effective strategy. The map's balance may vary based on unit distribution and trigger settings, so players should pay attention to the 'Player 12 unit distribution' note. Corsair Defense 4 is a classic among custom defense maps, known for its enduring popularity in the StarCraft custom map community.
네덱스 디스트로이 Z 3.8 (Nexus Destroy Z 3.8)
스타크래프트 브루드워의 유즈맵 <네덱스 디스트로이 Z 3.8(Nexus Destroy Z 3.8)>은 네트워크 파괴를 주제로 한 디펜스 장르의 유즈맵으로, 플레이어는 적의 넥서스를 파괴하는 동시에 자신의 기지를 방어해야 하는 전략적 긴장감을 느낄 수 있다. 맵은 사막 타일셋으로 구성되어 있으며, 중앙에 위치한 주요 전투 지역을 중심으로 네 개의 플레이어 기지가 배치되어 있다. 각 기지 주변에는 방어 시설이 상주하며, 적의 공격 패턴에 따라 유동적으로 대응해야 한다. 게임은 크게 두 가지 목표로 나뉘는데, 하나는 적 넥서스의 체력을 0으로 만드는 것이고, 다른 하나는 자신의 넥서스가 파괴되지 않도록 보호하는 것이다. 맵 곳곳에 배치된 미네랄과 가스는Resource Management를 요구하며, 초반에는 자원 확보가 중요하지만 중반 이후에는 방어와 공격의 균형을 맞추는 것이 핵심이다. 특히 적의 대규모 공격 타이밍을 예측하고, 유닛을 효율적으로 배치하는 것이 승리 열쇠가 된다. 맵의 난이도는 중상급으로, 적의 공격 패턴이 랜덤하게 변화하기 때문에 플레이어의 전략적 사고와 적응력이 요구된다. 이 맵은 초보 플레이어보다는 중급 이상의 유저들에게 적합하며, 디펜스와 공격의 밸런스를 맞추는 재미가 있는 한편, 다수의 유닛을 동시에 조종해야 하는 복잡성도 갖추고 있다. 또한, 맵의 구조상 방어선이 무너지면 순식간에 역전이 가능하다는 점에서 긴장감 있는 플레이가 특징이다. 추천하는 플레이 방식은 방어塔와 유닛의 조합을 미리 준비하고, 적의 공격 루트를 차단하는 것이다. 자원 관리와 병력 생산 타이밍을 잘 조절하면 보다 수월하게 진행할 수 있다. 이 맵을 플레이하기 전에는 자신의 기지 주변의 방어 시설과 자원 분포를 미리 확인하는 것이 좋다. 또한, 적 넥서스의 위치와 접근 루트를 파악하여 효율적인 공격 루트를 설정하는 것이 중요하다. 맵의 디자인상 특정 위치에서만 공격을 집중하는 전략이 유효할 수 있으므로, 게임을 시작하기 전에 맵을 충분히 분석해 두는 것이 좋다. StarCraft: Brood War's custom map *Nexus Destroy Z 3.8* is a defense-style map centered around the theme of network destruction, where players must destroy the enemy's Nexus while simultaneously defending their own base, creating a strategic and tense experience. The map features a desert tileset with four player bases positioned around a central combat zone. Each base is equipped with defensive structures, requiring players to adapt dynamically to the enemy's attack patterns. The game has two main objectives: reducing the enemy Nexus's health to zero and preventing your own Nexus from being destroyed. Scattered throughout the map, minerals and gas demand effective resource management. While securing resources early is crucial, balancing defense and offense becomes key in the mid-game. Predicting large-scale enemy attacks and deploying units efficiently are vital to victory. With a difficulty rating of medium-high, the map challenges players with randomized enemy attack patterns, demanding strong strategic thinking and adaptability. This map is best suited for intermediate to advanced players, offering a satisfying balance between defense and offense while also requiring the management of multiple units simultaneously. Its structure allows for dramatic comebacks if defensive lines collapse, adding to the excitement. Recommended strategies include preparing defensive towers and unit compositions in advance and blocking enemy attack routes. Proper resource management and timely troop production can make the game significantly smoother. Before playing, it’s wise to scout your base’s defensive structures and resource distribution. Identifying the enemy Nexus’s location and access routes helps in planning efficient attack strategies. Since certain positions on the map may lend themselves to focused attacks, thoroughly analyzing the map beforehand is essential.
벙커 워즈 X: 언리개블 (Bunker Warz-X: UnRiggable)
《Bunker Warz-X>UnRiggable!》는 스타크래프트: 브루드워의 유즈맵으로, 8명의 플레이어가 참여하는 대규모 전략 디펜스 맵이다. 맵은 중앙에 위치한 거대한 건물을 중심으로 펼쳐지며, 플레이어는 각자의 진영을 지키면서 적의 공격을 방어해야 한다. 맵 좌우 양측에는 다수의 입구가 존재하여 다방향에서 적의 침공이 예상되며, 이를 대비하기 위해 플레이어는 방어 건물과 유닛을 효율적으로 배치해야 한다. 맵의 특징 중 하나는 유닛 업그레이드 시스템으로, ‘255o Heroes’와 ‘Weak Dragons’가 언급된 것으로 보아 다양한 유닛의 능력치를 강화할 수 있는 것으로 추정된다. 또한 ‘Buildable Units...For a price’라는 설명은 일정 비용을 지불해 유닛을 생산할 수 있음을 시사하며, ‘Unriggable’이라는 단어는 맵의 버그나 꼼수가 불가능하도록 설계되었음을 강조한다. 맵의 분위기는 우주 테마로 설정되어 있으며, 타일셋과 인코딩 정보로 보아 한국어 환경에서 제작된 맵으로 보인다. 이 맵은 디펜스와 전략적 배치에 중점을 둔 만큼, 플레이어의 손빠르고 전략적인 판단력이 요구된다. 초보자는 방어선을 구축하는 기본기를 익히는 데 집중하고, 숙련자는 업그레이드와 자원 관리를 통해 더 효율적인 플레이를 노려야 할 것이다. 맵을 플레이하기 전에는 방어 건물의 위치와 각 입구의 중요도를 사전에 파악하는 것이 중요하다. 특히 ‘UnRiggable’이라는 설명대로 버그가 발생하지 않도록 공식적인 패치를 통해 최신 버전을 사용하는 것이 권장된다. Bunker Warz-X>UnRiggable! is a StarCraft: Brood War custom map designed for 8 players, featuring a large-scale strategy defense gameplay. The map centers around a massive central structure, with multiple entry points on both sides, requiring players to strategically place defenses against multidirectional enemy attacks. One of the key features is the unit upgrade system, hinted by terms like '255o Heroes' and 'Weak Dragons,' suggesting that players can enhance their units' capabilities. The phrase 'Buildable Units...For a price' implies that players can recruit units at a cost. The 'Unriggable' label indicates that the map is designed to prevent exploits or bugs, ensuring fair gameplay. Set in a space-themed tile set, the map is likely created for a Korean-speaking audience, as suggested by the encoding and tile set details. This map emphasizes defense and strategic placement, demanding quick reflexes and tactical thinking from players. Beginners should focus on mastering basic defensive structures, while experienced players can optimize upgrades and resource management. Before playing, it's essential to understand the location of defensive buildings and the significance of each entry point. Given the 'Unriggable' description, using the latest official patch is highly recommended to avoid potential bugs.
빌더 앤 파이터즈 /w 매스 (Builders and Fighters /w mass)
스타크래프트 브루드워의 유즈맵 "빌더 앤 파이터즈 /w 매스(Builders and Fighters /w mass)"는 전투와 건물을 동시에 관리하는 전략적 재미가 돋보이는 UMS 맵이다. 8명의 플레이어가 각자 빌더 유닛을 보유하며, 이 빌더를 통해 전투 유닛을 생산하고 상대방의 전투 건물인 '파이터 버나'를 파괴하는 것이 목표로 보인다. 맵은 황무지 타일셋을 기반으로 구성되어 있으며, 중앙에 넓은 평지가 펼쳐져 있어 전투가 벌어질 가능성이 높다. 맵의 가장 큰 특징은 빌더를 통한 능동적인 유닛 생산으로, 단순히 전투만 벌이는 것이 아니라 자원과 건물을 관리하는 전략적 요소가 추가되어 있다. 전투 유닛 생산뿐만 아니라 상대방을 견제하거나 자신의 기지를 보호하는 플레이도 중요할 것으로 추정된다.ター의 설명에 따르면 빌더는 전투 유닛을 생산하는 동시에 자신의 기지를 강화하는 역할도 담당하는 것으로 보이며, 이는 초보자부터 숙련자까지 다양한 플레이 스타일을 요구할 수 있는 구조다. 초보자는 빌더 관리와 전투에 집중해야 하며, 숙련자는 빌더를 활용한 빠른 유닛 생산과 기지 방어 전략을 구사할 수 있을 것이다. 다만 맵의 밸런스가 어떻게 맞춰졌는지는 확인되지 않지만, 빌더의 역할이 크기 때문에 빌더의 생산성이나 전투 유닛의 스펙에 따라 전략이 크게 달라질 수 있을 것으로 보인다. 플레이 전에는 빌더의 생산 속도와 전투 유닛의 성능, 그리고 상대방의 전략을 읽는 능력을 키우는 것이 중요할 것으로 판단된다. 특히 빌더 관리와 전투 동시 진행의 어려움이 이 맵의 핵심 난관으로 작용할 가능성이 높다. Builders and Fighters /w mass is a UMS custom map in StarCraft: Brood War that offers a unique blend of building management and real-time combat. The map allows up to 8 players, each controlling a builder unit that can construct combat units to attack and destroy the enemy's Fighter's Bunker. The central terrain is mostly flat, providing ample space for large-scale battles. The key mechanic revolves around the builder unit, which not only produces combat units but also manages resources and base defenses, adding a strategic layer beyond simple combat. Players must balance between expanding their army, defending their base, and launching offensives. The map seems designed to cater to both beginners and experienced players, as beginners can focus on basic builder and combat management, while advanced players can exploit builder efficiency and base defense strategies. However, the balance of unit production speed and combat effectiveness remains unclear without further testing. Players should prepare for the challenge of multitasking between building units and engaging in combat simultaneously, as this dual responsibility forms the core difficulty of the map.
어둠 속의 고독 (Alone in the Dark)
스타크래프트 브루드워의 대표적인 공포 디펜스 유즈맵인 〈Alone in the Dark〉는 1.5 버전으로 업데이트된 후에도 여전히 플레이어들에게 긴장감 넘치는 밤을 선사합니다. 이 맵은 플레이어가 홀로 어둠 속에서 각종 유닛과 구조물을 활용해 야간을 버텨내야 하는 서바이벌 디펜스 장르로, 기본적으로는 5인의 플레이어가 협동하여 적의 공격을 방어하는 구조입니다. 맵의 배경은 어두운 숲과 얼어붙은 설원 지형으로 구성되어 있으며, 어두운 조명과 붉은 색조의 조명이 공포감을 더욱 고조시킵니다. 플레이 방식은 꽤 단순하면서도 전략적인데, 시작 지점에서 출발한 플레이어는 맵 중앙 부근에 위치한 방어 기지 주변을 중심으로 방어선을 구축해야 합니다. 적 유닛은 밤이 지나면서 점점 강력해지는 웨이브로 몰려오며, 플레이어는 제한된 자원으로 방어용 건물을 건설하고 유닛을 생산해 대응해야 합니다. 건물 건설은 제한 구역 내에만 가능하며, 자원은 맵 곳곳에 흩어져 있는 미네랄과 가스를 채취해 사용합니다. 특히 밤이 깊어질수록 적의 공격 패턴이 변하고, 더 강한 유닛들이 등장하기 때문에 방어 전략을 끊임없이 유동적으로 변경해야 합니다. 추천하는 플레이 방식은 초반에 최대한 빠른 자원 확보와 방어 건물 설치에 집중하는 것입니다. 건물이 파괴되면 회복이 불가능한 경우가 많기 때문에, 방어선 구축에 실패하면 곧장 게임 오버로 이어질 수 있습니다. 또한, 주기적으로 등장하는 보스급 적에 대비해 강력한 유닛을 배치하는 것도 중요합니다. 맵의 특성상 밤이 깊어질수록 시야가 제한되고, 맵 곳곳에 숨은 적들이 등장하기 때문에 맵의 구조를 잘 숙지하는 것이 필수입니다. 이 맵은 공포와 긴장감을 중시하는 플레이어들에게 특히 인기가 많으며, 5인 이상의 협동 플레이가 가장 효과적입니다. 혼자 플레이하는 것도 가능하지만, 방어의 안정성을 위해 최소 2인 이상의 팀 플레이를 추천합니다. 또한, 맵의 어두운 분위기를 최대한 살리기 위해 밝기 조절과 사운드 설정을 최적화하는 것이 좋습니다. Alone in the Dark is a classic survival defense custom map in StarCraft: Brood War, updated to version 1.5, offering players an intense night of survival against relentless enemy waves. Set in a dark forest and frozen tundra, the map immerses players in a tense atmosphere with dim lighting and eerie red hues. The gameplay is straightforward yet strategic: players must defend a central base from increasingly powerful enemy units as night progresses. Starting from their initial positions, players collect resources—minerals and gas—scattered across the map to build defensive structures and produce units. Construction is limited to designated zones, adding a layer of challenge to base management. A strong early-game strategy is essential, focusing on rapid resource gathering and the swift establishment of defensive buildings. Failure to secure the base early often leads to an inevitable game over, as destroyed structures cannot be recovered. Players must adapt their defenses dynamically, as enemy attack patterns intensify with nightfall, culminating in powerful boss units that require strategic unit placement to counter. The map shines in cooperative play, particularly with teams of 5 or more, though solo or smaller team play is possible with careful planning. Familiarity with the map layout is crucial, as obscured vision and hidden enemies become more prevalent as the night deepens. To fully experience the eerie atmosphere, optimizing brightness and sound settings is highly recommended. This map is ideal for players who thrive on tension and strategic depth in a survival defense setting.
맵 선택 가이드
태그는 맵의 핵심 특징을 빠르게 설명하지만 제작 버전마다 규칙이 다를 수 있습니다. 상세 설명에서 권장 인원, 난이도, 플레이 시간과 버전을 함께 확인한 뒤 다운로드하세요.