
유닛 방어 스타크래프트 맵 모음
'유닛 방어' 태그가 등록된 맵을 모았습니다. 장르 하나로 찾기 어려운 플레이 방식, 난이도와 특징을 중심으로 인기 맵과 최신 맵을 비교해 보세요.
- 등록 맵
- 4개
- 누적 다운로드
- 0
- 누적 조회
- 236
인기 맵
다운로드와 조회 반응이 높은 맵입니다.
리커 디펜스 솔로 하드 3.2b (Lurker Defense Solo HARD 3.2b)
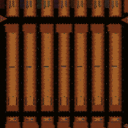
스타크래프트: 브루드워의 숨은 명작 디펜스 유즈맵인 <리커 디펜스 솔로 하드 3.2b>는 이름 그대로 리커(Lurker)라는 지상형 유닛을 중심으로 한 고전적인 디펜스 장르의 정수를 보여준다. 이 맵은 플레이어가 맵 하단에 배치된 방어 건물과 유닛을 활용해 끊임없이 몰려오는 적군 웨이브를 막아내야 하는 구조로, 30단계에 걸쳐 점점 강해지는 적군을 상대해야 한다. 각 웨이브는 다양한 조합의 저글링, 히드라리스크, 뮤탈리스크 등으로 구성되어 있으며, 리커의 특성상 지상 공격만 가능한 특수 능력을 적극 활용해야 효율적인 방어가 가능하다. 맵의 특징은 하드 난이도로, 초보자에게는 상당히 어려운 난이도를 자랑하지만 숙련된 플레이어라면 전략적으로 리커를 배치하고 자원을 효율적으로 관리하는 재미를 느낄 수 있다. 특히 리커의 땅굴 발사 능력은 하단에서 공격해오는 적군을 미리 차단할 수 있어 전략의 핵심으로 작용한다. 맵의 진행 방식은 웨이브가 시작될 때마다 맵 상단에서 적군이 하단으로 진격하는 방식이며, 플레이어는 각 웨이브를 통과할 때마다 일정량의 미네랄과 가스를 획득할 수 있어 자원 관리가 중요하다. 또한, 맵의 배경은 황혼 테마의 황량한 분위기로 구성되어 있어 플레이어에게 긴장감을 더해준다. 이 맵은 혼자서 플레이하는 솔로 디펜스라는 점에서 concentration과 patience가 요구되며, 실수를 допу할 경우 다음 웨이브에서 치명적인 타격을 입을 수 있어 신중한 플레이가 필요하다. 추천 대상은 디펜스 장르를 좋아하는 플레이어, 리커 유닛의 전략적 활용을 즐기는 유저, 그리고 혼자서 긴장감 넘치는 플레이를 원하는 게이머들에게 적합하다. 플레이 전에는 리커의 특성과 각 웨이브 별 적군 조합을 숙지하고, 방어 건물의 위치와 리소스 관리 계획을 미리 세워두는 것이 중요하다. 또한, 하드 난이도 특성상 실수 허용도가 낮기 때문에 충분한 연습을 거친 후에 도전하는 것이 바람직하다. Lurker Defense Solo HARD 3.2b is a classic defense-style custom map in StarCraft: Brood War that focuses on the Lurker unit, offering a challenging experience for solo players. The gameplay revolves around defending the bottom of the map against relentless enemy waves that escalate in difficulty over 30 levels. Each wave consists of ground-based units like Zerglings, Hydralisks, and Mutalisks, requiring players to strategically place Lurkers to maximize their ground attack capabilities. The "Hard" difficulty ensures a tough challenge, where even a single mistake can lead to devastating consequences. Players earn minerals and vespene gas with each cleared wave, enabling resource management for upgrades and unit production. The map's eerie Twilight-themed atmosphere enhances the tension, making every wave feel like a high-stakes battle. Solo play demands concentration and patience, as the absence of team support means all defensive strategies must be executed flawlessly. This map is ideal for players who enjoy defense genres, appreciate the strategic depth of Lurkers, and seek a solo experience filled with excitement. Before playing, it's crucial to understand Lurker mechanics, study enemy wave compositions, and plan resource distribution carefully. Given the Hard difficulty, ample practice is recommended to avoid costly mistakes during the later stages.
고스트 디펜스 (Ghost Defence)
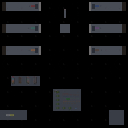
고스트 디펜스(Ghost Defence)는 스타크래프트 브루드워에서 즐길 수 있는 대표적인 유즈맵 중 하나로, 유저들에게 꾸준한 사랑을 받아온 디펜스 장르의 클래식한 작품이다. 이 맵은 우주 타일셋을 바탕으로 구성되어 있으며, 맵 전체에 배치된 독특한 구조물과 유닛 배치는 플레이어가 방어에 집중할 수 있는 환경을 조성한다. 내부 설명에서 엿볼 수 있듯이 적과의 끊임없는 교전과 처치에 초점이 맞춰져 있어, 빠른 페이스의 전투를 선호하는 이들에게 적합한 구조를 갖추고 있다. 플레이어는 각자 배정된 구역에서 몰려오는 적들을 막아내야 하며, 유닛의 효율적인 배치와 지속적인 업그레이드가 생존을 위한 핵심 요소로 작용한다. 맵의 전반적인 구조는 다수의 플레이어가 협력하여 밀려오는 공세를 버텨내는 방어 중심의 흐름을 띤다. 각 진영마다 유닛을 활용할 수 있는 공간이 마련되어 있으며, 중앙 및 주변 지역의 배치에 따라 전략적인 변수가 발생할 수 있다. 특히 초반부터 이어지는 치열한 웨이브를 견디기 위해 팀원 간의 유기적인 소통과 자원 분배가 중요하게 작용한다. 단순한 컨트롤뿐만 아니라 타이밍에 맞는 업그레이드 선택이 승패를 가르는 결정적인 역할을 맡는다. 이 맵은 친구들과 함께 가볍게 즐기면서도 몰입감 넘치는 방어의 재미를 느끼고 싶은 유저들에게 추천할 만하다. 복잡한 룰보다는 직관적인 섬멸 방식을 채택하고 있어 스타크래프트 디펜스 유즈맵에 익숙한 플레이어라면 누구나 쉽게 적응할 수 있다. 다만, 적의 공세가 점차 거세지는 특성상 방심하면 순식간에 진영이 무너질 수 있으므로 철저한 대비가 필요하다. 본격적인 플레이에 앞서 각 진영의 위치와 유닛 조합의 특성을 미리 파악해 두는 것이 원활한 진행에 큰 도움이 될 것이다. Ghost Defence is a classic defense genre map that can be enjoyed in StarCraft: Brood War, consistently loved by players as a signature user-custom map. This map is built upon a space tileset, creating an environment where players can concentrate entirely on defensive operations through its uniquely arranged structures and unit placements across the entire map. As hinted by its internal description, the gameplay focuses heavily on relentless engagement and eradication of enemies, establishing a structure well-suited for those who prefer fast-paced combat. Players must fend off incoming waves within their respective assigned areas, where efficient unit positioning and continuous upgrades act as core elements for survival. The overall layout follows a defense-centric flow where multiple participants cooperate to endure oncoming offensives. Space is designated for each faction to utilize units, and strategic variables can arise depending on the arrangement of central and surrounding zones. Organic communication and resource distribution among team members are particularly crucial to withstand the intense waves that begin early on. Beyond simple control, choosing upgrades at the right timing plays a decisive role in determining victory or defeat. This map is recommended for users who want to casually enjoy while experiencing immersive defensive fun alongside friends. By adopting an intuitive annihilation style rather than complex rules, any player familiar with StarCraft defense custom maps can easily adapt. However, thorough preparation is necessary because the faction can collapse in an instant if one lets their guard down due to the characteristic escalation of enemy offensives. Grasping the positions of each faction and the traits of unit combinations beforehand will greatly assist in smooth progression before diving into full gameplay.
썬컨 디펜스 2005 (Sunken Defense 2005)
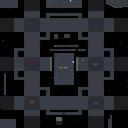
§ùñkëñ Ðêfèñsé 2ØØ5는 스타크래프트 브루드워의 유즈맵으로, 디펜스 장르에 특화된 플레이를 제공하는 맵이다. 맵의 이름은 '썬컨 디펜스'로 추정되며, 2005년 버전으로 보이며 여러 차례의 업데이트가 이루어진 것으로 보인다. 전체적으로 우주 테마의 타일셋을 사용하여 제작되었으며, 플레이어는 적의 끊임없는 공격을 방어해야 하는 구조로 구성되어 있다. 맵의 크기는 4096x4096으로 상당히 규모가 크며, 디펜스 맵으로서의 완성도를 추구하고 있다. 게임의 진행 방식은 일반적으로 디펜스 맵에서 볼 수 있는 것처럼, 플레이어의 기지 주위에 방어 건물을 건설하고, 일정 주기로 몰려오는 적의 웨이브를 막아내는 것이다. 맵의 구조는 중앙에 플레이어의 기지가 위치하고 있으며, 주변으로 적의 진입로가 뻗어 있는 형태로 보인다. 방어 건물의 종류와 배치, 그리고 적의 공격 패턴이 어떻게 변화하는지에 따라 플레이어의 전략이 달라질 수 있다. 맵의 난이도는 명시되어 있지 않지만, 다수의 적과 다양한 유닛 조합이 등장할 가능성이 있어 보통 이상의 난이도를 가질 것으로 예상된다. 이 맵은 특히 디펜스 장르에 익숙한 플레이어들에게 어울릴 것이며, 방어 건물의 배치와 자원 관리, 그리고 적의 공격 타이밍을 예측하는 능력이 요구된다. 또한, 맵의 규모가 크기 때문에 여러 번의 플레이를 통해 맵의 구조와 적의 공격 패턴을 익히는 것이 중요할 것이다. 초보자의 경우 난이도가 높을 수 있으므로, 먼저 간단한 디펜스 맵으로 연습한 후 도전하는 것이 좋다. 플레이 전 확인해야 할 포인트는 방어 건물의 종류와 성능, 그리고 적의 웨이브 간격과 유닛 구성이다. 이를 파악하지 못하면 방어에 실패할 가능성이 높기 때문이다. 또한, 맵의 전체적인 구조를 파악하기 위해 미리 맵을 둘러보는 것도 도움이 될 것이다. 맵의 크기가 크기 때문에 처음 플레이할 때는 다소 혼란스러울 수 있지만, 점차 익숙해지면서 전략적인 플레이가 가능해질 것이다. §ùñkëñ Ðêfèñsé 2ØØ5 is a StarCraft: Brood War custom map designed for defense-focused gameplay. The map is likely titled "Sunken Defense" and appears to be a 2005 version that has undergone multiple updates. It features a space-themed tileset and challenges players to defend against relentless enemy waves in a large-scale structure. The gameplay follows the standard defense map formula: players construct defensive buildings around their base and fend off periodic enemy assaults. The layout centers the player’s base with pathways extending outward, where enemy forces approach. Strategy depends heavily on building placement, unit selection, and adapting to shifting enemy attack patterns. While difficulty isn’t explicitly stated, the map likely presents an above-average challenge due to the number of enemies and varied unit compositions. This map is ideal for players familiar with defense games, requiring strategic building placement, resource management, and precise timing to counter enemy waves. Its vast size means mastering the layout and enemy behaviors will take multiple attempts. Beginners may find it difficult, so practicing on simpler defense maps before attempting this one is recommended. Before playing, check the types and stats of defensive buildings, as well as the intervals and compositions of enemy waves—failing to do so can lead to failed defenses. Scouting the map beforehand can also help, as its size may initially feel overwhelming, but familiarity will unlock more strategic approaches over time.
발레리 보호하기 little nicky (Protect Valerie little nicky)
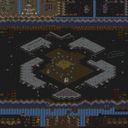
‘PROTECT VALERIE! little nicky’는 스타크래프트 브루드워의 유즈맵으로, 플레이어는 ‘발레리’를 보호하는 임무를 수행해야 하는 디펜스 장르의 맵이다. 내부 맵 설명에서도 명확히 드러나듯, ‘발레리’를 모든 비용으로 지켜내야 한다는 목표가 맵의 핵심이다. 맵 제목에 포함된 ‘little nicky’는 아마도 제작자의 오너캐릭터이거나 유머러스한 요소로 보이며, 전체적인 분위기는 가벼운 디펜스 게임으로 느껴진다. 맵은 3072x3072 크기의 황무지 타일셋으로 구성되어 있으며, 중앙에 위치한 ‘발레리’가 위치한 공간을 중심으로 방어 시설을 구축하고 적의 공격을 차단하는 방식으로 진행된다. 이미지에서 확인되는 바, 맵 곳곳에 방어용 건물이 배치되어 있으며, 적의 유닛들은 중앙으로 몰려드는 구조로 보인다. 방어 라인이 비교적 단순하면서도 효율적으로 설계되어 있어, 초보 플레이어도 쉽게 접근할 수 있을 것으로 추정된다. 다만, 맵의 난이도를 조절하는 요소가 있다면, 적의 공격 패턴이나 방어 시설을 강화하는 장치가 포함되어 있을 가능성이 있다. 이 맵의 가장 큰 장점은 명확한 목표와 간결한 구조에 있다. ‘발레리’를 지키기만 하면 된다는 단순하면서도 직관적인 목표는 플레이어에게 부담을 주지 않으면서도 긴장감을 유지할 수 있도록 도와준다. 또한, 맵의 디자인 자체가 방어에 초점을 맞추고 있어, 방어 시설을 어떻게 배치하느냐에 따라 전략적 선택의 재미를 느낄 수 있다. 다만, 맵의 크기가 크고 방어 구역이 넓다면, 초반에 방어 시설을 제대로 구축하지 못했을 경우 적의 공격에 취약해질 수 있으니 주의가 필요하다. 이 맵은 주로 디펜스 게임을 즐기는 플레이어들에게 추천된다. 특히나 보호 대상인 ‘발레리’가 맵 중앙에 위치한 구조는 방어 전략을 세우는 재미를 배가시킬 수 있을 것이다. 또한, 유즈맵 특유의 창의적인 요소와 함께, 간단한 조작으로도 긴장감을 느낄 수 있어 casual한 플레이어들에게도 적합하다. 플레이 전에는 방어 시설을 미리 배치할 수 있는 시간을 충분히 활용하고, 적의 공격 패턴을 미리 예상해보는 것이 중요하다. 만약 맵에 랜덤 요소나 특수한 방어 메커니즘이 포함되어 있다면, 그 부분을 숙지하는 것도 성공적인 플레이에 도움이 될 것이다. ‘PROTECT VALERIE! little nicky’ is a custom map in *StarCraft: Brood War* where players must defend a character named "Valerie" in a defense-style game. As the map's internal description makes clear, the core objective is to protect Valerie at all costs. The title’s inclusion of "little nicky" likely refers to the creator’s avatar or adds a humorous touch, giving the overall experience a lighthearted defense game feel. The map is set on a 3072x3072 wasteland tileset, with Valerie positioned at the center. Players build defensive structures around her and block enemy attacks. The image shows defensive buildings scattered throughout the map, while enemy units appear to converge toward the center. The defense lines are designed simply yet efficiently, making the map accessible even to beginners. If there’s any difficulty adjustment, it may come from enemy attack patterns or additional defensive mechanics. The map’s biggest strength lies in its clear objective and streamlined structure. The straightforward goal of protecting Valerie keeps tension high without overwhelming players. The design also emphasizes defense, allowing players to experiment with different placement strategies for a strategic challenge. However, if the map is large with wide defensive zones, failing to set up defenses properly early on could leave Valerie vulnerable, so caution is advised. This map is best suited for players who enjoy defense games. The central positioning of Valerie enhances the fun of planning defensive strategies. Its creative custom-map elements and simple controls also make it a good fit for casual players seeking tension without complexity. Before playing, take time to plan where to place defenses and anticipate enemy attack patterns. If the map includes random elements or special defensive mechanics, understanding those will also help ensure a successful run.
최근 등록된 맵
새로 추가된 파일과 버전을 확인하세요.
썬컨 디펜스 2005 (Sunken Defense 2005)
§ùñkëñ Ðêfèñsé 2ØØ5는 스타크래프트 브루드워의 유즈맵으로, 디펜스 장르에 특화된 플레이를 제공하는 맵이다. 맵의 이름은 '썬컨 디펜스'로 추정되며, 2005년 버전으로 보이며 여러 차례의 업데이트가 이루어진 것으로 보인다. 전체적으로 우주 테마의 타일셋을 사용하여 제작되었으며, 플레이어는 적의 끊임없는 공격을 방어해야 하는 구조로 구성되어 있다. 맵의 크기는 4096x4096으로 상당히 규모가 크며, 디펜스 맵으로서의 완성도를 추구하고 있다. 게임의 진행 방식은 일반적으로 디펜스 맵에서 볼 수 있는 것처럼, 플레이어의 기지 주위에 방어 건물을 건설하고, 일정 주기로 몰려오는 적의 웨이브를 막아내는 것이다. 맵의 구조는 중앙에 플레이어의 기지가 위치하고 있으며, 주변으로 적의 진입로가 뻗어 있는 형태로 보인다. 방어 건물의 종류와 배치, 그리고 적의 공격 패턴이 어떻게 변화하는지에 따라 플레이어의 전략이 달라질 수 있다. 맵의 난이도는 명시되어 있지 않지만, 다수의 적과 다양한 유닛 조합이 등장할 가능성이 있어 보통 이상의 난이도를 가질 것으로 예상된다. 이 맵은 특히 디펜스 장르에 익숙한 플레이어들에게 어울릴 것이며, 방어 건물의 배치와 자원 관리, 그리고 적의 공격 타이밍을 예측하는 능력이 요구된다. 또한, 맵의 규모가 크기 때문에 여러 번의 플레이를 통해 맵의 구조와 적의 공격 패턴을 익히는 것이 중요할 것이다. 초보자의 경우 난이도가 높을 수 있으므로, 먼저 간단한 디펜스 맵으로 연습한 후 도전하는 것이 좋다. 플레이 전 확인해야 할 포인트는 방어 건물의 종류와 성능, 그리고 적의 웨이브 간격과 유닛 구성이다. 이를 파악하지 못하면 방어에 실패할 가능성이 높기 때문이다. 또한, 맵의 전체적인 구조를 파악하기 위해 미리 맵을 둘러보는 것도 도움이 될 것이다. 맵의 크기가 크기 때문에 처음 플레이할 때는 다소 혼란스러울 수 있지만, 점차 익숙해지면서 전략적인 플레이가 가능해질 것이다. §ùñkëñ Ðêfèñsé 2ØØ5 is a StarCraft: Brood War custom map designed for defense-focused gameplay. The map is likely titled "Sunken Defense" and appears to be a 2005 version that has undergone multiple updates. It features a space-themed tileset and challenges players to defend against relentless enemy waves in a large-scale structure. The gameplay follows the standard defense map formula: players construct defensive buildings around their base and fend off periodic enemy assaults. The layout centers the player’s base with pathways extending outward, where enemy forces approach. Strategy depends heavily on building placement, unit selection, and adapting to shifting enemy attack patterns. While difficulty isn’t explicitly stated, the map likely presents an above-average challenge due to the number of enemies and varied unit compositions. This map is ideal for players familiar with defense games, requiring strategic building placement, resource management, and precise timing to counter enemy waves. Its vast size means mastering the layout and enemy behaviors will take multiple attempts. Beginners may find it difficult, so practicing on simpler defense maps before attempting this one is recommended. Before playing, check the types and stats of defensive buildings, as well as the intervals and compositions of enemy waves—failing to do so can lead to failed defenses. Scouting the map beforehand can also help, as its size may initially feel overwhelming, but familiarity will unlock more strategic approaches over time.
발레리 보호하기 little nicky (Protect Valerie little nicky)
‘PROTECT VALERIE! little nicky’는 스타크래프트 브루드워의 유즈맵으로, 플레이어는 ‘발레리’를 보호하는 임무를 수행해야 하는 디펜스 장르의 맵이다. 내부 맵 설명에서도 명확히 드러나듯, ‘발레리’를 모든 비용으로 지켜내야 한다는 목표가 맵의 핵심이다. 맵 제목에 포함된 ‘little nicky’는 아마도 제작자의 오너캐릭터이거나 유머러스한 요소로 보이며, 전체적인 분위기는 가벼운 디펜스 게임으로 느껴진다. 맵은 3072x3072 크기의 황무지 타일셋으로 구성되어 있으며, 중앙에 위치한 ‘발레리’가 위치한 공간을 중심으로 방어 시설을 구축하고 적의 공격을 차단하는 방식으로 진행된다. 이미지에서 확인되는 바, 맵 곳곳에 방어용 건물이 배치되어 있으며, 적의 유닛들은 중앙으로 몰려드는 구조로 보인다. 방어 라인이 비교적 단순하면서도 효율적으로 설계되어 있어, 초보 플레이어도 쉽게 접근할 수 있을 것으로 추정된다. 다만, 맵의 난이도를 조절하는 요소가 있다면, 적의 공격 패턴이나 방어 시설을 강화하는 장치가 포함되어 있을 가능성이 있다. 이 맵의 가장 큰 장점은 명확한 목표와 간결한 구조에 있다. ‘발레리’를 지키기만 하면 된다는 단순하면서도 직관적인 목표는 플레이어에게 부담을 주지 않으면서도 긴장감을 유지할 수 있도록 도와준다. 또한, 맵의 디자인 자체가 방어에 초점을 맞추고 있어, 방어 시설을 어떻게 배치하느냐에 따라 전략적 선택의 재미를 느낄 수 있다. 다만, 맵의 크기가 크고 방어 구역이 넓다면, 초반에 방어 시설을 제대로 구축하지 못했을 경우 적의 공격에 취약해질 수 있으니 주의가 필요하다. 이 맵은 주로 디펜스 게임을 즐기는 플레이어들에게 추천된다. 특히나 보호 대상인 ‘발레리’가 맵 중앙에 위치한 구조는 방어 전략을 세우는 재미를 배가시킬 수 있을 것이다. 또한, 유즈맵 특유의 창의적인 요소와 함께, 간단한 조작으로도 긴장감을 느낄 수 있어 casual한 플레이어들에게도 적합하다. 플레이 전에는 방어 시설을 미리 배치할 수 있는 시간을 충분히 활용하고, 적의 공격 패턴을 미리 예상해보는 것이 중요하다. 만약 맵에 랜덤 요소나 특수한 방어 메커니즘이 포함되어 있다면, 그 부분을 숙지하는 것도 성공적인 플레이에 도움이 될 것이다. ‘PROTECT VALERIE! little nicky’ is a custom map in *StarCraft: Brood War* where players must defend a character named "Valerie" in a defense-style game. As the map's internal description makes clear, the core objective is to protect Valerie at all costs. The title’s inclusion of "little nicky" likely refers to the creator’s avatar or adds a humorous touch, giving the overall experience a lighthearted defense game feel. The map is set on a 3072x3072 wasteland tileset, with Valerie positioned at the center. Players build defensive structures around her and block enemy attacks. The image shows defensive buildings scattered throughout the map, while enemy units appear to converge toward the center. The defense lines are designed simply yet efficiently, making the map accessible even to beginners. If there’s any difficulty adjustment, it may come from enemy attack patterns or additional defensive mechanics. The map’s biggest strength lies in its clear objective and streamlined structure. The straightforward goal of protecting Valerie keeps tension high without overwhelming players. The design also emphasizes defense, allowing players to experiment with different placement strategies for a strategic challenge. However, if the map is large with wide defensive zones, failing to set up defenses properly early on could leave Valerie vulnerable, so caution is advised. This map is best suited for players who enjoy defense games. The central positioning of Valerie enhances the fun of planning defensive strategies. Its creative custom-map elements and simple controls also make it a good fit for casual players seeking tension without complexity. Before playing, take time to plan where to place defenses and anticipate enemy attack patterns. If the map includes random elements or special defensive mechanics, understanding those will also help ensure a successful run.
고스트 디펜스 (Ghost Defence)
고스트 디펜스(Ghost Defence)는 스타크래프트 브루드워에서 즐길 수 있는 대표적인 유즈맵 중 하나로, 유저들에게 꾸준한 사랑을 받아온 디펜스 장르의 클래식한 작품이다. 이 맵은 우주 타일셋을 바탕으로 구성되어 있으며, 맵 전체에 배치된 독특한 구조물과 유닛 배치는 플레이어가 방어에 집중할 수 있는 환경을 조성한다. 내부 설명에서 엿볼 수 있듯이 적과의 끊임없는 교전과 처치에 초점이 맞춰져 있어, 빠른 페이스의 전투를 선호하는 이들에게 적합한 구조를 갖추고 있다. 플레이어는 각자 배정된 구역에서 몰려오는 적들을 막아내야 하며, 유닛의 효율적인 배치와 지속적인 업그레이드가 생존을 위한 핵심 요소로 작용한다. 맵의 전반적인 구조는 다수의 플레이어가 협력하여 밀려오는 공세를 버텨내는 방어 중심의 흐름을 띤다. 각 진영마다 유닛을 활용할 수 있는 공간이 마련되어 있으며, 중앙 및 주변 지역의 배치에 따라 전략적인 변수가 발생할 수 있다. 특히 초반부터 이어지는 치열한 웨이브를 견디기 위해 팀원 간의 유기적인 소통과 자원 분배가 중요하게 작용한다. 단순한 컨트롤뿐만 아니라 타이밍에 맞는 업그레이드 선택이 승패를 가르는 결정적인 역할을 맡는다. 이 맵은 친구들과 함께 가볍게 즐기면서도 몰입감 넘치는 방어의 재미를 느끼고 싶은 유저들에게 추천할 만하다. 복잡한 룰보다는 직관적인 섬멸 방식을 채택하고 있어 스타크래프트 디펜스 유즈맵에 익숙한 플레이어라면 누구나 쉽게 적응할 수 있다. 다만, 적의 공세가 점차 거세지는 특성상 방심하면 순식간에 진영이 무너질 수 있으므로 철저한 대비가 필요하다. 본격적인 플레이에 앞서 각 진영의 위치와 유닛 조합의 특성을 미리 파악해 두는 것이 원활한 진행에 큰 도움이 될 것이다. Ghost Defence is a classic defense genre map that can be enjoyed in StarCraft: Brood War, consistently loved by players as a signature user-custom map. This map is built upon a space tileset, creating an environment where players can concentrate entirely on defensive operations through its uniquely arranged structures and unit placements across the entire map. As hinted by its internal description, the gameplay focuses heavily on relentless engagement and eradication of enemies, establishing a structure well-suited for those who prefer fast-paced combat. Players must fend off incoming waves within their respective assigned areas, where efficient unit positioning and continuous upgrades act as core elements for survival. The overall layout follows a defense-centric flow where multiple participants cooperate to endure oncoming offensives. Space is designated for each faction to utilize units, and strategic variables can arise depending on the arrangement of central and surrounding zones. Organic communication and resource distribution among team members are particularly crucial to withstand the intense waves that begin early on. Beyond simple control, choosing upgrades at the right timing plays a decisive role in determining victory or defeat. This map is recommended for users who want to casually enjoy while experiencing immersive defensive fun alongside friends. By adopting an intuitive annihilation style rather than complex rules, any player familiar with StarCraft defense custom maps can easily adapt. However, thorough preparation is necessary because the faction can collapse in an instant if one lets their guard down due to the characteristic escalation of enemy offensives. Grasping the positions of each faction and the traits of unit combinations beforehand will greatly assist in smooth progression before diving into full gameplay.
리커 디펜스 솔로 하드 3.2b (Lurker Defense Solo HARD 3.2b)
스타크래프트: 브루드워의 숨은 명작 디펜스 유즈맵인 <리커 디펜스 솔로 하드 3.2b>는 이름 그대로 리커(Lurker)라는 지상형 유닛을 중심으로 한 고전적인 디펜스 장르의 정수를 보여준다. 이 맵은 플레이어가 맵 하단에 배치된 방어 건물과 유닛을 활용해 끊임없이 몰려오는 적군 웨이브를 막아내야 하는 구조로, 30단계에 걸쳐 점점 강해지는 적군을 상대해야 한다. 각 웨이브는 다양한 조합의 저글링, 히드라리스크, 뮤탈리스크 등으로 구성되어 있으며, 리커의 특성상 지상 공격만 가능한 특수 능력을 적극 활용해야 효율적인 방어가 가능하다. 맵의 특징은 하드 난이도로, 초보자에게는 상당히 어려운 난이도를 자랑하지만 숙련된 플레이어라면 전략적으로 리커를 배치하고 자원을 효율적으로 관리하는 재미를 느낄 수 있다. 특히 리커의 땅굴 발사 능력은 하단에서 공격해오는 적군을 미리 차단할 수 있어 전략의 핵심으로 작용한다. 맵의 진행 방식은 웨이브가 시작될 때마다 맵 상단에서 적군이 하단으로 진격하는 방식이며, 플레이어는 각 웨이브를 통과할 때마다 일정량의 미네랄과 가스를 획득할 수 있어 자원 관리가 중요하다. 또한, 맵의 배경은 황혼 테마의 황량한 분위기로 구성되어 있어 플레이어에게 긴장감을 더해준다. 이 맵은 혼자서 플레이하는 솔로 디펜스라는 점에서 concentration과 patience가 요구되며, 실수를 допу할 경우 다음 웨이브에서 치명적인 타격을 입을 수 있어 신중한 플레이가 필요하다. 추천 대상은 디펜스 장르를 좋아하는 플레이어, 리커 유닛의 전략적 활용을 즐기는 유저, 그리고 혼자서 긴장감 넘치는 플레이를 원하는 게이머들에게 적합하다. 플레이 전에는 리커의 특성과 각 웨이브 별 적군 조합을 숙지하고, 방어 건물의 위치와 리소스 관리 계획을 미리 세워두는 것이 중요하다. 또한, 하드 난이도 특성상 실수 허용도가 낮기 때문에 충분한 연습을 거친 후에 도전하는 것이 바람직하다. Lurker Defense Solo HARD 3.2b is a classic defense-style custom map in StarCraft: Brood War that focuses on the Lurker unit, offering a challenging experience for solo players. The gameplay revolves around defending the bottom of the map against relentless enemy waves that escalate in difficulty over 30 levels. Each wave consists of ground-based units like Zerglings, Hydralisks, and Mutalisks, requiring players to strategically place Lurkers to maximize their ground attack capabilities. The "Hard" difficulty ensures a tough challenge, where even a single mistake can lead to devastating consequences. Players earn minerals and vespene gas with each cleared wave, enabling resource management for upgrades and unit production. The map's eerie Twilight-themed atmosphere enhances the tension, making every wave feel like a high-stakes battle. Solo play demands concentration and patience, as the absence of team support means all defensive strategies must be executed flawlessly. This map is ideal for players who enjoy defense genres, appreciate the strategic depth of Lurkers, and seek a solo experience filled with excitement. Before playing, it's crucial to understand Lurker mechanics, study enemy wave compositions, and plan resource distribution carefully. Given the Hard difficulty, ample practice is recommended to avoid costly mistakes during the later stages.
맵 선택 가이드
태그는 맵의 핵심 특징을 빠르게 설명하지만 제작 버전마다 규칙이 다를 수 있습니다. 상세 설명에서 권장 인원, 난이도, 플레이 시간과 버전을 함께 확인한 뒤 다운로드하세요.