
웨이브 디펜스 스타크래프트 맵 모음
'웨이브 디펜스' 태그가 등록된 맵을 모았습니다. 장르 하나로 찾기 어려운 플레이 방식, 난이도와 특징을 중심으로 인기 맵과 최신 맵을 비교해 보세요.
- 등록 맵
- 168개
- 누적 다운로드
- 7
- 누적 조회
- 6,807
인기 맵
다운로드와 조회 반응이 높은 맵입니다.
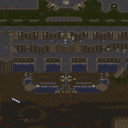
헤븐스 라스트 디펜스 v2.0 (Heaven's Last Defense v2.0)
헤븐스 라스트 디펜스 v2.0은 신이 잠든 사이 타락한 세력이 천국을 침공한다는 설정을 바탕으로 한 8인 협동 디펜스 맵이다. 사막 타일셋 위에 펼쳐진 128×128 타일 크기의 전장은 중앙에 위치한 핵심 방어 목표를 중심으로 여러 갈래의 공격 루트가 배치되어 있어, 플레이어는 각자 맡은 구역에서 몰려오는 적 웨이브를 막아내야 한다. 초반에는 기본 유닛과 자원으로 간단한 방어선을 구축하지만, 웨이브가 진행될수록 적의 체력과 공격력이 크게 오르고 특수 능력을 가진 보스급 유닛이 등장해 단일 유닛 의존 전략은 통하지 않는다. 따라서 플레이어 간 역할 분담(탱커, 딜러, 지원)과 업그레이드 타이밍 공유, 좁은 입구를 활용한 병목 방어 설계가 승패를 가른다. 맵 설명에 등장하는 '주님이 깨어나지 못하게 하라'는 문구는 최종 보스전이나 시간 제한 미션으로 이어질 가능성이 높아, 중반 이후에는 공격적인 타워 배치와 스펠 캐스터 활용이 필수적이다. 8인 풀파티로 입장 시 난이도가 급격히 상승하므로, 4~6인 파티로 시작해 맵 구조와 웨이브 패턴을 익힌 뒤 인원을 늘리는 방식이 권장된다. 사막 지형의 시야 제한과 모래 폭풍 연출이 간헐적으로 시야를 가리므로, 관측선이나 탐지 유닛을 미리 확보해 두는 것이 안전하다. 협동 디펜스 장르 입문자보다는 웨이브 관리와 자원 분배 경험이 있는 중급 이상 유저에게 적합하며, 긴 호흡의 전략적 방어전을 즐기는 플레이어에게 추천한다. Heaven's Last Defense v2.0 is an eight‑player cooperative defense map built around the premise that fallen forces assault Heaven while God sleeps. The 128×128‑tile desert battlefield centers on a core objective with multiple attack lanes, requiring each player to hold a designated sector against increasingly powerful waves. Early game relies on basic units and simple walls, but later waves introduce high‑HP elites and boss‑type units with special abilities, making single‑unit strategies ineffective. Success hinges on clear role assignment (tank, damage, support), coordinated upgrade timing, and chokepoint‑focused defensive layouts. The description’s line about preventing the Lord’s awakening suggests a timed final boss or survival phase, so mid‑to‑late game demands aggressive tower placement and spell‑caster usage. Difficulty spikes sharply with a full eight‑player party; starting with four to six players to learn wave patterns and map flow before scaling up is advisable. Occasional sandstorm visual effects limit vision, so securing detectors or observer units early improves safety. This map suits intermediate or veteran players familiar with wave management and resource sharing, offering a long‑form strategic defense experience for those who enjoy coordinated hold‑the‑line gameplay.
![[EUD] 히드라2000부대막기_EX 맵 미리보기](https://cdn-star-data.huzy.net/thumbnail_0cd40c8e9d7745ad8a0a6ebaa8401744.jpg)
[EUD] 히드라2000부대막기_EX
스타크래프트 브루드워의 유즈맵 중 하나인 '[EUD] 히드라2000부대막기_EX'는 디펜스 장르에 속하는 맵으로, 플레이어는 끊임없이 몰려오는 적 유닛을 막아내야 하는 구조를 가지고 있다. 맵의 제목에서 알 수 있듯이 주로 히드라리스크로 구성된 대규모 적 부대를 상대하는 것이 주요 목표이며, EUD(Extended Unit Death) 기술을 활용해 복잡한 트리거가 구현되어 있는 특징이 있다. 맵은 화산 타일셋을 기반으로 제작되어 visually한 분위기를 자아내며, 2048x3072라는 넓은 맵 사이즈 덕분에 다양한 배치와 진형이 가능하다는 장점이 있다. 게임은 일정 시간마다 등장하는 적 웨이브를 방어하는 방식으로 진행되며, 각 웨이브마다 조금씩 강화된 적 부대가 등장해 플레이어의 전략과 대처 능력을 시험한다. 방어에 성공할 때마다 보상을 얻으며, 일정 조건을 달성하면 승리하거나 추가적인 기능을 해금할 수 있는 구조로 보인다. 맵의 넓은 공간을 활용해 방어선을 구축하고, 적의 공격을 효율적으로 분산시키는 것이 핵심 전략이 될 것이다. 또한, EUD 기술이 적용되어 있어 일반적인 맵과는 다른 특수 효과나 인터페이스가 포함되어 있을 가능성이 높다. 이 맵은 주로 1인 플레이를 상정하고 제작되었으나, 팀 플레이로도 충분히 즐길 수 있을 것으로 추정된다. 방대한 맵 크기와 복잡한 적 웨이브 시스템 덕분에 플레이어는 여러 번의 시도와 전략 수정을 통해 자신만의 방어 노하우를 쌓아갈 수 있을 것이다. 초보자보다는 어느 정도의 경험이 있는 플레이어에게 더 적합할 것으로 보이며, 디펜스 장르에 익숙한 유저라면 재미있게 즐길 수 있는 맵이다. 다만, 넓은 맵을 활용한 전략적 플레이가 요구되므로, 시야 확보와 자원 관리에 주의를 기울일 필요가 있다. 이 맵을 플레이하기 전에는 EUD 맵에 대한 기본적인 이해와 디펜스 장르의 특성을 숙지하는 것이 좋다. 또한, 넓은 맵에서 발생할 수 있는 자원 부족이나 방어선 붕괴 scenarios를 대비하기 위해 미리 방어 건물이나 유닛 배치 계획을 세워두는 것이 중요하다. 맵의 난이도는 난이도 설정이나 웨이브 강도에 따라 달라질 수 있으므로, 처음 플레이할 때는 쉬운 난이도로 시작하는 것이 추천된다. 특히 히드라리스크는 스플래시 대미지를 입히므로, 방어 건물이나 탱커 유닛을 적절히 배치해 효율적인 대처가 필요할 것이다. This StarCraft: Brood War custom map, '[EUD] 히드라2000부대막기_EX', falls under the defense genre, challenging players to withstand relentless waves of enemy units, primarily Hydralisks as indicated by the title. Utilizing EUD (Extended Unit Death) technology, the map incorporates advanced triggers that enhance gameplay mechanics beyond standard custom maps. Set against a volcanic tileset, the 2048x3072 map size provides ample space for strategic unit placement and dynamic combat scenarios. The gameplay revolves around a wave-based defense system where players must fortify their positions and repel increasingly powerful enemy assaults. Successful defense yields rewards, and achieving specific objectives unlocks additional features or leads to victory. The vast map area allows for creative defensive setups, encouraging players to spread out units and manage resources efficiently. Given the EUD implementation, players can expect unique mechanics or interfaces that differ from conventional custom maps. While designed primarily for single-player experiences, the map can also accommodate team-based play. The expansive layout and complex enemy waves make it ideal for players seeking a challenge and the opportunity to refine their strategies over multiple attempts. Beginners may find it daunting, but intermediate to advanced players familiar with defense maps will appreciate its depth and replayability. Strategic vision and resource management are crucial, as overlooking potential weaknesses in defensive lines can lead to failure. Before diving into gameplay, players should familiarize themselves with EUD mechanics and the nuances of defense maps. It is advisable to plan defensive structures and unit placements carefully to mitigate risks such as resource shortages or line breaches. Starting on easier difficulties is recommended for newcomers, as the Hydralisk's splash damage requires thoughtful positioning of defensive buildings and tank units. The map's difficulty can vary based on settings and wave intensity, so adjusting these parameters can help tailor the experience to individual skill levels.
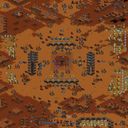
테스트 오브 서바이벌 (아인스) ver 1.57 (Test of survival(eins) ver 1.57)
스타크래프트 브루드워 유즈맵 '테스트 오브 서바이벌 (아인스) ver 1.57'은 5인용 생존형 맵으로, 황혼 타일셋 배경의 웨이브 디펜스 플레이를 제공한다. 맵 크기 3072x3072, 96x96 타일 구성으로 세밀한 지형 설계가 엿보인다. 제작자 hatimaki의 1.57버전은 지속적 업데이트를 거친 시리즈물로, 내부 설명에 'TOS eins ver 1.57by hatimaki'라 표기되어 있다. 최대 5명이 협력해 몰려드는 적 웨이브를 막아내는 것이 핵심 목표로 보인다. 초반 자원 확보와 병력 구성, 중반 이후 보스급 유닛 대응이 승부를 가를 전망이다. 황혼 타일셋의 어두운 분위기가 긴장감을 더하며, 지형 요소들이 전략적 요충지 역할을 할 것으로 추정된다. 진행은 웨이브 간 인터벌 동안 업그레이드와 유닛 생산을 병행하는 일반적인 디펜스 흐름일 가능성이 높다. 5인 협동인 만큼 역할 분담과 자원 공유가 중요 변수다. 버전별 난이도 조정이 보여 초보자부터 숙련자까지 폭넓게 즐길 수 있을 것으로 보인다. 플레이 전 확인점은 cp949 인코딩으로 한글 채팅·트리거 텍스트 깨짐 여부, 최신 패치 호환성이다. Ver1.08, 1.11, 1.30, 1.38x 등 다수 버전 중 1.57이 최신 안정화판일 확률이 높다. 맵 해시 a255ea63c95b8d5b로 식별되며 에디터 수정이 용이할 것으로 보인다. 추천 대상은 생존·디펜스 장르를 선호하는 4~5인 파티, 장시간 협동 플레이를 즐기는 유저다. 혼자서는 난이도가 높을 수 있으니 팀 구성을 권장한다. The StarCraft Brood War use map "Test of Survival (Eins) ver 1.57" is a 5-player survival map offering wave defense gameplay on the Twilight tileset. The map size is 3072x3072 with a 96x96 tile layout, showing detailed terrain design. Version 1.57 by creator hatimaki is part of an ongoing series, as indicated by the internal description "TOS eins ver 1.57by hatimaki". Up to five players cooperate to stop incoming enemy waves. Early resource management, army composition, and mid-to-late game boss responses will likely decide the outcome. The Twilight tileset's dark atmosphere adds tension, and terrain features are expected to serve as strategic chokepoints. Progression likely follows a typical defense pattern: upgrading and producing units between waves. With five-player co-op, role assignment (tank, damage, support) and resource sharing become key variables. Difficulty adjustments across versions suggest accessibility for both beginners and veterans. Before playing, verify that the cp949 encoding displays Korean chat and trigger text correctly and check compatibility with the latest patch. Among the group's versions (1.08, 1.11, 1.30, 1.38x), 1.57 is probably the most recent stable build. The map hash a255ea63c95b8d5b identifies the file, and the tileset info allows easy editing. Recommended for 4-5 player parties who enjoy survival/defense genres and extended co-op sessions. Solo play may be too difficult, so forming a team is advised.
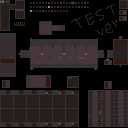
EUD 떵우강화하기
스타크래프트 브루드워의 유즈맵 중 하나인 ‘EUD 떵우강화하기’는 EUD(Enhanced User Defined) 기술을 활용한 강화형 디펜스 맵으로, 플레이어는 강력한 유닛을 지속적으로 강화하며 몰려오는 적들을 방어하는 재미가 인상적이다. 맵은 정글 테마의 넓은 맵 크기를 자랑하며, 중앙에 위치한 본진 주변으로 방어건물과 유닛 생산 건물이 배치되어 있다. 화면 상단에는 플레이어의 자원과 강화 수치, 남은 적 웨이브가 표시되어 있으며, 강화는 일정 주기마다 진행되는 웨이브를 클리어할 때마다 포인트를 획득해 가능하다는 구조가 보인다. 각 웨이브마다 다양한 적 유닛이 등장하며, 플레이어는 선택한 강화 트리를 따라 유닛의 능력치를 업그레이드하거나 새로운 유닛을 해금할 수 있다. 특히 EUD를 활용한 특수한 효과나 UI가 맵 곳곳에 적용되어 있어, 기존 디펜스 맵과는 차별화된 플레이 경험을 제공한다. 맵의 난이도는 강화 트리를 어떻게 구성하느냐에 따라 달라지며, 초보자는 기본적인 방어에 집중하고, 숙련자는 극한의 강화로 빠른 클리어를 노릴 수 있다. 추천 대상은 스타크래프트 유즈맵爱好者, 특히 디펜스와 강화 시스템에 흥미를 느끼는 플레이어들에게 최적화되어 있으며, 플레이 전 강화 트리와 유닛 조합을 미리 계획해두면 더 효율적인 플레이가 가능하다. 맵의 구조는 중앙 본진을 중심으로 방어선을 구축하며, 좌우로 확장된 길목을 통해 적들이 접근하는 방식이기 때문에, 본진 주변의 방어 건물 배치와 유닛 배치에 신경을 써야 한다. 전체적으로는 EUD 기술을 활용한 독특한 시스템과 강화 요소가 돋보이는 맵으로, 반복 플레이를 통해 더욱 재미를 느낄 수 있는 구조다. This Brood War custom map, ‘EUD 떵우강화하기’, stands out as a defense title leveraging EUD technology to offer a unique upgrade-based gameplay loop. Set on a sprawling jungle-themed 4096x4096 map, players defend their base from waves of enemies while strategically upgrading units or unlocking powerful new ones using accumulated points. The top UI displays resources, current upgrades, and remaining enemy waves, guiding players through each stage. The map’s core mechanic revolves around wave-based progression, where clearing waves grants upgrade points, enabling players to customize their army composition—whether focusing on raw power, speed, or specialized units. The EUD-enhanced effects and UI elements add depth, differentiating it from standard defense maps. Difficulty scales significantly with upgrade choices, appealing to both beginners (prioritizing survival) and veterans (optimizing for speed clears). Ideal for StarCraft custom map enthusiasts, especially those who enjoy strategic planning and progression systems, ‘EUD 떵우강화하기’ rewards foresight in base layout and unit synergy. Central base defense with side expansions means balancing resource allocation and defensive structures is key to lasting through later waves. Overall, this map shines with its blend of EUD innovation and engaging upgrade mechanics, promising replayability as players refine their strategies.
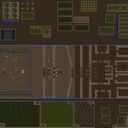
성 지키기 3 War of Epsilion
《성 지키기 3: War of Epsilion》은 스타크래프트 브루드워의 대표적인 디펜스형 유즈맵으로, ‘성 지키기’ 시리즈의 세 번째 작품이다. 이 맵은 사막 테마의 광활한 지형 위에 펼쳐지는 방어전으로, 7명의 플레이어가 각자의 캐릭터와 고유한 콤보, 속성을 활용해 끊임없이 몰려드는 적의 웨이브를 막아내야 한다. 내부 맵 제목과 설명에서 확인되는 ‘월오브 엡실리온(War of Epsilion)’이라는 명칭은, 제작자 Ankalagon이 네이버 닉네임 ‘꿈의낙원’을 통해 공개한 작품으로, 버그 제보 이메일까지 명시되어 있어 비교적 공식성이 있는Fanmade 맵으로 추정된다. 이 맵의 가장 큰 특징은 각 캐릭터별로 부여된 ‘콤보’와 ‘속성’ 시스템이다. 이를 통해 플레이어는 단순히 방어만을 하는 것이 아니라, 전략적으로 스킬을 조합하거나 속성에 따른 특수 효과를 활용해 공격과 방어의 균형을 맞춰야 한다. 예를 들어 특정 속성의 조합이 시너지를 일으켜 적의 공격을 더 효율적으로 방어하거나, 반대로 약점을 찌르는 콤보를 사용해 다수의 적을 한꺼번에 정리할 수 있다. 이러한 시스템은 디펜스 장르에 새로운 전략적 깊이를 더하며, 단순히 ‘버티기’에 그치지 않고 ‘능동적 방어’를 요구한다. 사막 지형의 넓은 맵은 적의 웨이브가 한 방향으로 밀려오는 구조로, 플레이어는 성 주변에 배치된 방어 건물과 유닛을 활용해 진격을 저지해야 한다. 특히 중앙의 성채를 중심으로 한 방어선은 게임의 핵심으로, 성채가 파괴되면 게임 오버가 되므로 신중한 자원 배분과 유닛 관리, 그리고 타이밍 감각이 요구된다. 맵의 광활한 규모는 한눈에 모든 상황을 파악하기 어렵게 만들지만, 반대로 넓은 시야를 활용한 전략적 배치와 시야 차단, 또는 복수의 진입로를 동시에 방어하는 다양한 전술이 가능하다는 장점도 있다. 《성 지키기 3: War of Epsilion》은 초보자에게는 다소 어려운 난이도를 가질 수 있지만, 콤보와 속성 시스템을 익히고 나면 전략적 즐거움이 배가되는 맵이다. 특히 같은 팀원과의 조율과 역할 분담을 통해 시너지를 발휘할 수 있는 팀플레이가 강제되므로, 혼자서는 해결하기 어려운 상황에서도 팀워크로 극복할 수 있는 장점이 있다. 또한, 지속적인 웨이브가 진행되므로 플레이 시간도 길어질 가능성이 높아, 긴장감을 유지하며 몰입할 수 있는 구조를 가지고 있다. 이 맵을 플레이하기 전에는 각 캐릭터의 콤보와 속성을 미리 숙지하고, 사막 지형의 주요 거점(예: 고지대, 좁은 길목)을 활용한 방어 전략을 계획하는 것이 중요하다. 또한, 성채 주변의 방어 건물 배치와 자원 관리(예: 미네랄, 가스)도 신중히 고려해야 한다. 특히 웨이브가 시작되기 전의 준비 단계에서 시간을 허비하지 않고 신속히 대비를 갖춰야 하며, 팀원과의 의사소통을 통해 역할 분담을 명확히 하는 것이 게임의 승패를 좌우할 수 있다. 이 맵은 디펜스 장르를 любить하는 플레이어뿐만 아니라, 전략적 사고와 팀플레이를 즐기는 유저에게 강력히 추천할 만한 작품이다. 《Star Defense 3: War of Epsilion》 is a renowned defense-style custom map in *StarCraft: Brood War*, serving as the third installment in the *Star Defense* series. The map features a vast desert-themed battlefield where seven players must defend against endless enemy waves, utilizing their unique characters, combos, and attributes. The title "War of Epsilion," found in the internal map description, suggests the map was released by the creator Ankalagon under the Naver username "꿈의낙원," with an official-looking bug report email included, indicating it is a relatively well-established fanmade map. The map’s standout feature is its combo and attribute system, which assigns each character distinct skills and elemental properties. Players aren’t just passively defending—they must strategically combine abilities or leverage attribute-based effects to balance offense and defense. For example, certain attribute synergies can enhance defensive efficiency, while well-timed combos can exploit enemy weaknesses to eliminate large groups at once. This system adds strategic depth beyond mere endurance, demanding "active defense" rather than passive resistance. The expansive desert terrain funnels enemy waves toward a single direction, forcing players to rely on defensive structures and units placed around the base to halt their advance. The fortress at the center serves as the game’s linchpin—its destruction triggers a game over, requiring careful resource allocation, unit management, and precise timing. While the map’s vast scale makes it difficult to grasp the full battlefield at a glance, it also enables diverse tactics, such as strategic positioning, vision control, or defending multiple entry points simultaneously. Though 《Star Defense 3: War of Epsilion》 may pose a challenge for beginners, mastering the combo and attribute systems unlocks deep strategic enjoyment. The map enforces teamwork, as players must coordinate roles and synergize to overcome obstacles that would be impossible alone. With continuous waves extending playtime, the structure maintains tension and immersion throughout. Before playing, it’s crucial to familiarize yourself with each character’s combos and attributes and plan defensive strategies around key desert terrain features, such as high ground or narrow chokepoints. Thoughtful placement of defensive buildings around the fortress and efficient resource management (minerals, gas) are also vital. Quick preparation before waves begin and clear role assignments through team communication can determine victory or defeat. This map is highly recommended not only for defense genre enthusiasts but also for players who enjoy strategic thinking and teamwork.
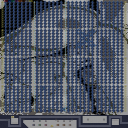
더러운 탱크 디펜더스 30 (Dirty Tank Defenders 30)
‘Dirty Tank Defenders 30’은 스타크래프트 브루드워의 유즈맵으로, 디펜스 장르의 하나로 탱크 유닛을 중심으로 한 방어형 미션을 제공한다. 맵 제목에서 유추할 수 있듯이 탱크가 주요 방어 유닛으로 기능하며, 플레이어는 일정 시간 동안 적의 공격을 막아내야 한다. 내부 맵 설명에서 ‘Nude Picture Tank Defence Game’이라는 문구와 ‘Eighth Dwarf’라는 서사가 포함되어 있어, 탱크를 조작하는 디펜스 게임으로 추정된다. 맵의 구조는 중앙에 방어 거점 역할을 하는 건물들이 배치되어 있고, 그 주변으로 적 유닛이 끊임없이 몰려드는 형식으로 보인다. 적의 공격 패턴은 탱크와 보병 유닛이 조합된 것으로 보이며, 방어에 성공하면 다음 웨이브가 이어지는 구조로 구성되어 있을 가능성이 크다. 플레이어는 4~6명의 인원으로 구성되며, 각자의 방어 거점을 맡아 탱크와 보조 유닛을 배치하고 효율적으로 적을 제거해야 한다. 맵의 해상도와 타일셋은 플랫폼 기반으로, 비교적 넓은 맵에서 전투가 펼쳐진다. 탱크 디펜스라는 장르적 특성상, 지속적인 자원 관리와 유닛 배치 전략이 중요하며, 특히 탱크의 체력과 화력 관리가 핵심 포인트로 보인다. 맵의 제목에 ‘30’이 포함된 점으로 미루어 보아, 총 30개의 웨이브 또는 스테이지가 있는 장기전 형식의 맵일 가능성이 높다. 초보자의 경우 탱크의 특성과 방어 전략을 숙지한 후 도전하는 것이 좋으며, 숙련자라면 빠른 적응과 효율적인 자원 배분이 요구된다. 이 맵은 ‘Dirty Tank Defenders’라는 시리즈의 서드 파티로, ‘Eighth Dwarf’라는 서사를 담은 시리즈물의 일부로 추정된다. 탱크 디펜스라는 장르 자체가 한국 스타크래프트 유즈맵 커뮤니티에서 인기 있는 장르 중 하나로, 지속적인 공격과 방어의 긴장감을 즐길 수 있는 구조로 설계되어 있다. 플레이어는 맵의 중앙이나 방어 거점에 집중된 적의 공격을 효과적으로 차단해야 하며, 탱크의 업그레이드와 보조 유닛의 활용이 승패를 좌우할 수 있다. 맵의 인코딩이 cp949로 설정되어 있어 한글 환경에서 정상적으로 로드될 수 있도록 배려된 점도 특징이다. 전체적으로 탱크 디펜스 장르에 익숙한 플레이어들에게 강추할 만한 맵으로, 시리즈물의 팬이라면 더욱 흥미롭게 즐길 수 있을 것이다. Dirty Tank Defenders 30 is a StarCraft: Brood War custom map focused on a tank-based defense genre, where players must withstand waves of enemy attacks using tanks as their primary units. The internal map description hints at a "Nude Picture Tank Defence Game" with a narrative involving "Eighth Dwarf," suggesting a structured defense mission with a series of challenges. The map layout features central defensive structures surrounded by enemy spawn points, likely sending waves of tanks and infantry to overwhelm the player. Players are expected to coordinate in groups of 4 to 6, managing resources and strategically placing tanks and supporting units to fend off relentless assaults. The large map size (4064x4096) and platform tile set provide ample space for tactical maneuvering, though the core challenge lies in maintaining tank health and firepower efficiency. The inclusion of "30" in the title implies a 30-wave or 30-stage progression, making it a long-form defense challenge suited for both casual and hardcore players. Beginners should familiarize themselves with tank mechanics and basic defense strategies, while experts will need to optimize unit placement and resource allocation for maximum efficiency. This map appears to be part of the Dirty Tank Defenders series, with "Eighth Dwarf" suggesting a serialized narrative. Tank defense maps are a popular subgenre in Korean StarCraft custom maps, offering high-stakes, tension-filled gameplay centered on survival and strategic adaptation. The cp949 encoding ensures compatibility in Korean environments, and the map’s design caters to players who enjoy prolonged defensive battles. Fans of the series or defense maps in general will find this a compelling experience, especially if they appreciate the challenge of optimizing tank-based strategies.
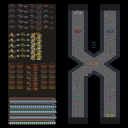
레벨 디펜스 vAmazin (Level Defense vAmazin)
스타크래프트: 브루드워의 유즈맵 장인 SoAmazin이 제작한 레벨 디펜스(Defense) 장르 유즈맵인 〈Level Defense vAmazin(2.1)〉은 적의 끊임없는 웨이브를 방어하는 classic 디펜스 게임의 정수를 담은 맵입니다. 맵의 중앙에 위치한 방어 포인트(건물)를 지키며, 오른쪽과 왼쪽에서 쏟아지는 다채로운 색상의 적 유닛들을 블록, 크리스탈, 골드, 다이아몬드 등 다양한 오브젝트로 가로막아 퇴치해야 합니다. 각 웨이브는 시간 경과에 따라 점점 강해지는 적군을 배치하며, 방어에 실패하면 방어 포인트가 파괴되고 맵은 리셋됩니다. 맵의 특징은 바로 'vAmazin'이라는 이름에서 암시되듯, 좌우로 펼쳐진 넓은 맵과 색상별로 다른 적군의 패턴이 시각적으로도 흥미로움을 더한다는 점입니다. 특히, 적 유닛들이 맵 중앙으로 진격하는 길목에 설치할 수 있는 블록 오브젝트는 맵의 전략적 깊이를 한층 끌어올립니다. 초보 플레이어는 블록 배치와 자원 관리만으로도 충분히 재미를 느낄 수 있지만, 고수들은 적의 패턴을 예측하고 최적의 방어 라인을 구축하는 재미에 푹 빠질 수 있는 구조입니다. 맵의 난이도는 웨이브가 진행될수록 적 유닛의 수가 급증하고 패턴이 복잡해지므로, 초보자의 경우 보호막 업그레이드와 블록 배치에 중점을 두는 것이 중요합니다. 반면, 숙련된 플레이어는 자원과 시간을 효율적으로 활용해 방어 라인을 최대한 오래 유지하는 플레이를 추구하게 됩니다. 맵의 분위기는 우주 테마를 기반으로 한 색상과 오브젝트로 구성되어 있으며, 디펜스 게임의 기본 틀을 지키면서도 시각적 즐거움을 극대화한 점이 돋보입니다. 이 맵은 디펜스 장르에 익숙한 플레이어는 물론, 스타크래프트의 유즈맵 문화에 입문하고자 하는 이들에게도 좋은 시작점이 될 것입니다. 다만, 블록 오브젝트의 배치와 자원 관리에 신경을 쓰지 않으면 예상치 못한 웨이브에서 무너질 수 있으니, 초반에는 천천히 적응해 가는 것이 중요합니다. 또한, 맵의 해상도가 2048x3072로 크고 타일 단위가 64x96으로 넓기 때문에, 화면 스크롤과 미니맵 활용이 필수적이라는 점도 고려해야 합니다. 맵의 재미는 방어 실패 시의 긴장감과 성공 시의 성취감에서 오며, 특히 친구나 가족과 함께 플레이할 때 경쟁심과 협동심을 동시에 느낄 수 있는 점이 매력적입니다. 마지막으로, 이 맵은 SoAmazin의 개성을 잘 반영한 작품으로, 디펜스 장르의 새로운 재미를 제공한다는 점에서 유즈맵 커뮤니티에서 주목받을 만한 가치가 있습니다. 즐겁고 전략적인 플레이를 원한다면 반드시 추천하는 맵입니다. 게임을 시작하기 전에는 맵의 구조와 블록 배치 가능 영역을 미리 숙지하고, 각 웨이브별로 어떤 적군이 등장하는지 예측해 보는 연습을 해 보는 것이 좋습니다. 또한, 자원이 제한적이므로 무리한 블록 업그레이드보다는 효율적인 자원 배분을 고려해야 합니다. 게임의 목표는 단순히 적을 막는 것이 아니라, 얼마나 오랫동안 방어 라인을 유지할 수 있는지에 달려 있습니다. 이 맵의 진정한 재미는 바로 그 긴장감과 전략의 조화에서 비롯됩니다. 다양한 전략을 시도해 보며, 자신에게 가장 잘 맞는 플레이 스타일을 찾아보세요. 디펜스 게임의 기본기를 다지고 싶다면 이 맵만큼 좋은 선택은 없을 것입니다. 특히, 스타크래프트의 classic 디펜스 장르를 좋아하는 플레이어라면 이 맵이 제공하는 새로운 재미와 도전 과제에 흠뻑 빠질 수 있을 것입니다. 이 맵을 통해 디펜스 게임의 매력에 빠져보세요! StarCraft: Brood War's renowned custom map creator SoAmazin presents *Level Defense vAmazin (2.1)*, a level-based defense (Defense) genre map that encapsulates the essence of classic defense games. Players must defend a central defense point (building) while blocking and eliminating waves of colorful enemy units pouring in from the left and right using various obstacles like blocks, crystals, gold, and diamonds. Each wave escalates in difficulty over time, and failing to defend results in the destruction of the defense point and a reset of the map. The map's defining feature, as hinted by its name "vAmazin," is its wide layout and visually engaging enemy patterns, differentiated by color. Players can strategically place block obstacles along the enemy's path to the center, adding depth to the gameplay. While beginners can enjoy the game by focusing on block placement and resource management, advanced players will relish predicting enemy patterns and constructing optimal defense lines. The difficulty ramps up significantly as waves progress, with enemy numbers surging and patterns growing more complex, making it crucial for newcomers to prioritize shield upgrades and block placement. Skilled players, on the other hand, will aim to sustain their defense lines as long as possible by efficiently managing resources and time. The map's atmosphere is enhanced by its space-themed colors and objects, maximizing visual enjoyment while adhering to the core mechanics of defense games. It serves as an excellent starting point not only for defense genre enthusiasts but also for those new to StarCraft's custom map culture. However, neglecting block placement and resource management can lead to unexpected collapses during waves, so it's important to take it slow and adapt gradually. Additionally, the map's high resolution (2048x3072) and large tile size (64x96) make screen scrolling and mini-map usage essential. The thrill of tense defense and the satisfaction of success drive the map's appeal, especially when played with friends or family, fostering both competition and teamwork. As a reflection of SoAmazin's unique style, this map offers fresh excitement to the defense genre and holds significant value within the custom map community. If you're seeking an engaging and strategic experience, this is a must-try map. Before starting, familiarize yourself with the map layout and block placement zones, and practice predicting enemy waves. Since resources are limited, prioritize efficient allocation over excessive block upgrades. The goal isn't just to block enemies but to maintain your defense line as long as possible—the true fun lies in the balance of tension and strategy. Experiment with different tactics to discover your ideal playstyle, and if you're looking to refine your defense game fundamentals, this map is an excellent choice. Fans of StarCraft's classic defense genre will especially appreciate the fresh challenges and entertainment it provides. Dive into the charm of defense games with this map!
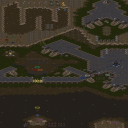
헬름즈 딥 대 아나타 13.3 (Helms Deep v. Annatar 13.3)
‘헬름즈 딥 대 아나타 13.3’은 스타크래프트: 브루드워의 유즈맵으로, 총 8명의 플레이어가 참여하는 대규모 디펜스 및 전략 게임이다. 맵의 전체적인 구조는 중앙에 위치한 거대한 요새와 주변을 에워싼 방어 시설, 그리고 적의 공격 루트를 차단하는 요충지들로 구성되어 있다. 맵의 배경은 사막 타일셋을 사용해 건조하고 메마른 분위기를 연출하며, 요새와 방어 시설은 마치Middle-earth의 ‘헬름즈 딥 전투’를 연상케 하는 중세 요새 디자인으로 구성되어 있다. 플레이어는 요새를 중심으로 한 방어선을 구축하고, 끊임없이 몰려오는 적의 웨이브를 상대해야 하며, 이 과정에서 자원 관리와 병력 배치, 전략적 판단이 요구된다. 특히 맵의 특징은 맵 곳곳에 배치된 방어 타워와 유닛 생산 건물들로, 플레이어는 초반 자원을 확보해 효율적으로 방어 체계를 구축해야 한다. 적의 공격은 요새 외곽에서부터 시작되며, 공격 루트는 맵의 지형을 따라 여러 갈래로 나뉘어 있어 플레이어는 한정된 병력으로도 다방면의 공격을 방어해야 한다. 또한 맵의 규모가 크고 지형이 복잡해, 전술적인 시야 확보와 통제가 중요한 포인트로 작용한다. 맵의 디자인상으로는 요새 내부와 외곽의 구조가 뚜렷이 구분되어 있어, 방어와 공격의 밸런스를 맞추는 것이 관건이다. 이 맵은 초보 플레이어보다는 중급 이상의 실력을 가진 플레이어에게 더 적합한데, 그 이유는 복잡한 지형과 다채로운 적의 웨이브 패턴 때문이다. 또한 팀 플레이가 강제되는 구조는 아니지만, 협력과 분업이 방어 성공의 열쇠가 되므로, 친구나 팀원과의 원활한 소통이 필요하다. 맵의 난이도는 적의 공격 패턴이 점점 강력해지면서 상승하므로, 초반 자원 확보와 방어 시설 구축을 얼마나 신속히 완료하는지가 승패를 좌우할 수 있다. 맵의 플레이 시간은 약 60분 내외로 예상되며, 이는 맵의 규모와 적의 웨이브 수가 많기 때문이다. 플레이 전 반드시 확인해야 할 요소는 맵의 주요 방어 지점과 적의 공격 루트, 그리고 자원 수집 지역의 위치다. 특히 요새 주변의 mineral field와 gas geyser의 분포는 초반 자원 확보에 큰 영향을 미치므로, 이를 미리 파악해두는 것이 중요하다. 또한 맵의 지형상 여러 길목이 존재해, 한 곳에만 방어 시설을 집중하면 쉽게 뚫릴 수 있으므로, 맵 전체를 아우르는 균형 잡힌 방어 계획을 세우는 것이 필수다. 마지막으로, 적의 웨이브는 일정 시간 간격으로 발생하므로, 이를 예측해 병력을 배치하고 보충하는 타이밍을 잘 조절해야 한다. ‘Helm’s Deep vs. Anath 13.3’ is a *StarCraft: Brood War* custom map designed for a large-scale defense and strategy game with up to eight players. The map features a massive central fortress surrounded by defensive structures and key choke points that block enemy attack routes. Set in a desert tile theme, the dry, barren atmosphere evokes the medieval fortress designs reminiscent of Middle-earth’s Battle of Helm’s Deep. Players must fortify defenses around the fortress while fending off relentless enemy waves, requiring careful resource management, troop positioning, and strategic decision-making. A defining feature of the map is the scattered defensive towers and unit production buildings. Players must secure early resources to efficiently build their defensive framework. Enemy attacks originate from the outer edges of the fortress, with multiple branching routes dictated by the terrain, forcing players to defend against multi-pronged assaults with limited forces. The large scale and complex geography of the map make tactical vision and control critical. The clear distinction between the fortress interior and exterior structures plays a key role in balancing defense and offense. This map is better suited for intermediate to advanced players due to its intricate terrain and varied enemy wave patterns. While not strictly team-based, successful defense hinges on cooperation and division of roles, making clear communication with teammates or friends essential. The difficulty escalates as enemy attacks grow stronger, with early resource collection and rapid defense setup often determining victory or defeat. Matches typically last around 60 minutes, given the map’s size and the number of enemy waves. Before playing, it’s crucial to identify key defensive points, enemy attack routes, and resource locations—especially the distribution of mineral fields and gas geysers around the fortress, which significantly impact early-game resource gathering. The terrain includes multiple pathways, and over-concentrating defenses in one area can lead to easy breaches, so a balanced, map-wide defense plan is vital. Additionally, since enemy waves spawn at regular intervals, predicting their timing and adjusting troop placements and reinforcements accordingly is essential for survival.
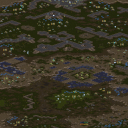
정복자들: 보너스 레벨 (Conquistadores: Bonus Level)
‘정복자들: 보너스 레벨’은 스타크래프트 브루드워의 유즈맵으로, 단일 플레이어용으로 설계된 디펜스 장르의 맵이다. 맵의 배경은 사막 지형으로 펼쳐지며, 중앙에 위치한 본진을 중심으로 적의 끊임없는 웨이브가 밀어닥치는 구조를 갖추고 있다. 플레이어는 프로토스 종족을 선택해, 강력한 방어 건물과 유닛을 배치하고 자원을 관리하면서 적의 공격을 방어해야 한다. 맵 곳곳에는 방어 타워를 설치할 수 있는 공간과 자원 채취 지역이 배치되어 있어, 전략적으로 건물을 배치하고 자원을 확보하는 것이 핵심이다. 이 맵의 가장 큰 특징은 바로 ‘보너스 레벨’이라는 이름에 걸맞게, 플레이어의 선택에 따라 다양한 전략을 펼칠 수 있는 유연성을 제공한다는 점이다. 예를 들어, 초반에 자원을 집중해 강력한 방어 건물을 짓거나, 적의 공격 패턴을 분석해 유닛을 효율적으로 배치할 수 있다. 또한, 맵의 중앙에 위치한 넓은 평원은 방어 건물의 배치와 유닛의 이동 경로를 결정짓는 중요한 요소로 작용한다. 플레이어는 이 평원을 어떻게 활용하느냐에 따라 방어 성공 여부가 갈릴 수 있다. ‘정복자들: 보너스 레벨’의 또 다른 매력은 바로 긴 플레이 시간과 높은 난이도다. 맵의 크기가 크고, 적의 공격이 끊임없이 이어지기 때문에 플레이어는 긴장감을 늦추지 않고 estratégia를 세워야 한다. 또한, 맵 곳곳에 숨겨진 자원과 보너스 아이템을 찾아내어 활용하는 것도 성공의 열쇠가 된다. 이 맵은 단순히 방어하는 것에서 그치지 않고, 자원의 관리와 전략적 계획이 요구되는 고난이도의 디펜스 게임으로, 스타크래프트 유즈맵의 매력을 한껏 느낄 수 있는 작품이다. 이 맵을 추천하는 대상은 바로 디펜스 게임을 즐기며, 전략적 사고와 긴장감을 동시에 경험하고 싶은 플레이어들이다. 특히, 단일 플레이어용 디펜스 맵을 선호하는 유저들에게는 최적의 선택지가 될 것이다. 또한, 프로토스 종족의 특성을 살려 플레이하고 싶은 유저들에게도 적합한 맵으로, 다양한 유닛과 건물의 조합을 통해 자신만의 전략을 펼쳐볼 수 있다. 마지막으로, 긴 플레이 시간을 즐기며 반복 플레이를 통해 실력을 향상시키고 싶은 유저들에게도 추천할 만한 작품이다. 플레이 전 반드시 확인해야 할 사항은 다음과 같다. 먼저, 맵의 크기가 크기 때문에 자원의 분배와 건물의 배치에 신중을 기해야 한다. 또한, 적의 공격 패턴을 미리 분석해 방어 전략을 세우는 것이 중요하다. 마지막으로, 맵 곳곳의 자원과 보너스 아이템을 빠르게 찾아내어 활용하는 연습을 해두면 더 효과적으로 플레이할 수 있다. English review text without any translation heading ‘Conquistadores: Bonus Level’ is a custom map for StarCraft: Brood War, designed as a single-player defense game. The map unfolds across a vast desert terrain, where the player’s base is positioned centrally, surrounded by waves of enemy units that relentlessly assault from all directions. Players control the Protoss faction, tasked with building defenses, gathering resources, and strategically positioning units to withstand continuous enemy pressure. The defining feature of this map is its flexibility, embodied in the ‘Bonus Level’ designation. Players can adapt their strategy based on resource availability and enemy patterns. For instance, early-game tower rushes or defensive setups can be viable, while mid-to-late game requires balancing unit production with base expansion. The central open area plays a crucial role in determining unit movement and building placement, making spatial awareness a key factor in survival. A standout aspect of ‘Conquistadores: Bonus Level’ is its extended playtime and high difficulty. The map’s large scale and persistent enemy waves demand sustained focus and adaptability. Hidden resources and bonus items scattered across the map add depth, rewarding thorough exploration and resource management. This map transcends typical tower defense mechanics by integrating resource scarcity, strategic depth, and real-time decision-making, offering a challenging yet rewarding experience. This map is ideal for players who enjoy defense-focused custom maps and seek a combination of strategic depth and tension. It caters especially to those who prefer single-player scenarios, as well as Protoss enthusiasts looking to leverage the faction’s unique strengths. The extended playtime and replayability make it a great choice for players who enjoy refining their tactics over multiple attempts. Before diving in, players should prioritize careful resource allocation and base layout, as the map’s size amplifies the consequences of poor planning. Analyzing enemy attack patterns and securing bonus resources early will significantly improve long-term survival. Familiarity with Protoss tech trees and defensive structures is also beneficial, as the map rewards disciplined macro-management alongside tactical micro-decisions.
백화점 습격사건 2 평평한 땅 (Department Store Heist Event 2: Flat Land)
스타크래프트 브루드워의 유즈맵 <백화점 습격사건 2 평평한 땅>은 디펜스 장르의 UMS 맵으로, 플레이어들이 평평한 눈 덮인 평원에 자리한 백화점을 지키며 끊임없이 몰려오는 적들을 상대하는 전투를 펼치게 된다. 맵의 배경은 설원 테마로 구성되어 있어 한겨울의 차가운 분위기를 물씬 느낄 수 있으며, 눈밭과 얼음 지형이 조화를 이루며 시각적 몰입감을 높인다. 맵 중앙에는 거대한 백화점 건물이 위치하고 있으며, 플레이어는 이 건물을 중심으로 방어선을 구축하거나 보조 건물을 배치해 적의 공격을 막아내야 한다. 디펜스 게임답게 각 웨이브마다 적의 종류와 수가 점차 증가하며, 후반부로 갈수록 공세력이 강해지는 구조로 구성되어 있다. 플레이어는 초반 자원을 효율적으로 관리하며 방어 타워나 유닛 생산 건물을 배치해야 하며, 적의 진로와 약점을 파악해 전략적인 배치와 유닛 조합을 결정해야 한다. 맵의 평평한 지형은 전투가 벌어지는 장소를 넓게 펼쳐지게 하며, 이는 플레이어에게 넓은 시야와 전략적 움직임을 제공한다. 또한, 맵 곳곳에 배치된 장애물이나 지형적 특징은 방어선을 구축하거나 적의 진로를 방해하는 요소로 활용할 수 있어, 게임의 깊이와 재미를 더한다. 이 맵은 디펜스 장르를 좋아하는 플레이어들에게 특히 추천되며, 특히 UMS(유즈맵) 특유의 자유로운 플레이와 전략적 선택이 가능한 점이 매력적이다. 초보자의 경우 맵의 기본 구조와 적의 공세 패턴을 숙지한 뒤 점차 난이도를 높여 나가며, 숙련된 플레이어는 최적의 방어 전략과 자원 관리를 통해 높은 점수를 노릴 수 있다. 백화점이라는 독특한 배경과 설원 테마가 어우러져 시각적으로도 즐거움을 주는 맵이므로, 디펜스 게임을 즐기는 유저라면 한 번쯤 도전해 볼 만한 작품이다. 이 맵을 플레이하기 전에는 맵의 중앙 백화점 건물을 중심으로 한 방어선 배치와 자원 관리 전략을 미리 계획해 두는 것이 중요하며, 적의 웨이브 패턴을 숙지하는 것도 필수적이다. 또한, 맵의 평평한 지형과 눈 덮인 배경이 시야를 가릴 수 있으므로, 맵의 지형적 특징을 잘 활용해 방어선을 구축하는 것이 관건이다. 초반에 자원을 효율적으로 사용하지 않으면 후반부에서 어려움을 겪을 수 있으므로, 자원 관리에도 신경을 써야 한다. 이 맵은 디펜스 장르의 기본기와 전략적 사고력을 모두 요구하는 만큼, 플레이어의 판단력과 집중력을 시험하게 될 것이다. This StarCraft: Brood War custom map, <백화점 습격사건 2 평평한 땅 (Department Store Heist Event 2: Flat Land)>, is a UMS defense game where players defend a department store situated on a snowy, flat plain against relentless waves of enemies. Set against a wintery backdrop of snow-covered terrain and icy landscapes, the map immerses players in a cold, visually striking atmosphere. At the center of the map stands a large department store building, which players must protect by strategically placing defensive structures or auxiliary buildings. Like many defense games, the map escalates in difficulty with each wave, as enemy types and numbers grow more challenging over time. Players must efficiently manage early-game resources to build defenses or production facilities, while analyzing enemy movement patterns and weaknesses to optimize their strategies. The flat terrain provides ample space for combat, offering wide visibility and strategic maneuverability. Additionally, scattered obstacles and terrain features can be leveraged to block enemy paths or reinforce defense lines, adding depth and replayability to the experience. This map is highly recommended for fans of the defense genre, particularly those who enjoy UMS custom maps that allow for creative and strategic gameplay. Beginners can start by learning the map layout and enemy attack patterns before gradually increasing the challenge, while experienced players can aim for high scores through optimized resource management and advanced defense strategies. The unique department store theme combined with a snowy setting creates an engaging visual experience, making it a worthwhile challenge for defense game enthusiasts. Before playing, it is crucial to plan the initial defense lines around the central department store and devise a resource management strategy. Familiarizing oneself with enemy wave patterns is equally important, as the flat terrain and snowy background can obscure visibility. Poor early-game resource allocation may lead to difficulties in later stages, so careful planning is essential. This map tests both fundamental defense mechanics and strategic thinking, demanding sharp judgment and focus from players.
투혼 1.3 (Tohon 1.3)
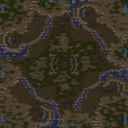
스타크래프트 브루드워의 고전 유즈맵으로 꼽히는 <투혼 1.3>은 혼신의 힘을 끌어내야만 승리를 쟁취할 수 있는 치열한 전투를 제공하는 맵이다. 맵의 이름처럼 물러설 곳이 없다는 것의 의미를 온전히 느끼게 해주는 이 맵은, 플레이어가 전술적 선택과 빠른 판단력을 요구받는 디펜스 장르에 속한다. 맵의 배경은 사막 지형을 바탕으로 하며, 넓은 개활지와 더불어 곳곳에 배치된 방어 시설물을 활용해 적의 공격을 방어해야 한다. 맵의 중앙에는 '은빛 날개'라는 상징적인 구조물이 자리하고 있는데, 이 구조물은 승리 조건과 깊은 연관이 있는 것으로 추정된다. 플레이어는 각자의 기지를 지키며 끊임없이 몰려드는 적의 웨이브를 막아내야 하며, 방어 라인을 구축하고 자원을 확보하는 동시에 적절한 타이밍에 반격을 펼쳐야 한다. 특히 맵의 지형이 복잡한 구조를 띠고 있어, 전략적인 포지셔닝이 승리를 좌우할 확률이 높다. 초보 플레이어는 방어 라인의 중요성을 간과하기 쉬우며, 자원 관리와 병력 구성을 제대로 하지 못해 쉽게 무너질 수 있다. 반면 숙련된 플레이어는 맵의 패턴을 익히고 효율적인 방어 체계를 구축해 적의 공격을 무력화시키는 데 능숙하다. 맵의 분위기는 전쟁의 비장함과 희생을 강조하며, 플레이어에게는 전장의 지휘관으로서의 책임을 부여한다. 전투가 치열해질수록 긴장감은 배가되며, 승리를 향해 나아가기 위해 플레이어는 끊임없이 도전하고 성장해야 한다. 이 맵은 단순히 방어만을 요구하는 것이 아니라, 적재적소에 병력을 투입하고 반격을 펼치는 능동적인 플레이가 요구된다. 때문에 디펜스 장르를 любители지만 전략적 깊이를 원하는 플레이어들에게 strong하게 추천할 만하다. 특히 팀플레이가 가능한 맵 구조를 갖추고 있어, 파트너와의 호흡이 승리를 좌우할 수도 있다. 맵을 플레이하기 전에는 방어 라인의 배치와 주요 자원 지점, 그리고 '은빛 날개'의 위치를 숙지하는 것이 중요하다. 또한, 각 웨이브별로 등장하는 적의 종류와 패턴을 미리 파악해 두면 훨씬 수월하게 방어전을 수행할 수 있을 것이다. 맵의 난이도는 대체로 어려운 편에 속하며, 숙련된 플레이어라도 반복 플레이를 통해 실력을 갈고닦아야만 한다. 투혼 1.3은 단순히 방어만 하는 것이 아니라, 승리를 위한 전략적 사고와 끈기를 요구하는 맵이기 때문이다. 이 맵을 통해 플레이어는 전장의 지휘관으로서의 역량을 발휘하며, 그로 인한 성취감을 느낄 수 있을 것이다. 또한, 맵의 디자인과 분위기가 전쟁의 비장함을 강조하기 때문에, 플레이어는 전투의 무게감을 온전히 느낄 수 있다. 요약하자면, 투혼 1.3은 디펜스 장르의 걸작으로 손꼽히며, 전략적 깊이를 추구하는 플레이어들에게 strong한 추천을 보낸다. 맵의 구조와 디자인이 뛰어나며, 플레이어의 능동적인 참여를 요구한다는 점에서 깊은 인상을 남긴다. 이 맵을 통해 디펜스 장르의 매력을 다시 한 번 느껴보길 바란다. *Touhon 1.3* is a classic *StarCraft: Brood War* custom map renowned for delivering intense battles where victory demands every ounce of a player’s skill. As its name suggests, the map leaves no room for retreat, immersing players in a tense defense genre that tests tactical foresight and split-second decision-making. Set against a desert terrain, the map features vast open spaces alongside strategically placed defensive structures that players must leverage to fend off relentless enemy waves. At its heart lies the iconic "Silver Wing" structure, which appears to be deeply tied to the victory condition. Players must defend their base while simultaneously managing resources, fortifying defensive lines, and launching well-timed counterattacks against waves of enemies. The map’s intricate terrain demands careful positioning, as strategic placement often determines the outcome of battles. Novices may struggle by overlooking the importance of defensive lines, mismanaging resources, or failing to build effective armies, while experienced players excel by recognizing patterns and establishing efficient defensive systems to neutralize threats. The map’s atmosphere is steeped in the gravity of war and sacrifice, placing players in the role of a commander responsible for the fate of their forces. As combat intensifies, the tension escalates, pushing players to constantly adapt and grow to secure victory. *Touhon 1.3* isn’t just about passive defense—it rewards proactive play, requiring players to deploy forces strategically and seize opportunities for counterattacks. This makes it an excellent choice for fans of the defense genre who seek deeper strategic engagement. The map also supports team play, where coordination with a partner can be the key to success. Before diving in, players should familiarize themselves with defensive layouts, critical resource points, and the location of the "Silver Wing." Understanding the types and patterns of enemies that appear in each wave will make defense far more manageable. The difficulty is high, and even seasoned players will need repeated attempts to refine their strategies, as *Touhon 1.3* demands not just defense but a commander’s mindset and unwavering perseverance. Through this map, players take on the role of a battlefield leader, experiencing the satisfaction of overcoming challenges through skill and strategy. Its design and atmosphere amplify the weight of war, allowing players to fully grasp the gravity of their decisions. In short, *Touhon 1.3* stands as a masterpiece of the defense genre, highly recommended for players who crave strategic depth. Its exceptional structure and design demand active participation, leaving a lasting impression. I strongly encourage fans of defense maps to rediscover its appeal.
미로 디펜스 4.1 (Maze Defense 4.1)
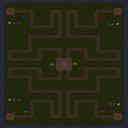
스타크래프트 브루드워 유즈맵 '미로 디펜스 4.1'은 4인 협동으로 진행되는 미로 건설형 타워 디펜스 맵이다. 사막 타일셋을 배경으로 128x128 타일 크기의 전장에서 중앙으로 몰려드는 적 유닛 웨이브를 막아내는 것이 핵심 목표다. 플레이어는 각자 시작 지점에서 미로 벽을 설치해 적의 이동 경로를 길게 늘리고, 그 사이사이에 방어 타워나 유닛을 배치해 화력을 집중시키는 방식으로 방어선을 구축한다. 맵 설명에 따르면 원작자 speed_limit의 아이디어를 Dum-Fuggin-Newb가 수정 및 완성해 4.1 버전까지 이어졌으며, 2.1부터 6.1까지 여러 버전이 존재하는 장수 시리즈임을 알 수 있다. 진행 방식은 일반적인 입구막기나 고정 루트 디펜스와 달리, 플레이어가 직접 미로 형태를 설계한다는 점에서 전략적 자유도가 높다. 초반에는 저렴한 유닛이나 기본 건물로 간단한 미로를 짜고, 웨이브가 거세질수록 미로를 확장하거나 고급 타워로 교체하며 대응한다. 4명이 동시에 플레이하므로 역할 분담이 중요하다. 한 명이 미로 설계를 전담하고 나머지는 자원 수급과 타워 업그레이드를 맡는 식의 협업이 승률을 높인다. 사막 지형의 모래 색상과 바위 지형이 미로 벽과 시각적으로 대비되어 가독성이 좋은 편이다. 추천 대상은 타워 디펜스 장르를 즐기며 직접 길찾기 알고리즘을 시험해보고 싶은 유저, 친구들과 음성 채팅으로 전략을 짜며 30~50분 정도 몰입할 협동 콘텐츠를 찾는 팀이다. 난이도는 웨이브 구성에 따라 '보통'에서 '어려움' 사이로 조절되며, 미로 설계 경험이 없는 초보자는 초반 웨이브에서 막힐 수 있으니 기존 버전 플레이 영상이나 공략을 참고해 기본 미로 패턴을 익히는 것이 좋다. 파일명과 내부 제목이 'Maze Defense 4.1'로 동일하며, 한글 커뮤니티에서는 '미로 디펜스 4.1'로 통용된다. 버전 표기상 4.1이 안정화된 빌드일 가능성이 높다. StarCraft Brood War custom map 'Maze Defense 4.1' is a cooperative maze-building tower defense for four players. Set on a desert tileset across a 128x128 tile battlefield, the core objective is to stop waves of enemy units rushing toward the center. Each player constructs maze walls from their starting area to lengthen the enemy path, then places defensive towers or units along the corridors to concentrate firepower. According to the map description, the original concept by speed_limit was modified and finished by Dum-Fuggin-Newb, reaching version 4.1, with multiple versions from 2.1 to 6.1 indicating a long-running series. Unlike fixed-route or entrance-blocking defenses, this map offers high strategic freedom by letting players design the maze layout themselves. Early game involves building simple mazes with cheap units or basic structures, then expanding or upgrading to advanced towers as waves intensify. With four simultaneous players, role division is crucial. One player may focus on maze design while others handle resource gathering and tower upgrades, boosting the team's survival chance. The desert terrain's sand tones and rocky outcrops provide good visual contrast against maze walls. Recommended for tower defense fans who want to test their own pathfinding strategies, or groups seeking a 30-50 minute cooperative session with voice chat coordination. Difficulty ranges from 'Normal' to 'Hard' depending on wave composition; beginners unfamiliar with maze design may struggle early on, so watching gameplay of previous versions or studying basic maze patterns is advised. The filename and internal title both read 'Maze Defense 4.1', while Korean communities refer to it as '미로 디펜스 4.1'. The version numbering suggests 4.1 is a stabilized build.
최근 등록된 맵
새로 추가된 파일과 버전을 확인하세요.
버피 더 뱀파이어 슬레이어 (Buffy the Vampire Slayer)
‘버피 더 뱀파이어 슬레이어’는 스타크래프트: 브루드워의 유즈맵으로, 인기 TV 드라마 ‘버피 더 뱀파이어 슬레이어’의 세계관을 재해석한 디펜스/액션 하이브리드 맵이다. 플레이어는 뱀파이어 사냥꾼인 버피, 오즈, 잰더 중 한 명을 선택해 악마와 뱀파이어 무리를 물리치거나, 반대로 뱀파이어의 우두머리인 ‘뱀파이어 마스터’와 에단으로 플레이해 버피 일행을 제거하는 이중 구도를 경험할 수 있다. 맵은 설원/얼음 테마의 타일셋으로 꾸며졌으며, 1024x1024 크기의 넓은 맵에서 펼쳐지는 전투는 긴장감과 전략적 깊이감을 동시에 제공한다. 뱀파이어와 악마가 끊임없이 몰려오는 웨이브 디펜스 형식으로 진행되며, 각 캐릭터는 고유한 스킬과 능력을 활용해 적을 처치하거나 팀을 보호해야 한다. 특히 버피는 ‘슬레이어’로서의 역할을, 뱀파이어 마스터는 ‘흡혈’과 ‘저주’ 스킬을 통해 상대방을 약화시키는 등 역할Play가 뚜렷해 전략적 선택이 중요하다. 맵의 승패 조건은 명확히 제시되지 않지만, 일반적으로 적의 본진 파괴 또는 버피 팀의 생존 여부에 따라 나뉠 것으로 추정된다. 초보자도 쉽게 접근할 수 있는 조작감과 함께, 팀워크와 실시간 대처 능력이 요구되는 점에서 초중수층 모두에게 매력적인 맵이다. 다만, 뱀파이어 마스터 측은 상대적으로 조작 난이도가 높고 전략적 선택지가 많기 때문에, 초보자는 버피 팀으로 플레이하는 것이 안전할 수 있다. 맵을 시작하기 전, 각 캐릭터의 스킬과 맵의 주요 거점 위치를 숙지하는 것이 승리의 관건이다. 또한, 설원 테마의 시각적 디자인과 사운드가 분위기를 한층 끌어올려 몰입감을 높여주니, 시각적 즐거움까지 기대해도 좋다. Buffy the Vampire Slayer is a custom StarCraft: Brood War map that reimagines the universe of the hit TV series Buffy the Vampire Slayer as a hybrid defense/action UMS. Players can choose to embody one of the Slayers—Buffy, Oz, or Xander—and fight against waves of vampires and demons, or take on the roles of the Vampire Master and Ethan to eliminate Buffy and her team. Set on a snowy/ice-themed tile set, the expansive 1024x1024 map delivers high-stakes battles filled with tension and strategic depth. The gameplay follows a wave defense format where enemies continuously spawn, and each character brings unique abilities to the fight. Buffy excels as the Slayer, while the Vampire Master weakens opponents through abilities like ‘Blood Drain’ and ‘Curse.’ The win condition remains unstated, but likely hinges on destroying the enemy’s base or ensuring Buffy’s team survives. The map is easy to pick up, though mastering the Vampire Master’s strategic options may prove challenging for beginners. New players are advised to start as Buffy’s team for a smoother experience. Familiarizing yourself with each character’s skills and key map locations before starting is crucial for victory. The snowy visual design and immersive sound effects enhance the atmosphere, adding to the overall enjoyment.
익스트림 캔디 워즈 (Extreme Candy Warz)
스타크래프트 브루드워의 유즈맵 'Extreme Candy Warz'는 웨이브 디펜스와 클래스 기반 전투가 조합된 흥미로운 맵입니다. 이 맵은 플레이어가 기지 방어에 집중하면서 동시에 다양한 클래스를 조작하고 성장시키는 재미를 제공합니다. 내부 맵 설명에서 확인할 수 있듯이, 전사(Warrior), 도적(Rogue), 사냥꾼(Hunter), 마법사(Mage) 네 가지 클래스를 선택할 수 있으며, 각 클래스는 고유한 능력을 발휘합니다. 플레이어는 'Gnome', 'Human', 'Night Elf' 중 하나의 종족을 선택할 수 있는데, 이는 게임 내 스킨이나 능력치 차이로 이어질 가능성이 있어 보입니다. 맵 제목에서 'Candy Warz'라는 다소 독특한 단어가 포함되어 있는데, 이는Sweet(달콤한) + War(전쟁)의 조합으로 보이며, 전투와 생존의 조화를 상징하는 듯합니다. 맵은 우주 타일셋을 사용해 우주 배경의 방어전을 펼치게 되며, 1024x1024 크기의 넓은 맵에서 펼쳐지는 전투는 긴장감을 조성합니다. 플레이어는 끊임없이 몰려오는 적 웨이브를 막아내며 기지를 지켜야 하는데, 각 웨이브는 점점 강해지는 난이도를 자랑합니다. 클래스별로 다른 스킬과 전략을 활용해야 하며, 여러 플레이어가 협력해 적을 제압하는 팀워크가 중요한 요소로 작용할 것입니다. 이 맵은 초보 플레이어에게는 다소 어려울 수 있지만, 클래스별 특성과 전략을 익히면 점차 재미를 느낄 수 있습니다. 특히 방어전과 성장형 플레이가 결합된 점에서 전략적 깊이가 있는 유즈맵으로 평가됩니다. 한 가지 아쉬운 점은 맵 설명이나 승리 조건이 명확히 제시되어 있지 않아, 플레이 전 미리 룰을 숙지해야 한다는 점입니다. nevertheless, 다양한 클래스와 종족을 조합해 플레이할 수 있는 점은 이 맵의 큰 장점입니다. 이 맵을 즐기기 위해서는 클래스별 스킬과 종족의 특성을 숙지하고, 팀 플레이 시 협력 시스템을 적극 활용하는 것이 중요합니다. 또한, 우주 배경의 시각적 요소는 전투의 긴장감을 한층 높여주어 몰입감을 제공합니다. 이 맵은 디펜스와 전략적 플레이를 좋아하는 유즈맵 팬들에게 강력히 추천할 만합니다. 다만, 맵의 난이도 조절이나 클래스 밸런스 등에 대한 평가는 개개인의 플레이 스타일에 따라 달라질 수 있음을 염두에 두어야 합니다. Extreme Candy Warz is a unique StarCraft: Brood War custom map that blends wave defense mechanics with class-based combat. The map allows players to select from four distinct classes—Warrior, Rogue, Hunter, and Mage—each offering unique abilities that evolve as players progress. According to the internal map description, players can also choose between three races: Gnome, Human, and Night Elf, which likely introduces subtle differences in gameplay or visuals. The title "Extreme Candy Warz" suggests a playful yet intense experience, combining the idea of sweetness (candy) with relentless warfare (wars), hinting at a balance between challenge and enjoyment. Set against a cosmic backdrop using the space tileset, the 1024x1024 map provides ample space for strategic maneuvering as players defend their base against increasingly formidable enemy waves. The core gameplay revolves around surviving waves of attacks while leveraging class-specific skills to turn the tide in your favor. Teamwork is essential, as coordinating different class abilities can mean the difference between victory and defeat. While the map may pose a challenge for beginners, mastering the nuances of each class and race can lead to a deeply engaging experience. One potential drawback is the lack of explicit instructions or victory conditions, which means players should familiarize themselves with the rules beforehand. However, the variety in class and race selection offers high replayability, allowing for different strategies and synergies in each playthrough. The cosmic visual theme enhances immersion, making the defensive battles feel both epic and visually striking. Overall, Extreme Candy Warz is a standout custom map for players who enjoy strategy, teamwork, and the thrill of overcoming waves of enemies. To fully enjoy the experience, players should invest time in understanding each class's strengths and how they complement team dynamics. While the map's difficulty and class balance may vary depending on individual preferences, its innovative blend of defense and class-based progression makes it a must-try for custom map enthusiasts.
매트릭스 4.0 (MATRIX - 4.0)
스타크래프트 브루드워의 유즈맵 〈--- MATRIX - 4.0---〉는 다중 플레이어 기반의 전략형 디펜스 맵으로, 플레이어들이 협력하여 끊임없이 몰려드는 적의 공격을 방어하는 구조가 특징이다. 맵의 이름은 'MATRIX'라는 키워드와 함께 버전 넘버 '4.0'이 강조되어 있어, 지속적인 개선과 업그레이드 컨셉이 반영된 듯하다. 내부 설명에 'X-pert Version'과 'Good Game !!'이라는 문구가 포함되어 있으며, 'Improved By: ']['ru3-[)3v!L'이라는 제작자의 개선 흔적 또한 확인된다. 이는 맵이 여러 버전을 거쳐 발전해 왔음을 암시하며, 커뮤니티 내에서의 꾸준한 피드백과 개선 과정을 거쳤음을 짐작할 수 있다. 맵의 주요 특징은 방어선에 초점을 맞춘 전투 구성이다. 플레이어는 각자의 위치에서 적의Wave(웨이브)를 막아내며, 시간이 지나면서 점점 강화되는 적의 공격 패턴에 대응해야 한다. 맵의 규모는 1024 x 1024의 타일 크기를 기반으로 하며, 우주 타일셋을 사용하여 광활하고 미래적인 분위기를 연출한다. 6인의 플레이어가 동시에 참여할 수 있도록 설계되어 있으며, 각 플레이어는 개별 자원이나 유닛을 관리할 수 있는 구조로 보인다. 맵의 해상도와 타일 단위가 크고 디테일하게 구성되어 있어, 시야 확보와 전략적 배치에 유리한 환경을 제공한다. 플레이어들은 협력과 전략적 판단력이 요구되는 이 맵에서, 각 웨이브마다 출현하는 적의 종류와 패턴을 분석하여 방어 라인을 구축해야 한다. 내부 설명에 'Improved Version'이라는 표기가 반복되는 점을 고려하면, 밸런스 조정이나 UI 개선 등이 이루어진 버전이 존재할 가능성이 크다. 맵의 이름 'MATRIX'는 영화 '매트릭스'의 개념을 차용한 듯하며, 현실과 가상의 경계가 모호한 듯한 전투 환경을 연상시킨다. 이 맵은 디펜스 장르의 유즈맵 중에서도 다인용 협력형 플레이에 초점을 맞추고 있어, 팀워크와 순간적인 판단력이 요구되는 플레이 경험을 제공할 것이다. 이 맵을 즐기기 위해서는 다수의 플레이어가 동시에 참여해야 하며, 각자의 역할 분담을 신중히 결정하는 것이 중요하다. 또한, 맵의 우주 테마와 웨이브 디펜스 구조가 어우러져 독특한 분위기를 연출하므로, 디펜스 장르에 익숙한 플레이어뿐만 아니라 새로운 경험을 원하는 유저들에게도 매력적으로 다가갈 수 있을 것이다. This StarCraft: Brood War custom map, titled 〈--- MATRIX - 4.0---〉, is a multiplayer defense-focused strategy game where players collaborate to fend off waves of enemy attacks. The map's name, 'MATRIX,' combined with version '4.0,' suggests a long-term development cycle with iterative improvements. The internal description mentions 'X-pert Version' and 'Good Game !!,' hinting at a well-refined gameplay experience, while credits like 'Improved By: ']['ru3-[)3v!L' indicate community-driven enhancements over time. The core gameplay revolves around strategic defense mechanics. Players must hold their positions against progressively stronger enemy waves, requiring teamwork and tactical positioning. The map utilizes a 1024 x 1024 tile size with a space-themed tileset, creating an expansive and futuristic atmosphere. Designed for up to six players, the layout supports individual resource and unit management while emphasizing coordinated defense strategies. The high resolution and detailed tile design enhance visibility and strategic depth. Players must analyze enemy patterns and adapt their defenses accordingly, making each wave a new challenge. The repeated mention of 'Improved Version' in the description suggests prior iterations with balance adjustments or UI refinements. The 'MATRIX' theme likely draws inspiration from the film *The Matrix*, evoking a surreal battle environment where reality and simulation blur. This map stands out among custom defense games for its multiplayer cooperative focus, demanding teamwork and quick decision-making. To fully enjoy this map, players should prioritize clear role distribution and communication. The combination of space-themed visuals and wave-based defense creates a unique experience, appealing not only to seasoned defense game enthusiasts but also to players seeking fresh challenges in the genre.
병신디펜스 BETA-c
스타크래프트 브루드워 유즈맵 '병신디펜스 BETA-c'는 제작자 Preserve[NV]가 배포한 6인용 협동 디펜스 맵으로, 화산 타일셋을 배경으로 한 128x128 타일 크기의 전장에서 펼쳐진다. 맵 제목에 'BETA-c' 표기가 붙은 점으로 미루어 보아 정식 출시에 앞서 밸런스 검증과 버그 수정을 위한 테스트 빌드 성격이 강하며, 현재 분류는 디펜스(DEFENSE) 장르에 속한다. 내부 설명에 따르면 승리 조건은 20탄(웨이브) 클리어, 패배 조건은 누적 유출 유닛 200마리 초과로 설정되어 있어, 일반적인 입구막기형 디펜스 룰을 충실히 따른다. 맵 구조는 6명의 플레이어가 각각 독립된 혹은 인접한 시작 지점에서 자원을 확보한 뒤, 중앙 혹은 다수의 진입로로 몰려오는 적 병력을 합동으로 저지하는 방식이다. 화산 지형 특유의 용암 지대와 고저차가 시야 제한과 병목 지점 형성에 영향을 주므로, 드론이나 오버로드 등 시야 확보 유닛의 운용이 중요해 보인다. 웨이브 구성은 초반 저글링, 히드라리스크 등 소형 지상군 위주에서 중반 이후 울트라리스크, 가디언, 디바우러 등 대형 공중·지상 혼합 부대로 확대될 것으로 추정되며, 200마리라는 유출 허용치가 초반에는 여유롭게 느껴지나 후반 고체력 유닛 다수 유출 시 순식간에 패배로 직결될 수 있다. 플레이 경험 측면에서는 팀원 간 자원 공유(앨리 자원 주기)와 병력 합류 타이밍, 업그레이드 순서 선정이 클리어의 핵심 변수로 작용한다. 베타 버전 특성상 특정 웨이브의 난이도 스파이크나 트리거 오류 가능성을 염두에 두고, 세이브/로드 없이 한 판을 완주해야 하는 긴장감이 있다. 추천 대상은 디펜스 장르 입문자부터 숙련자까지 폭넓으나, 정식 버전이 아닌 테스트 빌드임을 감안해 버그 리포팅이나 밸런스 피드백을 겸할 수 있는 유저에게 특히 적합하다. 플레이 전에는 6인 풀파티 구성 여부에 따른 난이도 체감 차이, 맵 설명에 명시된 승리·패배 조건 숙지, 화산 타일셋 특유의 시야 제한 요소 대비를 위한 정찰 유닛 선제 생산 등을 확인하는 것이 좋다. StarCraft: Brood War UMS map 'Byungshin Defense BETA-c' is a 6-player cooperative defense map created by Preserve[NV], set on a 128x128 tile volcano tileset. The 'BETA-c' suffix indicates a test build prior to official release, likely for balance verification and bug fixes, and it falls under the Defense genre. According to the internal description, the victory condition is clearing 20 waves, while defeat triggers when cumulative leaked units exceed 200, adhering to the classic entrance-blocking defense rules. The map structure has six players securing resources from individual or adjacent starting locations before jointly stopping enemy forces rushing through central or multiple choke points. The volcano terrain's lava zones and elevation differences affect vision and bottleneck formation, making vision-providing units like Overlords or Observers crucial. Wave composition likely escalates from early-game Zerglings and Hydralisks to late-game Ultralisk, Guardian, and Devourer mixes. While the 200-leak limit feels generous early on, mass leaks of high-HP units in later waves can cause instant defeat. In terms of gameplay, resource sharing between allies, troop merge timing, and upgrade prioritization are key variables for clearing. Being a beta version, players should anticipate potential difficulty spikes or trigger errors, adding tension to a no-save run. It is recommended for a wide range of players from defense beginners to veterans, but especially for those willing to provide bug reports or balance feedback on a test build. Before playing, check party size impact on difficulty, memorize the win/lose conditions, and prepare scout units early to counter vision limitations inherent to the volcano tileset.
![[ПВВ13] 탄두라스로의 귀환 (Return to Thanduras) 맵 미리보기](https://cdn-star-data.huzy.net/thumbnail_ca616abb4f8f4a04a25da63aefe5dc3a.jpg)
[ПВВ13] 탄두라스로의 귀환 (Return to Thanduras)
이 맵은 스타크래프트 브루드워의 유즈맵으로, 사막 지형을 배경으로 한 디펜스 장르의 맵이다. 제목인 '[ПВВ13] – Возвращение на Тандурас'는 러시아어로 'Return to Thanduras'를 의미하는데, 이는 '탄두라스로의 귀환' 정도로 해석될 수 있다. 내부 설명에서도 '탄두라스를 파괴하는 저그를 제거하라'는 지시가 확인되며, 플레이어는 한 명의 유닛을 조종해 끊임없이 밀려드는 저그 웨이브를 상대해야 한다. 맵의 전체적인 구조는 중앙에 위치한 플레이어 기지 주변으로 사방이 개방되어 있어, 저그의 공격로와 포인트가 비교적 명확하게 나뉘어 있다. 사막 타일셋의 넓은 평지와 언덕 지형이 특징적이며, 일부 지역은 시야를 가리는 지형지물이 배치되어 있어 전략적인 위치 선정이 중요하다. 저그의 공격 패턴은 일정 주기로 웨이브가 밀려오며, 플레이어는 매번의 공격을 방어하거나 기지를 확장해 나가야 한다. 맵의 난이도는 플레이어의 컨트롤과 업그레이드, 유닛 조합에 따라 크게 달라지며, 초보자는 방어에 집중해야 하고 숙련자는 보다 공격적인 전략을 구사할 수 있다. 추천 대상은 스타크래프트의 디펜스 장르를 좋아하는 플레이어이며, 특히 사막 배경의 웨이브 디펜스가 즐거운 유저들에게 적합하다. 플레이 전에는 미네랄과 가스의 배치, 주요 공격로의 위치, 그리고 기지의 방어 시설 확충 가능성을 미리 점검하는 것이 좋다. 또한, 저그의 웨이브가 시작되는 타이밍과 패턴을 숙지하여 효과적인 대처를 준비해야 한다. 이 맵은 한 명의 플레이어만이 참여할 수 있는 싱글 플레이형 디펜스로, 지속적인 집중력과 전략적 사고가 요구되는 재미있는 유즈맵이다. This StarCraft: Brood War custom map is a defense genre map set in a desert terrain. The title '[ПВВ13] – Возвращение на Тандурас' translates to 'Return to Thanduras' in Russian, implying a mission to reclaim or defend the Thanduras region. The internal description confirms this, instructing players to 'destroy the Zerg destroying Thanduras.' The player controls a single unit and must defend against relentless waves of Zerg forces. The map features an open central base surrounded by desert terrain with some elevated hills and obstructive structures, requiring strategic positioning. Zerg waves attack periodically, and players must either defend their base or expand strategically. Difficulty varies based on player control, unit upgrades, and tactical choices; beginners should focus on defense while advanced players can experiment with aggressive strategies. Ideal for fans of wave-based defense games, especially those who enjoy desert-themed maps. Before playing, check mineral and gas distribution, main attack routes, and base expansion opportunities. Understanding the Zerg wave timing and patterns is crucial for effective defense. As a single-player defense map, it demands sustained focus and strategic thinking, making it a compelling custom map experience.
포켓몬 성큰 디펜 (Pokémon Sunken Defense)
《포켓몬 성큰 디펜 포켓몬추가》는 스타크래프트: 브루드워의 유즈맵으로, 디펜스 장르에 포켓몬 테마를 접목한 컴까기형 맵이다. 맵의 중앙에는 플레이어의 본진을 보호해야 하는 핵심 구조물이 있으며, 주변에 펼쳐진 길이와 장애물 사이로 끊임없이 몰려드는 적 유닛들이 공격해 온다. 맵의 특징은 이름 그대로 포켓몬 캐릭터들이 다수 등장한다는 점으로, 여러 가지 포켓몬이 각각의 스킬이나 특성을 지닌 채 웨이브를 이루며 공격해 온다. 플레이어는 제한된 자원으로 이 포켓몬 웨이브를 막아내야 하며, 때로는 포켓몬을 직접 조종해 반격을 가하기도 한다. 맵의 디자인상으로는 중앙 본진을 중심으로 세 방향으로 길이 나뉘어 있으며, 길 중간중간에 포션이나 아이템이 배치되어 있어 이를 활용해 생존률을 높일 수 있다. 또한 맵의 가장자리에는 방어 타워를 건설할 수 있는 공간이 있어, strategic한 플레이가 요구된다. 초반에는 비교적 약한 적들이 나오지만, 웨이브가 진행될수록 점점 강해지는 포켓몬들이 등장하며 난이도가 상승한다. 때문에 초보자는 게임의 흐름을 익히는 데 어려움을 느낄 수 있지만, 익숙해지면 전략적 깊이를 즐길 수 있는 맵이다. 특히 포켓몬이라는 익숙한 콘텐츠가 게임의 재미를 더해주며, 다양한 포켓몬의 능력치를 활용해 공략법을 찾는 것이 핵심 포인트다. 추천 대상은 디펜스 장르를 좋아하는 유저들이며, 특히 포켓몬 팬들에게는Interesting한 경험을 제공할 것이다. 플레이 전에는 포켓몬별 스킬이나 맵의 구조를 미리 숙지하고, 방어 타워의 배치와 아이템 사용 타이밍을 연습해 두는 것이 중요하다. This StarCraft: Brood War custom map, 《Pokémon Sunken Defense Pokémon Addition》, blends the defense genre with Pokémon themes into a compelling tower defense-style experience. The core gameplay revolves around protecting your base from relentless waves of enemy units, which include a variety of Pokémon characters, each with unique abilities or traits. The map features a central base protected by three main paths, where players must strategically place defensive towers and use potions or items scattered along the routes to survive. As the waves progress, the Pokémon grow stronger, increasing the challenge. Early waves are manageable, but later stages demand careful planning and adaptability. Novice players may find the learning curve steep, but those familiar with tower defense mechanics will appreciate the depth. The Pokémon theme adds a layer of familiarity and fun, especially for fans of the franchise. Players are advised to study each Pokémon’s abilities, plan tower placements wisely, and manage resources efficiently to maximize their chances of success.
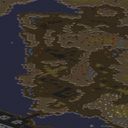
챕터 포: 리버스 (Chapter Four: Rebirth)
‘챕터 포: 리버스(Chapter Four: Rebirth)’는 스타크래프트 브루드워의 유즈맵으로, 캠페인 형식의 디펜스 장르에 속한다. 내부 맵 제목과 설명에서 확인할 수 있듯, 프로토스 기지인 타소니스가 침묵하고 저그가 숨은 곳을 기어 나오는 상황으로 전개된다. 맵은 황무지 타일셋을 기반으로 4096x6144 크기의 넓은 필드를 제공하며, 플레이어는 단독으로 저그의 침공을 방어하는 목표를 수행한다. 게임 시작 시 ‘USE MAP SETTINGS’를 통해 veteren(베테랑) 수준의 난이도가 적용되는 것으로 추정되며, 스토리 흐름상 저그의 공격 패턴과 프로토스 방어 시설의 효율성을 테스트하는 구조로 보인다. 플레이 방식은 기본적으로 디펜스 타입으로, 미네랄과 베스핀 가스를 확보한 후 방어 건물을 건설하고 유닛을 생산하여 waves(웨이브) 형태로 밀려오는 저그 유닛을 막아내는 방식이다. 맵 곳곳에 배치된 프로토스 방어 시설과 지형적 이점을 활용해 효율적인 전략을 수립해야 한다. 특히 넓은 맵 크기만큼이나 저그의 공격 루트가 다양하게 배치되어 있으므로, 초기 자원 관리와 건물 배치의 중요성이 크다. 또한 맵 제목에서 유추할 수 있듯이, ‘리버스’는 단순히 방어전을 펼치는 것만이 아니라 과거의 패배를 딛고 일어서는 스토리적 의미를 내포하고 있어 감성적 몰입감을 높이는 요소로 작용할 것으로 보인다. 이 맵은 스타크래프트의 캠페인 스타일을 재현하면서도 유즈맵만의 자유로운 플레이를 제공하는 점이 특징이다. 특히 베테랑 난이도답게 저그의 공격력이 강하고 패턴이 다양해 숙련도가 요구된다. 프로토스 유저라면 익숙한 건물과 유닛을 활용할 수 있지만, 좁은 시야와 지속적인 압박감을 주는 저그의 공격을 efficiently 막아내야 한다. 초보자는 공략을 숙지한 후 도전하는 것이 좋으며, 경험 있는 플레이어는 최적의 빌드 오더와 멀티 태스킹 능력을 테스트할 수 있을 것이다. 맵의 스케일과 몰입감 있는 스토리 덕분에 단독 플레이임에도 불구하고 타 유즈맵과는 차별화된 경험을 제공한다. 공략 팁으로는 초기 단계에서 프로브를 적극 활용해 지뢰(마인)나 포톤 캐논을 효율적으로 배치하는 것이 중요하다. 또한 자원 채취를 최적화하고, 저그의 주요 공격 루트를 사전에 파악해 방어선을 구축하는 전략이 필수적이다. 맵 곳곳에 숨겨진 자원이나 보너스 목표가 있는지 여부는 확인되지 않지만, 넓은 필드만큼이나 전략의 다양성이 보장된다는 점에서 반복 플레이의 가치가 있다. 저그의 공격 패턴을 익히고, 프로토스의 강력한 광선 무기와 보호막을 활용해 승리를 이끌어내야 한다. ‘Chapter Four: Rebirth’ is a custom map for *StarCraft: Brood War*, falling under the defense genre in a campaign-style format. As indicated in the internal map title and description, the scenario unfolds with the Protoss base of Tarsonis silenced and the Zerg emerging from their hidden lairs. The map features a vast 4096x6144 field based on a wasteland tileset, where the player must defend alone against waves of Zerg attacks. Based on the ‘USE MAP SETTINGS’ option, the difficulty appears to be set to veteran level, and the structure of the game tests both the Zerg’s attack patterns and the efficiency of the Protoss defensive structures. The gameplay revolves around a defense-type format, where players gather minerals and Vespene gas to construct defensive buildings and produce units to fend off Zerg waves. Strategic planning is essential, utilizing the Protoss defensive structures and terrain advantages scattered across the map. Given the map’s expansive size, the Zerg’s attack routes are varied, making early resource management and building placement critical. Additionally, the title ‘Rebirth’ suggests not just a defensive battle but a narrative of overcoming past defeat, adding emotional depth to the experience. This map stands out by blending *StarCraft*’s campaign style with the freedom of a custom map. The veteran difficulty ensures strong and diverse Zerg attacks, demanding player skill. While Protoss players can utilize familiar buildings and units, they must contend with the Zerg’s relentless pressure and limited visibility. Beginners should familiarize themselves with strategies before attempting, while experienced players can test optimal build orders and multitasking abilities. The map’s scale and immersive story provide a unique experience even in solo play, setting it apart from other custom maps. Tips for success include actively using Probes to efficiently place mines or photon cannons early on. Optimizing resource gathering and preemptively securing key attack routes are vital strategies. While hidden resources or bonus objectives remain unverified, the map’s vastness guarantees diverse strategic possibilities, making repeated play worthwhile. Mastering the Zerg’s attack patterns and leveraging the Protoss’s powerful beam weapons and shields are key to securing victory.
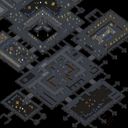
Chapter Six: Cutting the Cord
스타크래프트 브루드워의 유즈맵 ‘Chapter Six: Cutting the Cord’는 캠페인 형식의 디펜스 맵으로, 플레이어가Terran의 입장에서 Protoss 함대를 보호하며 Overmind의 공격을 방어하는 구조를 갖추고 있다. 맵 중앙의 Protoss 함대는 주요 보호 대상이지만, 게임 시작 직후부터 끊임없이 몰려오는 저그의 공격을 막아내야 한다. 맵은 넓은 우주 타일셋을 기반으로 하며, Protoss 함대 주변에 배치된 방어 건물과 유닛들을 활용해 저그의 침공을 저지하는 것이 핵심이다. 플레이어는 제한된 자원으로 매 waves마다 쏟아지는 저글링, 히드라리스크, 뮤탈리스크 등 다양한 저그 유닛을 상대해야 하며, 각 웨이브가 지나갈 때마다 새로운 공격 패턴이 등장하는 것으로 보인다. 맵의 난이도는 초반에는 비교적 쉬운 편이지만, 후반부로 갈수록 저그의 공격 규모와 다양성이 증가하여 전략적인 대처가 요구된다. 방어에 실패하면 Protoss 함대가 파괴되면서 게임 오버가 되므로, 지속적인 자원 관리와 유닛 배치, 그리고 효율적인 방어 전략이 필수적이다. 맵의 분위기는 테란의 절박한 상황과 저그의 위협적인 공세를 강조하며, 플레이어에게 긴장감과 성취감을 동시에 제공한다. 초보 플레이어는 방어 건물의 배치와 자원 수급에 집중해야 하며, 숙련된 플레이어는 효율적인 유닛 컨트롤과 다중 방어 라인 구축을 통해 더 높은 난이도에서도 승리를 노릴 수 있다. 특히 Protoss 함대의 보호는 필수적이므로, 함대 주변의 방어선을 견고히 유지하는 것이 중요하다. 맵의 진행은 자동으로 웨이브가 발생하는 방식으로 추정되며, 승리 조건은 모든 웨이브를 성공적으로 방어하는 것으로 보인다. 플레이 전에는 맵의 방어 건물과 유닛 구성을 숙지하고, 각 웨이브별로 등장하는 적 유닛의 패턴을 분석하는 것이 성공의 열쇠가 될 것이다. StarCraft: Brood War's custom map *Chapter Six: Cutting the Cord* is a defense-style map with a campaign structure where players take on the role of the Terran, protecting Protoss fleets while fending off attacks from the Overmind. The central Protoss fleet is the primary objective, but players must immediately defend against relentless Zerg assaults from the start. The map features a vast space-themed tileset, and the key strategy involves using defensive structures and units positioned around the Protoss fleet to repel the Zerg invasion. Players must manage limited resources to counter waves of Zerglings, Hydralisks, Mutalisks, and other Zerg units, with each wave introducing new attack patterns. While the early waves are relatively manageable, the difficulty escalates in later stages as the Zerg’s scale and variety of attacks grow, demanding strategic adaptation. Failing to defend results in the Protoss fleet being destroyed and a game over, making constant resource management, unit positioning, and effective defense tactics essential. The map’s atmosphere emphasizes the Terran’s desperate situation and the Zerg’s overwhelming threat, delivering both tension and a sense of accomplishment. Beginners should focus on placing defensive structures and resource gathering, while experienced players can aim for higher difficulties by mastering unit control and establishing multiple defensive lines. Protecting the Protoss fleet is critical, so maintaining a strong perimeter around it is vital. The map appears to progress with waves triggered automatically, and the victory condition likely involves successfully defending all waves. Before playing, it’s crucial to familiarize yourself with the map’s defensive structures and unit compositions, and analyzing the enemy patterns for each wave will be key to success.
맵 선택 가이드
태그는 맵의 핵심 특징을 빠르게 설명하지만 제작 버전마다 규칙이 다를 수 있습니다. 상세 설명에서 권장 인원, 난이도, 플레이 시간과 버전을 함께 확인한 뒤 다운로드하세요.