
웨이브 공격 스타크래프트 맵 모음
'웨이브 공격' 태그가 등록된 맵을 모았습니다. 장르 하나로 찾기 어려운 플레이 방식, 난이도와 특징을 중심으로 인기 맵과 최신 맵을 비교해 보세요.
- 등록 맵
- 10개
- 누적 다운로드
- 3
- 누적 조회
- 388
인기 맵
다운로드와 조회 반응이 높은 맵입니다.
--- M A T R I X - 3.7 ---
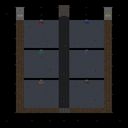
스타크래프트 브루드워의 유즈맵으로 유명한 ‘--- M A T R I X - 3.7 ---’은 우주 배경의 디펜스 장르 맵으로, 플레이어는 외계 세력의 침공을 방어하는 임무를 맡습니다. 맵의 전체적인 구조는 가로 3072, 세로 4096의 넓은 필드에 펼쳐져 있으며, 타일셋은 우주 테마로 구성되어 atmosferic한 분위기를 연출합니다. 맵의 특징은 중앙에 위치한 거대한 적 기지 주변으로 여러 개의 방어 타워가 배치되어 있으며, 플레이어는 자원을 확보해 방어 건물과 병력을 생산해 적의 공격을 막아야 합니다. 맵의 진행은 주로 적의 웨이브가 지속적으로 몰려오는 형태로, 각 웨이브마다 다양한 유닛과 조합을 상대해야 합니다. 방어에 성공할 때마다 보상을 얻으며, 이를 바탕으로 더 강력한 방어 체계를 구축할 수 있습니다. 맵의 난이도는 중간 정도로 설정되어 있지만, 후반부로 갈수록 적의 공격력이 급증하므로 전략적인 자원 관리와 방어선 구축이 중요합니다. 특히, 맵의 넓은 공간을 활용한 멀티 위치 선정과Resource gathering의 효율성이 승패를 좌우할 수 있습니다. 초보 플레이어는 방어 우선순위를 잘못 잡는 경우가 많으므로, 초반 자원 확보와 방어 건물의 초기 배치에 신경 써야 합니다. 또한, 후속 웨이브의 공격을 예측하고 미리 대비할 수 있도록 맵의 지형을 숙지하는 것이 중요합니다. 이 맵은 넓은 필드와 지속적인 공격 패턴으로 인해 긴장감과 전략적 깊이를 동시에 제공하며, 특히 디펜스 장르를 좋아하는 플레이어에게 추천할 만합니다. 다만, 넓은 맵 특성상 자원 gathering에 시간이 소요될 수 있으니, 이를 고려한 플레이가 필요합니다. 맵의 인코딩은 cp949로 한국어 환경에서 문제없이 구동될 수 있도록 지원합니다. 플레이 전에는 맵의 기본 구조와 방어 건물의 배치 위치를 미리 확인해 두는 것이 좋습니다. 또한, 후속 업데이트 버전이 존재하는 만큼 최신 버전을 사용하는 것이 바람직합니다. This Brood War custom map, ‘--- M A T R I X - 3.7 ---’, is a space-themed defense game where players must protect their base from relentless alien invasions. The map spans a vast 3072x4096 grid with a cosmic tileset, creating an immersive sci-fi atmosphere. Players start with limited resources and must strategically expand their territory while constructing defenses and producing units to fend off enemy waves. The gameplay revolves around surviving progressively stronger enemy assaults, with each successful defense granting rewards to upgrade fortifications. Mid-game presents a balanced challenge, but later stages require careful resource management and adaptive strategies as enemy compositions become more complex. Beginners often struggle with initial base layouts and priority defenses, so early preparations are crucial. The map’s spacious design demands smart multi-positioning and efficient resource gathering to maintain momentum. While the open terrain offers strategic depth, it can also slow down new players unfamiliar with space-themed defenses. This title is ideal for fans of tower defense mechanics who enjoy a mix of tension and tactical planning. Always check for the latest version (3.7) to ensure compatibility and balance improvements. Reviewing the map’s terrain and defense hotspots before play helps optimize early-game decisions.
엘드리치 레이크 1.6 (Eldritch Lake 1.6)
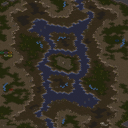
스타크래프트 브루드워의 유즈맵 《엘드리치 레이크 1.6》(Eldritch Lake1.6)은 수중 테마의 디펜스형 맵으로, 최대 8명의 플레이어가 한 팀을 이뤄 협동하는 구조다. 맵 중앙에는 거대한 호수가 자리 잡고 있으며, 주변에는 지형과 자원이 배치되어 있는 가운데 플레이어는 이 공간을 방어하며 지속적인 공격을 버텨내야 한다. 맵의 이름은 ‘엘드리치’라는 다소 낯선 단어가 포함되어 있지만, 사실상 ‘이상한 호수’라는 뜻의 상징적 제목으로 보인다. 맵의 분위기는 사막 타일셋을 기반으로 하지만 수중 지역과 섬 지형이 조화를 이뤄 신비로운 느낌을 자아낸다. 맵의 주요 특징은 중앙 호수 주변의 좁은 길목을 중심으로 적의 공격을 허용하지 않고 방어 구조물을 구축하는 데 있다. 맵의 구조상 플레이어는 호수 주변의 고지대와 섬 지형을 활용해 방어선을 구축할 수 있으며, 자원의 확보와 건물을 배치하는 공간이 한정적이므로 전략적 선택이 중요하다. 특히, 맵의 지형이 복잡하고 좁은 통로로만 접근이 가능한 구조이기 때문에, 초반부터 방어 태세를 갖추지 않으면 순식간에 밀리기 십상이다. 맵의 진행은 주로 적의 웨이브가 지속적으로 밀려오는 방식으로, 각 웨이브마다 적의 종류와 수가 조금씩 달라지는 것으로 추정된다. 플레이어는 각자의 역할을 분담해 방어 타워를 건설하고, 자원을 효율적으로 관리하며, 적의 공격을 효과적으로 방어해야 한다. 맵의 난이도는 맵의 구조상 초보자보다는 중급 이상의 플레이어에게 적합한 편으로 보인다. 초보자의 경우 좁은 길목과 복잡한 지형 때문에 자원 관리와 방어 전략 수립이 어려울 수 있으며, 적의 공격 패턴을 파악하지 못해 순식간에 무너질 위험이 크다. 반면, 중급 이상의 플레이어는 지형의 이점을 최대한 활용해 방어선을 구축하고, 자원의 흐름을 예측하며, 적의 공격을 분산시키는 전략을 구사할 수 있을 것이다. 맵을 플레이하기 전에는 반드시 맵의 지형과 자원 분포를 숙지해야 하며, 방어 타워의 배치와 자원 확보의 우선순위를 신중히 결정해야 한다. 또한, 팀원과의 원활한 소통과 역할 분담을 통해 효율적인 방어 체계를 구축하는 것이 성패의 관건이다. 이 맵은 디펜스 장르에 익숙한 플레이어에게는 흥미로운 도전 과제가 될 것이며, 협동 플레이를 중시하는 유저들에게는 훌륭한 선택지가 될 것이다. 그러나 복잡한 지형과 제한된 공간 때문에 플레이 시간이 다소 길어질 수 있으며, 자원의 부족으로 인한 타워 건설의 지연이 발생할 가능성이 있으니 주의가 필요하다. StarCraft: Brood War's custom map *Eldritch Lake 1.6* is a defense-style map with an underwater theme, designed for up to eight players to team up and collaborate. At the center of the map lies a massive lake, surrounded by terrain and resources, where players must defend the area while enduring continuous enemy attacks. Though the name includes the somewhat unfamiliar word "Eldritch," it likely symbolizes a title meaning "strange lake." The map’s atmosphere is based on a desert tileset but harmonizes with underwater regions and island terrain to evoke a mysterious feel. The map’s key feature revolves around the narrow pathways surrounding the central lake, where players must build defensive structures to fend off enemy assaults. Due to the map’s layout, players can establish defensive lines by utilizing high ground and islands, but limited space for resource gathering and building placement makes strategic decisions crucial. The complex terrain and restricted access through narrow passages mean that failing to set up defenses early can lead to quick defeat. The gameplay primarily involves waves of enemies continuously pushing forward, with each wave featuring varying enemy types and numbers. Players must assign roles, construct defensive towers, manage resources efficiently, and effectively counter attacks. The map’s difficulty seems better suited for intermediate to advanced players rather than beginners, as the narrow paths and intricate terrain can make resource management and defense planning difficult for newcomers. Novices may struggle to grasp enemy attack patterns and could collapse quickly without a solid strategy. In contrast, intermediate or advanced players can leverage the terrain to build strong defenses, predict resource flow, and disperse enemy attacks strategically. Before playing, it’s essential to thoroughly understand the map’s terrain and resource distribution, carefully deciding where to place defensive towers and prioritize resource collection. Effective communication and role distribution among teammates are critical to building a cohesive defense. For players familiar with defense genres, this map offers an engaging challenge, while cooperative players will find it an excellent choice. However, the complex terrain and limited space may result in longer playtimes, and resource shortages could delay tower construction, so caution is advised.
핵무기 방어 작전 6000 (Nuclear Defense 6ooo)
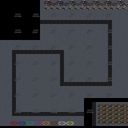
스타크래프트 브루드워의 대표적인 디펜스 장르 유즈맵인 〈Nuclear Defense 6ooo〉는 핵미사일과 방어전을 중심으로 펼쳐지는 긴장감 넘치는 전투를 경험할 수 있는 맵입니다. 맵의 핵심은 중앙에 위치한 핵미사일 기지 주변을 오가는 웨이브를 방어하는 것으로, 아군 기지를 파괴하려는 적의 무한한 공격을 효과적으로 저지해야 합니다. 맵 구조는 중앙 기지를 보호하는 방어 타워와 자원 채취 지역, 그리고 적의 공격 루트가 명확히 구분되어 있어 전략적인 배치와 빠른 판단이 요구됩니다. 맵 곳곳에 배치된 방어 건물들은 초기에는 빈약해 보이지만, 자원을 충분히 확보하고 적절한 업그레이드를 진행하면 강력한 요새로 탈바꿈할 수 있습니다. 특히 적의 공격을 막아내는 동시에 자원을 안정적으로 확보하는 균형 잡힌 플레이가 승리의 열쇠가 됩니다. 초보자도 쉽게 접근할 수 있는 기본적인 조작법이지만, 고수들은 방어 라인을 clever하게 구축하고 최적의 자원 관리로 적의 공격을 무력화시키는 전략을 펼칠 수 있습니다. 맵의 볼륨은 크지 않지만, 핵미사일이라는 독특한 테마와 반복되는 웨이브 공격이 플레이어의 긴장감을 지속적으로 자극합니다. 이 맵은 디펜스 장르에 익숙한 플레이어뿐만 아니라, 새로운 전략적 도전을 원하는 유저들에게도 추천할 만한佳作입니다. 다만, 방어 타워의 배치와 업그레이드 타이밍을 잘못 잡으면 쉽게 무너질 수 있으니, 초반 자원 관리와 타워 위치 선정에 유의해야 합니다. 핵무기의 위협을 느끼며 아군을 지켜내는 짜릿한 경험을 원한다면 〈Nuclear Defense 6ooo〉를 시도해 보세요. Nuclear Defense 6000 is a classic defense genre custom map in StarCraft: Brood War, offering intense battles centered around nuclear missiles and defensive combat. The core gameplay revolves around defending the central nuclear missile base from waves of enemies, preventing them from destroying your base with relentless attacks. The map’s structure clearly separates the central base’s defensive towers, resource gathering areas, and enemy attack routes, requiring strategic placement and quick decision-making. While the defensive structures scattered across the map may seem weak at first, they can transform into formidable fortresses with sufficient resources and proper upgrades. Balancing defense against enemy waves while securing resources steadily is key to victory. Though the mechanics are simple enough for beginners, skilled players can craft clever defensive lines and neutralize attacks through optimal resource management. Despite its compact size, the unique theme of nuclear missiles and the recurring wave attacks keep players on edge. This map is a masterpiece that appeals not only to defense genre veterans but also to players seeking fresh strategic challenges. However, misplacing towers or upgrading at the wrong time can lead to a quick collapse, so careful attention to early resource management and tower positioning is essential. If you crave the thrill of defending your forces under the threat of nuclear weapons, give Nuclear Defense 6000 a try.
파일론 디펜스 (Pylon Defense v1.08i)
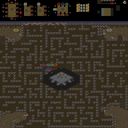
스타크래프트 브루드워의 대표적인 디펜스 유즈맵 ‘파일론 디펜스(Pylon Defense)’는 플레이어가 보호해야 할 파일런을 중심으로 끊임없이 몰려드는 적 유닛을 방어하는 전형적인 구조를 갖추고 있다. 맵 상단 중앙에 위치한 파일런을 중심으로 하단 진영에서 적의 공격을 차단하며, 적의 파상 공세를 효과적으로 막아내야만 승리를 거둘 수 있다. 게임은 정해진 웨이브 수만큼 적의 공격을 버텨내는 방식으로 진행되며, 파일런 주변의 방어 건물과 유닛 생산 건물을 최대한 효율적으로 배치해 지속적인 방어를 구축하는 것이 핵심 전략이다. 적의 공격 패턴은 시간이 지날수록 점점 강력해지며, 때로는 공중 유닛이나 특수 유닛이 등장하기도 해서 플레이어는 방어뿐만 아니라 공격력 강화와 자원 관리에 신경을 써야 한다. 파일론 디펜스는 기본적인 디펜스 맵이지만, 방어 건물 배치와 유닛 생산 타이밍, 자원 수급의 균형을 맞추는 것이 승리의 관건이다. 초보 플레이어는 방어 건물과 유닛 생산의 기본 구성만으로도 충분히 즐길 수 있지만, 숙련된 플레이어는 최적의 방어 라인 구축과 효율적인 자원 운용을 통해 더 긴 웨이브를 버텨내는 도전을 즐길 수 있다. 이 맵은 디펜스라는 장르의 정석을 보여주면서도, 간단한 조작과 명확한 승리 조건 덕분에 누구나 쉽게 접근할 수 있으며, 반복 플레이를 통해 전략적 깊이를 더할 수 있다. 파일론 디펜스는 특히 디펜스 유즈맵을 좋아하는 유저들에게 강력히 추천할 만한 작품으로, 오랜 기간 사랑받아 온 classic 맵 중 하나이다. 플레이 전에는 방어 건물의 배치와 유닛 생산 건물의 위치를 미리 숙지하고, 초반 자원 수급을 안정적으로 유지하는 것이 중요하다. 또한, 적의 공격 패턴을 예측하고 방어 라인을 강화하는 타이밍을 잘 잡는 것이 승리의 열쇠가 된다. 파일론 디펜스는 단순한 방어 게임이 아니라, 전략과 집중력을 요구하는Challenge가 매력적인 유즈맵이다. 파일론 디펜스를 플레이하기 전에는 방어 건물의 배치와 유닛 생산 건물의 위치를 미리 확인하고, 초반 자원 수급을 안정적으로 유지하는 것이 중요하다. 또한, 적의 공격 패턴을 예측하고 방어 라인을 강화하는 타이밍을 잘 잡는 것이 승리의 열쇠가 된다. 이 맵은 디펜스 장르의 정석을 보여주며, 누구나 쉽게 접근할 수 있지만, 전략적 깊이를 더하기 위해 반복 플레이가 권장된다. 특히 방어 건물과 유닛 생산의 균형을 맞추는 것이 핵심이며, 숙련될수록 더 긴 웨이브를 버텨내는 도전에 도전할 수 있다. 파일론 디펜스는 classic 디펜스 유즈맵으로써 오랜 기간 사랑받아 온 작품으로, 디펜스 장르를 좋아하는 유저라면 반드시 한 번쯤 플레이해 볼 만한 가치가 있다. Pylon Defense is one of the classic defense-style custom maps in StarCraft: Brood War, where players must protect a central pylon from relentless waves of enemy units. The gameplay revolves around building and managing a defense around the pylon located at the top center of the map, while fending off attacks from the lower enemy base. The core strategy involves efficiently placing defensive structures and producing units to withstand increasingly powerful enemy assaults as waves progress. Over time, the enemy introduces stronger units, including air and special units, requiring players to balance defense, resource management, and offensive capabilities. While the map is accessible to beginners, experienced players can enhance their strategy by optimizing defensive lines and resource allocation to survive longer waves. Pylon Defense exemplifies the essence of defense maps with its straightforward mechanics and clear victory conditions, making it a timeless favorite among custom map enthusiasts. Before playing, it is crucial to familiarize yourself with the placement of defensive buildings and unit production structures, and to maintain stable early-game resource gathering. Predicting enemy attack patterns and reinforcing defenses at the right moments are key to achieving victory. Beyond its simple premise, the map offers a rewarding challenge that blends strategy and focus, making it a must-play for fans of the defense genre. Repeated playthroughs are encouraged to refine tactics and explore deeper strategic layers.
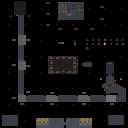
Korean Defense 3
스타크래프트 브루드워의 대표적인 디펜스 장르 유즈맵인 <strong>Korean Defense 3</strong>는 중앙에 위치한 기지 방어와 지속적인 웨이브 공격을 처리하는 전략적인 플레이를 요구하는 맵입니다. 맵 중앙의 넥서스를 중심으로 테란, 저그, 프로토스 세 종족의 건물이 배치되어 있으며, 플레이어는 각 웨이브에서 몰려오는 적군 유닛을 상대로 방어선을 구축하고 자원을 관리해야 합니다. 맵의 구조는 비교적 단순하지만, 각 웨이브별로 등장하는 적의 조합과 숫자가 점차 증가하며 난이도가 상승하는 특징을 가지고 있습니다. 특히, 적의 공격을 효과적으로 저지하기 위해 방어 건물과 유닛의 조합을 신중히 선택해야 하며, 자원 관리를 소홀히 하면 순식간에 방어선이 무너질 위험이 있습니다. 맵 상단과 하단에는 각각의 플레이어 기지가 위치하며, 중앙의 넓은 공간에서 벌어지는 전투가 이 맵의 핵심입니다. 적의 공격을 방어하는 동시에 자원을 꾸준히 확보하여 병력을 보강해야 하기 때문에, 전략적 사고와 실시간 판단력이 요구되는 맵으로 평가됩니다. 초보 플레이어는 방어 건물의 배치와 자원 관리에서 어려움을 느낄 수 있으며, 숙련된 플레이어는 보다 효율적인 병력 운용과 타이밍 공격을 통해 보다 쉽게 클리어할 수 있습니다. 맵의 밸런스는 대체로 잘 짜여져 있지만, 특정 조합의 적에 대해 취약할 수 있으므로 다양한 전략을 연습하는 것이 중요합니다. 또한, 맵의 해상도와 타일셋이 우주 테마로 구성되어 있어 시각적으로도 흥미로운 요소로 작용합니다. 이 맵은 디펜스 장르에 익숙한 플레이어는 물론, 전략적 플레이를 즐기는 모든 유저에게 추천할 만한佳作입니다. 플레이 전에는 반드시 각 웨이브별 적의 패턴과 방어 건물의 효율적인 배치 방법을 숙지하고, 자원 관리 계획을 세우는 것이 중요합니다. 또한, 맵의 중앙 지역을 최대한 활용하여 방어선을 구축하고, 적의 공격을 효율적으로 저지할 수 있도록 준비를 철저히 해야 합니다. Korean Defense 3 is a classic defense genre custom map in StarCraft: Brood War that requires strategic play focused on base defense and handling continuous wave attacks. The map centers around a Nexus located in the middle, with buildings from Terran, Zerg, and Protoss factions arranged around it. Players must build defensive structures and manage resources to fend off waves of enemy units that grow increasingly challenging over time. The map features a relatively simple structure, but the increasing difficulty comes from the growing number and variety of enemies with each wave. Effective defense relies on carefully selecting and combining defensive buildings and units, as poor resource management or misplaced defenses can lead to a quick defeat. Player bases are situated at the top and bottom of the map, with the central area serving as the primary battleground. Success depends on balancing defense with resource gathering to reinforce your forces. Beginners may struggle with defense placement and resource management, while experienced players can optimize unit deployment and timing for quicker clearances. The map’s balance is generally well-executed, though certain enemy compositions may pose challenges, making versatility in strategy essential. The space-themed tileset and high-resolution design add visual appeal, enhancing the immersive experience. Recommended for both seasoned defense genre fans and players who enjoy strategic gameplay, Korean Defense 3 offers a rewarding challenge. Before playing, familiarize yourself with the enemy patterns per wave, optimize defensive structure placement, and plan resource management carefully. Maximizing the use of the central area and preparing an effective defense strategy are key to success.
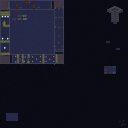
혈압 마라톤 빠삐놈버전 (Blood Pressure Marathon: Papinomb Version)
혈압 마라톤 빠삐놈버전은 스타크래프트 브루드워의 유즈맵답게 속도감과 리듬감을 중시하는 디펜스 장르의 맵으로, 유저들에게 끊임없는 긴장감을 제공한다. 맵은 중앙에 넓은 통로를 두고 양측에 건물을 배치한 구조로, 플레이어는 지속적으로 밀려오는 적을 방어하면서 동시에 맵 곳곳에 배치된 함정이나 보급로를 활용해야 한다. 특히 맵 좌우에 배치된 붉은색 건물들은 단순한 방어 거점이 아니라, 적의 공격 루트를 교란하거나 추가적인 자원을 확보하는 데 중요한 역할을 한다. 맵의 특징 중 하나는 빠른 진행 속도와 더불어, 중앙 통로의 좁은 공간에서 벌어지는 집단 전투로 인해 혈압을 상승시키는 디자인이다. 플레이어는 끊임없이 몰려오는 적을 상대로 전략을 세워야 하며, 특히 초반과 중반의 밀집된 적 웨이브를 어떻게 버텨내느냐가 승패를 가를 가능성이 크다. 또한, 맵의 배경은 화산 타일셋으로 이루어져 있어 붉은색과 노란색의 강렬한 색채가 시각적인 긴장감을 더한다. 이 맵은 초보보다는 중수 이상의 플레이어에게 적합하며, 빠른 판단력과 손속을 요구하는 만큼 반복 플레이를 통해 실력을 향상시킬 수 있는 구조로 설계되어 있다. 추천 포인트는 중앙 통로의 좁은 길목에서 벌어지는 전투에서 아군의 위치를 잘 조절하는 것과, 건물을 최대한 활용하여 적의 진격을 지연시키는 것이다. 또한, 보급로를 확보하여 자원의 부족 없이 지속적인 전투를 이어갈 수 있도록 신경 써야 한다. 이 맵은 단순히 적을 죽이는 것이 아니라, 끊임없이 변화하는 전장에서 어떻게 살아남느냐가 관건인 만큼, 전략적 사고가 필요하다는 점을 기억해야 한다. Blood Pressure Marathon: Papinomb Version is a fast-paced defense-style custom map in StarCraft: Brood War, designed to keep players on edge with its rhythm and intensity. The map features a wide central corridor flanked by buildings on both sides, where players must continuously fend off waves of enemies while strategically utilizing traps and supply routes scattered across the map. The red buildings on the left and right aren’t just defensive structures—they serve as key points to disrupt enemy attack paths or secure additional resources. What sets this map apart is its relentless pace and the chaotic, close-quarters combat in the narrow central corridor, which cranks up the tension. Players must constantly adapt their strategies to handle the dense enemy waves, especially during the early and mid-game where survival hinges on quick decision-making. The volcanic tile set, with its bold reds and yellows, further amplifies the visual stress of the battlefield. This map is best suited for intermediate to advanced players who thrive under pressure, as it demands sharp reflexes and precision. Key tips include controlling unit positioning in the cramped central corridor, using buildings to delay enemy advances, and prioritizing supply route control to avoid resource shortages. Unlike mindless slaughters, this map challenges players to outthink a dynamic battlefield, making it a test of both reflexes and strategy.
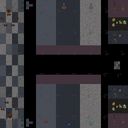
오버마인드 디펜스 8.1 파이널! (Overmind Defence 8.1 Final!)
‘오버마인드 디펜스 8.1 파이널!’은 스타크래프트: 브루드워의 대표적인 디펜스 장르 유즈맵으로, 플레이어들이 끊임없이 밀려오는 적군 웨이브를 막아내며 수비전을 펼치는 플레이에 집중된 작품이다. 맵은 넓은 우주 테마의 타일셋을 활용해 우주 공간 feel을 살렸으며, 중앙에 위치한 넥서스와 주변의 방어 건물을 지키며 Ressources(자원)를 모아 업그레이드와 방어 병력을 강화하는 것이 핵심 전략이다. 공격과 방어의 균형을 맞추는 것이 관건으로, 초반에는 소규모 유닛으로 버티며 자원을 확보하고, 중반부터는 방어 건물과 유닛 조합을 최적화해 웨이브를 효과적으로 방어해야 한다. 맵의 구조는 비교적 넓고 복잡한 배치로 이루어져 있어, 방어 라인을 잘못 설정하면 예기치 못한 타격을 입기 쉬우므로 사전 계획이 중요하다. 또한, 각 웨이브마다 등장하는 적군의 조합과 패턴이 조금씩 다르기 때문에, 이를 숙지하고 대비하는 것이 승리의 열쇠다. 이 맵은 혼자서 플레이하기보다는 팀 단위로 협동하며 방어 라인을 구축하는 방식이 가장 효과적이며, 특히 초보자보다는 디펜스 장르에 익숙한 플레이어들에게 추천할 만한 작품이다. 게임의 난이도는 보통 수준으로 설정되어 있지만, 후반부로 갈수록 압박이 심해지므로 꾸준한 피드백과 전략 수정이 필요하다. 플레이 전에는 맵의 방어 포인트와 주요 자원 수집 지역을 미리 파악해 두는 것이 좋다. 또한, 각 웨이브 간의 간격이 비교적 긴 편이므로,在此期间Upgrade와 방어 건물 배치를 신중히 결정해야 한다. 이 맵은 오랜 기간 동안 디펜스 장르의 인기를 유지해온 만큼, 세심한 밸런스와 다양한 전략적 선택지를 제공한다는 점에서 유즈맵 팬들에게 꾸준한 사랑을 받고 있다. 초보자의 경우, 난이도를 낮춰서 연습 모드를 활용하거나, 팀원들과의 협력을 통해 점차 숙련도를 높이는 것이 바람직하다. "Overmind Defense 8.1 Final!" is a classic defense-style custom map in *StarCraft: Brood War*, where players focus on repelling endless waves of enemy forces in a defensive battle. The map utilizes a vast space-themed tileset to evoke a cosmic atmosphere, with the core strategy revolving around protecting the central Nexus and surrounding defensive structures while gathering resources to upgrade and reinforce your defenses. Balancing offense and defense is key—early on, you must hold out with small units while securing resources, then optimize your defensive structures and unit compositions to effectively counter each wave as the game progresses. The map features a relatively large and complex layout, making it easy to take unexpected damage if defensive lines are poorly placed, so careful planning is essential. Additionally, each wave introduces slightly different enemy unit compositions and patterns, so recognizing and adapting to these variations is crucial to victory. While the map can be played solo, the most effective approach is team-based cooperation to establish defensive lines, making it particularly recommended for players familiar with the defense genre rather than beginners. The difficulty is set to a moderate level, but pressure intensifies significantly in the later stages, requiring consistent feedback and strategic adjustments. Before playing, it's wise to scout defensive key points and major resource collection areas. Since the intervals between waves are relatively long, you should carefully decide when and where to upgrade and place defensive structures. Having maintained its popularity in the defense genre for a long time, this map continues to earn consistent love from custom map fans for its meticulous balance and diverse strategic options. Beginners are advised to lower the difficulty for practice or improve their skills through teamwork with others.
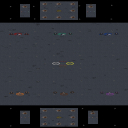
Evolves 2003
스타크래프트 브루드워의 유즈맵 Evolves 2003은 우주 공간을 배경으로 한 디펜스 장르 맵으로, 6명의 플레이어가 각각의 기지를 방어하며 적의 대군을 상대하는 구조로 구성되어 있다. 맵 중앙에는 거대한 우주 공간이 펼쳐지며, 각 플레이어는 맵의 모서리나 가장자리에 위치한 본진을 중심으로 건물을 건설하고 유닛을 생산해 적의 공격을 막아내야 한다. 맵 곳곳에는 다수의 웨이브로 구성된 적군이 끊임없이 몰려오며, 특히 'mass attack'이라는 특징이 강조되어 대량의 저글링과 같은 저렴한 유닛들이 끊임없이 쏟아진다. 이를 방어하기 위해서는 적절한 건물 배치와 유닛 조합이 필수적이며, 초반에는 자원 수급에 주력하되, 중반 이후로는 방어 타워나 강력한 유닛을 배치해 적의 물량을 차단하는 전략이 요구된다. 맵의 난이도는 적의 물량이 많아질수록 높아지므로, 초보자는 어려움을 느낄 수 있지만, 숙련된 플레이어라면 다양한 전략을 구사해 승리를 이끌어낼 수 있다. 이 맵은 주로 6인 플레이를 전제로 설계되어 있으며, 각 플레이어의 순수한 실력과 순간 판단력이 승패를 좌우하는 요소가 된다. 특히, 우주 배경과 함께 펼쳐지는 대규모 전투는 시각적 볼거리도 뛰어나며, 긴장감과 긴축감을 동시에 느낄 수 있는 흥미로운 경험을 제공한다. 플레이 전에는 맵의 구조와 적의 공격 패턴을 미리 숙지하는 것이 중요하며, 초반 자원 관리와 타워 건설 위치를 신중히 결정해야 한다. 또한, 팀원과의 협력이나 경쟁 여부에 따라 전략이 달라질 수 있으므로, 게임을 시작하기 전 이러한 요소들을 고려하는 것이 좋다. 이 맵은 디펜스 장르를 любители들에게 강력히 추천하며, 특히 대규모 전투와 전략적 깊이를 즐기는 플레이어들에게 적합하다. 추가로, 맵의 이름 'Evolves'는 지속적인 적의 진화와 공격 패턴 변화를 시사하며, 이를 대비한 플레이어의 적응력도 중요하다는 점을 강조한다. Evolves 2003 is a defense-style StarCraft: Brood War custom map set in a cosmic environment, designed for six players. Each player must defend their base against waves of enemy units, primarily consisting of low-cost zerg units like zerglings, as indicated by the 'mass attack' theme. The map features a vast central space where the main action takes place, with players positioned at the edges or corners of the map. Strategic building placement, resource management, and unit composition are crucial for survival, especially as enemy waves intensify over time. The difficulty ramps up significantly in later stages, requiring players to adapt their tactics quickly. While beginners may find the constant enemy pressure challenging, experienced players will enjoy the depth and strategic variety this map offers. The cosmic theme and large-scale battles provide a visually engaging experience, blending tension and excitement. Prior to playing, it’s essential to study the map layout and enemy attack patterns, as early decisions about resource gathering and tower placement can drastically influence the outcome. The name 'Evolves' hints at the dynamic and adaptive nature of enemy attacks, rewarding players who can evolve their strategies accordingly. This map is highly recommended for defense genre enthusiasts, particularly those who enjoy deep strategic gameplay and large-scale battles.
파워 디펜스 1.1v (Power Defense 1.1v)
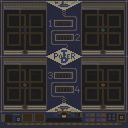
‘Æ÷Ä¿ µðÆ潺 1.1v’는 스타크래프트 브루드워의 전장 중심부에 거대한 방어 구조물이 자리 잡은 UMS(유즈맵) 디펜스 맵이다. 맵의 주된 목표는 적의 끊임없는 웨이브 공격을 방어해 내는 것으로 보이며, 중앙의 요새나 타워를 중심으로 플레이어들이 힘을 합쳐 버티는 형식으로 추정된다. 방어선의 주요 지점은 중앙 요새와 사방에 배치된 방어 건물로, 각 플레이어는 자원과 유닛을 조합해 적절한 방어선을 구축해야 한다. 맵의 디자인에서 확인되는 규칙적인 타워 배치와 좁혀지는 통로들은 방어전의 핵심 전략을 유도하며, 특히 중앙 요새 주변의 좁은 길목은 적의 공격을 효과적으로 차단할 수 있는 포인트로 활용된다. 또한, 맵의 테두리에는 추가적인 방어 시설이 배치되어 있어, 플레이어들이 전면전을 벌이거나 후방 침입을 막아내야 하는 다층적인 전략이 요구된다. 이 맵은 초보자와 숙련자 모두에게 적합한 구조를 가지고 있다. 초보자라면 중앙 요새를 중심으로 한 기본적인 방어 전략을 익힐 수 있으며, 숙련자라면 좁은 길목에서의 효율적인 방어와 자원 관리, 그리고 예비 병력의 배치 등을 통해 더욱 깔끔한 승리를 노릴 수 있다. 다만, 방어선을 구축하는 데 필요한 자원과 유닛의 종류가 명확하지 않기 때문에, 플레이 전 맵 내부의 구조와 자원 배치, 그리고 방어에 필요한 주요 건물과 유닛을 미리 확인하는 것이 중요하다. 또한, 팀 플레이가 가능한 구조로 보이며, 팀원 간의 협력이 성공의 열쇠가 될 가능성이 높다. 맵의 난이도는 보통 수준으로 추정되며, 적의 공격 패턴과 웨이브의 강도에 따라 난이도가 변동될 수 있어, 플레이어의 적응력이 중요하다. ‘Æ÷Ä¿ µðÆæ½스 1.1v’는 스타크래프트의 디펜스 장르를 좋아하는 플레이어들에게 특히 추천할 만한 맵이다. 방어전 특유의 긴장감과 전략적 깊이가 있는 만큼, 반복 플레이를 통해 더욱 효율적인 방어 전략을 개발해 나갈 수 있을 것이다. 또한, 맵의 중앙 구조물과 좁은 통로들은 전략적 깊이감을 더해 주며, 플레이어들이 맵을 숙지하고 나면 더욱 흥미로운 플레이가 가능할 것이다. 만약 당신이 디펜스 맵을 즐기며, 전략적 사고와 팀워크를 중요시한다면, 이 맵은 훌륭한 선택지가 될 것이다. ‘ÆØ¿Ä µðÆ潺 1.1v’ is a UMS (user-made scenario) defense map in *StarCraft: Brood War* where a massive defensive structure sits at the center of the battlefield. The main objective appears to be surviving endless waves of enemy attacks, with players working together to hold the line around the central fortress or towers. Key defensive points include the central stronghold and scattered defensive buildings, requiring players to combine resources and units to build an effective barrier. The map’s design features a structured tower placement and narrowing pathways that guide core defensive strategies—particularly around the tight corridors near the central fortress, which serve as critical choke points to block enemy advances. Additional defensive structures are placed along the map’s edges, demanding multilayered strategies for both frontline combat and preventing backdoor invasions. This map offers a balanced structure suitable for both beginners and experienced players. Beginners can learn foundational defense tactics centered on the main fortress, while advanced players can refine strategies like efficient resource management, optimal unit placement in narrow passages, and maintaining reserve forces for cleaner victories. However, the exact types of resources and units needed to fortify defenses aren’t immediately clear, so it’s crucial to study the map’s layout, resource distribution, and necessary buildings and units before playing. The map also seems designed for team play, making cooperation among teammates a potential key to success. The difficulty is estimated to be moderate, though it can fluctuate based on enemy attack patterns and wave intensity, making adaptability a vital skill. ‘ÆØ¿Ä µðÆ潺 1.1v’ is especially recommended for players who enjoy *StarCraft*’s defense genre. With its tense atmosphere and strategic depth, repeated play can help refine more efficient defensive approaches. The central structure and narrow pathways add layers of strategy, and once players become familiar with the map, more engaging gameplay becomes possible. If you enjoy defense maps, value strategic thinking, and prioritize teamwork, this map is an excellent choice.
Perfect Stacked Defense 10-Way
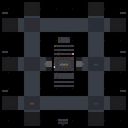
《Perfect Stacked Defense 10-Way》는 스타크래프트 브루드워에서 만나볼 수 있는 대표적인 디펜스 장르의 유즈맵으로, 10개의 서로 다른 스테이지를 거쳐가는 구조가 특징이다. 맵 중앙에 위치한 본진을 중심으로 적의 물량이 끊임없이 몰려오며, 플레이어는 방어선을 구축하고 전략적으로 유닛을 배치해 살아남아야 한다. 각 스테이지마다 등장하는 적의 종류와 패턴이 조금씩 달라지기 때문에 매번 새로운 전략을 짜야 한다는 점이 흥미를 더한다. 특히 10개의 스테이지가 모두 끝난 후에는 최종 보스가 등장하는데, 이 보스는 기존의 적과는 차원이 다른 난이도를 자랑하므로 신중한 준비가 필요하다. 디펜스 장르 특유의 긴장감과 더불어, 맵의 디자인도 매우 깔끔하게 되어 있다. 본진 주변의 좁은 통로와 다수의 언덕 지형이 조화를 이루어 방어하기 쉬운 곳과 어려운 곳을 자연스럽게 구분해준다. 또한, 각 스테이지마다 주어지는 제한 시간이나 특정 조건(예: 특정 유닛만 사용 가능)이 있는지는 맵 설명에서 확인할 수 없지만, 플레이어의 실력과 판단력이 중요하다는 점에서 충분히 매력적이다. 초보자는 기본적인 방어 전략을 익히는 데 집중하고, 고수라면 최적의 유닛 배치와 자원 관리, 기지 확장 전략을 구사해볼 수 있다. 이 맵을 추천하는 대상은 디펜스 장르를 즐기는 모든 플레이어다. 특히 3~6명의 플레이어가 동시에 참여할 수 있는 구조이기 때문에 친구들과 협동하거나 경쟁하며 즐길 수 있다는 점이 장점이다. 다만, 각 스테이지의 난이도가 일정하지 않고 최종 보스가 매우 강력하므로, 처음 플레이할 때는 체력 관리와 자원 수급에 신경 쓰는 것이 좋다. 맵의 전체적인 밸런스는 비교적 안정적이지만, 일부 스테이지에서는 특정 유닛이 지나치게 강하거나 약할 수 있으므로, 자신의 플레이 스타일에 맞는 유닛을 적극 활용해야 한다. 마지막으로, 맵의 버전이 v1.16이며, 제작자나 배포자에 대한 정보도 내부 설명에 포함되어 있으니 참고하면 좋다. Perfect Stacked Defense 10-Way is a popular defense-style custom map in StarCraft: Brood War, featuring a unique structure where players progress through 10 distinct stages. The game revolves around protecting the main base in the center of the map while waves of enemies continuously attack. Each stage introduces new enemy types and patterns, requiring players to adapt their strategies dynamically. The final stage culminates in a boss battle that demands meticulous preparation due to its extreme difficulty. The map boasts a clean and intuitive design, with narrow pathways and elevated terrain around the base that naturally guide enemy movements. While the map description does not explicitly mention stage-specific time limits or unit restrictions, the gameplay emphasizes player skill and strategic planning. Beginners can focus on mastering basic defense tactics, while advanced players can experiment with optimal unit placement, resource management, and base expansion strategies. This map is highly recommended for fans of the defense genre, especially those who enjoy playing with 3 to 6 participants. The collaborative or competitive multiplayer experience adds to its appeal, though players should be mindful of varying stage difficulties and the powerful final boss. While the overall balance is stable, some stages may favor certain unit types over others, so adapting to the map’s demands is key. Additionally, the map is currently on version v1.16, and details about the creator and distributor are included in the internal description for reference.
최근 등록된 맵
새로 추가된 파일과 버전을 확인하세요.
파일론 디펜스 (Pylon Defense v1.08i)
스타크래프트 브루드워의 대표적인 디펜스 유즈맵 ‘파일론 디펜스(Pylon Defense)’는 플레이어가 보호해야 할 파일런을 중심으로 끊임없이 몰려드는 적 유닛을 방어하는 전형적인 구조를 갖추고 있다. 맵 상단 중앙에 위치한 파일런을 중심으로 하단 진영에서 적의 공격을 차단하며, 적의 파상 공세를 효과적으로 막아내야만 승리를 거둘 수 있다. 게임은 정해진 웨이브 수만큼 적의 공격을 버텨내는 방식으로 진행되며, 파일런 주변의 방어 건물과 유닛 생산 건물을 최대한 효율적으로 배치해 지속적인 방어를 구축하는 것이 핵심 전략이다. 적의 공격 패턴은 시간이 지날수록 점점 강력해지며, 때로는 공중 유닛이나 특수 유닛이 등장하기도 해서 플레이어는 방어뿐만 아니라 공격력 강화와 자원 관리에 신경을 써야 한다. 파일론 디펜스는 기본적인 디펜스 맵이지만, 방어 건물 배치와 유닛 생산 타이밍, 자원 수급의 균형을 맞추는 것이 승리의 관건이다. 초보 플레이어는 방어 건물과 유닛 생산의 기본 구성만으로도 충분히 즐길 수 있지만, 숙련된 플레이어는 최적의 방어 라인 구축과 효율적인 자원 운용을 통해 더 긴 웨이브를 버텨내는 도전을 즐길 수 있다. 이 맵은 디펜스라는 장르의 정석을 보여주면서도, 간단한 조작과 명확한 승리 조건 덕분에 누구나 쉽게 접근할 수 있으며, 반복 플레이를 통해 전략적 깊이를 더할 수 있다. 파일론 디펜스는 특히 디펜스 유즈맵을 좋아하는 유저들에게 강력히 추천할 만한 작품으로, 오랜 기간 사랑받아 온 classic 맵 중 하나이다. 플레이 전에는 방어 건물의 배치와 유닛 생산 건물의 위치를 미리 숙지하고, 초반 자원 수급을 안정적으로 유지하는 것이 중요하다. 또한, 적의 공격 패턴을 예측하고 방어 라인을 강화하는 타이밍을 잘 잡는 것이 승리의 열쇠가 된다. 파일론 디펜스는 단순한 방어 게임이 아니라, 전략과 집중력을 요구하는Challenge가 매력적인 유즈맵이다. 파일론 디펜스를 플레이하기 전에는 방어 건물의 배치와 유닛 생산 건물의 위치를 미리 확인하고, 초반 자원 수급을 안정적으로 유지하는 것이 중요하다. 또한, 적의 공격 패턴을 예측하고 방어 라인을 강화하는 타이밍을 잘 잡는 것이 승리의 열쇠가 된다. 이 맵은 디펜스 장르의 정석을 보여주며, 누구나 쉽게 접근할 수 있지만, 전략적 깊이를 더하기 위해 반복 플레이가 권장된다. 특히 방어 건물과 유닛 생산의 균형을 맞추는 것이 핵심이며, 숙련될수록 더 긴 웨이브를 버텨내는 도전에 도전할 수 있다. 파일론 디펜스는 classic 디펜스 유즈맵으로써 오랜 기간 사랑받아 온 작품으로, 디펜스 장르를 좋아하는 유저라면 반드시 한 번쯤 플레이해 볼 만한 가치가 있다. Pylon Defense is one of the classic defense-style custom maps in StarCraft: Brood War, where players must protect a central pylon from relentless waves of enemy units. The gameplay revolves around building and managing a defense around the pylon located at the top center of the map, while fending off attacks from the lower enemy base. The core strategy involves efficiently placing defensive structures and producing units to withstand increasingly powerful enemy assaults as waves progress. Over time, the enemy introduces stronger units, including air and special units, requiring players to balance defense, resource management, and offensive capabilities. While the map is accessible to beginners, experienced players can enhance their strategy by optimizing defensive lines and resource allocation to survive longer waves. Pylon Defense exemplifies the essence of defense maps with its straightforward mechanics and clear victory conditions, making it a timeless favorite among custom map enthusiasts. Before playing, it is crucial to familiarize yourself with the placement of defensive buildings and unit production structures, and to maintain stable early-game resource gathering. Predicting enemy attack patterns and reinforcing defenses at the right moments are key to achieving victory. Beyond its simple premise, the map offers a rewarding challenge that blends strategy and focus, making it a must-play for fans of the defense genre. Repeated playthroughs are encouraged to refine tactics and explore deeper strategic layers.
Perfect Stacked Defense 10-Way
《Perfect Stacked Defense 10-Way》는 스타크래프트 브루드워에서 만나볼 수 있는 대표적인 디펜스 장르의 유즈맵으로, 10개의 서로 다른 스테이지를 거쳐가는 구조가 특징이다. 맵 중앙에 위치한 본진을 중심으로 적의 물량이 끊임없이 몰려오며, 플레이어는 방어선을 구축하고 전략적으로 유닛을 배치해 살아남아야 한다. 각 스테이지마다 등장하는 적의 종류와 패턴이 조금씩 달라지기 때문에 매번 새로운 전략을 짜야 한다는 점이 흥미를 더한다. 특히 10개의 스테이지가 모두 끝난 후에는 최종 보스가 등장하는데, 이 보스는 기존의 적과는 차원이 다른 난이도를 자랑하므로 신중한 준비가 필요하다. 디펜스 장르 특유의 긴장감과 더불어, 맵의 디자인도 매우 깔끔하게 되어 있다. 본진 주변의 좁은 통로와 다수의 언덕 지형이 조화를 이루어 방어하기 쉬운 곳과 어려운 곳을 자연스럽게 구분해준다. 또한, 각 스테이지마다 주어지는 제한 시간이나 특정 조건(예: 특정 유닛만 사용 가능)이 있는지는 맵 설명에서 확인할 수 없지만, 플레이어의 실력과 판단력이 중요하다는 점에서 충분히 매력적이다. 초보자는 기본적인 방어 전략을 익히는 데 집중하고, 고수라면 최적의 유닛 배치와 자원 관리, 기지 확장 전략을 구사해볼 수 있다. 이 맵을 추천하는 대상은 디펜스 장르를 즐기는 모든 플레이어다. 특히 3~6명의 플레이어가 동시에 참여할 수 있는 구조이기 때문에 친구들과 협동하거나 경쟁하며 즐길 수 있다는 점이 장점이다. 다만, 각 스테이지의 난이도가 일정하지 않고 최종 보스가 매우 강력하므로, 처음 플레이할 때는 체력 관리와 자원 수급에 신경 쓰는 것이 좋다. 맵의 전체적인 밸런스는 비교적 안정적이지만, 일부 스테이지에서는 특정 유닛이 지나치게 강하거나 약할 수 있으므로, 자신의 플레이 스타일에 맞는 유닛을 적극 활용해야 한다. 마지막으로, 맵의 버전이 v1.16이며, 제작자나 배포자에 대한 정보도 내부 설명에 포함되어 있으니 참고하면 좋다. Perfect Stacked Defense 10-Way is a popular defense-style custom map in StarCraft: Brood War, featuring a unique structure where players progress through 10 distinct stages. The game revolves around protecting the main base in the center of the map while waves of enemies continuously attack. Each stage introduces new enemy types and patterns, requiring players to adapt their strategies dynamically. The final stage culminates in a boss battle that demands meticulous preparation due to its extreme difficulty. The map boasts a clean and intuitive design, with narrow pathways and elevated terrain around the base that naturally guide enemy movements. While the map description does not explicitly mention stage-specific time limits or unit restrictions, the gameplay emphasizes player skill and strategic planning. Beginners can focus on mastering basic defense tactics, while advanced players can experiment with optimal unit placement, resource management, and base expansion strategies. This map is highly recommended for fans of the defense genre, especially those who enjoy playing with 3 to 6 participants. The collaborative or competitive multiplayer experience adds to its appeal, though players should be mindful of varying stage difficulties and the powerful final boss. While the overall balance is stable, some stages may favor certain unit types over others, so adapting to the map’s demands is key. Additionally, the map is currently on version v1.16, and details about the creator and distributor are included in the internal description for reference.
오버마인드 디펜스 8.1 파이널! (Overmind Defence 8.1 Final!)
‘오버마인드 디펜스 8.1 파이널!’은 스타크래프트: 브루드워의 대표적인 디펜스 장르 유즈맵으로, 플레이어들이 끊임없이 밀려오는 적군 웨이브를 막아내며 수비전을 펼치는 플레이에 집중된 작품이다. 맵은 넓은 우주 테마의 타일셋을 활용해 우주 공간 feel을 살렸으며, 중앙에 위치한 넥서스와 주변의 방어 건물을 지키며 Ressources(자원)를 모아 업그레이드와 방어 병력을 강화하는 것이 핵심 전략이다. 공격과 방어의 균형을 맞추는 것이 관건으로, 초반에는 소규모 유닛으로 버티며 자원을 확보하고, 중반부터는 방어 건물과 유닛 조합을 최적화해 웨이브를 효과적으로 방어해야 한다. 맵의 구조는 비교적 넓고 복잡한 배치로 이루어져 있어, 방어 라인을 잘못 설정하면 예기치 못한 타격을 입기 쉬우므로 사전 계획이 중요하다. 또한, 각 웨이브마다 등장하는 적군의 조합과 패턴이 조금씩 다르기 때문에, 이를 숙지하고 대비하는 것이 승리의 열쇠다. 이 맵은 혼자서 플레이하기보다는 팀 단위로 협동하며 방어 라인을 구축하는 방식이 가장 효과적이며, 특히 초보자보다는 디펜스 장르에 익숙한 플레이어들에게 추천할 만한 작품이다. 게임의 난이도는 보통 수준으로 설정되어 있지만, 후반부로 갈수록 압박이 심해지므로 꾸준한 피드백과 전략 수정이 필요하다. 플레이 전에는 맵의 방어 포인트와 주요 자원 수집 지역을 미리 파악해 두는 것이 좋다. 또한, 각 웨이브 간의 간격이 비교적 긴 편이므로,在此期间Upgrade와 방어 건물 배치를 신중히 결정해야 한다. 이 맵은 오랜 기간 동안 디펜스 장르의 인기를 유지해온 만큼, 세심한 밸런스와 다양한 전략적 선택지를 제공한다는 점에서 유즈맵 팬들에게 꾸준한 사랑을 받고 있다. 초보자의 경우, 난이도를 낮춰서 연습 모드를 활용하거나, 팀원들과의 협력을 통해 점차 숙련도를 높이는 것이 바람직하다. "Overmind Defense 8.1 Final!" is a classic defense-style custom map in *StarCraft: Brood War*, where players focus on repelling endless waves of enemy forces in a defensive battle. The map utilizes a vast space-themed tileset to evoke a cosmic atmosphere, with the core strategy revolving around protecting the central Nexus and surrounding defensive structures while gathering resources to upgrade and reinforce your defenses. Balancing offense and defense is key—early on, you must hold out with small units while securing resources, then optimize your defensive structures and unit compositions to effectively counter each wave as the game progresses. The map features a relatively large and complex layout, making it easy to take unexpected damage if defensive lines are poorly placed, so careful planning is essential. Additionally, each wave introduces slightly different enemy unit compositions and patterns, so recognizing and adapting to these variations is crucial to victory. While the map can be played solo, the most effective approach is team-based cooperation to establish defensive lines, making it particularly recommended for players familiar with the defense genre rather than beginners. The difficulty is set to a moderate level, but pressure intensifies significantly in the later stages, requiring consistent feedback and strategic adjustments. Before playing, it's wise to scout defensive key points and major resource collection areas. Since the intervals between waves are relatively long, you should carefully decide when and where to upgrade and place defensive structures. Having maintained its popularity in the defense genre for a long time, this map continues to earn consistent love from custom map fans for its meticulous balance and diverse strategic options. Beginners are advised to lower the difficulty for practice or improve their skills through teamwork with others.
핵무기 방어 작전 6000 (Nuclear Defense 6ooo)
스타크래프트 브루드워의 대표적인 디펜스 장르 유즈맵인 〈Nuclear Defense 6ooo〉는 핵미사일과 방어전을 중심으로 펼쳐지는 긴장감 넘치는 전투를 경험할 수 있는 맵입니다. 맵의 핵심은 중앙에 위치한 핵미사일 기지 주변을 오가는 웨이브를 방어하는 것으로, 아군 기지를 파괴하려는 적의 무한한 공격을 효과적으로 저지해야 합니다. 맵 구조는 중앙 기지를 보호하는 방어 타워와 자원 채취 지역, 그리고 적의 공격 루트가 명확히 구분되어 있어 전략적인 배치와 빠른 판단이 요구됩니다. 맵 곳곳에 배치된 방어 건물들은 초기에는 빈약해 보이지만, 자원을 충분히 확보하고 적절한 업그레이드를 진행하면 강력한 요새로 탈바꿈할 수 있습니다. 특히 적의 공격을 막아내는 동시에 자원을 안정적으로 확보하는 균형 잡힌 플레이가 승리의 열쇠가 됩니다. 초보자도 쉽게 접근할 수 있는 기본적인 조작법이지만, 고수들은 방어 라인을 clever하게 구축하고 최적의 자원 관리로 적의 공격을 무력화시키는 전략을 펼칠 수 있습니다. 맵의 볼륨은 크지 않지만, 핵미사일이라는 독특한 테마와 반복되는 웨이브 공격이 플레이어의 긴장감을 지속적으로 자극합니다. 이 맵은 디펜스 장르에 익숙한 플레이어뿐만 아니라, 새로운 전략적 도전을 원하는 유저들에게도 추천할 만한佳作입니다. 다만, 방어 타워의 배치와 업그레이드 타이밍을 잘못 잡으면 쉽게 무너질 수 있으니, 초반 자원 관리와 타워 위치 선정에 유의해야 합니다. 핵무기의 위협을 느끼며 아군을 지켜내는 짜릿한 경험을 원한다면 〈Nuclear Defense 6ooo〉를 시도해 보세요. Nuclear Defense 6000 is a classic defense genre custom map in StarCraft: Brood War, offering intense battles centered around nuclear missiles and defensive combat. The core gameplay revolves around defending the central nuclear missile base from waves of enemies, preventing them from destroying your base with relentless attacks. The map’s structure clearly separates the central base’s defensive towers, resource gathering areas, and enemy attack routes, requiring strategic placement and quick decision-making. While the defensive structures scattered across the map may seem weak at first, they can transform into formidable fortresses with sufficient resources and proper upgrades. Balancing defense against enemy waves while securing resources steadily is key to victory. Though the mechanics are simple enough for beginners, skilled players can craft clever defensive lines and neutralize attacks through optimal resource management. Despite its compact size, the unique theme of nuclear missiles and the recurring wave attacks keep players on edge. This map is a masterpiece that appeals not only to defense genre veterans but also to players seeking fresh strategic challenges. However, misplacing towers or upgrading at the wrong time can lead to a quick collapse, so careful attention to early resource management and tower positioning is essential. If you crave the thrill of defending your forces under the threat of nuclear weapons, give Nuclear Defense 6000 a try.
--- M A T R I X - 3.7 ---
스타크래프트 브루드워의 유즈맵으로 유명한 ‘--- M A T R I X - 3.7 ---’은 우주 배경의 디펜스 장르 맵으로, 플레이어는 외계 세력의 침공을 방어하는 임무를 맡습니다. 맵의 전체적인 구조는 가로 3072, 세로 4096의 넓은 필드에 펼쳐져 있으며, 타일셋은 우주 테마로 구성되어 atmosferic한 분위기를 연출합니다. 맵의 특징은 중앙에 위치한 거대한 적 기지 주변으로 여러 개의 방어 타워가 배치되어 있으며, 플레이어는 자원을 확보해 방어 건물과 병력을 생산해 적의 공격을 막아야 합니다. 맵의 진행은 주로 적의 웨이브가 지속적으로 몰려오는 형태로, 각 웨이브마다 다양한 유닛과 조합을 상대해야 합니다. 방어에 성공할 때마다 보상을 얻으며, 이를 바탕으로 더 강력한 방어 체계를 구축할 수 있습니다. 맵의 난이도는 중간 정도로 설정되어 있지만, 후반부로 갈수록 적의 공격력이 급증하므로 전략적인 자원 관리와 방어선 구축이 중요합니다. 특히, 맵의 넓은 공간을 활용한 멀티 위치 선정과Resource gathering의 효율성이 승패를 좌우할 수 있습니다. 초보 플레이어는 방어 우선순위를 잘못 잡는 경우가 많으므로, 초반 자원 확보와 방어 건물의 초기 배치에 신경 써야 합니다. 또한, 후속 웨이브의 공격을 예측하고 미리 대비할 수 있도록 맵의 지형을 숙지하는 것이 중요합니다. 이 맵은 넓은 필드와 지속적인 공격 패턴으로 인해 긴장감과 전략적 깊이를 동시에 제공하며, 특히 디펜스 장르를 좋아하는 플레이어에게 추천할 만합니다. 다만, 넓은 맵 특성상 자원 gathering에 시간이 소요될 수 있으니, 이를 고려한 플레이가 필요합니다. 맵의 인코딩은 cp949로 한국어 환경에서 문제없이 구동될 수 있도록 지원합니다. 플레이 전에는 맵의 기본 구조와 방어 건물의 배치 위치를 미리 확인해 두는 것이 좋습니다. 또한, 후속 업데이트 버전이 존재하는 만큼 최신 버전을 사용하는 것이 바람직합니다. This Brood War custom map, ‘--- M A T R I X - 3.7 ---’, is a space-themed defense game where players must protect their base from relentless alien invasions. The map spans a vast 3072x4096 grid with a cosmic tileset, creating an immersive sci-fi atmosphere. Players start with limited resources and must strategically expand their territory while constructing defenses and producing units to fend off enemy waves. The gameplay revolves around surviving progressively stronger enemy assaults, with each successful defense granting rewards to upgrade fortifications. Mid-game presents a balanced challenge, but later stages require careful resource management and adaptive strategies as enemy compositions become more complex. Beginners often struggle with initial base layouts and priority defenses, so early preparations are crucial. The map’s spacious design demands smart multi-positioning and efficient resource gathering to maintain momentum. While the open terrain offers strategic depth, it can also slow down new players unfamiliar with space-themed defenses. This title is ideal for fans of tower defense mechanics who enjoy a mix of tension and tactical planning. Always check for the latest version (3.7) to ensure compatibility and balance improvements. Reviewing the map’s terrain and defense hotspots before play helps optimize early-game decisions.
파워 디펜스 1.1v (Power Defense 1.1v)
‘Æ÷Ä¿ µðÆ潺 1.1v’는 스타크래프트 브루드워의 전장 중심부에 거대한 방어 구조물이 자리 잡은 UMS(유즈맵) 디펜스 맵이다. 맵의 주된 목표는 적의 끊임없는 웨이브 공격을 방어해 내는 것으로 보이며, 중앙의 요새나 타워를 중심으로 플레이어들이 힘을 합쳐 버티는 형식으로 추정된다. 방어선의 주요 지점은 중앙 요새와 사방에 배치된 방어 건물로, 각 플레이어는 자원과 유닛을 조합해 적절한 방어선을 구축해야 한다. 맵의 디자인에서 확인되는 규칙적인 타워 배치와 좁혀지는 통로들은 방어전의 핵심 전략을 유도하며, 특히 중앙 요새 주변의 좁은 길목은 적의 공격을 효과적으로 차단할 수 있는 포인트로 활용된다. 또한, 맵의 테두리에는 추가적인 방어 시설이 배치되어 있어, 플레이어들이 전면전을 벌이거나 후방 침입을 막아내야 하는 다층적인 전략이 요구된다. 이 맵은 초보자와 숙련자 모두에게 적합한 구조를 가지고 있다. 초보자라면 중앙 요새를 중심으로 한 기본적인 방어 전략을 익힐 수 있으며, 숙련자라면 좁은 길목에서의 효율적인 방어와 자원 관리, 그리고 예비 병력의 배치 등을 통해 더욱 깔끔한 승리를 노릴 수 있다. 다만, 방어선을 구축하는 데 필요한 자원과 유닛의 종류가 명확하지 않기 때문에, 플레이 전 맵 내부의 구조와 자원 배치, 그리고 방어에 필요한 주요 건물과 유닛을 미리 확인하는 것이 중요하다. 또한, 팀 플레이가 가능한 구조로 보이며, 팀원 간의 협력이 성공의 열쇠가 될 가능성이 높다. 맵의 난이도는 보통 수준으로 추정되며, 적의 공격 패턴과 웨이브의 강도에 따라 난이도가 변동될 수 있어, 플레이어의 적응력이 중요하다. ‘Æ÷Ä¿ µðÆæ½스 1.1v’는 스타크래프트의 디펜스 장르를 좋아하는 플레이어들에게 특히 추천할 만한 맵이다. 방어전 특유의 긴장감과 전략적 깊이가 있는 만큼, 반복 플레이를 통해 더욱 효율적인 방어 전략을 개발해 나갈 수 있을 것이다. 또한, 맵의 중앙 구조물과 좁은 통로들은 전략적 깊이감을 더해 주며, 플레이어들이 맵을 숙지하고 나면 더욱 흥미로운 플레이가 가능할 것이다. 만약 당신이 디펜스 맵을 즐기며, 전략적 사고와 팀워크를 중요시한다면, 이 맵은 훌륭한 선택지가 될 것이다. ‘ÆØ¿Ä µðÆ潺 1.1v’ is a UMS (user-made scenario) defense map in *StarCraft: Brood War* where a massive defensive structure sits at the center of the battlefield. The main objective appears to be surviving endless waves of enemy attacks, with players working together to hold the line around the central fortress or towers. Key defensive points include the central stronghold and scattered defensive buildings, requiring players to combine resources and units to build an effective barrier. The map’s design features a structured tower placement and narrowing pathways that guide core defensive strategies—particularly around the tight corridors near the central fortress, which serve as critical choke points to block enemy advances. Additional defensive structures are placed along the map’s edges, demanding multilayered strategies for both frontline combat and preventing backdoor invasions. This map offers a balanced structure suitable for both beginners and experienced players. Beginners can learn foundational defense tactics centered on the main fortress, while advanced players can refine strategies like efficient resource management, optimal unit placement in narrow passages, and maintaining reserve forces for cleaner victories. However, the exact types of resources and units needed to fortify defenses aren’t immediately clear, so it’s crucial to study the map’s layout, resource distribution, and necessary buildings and units before playing. The map also seems designed for team play, making cooperation among teammates a potential key to success. The difficulty is estimated to be moderate, though it can fluctuate based on enemy attack patterns and wave intensity, making adaptability a vital skill. ‘ÆØ¿Ä µðÆ潺 1.1v’ is especially recommended for players who enjoy *StarCraft*’s defense genre. With its tense atmosphere and strategic depth, repeated play can help refine more efficient defensive approaches. The central structure and narrow pathways add layers of strategy, and once players become familiar with the map, more engaging gameplay becomes possible. If you enjoy defense maps, value strategic thinking, and prioritize teamwork, this map is an excellent choice.
Korean Defense 3
스타크래프트 브루드워의 대표적인 디펜스 장르 유즈맵인 <strong>Korean Defense 3</strong>는 중앙에 위치한 기지 방어와 지속적인 웨이브 공격을 처리하는 전략적인 플레이를 요구하는 맵입니다. 맵 중앙의 넥서스를 중심으로 테란, 저그, 프로토스 세 종족의 건물이 배치되어 있으며, 플레이어는 각 웨이브에서 몰려오는 적군 유닛을 상대로 방어선을 구축하고 자원을 관리해야 합니다. 맵의 구조는 비교적 단순하지만, 각 웨이브별로 등장하는 적의 조합과 숫자가 점차 증가하며 난이도가 상승하는 특징을 가지고 있습니다. 특히, 적의 공격을 효과적으로 저지하기 위해 방어 건물과 유닛의 조합을 신중히 선택해야 하며, 자원 관리를 소홀히 하면 순식간에 방어선이 무너질 위험이 있습니다. 맵 상단과 하단에는 각각의 플레이어 기지가 위치하며, 중앙의 넓은 공간에서 벌어지는 전투가 이 맵의 핵심입니다. 적의 공격을 방어하는 동시에 자원을 꾸준히 확보하여 병력을 보강해야 하기 때문에, 전략적 사고와 실시간 판단력이 요구되는 맵으로 평가됩니다. 초보 플레이어는 방어 건물의 배치와 자원 관리에서 어려움을 느낄 수 있으며, 숙련된 플레이어는 보다 효율적인 병력 운용과 타이밍 공격을 통해 보다 쉽게 클리어할 수 있습니다. 맵의 밸런스는 대체로 잘 짜여져 있지만, 특정 조합의 적에 대해 취약할 수 있으므로 다양한 전략을 연습하는 것이 중요합니다. 또한, 맵의 해상도와 타일셋이 우주 테마로 구성되어 있어 시각적으로도 흥미로운 요소로 작용합니다. 이 맵은 디펜스 장르에 익숙한 플레이어는 물론, 전략적 플레이를 즐기는 모든 유저에게 추천할 만한佳作입니다. 플레이 전에는 반드시 각 웨이브별 적의 패턴과 방어 건물의 효율적인 배치 방법을 숙지하고, 자원 관리 계획을 세우는 것이 중요합니다. 또한, 맵의 중앙 지역을 최대한 활용하여 방어선을 구축하고, 적의 공격을 효율적으로 저지할 수 있도록 준비를 철저히 해야 합니다. Korean Defense 3 is a classic defense genre custom map in StarCraft: Brood War that requires strategic play focused on base defense and handling continuous wave attacks. The map centers around a Nexus located in the middle, with buildings from Terran, Zerg, and Protoss factions arranged around it. Players must build defensive structures and manage resources to fend off waves of enemy units that grow increasingly challenging over time. The map features a relatively simple structure, but the increasing difficulty comes from the growing number and variety of enemies with each wave. Effective defense relies on carefully selecting and combining defensive buildings and units, as poor resource management or misplaced defenses can lead to a quick defeat. Player bases are situated at the top and bottom of the map, with the central area serving as the primary battleground. Success depends on balancing defense with resource gathering to reinforce your forces. Beginners may struggle with defense placement and resource management, while experienced players can optimize unit deployment and timing for quicker clearances. The map’s balance is generally well-executed, though certain enemy compositions may pose challenges, making versatility in strategy essential. The space-themed tileset and high-resolution design add visual appeal, enhancing the immersive experience. Recommended for both seasoned defense genre fans and players who enjoy strategic gameplay, Korean Defense 3 offers a rewarding challenge. Before playing, familiarize yourself with the enemy patterns per wave, optimize defensive structure placement, and plan resource management carefully. Maximizing the use of the central area and preparing an effective defense strategy are key to success.
Evolves 2003
스타크래프트 브루드워의 유즈맵 Evolves 2003은 우주 공간을 배경으로 한 디펜스 장르 맵으로, 6명의 플레이어가 각각의 기지를 방어하며 적의 대군을 상대하는 구조로 구성되어 있다. 맵 중앙에는 거대한 우주 공간이 펼쳐지며, 각 플레이어는 맵의 모서리나 가장자리에 위치한 본진을 중심으로 건물을 건설하고 유닛을 생산해 적의 공격을 막아내야 한다. 맵 곳곳에는 다수의 웨이브로 구성된 적군이 끊임없이 몰려오며, 특히 'mass attack'이라는 특징이 강조되어 대량의 저글링과 같은 저렴한 유닛들이 끊임없이 쏟아진다. 이를 방어하기 위해서는 적절한 건물 배치와 유닛 조합이 필수적이며, 초반에는 자원 수급에 주력하되, 중반 이후로는 방어 타워나 강력한 유닛을 배치해 적의 물량을 차단하는 전략이 요구된다. 맵의 난이도는 적의 물량이 많아질수록 높아지므로, 초보자는 어려움을 느낄 수 있지만, 숙련된 플레이어라면 다양한 전략을 구사해 승리를 이끌어낼 수 있다. 이 맵은 주로 6인 플레이를 전제로 설계되어 있으며, 각 플레이어의 순수한 실력과 순간 판단력이 승패를 좌우하는 요소가 된다. 특히, 우주 배경과 함께 펼쳐지는 대규모 전투는 시각적 볼거리도 뛰어나며, 긴장감과 긴축감을 동시에 느낄 수 있는 흥미로운 경험을 제공한다. 플레이 전에는 맵의 구조와 적의 공격 패턴을 미리 숙지하는 것이 중요하며, 초반 자원 관리와 타워 건설 위치를 신중히 결정해야 한다. 또한, 팀원과의 협력이나 경쟁 여부에 따라 전략이 달라질 수 있으므로, 게임을 시작하기 전 이러한 요소들을 고려하는 것이 좋다. 이 맵은 디펜스 장르를 любители들에게 강력히 추천하며, 특히 대규모 전투와 전략적 깊이를 즐기는 플레이어들에게 적합하다. 추가로, 맵의 이름 'Evolves'는 지속적인 적의 진화와 공격 패턴 변화를 시사하며, 이를 대비한 플레이어의 적응력도 중요하다는 점을 강조한다. Evolves 2003 is a defense-style StarCraft: Brood War custom map set in a cosmic environment, designed for six players. Each player must defend their base against waves of enemy units, primarily consisting of low-cost zerg units like zerglings, as indicated by the 'mass attack' theme. The map features a vast central space where the main action takes place, with players positioned at the edges or corners of the map. Strategic building placement, resource management, and unit composition are crucial for survival, especially as enemy waves intensify over time. The difficulty ramps up significantly in later stages, requiring players to adapt their tactics quickly. While beginners may find the constant enemy pressure challenging, experienced players will enjoy the depth and strategic variety this map offers. The cosmic theme and large-scale battles provide a visually engaging experience, blending tension and excitement. Prior to playing, it’s essential to study the map layout and enemy attack patterns, as early decisions about resource gathering and tower placement can drastically influence the outcome. The name 'Evolves' hints at the dynamic and adaptive nature of enemy attacks, rewarding players who can evolve their strategies accordingly. This map is highly recommended for defense genre enthusiasts, particularly those who enjoy deep strategic gameplay and large-scale battles.
맵 선택 가이드
태그는 맵의 핵심 특징을 빠르게 설명하지만 제작 버전마다 규칙이 다를 수 있습니다. 상세 설명에서 권장 인원, 난이도, 플레이 시간과 버전을 함께 확인한 뒤 다운로드하세요.