
요새 파괴 스타크래프트 맵 모음
'요새 파괴' 태그가 등록된 맵을 모았습니다. 장르 하나로 찾기 어려운 플레이 방식, 난이도와 특징을 중심으로 인기 맵과 최신 맵을 비교해 보세요.
- 등록 맵
- 4개
- 누적 다운로드
- 1
- 누적 조회
- 153
인기 맵
다운로드와 조회 반응이 높은 맵입니다.
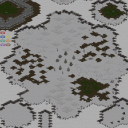
Ultimate Madness (울티메이트 매드니스)
스타크래프트 브루드워의 인기 유즈맵인 'Ultimate Madness'는 8명의 플레이어가 동시에 전투를 펼치는 대규모 다중 플레이어 전투 맵이다. 이 맵은 넓은 평야와 중앙에 위치한 거대한 요새 구조물을 중심으로 전개되며, 각 플레이어는 시작 지점에서 출발해 상대방을 섬멸하거나 요새를 파괴하는 목표를 달성해야 한다. 맵의 특징은 광활한 개활지 형태로, 초반부터 중반까지는 넓은 시야와 빠른 기동성이 중요하며, 후반부로 갈수록 요새 주변의 좁은 통로와 엄폐물이 전투 양상을 변화시킨다. 전투는 주로 테란의 벙커, 프로토스의 포톤 캐논, 저그의Creep 기반 방어 시설 등으로 이루어지며, 이러한 구조물을 활용한 전략적 방어와 기습 공격이 관전 포인트다. 특히, 중앙 요새의 파괴 여부가 게임의 승패를 가르는 중요한 변수로 작용하는데, 요새 내부로 진입하기 위한 좁은 통로와 다수의 방어 시설이 플레이어들에게 지속적인 압박을 가한다. 맵의 밸런스는 초보자와 숙련자 모두에게 공평한 기회를 제공하도록 설계되었으나, 넓은 맵 특성상 초반 자원 수급과 멀티 테스팅이 중요하며, 타이밍 러시나 조이기 전략이 효과적으로 작용한다. 초보자라면 넓은 시야와 빠른 반응 속도를 연습하는 것이 중요하며, 숙련자라면 중앙 요새의 구조물을 활용한 방어와 기습을 통한 승부수를 던질 수 있다. Ultimate Madness는 맵의 규모와 전투 intensity 덕분에 스타크래프트 유즈맵의 대표적인 대형 전투 맵으로 자리매김했으며, 특히 8인 풀방에서 펼쳐지는Blood와 같은 전투 양상은 관전자들에게도 큰 재미를 선사한다. 또한, 맵의 symmetrical한 구조는 모든 플레이어에게 동일한 시작 조건을 제공하여 공정한 경쟁을 보장한다. 플레이 전에는 맵의 주요 통로와 요새의 구조를 숙지하고, 초반 자원 관리와 멀티 테스팅에 중점을 두어 전략을 수립하는 것이 중요하다. 또한, 팀플레이가 가능하다면 요새 주변의 엄폐물을 활용한 조기 방어와 협공 전략이 승률을 높이는 데 도움이 된다. Ultimate Madness is a thrilling StarCraft: Brood War custom map designed for 8 players, where intense large-scale battles unfold across vast open fields and a central fortress structure. The map features wide plains and strategic choke points near the fortress, forcing players to balance mobility and defense. Early to mid-game emphasizes open-field combat, while late-game shifts to tighter corridors around the fortress, where structures like Terran bunkers, Protoss photon cannons, and Zerg creep-based defenses become critical. The central fortress acts as a major gameplay pivot—destroying it often decides the match. The balanced design ensures fair opportunities for both beginners and veterans, though wide spaces demand strong early-game resource management and multi-tasking. For newcomers, practicing vision control and reaction speed is key, while advanced players can exploit fortress structures for ambushes or defensive play. Ultimate Madness shines in 8-player full lobbies, delivering high-intensity battles reminiscent of Blood-style gameplay. Its symmetrical layout guarantees equal starting conditions, fostering competitive fairness. Before playing, study key pathways and fortress layouts, prioritize early resource gathering, and adapt strategies based on opponent movements. Team coordination around the fortress’s cover can significantly boost victory chances.
![버섯 왕국 전쟁 EX (Mushroom Kingdom War [=EX=]) 맵 미리보기](https://cdn-star-data.huzy.net/thumbnail_83d1e9b14df64a0cabb3b67d2617a5aa.jpg)
버섯 왕국 전쟁 EX (Mushroom Kingdom War [=EX=])
스타크래프트 브루드워의 유즈맵 중 하나로, ‘Mushroom Kingdom War ([=EX=])’는 마리오 시리즈의 무챤 왕국을 배경으로 한 디펜스 및 전투형 맵이다. 7명의 플레이어가 각자 맵의 양쪽 끝에서 시작하며, 초록색 진영은 ‘마리오 측’으로 요새를 방어하는 임무를, 빨간색 진영은 ‘쿠파 측’으로 요새를 파괴하는 임무를 수행한다. 맵 중앙에는 거대한 ‘Mushroom’ 모양의 구조물이 자리 잡고 있으며, 양측 진영은 이 구조물을 중심으로 대치하면서 자원을 확보하고 유닛을 생산해 전투를 벌인다. 맵의 지형은 사막 타일셋을 사용해 비교적 평탄한 구조로 이루어져 있으며, 요새와 주요 건물들이 전략적 요충지에 배치되어 있어 방어와 공격의 균형이 중요하다. 특히, 중앙 ‘Mushroom’ 구역은 양측의 교전장이자Resource Points(자원 채취 구역)으로 기능해, 자원 확보 경쟁이 치열해질 수밖에 없다. 전투는 주로 중장갑 유닛과 마법 유닛을 조합해 진행되며, 각 진영의 특성에 따라 전략이 크게 갈린다. 예를 들어, 마리오 측은 빠른 기동성과 방어 건물을 활용한 수비 전략이, 쿠파 측은 강력한 공격 유닛과 테러 전략이 유효하다. 맵의 볼륨이 크고 구조가 복잡해 초보자는 적응하는 데 시간이 걸리겠지만, 숙련된 플레이어에게는 다양한 전략과 전술을 구사할 수 있는 넓은 공간을 제공한다. 추천 대상은 스타크래프트 디펜스 및 유즈맵을 좋아하는 플레이어들로, 특히 팀 플레이와 전략적 사고를 즐기는 이들에게 최적이다. 플레이 전에는 중앙 자원 구역의 위치와 요새의 방어 시설 배치를 미리 숙지하고, 각 진영의 특성을 분석하는 것이 중요하다. 또한, 맵의 규모가 크기 때문에 맵의 전체적인 흐름을 미리 파악하지 않으면 자원 확보와 전투에서 불리해질 수 있다. 초보자라면 난이도를 ‘보통’ 정도로 설정하고, 경험을 쌓아가며 플레이하는 것이 바람직하다. 이 맵은 스타크래프트 유즈맵의 정수를 담고 있어, 오랜 기간 사랑받아 온 클래식한 작품 중 하나로 손꼽힌다. "Mushroom Kingdom War ([=EX=])" is a defense and combat custom map from *StarCraft: Brood War* set in the Mushroom Kingdom from the *Mario* series. Seven players start on opposite ends of the map—green team plays as Mario's side, tasked with defending their fortress, while red team plays as Bowser's side, aiming to destroy their enemy's stronghold. At the center of the map stands a massive mushroom-shaped structure, around which both sides clash to secure resources and produce units for battle. The terrain uses a desert tileset, featuring a relatively flat layout with key strategic positions for fortresses and major buildings, making balance between defense and offense crucial. The central mushroom area serves as a battleground and a Resource Point (resource-gathering zone), intensifying competition for resources. Battles typically involve a mix of heavy-armored and magical units, with strategies diverging based on each side's strengths—Mario's team excels with fast mobility and defensive structures, while Bowser's team benefits from powerful offensive units and terror tactics. Though the map's large scale and complex layout may challenge beginners, experienced players will appreciate the vast space for diverse strategies and tactics. It’s ideal for fans of *StarCraft* defense maps and custom games, especially those who enjoy teamwork and strategic thinking. Before playing, it’s essential to memorize the central resource zone’s location and fortress defenses, analyze each side’s strengths, and understand the map’s flow to avoid disadvantages in resource gathering and combat. Beginners should start on a moderate difficulty setting and gradually improve their skills. As a classic custom map that has stood the test of time, "Mushroom Kingdom War ([=EX=])" encapsulates the essence of *StarCraft* custom maps and remains a beloved title among players.
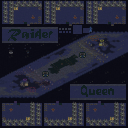
데저트 스트라이크 나이트 II (Desert Strike Night II)
‘데저트 스트라이크 나이트 II’라는 맵은 화산 지형을 배경으로 펼쳐지는 디펜스형 유즈맵으로, 플레이어는 적의 요새를 파괴하는 목표를 달성해야 한다. 맵 중앙에는 거대한 요새가 자리 잡고 있으며, 주변에는 적의 기지가 흩어져 있어 방어선 구축이 필수적이다. 맵의 특징은 야간에 해당한다는 설정으로, 전체적인 분위기가 어두운 톤으로 구성되어 있고, 곳곳에 불이 피어오르는 연출이 있어 긴장감을 조성한다. 특히, 맵의 각 구역을 연결하는 도로와 협곡이 있으며, 적의 공격 루트가 제한되어 있어 전략적인 대비를 요구한다. 플레이어는 초반에 자원을 확보하여 방어 시설과 유닛을 배치해야 하며, 적의 다수Wave 공격을 막아내며 점차 teritorial을 넓혀 나가야 한다. 맵의 어려운 점은 적의 공격 패턴이 다양하다는 점으로, 공중 유닛과 지상 유닛이 혼합된 공격을 퍼붓기 때문에 방어 체계를 종합적으로 갖추어야 한다. 또한, 맵의 지형이 복잡하여 시야 확보가 제한되는 구간이 많아 유닛의 배치와 이동 경로를 신중히 계획해야 한다. 이 맵은 주로 6인 이상의 플레이어를 대상으로 하며, 팀 플레이보다는 개인 또는 소규모 팀 단위의 플레이에 최적화되어 있다. 초보 플레이어는 방어 시설을 구축하는 데 어려움을 느낄 수 있으며, 숙련된 플레이어는 공격과 방어의 균형을 맞추어 효율적으로 진행할 수 있다. 맵을 플레이하기 전에는 자원 분배와 방어 건물의 위치, 유닛 조합을 미리 숙지하는 것이 중요하다. 또한, 맵의 특성상 야간 시야가 제한되어 있으므로 센서 건이나 스캔 같은 보조 요소를 활용하는 것도 좋은 전략이다. 이 맵은 디펜스와 공격의 균형을 맞추어 긴장감 넘치는 플레이를 즐길 수 있도록 설계되어 있으며, 특히 팀전보다는 개인전이나 2:2, 3:3 같은 소규모 팀전에서 더욱 재미를 느낄 수 있다. ‘Desert Strike Night II’ is a defense-style custom map set against a volcanic landscape, where players must achieve the goal of destroying the enemy’s stronghold. At the center of the map lies a massive fortress, with enemy bases scattered around it, making it essential to establish defensive lines. The map’s defining feature is its nighttime setting, with a dark-toned atmosphere and flames rising from various points, creating a tense mood. The map includes roads and ravines connecting different zones, with enemy attack routes limited, requiring strategic preparation. Players must secure resources early on to deploy defensive structures and units, then fend off multiple waves of attacks while gradually expanding their territory. The map’s challenge lies in the enemy’s varied attack patterns, which combine air and ground units, necessitating a well-rounded defense. Additionally, the complex terrain limits visibility in certain areas, making careful planning of unit placement and movement paths crucial. Designed primarily for six or more players, the map is optimized for solo or small-team play rather than large-scale team battles. Novice players may struggle with setting up defenses, while experienced players can balance offense and defense efficiently. Before playing, it’s important to familiarize yourself with resource distribution, defensive building placements, and unit compositions. Given the nighttime limitations, using auxiliary tools like sensor towers or scans can also be a smart strategy. The map is designed to deliver an intense experience by balancing defense and offense, offering the most fun in solo matches or small team formats like 2v2 or 3v3 rather than full team battles.
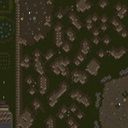
전쟁: 레드 VS 블루 2.3 (War: Red VS Blue 2.3)
스타크래프트 브루드워의 대표적인 유즈맵 중 하나인 〈War: Red VS Blue 2.3〉은 플레이어 간의 대결을 극한으로 끌어올린 액션 디펜스 장르의 맵입니다. 맵의 전체적인 구도는 넓은 평야와 중앙에 위치한 거대한 요새로 나뉘며, 적과 아군이 각각의 요새를 지키며 상대방의 건물을 파괴하는 것이 주 목표로 보입니다. 맵의 사막 타일셋은 건조한 환경에서 벌어지는 전쟁의 분위기를 한층 더해주며, 넓은 맵 특성상macro와micro 컨트롤이 모두 요구되는有趣的是한 게임이 될 것 같습니다. 이 맵은 6명의 플레이어가 참여하며, 각 플레이어는 개별적인 시작 자원과 건물을 배정받아 상대방과의 전투를 준비합니다. 중앙 요새는 강력한 방어 시설로 둘러싸여 있으며, 요새 내부의 주요 건물을 파괴하지 않으면 적의 본진을 공격할 수 없을 가능성이 높아 보입니다. 맵의 구조상으로는 양측이 대칭적으로 배치되어 있어 공정한 전투가 가능하도록 설계된 것으로 추정됩니다. 또한, 중간 지점에는 보급로나 추가 자원 지대가 배치되어 있어 게임의 후반전으로 갈수록 전략적 선택이 중요해질 것입니다. 플레이어는 초반에는 자원을 모아 병력을 생산하고 방어 건물을 건설하는 데 집중해야 하며, 중반부터는 상대방의 약점을 노리는 공격 타이밍을 잡아야 합니다. 방어 건물의 종류나 배치 방식에 따라 게임의 흐름이 완전히 달라질 수 있으므로, 다양한 전략을 시도해볼 필요가 있습니다. 맵의 넓이와 복잡한 지형 덕에 초보자들은 적응하는 데 시간이 걸릴 수 있지만, 숙련된 플레이어들에게는 치밀한 전략과 빠른 판단력이 요구되는 흥미로운 대결이 될 것입니다. 특히, 팀 플레이가 중요한 맵이므로 동료와의 호흡이 게임의 승패를 좌우할 가능성이 높습니다. 이 맵은 스타크래프트 브루드워의 유즈맵 중에서 비교적 규모가 크고 전략적 깊이가 있는 편에 속합니다. 넓은 맵과 다양한 전략적 선택지 덕분에 한 판 한 판이 매번 새로운 경험으로 다가올 것입니다. 또한, 디펜스와 공격의 밸런스가 잘 맞춰져 있어 공방 양면에서 즐길 수 있는 재미있는 구성입니다. 초보자와 숙련자 모두에게 추천할 만한 맵으로, 스타크래프트 유즈맵의 진수를 느낄 수 있는 작품입니다. 이 맵을 즐기기 위해서는 최소한의 스타크래프트 브루드워 설치와 기본적인 게임 이해도가 필요하며, 특히 다인용 맵 특성상 네트워크 환경이 안정적이어야 합니다. 또한, 다양한 전략을 시도해보면서 자신만의 플레이 스타일을 개발하는 것이 중요합니다. 넓은 맵에서 벌어지는 치열한 전투는 보는 이에게도 큰 몰입감을 선사할 것입니다. "War: Red VS Blue 2.3" is one of the most iconic custom maps in *StarCraft: Brood War*, designed as a high-stakes action defense game that pushes player battles to their limits. The map is divided into vast open plains and a massive central fortress, where both teams must defend their own strongholds while destroying the enemy’s buildings. The desert tileset enhances the war-torn atmosphere, and with the map’s expansive size, players will need to master both macro and micro control for an engaging and dynamic experience. The game supports six players, each starting with their own resources and buildings to prepare for battle. The central fortress is heavily fortified, making it nearly impossible to attack the enemy’s main base without first destroying key structures inside. The symmetrical layout ensures fair combat, and mid-map supply routes or resource zones add strategic depth, especially in the late game. Early on, players should focus on gathering resources to train units and construct defenses, while mid-game requires seizing the right moment to exploit enemy weaknesses. The type and placement of defensive structures can drastically alter the flow of the game, so experimenting with different strategies is key. The map’s vastness and complex terrain may pose a challenge for beginners, but for skilled players, it demands sharp strategy and quick decision-making. Teamwork is crucial, as coordination with allies can often determine victory. Among *Brood War* custom maps, this one stands out for its large scale and deep strategic options. The wide battlefield and varied tactical choices ensure each match feels fresh and unpredictable. The balance between defense and offense makes it enjoyable for both attacking and defending, appealing to players of all skill levels. If you want to experience the essence of *StarCraft* custom maps, this is a must-play. To fully enjoy the game, you’ll need *Brood War* installed and a basic understanding of the game mechanics. Since it’s a multiplayer map, a stable network connection is essential. Trying out different strategies and developing your own playstyle will make the intense battles across the vast battlefield even more immersive for both players and spectators.
최근 등록된 맵
새로 추가된 파일과 버전을 확인하세요.
전쟁: 레드 VS 블루 2.3 (War: Red VS Blue 2.3)
스타크래프트 브루드워의 대표적인 유즈맵 중 하나인 〈War: Red VS Blue 2.3〉은 플레이어 간의 대결을 극한으로 끌어올린 액션 디펜스 장르의 맵입니다. 맵의 전체적인 구도는 넓은 평야와 중앙에 위치한 거대한 요새로 나뉘며, 적과 아군이 각각의 요새를 지키며 상대방의 건물을 파괴하는 것이 주 목표로 보입니다. 맵의 사막 타일셋은 건조한 환경에서 벌어지는 전쟁의 분위기를 한층 더해주며, 넓은 맵 특성상macro와micro 컨트롤이 모두 요구되는有趣的是한 게임이 될 것 같습니다. 이 맵은 6명의 플레이어가 참여하며, 각 플레이어는 개별적인 시작 자원과 건물을 배정받아 상대방과의 전투를 준비합니다. 중앙 요새는 강력한 방어 시설로 둘러싸여 있으며, 요새 내부의 주요 건물을 파괴하지 않으면 적의 본진을 공격할 수 없을 가능성이 높아 보입니다. 맵의 구조상으로는 양측이 대칭적으로 배치되어 있어 공정한 전투가 가능하도록 설계된 것으로 추정됩니다. 또한, 중간 지점에는 보급로나 추가 자원 지대가 배치되어 있어 게임의 후반전으로 갈수록 전략적 선택이 중요해질 것입니다. 플레이어는 초반에는 자원을 모아 병력을 생산하고 방어 건물을 건설하는 데 집중해야 하며, 중반부터는 상대방의 약점을 노리는 공격 타이밍을 잡아야 합니다. 방어 건물의 종류나 배치 방식에 따라 게임의 흐름이 완전히 달라질 수 있으므로, 다양한 전략을 시도해볼 필요가 있습니다. 맵의 넓이와 복잡한 지형 덕에 초보자들은 적응하는 데 시간이 걸릴 수 있지만, 숙련된 플레이어들에게는 치밀한 전략과 빠른 판단력이 요구되는 흥미로운 대결이 될 것입니다. 특히, 팀 플레이가 중요한 맵이므로 동료와의 호흡이 게임의 승패를 좌우할 가능성이 높습니다. 이 맵은 스타크래프트 브루드워의 유즈맵 중에서 비교적 규모가 크고 전략적 깊이가 있는 편에 속합니다. 넓은 맵과 다양한 전략적 선택지 덕분에 한 판 한 판이 매번 새로운 경험으로 다가올 것입니다. 또한, 디펜스와 공격의 밸런스가 잘 맞춰져 있어 공방 양면에서 즐길 수 있는 재미있는 구성입니다. 초보자와 숙련자 모두에게 추천할 만한 맵으로, 스타크래프트 유즈맵의 진수를 느낄 수 있는 작품입니다. 이 맵을 즐기기 위해서는 최소한의 스타크래프트 브루드워 설치와 기본적인 게임 이해도가 필요하며, 특히 다인용 맵 특성상 네트워크 환경이 안정적이어야 합니다. 또한, 다양한 전략을 시도해보면서 자신만의 플레이 스타일을 개발하는 것이 중요합니다. 넓은 맵에서 벌어지는 치열한 전투는 보는 이에게도 큰 몰입감을 선사할 것입니다. "War: Red VS Blue 2.3" is one of the most iconic custom maps in *StarCraft: Brood War*, designed as a high-stakes action defense game that pushes player battles to their limits. The map is divided into vast open plains and a massive central fortress, where both teams must defend their own strongholds while destroying the enemy’s buildings. The desert tileset enhances the war-torn atmosphere, and with the map’s expansive size, players will need to master both macro and micro control for an engaging and dynamic experience. The game supports six players, each starting with their own resources and buildings to prepare for battle. The central fortress is heavily fortified, making it nearly impossible to attack the enemy’s main base without first destroying key structures inside. The symmetrical layout ensures fair combat, and mid-map supply routes or resource zones add strategic depth, especially in the late game. Early on, players should focus on gathering resources to train units and construct defenses, while mid-game requires seizing the right moment to exploit enemy weaknesses. The type and placement of defensive structures can drastically alter the flow of the game, so experimenting with different strategies is key. The map’s vastness and complex terrain may pose a challenge for beginners, but for skilled players, it demands sharp strategy and quick decision-making. Teamwork is crucial, as coordination with allies can often determine victory. Among *Brood War* custom maps, this one stands out for its large scale and deep strategic options. The wide battlefield and varied tactical choices ensure each match feels fresh and unpredictable. The balance between defense and offense makes it enjoyable for both attacking and defending, appealing to players of all skill levels. If you want to experience the essence of *StarCraft* custom maps, this is a must-play. To fully enjoy the game, you’ll need *Brood War* installed and a basic understanding of the game mechanics. Since it’s a multiplayer map, a stable network connection is essential. Trying out different strategies and developing your own playstyle will make the intense battles across the vast battlefield even more immersive for both players and spectators.
버섯 왕국 전쟁 EX (Mushroom Kingdom War [=EX=])
스타크래프트 브루드워의 유즈맵 중 하나로, ‘Mushroom Kingdom War ([=EX=])’는 마리오 시리즈의 무챤 왕국을 배경으로 한 디펜스 및 전투형 맵이다. 7명의 플레이어가 각자 맵의 양쪽 끝에서 시작하며, 초록색 진영은 ‘마리오 측’으로 요새를 방어하는 임무를, 빨간색 진영은 ‘쿠파 측’으로 요새를 파괴하는 임무를 수행한다. 맵 중앙에는 거대한 ‘Mushroom’ 모양의 구조물이 자리 잡고 있으며, 양측 진영은 이 구조물을 중심으로 대치하면서 자원을 확보하고 유닛을 생산해 전투를 벌인다. 맵의 지형은 사막 타일셋을 사용해 비교적 평탄한 구조로 이루어져 있으며, 요새와 주요 건물들이 전략적 요충지에 배치되어 있어 방어와 공격의 균형이 중요하다. 특히, 중앙 ‘Mushroom’ 구역은 양측의 교전장이자Resource Points(자원 채취 구역)으로 기능해, 자원 확보 경쟁이 치열해질 수밖에 없다. 전투는 주로 중장갑 유닛과 마법 유닛을 조합해 진행되며, 각 진영의 특성에 따라 전략이 크게 갈린다. 예를 들어, 마리오 측은 빠른 기동성과 방어 건물을 활용한 수비 전략이, 쿠파 측은 강력한 공격 유닛과 테러 전략이 유효하다. 맵의 볼륨이 크고 구조가 복잡해 초보자는 적응하는 데 시간이 걸리겠지만, 숙련된 플레이어에게는 다양한 전략과 전술을 구사할 수 있는 넓은 공간을 제공한다. 추천 대상은 스타크래프트 디펜스 및 유즈맵을 좋아하는 플레이어들로, 특히 팀 플레이와 전략적 사고를 즐기는 이들에게 최적이다. 플레이 전에는 중앙 자원 구역의 위치와 요새의 방어 시설 배치를 미리 숙지하고, 각 진영의 특성을 분석하는 것이 중요하다. 또한, 맵의 규모가 크기 때문에 맵의 전체적인 흐름을 미리 파악하지 않으면 자원 확보와 전투에서 불리해질 수 있다. 초보자라면 난이도를 ‘보통’ 정도로 설정하고, 경험을 쌓아가며 플레이하는 것이 바람직하다. 이 맵은 스타크래프트 유즈맵의 정수를 담고 있어, 오랜 기간 사랑받아 온 클래식한 작품 중 하나로 손꼽힌다. "Mushroom Kingdom War ([=EX=])" is a defense and combat custom map from *StarCraft: Brood War* set in the Mushroom Kingdom from the *Mario* series. Seven players start on opposite ends of the map—green team plays as Mario's side, tasked with defending their fortress, while red team plays as Bowser's side, aiming to destroy their enemy's stronghold. At the center of the map stands a massive mushroom-shaped structure, around which both sides clash to secure resources and produce units for battle. The terrain uses a desert tileset, featuring a relatively flat layout with key strategic positions for fortresses and major buildings, making balance between defense and offense crucial. The central mushroom area serves as a battleground and a Resource Point (resource-gathering zone), intensifying competition for resources. Battles typically involve a mix of heavy-armored and magical units, with strategies diverging based on each side's strengths—Mario's team excels with fast mobility and defensive structures, while Bowser's team benefits from powerful offensive units and terror tactics. Though the map's large scale and complex layout may challenge beginners, experienced players will appreciate the vast space for diverse strategies and tactics. It’s ideal for fans of *StarCraft* defense maps and custom games, especially those who enjoy teamwork and strategic thinking. Before playing, it’s essential to memorize the central resource zone’s location and fortress defenses, analyze each side’s strengths, and understand the map’s flow to avoid disadvantages in resource gathering and combat. Beginners should start on a moderate difficulty setting and gradually improve their skills. As a classic custom map that has stood the test of time, "Mushroom Kingdom War ([=EX=])" encapsulates the essence of *StarCraft* custom maps and remains a beloved title among players.
데저트 스트라이크 나이트 II (Desert Strike Night II)
‘데저트 스트라이크 나이트 II’라는 맵은 화산 지형을 배경으로 펼쳐지는 디펜스형 유즈맵으로, 플레이어는 적의 요새를 파괴하는 목표를 달성해야 한다. 맵 중앙에는 거대한 요새가 자리 잡고 있으며, 주변에는 적의 기지가 흩어져 있어 방어선 구축이 필수적이다. 맵의 특징은 야간에 해당한다는 설정으로, 전체적인 분위기가 어두운 톤으로 구성되어 있고, 곳곳에 불이 피어오르는 연출이 있어 긴장감을 조성한다. 특히, 맵의 각 구역을 연결하는 도로와 협곡이 있으며, 적의 공격 루트가 제한되어 있어 전략적인 대비를 요구한다. 플레이어는 초반에 자원을 확보하여 방어 시설과 유닛을 배치해야 하며, 적의 다수Wave 공격을 막아내며 점차 teritorial을 넓혀 나가야 한다. 맵의 어려운 점은 적의 공격 패턴이 다양하다는 점으로, 공중 유닛과 지상 유닛이 혼합된 공격을 퍼붓기 때문에 방어 체계를 종합적으로 갖추어야 한다. 또한, 맵의 지형이 복잡하여 시야 확보가 제한되는 구간이 많아 유닛의 배치와 이동 경로를 신중히 계획해야 한다. 이 맵은 주로 6인 이상의 플레이어를 대상으로 하며, 팀 플레이보다는 개인 또는 소규모 팀 단위의 플레이에 최적화되어 있다. 초보 플레이어는 방어 시설을 구축하는 데 어려움을 느낄 수 있으며, 숙련된 플레이어는 공격과 방어의 균형을 맞추어 효율적으로 진행할 수 있다. 맵을 플레이하기 전에는 자원 분배와 방어 건물의 위치, 유닛 조합을 미리 숙지하는 것이 중요하다. 또한, 맵의 특성상 야간 시야가 제한되어 있으므로 센서 건이나 스캔 같은 보조 요소를 활용하는 것도 좋은 전략이다. 이 맵은 디펜스와 공격의 균형을 맞추어 긴장감 넘치는 플레이를 즐길 수 있도록 설계되어 있으며, 특히 팀전보다는 개인전이나 2:2, 3:3 같은 소규모 팀전에서 더욱 재미를 느낄 수 있다. ‘Desert Strike Night II’ is a defense-style custom map set against a volcanic landscape, where players must achieve the goal of destroying the enemy’s stronghold. At the center of the map lies a massive fortress, with enemy bases scattered around it, making it essential to establish defensive lines. The map’s defining feature is its nighttime setting, with a dark-toned atmosphere and flames rising from various points, creating a tense mood. The map includes roads and ravines connecting different zones, with enemy attack routes limited, requiring strategic preparation. Players must secure resources early on to deploy defensive structures and units, then fend off multiple waves of attacks while gradually expanding their territory. The map’s challenge lies in the enemy’s varied attack patterns, which combine air and ground units, necessitating a well-rounded defense. Additionally, the complex terrain limits visibility in certain areas, making careful planning of unit placement and movement paths crucial. Designed primarily for six or more players, the map is optimized for solo or small-team play rather than large-scale team battles. Novice players may struggle with setting up defenses, while experienced players can balance offense and defense efficiently. Before playing, it’s important to familiarize yourself with resource distribution, defensive building placements, and unit compositions. Given the nighttime limitations, using auxiliary tools like sensor towers or scans can also be a smart strategy. The map is designed to deliver an intense experience by balancing defense and offense, offering the most fun in solo matches or small team formats like 2v2 or 3v3 rather than full team battles.
Ultimate Madness (울티메이트 매드니스)
스타크래프트 브루드워의 인기 유즈맵인 'Ultimate Madness'는 8명의 플레이어가 동시에 전투를 펼치는 대규모 다중 플레이어 전투 맵이다. 이 맵은 넓은 평야와 중앙에 위치한 거대한 요새 구조물을 중심으로 전개되며, 각 플레이어는 시작 지점에서 출발해 상대방을 섬멸하거나 요새를 파괴하는 목표를 달성해야 한다. 맵의 특징은 광활한 개활지 형태로, 초반부터 중반까지는 넓은 시야와 빠른 기동성이 중요하며, 후반부로 갈수록 요새 주변의 좁은 통로와 엄폐물이 전투 양상을 변화시킨다. 전투는 주로 테란의 벙커, 프로토스의 포톤 캐논, 저그의Creep 기반 방어 시설 등으로 이루어지며, 이러한 구조물을 활용한 전략적 방어와 기습 공격이 관전 포인트다. 특히, 중앙 요새의 파괴 여부가 게임의 승패를 가르는 중요한 변수로 작용하는데, 요새 내부로 진입하기 위한 좁은 통로와 다수의 방어 시설이 플레이어들에게 지속적인 압박을 가한다. 맵의 밸런스는 초보자와 숙련자 모두에게 공평한 기회를 제공하도록 설계되었으나, 넓은 맵 특성상 초반 자원 수급과 멀티 테스팅이 중요하며, 타이밍 러시나 조이기 전략이 효과적으로 작용한다. 초보자라면 넓은 시야와 빠른 반응 속도를 연습하는 것이 중요하며, 숙련자라면 중앙 요새의 구조물을 활용한 방어와 기습을 통한 승부수를 던질 수 있다. Ultimate Madness는 맵의 규모와 전투 intensity 덕분에 스타크래프트 유즈맵의 대표적인 대형 전투 맵으로 자리매김했으며, 특히 8인 풀방에서 펼쳐지는Blood와 같은 전투 양상은 관전자들에게도 큰 재미를 선사한다. 또한, 맵의 symmetrical한 구조는 모든 플레이어에게 동일한 시작 조건을 제공하여 공정한 경쟁을 보장한다. 플레이 전에는 맵의 주요 통로와 요새의 구조를 숙지하고, 초반 자원 관리와 멀티 테스팅에 중점을 두어 전략을 수립하는 것이 중요하다. 또한, 팀플레이가 가능하다면 요새 주변의 엄폐물을 활용한 조기 방어와 협공 전략이 승률을 높이는 데 도움이 된다. Ultimate Madness is a thrilling StarCraft: Brood War custom map designed for 8 players, where intense large-scale battles unfold across vast open fields and a central fortress structure. The map features wide plains and strategic choke points near the fortress, forcing players to balance mobility and defense. Early to mid-game emphasizes open-field combat, while late-game shifts to tighter corridors around the fortress, where structures like Terran bunkers, Protoss photon cannons, and Zerg creep-based defenses become critical. The central fortress acts as a major gameplay pivot—destroying it often decides the match. The balanced design ensures fair opportunities for both beginners and veterans, though wide spaces demand strong early-game resource management and multi-tasking. For newcomers, practicing vision control and reaction speed is key, while advanced players can exploit fortress structures for ambushes or defensive play. Ultimate Madness shines in 8-player full lobbies, delivering high-intensity battles reminiscent of Blood-style gameplay. Its symmetrical layout guarantees equal starting conditions, fostering competitive fairness. Before playing, study key pathways and fortress layouts, prioritize early resource gathering, and adapt strategies based on opponent movements. Team coordination around the fortress’s cover can significantly boost victory chances.
맵 선택 가이드
태그는 맵의 핵심 특징을 빠르게 설명하지만 제작 버전마다 규칙이 다를 수 있습니다. 상세 설명에서 권장 인원, 난이도, 플레이 시간과 버전을 함께 확인한 뒤 다운로드하세요.