
요새 방어 스타크래프트 맵 모음
'요새 방어' 태그가 등록된 맵을 모았습니다. 장르 하나로 찾기 어려운 플레이 방식, 난이도와 특징을 중심으로 인기 맵과 최신 맵을 비교해 보세요.
- 등록 맵
- 34개
- 누적 다운로드
- 0
- 누적 조회
- 1,252
인기 맵
다운로드와 조회 반응이 높은 맵입니다.
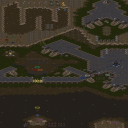
헬름즈 딥 대 아나타 13.3 (Helms Deep v. Annatar 13.3)
‘헬름즈 딥 대 아나타 13.3’은 스타크래프트: 브루드워의 유즈맵으로, 총 8명의 플레이어가 참여하는 대규모 디펜스 및 전략 게임이다. 맵의 전체적인 구조는 중앙에 위치한 거대한 요새와 주변을 에워싼 방어 시설, 그리고 적의 공격 루트를 차단하는 요충지들로 구성되어 있다. 맵의 배경은 사막 타일셋을 사용해 건조하고 메마른 분위기를 연출하며, 요새와 방어 시설은 마치Middle-earth의 ‘헬름즈 딥 전투’를 연상케 하는 중세 요새 디자인으로 구성되어 있다. 플레이어는 요새를 중심으로 한 방어선을 구축하고, 끊임없이 몰려오는 적의 웨이브를 상대해야 하며, 이 과정에서 자원 관리와 병력 배치, 전략적 판단이 요구된다. 특히 맵의 특징은 맵 곳곳에 배치된 방어 타워와 유닛 생산 건물들로, 플레이어는 초반 자원을 확보해 효율적으로 방어 체계를 구축해야 한다. 적의 공격은 요새 외곽에서부터 시작되며, 공격 루트는 맵의 지형을 따라 여러 갈래로 나뉘어 있어 플레이어는 한정된 병력으로도 다방면의 공격을 방어해야 한다. 또한 맵의 규모가 크고 지형이 복잡해, 전술적인 시야 확보와 통제가 중요한 포인트로 작용한다. 맵의 디자인상으로는 요새 내부와 외곽의 구조가 뚜렷이 구분되어 있어, 방어와 공격의 밸런스를 맞추는 것이 관건이다. 이 맵은 초보 플레이어보다는 중급 이상의 실력을 가진 플레이어에게 더 적합한데, 그 이유는 복잡한 지형과 다채로운 적의 웨이브 패턴 때문이다. 또한 팀 플레이가 강제되는 구조는 아니지만, 협력과 분업이 방어 성공의 열쇠가 되므로, 친구나 팀원과의 원활한 소통이 필요하다. 맵의 난이도는 적의 공격 패턴이 점점 강력해지면서 상승하므로, 초반 자원 확보와 방어 시설 구축을 얼마나 신속히 완료하는지가 승패를 좌우할 수 있다. 맵의 플레이 시간은 약 60분 내외로 예상되며, 이는 맵의 규모와 적의 웨이브 수가 많기 때문이다. 플레이 전 반드시 확인해야 할 요소는 맵의 주요 방어 지점과 적의 공격 루트, 그리고 자원 수집 지역의 위치다. 특히 요새 주변의 mineral field와 gas geyser의 분포는 초반 자원 확보에 큰 영향을 미치므로, 이를 미리 파악해두는 것이 중요하다. 또한 맵의 지형상 여러 길목이 존재해, 한 곳에만 방어 시설을 집중하면 쉽게 뚫릴 수 있으므로, 맵 전체를 아우르는 균형 잡힌 방어 계획을 세우는 것이 필수다. 마지막으로, 적의 웨이브는 일정 시간 간격으로 발생하므로, 이를 예측해 병력을 배치하고 보충하는 타이밍을 잘 조절해야 한다. ‘Helm’s Deep vs. Anath 13.3’ is a *StarCraft: Brood War* custom map designed for a large-scale defense and strategy game with up to eight players. The map features a massive central fortress surrounded by defensive structures and key choke points that block enemy attack routes. Set in a desert tile theme, the dry, barren atmosphere evokes the medieval fortress designs reminiscent of Middle-earth’s Battle of Helm’s Deep. Players must fortify defenses around the fortress while fending off relentless enemy waves, requiring careful resource management, troop positioning, and strategic decision-making. A defining feature of the map is the scattered defensive towers and unit production buildings. Players must secure early resources to efficiently build their defensive framework. Enemy attacks originate from the outer edges of the fortress, with multiple branching routes dictated by the terrain, forcing players to defend against multi-pronged assaults with limited forces. The large scale and complex geography of the map make tactical vision and control critical. The clear distinction between the fortress interior and exterior structures plays a key role in balancing defense and offense. This map is better suited for intermediate to advanced players due to its intricate terrain and varied enemy wave patterns. While not strictly team-based, successful defense hinges on cooperation and division of roles, making clear communication with teammates or friends essential. The difficulty escalates as enemy attacks grow stronger, with early resource collection and rapid defense setup often determining victory or defeat. Matches typically last around 60 minutes, given the map’s size and the number of enemy waves. Before playing, it’s crucial to identify key defensive points, enemy attack routes, and resource locations—especially the distribution of mineral fields and gas geysers around the fortress, which significantly impact early-game resource gathering. The terrain includes multiple pathways, and over-concentrating defenses in one area can lead to easy breaches, so a balanced, map-wide defense plan is vital. Additionally, since enemy waves spawn at regular intervals, predicting their timing and adjusting troop placements and reinforcements accordingly is essential for survival.
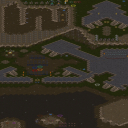
헬름즈 딥 v. 아나타 18.0 (Helms Deep v. Annatar 18.0)
스타크래프트 브루드워의 유즈맵 중에서도 전략성과 긴장감을 동시에 느낄 수 있는 ‘헬름즈 딥 v. 아나타 18.0(Helms Deep v. Annatar 18.0)’은 사막 지형을 배경으로 펼쳐지는 대규모 디펜스 형식의 맵입니다. 맵 중앙에 위치한 요새는 거대한 사각형 구조로 되어 있으며, 주변으로 여러 개의 방어 포인트가 배치되어 있습니다. 플레이어는 이 요새를 중심으로 적의 공격을 버텨내며 생존해야 하는 구조로 보이며, 요새의 각 모서리에는 대형 포탑이나 방어 시설이 있는 것으로 보입니다. 맵의 외곽은 넓은 평야가 펼쳐져 있어 적의 이동 경로가 다양하게 분포되어 있으며, 이를 활용해 전략적인 방어선을 구축할 수 있습니다. 이 맵은 다수의 플레이어가 참여하는 팀 대항전 형식으로 추정되며, 각 플레이어는 요새의 방어 또는 공격 역할을 맡아 진행하는 것으로 보입니다. 맵 상단과 하단에는 각각의 진영이 배치되어 있으며, 요새를 중심으로 한 방어 라인은 맵의 구조상 좁은 통로와 넓은 평지를 모두 포함하고 있어 방어 전략의 다양성을 요구합니다. 맵 중앙의 요새는 마치 ‘호수의 눈’이 떠오르는 듯한 독특한 디자인으로, 방어 시설이 집중되어 있어 적의 공격을 효과적으로 차단할 수 있도록 설계된 것으로 보입니다. 또한, 맵의 외곽에는 넓은 공간이 있어 적의 이동을 유도하거나 포위 공격을 시도할 수 있는 기회가 많습니다. 이 맵을 플레이하기 위해서는 방어와 공격의 균형을 carefully 조절해야 하며, 요새의 각 포인트를 효과적으로 방어하면서도 적의 약점을 노릴 수 있는 전략이 필요합니다. 플레이어 간의 협력이 중요한 만큼, 팀원 간의 호흡이 좋아야만 승리를 이끌어낼 수 있을 것입니다. 특히 요새의 각 모서리나 중앙 통로에서 벌어지는 전투는 맵의 긴장감을 한층 높이며, 맵의 구조상 넓은 시야를 확보하기 어려운 부분이 있어 예측하지 못한 공격을 받을 수도 있습니다. 따라서, 맵을 플레이하기 전에 요새의 구조와 각 방어 포인트의 위치를 충분히 숙지하는 것이 중요합니다. 이 맵은 주로 방어와 공격이 번갈아 가며 진행되는 만큼, 플레이어의 판단력과 순간적인 결정력이 승리를 좌우할 것입니다. 이 맵은 스타크래프트 유즈맵 중에서도 규모가 큰 편에 속하며, 대규모의 전투를 즐기고자 하는 플레이어들에게 적합한 작품입니다. 특히 디펜스와 공격이 혼합된 형식의 맵이기 때문에, 전략성을 중시하는 플레이어라면 즐겁게 플레이할 수 있을 것입니다. 다만, 맵의 복잡한 구조와 넓은 평야로 인해 초보자는 적응하는 데 시간이 걸릴 수 있으니, 먼저 연습 모드를 활용해 맵의 구조를 익히는 것이 좋습니다. 또한, 팀원과의 원활한 의사소통을 통해 전략을 공유하고, 요새의 각 포인트를 효율적으로 방어할 수 있도록 노력해야 합니다. 이 맵은 스타크래프트의 클래식한 유즈맵 중에서도 손꼽히는 작품으로, 오랜 기간 사랑받아 온 만큼, 플레이어들에게 새로운 전략과 재미를 선사할 것입니다. Among the custom maps of *StarCraft: Brood War*, *Helms Deep v. Annatar 18.0* stands out for delivering both strategic depth and intense suspense. Set against a desert landscape, this large-scale defense-style map features a massive square fortress at its center, surrounded by multiple defensive points. Players must hold their ground around the fortress, survive enemy assaults, and defend its corners, where heavy turrets and defensive structures are likely positioned. The outer edges of the map stretch into vast plains, offering varied enemy approach routes and opportunities to establish strategic defensive lines. Designed for team-based battles with multiple players, each participant takes on either a defensive or offensive role centered around the fortress. The top and bottom of the map house opposing factions, and the defensive lines around the fortress include both narrow passages and open fields, demanding diverse defensive strategies. The fortress’s central design resembles a "lake’s eye," with concentrated defensive structures to effectively block enemy advances. The map’s outer areas provide ample space to lure or encircle opponents, adding layers of tactical play. Success on this map hinges on balancing defense and offense, efficiently guarding key points of the fortress while exploiting enemy weaknesses. Teamwork is crucial, and strong coordination among players is essential for victory. Battles at the fortress’s corners or central corridors heighten the tension, and the map’s layout—where wide visibility is limited—can lead to unexpected ambushes. Familiarizing yourself with the fortress’s layout and defensive points beforehand is vital. As a large-scale custom map, it’s ideal for players seeking epic battles where defense and offense alternate dynamically. Its hybrid defense-attack mechanics make it a perfect fit for those who prioritize strategy. However, the map’s intricate design and expansive terrain may pose a challenge for beginners, so practicing in a training mode to learn the layout is recommended. Clear communication with teammates is key to sharing strategies and defending key points efficiently. A classic among *StarCraft* custom maps, *Helms Deep v. Annatar 18.0* has earned enduring popularity for offering fresh strategies and thrilling gameplay.
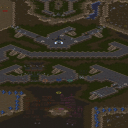
헬름즈 딥 v. 할디르 파이널 (Helms Deep v. Haldir Final)
‘헬름즈 딥 v. 할디르 파이널(Helms Deep v. Haldir Final)’은 스타크래프트: 브루드워의 대표적인 유즈맵으로, 반지의 제왕 세계관을 배경으로 한 대규모 디펜스 구조가 인상적인 맵이다. 맵 중앙에 위치한 거대한 요새 ‘헬름즈 딥’이 주요 방어 지점으로, 외부에서 몰려드는 적들을 막아내는 것이 핵심 목표로 보인다. 플레이어는 요새를 지키며 끊임없이 쏟아지는 적 유닛들을 상대로 방어선을 구축하고, 전략적 요충지를 확보해야 한다. 맵의 지형은 요새 주변으로 곡선형 언덕과 협곡이 펼쳐져 있어, 시야 확보와 진형 배치에 중점을 두어야 한다. 또한, 맵 상단과 하단에 위치한 두 개의 출입구는 방어의 핵심 포인트로, 이 곳을 집중 방어하지 않으면 적의 침투로 이어질 가능성이 높아 보인다. 맵의 분위기는 사막 타일셋을 활용해 건조하고 웅장한 느낌을 주며, 요새의 석조 구조물과 드워프의 방어 시설이 세밀하게 묘사되어 있어 몰입감을 높인다. 플레이어는 제한된 자원으로 방어군을 배치하고, 자원 채취를 통해 추가 병력을 생산할 수 있는 시스템으로 추정된다. 이 맵은 장기간의 방어전을 요하는 만큼, 팀워크와 전략적 사고가 요구되며, 특히 초보 플레이어보다는 중급 이상의 실력이 필요한 디펜스 유즈맵으로 보인다. 맵의 난이도는 적의Wave가 점차 강화되는 구조로 구성되어 있어, 초반의 여유로운 방어가 후반으로 갈수록 긴장감을 조성한다. 추천 대상은 스타크래프트의 디펜스 장르를 선호하는 플레이어이며, 특히 대규모 방어전을 즐기는 유저들에게 적합할 것으로 판단된다. 플레이 전에는 맵의 출입구 위치와 요새의 주요 방어จุ를 숙지하고, 자원 관리와 병력 배치에 대한 계획을 미리 세워두는 것이 중요하다. 또한, 팀플레이가 필수인 만큼, 팀원 간의 역할 분담을 사전에 논의하는 것이 성공적인 방어에 도움이 될 것이다. 맵의 첫 번째 버전인 ‘Helms Deep v. Haldir’에서 발생했던 버그와 오류가 이번 최종 버전에서 모두 수정되었다고 하니, 보다 안정적인 플레이가 가능할 것으로 기대된다.Helms Deep v. Haldir Final is a standout user-made defense map for StarCraft: Brood War, immersing players in the epic world of Middle-earth with a massive fortress, Helm's Deep, as the central battlefield. The map challenges players to defend the stronghold against relentless waves of enemy units, requiring strategic positioning and resource management. The terrain features curved hills and ravines around the fortress, offering vantage points and natural chokepoints that players must control to prevent enemy breakthroughs. The top and bottom entrances act as critical defense lines, and failing to secure them could lead to catastrophic invasions. The desert tile set enhances the map's grandeur, with detailed stone structures and dwarf fortifications that reinforce the Lord of the Rings aesthetic. Players are likely required to gather resources to produce additional troops while managing limited starting forces. This map demands teamwork and tactical foresight, making it more suitable for intermediate to advanced players rather than beginners. The difficulty ramps up as enemy waves intensify, shifting from manageable early waves to high-pressure late-game scenarios. Ideal for fans of defense-focused UMS maps, this title offers a thrilling, long-form experience that rewards coordination and planning. Before playing, it's crucial to identify key entrances, fortress bottlenecks, and resource nodes, while pre-discussing team roles to optimize defense strategies. As the final version, this map fixes all known bugs from the previous iteration, Helms Deep v. Haldir, ensuring a smoother and more polished experience.
킬 18,000 저그 (Kill 18,000 Zergs) v2.3
스타크래프트 브루드워의 유즈맵 《킬 18,000 저그》 v2.3는 대규모 디펜스형 컴까기 맵으로, 플레이어들이 endless wave의 저그 무리를 상대로 요새를 지켜내는 재미가 특징이다. 4인용으로 설계된 이 맵은 거대한 평원 중앙에 요새가 배치되어 있으며, 주변으로 끊임없이 몰려드는 저글링, 히드라리스크, 뮤탈리스크, 울트라리스크 등 각종 저그 유닛을 상대해야 한다. 맵의 구조는 중앙 요새 주변을 빙 둘러싼 8방향 입구(estimated 4~8개)가 존재하며, 각 입구는 방어선 역할을 할 수 있는 언덕이나 좁은 길목으로 이루어져 있다. 저그의 공격은 초반에는 약한 유닛으로 시작하지만, 시간이 지날수록 테크가 올라가면서 더욱 강력해지는 방식으로 진행된다. 플레이어는 제한된 자원으로 방어 건물을 건설하고, 업그레이드를 통해 병력의 화력을 강화해야 하며, 보조 자원이나 특수 능력(visible in minimap icons)을 활용해 저그의 흐름을 방해할 수 있다. 맵의 분위기는 황혼 타일셋을 기반으로 하여 시원한 느낌의 황무지와mpire-like한 분위기가 조성되어 있으며, minimap에 표시되는 저그의 움직임은 게임의 긴장감을 높이는 요소로 작용한다. 초보자는 방어 건물의 배치와 업그레이드 우선순위를 익히는 데 다소 시간이 걸릴 수 있지만, 팀원 간의 협력이 중요해지는 맵이기 때문에 실력이 부족해도 전략적인 플레이로 보완할 수 있다. 이 맵의 핵심은 끊임없는 공격과 방어의 반복으로, 얼마나 오랫동안 요새를 지켜내는지가 관건이다. 다만, 저그의 웨이브가 점점 강력해지는 특성상 후반부로 갈수록 방어가 어려워지므로, 초반에 최대한의 병력을 확보하는 것이 중요하다. 추천 대상은 스타크래프트의 기본 전략을 익히고자 하는 초보자와, 긴장감 넘치는 디펜스 게임을 즐기고 싶은 유저들이다. 특히, 팀 플레이를 좋아하는 유저에게는 최적의 선택이 될 것이다. This Brood War custom map, Kill 18,000 Zergs v2.3, is a large-scale defense-focused "comp vs. zerg" map where players must hold out against endless waves of Zerg units. Designed for 4 players, the map features a central fortress surrounded by multiple entry points (estimated 4–8) from which waves of Zerg units—ling, hydralisk, mutalisk, ultralisk, and more—emerge continuously. The central area is a flat plain, while the surrounding terrain includes hills and narrow paths that serve as natural choke points for defense. The Zerg attack escalates over time, starting with weaker units before progressing to higher-tier threats, forcing players to strategically place defensive structures, research upgrades, and manage limited resources. Players can also utilize special abilities or resource boosts, indicated by icons on the minimap, to disrupt the Zerg flow. The map’s aesthetic uses the Twilight tileset, creating a cool, desolate atmosphere that enhances the tense, military-themed experience. The minimap’s real-time display of incoming Zerg waves adds a layer of urgency, making every decision critical. While beginners may struggle initially with structure placement and upgrade prioritization, teamwork becomes essential as the difficulty ramps up. The core gameplay revolves around sustained defense against relentless assaults, with the ultimate goal being survival for as long as possible. However, the escalating strength of Zerg waves in later stages demands early-game preparation and strong unit compositions. Ideal for players looking to refine their strategic thinking or those who enjoy high-stakes defense experiences, this map is especially recommended for those who prefer collaborative gameplay. Its appeal lies in the balance between tension, strategy, and teamwork, making it a standout among StarCraft custom maps.
캐논 디펜스 10-Way V9.11 (Cannon Defense 10-Way V9.11)
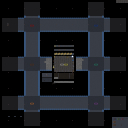
스타크래프트 브루드워의 대표적인 디펜스 유즈맵인 〈Cannon Defense 10-Way V9.11〉은 플레이어가 중앙 요새를 방어하며 끊임없이 몰려오는 적의 공격을 막아내는 구조로 구성되어 있다. 맵 중앙에는 요새 건물이 있으며, 그 주위를 에워싸듯 10개의 방향에서 적 유닛이 끊임없이 진격해 온다. 플레이어는 요새를 보호하기 위해 각 방향에 배치된 포탑과 방어 건물, 그리고 자원 수집을 통해 보강할 수 있는 방어 시설을 활용해야 한다. 맵 상단 중앙에는 자원 채취 구역이 있으며, 이를 통해 포탑 업그레이드나 추가 병력 생산에 필요한 미네랄을 확보할 수 있다. 게임의 핵심은 중앙 요새의 체력 관리와 포탑 배치 전략이다. 초반에는 적은 유닛으로 공격해 오지만, 시간이 지나면서 점점 강력해지는 적군을 상대해야 하며, 특히 후반부로 갈수록 대규모 공세가 이어진다. 포탑의 종류와 위치를 어떻게 배치하느냐에 따라 방어 성공 여부가 갈리므로, 플레이어는 각 방향의 공격 패턴을 분석하고 효율적인 방어선을 구축해야 한다. 또한, 자원 관리를 통해 포탑의 공격력과 체력을 지속적으로 업그레이드하는 것이 중요하다. 이 맵은 초보자부터 고수까지 폭넓은 플레이어층을 아우르며, 특히 디펜스 장르에 익숙하지 않은 플레이어도 쉽게 접근할 수 있도록 난이도가 조절되어 있다. 10개의 방향에서 동시에 공격이 들어오기 때문에, 집중력과 전략적 사고가 요구되며, 긴장감 넘치는 전투가 지속된다. 방어에 성공하면 요새가 유지되면서 다음 웨이브가 시작되고, 반대로 요새가 파괴되면 게임이 종료된다. 반복 플레이를 통해 방어 패턴을 익히고, 최적의 포탑 배치와 자원 관리를 연마할 수 있는 점이 이 맵의 큰 매력이다. 주로 1인 플레이를 권장하지만, 팀 플레이로도 즐길 수 있는 구조로 설계되어 있어, 혼자서도 충분히 긴장감 넘치는 경험을 제공한다. 플레이 전에는 포탑의 종류와 효과를 숙지하고, 각 방향의 공격 타이밍을 파악하는 것이 중요하다. 또한, 자원 수집을 소홀히 하지 말고, 포탑 업그레이드 우선순위를 신중히 결정해야 한다. 맵의 난이도는 시간이 지날수록 상승하므로, 초반에 충분한 방어선을 구축하지 않으면 중반 이후부터 급격히 어려워진다. 이 맵을 즐기기 위해서는 꾸준한 연습과 전략적 사고가 필수적이며, 요새를 지켜내는 짜릿한 성취감을 느낄 수 있을 것이다. 이 맵은 디펜스 장르의 정수를 담고 있어, 스타크래프트 유즈맵 중에서 손꼽히는 작품으로 평가받고 있다. 특히 10-Way라는 독특한 구조는 플레이어에게 끊임없는 긴장감을 제공하며, 전략적 깊이를 더한다. 반복 플레이를 통해 점점 더 어려운 웨이브를 극복해 나가는 재미가 일품이다. 디펜스를 좋아하는 플레이어라면 반드시 한 번쯤 도전해 볼 가치가 있는 맵이다. StarCraft: Brood War's classic defense custom map, *Cannon Defense 10-Way V9.11*, challenges players to defend a central fortress against relentless waves of enemies. The map features a central base building surrounded by ten directional paths from which enemies continuously advance. Players must protect the fortress by strategically placing turrets, defensive structures, and resource-gathering facilities to reinforce their defenses. At the top center of the map lies a resource collection area, allowing players to gather minerals for upgrading turrets and producing additional forces. The core gameplay revolves around maintaining the fortress's health and optimizing turret placement. Early waves consist of weaker units, but the enemy grows progressively stronger over time, culminating in large-scale assaults in the later stages. Success hinges on analyzing each direction's attack patterns and constructing an efficient defensive line. Proper resource management is also critical, as upgrading turret damage and durability directly impacts survival. This map caters to a wide range of players, from beginners to experts, with adjustable difficulty that makes it accessible even to those unfamiliar with the defense genre. The simultaneous assaults from ten directions demand focus and strategic thinking, creating an intense and engaging experience. Each successful defense preserves the fortress for the next wave, while its destruction ends the game. Repeated play allows players to refine their strategies, master turret placement, and improve resource management—key elements that make the map so appealing. While designed primarily for solo play, the map also supports team-based strategies, ensuring an exciting experience even when played alone. Before starting, players should familiarize themselves with turret types and their effects, study attack timings for each direction, and avoid neglecting resource collection. Prioritizing turret upgrades wisely is essential, as the difficulty escalates rapidly if defenses are insufficient early on. Mastery requires consistent practice and tactical foresight, rewarding players with the thrill of protecting the fortress against overwhelming odds. Renowned for capturing the essence of the defense genre, *Cannon Defense 10-Way V9.11* stands out among StarCraft custom maps. Its unique ten-directional structure delivers constant tension and strategic depth, making each playthrough a rewarding challenge. The satisfaction of overcoming increasingly difficult waves ensures this map is a must-try for any fan of the genre.
임파서블 니르바나 2010 (Impossible Nirvana 2010)
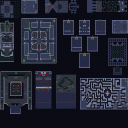
스타크래프트 브루드워의 유즈맵 <Impossible Nirvana 2010>은 플레이어 5명이 한 팀으로 협동하여 극한의 난관을 극복하는 디펜스 장르의 맵입니다. 맵 이미지에서 확인되는 여러 개의 요새와 방어 시설, serta 적의 끊임없는 공세가 인상적인 이 맵은 단순히 방어하는 것만이 아니라 전략적 계획과 빠른 판단력이 요구되는 하드코어 디펜스로 분류됩니다. 맵 중앙에는 거대한 요새가 자리 잡고 있으며, 외곽을 따라 배치된 방어 타워와 병영을 활용해 적의 공격을 저지해야 합니다. 특히, 맵의 구조상 일부 통로가 좁아져 있어 대량의 적 유닛을 한꺼번에 상대해야 하는 상황이 빈번히 발생하므로, 자원 관리와 유닛 조합에 신중한 접근이 필요합니다. 플레이 방식은 기본적으로 컴퓨터의 끊임없는 공격을 방어하는 컴까기(컴퓨터 상대 유즈맵)로 보이며, 맵 이미지에서 확인되는 다수의 적 시작 위치와 방어 시설의 배치가 이를 뒷받침합니다. 맵의 중앙 요새가 주요 방어 거점 역할을 하고, 외부 방어선에서 보조적으로 적을 막아내야 합니다. 또한, 맵 상단과 하단에 위치한 좁은 통로에서는 적의 대량 러시가 예상되므로, 초반 자원 확보와 병력 확충이 매우 중요합니다. 방어 타워의 배치를 최적화하고, 적의 공격 패턴을 예측하는 능력이 이 맵의 핵심 과제입니다. 이 맵은 초보자보다는 intermediates 이상의 플레이어에게 추천되며, 특히 스타크래프트의 디펜스 맵을 즐기는 유저들에게 큰 호응을 받을 만한 구성입니다. 단, 맵의 난이도가 높으므로 충분한 연습과 전략 수립이 필요합니다. 게임을 시작하기 전, 방어 시설의 배치와 자원 확보 타이밍을 미리 계획해 두는 것이 중요합니다. 또한, 맵의 복잡한 구조상 미니맵을 적극 활용해 적의 공격 루트를 실시간으로 확인하는 것이 성공의 열쇠가 될 것입니다. Impossible Nirvana 2010 is a hardcore defense-style custom map for StarCraft: Brood War where five players work together as a single team to withstand relentless enemy assaults. The map features a central fortress surrounded by defensive structures and tower placements, requiring players to strategically manage resources and unit compositions. Narrow pathways around the map force frequent encounters with waves of enemy units, making early resource collection and unit reinforcement critical to survival. The gameplay revolves around countering continuous computer-controlled attacks, evident from the multiple enemy starting positions and densely packed defensive layouts visible in the image. Players must prioritize fortifying the central fortress while maintaining auxiliary outer defenses. The top and bottom narrow corridors are hotspots for massive enemy rushes, demanding careful planning in the early game. Optimizing tower placements and predicting attack patterns are essential to overcoming the map's challenges. This map is recommended for intermediate to advanced players who enjoy StarCraft's defense custom maps. While the difficulty is high, the strategic depth and cooperative nature provide a rewarding experience for those willing to put in the effort. Before starting, players should plan their initial defenses and resource allocation. Utilizing the minimap to track enemy movements in real-time is crucial, given the map's intricate layout.
더 라스트 레전드 v.1.1 (The Last Legion v.1.1)
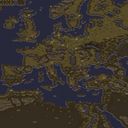
스타크래프트 브루드워의 대표적인 UMS 유즈맵인 〈더 라스트 레전드〉는 로마 제국의 몰락을 배경으로 한 대규모 디펜스 형식의 게임이다. 플레이어는 고대 로마의 영토를 침략하는 적군들을 상대로 방어선을 구축하고, 제한된 자원으로 병력과 건물을 관리해야 한다. 맵의 중심부는 넓은 평야와 요새로 구성되어 있으며, 적군은 주변에서 끊임없이 밀려오기 때문에 빠른 판단력과 전략적 배치력이 요구된다. 미니맵에서는 적의 움직임이 실시간으로 표시되어 실시간 대응이 가능하지만, 자원 수급은 비교적 제한적이어서 효율적인 관리 없이는 금방 무너질 수 있다. 특히 초반과 중반의 균형 잡힌 병력 운용이 승패를 좌우하는데, 초보자들은 자원을 과도하게 소비하거나 방어를 소홀히 하는 경우가 많아 쉽게 무너진다. 반면 숙련자들은 적의 공세를 예측하고 방어선을 재배치하는 등 능동적인 대처가 가능하다. 맵의 특징은 넓은 맵 크기와 세부적으로 배치된 요새 구조로, 플레이어의 시야와 전략적 깊이를 시험한다. 또한 적군의 종류와 공격 패턴이 단계적으로 강화되기 때문에 긴장감을 유지할 수 있다. 이 맵은 디펜스 장르를 любителей УЗМ에 소개하고자 하는 플레이어들에게 강력한 추천 대상이다. 다만, 넓은 맵과 복잡한 구조 때문에 초심자는 처음부터 어려움을 느낄 수 있으니, 간단한 방어형 맵으로 연습을 권장한다. 게임을 시작하기 전에는 자원 관리와 요새 배치 우선순위를 미리 숙지하는 것이 중요하다. 전체적으로 〈더 라스트 레전드〉는 전략성과 긴장감을 동시에 제공하는 훌륭한 유즈맵으로, 디펜스 장르의 정수를 느낄 수 있는 작품이다. StarCraft: Brood War’s iconic UMS custom map, *The Last Legend*, is a large-scale defense game set against the fall of the Roman Empire. Players must build defensive lines against invading forces, managing troops and structures with limited resources. The map’s center features wide plains and fortresses, with enemies continuously pouring in from the edges, demanding quick decision-making and strategic positioning. The minimap displays enemy movements in real time for responsive counterplay, but resource income is scarce, making efficient management crucial—otherwise, the defense collapses rapidly. Balanced troop deployment in the early and mid-game often determines victory or defeat; beginners frequently struggle by overspending resources or neglecting defenses, while experienced players adapt by predicting enemy assaults and repositioning their lines. The map’s defining traits—its vast size and intricately placed fortresses—test players’ vision and strategic depth, while the enemy’s evolving types and attack patterns maintain high tension throughout. Ideal for UMS enthusiasts seeking a defense experience, it’s best approached with prior practice on simpler defensive maps due to its complexity. Before starting, mastering resource management and prioritizing fortress placement is essential. Overall, *The Last Legend* delivers a masterful blend of strategy and suspense, encapsulating the essence of the defense genre.
로드 오브 더 맵: 모르도르의 구원 (LotR Mordor's Redemption)
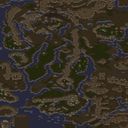
스타크래프트: 브루드워의 유즈맵인 ‘로드 오브 더 링: 모르도르의 구원(LotR Mordor's Redemption)’은 반지의 제왕 세계관을 배경으로 한 대규모 디펜스 및 서바이벌 장르의 맵입니다. 맵의 이름은 J.R.R. 톨킨의 소설 ‘반지의 제왕’에 등장하는 사악한 땅, 모르도르에서 영감을 받았으며, 플레이어는 어둠의 세력에 맞서 빛의 세력을 이끌고 최후의 방어선을 구축해야 합니다. 맵은 7명의 플레이어가 참여할 수 있으며, 각 플레이어는 고유한 시작 위치와 자원을 확보한 뒤, 끊임없이 몰려오는 적의 웨이브를 방어하거나 공격적으로 진출하여 목표를 달성해야 합니다. 내부 맵 설명에서 ‘Second Age’라는 언급으로 보아, 가운데땅의 역사적 시대적 배경 중 하나를 차용한 것으로 추정됩니다. 맵의 구조는 넓은 평원과 협곡, 그리고 요새를 중심으로 구성되어 있어, 플레이어는 지형을 활용한 방어 전략과 함께 자원의 관리, 동맹과의 협력, 적절한 타이밍의 공격 등 다층적인 전략을 구사해야 합니다. 특히, 맵의 중앙에는 거대한 요새가 위치해 있으며, 이곳을 중심으로 방어塔와 병력을 배치하거나, 반대로 요새를 파괴하기 위한 침공을 계획할 수 있습니다. 맵의 배경은 사막 타일셋으로 구성되어 있으며, 이는 모르도르의 황량한 풍경을 연상시키며 몰입감을 높이는 역할을 합니다. 이 맵의 특징은 단순히 방어에만 치중하지 않고, 적의 약점을 공격하거나 중립 건물을 점령하는 등 다양한 플레이 스타일을 요구한다는 점입니다. 또한, 지속적으로 쏟아지는 적의 웨이브는 플레이어의 집중력과 판단력을 시험하며, 실시간으로 변하는 전황에 따라 전략을 유연하게 전환해야 합니다. 초보자에게는 다소 어려운 난이도를 가질 수 있지만, 숙련된 플레이어에게는 전략의 깊이를 제공하는 매력적인 요소로 작용할 것입니다. 이 맵을 즐기기 위해서는 최소 2~3시간 정도의 플레이 시간을 예상하는 것이 좋습니다. 특히, 4~7명의 플레이어가 참여할 경우 긴장감과 긴 플레이 타임이 특징이며, 동맹과의 협력과 정보 공유가 victoria를 좌우할 수 있습니다. 맵의 버전은 3.1로, 지속적인 업데이트를 통해 밸런스가 조정되고 있는 것으로 보입니다. 또한, 맵의 복잡한 구조와 다양한 전략적 선택지 때문에, 초반에는 다소 혼란스러울 수 있으나, 여러 번 플레이를 반복하며 지형을 익히고 전략을 다듬을수록 재미와 성취감을 느낄 수 있을 것입니다. 추천 대상은 반지의 제왕 팬이거나, 디펜스 및 서바이벌 장르의 맵을 즐기는 플레이어, 그리고 전략적 깊이를 추구하는 게이머에게 적합합니다. 미리 맵의 구조와 주요 건물을 숙지하고, 동맹과의 역할 분담을 철저히 준비한다면, 더욱 즐거운 플레이가 될 것입니다. *StarCraft: Brood War*'s custom map, *Lord of the Rings: Mordor’s Redemption* (*LotR Mordor's Redemption*), is a large-scale defense and survival genre map set in the world of *The Lord of the Rings*. The map's name draws inspiration from Mordor, the dark land featured in J.R.R. Tolkien’s novel *The Lord of the Rings*, where players lead the forces of light against the darkness, building the final line of defense. The map supports up to seven players, each starting with unique positions and resources, tasked with defending against or counterattacking endless waves of enemies. The in-game description mentions the "Second Age," suggesting it borrows from one of Middle-earth’s historical eras. The map’s layout features vast plains, canyons, and fortresses, requiring players to utilize terrain for defense while managing resources, coordinating with allies, and launching well-timed attacks. A massive fortress sits at the center, serving as a focal point for deploying defensive towers or launching assaults to destroy it. The desert-themed tileset enhances immersion by evoking the barren landscape of Mordor. What sets this map apart is its emphasis on dynamic gameplay—attacking enemy weaknesses, capturing neutral structures, and adapting strategies in real time. The relentless enemy waves test players' focus and decision-making, demanding flexibility as the battlefield shifts. While the difficulty may be high for beginners, experienced players will appreciate its strategic depth. Expect a playtime of 2–3 hours, especially with 4–7 players, where tension and extended sessions heighten the experience. Cooperation and information sharing among allies can determine victory. The current version, 3.1, appears to undergo balance adjustments through updates. The map’s intricate layout and strategic options may feel overwhelming at first, but repeated plays help players familiarize themselves with the terrain and refine tactics, deepening enjoyment and satisfaction. Ideal for *Lord of the Rings* fans, defense/survival map enthusiasts, and players seeking strategic depth. Familiarizing yourself with the map’s structure and key buildings, along with thorough role distribution among allies, will ensure a more enjoyable experience.
하이랄: 카타스트로프 SE (Hyrule: Catastrophe SE)
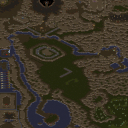
스타크래프트 브루드워의 유즈맵 '하이랄: 카타스트로프 SE(Hyrule: Catastrophe SE)'는 젤다의 전설 시리즈를 모티브로 한 대규모 디펜스 장르의 맵으로, 플레이어는 8인으로 구성된 팀을 이루어 맵 중앙에 위치한 요새를 방어하는 동시에 적의 공격을 막아내야 한다. 맵은 사막 타일셋을 기반으로 제작되었으며, 넓은 평야와 건물을 보호할 수 있는 전략적 요충지들이 배치되어 있어 팀워크와 순간 판단력이 중요한 요소로 작용한다. 맵 중앙의 요새는 여러 개의 건물이 모여 구성되어 있으며, 이 건물들을 보호하면서 동시에 외부에서 끊임없이 몰려드는 적을 상대해야 한다. 맵의 구도는 비교적 평탄한 지형이지만, 곳곳에 estratégic한 언덕과 협곡이 존재해 시야 확보와 방어 라인 구축에 영향을 미친다. 특히 맵의 좌측과 우측에 위치한 넓은 평야 지역은 적의 주요 진입로로 활용될 가능성이 높으므로, 방어 병력의 배치와 자원 관리, 건물 업그레이드에 신중한 계획이 필요하다. 이 맵의 특징은 맵의 규모가 매우 크고, 요새를 중심으로 한Circle의 방어 구조가 인상적이며, 적의 공격 패턴이 시간에 따라 변화한다는 점이다. 초반에는 소규모의 적들이 끊임없이 몰려오지만, 시간이 지나면서 대규모의 적들이 등장하여 방어 라인을 위협하기 때문에, 플레이어는 초반부터 꾸준한 자원 수집과 방어 시설 구축을 병행해야 한다. 또한, 맵의 디자인상 요새 주변의 언덕이나 협곡을 적극 활용하여 적의 접근을 차단하는 전략이 효과적일 것으로 보인다. 이 맵은 초보자에게는 다소 난해할 수 있지만, 팀워크와 전략적 사고가 뛰어난 플레이어들에게는 즐거운 도전 과제가 될 것이다. 특히 맵의 규모가 크기 때문에, 팀원 간의 원활한 소통과 역할 분담이 승리를 좌우할 가능성이 높다. 마지막으로, 이 맵을 플레이하기 전에는 팀원 간의 역할 분담을 사전에 협의하고, 방어 라인 구축에 필요한 자원을 충분히 확보하는 것이 중요하다. 또한, 맵의 구조를 숙지하여 요새 주변의 주요 진입로를 미리 파악해두는 것이 좋다. 이러한 준비가 뒷받침된다면, 하이랄: 카타스트로프 SE는 스타크래프트 유즈맵의 재미와 전략성을 동시에 느낄 수 있는 훌륭한 선택지가 될 것이다. 이 맵은 젤다의 전설의 세계관을 사랑하는 팬들에게 특히 매력적으로 다가갈 것이며, 디펜스 장르를 좋아하는 플레이어들에게도 강력히 추천할 만한 작품이다. Hyrule: Catastrophe SE is a large-scale defense-type custom map in StarCraft: Brood War, inspired by The Legend of Zelda series. Players form teams of 8 and must defend a central fortress while fending off relentless enemy attacks. The map is built on a desert tileset, featuring expansive plains and strategic high-ground positions that play a crucial role in defense planning. The central fortress consists of multiple buildings that require collective protection, while enemies continuously spawn from various entry points around the map. The terrain is relatively flat but includes hills and valleys that impact visibility and line of sight, making them key elements for positioning defenses. The left and right sides of the map are wide open plains, likely serving as primary enemy routes, so careful allocation of defensive forces and resource management is essential. One of the map's standout features is its massive scale and circular defensive structure centered around the fortress. Enemy attack patterns intensify over time, starting with small groups and escalating to large-scale assaults that threaten defensive lines. Players must balance early resource gathering with fortress upgrades and defensive structure construction to withstand these waves. The map's design encourages creative use of hills and valleys to block enemy advances, rewarding strategic thinking and teamwork. While the map may pose a challenge for beginners, it offers an engaging experience for players who excel in cooperation and strategic planning. Given its size, effective communication and role distribution among team members are critical to success. Before playing, it is advisable to coordinate roles, secure sufficient resources for defense, and familiarize yourself with the map's structure to identify key entry points around the fortress. With proper preparation, Hyrule: Catastrophe SE delivers an immersive blend of StarCraft's strategic depth and the nostalgic appeal of Zelda's universe, making it a top recommendation for defense map enthusiasts and Zelda fans alike.
![버섯 왕국 전쟁 EX (Mushroom Kingdom War [=EX=]) 맵 미리보기](https://cdn-star-data.huzy.net/thumbnail_83d1e9b14df64a0cabb3b67d2617a5aa.jpg)
버섯 왕국 전쟁 EX (Mushroom Kingdom War [=EX=])
스타크래프트 브루드워의 유즈맵 중 하나로, ‘Mushroom Kingdom War ([=EX=])’는 마리오 시리즈의 무챤 왕국을 배경으로 한 디펜스 및 전투형 맵이다. 7명의 플레이어가 각자 맵의 양쪽 끝에서 시작하며, 초록색 진영은 ‘마리오 측’으로 요새를 방어하는 임무를, 빨간색 진영은 ‘쿠파 측’으로 요새를 파괴하는 임무를 수행한다. 맵 중앙에는 거대한 ‘Mushroom’ 모양의 구조물이 자리 잡고 있으며, 양측 진영은 이 구조물을 중심으로 대치하면서 자원을 확보하고 유닛을 생산해 전투를 벌인다. 맵의 지형은 사막 타일셋을 사용해 비교적 평탄한 구조로 이루어져 있으며, 요새와 주요 건물들이 전략적 요충지에 배치되어 있어 방어와 공격의 균형이 중요하다. 특히, 중앙 ‘Mushroom’ 구역은 양측의 교전장이자Resource Points(자원 채취 구역)으로 기능해, 자원 확보 경쟁이 치열해질 수밖에 없다. 전투는 주로 중장갑 유닛과 마법 유닛을 조합해 진행되며, 각 진영의 특성에 따라 전략이 크게 갈린다. 예를 들어, 마리오 측은 빠른 기동성과 방어 건물을 활용한 수비 전략이, 쿠파 측은 강력한 공격 유닛과 테러 전략이 유효하다. 맵의 볼륨이 크고 구조가 복잡해 초보자는 적응하는 데 시간이 걸리겠지만, 숙련된 플레이어에게는 다양한 전략과 전술을 구사할 수 있는 넓은 공간을 제공한다. 추천 대상은 스타크래프트 디펜스 및 유즈맵을 좋아하는 플레이어들로, 특히 팀 플레이와 전략적 사고를 즐기는 이들에게 최적이다. 플레이 전에는 중앙 자원 구역의 위치와 요새의 방어 시설 배치를 미리 숙지하고, 각 진영의 특성을 분석하는 것이 중요하다. 또한, 맵의 규모가 크기 때문에 맵의 전체적인 흐름을 미리 파악하지 않으면 자원 확보와 전투에서 불리해질 수 있다. 초보자라면 난이도를 ‘보통’ 정도로 설정하고, 경험을 쌓아가며 플레이하는 것이 바람직하다. 이 맵은 스타크래프트 유즈맵의 정수를 담고 있어, 오랜 기간 사랑받아 온 클래식한 작품 중 하나로 손꼽힌다. "Mushroom Kingdom War ([=EX=])" is a defense and combat custom map from *StarCraft: Brood War* set in the Mushroom Kingdom from the *Mario* series. Seven players start on opposite ends of the map—green team plays as Mario's side, tasked with defending their fortress, while red team plays as Bowser's side, aiming to destroy their enemy's stronghold. At the center of the map stands a massive mushroom-shaped structure, around which both sides clash to secure resources and produce units for battle. The terrain uses a desert tileset, featuring a relatively flat layout with key strategic positions for fortresses and major buildings, making balance between defense and offense crucial. The central mushroom area serves as a battleground and a Resource Point (resource-gathering zone), intensifying competition for resources. Battles typically involve a mix of heavy-armored and magical units, with strategies diverging based on each side's strengths—Mario's team excels with fast mobility and defensive structures, while Bowser's team benefits from powerful offensive units and terror tactics. Though the map's large scale and complex layout may challenge beginners, experienced players will appreciate the vast space for diverse strategies and tactics. It’s ideal for fans of *StarCraft* defense maps and custom games, especially those who enjoy teamwork and strategic thinking. Before playing, it’s essential to memorize the central resource zone’s location and fortress defenses, analyze each side’s strengths, and understand the map’s flow to avoid disadvantages in resource gathering and combat. Beginners should start on a moderate difficulty setting and gradually improve their skills. As a classic custom map that has stood the test of time, "Mushroom Kingdom War ([=EX=])" encapsulates the essence of *StarCraft* custom maps and remains a beloved title among players.
헬름스 딥 v제로글링 퍼펙트 (Helms Deep vZerglingPerfect)
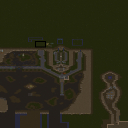
스타크래프트 브루드워의 유즈맵으로 유명한 <헬름스 딥 v제로글링 퍼펙트(Helms Deep vZerglingPerfect)>는 J.R.R. 톨킨의 반지의 제왕 세계관을 배경으로 한 디펜스 장르의 유즈맵입니다. 이 맵은 오크족의 저글링 무리인 젠글링이 헬름스 딥을 파괴하려는 시도를 막아내는 구조로, 인간과 엘프가 요새를 방어하는 전략적 플레이가 특징입니다. 맵의 지형은 사막 타일셋을 기반으로 구축되었으며, 중앙 요새와 주변 방어 시설을 중심으로 펼쳐지는 전투가 인상적입니다. 플레이어는 다수의 저글링 웨이브를 상대해야 하며, 방어 시설을 보수하고 전략적으로 유닛을 배치해야만 합니다. 맵의 제목에서 볼 수 있듯이 저글링에 특화된 디펜스가 핵심으로, 빠른 판단과 효율적인 자원 관리가 요구됩니다. 특히 제로글링(Perfect) 버전은 난이도가 높아 숙련자용으로 분류되며, 지속적인 공격을 버텨내고 요새를 지켜내는 짜릿한 긴장감이 특징입니다. 초보 플레이어는 맵의 구조와 방어 포인트를 숙지한 뒤, 점차 난이도를 높여가는 것이 좋습니다. 맵의 볼륨이 크고 디테일한 그래픽으로 구성되어 있어 몰입감이 뛰어나며, 팬층이 두터운 반지의 제왕 세계관의 매력을 느낄 수 있는 유즈맵입니다. 플레이 전에는 맵의 주요 방어 지점과 자원 분포를 확인하고, 유닛 생산 빌드를 미리 준비하는 것이 중요합니다. 또한, 팀 플레이가 가능한 맵으로, 팀원 간의 호흡이 어우러질 때 더 높은 성공률을 기대할 수 있습니다.Helms Deep vZerglingPerfect는 스타크래프트 브루드워의 UMS(유즈맵) 장르 중에서도 디펜스 계열에 속하는 맵으로, 오크족의 젠글링 무리가 요새를 공격하는 구조를 중심으로 플레이가 전개됩니다. 맵의 핵심은 중앙 요새를 지키며 끊임없이 몰려오는 적을 상대하는 것이며, 방어 시설의 관리와 유닛 배치 전략이 승패를 좌우합니다. 특히 젠글링의 빠른 기동성과 다수 공격 패턴을 고려해 방어 라인을 구축해야 하며, 자원의 효율적인 활용이 필수적입니다. 맵의 배경인 헬름스 딥은 반지의 제왕에서 오크와 humans의 전투로 유명한 장소로, 이 세계관을 fans에게 어필하는 요소로 작용합니다. 플레이어는 각 웨이브의 공격 패턴을 분석하고, 그에 맞는 방어 전략을 수립해야 합니다. 또한, 맵의 규모가 크고 디테일이 풍부해 몰입감이 뛰어나며, 특히 사막 타일셋의 황량한 분위기가 전투의 긴장감을 더해줍니다. 이 맵은 주로 단독 플레이보다는 팀 플레이에 적합하며, 팀원 간의 협력이 요구되는 만큼 전략적인 플레이가 중요합니다. 초보자는 난이도를 낮춰가며 플레이하다 보면 점차 숙련도를 높일 수 있으며, 숙련자는 빠른 반응과 효율적인 자원 관리로 높은 점수를 노릴 수 있습니다. The *Helms Deep vZerglingPerfect* custom map from *StarCraft: Brood War* is a defense-style UMS renowned for its intense gameplay. Set in the world of J.R.R. Tolkien’s *The Lord of the Rings*, this map pits players against waves of Zerglings (called "Zerglings" in the title) attempting to destroy Helm’s Deep, with humans and elves defending the fortress. Built on a desert tileset, the map features a central stronghold and surrounding defensive structures, where strategic combat unfolds. Players must withstand relentless Zergling assaults, repair defenses, and deploy units efficiently. The "Perfect" version, as the name suggests, is designed for advanced players, demanding quick decision-making and precise resource management to endure continuous attacks and protect the fortress. Beginners should familiarize themselves with the map’s layout and defensive points before gradually increasing difficulty. The map’s immersive design, detailed graphics, and deep lore from *The Lord of the Rings* make it a fan favorite. Success depends on scouting key defensive zones and resource distribution beforehand, as well as preparing unit production builds. Team play is highly encouraged, as coordination among teammates significantly boosts survival rates. At its core, *Helms Deep vZerglingPerfect* is a defense-focused UMS where players must hold the central stronghold against waves of enemies. Effective management of defenses, strategic unit placement, and rapid adaptation to Zerglings’ fast-paced, high-volume attacks are crucial. The map’s desert setting enhances the raw tension of battle, and its scale and detail create a gripping atmosphere. While solo play is possible, the map thrives in team-based scenarios, requiring strong cooperation. Beginners can start on lower difficulties to build skills, while experienced players can aim for high scores through quick reflexes and optimal resource use.
버섯 왕국 히어로즈 v8 (Mushroom Kingdom Heroes v8)
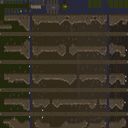
스타크래프트 브루드워의 유즈맵 <버섯 왕국 히어로즈 v8>은 5명의 플레이어가 함께 즐길 수 있는 대형 디펜스 기반의 전략 유즈맵으로, 플랫폼과 플레이어의 조합을 통해 지속적인 전투를 펼치는 구조가 특징이다. 맵의 중앙에는 거대한 요새가 위치하고 있으며, 이를 중심으로 플레이어는 각각의 기지를 건설하고 자원을 모아 유닛을 생산, 배치해야 한다. 맵의 가장 큰 특징은 맵 곳곳에 흩어져 있는 버섯 지형으로, 이 버섯을 파괴하면 보너스 자원이나 특수 유닛, 아이템을 획득할 수 있어 전략적 선택지가 넓어진다. 또한, 적의 공격 루트는 맵의 테두리를 따라 돌아가며 중앙 요새를 보호하는 방식으로 설계되어 있으며, 플레이어는 이를 방어하거나 반대로 요새를 공격할 수도 있다. 게임의 진행은 largely symmetrical한 맵 배치와 더불어, 버섯 파괴 여부, 자원 관리, 유닛 조합 등 다양한 변수가 존재해 매판의 플레이 스타일이 달라진다. 특히, 버섯을 얼마나 적극적으로 활용하는지에 따라 게임의 흐름이 완전히 달라질 수 있어, 초보자부터 숙련자까지 모두 재미를 느낄 수 있는 구조로 평가된다. 다만, 맵의 크기가 매우 크고 복잡한 구조를 가지고 있어 처음 플레이 시에는 길찾기나 자원 관리에서 다소 혼란을 겪을 수 있다. 따라서 이 맵을 처음 플레이하는 유저는 맵의 주요 지점(요새, 주요 버섯 지대, 주요 길목)을 미리 숙지하고 시작하는 것이 좋다. 또한, 팀플레이가 강제되는 구조는 아니지만, 5명의 플레이어가 한 팀을 이루는 경우라면 협력과 분배가 중요한 포인트가 된다. 맵의 난이도는 대체로 보통 수준으로 설정되어 있지만, 적의 공격 패턴이나 버섯의 배치에 따라 난이도가 급변할 수 있어 항상 긴장감을 유지할 수 있다. 이 맵은 디펜스와 대형 맵을 좋아하는 플레이어들에게 추천할 만한佳作이며, 특히 버섯을 활용한 전략적 플레이를 즐기고 싶은 유저라면 필수적으로 도전해볼 만한 작품이다. 플레이 전에는 맵의 주요 구조와 버섯의 위치, 적의 공격 루트를 미리 확인하고, 유닛 생산과 자원 관리를 철저히 하는 습관을 들이는 것이 중요하다. 또한, 팀플레이 시에는 각자의 역할을 clearly 분배하는 것이 승리의 열쇠가 될 것이다. StarCraft: Brood War's custom map *Mushroom Kingdom Heroes v8* is a large-scale defense-based strategy map designed for five players to enjoy together. The map features a structure where players engage in continuous combat through platform and player combinations. At the center of the map lies a massive fortress, around which players build their bases, gather resources, and produce and deploy units. The map's standout feature is the scattered mushroom terrain throughout, which, when destroyed, grants bonus resources, special units, or items, expanding strategic options. Additionally, enemy attack routes are designed to loop around the map's edges to protect the central fortress, allowing players to either defend or attack the fortress themselves. The game's progression varies with each match due to the largely symmetrical map layout, mushroom destruction, resource management, and unit combinations. The strategy can shift dramatically depending on how aggressively players utilize mushrooms, making it enjoyable for both beginners and experts. However, the map's vast size and complex structure may cause confusion for first-time players, especially in navigation and resource management. New players are advised to familiarize themselves with key locations (the fortress, major mushroom areas, and main pathways) before starting. While team play isn't mandatory, when five players form a team, cooperation and resource distribution become critical. The difficulty is generally moderate but can fluctuate sharply depending on enemy attack patterns or mushroom placements, keeping tension high throughout. This map is highly recommended for players who enjoy defense and large maps, especially those looking to experiment with mushroom-based strategies. Before playing, it's essential to study the map's key structures, mushroom locations, and enemy attack routes, while maintaining strict unit production and resource management. In team play, clearly dividing roles among players will be the key to victory.
최근 등록된 맵
새로 추가된 파일과 버전을 확인하세요.
스노우 포트 (Snow Fort)
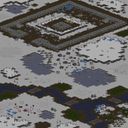
스노우 포트(Snow Fort)는 스타크래프트: 브루드워의 유즈맵으로, 눈 덮인 요새에서 적의 지휘관을 제거하는 것이 목표인 디펜스 스타일의 맵입니다. 눈과 얼음이 어우러진 겨울 배경의 맵은 시각적으로도 매력적이며, 긴장감 넘치는 전투를 즐길 수 있도록 설계되었습니다. 내부 맵 설명에 따르면 'UED가 요새에서 공격을 감행하고 있다. 지휘관을 제거하여 적을 제압하라'는 스토리가 담겨 있으며, 이는 플레이어가 단일 플레이어로 적의 침공을 방어해야 함을 암시합니다. 맵의 구조는 방어 거점을 중심으로 적 병력이 끊임없이 몰려오는 방식으로 구성되어 있어, 전략적 위치 선정이 매우 중요합니다. 특히 요새 내부의 좁은 길목과 넓은 평원 등 다양한 지형이 제공되어, 플레이어는 각자의 플레이 스타일에 맞게 방어선을 구축할 수 있습니다. 눈과 얼음으로 덮인 지형은 시야를 제한하고 이동 속도를 감소시키는 효과가 있어, 지형을 적극 활용한 전략이 요구됩니다. 맵의 난이도는 적의 공격 패턴과 지휘관의 위치에 따라 크게 달라지며, 초보자의 경우 방어 거점을 안정적으로 구축하는 데 집중해야 합니다. 반면 숙련된 플레이어는 적의 공격 타이밍을 예측하고, 효율적인 자원 관리를 통해 장기전을 펼칠 수 있습니다. 맵의 전체 크기가 크고, 타일 단위가 세밀하게 배치되어 있어, 디테일한 전략과 공간 활용이 중요한 맵으로 평가됩니다. 또한, 눈과 얼음의 시각적 효과는 게임의 분위기를 한층 더 살려주며, 겨울 테마의 맵을 선호하는 유저들에게는 특히 매력적인 요소로 작용할 것입니다. 하지만, 맵의 난이도가 적의 공격 패턴에 따라 크게 달라질 수 있어, 플레이 전 맵의 구조와 주요 거점을 숙지하는 것이 중요합니다. 이 맵은 디펜스와 생존을 중시하는 플레이어들에게 추천할 만한佳作입니다. 특히, 겨울 테마와 단일 플레이어라는 점에서 다른 디펜스 맵들과 차별화된 경험을 제공합니다. 맵을 플레이하기 전에는 방어 거점의 위치와 적의 공격 경로를 미리 확인하여, 보다 효과적인 방어 전략을 준비해 두는 것이 좋습니다. 또한, 눈과 얼음으로 인한 시야 제한과 이동 속도 저하를 고려하여, 플레이어의 유닛 선택과 배치에 신중을 기해야 합니다. Snow Fort is a custom map in StarCraft: Brood War where the objective is to eliminate the enemy commander in a snowy fortress-style defense map. The map, set against a winter backdrop of snow and ice, is visually appealing and designed to deliver tense, high-stakes battles. According to its in-game description, the story revolves around a UED assault on the fortress, tasking the player with suppressing the enemy by taking out their commander—a clear indication that the player must defend single-handedly against incoming waves. The map’s structure revolves around key defensive strongholds, with enemy forces continuously swarming in waves, making strategic positioning crucial. The terrain offers variety, from narrow choke points inside the fortress to wide-open plains, allowing players to tailor their defenses to their preferred playstyle. The snow- and ice-covered ground restricts visibility and slows movement, adding depth to the strategy by forcing players to leverage the terrain effectively. Difficulty fluctuates significantly depending on enemy attack patterns and the commander’s location, so beginners should focus on securing stable defensive perimeters. Skilled players, however, can anticipate attack timings and manage resources efficiently to sustain long-term battles. With its expansive size and meticulously arranged tiles, the map demands precise strategy and spatial awareness. The visual effects of snow and ice enhance the game’s atmosphere, making it especially appealing to fans of winter-themed maps. However, the difficulty can vary greatly depending on the enemy’s attack patterns, so it’s vital to study the map’s layout and key strongholds before playing. This map is highly recommended for players who enjoy defense-focused survival gameplay, offering a unique experience thanks to its winter theme and single-player structure. Before jumping in, it’s wise to scout defensive positions and enemy approach routes to prepare a more effective strategy. Additionally, players should carefully consider unit selection and placement, accounting for the reduced visibility and slower movement caused by the snow and ice.
팀 포트리스 디펜스 (Team Fortress Defense)
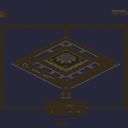
'팀 포트리스 디펜스'는 8인용 팀 기반 요새 방어 맵으로, '요새를 지키거나 부수라'는 설명 그대로 공격과 수비가 명확히 나뉘어 진행되는 유즈맵이다. 사막 타일셋 위에 펼쳐진 256×256 타일 크기의 전장은 양 진영이 대치하는 대칭 구조로 보이며, 중앙 요새를 중심으로 입구 막기 형태의 방어선이 형성될 것으로 보인다. 플레이어는 수비팀과 공격팀으로 나뉘어 각자 역할을 수행하며, 수비측은 제한된 자원과 병력으로 요새 내 핵심 건물을 보호하고 공격측은 병력 조합과 타이밍을 맞춰 방어선을 돌파해야 한다. 일반적인 타워 디펜스와 달리 양측 모두 플레이어가 직접 유닛을 조작하는 PvP 성격이 강해, 밀리 실력과 팀워크가 승부를 가른다. 8인 풀방 기준 20~40분 내외 승부가 나며, 초반 빌드 오더와 정찰, 중반 병력 교환, 후반 결정타 타이밍 등 밀리 흐름이 그대로 적용된다. 입문자는 수비측에서 기본적인 벙커링과 병력 배치법을 익히기 좋고, 숙련자는 공격측에서 다각도 러시와 페이크 운영으로 변수를 만들 수 있다. 맵 크기가 8192×8192로 넓지 않아 기동전이 빈번하고, 미네랄 멀티 확보 타이밍이 승부의 분수령이 된다. 플레이 전 팀 배분과 맵 버전 확인, 옵저버 유무만 점검하면 바로 즐길 수 있는 경쟁형 디펜스 맵이다. 'Team Fortress Defense' is an 8-player team-based fortress defense map where offense and defense are clearly divided as the description states: 'Hold the fort or break the fort.' The battlefield spread across a desert tileset with 256×256 tiles appears to feature a symmetrical structure where both bases face each other, with a choke-point defense line likely forming around the central fortress. Players split into defense and offense teams, each fulfilling their role—the defense protects key buildings inside the fortress with limited resources and units, while the offense must combine forces and time their push to break through. Unlike typical tower defenses, both sides directly control units, giving it a strong PvP character where melee skill and teamwork decide the outcome. A full 8-player match lasts roughly 20–40 minutes, and the standard melee flow applies: early build orders and scouting, mid-game army trades, and late-game timing for the decisive blow. Beginners can learn basic bunker placement and army positioning on defense, while veterans can create variables on offense with multi-angle rushes and fake plays. The map size of 8192×8192 keeps mobility fights frequent, and the timing of mineral expansion control becomes the turning point. Simply verify team assignments, map version, and observer settings before starting, and you can jump straight into this competitive defense map.
폭풍의 요새 2010 (Storm the Fort 2010)
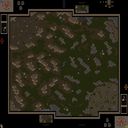
스타크래프트 브루드워의 유즈맵 'Storm the Fort 2010 v08'는 6인용 대규모 유닛 디펜스(UMS) 장르의 맵으로, 적의 끊임없는 공격을 막아내며 요새를 사수하는 긴장감 넘치는 플레이를 제공한다. 맵은 사막 테마의 넓은 평야와 요새 구조로 구성되어 있으며, 중앙 요새를 중심으로 다수의 적 기지가 동시다발적으로 공격을 펼친다. 플레이어는 요새 내 자원 기반을 지키며, 주기적으로 쏟아지는 적 병력과 방어선을 유지해야 한다. 맵의 특징은 대규모 맵 크기와 디테일한 지형 설계로, 요새 주변의 언덕과 좁은 통로가 전략적 우위를 제공한다는 점이다. 또한, 요새 내부와 외부에서 동시에 발생하는 적의 공격 패턴을 예측하고 방어 전술을 세우는 것이 핵심이다. 초보 플레이어는 자원 관리와 방어 건물 배치에 어려움을 느낄 수 있지만, 숙련된 플레이어는 효율적인 병력 운용과 위치 선정을 통해 장기전을 승리로 이끌어낼 수 있다. 맵의 긴장감과 몰입도는 높은 편으로, 특히 요새가 점차 붕괴해가는 연출이 플레이어의 긴장을 고조시킨다. 추천 대상은 디펜스 유즈맵을 즐기는 플레이어이며, 특히 대규모 공격과 방어 전략을 좋아하는 유저들에게 적합하다. 플레이 전에는 요새 주변의 지형과 공격 루트를 미리 파악하는 것이 중요하다. 또한, 팀 플레이가 필수적이며, 각 플레이어의 역할 분배가 승패를 좌우할 수 있음을 염두에 둬야 한다. StarCraft: Brood War's custom map *Storm the Fort 2010 v08* is a 6-player large-scale unit defense (UMS) genre map that offers intense gameplay where players must defend their fortress against relentless enemy attacks. The map features a desert-themed wide plain with fortress structures, where multiple enemy bases launch simultaneous assaults centered around the central fortress. Players must protect the resource base inside the fortress while maintaining defensive lines against waves of incoming enemy forces. The map stands out with its large size and detailed terrain design, where hills and narrow passages around the fortress provide strategic advantages. Predicting enemy attack patterns that occur both inside and outside the fortress and devising defense tactics is key. While beginners may struggle with resource management and building placement, experienced players can secure victory through efficient troop operations and positioning in a prolonged battle. The map delivers high tension and immersion, especially with the dramatic effect of the fortress gradually crumbling, heightening the player's stress. It is recommended for players who enjoy defense custom maps, particularly those who love large-scale attacks and defensive strategies. Before playing, it's crucial to familiarize yourself with the terrain around the fortress and attack routes. Team play is essential, and the distribution of roles among players can determine victory or defeat.
스나이퍼 볼드 락스 (Snipers Bald Locks) v337
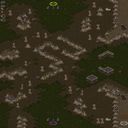
스타크래프트 브루드워의 유즈맵 「Snipers Bald Locks v337」은 컴까기 장르의 디펜스 게임으로, 7명의 플레이어가 협력하여 적의 공격을 방어하는 재미를 제공합니다. 맵은 사막 지형을 배경으로 하며, 중앙에 위치한 요새를 중심으로 적의 공격을 저지하는 구조로 설계되었습니다. 플레이어는 각각의 위치에서 스나이퍼로 활약하며, 적의 유닛들이 요새에 도달하지 못하도록 막아야 합니다. 이 맵의 핵심은 'Locks' 시스템으로, 적의 공격을 효과적으로 차단할 수 있는 방어 구조물이 곳곳에 배치되어 있습니다. 또한 'Anti-MH'라는 시스템이 포함되어 있어 미네랄 홀딩(MH) 전략을 무력화하는 요소도 있습니다. 플레이어들은 요새를 중심으로 한 협력 플레이가 필수적이며, 각자의 역할과 위치를 잘 파악하여 전략적으로 방어해야 합니다. 진행 방식은 비교적 단순하지만, 맵의 구조와 방어 시스템이 복잡하게 얽혀 있어 초보자가 바로 적응하기는 어려울 수 있습니다. 따라서 이 맵은 어느 정도 스타크래프트 유즈맵에 익숙한 플레이어들에게 추천하며, 팀워크와 전략적 사고가 요구됩니다. 맵의 난이도는 보통 수준으로 설정되어 있지만, 방어 라인을 어떻게 구축하느냐에 따라 체감 난이도가 크게 달라질 수 있습니다. 플레이 전에는 맵의 구조와 방어 포인트를 미리 숙지하는 것이 중요하며, 팀원 간의 역할 분담과 커뮤니케이션을 원활히 하는 것이 성공의 열쇠가 될 것입니다. 또한, 맵의 특수 시스템인 'Locks'와 'Anti-MH'를 잘 활용하는 것이 승리 조건을 달성하는 데 큰 도움이 될 것입니다. Snipers Bald Locks v337 is a UMS defense map in StarCraft: Brood War where 7 players cooperate to defend their fortress against enemy attacks. Set in a desert terrain, the map features a central stronghold that must be protected from waves of incoming units. The core mechanics revolve around the 'Locks' system, defensive structures scattered throughout the map that block enemy progression effectively. Additionally, the 'Anti-MH' feature neutralizes Mineral Holding strategies, adding depth to the gameplay. Players must work together, each occupying strategic positions to form a cohesive defense line. While the gameplay loop is straightforward, the map's intricate layout and defensive systems demand prior experience with StarCraft custom maps. Thus, this map is best suited for intermediate players familiar with UMS titles, where teamwork and strategic planning are crucial. Before playing, it's essential to study the map layout and key defensive points. Effective communication and role assignment among teammates significantly enhance the chances of success. Mastering the 'Locks' and 'Anti-MH' mechanics will also be vital for achieving the victory conditions.
버섯 왕국 전쟁 EX (Mushroom Kingdom War [=EX=])
스타크래프트 브루드워의 유즈맵 중 하나로, ‘Mushroom Kingdom War ([=EX=])’는 마리오 시리즈의 무챤 왕국을 배경으로 한 디펜스 및 전투형 맵이다. 7명의 플레이어가 각자 맵의 양쪽 끝에서 시작하며, 초록색 진영은 ‘마리오 측’으로 요새를 방어하는 임무를, 빨간색 진영은 ‘쿠파 측’으로 요새를 파괴하는 임무를 수행한다. 맵 중앙에는 거대한 ‘Mushroom’ 모양의 구조물이 자리 잡고 있으며, 양측 진영은 이 구조물을 중심으로 대치하면서 자원을 확보하고 유닛을 생산해 전투를 벌인다. 맵의 지형은 사막 타일셋을 사용해 비교적 평탄한 구조로 이루어져 있으며, 요새와 주요 건물들이 전략적 요충지에 배치되어 있어 방어와 공격의 균형이 중요하다. 특히, 중앙 ‘Mushroom’ 구역은 양측의 교전장이자Resource Points(자원 채취 구역)으로 기능해, 자원 확보 경쟁이 치열해질 수밖에 없다. 전투는 주로 중장갑 유닛과 마법 유닛을 조합해 진행되며, 각 진영의 특성에 따라 전략이 크게 갈린다. 예를 들어, 마리오 측은 빠른 기동성과 방어 건물을 활용한 수비 전략이, 쿠파 측은 강력한 공격 유닛과 테러 전략이 유효하다. 맵의 볼륨이 크고 구조가 복잡해 초보자는 적응하는 데 시간이 걸리겠지만, 숙련된 플레이어에게는 다양한 전략과 전술을 구사할 수 있는 넓은 공간을 제공한다. 추천 대상은 스타크래프트 디펜스 및 유즈맵을 좋아하는 플레이어들로, 특히 팀 플레이와 전략적 사고를 즐기는 이들에게 최적이다. 플레이 전에는 중앙 자원 구역의 위치와 요새의 방어 시설 배치를 미리 숙지하고, 각 진영의 특성을 분석하는 것이 중요하다. 또한, 맵의 규모가 크기 때문에 맵의 전체적인 흐름을 미리 파악하지 않으면 자원 확보와 전투에서 불리해질 수 있다. 초보자라면 난이도를 ‘보통’ 정도로 설정하고, 경험을 쌓아가며 플레이하는 것이 바람직하다. 이 맵은 스타크래프트 유즈맵의 정수를 담고 있어, 오랜 기간 사랑받아 온 클래식한 작품 중 하나로 손꼽힌다. "Mushroom Kingdom War ([=EX=])" is a defense and combat custom map from *StarCraft: Brood War* set in the Mushroom Kingdom from the *Mario* series. Seven players start on opposite ends of the map—green team plays as Mario's side, tasked with defending their fortress, while red team plays as Bowser's side, aiming to destroy their enemy's stronghold. At the center of the map stands a massive mushroom-shaped structure, around which both sides clash to secure resources and produce units for battle. The terrain uses a desert tileset, featuring a relatively flat layout with key strategic positions for fortresses and major buildings, making balance between defense and offense crucial. The central mushroom area serves as a battleground and a Resource Point (resource-gathering zone), intensifying competition for resources. Battles typically involve a mix of heavy-armored and magical units, with strategies diverging based on each side's strengths—Mario's team excels with fast mobility and defensive structures, while Bowser's team benefits from powerful offensive units and terror tactics. Though the map's large scale and complex layout may challenge beginners, experienced players will appreciate the vast space for diverse strategies and tactics. It’s ideal for fans of *StarCraft* defense maps and custom games, especially those who enjoy teamwork and strategic thinking. Before playing, it’s essential to memorize the central resource zone’s location and fortress defenses, analyze each side’s strengths, and understand the map’s flow to avoid disadvantages in resource gathering and combat. Beginners should start on a moderate difficulty setting and gradually improve their skills. As a classic custom map that has stood the test of time, "Mushroom Kingdom War ([=EX=])" encapsulates the essence of *StarCraft* custom maps and remains a beloved title among players.
버섯 왕국 히어로즈 v8 (Mushroom Kingdom Heroes v8)
스타크래프트 브루드워의 유즈맵 <버섯 왕국 히어로즈 v8>은 5명의 플레이어가 함께 즐길 수 있는 대형 디펜스 기반의 전략 유즈맵으로, 플랫폼과 플레이어의 조합을 통해 지속적인 전투를 펼치는 구조가 특징이다. 맵의 중앙에는 거대한 요새가 위치하고 있으며, 이를 중심으로 플레이어는 각각의 기지를 건설하고 자원을 모아 유닛을 생산, 배치해야 한다. 맵의 가장 큰 특징은 맵 곳곳에 흩어져 있는 버섯 지형으로, 이 버섯을 파괴하면 보너스 자원이나 특수 유닛, 아이템을 획득할 수 있어 전략적 선택지가 넓어진다. 또한, 적의 공격 루트는 맵의 테두리를 따라 돌아가며 중앙 요새를 보호하는 방식으로 설계되어 있으며, 플레이어는 이를 방어하거나 반대로 요새를 공격할 수도 있다. 게임의 진행은 largely symmetrical한 맵 배치와 더불어, 버섯 파괴 여부, 자원 관리, 유닛 조합 등 다양한 변수가 존재해 매판의 플레이 스타일이 달라진다. 특히, 버섯을 얼마나 적극적으로 활용하는지에 따라 게임의 흐름이 완전히 달라질 수 있어, 초보자부터 숙련자까지 모두 재미를 느낄 수 있는 구조로 평가된다. 다만, 맵의 크기가 매우 크고 복잡한 구조를 가지고 있어 처음 플레이 시에는 길찾기나 자원 관리에서 다소 혼란을 겪을 수 있다. 따라서 이 맵을 처음 플레이하는 유저는 맵의 주요 지점(요새, 주요 버섯 지대, 주요 길목)을 미리 숙지하고 시작하는 것이 좋다. 또한, 팀플레이가 강제되는 구조는 아니지만, 5명의 플레이어가 한 팀을 이루는 경우라면 협력과 분배가 중요한 포인트가 된다. 맵의 난이도는 대체로 보통 수준으로 설정되어 있지만, 적의 공격 패턴이나 버섯의 배치에 따라 난이도가 급변할 수 있어 항상 긴장감을 유지할 수 있다. 이 맵은 디펜스와 대형 맵을 좋아하는 플레이어들에게 추천할 만한佳作이며, 특히 버섯을 활용한 전략적 플레이를 즐기고 싶은 유저라면 필수적으로 도전해볼 만한 작품이다. 플레이 전에는 맵의 주요 구조와 버섯의 위치, 적의 공격 루트를 미리 확인하고, 유닛 생산과 자원 관리를 철저히 하는 습관을 들이는 것이 중요하다. 또한, 팀플레이 시에는 각자의 역할을 clearly 분배하는 것이 승리의 열쇠가 될 것이다. StarCraft: Brood War's custom map *Mushroom Kingdom Heroes v8* is a large-scale defense-based strategy map designed for five players to enjoy together. The map features a structure where players engage in continuous combat through platform and player combinations. At the center of the map lies a massive fortress, around which players build their bases, gather resources, and produce and deploy units. The map's standout feature is the scattered mushroom terrain throughout, which, when destroyed, grants bonus resources, special units, or items, expanding strategic options. Additionally, enemy attack routes are designed to loop around the map's edges to protect the central fortress, allowing players to either defend or attack the fortress themselves. The game's progression varies with each match due to the largely symmetrical map layout, mushroom destruction, resource management, and unit combinations. The strategy can shift dramatically depending on how aggressively players utilize mushrooms, making it enjoyable for both beginners and experts. However, the map's vast size and complex structure may cause confusion for first-time players, especially in navigation and resource management. New players are advised to familiarize themselves with key locations (the fortress, major mushroom areas, and main pathways) before starting. While team play isn't mandatory, when five players form a team, cooperation and resource distribution become critical. The difficulty is generally moderate but can fluctuate sharply depending on enemy attack patterns or mushroom placements, keeping tension high throughout. This map is highly recommended for players who enjoy defense and large maps, especially those looking to experiment with mushroom-based strategies. Before playing, it's essential to study the map's key structures, mushroom locations, and enemy attack routes, while maintaining strict unit production and resource management. In team play, clearly dividing roles among players will be the key to victory.
로드 오브 더 맵: 모르도르의 구원 (LotR Mordor's Redemption)
스타크래프트: 브루드워의 유즈맵인 ‘로드 오브 더 링: 모르도르의 구원(LotR Mordor's Redemption)’은 반지의 제왕 세계관을 배경으로 한 대규모 디펜스 및 서바이벌 장르의 맵입니다. 맵의 이름은 J.R.R. 톨킨의 소설 ‘반지의 제왕’에 등장하는 사악한 땅, 모르도르에서 영감을 받았으며, 플레이어는 어둠의 세력에 맞서 빛의 세력을 이끌고 최후의 방어선을 구축해야 합니다. 맵은 7명의 플레이어가 참여할 수 있으며, 각 플레이어는 고유한 시작 위치와 자원을 확보한 뒤, 끊임없이 몰려오는 적의 웨이브를 방어하거나 공격적으로 진출하여 목표를 달성해야 합니다. 내부 맵 설명에서 ‘Second Age’라는 언급으로 보아, 가운데땅의 역사적 시대적 배경 중 하나를 차용한 것으로 추정됩니다. 맵의 구조는 넓은 평원과 협곡, 그리고 요새를 중심으로 구성되어 있어, 플레이어는 지형을 활용한 방어 전략과 함께 자원의 관리, 동맹과의 협력, 적절한 타이밍의 공격 등 다층적인 전략을 구사해야 합니다. 특히, 맵의 중앙에는 거대한 요새가 위치해 있으며, 이곳을 중심으로 방어塔와 병력을 배치하거나, 반대로 요새를 파괴하기 위한 침공을 계획할 수 있습니다. 맵의 배경은 사막 타일셋으로 구성되어 있으며, 이는 모르도르의 황량한 풍경을 연상시키며 몰입감을 높이는 역할을 합니다. 이 맵의 특징은 단순히 방어에만 치중하지 않고, 적의 약점을 공격하거나 중립 건물을 점령하는 등 다양한 플레이 스타일을 요구한다는 점입니다. 또한, 지속적으로 쏟아지는 적의 웨이브는 플레이어의 집중력과 판단력을 시험하며, 실시간으로 변하는 전황에 따라 전략을 유연하게 전환해야 합니다. 초보자에게는 다소 어려운 난이도를 가질 수 있지만, 숙련된 플레이어에게는 전략의 깊이를 제공하는 매력적인 요소로 작용할 것입니다. 이 맵을 즐기기 위해서는 최소 2~3시간 정도의 플레이 시간을 예상하는 것이 좋습니다. 특히, 4~7명의 플레이어가 참여할 경우 긴장감과 긴 플레이 타임이 특징이며, 동맹과의 협력과 정보 공유가 victoria를 좌우할 수 있습니다. 맵의 버전은 3.1로, 지속적인 업데이트를 통해 밸런스가 조정되고 있는 것으로 보입니다. 또한, 맵의 복잡한 구조와 다양한 전략적 선택지 때문에, 초반에는 다소 혼란스러울 수 있으나, 여러 번 플레이를 반복하며 지형을 익히고 전략을 다듬을수록 재미와 성취감을 느낄 수 있을 것입니다. 추천 대상은 반지의 제왕 팬이거나, 디펜스 및 서바이벌 장르의 맵을 즐기는 플레이어, 그리고 전략적 깊이를 추구하는 게이머에게 적합합니다. 미리 맵의 구조와 주요 건물을 숙지하고, 동맹과의 역할 분담을 철저히 준비한다면, 더욱 즐거운 플레이가 될 것입니다. *StarCraft: Brood War*'s custom map, *Lord of the Rings: Mordor’s Redemption* (*LotR Mordor's Redemption*), is a large-scale defense and survival genre map set in the world of *The Lord of the Rings*. The map's name draws inspiration from Mordor, the dark land featured in J.R.R. Tolkien’s novel *The Lord of the Rings*, where players lead the forces of light against the darkness, building the final line of defense. The map supports up to seven players, each starting with unique positions and resources, tasked with defending against or counterattacking endless waves of enemies. The in-game description mentions the "Second Age," suggesting it borrows from one of Middle-earth’s historical eras. The map’s layout features vast plains, canyons, and fortresses, requiring players to utilize terrain for defense while managing resources, coordinating with allies, and launching well-timed attacks. A massive fortress sits at the center, serving as a focal point for deploying defensive towers or launching assaults to destroy it. The desert-themed tileset enhances immersion by evoking the barren landscape of Mordor. What sets this map apart is its emphasis on dynamic gameplay—attacking enemy weaknesses, capturing neutral structures, and adapting strategies in real time. The relentless enemy waves test players' focus and decision-making, demanding flexibility as the battlefield shifts. While the difficulty may be high for beginners, experienced players will appreciate its strategic depth. Expect a playtime of 2–3 hours, especially with 4–7 players, where tension and extended sessions heighten the experience. Cooperation and information sharing among allies can determine victory. The current version, 3.1, appears to undergo balance adjustments through updates. The map’s intricate layout and strategic options may feel overwhelming at first, but repeated plays help players familiarize themselves with the terrain and refine tactics, deepening enjoyment and satisfaction. Ideal for *Lord of the Rings* fans, defense/survival map enthusiasts, and players seeking strategic depth. Familiarizing yourself with the map’s structure and key buildings, along with thorough role distribution among allies, will ensure a more enjoyable experience.
더 라스트 레전드 v.1.1 (The Last Legion v.1.1)
스타크래프트 브루드워의 대표적인 UMS 유즈맵인 〈더 라스트 레전드〉는 로마 제국의 몰락을 배경으로 한 대규모 디펜스 형식의 게임이다. 플레이어는 고대 로마의 영토를 침략하는 적군들을 상대로 방어선을 구축하고, 제한된 자원으로 병력과 건물을 관리해야 한다. 맵의 중심부는 넓은 평야와 요새로 구성되어 있으며, 적군은 주변에서 끊임없이 밀려오기 때문에 빠른 판단력과 전략적 배치력이 요구된다. 미니맵에서는 적의 움직임이 실시간으로 표시되어 실시간 대응이 가능하지만, 자원 수급은 비교적 제한적이어서 효율적인 관리 없이는 금방 무너질 수 있다. 특히 초반과 중반의 균형 잡힌 병력 운용이 승패를 좌우하는데, 초보자들은 자원을 과도하게 소비하거나 방어를 소홀히 하는 경우가 많아 쉽게 무너진다. 반면 숙련자들은 적의 공세를 예측하고 방어선을 재배치하는 등 능동적인 대처가 가능하다. 맵의 특징은 넓은 맵 크기와 세부적으로 배치된 요새 구조로, 플레이어의 시야와 전략적 깊이를 시험한다. 또한 적군의 종류와 공격 패턴이 단계적으로 강화되기 때문에 긴장감을 유지할 수 있다. 이 맵은 디펜스 장르를 любителей УЗМ에 소개하고자 하는 플레이어들에게 강력한 추천 대상이다. 다만, 넓은 맵과 복잡한 구조 때문에 초심자는 처음부터 어려움을 느낄 수 있으니, 간단한 방어형 맵으로 연습을 권장한다. 게임을 시작하기 전에는 자원 관리와 요새 배치 우선순위를 미리 숙지하는 것이 중요하다. 전체적으로 〈더 라스트 레전드〉는 전략성과 긴장감을 동시에 제공하는 훌륭한 유즈맵으로, 디펜스 장르의 정수를 느낄 수 있는 작품이다. StarCraft: Brood War’s iconic UMS custom map, *The Last Legend*, is a large-scale defense game set against the fall of the Roman Empire. Players must build defensive lines against invading forces, managing troops and structures with limited resources. The map’s center features wide plains and fortresses, with enemies continuously pouring in from the edges, demanding quick decision-making and strategic positioning. The minimap displays enemy movements in real time for responsive counterplay, but resource income is scarce, making efficient management crucial—otherwise, the defense collapses rapidly. Balanced troop deployment in the early and mid-game often determines victory or defeat; beginners frequently struggle by overspending resources or neglecting defenses, while experienced players adapt by predicting enemy assaults and repositioning their lines. The map’s defining traits—its vast size and intricately placed fortresses—test players’ vision and strategic depth, while the enemy’s evolving types and attack patterns maintain high tension throughout. Ideal for UMS enthusiasts seeking a defense experience, it’s best approached with prior practice on simpler defensive maps due to its complexity. Before starting, mastering resource management and prioritizing fortress placement is essential. Overall, *The Last Legend* delivers a masterful blend of strategy and suspense, encapsulating the essence of the defense genre.
맵 선택 가이드
태그는 맵의 핵심 특징을 빠르게 설명하지만 제작 버전마다 규칙이 다를 수 있습니다. 상세 설명에서 권장 인원, 난이도, 플레이 시간과 버전을 함께 확인한 뒤 다운로드하세요.