
오버마인드 스타크래프트 맵 모음
'오버마인드' 태그가 등록된 맵을 모았습니다. 장르 하나로 찾기 어려운 플레이 방식, 난이도와 특징을 중심으로 인기 맵과 최신 맵을 비교해 보세요.
- 등록 맵
- 37개
- 누적 다운로드
- 0
- 누적 조회
- 1,489
인기 맵
다운로드와 조회 반응이 높은 맵입니다.
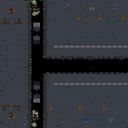
오버마인드 디펜스 7:1 파이널 (Overmind Defence 7:1 Final)
‘오버마인드 디펜스 7:1 파이널(Overmind Defence 7:1 final)’은 스타크래프트 브루드워의 대표적인 UMS 유즈맵으로, 8명의 플레이어가 협동하여 적의 오버마인드를 파괴하는 디펜스 형식의 타워 디펜스 맵이다. 맵은 3072x3072의 거대한 우주 타일셋으로 구성되어 있으며, 중앙에 위치한 적의 오버마인드를 surrounded하는 형태로 진행된다. 플레이어는 각자 주어진 진영에서 건물을 짓고, 유닛을 생산하여 끊임없이 몰려드는 적의 공세를 방어해야 한다. 맵의 특징은 7:1이라는 극심한 밸런스 불균형에도 불구하고, 플레이어들이 협력하여 승리 가능한 구조로 설계되었다는 점이다. 맵 곳곳에는 방어 타워를 건설할 수 있는 ‘포인트’가 배치되어 있으며, 이를 활용하여 효율적인 방어선을 구축해야 한다. 또한, 맵의 테두리에는 자원이나 업그레이드 포인트가 배치되어 있어, 이를 확보하며 병력을 강화하는 전략이 필요하다. 맵의 난이도는 8명의 플레이어가 모두 협력해야만 클리어가 가능한 ‘보통’ 수준으로, 초보자의 경우 팀원 간의 조율 부족으로 인해 실패할 가능성이 높다. 맵의 재미는 타워 디펜스와 협동의 조합으로, 전략적인 건물 배치와 실시간 병력 관리가 요구된다. 플레이 전에는 맵의 포인트 위치와 자원 분포를 숙지하는 것이 중요하며, 특히 방어 타워의 건설 위치는 승리 여부를 좌우할 수 있다. 추천 대상은 팀플을 즐기는 유저들이며, 협동 전략 게임을 좋아하는 플레이어들에게 적합하다. 맵의 긴 플레이 시간과 복잡한 구조는 초보자의 진입 장벽을 높이지만, 숙련자들에게는 깊고 전략적인 재미를 제공한다. ‘Overmind Defence 7:1 final’ is a classic UMS custom map in StarCraft: Brood War, where 8 players work together to destroy the enemy Overmind in a tower defense-style gameplay. Set on a massive 3072x3072 space-themed tile, the map challenges players to defend their territory while managing resources and unit production. The core appeal lies in its cooperative mechanics, as players must strategically build defenses and fend off relentless enemy waves despite the overwhelming 7v1 disadvantage. Key features include designated tower-building points scattered throughout the map and resource nodes along the edges, which allow for upgrades and reinforcement. The difficulty is balanced for ‘normal’ play, requiring close coordination among all players to succeed. Novices may struggle due to the need for real-time strategy and teamwork, but experienced players will appreciate the depth of tactical planning and execution. Before playing, familiarizing yourself with tower placement spots and resource locations is crucial. This map is ideal for those who enjoy team-based strategy games and cooperative gameplay, offering a rewarding yet challenging experience for seasoned players.
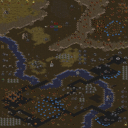
The Doomed Quest RPG v2.9
스타크래프트 브루드워 유즈맵 '둠드 퀘스트 RPG v2.9'는 5인 협동 플레이를 전제로 한 정통 RPG 스타일 맵이다. 황무지 타일셋 위에 128x128 타일, 4096x4096 크기의 광활한 전장이 펼쳐지며, 플레이어는 저마다 고유한 능력을 가진 다섯 영웅 중 하나를 선택해 고대 저주에 맞서 사원의 힘을 빌려 오버마인드를 격파하는 긴 여정에 나선다. 진행 방식은 퀘스트 수행과 보스 공략, 아이템 파밍, 레벨업 등 전형적인 RPG 성장 루프를 따르며, 맵 설명이 '길고 힘든 전투'를 예고하듯 난이도는 상당히 높은 편으로 추정된다. 싱글 플레이로는 클리어가 거의 불가능에 가까우므로 5명이 모두 모인 파티 플레이를 권장하며, 음성 채팅이나 사전 전략 공유가 승패를 가른다. 맵 파일명은 '(5)Doomed Quest RPG v2.9.scx'로 버전 관리가 명확하며, v1.93과 v2.3 등 이전 버전도 존재하는 만큼 밸런스 패치가 지속된 것으로 보인다. 입문자는 초반 적정 레벨 구간에서 경험치와 자원 수급 루트를 익히는 것이 중요하며, 후반부 사원 메커니즘과 오버마인드 공략 패턴을 숙지해야 클리어 확률을 높일 수 있다. 협동 RPG 특유의 역할 분담과 긴 호흡의 전략을 즐기는 유저에게 적합한 맵이다. StarCraft Brood War custom map 'The Doomed Quest RPG v2.9' is a classic cooperative RPG designed for five players. On the Wasteland tileset, a vast 4096x4096 battlefield unfolds at 128x128 tiles, where each player picks one of five unique heroes to embark on a lengthy quest: break an ancient curse, harness the Temple's power, and defeat the Overmind. Gameplay follows a traditional RPG loop of questing, boss battles, item farming, and leveling, and the description's promise of a 'long, and hard, battle' suggests a high difficulty curve. Solo clearance is nearly impossible, so a full five‑player party with voice chat or pre‑planned strategy is strongly recommended. The file name '(5)Doomed Quest RPG v2.9.scx' shows clear versioning, and earlier versions like v1.93 and v2.3 indicate ongoing balance updates. Newcomers should first learn efficient experience and resource routes in the early leveling zones, then master the Temple mechanics and Overmind attack patterns for the endgame. This map suits players who enjoy role specialization and long‑term strategic coordination typical of cooperative RPGs.
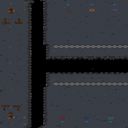
오버마인드 디펜스 7:0 파이널 (Overmind Defence 7:0 Final)
스타크래프트 브루드워의 대표적인 UMS 디펜스 유즈맵인 ‘오버마인드 디펜스 7:0 파이널(Overmind Defence 7:0 Final)’은 8명의 플레이어가 하나의 팀을 이루어 끊임없이 몰려드는 저그 병력을 상대하는 전략적 디펜스 게임이다. 맵의 중심에는 파괴해야 할 오버마인드가 위치해 있으며, 플레이어들은 방어선을 구축하고 자원 관리, 병력 조합, 전략적 판단으로 끊임없는 웨이브를 버텨내야 한다. 맵은 3072x3072의 넓은 우주 타일셋으로 구성되어 있으며, 각 플레이어는 중앙 기지 주변의 입구에서부터 시작해 외곽 지역을 차지하며 방어선을 확장할 수 있다. 이미지에서는 우주 배경의 어두운 밤하늘과 함께 중앙에 위치한 오버마인드의 실루엣이 확인되며, 플레이어 기지 주변으로 방어 시설과 병력이 배치되어 있는 것이 보인다. 맵의 특징은 끊임없는 웨이브 디펜스로, 초반에는 소수 정예 병력으로 버티지만 후반으로 갈수록 저그의 화력이 급격히 강해지므로 플레이어 간 협력이 무엇보다 중요하다. 또한, 자원 관리와 생산 효율성 또한 승리를 좌우하는 핵심 요소로, 초반 자원이 부족한 상황에서 어떻게 병력을 조합하고 기지를 확장할지가 관건이다. 이 맵은 디펜스 게임을 즐기는 플레이어들에게 긴장감과 전략적 깊이를 제공하며, 특히 팀플레이를 중시하는 유저들에게 인기가 높다. 추천 대상은 디펜스 게임을 좋아하는 스타크래프트 유즈맵 플레이어이며, 초보자라도 팀의 흐름을 잘 따라가며 전략을 배우는 데 적합하다. 다만, 후반부로 갈수록 난이도가 급상승하므로 꾸준한 연습과 팀워크가 요구된다. 플레이 전에는 맵의 구조와 오버마인드의 위치, 자원 분포를 미리 숙지하고 각자의 역할(방어, 공격, 자원 관리)을 명확히 정하는 것이 중요하다. 또한, 병력 조합의 다양성과 방어선의 중요성을 인식하고, 끊임없이 웨이브가 밀려오므로 실수 없이 대처할 수 있는 준비를 갖추는 것이 필수다. "Overmind Defence 7:0 Final" is a classic Brood War UMS defense custom map where eight players team up to fend off endless waves of Zerg forces. At the center of the map lies the Overmind, which must be destroyed, and players must build defenses, manage resources, and make strategic decisions to survive wave after wave. The map features a vast 3072x3072 space-themed tileset, with each player starting near the central base and expanding outward to secure outer regions. The image shows a dark cosmic night sky with the Overmind’s silhouette at the center, while defensive structures and forces surround the player bases. The defining feature of this map is its relentless wave defense—players begin with elite forces but face increasingly intense Zerg attacks as the game progresses, making teamwork essential. Resource management and production efficiency are also critical to victory, as players must balance limited early resources, unit composition, and base expansion. This map offers thrilling challenge and deep strategy for defense game fans, especially those who enjoy team play. It’s recommended for Brood War custom map players who love defense games, including beginners who can follow team flow and learn strategies. However, difficulty spikes sharply in later waves, requiring consistent practice and strong teamwork. Before playing, familiarize yourself with the map layout, Overmind’s location, and resource distribution, and clearly assign roles (defense, offense, resource management). Understanding unit composition diversity and defensive line importance is key, as waves continuously assault your position—preparation and precision are a must.
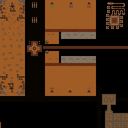
오버마인드 디펜스 골드 (Overmind Defence GOLD)
스타크래프트 브루드워의 대표적인 유즈맵이자 디펜스 장르의 정석으로 불리는 ‘오버마인드 디펜스 골드’는 고전 디펜스 게임의 명성을 그대로 계승한 작품입니다. 이 맵은 플레이어가 자원 채취를 통해 건물을 건설하고 방어 체계를 구축한 뒤, 본진에 침공하는 적의 오버마인드를 처치하는 것이 목표인 컴까기 형식의 디펜스 맵입니다. 맵 중앙에 위치한 오버마인드가 끊임없이 스폰되는 적 유닛을 생산하는 구조로 되어 있어, 플레이어는 이를 저지하기 위한 전략적 건축과Resource 관리, 그리고 지속적인 방어선을 유지해야 합니다. 특히 골드 버전은 여러 번의 업데이트를 거치며 맵 밸런스와 디자인 면에서 완성도를 높였으며, 황혼 타일셋을 활용한 따뜻한 색감의 그래픽이 맵의 분위기를 한층 풍부하게 연출합니다. 플레이어는 시작 시 제공되는 미네랄을 활용해 엔지니어링 베이, 포지, 진화실을 건설할 수 있으며, 이를 통해 지상 및 공중 유닛의 생산과 업그레이드를 진행할 수 있습니다. 방어 라인은 주로 방어탑이나 유닛 배치로 구성되며, 오버마인드 주변의 좁은 길목을 방어하는 것이 핵심 전략이 됩니다. 적의 공격 패턴은 맵 곳곳에 배치된 센서나 웨이브에 따라 변화하기 때문에, 예측 가능한 타이밍에 맞춰 방어 자원을 재배치하는 판단력이 중요합니다. 맵의 규모는 4096x4096의 넓은 공간을 자랑하지만, 오버마인드 주변의 좁은 길목을 중심으로 전투가 집중되어 있어 플레이 난이도와는 별개로 전략적 집중력을 요구합니다. 이 맵은 특히 초보자와 중급 플레이어 모두에게 적합한 난이도를 제공합니다. 기본적인 유닛 생산과 방어 라인 구축 방법을 익히기에 좋으며, 후반부로 갈수록 복잡해지는 적의 공격 패턴을 대응하는 재미가 있습니다. 또한, 맵의 골드 버전은 이전 버전들보다 더욱 세밀한 밸런스 조정이 이루어져 있어, 반복 플레이 시에도 새로운 전략을 시도해 볼 수 있는 장점이 있습니다. 디펜스 맵으로서의 완성도뿐만 아니라, 전략적 깊이와 플레이의 재현성까지 갖춘 이 맵은 스타크래프트 유즈맵의 역사를 대표하는 작품 중 하나로 손꼽힙니다. 시작 전에 반드시 확인해야 할 점은 방어 건물의 위치와 오버마인드 주변의 길목입니다. 방어 건물은 주로 맵 중앙의 좁은 통로에 배치하는 것이 효과적이므로, 초반 자원 관리를 통해 빠르게 포지와 엔지니어링 베이 등을 확보하는 것이 중요합니다. 또한, 적의 공격 타이밍을 예측하여 방어 라인을 미리 구축해두면, 후반부로 갈수록 increasing하는 적의 공격 패턴에 대처하기가 한층 수월해질 것입니다. 맵의 그래픽과 구조가 제공하는 아름다운 배경과 함께, 전략적 깊이를 즐길 수 있는 이 맵은 스타크래프트 유즈맵의 진가를 느끼기에 충분한 작품입니다. StarCraft: Brood War's iconic custom map and the gold standard of the defense genre, *Overmind Defense Gold*, is a work that fully inherits the reputation of classic defense games. In this map, players gather resources to build structures and establish defenses before eliminating the Overmind invading their main base, following a tower-defense format. The Overmind at the center of the map continuously spawns enemy units, requiring players to strategically construct buildings, manage resources, and maintain a continuous defensive line to stop it. The Gold version has undergone multiple updates to refine its balance and design, and its warm-toned graphics using the Twilight tileset further enrich the map's atmosphere. At the start, players can use the provided minerals to build structures like the Engineering Bay, Forge, and Evolution Chamber, enabling the production and upgrades of ground and air units. The defense lines primarily consist of defensive towers and unit placements, with the key strategy being to defend the narrow paths around the Overmind. Enemy attack patterns vary based on sensors or waves placed across the map, making it crucial to reposition defensive resources at predictable intervals. Despite the map's large 4096x4096 scale, combat is concentrated around the narrow paths near the Overmind, demanding strategic focus rather than sheer difficulty. This map offers a balanced difficulty suitable for both beginners and intermediate players. It's great for learning basic unit production and defense line construction, and the fun lies in adapting to increasingly complex enemy attack patterns as the game progresses. The Gold version also features more refined balancing than previous iterations, allowing players to experiment with new strategies even after multiple playthroughs. As a defense map, it stands out not only for its completeness but also for its strategic depth and replayability, making it one of the most representative works in the history of StarCraft custom maps. Before starting, it's essential to check the placement of defensive buildings and the paths around the Overmind. Positioning defensive structures near the central narrow passages is most effective, so securing a Forge and Engineering Bay early through efficient resource management is key. Predicting enemy attack timings and preemptively setting up defense lines will make it easier to handle the escalating attack patterns in later stages. With its beautiful graphics and structure, this map offers a rich backdrop and ample strategic depth, making it more than enough to experience the true value of StarCraft custom maps.
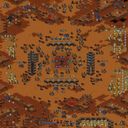
테스트 오브 서바이벌 (eins) Ver1.30 (Test of survival (eins) Ver1.30)
스타크래프트 브루드워의 고전 서바이벌 유즈맵인 〈Test of survival (eins) Ver1.30〉은 오버마인드를 처치하는 것이 최종 목표인 긴장감 넘치는 생존형 맵이다. 맵 곳곳에 배치된 적의 무리 속에서 끊임없이 밀려오는 저글링, 히드라리스크, 울트라리스크, 뮤탈리스크 등 다양한 저그 유닛을 상대해야 하며, 중앙 오버마인드 주변의 보호막을 해제하고 파괴하는 전략이 요구된다. 맵은 황혼 테마의 어두운 분위기로 구성되어 있어 플레이어에게 긴박감을 더한다. 맵의 크기는 3072x3072로 상당히 넓고, 시작 지역은 맵의 양쪽 끝에 각각 배치되어 있으며 중앙에는 오버마인드와 보호막 구조물이 위치하고 있다. 플레이어는 초반에 자원 수집과 방어 시설 구축을 통해 적절한 준비를 마친 뒤, 서서히 몰려오는 적의 공세를 버텨내며 오버마인드를 공격할 수 있는 기회를 잡아야 한다. 맵의 특징은 끊임없이 쏟아지는 적의 물량과 제한된 자원으로 어떻게 버티느냐가 관건이며, 팀 플레이가 필수적인 구조로 보인다. 특히 오버마인드 주변의 보호막을 해제하는 타이밍과 방법, 그리고 보호막을 파괴한 후의 공격 루트를 신중히 계획해야 한다. 서바이벌 장르답게 플레이어의 실수나 방심이 치명적인 결과를 초래할 수 있어, 초보보다는 적어도 중간 이상의 실력을 가진 플레이어에게 추천된다. 또한 맵의 버전이 1.30으로 업데이트되면서 이전 버전들에 비해 밸런스나 난이도가 조정되었을 가능성이 높아, 최신 버전을 플레이하는 것이 좋다. 맵을 시작하기 전에는 오버마인드 주변의 지형과 보호막의 위치, 그리고 각 시작 지점 간의 거리를 확인하여 전략을 수립하는 것이 중요하다. 이 맵은 혼자서 플레이하기보다는 팀원과의 원활한 소통과 협력이 필수적이므로, 함께 플레이할 팀원의 실력과 전략적 호흡도 고려해야 한다. 마지막으로, 맵의 긴 플레이 시간과 높은 난이도를 감안하여 충분한 시간과 전략적 준비를 하고 도전해 보는 것을 권장한다. The classic survival custom map from StarCraft: Brood War, *Test of Survival (Eins) Ver 1.30*, is a tense survival-style map where the ultimate goal is to defeat the Overmind. Players must face waves of relentless Zerg units—zerglings, hydralisks, ultralisks, mutalisks, and more—spawned throughout the map. A key strategy involves disabling and destroying the protective shield surrounding the central Overmind. The map’s twilight-themed, dark atmosphere heightens the sense of urgency. Spanning 3072x3072, the map is quite large, with starting positions placed at opposite ends and the Overmind’s shielded structure located in the center. Early on, players must gather resources and build defenses before weathering the escalating enemy assaults to create an opening to attack the Overmind. The core challenge lies in enduring the constant stream of Zerg forces while managing limited resources, and teamwork appears essential. Timing and method for disabling the shield around the Overmind, as well as planning an efficient attack route afterward, require careful consideration. As a survival map, mistakes or lapses in focus can lead to dire consequences, making it more suitable for intermediate to advanced players rather than beginners. Since version 1.30 may have adjusted balance and difficulty compared to earlier releases, playing the latest version is recommended. Before starting, it’s crucial to study the terrain around the Overmind, the shield’s location, and the distances between starting points to develop a solid strategy. Since smooth communication and cooperation with teammates are vital, the skill level and strategic synergy of your party should also be taken into account. Given the map’s long playtime and high difficulty, it’s wise to prepare thoroughly and approach the challenge with a well-devised plan.
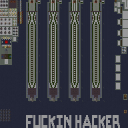
템플 디스트럭션 (Temple Destruction)
스타크래프트 브루드워의 컴까기(컴퓨터 상대 디펜스) 장르 유즈맵인 〈템플 디스트럭션〉은 플레이어가 오버마인드를 방어하면서 고대 신전의 파괴를 저지하는 전략적 목표를 달성하는 맵이다. 맵의 왼쪽 중앙에 위치한 오버마인드와 오른쪽 중앙의 고대 신전은 각각 방어와 파괴의 핵심 지점으로, 플레이어는 이 두 곳을 중심으로 자원 관리와 유닛 생산, 그리고 전략적 판단력을 발휘해야 한다. 맵의 전체적인 구조는 중앙을 가로지르는 협곡 형태로, 양 측이 접근하기 용이한 지형을 제공하면서도 각자 방어와 공격에 최적화된 위치를 차지할 수 있도록 배치되어 있다. 오른쪽에 위치한 고대 신전은 네 개의 입구를 통해 접근할 수 있으며, 각 입구에는 방어 시설을 구축할 수 있는 공간이 마련되어 있어 적의 공격을 효과적으로 차단할 수 있다. 반면, 왼쪽에 위치한 오버마인드는 좁은 통로로 방어하기 용이하지만, 다수의 적군이 한꺼번에 몰려올 경우 대응이 쉽지 않으므로 신중한 유닛 배치와 자원 관리가 필수적이다. 맵의_NAME_은 '템플 디스트럭션'으로, 고대 신전의 파괴를 뜻하며, 플레이어는 이를 저지하기 위해 최선을 다해야 한다. 맵의 진행 방식은 크게 세 가지로 나뉠 수 있는데, 첫째는 초반 자원 수집과 방어 시설 확충, 둘째는 중반에 걸쳐 오버마인드 주변의 적군을 정리하고 신전 방어선을 강화하는 단계, 셋째는 후반에 접어들어 고대 신전 주변의 적군을 소탕하고 최종 방어전을 펼치는 것이다. 이 과정에서 플레이어는 저글링, 히드라리스크, 뮤탈리스크 등 다양한 저그 유닛을 생산하여 적절한 조합으로 전투에 임해야 하며, 특히 초반에는 저글링 위주로 생산하여 오버마인드를 방어하는 데 주력하는 것이 중요하다. 중반 이후에는 히드라리스크나 뮤탈리스크를 조합하여 신전 주변의 적군을 공격하거나 방어하는 전략을 구사할 수 있다. 또한, 맵의 특정 지점에 배치된 스페셜 유닛이나 아이템을 활용하여 전투력을 강화할 수도 있는데, 이는 맵의 진행을 보다 수월하게 만드는 핵심 요소 중 하나다. 〈템플 디스트럭션〉은 이러한 구조와 진행 방식을 바탕으로, 초보자부터 숙련자까지 폭넓은 플레이어들에게 적합한 맵으로 평가된다. 초보자의 경우, 저글링 위주의 단순한 조합으로도 충분히 방어에 성공할 수 있지만, 숙련자의 경우 다양한 유닛 조합과 전략을 구사하여 보다 높은 난이도의 적군을 상대할 수 있다. 특히, 팀 플레이가 가능한 경우, 팀원 간의 협력과 역할 분담이 게임의 승패를 좌우할 수 있으므로, 팀원과의 원활한 소통이 중요하다. 플레이 전에는 맵의 구조와 입구 위치를 숙지하여 오버마인드와 신전 주변의 방어선을 어떻게 배치할 것인지 미리 계획을 세우는 것이 좋다. 또한, 자원 수집 속도와 유닛 생산 타이밍을 조절하여 적의 공격 타이밍에 맞춰 대응할 수 있도록 준비해야 한다. 마지막으로, 맵의_NAME_을 정확히 이해하고, '오버마인드 방어'와 '고대 신전 파괴 저지'라는 두 가지 핵심 목표를 잊지 않도록 주의해야 한다. 이러한 점들을 고려한다면 〈템플 디스트럭션〉은 스타크래프트 브루드워의 유즈맵 가운데에서도 손꼽히는 재미와 전략적 깊이를 지닌 맵으로 즐길 수 있을 것이다. Temple Destruction is a UMS (Use Map Settings) computer vs player defense map in StarCraft: Brood War, where players must defend their Overmind while preventing the destruction of an ancient temple. The map features a central canyon structure, with the Overmind positioned on the left and the ancient temple on the right, each serving as a critical focal point for defense and offense. The temple, located on the right side, has four accessible entrances, each offering spaces to build defensive structures, while the Overmind on the left is protected by narrow pathways that are easier to defend but require careful unit placement to counter concentrated enemy attacks. The map's title, 'Temple Destruction,' hints at the core objective: preventing the temple's destruction while defending the Overmind. The gameplay is divided into three main phases: early-game resource gathering and base expansion, mid-game clearing enemy units around the Overmind and reinforcing temple defenses, and late-game eliminating enemy forces near the temple while executing a final defense strategy. Players must produce a balanced mix of Zerg units such as Zerglings, Hydralisks, and Mutalisks to adapt to different combat scenarios. Early-game strategies should focus on Zergling production to protect the Overmind, while mid-to-late game allows for more versatile unit combinations like Hydralisks or Mutalisks to attack or defend the temple. Special units or items scattered across the map can also enhance combat effectiveness, adding depth to the gameplay. Temple Destruction is suitable for both beginners and experienced players, offering a balanced challenge. Beginners can succeed with simple Zergling-based strategies, while advanced players can experiment with complex unit compositions and tactics to tackle higher difficulty enemy waves. Team play is highly recommended, as coordination and role distribution among teammates significantly influence the outcome. Before starting, players should study the map layout and entrance positions to plan defensive structures around the Overmind and temple. Efficient resource management and timely unit production are crucial to counter enemy attacks. Understanding the dual objectives—defending the Overmind and preventing the temple's destruction—is key to mastering this map. With these considerations in mind, Temple Destruction stands out as one of the most engaging and strategically rich UMS maps in StarCraft: Brood War.
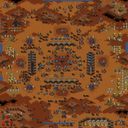
테스트 오브 서바이벌 (Test Of Survival)
이 맵은 ‘Test Of Survival(eins)1.0beta.scx’ 파일명에서 알 수 있듯이 5명의 플레이어가 동시에 참여해 살아남기를 목표로 하는 서바이벌형 유즈맵이다. 내부 제목과 설명에 ‘Kill the overmind’라는 문구가 보이므로, 오버마인드와 같은 강력한 AI 혹은 특정 유닛을 제거하는 것이 주요 승리 조건으로 추정된다. 맵 크기가 3072×3072 타일 단위 96×96으로 꽤 넓으며, 황혼 타일셋을 사용해 어두운 분위기의 지형이 배치돼 있다. 시작 지점은 맵 중앙에 여러 개가 흩어져 있을 가능성이 높으며, 각 플레이어는 초기 자원을 제한적으로 받는 경우가 많다. 따라서 초반에는 자원 확보와 방어 라인 구축이 핵심이며, 중후반으로 갈수록 적의 움직임을 예측해 포위하거나 협동 공격을 시도해야 한다. 맵에는 자연 지형 외에도 중립 유닛이나 방어 타워가 배치돼 있을 수 있어, 이를 적절히 활용하면 방어와 공격을 동시에 수행할 수 있다. 플레이 전 확인해야 할 포인트는 자원 스폰 위치, 중립 유닛의 리스폰 타이머, 그리고 오버마인드와 관련된 트리거가 언제 발동하는지이다. 이 정보를 파악하면 초반 전투에서 유리한 위치를 선점하고, 중반 이후에는 상대를 압박해 승리 확률을 높일 수 있다. 전반적으로 전략적 사고와 협동이 요구되는 맵이므로, 팀 플레이를 즐기는 유저나 서바이벌 매치를 선호하는 플레이어에게 추천한다. This map, identified by the filename TestOfSurvival(eins)1.0beta.scx, is a survival‑style UMS where up to five players compete to outlast each other. The internal title and description mention “Kill the overmind,” suggesting that eliminating a central AI or a specific powerful unit is the primary victory condition. With a large 3072×3072 layout divided into 96×96 tiles and using the Twilight tileset, the map presents a dark, expansive battlefield. Spawn points are likely scattered around the center, each player starting with limited resources, making early resource gathering and defensive positioning crucial. As the game progresses, predicting opponent movements and coordinating attacks become essential. Neutral units or defensive towers may be placed throughout the map, allowing players to blend offense and defense effectively. Before playing, it’s important to locate resource spawns, check neutral unit respawn timers, and understand when the overmind‑related triggers activate. Knowing these details helps secure advantageous early positions and apply pressure in the mid‑to‑late game. Overall, the map demands strategic planning and cooperation, making it ideal for players who enjoy team‑based survival matches.
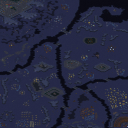
Elements Flux
Elements Flux는 두 마리의 뇌충이 프로토스와 테란 기지를 감염시키고 시간의 흐름을 왜곡해 과거의 오버마인드를 현재로 소환했다는 설정을 배경으로 한다. 최대 6인이 협력해 오버마인드를 격퇴하는 시나리오형 유즈맵으로, 화산 타일셋의 256×256 대형 맵에서 진행된다. 플레이어는 각자 기지를 운영하며 병력을 생산해 적 기지를 공략하거나, 트리거 이벤트에 따라 등장하는 보스급 유닛과 전투를 벌이게 된다. 맵 설명에 등장하는 '시간의 흐름(Time Flux)' 설정이 실제 트리거로 어떻게 구현되었는지가 핵심 재미 요소로 보인다. 일반적인 컴까기나 디펜스와 달리 스토리 라인이 명확하고, 오버마인드라는 상징적 보스를 목표로 삼아 캠페인 미션을 연상시키는 진행이 예상된다. 맵 중앙에는 오버마인드 소환 지점이 위치하며, 양옆으로 프로토스와 테란 감염 기지가 배치되어 있는 것으로 보인다. 플레이어 시작 지점은 가장자리 부근에 분산되어 있어 초반 정찰과 자원 확보가 중요하다. 화산 지형 특성상 용암 지대가 이동 경로를 제한할 수 있으며, 이를 활용한 병목 지점 방어나 우회 루트 확보가 전략적 변수가 된다. 트리거 이벤트로는 주기적인 적 공세, 오버마인드 소환 카운트다운, 특정 건물 파괴 시 추가 유닛 지급 등이 있을 것으로 추정된다. 6인 풀파티 기준 40~60분 내외의 플레이 타임이 예상되며, 난이도는 협동 숙련도에 따라 체감 차이가 클 수 있다. 솔로 플레이는 사실상 불가능에 가까우므로 파티 구성이 필수적이다. 협동 플레이를 즐기는 유저나 브루드워 스토리 연장선에서 색다른 미션을 원하는 유저에게 적합하다. 플레이 전에는 버전 표시가 FINAL 1.4인 점, 맵 크기가 커 로딩 시간이 길 수 있음을 감안하고 팀원 간 역할 분담을 미리 정하는 것이 좋다. Elements Flux is based on a setting where two Cerebrates have infested Protoss and Terran encampments, creating a time flux that brings the Overmind from the past to the present. It is a scenario-type use map where up to six players cooperate to defeat the Overmind, played on a large 256×256 volcanic tileset map. Each player manages a base, produces forces to attack enemy bases, and fights boss-class units triggered by events. The implementation of the "Time Flux" concept into triggers appears to be the core fun factor. Unlike typical comp-stomp or defense maps, it features a clear storyline and a symbolic boss objective, reminiscent of a campaign mission. The map likely places the Overmind summoning point in the center with infected Protoss and Terran bases on either side. Player starts are scattered near the edges, making early scouting and resource securing crucial. Lava terrain restricts movement paths, creating strategic chokepoints and flanking routes. Expected triggers include periodic enemy assaults, an Overmind summoning countdown, and bonus units upon destroying key structures. Estimated playtime is 40–60 minutes for a full six-player party, with difficulty varying greatly by team coordination. Solo play is nearly impossible, so party formation is essential. Recommended for players who enjoy cooperative play or want a fresh mission extending the Brood War lore. Before playing, note the FINAL 1.4 version, longer load times due to map size, and the need to assign roles among teammates in advance.
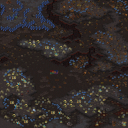
크래시 알피지: 소울애시 (Crash Rpg: SoulAsh)
‘크래시 알피지: 소울애시’는 스타크래프트 브루드워의 유즈맵 RPG 장르로, 플레이어들이 세 명의 영웅을 조종해 크립탈 3개를 수집하고 사이오닉 에미터를 파괴해 오버마인드를 약화시키는 것이 목표인 전략형 RPG다. 맵은 정글 타일셋으로 구성되어 있으며, 4096x4096의 넓은 공간에서 진행된다. 내부 설명에 따르면 레벨 업 포인트는 25,000, 50,000, 100,000으로 설정되어 있고, 영웅과 스탯의 밸런스가 재조정되었다고 한다. 맵의 구조를 보면 중앙에 오버마인드가 위치한 가운데, 플레이어는 외곽에서 시작해 크립탈과 사이오닉 에미터를 확보한 뒤 오버마인드를 공격할 수 있는 기반을 마련해야 한다. 맵 곳곳에는 건물이 배치되어 있어 방어 거점을 마련할 수 있으며, 오버마인드 주변에는 강력한 방어 시설이 있어 한 번에 밀어붙이기보다는 단계적인 전투가 필요하다. 특히 사이오닉 에미터 파괴 후 오버마인드의 체력이 급격히 감소하는 구조로 보이며, 이는 플레이어들에게 전략적 타이밍을 요구한다. 영웅의 레벨 업 시스템과 스탯 재조정은 전투 밸런스를 맞추기 위한 것으로 추정되며, 다수의 유닛과 건물이 등장하는만큼 초보자는 적응이 다소 어려울 수 있다. 추천하는 플레이 방식은 팀을 이뤄 협동하는 방식으로, 개인의 영웅 성장과 팀의Resource 관리, 오버마인드 공격 타이밍을 조율하는 것이 핵심이다. 맵의 난이도는 보통 수준으로, 적절한 스킬과 아이템 활용이 중요하다. 특히 오버마인드 주변의 방어 시설은 플레이어들의 레벨이 충분히 오르지 않으면 접근조차 어려운 구조로 보이며, 이는 플레이어들에게 성장 곡선의 중요성을 강조한다. 이 맵은 RPG 장르의 특성을 살리면서도 스타크래프트의 전략적 요소와 시너지를 내고 있으며, 영웅의 성장과 팀워크가 요구되는 만큼 즐겁고 도전적인 경험을 제공할 것으로 예상된다. 플레이 전 영웅의 스킬과 아이템 시스템을 숙지하고, 맵의 주요 지점을 미리 확인해두는 것이 중요하다. ‘Crash RPG: SoulAsh’ is a user-created RPG map in *StarCraft: Brood War* where players control three heroes, aiming to collect three Crystals and destroy the Psionic Emitter to weaken the Overmind in a strategic RPG format. The map features a jungle tileset and unfolds across a vast 4096x4096 space. According to the in-game description, level-up points are set at 25,000, 50,000, and 100,000, with adjustments made to balance heroes and their stats. Structurally, the Overmind is positioned centrally, while players begin on the outskirts, securing Crystals and the Psionic Emitter before establishing a foothold to attack the Overmind. Buildings are scattered throughout the map, allowing for defensive strongholds, and the area around the Overmind is fortified with powerful defenses, necessitating gradual, staged battles rather than all-out assaults. Notably, destroying the Psionic Emitter causes the Overmind’s health to plummet sharply, demanding strategic timing from players. The hero leveling system and stat adjustments appear designed to balance combat, though the presence of numerous units and structures may pose a slight challenge for beginners. A recommended approach is to team up and collaborate, coordinating individual hero progression, team resource management, and the timing of Overmind attacks. The map’s difficulty is moderate, with effective skill and item usage being crucial. The defenses around the Overmind seem nearly impassable unless players have sufficiently leveled up, underscoring the importance of a steady growth curve. While staying true to RPG mechanics, the map synergizes with *StarCraft*’s strategic elements, offering an engaging and challenging experience that emphasizes hero progression and teamwork. Prior to playing, it’s essential to familiarize yourself with the heroes’ skills and item systems and to scout key locations on the map.
오버마인드 디펜스 6:0 모어 스페이스 (Overmind Defence 6:0 More space!)
스타크래프트 브루드워의 대표적인 디펜스 장르 유즈맵 ‘오버마인드 디펜스 6:0 모어 스페이스(Overmind Defence 6:0 More space!)’는 8명의 플레이어가 한 팀으로 적의 오버마인드를 파괴하는 목표를 향해 협동하는 구조로 설계되었다. 맵은 우주 타일셋을 기반으로 3072x3072의 넓은 공간을 차지하며, 가운데 위치한 적 기지 주변으로 적의 공격로가 복잡하게 배치되어 있다. 플레이어는 각자의 스타크래프트 유닛을 이끌고 방어선을 구축하고, 적의 공세를 물리치며 자원과 기술을 확보해야 한다. 맵의 특징은 ‘0:More space!’라는 제목에서 알 수 있듯이 넓은 맵과 넓어진 방어 공간으로, 적의 침공을 더 효율적으로 차단하고 자원을 확보할 수 있는 기회를 제공한다. 특히 초반 방어 타워와 유닛 배치 위치가 넓게 분산되어 있어 전략적 플레이가 요구되며, 후반으로 갈수록 강력한 적의 공세가 쏟아지므로 팀 간의 긴밀한 협력이 필수적이다. 초보 유저는 방어선 구축과 자원 관리에 집중해야 하며, 숙련자는 적의 약점을 파고들며 공세를 역으로 활용하는 플레이가 가능하다. 맵의 재미는 넓은 공간을 활용한 광역 방어와 협동 플레이에서 오며, 특히 적의 오버마인드를 파괴하기 위한 마지막 공세 타이밍이 긴장감을 높인다. 플레이 전에는 맵의 넓은 공간을 고려해 방어선 구축과 자원 확보를 위한 전략을 미리 세우는 것이 중요하며, 팀원과의 원활한 소통이 승리를 좌우할 수 있다. 이 맵은 디펜스 장르의Classic을 재해석한 작품으로, 넓은 맵과 전략적 깊이를 통해 많은 유저들에게 사랑받고 있다. Overmind Defence 6:0 More space! is a classic defense genre custom map in StarCraft: Brood War, designed for 8 players working together as one team to destroy the enemy's Overmind. The map spans a vast 3072x3072 area using a space-themed tileset, featuring a central enemy base surrounded by intricately designed attack paths. Players must strategically place defensive towers and units, manage resources, and repel enemy waves while advancing their own technology. The name '0:More space!' reflects its expanded design, offering more room for defense and resource gathering compared to previous versions. Early gameplay requires careful tower placement and unit management, while later stages demand coordinated teamwork to withstand increasingly powerful enemy assaults. Beginners should focus on building a solid defense and resource economy, while experienced players can exploit enemy weaknesses and turn the tide with counter-attacks. The map’s charm lies in its strategic depth and teamwork, with the final push to destroy the Overmind creating intense moments. Before playing, it's crucial to plan defense lines and resource strategies, as communication and cooperation among teammates are key to success. This map is a refined take on the defense genre, celebrated for its wide space and strategic complexity among StarCraft fans.
멍청한 오버마인드 2 (Mungcheonghan Overmind 2)
스타크래프트 브루드워 맵인 멍청한 오버마인드 2(Mungcheonghan Overmind 2)는 독특한 콘셉트와 오리지널 규칙을 담고 있는 유즈맵 장르의 작품이다. 전통적인 밀리 대전 방식에서 벗어나 플레이어들이 색다른 방식으로 게임을 즐길 수 있도록 기획되었으며, 화산 타일셋을 배경으로 하여 어둡고 강렬한 전장 분위기를 자아낸다. 내부 설명과 맵 구조를 살펴보면 제작자의 개성 있는 연출과 전용 진행 방식이 반영되어 있음을 짐작할 수 있다. 전체적인 진행은 플레이어 간의 협력 혹은 주어진 조건에 맞춘 플레이를 요구하는 형태로 구성되어 있으며, 다인용 플레이 환경에 알맞은 배치가 돋보인다. 맵 전장의 넓은 공간과 배치된 오브젝트들은 일반적인 대전 게임과는 다른 호흡으로 게임이 전개됨을 보여준다. 기존의 단순한 대전이나 정형화된 플레이에서 벗어나 색다른 재미를 찾는 유저들에게 적합하며, 친구들과 함께 모여 가볍게 독특한 규칙을 파악하며 즐기기에 알맞은 플레이 경험을 제공한다. 플레이 전에는 맵의 전반적인 구성을 미리 확인하고, 함께 참여하는 인원들과 호흡을 맞추는 것이 원활한 진행에 도움이 된다. Starcraft Brood War map Mungcheonghan Overmind 2 is a custom use map featuring a unique concept and original rules. Moving away from traditional melee gameplay, it is designed for players to enjoy the game in a distinct style, utilizing a volcanic tileset to create a dark and intense battlefield atmosphere. Examining the internal description and map structure suggests that the creator's unique direction and specialized progression mechanics have been implemented. The overall flow is structured to require cooperation among players or adherence to specific conditions, highlighted by a layout tailored for multi-player environments. The spacious battlefield and placed objects indicate that the game unfolds at a different pace compared to standard matches. It is well-suited for users looking for unconventional fun away from standard battles, offering an engaging experience suitable for gathering with friends to understand unique rules and play together lightly. Before playing, it is helpful to check the overall composition of the map in advance and coordinate with participating members for a smooth progression.
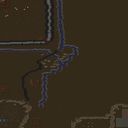
에일리언 앤 휴먼 워 (Alien and human war)
스타크래프트 브루드워 유즈맵 '에일리언 앤 휴먼 워'는 4인 협력 플레이를 전제로 한 컴까기 스타일의 시나리오 맵이다. 황무지 타일셋 위에 256×256 타일 크기로 펼쳐진 전장은 오버마인드를 파괴하라는 명확한 목표를 제시하며, 플레이어들은 각자 기지를 운영하면서 적진으로 진출해야 한다. 맵 구조는 일반적인 밀리맵과 유사하게 자원 지대와 확장 기지가 배치되어 있으나, 중앙과 후방에 강력한 저그 병력과 방어 타워가 밀집해 있어 초반 견제와 중반 병력 조합이 승패를 가른다. 트리거로 구현된 이벤트는 오버마인드 처치 시 즉시 승리하는 단순 조건이지만, 그 과정에서 등장하는 울트라리스크 무리와 수호군주 파도는 방심할 수 없는 난이도를 제공한다. 4인 풀파티로 진행할 경우 역할 분담이 자연스럽게 이루어지며, 한 명이 초반 러시를 막고 나머지가 테크트리를 올리는 전술이 유효하다. 솔로 플레이는 적 병력 압박이 거세 추천하지 않으며, 음성 채팅이나 핑으로 공격 타이밍을 맞추는 팀워크가 필수적이다. 맵 파일명 'Mine.scx'와 내부 제목이 일치해 버전 관리가 용이하며, cp949 인코딩으로 한글 채팅도 문제없이 지원된다. 협동전 입문용으로 적당하며, 밀리 빌드 연습과 유즈맵 특유의 연출을 동시에 즐기고 싶은 유저에게 권한다. StarCraft Brood War use map 'Alien and human war' is a scenario-style comp-stomp map designed for four-player cooperation. The 256×256 tile battlefield on the Badlands tileset presents a clear objective: destroy the Overmind. Players must manage their own bases while advancing into enemy territory. The layout resembles a standard melee map with resource fields and expansion sites, but the center and rear are packed with strong Zerg forces and defensive towers, making early harassment and mid-game army composition decisive. The trigger-based event ends the game instantly upon Overmind death, yet the waves of Ultralisks and Guardians that appear along the way deliver a surprisingly stiff challenge. With a full party of four, roles naturally split—one player holds early rushes while others tech up—a tactic that proves effective. Solo play is not recommended due to overwhelming enemy pressure, and teamwork via voice chat or pings to synchronize attack timing is essential. The map filename 'Mine.scx' matches the internal title, simplifying version control, and cp949 encoding ensures Korean chat works without issues. It serves as a good entry point for cooperative play, recommended for users who want to practice melee builds while enjoying the unique staging of a use map.
최근 등록된 맵
새로 추가된 파일과 버전을 확인하세요.
오버마인드 파괴 (Der Overmind)
스타크래프트 브루드워의 독특한 유즈맵으로, 단독 플레이를 전제로 한 ‘Der Overmind’는 우주 테마의 거대한 맵에서 저그 종족을 조종해 오버마인드를 파괴하는 목표를 지닌 디펜스형 미션이다. 맵 중앙에 위치한 거대한 오버마인드 건물을 중심으로 주변에 배치된 저글링과 히드라리스크, 뮤탈리스크 등 저그의 핵심 유닛들이 자동 생성되며, 플레이어는 제한된 자원으로 이들을 효율적으로 배치하고 방어선을 구축해야 한다. 맵은 4096x4096의 넓은 우주 공간으로 구성되어 있으며, 중앙 오버마인드 주변으로는 적의 공격 루트가 복잡한 지형으로 설계되어 있어 전략적 배치와 유닛 관리 능력이 요구된다. 플레이 방식은 기본적으로 방어와 자원 관리의 균형을 맞추는 데 초점을 맞추고 있으며, 오버마인드에 지속적인 피해를 입히기 위해 다수의 유닛을 동원해야 한다. 맵 곳곳에 흩어져 있는 미네랄과 가스 채취 지점을 확보해 자원을 확보하는 동시에, 적의 공격을 효과적으로 차단할 방어선을 구축하는 것이 핵심이다. 특히 오버마인드 주변의 좁은 통로와 언덕 지형은 유닛의 움직임을 제약하는 요소로 작용하며, 이를 활용해 방어 효율을 극대화할 수 있다. 또한, 맵의 넓은 공간은 넓은 시야를 제공하지만, 동시에 적의 접근을 쉽게 허용할 수 있어 신중한 플레이가 필요하다. 이 맵은 단독 플레이를 전제로 설계되었으므로, AI의 공격 패턴을 예측하고 이에 맞춰 방어 전략을 수립하는 것이 중요하다. 초보자보다는 중급 이상의 플레이어에게 적합하며, 특히 저그 유닛의 특성을 잘 이해하고 있는 플레이어에게 더 나은 경험을 제공할 것으로 보인다. 또한, 넓은 맵과 복잡한 지형은 전략적 깊이를 더해주어, 같은 미션이라도 다양한 플레이 스타일을 시도해 볼 수 있는 장점이 있다. 다만, 자원 관리와 유닛 배치의 균형을 맞추는 것이 어려울 수 있어, 여러 번의 플레이를 통해 최적의 전략을 찾아내는 것이 필수적이다. 이 맵을 즐기기 위해서는 유닛의 특성과 맵의 지형을 충분히 숙지하고, 방어와 공격의 균형을 carefully 관리하는 것이 중요하다. Der Overmind is a unique custom map in StarCraft: Brood War designed for solo play, where players control the Zerg faction to destroy the Overmind in a defense-oriented mission set in a vast space-themed map. The map features a central Overmind structure surrounded by auto-generated Zerg units like Zerglings, Hydralisks, and Mutalisks, requiring players to strategically position and manage these units while balancing resource collection. The 4096x4096 map offers a sprawling cosmic landscape with complex terrain around the Overmind, demanding careful unit placement and strategic foresight. The gameplay revolves around maintaining a balance between defense and resource management, with the primary objective being to inflict continuous damage on the Overmind by deploying units effectively. Scattered mineral and gas deposits across the map must be secured to sustain resources, while defensive structures are built to counter enemy attacks. The narrow pathways and elevated terrain near the Overmind restrict unit movement, allowing players to leverage these features for optimized defense. However, the vast open spaces also pose risks of enemy incursions, necessitating cautious and adaptive play. Tailored for solo players, the map challenges players to anticipate AI attack patterns and adapt defensive strategies accordingly. While accessible to intermediate players, it offers deeper strategic depth for those familiar with Zerg unit mechanics. The expansive map and intricate terrain encourage experimentation with various playstyles, though balancing resource management and unit deployment can be challenging. Mastery requires multiple playthroughs to refine optimal strategies, making it essential to understand unit strengths, map topography, and the delicate equilibrium between offense and defense.
생존의 시험(eins) 완료 (Test of survival(eins) complete)
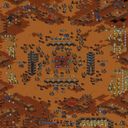
《Test of survival(eins) complete》는 스타크래프트 브루드워 유즈맵의 서바이벌 장르 맵으로, 저그의 오버마인드를 처치하는 것이 최종 목표다. 맵은 넓은 황무지 한가운데에 위치한 오버마인드 주변을 중심으로 전개되며, 플레이어는 끊임없이 몰려드는 저그 무리 속에서 살아남아야 한다. 맵의 전체적인 분위기는 컴컴한 황혼 테마로 조성되어 있어 공포와 긴장감을 자아낸다. 맵 곳곳에는 미네랄과 가스, 그리고 소규모 저그 무리가 배치되어 있으며, 오버마인드는 중앙에 위치한 거대한 둥지 위에 자리 잡고 있다. 플레이어는 제한된 자원으로 저그를 방어하며, 오버마인드에 도달하기까지의 과정 속에서 지속적인 압박을 받게 된다. 맵의 디자인은 단순하지만, 끊임없이 쏟아지는 저그의 물량 공세와 제한된 자원 관리가 주요한 전략적 포인트다. 특히 오버마인드에 가까이 접근할수록 적의 공격이 더욱 치열해지는 구조로 되어 있어, 플레이어는 신중한 자원 관리와 효율적인 방어 전략을 세워야 한다. 이 맵은 특히 난이도가 높고 긴장감을 유지하기 때문에, 숙련된 플레이어에게 적합하며, 팀 플레이보다는 개인 생존에 초점을 맞추고 있다. 플레이 전에는 저그의 배치와 오버마인드 주변의 방어 구조를 미리 파악하는 것이 중요하다. 또한, 제한된 자원을 효율적으로 활용하기 위한 생산 및 방어 건물 배치 전략을 미리 계획하는 것이 필수적이다. 이 맵은 서바이벌이라는 장르의 특성상, 끊임없는 긴장감과 전략적 깊이가 요구되는 점이 특징이다. 초보자의 경우 난이도를 낮춰 연습 모드에서 시작하는 것이 좋으며, 점차적인 난이도 상승을 통해 실력을 키워나가는 것이 바람직하다. 맵의 분위기와 구조는 서바이벌 장르의 정석을 따르고 있으며, 플레이어에게 끊임없는 도전과 성취감을 제공할 것이다. 《Test of survival(eins)》 is a survival genre StarCraft: Brood War custom map where the ultimate goal is to defeat the Zerg Overmind. The map unfolds around the Overmind, situated in the center of a vast wasteland, with players forced to survive relentless waves of Zerg. The overall atmosphere is dark and eerie, evoking a sense of dread and tension. Scattered throughout the map are minerals, gas, and small groups of Zerg, while the Overmind perches atop a massive nest at the center. Players must defend against the Zerg with limited resources, facing constant pressure as they work toward reaching the Overmind. Though the design is simple, the map’s key strategic elements lie in managing limited resources and countering the Zerg’s endless swarms. The closer players get to the Overmind, the more intense the enemy’s attacks become, demanding careful resource management and efficient defensive strategies. Due to its high difficulty and sustained tension, this map is best suited for experienced players, focusing more on individual survival than teamwork. Before playing, it’s crucial to study the Zerg’s placement and the defensive structures around the Overmind. Planning an effective production and building placement strategy to maximize limited resources is also essential. As a survival map, it emphasizes continuous tension and strategic depth, offering both challenge and a sense of accomplishment. Beginners should start with a lower difficulty practice mode to gradually build their skills, making their way up to higher challenges. The map’s atmosphere and structure adhere to the survival genre’s classic formula, providing players with relentless challenges and rewarding achievements.
생존 테스트 (eins) complete
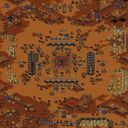
스타크래프트 브루드워 유즈맵 중에서도 독특한 생존 테마를 다루는 'Test of survival(eins) complete'는 플레이어에게 극한의 긴장감을 선사하는 서바이벌 장르의 맵입니다. 이 맵은 단순한 전투를 넘어, 중앙의 핵심 목표인 오버마인드를 처치하기 위해 몰려오는 끊임없는 적들을 막아내며 살아남아야 하는 구조를 가지고 있습니다. 맵의 전반적인 지형은 황혼 타일셋을 사용하여 어둡고 황량한 분위기를 연출하며, 이는 플레이어가 느끼는 고립감과 생존의 절박함을 시각적으로 극대화하는 역할을 합니다. 게임의 진행 방식은 중앙을 중심으로 배치된 거점들과 사방에서 밀려드는 유닛들을 방어하는 형태로 이루어지며, 플레이어는 자원을 효율적으로 관리하고 병력을 적재적소에 배치하여 몰려오는 위협을 극복해야 합니다. 특히 맵의 구조상 사방이 개방되어 있거나 좁은 길목이 존재하여, 방어선이 뚫릴 경우 순식간에 게임이 패배로 이어질 수 있는 긴박한 플레이 경험을 제공합니다. 이 맵은 단순한 컨트롤 싸움을 넘어 전략적인 배치와 자원 운용이 핵심이므로, 정교한 운영을 즐기는 플레이어들에게 매우 적합합니다. 플레이 전 확인 포인트로는, 맵의 난이도가 상당히 높게 설정되어 있을 가능성이 크므로 충분한 준비와 팀원 간의 협력이 필수적이라는 점을 염두에 두어야 합니다. 또한, 오버마인드를 목표로 하는 특수한 승리 조건이 포함되어 있으므로, 단순히 버티는 것을 넘어 공격적인 목표 달성을 위한 전략 수립이 필요합니다. 스타크래프트 유즈맵 매니아라면 한 번쯤 도전해 볼 만한 가치가 있는 완성도 높은 서바이벌 맵입니다. 'Test of survival(eins) complete' is a survival-genre StarCraft: Brood War UMS map that offers a unique theme and intense tension. This map goes beyond simple combat, requiring players to survive against endless waves of enemies to ultimately destroy the Overmind, which serves as the central objective. The overall terrain utilizes the Twilight tileset, creating a dark and desolate atmosphere that visually amplifies the sense of isolation and the urgency of survival. The gameplay revolves around defending key strongholds positioned around the center against enemies rushing from all directions. Players must efficiently manage resources and strategically deploy units to overcome the constant threats. Due to the map's layout, which features both open areas and narrow chokepoints, a breach in the defensive line can lead to an immediate defeat, providing a high-stakes and thrilling experience. Since the gameplay demands strategic placement and resource management rather than just micro-management, it is highly suitable for players who enjoy sophisticated tactical gameplay. A key point to note before playing is that the difficulty is likely quite high, so thorough preparation and teamwork are essential. Furthermore, as the map includes a specific victory condition centered on defeating the Overmind, players must develop strategies for offensive goal achievement rather than just passive defense. This is a highly polished survival map that StarCraft UMS enthusiasts will find worth attempting.
테스트 오브 서바이벌 (eins) Ver1.30 (Test of survival (eins) Ver1.30)
스타크래프트 브루드워의 고전 서바이벌 유즈맵인 〈Test of survival (eins) Ver1.30〉은 오버마인드를 처치하는 것이 최종 목표인 긴장감 넘치는 생존형 맵이다. 맵 곳곳에 배치된 적의 무리 속에서 끊임없이 밀려오는 저글링, 히드라리스크, 울트라리스크, 뮤탈리스크 등 다양한 저그 유닛을 상대해야 하며, 중앙 오버마인드 주변의 보호막을 해제하고 파괴하는 전략이 요구된다. 맵은 황혼 테마의 어두운 분위기로 구성되어 있어 플레이어에게 긴박감을 더한다. 맵의 크기는 3072x3072로 상당히 넓고, 시작 지역은 맵의 양쪽 끝에 각각 배치되어 있으며 중앙에는 오버마인드와 보호막 구조물이 위치하고 있다. 플레이어는 초반에 자원 수집과 방어 시설 구축을 통해 적절한 준비를 마친 뒤, 서서히 몰려오는 적의 공세를 버텨내며 오버마인드를 공격할 수 있는 기회를 잡아야 한다. 맵의 특징은 끊임없이 쏟아지는 적의 물량과 제한된 자원으로 어떻게 버티느냐가 관건이며, 팀 플레이가 필수적인 구조로 보인다. 특히 오버마인드 주변의 보호막을 해제하는 타이밍과 방법, 그리고 보호막을 파괴한 후의 공격 루트를 신중히 계획해야 한다. 서바이벌 장르답게 플레이어의 실수나 방심이 치명적인 결과를 초래할 수 있어, 초보보다는 적어도 중간 이상의 실력을 가진 플레이어에게 추천된다. 또한 맵의 버전이 1.30으로 업데이트되면서 이전 버전들에 비해 밸런스나 난이도가 조정되었을 가능성이 높아, 최신 버전을 플레이하는 것이 좋다. 맵을 시작하기 전에는 오버마인드 주변의 지형과 보호막의 위치, 그리고 각 시작 지점 간의 거리를 확인하여 전략을 수립하는 것이 중요하다. 이 맵은 혼자서 플레이하기보다는 팀원과의 원활한 소통과 협력이 필수적이므로, 함께 플레이할 팀원의 실력과 전략적 호흡도 고려해야 한다. 마지막으로, 맵의 긴 플레이 시간과 높은 난이도를 감안하여 충분한 시간과 전략적 준비를 하고 도전해 보는 것을 권장한다. The classic survival custom map from StarCraft: Brood War, *Test of Survival (Eins) Ver 1.30*, is a tense survival-style map where the ultimate goal is to defeat the Overmind. Players must face waves of relentless Zerg units—zerglings, hydralisks, ultralisks, mutalisks, and more—spawned throughout the map. A key strategy involves disabling and destroying the protective shield surrounding the central Overmind. The map’s twilight-themed, dark atmosphere heightens the sense of urgency. Spanning 3072x3072, the map is quite large, with starting positions placed at opposite ends and the Overmind’s shielded structure located in the center. Early on, players must gather resources and build defenses before weathering the escalating enemy assaults to create an opening to attack the Overmind. The core challenge lies in enduring the constant stream of Zerg forces while managing limited resources, and teamwork appears essential. Timing and method for disabling the shield around the Overmind, as well as planning an efficient attack route afterward, require careful consideration. As a survival map, mistakes or lapses in focus can lead to dire consequences, making it more suitable for intermediate to advanced players rather than beginners. Since version 1.30 may have adjusted balance and difficulty compared to earlier releases, playing the latest version is recommended. Before starting, it’s crucial to study the terrain around the Overmind, the shield’s location, and the distances between starting points to develop a solid strategy. Since smooth communication and cooperation with teammates are vital, the skill level and strategic synergy of your party should also be taken into account. Given the map’s long playtime and high difficulty, it’s wise to prepare thoroughly and approach the challenge with a well-devised plan.
테스트 오브 서바이벌 (eins) Ver1.11 (Test of survival (eins) Ver1.11)
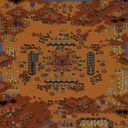
스타크래프트 브루드워 유즈맵 ‘Test of survival (eins) Ver1.11’을 리뷰합니다. 이 맵은 총 5명의 플레이어가 함께하는 서바이벌 장르의 유즈맵으로, 내부 설명에 적힌 ‘Kill the overmind’에서 알 수 있듯이 오버마인드를 무찌르며 살아남아야 하는 목표를 가지고 있습니다. 황혼 타일셋을 기반으로 한 어두운 분위기의 맵은 플레이어들에게 긴장감을 조성하며, 맵 중앙에 위치한 오버마인드를 중심으로 펼쳐지는 전투가 주요 볼거리입니다. 서바이벌 장르답게 끊임없는 적의 웨이브가 몰아치는 가운데, 플레이어들은 지속적으로Resources를 확보하고 Upgrade를 진행해야 합니다. 맵의 구조는 비교적 개방적이지만, 오버마인드 주변에는 방어선을 구축할 수 있는 공간이 마련되어 있어 전략적인 플레이가 가능합니다. 특히 ‘eins’라는 버전명에서 유추해 볼 때, 이 맵은 시리즈물의 중간 버전으로 보이며, 이전 버전들보다 밸런스가 개선되었을 가능성이 큽니다. 플레이어들은 각자의 스타일을 살려서 정예 유닛을 키우거나, 다수의 병력을 꾸려서 오버마인드를 향해 진격할 수 있습니다. 이 맵의 가장 큰 특징은 끊임없는 적의 공격과 제한된 리소스 사이에서 균형을 맞추는 것입니다. 초보자들은Resources 관리와 Upgrade 우선순위를 잘못 설정해 쉽게 무너질 수 있지만, 숙련자라면 효율적인Resource 활용과 타이밍을 잡는 데 중점을 둬야 합니다. 또한, 팀 플레이가 가능하다는 점에서 친구들과의 협동 플레이도 추천할 만합니다. 다만, 오버마인드를 무찌르는 것이 목표지만, 적의 패턴이나 맵의 디자인 변화가 시리즈를 거듭할수록 어떻게 달라질지 궁금증을 자아냅니다. 이 맵을 즐기기 위해서는 최소 5명의 플레이어가 필요하며, 예상 플레이 시간은 30분에서 1시간 정도로 추정됩니다. 초보자의 경우 난이도가 다소 높을 수 있으므로, 먼저 튜토리얼이나 쉬운 난이도의 유즈맵으로 연습을 거친 뒤 도전하는 것이 좋습니다. Test of survival (eins) Ver1.11 is a survival-style custom map for StarCraft: Brood War where up to five players must survive endless waves of enemies and ultimately defeat the Overmind. Set against the backdrop of the Twilight tileset, the map’s dark and immersive atmosphere heightens the tension as players scramble to gather resources, upgrade their forces, and defend against relentless assaults. The game revolves around protecting the central Overmind while expanding outward to secure key strategic points. Players can choose between a rush strategy, overwhelming the enemy with sheer numbers, or a more methodical approach, building elite units and fortifications. The ‘eins’ in the title suggests this is part of a series, likely refining mechanics and balance with each iteration, though the core survival gameplay remains consistent. One of the map’s standout features is its resource management challenge. Players must carefully balance income, spending, and upgrades to avoid being overwhelmed by the enemy’s persistent waves. Novices may struggle with prioritization, while experienced players will focus on optimizing their build orders and timing. Cooperative play is highly recommended, as teamwork and communication can mean the difference between survival and defeat. Given its survival mechanics, players should expect a dynamic and challenging experience that tests their adaptability. A full game typically lasts between 30 minutes to an hour, depending on player skill and strategy. Beginners are advised to practice with simpler custom maps or tutorials before tackling this intense challenge.
테스트 오브 서바이벌 (Test Of Survival)
이 맵은 ‘Test Of Survival(eins)1.0beta.scx’ 파일명에서 알 수 있듯이 5명의 플레이어가 동시에 참여해 살아남기를 목표로 하는 서바이벌형 유즈맵이다. 내부 제목과 설명에 ‘Kill the overmind’라는 문구가 보이므로, 오버마인드와 같은 강력한 AI 혹은 특정 유닛을 제거하는 것이 주요 승리 조건으로 추정된다. 맵 크기가 3072×3072 타일 단위 96×96으로 꽤 넓으며, 황혼 타일셋을 사용해 어두운 분위기의 지형이 배치돼 있다. 시작 지점은 맵 중앙에 여러 개가 흩어져 있을 가능성이 높으며, 각 플레이어는 초기 자원을 제한적으로 받는 경우가 많다. 따라서 초반에는 자원 확보와 방어 라인 구축이 핵심이며, 중후반으로 갈수록 적의 움직임을 예측해 포위하거나 협동 공격을 시도해야 한다. 맵에는 자연 지형 외에도 중립 유닛이나 방어 타워가 배치돼 있을 수 있어, 이를 적절히 활용하면 방어와 공격을 동시에 수행할 수 있다. 플레이 전 확인해야 할 포인트는 자원 스폰 위치, 중립 유닛의 리스폰 타이머, 그리고 오버마인드와 관련된 트리거가 언제 발동하는지이다. 이 정보를 파악하면 초반 전투에서 유리한 위치를 선점하고, 중반 이후에는 상대를 압박해 승리 확률을 높일 수 있다. 전반적으로 전략적 사고와 협동이 요구되는 맵이므로, 팀 플레이를 즐기는 유저나 서바이벌 매치를 선호하는 플레이어에게 추천한다. This map, identified by the filename TestOfSurvival(eins)1.0beta.scx, is a survival‑style UMS where up to five players compete to outlast each other. The internal title and description mention “Kill the overmind,” suggesting that eliminating a central AI or a specific powerful unit is the primary victory condition. With a large 3072×3072 layout divided into 96×96 tiles and using the Twilight tileset, the map presents a dark, expansive battlefield. Spawn points are likely scattered around the center, each player starting with limited resources, making early resource gathering and defensive positioning crucial. As the game progresses, predicting opponent movements and coordinating attacks become essential. Neutral units or defensive towers may be placed throughout the map, allowing players to blend offense and defense effectively. Before playing, it’s important to locate resource spawns, check neutral unit respawn timers, and understand when the overmind‑related triggers activate. Knowing these details helps secure advantageous early positions and apply pressure in the mid‑to‑late game. Overall, the map demands strategic planning and cooperation, making it ideal for players who enjoy team‑based survival matches.
Test of survival(eins) complete
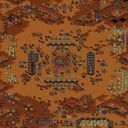
스타크래프트 브루드워 유즈맵 ‘Test of survival(eins) complete’는 서바이벌 장르의 컴까기 맵으로, 플레이어는 끊임없이 몰려드는 저그 무리를 상대하며 생존을 목표로 삼게 된다. 맵의 핵심은 ‘오버마인드’를 제거하는 것이지만, 실제 플레이에서는 끊임없는 저글링과 히드라리스크, 뮤탈리스크의 공세를 버텨내고Resource를 확보하는 데 주력하게 된다. 황혼 타일셋을 기반으로 한 어두운 분위기의 맵은 긴장감을 한층 더해 주며, 3072x3072라는 넓은 공간에서 벌어지는 전투는 마치 생존 게임을 플레이하는 듯한 몰입감을 선사한다. 저그의 공격 패턴은 무작위가 아니라 특정 타이밍에 집중되는 경향이 있으며,Resource가 부족한 초반에는 수비에 집중해야 한다.Resource가 확보되면 방어선을 구축하고 반격에 나서도 되지만,Resource가 고갈되면 순식간에 무너질 수 있어Resource 관리가 무엇보다 중요하다는 점에서 전략적 깊이가 돋보인다. 이 맵은 초보보다는 어느 정도 전략과Resource 관리 경험이 있는 플레이어에게 더 적합하며, 특히 저그 유닛을 상대하는 데 익숙한 유저라면 높은 난이도에서도oldooldooldooldooldooldooldooldooldooldooldooldooldooldooldooldooldooldooldooldooldooldooldooldooldooldooldooldooldooldooldooldooldooldooldooldooldooldooldooldooldooldooldooldooldooldooldooldooldooldooldooldooldooldooldooldooldooldooldooldooldooldooldooldooldooldooldooldooldooldooldooldooldooldo Test of survival(eins) complete is a survival-style UMS map in StarCraft: Brood War where players must withstand endless waves of Zerg units while aiming to eliminate the Overmind. Despite the stated objective, the core challenge lies in surviving relentless attacks from Zerglings, Hydralisks, and Mutalisks while securing resources to expand and defend. The map, set on a Twilight tileset with a 3072x3072 grid, delivers an immersive survival experience within a dark, expansive battlefield. Zerg assaults follow semi-predictable timing patterns, forcing players to balance defense and resource gathering—especially critical in the early game when resources are scarce. As players progress, they can fortify positions and counterattack, but mismanagement of resources or poor unit positioning can lead to swift defeat, emphasizing strategic depth and adaptability. This map is best suited for intermediate players with experience in micro-management and Zerg engagement, offering a punishing but rewarding survival challenge for those seeking to test their skills in Brood War's UMS landscape.
오버마인드 디펜스 v.CPU GOLD 2 (Overmind Defence v.CPU GOLD 2)
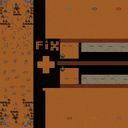
스타크래프트 브루드워의 유즈맵으로 유명한 '오버마인드 디펜스 v.CPU GOLD 2'는 프로토스 종족을 상대하는 디펜스 장르의 대표적인 컴까기 맵으로, 플레이어가 자원 채취와 방어 건물을 구축하며 적의 오버마인드를 파괴하는 것이 목표다. 이 맵은 내부 설명에서 확인할 수 있듯이 'U get minerals buy building engineering bay, forge or evolution chamber. U must kill enemy Overmind.'라는 간단한 목표를 제시하며, 플레이어는 초기에 제공되는 자원으로 엔지니어링 베이, 포지, 이볼루션 챔버 등 방어 건물을 건설한 후 프로토스 오버마인드를 공격해야 한다. 맵 이미지에서 확인되는 중앙의 넓은 평지와 주변의 지형적 특징들은 방어와 공격의 균형을 맞추기 위한 디자인으로 보이며, 특히 오버마인드 주변의 진입로와 방어 건물의 배치 공간이 상대적으로 넓게 설계되어 있음을 추정할 수 있다. 이 맵의 특징은 프로토스 오버마인드를 직접 공격하는 것이 아니라 방어 건물을 건설하고 자원을 관리하며 오버마인드를 파괴하는 전략적 요소가 강하다는 점이다. 방어 건물의 종류와 배치에 따라 난이도가 크게 달라질 수 있으며, 특히 포지와 이볼루션 챔버는 공격과 방어 모두에 영향을 미치는 핵심 건물로 보인다. 플레이어는 자원 채취와 건물 건설을 신중히 계획해야 하며, 오버마인드 주변의 프로토스 방어 건물(보호막 포함)을 제거하면서 접근로를 확보해야 한다. 맵의 난이도는 CPU 레벨이 GOLD로 설정되어 있어 적절한 수준의 도전을 제공하며, 방어 건물의 배치와 자원 관리, 오버마인드 파괴 타이밍 등이 주요 전략 포인트로 작용할 것으로 예상된다. 이 맵을 추천하는 대상은 스타크래프트의 디펜스 장르와 컴까기 경험을 원하는 플레이어, 특히 프로토스 종족을 상대하는 전략에 흥미를 느끼는 유저들이다. 또한 방어 건물의 건설과 자원 관리를 통해 전략적 사고를 키우고 싶은 초보 및 중급 플레이어에게도 적합하다. 다만, 오버마인드 파괴를 위해 프로토스 방어 건물(예: 스포어 콜로니, 시즈 탱크 등)을 우선적으로 제거해야 한다는 점을 고려해야 한다. 플레이 전에 확인해야 할 포인트는 다음과 같다. 첫째, 방어 건물의 종류와 역할(포지: 보호막 업그레이드, 이볼루션 챔버: 공격 업그레이드 등)을 숙지하고, 자원 관리와 건물 건설 우선순위를 미리 계획해야 한다. 둘째, 오버마인드 주변의 프로토스 방어 건물과 접근로의 배치 상태를 확인하여 공격 루트를 설정해야 한다. 셋째, CPU의 레벨(GOLD)이 적절한 난이도를 제공하므로, 초보자는 난이도를 낮추어 연습해 보는 것도 좋다. Overmind Defence v.CPU GOLD 2 is a classic UMS (User-Made Scenario) map in StarCraft: Brood War, renowned for its defense gameplay where players must build defensive structures and gather resources to destroy the enemy Overmind. As indicated in the internal description, the core objective is to 'get minerals, buy buildings like engineering bay, forge, or evolution chamber, and kill the enemy Overmind.' The map features a spacious central area surrounded by terrain that suggests strategic building placement for both defense and attack. The map's unique appeal lies in its strategic depth, requiring players to balance resource management, defensive structure placement, and direct attacks on the Overmind. Key buildings like the Forge and Evolution Chamber play dual roles in both offense and defense, making their placement critical. Players must carefully plan their resource allocation and building strategy, as the Overmind's surrounding Protoss defenses (including shielded structures) can hinder progress. The CPU difficulty set to GOLD ensures a challenging but fair experience, testing the player's ability to adapt and strategize. This map is ideal for players who enjoy defense-oriented UMS maps and those interested in Protoss-centric strategies. It also suits beginners and intermediate players looking to refine their strategic thinking through resource management and defensive building placement. However, players should prioritize removing Protoss defensive structures (such as Spore Colonies or Siege Tanks) around the Overmind to create a viable attack path. Before playing, it's essential to understand the roles of defensive structures (e.g., Forge for shield upgrades, Evolution Chamber for attack upgrades) and plan your resource allocation accordingly. Assess the layout of Protoss defenses and access routes around the Overmind to determine the best attack strategy. Since the CPU level is set to GOLD, beginners may want to start with lower difficulty settings to practice.
맵 선택 가이드
태그는 맵의 핵심 특징을 빠르게 설명하지만 제작 버전마다 규칙이 다를 수 있습니다. 상세 설명에서 권장 인원, 난이도, 플레이 시간과 버전을 함께 확인한 뒤 다운로드하세요.