
역할 분담 스타크래프트 맵 모음
'역할 분담' 태그가 등록된 맵을 모았습니다. 장르 하나로 찾기 어려운 플레이 방식, 난이도와 특징을 중심으로 인기 맵과 최신 맵을 비교해 보세요.
- 등록 맵
- 22개
- 누적 다운로드
- 0
- 누적 조회
- 647
인기 맵
다운로드와 조회 반응이 높은 맵입니다.
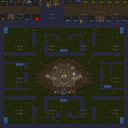
고양이와 쥐 2: 정글의 숨바꼭질 (Classic Cat n Mouse (E) Jungle 2)
스타크래프트 브루드워의 대표적인 UMS 유즈맵인 〈Classic Cat n Mouse〉의 후속작으로, 이번 〈Classic Cat n Mouse (E) Jungle 2〉는 플레이어들에게 숨바꼭질과 같은 긴장감을 선사하는 재미있는 디펜스 맵입니다. 맵은 넓은 정글 지형을 배경으로 하며, 숨는 플레이어(‘쥐’)와 쫓는 플레이어(‘고양이’)로 나뉘어 진행됩니다. 숨는 플레이어는 맵 곳곳의 숨겨진 장소나 구조물을 활용해 고양이로부터 5분을 버티는 것이 목표이며, 쫓는 플레이어는 제한된 시야와 맵의 복잡한 지형을 이용해 쥐를 효율적으로 찾아내야 합니다. 맵의 디자인상 쥐는 시야가 제한된 상태에서 움직이며, 고양이는 맵의 주요 길목을 차단하거나 특정 구역을 순찰하는 방식으로 플레이를 유도합니다. 맵의 분위기는 정글의 어두운 색감과 푸른 조명으로 조성되며, 숨는 플레이어의 경우 맵 곳곳에 숨겨진 ‘안전 구역’이 존재하여 잠시 숨을 돌릴 수 있습니다. 하지만 안심할 수 없는 것이, 고양이 플레이어는 일정 시간마다 맵의 주요 경로를 탐색하거나 쥐가 있는 구역을 우선적으로 수색하기 때문에 전략적인 움직임이 필요합니다. 특히 맵의 중간 지점에 위치한 넓은 개활지는 쥐가 쉽게 들키기 쉬운 곳이므로, 이곳을 통과할 때는 신중을 기해야 합니다. 이 맵은 7명의 플레이어가 참여할 수 있으며, 팀 구분이 없으므로 모든 플레이어가 쥐 또는 고양이로 역할을 바꿔가며 플레이할 수 있는 구조입니다. 초보자는 맵의 숨은 장소를 찾는 연습을, 숙련자는 고양이의 시야와 맵의 구조를 활용한 전략을 연마할 수 있어 재플레이성이 높은 것이 특징입니다. 다만, 쥐와 고양이의 역할이 완전히 바뀌는 경우가 많기 때문에, 한 번에 모든 전략을 익히기는 어려울 수 있습니다. 따라서 처음 플레이할 때는 숨는 플레이어 위주로 연습하는 것이 좋습니다. 이 맵은 UMS 유즈맵의 전형적인 재미 요소인 ‘숨바꼭질’을 잘 구현하고 있으며, 정글이라는 테마 덕분에 시각적 몰입감도 높습니다. 다만, 맵의 복잡한 구조가 다소 혼란을 초래할 수 있어, 처음 플레이하는 유저는 맵을 미리 둘러보며 숨은 장소를 찾는 연습을 권장합니다. 또한, 고양이 플레이어의 경우 맵의 주요 길목을 차단하는 전략이 중요하므로, 팀원과의 협력이 필수적입니다. 맵의 밸런스는 역할에 따라 달라지지만, 일반적으로 쥐가 조금 더 유리한 편으로 평가됩니다. 이 맵은 친구들과의 친목이나 스트레스 해소용으로 적합하며, 특히 숨는 플레이어의 경우 긴장감과 성취감을 동시에 느낄 수 있습니다. 다만, 고양이 플레이어의 경우 운이나 맵 이해도가 성패를 좌우할 수 있어, 숙련도가 필요하다는 점도 유념해야 합니다. 맵의 디자인과 분위기는 정글의 어둡고 신비로운 느낌을 잘 살려내어, 플레이어들에게 색다른 경험을 제공합니다. 특히 밤이나 어두운 색감의 조명 덕분에 숨는 플레이어의 위치를 찾기 어려워 긴장감을 극대화합니다. 이 맵은 UMS 유즈맵 중에서도 손에 꼽히는 작품으로,Hide and Seek(숨바꼭질) 장르의 정석을 보여줍니다. 플레이 전에는 반드시 맵의 숨은 장소를 미리 확인하고, 고양이 플레이어는 맵의 주요 길목을 차단하는 전략을 연습해야 합니다. 또한, 팀원과의 원활한 소통이 성공의 열쇠가 될 수 있으므로, 게임 시작 전 전략을briefly 공유하는 것이 좋습니다. 마지막으로, 맵의 복잡한 구조 때문에 처음 플레이하는 유저는 다소 혼란스러울 수 있지만, 몇 번 플레이하다 보면 맵의 패턴을 익힐 수 있습니다. 이 맵은 특히Hide and Seek(숨바꼭질) 장르를 좋아하는 유저들에게 강력히 추천합니다. 또한, 정글 테마와 어두운 분위기가 조화를 이루어 시각적 즐거움도 제공합니다. 다만, 고양이 플레이어의 경우 상대의 위치를 찾기 위한 노력이 필요하며, 쥐 플레이어는 안전한 루트를 찾기 위해 맵의 구조를 꼼꼼히 살펴야 합니다. 이 맵은 10년 이상의 역사를 자랑하는 고전 UMS 유즈맵으로, 여전히 많은 유저들에게 사랑받고 있습니다. 특히Hide and Seek(숨바꼭질) 장르의 재미와 긴장감을 동시에 느낄 수 있어, 오랜 기간 사랑받을 만한 가치가 충분합니다. Classic Cat n Mouse (E) Jungle 2 is a fun defense map that offers the thrilling tension of a game of hide-and-seek, serving as the successor to the classic Brood War UMS map Classic Cat n Mouse. Set against a vast jungle backdrop, players are divided into "mice" who hide and "cats" who chase. The mice must survive for five minutes by utilizing hidden spots and structures across the map, while the cats must efficiently track them down despite limited visibility and the map's complex terrain. The design forces mice to move with restricted vision, while cats control key paths or patrol certain zones to corner their prey. The map's atmosphere is enhanced by dark jungle tones and blue lighting, with hidden "safe zones" where mice can briefly catch their breath—though cats periodically sweep major routes or prioritize searching suspected areas, demanding strategic movement. The mid-map's open expanse is particularly risky for mice, requiring careful navigation. The map supports seven players with no team divisions, allowing everyone to alternate between mouse and cat roles. Beginners can practice finding hidden spots, while veterans refine strategies using the cats' vision and map layout, ensuring high replayability. However, frequent role swaps make mastering all strategies at once challenging, so new players should focus on the hiding role first. Classic Cat n Mouse (E) Jungle 2 perfectly captures the hide-and-seek appeal of UMS custom maps, immersing players in its jungle theme with strong visual engagement. Its intricate layout may overwhelm newcomers, so it's wise to explore the map beforehand to locate hidden spots. Cats rely on blocking key paths, making teamwork essential. While balance varies by role, mice generally hold a slight advantage. The map is ideal for socializing or stress relief, offering mice a mix of tension and accomplishment, though cats' success hinges more on luck and map knowledge. Its design and ambiance evoke the dark, mysterious allure of a jungle, heightening tension with dim lighting that obscures hiding spots. Among UMS maps, it stands out as a quintessential hide-and-seek experience. Before playing, familiarize yourself with hidden locations, and cats should practice blocking routes. Clear communication with teammates can be pivotal, so briefly sharing strategies before matches is recommended. New players may feel disoriented by the complex layout, but repeated plays will reveal its patterns. This map is highly recommended for hide-and-seek enthusiasts, blending its jungle theme with atmospheric visuals. Cats must actively search for prey, while mice should carefully study the map to find safe routes. With over a decade of history, it remains a beloved classic UMS map, delivering the perfect blend of fun and suspense that ensures its enduring popularity.
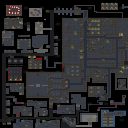
시뮬레이션 스쿨 2.34 베스트 (Sims School 2.34 best)
스타크래프트 브루드워의 대표적인 유즈맵 중 하나인 <시뮬레이션 스쿨>의 최신 버전인 2.34 베스트는, 플레이어들에게 색다른 전략과 팀워크를 요구하는 흥미로운 콘텐츠로 주목받고 있다. 이 맵은 기존의 단순 디펜스 성향을 넘어서, 학생과 교사, 학교 시설 간의 상호작용을 기반으로 한 전략적 플레이가 핵심이다. 맵 곳곳에 배치된 건물과 자원 포인트는 플레이어의 선택에 따라 다양한 전략을 구사할 수 있도록 설계되어 있으며, 특히 학생 역할을 맡은 플레이어는 학교 시설과 상호작용하며 자원을 확보하거나 방어 체계를 강화하는 임무를 수행한다. 반면 교사 역할을 맡은 플레이어는 학생들의 활동을 지원하고, 학교 시설의 유지·보수를 담당하는 등 역할 분담이 명확히 나뉜다. 맵의 공간 구성은 넓은 평원과 건물 밀집 지역이 조화를 이루며, 중앙에 위치한 학교 본관은 핵심 전투 지역으로 활용된다. 학생들은 학교 내외에서 활동하며 자원을 수집하고, 교사들은 학생들을 보호하고 시설물을 관리하는 동시에 적의 침입에 대비해야 한다. 이 맵의 특징 중 하나는 '노치프' 시스템으로, 초보 플레이어가 악용할 수 있는 비정상적인 전략을 차단하는 데 중점을 두고 있다는 점이다. 이를 통해 게임의 밸런스를 유지하며, 순수한 전략과 팀워크를 중시하는 플레이 환경을 제공한다. 또한, 맵의 디자인과 배치된 건물들은 학교의 분위기를 잘 살리며, 플레이어는 마치 실제 학교에서 벌어지는elike 전투를 체험할 수 있다. 이 맵은 특히 팀 플레이를 중시하는 유저들에게 적합하며, 역할 분담과 전략적 협력이 요구된다. 초보자는 역할의 중요성을 충분히 인지하고, 팀원과의 원활한 소통을 통해 게임을 진행하는 것이 중요하다. 마지막으로, 이 맵은 단순한 디펜스나 공격 위주의 맵이 아니라, 학생과 교사의 역할 분담을 통한 종합적인 전략이 요구되는 만큼, 다양한 플레이 스타일을 시도해 볼 수 있는 장점이 있다. StarCraft: Brood War’s classic custom map, *Simulation School*, with its latest version 2.34 Best, stands out as a compelling experience that demands fresh strategies and strong teamwork from players. Unlike typical defense-focused maps, this one revolves around strategic play centered on the interactions between students, teachers, and school facilities. Scattered buildings and resource points are designed to allow for diverse strategies depending on player choices, with students tasked with securing resources or reinforcing defenses through interactions with school facilities. Teachers, on the other hand, support students, maintain school infrastructure, and prepare for enemy incursions, creating a clear division of roles. The map’s layout blends open plains with densely built areas, where the central school building serves as a key battleground. Students operate both inside and outside the school, gathering resources, while teachers protect them, manage facilities, and guard against attacks. A notable feature is the "NoCheat" system, which prevents exploitative strategies often used by inexperienced players, ensuring balanced gameplay that emphasizes genuine strategy and teamwork. The map’s design and building placements evoke a school atmosphere, immersing players in what feels like a real schoolyard battle. Ideal for team-oriented players, it requires clear role distribution and strategic coordination. Beginners should recognize the importance of their roles and maintain smooth communication with teammates to succeed. Unlike maps focused solely on defense or offense, *Simulation School* rewards comprehensive strategies through role specialization, offering players the chance to experiment with a variety of playstyles.
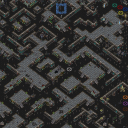
도둑과 경찰 Silver SE (Cops and Robbers Silver SE)
스타크래프트 브루드워의 고전 유즈맵 장르인 ‘컴까기’(컴퓨터 상대 게임) 중에서도 독특한 변주를 선보이는 《Cops and Robbers Silver SE》는 경찰과 강도의 대결을 테마로 한 흥미로운 전략 디펜스 맵이다. 맵의 배경은 황무지 타일셋으로 구성되어 있으며, 도시를 배경으로 경찰과 강도가 시민을 지키거나 약탈하는 대립 구조가 섬세하게 구현되어 있다. 맵은 3072x2048의 넓은 공간을 자랑하며, 7명의 플레이어(또는 팀)가 참여할 수 있도록 설계되어 있다. 경찰과 강도 역할을 명확히 구분하고, 시민 보호 또는 약탈이라는 목표를 달성하기 위해 전략적 선택이 요구되는 점이 이 맵의 핵심魅力이다. 플레이 방식은 경찰과 강도로 나뉘며, 경찰은 시민을 보호하고 강도를 처치하는 것이 목표인 반면, 강도는 시민을 약탈하여 돈을 벌어 경찰을 피하면서 목표를 달성해야 한다. 맵 곳곳에 배치된 건물과 지형은 엄폐물 역할을 하며, 특히 도시 중심부에는 시민이 모여 있는 구역이 있어 전략적 이동과 전투가 필수적이다. 맵의 넓은 공간은 넓은 시야와 넓은 이동 경로를 제공하지만, 동시에 적의 공격에 노출될 위험도 크기 때문에 시야 관리와 자원 활용이 중요하다. 또한, 맵의 구조상 특정 지점은 요충지로 작용할 가능성이 높아, 초보 플레이어는 이러한 지점을 빠르게 파악하는 것이 관건이다. 이 맵은 특히 팀플레이보다는 개인 또는 소수 팀 간 전략 대결에 초점을 맞추고 있으며, 역할에 따라 완전히 다른 플레이 스타일이 요구된다. 경찰은 방어와 공격의 균형을 맞춰야 하며, 강도는 효율적인 약탈 루트를 찾아야 한다. 맵의 난이도는 맵의 넓이와 역할의 복잡성으로 인해 초보자가 진입하기 어려울 수 있지만, 꾸준한 플레이를 통해 전략적 사고력을 키울 수 있는 장점이 있다. 또한, 경찰과 강도의 역할 전환이나 다양한 전략적 변수가 존재하여 반복 플레이가 가능한 재밌는 구조를 지닌다. 이 맵을 즐기기 위해서는 넓은 맵을 활용한 시야 관리와 신속한 판단력이 필요하며, 특히 강도 플레이어는 적절한 약탈 루트를 찾아야 생존할 수 있다. 추천 대상은 전략 디펜스 맵을 좋아하는 유저, 경찰과 강도의 역할 분담을 즐기는 플레이어, 넓은 맵에서 전략적 대결을 펼치고자 하는 유저들에게 적합하다. 또한, 팀플레이보다는 개인 또는 소수 팀 간 경쟁을 선호하는 유저들에게도 추천할 만하다. 맵의 넓은 공간과 복잡한 구조는 초보자에게는 다소 부담스러울 수 있지만, 꾸준한 연습을 통해 실력을 키울 수 있는 기회를 제공한다. 이 맵을 플레이하기 전에는 맵의 주요 요충지와 시민 보호 구역을 미리 파악하고, 역할에 맞는 전략을 미리 세워두는 것이 좋다. 또한, 맵의 넓은 시야를 활용하기 위해 미니맵 사용을 적극 권장한다. This classic Brood War custom map, Cops and Robbers Silver SE, offers a refreshing twist on the beloved 'computer-killer' genre by blending the classic cops-and-robbers theme with strategic defense mechanics. Set against a post-apocalyptic wasteland tile, the 3072x2048 map pits players in a tense battle between law enforcement and outlaws, each with distinct objectives: cops must protect civilians and eliminate robbers, while robbers aim to loot civilians to accumulate wealth while evading the pursuing police. The expansive layout provides ample cover and vantage points, but also demands sharp map awareness to avoid ambushes and optimize looting routes. The gameplay revolves around role-specific strategies, with cops focusing on defense and targeted strikes, while robbers must navigate the urban terrain to maximize loot collection without getting cornered. The map’s wide open spaces encourage dynamic positioning, but the presence of chokepoints and civilian clusters adds layers of tactical depth. Beginners may find the sheer scale and role-switching mechanics daunting, but the map rewards players who invest time in mastering its nuanced systems. The lack of forced team play makes it ideal for solo or small-team competitive matches, where individual decision-making and adaptability are key. Cops and Robbers Silver SE is best suited for players who enjoy strategic defense maps, role-divided gameplay, and large-scale tactical battles. Its replayability stems from the evolving strategies that emerge from the cops’ evolving pursuit tactics and robbers’ adaptive looting patterns. Before diving in, players should familiarize themselves with critical zones such as civilian clusters and high-traffic routes, and leverage the minimap for real-time spatial awareness. While the map’s complexity might intimidate newcomers, it offers a rewarding challenge for those willing to refine their strategic instincts.
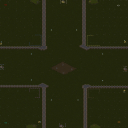
4명의 빌더 - 4명의 지휘관 (4 Builders - 4 Commanders)
스타크래프트: 브루드워의 유즈맵 계보에서 독특한 재미를 자아내는 〈4 Builders - 4 Commanders〉는 4명의 커맨더가 각각 4명의 빌더를 지휘하는 이색적인 구조의 디펜스 맵이다. 맵은 넓은 사막 타일셋으로 구성되어 있으며, 중앙에는 각 플레이어가 점령할 수 있는 자원 기반지가 배치되어 있다. 맵의 특징은_builders_와_commanders_의 역할 분리로, 빌더는 건물을 건설하고 자원을 관리하는 데 집중하는 반면, 커맨더는 유닛 생산과 방어 전략을 담당한다는 점이다. 이는 기존 디펜스 맵과는 차별화된 전략적 깊이를 제공한다. 게임은 총 8명의 플레이어가 참여하며, 각 팀은 2명의 커맨더와 2명의 빌더로 구성된다. 맵의 긴 밀림과 넓은 시야는 방어와 자원 확보의 중요성을 강조한다. 플레이어는 초반 자원 확보와 방어 태세 구축에 주력해야 하며, 중반 이후에는 커맨더의 지휘력과 빌더의 건설 효율성이 승패를 좌우할 것이다. 맵의 난이도는 보통 수준으로, 초보자는 자원 관리와 방어 라인 구축에서 어려움을 느낄 수 있지만, 숙련된 플레이어는 전략적 팀워크를 발휘해 안정적으로 공략할 수 있다. 추천 대상으로는 실시간 전략 게임에 익숙한 유저나 팀 플레이를 즐기는 게이머가 적합하다. 특히, 서로 다른 역할을 맡아 협력하는 재미가 있는 맵이므로, 친구들과 함께 플레이할 때 시너지를 발휘할 수 있다. 게임 시작 전에는 맵의 자원 분포와 주요 길목을 파악하는 것이 중요하며, 커맨더와 빌더 간의 소통을 원활히 하기 위해 미리 전략을 짜두는 것이 좋다. 맵의 넓은 규모와 복잡한 구조는 초보자의 진입 장벽이 될 수 있지만, 이를 극복하면 뛰어난 전략적 재미를 느낄 수 있을 것이다. 이 맵은 단순히 방어만 하는 것이 아니라, 빌더와 커맨더의 역할 분담을 통해 전략적 깊이를 더한 점이 돋보인다. 넓은 맵과 사막 분위기는 긴장감을 조성하며, 8명의 플레이어가 한꺼번에 몰려드는 전투는 큰 스케일의 전략 시뮬레이션을 연상시킨다. 플레이어는 각자의 역할을 충실히 이행하면서도 팀의 vittoria를 위해 끊임없이 소통해야 한다. 이처럼 〈4 Builders - 4 Commanders〉는 전략적 팀워크와 역할 분담의 묘미를 느낄 수 있는 매력적인 유즈맵으로, 스타크래프트 유즈맵의 새로운 장르를 개척한 작품 중 하나로 손꼽힌다. StarCraft: Brood War's custom map history introduces a unique and engaging experience with *4 Builders - 4 Commanders*, a defense map featuring an unconventional structure where four Commanders each lead four Builders. The map is set on a vast desert tileset, with resource bases positioned centrally for each player to claim. What sets this map apart is the clear division of roles—Builders focus on constructing buildings and managing resources, while Commanders handle unit production and defensive strategies, offering strategic depth unlike traditional defense maps. The game accommodates eight players total, with each team consisting of two Commanders and two Builders. The map's long corridors and wide visibility emphasize the importance of resource control and defense. Players must prioritize securing early resources and establishing defensive formations, while mid-to-late game success hinges on the Commanders' leadership and the Builders' construction efficiency. While the difficulty is moderate—novices may struggle with resource management and building defenses—skilled players can leverage teamwork and strategy to overcome challenges. This map is ideal for users familiar with real-time strategy games or those who enjoy team-based gameplay. Its standout feature is the collaborative fun of taking on distinct roles, making it perfect for playing with friends and maximizing synergy. Before starting, it's crucial to scout resource distribution and key pathways, and communicating effectively between Commanders and Builders is essential—preparing a strategy in advance can make a big difference. Though the map's scale and complexity may pose a barrier for beginners, overcoming these hurdles leads to a deeply rewarding strategic experience. What makes this map stand out is its blend of defense with role specialization, enhancing strategic depth through the collaboration between Builders and Commanders. The expansive desert setting creates tension, while the large-scale battles involving all eight players evoke the feel of a grand strategy simulation. Players must fulfill their roles diligently while continuously communicating to secure victory. *4 Builders - 4 Commanders* excels as a captivating custom map that highlights the thrill of teamwork and role division, earning recognition as a groundbreaking title that expands the possibilities of StarCraft custom maps.
빌드 앤 커맨드 카우즈! (BUILD AND COMMAND COWS!)
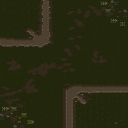
스타크래프트 브루드워 유즈맵 'BUILD AND COMMAND COWS!'는 8명의 플레이어가 참가하는 전략형 디펜스 맵입니다. 맵 제목과 설명에서 알 수 있듯, 'Builders'와 'Commanders'라는 두 역할로 나뉘어 플레이가 진행됩니다. Builders는 건물을 건설하고 자원을 관리하며, Commanders는 생산된 유닛을 조종해 적의 공격을 방어하거나 목표를 달성하는 역할을 맡습니다. 맵 이미지를 보면 중앙에 넓은 평지가 펼쳐져 있으며, 각 플레이어의 시작 지역은 구획화되어 있습니다. 좌측 상단에 위치한 Builders는 자원 채취를 통해 건물을 짓고 유닛을 생산하는 데 집중하며, 우측 하단의 Commanders는 전투를 지휘하는 방식으로 게임이 진행됩니다. 맵의 특성은 역할 분담과 협력이 핵심인데, Builders가 충분히 건물을 짓고 유닛을 생산해야만 Commanders가 효과적으로 전투를 수행할 수 있습니다. 반대로 Commanders가 적을 방어하지 못하거나 목표를 달성하지 못하면 패배로 이어질 수 있습니다. 초보 플레이어는 각 역할의 중요성을 이해하지 못하고 한쪽만 집중하는 경우가 많으므로, 맵을 플레이하기 전 역할별 책임을 명확히 숙지하는 것이 중요합니다. 또한, 맵의 난이도는 중간 정도로 추정되며, 특히 Commanders의 경우 실시간으로 변하는 전황을 빠르게 판단해야 합니다. 맵의 구조상 중앙 평지가 넓고 개방되어 있어 대규모 전투가 자주 발생할 수 있으며,Builders는 자원 수급을 안정적으로 유지해야 합니다. 맵의 배경은 사막 타일셋으로 구성되어 있으며, 전체적인 분위기는 전쟁과 지휘의 조화를 강조합니다. 이 맵은 협동과 전략적 사고를 요구하는 만큼, 팀원 간의 원활한 소통이 승리의 열쇠가 될 것입니다. 초보자보다는 중수 이상의 플레이어에게 적합한 맵으로, 역할 분담과 전략적 계획 수립이 가능한 플레이어에게 추천합니다. 맵을 플레이하기 전 Builders와 Commanders의 역할별 팁과 공략을 미리 숙지한다면 훨씬 수월한 플레이가 가능할 것입니다. StarCraft: Brood War custom map "BUILD AND COMMAND COWS!" is a strategy-focused defense map where eight players participate. As the title and description suggest, gameplay is divided into two roles: Builders and Commanders. Builders focus on constructing buildings, managing resources, and producing units, while Commanders control the produced units to defend against enemy attacks or achieve objectives. The map features a wide central plain with each player's starting area clearly divided. Builders, located in the top-left corner, concentrate on gathering resources and constructing buildings and units, while Commanders in the bottom-right direct combat. The map's core mechanics revolve around role division and cooperation—Commanders can only execute effective battles if Builders have built enough structures and produced sufficient units, while failure to defend or complete objectives results in defeat. Novice players often struggle by focusing solely on one role without understanding the importance of both, so it's crucial to clearly understand each role's responsibilities before playing. The map is considered to have a moderate difficulty level, with Commanders needing to quickly assess rapidly changing battle conditions. The open central plain frequently hosts large-scale battles, so Builders must maintain stable resource supply. The map's desert-themed tileset and overall atmosphere emphasize the harmony between warfare and command. Since this map demands cooperation and strategic thinking, smooth communication among teammates will be key to victory. It's recommended for intermediate to advanced players who can handle role division and strategic planning. Familiarizing yourself with role-specific tips and strategies before playing will make the experience much smoother.
경찰과 도둑 SE 2 (Cops and Robbers SE 2)
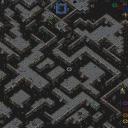
스타크래프트 브루드워의 유즈맵 장르 중에서도 독특한 ‘경찰과 도둑’을 주제로 한 맵 ‘Cops and Robbers SE 2’는 플레이어들에게 역할 분담을 통한 전략적 긴장감을 선사합니다. 이 맵은 7명의 플레이어가 경찰 팀과 도둑 팀으로 나뉘어 각각의 목표를 수행하는 방식으로 진행됩니다. 경찰은 도둑을 처치하거나 시민(유닛으로 표현된 유명인사)을 보호해야 하며, 도둑은 시민을 처치해 현금을 획득하는 동시에 경찰의 추적을 피해야 합니다. 맵은 황무지 타일셋을 기반으로 넓은 평야와 건물, 장애물이 배치되어 있어 시야 확보와 이동 경로 선택이 중요합니다. 시민 유닛은 맵 중앙 부근에 모여 있으며, 도둑은 이 유닛들을 공격해 현금을 획득할 수 있습니다. 경찰은 도둑을 추적하거나 시민을 보호하는 역할을 맡아 도둑의 활동을 방해해야 합니다. 특히 도둑이 시민을 공격할 때는 경찰이 빠르게 대응할 수 있도록 맵 구조가 개방되어 있어 추격전이 흥미진진합니다. 반면 도둑은 건물이나 장애물 뒤에 숨어 경찰의 시야를 차단하거나, 맵 외곽을 통해 시민을 공격하는 등 다양한 전략을 구사할 수 있습니다. 플레이어 간의 협력이 중요한데, 경찰은 도둑을 잡기 위해 팀워크를 발휘해야 하며, 도둑은 서로의 위치를 공유하거나 시민을 공격할 때 협동 공격을 펼칠 수 있습니다. 또한 경찰과 도둑의 역할이 명확히 나뉘어 있어 각 역할의 장단점을 경험해 볼 수 있는 점이 매력적입니다. 맵의 넓은 공간은 빠른 이동과Hide-and-seek(숨바꼭질) 요소를 강조하며, 특히 시민 보호와 현금 획득의 균형을 맞추는 것이 관전 포인트입니다. 이 맵은 특히 7명이 플레이할 때 가장 재미를 느낄 수 있으며, 경찰과 도둑의 역할이 명확히 나뉘어 있어 초보자도 쉽게 접근할 수 있지만, 전략적 깊이를 더하기 위해 숙련된 플레이어들도 즐길 수 있는 요소들이 포함되어 있습니다. 맵의 넓은 공간과 다양한 장애물은Hide-and-seek 요소를 강화하며, 플레이어 간의 상호작용을 극대화합니다. 또한 경찰과 도둑의 역할이 명확히 나뉘어 있어 초보자도 쉽게 접근할 수 있지만, 전략적 깊이를 더하기 위해 숙련된 플레이어들도 즐길 수 있는 요소들이 포함되어 있습니다. Among the unique user-created maps of *StarCraft: Brood War*, *Cops and Robbers SE 2* stands out with its distinctive "Cops and Robbers" theme, offering players strategic tension through role division. The map divides seven players into two teams—cops and robbers—each with distinct objectives. Cops must either eliminate robbers or protect civilians (represented by famous personalities as units), while robbers aim to kill civilians to collect cash while evading police pursuit. Built on a wasteland tileset, the map features wide plains, buildings, and obstacles, making vision control and pathfinding crucial. Civilians are clustered near the map’s center, where robbers can attack them to earn money. Cops must track down robbers or defend civilians, and the open map design allows for thrilling chases, enabling quick police responses when civilians are under attack. Meanwhile, robbers can exploit buildings and obstacles to block police vision or strike civilians from the map’s outskirts, employing diverse strategies. Teamwork is essential—cops rely on coordination to catch robbers, while robbers can share positions or coordinate attacks on civilians. The clear division of roles between cops and robbers highlights their respective strengths and weaknesses, adding to the map’s appeal. The expansive layout emphasizes fast movement and hide-and-seek elements, with the balance between civilian protection and cash collection serving as a key spectator point. The map shines brightest with seven players, offering an accessible entry point for beginners thanks to its clear roles, yet it also includes depth for experienced players to explore. The vast space and varied obstacles amplify the hide-and-seek dynamic, maximizing player interaction. Its well-defined roles make it easy for newcomers to pick up, while the strategic layers ensure seasoned players remain engaged.
구매자와 판매자 (Buyers And Sellers)
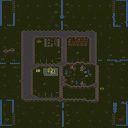
스타크래프트 브루드워 유즈맵 '구매자와 판매자(Buyers And Sellers)'는 7인용 사막 맵에서 독특한 경제-전투 하이브리드 시스템을 선보인다. 맵 설명에 따르면 판매자(Sellers)는 유닛을 생산해 판매하여 수익을 올리고, 구매자(Buyers)는 유닛을 구매해 서로 대결하는 구조다. 일반적인 밀리나 디펜스 장르와 달리 자원 채취와 유닛 생산이 역할별로 분리되어 있어, 판매자는 효율적인 생산 라인과 가격 책정이 핵심이고 구매자는 자금 운용과 병력 조합, 전투 마이크로가 승부를 가른다. 4096x4096 크기의 넓은 사막 지형은 확장 기지 확보와 병력 이동 경로에 전략적 깊이를 더한다. 7인 플레이 인원 기준으로는 판매자 1~2명, 구매자 5~6명 구성이 예상되며, 판매자끼리 경쟁하거나 구매자 간 자유 대결(FFA) 혹은 팀전이 펼쳐질 수 있다. 트리거로 구현된 거래 시스템은 미네랄/가스 직접 거래 대신 유닛을 화폐 삼아 순환시키는 점이 특징이다. 판매자는 초반 저가 유닛으로 자금을 모아 고급 유닛 생산으로 전환하는 타이밍이 중요하고, 구매자는 초반 생존과 중반 전력 증강, 후반 결전까지 자금 흐름을 읽어야 한다. 편집자 'Coolcoy27' 명의로 배포된 이 맵은 정식 캠페인이나 표준 유즈맵 장르(디펜스, RPG 등)에 속하지 않는 독창적 시나리오형 콘텐츠다. 경제 시뮬레이션과 RTS 전투를 동시에 즐기고 싶은 유저, 색다른 역할 분담 플레이를 찾는 7인 파티에 추천한다. 플레이 전에는 판매자/구매자 역할 배정 규칙과 거래 단축키, 승리 조건(최후 생존인지 목표 금액 달성인지)을 호스트에게 확인하는 것이 좋다. StarCraft Brood War use map 'Buyers And Sellers' presents a unique economic-combat hybrid system on a 7-player desert map. As the description states, Sellers produce and sell units to earn money, while Buyers purchase units to battle each other. Unlike standard melee or defense genres, resource gathering and unit production are split by role: Sellers focus on efficient production lines and pricing, while Buyers manage funds, army composition, and combat micro. The spacious 4096x4096 desert terrain adds strategic depth to expansion base securing and army movement routes. With 7 players, a likely setup is 1-2 Sellers and 5-6 Buyers, allowing Sellers to compete among themselves while Buyers engage in free-for-all or team battles. The trigger-based trading system uses units as currency instead of direct mineral/gas exchange. Sellers must time their transition from cheap early units to high-tier production, while Buyers must read the cash flow from early survival through mid-game power spikes to late-game showdowns. Edited by 'Coolcoy27', this map is an original scenario-type content that doesn't fit standard use-map genres like defense or RPG. Recommended for players wanting to enjoy economic simulation and RTS combat simultaneously, and for 7-player parties seeking fresh role-divided gameplay. Before playing, confirm with the host the role assignment rules, trade hotkeys, and victory conditions (last man standing or target wealth achievement).
TEAMplay
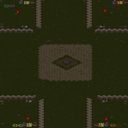
스타크래프트 브루드워의 UMS(Use Map Settings) 형식으로 제작된 팀플레이 전용 맵인 'TEAMplay'는 8명의 플레이어가 참여하는 팀 기반의 대전 형식을 제공한다. 이 맵은 내부 설명에서 밝히고 있듯이 'Builders'와 'Fighters'라는 두 가지 역할을 중심으로 구성되어 있으며, 동맹을 도와 건물을 짓는 것이 주요 임무인 빌더와 동맹의 유닛을 지원하며 전투를 수행하는 파이터로 나뉜다. 맵의 중앙에는 넓은 평지가 펼쳐져 있어 동맹 간의 협력이 필수적이지만, 동시에 각 팀의 건물을 보호하고 적의 공격을 방어해야 하는 전략적 선택이 요구된다. 맵의 구조는 사막 타일셋을 기반으로 하며, 3072x3072의 넓은 공간을 활용해 다양한 전략적 플레이가 가능하다. 특히, 동맹 간의 역할 분담이 맵의 핵심으로, 빌더는 건물을 짓고 자원을 관리하는 데 집중해야 하며, 파이터는 전투를 주도하는 역할을 맡아 동맹의 생존과 승리를 도모해야 한다. 맵의 승리 조건은 모든 적 건물 파괴로 추정되지만, 내부 설명에는 명시되지 않아서 플레이어는 게임 시작 전에 확인해야 한다. 이 맵은 팀플레이의 중요성을 강조하며, 협동과 전략적 분배가 승리를 좌우하는 특징을 갖고 있다. 초보 플레이어는 동맹 간의 역할 분담을 명확히 이해하고, 빌더와 파이터 간의 협력 방식을 익히는 데 시간이 필요할 수 있다. 반면, 숙련된 플레이어는 각자의 역할을 최적화하고, 적절한 타이밍에 전투와 건물을 관리하는 전략을 구사할 수 있을 것이다. 특히, 넓은 맵을 활용한 기습 공격이나 방어 전략이 승패를 좌우할 수 있어, 다양한 플레이 스타일을 시도해 볼 수 있는 매력이 있다. TEAMplay is a custom UMS (Use Map Settings) teamplay map for StarCraft: Brood War designed for 8-player team battles. As explained in its internal description, the map revolves around two distinct roles: Builders and Fighters. Builders assist allies by constructing buildings and managing resources, while Fighters support allied units and engage in combat. The map features a large central plain that necessitates close cooperation between teammates, yet also requires strategic decisions to protect your own buildings and fend off enemy attacks. The map is set on a desert tileset and utilizes a vast 3072x3072 play area, allowing for a variety of strategic approaches. Cooperation between teammates is central to the design, with Builders focusing on construction and resource management, and Fighters taking the lead in combat to ensure the team’s survival and victory. While the victory condition is likely the destruction of all enemy buildings, this is not explicitly stated in the internal description, so players should verify it before starting the game. This map emphasizes the importance of teamwork, where coordination and strategic role distribution determine success. Beginners may need time to grasp the division of roles and learn how Builders and Fighters can best cooperate, whereas experienced players can optimize their roles and employ well-timed strategies for combat and construction. The large map size also allows for dynamic plays like ambushes and defensive maneuvers, making it appealing for players to experiment with different playstyles.
톰과 제리 잇다편 (Tom and Jerry Itda Edition)
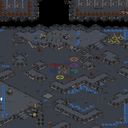
이 맵은 톰과 제리의 인기 에피소드를 소재로 한 스타크래프트 브루드워의 유즈맵으로, 플레이어는 톰과 제리, 그리고 제리의 가족으로 나뉘어 진행하는 흥미로운 대결 구조를 가지고 있다. 맵 중앙에는 거대한 맵 중앙 건물이 배치되어 있으며, 이 주변을 중심으로 각 플레이어의 기지가 나뉘어져 있는 것이 보인다. 톰과 제리 간의 추격전, 제리의 가족이 톰을 방해하거나 제리를 보호하는 등 다양한 플레이 방식이 예상된다. 시작 지점에서부터 플레이어들은 각자의 역할을 부여받아 맵 곳곳에서 벌어질 전투에 대비해야 한다. 특히 톰과 제리의 경우 상대방의 기지를 파괴하거나 공격을 방어하는 동시에, 제리의 가족은 제리를 보호하고 톰의 공격을 저지하는 전략을 구사할 수 있을 것이다. 맵의 넓은 공간을 활용한 기동전이 예상되며, 상대의 움직임을 예측하며 효율적인 자원 관리와 유닛 컨트롤이 중요한 포인트로 작용할 것이다. 제작된 맵의 특성상 단순한 디펜스나 공격만이 아닌, 각 캐릭터의 역할에 맞는 플레이가 요구된다. 톰의 경우 제리를 추격하고 제리 가족의 기지를 파괴하는 데 중점을 둔다면, 제리와 가족은 톰으로부터의 공격을 피해 다니며 생존을 도모해야 한다. 이렇듯 맵의 구조는 단순히 전투만을 위한 것이 아니라, 캐릭터 간의 상호작용과 전략적 선택이 핵심이 되는 구조로 설계되어 있는 것이 특징이다. 이 맵을 즐기기 위해서는 각 플레이어 간의 협력과 상대방의 전략을 읽어내는 능력이 필요할 것이다. 특히 넓은 맵을 활용한 기동전과 순간적인 판단력이 요구되며, 팀 플레이가 중요한 요소로 작용할 수 있다. 톰과 제리의 인기 캐릭터성을 살린 재미있는 전투와 추격전을 즐기고자 한다면, 이 맵은 훌륭한 선택이 될 것이다. 특히 스타크래프트 유즈맵의 특성상 다양한 전략과 전술을 시도해 볼 수 있는 여지가 많기 때문에, 반복 플레이를 통해 새로운 전략을 발견할 수 있을 것이다. This custom map in *StarCraft: Brood War* is based on the popular *Tom and Jerry* episodes, where players are divided into teams as Tom, Jerry, or Jerry’s family for an engaging battle structure. At the center of the map stands a massive central building, with each player’s base arranged around it. The gameplay promises diverse strategies, including chase battles between Tom and Jerry, while Jerry’s family disrupts Tom or protects Jerry. From the start, players receive their roles and must prepare for battles across the map. Tom’s focus is on chasing Jerry or destroying Jerry’s family’s bases, while Jerry and his family must evade Tom’s attacks and survive. The map’s wide-open spaces encourage mobile warfare, where predicting opponent movements, efficient resource management, and precise unit control become key factors. Unlike simple defense or attack-focused maps, this one emphasizes role-based play tailored to each character. Tom prioritizes pursuit and destruction, while Jerry and his family must navigate carefully to avoid capture. The map’s design revolves around character interactions and strategic choices rather than just combat. To enjoy this map, players will need strong teamwork and the ability to read opponents’ strategies. Fast decision-making and dynamic movement across the large map are essential, with teamwork playing a crucial role. If you’re looking for fun, action-packed chase battles that bring *Tom and Jerry*’s iconic characters to life, this map is a great choice. As a *StarCraft* custom map, it offers plenty of room for experimentation with different strategies and tactics, making each playthrough a chance to discover new approaches.
생산과 컨트롤 (3vs3) (Make & Control (3vs3) v1.0)
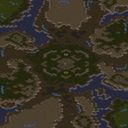
스타크래프트 브루드워의 유즈맵 'Make & Control (3vs3) v1.0'은 8명의 플레이어가Maker와 Controller로 나뉘어 진행하는 흥미로운 전략 디펜스 맵이다. 맵은 사막 타일셋으로 구성되어 있으며, 4096x4096 크기의 넓은 필드에서 펼쳐진다. 플레이 방식은 흥미로운 분업 구조로, 1~4번 플레이어는 'Maker' 역할을 맡아 기지 건설과 자원 관리, 방어 건물을 건설하는 역할을 수행하고, 5~6번 플레이어는 'Controller'로 지정된 위치에서 유닛을 생산하여 적군을 공격하거나 방어선을 보강하는 임무를 맡는다. Maker는 제한된 자원으로 시작하며, 자원 채취를 통해 건물을 짓고 방어 체계를 구축해야 한다. 반면 Controller는 Maker가 제공하는 자원과 명령을 바탕으로 유닛을 생산하여 전선에서 활약한다. 맵은 중앙에 위치한 넓은 평야와 이를 둘러싼 협곡 지형으로 나뉘어 있으며, 협곡은 주로 방어선을 구축하기 좋은 위치로 활용된다. Maker의 방어 건물과 Controller의 유닛 조합을 어떻게 효율적으로 운용하느냐가 승리의 핵심이다. 초보 플레이어는 Maker와 Controller의 역할 분담을 완벽히 이해하기 어려울 수 있어, 팀원과의 원활한 소통이 중요하다. 또한, 자원 관리와 유닛 생산 타이밍을 잘 조율해야만 적의 침공을 effectively 방어할 수 있다. 이 맵은 팀워크와 전략적 사고를 요구하는 만큼, 친구들과 함께 플레이하면 더욱 재미있게 즐길 수 있다. 특히, 3:3 대결 구도로 진행되는 만큼, 팀원 간의 역할 분담과 커뮤니케이션이 원활하지 않으면 쉽게 무너질 위험이 존재한다. 따라서, 팀원과의 협력을 중시하는 플레이어에게 적합한 맵이다. This Brood War custom map, 'Make & Control (3vs3) v1.0', offers a unique strategic defense experience where 8 players are divided into two distinct roles: Makers and Controllers. Set in a vast 4096x4096 desert tile map, the game challenges players to collaborate in a split responsibility system. The 1st to 4th players act as Makers, responsible for base construction, resource management, and defensive structures, while the 5th and 6th players serve as Controllers, producing units to attack enemies or reinforce defenses. Makers begin with limited resources, requiring careful planning to expand their base and establish defenses, whereas Controllers rely on the resources and commands provided by Makers to deploy units effectively. The map features a central plain surrounded by canyon terrain, with the latter offering strategic positions for defensive structures. Victory hinges on the seamless coordination between Makers and Controllers, particularly in resource allocation and unit production timings. Novice players may struggle initially due to the complexity of role division and the need for clear communication within the team. Timing and resource management are critical, as inefficient strategies can lead to early defeats. The 3vs3 format demands strong teamwork and strategic foresight, making it ideal for players who enjoy collaborative gameplay and tactical depth. However, poor coordination among team members can quickly turn the tide against the team, emphasizing the importance of synergy and clear role assignment.
바이스 앤 셀러스 (Buyers And Sellers)
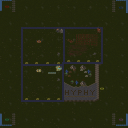
스타크래프트 브루드워의 유즈맵 'Buyers And Sellers'(한글 제목: 바이스 앤 셀러스)는 판매자와 구매자로 나뉘어 진행되는 독특한 전략형 디펜스 맵이다. 맵의 핵심 메커니즘은 이름 그대로 '판매'와 '구매'에 집중되어 있으며, 플레이어는 두 역할 중 하나를 선택해 상대방과_resource_를 두고 경쟁한다. 판매자는 자신이 보유한 유닛을 시장에 내다 팔아 자원을 획득하는 반면, 구매자는 다른 플레이어로부터 유닛을 구입해 자신의 병력으로 삼아 경쟁자들을 제압해야 한다. 맵 중앙에는 거대한 시장이 위치해 있으며, 이곳에서 유닛 거래가 이루어지는 것으로 보인다. 판매자와 구매자 간의 밸런스는 게임의 흥행 여부를 좌우하는데, 이 맵은 두 역할이 상호 보완적으로 작용하도록 설계되어 있어 전략적 깊이를 더한다. 특히, 세밀한 자원 관리와 타이밍 감각이 요구되며, 초보자가 진입하기에는 다소 난해할 수 있지만, 전략적 사고를 즐기는 플레이어에게는 매력적인 선택지가 될 것이다. 맵의 구조는 사막 타일셋을 기반으로 하며, 넓은 평야와 중앙 시장이 특징적이다. 플레이 전에는 자신의 역할을 신중히 선택하고, 시장의 트렌드를 파악하는 것이 중요하다. 또한, 상대방의 전략에 대응할 수 있는 유연한 대처력이 요구된다. 이 맵은 특히 팀플레이보다는 1:1 또는 소규모 경쟁 구도에서 빛을 발할 것으로 예상되며, 다양한 전략 시뮬레이션을 즐기는 유저들에게 추천할 만하다. 다만, 초보자의 경우 역할별 기본 메커니즘을 충분히 숙지한 후 플레이를 시작하는 것이 바람직하다. 맵의 진행은 비교적 속도감 있게 전개되며, 긴장감 있는 전투가 반복적으로 발생할 수 있어 플레이어의 집중력을 요한다. 이 맵의 가장 큰 특징은 바로 '거래'라는 새로운 요소인데, 이는 기존의 디펜스나 미션형 맵과 차별화되는 요소로 작용해Fresh한 경험을 제공한다. 또한, 맵의 디자인과 배치 역시 이러한 거래 시스템을 자연스럽게 녹여낸 결과물로, 시각적·전략적 즐거움을 동시에 제공한다. 플레이어는 시장의 위치와 유닛 배치, 자원 흐름을 면밀히 분석해야 하며, 이는 단순한 전투뿐만 아니라 경제적 감각까지 요구하는 종합적인 전략 게임으로 자리매김하고 있다. 상대방의 자원과 병력 구성을 예측하는 능력 또한 승리의 핵심 포인트 중 하나로 작용할 것이다. 맵의 난이도는 보통 수준으로 설정되어 있지만, 역할에 따라 난이도가 상이할 수 있으니 자신의 선호 역할에 따라 적응하는 것이 중요하다. 마지막으로, 이 맵은 스타크래프트의 클래식한 요소와 새로운 전략적 시도를 결합한 작품으로, 단순한 재미를 넘어서는 전략적 깊이를 제공한다는 점에서 주목할 만하다. 특히, 자원 관리와 거래 타이밍의 중요성은 이 맵의 핵심을 이루며, 이를 얼마나 잘 활용하느냐가 승패를 가를 가능성이 크다. 맵을 플레이하면서 느끼는 재미는 개인의 전략적 감각과 판단력에 달려 있으며, 이는 이 맵이 오랫동안 사랑받을 수 있는 이유 중 하나로 꼽힌다. 게임을 시작하기 전, 맵의 기본 규칙과 역할별 특징을 충분히 숙지하는 것이 게임의 재미를 극대화하는 길이다. 또한, 다른 플레이어들과의 협력이나 경쟁을 통해 더욱 다양한 전략을 경험해 볼 수 있으니, 커뮤니티 활동도 적극 권장된다. 이 맵은 단순히 유닛을 조종하는 것에서 나아가, 시장의 흐름을 읽고 전략을 세우는 새로운 경험을 제공하기 때문이다. "Buyers and Sellers" (Korean title: *Vice & Sellers*) is a unique strategy defense map in *StarCraft: Brood War* where players are divided into sellers and buyers, competing for resources in a distinct economic-driven battle. The core mechanic revolves around buying and selling units—sellers earn resources by selling their units on the market, while buyers must purchase units from others to strengthen their forces and overpower opponents. At the center of the map lies a massive market where all transactions take place. The balance between sellers and buyers is crucial to the game’s flow, as the roles are designed to complement each other, adding strategic depth. The map demands precise resource management and sharp timing, which may pose a challenge for beginners but offers a rewarding experience for players who enjoy tactical thinking. The terrain features a desert tile set with vast plains and a central market, creating an immersive setting. Before starting, players should carefully choose their role and study market trends. Flexibility in adapting to opponents’ strategies is essential, as the game thrives in 1v1 or small-scale competitive setups rather than team play. The pace of the match is fast, with high-stakes battles recurring frequently, requiring players to stay highly focused. What sets this map apart is its "trading" mechanic, a fresh departure from traditional defense or mission-based maps, offering a novel experience. The design seamlessly integrates this system, blending visual appeal with strategic depth. Success hinges on analyzing the market’s position, unit placements, and resource flows, making it more than just a combat game—it’s a comprehensive strategy experience that tests economic intuition alongside tactical skill. Predicting opponents’ resource and troop compositions is key to victory. While the difficulty is moderate overall, it varies depending on the chosen role, so adapting to your preferred position is important. Ultimately, this map stands out by merging classic *StarCraft* elements with innovative strategic experimentation, delivering a depth that goes beyond mere entertainment. Mastering resource management and trade timing is vital, as these factors often decide the outcome. The fun derived from the game depends on personal strategy and judgment, which is why it has remained beloved. Before playing, thoroughly understanding the rules and role-specific mechanics is essential for maximizing enjoyment. Engaging with other players—whether cooperating or competing—can lead to discovering new strategies, so community involvement is highly encouraged. This map doesn’t just involve controlling units; it offers a fresh experience where reading market trends and crafting strategies take center stage.
Chain of Command
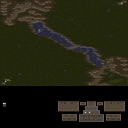
체인 오브 커맨드(Chain of Command)는 8인용 팀 대전 유즈맵으로, '장군(General)'과 '사령관(Commander)'이라는 비대칭 역할 분담이 핵심인 맵이다. 사막 타일셋의 128x192 타일 전장에서 두 팀이 거점을 점령하며 가스를 확보하고, 장군은 자원으로 병력을 생산해 사령관에게 넘겨주며 사령관은 병력을 직접 조작해 적을 섬멸하는 방식으로 진행된다. 일반적인 밀리나 디펜스와 달리 자원 관리와 마이크로 컨트롤, 팀원 간의 의사소통이 승패를 가르는 독특한 시스템을 갖췄다. 장군은 전체 전황을 보며 병력 구성과 업그레이드 타이밍을 조율해야 하고, 사령관은 주어진 병력으로 교전과 거점 방어를 수행해야 하므로 역할 숙련도에 따른 난이도 편차가 크다. 8명이 모이기 어려운 환경에서는 컴퓨터 상대로 연습하거나 인원 수에 맞춰 팀을 구성해야 원활한 플레이가 가능하다. 버전 2.9 기준 밸런스 조정과 버그 수정이 반영되어 있어 최신 버전 확인이 권장된다. 협동과 전략을 동시에 즐기고 싶은 유저, 색다른 역할 분담 맵을 찾는 팀에게 추천한다. 플레이 전 장군과 사령관의 역할 차이와 거점 점령 시 가스 획득 구조를 숙지하면 초반 적응이 수월하다. Chain of Command is an 8-player team battle UMS map where the asymmetric roles of 'General' and 'Commander' form the core gameplay. On a 128x192 tile desert battlefield, two teams capture control points to secure gas; the General produces units with resources and transfers them to Commanders, who directly micro the army to eliminate the enemy. Unlike standard melee or defense maps, this unique system makes resource management, micro control, and team communication the deciding factors of victory. The General must oversee the entire battlefield to manage army composition and upgrade timing, while Commanders must execute engagements and defend points with given forces, creating a significant difficulty variance based on role proficiency. Since gathering 8 players can be difficult, practicing against computers or adjusting team sizes to the headcount is advised for smooth play. Version 2.9 includes balance tweaks and bug fixes, so verifying the latest version is recommended. This map is recommended for users who want to enjoy cooperation and strategy simultaneously, and for teams looking for a fresh role-based experience. Before playing, understanding the General-Commander role differences and the gas income structure from point capture will ease early adaptation.
최근 등록된 맵
새로 추가된 파일과 버전을 확인하세요.
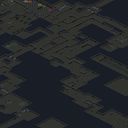
하프라이프 Pt.1 Rp (Half-Life Pt.1 Rp)
스타크래프트 브루드워의 ‘Half-Life Pt.1 Rp’는 얼음과 설원으로 가득한 광활한 맵 위에서 펼쳐지는 독특한 역할 분담형 유즈맵이다. 제목에서부터 느껴지듯,Valve의 인기 게임 <하프라이프>의 첫 번째 챕터를 모티브로 삼아 제작된 이 맵은 단순히 디펜스나 러시가 아니라, 플레이어 각자의 역할에 맞춰 임무를 수행해야 하는 협동형 플레이가 핵심이다. 맵 중앙의 넓은 공간은 ‘FreeMan’으로 불리는 민간인 역할을 맡은 플레이어의 생존 공간이며, 나머지 네 명의 플레이어는 각각 고든 프리맨, 경찰, Opposing Force 소속으로 역할이 나뉜다. ‘Get A Hazard Suit’라는 지시문은 방사능 지역을 통과하거나 특정 구역에 접근해야 한다는 임무를 암시하며, 플레이어 간 협력이 필수적이다. 설원 타일셋은 차가운 분위기를 살리며, 광활한 맵 크기는 넓은 시야와 긴 이동 거리를 제공하지만, 동시에 조작 난이도를 높이는 요소로 작용할 수 있다. 역할 분담과 협동이 요구되는 이 맵은 팀워크와 전략적 사고를 동시에 요구하며, 특히 역할에 맞는 행동과 빠른 판단력이 승패를 가를 것이다. 처음 플레이하는 유저라면 각 역할의 목표와 맵의 주요 구역을 꼼꼼히 살피고, 팀원과의 원활한 소통을 통해 임무를 수행하는 것이 중요하다. 또한, 방사능 지역이나 위험한 구역을 탐험하기 전에는 반드시 팀원과의 협의가 선행되어야 한다. 이 맵은 단순히 재미를 넘어서, 플레이어 간의 유대感과 전략적 협동을 중시하는 유즈맵으로, 팀 플레이를 좋아하는 유저들에게 특히 추천할 만하다. 다만, 역할 분담이 명확하지 않거나 팀원 간의 의사소통이 원활하지 않으면 예상치 못한 상황으로 이어질 수 있으므로, 초보자는 난이도를 ‘어려움’ 정도로 설정하고 플레이하는 것이 좋다. Half-Life Pt.1 Rp is a unique role-based custom map set against a vast icy and snowy landscape in StarCraft: Brood War. Inspired by the first chapter of Valve’s iconic game <Half-Life>, this map transforms the familiar setting into a cooperative mission where players must fulfill distinct roles. The central open area serves as the safe zone for the ‘FreeMan,’ a civilian role, while the remaining four players take on roles as Gordon Freeman, a police officer, or an Opposing Force operative. The directive ‘Get A Hazard Suit’ hints at critical missions such as navigating radioactive zones or accessing restricted areas, making teamwork essential. The snowy tileset enhances the cold, immersive atmosphere, while the expansive map scale offers long-range visibility and extended movement but also demands precise control. This map emphasizes teamwork, strategy, and quick decision-making, with victory hinging on coordinated actions and role-specific tasks. New players should familiarize themselves with each role’s objectives and key map areas, prioritizing clear communication with teammates. Before venturing into hazardous zones or radioactive areas, players should always consult with their team to avoid unexpected setbacks. More than just entertainment, this map fosters camaraderie and strategic collaboration, making it ideal for players who enjoy team-based gameplay. However, without clear role division or effective communication, players may face unforeseen challenges, so beginners are advised to set the difficulty to ‘Hard’ for a balanced experience.
생산과 컨트롤 (3vs3) (Make & Control (3vs3) v1.0)
스타크래프트 브루드워의 유즈맵 'Make & Control (3vs3) v1.0'은 8명의 플레이어가Maker와 Controller로 나뉘어 진행하는 흥미로운 전략 디펜스 맵이다. 맵은 사막 타일셋으로 구성되어 있으며, 4096x4096 크기의 넓은 필드에서 펼쳐진다. 플레이 방식은 흥미로운 분업 구조로, 1~4번 플레이어는 'Maker' 역할을 맡아 기지 건설과 자원 관리, 방어 건물을 건설하는 역할을 수행하고, 5~6번 플레이어는 'Controller'로 지정된 위치에서 유닛을 생산하여 적군을 공격하거나 방어선을 보강하는 임무를 맡는다. Maker는 제한된 자원으로 시작하며, 자원 채취를 통해 건물을 짓고 방어 체계를 구축해야 한다. 반면 Controller는 Maker가 제공하는 자원과 명령을 바탕으로 유닛을 생산하여 전선에서 활약한다. 맵은 중앙에 위치한 넓은 평야와 이를 둘러싼 협곡 지형으로 나뉘어 있으며, 협곡은 주로 방어선을 구축하기 좋은 위치로 활용된다. Maker의 방어 건물과 Controller의 유닛 조합을 어떻게 효율적으로 운용하느냐가 승리의 핵심이다. 초보 플레이어는 Maker와 Controller의 역할 분담을 완벽히 이해하기 어려울 수 있어, 팀원과의 원활한 소통이 중요하다. 또한, 자원 관리와 유닛 생산 타이밍을 잘 조율해야만 적의 침공을 effectively 방어할 수 있다. 이 맵은 팀워크와 전략적 사고를 요구하는 만큼, 친구들과 함께 플레이하면 더욱 재미있게 즐길 수 있다. 특히, 3:3 대결 구도로 진행되는 만큼, 팀원 간의 역할 분담과 커뮤니케이션이 원활하지 않으면 쉽게 무너질 위험이 존재한다. 따라서, 팀원과의 협력을 중시하는 플레이어에게 적합한 맵이다. This Brood War custom map, 'Make & Control (3vs3) v1.0', offers a unique strategic defense experience where 8 players are divided into two distinct roles: Makers and Controllers. Set in a vast 4096x4096 desert tile map, the game challenges players to collaborate in a split responsibility system. The 1st to 4th players act as Makers, responsible for base construction, resource management, and defensive structures, while the 5th and 6th players serve as Controllers, producing units to attack enemies or reinforce defenses. Makers begin with limited resources, requiring careful planning to expand their base and establish defenses, whereas Controllers rely on the resources and commands provided by Makers to deploy units effectively. The map features a central plain surrounded by canyon terrain, with the latter offering strategic positions for defensive structures. Victory hinges on the seamless coordination between Makers and Controllers, particularly in resource allocation and unit production timings. Novice players may struggle initially due to the complexity of role division and the need for clear communication within the team. Timing and resource management are critical, as inefficient strategies can lead to early defeats. The 3vs3 format demands strong teamwork and strategic foresight, making it ideal for players who enjoy collaborative gameplay and tactical depth. However, poor coordination among team members can quickly turn the tide against the team, emphasizing the importance of synergy and clear role assignment.
톰과 제리 잇다편 (Tom and Jerry Itda Edition)
이 맵은 톰과 제리의 인기 에피소드를 소재로 한 스타크래프트 브루드워의 유즈맵으로, 플레이어는 톰과 제리, 그리고 제리의 가족으로 나뉘어 진행하는 흥미로운 대결 구조를 가지고 있다. 맵 중앙에는 거대한 맵 중앙 건물이 배치되어 있으며, 이 주변을 중심으로 각 플레이어의 기지가 나뉘어져 있는 것이 보인다. 톰과 제리 간의 추격전, 제리의 가족이 톰을 방해하거나 제리를 보호하는 등 다양한 플레이 방식이 예상된다. 시작 지점에서부터 플레이어들은 각자의 역할을 부여받아 맵 곳곳에서 벌어질 전투에 대비해야 한다. 특히 톰과 제리의 경우 상대방의 기지를 파괴하거나 공격을 방어하는 동시에, 제리의 가족은 제리를 보호하고 톰의 공격을 저지하는 전략을 구사할 수 있을 것이다. 맵의 넓은 공간을 활용한 기동전이 예상되며, 상대의 움직임을 예측하며 효율적인 자원 관리와 유닛 컨트롤이 중요한 포인트로 작용할 것이다. 제작된 맵의 특성상 단순한 디펜스나 공격만이 아닌, 각 캐릭터의 역할에 맞는 플레이가 요구된다. 톰의 경우 제리를 추격하고 제리 가족의 기지를 파괴하는 데 중점을 둔다면, 제리와 가족은 톰으로부터의 공격을 피해 다니며 생존을 도모해야 한다. 이렇듯 맵의 구조는 단순히 전투만을 위한 것이 아니라, 캐릭터 간의 상호작용과 전략적 선택이 핵심이 되는 구조로 설계되어 있는 것이 특징이다. 이 맵을 즐기기 위해서는 각 플레이어 간의 협력과 상대방의 전략을 읽어내는 능력이 필요할 것이다. 특히 넓은 맵을 활용한 기동전과 순간적인 판단력이 요구되며, 팀 플레이가 중요한 요소로 작용할 수 있다. 톰과 제리의 인기 캐릭터성을 살린 재미있는 전투와 추격전을 즐기고자 한다면, 이 맵은 훌륭한 선택이 될 것이다. 특히 스타크래프트 유즈맵의 특성상 다양한 전략과 전술을 시도해 볼 수 있는 여지가 많기 때문에, 반복 플레이를 통해 새로운 전략을 발견할 수 있을 것이다. This custom map in *StarCraft: Brood War* is based on the popular *Tom and Jerry* episodes, where players are divided into teams as Tom, Jerry, or Jerry’s family for an engaging battle structure. At the center of the map stands a massive central building, with each player’s base arranged around it. The gameplay promises diverse strategies, including chase battles between Tom and Jerry, while Jerry’s family disrupts Tom or protects Jerry. From the start, players receive their roles and must prepare for battles across the map. Tom’s focus is on chasing Jerry or destroying Jerry’s family’s bases, while Jerry and his family must evade Tom’s attacks and survive. The map’s wide-open spaces encourage mobile warfare, where predicting opponent movements, efficient resource management, and precise unit control become key factors. Unlike simple defense or attack-focused maps, this one emphasizes role-based play tailored to each character. Tom prioritizes pursuit and destruction, while Jerry and his family must navigate carefully to avoid capture. The map’s design revolves around character interactions and strategic choices rather than just combat. To enjoy this map, players will need strong teamwork and the ability to read opponents’ strategies. Fast decision-making and dynamic movement across the large map are essential, with teamwork playing a crucial role. If you’re looking for fun, action-packed chase battles that bring *Tom and Jerry*’s iconic characters to life, this map is a great choice. As a *StarCraft* custom map, it offers plenty of room for experimentation with different strategies and tactics, making each playthrough a chance to discover new approaches.
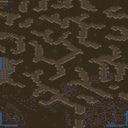
침략자들 (The Invaders)
스타크래프트 브루드워의 대표적인 디펜스/공격형 유즈맵인 <The Invaders>는 방어자(As a base)와 침략자(As the intruders) 두 역할로 나뉘어 진행되는 흥미로운 대결 구조를 가지고 있다. 맵 내부 설명에 따르면 방어자는 모든 침략자(인트로더)를 제거해야 하며, 침략자는 발전기를 파괴해야 한다는 목표가 주어진다. 이처럼 명확한 역할 분담과 목표가 존재하는 만큼 플레이어 간의 전략적 선택과 협력이 핵심 요소로 부각된다. 방어 측은 주로 기지 방어와 자원 수집에 집중해야 하며, 침략 측은 발전기 파괴를 위해 효율적인 침투 루트를 모색해야 한다. 맵의 넓은 공간과 복잡한 지형은 각 역할에 맞는 독특한 전략을 요구하며, 특히 침략 측은 발전기 주변의 방어 시설을 우회하거나 파괴하는 데 주력해야 한다. 방어 측은 침략자의 움직임을 예측하고 주요據點을 지키며, 동시에 침략자를 사냥하는 데 집중해야 한다. 이 맵의 가장 큰 특징은 역할에 따라 완전히 다른 플레이 스타일을 경험할 수 있다는 점이다. 방어자는 방어와Resource 관리, 침략자는 속도와 파괴 전략을 구사해야 하며, 이러한 대조적인 목표가 게임의 긴장감을 높인다. 또한, 맵의 넓고 복잡한 지형은 플레이어 간의 의사소통과 팀워크를 강조하며, 개개인의 실력이 중요한 요소로 작용한다. 특히 침략 측의 경우 효율적인 이동 경로를 찾지 못하면 쉽게 패배할 수 있어, 맵의 구조를 숙지하는 것이 필수적이다. 추천 대상으로는 스타크래프트의 다양한 유즈맵을 즐기는 플레이어, 특히 전략과 팀플레이를 중시하는 유저들에게 적합하다. 또한, 역할이 바뀌는 재미와 긴장감 있는 전투가 매력적인 맵이므로, 다양한 전략을 시도해 보고 싶은 유저들에게도 추천할 만하다. 플레이 전에는 맵의 주요 지형과 각 역할의 목표를 충분히 숙지하고, 팀원 간의 전략적 협의를 철저히 준비하는 것이 중요하다. 또한, 자원 관리와 방어 시설의 배치를 신중히 결정해야 하며, 침략 측은 발전기의 위치를 정확히 파악하고 침투 루트를 계획하는 데 주력해야 한다. StarCraft: Brood War's classic defense/offense custom map, *The Invaders*, features an engaging dual-structure where players are divided into two roles: defenders (As a base) and invaders (As the intruders). According to the in-game description, defenders must eliminate all invaders, while invaders must destroy the generators. With clearly defined roles and objectives, strategic decision-making and teamwork become the core elements of the game. Defenders primarily focus on base defense and resource collection, whereas invaders must scout for efficient infiltration routes to reach the generators. The map's vast open spaces and complex terrain demand unique strategies tailored to each role—invaders must navigate around or destroy defensive structures near the generators, while defenders must predict enemy movements, protect key positions, and hunt down intruders. The map's standout feature is the drastically different playstyles it offers depending on the role. Defenders must balance defense and resource management, while invaders rely on speed and destruction tactics—these contrasting goals heighten the game's tension. The map's expansive and intricate terrain also emphasizes communication and teamwork, making individual skill a crucial factor. Invaders, in particular, risk quick defeat if they fail to find optimal paths, making map familiarity essential. This map is ideal for players who enjoy Brood War's variety of custom maps, especially those who value strategy and teamwork. Its dynamic role-switching and high-stakes battles make it appealing to those looking to experiment with different tactics. Before playing, thoroughly study the map's key terrain features and each role's objectives, and coordinate team strategies in advance. Defenders should carefully manage resources and defensive placements, while invaders must pinpoint generator locations and meticulously plan their infiltration routes.
TEAMplay
스타크래프트 브루드워의 UMS(Use Map Settings) 형식으로 제작된 팀플레이 전용 맵인 'TEAMplay'는 8명의 플레이어가 참여하는 팀 기반의 대전 형식을 제공한다. 이 맵은 내부 설명에서 밝히고 있듯이 'Builders'와 'Fighters'라는 두 가지 역할을 중심으로 구성되어 있으며, 동맹을 도와 건물을 짓는 것이 주요 임무인 빌더와 동맹의 유닛을 지원하며 전투를 수행하는 파이터로 나뉜다. 맵의 중앙에는 넓은 평지가 펼쳐져 있어 동맹 간의 협력이 필수적이지만, 동시에 각 팀의 건물을 보호하고 적의 공격을 방어해야 하는 전략적 선택이 요구된다. 맵의 구조는 사막 타일셋을 기반으로 하며, 3072x3072의 넓은 공간을 활용해 다양한 전략적 플레이가 가능하다. 특히, 동맹 간의 역할 분담이 맵의 핵심으로, 빌더는 건물을 짓고 자원을 관리하는 데 집중해야 하며, 파이터는 전투를 주도하는 역할을 맡아 동맹의 생존과 승리를 도모해야 한다. 맵의 승리 조건은 모든 적 건물 파괴로 추정되지만, 내부 설명에는 명시되지 않아서 플레이어는 게임 시작 전에 확인해야 한다. 이 맵은 팀플레이의 중요성을 강조하며, 협동과 전략적 분배가 승리를 좌우하는 특징을 갖고 있다. 초보 플레이어는 동맹 간의 역할 분담을 명확히 이해하고, 빌더와 파이터 간의 협력 방식을 익히는 데 시간이 필요할 수 있다. 반면, 숙련된 플레이어는 각자의 역할을 최적화하고, 적절한 타이밍에 전투와 건물을 관리하는 전략을 구사할 수 있을 것이다. 특히, 넓은 맵을 활용한 기습 공격이나 방어 전략이 승패를 좌우할 수 있어, 다양한 플레이 스타일을 시도해 볼 수 있는 매력이 있다. TEAMplay is a custom UMS (Use Map Settings) teamplay map for StarCraft: Brood War designed for 8-player team battles. As explained in its internal description, the map revolves around two distinct roles: Builders and Fighters. Builders assist allies by constructing buildings and managing resources, while Fighters support allied units and engage in combat. The map features a large central plain that necessitates close cooperation between teammates, yet also requires strategic decisions to protect your own buildings and fend off enemy attacks. The map is set on a desert tileset and utilizes a vast 3072x3072 play area, allowing for a variety of strategic approaches. Cooperation between teammates is central to the design, with Builders focusing on construction and resource management, and Fighters taking the lead in combat to ensure the team’s survival and victory. While the victory condition is likely the destruction of all enemy buildings, this is not explicitly stated in the internal description, so players should verify it before starting the game. This map emphasizes the importance of teamwork, where coordination and strategic role distribution determine success. Beginners may need time to grasp the division of roles and learn how Builders and Fighters can best cooperate, whereas experienced players can optimize their roles and employ well-timed strategies for combat and construction. The large map size also allows for dynamic plays like ambushes and defensive maneuvers, making it appealing for players to experiment with different playstyles.
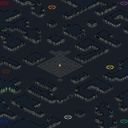
공포의 살인마 (Scary Movie - Haul Ass!)
스타크래프트 브루드워의 유즈맵 〈Scary Movie (Haul Ass!)〉는 공포와 생존을 테마로 한 컴까기 장르의 맵으로, 플레이어는 경찰과 살인마로 나뉘어 긴장감 넘치는 대결을 펼치게 된다. 맵은 어두운 분위기의 설원 지형으로 구성되어 있으며, 넓은 맵 곳곳에 배치된 건물과 지형물이 숨을 곳을 제공한다. 경찰 측은 무기를 확보해 살인마를 추격해야 하며, 살인마는 경찰을 사냥해 살아남는 것이 목표다. 게임은 경찰이 도착할 때까지 기다리거나, 살인마가 모든 경찰을 처치하면 끝난다. 맵의 특징으로는 복잡한 지형과 시야 제한이 있어 전략적인 움직임이 중요하다는 점이다. 특히 어두운 색조의 타일셋은 공포 분위기를 한층 높이며, 플레이어는 지형을 활용해 적을 포착하거나 숨는 플레이를 구사해야 한다. 추천 대상은 공포와 액션을 좋아하는 플레이어로, 팀워크와 순간적인 판단력이 요구되는 맵이다. 플레이 전 맵의 구조와 주요 건물을 파악해 두면 게임 중 큰 도움이 된다. 또한, 살인마의 경우 맵 곳곳의 시야가 제한된 점을 이용해 은신과 기습을 계획하는 것이 중요하며, 경찰은 조명이나 무기 확보를 우선시하는 전략을 세워야 한다. 맵의 분위기와 긴장감 덕분에 단체 플레이 시 많은 재미를 느낄 수 있을 것이다. This StarCraft: Brood War custom map, 〈Scary Movie (Haul Ass!)〉, is a horror-themed UMS game where players are divided into police officers and a killer, engaging in a high-stakes survival challenge. The map features a dark, snowy terrain with scattered buildings and structures that provide hiding spots. Police must arm themselves and hunt down the killer, while the killer's goal is to eliminate all officers before reinforcements arrive. The map's complex terrain and limited visibility add strategic depth, requiring players to use the environment to their advantage. The dark tile set enhances the eerie atmosphere, making stealth and ambush tactics crucial. The game is ideal for players who enjoy horror and action, demanding teamwork and quick decision-making. Before playing, it is recommended to familiarize yourself with the map layout and key buildings. The killer should focus on stealth and surprise attacks, while police need to prioritize securing weapons and lighting. The intense atmosphere and team dynamics make it a fun experience for group play.
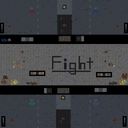
Builders & Fighters X5
스타크래프트 브루드워의 유즈맵 「Builders & Fighters X5」는 타워 디펜스 장르의 대표적인 작품으로, 6명의 플레이어가 협력하여 방어선을 구축하고 적의 공격을 막아내는 재미를 느낄 수 있는 맵이다. 맵 중앙에는 넓게 펼쳐진 길들이 존재하며, 이 길들을 따라 끊임없이 몰려오는 적 유닛들을 상대로 플레이어들은 각자의 타워를 건설하고 업그레이드할 수 있다. 맵 상단과 하단에는 각 플레이어 전용의 건물을 배치할 수 있는 공간이 마련되어 있으며, 이 건물들을 통해 자원을 획득하거나 추가적인 타워를 건설할 수 있는 공간을 확보할 수 있다. 특히 이 맵의 특징은 「Builders」와 「Fighters」라는 두 가지 역할로 나뉘어 플레이할 수 있다는 점이다. Builders는 주로 자원 관리와 타워 건설을 담당하며, Fighters는 전투 유닛을 소환하거나 방어선을 보강하는 역할을 맡는다. 이를 통해 플레이어들은 역할 분담을 통해 효율적인 방어 전략을 펼칠 수 있으며, 특히 초보 플레이어도 쉽게 접근할 수 있도록 설계되어 있다. 맵 곳곳에 배치된 방어 건물들과 특수 타워들은 다양한 공격 패턴을 가진 적들에게 대응할 수 있도록 다양하게 구성되어 있어, 전략적 깊이를 더한다. Builders & Fighters X5는 타워 디펜스 장르의 특성상 긴 플레이 시간을 요구하지만, 각기 다른 전략을 시도해 볼 수 있는 요소들이 많아 반복 플레이를 즐길 수 있는 구조로 설계되어 있다. 또한, 맵의 디자인과 타일셋(우주)이 조화를 이루어 시각적으로도 흥미로운 환경을 제공한다. 이 맵을 플레이하기 위해서는 각각의 역할에 맞게 팀원들과의 원활한 소통이 중요하며, 특히 초반 자원 관리와 타워 배치 계획이 승패를 좌우할 수 있다.Builders & Fighters X5는 초보자와 숙련자 모두에게 적합한 타워 디펜스 유즈맵으로, 협동 플레이를 통해 방어의 재미를 느낄 수 있는 작품이다. 맵의 넓은 공간과 다양한 타워 옵션을 활용하여 적절한 전략을 수립하고, 끊임없이 밀려오는 적들을 상대로 자신의 방어선을 지켜내는 짜릿한 경험을 제공한다. 특히, Builders와 Fighters라는 역할 분담을 통해 팀원 간의 역할이 명확해지며, 이를 통해 전략적 협력이 자연스럽게 이루어진다. 맵의 디자인과 타일셋도 타워 디펜스 장르의 특성을 잘 살려내어 시각적인 즐거움도 더한다. 이 맵을 플레이하기 전에는 각 역할의 책임과 기본적인 타워의 특성을 숙지하는 것이 중요하며, 초반 자원 관리와 타워 배치 계획을 철저히 세워야 한다. 또한, 적의 공격 패턴을 분석하고 그에 맞는 방어 전략을 준비하는 것이 핵심이다.Builders & Fighters X5 is a tower defense game in StarCraft: Brood War, designed for up to six players to collaborate in building and defending against waves of enemy units. The map features a central pathway where enemies spawn and advance, while players have designated spaces at the top and bottom to construct towers, gather resources, and reinforce their defenses. A standout feature of this map is the dual-role system: Builders focus on resource management and tower construction, while Fighters handle combat unit summoning and defensive reinforcements. This division allows players to specialize, making it easier for beginners to contribute meaningfully. The map includes a variety of defensive structures and special towers, each designed to counter different enemy attack patterns, adding depth and replayability. The map’s spacious design and cosmic-themed tileset provide a visually engaging environment, enhancing the overall experience. While the gameplay requires strategic planning and teamwork, the clear role distribution and intuitive mechanics make it accessible. Players should prioritize early resource management and tower placement, as these factors significantly influence the outcome. Analyzing enemy attack patterns and adapting defenses accordingly is key to success in Builders & Fighters X5.
경찰과 도둑 4 골드 (Cops and Robbers 4 Gold)
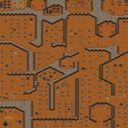
스타크래프트 브루드워의 경찰과 도둑 시리즈 중 하나로 renowned된 ‘Cops and Robbers 4 Gold’는 유즈맵 특유의 전략성과 재미를 한층 끌어올린 작품이다. 경찰과 도둑이라는 간단한 설정 아래, 플레이어는 각자 역할을 부여받아 팀별로 협동하거나 경쟁하며 목표를 달성해야 한다. 맵은 넓은 평야와 복잡한 지형을 동시에 갖추고 있어, 좁은 길목을 막아 도둑을 제압하는 경찰의 방어 플레이와 도둑의 빠른 탈출, 혹은 도주로를 확보하는 전략이 요구된다. 내부 설명에서 언급된 ‘특징’이란likely는 도둑의 종족 선택권을 포함하여, 각 종족의 고유 유닛과 특성을 활용한 플레이가 가능하다는 점으로 추정된다. 또한 ‘Fix again by echo-strike with the anti cheap stuff’라는 문구는 과거 버전에서 문제가 되었던 꼼수 플레이를 방지하기 위한 패치 내역을 강조하는 부분으로 보이며, 이는 맵의 밸런스와 공정성을 중시한 결과물임을 알 수 있다. 이 맵의 핵심은 바로 ‘선택과 집중’이다. 경찰팀은 도둑의 움직임을 예측하고 주요 통로를 봉쇄해야 하며, 도둑팀은 조밀한 지형 속에서 숨통을 틔우고 목표물을 획득한 뒤 신속히 탈출해야 한다. 맵 곳곳의 언덕과 협곡은 시야를 가리고 기습 Opportunities를 제공하며, 이러한 지형적 특징은 플레이어 간의 심리전을 더욱 치열하게 만든다. moreover, 맵에 배치된 여러 개의 보급고나 숨겨진 루트는 도둑에게는 숨통이며, 경찰에게는 함정으로 작용할 수 있어 전략의 다양성을 극대화한다. 특히 도둑의 종족 선택권은 종족별 장단점을 살려 플레이 스타일을 유연하게 바꿀 수 있어, 한 번 플레이해도 다른 재미를 느낄 수 있도록 설계되었다고 볼 수 있다. 이 맵은 7인 플레이를 지원하며, 경찰과 도둑의 비율이 균형을 맞추기 위해 인원 수를 조절하는 경우가 많다. 또한 넓은 맵 크기와 복잡한 지형은 초보자보다는 중수 이상의 플레이어에게 더 적합하며, 여러 번 플레이하며 전략을 숙지할수록 재미가 배가된다. 맵의 난이도는 내부 설명에 명시되어 있지 않지만, 도둑의 종족 선택권과 경찰의 방어 라인 구축을 고려할 때 ‘보통’ 수준으로 추정된다. 마지막으로, 맵의 고유한 재미 요소와 더불어 꼼수 방지 패치까지 고려해 본다면, 이 맵은 단순한 추억의 유즈맵을 넘어 전략적 깊이가 있는 작품으로 평가할 수 있다. 특히 경찰과 도둑의 역할극을 좋아하는 플레이어라면, 이 맵이 제공하는 긴장감과 짜릿함을 충분히 느낄 수 있을 것이다. "Cops and Robbers 4 Gold," one of the renowned "Police and Thieves" series in *StarCraft: Brood War*, elevates the strategic depth and fun unique to custom maps. Under the simple premise of police and thieves, players are assigned roles, working together or competing as teams to achieve their objectives. The map combines vast open plains with intricate terrain, demanding both defensive play—where police block narrow passages to suppress thieves—and thief strategies for swift escapes or securing escape routes. The mentioned "features" likely include the thief’s ability to choose a race, allowing players to utilize each race’s unique units and traits. The phrase *"Fix again by echo-strike with the anti cheap stuff"* suggests a patch addressing exploitative tactics from past versions, highlighting the map’s emphasis on balance and fairness. The core of this map lies in "choice and focus." The police team must predict the thieves’ movements and block key pathways, while the thieves need to navigate dense terrain, secure their target, and escape quickly. Hills and ravines scattered across the map obscure vision and create ambush opportunities, intensifying psychological warfare between players. Moreover, scattered supply depots and hidden paths serve as lifelines for thieves and traps for police, maximizing strategic variety. The thief’s race selection, in particular, allows flexible playstyles tailored to each race’s strengths and weaknesses, ensuring a fresh experience even after multiple plays. Designed for seven players, the map often adjusts the police-to-thief ratio to maintain balance. Its expansive size and complex terrain cater more to intermediate to advanced players rather than beginners, with the fun factor increasing as players master the strategies. While the difficulty isn’t explicitly stated in the internal description, considering the thief’s race choice and the police’s need to build defensive lines, it’s likely rated as "moderate." Beyond its unique fun elements and anti-exploit patches, this map stands out as a strategically rich work rather than just a nostalgic custom map. Players who enjoy role-playing as police and thieves will especially appreciate the tension and thrill it delivers.
맵 선택 가이드
태그는 맵의 핵심 특징을 빠르게 설명하지만 제작 버전마다 규칙이 다를 수 있습니다. 상세 설명에서 권장 인원, 난이도, 플레이 시간과 버전을 함께 확인한 뒤 다운로드하세요.