
얼음 타일셋 스타크래프트 맵 모음
'얼음 타일셋' 태그가 등록된 맵을 모았습니다. 장르 하나로 찾기 어려운 플레이 방식, 난이도와 특징을 중심으로 인기 맵과 최신 맵을 비교해 보세요.
- 등록 맵
- 3개
- 누적 다운로드
- 0
- 누적 조회
- 54
인기 맵
다운로드와 조회 반응이 높은 맵입니다.
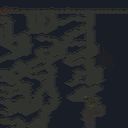
빠른 승리 (the fast win)
스타크래프트 브루드워의 얼음 타일셋을 기반으로 한 정제되지 않은 밀리 맵, 'Untitled Scenario'는 파일명 'the fast win.scx'에서 느껴지듯 극단적인 초반 교전과 일방적인 승리를 위한 구조로 설계되었습니다. 4096x4096의 넓은 필드 중앙에는 자원 멀티와 건물이 거의 배치되지 않아, 시작하자마자 바로 본진 인근에서 전투가 벌어질 수밖에 없습니다. 이 맵의 특징은 '빠른 승리'라는 이름처럼 테란의 벙커 러시, 프로토스의 광전사 러시, 저그의 러커 드랍 등 초반 전략이 매우 강력하게 작용한다는 점입니다. 특히 설원 타일셋의 어두운 배경은 시야를 제한하여 초반 정찰의 중요성을 높이고, 맵의 균형이 무너지기 쉬운 구조를 부여합니다. 플레이어는 시작 직후 자신의 스타팅Area를 벗어나지 않고도 적의 기지를 바로 공격할 수 있는 위치에 있으며, 이는 맵의 긴장감을 극대화합니다. 다만, 중앙 멀티와 같은 자원 분배 구역이 없어서 후반 자원 전쟁이 발생하지 않으며, 오로지 초반 교전과 빠른 건물 파괴에 모든 것이 집중됩니다. 이러한 구조는 초보 플레이어에게는 학습 효과가 크지만, 숙련자들에게는 전략의 깊이가 부족하게 느껴질 수 있습니다. 맵의 승리 조건은 단순하게 모든 적 건물을 파괴하는 것으로, 이를 위해 플레이어는 자신이 가진 모든 유닛을 즉시 전선에 투입하는 극한의 공격적 플레이가 요구됩니다. 초반 빌드오더와 테크 선택의 차이가 승패를 좌우하는 이 맵은, 말 그대로 '빠른 승리'를 목표로 하는 밀리 맵의 정석을 보여줍니다. 다만, 맵의 밸런스가 오로지 초반 교전에만 치중되어 있어, 다양한 전략과 테크트리를 시도해 보고 싶은 플레이어들에게는 다소 아쉬운 부분으로 남습니다. 이 맵을 즐기기 위해서는 초반 유닛 생산과 진출 타이밍을 철저히 계산해야 하며, 가능한 한 빠른 시간 내에 적 기지를 파괴하는 것이 핵심입니다. 또한, 설원 타일셋의 어두운 조명과 제한된 시야를 고려하여, 유닛 컨트롤과 정찰을 동시에 수행할 수 있는 능력이 필요합니다. 초보자와 숙련자 모두에게 흥미로운 경험을 제공하지만, 특히 초보자에게는 스타크래프트의 기본적인 전투와 빌드 개념을 빠르게 습득할 수 있는 좋은 연습용 맵으로 활용될 수 있을 것입니다. 다만, 이 맵이 제공하는 전략의 다양성은 제한적이므로, 다양한 맵을 접하고자 하는 플레이어에게는 추천하기 어려운 점도 있습니다. 이 맵을 플레이하기 전에, 자신의 스타일과 전략이 초반 교전에 특화되어 있는지, 그리고 빠른 승리를 목표로 할 수 있는 준비가 되어 있는지를 먼저 생각해 보는 것이 좋습니다. 또한, 맵의dark한 조명과 제한된 시야를 극복하기 위해, 가능한 한 빠른 정찰과 맵 리딩 능력을 키우는 연습을 병행하는 것이 좋습니다. 이 맵은 단순히 '승리'만을 목표로 하기보다는, 스타크래프트의 기본기와 전투 감각을 다듬는 데에 중점을 두는 것이 바람직합니다. 초보자와 숙련자 모두에게 유용한 맵이지만, 그 활용 방법은 분명히 구분되어야 합니다. 초보자는 이 맵을 통해 빠른 전투와 빌드오더의 중요성을 배울 수 있으며, 숙련자는 자신의 초반 전략과 테크 선택 능력을 검증할 수 있는 좋은 기회로 삼을 수 있습니다. 다만, 이 맵이 제공하는 전략적 깊이의 한계는 반드시 염두에 두어야 합니다. 이 맵을 즐기면서도, 동시에 다른 전략적 깊이를 가진 맵들도 함께 플레이하여 스타크래프트의 다양한 재미를 경험하는 것이 좋습니다. This untitled melee map, set on the frozen tundra tileset of StarCraft: Brood War, is a raw and unrefined design that prioritizes instant early-game aggression under the filename 'the fast win.scx'. The 4096x4096 expansive field deliberately omits mid-game resources and expansions, forcing immediate confrontation near starting positions regardless of race. The dark, snow-covered environment restricts visibility, amplifying the role of scouting in the opening minutes. The map’s balance hinges entirely on rapid base destruction through early rushes — Terran bunkers, Protoss zealot charges, or Zerg lurker drops all thrive in this compressed battlefield. Central resource nodes are nonexistent, eliminating late-game macro play and reducing the match to a swift, decisive clash. While the simplicity aids new players in grasping core combat dynamics, it offers limited strategic depth for veterans seeking extended build orders or multi-stage strategies. Victory requires destroying all enemy structures, compelling players to commit every unit to the frontline immediately. The map’s balance revolves around optimizing initial unit production and timing, but its narrow focus on early aggression may feel repetitive for those seeking diverse tactical play. The dim lighting and obscured vision demand sharp micro-management and constant map awareness. Beginners will find this map useful for practicing fundamental combat and build orders, but its lack of variety makes it less ideal for players seeking broader strategic experiences. Before playing, assess whether your strategy aligns with early-game dominance and prepare for quick victories. The map’s constraints also serve as an exercise in efficient scouting and unit control under limited visibility. While it serves as a practical tool for refining basic mechanics, its limited depth means supplementing play with more complex maps is advisable for sustained enjoyment. Both beginners and experts can benefit, but their engagement with the map should differ — novices to learn pace, veterans to test rush strategies — always mindful of its strategic limitations.
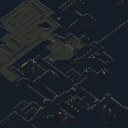
어둠 속의 고독 (Alone in the Dark)
스타크래프트 브루드워의 대표적인 공포 디펜스 유즈맵인 〈Alone in the Dark〉는 1.5 버전으로 업데이트된 후에도 여전히 플레이어들에게 긴장감 넘치는 밤을 선사합니다. 이 맵은 플레이어가 홀로 어둠 속에서 각종 유닛과 구조물을 활용해 야간을 버텨내야 하는 서바이벌 디펜스 장르로, 기본적으로는 5인의 플레이어가 협동하여 적의 공격을 방어하는 구조입니다. 맵의 배경은 어두운 숲과 얼어붙은 설원 지형으로 구성되어 있으며, 어두운 조명과 붉은 색조의 조명이 공포감을 더욱 고조시킵니다. 플레이 방식은 꽤 단순하면서도 전략적인데, 시작 지점에서 출발한 플레이어는 맵 중앙 부근에 위치한 방어 기지 주변을 중심으로 방어선을 구축해야 합니다. 적 유닛은 밤이 지나면서 점점 강력해지는 웨이브로 몰려오며, 플레이어는 제한된 자원으로 방어용 건물을 건설하고 유닛을 생산해 대응해야 합니다. 건물 건설은 제한 구역 내에만 가능하며, 자원은 맵 곳곳에 흩어져 있는 미네랄과 가스를 채취해 사용합니다. 특히 밤이 깊어질수록 적의 공격 패턴이 변하고, 더 강한 유닛들이 등장하기 때문에 방어 전략을 끊임없이 유동적으로 변경해야 합니다. 추천하는 플레이 방식은 초반에 최대한 빠른 자원 확보와 방어 건물 설치에 집중하는 것입니다. 건물이 파괴되면 회복이 불가능한 경우가 많기 때문에, 방어선 구축에 실패하면 곧장 게임 오버로 이어질 수 있습니다. 또한, 주기적으로 등장하는 보스급 적에 대비해 강력한 유닛을 배치하는 것도 중요합니다. 맵의 특성상 밤이 깊어질수록 시야가 제한되고, 맵 곳곳에 숨은 적들이 등장하기 때문에 맵의 구조를 잘 숙지하는 것이 필수입니다. 이 맵은 공포와 긴장감을 중시하는 플레이어들에게 특히 인기가 많으며, 5인 이상의 협동 플레이가 가장 효과적입니다. 혼자 플레이하는 것도 가능하지만, 방어의 안정성을 위해 최소 2인 이상의 팀 플레이를 추천합니다. 또한, 맵의 어두운 분위기를 최대한 살리기 위해 밝기 조절과 사운드 설정을 최적화하는 것이 좋습니다. Alone in the Dark is a classic survival defense custom map in StarCraft: Brood War, updated to version 1.5, offering players an intense night of survival against relentless enemy waves. Set in a dark forest and frozen tundra, the map immerses players in a tense atmosphere with dim lighting and eerie red hues. The gameplay is straightforward yet strategic: players must defend a central base from increasingly powerful enemy units as night progresses. Starting from their initial positions, players collect resources—minerals and gas—scattered across the map to build defensive structures and produce units. Construction is limited to designated zones, adding a layer of challenge to base management. A strong early-game strategy is essential, focusing on rapid resource gathering and the swift establishment of defensive buildings. Failure to secure the base early often leads to an inevitable game over, as destroyed structures cannot be recovered. Players must adapt their defenses dynamically, as enemy attack patterns intensify with nightfall, culminating in powerful boss units that require strategic unit placement to counter. The map shines in cooperative play, particularly with teams of 5 or more, though solo or smaller team play is possible with careful planning. Familiarity with the map layout is crucial, as obscured vision and hidden enemies become more prevalent as the night deepens. To fully experience the eerie atmosphere, optimizing brightness and sound settings is highly recommended. This map is ideal for players who thrive on tension and strategic depth in a survival defense setting.
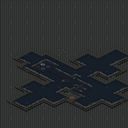
소행성 지대 (Asteroid Field)
스타크래프트 브루드워 유즈맵 '소행성 지대 (Asteroid Field)'는 1인용 퍼즐형 맵으로, 얼음 타일셋 위에서 장애물을 피해 최단 경로를 찾는 독특한 진행 방식을 보여줍니다. 내부 설명에 '장애물 때문에 무언가 조치를 취해야 한다. A에서 B로 가는 가장 빠른 길은 직진이다'라는 문구가 있어, 플레이어는 주어진 지형과 유닛을 활용해 막힌 길을 뚫거나 우회하는 전략적 사고가 필요합니다. 맵 크기는 128x128 타일로 비교적 아담하지만, 블리자드 기본 에디터로 구현된 트리거와 지형 배치가 정교하게 맞물려 있어 단순한 이동 퍼즐을 넘어선 연출이 인상적입니다. 싱글 플레이 전용이라 멀티플레이 부담 없이 자신만의 페이스로 공략할 수 있으며, 난이도는 초반에는 직관적이지만 후반으로 갈수록 장애물 패턴이 복잡해져 집중력을 요합니다. 추천 대상은 퍼즐 및 미로형 유즈맵을 즐기는 유저, 짧은 시간 안에 완결성 있는 챌린지를 원하는 플레이어입니다. 플레이 전 확인할 점은 별도의 모드 선택 없이 바로 시작되므로, 유닛 컨트롤과 지형 인식이 익숙한지 점검하는 것이 좋습니다. 전체적으로 가벼운 두뇌 플레이를 원할 때 부담 없이 즐길 수 있는 수작입니다. StarCraft Brood War use map 'Asteroid Field' is a single-player puzzle map that features a unique progression of finding the shortest route while avoiding obstacles on an ice tileset. The internal description states, 'Something must be done about the barriers in the way. The fastest route from A to B is straight forward,' indicating that players must use the given terrain and units to break through or bypass blocked paths, requiring strategic thinking. Although the map size is a modest 128x128 tiles, the triggers and terrain placement implemented with the standard Blizzard editor interlock precisely, delivering an impressive presentation that goes beyond a simple movement puzzle. Since it is single-player only, there is no multiplayer pressure, allowing players to tackle it at their own pace; the difficulty starts intuitive but becomes more demanding as obstacle patterns grow complex in later stages. Recommended for users who enjoy puzzle and maze-type use maps, and for players seeking a concise, self-contained challenge. Before playing, note that the map starts immediately without a separate mode selection, so it is advisable to check familiarity with unit control and terrain recognition. Overall, it is a well-crafted piece for those wanting a light brain-teasing experience without burden.
최근 등록된 맵
새로 추가된 파일과 버전을 확인하세요.
소행성 지대 (Asteroid Field)
스타크래프트 브루드워 유즈맵 '소행성 지대 (Asteroid Field)'는 1인용 퍼즐형 맵으로, 얼음 타일셋 위에서 장애물을 피해 최단 경로를 찾는 독특한 진행 방식을 보여줍니다. 내부 설명에 '장애물 때문에 무언가 조치를 취해야 한다. A에서 B로 가는 가장 빠른 길은 직진이다'라는 문구가 있어, 플레이어는 주어진 지형과 유닛을 활용해 막힌 길을 뚫거나 우회하는 전략적 사고가 필요합니다. 맵 크기는 128x128 타일로 비교적 아담하지만, 블리자드 기본 에디터로 구현된 트리거와 지형 배치가 정교하게 맞물려 있어 단순한 이동 퍼즐을 넘어선 연출이 인상적입니다. 싱글 플레이 전용이라 멀티플레이 부담 없이 자신만의 페이스로 공략할 수 있으며, 난이도는 초반에는 직관적이지만 후반으로 갈수록 장애물 패턴이 복잡해져 집중력을 요합니다. 추천 대상은 퍼즐 및 미로형 유즈맵을 즐기는 유저, 짧은 시간 안에 완결성 있는 챌린지를 원하는 플레이어입니다. 플레이 전 확인할 점은 별도의 모드 선택 없이 바로 시작되므로, 유닛 컨트롤과 지형 인식이 익숙한지 점검하는 것이 좋습니다. 전체적으로 가벼운 두뇌 플레이를 원할 때 부담 없이 즐길 수 있는 수작입니다. StarCraft Brood War use map 'Asteroid Field' is a single-player puzzle map that features a unique progression of finding the shortest route while avoiding obstacles on an ice tileset. The internal description states, 'Something must be done about the barriers in the way. The fastest route from A to B is straight forward,' indicating that players must use the given terrain and units to break through or bypass blocked paths, requiring strategic thinking. Although the map size is a modest 128x128 tiles, the triggers and terrain placement implemented with the standard Blizzard editor interlock precisely, delivering an impressive presentation that goes beyond a simple movement puzzle. Since it is single-player only, there is no multiplayer pressure, allowing players to tackle it at their own pace; the difficulty starts intuitive but becomes more demanding as obstacle patterns grow complex in later stages. Recommended for users who enjoy puzzle and maze-type use maps, and for players seeking a concise, self-contained challenge. Before playing, note that the map starts immediately without a separate mode selection, so it is advisable to check familiarity with unit control and terrain recognition. Overall, it is a well-crafted piece for those wanting a light brain-teasing experience without burden.
빠른 승리 (the fast win)
스타크래프트 브루드워의 얼음 타일셋을 기반으로 한 정제되지 않은 밀리 맵, 'Untitled Scenario'는 파일명 'the fast win.scx'에서 느껴지듯 극단적인 초반 교전과 일방적인 승리를 위한 구조로 설계되었습니다. 4096x4096의 넓은 필드 중앙에는 자원 멀티와 건물이 거의 배치되지 않아, 시작하자마자 바로 본진 인근에서 전투가 벌어질 수밖에 없습니다. 이 맵의 특징은 '빠른 승리'라는 이름처럼 테란의 벙커 러시, 프로토스의 광전사 러시, 저그의 러커 드랍 등 초반 전략이 매우 강력하게 작용한다는 점입니다. 특히 설원 타일셋의 어두운 배경은 시야를 제한하여 초반 정찰의 중요성을 높이고, 맵의 균형이 무너지기 쉬운 구조를 부여합니다. 플레이어는 시작 직후 자신의 스타팅Area를 벗어나지 않고도 적의 기지를 바로 공격할 수 있는 위치에 있으며, 이는 맵의 긴장감을 극대화합니다. 다만, 중앙 멀티와 같은 자원 분배 구역이 없어서 후반 자원 전쟁이 발생하지 않으며, 오로지 초반 교전과 빠른 건물 파괴에 모든 것이 집중됩니다. 이러한 구조는 초보 플레이어에게는 학습 효과가 크지만, 숙련자들에게는 전략의 깊이가 부족하게 느껴질 수 있습니다. 맵의 승리 조건은 단순하게 모든 적 건물을 파괴하는 것으로, 이를 위해 플레이어는 자신이 가진 모든 유닛을 즉시 전선에 투입하는 극한의 공격적 플레이가 요구됩니다. 초반 빌드오더와 테크 선택의 차이가 승패를 좌우하는 이 맵은, 말 그대로 '빠른 승리'를 목표로 하는 밀리 맵의 정석을 보여줍니다. 다만, 맵의 밸런스가 오로지 초반 교전에만 치중되어 있어, 다양한 전략과 테크트리를 시도해 보고 싶은 플레이어들에게는 다소 아쉬운 부분으로 남습니다. 이 맵을 즐기기 위해서는 초반 유닛 생산과 진출 타이밍을 철저히 계산해야 하며, 가능한 한 빠른 시간 내에 적 기지를 파괴하는 것이 핵심입니다. 또한, 설원 타일셋의 어두운 조명과 제한된 시야를 고려하여, 유닛 컨트롤과 정찰을 동시에 수행할 수 있는 능력이 필요합니다. 초보자와 숙련자 모두에게 흥미로운 경험을 제공하지만, 특히 초보자에게는 스타크래프트의 기본적인 전투와 빌드 개념을 빠르게 습득할 수 있는 좋은 연습용 맵으로 활용될 수 있을 것입니다. 다만, 이 맵이 제공하는 전략의 다양성은 제한적이므로, 다양한 맵을 접하고자 하는 플레이어에게는 추천하기 어려운 점도 있습니다. 이 맵을 플레이하기 전에, 자신의 스타일과 전략이 초반 교전에 특화되어 있는지, 그리고 빠른 승리를 목표로 할 수 있는 준비가 되어 있는지를 먼저 생각해 보는 것이 좋습니다. 또한, 맵의dark한 조명과 제한된 시야를 극복하기 위해, 가능한 한 빠른 정찰과 맵 리딩 능력을 키우는 연습을 병행하는 것이 좋습니다. 이 맵은 단순히 '승리'만을 목표로 하기보다는, 스타크래프트의 기본기와 전투 감각을 다듬는 데에 중점을 두는 것이 바람직합니다. 초보자와 숙련자 모두에게 유용한 맵이지만, 그 활용 방법은 분명히 구분되어야 합니다. 초보자는 이 맵을 통해 빠른 전투와 빌드오더의 중요성을 배울 수 있으며, 숙련자는 자신의 초반 전략과 테크 선택 능력을 검증할 수 있는 좋은 기회로 삼을 수 있습니다. 다만, 이 맵이 제공하는 전략적 깊이의 한계는 반드시 염두에 두어야 합니다. 이 맵을 즐기면서도, 동시에 다른 전략적 깊이를 가진 맵들도 함께 플레이하여 스타크래프트의 다양한 재미를 경험하는 것이 좋습니다. This untitled melee map, set on the frozen tundra tileset of StarCraft: Brood War, is a raw and unrefined design that prioritizes instant early-game aggression under the filename 'the fast win.scx'. The 4096x4096 expansive field deliberately omits mid-game resources and expansions, forcing immediate confrontation near starting positions regardless of race. The dark, snow-covered environment restricts visibility, amplifying the role of scouting in the opening minutes. The map’s balance hinges entirely on rapid base destruction through early rushes — Terran bunkers, Protoss zealot charges, or Zerg lurker drops all thrive in this compressed battlefield. Central resource nodes are nonexistent, eliminating late-game macro play and reducing the match to a swift, decisive clash. While the simplicity aids new players in grasping core combat dynamics, it offers limited strategic depth for veterans seeking extended build orders or multi-stage strategies. Victory requires destroying all enemy structures, compelling players to commit every unit to the frontline immediately. The map’s balance revolves around optimizing initial unit production and timing, but its narrow focus on early aggression may feel repetitive for those seeking diverse tactical play. The dim lighting and obscured vision demand sharp micro-management and constant map awareness. Beginners will find this map useful for practicing fundamental combat and build orders, but its lack of variety makes it less ideal for players seeking broader strategic experiences. Before playing, assess whether your strategy aligns with early-game dominance and prepare for quick victories. The map’s constraints also serve as an exercise in efficient scouting and unit control under limited visibility. While it serves as a practical tool for refining basic mechanics, its limited depth means supplementing play with more complex maps is advisable for sustained enjoyment. Both beginners and experts can benefit, but their engagement with the map should differ — novices to learn pace, veterans to test rush strategies — always mindful of its strategic limitations.
어둠 속의 고독 (Alone in the Dark)
스타크래프트 브루드워의 대표적인 공포 디펜스 유즈맵인 〈Alone in the Dark〉는 1.5 버전으로 업데이트된 후에도 여전히 플레이어들에게 긴장감 넘치는 밤을 선사합니다. 이 맵은 플레이어가 홀로 어둠 속에서 각종 유닛과 구조물을 활용해 야간을 버텨내야 하는 서바이벌 디펜스 장르로, 기본적으로는 5인의 플레이어가 협동하여 적의 공격을 방어하는 구조입니다. 맵의 배경은 어두운 숲과 얼어붙은 설원 지형으로 구성되어 있으며, 어두운 조명과 붉은 색조의 조명이 공포감을 더욱 고조시킵니다. 플레이 방식은 꽤 단순하면서도 전략적인데, 시작 지점에서 출발한 플레이어는 맵 중앙 부근에 위치한 방어 기지 주변을 중심으로 방어선을 구축해야 합니다. 적 유닛은 밤이 지나면서 점점 강력해지는 웨이브로 몰려오며, 플레이어는 제한된 자원으로 방어용 건물을 건설하고 유닛을 생산해 대응해야 합니다. 건물 건설은 제한 구역 내에만 가능하며, 자원은 맵 곳곳에 흩어져 있는 미네랄과 가스를 채취해 사용합니다. 특히 밤이 깊어질수록 적의 공격 패턴이 변하고, 더 강한 유닛들이 등장하기 때문에 방어 전략을 끊임없이 유동적으로 변경해야 합니다. 추천하는 플레이 방식은 초반에 최대한 빠른 자원 확보와 방어 건물 설치에 집중하는 것입니다. 건물이 파괴되면 회복이 불가능한 경우가 많기 때문에, 방어선 구축에 실패하면 곧장 게임 오버로 이어질 수 있습니다. 또한, 주기적으로 등장하는 보스급 적에 대비해 강력한 유닛을 배치하는 것도 중요합니다. 맵의 특성상 밤이 깊어질수록 시야가 제한되고, 맵 곳곳에 숨은 적들이 등장하기 때문에 맵의 구조를 잘 숙지하는 것이 필수입니다. 이 맵은 공포와 긴장감을 중시하는 플레이어들에게 특히 인기가 많으며, 5인 이상의 협동 플레이가 가장 효과적입니다. 혼자 플레이하는 것도 가능하지만, 방어의 안정성을 위해 최소 2인 이상의 팀 플레이를 추천합니다. 또한, 맵의 어두운 분위기를 최대한 살리기 위해 밝기 조절과 사운드 설정을 최적화하는 것이 좋습니다. Alone in the Dark is a classic survival defense custom map in StarCraft: Brood War, updated to version 1.5, offering players an intense night of survival against relentless enemy waves. Set in a dark forest and frozen tundra, the map immerses players in a tense atmosphere with dim lighting and eerie red hues. The gameplay is straightforward yet strategic: players must defend a central base from increasingly powerful enemy units as night progresses. Starting from their initial positions, players collect resources—minerals and gas—scattered across the map to build defensive structures and produce units. Construction is limited to designated zones, adding a layer of challenge to base management. A strong early-game strategy is essential, focusing on rapid resource gathering and the swift establishment of defensive buildings. Failure to secure the base early often leads to an inevitable game over, as destroyed structures cannot be recovered. Players must adapt their defenses dynamically, as enemy attack patterns intensify with nightfall, culminating in powerful boss units that require strategic unit placement to counter. The map shines in cooperative play, particularly with teams of 5 or more, though solo or smaller team play is possible with careful planning. Familiarity with the map layout is crucial, as obscured vision and hidden enemies become more prevalent as the night deepens. To fully experience the eerie atmosphere, optimizing brightness and sound settings is highly recommended. This map is ideal for players who thrive on tension and strategic depth in a survival defense setting.
맵 선택 가이드
태그는 맵의 핵심 특징을 빠르게 설명하지만 제작 버전마다 규칙이 다를 수 있습니다. 상세 설명에서 권장 인원, 난이도, 플레이 시간과 버전을 함께 확인한 뒤 다운로드하세요.