
언덕 스타크래프트 맵 모음
'언덕' 태그가 등록된 맵을 모았습니다. 장르 하나로 찾기 어려운 플레이 방식, 난이도와 특징을 중심으로 인기 맵과 최신 맵을 비교해 보세요.
- 등록 맵
- 5개
- 누적 다운로드
- 0
- 누적 조회
- 254
인기 맵
다운로드와 조회 반응이 높은 맵입니다.
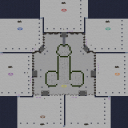
50분 버티기(언덕) v1.2 (Fifty-Minute Defense Hill v1.2)
스타크래프트 브루드워의 대표적인 디펜스 장르 유즈맵인 〈50분 버티기(언덕)〉는 플레이어가 중앙 언덕에 위치한 건물을 방어하며 끊임없이 몰려드는 적을 상대하는 컴까기형 맵이다. 맵 중앙에 위치한 넥서스는 3분 간격으로 무리한 공격을 시도하는 컴퓨터 상대의 부대를 상대해야 하며, 언덕 지형이 제공하는 시야와 방어 advantage를 활용해 최대한 오랫동안 건물을 지켜내는 것이 핵심 목표다. 맵의 특징적인 지형은 언덕 주변으로 배치된 좁은 통로와 구불구불한 길로, 플레이어는 이 곳을 최대한 효율적으로 활용해 적 병력의 공격을 분산시키고 방어선을 유지해야 한다. 공격 패턴은 시간이 지나면서 점점 강화되며, 후반부로 갈수록 적의 물량이 늘어나고 조합도 다양해지므로 초중반 방어에 실패하면 게임을 되돌리기 어려운 구조로 되어 있다. 이 맵은 ‘정신연령 초딩은 관람불가’라는 내부 설명에서 알 수 있듯 다소 과격한 표현을 사용했지만, 실제로는 초보부터 고수까지 폭넓은 플레이어 층을 겨냥한 밸런스형 디펜스 게임이다. 플레이 전에는 언덕 지형의 방어 효율성과 통로의 배치, 그리고 시간 경과에 따른 공격 패턴 변화를 미리 숙지하는 것이 중요하며, 특히 25분과 40분대에는 공격 강도가 급격히 상승한다는 점을 유념해야 한다. 건물을 지키며 최대한 오랫동안 버티는 재미와, 점점 강해지는 적을 상대하는 긴장감이 이 맵의 매력 포인트다. 추천 대상으로는 스타크래프트 디펜스 유즈맵을 즐기는 모든 유저이며, 특히 언덕 지형의 방어력을 활용한 전략적 플레이를 좋아하는 플레이어에게 적합하다. 또한 컴퓨터 상대와의 긴장감 있는 전투를 즐기고자 하는 이들에게도 좋은 선택지가 될 것이다. 플레이 전에는 맵의 지형과 공격 패턴을 충분히 숙지하고, 방어 건물과 유닛의 조합을 신중히 계획하는 것이 성공의 열쇠가 될 것이다. This StarCraft: Brood War custom map, titled 〈50분 버티기(언덕)〉 (Fifty-Minute Defense Hill), is a classic defense-oriented UMS (Use Map Settings) game where players must protect a central building on a hilltop from relentless waves of AI-controlled enemies. The core gameplay revolves around strategic positioning and resource management, as the AI launches attacks every three minutes with increasing difficulty and unit diversity. The hill terrain provides a tactical advantage, offering elevated vision and choke points that players must exploit to maximize defense efficiency. The map’s design emphasizes tight corridors and winding paths around the hill, forcing players to manage unit flow and positioning carefully to prevent overwhelming attacks. As time progresses, enemy waves escalate in both quantity and complexity, making early-game mistakes difficult to recover from. The internal description, while using somewhat blunt language, hints at a balanced challenge suitable for players of all skill levels, from beginners to advanced gamers. This defense map is ideal for fans of StarCraft’s UMS genre, particularly those who enjoy strategic depth and the tension of progressively stronger enemy assaults. Players should familiarize themselves with the terrain and attack patterns before starting, as the difficulty spikes around the 25-minute and 40-minute marks are critical turning points. The combination of tactical positioning and adaptive gameplay makes this a standout choice for anyone seeking a challenging and engaging defense experience.
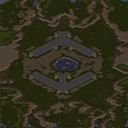
마운틴 루인스 (Mountain Ruins)
(6)Mountain Ruins는 파일명에서 알 수 있듯 6인용 밀리 전용 맵으로, 사막 타일셋을 기반으로 한 전형적인 언덕 지형과 폐허 테마를 담고 있다. 내부 제목은 'Untitled Scenario'로 미설정 상태이나, 맵 해시와 파일명이 일치해 배포용 완성본으로 추정된다. 192x192 타일 크기는 중형 맵에 속하며, 6시 방향 대칭 구조로 시작 지점이 배치되어 3대3 팀전이나 6인 난전 모두 소화 가능하다. 지형은 중앙을 가로지르는 높은 언덕과 양옆의 협곡, 그리고 본진 뒤로 돌아가는 우회로가 특징이다. 사막 타일셋 특유의 모래 질감 위에 바위 덩어리와 폐허 장식이 놓여 시각적 시인성은 좋은 편이며, 미네랄과 베스핀 가스 배치는 표준 밀리 규격을 따른다. 본진 입구는 비교적 좁아 초반 러시 방어에 유리하지만, 언덕 위 시야 확보가 필수적이라 정찰과 드랍십·오버로드 운용이 승부를 가른다. 중앙 확장 기지는 양 진영에서 접근하기 쉬워 중반 교전 거점이 되며, 3시·9시 방향 멀티는 수비적 운영을 유도한다. 진행 방식은 일반 밀리와 동일하게 '적 건물 전멸' 승리 조건을 갖는다. 테란은 언덕 위 벙커와 공성 전차로 견제하기 좋고, 저그는 가시 촉수와 럴커로 입구를 틀어막기 용이하며, 프로토스는 광자포와 차원 관문 드랍으로 변수를 만들 수 있다. 맵 크기가 지나치게 크지 않아 초반 치고받기가 잦고, 후반엔 다수 확장 싸움이 벌어지는 전형적인 밀리 흐름을 보인다. 추천 대상은 래더 맵 풀 연습용으로 표준적인 6인 맵을 찾는 유저, 혹은 친구들과 3대3 팀전을 즐기려는 그룹이다. 별도 트리거나 유즈맵 요소가 없어 순수 실력 대결을 원할 때 적합하다. 플레이 전 본진 입구 막기 빌드와 중앙 언덕 장악 타이밍만 숙지하면 무난히 적응할 수 있다. Mountain Ruins (6) is a 6-player melee map as indicated by its filename, featuring a classic high-ground terrain and ruins theme based on the Desert tileset. The internal title remains 'Untitled Scenario', suggesting the author left it unset, but the map hash and filename match, indicating a finished distribution version. The 192x192 tile size falls into the medium category, with six starting positions arranged in rotational symmetry, accommodating both 3v3 team games and 6-player free-for-all. The terrain features a high ridge cutting across the center, side canyons, and bypass routes behind the main bases. The sandy texture of the Desert tileset combined with rock formations and ruin doodads provides good visual clarity. Mineral and vespene gas placements follow standard melee conventions. Main base ramps are relatively narrow, favoring early rush defense, but securing vision on the high ground is essential, making scouting and dropship/overlord play decisive. The central expansion serves as a mid-game flashpoint accessible to both sides, while the 3 and 9 o'clock expansions encourage defensive macro play. Gameplay follows standard melee rules with the 'destroy all enemy buildings' victory condition. Terran benefits from bunkers and siege tanks on the high ground; Zerg can block chokes with sunken colonies and lurkers; Protoss can create pressure with photon cannons and warp prism drops. The map size is not excessive, leading to frequent early skirmishes and transitioning into multi-base wars in the late game—a quintessential melee flow. Recommended for players seeking a standard 6-player map for ladder practice or groups wanting to enjoy 3v3 team matches. With no custom triggers or UMS elements, it suits those desiring a pure skill contest. Familiarity with wall-in builds for the main ramp and timing for central high-ground control is sufficient preparation before playing.
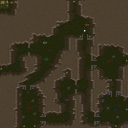
어썰트 온 우 테리토리 (Assault on Wu Territory)
‘어썰트 온 우 테리토리(Assualt on Wu Territory)’는 삼국지 배경의 스타크래프트 브루드워 유즈맵으로, 플레이어는 손책을 조종해 오나라 territory를 공격하거나, 반대로 손책을 방어하는 이중 플레이가 가능한 전략 디펜스 장르의 맵이다. 맵은 사막 타일셋으로 구성되어 있으며 넓은 평원과 협곡, 언덕 지형이 조화롭게 배치되어 있어 시야와 기동성의 균형을 제공한다. 중앙에는 주요 거점이 위치하고 있으며, 오나라 세 명의 장수(손견, 주유, 황개)가 각각의 요새를 방어하고 있다. 전투는 손책의 유닛들을 지휘해 오나라 유닛들을 섬멸하거나, 반대로 오나라 유닛들을 조종해 손책의 공격을 방어하는 방식으로 진행된다. 맵의 특징은 손책의 선택에 따라 공격과 방어가 번갈아 일어나며, 각 라운드마다 오나라 장수들이 보조를 받거나 강화되는 등 변동성이 있는 점이다. 맵의 규모는 4096x4096으로 넓지만, 주요 전투 지역은 중앙과 동서로 나뉜 3개의 거점으로 집중되어 있어 전략적 선택이 필요하다. 또한, 협곡과 언덕을 활용한 진영별 기습이나 후방 공격이 게임의 승패를 좌우할 수 있다. 이 맵은 삼국지 팬과 전략 디펜스 장르를 좋아하는 유저들에게 특히 매력적이며, 손책의 캐릭터성을 살린 스토리텔링과 긴장감 있는 전투가 특징이다. 플레이 전에는 맵의 주요 거점과 진영별 유닛 조합을 숙지하고, 협곡과 언덕의 지형적 이점을 활용할 계획을 미리 세워야 한다. 또한, 오나라 장수들의 패턴과 강화 시점을 예측하는 것이 승리의 열쇠가 될 것이다. Assualt on Wu Territory is a StarCraft: Brood War custom map set in the Three Kingdoms period, offering a dual-player experience where one side controls Sun Ce to attack Wu territory while the other defends as the Wu forces. The map features a desert tileset with a mix of open plains, canyons, and hills, providing a balance between visibility and mobility. Central to the map are key strongholds, each defended by one of Wu's three warlords: Sun Jian, Zhou Yu, and Huang Gai. Gameplay revolves around commanding Sun Ce's units to eliminate Wu forces or, conversely, controlling Wu units to repel Sun Ce's attacks. The map introduces variability by allowing the Wu warlords to receive reinforcements or upgrades each round, adding dynamic shifts in the battle. Spanning 4096x4096 in size, the map's vastness is balanced by three primary battlegrounds clustered around the central and eastern/western strongholds. Terrain features like canyons and hills enable flanking maneuvers or surprise attacks, which can decisively influence the outcome. This map appeals to fans of the Three Kingdoms era and strategy defense enthusiasts, thanks to its immersive storytelling centered on Sun Ce and the tension-filled battles. Before playing, it's essential to familiarize yourself with the key strongholds and faction unit compositions, and to plan around the terrain advantages offered by canyons and hills. Predicting the Wu warlords' reinforcement patterns and upgrade timings will also be crucial for victory.
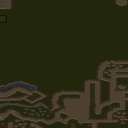
스나이퍼 Crysis
‘스나이퍼 Crysis’는 스타크래프트 브루드워 유즈맵으로, 사막 지형을 배경으로 한 디펜스 장르 맵이다. 맵의 구조는 크게 세 개의 구역으로 나뉘며, 중앙에는 넓은 평지가 펼쳐져 있고 양측 언덕에는 건물이 배치되어 있다. 플레이어는 각 구역에 배치된 건물을 방어하면서 적의 공격을 막아내야 한다. 맵의 특색 중 하나는 사막 지형과 언덕 지형이 조화를 이뤄, 시야 확보와 전략적 위치 선정이 중요한 요소로 작용한다는 점이다. 건물이 위치한 언덕은 높은 고도 덕분에 시야가 넓고, 평지 구역은 넓은 공간을 활용한 대형 유닛 배치와 이동이 용이하다. 맵의 테두리에는 벽이 둘러져 있어 적의 진입을 차단하는 데 도움을 준다. 다만, 맵의 거대함과 복잡한 구조는 초보 플레이어에게 다소 부담으로 다가올 수 있어, 플레이 전 맵의 지형을 충분히 숙지하는 것이 중요하다. 또한, 방어 건물의 배치와 업그레이드 타이밍을 잘 조율해야만 안정적인 방어가 가능하다. ‘스나이퍼 Crysis’는 디펜스 장르의 특성을 살리면서도, 사막과 언덕의 조화를 통해 전략적 깊이를 더한 맵으로, 디펜스 게임을 즐기는 플레이어에게 추천할 만한 작품이다. 특히, 팀 플레이를 지향하는 유저라면 각 구역의 역할 분담을 통해 더욱 효율적인 방어 전략을 구사할 수 있을 것이다. 맵의 난이도는 전체적으로 ‘보통’ 수준으로 평가되지만, 방어 건물의 배치와 업그레이드 타이밍에 따라 난이도가 크게 달라질 수 있으니, 충분한 연습이 필요하다. 맵의 플레이 시간은 맵의 구조와 플레이어의 숙련도에 따라 20분에서 40분 정도로 예상된다. ‘스나이퍼 Crysis’는 디펜스와 팀 플레이를 좋아하는 유저들에게 적합한 맵으로, 사막과 언덕의 조화를 통해 전략적 깊이를 더한 작품이다. 맵의 구조와 건물을 방어하는 전략을 잘 숙지한다면, 누구나 즐겁게 플레이할 수 있을 것이다. 다만, 초보자의 경우 맵의 복잡한 구조와 방어 건물의 배치에 익숙해지는 데 시간이 걸릴 수 있으니, 여유를 가지고 플레이하는 것이 좋다. Sniper Crysis is a StarCraft: Brood War custom map set in a desert terrain, designed primarily as a defense genre map. The map is divided into three main sections: a central plain and two elevated areas on either side, each equipped with buildings. Players must defend these buildings against enemy attacks while utilizing the strategic advantages of the terrain. The desert and elevated sections offer expansive views for long-range units and open spaces for large-scale unit deployment, respectively. The map is bordered by walls that help block enemy advances. However, the map's size and complex structure may pose challenges for beginners, making it essential to familiarize oneself with the terrain beforehand. Effective coordination of building placement and upgrades is crucial for maintaining a strong defense. Sniper Crysis stands out in the defense genre by blending desert and elevated terrains, adding strategic depth. It is particularly recommended for players who enjoy defense games and team-based strategies, as proper role distribution across sections can enhance defense efficiency. The difficulty is generally rated as 'medium,' though it can vary significantly based on building placement and upgrade timing. The estimated playtime ranges from 20 to 40 minutes, depending on the player's skill level and map familiarity. This map is ideal for those who appreciate defense mechanics and teamwork, offering a blend of strategy and excitement. Beginners may find the complex structure and building placements challenging at first, so taking time to learn the map is advisable.
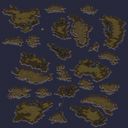
드래프팅 타이드 (Drifting Tides)
드래프팅 타이드는 스타크래프트 브루드워의 4인용 밀리 맵으로, 황무지 타일셋을 기반으로 제작된 정글과 강이 어우러진 맵입니다. 맵 중앙에는 두 개의 큰 강이 가로지를르며, 각각의 강에는 좁은 다리가 연결되어 있어 초반 교전이나 진출 전략을 크게 좌우합니다. 강 주변은 평야 지대와 언덕으로 구분되어 있으며, 각 플레이어의 시작 지점은 맵의 네 모서리에 배치되어 상대방과 최대한 멀리 떨어져 있습니다. 맵의 특징은 강의 흐름이 맵 전체를 가로지르며 자연스럽게 방어선을 형성한다는 점으로, 이를 활용한 입구막기 전략이나 강을 건너는 타이밍이 승패를 가를 수 있습니다. 또한, 언덕 지형이 곳곳에 분포해 시야 확보와 방어 시설 배치에 전략적 깊이를 더합니다. 맵의 밸런스는 초반 진출 루트가 제한적이면서도 다양한 선택지를 제공해, 플레이어들은 강의 다리를 활용한 진격로 선정, 언덕 요새화, 혹은 강을 건너는 위험을 감수하는 등 다채로운 전술을 구사할 수 있습니다. 초보자는 강의 다리나 평야 지대를 중심으로 한 방어 구축에 중점을 두고, 중급 이상 플레이어는 강을 건너는 타이밍이나 언덕 시야 싸움을 적극 활용하는 것이 중요합니다. 맵을 플레이하기 전에는 강의 흐름과 다리 위치, 언덕의 배치도를 미리 숙지하고, 상대방의 진출 루트를 예상하는 연습이 필요합니다. 또한, 강 주변의 시야 확보를 위해 오버로드나 스캔 사용을 고려해볼 만합니다. 이 맵은 밀리 장르의 기본기와 전략적 사고를 모두 요구하는 만큼, 스타크래프트의Classic한 재미를 느낄 수 있는 맵입니다. 특히, 팀플레이보다는 1대1이나 2대2에서 더욱 치열한 접전이 예상되는 구조로, 플레이어 간의 실력 차이에 따라 게임 양상이 크게 달라질 수 있습니다. Drafting Tides is a four-player melee map in StarCraft: Brood War, featuring a jungle and river setting built on a wasteland tileset. Two large rivers run through the center of the map, each connected by narrow bridges that heavily influence early skirmishes and push strategies. The area around the rivers is divided into flatlands and hills, with each player’s starting position placed in a corner of the map to maximize distance from opponents. The defining feature is how the rivers flow across the entire map, naturally forming defensive lines—mastering entrance-blocking tactics or timing river crossings can decide the match. Hills are scattered throughout, adding depth to vision control and defensive structure placement. The map’s balance restricts early expansion routes while offering varied choices, forcing players to adapt their strategies—whether securing bridges for advances, fortifying hills, or risking river crossings. Beginners should focus on building defenses around bridges or flatlands, while intermediate and advanced players must leverage river-crossing timings and hill-based vision battles. Before playing, study the river flows, bridge positions, and hill placements, and practice predicting opponent push routes. Utilizing overlords or scans for vision control around the rivers is also crucial. Given its demand for both mechanical skill and strategic thinking, the map delivers classic StarCraft enjoyment. With its structure favoring 1v1 or 2v2 over team play, the intensity of matches escalates dramatically based on player skill differences.
최근 등록된 맵
새로 추가된 파일과 버전을 확인하세요.
마운틴 루인스 (Mountain Ruins)
(6)Mountain Ruins는 파일명에서 알 수 있듯 6인용 밀리 전용 맵으로, 사막 타일셋을 기반으로 한 전형적인 언덕 지형과 폐허 테마를 담고 있다. 내부 제목은 'Untitled Scenario'로 미설정 상태이나, 맵 해시와 파일명이 일치해 배포용 완성본으로 추정된다. 192x192 타일 크기는 중형 맵에 속하며, 6시 방향 대칭 구조로 시작 지점이 배치되어 3대3 팀전이나 6인 난전 모두 소화 가능하다. 지형은 중앙을 가로지르는 높은 언덕과 양옆의 협곡, 그리고 본진 뒤로 돌아가는 우회로가 특징이다. 사막 타일셋 특유의 모래 질감 위에 바위 덩어리와 폐허 장식이 놓여 시각적 시인성은 좋은 편이며, 미네랄과 베스핀 가스 배치는 표준 밀리 규격을 따른다. 본진 입구는 비교적 좁아 초반 러시 방어에 유리하지만, 언덕 위 시야 확보가 필수적이라 정찰과 드랍십·오버로드 운용이 승부를 가른다. 중앙 확장 기지는 양 진영에서 접근하기 쉬워 중반 교전 거점이 되며, 3시·9시 방향 멀티는 수비적 운영을 유도한다. 진행 방식은 일반 밀리와 동일하게 '적 건물 전멸' 승리 조건을 갖는다. 테란은 언덕 위 벙커와 공성 전차로 견제하기 좋고, 저그는 가시 촉수와 럴커로 입구를 틀어막기 용이하며, 프로토스는 광자포와 차원 관문 드랍으로 변수를 만들 수 있다. 맵 크기가 지나치게 크지 않아 초반 치고받기가 잦고, 후반엔 다수 확장 싸움이 벌어지는 전형적인 밀리 흐름을 보인다. 추천 대상은 래더 맵 풀 연습용으로 표준적인 6인 맵을 찾는 유저, 혹은 친구들과 3대3 팀전을 즐기려는 그룹이다. 별도 트리거나 유즈맵 요소가 없어 순수 실력 대결을 원할 때 적합하다. 플레이 전 본진 입구 막기 빌드와 중앙 언덕 장악 타이밍만 숙지하면 무난히 적응할 수 있다. Mountain Ruins (6) is a 6-player melee map as indicated by its filename, featuring a classic high-ground terrain and ruins theme based on the Desert tileset. The internal title remains 'Untitled Scenario', suggesting the author left it unset, but the map hash and filename match, indicating a finished distribution version. The 192x192 tile size falls into the medium category, with six starting positions arranged in rotational symmetry, accommodating both 3v3 team games and 6-player free-for-all. The terrain features a high ridge cutting across the center, side canyons, and bypass routes behind the main bases. The sandy texture of the Desert tileset combined with rock formations and ruin doodads provides good visual clarity. Mineral and vespene gas placements follow standard melee conventions. Main base ramps are relatively narrow, favoring early rush defense, but securing vision on the high ground is essential, making scouting and dropship/overlord play decisive. The central expansion serves as a mid-game flashpoint accessible to both sides, while the 3 and 9 o'clock expansions encourage defensive macro play. Gameplay follows standard melee rules with the 'destroy all enemy buildings' victory condition. Terran benefits from bunkers and siege tanks on the high ground; Zerg can block chokes with sunken colonies and lurkers; Protoss can create pressure with photon cannons and warp prism drops. The map size is not excessive, leading to frequent early skirmishes and transitioning into multi-base wars in the late game—a quintessential melee flow. Recommended for players seeking a standard 6-player map for ladder practice or groups wanting to enjoy 3v3 team matches. With no custom triggers or UMS elements, it suits those desiring a pure skill contest. Familiarity with wall-in builds for the main ramp and timing for central high-ground control is sufficient preparation before playing.
드래프팅 타이드 (Drifting Tides)
드래프팅 타이드는 스타크래프트 브루드워의 4인용 밀리 맵으로, 황무지 타일셋을 기반으로 제작된 정글과 강이 어우러진 맵입니다. 맵 중앙에는 두 개의 큰 강이 가로지를르며, 각각의 강에는 좁은 다리가 연결되어 있어 초반 교전이나 진출 전략을 크게 좌우합니다. 강 주변은 평야 지대와 언덕으로 구분되어 있으며, 각 플레이어의 시작 지점은 맵의 네 모서리에 배치되어 상대방과 최대한 멀리 떨어져 있습니다. 맵의 특징은 강의 흐름이 맵 전체를 가로지르며 자연스럽게 방어선을 형성한다는 점으로, 이를 활용한 입구막기 전략이나 강을 건너는 타이밍이 승패를 가를 수 있습니다. 또한, 언덕 지형이 곳곳에 분포해 시야 확보와 방어 시설 배치에 전략적 깊이를 더합니다. 맵의 밸런스는 초반 진출 루트가 제한적이면서도 다양한 선택지를 제공해, 플레이어들은 강의 다리를 활용한 진격로 선정, 언덕 요새화, 혹은 강을 건너는 위험을 감수하는 등 다채로운 전술을 구사할 수 있습니다. 초보자는 강의 다리나 평야 지대를 중심으로 한 방어 구축에 중점을 두고, 중급 이상 플레이어는 강을 건너는 타이밍이나 언덕 시야 싸움을 적극 활용하는 것이 중요합니다. 맵을 플레이하기 전에는 강의 흐름과 다리 위치, 언덕의 배치도를 미리 숙지하고, 상대방의 진출 루트를 예상하는 연습이 필요합니다. 또한, 강 주변의 시야 확보를 위해 오버로드나 스캔 사용을 고려해볼 만합니다. 이 맵은 밀리 장르의 기본기와 전략적 사고를 모두 요구하는 만큼, 스타크래프트의Classic한 재미를 느낄 수 있는 맵입니다. 특히, 팀플레이보다는 1대1이나 2대2에서 더욱 치열한 접전이 예상되는 구조로, 플레이어 간의 실력 차이에 따라 게임 양상이 크게 달라질 수 있습니다. Drafting Tides is a four-player melee map in StarCraft: Brood War, featuring a jungle and river setting built on a wasteland tileset. Two large rivers run through the center of the map, each connected by narrow bridges that heavily influence early skirmishes and push strategies. The area around the rivers is divided into flatlands and hills, with each player’s starting position placed in a corner of the map to maximize distance from opponents. The defining feature is how the rivers flow across the entire map, naturally forming defensive lines—mastering entrance-blocking tactics or timing river crossings can decide the match. Hills are scattered throughout, adding depth to vision control and defensive structure placement. The map’s balance restricts early expansion routes while offering varied choices, forcing players to adapt their strategies—whether securing bridges for advances, fortifying hills, or risking river crossings. Beginners should focus on building defenses around bridges or flatlands, while intermediate and advanced players must leverage river-crossing timings and hill-based vision battles. Before playing, study the river flows, bridge positions, and hill placements, and practice predicting opponent push routes. Utilizing overlords or scans for vision control around the rivers is also crucial. Given its demand for both mechanical skill and strategic thinking, the map delivers classic StarCraft enjoyment. With its structure favoring 1v1 or 2v2 over team play, the intensity of matches escalates dramatically based on player skill differences.
어썰트 온 우 테리토리 (Assault on Wu Territory)
‘어썰트 온 우 테리토리(Assualt on Wu Territory)’는 삼국지 배경의 스타크래프트 브루드워 유즈맵으로, 플레이어는 손책을 조종해 오나라 territory를 공격하거나, 반대로 손책을 방어하는 이중 플레이가 가능한 전략 디펜스 장르의 맵이다. 맵은 사막 타일셋으로 구성되어 있으며 넓은 평원과 협곡, 언덕 지형이 조화롭게 배치되어 있어 시야와 기동성의 균형을 제공한다. 중앙에는 주요 거점이 위치하고 있으며, 오나라 세 명의 장수(손견, 주유, 황개)가 각각의 요새를 방어하고 있다. 전투는 손책의 유닛들을 지휘해 오나라 유닛들을 섬멸하거나, 반대로 오나라 유닛들을 조종해 손책의 공격을 방어하는 방식으로 진행된다. 맵의 특징은 손책의 선택에 따라 공격과 방어가 번갈아 일어나며, 각 라운드마다 오나라 장수들이 보조를 받거나 강화되는 등 변동성이 있는 점이다. 맵의 규모는 4096x4096으로 넓지만, 주요 전투 지역은 중앙과 동서로 나뉜 3개의 거점으로 집중되어 있어 전략적 선택이 필요하다. 또한, 협곡과 언덕을 활용한 진영별 기습이나 후방 공격이 게임의 승패를 좌우할 수 있다. 이 맵은 삼국지 팬과 전략 디펜스 장르를 좋아하는 유저들에게 특히 매력적이며, 손책의 캐릭터성을 살린 스토리텔링과 긴장감 있는 전투가 특징이다. 플레이 전에는 맵의 주요 거점과 진영별 유닛 조합을 숙지하고, 협곡과 언덕의 지형적 이점을 활용할 계획을 미리 세워야 한다. 또한, 오나라 장수들의 패턴과 강화 시점을 예측하는 것이 승리의 열쇠가 될 것이다. Assualt on Wu Territory is a StarCraft: Brood War custom map set in the Three Kingdoms period, offering a dual-player experience where one side controls Sun Ce to attack Wu territory while the other defends as the Wu forces. The map features a desert tileset with a mix of open plains, canyons, and hills, providing a balance between visibility and mobility. Central to the map are key strongholds, each defended by one of Wu's three warlords: Sun Jian, Zhou Yu, and Huang Gai. Gameplay revolves around commanding Sun Ce's units to eliminate Wu forces or, conversely, controlling Wu units to repel Sun Ce's attacks. The map introduces variability by allowing the Wu warlords to receive reinforcements or upgrades each round, adding dynamic shifts in the battle. Spanning 4096x4096 in size, the map's vastness is balanced by three primary battlegrounds clustered around the central and eastern/western strongholds. Terrain features like canyons and hills enable flanking maneuvers or surprise attacks, which can decisively influence the outcome. This map appeals to fans of the Three Kingdoms era and strategy defense enthusiasts, thanks to its immersive storytelling centered on Sun Ce and the tension-filled battles. Before playing, it's essential to familiarize yourself with the key strongholds and faction unit compositions, and to plan around the terrain advantages offered by canyons and hills. Predicting the Wu warlords' reinforcement patterns and upgrade timings will also be crucial for victory.
스나이퍼 Crysis
‘스나이퍼 Crysis’는 스타크래프트 브루드워 유즈맵으로, 사막 지형을 배경으로 한 디펜스 장르 맵이다. 맵의 구조는 크게 세 개의 구역으로 나뉘며, 중앙에는 넓은 평지가 펼쳐져 있고 양측 언덕에는 건물이 배치되어 있다. 플레이어는 각 구역에 배치된 건물을 방어하면서 적의 공격을 막아내야 한다. 맵의 특색 중 하나는 사막 지형과 언덕 지형이 조화를 이뤄, 시야 확보와 전략적 위치 선정이 중요한 요소로 작용한다는 점이다. 건물이 위치한 언덕은 높은 고도 덕분에 시야가 넓고, 평지 구역은 넓은 공간을 활용한 대형 유닛 배치와 이동이 용이하다. 맵의 테두리에는 벽이 둘러져 있어 적의 진입을 차단하는 데 도움을 준다. 다만, 맵의 거대함과 복잡한 구조는 초보 플레이어에게 다소 부담으로 다가올 수 있어, 플레이 전 맵의 지형을 충분히 숙지하는 것이 중요하다. 또한, 방어 건물의 배치와 업그레이드 타이밍을 잘 조율해야만 안정적인 방어가 가능하다. ‘스나이퍼 Crysis’는 디펜스 장르의 특성을 살리면서도, 사막과 언덕의 조화를 통해 전략적 깊이를 더한 맵으로, 디펜스 게임을 즐기는 플레이어에게 추천할 만한 작품이다. 특히, 팀 플레이를 지향하는 유저라면 각 구역의 역할 분담을 통해 더욱 효율적인 방어 전략을 구사할 수 있을 것이다. 맵의 난이도는 전체적으로 ‘보통’ 수준으로 평가되지만, 방어 건물의 배치와 업그레이드 타이밍에 따라 난이도가 크게 달라질 수 있으니, 충분한 연습이 필요하다. 맵의 플레이 시간은 맵의 구조와 플레이어의 숙련도에 따라 20분에서 40분 정도로 예상된다. ‘스나이퍼 Crysis’는 디펜스와 팀 플레이를 좋아하는 유저들에게 적합한 맵으로, 사막과 언덕의 조화를 통해 전략적 깊이를 더한 작품이다. 맵의 구조와 건물을 방어하는 전략을 잘 숙지한다면, 누구나 즐겁게 플레이할 수 있을 것이다. 다만, 초보자의 경우 맵의 복잡한 구조와 방어 건물의 배치에 익숙해지는 데 시간이 걸릴 수 있으니, 여유를 가지고 플레이하는 것이 좋다. Sniper Crysis is a StarCraft: Brood War custom map set in a desert terrain, designed primarily as a defense genre map. The map is divided into three main sections: a central plain and two elevated areas on either side, each equipped with buildings. Players must defend these buildings against enemy attacks while utilizing the strategic advantages of the terrain. The desert and elevated sections offer expansive views for long-range units and open spaces for large-scale unit deployment, respectively. The map is bordered by walls that help block enemy advances. However, the map's size and complex structure may pose challenges for beginners, making it essential to familiarize oneself with the terrain beforehand. Effective coordination of building placement and upgrades is crucial for maintaining a strong defense. Sniper Crysis stands out in the defense genre by blending desert and elevated terrains, adding strategic depth. It is particularly recommended for players who enjoy defense games and team-based strategies, as proper role distribution across sections can enhance defense efficiency. The difficulty is generally rated as 'medium,' though it can vary significantly based on building placement and upgrade timing. The estimated playtime ranges from 20 to 40 minutes, depending on the player's skill level and map familiarity. This map is ideal for those who appreciate defense mechanics and teamwork, offering a blend of strategy and excitement. Beginners may find the complex structure and building placements challenging at first, so taking time to learn the map is advisable.
50분 버티기(언덕) v1.2 (Fifty-Minute Defense Hill v1.2)
스타크래프트 브루드워의 대표적인 디펜스 장르 유즈맵인 〈50분 버티기(언덕)〉는 플레이어가 중앙 언덕에 위치한 건물을 방어하며 끊임없이 몰려드는 적을 상대하는 컴까기형 맵이다. 맵 중앙에 위치한 넥서스는 3분 간격으로 무리한 공격을 시도하는 컴퓨터 상대의 부대를 상대해야 하며, 언덕 지형이 제공하는 시야와 방어 advantage를 활용해 최대한 오랫동안 건물을 지켜내는 것이 핵심 목표다. 맵의 특징적인 지형은 언덕 주변으로 배치된 좁은 통로와 구불구불한 길로, 플레이어는 이 곳을 최대한 효율적으로 활용해 적 병력의 공격을 분산시키고 방어선을 유지해야 한다. 공격 패턴은 시간이 지나면서 점점 강화되며, 후반부로 갈수록 적의 물량이 늘어나고 조합도 다양해지므로 초중반 방어에 실패하면 게임을 되돌리기 어려운 구조로 되어 있다. 이 맵은 ‘정신연령 초딩은 관람불가’라는 내부 설명에서 알 수 있듯 다소 과격한 표현을 사용했지만, 실제로는 초보부터 고수까지 폭넓은 플레이어 층을 겨냥한 밸런스형 디펜스 게임이다. 플레이 전에는 언덕 지형의 방어 효율성과 통로의 배치, 그리고 시간 경과에 따른 공격 패턴 변화를 미리 숙지하는 것이 중요하며, 특히 25분과 40분대에는 공격 강도가 급격히 상승한다는 점을 유념해야 한다. 건물을 지키며 최대한 오랫동안 버티는 재미와, 점점 강해지는 적을 상대하는 긴장감이 이 맵의 매력 포인트다. 추천 대상으로는 스타크래프트 디펜스 유즈맵을 즐기는 모든 유저이며, 특히 언덕 지형의 방어력을 활용한 전략적 플레이를 좋아하는 플레이어에게 적합하다. 또한 컴퓨터 상대와의 긴장감 있는 전투를 즐기고자 하는 이들에게도 좋은 선택지가 될 것이다. 플레이 전에는 맵의 지형과 공격 패턴을 충분히 숙지하고, 방어 건물과 유닛의 조합을 신중히 계획하는 것이 성공의 열쇠가 될 것이다. This StarCraft: Brood War custom map, titled 〈50분 버티기(언덕)〉 (Fifty-Minute Defense Hill), is a classic defense-oriented UMS (Use Map Settings) game where players must protect a central building on a hilltop from relentless waves of AI-controlled enemies. The core gameplay revolves around strategic positioning and resource management, as the AI launches attacks every three minutes with increasing difficulty and unit diversity. The hill terrain provides a tactical advantage, offering elevated vision and choke points that players must exploit to maximize defense efficiency. The map’s design emphasizes tight corridors and winding paths around the hill, forcing players to manage unit flow and positioning carefully to prevent overwhelming attacks. As time progresses, enemy waves escalate in both quantity and complexity, making early-game mistakes difficult to recover from. The internal description, while using somewhat blunt language, hints at a balanced challenge suitable for players of all skill levels, from beginners to advanced gamers. This defense map is ideal for fans of StarCraft’s UMS genre, particularly those who enjoy strategic depth and the tension of progressively stronger enemy assaults. Players should familiarize themselves with the terrain and attack patterns before starting, as the difficulty spikes around the 25-minute and 40-minute marks are critical turning points. The combination of tactical positioning and adaptive gameplay makes this a standout choice for anyone seeking a challenging and engaging defense experience.
맵 선택 가이드
태그는 맵의 핵심 특징을 빠르게 설명하지만 제작 버전마다 규칙이 다를 수 있습니다. 상세 설명에서 권장 인원, 난이도, 플레이 시간과 버전을 함께 확인한 뒤 다운로드하세요.