
어려움 난이도 스타크래프트 맵 모음
'어려움 난이도' 태그가 등록된 맵을 모았습니다. 장르 하나로 찾기 어려운 플레이 방식, 난이도와 특징을 중심으로 인기 맵과 최신 맵을 비교해 보세요.
- 등록 맵
- 6개
- 누적 다운로드
- 1
- 누적 조회
- 201
인기 맵
다운로드와 조회 반응이 높은 맵입니다.
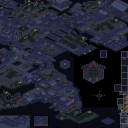
왕의기사 Antibirth
스타크래프트 브루드워의 대표적인 타워 디펜스 유즈맵인 '왕의기사 Antibirth'는 화산 테마의 광활한 맵 위에서 펼쳐지는 전략적 방어전을 경험할 수 있는 작품이다. 맵은 중앙의 넓은 평야를 중심으로 양측에서 끊임없이 몰려드는 적의 웨이브를 막아내는 구조로 설계되어 있으며, 플레이어는 각자의 위치에서 타워를 건설하고 업그레이드하여 방어선을 구축해야 한다. 맵 중앙에는 넓은 통로와 협소한 틈새가 조화롭게 배치되어 있어, 적의 공격 패턴에 따라 타워 배치 전략을 유동적으로 변경할 수 있다. 특히, 맵 좌우측에는Resource가 배치된 지역이 보이며, 이를 활용한 자원 수집과 타워 건설의 균형이 게임의 핵심 포인트로 작용한다. 맵의 난이도는 상대적으로 높은 편으로, 초보자가 처음 접하기에는 다소 어려운 구조를 가지고 있어 충분한 사전 숙지가 필요하다. 또한, 맵의 진행 방식은 웨이브가 점점 강해지는 방식으로, 후속 웨이브에서 등장하는 적의 종류와 수가 점차 증가하여 플레이어의 긴장감을 지속적으로 유도한다. 추천 대상은 타워 디펜스 장르를 즐기는 플레이어이며, 특히 전략적 사고와 빠른 판단력이 요구되는 맵을 선호하는 경우 필수적으로 플레이해볼 만한 작품이다. 플레이 전에는 맵의Resource 배치와 주요 통로, 그리고 적의 웨이브 패턴을 미리 숙지하는 것이 좋으며, 타워의 효율적인 배치와 업그레이드 타이밍을 carefully 계획해야 한다. 맵의 난이도를 낮추기 위해 초반에는 방어에 중점을 두고, 자원을 충분히 확보한 후 강력한 타워를 건설하는 전략을 추천한다. Starcraft: Brood War's iconic tower defense custom map, "King's Knight Antibirth," offers a strategic defensive battle set across a vast volcanic-themed map. Designed with a central open plain, the map challenges players to defend against endless waves of enemies approaching from both sides, requiring them to construct and upgrade towers from their respective positions. The map balances wide pathways and narrow gaps, allowing for flexible tower placement strategies depending on enemy attack patterns. Notably, resource-rich areas on the left and right sides of the map play a crucial role, as balancing resource gathering with tower construction becomes a key aspect of gameplay. The difficulty is relatively high, with a structure that may be challenging for beginners, necessitating thorough preparation beforehand. The progression system escalates with increasingly powerful waves, where later stages introduce more numerous and varied enemies to keep players on edge. This map is highly recommended for fans of the tower defense genre, especially those who enjoy maps demanding strategic thinking and quick decision-making. Before playing, it's advisable to familiarize yourself with resource distribution, key pathways, and enemy wave patterns. Efficient tower placement and timely upgrades are essential, so planning ahead is crucial. For a smoother experience, prioritize defense early on, secure ample resources, and then focus on building powerful towers.
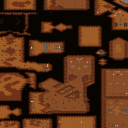
Impossible Scenarios Desert2 (불가능한 시나리오: 황무지2)
‘Impossible Scenarios Desert2’는 스타크래프트 브루드워의 유즈맵으로, ‘Fadetoblack’이 제작한 ‘Impossible Scenarios’ 시리즈의 Desert 스타일을 계승한 맵이다. 이 맵은 황무지 지형과 섬세한 타일셋을 기반으로 삼아 플레이어에게 끊임없는 도전과 긴장감을 제공하는 디펜스 장르의 유즈맵으로 분류된다. 맵의 전체적인 분위기는 어두운 황무지와 붉은 노을이 어우러져 있으며, 맵 중앙에는 거대한 요새와 같은 구조물이 자리 잡고 있다. 이를 둘러싼 길목과 협소한 통로들은 적의 물량 공격을 효과적으로 방어할 수 있는 구조로 설계되어 있으며, 플레이어는 제한된 자원으로 끊임없이 밀려오는 적을 상대로 전략을 세워야 한다. 플레이 방식은 기본적으로 컴퓨터(저그, 테란, 프로토스)의 지속적인 러시를 방어하는 ‘컴까기’ 형식으로 진행된다. 맵 곳곳에 배치된 방어 건물과 유닛 생산 시설은 플레이어의 전략에 따라 자유롭게 활용할 수 있으며, 지형 특성을 살려 요새화할 수 있는 위치가 다수 존재한다. 특히 맵의 가장자리와 중앙 요새 주변은 방어 포인트로 활용하기 좋은 지형으로, 플레이어는 이들을 중심으로 방어 라인을 구축하는 것이 핵심이다. 또한, 맵의 일부 구역은 협소한 통로로 연결되어 있어 방어에 유리한 지형을 만들 수 있지만, 반대로 적의 진입로를 한 곳에 집중시킬 수 있어 위험하기도 하다. 이 맵의 가장 큰 특징은 ‘불가능한 시나리오’라는 컨셉에 맞게 극한의 난이도를 자랑한다는 점이다. 시리즈의 이름에서 알 수 있듯이, 이 맵은 단순히 방어하는 것을 넘어 플레이어의 전략적 사고와 순발력을 끊임없이 시험한다. 맵 곳곳에는 숨겨진 트리거나 특수한 조건이 있을 가능성이 있으며, 이를 파악하고 대비하는 것이 승리의 열쇠가 될 수 있다. 또한, 맵의 전체적인 규모가 크고 복잡한 구조를 가지고 있어 초보자는 물론 경험자도 쉽게 적응하기 어려운 구조로 설계되어 있다. 이 맵을 추천하는 대상은 스타크래프트 유즈맵 중에서도 도전적인 플레이를 즐기는 유저들이다. 특히 디펜스 장르에 익숙하지 않거나, 새로운 전략을 시도해 보고 싶은 플레이어에게 적합하다. 또한, 팀 플레이보다는 혼자서도 충분히 즐길 수 있는 구조지만, 팀원과의 협동 플레이가 필요하다면 팀원 간의 원활한 소통이 필수적일 것이다. 플레이 전에는 맵의 구조를 꼼꼼히 분석하고, 방어 라인 구축에 필요한 자원의 배치를 미리 계획하는 것이 중요하다. 또한, 예상치 못한 적의 공격 패턴에 대비해 유연하게 대처할 수 있는 준비를 갖춰야 한다. ‘Impossible Scenarios Desert2’ is a custom map for *StarCraft: Brood War*, inheriting the Desert style from the *Impossible Scenarios* series created by Fadetoblack. This map is classified as a defense genre custom map, offering players endless challenges and tension through its barren terrain and intricate tileset. The overall atmosphere blends a dark wasteland with a crimson sunset, and at the center of the map stands a massive fortress-like structure. The narrow paths and constricted passages surrounding it are designed to effectively counter waves of enemy attacks, forcing players to strategize with limited resources against relentless enemy forces. The gameplay follows a "comp-scumming" format, where players must defend against continuous rushes from AI-controlled factions (Zerg, Terran, and Protoss). Defense buildings and unit production facilities scattered across the map can be freely utilized based on the player’s strategy, with multiple locations that allow for fortification by leveraging the terrain. Key defensive spots include the edges of the map and areas around the central fortress, where players should focus on establishing strong defensive lines. Some zones are connected by tight corridors, which can create advantageous defensive terrain but also concentrate enemy entry points, posing risks. The map’s defining feature is its extreme difficulty, living up to the "impossible scenarios" concept. Beyond mere defense, it constantly tests the player’s strategic thinking and quick decision-making. Hidden triggers or special conditions may exist throughout the map, and uncovering and preparing for them could be the key to victory. The map’s large scale and complex structure make it difficult for both beginners and experienced players to adapt to easily. This map is recommended for players who enjoy challenging custom maps in *StarCraft*. It suits those looking to try new strategies or unfamiliar with the defense genre. While it can be enjoyed solo, team coordination is essential if playing cooperatively. Before starting, it’s important to carefully analyze the map’s layout, plan resource distribution for defense lines, and prepare flexible responses to unexpected enemy attack patterns.
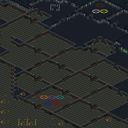
스매시 TV 이터널 에디션 (Smash TV Eternal Edition)
스타크래프트 브루드워의 고전 유즈맵 'Smash TV'를 현대적으로 재해석한 'Smash TV Eternal Edition'은 강력한 디펜스와 스테이지형 진행으로 플레이어들에게 긴장감 넘치는 경험을 선사합니다. 맵의 전체적인 구조는 복도와 방으로 이루어진 미로를 연상시키며, 곳곳에 배치된 적 유닛과 함정, 그리고 숨겨진 아이템들이 플레이어의 전략을 끊임없이 요구합니다. 특히 맵의 중앙부에 위치한 넓은 공간에서는 다수의 적들이 끊임없이 쏟아져 나오며, 이를 방어하기 위한 방어 시설과 자원 관리가 필수적입니다. 한글로 작성된 내부 설명에 따르면 이 버전은 '가장 어려운 버전'으로 제작되었으며, 수많은 비밀 요소와 숨겨진 조건들이 존재한다고 합니다. 이는 단순히 디펜스를 넘어서서 맵을 여러 번 플레이하며 새로운 요소들을 발견하는 재미를 제공합니다. 추천 대상은 스타크래프트의 디펜스 및 유즈맵을 즐기는 플레이어들로, 특히 숨겨진 요소와 어려운 난이도를 즐기고 싶어하는 분들에게 적합합니다. 플레이 전 반드시 확인해야 할 점은 방어 시설의 배치와 자원 수급 방법, 그리고 함정이나 비밀 통로의 위치를 숙지하는 것입니다. 맵의 타일셋은 설원 테마로 이루어져 있어 시각적으로도 차분한 분위기를 연출하며, 넓은 맵 크기와 함께 spacious한 느낌을 줍니다. 이 맵은 디펜스 장르의 유즈맵으로서의 정체성을 유지하면서도, 스테이지형 진행과 숨겨진 요소로 인해 반복 플레이를 유도하는 구조적 특징을 가지고 있습니다. "Smash TV Eternal Edition," a modern reinterpretation of the classic Brood War custom map "Smash TV," delivers a thrilling experience with its intense defense mechanics and stage-based progression. The map's structure resembles a maze of corridors and rooms, filled with enemy units, traps, and hidden items that constantly challenge the player's strategy. In the central area, waves of enemies continuously spawn, making defensive structures and resource management essential. According to the in-game Korean descriptions, this version is designed as the "hardest version," featuring countless hidden elements and secret conditions. This goes beyond simple defense, rewarding players who replay the map with new discoveries. It's ideal for those who enjoy Brood War's defense and custom maps, especially those seeking hidden challenges and high difficulty. Before playing, be sure to study the placement of defensive structures, resource-gathering methods, and the locations of traps or secret passages. The map's snow-themed tileset creates a serene atmosphere, enhanced by its spacious layout. While maintaining the identity of a defense genre custom map, its stage-based progression and hidden elements encourage repeated playthroughs.
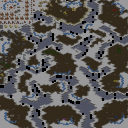
5v3 인세인 컴퓨터 (5v3 Insane Computers)
스타크래프트 브루드워의 유즈맵 '5v3 insane computers'는 5명의 플레이어가 컴퓨터 3인을 상대로 벌이는 디펜스 장르의 맵으로, 긴장감 넘치는 전투를 즐길 수 있는 작품이다. 맵은 전체적으로 넓은 평야와 중앙을 가로지르는 강, 그리고 곳곳에 배치된 방어 거점이 특징적이다. 플레이어는 본진을 지키며 끊임없이 몰려오는 저그의 공세를 막아내야 하며, 특수 건물을 건설하거나 업그레이드를 통해 방어력을 강화할 수 있다. 맵의 지형은 복잡하지 않지만, 강과 언덕을 활용한 전략적 배치로 인해 끊임없이 변화하는 전투 상황을 연출한다. 특히, 중앙 강을 사이에 두고 펼쳐지는 교전은 양측이 서로의 움직임을 예측하며 전략을 짜야 하는 재미를 준다. 이 맵의 가장 큰 특징은 'insane' 난이도로 설정된 컴퓨터 상대라는 점이다. 일반적인 디펜스 맵보다 훨씬 aggressive한 공격을 펼치며, 플레이어는 초반부터 끊임없이 teritorial control을 유지해야 한다. 또한, 맵 곳곳에 scattered되어 있는 mineral patches와 vespene geyser는 자원 확보를 어렵게 만들어,Resource management도 중요한 전략 요소로 작용한다. 방어 건물의 배치와 업그레이드 타이밍, 그리고 자원 확보의 밸런스를 잘 맞춰야만 장기전을 버틸 수 있다. 이 맵은 초보 플레이어보다는 어느 정도 경험이 있는 유저에게 추천되며, 특히 팀플레이보다는 혼자서 컴퓨터를 상대해야 하는 싱글 플레이 경험을 원한다면 매우 흥미로운 작품이 될 것이다. 또한, 맵의 난이도가 높기 때문에 처음 플레이 시에는 여러 번의 시도와 실수를 통해 전략을 익히는 것이 중요하다. 방어 거점 간의 거리와 자원 확보의 중요성을 깨닫는 순간, 이 맵의 진정한 재미에 빠질 수 있을 것이다. 플레이 전 반드시 확인해야 할 포인트는 방어 건물의 배치와 업그레이드 우선순위, 그리고 자원 확보의 타이밍이다. 또한, 컴퓨터의 공격 패턴을 파악하기 위해 초반 전투에서 얻은 데이터를 바탕으로 전략을 조정하는 것이 중요하다. 맵의 지형을 충분히 숙지하고, 중앙 강을 활용한 진형 유지와 teritorial control을 유지하는 데 집중한다면, 이 맵의 긴장감과 성취감을 만끽할 수 있을 것이다. The *StarCraft: Brood War* custom map *"5v3 Insane Computers"* is a defense-style map where five players face off against three AI opponents, offering intense, high-stakes battles. The map features wide open plains, a central river, and strategically placed defensive strongholds. Players must defend their bases against relentless Zerg assaults, bolstering their defenses with special buildings and upgrades. While the terrain isn’t overly complex, the river and elevation changes create dynamic combat scenarios that keep every battle unpredictable. What truly sets this map apart is its "insane" difficulty setting. The AI doesn’t just attack—it presses aggressively from the start, forcing players to constantly fight for territorial control. Scattered mineral patches and vespene geysers make resource management a critical challenge, requiring careful balancing between defense, upgrades, and expansion. Mastering the timing of defensive structures, upgrades, and resource gathering is key to surviving the long haul. This map is best suited for players with some experience rather than complete beginners. If you’re looking for a solo challenge against the AI instead of team play, it delivers a uniquely engaging experience. Expect a steep learning curve—success often comes after multiple attempts and adjustments. Once you grasp the spacing between defensive points and the importance of resource efficiency, the real thrill of the map will click. Before jumping in, study the optimal placement of defensive buildings, prioritize upgrades, and time your resource collection carefully. Observing the AI’s attack patterns early on and adapting your strategy accordingly is crucial. Familiarize yourself with the terrain, maintain strong positioning around the central river, and focus on holding territorial control to fully savor the tension and sense of achievement this map offers.
7vs1 하드 컴퓨터 (7vs1 Hard Computer)
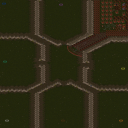
스타크래프트 브루드워의 대표적인 디펜스 형식 유즈맵인 ‘7vs1 hard computer’는 7명의 플레이어가 한 명의 강력한 컴퓨터를 상대로Base Defense를 펼치는 흥미로운 전투를 제공한다. 맵은 넓은 사막 타일셋 위에 펼쳐지며, 중앙에 위치한 플레이어 기지 주변으로 적절한 방어선을 구축할 수 있는 공간이 확보되어 있다. 플레이어는 초반부터 끊임없이 몰려오는 저글링, 히드라, 뮤탈, 울트라리스크 등으로 구성된 컴퓨터의 러시 공격을 방어해야 하며, 방어가 허술할 경우 순식간에 기지가 파괴될 수 있는 긴장감이 특징이다. 공략의 핵심은 빠른 자원 채취와 효율적인 건물 배치에 있다. 플레이어들은 시작 지점에서 가까운 미네랄과 가스를 확보한 뒤, 초반 방어 건물을 건설해 러시를 막아야 한다. 방어선은 게이트웨이, 포지, 시타델 오브 아둔 등으로 구성되며, 필요에 따라 파일런과 포톤 캐논을 추가로 건설해 보강할 수 있다. 방어에 성공한 후에는 서서히 공격을展開하여 컴퓨터의 본진을 파괴하는 것이 승리 조건으로 추정된다. 다만, 컴퓨터의 공격 패턴은 매우 공격적이므로, 방어 건물의 밀도를 높이고, 업그레이드와 유닛 생산을 병행하는 것이 필수다. 이 맵은 특히 7인 팀플레이에 최적화되어 있으며, 각 플레이어 간의 역할 분담과 협력이 중요하다. 방어 라인 유지, 자원 관리, 공격 타이밍 등 다방면에서 전략적 사고가 요구된다. 초보자의 경우 방어에 실패해 기지가 파괴되는 경우가 많으므로, 난이도는 ‘어려움’ 정도로 설정하는 것이 적절할 것으로 보인다. 또한, 컴퓨터의 러시 패턴을 숙지하고, 방어 건물의 배치와 업그레이드 우선순위를 신중히 결정해야 한다. 한 번 방어선을 무너뜨리면 재기하기 힘든 만큼, 초반 방어에 모든 역량을 집중하는 것이 중요하다. This Brood War custom map, titled ‘7vs1 hard computer,’ offers a thrilling Base Defense challenge where seven players unite to fend off relentless waves from a single, highly aggressive computer opponent. Set on a sprawling desert tileset, the map provides ample space around the players' base to construct defensive structures while leaving room for strategic unit production. From the outset, players must brace for continuous rushes—comprising Zerglings, Hydralisks, Mutalisks, and Ultralisk spawns—that demand quick reflexes and meticulous base fortification. The key to survival lies in rapid resource gathering and optimal building placement. Players should secure nearby minerals and gas early, immediately constructing defensive buildings like Gateways, Pylons, and Photon Cannons to hold the initial assault. As the game progresses, reinforcing the defense with additional structures such as Forges and Citadels becomes essential. Once a stable defense is established, players can transition into an offensive stance, gradually pushing toward the computer's base to secure victory. However, given the computer's aggressive tactics, maintaining a high density of defensive structures and balancing upgrades with unit production is critical. Designed specifically for 7-player team coordination, this map emphasizes role specialization and collective strategy. Each player must contribute to maintaining the defense line, managing resources, and timing attacks effectively. Novices may struggle initially, as failing to hold the defense often results in an irreversible disadvantage, suggesting a difficulty level akin to ‘hard.’ Mastery requires understanding the computer's rush patterns, prioritizing defensive upgrades, and ensuring a compact yet resilient base layout. Early-game defense is paramount, as recovery becomes exponentially harder once the line is breached.
나무 디펜스 Expert 3.0 (Tree Defence v. Expert 3.0)
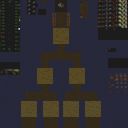
‘Tree Defence v. Expert 3.0’은 스타크래프트: 브루드워의 유즈맵으로, 디펜스 장르에 속하는 맵이다. 이 맵은 ‘Tree Defence’ 시리즈의 세 번째 버전으로, ‘Expert’ 등급의 난이도를 제공하며 기존 버전보다 더 어려운 웨이브를 자랑한다. 맵의 주된 목표는 플레이어가 제공되는 방어 건물을 배치하고, 일정 시간마다 밀려오는 적들을 상대로 버티는 것이다. 디자인된 맵 구조는 중앙 요새와 여러 갈래의 진입로를 통해 적의 공격을 분산시키는 구조로, 플레이어는 각 진입로에 건물을 배치하여 효율적으로 방어해야 한다. 특히 맵 중앙의 요새는 특별한 방어력을 갖추고 있어, 이곳을 중심으로 건물을 배치하면 좀 더 안정적인 방어가 가능하다. 또한, 맵 곳곳에 배치된 자원 지점과 건물을 업그레이드할 수 있는 기능이 있어, 플레이어는 자원을 확보하고 건물을 강화하며 장기적인 방어전을 준비할 수 있다. 이 맵은 초보자보다는 중급 이상의 플레이어에게 적합하며, 건물을 배치하는 전략과 자원 관리가 핵심이다. 맵의 난이도가 높기 때문에, 플레이 전 맵 구조와 건물을 배치할 수 있는 공간을 정확히 파악하는 것이 중요하다. 또한, 업그레이드와 자원 관리에 대한 이해가 부족하면 금방 무너질 수 있으므로, 게임에 익숙하지 않다면 ‘Expert’ 버전 이전에 다른 버전에서 연습을 추천한다. 이 맵은 디펜스 장르의 정석을 보여주며, 긴장감과 전략적 깊이를 동시에 제공하는佳作라 할 수 있다. This StarCraft: Brood War custom map, ‘Tree Defence v. Expert 3.0’, falls under the defense genre, specifically targeting players seeking a challenging experience. As the third installment in the ‘Tree Defence’ series, this Expert version escalates difficulty with more intense enemy waves, requiring strategic placement of defensive structures across multiple entry points. The map’s layout features a central fortress with branching paths, allowing players to distribute their defenses effectively. The central structure offers higher durability, making it a key focal point for building placement. Scattered resource points and upgrade options enable players to fortify their defenses over time, adding layers of strategy beyond simple tower placement. Aimed at intermediate to advanced players, the map demands precise spatial awareness and resource management to withstand relentless assaults. Beginners may struggle without prior practice on easier versions, as poor planning or resource mismanagement can lead to quick defeats. ‘Tree Defence v. Expert 3.0’ exemplifies the defense genre’s core appeal—combining tension, strategy, and replayability in a compact yet engaging experience.
최근 등록된 맵
새로 추가된 파일과 버전을 확인하세요.
나무 디펜스 Expert 3.0 (Tree Defence v. Expert 3.0)
‘Tree Defence v. Expert 3.0’은 스타크래프트: 브루드워의 유즈맵으로, 디펜스 장르에 속하는 맵이다. 이 맵은 ‘Tree Defence’ 시리즈의 세 번째 버전으로, ‘Expert’ 등급의 난이도를 제공하며 기존 버전보다 더 어려운 웨이브를 자랑한다. 맵의 주된 목표는 플레이어가 제공되는 방어 건물을 배치하고, 일정 시간마다 밀려오는 적들을 상대로 버티는 것이다. 디자인된 맵 구조는 중앙 요새와 여러 갈래의 진입로를 통해 적의 공격을 분산시키는 구조로, 플레이어는 각 진입로에 건물을 배치하여 효율적으로 방어해야 한다. 특히 맵 중앙의 요새는 특별한 방어력을 갖추고 있어, 이곳을 중심으로 건물을 배치하면 좀 더 안정적인 방어가 가능하다. 또한, 맵 곳곳에 배치된 자원 지점과 건물을 업그레이드할 수 있는 기능이 있어, 플레이어는 자원을 확보하고 건물을 강화하며 장기적인 방어전을 준비할 수 있다. 이 맵은 초보자보다는 중급 이상의 플레이어에게 적합하며, 건물을 배치하는 전략과 자원 관리가 핵심이다. 맵의 난이도가 높기 때문에, 플레이 전 맵 구조와 건물을 배치할 수 있는 공간을 정확히 파악하는 것이 중요하다. 또한, 업그레이드와 자원 관리에 대한 이해가 부족하면 금방 무너질 수 있으므로, 게임에 익숙하지 않다면 ‘Expert’ 버전 이전에 다른 버전에서 연습을 추천한다. 이 맵은 디펜스 장르의 정석을 보여주며, 긴장감과 전략적 깊이를 동시에 제공하는佳作라 할 수 있다. This StarCraft: Brood War custom map, ‘Tree Defence v. Expert 3.0’, falls under the defense genre, specifically targeting players seeking a challenging experience. As the third installment in the ‘Tree Defence’ series, this Expert version escalates difficulty with more intense enemy waves, requiring strategic placement of defensive structures across multiple entry points. The map’s layout features a central fortress with branching paths, allowing players to distribute their defenses effectively. The central structure offers higher durability, making it a key focal point for building placement. Scattered resource points and upgrade options enable players to fortify their defenses over time, adding layers of strategy beyond simple tower placement. Aimed at intermediate to advanced players, the map demands precise spatial awareness and resource management to withstand relentless assaults. Beginners may struggle without prior practice on easier versions, as poor planning or resource mismanagement can lead to quick defeats. ‘Tree Defence v. Expert 3.0’ exemplifies the defense genre’s core appeal—combining tension, strategy, and replayability in a compact yet engaging experience.
스매시 TV 이터널 에디션 (Smash TV Eternal Edition)
스타크래프트 브루드워의 고전 유즈맵 'Smash TV'를 현대적으로 재해석한 'Smash TV Eternal Edition'은 강력한 디펜스와 스테이지형 진행으로 플레이어들에게 긴장감 넘치는 경험을 선사합니다. 맵의 전체적인 구조는 복도와 방으로 이루어진 미로를 연상시키며, 곳곳에 배치된 적 유닛과 함정, 그리고 숨겨진 아이템들이 플레이어의 전략을 끊임없이 요구합니다. 특히 맵의 중앙부에 위치한 넓은 공간에서는 다수의 적들이 끊임없이 쏟아져 나오며, 이를 방어하기 위한 방어 시설과 자원 관리가 필수적입니다. 한글로 작성된 내부 설명에 따르면 이 버전은 '가장 어려운 버전'으로 제작되었으며, 수많은 비밀 요소와 숨겨진 조건들이 존재한다고 합니다. 이는 단순히 디펜스를 넘어서서 맵을 여러 번 플레이하며 새로운 요소들을 발견하는 재미를 제공합니다. 추천 대상은 스타크래프트의 디펜스 및 유즈맵을 즐기는 플레이어들로, 특히 숨겨진 요소와 어려운 난이도를 즐기고 싶어하는 분들에게 적합합니다. 플레이 전 반드시 확인해야 할 점은 방어 시설의 배치와 자원 수급 방법, 그리고 함정이나 비밀 통로의 위치를 숙지하는 것입니다. 맵의 타일셋은 설원 테마로 이루어져 있어 시각적으로도 차분한 분위기를 연출하며, 넓은 맵 크기와 함께 spacious한 느낌을 줍니다. 이 맵은 디펜스 장르의 유즈맵으로서의 정체성을 유지하면서도, 스테이지형 진행과 숨겨진 요소로 인해 반복 플레이를 유도하는 구조적 특징을 가지고 있습니다. "Smash TV Eternal Edition," a modern reinterpretation of the classic Brood War custom map "Smash TV," delivers a thrilling experience with its intense defense mechanics and stage-based progression. The map's structure resembles a maze of corridors and rooms, filled with enemy units, traps, and hidden items that constantly challenge the player's strategy. In the central area, waves of enemies continuously spawn, making defensive structures and resource management essential. According to the in-game Korean descriptions, this version is designed as the "hardest version," featuring countless hidden elements and secret conditions. This goes beyond simple defense, rewarding players who replay the map with new discoveries. It's ideal for those who enjoy Brood War's defense and custom maps, especially those seeking hidden challenges and high difficulty. Before playing, be sure to study the placement of defensive structures, resource-gathering methods, and the locations of traps or secret passages. The map's snow-themed tileset creates a serene atmosphere, enhanced by its spacious layout. While maintaining the identity of a defense genre custom map, its stage-based progression and hidden elements encourage repeated playthroughs.
Impossible Scenarios Desert2 (불가능한 시나리오: 황무지2)
‘Impossible Scenarios Desert2’는 스타크래프트 브루드워의 유즈맵으로, ‘Fadetoblack’이 제작한 ‘Impossible Scenarios’ 시리즈의 Desert 스타일을 계승한 맵이다. 이 맵은 황무지 지형과 섬세한 타일셋을 기반으로 삼아 플레이어에게 끊임없는 도전과 긴장감을 제공하는 디펜스 장르의 유즈맵으로 분류된다. 맵의 전체적인 분위기는 어두운 황무지와 붉은 노을이 어우러져 있으며, 맵 중앙에는 거대한 요새와 같은 구조물이 자리 잡고 있다. 이를 둘러싼 길목과 협소한 통로들은 적의 물량 공격을 효과적으로 방어할 수 있는 구조로 설계되어 있으며, 플레이어는 제한된 자원으로 끊임없이 밀려오는 적을 상대로 전략을 세워야 한다. 플레이 방식은 기본적으로 컴퓨터(저그, 테란, 프로토스)의 지속적인 러시를 방어하는 ‘컴까기’ 형식으로 진행된다. 맵 곳곳에 배치된 방어 건물과 유닛 생산 시설은 플레이어의 전략에 따라 자유롭게 활용할 수 있으며, 지형 특성을 살려 요새화할 수 있는 위치가 다수 존재한다. 특히 맵의 가장자리와 중앙 요새 주변은 방어 포인트로 활용하기 좋은 지형으로, 플레이어는 이들을 중심으로 방어 라인을 구축하는 것이 핵심이다. 또한, 맵의 일부 구역은 협소한 통로로 연결되어 있어 방어에 유리한 지형을 만들 수 있지만, 반대로 적의 진입로를 한 곳에 집중시킬 수 있어 위험하기도 하다. 이 맵의 가장 큰 특징은 ‘불가능한 시나리오’라는 컨셉에 맞게 극한의 난이도를 자랑한다는 점이다. 시리즈의 이름에서 알 수 있듯이, 이 맵은 단순히 방어하는 것을 넘어 플레이어의 전략적 사고와 순발력을 끊임없이 시험한다. 맵 곳곳에는 숨겨진 트리거나 특수한 조건이 있을 가능성이 있으며, 이를 파악하고 대비하는 것이 승리의 열쇠가 될 수 있다. 또한, 맵의 전체적인 규모가 크고 복잡한 구조를 가지고 있어 초보자는 물론 경험자도 쉽게 적응하기 어려운 구조로 설계되어 있다. 이 맵을 추천하는 대상은 스타크래프트 유즈맵 중에서도 도전적인 플레이를 즐기는 유저들이다. 특히 디펜스 장르에 익숙하지 않거나, 새로운 전략을 시도해 보고 싶은 플레이어에게 적합하다. 또한, 팀 플레이보다는 혼자서도 충분히 즐길 수 있는 구조지만, 팀원과의 협동 플레이가 필요하다면 팀원 간의 원활한 소통이 필수적일 것이다. 플레이 전에는 맵의 구조를 꼼꼼히 분석하고, 방어 라인 구축에 필요한 자원의 배치를 미리 계획하는 것이 중요하다. 또한, 예상치 못한 적의 공격 패턴에 대비해 유연하게 대처할 수 있는 준비를 갖춰야 한다. ‘Impossible Scenarios Desert2’ is a custom map for *StarCraft: Brood War*, inheriting the Desert style from the *Impossible Scenarios* series created by Fadetoblack. This map is classified as a defense genre custom map, offering players endless challenges and tension through its barren terrain and intricate tileset. The overall atmosphere blends a dark wasteland with a crimson sunset, and at the center of the map stands a massive fortress-like structure. The narrow paths and constricted passages surrounding it are designed to effectively counter waves of enemy attacks, forcing players to strategize with limited resources against relentless enemy forces. The gameplay follows a "comp-scumming" format, where players must defend against continuous rushes from AI-controlled factions (Zerg, Terran, and Protoss). Defense buildings and unit production facilities scattered across the map can be freely utilized based on the player’s strategy, with multiple locations that allow for fortification by leveraging the terrain. Key defensive spots include the edges of the map and areas around the central fortress, where players should focus on establishing strong defensive lines. Some zones are connected by tight corridors, which can create advantageous defensive terrain but also concentrate enemy entry points, posing risks. The map’s defining feature is its extreme difficulty, living up to the "impossible scenarios" concept. Beyond mere defense, it constantly tests the player’s strategic thinking and quick decision-making. Hidden triggers or special conditions may exist throughout the map, and uncovering and preparing for them could be the key to victory. The map’s large scale and complex structure make it difficult for both beginners and experienced players to adapt to easily. This map is recommended for players who enjoy challenging custom maps in *StarCraft*. It suits those looking to try new strategies or unfamiliar with the defense genre. While it can be enjoyed solo, team coordination is essential if playing cooperatively. Before starting, it’s important to carefully analyze the map’s layout, plan resource distribution for defense lines, and prepare flexible responses to unexpected enemy attack patterns.
7vs1 하드 컴퓨터 (7vs1 Hard Computer)
스타크래프트 브루드워의 대표적인 디펜스 형식 유즈맵인 ‘7vs1 hard computer’는 7명의 플레이어가 한 명의 강력한 컴퓨터를 상대로Base Defense를 펼치는 흥미로운 전투를 제공한다. 맵은 넓은 사막 타일셋 위에 펼쳐지며, 중앙에 위치한 플레이어 기지 주변으로 적절한 방어선을 구축할 수 있는 공간이 확보되어 있다. 플레이어는 초반부터 끊임없이 몰려오는 저글링, 히드라, 뮤탈, 울트라리스크 등으로 구성된 컴퓨터의 러시 공격을 방어해야 하며, 방어가 허술할 경우 순식간에 기지가 파괴될 수 있는 긴장감이 특징이다. 공략의 핵심은 빠른 자원 채취와 효율적인 건물 배치에 있다. 플레이어들은 시작 지점에서 가까운 미네랄과 가스를 확보한 뒤, 초반 방어 건물을 건설해 러시를 막아야 한다. 방어선은 게이트웨이, 포지, 시타델 오브 아둔 등으로 구성되며, 필요에 따라 파일런과 포톤 캐논을 추가로 건설해 보강할 수 있다. 방어에 성공한 후에는 서서히 공격을展開하여 컴퓨터의 본진을 파괴하는 것이 승리 조건으로 추정된다. 다만, 컴퓨터의 공격 패턴은 매우 공격적이므로, 방어 건물의 밀도를 높이고, 업그레이드와 유닛 생산을 병행하는 것이 필수다. 이 맵은 특히 7인 팀플레이에 최적화되어 있으며, 각 플레이어 간의 역할 분담과 협력이 중요하다. 방어 라인 유지, 자원 관리, 공격 타이밍 등 다방면에서 전략적 사고가 요구된다. 초보자의 경우 방어에 실패해 기지가 파괴되는 경우가 많으므로, 난이도는 ‘어려움’ 정도로 설정하는 것이 적절할 것으로 보인다. 또한, 컴퓨터의 러시 패턴을 숙지하고, 방어 건물의 배치와 업그레이드 우선순위를 신중히 결정해야 한다. 한 번 방어선을 무너뜨리면 재기하기 힘든 만큼, 초반 방어에 모든 역량을 집중하는 것이 중요하다. This Brood War custom map, titled ‘7vs1 hard computer,’ offers a thrilling Base Defense challenge where seven players unite to fend off relentless waves from a single, highly aggressive computer opponent. Set on a sprawling desert tileset, the map provides ample space around the players' base to construct defensive structures while leaving room for strategic unit production. From the outset, players must brace for continuous rushes—comprising Zerglings, Hydralisks, Mutalisks, and Ultralisk spawns—that demand quick reflexes and meticulous base fortification. The key to survival lies in rapid resource gathering and optimal building placement. Players should secure nearby minerals and gas early, immediately constructing defensive buildings like Gateways, Pylons, and Photon Cannons to hold the initial assault. As the game progresses, reinforcing the defense with additional structures such as Forges and Citadels becomes essential. Once a stable defense is established, players can transition into an offensive stance, gradually pushing toward the computer's base to secure victory. However, given the computer's aggressive tactics, maintaining a high density of defensive structures and balancing upgrades with unit production is critical. Designed specifically for 7-player team coordination, this map emphasizes role specialization and collective strategy. Each player must contribute to maintaining the defense line, managing resources, and timing attacks effectively. Novices may struggle initially, as failing to hold the defense often results in an irreversible disadvantage, suggesting a difficulty level akin to ‘hard.’ Mastery requires understanding the computer's rush patterns, prioritizing defensive upgrades, and ensuring a compact yet resilient base layout. Early-game defense is paramount, as recovery becomes exponentially harder once the line is breached.
5v3 인세인 컴퓨터 (5v3 Insane Computers)
스타크래프트 브루드워의 유즈맵 '5v3 insane computers'는 5명의 플레이어가 컴퓨터 3인을 상대로 벌이는 디펜스 장르의 맵으로, 긴장감 넘치는 전투를 즐길 수 있는 작품이다. 맵은 전체적으로 넓은 평야와 중앙을 가로지르는 강, 그리고 곳곳에 배치된 방어 거점이 특징적이다. 플레이어는 본진을 지키며 끊임없이 몰려오는 저그의 공세를 막아내야 하며, 특수 건물을 건설하거나 업그레이드를 통해 방어력을 강화할 수 있다. 맵의 지형은 복잡하지 않지만, 강과 언덕을 활용한 전략적 배치로 인해 끊임없이 변화하는 전투 상황을 연출한다. 특히, 중앙 강을 사이에 두고 펼쳐지는 교전은 양측이 서로의 움직임을 예측하며 전략을 짜야 하는 재미를 준다. 이 맵의 가장 큰 특징은 'insane' 난이도로 설정된 컴퓨터 상대라는 점이다. 일반적인 디펜스 맵보다 훨씬 aggressive한 공격을 펼치며, 플레이어는 초반부터 끊임없이 teritorial control을 유지해야 한다. 또한, 맵 곳곳에 scattered되어 있는 mineral patches와 vespene geyser는 자원 확보를 어렵게 만들어,Resource management도 중요한 전략 요소로 작용한다. 방어 건물의 배치와 업그레이드 타이밍, 그리고 자원 확보의 밸런스를 잘 맞춰야만 장기전을 버틸 수 있다. 이 맵은 초보 플레이어보다는 어느 정도 경험이 있는 유저에게 추천되며, 특히 팀플레이보다는 혼자서 컴퓨터를 상대해야 하는 싱글 플레이 경험을 원한다면 매우 흥미로운 작품이 될 것이다. 또한, 맵의 난이도가 높기 때문에 처음 플레이 시에는 여러 번의 시도와 실수를 통해 전략을 익히는 것이 중요하다. 방어 거점 간의 거리와 자원 확보의 중요성을 깨닫는 순간, 이 맵의 진정한 재미에 빠질 수 있을 것이다. 플레이 전 반드시 확인해야 할 포인트는 방어 건물의 배치와 업그레이드 우선순위, 그리고 자원 확보의 타이밍이다. 또한, 컴퓨터의 공격 패턴을 파악하기 위해 초반 전투에서 얻은 데이터를 바탕으로 전략을 조정하는 것이 중요하다. 맵의 지형을 충분히 숙지하고, 중앙 강을 활용한 진형 유지와 teritorial control을 유지하는 데 집중한다면, 이 맵의 긴장감과 성취감을 만끽할 수 있을 것이다. The *StarCraft: Brood War* custom map *"5v3 Insane Computers"* is a defense-style map where five players face off against three AI opponents, offering intense, high-stakes battles. The map features wide open plains, a central river, and strategically placed defensive strongholds. Players must defend their bases against relentless Zerg assaults, bolstering their defenses with special buildings and upgrades. While the terrain isn’t overly complex, the river and elevation changes create dynamic combat scenarios that keep every battle unpredictable. What truly sets this map apart is its "insane" difficulty setting. The AI doesn’t just attack—it presses aggressively from the start, forcing players to constantly fight for territorial control. Scattered mineral patches and vespene geysers make resource management a critical challenge, requiring careful balancing between defense, upgrades, and expansion. Mastering the timing of defensive structures, upgrades, and resource gathering is key to surviving the long haul. This map is best suited for players with some experience rather than complete beginners. If you’re looking for a solo challenge against the AI instead of team play, it delivers a uniquely engaging experience. Expect a steep learning curve—success often comes after multiple attempts and adjustments. Once you grasp the spacing between defensive points and the importance of resource efficiency, the real thrill of the map will click. Before jumping in, study the optimal placement of defensive buildings, prioritize upgrades, and time your resource collection carefully. Observing the AI’s attack patterns early on and adapting your strategy accordingly is crucial. Familiarize yourself with the terrain, maintain strong positioning around the central river, and focus on holding territorial control to fully savor the tension and sense of achievement this map offers.
왕의기사 Antibirth
스타크래프트 브루드워의 대표적인 타워 디펜스 유즈맵인 '왕의기사 Antibirth'는 화산 테마의 광활한 맵 위에서 펼쳐지는 전략적 방어전을 경험할 수 있는 작품이다. 맵은 중앙의 넓은 평야를 중심으로 양측에서 끊임없이 몰려드는 적의 웨이브를 막아내는 구조로 설계되어 있으며, 플레이어는 각자의 위치에서 타워를 건설하고 업그레이드하여 방어선을 구축해야 한다. 맵 중앙에는 넓은 통로와 협소한 틈새가 조화롭게 배치되어 있어, 적의 공격 패턴에 따라 타워 배치 전략을 유동적으로 변경할 수 있다. 특히, 맵 좌우측에는Resource가 배치된 지역이 보이며, 이를 활용한 자원 수집과 타워 건설의 균형이 게임의 핵심 포인트로 작용한다. 맵의 난이도는 상대적으로 높은 편으로, 초보자가 처음 접하기에는 다소 어려운 구조를 가지고 있어 충분한 사전 숙지가 필요하다. 또한, 맵의 진행 방식은 웨이브가 점점 강해지는 방식으로, 후속 웨이브에서 등장하는 적의 종류와 수가 점차 증가하여 플레이어의 긴장감을 지속적으로 유도한다. 추천 대상은 타워 디펜스 장르를 즐기는 플레이어이며, 특히 전략적 사고와 빠른 판단력이 요구되는 맵을 선호하는 경우 필수적으로 플레이해볼 만한 작품이다. 플레이 전에는 맵의Resource 배치와 주요 통로, 그리고 적의 웨이브 패턴을 미리 숙지하는 것이 좋으며, 타워의 효율적인 배치와 업그레이드 타이밍을 carefully 계획해야 한다. 맵의 난이도를 낮추기 위해 초반에는 방어에 중점을 두고, 자원을 충분히 확보한 후 강력한 타워를 건설하는 전략을 추천한다. Starcraft: Brood War's iconic tower defense custom map, "King's Knight Antibirth," offers a strategic defensive battle set across a vast volcanic-themed map. Designed with a central open plain, the map challenges players to defend against endless waves of enemies approaching from both sides, requiring them to construct and upgrade towers from their respective positions. The map balances wide pathways and narrow gaps, allowing for flexible tower placement strategies depending on enemy attack patterns. Notably, resource-rich areas on the left and right sides of the map play a crucial role, as balancing resource gathering with tower construction becomes a key aspect of gameplay. The difficulty is relatively high, with a structure that may be challenging for beginners, necessitating thorough preparation beforehand. The progression system escalates with increasingly powerful waves, where later stages introduce more numerous and varied enemies to keep players on edge. This map is highly recommended for fans of the tower defense genre, especially those who enjoy maps demanding strategic thinking and quick decision-making. Before playing, it's advisable to familiarize yourself with resource distribution, key pathways, and enemy wave patterns. Efficient tower placement and timely upgrades are essential, so planning ahead is crucial. For a smoother experience, prioritize defense early on, secure ample resources, and then focus on building powerful towers.
맵 선택 가이드
태그는 맵의 핵심 특징을 빠르게 설명하지만 제작 버전마다 규칙이 다를 수 있습니다. 상세 설명에서 권장 인원, 난이도, 플레이 시간과 버전을 함께 확인한 뒤 다운로드하세요.