
어려움 스타크래프트 맵 모음
'어려움' 태그가 등록된 맵을 모았습니다. 장르 하나로 찾기 어려운 플레이 방식, 난이도와 특징을 중심으로 인기 맵과 최신 맵을 비교해 보세요.
- 등록 맵
- 28개
- 누적 다운로드
- 2
- 누적 조회
- 963
인기 맵
다운로드와 조회 반응이 높은 맵입니다.
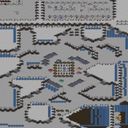
톰과제리 겨울버전 (Tom and Jerry Winter Version)
톰과 제리의 겨울 테마를 재해석한 스타크래프트 브루드워 유즈맵 <톰과제리 겨울버젼>은 classic 디펜스(컴까기) 장르에 속하는 맵으로, 7명의 플레이어가 참여해 컴퓨터 유닛을 상대로 전투를 펼치는 재미있는 구조를 갖추고 있다. 맵 중앙에 위치한 '제리' 유닛은 끊임없이 공격해오는 적 무리 속에서 살아남아야 하며, 플레이어들은 각자의 포지션에서 톰 유닛을 배치·강화하거나 제리를 보호하는 역할을 맡게 된다. 내부 맵 설명에 따르면 톰과 제리 모두 업그레이드가 가능하다고 명시되어 있어, 전략적 선택이 게임의 승패를 좌우할 수 있다. 특히 '많이 어려워졌습니다'라는 설명에서 알 수 있듯이 난이도가 상당히 높은 편으로, 초보자보다는 경험 있는 플레이어에게 적합한 맵으로 추정된다. 맵 이미지에서는 제리를 중심으로 적의 공격 패턴이 집중되는 구조가 보이며, 플레이어들은 제리 주변의 방어선 구축과 톰의 배치 최적화를 통해 승리를 노리게 된다. This StarCraft: Brood War custom map, <Tom and Jerry Winter Version>, reimagines the classic cartoon duo in a challenging defense-style gameplay where 7 players must protect Jerry from relentless enemy waves. The map is structured around a central Jerry unit that must be defended at all costs, while players deploy and upgrade Tom units to fend off attacks. According to the internal map description, both characters are upgradable, adding depth to strategic decisions. The phrase 'It has become much harder' suggests a high difficulty level, making it more suitable for experienced players. The map layout, as seen in the image, features a fortified defense around Jerry, with players needing to balance offense and protection to secure victory. The winter theme is subtly integrated into the aesthetics, enhancing the immersive experience.
마인 디펜스 (Mind the Mine) 7.6
스타크래프트 브루드워의 유즈맵 계보에서 독특한 장르로 자리매김한 ‘마인’(Mine) 시리즈의 최신 버전, [EUD] Mind the Mine 7.6은 플레이어들에게 긴장과 전략을 동시에 요구하는 흥미로운 경험을 제공합니다. 이 맵은 EUD(Extended Unit Death) 기술을 적극 활용한 퍼즐 디펜스 장르로, 미로와 지뢰가 복잡하게 얽힌 구조 속에서 안전한 길을 찾아야 합니다. 맵의 중앙부에 위치한 다수의 지뢰는 플레이어의 실수 한 번으로도 치명적인 결과를 초래할 수 있으며, 제한된 시야와 순간적인 판단력이 요구됩니다. 맵 곳곳에 배치된 함정과 장애물을 피해 목적지까지 도달하는 것이 주 목표로 보이며, 특히 지뢰의 위치를 정확히 파악하지 못한 상태에서 무작정 전진했다가는 게임 오버로 직행할 수 있습니다. 맵의 디자인 자체는 8192x8192의 넓은 공간을 활용해 미로와 함정을 조화롭게 배치했으며, 우주 타일셋을 사용하여Dark, Mysterious한 분위기를 자아냅니다. 플레이어는 제한된 자원과 짧은 시간 내에 최적의 경로를 계산해야 하므로, 게임은 자연스럽게 전략적 사고와 손-눈 협응력을 동시에 요구합니다.Mind the Mine 시리즈는 오랜 기간 동안 유즈맵 커뮤니티에서 사랑받아 왔으며, 특히 EUD 기술을 활용한 지뢰 찾기 게임으로서의 정체성을 확고히 하고 있습니다. 이 맵은 초보자보다는 전략과 집중력이 요구되는 중급자 이상에게 추천되며, 한 번의 실수가 승패를 좌우할 수 있는 긴장감 넘치는 플레이가 특징입니다. 또한, 맵의 난이도는 지뢰의 밀도와 배치에 따라 조절할 수 있도록 설계되어 있어, 반복 플레이를 통해 점차 익숙해질 수 있는 구조를 갖추고 있습니다. [EUD] Mind the Mine 7.6, the latest installment in the *Mine* series—a unique genre in the StarCraft: Brood War custom map lineage—offers players a thrilling experience that demands both tension and strategy. Utilizing Extended Unit Death (EUD) technology, this map is a puzzle defense game where players must navigate a labyrinth of mines and traps to find a safe path. The numerous mines scattered across the map’s central area can instantly end the game with a single mistake, requiring sharp reflexes and quick decision-making under limited visibility. The primary objective is to reach the destination while avoiding traps and obstacles, though charging forward without accurately identifying mine locations will likely result in an immediate game over. The map’s design spans a vast 8192x8192 space, harmoniously blending mazes and traps while using a cosmic tileset to evoke a dark, mysterious atmosphere. Players must calculate the optimal route within tight resource constraints and time limits, naturally challenging both strategic thinking and hand-eye coordination. The *Mind the Mine* series has long been beloved in the custom map community, solidifying its identity as a mine-hunting game powered by EUD technology. This map is recommended for intermediate to advanced players rather than beginners, as it demands sharp strategy and focus—where even a single misstep can decide victory or defeat. The difficulty can also be adjusted through mine density and placement, allowing players to gradually grow accustomed to its mechanics through repeated plays.
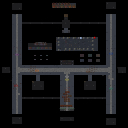
하이드라 디펜스 익스트림 2! (Hydra Defense Extreme 2!)
《하이드라 디펜스 익스트림 2!》는 스타크래프트 브루드워의 유즈맵 중에서도 손에 꼽히는 난이도를 자랑하는 디펜스 게임이다. 맵 전체가 어두운 우주 배경으로 구성되어 있으며, 중앙에 위치한 주요 방어 건물을 중심으로 다수의 웨이브가 끊임없이 몰려오는 구조로 되어 있다. 방어 건물 주변에는 좁은 통로와 요충지가 존재하여 적들의 진입을 통제할 수 있는 전략적 요소가 곳곳에 배치되어 있다. 플레이어는 제한된 자원으로 끊임없이 쏟아지는 적을 효과적으로 방어해야 하며, 각 웨이브별로 등장하는 적의 조합과 패턴이 조금씩 달라져서 전략적 깊이를 더한다. 특히 방어 타워의 배치와 업그레이드 타이밍이 승패를 가르는 핵심 요소로 보인다. 맵의 특징 중 하나는 매우 높은 난이도로, 제작자 StarTrek에 의해 'Very Hard! Experts Only!'라는 경고 문구가 포함되어 있을 정도로 초보자는 물론 숙련자도 쉽게 클리어하기 어려운 구조로 설계되어 있다. 방어 건물 주변의 좁은 통로는 적의 공격을 효과적으로 분산시킬 수 있지만, 반대로 실수하면 순식간에 방어선이 무너질 수 있어 긴장감을 유지할 수 있다. 이 맵은 디펜스 장르를 선호하는 플레이어들에게 도전 과제를 제공하며, 특히 전략적 사고와 빠른 판단력을 요구하는 유저들에게 추천할 만한 작품이다. 플레이 전에는 방어 타워의 최적 배치와 자원 관리 전략을 충분히 숙지하고 도전하는 것이 바람직하다. Hydra Defense Extreme 2! is one of the most challenging defense-style custom maps in StarCraft: Brood War, featuring a dark cosmic-themed battlefield centered around a primary defensive structure. The map is designed with narrow pathways and strategic chokepoints that allow players to control enemy movement effectively. Players must defend against waves of increasingly difficult enemies using limited resources, with each wave introducing new enemy compositions and attack patterns that demand adaptive strategies. The core challenge lies in optimizing tower placements and upgrade timing, as a single misstep can lead to a rapid collapse of defenses. Noted for its extreme difficulty, the map includes a warning label stating 'Very Hard! Experts Only!' by its creator, StarTrek, making it suitable for advanced players seeking a rigorous test of skill. The tight corridors around the main structure help manage enemy flow but also amplify the consequences of poor decisions. This map is ideal for defense enthusiasts who enjoy high-stakes strategy and quick decision-making, though thorough preparation in tower placement and resource management is strongly recommended before attempting a playthrough.
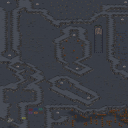
탈옥 2 V.Better (Jail Break 2 V.Better)
스타크래프트 브루드워의 유즈맵 <Jail Break 2 V.Better>는 이름 그대로 '탈옥'을 주제로 한 퍼즐형 맵이다. 플레이어는 감옥에 갇힌 상태에서 탈출구를 찾아야 하며, 오직 지형과 장애물, 그리고 제한된 자원을 활용해 길을 개척해 나가야 한다. 맵의 특징은 탈출 경로가 한정되어 있지만, 각 라운드마다 배치되는 장애물과 함정의 조합이 달라져 매번 새로운 도전이 되는 점이다. 특히 우주 테마의 타일셋이 어두운 분위기를 조성하며, 긴장감 있는 탈출을 강조한다. 퍼즐의 난이도는 점차 상승하는 구조로, 초반에는 단순한 길 찾기에서 시작하지만 후반부로 갈수록 복잡한 함정과 좁은 통로를 통과해야 한다. 추천 대상은 퍼즐을 즐기거나 스타크래프트에서 새로운 게임 방식을 경험하고 싶은 유저들이다. 플레이 전에는 맵의 구조와 함정 배치 패턴을 미리 파악하는 것이 중요하며, 특히 팀플레이가 가능한 맵이 아니므로 혼자서 집중하며 진행해야 한다. 맵의 제목처럼 '두 번째 탈옥'답게, 전작보다 더 정교해진 장애물과 새로운 함정이 추가되어 재플레이 가치를 높였다. 5명의 플레이어가 동시에 참여할 수 있지만, 각 플레이어는 개별적으로 탈출을 시도해야 한다. 맵의 분위기는 어둡고 긴박感이 느껴지며, 탈출에 성공했을 때의 성취감은 이 맵의 큰 매력 포인트다. 다만, 퍼즐의 난이도가 높기 때문에 초보 유저는 어려움을 느낄 수 있어, 적절한 난이도 조절이 필요할 수 있다. Jail Break 2 V.Better, a custom map from StarCraft: Brood War, is a puzzle-style map centered around the theme of "escape." Players begin trapped in a prison and must find an escape route, navigating terrain, obstacles, and limited resources to forge their path. The map’s defining feature is its fixed escape routes, though the combination of obstacles and traps shifts each round, offering fresh challenges every time. The cosmic-themed tileset sets a dark, tense atmosphere, heightening the urgency of the escape. The puzzle difficulty escalates progressively, starting with simple pathfinding before evolving into intricate traps and narrow passages. Ideal for players who enjoy puzzles or want to experience a new gameplay style in StarCraft, it demands solo focus, as team play isn’t supported. Like the title suggests, this "second escape" refines obstacles from the original and introduces new traps, boosting replayability. While up to five players can participate, each must attempt to escape independently. The map’s dark, high-stakes ambiance makes success deeply rewarding, though its difficulty may overwhelm beginners, requiring careful balance adjustments.
임파서블 케익스 (Impossible Keks)
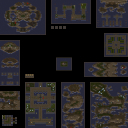
임파서블 케익스는 스타크래프트 브루드워의 유즈맵으로, 이름에서부터 느껴지듯 어려운 난이도로 유명한 컴까기 맵이다. 맵은 사막 테마의 넓은 공간에 여러 개의 건물이 흩어져 있는 구조로, 플레이어는 제한된 자원으로 끊임없이 몰려오는 적군 유닛을 상대해야 한다. 맵의 핵심은 '불가능'이라는 이름에 걸맞게 극한의 방어와 자원 관리인데, 초반에는 비교적 손쉬운 적들이 등장하지만 점차 난이도가 올라가면서 조합된 유닛과 다량의 공격을 버텨내야 한다. 맵의 특징은 건물 배치와 자원 분배의 중요성으로, 초반에 실수를 하면 중반 이후부터는 심각한 자원 부족에 시달리게 된다. 또한, 맵 곳곳에 숨겨진 자원 상자와 미네랄 멀티가 배치되어 있어 전략적인 자원 확보가 필수적이다. 플레이어는 기본적으로 넥서스와 커맨드 센터를 방어하는 동시에, 추가 건물을 지어 자원 채취 효율을 높이는 동시에 적의 공격을 효과적으로 방어하는 방법을 모색해야 한다. 맵의 볼륨은 상당히 크며, 맵 전체에 걸쳐 건물과 유닛이 배치되어 있어 플레이 중에는 시야 확보와 자원 관리에 신경을 써야 한다. 이 맵은 초보 플레이어보다는 중급 이상의 실력을 가진 유저에게 적합하며, 특히 막히기 쉬운 구간에 도달하면 전략적 접근 방식의 변화가 요구된다. 추천하는 플레이 방식은 초반에 빠른 자원 확보와 방어 건물 건설을 우선시하고, 중반부터는 공격형 건물과 유닛 생산을 병행하는 것이다. 맵의 난이도가 높기 때문에 실패를 반복하며 전략을 수정하는 과정이 필요하며, 이는 맵의 جذ감을 크게 높이는 요소로 작용한다. 또한, 맵의 난이도를 낮추고 싶다면 시작 지점 근처의 미네랄 멀티를 최대한 빨리 확보하는 것이 중요하다. 이 맵은 스타크래프트 유즈맵 커뮤니티에서 어려운 맵으로 알려져 있으며, 클리어에 성공한 플레이어는 큰 성취감을 느낄 수 있을 것이다. 맵의 플레이 시간은 약 30분에서 1시간 정도로 예상되며, 팀 플레이보다는 개인 플레이에 최적화되어 있다. 맵의 구조상 자원 확보와 방어 라인 구축이 가장 중요하므로, 이러한 요소에 집중하며 플레이하는 것이 좋다. 마지막으로, 맵의 모든 요소를 익히려면 여러 번의 시도와 실수를 감수해야 한다. 맵의 난이도가 높기 때문에 플레이 전에는 반드시 맵의 구조와 자원 분포를 숙지하는 것이 좋다. 이 맵은 스타크래프트 유즈맵 중에서도 손꼽히는 어려운 맵으로, 도전欲을 자극하는 요소로 가득하다. 맵의 볼륨이 크고 디테일이 풍부하기 때문에, 한번 성공하면 여러 번 플레이하고 싶어질 만한 매력이 있다. Impossible Keks is a challenging UMS (Use Map Settings) custom map in StarCraft: Brood War, designed for solo players seeking a tough survival experience. Set in a desert-themed terrain, the map features scattered buildings and strategic resource points, requiring players to manage limited resources while defending against relentless waves of enemy units. The name 'Impossible' reflects its punishing difficulty, where early waves are manageable but rapidly escalate in intensity, forcing players to master base defense and resource allocation. Key mechanics include hidden resource boxes and mineral expansions, making efficient gathering and base expansion critical. The map demands careful attention to building placement, as poor initial decisions lead to severe resource shortages later. Mid-game strategies should balance defensive structures with offensive production, adapting as enemy compositions shift. The large map size and dense unit distribution necessitate constant vigilance over vision and resource management. This map is best suited for intermediate to advanced players familiar with UMS mechanics, especially those who enjoy overcoming steep learning curves. Players should prioritize securing nearby mineral expansions early and adjusting strategies after setbacks. While the expected playtime ranges from 30 to 60 minutes, the true challenge lies in repeated attempts to refine tactics. The map's depth and replayability stem from its unforgiving yet rewarding mechanics, making it a standout title in the StarCraft custom map community. Its design encourages players to analyze failures and experiment with new approaches, enhancing long-term engagement.
아쿠마 바운드 (Akuma-Bound)
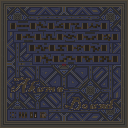
《Akuma-Bound》는 스타크래프트 브루드워의 하드코어 디펜스 유즈맵으로, 중앙에 위치한 방어 포인트를 중심으로 끊임없이 몰려드는 적 유닛을 상대로 일정 시간 동안 버텨야 하는 긴장감 넘치는 구조가 특징이다. 맵의 중앙에는 플레이어가據守해야 할 핵심 건물이 있으며, 그 주변으로 좁은 통로와 장애물이 배치되어 있어 유닛의 진입을 통제하고 전략적 우위를 점할 수 있도록 설계되었다. ‘Obstacles: 18’이라는 설명에서 보듯, 장애물의 종류와 배치에 따라 공략 방식이 달라지며, Revives(부활 횟수) 3회와 Lives(목숨 횟수) 25+35+45+55라는 수치는 플레이어에게 치명적인 실수를 допу하더라도 다시 도전할 기회를 제공하는 동시에 높은 난이도를 암시한다. ‘Difficulty: 3-7/10’이라는 설명은 초보 플레이어에게는 비교적 접근하기 쉬운 반면, 숙련된 플레이어에게는 극한의 컨트롤과 자원 관리가 요구되는 구조임을 시사한다. 플레이어는 제한된 자원으로 방어선을 구축해야 하며, 적의 웨이브가 점점 강력해지는 패턴을 분석하여 방어 전략을 수립해야 한다. 맵의 황무지 타일셋은 황량한 전투의 분위기를 조성하며, 4096x4096의 넓은 공간은 시야를 확보하기 어렵게 만들어 긴장감을 고조시킨다. 특히 좁은 통로와 장애물은 적의 공격 루트를 제한하는 동시에 플레이어의 방어 타워나 유닛 배치를 최적화할 수 있는 기회를 제공한다. 이 맵은 혼자 또는 팀으로 플레이할 수 있으며, 제한된 부활 횟수와 생명 수를 고려할 때 지속적인 집중력과 적응력이 요구된다. 초보자는 기본적인 방어 전략을 숙지한 후 도전하는 것이 좋고, 숙련자는 장애물의 활용과 자원 관리를 극대화하여 최대한의 수명을 유지하는 데 집중해야 한다. 맵의 핵심은 ‘버티기’와 ‘적응’이므로, 초반의 실수는 후반으로 갈수록 치명적으로 작용할 수 있음을 명심해야 한다. Akuma-Bound is a hardcore defense custom map in StarCraft: Brood War, featuring a central defensive point where players must withstand relentless waves of enemy units for a prolonged period. The map is structured around a core building that must be defended, surrounded by narrow pathways and 18 obstacles designed to control enemy movement and create strategic advantages. The ‘Revives: 3’ and ‘Lives: 25+35+45+55’ mechanics indicate that players are granted multiple chances to recover from mistakes, though the high difficulty implied by the ‘Difficulty: 3-7/10’ rating ensures that only precise execution and adaptability will lead to success. Players must construct defensive lines with limited resources while analyzing the increasingly powerful enemy waves to formulate effective strategies. The wasteland tileset enhances the map’s harsh and tense atmosphere, with the vast 4096x4096 space making visibility challenging and heightening the sense of urgency. Narrow passages and obstacles restrict enemy routes while allowing players to optimize tower placements and unit positioning. This map supports solo or team play, requiring sustained focus and adaptability due to limited revives and life counts. Beginners should familiarize themselves with basic defensive tactics before attempting the map, while experienced players should focus on maximizing resource management and obstacle utilization to extend their survival. The core gameplay revolves around endurance and adaptation, as early mistakes can prove fatal in later stages.
썬켄 하드 10웨이 (Sunken HARD 10Way)
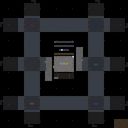
를 찾고 계신다면, 독특한 구조와 높은 난이도를 자랑하는 이번 유즈맵을 주목해 보시기 바랍니다. 파일명과 내부 설정에서 짐작할 수 있듯 이 맵은 썬켄(Sunken)을 활용한 독특한 디펜스 장르의 플레이 방식을 제공합니다. 전체적인 지형을 살펴보면 중앙의 기지 혹은 핵심 구역을 중심으로 사방으로 뻗어 나가는 다중 갈래 길 구조를 확인할 수 있습니다. 다수의 방향에서 몰려오는 적들의 공세에 맞서야 하므로 플레이어 간의 협동과 전략적인 위치 배치가 매우 중요하게 작용합니다. 맵의 전체적인 분위기는 우주 타일셋을 기반으로 깔끔하면서도 긴장감 넘치는 전장을 연출하고 있으며, 점차 높아지는 난이도 속에서 살아남는 재미를 느낄 수 있습니다. 초보자보다는 어느 정도 스타크래프트 브루드워 디펜스 유즈맵에 익숙하고 도전적인 플레이를 즐기는 유저들에게 특히 추천할 만한 맵입니다. 본격적으로 게임을 시작하기 전에 플레이어별 담당 구역이나 방어선 구축 위치를 미리 의논해 두는 것이 클리어 확률을 높이는 좋은 방법이 될 것입니다. 다채로운 웨이브와 함께 손에 땀을 쥐는 방어전을 경험하고 싶다면 지금 바로 이 맵을 통해 실력을 시험해 보시기를 바랍니다. If you are looking for a StarCraft Brood War map review, you should pay attention to this custom use map featuring a unique structure and high difficulty. As you can guess from the file name and internal settings, this map offers a distinctive defense genre gameplay utilizing sunkens. Looking at the overall terrain, you can notice a multi-way path structure extending in all directions from a central base or core area. Since you must cope with enemy attacks rushing from multiple directions, cooperation and strategic positioning among players play a very crucial role. The overall atmosphere of the map creates a clean yet tense battlefield based on a space tileset, allowing you to feel the fun of surviving amidst gradually increasing difficulty. It is especially recommended for users who are somewhat familiar with StarCraft Brood War defense use maps and enjoy challenging gameplay rather than beginners. Discussing each player's assigned area or defense line construction position in advance before starting the game in earnest is a good way to increase the clearance probability. If you want to experience a nail-biting defense battle with various waves, we encourage you to test your skills through this map right now.
어메이징 터렛 스파이럴 헬 (Amazing Turret Spiral Hell)
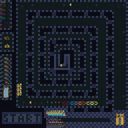
Amazing Turret Spiral Hell은 스타크래프트 브루드워의 디펜스 장르에 속하는 유즈맵으로, 이름 그대로 나선형으로 배치된 터렛 라인과 복잡한 지형이 특징이다. 맵은 화산 타일셋을 사용해 붉은 색조와 용암 흐름이 강조된 분위기를 제공한다. 플레이어는 제한된 자원을 이용해 지속적으로 등장하는 적 웨이브를 방어해야 하며, 터렛을 적절히 배치하고 업그레이드하는 것이 승리의 핵심이다. 적군은 다양한 유닛 조합으로 파동을 이루며, 특히 고속 이동 유닛이 나선형 경로를 따라 급격히 접근해오는 경우가 많아 미리 예측하고 방어 라인을 조정해야 한다. 맵의 난이도는 "Impossible clear"이라는 설명이 암시하듯 매우 높으며, 초보자보다는 경험이 풍부한 플레이어에게 적합하다. 플레이 전 확인해야 할 포인트는 터렛 배치 가능한 영역이 제한적이라는 점과, 자원 회수 속도가 느리기 때문에 초기 방어 라인을 신중히 설계해야 한다는 것이다. 또한, 적 웨이브가 점점 강력해지므로 중반 이후에는 터렛 업그레이드와 추가 방어 설비 구축이 필수적이다. 전반적인 플레이 경험은 전략적 사고와 빠른 판단을 요구하며, 터렛 배치와 업그레이드 타이밍을 놓치면 곧바로 패배하게 된다. 따라서 전략 게임을 즐기고, 고난이도 디펜스 맵을 도전하고 싶은 숙련된 유저에게 강력히 추천한다. Amazing Turret Spiral Hell is a user-made map for StarCraft: Brood War classified as a defense type, featuring a spiral arrangement of turret lines and intricate terrain. The map uses a volcanic tileset, giving it a reddish hue and flowing lava atmosphere. Players must defend against continuously spawning enemy waves using limited resources, focusing on proper turret placement and upgrades to achieve victory. Enemies come in varied unit combinations, and fast-moving units often rush along the spiral paths, requiring foresight and adjustment of defensive lines. The difficulty is indicated as "Impossible clear," suggesting it is suited for experienced players rather than beginners. Before playing, note that turret placement zones are limited and resource gathering is slow, so early defensive layouts must be carefully planned. As enemy waves become stronger in the mid to late game, turret upgrades and additional defenses become essential. The overall experience demands strategic thinking and rapid decision‑making; missing turret placement or upgrade timing leads to quick defeat. Consequently, this map is highly recommended for seasoned players who enjoy challenging defense scenarios in StarCraft: Brood War.
죽음의 땅 (The Land of the Dead)
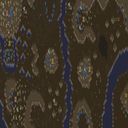
스타크래프트 브루드워의 ‘The Land of the Dead’는 이름 그대로 죽음의 땅을 무대로 펼쳐지는 서바이벌 디펜스 맵으로, 플레이어는 단 한 명의 유닛을 조종하며 끊임없이 몰려드는 적들 속에서 생존을 다져야 한다. 맵은 광활한 사막 지형을 배경으로 펼쳐지며, 곳곳에 배치된 오브젝트와 장애물이 시야를 가리고 숨을 곳을 마련해준다. 내부 설명에서 강조하듯 ‘눈을 깜빡이면 늦는다’는 경고는 플레이어의 긴장감을 끊임없이 유발하며, 실시간으로 다가오는 리퍼(Reaper) 유닛의 위협은 이 맵의 핵심 콘셉트를 집약한다. 맵의 구조는 선형에 가까우며, 진행 경로가 비교적 명확한 편이지만, 곳곳의 엄폐물과 굴곡이 플레이어의 움직임을 방해해 전략적 선택을 강요한다. 특히, 적의 공격 패턴과 리스폰 타이밍을 예측하며 자원을 효율적으로 관리하는 것이 관건인데, 내부 설명에 언급된 ‘Veteran Level Campaign’이라는 점은 난이도가 상당히 높음을 시사한다. 맵의 분위기는 어둡고 긴박한 사막의 황무지가 어우러져 공포감을 조성하며, 플레이어는 생존을 위한 집중력과 순간적인 판단력이 요구된다. 초보자는 적의 공격 패턴을 숙지하지 못해 쉽게 쓰러질 가능성이 높으므로, 난이도를 낮춰가며 적응하는 것이 좋다. 반면 숙련된 플레이어에게는 끊임없는 도전의식을 제공하는 흥미로운 구조로, 특히 서바이벌과 디펜스 요소가 결합된 점이 매력적이다. 플레이 전에는 맵의 진행 경로와 주요 엄폐물 위치를 미리 숙지하고, 리소스 관리와 유닛 컨트롤에 대한 기본기를 다져두는 것이 중요하다. 이 맵은 단순히 적을 물리치는 것만이 아니라, ‘얼마나 오랫동안 살아남을 수 있는가’라는 질문에 답을 찾는 재미가 있는 작품이다. 추천 대상은 서바이벌 디펜스 장르를 좋아하는 플레이어이며, 특히 공포와 긴박감을 즐기는 유저라면 강추할 만하다. "StarCraft: Brood War's *The Land of the Dead* is a survival defense map set in a land of death, where players control a single unit and must fight to survive against endless waves of enemies. The map unfolds across vast desert terrain, with scattered objects and obstacles blocking vision and providing hiding spots. As the in-game description warns, 'blink and you're dead'—a phrase that keeps players on edge—while the constant threat of incoming Reaper units embodies the map's core concept. The layout is mostly linear with clear progression paths, but scattered cover and uneven terrain disrupt movement, forcing strategic decisions. The key to success lies in predicting enemy attack patterns and spawn timings while managing resources efficiently, with the mention of 'Veteran Level Campaign' hinting at its high difficulty. The atmosphere blends the dark, tense desolation of a desert wasteland, creating a sense of dread where players must rely on sharp focus and quick reflexes. Beginners may struggle to grasp enemy patterns and fall easily, so easing into lower difficulty settings is advisable. For experienced players, however, the map offers a compelling challenge, particularly with its blend of survival and defense mechanics. Before playing, it's crucial to study the progression routes and key cover spots, honing basic resource management and unit control skills. The real appeal isn't just defeating enemies but answering the question: *How long can you survive?* This map is perfect for fans of the survival defense genre and a must-play for those who enjoy horror and high-pressure gameplay."
나치 디펜스 리본 (Nazi Defence Reborn)
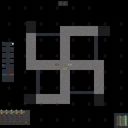
스타크래프트 브루드워의 유즈맵 가운데서도 다소 충격적인 소재로 주목받는 ‘Nazi Defence Reborn’는 기존 디펜스 장르의 뼈대를 유지하면서도 ‘ catturare e distruggere ’라는 특이한 테마를 앞세운 atypical UMS 맵이다. 맵의 핵심은 적의 공격을 방어하는 동시에 다수의 적 유닛을 제거하는 동시에 진행되는 구조로, 중앙에 위치한 거대한 요새( предположительно 핵시설 또는 요새) 주변을 여러 진영의 적군이 끊임없이 공격해오는 방식이다. 플레이어는 중앙 요새의 체력을 유지하면서 동시에 외부에서 몰려드는 적들을 섬멸하는 이중 과제를 수행해야 한다. 맵의 타일셋은 우주 배경으로 처리되어 있으며, 요새와 방어 시설은 어둡고 무거운 느낌의 디자인으로 구성되어 있어 긴장감을 조성한다. 외부에서 적들이 몰려오는 진입로는 두세 곳으로 한정되어 있지만, 각 진입로마다 배치된 방어 시설( предположительно 포탑과 바리케이드)을 신중하게 관리하지 않으면 순식간에 요새가 무너질 위험이 있다. 맵의 분위기는 어둡고 진지한 편이지만, 동시에 ‘Kill all the jews!!!’와 같은 내부 설명문구로 인해 논란의 소지가 다분하다는 점도 특징이다. 이러한 특성은 플레이 경험을 극단적으로 만드는 동시에, 플레이어의 전략적 선택과 판단력을 한층 더 요구하는 요소로 작용한다. 추천 대상은 디펜스 장르에 익숙하면서도 특이한 테마를 즐기는 플레이어이며, 특히 전략적 깊이와 긴장감 있는 진행을 선호하는 이들에게 suitable할 것으로 보인다. 플레이 전에는 방어 시설의 배치와 요새 체력 관리, 그리고 적 유닛의 패턴을 사전에 숙지하는 것이 중요하다. 또한, 맵의 특성상 도덕적 논쟁을 유발할 수 있는 소재가 포함되어 있음을 감안하고 접근할 필요가 있다. StarCraft: Brood War's custom maps include "Nazi Defence Reborn," a title that draws attention for its shocking subject matter. Unlike typical defense-style UMS maps, it adopts an unusual theme centered around "capture and destroy." The core gameplay involves defending a central fortress—likely a nuclear facility or stronghold—while simultaneously eliminating waves of enemy units. Players must maintain the fortress's health while wiping out incoming enemies, creating a dual challenge. The map's tileset is set in a dark, space-themed environment, with the fortress and defensive structures designed to evoke a heavy, oppressive atmosphere. Enemy entry points are limited to a few routes, but each is guarded by critical defensive installations—presumably turrets and barricades—that must be managed carefully to prevent the fortress from falling. While the map's tone is dark and serious, its internal text, including phrases like "Kill all the jews!!!", has sparked controversy. This duality makes the experience extreme, forcing players to rely heavily on strategy and quick decision-making. It’s recommended for those familiar with defense games who enjoy unconventional themes, particularly players who value strategic depth and tense progression. Before playing, it’s crucial to study defensive placements, fortress health mechanics, and enemy unit patterns. However, be aware that the map’s content may provoke moral debate.
터렛 M 디펜스 (Stacked-Turret-M-Def)
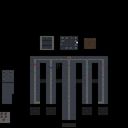
스타크래프트 브루드워의 유즈맵으로서 ‘Stacked-Turret-M-Def’는 이름 그대로 터렛을 쌓아가며 방어전을 펼치는 디펜스 장르의 맵이다. 맵의 중앙에 위치한 본진 기지 주변으로 적의 공격로가 세 방향으로 뻗어나가 있으며, 각 길목마다 방어용 터렛을 배치하고 업그레이드를 통해 방어력을 강화하는 구조로 되어 있다. 내부 맵 제목과 파일명에서 확인되는 ‘M Defense’는 presumably ‘M’(Master 또는 Mega 등)을 의미하는 것으로 보이며, 난이도가 ‘Very Hard! Experts Only!’로 명시되어 있어 초보자는 물론 중수도 쉽게 공략하기 어려운 난이도로 설계되었음을 알 수 있다. 맵 이미지에서 확인되는 다수의 터렛과 방어 건물이 밀집된 중앙 지역은 플레이어가 전략적으로 방어선을 구축하고 지속적인 관리가 필요한 구조로 보인다. 또한, 적의 공격 패턴이 예측 불가능하거나 다변화되어 있을 가능성이 높아, 단순히 방어 건물을 늘리는 것만으로는 버티기 어려운 구조로 추정된다. 맵의 전체적인 분위기는 우주 테마를 기반으로 하며, 어두운 배경과 대비되는 밝은 터렛과 방어 건물의 색상을 통해 시각적 집중을 유도한다. 플레이어는 제한된 자원을 효율적으로 관리하면서도 방어선을 유지해야 하며, 특히 적의 다수Wave에 대응할 수 있는 체력과 화력의 균형을 맞추는 것이 관건이다. 이 맵은 디펜스를 즐기는 유저들에게는 높은 도전 과제를 제공하며, 성공적인 방어 성공 시 성취감을 느낄 수 있는 구조로 설계된 듯하다. 추천 대상으로는 디펜스 장르에 익숙한 유저나 난이도 높은 맵을 선호하는 플레이어, 그리고 전략적 자원 관리와 방어 라인 구축에 관심이 있는 게이머들이 적합할 것이다. 또한, 맵의 난이도 특성상 팀 플레이보다는 개인 또는 소수의 플레이어가 집중적으로 방어에 임하는 방식이 더 어울릴 수 있어 1~2인 플레이도 고려해볼 만하다. 플레이 전 미리 방어 건물의 배치 위치와 업그레이드 우선순위를 숙지하고, 적의 공격 패턴을 분석하는 시간을 갖는 것이 성공 확률을 높이는 핵심 포인트라 할 수 있다. This Brood War custom map, titled ‘Stacked-Turret-M-Def’, is a defense genre map where players stack turrets to fend off enemy waves. The map features three main attack paths leading to the player's base, located centrally, with designated spots for turret placement and upgrades to enhance defense. The internal title and filename suggest ‘M’ could stand for Master or Mega, and the difficulty is explicitly labeled as ‘Very Hard! Experts Only!’, indicating a steep challenge even for experienced players. The map image reveals dense clusters of turrets and defensive structures around the central area, requiring strategic placement and continuous management. The enemy’s attack patterns appear varied and unpredictable, making passive defense insufficient without careful resource allocation and adaptive strategies. The cosmic-themed design, with a dark background contrasting bright turrets and buildings, guides visual focus to critical areas. Players must balance limited resources while maintaining a resilient defense line, especially against multiple enemy waves. This map offers a rewarding yet demanding experience for defense enthusiasts, particularly those seeking high-difficulty challenges. Ideal for players familiar with defense mechanics or those who enjoy strategic resource management and base fortification. Given its punishing difficulty, solo or duo play may be more feasible than larger team setups. Preparing defense layouts and prioritizing upgrades before facing the first wave significantly improves survival chances, making this map a test of both preparation and adaptability.
터렛 스파이럴 헬 (Amazing Turret Spiral Hell)
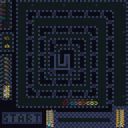
스타크래프트 브루드워의 디펜스 장르 유즈맵인 ‘Amazing Turret Spiral Hell’은 이름 그대로 터렛을 중심으로 한 공격과 방어를 재밌게 뒤섞은 디펜스 게임입니다. 맵의 중앙에는 거대한 나선형 구조물이 펼쳐져 있으며, 플레이어는 이 구조물 주변에 터렛을 배치하여 끊임없이 몰려드는 적 유닛을 방어합니다. 맵의 특징은 나선형 구조물이 단순한 디펜스 맵을 넘어서, 터렛의 배치와 공격 타이밍을 전략적으로 고민하게 만드는 점입니다. 나선형 구조물은 적의 공격 경로를 복잡하게 만들어 방어를 더욱 흥미롭게 만들고, 플레이어는 구조물의 각 층마다 터렛을 효율적으로 배치해야 합니다. 특히, 맵의 이름은 ‘Spiral Hell’로 적 유닛의 밀집도가 높아질수록 게임의 강도가 급격히 올라가는 디펜스 게임의 정점을 보여줍니다. 게임의 진행 방식은 크게 세 가지로 나뉩니다. 첫째, 플레이어는 시작 지점에서 터렛을 건설하고 업그레이드할 수 있습니다. 둘째, 맵 중앙의 나선형 구조물을 따라 끊임없이 공격해오는 적 유닛을 방어해야 하며, 셋째, 구조물의 각 층에서 발생하는 특수 이벤트나 보너스 유닛을 활용하여 더 높은 점수를 획득하는 방식입니다. 적 유닛의 종류는 기본적인 저글링, 질럿, 드라군부터 시작하여 후반으로 갈수록 하이 템플러, 캐리어, 울트라리스크까지 등장합니다. 이를 방어하기 위해 플레이어는 터렛의 종류와 배치, 업그레이드 타이밍을 신중히 결정해야 합니다. 이 맵의 가장 큰 매력은 바로 ‘나선형 구조물’의 디자인입니다. 나선형 구조물은 단순히 방어선을 형성하는 데 그치지 않고, 적의 공격 경로를 조절하여 플레이어에게 전략적인 선택지를 제공합니다. 예를 들어, 나선형 구조물의 외곽에 터렛을 배치하면 적의 접근을 늦추는 동시에 내부로의 침투를 차단할 수 있습니다. 반면, 내부에 터렛을 집중 배치하면 적의 공격 루트를 좁혀 더 효율적으로 방어할 수 있습니다. 이러한 구조는 디펜스 게임의 기본 틀을 벗어나서, 플레이어에게 끊임없는 전략적 고민을 요구합니다. 추천 대상은 디펜스 게임을 즐기는 플레이어라면 누구나 좋습니다. 특히, 디펜스 게임의 기본적인 메커니즘을 익히고 싶거나, 터렛의 배치와 업그레이드에 estratégic thinking을 더하고 싶은 플레이어에게 적합합니다. 또한, 나선형 구조물의 복잡한 디자인은 게임의 난이도를 한층 높여주기 때문에, 숙련자도 새로운 도전을 즐길 수 있습니다. 플레이 전에는 터렛의 종류와 역할, 맵의 나선형 구조에 대한 이해가 필요하며, 적 유닛의 패턴을 미리 숙지하는 것이 좋습니다. 마지막으로, 이 맵은 7명의 플레이어가 동시에 플레이할 수 있지만, 각 플레이어의 역할 분담이 명확하지 않기 때문에 팀 플레이보다는 개인戦中心의 플레이가 더 어울립니다. Amazing Turret Spiral Hell is a unique defense-style custom map for StarCraft: Brood War that blends turret placement and strategic combat into an engaging experience. The map features a massive spiral structure at its core, where players must strategically position turrets to fend off relentless waves of enemy units. The spiral design isn't just for aesthetics; it forces players to think deeply about turret placement and timing, as the complex pathways disrupt enemy movement and create dynamic defense scenarios. The name 'Spiral Hell' hints at the escalating intensity, with enemy waves growing denser and more challenging as the game progresses. The gameplay revolves around three key mechanics: constructing and upgrading turrets from the starting point, defending the spiral structure against waves of enemies, and leveraging special events or bonus units on each layer of the spiral for higher scores. Early waves consist of basic units like Zerglings, Zealots, and Dragoons, but as the game advances, players face elite units such as High Templars, Carriers, and Ultralisks. To counter these threats, players must carefully choose turret types, their placement, and upgrade priorities. The spiral structure is the standout feature of this map. It doesn't just serve as a defensive perimeter but actively shapes the flow of battle. Players can opt to place turrets on the outer layers to slow enemy advances and block infiltration, or focus on inner layers to tightly control enemy routes. This design elevates the map beyond a typical defense game, demanding constant strategic adjustments and adaptability. This map is ideal for players who enjoy defense-style games, especially those looking to refine their turret placement and upgrade strategies. The intricate spiral layout also makes it appealing to veterans seeking a fresh challenge. Players should familiarize themselves with turret roles and the spiral's mechanics before diving in, and studying enemy wave patterns will significantly improve performance. While the map supports up to seven players, its mechanics work best in a solo or individual-focused playstyle rather than strict team coordination.
최근 등록된 맵
새로 추가된 파일과 버전을 확인하세요.
러너 웨이 3 (Run Away 3)
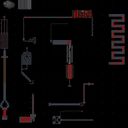
‘러너 웨이 3(Run Away 3)’은 스타크래프트 브루드워의 유즈맵으로, 플레이어가 끊임없이 밀려오는 적군을 피해 살아남는 ‘서바이벌 디펜스’ 장르에 속한다. 맵은 중앙을 가로지르는 긴 통로와 양쪽에 배치된 건물을 중심으로 구성되어 있으며, 플레이어는 이 통로를 따라 이동하며 적의 공격을 피하거나 방어해야 한다. 주요 특징으로는 좁은 통로와 다수의 길목이 존재하는데, 이 구조는 적의 공격을 효율적으로 분산시키거나 피할 수 있는 기회를 제공한다. 또한, 맵 곳곳에 배치된 건물과 장식용 오브젝트는 시야를 가리는 역할을 하기도 한다. 맵의 분위기는 어두운 우주 배경으로 설정되어 있으며, 적군의 종류와 공격 패턴은 맵 내부에서 추정되는 바와 같이 다양하게 배치되어 있는 것으로 보인다. 플레이어는 제한된 자원과 시간 속에서 생존을 도모해야 하며, 이를 위해 전략적인 움직임과 자원 관리가 요구된다. 추천 대상은 디펜스와 서바이벌 장르를 선호하는 플레이어로, 특히 긴장감 있는 플레이와 순간적인 판단력을 요구하는 맵을 즐기는 유저에게 적합할 것이다. 플레이 전에는 맵의 구조와 적의 배치 패턴을 미리 숙지하는 것이 중요하며, 초보자의 경우 난이도가 상대적으로 높은 편이므로 충분한 연습이 필요하다. 맵의 디자인과 진행 방식은 ‘러너 웨이’ 시리즈의 전통을 계승하고 있으며, 시리즈의 팬이라면 익숙한 요소들을 느낄 수 있을 것이다. 특히 ‘러너 웨이’ 시리즈는 피하기와 서바이벌 요소가 결합된 독특한 장르로, 이 맵에서도 그 특징이 그대로 반영되어 있다. 맵의 밸런스나 승리 조건 등은 명확히 확인되지 않지만, 생존을 위한 도전과 만족감을 제공할 것으로 추정된다. ‘Run Away 3’ is a *Brood War* custom map in the survival defense genre, where players must outlast endless waves of enemies. The map features a long central corridor flanked by buildings, forcing players to navigate its tight passages while dodging or defending against attacks. Its design includes narrow paths and multiple choke points, which help disperse enemy forces or create evasion opportunities. Scattered structures and decorative objects also obscure visibility, adding strategic depth. Set against a dark cosmic backdrop, the map hosts a variety of enemy types and attack patterns that adapt dynamically. Players must survive within limited resources and time, relying on sharp reflexes and resource management. Ideal for fans of tense, high-stakes gameplay, it demands quick decision-making—especially for those who enjoy defense and survival mechanics. Familiarizing yourself with the map’s layout and enemy behavior is crucial before playing, as the difficulty can be steep for newcomers. As part of the *Run Away* series, it retains the franchise’s signature blend of evasion and survival, appealing to longtime fans of the genre. While specific balance details and win conditions aren’t confirmed, the map promises a challenging yet rewarding experience centered on survival.
죽음의 땅 (The Land of the Dead)
스타크래프트 브루드워의 ‘The Land of the Dead’는 이름 그대로 죽음의 땅을 무대로 펼쳐지는 서바이벌 디펜스 맵으로, 플레이어는 단 한 명의 유닛을 조종하며 끊임없이 몰려드는 적들 속에서 생존을 다져야 한다. 맵은 광활한 사막 지형을 배경으로 펼쳐지며, 곳곳에 배치된 오브젝트와 장애물이 시야를 가리고 숨을 곳을 마련해준다. 내부 설명에서 강조하듯 ‘눈을 깜빡이면 늦는다’는 경고는 플레이어의 긴장감을 끊임없이 유발하며, 실시간으로 다가오는 리퍼(Reaper) 유닛의 위협은 이 맵의 핵심 콘셉트를 집약한다. 맵의 구조는 선형에 가까우며, 진행 경로가 비교적 명확한 편이지만, 곳곳의 엄폐물과 굴곡이 플레이어의 움직임을 방해해 전략적 선택을 강요한다. 특히, 적의 공격 패턴과 리스폰 타이밍을 예측하며 자원을 효율적으로 관리하는 것이 관건인데, 내부 설명에 언급된 ‘Veteran Level Campaign’이라는 점은 난이도가 상당히 높음을 시사한다. 맵의 분위기는 어둡고 긴박한 사막의 황무지가 어우러져 공포감을 조성하며, 플레이어는 생존을 위한 집중력과 순간적인 판단력이 요구된다. 초보자는 적의 공격 패턴을 숙지하지 못해 쉽게 쓰러질 가능성이 높으므로, 난이도를 낮춰가며 적응하는 것이 좋다. 반면 숙련된 플레이어에게는 끊임없는 도전의식을 제공하는 흥미로운 구조로, 특히 서바이벌과 디펜스 요소가 결합된 점이 매력적이다. 플레이 전에는 맵의 진행 경로와 주요 엄폐물 위치를 미리 숙지하고, 리소스 관리와 유닛 컨트롤에 대한 기본기를 다져두는 것이 중요하다. 이 맵은 단순히 적을 물리치는 것만이 아니라, ‘얼마나 오랫동안 살아남을 수 있는가’라는 질문에 답을 찾는 재미가 있는 작품이다. 추천 대상은 서바이벌 디펜스 장르를 좋아하는 플레이어이며, 특히 공포와 긴박감을 즐기는 유저라면 강추할 만하다. "StarCraft: Brood War's *The Land of the Dead* is a survival defense map set in a land of death, where players control a single unit and must fight to survive against endless waves of enemies. The map unfolds across vast desert terrain, with scattered objects and obstacles blocking vision and providing hiding spots. As the in-game description warns, 'blink and you're dead'—a phrase that keeps players on edge—while the constant threat of incoming Reaper units embodies the map's core concept. The layout is mostly linear with clear progression paths, but scattered cover and uneven terrain disrupt movement, forcing strategic decisions. The key to success lies in predicting enemy attack patterns and spawn timings while managing resources efficiently, with the mention of 'Veteran Level Campaign' hinting at its high difficulty. The atmosphere blends the dark, tense desolation of a desert wasteland, creating a sense of dread where players must rely on sharp focus and quick reflexes. Beginners may struggle to grasp enemy patterns and fall easily, so easing into lower difficulty settings is advisable. For experienced players, however, the map offers a compelling challenge, particularly with its blend of survival and defense mechanics. Before playing, it's crucial to study the progression routes and key cover spots, honing basic resource management and unit control skills. The real appeal isn't just defeating enemies but answering the question: *How long can you survive?* This map is perfect for fans of the survival defense genre and a must-play for those who enjoy horror and high-pressure gameplay."
톰과제리 겨울버전 (Tom and Jerry Winter Version)
톰과 제리의 겨울 테마를 재해석한 스타크래프트 브루드워 유즈맵 <톰과제리 겨울버젼>은 classic 디펜스(컴까기) 장르에 속하는 맵으로, 7명의 플레이어가 참여해 컴퓨터 유닛을 상대로 전투를 펼치는 재미있는 구조를 갖추고 있다. 맵 중앙에 위치한 '제리' 유닛은 끊임없이 공격해오는 적 무리 속에서 살아남아야 하며, 플레이어들은 각자의 포지션에서 톰 유닛을 배치·강화하거나 제리를 보호하는 역할을 맡게 된다. 내부 맵 설명에 따르면 톰과 제리 모두 업그레이드가 가능하다고 명시되어 있어, 전략적 선택이 게임의 승패를 좌우할 수 있다. 특히 '많이 어려워졌습니다'라는 설명에서 알 수 있듯이 난이도가 상당히 높은 편으로, 초보자보다는 경험 있는 플레이어에게 적합한 맵으로 추정된다. 맵 이미지에서는 제리를 중심으로 적의 공격 패턴이 집중되는 구조가 보이며, 플레이어들은 제리 주변의 방어선 구축과 톰의 배치 최적화를 통해 승리를 노리게 된다. This StarCraft: Brood War custom map, <Tom and Jerry Winter Version>, reimagines the classic cartoon duo in a challenging defense-style gameplay where 7 players must protect Jerry from relentless enemy waves. The map is structured around a central Jerry unit that must be defended at all costs, while players deploy and upgrade Tom units to fend off attacks. According to the internal map description, both characters are upgradable, adding depth to strategic decisions. The phrase 'It has become much harder' suggests a high difficulty level, making it more suitable for experienced players. The map layout, as seen in the image, features a fortified defense around Jerry, with players needing to balance offense and protection to secure victory. The winter theme is subtly integrated into the aesthetics, enhancing the immersive experience.
어메이징 터렛 스파이럴 헬 (Amazing Turret Spiral Hell)
Amazing Turret Spiral Hell은 스타크래프트 브루드워의 디펜스 장르에 속하는 유즈맵으로, 이름 그대로 나선형으로 배치된 터렛 라인과 복잡한 지형이 특징이다. 맵은 화산 타일셋을 사용해 붉은 색조와 용암 흐름이 강조된 분위기를 제공한다. 플레이어는 제한된 자원을 이용해 지속적으로 등장하는 적 웨이브를 방어해야 하며, 터렛을 적절히 배치하고 업그레이드하는 것이 승리의 핵심이다. 적군은 다양한 유닛 조합으로 파동을 이루며, 특히 고속 이동 유닛이 나선형 경로를 따라 급격히 접근해오는 경우가 많아 미리 예측하고 방어 라인을 조정해야 한다. 맵의 난이도는 "Impossible clear"이라는 설명이 암시하듯 매우 높으며, 초보자보다는 경험이 풍부한 플레이어에게 적합하다. 플레이 전 확인해야 할 포인트는 터렛 배치 가능한 영역이 제한적이라는 점과, 자원 회수 속도가 느리기 때문에 초기 방어 라인을 신중히 설계해야 한다는 것이다. 또한, 적 웨이브가 점점 강력해지므로 중반 이후에는 터렛 업그레이드와 추가 방어 설비 구축이 필수적이다. 전반적인 플레이 경험은 전략적 사고와 빠른 판단을 요구하며, 터렛 배치와 업그레이드 타이밍을 놓치면 곧바로 패배하게 된다. 따라서 전략 게임을 즐기고, 고난이도 디펜스 맵을 도전하고 싶은 숙련된 유저에게 강력히 추천한다. Amazing Turret Spiral Hell is a user-made map for StarCraft: Brood War classified as a defense type, featuring a spiral arrangement of turret lines and intricate terrain. The map uses a volcanic tileset, giving it a reddish hue and flowing lava atmosphere. Players must defend against continuously spawning enemy waves using limited resources, focusing on proper turret placement and upgrades to achieve victory. Enemies come in varied unit combinations, and fast-moving units often rush along the spiral paths, requiring foresight and adjustment of defensive lines. The difficulty is indicated as "Impossible clear," suggesting it is suited for experienced players rather than beginners. Before playing, note that turret placement zones are limited and resource gathering is slow, so early defensive layouts must be carefully planned. As enemy waves become stronger in the mid to late game, turret upgrades and additional defenses become essential. The overall experience demands strategic thinking and rapid decision‑making; missing turret placement or upgrade timing leads to quick defeat. Consequently, this map is highly recommended for seasoned players who enjoy challenging defense scenarios in StarCraft: Brood War.
터렛 스파이럴 헬 (Amazing Turret Spiral Hell)
스타크래프트 브루드워의 디펜스 장르 유즈맵인 ‘Amazing Turret Spiral Hell’은 이름 그대로 터렛을 중심으로 한 공격과 방어를 재밌게 뒤섞은 디펜스 게임입니다. 맵의 중앙에는 거대한 나선형 구조물이 펼쳐져 있으며, 플레이어는 이 구조물 주변에 터렛을 배치하여 끊임없이 몰려드는 적 유닛을 방어합니다. 맵의 특징은 나선형 구조물이 단순한 디펜스 맵을 넘어서, 터렛의 배치와 공격 타이밍을 전략적으로 고민하게 만드는 점입니다. 나선형 구조물은 적의 공격 경로를 복잡하게 만들어 방어를 더욱 흥미롭게 만들고, 플레이어는 구조물의 각 층마다 터렛을 효율적으로 배치해야 합니다. 특히, 맵의 이름은 ‘Spiral Hell’로 적 유닛의 밀집도가 높아질수록 게임의 강도가 급격히 올라가는 디펜스 게임의 정점을 보여줍니다. 게임의 진행 방식은 크게 세 가지로 나뉩니다. 첫째, 플레이어는 시작 지점에서 터렛을 건설하고 업그레이드할 수 있습니다. 둘째, 맵 중앙의 나선형 구조물을 따라 끊임없이 공격해오는 적 유닛을 방어해야 하며, 셋째, 구조물의 각 층에서 발생하는 특수 이벤트나 보너스 유닛을 활용하여 더 높은 점수를 획득하는 방식입니다. 적 유닛의 종류는 기본적인 저글링, 질럿, 드라군부터 시작하여 후반으로 갈수록 하이 템플러, 캐리어, 울트라리스크까지 등장합니다. 이를 방어하기 위해 플레이어는 터렛의 종류와 배치, 업그레이드 타이밍을 신중히 결정해야 합니다. 이 맵의 가장 큰 매력은 바로 ‘나선형 구조물’의 디자인입니다. 나선형 구조물은 단순히 방어선을 형성하는 데 그치지 않고, 적의 공격 경로를 조절하여 플레이어에게 전략적인 선택지를 제공합니다. 예를 들어, 나선형 구조물의 외곽에 터렛을 배치하면 적의 접근을 늦추는 동시에 내부로의 침투를 차단할 수 있습니다. 반면, 내부에 터렛을 집중 배치하면 적의 공격 루트를 좁혀 더 효율적으로 방어할 수 있습니다. 이러한 구조는 디펜스 게임의 기본 틀을 벗어나서, 플레이어에게 끊임없는 전략적 고민을 요구합니다. 추천 대상은 디펜스 게임을 즐기는 플레이어라면 누구나 좋습니다. 특히, 디펜스 게임의 기본적인 메커니즘을 익히고 싶거나, 터렛의 배치와 업그레이드에 estratégic thinking을 더하고 싶은 플레이어에게 적합합니다. 또한, 나선형 구조물의 복잡한 디자인은 게임의 난이도를 한층 높여주기 때문에, 숙련자도 새로운 도전을 즐길 수 있습니다. 플레이 전에는 터렛의 종류와 역할, 맵의 나선형 구조에 대한 이해가 필요하며, 적 유닛의 패턴을 미리 숙지하는 것이 좋습니다. 마지막으로, 이 맵은 7명의 플레이어가 동시에 플레이할 수 있지만, 각 플레이어의 역할 분담이 명확하지 않기 때문에 팀 플레이보다는 개인戦中心의 플레이가 더 어울립니다. Amazing Turret Spiral Hell is a unique defense-style custom map for StarCraft: Brood War that blends turret placement and strategic combat into an engaging experience. The map features a massive spiral structure at its core, where players must strategically position turrets to fend off relentless waves of enemy units. The spiral design isn't just for aesthetics; it forces players to think deeply about turret placement and timing, as the complex pathways disrupt enemy movement and create dynamic defense scenarios. The name 'Spiral Hell' hints at the escalating intensity, with enemy waves growing denser and more challenging as the game progresses. The gameplay revolves around three key mechanics: constructing and upgrading turrets from the starting point, defending the spiral structure against waves of enemies, and leveraging special events or bonus units on each layer of the spiral for higher scores. Early waves consist of basic units like Zerglings, Zealots, and Dragoons, but as the game advances, players face elite units such as High Templars, Carriers, and Ultralisks. To counter these threats, players must carefully choose turret types, their placement, and upgrade priorities. The spiral structure is the standout feature of this map. It doesn't just serve as a defensive perimeter but actively shapes the flow of battle. Players can opt to place turrets on the outer layers to slow enemy advances and block infiltration, or focus on inner layers to tightly control enemy routes. This design elevates the map beyond a typical defense game, demanding constant strategic adjustments and adaptability. This map is ideal for players who enjoy defense-style games, especially those looking to refine their turret placement and upgrade strategies. The intricate spiral layout also makes it appealing to veterans seeking a fresh challenge. Players should familiarize themselves with turret roles and the spiral's mechanics before diving in, and studying enemy wave patterns will significantly improve performance. While the map supports up to seven players, its mechanics work best in a solo or individual-focused playstyle rather than strict team coordination.
생존의 시험 (Test of Survival) - INSANE!!!
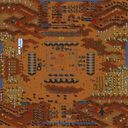
스타크래프트 브루드워의 서바이벌 유즈맵 〈Test of Survival - INSANE!!!〉는 플레이어가 컴퓨터 유닛과 건물을 파괴하며 생존을 목표로 하는 intense한 전투를 경험할 수 있는 맵입니다. 맵 중앙의 본진 지역과 주변의 확장한 기지 지역이 등장하며, 끊임없이 몰려오는 적군 다크 스웜과 터렛, 스파이어, 파일런 등으로 구성된 방어 시설이 플레이어를 압박합니다. 맵의 특징은 ‘INSANE’라는 제목에서 알 수 있듯 극한의 난이도를 자랑한다는 점으로, 초반부터 강력한 적의 공격을 버텨내며渐渐地 확장하고 방어선을 구축해야 합니다. 특히 적의 다크 스웜이 지속적으로 시야를 차단하고, 커세어와 캐리어, 디바우러 등이 공중 유닛을 다수 운용하기 때문에 공중 방어와 대공 유닛의 준비가 필수적입니다. 또한, 맵 곳곳에 흩어진 자원 지역을 확보하여 자원을 지속적으로 확보하지 않으면 빠른 타임리프를 당할 수 있어 자원 관리와 확장 전략이 중요합니다. 이 맵의 핵심은 ‘생존’이므로 플레이어는 초반 방어에 집중하되, 동시에 자원 채취와 방어선 구축을 병행해야 합니다. 적의 공격 패턴이 랜덤하게 변하기 때문에 예측이 어려우며, 특히 ‘INSANE’라는 난이도名称에서 짐작할 수 있듯 일반적인 서바이벌 맵보다 훨씬 공격적이고 치명적인 공격을 받습니다. 따라서 초보 플레이어보다는 적어도 중간 이상의 실력을 보유한 유저가 즐기기에 적합하며, 팀 플레이보다는 1인 플레이 또는 2~4인 팀 플레이가 권장됩니다. 맵의 분위기는 어둡고 압도적인 적의 압박을 느낄 수 있도록 디자인되어 있으며, 플레이어는 끊임없이 긴장하며 전략을 재구성해야 합니다. 이 맵은 단순히 적을 죽이는 것이 아니라 ‘살아남는 것’이 목표라는 점에서 다른 서바이벌 맵과는 차별화된 경험을 제공합니다. 특히 ‘BEST’라는 수식어가 붙은 파일명은 이 버전이 맵의 완성도와 난이도 면에서 가장 뛰어난 버전임을 시사합니다. 추천 대상은 서바이벌 맵을 좋아하고, 높은 난이도와 끊임없는 압박을 즐기는 플레이어이며, 특히 1인 또는 소규모 팀 플레이를 선호하는 유저에게 적합합니다. 플레이 전에는 방어선 구축, 대공 유닛 확보, 자원 관리 전략을 미리 준비하고, 초반 공격을 버틸 수 있는 충분한 유닛을 확보하는 것이 중요합니다. 또한, 적의 공격 패턴을 분석하고 대처하는 능력이 요구되므로, 초보자라면 먼저 쉬운 버전부터 연습한 후 도전하는 것이 좋습니다. This StarCraft: Brood War custom map, Test of Survival - INSANE!!!, delivers an intense survival experience where players must destroy enemy computer units and structures while enduring relentless waves of attacks. The map features a central main base area surrounded by expanded defensive positions, with Dark Swarms, turrets, spires, and pylons constantly threatening your survival. The 'INSANE' difficulty is reflected in the map's design, as players face overwhelming enemy pressure from the start, requiring rapid base expansion and defensive fortification. The core gameplay revolves around survival, demanding players to balance resource gathering, defensive line construction, and strategic expansion. The enemy employs diverse units, including Corsairs, Carriers, and Devourers, making air defense a critical priority. The scattered resource nodes across the map necessitate efficient resource management, as neglecting expansion or defense will lead to swift defeat. The random and unpredictable attack patterns of the enemy forces players to adapt quickly, making this map particularly challenging for newcomers. Test of Survival - INSANE!!! is best suited for players with intermediate to advanced skills who enjoy high-pressure survival scenarios. While solo play is viable, team play with 2-4 players is recommended to distribute the overwhelming defensive responsibilities. The map's dark, oppressive atmosphere enhances the sense of urgency, as players must constantly adjust strategies to survive. The 'BEST' designation in the filename suggests this version represents the pinnacle of the map's design and difficulty curve. Ideal for survival map enthusiasts, this map demands preparation: secure early defenses, prioritize air units, and plan resource expansion carefully. Beginners are advised to practice on easier versions before attempting this challenging iteration, as survival hinges on quick decision-making and adaptability.
썬쿠엔D 10웨이 17.9 임파서블 (SunkenD 10Way 17.9 Impossible)
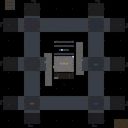
‘썬쿠엔D 10웨이 17.9 임파서블(SunkenD 10Way 17.9 Impossible)’은 25단계에 달하는 장렬한 디펜스 유즈맵으로, 끊임없는 적의 웨이브를 막아내며 방어선을 지켜내는 짜릿한 긴장감을 자아낸다. 맵 곳곳에 배치된 방어 건물과 구축로, 그리고 맵 중앙에 자리한 대규모 건물이 이 맵의 특징인데, 특히 10개의 웨이브가 끊임없이 몰아치는 구조는 플레이어의 집중력과 전략적 대처 능력을 극한까지 시험한다. 적들은 다양한 유닛으로 구성되어 있으며, 후반부로 갈수록 난이도가 기하급수적으로 상승하는 탓에 초보자는 물론 숙련자까지도 끊임없는 긴장감을 느낄 수밖에 없다. 방어 건물과 자원 관리, 그리고 시야 확보가 핵심 포인트로, 잘못된 배치나 소홀한 자원 관리는 금세 패인으로 이어질 수 있다. 이 맵은 다인 플레이보다는 혼자서 또는 소규모 팀으로 도전하는 것이 효과적이며, 특히 방어 시설을 최대한 효율적으로 배치해 자원을 절약하는 것이 관건이다. 맵의 전체적인 분위기는 어둡고 칙칙한 색조로 조성되어 있어, 몰입감 있는 디펜스 경험을 제공한다. 이 맵을 즐기기 위해서는 일정 수준 이상의 미네랄과 가스 관리가 필요하며, 방어 건물의 업그레이드와 보조 건물의 적절한 활용이 필수적이다. 초보자의 경우 1~5단계까지는 무난히 클리어할 수 있지만, 10단계 이후부터는 상당한 숙련도가 요구된다. 맵의 복잡한 구조와 끊임없는 공격 패턴은 초반에는 당황스러울 수 있지만, 점차 적의 패턴을 익히고 방어 전략을 다듬어 나갈수록 그 짜릿한 재미에 흠뻑 빠질 수 있을 것이다. 이 맵은 디펜스 유즈맵의 정수를 느낄 수 있는佳作으로, 반복 플레이를 통해 자신의 실력을 한층 더 끌어올릴 수 있는 좋은 기회가 될 것이다. This intense defense custom map, ‘SunkenD 10Way 17.9 Impossible’, delivers thrilling tension through relentless enemy waves across 25 escalating stages. The map features strategically placed defensive structures and pathways, with a large central building anchoring the layout. Its defining trait is the continuous 10-way assaults that push players to their limits, demanding sharp focus and adaptive strategies. Enemy compositions vary, and the difficulty spikes exponentially as stages progress, making it a challenge even for seasoned players. Effective resource management, building placement, and vision control are critical to survival. While multiplayer is possible, the map is best enjoyed solo or in small teams, where efficient use of defenses and resources becomes paramount. The dark, muted color palette enhances immersion, creating a tense atmosphere ideal for defense gameplay. Newcomers may comfortably clear early stages (1–5), but mastery is essential beyond stage 10 due to complex enemy patterns and resource demands. The map rewards perseverance with a gratifying sense of progression as players refine their strategies and adapt to evolving threats. A standout title in the defense genre, it offers ample replay value and a pathway to skill improvement through repeated challenges.
썬켄 하드 10웨이 (Sunken HARD 10Way)
를 찾고 계신다면, 독특한 구조와 높은 난이도를 자랑하는 이번 유즈맵을 주목해 보시기 바랍니다. 파일명과 내부 설정에서 짐작할 수 있듯 이 맵은 썬켄(Sunken)을 활용한 독특한 디펜스 장르의 플레이 방식을 제공합니다. 전체적인 지형을 살펴보면 중앙의 기지 혹은 핵심 구역을 중심으로 사방으로 뻗어 나가는 다중 갈래 길 구조를 확인할 수 있습니다. 다수의 방향에서 몰려오는 적들의 공세에 맞서야 하므로 플레이어 간의 협동과 전략적인 위치 배치가 매우 중요하게 작용합니다. 맵의 전체적인 분위기는 우주 타일셋을 기반으로 깔끔하면서도 긴장감 넘치는 전장을 연출하고 있으며, 점차 높아지는 난이도 속에서 살아남는 재미를 느낄 수 있습니다. 초보자보다는 어느 정도 스타크래프트 브루드워 디펜스 유즈맵에 익숙하고 도전적인 플레이를 즐기는 유저들에게 특히 추천할 만한 맵입니다. 본격적으로 게임을 시작하기 전에 플레이어별 담당 구역이나 방어선 구축 위치를 미리 의논해 두는 것이 클리어 확률을 높이는 좋은 방법이 될 것입니다. 다채로운 웨이브와 함께 손에 땀을 쥐는 방어전을 경험하고 싶다면 지금 바로 이 맵을 통해 실력을 시험해 보시기를 바랍니다. If you are looking for a StarCraft Brood War map review, you should pay attention to this custom use map featuring a unique structure and high difficulty. As you can guess from the file name and internal settings, this map offers a distinctive defense genre gameplay utilizing sunkens. Looking at the overall terrain, you can notice a multi-way path structure extending in all directions from a central base or core area. Since you must cope with enemy attacks rushing from multiple directions, cooperation and strategic positioning among players play a very crucial role. The overall atmosphere of the map creates a clean yet tense battlefield based on a space tileset, allowing you to feel the fun of surviving amidst gradually increasing difficulty. It is especially recommended for users who are somewhat familiar with StarCraft Brood War defense use maps and enjoy challenging gameplay rather than beginners. Discussing each player's assigned area or defense line construction position in advance before starting the game in earnest is a good way to increase the clearance probability. If you want to experience a nail-biting defense battle with various waves, we encourage you to test your skills through this map right now.
맵 선택 가이드
태그는 맵의 핵심 특징을 빠르게 설명하지만 제작 버전마다 규칙이 다를 수 있습니다. 상세 설명에서 권장 인원, 난이도, 플레이 시간과 버전을 함께 확인한 뒤 다운로드하세요.