
액션 스타크래프트 맵 모음
'액션' 태그가 등록된 맵을 모았습니다. 장르 하나로 찾기 어려운 플레이 방식, 난이도와 특징을 중심으로 인기 맵과 최신 맵을 비교해 보세요.
- 등록 맵
- 99개
- 누적 다운로드
- 0
- 누적 조회
- 3,492
인기 맵
다운로드와 조회 반응이 높은 맵입니다.
토마와 제리 (Tom vs Jerry)
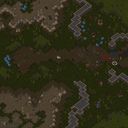
스타크래프트 브루드워 유즈맵 중 독특한 컨셉을 가진 '토마와 제리(Tom vs Jerry)' 스타일의 액션 디펜스 맵을 소개합니다. 이 맵은 이미지와 파일명을 통해 추정할 때, 플레이어가 특정 대상을 추격하거나 방어하는 서바이벌 형태의 미션을 수행하는 구조를 가지고 있습니다. 맵의 전체적인 배경은 황량한 사막 지형으로 구성되어 있으며, 좁은 길목과 복잡한 지형지물이 배치되어 있어 전략적인 움직임이 필수적입니다. 게임의 주요 목표는 적절한 유닛을 활용하여 몰려오는 적들을 처치하거나, 특정 목표물을 보호하는 것으로 보입니다. 맵의 구조를 살펴보면, 중앙의 개활지와 외곽의 숲, 그리고 인위적으로 조성된 듯한 석재 도로가 혼재되어 있어 플레이어의 이동 경로에 따라 전투 양상이 크게 달라질 수 있습니다. 특히 석재 도로는 유닛의 이동 효율을 높여주는 경로 역할을 할 것으로 추정되며, 이는 방어 라인을 구축하거나 기동성을 활용한 공격을 수행할 때 핵심적인 요소가 됩니다. 이 맵은 단순한 밀리(Melee) 방식이 아닌, 정해진 시나리오에 따라 적을 물리치는 유즈맵(UMS) 특유의 재미를 강조합니다. 따라서 단순한 자원 채취와 병력 생산보다는, 적의 이동 경로를 예측하고 효율적인 배치로 방어선을 유지하는 플레이 경험을 제공합니다. 혼자서도 충분히 즐길 수 있는 싱글 플레이 중심의 구성으로 보이며, 정교한 컨트롤과 적절한 타이밍의 유닛 투입이 승패를 가르는 핵심 요소가 될 것입니다. 이 맵은 복잡한 전략보다는 직관적인 액션과 몰입감 있는 미션 수행을 선호하는 유저들에게 추천합니다. 플레이 전, 맵의 특수한 트리거로 인해 유닛의 생산이나 자원 획득 방식이 일반적인 스타크래프트와 다를 수 있음을 인지하고 플레이하는 것이 좋습니다. This StarCraft: Brood War custom map, reminiscent of 'Tom vs Jerry' themes, is a unique action-defense UMS (Use Map Settings) experience. Based on the visual elements, the map features a desert terrain with a mix of open areas, forested patches, and paved stone paths. The core gameplay appears to revolve around a survival or mission-based objective, where players must engage with encroaching enemies or protect a specific target. The layout includes strategic pathways, such as the stone roads, which likely serve as efficient movement corridors for units, making them crucial for both defensive positioning and rapid response. Unlike a standard Melee game focused on resource management and macro play, this map emphasizes tactical unit placement and reactive combat to overcome specific scenarios. The environment's diverse topography—ranging from open deserts to narrow passages—suggests that positioning and map awareness will be vital for success. This map is highly recommended for players who enjoy mission-driven gameplay and direct combat encounters rather than long-term economic management. As it appears to be optimized for a single-player or focused mission experience, mastering unit control and timing will be the key to victory. Players should be prepared for non-traditional mechanics, as custom triggers often alter standard resource or unit production systems in such specialized maps.
여자잡기VER:1.2 (Catch the Girl VER:1.2)
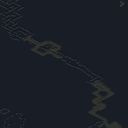
‘여자잡기VER:1.2’는 스타크래프트 브루드워 유즈맵의 특이한 장르를 대표하는 맵으로, 스토리 중심의 서바이벌 디펜스와 액션 요소가 혼합된 독특한 플레이 경험을 제공한다. 맵의 배경은 설원 지형으로 설정되어 있으며, 플레이어는 흩어진 길을 따라 도망치는 여자를 쫓아가는 역할을 맡는다. 주요 목표는 여자를 잡기 전에 ‘깡패’라는 이름의 적들을 제압하고, 최종적으로 여자를 붙잡는 것이다. 맵의 진행 방식은 도망자(여자)와 추격자(플레이어) 간의 긴장감 넘치는 추격전으로 구성되어 있으며, 도중에 등장하는 적들과의 전투를 통해 여자를 붙잡기 전까지의 시간을 벌어내야 한다. 맵의 구조는 비교적 복잡한 길과 함정, 그리고 적의 배치로 이루어져 있어 전략적인 접근이 요구된다. 특히 도망치는 여자의 경로가 예측 가능하지 않기 때문에, 플레이어는 맵 전체를 신속하게 파악하고 대응해야 한다. 맵의 분위기는 어두운 스토리텔링과 함께 액션성이 강해, 단순 디펜스나 러시가 아닌 ‘잡기’라는 독특한 목표를 중심으로 설계되었다. 초보자부터 숙련자까지 즐길 수 있도록 난이도가 조절되어 있지만, 도망자의 속도와 적의 배치에 따라 체감 난이도가 크게 달라질 수 있다. 추천 대상은 스토리 기반의 유즈맵을 선호하는 플레이어나, 새로운 장르의 맵을 경험하고 싶은 유저들에게 적합하다. 플레이 전에는 맵의 분위기와 목표를 충분히 이해하고, 도망자의 경로를 예측하는 연습을 해두는 것이 좋다. 또한, 적과의 전투에서 효율적인 유닛 조합과 컨트롤을 익혀두면 훨씬 수월하게 진행할 수 있을 것이다. ‘Girl Catch VER:1.2’ stands out as a unique genre in *Brood War* custom maps, blending a story-driven survival defense with action-packed gameplay to deliver a distinctive experience. Set against a snowy terrain, the map casts players as pursuers chasing a fleeing woman along winding paths. The core objective is to eliminate enemies labeled ‘Gangsters’ before finally capturing her. The tension comes from the cat-and-mouse chase between the fugitive (the woman) and the hunters (the players), where strategic combat against mid-map foes buys precious time to close the gap. Its layout features intricate routes, hidden traps, and carefully placed enemies, demanding sharp map awareness and adaptability. Since the woman’s escape path is unpredictable, players must quickly master the entire map and react on the fly. The dark narrative and high-octane action shift focus from pure defense or rushes to the singular goal of ‘catching’—making it more than just another defensive or rush-style map. Though the difficulty scales for both beginners and veterans, the actual challenge shifts dramatically depending on the fugitive’s speed and enemy placements. It’s ideal for players who enjoy story-driven custom maps or those eager to try a fresh genre. Before jumping in, take time to grasp the map’s tone and mechanics, and practice predicting the fugitive’s route. Honing efficient unit compositions and control during fights will also make the run far smoother.
드래곤볼 월드M 0.94
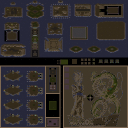
드래곤볼 월드M 0.94는 스타크래프트: 브루드워의 유즈맵으로, 드래곤볼 시리즈의 세계관을 기반으로 한 액션 디펜스 및 캐릭터 육성 요소가 혼합된 맵입니다. 맵의 전체적인 구조는 넓은 평야와 중앙에 위치한 주요 건물이 배치되어 있으며, 플레이어는 시작 지점에서부터 전투를 시작해 적의 공격을 방어하거나 목표 지점을 점령하는 방식으로 진행됩니다. 내부 맵 제목과 설명에서 확인할 수 있듯이, 드래곤볼 월드M 0.94는 '드래곤볼 월드M'이라는 시리즈물의 일환으로 보이며, EUD(Enhanced User Interface Design) 기술을 활용한 것으로 추정됩니다. 맵의 배경은 사막 타일셋으로 구성되어 있으며, 넓은 맵 크기(8192 x 8192) 덕분에 다양한 전략적 플레이가 가능합니다. 맵의 주요 특징은 캐릭터 선택과 육성 시스템으로, 플레이어는 각자의 팀을 구성해 전투에 임하며, 캐릭터의 레벨 업, 스킬 습득, 아이템 장착 등을 통해 전력을 강화할 수 있습니다. 전투는 실시간으로 진행되며, 적의 웨이브가 지속적으로 공격해오므로 방어 타워 건설, 유닛 관리, 자원 수집 등이 핵심 전략이 됩니다. 특히 드래곤볼 특유의 변신 시스템(예: 초사이어인)이나 필살기 사용이 가능할 것으로 보이며, 이를 통해 플레이어는 한층 더 몰입감 있는 경험을 즐길 수 있습니다. 이 맵은 드래곤볼 팬은 물론, 디펜스와 액션 요소가 결합된 유즈맵을 선호하는 플레이어에게 추천할 만합니다. 단, EUD를 기반으로 한 맵인 만큼, 일부 시스템이나 UI가 복잡할 수 있으며, 초기 세팅이나 캐릭터 선택 시 주의가 필요합니다. 또한, 넓은 맵 크기 탓에 미니맵 사용이 필수적이며, 팀원 간의 전략적 협력이 중요하다는 점을 미리 숙지해야 합니다.Dragonball World M 0.94 is a StarCraft: Brood War custom map that blends action defense with character progression elements, inspired by the Dragon Ball series. The map features a broad plain with a central structure, where players start from designated positions and engage in combat to defend against enemy waves or capture objectives. The internal map title and description indicate it is part of the 'Dragon Ball World M' series, likely utilizing EUD (Enhanced User Interface Design) technology for enhanced visuals and mechanics. The desert tileset backdrop, combined with the massive map size (8192 x 8192), allows for diverse strategic gameplay. A standout feature is the character selection and progression system, enabling players to build teams, level up characters, acquire skills, and equip items to strengthen their forces. Battles unfold in real-time, with continuous enemy waves requiring strategic tower placement, unit management, and resource collection. The map likely incorporates Dragon Ball’s signature transformation mechanics (e.g., Super Saiyan) and special abilities, adding depth to the gameplay experience. This map is ideal for Dragon Ball fans and players who enjoy custom maps merging defense and action elements. However, as an EUD-based map, some systems or UI elements may be complex, necessitating careful initial setup and character selection. The large map size also demands effective use of the minimap, and team coordination is crucial for success.
레이저 태그 옴니사이언스 v4.2 (Laser Tag Omniscience v4.2)
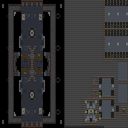
《레이저 태그 옴니사이언스 v4.2》는 스타크래프트: 브루드워 유즈맵으로, 레이저(RTS 기반) 및 태그(태그 팀 배틀) 요소를 결합한 독특한 4가지 게임 모드를 제공한다. 맵의 중앙에는 넓은 개방형 전투장이 펼쳐져 있으며, 곳곳에 배치된 지형지물과 장애물들이 전략적 포지셔닝을 강제한다. 맵의 구조는 크게 4개의 구역으로 나뉘어 있으며, 각 구역은 서로 다른 테마와 전투 스타일을 요구한다. 예를 들어, 한 구역은 좁은 통로와 높은 지대 위주로 설계되어 있어 기동성과 시야 확보가 중요하며, 다른 구역은 넓은 평지 위주로 펼쳐져 있어 대규모 전투가 가능하다. 맵의 가장자리는 대부분 막혀 있지만, 일부 구역에서는 외부에서 진입할 수 있는 루트가 존재해 기습 전술이 가능하다는 점도 특징이다. 플레이어들은 팀을 이뤄 레이저를 발사하는 방식으로 상대방을 공격하며, 각 구역의 특성에 맞게 전술을 변화시켜야 한다. 특히 맵의 중앙에 위치한 대형 구조물은 전투의 핵심 거점으로, 이 곳을 점령하거나 방어하는 것이 승리의 열쇠가 될 수 있다. 레이저의 특성상 원거리 공격이 주를 이루지만, 근접 전투도 충분히 가능하도록 맵이 설계되어 있어 다양한 플레이 스타일을 즐길 수 있다. 초보자부터 숙련자까지 모두 즐길 수 있도록 난이도가 조절되어 있지만, 팀워크와 전략적 사고가 부족하면 쉽게 무너질 수 있는 구조다. 맵의 전체적인 분위기는 SF적이면서도 밝고 활동적인 느낌을 주며, 레이저와 태그 요소의 조합으로 인해 다른 RTS나 액션 게임과는 차별화된 독특한 경험을 제공한다. 이 맵을 플레이하기 위해서는 팀 간의 원활한 소통과 빠른 판단력이 요구되며, 특히 넓은 개방형 구역에서는 시야 확보와 기동성이 승패를 좌우할 수 있다. 맵의 디자인과 밸런스는 대체로 균형 잡혀 있지만, 특정 모드에서는 특정 전략이 지나치게 강세를 보일 수 있어 주의가 필요하다. 레이저 태그 옴니사이언스는 주로 8명의 플레이어가 참여하는 팀전 중심의 유즈맵으로, 레이저 배틀로얄, 레이저 서바이벌, 레이저 디펜스, 레이저 태그 등 다양한 모드를 제공하여 여러 번 플레이해도 질리지 않는 구성이다. 레이저의 색상과 효과음이 시각적·청각적으로 강렬해 플레이 경험을 한층 풍부하게 만든다. 이 맵은 레이저와 태그 요소를 좋아하는 유저들에게 특히 추천되며, 팀플레이와 전략적 사고를 동시에 즐기고 싶은 플레이어들에게도 안성맞춤이다. 플레이 전에는 각 구역의 특성과 레이저의 공격 패턴, 팀원의 역할 분배를 미리 숙지하는 것이 좋다. 《Laser Tag OmniScience v4.2》 is a StarCraft: Brood War custom map that uniquely combines elements of laser combat (RTS-based) and tag (team battle) into four distinct game modes. At its center lies a vast open battlefield, with terrain obstacles strategically placed to force players into thoughtful positioning. The map is divided into four main zones, each with its own theme and combat style—some feature narrow corridors and elevated platforms that demand agility and visibility, while others offer wide-open plains ideal for large-scale engagements. Though most edges are blocked off, certain areas allow outside access, enabling surprise tactics. Players team up to fire lasers at opponents, adapting their strategies to each zone’s characteristics. The massive central structure serves as a key battleground—controlling or defending it often decides the match. While laser combat emphasizes ranged attacks, the map also accommodates close-quarters combat, supporting diverse playstyles. Designed to be accessible to both beginners and experts, the difficulty is balanced, but success hinges on teamwork and strategic thinking. The overall aesthetic blends sci-fi with bright, energetic vibes, offering a fresh experience distinct from traditional RTS or action games. Effective communication and quick decision-making are essential, especially in open areas where vision and mobility determine victory. While the design and balance are generally solid, some modes may favor certain strategies, so adaptability is key. Primarily a team-based 8-player map, it offers replayability with modes like Laser Battle Royale, Laser Survival, Laser Defense, and Laser Tag. The vivid laser colors and dynamic sound effects enhance immersion, making it ideal for fans of laser and tag mechanics or anyone seeking a mix of teamplay and strategy. Before diving in, familiarize yourself with each zone’s traits, laser attack patterns, and team roles for the best experience.
메탈 암즈: 컴뱃 v2.1-BW (Metal Arms: Combat v2.1-BW)
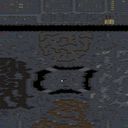
스타크래프트 브루드워 유즈맵 '메탈 암즈: 컴뱃 v2.1-BW'는 동명의 콘솔 액션 게임 '메탈 암즈: 글리치 인 더 시스템'을 스타크래프트 엔진으로 충실히 이식한 야심찬 프로젝트다. 4인용 협력 플레이를 기본으로 설계되었으며, 우주 타일셋 위에 128x192 타일 규모의 널찍한 전장이 펼쳐진다. 큰 틀에서는 UMS로 분류되나, 영웅 시스템과 무기 획득·업그레이드, 스토리 기반 미션 진행 등 RPG적 요소가 핵심을 이룬다. 내부 설명에 따르면 플레이어는 주요 무기와 보조 무기를 모두 구현한 무기고를 활용해 영웅들을 구출하고, 신규 장비를 수집하며 적대 세력 '밀스'를 완전히 격멸하는 목표를 수행한다. 맵 진행은 선형적인 시나리오 구조를 따르며, 곳곳에 배치된 트리거 이벤트와 컷신 연출이 콘솔 원작의 내러티브 흐름을 잘 살려낸다. 전투는 스타크래프트 고유의 유닛 제어 인터페이스에 맞춰 조작감이 최적화되었으며, 상황별 무기 교체와 업그레이드 선택이 전술적 깊이를 더한다. 난이도 곡선은 초반 튜토리얼 구간부터 후반부 대규모 공방전까지 비교적 완만하게 상승하며, 솔로 플레이보다는 4인 풀파티 협동 시 시너지와 생존율이 크게 높아진다. 추천 대상은 원작 팬층, 스토리 몰입형 유즈맵을 즐기는 유저, 정교한 트리거 연출을 선호하는 플레이어다. 플레이 전에는 파일명과 내부 버전(v2.1) 일치 여부, 최신 패치 적용 상태, 4인 파티 구성 권장 사항을 확인하는 것이 좋으며, 한국어 패치 유무와 싱글 플레이 난이도 조절 옵션 존재 여부도 미리 살펴보길 권한다. Metal Arms: Combat v2.1-BW for StarCraft Brood War is an ambitious project that faithfully ports the console action game Metal Arms: Glitch in the System into the StarCraft engine. Designed for 4-player cooperative play, it unfolds a spacious battlefield of 128x192 tiles on a space tileset. While broadly classified as UMS, its core revolves around RPG elements: a hero system, weapon acquisition and upgrades, and story-driven mission progression. According to the internal description, players utilize an arsenal replicating all primary and secondary weapons to rescue heroes, collect new gear, and utterly destroy the hostile Mils faction. Map progression follows a linear scenario structure, with trigger events and cutscenes placed throughout to effectively recreate the narrative flow of the console original. Combat is optimized for StarCraft's unique unit control interface, adding tactical depth through situational weapon switching and upgrade choices. The difficulty curve rises gently from the early tutorial section to large-scale battles in the later stages, and synergy and survival rates increase significantly with a full 4-player party rather than solo play. Recommended for fans of the original, players who enjoy story-immersive UMS maps, and those who appreciate sophisticated trigger direction. Before playing, verify that the file name matches the internal version (v2.1), check for the latest patch application, and note that a full 4-player party is recommended. It is also advisable to check for the availability of a Korean patch and a difficulty adjustment option for solo play.
DBZ - 빌런즈 SE (DBZ - Villians SE)
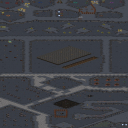
DBZ - Villians SE는 드래곤볼 Z의 악역들을 중심으로 펼쳐지는 5인용 유즈맵으로, 게임의 핵심은 플레이어들이 프리저, 셀, 부우 등 강력한 적들을 상대로Z전사들의 힘을 모아 싸우는 것이다. 맵은 넓은 우주 공간을 배경으로 하며, 각 플레이어는 자신의 스타크래프트 유닛을 조종해 적을 물리치고 승리를 향해 나아가야 한다. 맵의 구조는 비교적 평탄한 지형을 기반으로 하지만, 곳곳에 배치된 방어 건물과 자원 지점이 전투의 판도를 바꿀 수 있는 요소로 작용한다. 특히, 적 진영은 강력한 방어 건물로 무장하고 있어 플레이어들은 전략적으로 유닛을 조합하고 자원을 관리해야 한다. 전투는 대체로 근접 전투가 주를 이루며, 강력한 스킬을 지닌 유닛들이 다수 등장해 전투의 스케일을 크게 한다. 맵의 분위기는 드래곤볼 Z의 액션 넘치는 전투를 재현한 듯 화려한 연출과 함께 진행되며, 플레이어들은 각자의 스타일대로 전투를 이끌어나갈 수 있다. 이 맵은 드래곤볼 팬이라면 익숙한 캐릭터들과 전투를 즐길 수 있지만, 스토리 진행보다는 액션과 전투에 중점을 두고 있어 접근성이 높다. 다만, 팀플레이보다는 개인전 위주의 전투가 많기 때문에 팀웍보다는 개인의 실력이 중요하게 작용할 것으로 보인다. 또한, 맵의 크기가 상당히 크고 복잡한 구조를 가지고 있어 초보자는 적응하는 데 시간이 필요할 수 있다. 하지만 익숙해지면 넓은 전투 공간을 활용한 전략적인 플레이가 가능하다는 점에서 매력이 있다. 무엇보다도, 드래곤볼의 팬이라면 익숙한 캐릭터들과 전투를 즐길 수 있어 몰입도가 높은 편이다. 다만, 게임의 난이도는 중간 정도로 예상되며, 초보자는 난이도를 낮춰 플레이하는 것이 좋다. 맵의 진행 방식은 대체로 선공격을 펼치는 적을 상대로 방어와 공격을 조절하며 자원을 확보하는 방식으로 전개된다. 플레이어들은 전투 중에 자원을 확보해 유닛을 보강하거나 방어 건물을 건설하는 등 다양한 선택을 할 수 있다. 전투는 대체로 30분 내외로 완료될 것으로 예상되며, 긴장감 넘치는 전투가 지속된다. 이 맵은 드래곤볼 팬뿐만 아니라, 넓은 전투 공간과 전략적인 플레이를 좋아하는 게이머들에게도 추천할 만하다. 다만, 초보자는 전투의 패턴을 익히기 위해 연습 모드를 활용하는 것이 좋다. 또한, 팀플레이보다는 개인전 위주의 전투가 많기 때문에 팀웍보다는 개인의 실력이 중요하게 작용할 수 있다. 게임을 시작하기 전에 맵의 구조와 주요 전투 지점을 미리 확인해 두면 전투를 보다 효율적으로 진행할 수 있을 것이다. 특히, 맵의 가장자리에는 방어 건물이 집중되어 있어 이를 어떻게 공략하느냐가 승패의 열쇠가 될 수 있다. DBZ - Villains SE is a 5-player custom StarCraft map centered around the villains of Dragon Ball Z, where the core gameplay involves players uniting the power of Z Fighters to battle against powerful enemies like Frieza, Cell, and Buu. Set against a vast cosmic backdrop, each player controls StarCraft units to eliminate foes and push toward victory. While the terrain is relatively flat, strategically placed defensive structures and resource points can dramatically shift the flow of battle. Enemy bases are heavily fortified with defensive buildings, forcing players to carefully combine units and manage resources. Combat primarily revolves around close-quarters engagements, with numerous high-damage units featuring powerful abilities that amplify the scale of battles. The map captures the dynamic action of Dragon Ball Z with vibrant visuals and explosive effects, allowing players to lead battles in their own style. While fans of the series will recognize familiar characters and battles, the focus leans more toward action and combat rather than narrative, making it accessible to a broad audience. However, the map leans heavily toward individual combat rather than team play, meaning personal skill will matter more than teamwork. The map’s large and intricate layout may pose a challenge for beginners, requiring time to adapt. Once mastered, however, the expansive battlefield offers ample opportunities for strategic play. The immersion is strong for Dragon Ball fans, who can enjoy battles with iconic characters. That said, the difficulty is moderate, so beginners may want to lower the difficulty settings for a smoother experience. Gameplay unfolds as players balance defense and offense against early aggression while securing resources. Throughout battles, players can gather resources to reinforce units or construct defensive buildings, adding depth to their choices. Matches typically conclude within 30 minutes, maintaining high tension throughout. This map is recommended not only for Dragon Ball fans but also for gamers who enjoy large-scale combat and strategic depth. Beginners should practice in training mode to familiarize themselves with combat patterns, as individual skill is crucial due to the lack of emphasis on team coordination. Before starting, reviewing the map layout and key battle zones can streamline progress. Defensive structures concentrated along the edges can be pivotal, as how players approach them may determine victory or defeat.
GTA: 도시 탈출 (Grand Theft Auto v5.0)
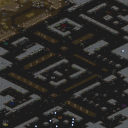
스타크래프트 브루드워의 유즈맵인 〈Grand Theft Auto v5.0〉은 이름에서 느껴지는 것처럼 도심과 도로가 복잡하게 얽힌 맵을 배경으로 한 액션 어드벤처형 디펜스 맵이다. 맵 중앙에는 넓은 도로가 펼쳐져 있으며, 곳곳에 건물이 배치되어 있어 시야를 가리고 적의 공격을 피하기 쉽다. 도로 양쪽으로는 아파트와 상가들이 밀집해 있어 전투가 벌어질 때마다 건물 뒤에 숨는 전략이 필요하다. 특히 맵 상단과 하단에는 넓은 평지가 펼쳐져 있어 대규모 전투가 벌어질 가능성이 높고, 중앙 도로가 주요 주요 교전 지역으로 활용될 것으로 추정된다. 도로 곳곳에는 차량이 주차되어 있어 시야 방해 요소로 작용할 수 있으며, 건물 출입구는 좁아지면서도 다수 유닛이 동시에 이동할 수 있는 구조를 가지고 있다. 플레이어는 이 맵에서 차량을 조종하거나 보행 유닛을 활용해 공격을 방어해야 하며, 건물과 도로의 특성을 잘 활용해 적의 공격을 효율적으로 막아내야 한다. 맵의 특징상 시야가 가려지는 구간이 많기 때문에 유닛의 배치와 이동 경로를 carefully plan해야 하며, 특히 도로의 중앙 교차로와 건물 밀집 지역은 전투의 핵심 포인트로 작용할 것이다. 초보 플레이어는 건물 뒤에 숨는 기본 전략부터 숙지해야 하며, 숙련자들은 도로의 넓은 공간을 활용한 기동전을 펼칠 수 있다. 맵의 분위기는 도심 한복판의 치안이 불안정한 지역을 연상시키며, 플레이어는 마치 범죄 조직의 일원이나 경찰처럼 도로와 건물 사이를 누비며 전투를 벌이는 경험을 하게 된다. 이 맵은 단독 플레이보다는 다인 플레이에서 더욱 재미를 느낄 수 있으며, 특히 팀플레이를 통해 건물과 도로의 특성을 공유하고 전략을 세우는 것이 중요하다. 맵을 플레이하기 전에는 건물의 출입구 위치와 도로의 주요 교차로를 미리 확인해 두는 것이 좋다. 또한, 유닛의 이동 경로가 좁은 통로에 의해 제한될 수 있으므로, 넓은 공간을 점유할 수 있는 유닛을 선택하는 것도 전략의 한 부분이다. 마지막으로, 맵의 복잡한 구조는 시야를 가리는 요소가 많기 때문에, 건물 꼭대기나 높은 지대에 유닛을 배치해 시야를 확보하는 것도 고려해 볼 만하다. Grand Theft Auto v5.0, a StarCraft: Brood War custom map, is an action-adventure defense game set in a densely packed urban environment with intricate roads and buildings. The map features a wide central road surrounded by scattered structures that block vision and provide cover from enemy attacks. On either side of the road, apartment complexes and commercial buildings are densely packed, forcing players to take cover behind them during combat. The top and bottom sections of the map consist of open plains where large-scale battles are likely to occur, while the central road serves as the primary battleground. Scattered vehicles along the roads act as visual obstructions, and building entrances are narrow yet allow multiple units to pass through simultaneously. Players must defend by either controlling vehicles or using infantry, leveraging the map’s buildings and roads to counter enemy attacks effectively. Due to the map’s many obscured areas, careful planning of unit placement and movement is essential, with the central intersections and densely built-up zones serving as critical combat hotspots. Beginners should start by mastering basic strategies like hiding behind buildings, while experienced players can exploit the open roads for mobile warfare. The map’s atmosphere evokes a crime-ridden urban district, immersing players in the role of either a criminal or police officer navigating the streets and buildings in battle. While enjoyable solo, the map shines brightest in multiplayer, where teamwork and shared strategies—especially utilizing the unique features of buildings and roads—become crucial. Before playing, it’s wise to scout building entrances and major intersections. Since narrow passages can restrict unit movement, selecting units capable of controlling open spaces is a key part of strategy. Finally, the map’s complex layout means vision control is vital—consider placing units on rooftops or elevated terrain to secure sightlines.
골렘 매드니스 퍼펙트 (Golem Madness Perfect)
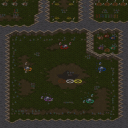
스타크래프트 브루드워의 유즈맵인 〈골렘 매드니스 퍼펙트〉는 다섯 명의 플레이어가 협동하거나 경쟁하며 골렘을 조종하고 파괴하는 재미를 느낄 수 있는 디펜스 장르의 맵입니다. 내부 설명을 보면 ‘골렘 파괴와 건설’이라는 핵심 메커니즘이 강조되며, ‘레드맨55’가 제작한 원본 게임을 ‘SSJ9_ZERO’가 업데이트하고 수정한 버전으로 확인됩니다. 맵 이미지를 보면 넓은 사막 지형에 흙길과 바위들이 배치되어 있으며, 중앙에는 커다란 골렘이 파괴된 상태로 놓여 있고, 주변에는 플레이어 기지나 골렘 생성 시설로 추정되는 구조물이 배치되어 있습니다. 골렘의 파괴와 재건을 반복하는 게임 방식은 전략적 판단과 빠른 액션을 동시에 요구합니다. 맵의 해상도와 타일셋은 2048×2048의 큰 규모로, 사막 풍경이 풍부한 디자인으로 몰입감을 높입니다. 이 맵은 특히 골렘을 직접 조종하며 파괴와 건설을 반복하는 재미와 함께, 플레이어 간의 협동이나 경쟁을 통해 전략적 깊이를 느낄 수 있도록 설계되었습니다. 초보와 숙련자 모두 즐길 수 있도록 난이도 조절이 가능할 것으로 추정되며, 팀플레이가 가능한 구조로 보입니다. 다만, 승리 조건이나 상세한 게임 규칙은 제공된 정보에 없으므로, 게임을 시작하기 전 내부 설명이나 맵 내 트리거를 확인하는 것이 좋습니다. 골렘의 움직임을 예측하며 전략을 세우고, 파괴와 재건의 타이밍을 잘 조절하는 것이 이 맵의 핵심 포인트입니다. Golem Madness Perfect is a UMS (Use Map Settings) custom map in StarCraft: Brood War where five players can either cooperate or compete by controlling and destroying golems. The map's internal description highlights its core mechanics—"Destroy and Build Golems"—and mentions that it was originally created by Redman55, later updated and fixed by SSJ9_ZERO. The map image reveals a vast desert terrain with dirt paths and rocks, featuring a large, destroyed golem in the center and what appear to be player bases or golem construction facilities around it. The gameplay revolves around repeatedly destroying and rebuilding golems, requiring both strategic thinking and quick reflexes. With a resolution of 2048×2048 and a desert tileset, the map immerses players in a rich, expansive environment. The design encourages strategic depth through either cooperative or competitive play. It is likely designed to be enjoyable for both beginners and experienced players, though difficulty adjustments may depend on player skill. While the exact win conditions and detailed rules are not provided, players are advised to check internal descriptions or in-game triggers before starting. The key to success lies in predicting golem movements, planning strategies, and timing the destruction and rebuilding phases effectively.
빅 게임 헌터스 (Big Game Hunters) (best.ver)
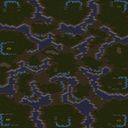
스타크래프트 브루드워의 고전 유즈맵으로 유명한 <빅 게임 헌터스(Big Game Hunters)>의 베스트 버전인 '$ Hunter (best.ver) $'는 사냥꾼과 사냥감이 되는 플레이어 간의 대결을 중심으로 구성된 팀 기반의 액션 디펜스 장르 맵이다. 맵은 넓은 사막 지형을 배경으로 펼쳐지며, 사냥꾼 팀은 맵 중앙의 거대한 동물(사슴, 곰, 코끼리 등)을 사냥하는 목표를 갖고, 동물 팀은 이들을 보호하고 탈출하는 것이 주요 임무다. 사냥꾼 팀은 동물의 체력을 깎아내야 하고, 동물 팀은 체력이 가득 차거나 특정 구역에 도달하면 승리를 거둘 수 있다. 맵 곳곳에는 장애물과 숨겨진 지점이 있어 전략적인 플레이가 요구된다. 특히 동물 팀은 맵 내의 동굴이나 바위 지형을 활용해 사냥꾼의 공격을 피할 수 있으며, 사냥꾼 팀은 맵의 넓은 시야를 바탕으로 동물의 위치를 추적해야 한다. 맵의 밸런스는 사냥꾼과 동물의 능력 차이를 고려해 설계되어 있으며, 플레이어 간 협력이 중요하다. 추천 플레이 인원은 2~8명으로, 팀 구성은 사냥꾼 1팀 vs 동물 1팀이 기본이지만, 변칙적으로 사냥꾼 2팀 vs 동물 1팀으로 플레이할 수도 있다. 맵의 난이도는 보통 수준으로, 초보 플레이어도 충분한 전략과 팀워크가 있다면 승리를 노려볼 수 있지만, 숙련된 플레이어와 마주하면 쉽지 않은 전투가 될 수 있다. 맵의 특징은 맵 내의 동물 모델과 사냥꾼 모델의 디자인, 그리고 사막 배경의 몰입감 있는 그래픽에 있다. 따라서 맵을 플레이하기 전에는 동물 팀의 보호 구역과 사냥꾼 팀의 공격 루트를 미리 파악하고, 팀원 간의 역할 분담을 clearly 정하는 것이 중요하다. 또한, 맵의 베스트 버전답게 밸런스가 잘 조절되어 있어, 초심자도 즐기기 좋은 동시에 숙련자도 전략적 깊이를 느낄 수 있는 매력이 있다. 이 맵은 팀워크와 전략이 요구되는 만큼, 친구들과 함께 플레이하면 더욱 재미를 느낄 수 있을 것이다. $ Hunter (best.ver) $ is a classic Brood War custom map famous for its Big Game Hunters series. This best version is a team-based action defense game where hunters face off against players acting as prey. Set in a vast desert landscape, the hunters' goal is to take down a large animal in the center of the map—such as a deer, bear, or elephant—while the animal team must protect it and escape. Hunters reduce the animal's health, and the animal team wins if their health is fully restored or they reach a certain area. Scattered obstacles and hidden spots add depth, requiring strategic play. The animal team can use caves or rocky terrain to evade hunters, while hunters rely on the map's wide visibility to track their targets. The map is balanced to account for the differing abilities of both sides, making teamwork essential. Recommended player count is 2 to 8, with the standard setup being one hunter team versus one animal team, though variations like two hunter teams versus one animal team are possible. The difficulty is moderate—beginners can strategize and cooperate for a chance at victory, but facing skilled players makes the battle tougher. Standout features include the detailed animal and hunter models and the immersive desert graphics. Before playing, it's crucial to study the animal team's protected zones and the hunters' attack routes and clearly assign roles among teammates. As the best version of the map, it offers well-tuned balance, making it enjoyable for newcomers while still providing strategic depth for experienced players. With its emphasis on teamwork and strategy, it's a great choice to play with friends for maximum fun.
Adult swim v6.0
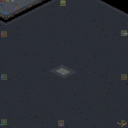
'어덜트 스윔 v6.0(Adult Swim v6.0)'은 E)Bighunger가 제작하고 dbgt-omegashen이 수정한 8인용 유즈맵으로, 우주 타일셋의 128x128 타일 크기에서 펼쳐지는 빠른 액션 전투가 특징입니다. 맵 제목과 'ASS KICKIN ACTION'이라는 설명에서 알 수 있듯, 복잡한 빌드 오더나 자원 관리보다는 즉각적인 유닛 조작과 화력 대결에 초점을 맞춘 아레나·블러드 계열의 플레이를 지향합니다. 8명의 플레이어가 동시에 진입하는 구조상 초반부터 난전이 벌어지며, 맵 크기가 표준보다 작아 이동 거리가 짧고 교전 템포가 매우 빠릅니다. 트리거로 제공되는 유닛 강화나 특수 능력 아이템을 활용해 순발력 있게 대처하는 재미가 핵심이며, 장시간 밀리 운영에 부담을 느끼는 유저나 가벼운 킬링 타임용 대전 맵을 찾는 이들에게 적합합니다. 플레이 전에는 버전별 밸런스 조정 사항과 시작 자원, 유닛 구성 프리셋을 확인하고, 팀 프리 또는 FFA 룰 여부를 호스트와 맞춰보는 것이 좋습니다. 시리즈의 여섯 번째 버전인 만큼 전작 대비 유닛 밸런스와 맵 지형 수정이 누적되어 있을 것으로 보입니다. 'Adult Swim v6.0' is an 8-player UMS map created by E)Bighunger and modified by dbgt-omegashen, featuring fast-paced action combat on a 128x128 tile space tileset. As the title and the description 'ASS KICKIN ACTION' suggest, it focuses on immediate unit control and firepower duels rather than complex build orders or resource management, leaning towards arena/blood-style gameplay. With eight players entering simultaneously, chaotic skirmishes erupt from the early game, and the map size is smaller than standard, shortening travel distance and accelerating engagement tempo. The core fun lies in reacting swiftly using unit upgrades or special ability items provided via triggers. It suits users who feel burdened by long macro games or seek a light, kill-time battle map. Before playing, it is advisable to check version-specific balance changes, starting resources, unit presets, and confirm whether the host runs Team Free or FFA rules. As the sixth version in the series, cumulative unit balance and terrain revisions from previous iterations are expected.
아토마드니스 3 (ATOMADNESS 3)
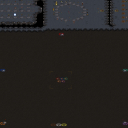
ATOMADNESS 3는 스타크래프트 브루드워의 유즈맵으로, 주인공 캐릭터를 조종해 적들을 섬멸하는 액션 중심의 디펜스 장르 맵이다. 맵의 전체적인 구조는 중앙 하단에 위치한 시작 지점에서 출발해, 상단과 좌우로 뻗어나가는 길목과 요새를 거쳐 적의 본진으로 진격하는 형태로 구성되어 있다. 맵 곳곳에는 다양한 장애물과 함정이 배치되어 있어, 플레이어는 이를 피해가며 전진하거나 적절히 활용해야 한다. 적들은 맵 상단에서 끊임없이 스폰되며, 플레이어는 그들을 efficiently 제압하는 동시에 본진으로 도달하는 길을 개척해야 한다. 맵의 분위기는 우주 테마로 연출되어 있으며, 어두운 배경과 밝은 빛 효과가 조화를 이루어 긴장감을 고조시킨다. 플레이어는 맵의 특성에 맞게 영웅 유닛을 활용하거나, 주변 자원을 수집해 능력을 강화하는 등 다양한 전략을 구사할 수 있다. 특히 맵의 난이도는 적의 수가 많고 배치된 함정이 복잡할수록 상승하므로, 초보자는 비교적 단순한 루트를 선택하는 것이 좋으며, 경험이 쌓이면 더 어려운 길목을 공략해 보상을 얻는 방식이 권장된다. 맵의 핵심은 지속적인 전진과 방어, 그리고 순간적인 판단력이다. 한 번 실수하면 전선이 무너질 수 있으므로, 신중한 플레이가 요구된다. 추천하는 플레이 대상은 액션 디펜스 장르를 좋아하는 플레이어이며, 특히 팀 플레이보다는 개인의 실력이 중요시되는 맵이라는 점도 염두에 둬야 한다. 플레이 전 맵의 구조와 함정 위치를 숙지하는 것이 무엇보다 중요하며, 영웅의 능력과 맵 상의 리소스를 잘 활용하는 연습이 필요하다. 또한, 적의 스폰 타이밍과 패턴을 파악하는 것도 승리 조건을 달성하는 데 큰 도움이 된다. 이 맵은 단순히 적을 죽이는 것뿐만 아니라, 맵 자체의 디자인과 상호작용하는 재미가 큰 만큼, 여러 번 플레이해 보며 최적의 전략을 찾아보는 것을 추천한다. 또한, 난이도가 높아질수록 더욱 전략적인 플레이가 요구되므로, 꾸준한 연습과 분석이 필요하다. 이 맵은 디펜스와 액션의 조화가 돋보이는 유즈맵으로, 스타크래프트의 유즈맵 среди에서 독특한 입지를 차지하고 있다. 플레이어는 맵의 긴장감 속에서 몰입감을 느낄 수 있으며, 매번 새로운 도전으로 재방문이 권장된다. 특히 맵의 구조적 특징과 함정 배치에 익숙해지면, 더 높은 점수를 획득할 수 있는 기회가 많아진다. 맵의 완성도가 높아 디자인적 측면에서도 호평을 받을 만한 요소들이 가득하다. 이 맵을 즐기기 위해서는 맵의 전체적인 흐름을 이해하고, 자신의 플레이 스타일에 맞게 전략을 조정하는 것이 중요하다. 또한, 맵의 난이도를 낮추고 싶다면, 적을 한 번에 몰아서 처리하는 방법보다는 한 명씩 차분히 처리하는 방법을 택하는 것이 좋다. 맵의 진행 속도는 플레이어의 실력에 따라 달라지므로, 자신에게 맞는 템포를 찾는 것이 핵심이다. 마지막으로, 이 맵은 경쟁보다는 성취감을 느끼는 데 중점을 둔 장르이므로, 부담 없이 즐기는 것이 가장 중요하다. ATOMADNESS 3는 디펜스와 액션의 조화가 돋보이는 유즈맵으로, 스타크래프트의 유즈맵 среди에서 독특한 입지를 차지하고 있다. 플레이어는 맵의 긴장감 속에서 몰입감을 느낄 수 있으며, 매번 새로운 도전으로 재방문이 권장된다. 특히 맵의 구조적 특징과 함정 배치에 익숙해지면, 더 높은 점수를 획득할 수 있는 기회가 많아진다. 맵의 완성도가 높아 디자인적 측면에서도 호평을 받을 만한 요소들이 가득하다. 이 맵을 즐기기 위해서는 맵의 전체적인 흐름을 이해하고, 자신의 플레이 스타일에 맞게 전략을 조정하는 것이 중요하다. 또한, 맵의 난이도를 낮추고 싶다면, 적을 한 번에 몰아서 처리하는 방법보다는 한 명씩 차분히 처리하는 방법을 택하는 것이 좋다. 맵의 진행 속도는 플레이어의 실력에 따라 달라지므로, 자신에게 맞는 템포를 찾는 것이 핵심이다. 마지막으로, 이 맵은 경쟁보다는 성취감을 느끼는 데 중점을 둔 장르이므로, 부담 없이 즐기는 것이 가장 중요하다. ATOMADNESS 3 is a custom map for *StarCraft: Brood War*, a defense-focused action game where players control a protagonist to eliminate enemies. The map’s structure starts from a central starting point at the bottom and progresses upward and outward through branching paths and forts, culminating in an assault on the enemy’s main base. Scattered across the map are various obstacles and traps, forcing players to either evade them or use them strategically. Enemies continuously spawn from the top of the map, requiring players to efficiently suppress them while forging a path to the main base. The atmosphere is space-themed, with a dark backdrop accented by bright lighting effects that heighten tension. Players can adapt their strategies by utilizing hero units or gathering resources to enhance abilities. The difficulty escalates with denser enemy spawns and more complex trap placements, so beginners should opt for simpler routes, while veterans are encouraged to tackle harder paths for greater rewards. The core gameplay revolves around relentless advancement, defense, and quick decision-making—mistakes can collapse the front line, demanding careful play. This map is ideal for fans of action-defense games, particularly those who value individual skill over team coordination. Before playing, it’s crucial to memorize the map layout and trap locations, along with mastering hero abilities and resource management. Recognizing enemy spawn timings and patterns is also key to securing victory. Beyond mere combat, the map’s design and interactive elements offer deep engagement, making repeated playthroughs valuable for refining optimal strategies. As difficulty rises, more tactical approaches become necessary, requiring consistent practice and analysis. ATOMADNESS 3 stands out in the *StarCraft* custom map scene for its seamless blend of defense and action, immersing players in its high-stakes atmosphere. Revisiting the map is highly recommended, as familiarity with its structure and traps unlocks opportunities for higher scores. The map’s polished design and attention to detail have earned it acclaim, but enjoying it fully means understanding its flow and tailoring strategies to personal playstyles. To ease difficulty, it’s better to engage enemies one at a time rather than overwhelming them in batches. The pace of progression depends on player skill, so finding a comfortable tempo is essential. Ultimately, this map prioritizes the sense of achievement over competition, so the best way to experience it is without pressure.
패어리 오즈 패런츠 매드니스 V2 (Fairly Odd Parents Madness V2)
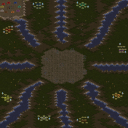
이 맵은 3072×3072 타일 크기의 대규모 유즈맵으로, 사막 타일셋을 이용해 넓게 펼쳐진 전장 위에 여러 강과 계곡이 복잡하게 얽혀 있다. 중앙에는 대형 비어 있는 구역이 존재하며, 주변에는 네 개씩 배치된 포인트가 적들의 스폰지와 아이템 획득 지점으로 활용된다. 전체 구조는 원형 중심에서 outward 방향으로 강과 계곡이 퍼져 있어, 플레이어는 각 구간을 점령하고 자원을 획득한 뒤 중앙으로 진입해 최종 전투를 벌인다. 장르는 UMS(유즈맵) 에 속하며, 디펜스와 컴까기 요소를 결합한 복합적인 플레이 방식을 제공한다. 8명까지 동시 플레이가 가능하고 팀 제한이 없으며, 각 플레이어는 다양한 유닛과 기술을 사용해 전장을 장악한다. 난이도는 보통 수준으로, 초보자도 충분히 적응 가능하지만 전략적 배치를 통해 고수玩家는 더 효율적인 승리를 달성할 수 있다. 플레이 전 확인 포인트로는 타일셋(사막), 해상도(3072×3072), 타일 크기(96×96), 인코딩(CP949) 등을 점검하고, 적절한 유닛 배분과 타이밍 조절이 필요함을 인식하는 것이 중요하다. This is a large UMS map measuring 3072 × 3072 tiles, built with the desert tileset and featuring a sprawling battlefield crisscrossed by many rivers and valleys. At the center lies a sizable empty zone, while the surrounding area contains four‑point clusters that serve as enemy spawn points and item pickup locations. The overall layout radiates outward from the circular core, with rivers and valleys spreading like spokes; players must capture each segment, gather resources, and then push toward the center for the final showdown. The map blends defense and scavenging elements, offering a hybrid playstyle that supports up to eight simultaneous players with no team restrictions. Each participant can employ a variety of units and abilities to dominate the map. Difficulty is moderate—beginners can adapt easily, while experienced players can refine their positioning for more efficient victories. Before playing, check the tileset (desert), resolution (3072 × 3072), tile size (96 × 96), and encoding (CP949), and remember that proper unit distribution and timing are crucial for success.
최근 등록된 맵
새로 추가된 파일과 버전을 확인하세요.
콘돔 깨기 (Break The Condom)
스타크래프트 브루드워 유즈맵 'Break The Condom'은 특이한 제목과 컨셉으로 눈길을 끄는 액션 기반의 UMS 맵입니다. 내부 설명에 따르면 이 맵의 핵심 목표는 장벽이나 방어구역을 뚫고(Condom을 깨고) 최종 목표물인 달걀(Egg)에 도달하는 것입니다. 이는 일종의 탈출 또는 목표 점령 형식의 게임으로 추정되며, 'Pregnacy'라는 게임명을 통해 유머러스하거나 선정적인 테마를 의도한 것으로 보입니다. 맵 크기가 2048 x 6144 타일로 매우 길고 좁은 구조를 띠고 있어, 광장형 전투보다는 좁은 통로나 복도를 따라 진행되거나 방어선을 돌파해야 하는 구도가 연출될 가능성이 높습니다. 플레이 방식은 최대 6인용으로 설계되었으며, 'Mass Attack'이 추가되었다는 설명에서 알 수 있듯 다수의 적 유닛이 몰려오는 웨이브 형태나 대규모 전투가 주요 플레이 요소로 보입니다. 'The Fallen Dragons Map Divison'과 'Stats_R_Gay'가 제작 및 수정에 참여했으며, 15분이라는 제한 시간(Orgasm Time) 내에 목표를 달성해야 한다는 점은 긴장감을 더합니다. 좁은 맵 레이아웃과 다수의 적 공격을 고려할 때, 빠른 이동속도와 방어력, 그리고 효율적인 군단 조종이 요구되는 하드코어한 액션 플레이가 예상됩니다. 이 맵은 기존의 전형적인 디펜스나 RPG와 달리, 단순한 생존이 아닌 특정 지점 도달에 초점을 맞춘 액션 어드벤처 느낌의 유즈맵입니다. 짧은 시간 내에 집중력을 발휘해 적군을 돌파해야 하므로, 빠른 리액션과 맵 지형 이해도가 중요한 스타크래프트 맵을 선호하는 플레이어들에게 추천합니다. 특히 유즈맵 중에서도 전투 중심의 액션성을 중요시하는 유저들에게 흥미로운 경험을 제공할 것으로 보입니다. 플레이 전에는 상대방과의 협력이나 경쟁 규칙을 명확히 하고, 제한 시간 내에 전략적으로 움직일 수 있는지 확인하는 것이 좋습니다. StarCraft Brood War user map 'Break The Condom' is an action-oriented UMS map that catches the eye with its unique title and concept. According to the internal description, the core objective is to break through a barrier or defense zone and reach the final target, the 'Egg'. This suggests an escape or objective-capture style game, with the name 'Pregnacy' hinting at a humorous or provocative theme. The map size of 2048 x 6144 tiles indicates a very long and narrow structure, likely featuring gameplay focused on advancing through narrow passages or breaching defense lines rather than open-field battles. Designed for up to 6 players, the mention of 'Mass Attack' added by Stats_R_Gay suggests that waves of enemy units or large-scale combat are key elements. The map was created by 'The Fallen Dragons Map Divison' and edited by Stats_R_Gay, with a 15-minute time limit ('Orgasm Time') adding urgency to achieving the goal. Considering the narrow layout and mass enemy attacks, hardcore action gameplay requiring fast movement, defense, and efficient army control is expected. Unlike typical defense or RPG maps, this user map focuses on reaching a specific point rather than mere survival, offering an action-adventure feel. It is recommended for players who prefer StarCraft maps that require concentration and quick reflexes within a short timeframe. It should provide an interesting experience for users who value combat-centric action in user maps. Before playing, it is advisable to clarify rules regarding cooperation or competition and ensure strategic movement within the time limit.
메가맨 X10 (Mega Man X10)
Mega Man X10은 스타크래프트 브루드워 기반의 유즈맵으로, 내부 설명인 'Kill Sigma'처럼 시그마를 물리치는 목표를 가진 액션 중심 미니게임 형태이다. 맵 크기는 1024x1024 타일로 넓은 우주 타일셋 배경을 사용하며, 최대 3명의 플레이어가 협동하여 시그마와 전투를 벌인다. 별도의 기지 건설이나 자원 채취 없이 바로 전투에 투입되는 구조로, 각 플레이어는 선택된 유닛이나 영웅을 통해 공격을 가하고 스킬을 활용한다. 시그마는 높은 체력과 강력한 공격을 보유하고 있으며, 패턴을 파악하고 적절한 타이밍에 스킬을 사용해야 승리할 수 있다. 협동 요소가 강조되어 플레이어 간 역할 분담이 중요하고, 한 명이 쓰러져도 다른 동료가 이어서 싸울 수 있어 부담이 적다. 전반적인 흐름은 빠른 진행과 즉각적인 피드백을 제공하여 짧은 시간 내에 긴장감 넘치는 플레이 경험을 선사한다. 이 맵은 스타크래프트 유즈맵 중에서 액션 및 보스전 스타일을 좋아하는 플레이어, 특히 메가맨 시리즈 팬에게 추천하며, 복잡한 전략보다는 직관적인 조작과 타이밍 잡기가 핵심이다. 플레이 전에는 유닛 조작법과 시그마의 공격 패턴을 미리 살펴보면 보다 원활한 진행이 가능하며, 3인 협동을 권장한다. Mega Man X10 is a StarCraft: Brood War UMS map whose internal description "Kill Sigma" indicates an action‑oriented mini‑game focused on defeating the boss Sigma. The map uses a 1024×1024 tile size with a space tileset backdrop and supports up to three players who cooperate in combat against Sigma. There is no base building or resource gathering; players jump straight into battle, controlling selected units or heroes to attack and use abilities. Sigma possesses high health and powerful attacks, requiring players to learn its patterns and time their skills correctly to win. Cooperation is emphasized, with role distribution mattering and fallen teammates able to be carried forward by others, reducing pressure. The flow delivers rapid progression and immediate feedback, offering a tense experience in a short playtime. This map is recommended for StarCraft UMS fans who enjoy action and boss‑fight styles, especially Mega Man enthusiasts, as it relies on intuitive control and timing rather than deep strategy. Before playing, reviewing unit controls and Sigma’s attack patterns helps ensure smooth progress, and three‑player cooperation is advised.
캅스 앤드 로버즈 (Cops n Robbers TheWeedMan)
Cops n Robbers TheWeedMan은 스타크래프트 브루드워의 UMS 맵으로, 우주 타일셋을 이용한 1024×1024 크기의 맵에서 경찰과 강도 사이의 대결을 펼치는 액션 중심의 유즈맵이다. 내부 설명에 따르면 플레이어는 돈을 훔치고, 차량을 납치하고, 건물을 폭파하며 경찰을 저지하고, 잡히지 않도록 해야 하는 목표를 갖는다. 이 구조는 강도 측이 다양한 범죄 행위를 통해 점수를 올리고, 경찰 측은 이를 저지하거나 범인을 체포하는 방식으로 진행되는 것으로 추정된다. 맵은 6명이 동시에 참여할 수 있도록 설계되었으며, 팀 구성은 사전에 정해지지 않아 호스트가 경찰과 강도의 비율을 자유롭게 조정할 수 있다. 우주 타일셋 특유의 미래적인 배경 속에 자리한 다양한 건물과 도로, 차량 스프라이트가 배치되어 있어, 강도는 건물 내부에 숨은 돈을 탈취하거나 차량을 hijack하여 도주로를 만드는 플레이를, 경찰은 순찰과 추격을 통해 이를 저지한다. 게임 플레이는 실시간으로 이루어지며, 일정 시간 내에 목표를 달성하거나 상대를 제거하는 방식으로 승부가 난다. 이러한 흐름은 긴장감과 순간적인 판단이 요구되며, 협상이나 배신 같은 심리전도 발생할 수 있어 소규모 그룹 간의 친선 매치나 대회 모두에 적합하다. 플레이 전 확인 포인트로는, 호스트가 경찰과 강도의 역할을 명확히 지정했는지, 돈과 차량 등의 오브젝트가 정상적으로 스폰되는지, 그리고 폭파나 납치 시점에 발생하는 트리거가 의도대로 작동하는지 등을 테스트해 보는 것이 좋다. 전반적으로 Cops n Robbers TheWeedMan은 간단한 조작과 직관적인 목표로 인해 입문자도 쉽게 접근할 수 있지만, 전략적인 팀 플레이와 타이밍이 승부를 가르는 만큼 중급 이상의 플레이어에게도 만족스러운 경험을 제공한다. Cops n Robbers TheWeedMan is a UMS map for StarCraft: Brood War that uses the space tileset on a 1024×1024 map to depict a confrontation between police and robbers in an action‑oriented user‑made scenario. According to the internal description, players must steal money, hijack vehicles, blow up buildings, take down cops, and avoid being caught. This setup suggests that the robber side earns points by committing various crimes while the police side tries to stop them or apprehend suspects. The map accommodates six players simultaneously, and because team assignments are not preset, the host can freely adjust the ratio of police to robbers. Set against a futuristic space backdrop, the map features assorted buildings, roads, and vehicle sprites, allowing robbers to infiltrate structures to loot cash or hijack vehicles for escape routes, while police patrol and pursue to thwart these actions. Gameplay proceeds in real time, with victory determined by achieving objectives within a time limit or eliminating opponents. This flow demands quick reflexes and situational judgment, and can also involve psychological elements such as bluffing or betrayal, making it suitable for both casual friendly matches and small‑scale tournaments. Before playing, checkpoints include verifying that the host has clearly assigned cop and robber roles, confirming that money and vehicle objects spawn correctly, and testing that destruction or hijack triggers fire as intended. Overall, Cops n Robbers TheWeedMan offers straightforward controls and intuitive goals that newcomers can grasp easily, yet its reliance on strategic teamwork and timing provides a rewarding challenge for intermediate and experienced players alike.
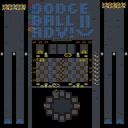
슈퍼 도지볼 어드밴스 V2 (Super DodgeBall Advance V2)
‘슈퍼 도지볼 어드밴스 V2’는 스타크래프트 브루드워에서 즐기는 독특한 액션형 유즈맵으로, 말 그대로 공을 들고 상대 팀에게 던져 체력을 깎아 승리하는 간단하면서도 중독성 있는 게임 방식이 특징이다. 맵 중앙에 위치한 넓은 경기장에서 두 팀이 대치하며, 손에 공을 쥐고 상대방을 향해 던지거나 공을 빼앗아 전략적으로 활용해야 한다. 맵은 우주 테마의 타일셋으로 구성되어 우주 공간을 배경으로 한 듯한 분위기를 연출하며, 넓은 공간 덕분에 빠른 움직임과 전술적 플레이가 가능하다는 장점이 있다. 특히 공을 던질 때 발생하는 물리적 효과와 충돌 판정이 인상적인데, 공의 궤적을 예측하며 적을 배제하는 재미가 돋보인다. 이 맵의 핵심은 ‘던지기’와 ‘피하기’에 맞춰진 타이밍과 거리 감각인데, 상대방의 움직임을 읽고 공을 던질 최적의 순간을 판단하는 것이 관건이다. 또한 팀원과의 협동이 중요하다는 점에서 단순한 개인 플레이를 넘어 팀워크가 빛을 발하는 장르로 분류할 수 있다. 초보자들이 осво하기 어려운 난이도이지만, 익숙해지면 공을 던지는 기술과 회피 기술이 발전해 더욱 흥미로운 플레이가 가능하다는 점에서 반복 플레이의 재미가 있다. 그러나 넓은 맵에서 공을 찾기 힘든 경우도 occasional 있어서 아이템이나 공의 생성 위치를 미리 확인하는 것이 좋다. 이 맵은 4~6명의 플레이어가 권장되지만, 7명으로 구성된 현재 버전에서는 팀 간 밸런스가 다소 불안정할 수 있어 공정성을 위해 팀 구성을 신중히 고려해야 한다. ‘슈퍼 도지볼 어드밴스 V2’는 단순한 재미를 넘어 전략과 감각을 동시에 요구하는 유즈맵으로, 소규모 전투와 재치 있는 액션을 좋아하는 플레이어들에게 강력히 추천할 만하다. 특히 팀전으로 즐길 때 그 진가가 발휘되므로, 친구들과 함께 팀원을 짜고 도전해 보는 것을 권장한다. 다만 공의 속도나 충돌 판정은 버전에 따라 조금씩 차이가 있을 수 있으니, 미리 플레이 해보면서 자신에게 맞는 설정을 찾는 것이 중요하다. 이 맵을 즐기기 위해서는 넓은 시야와 빠른 반응 속도가 필수이며, 상대방의 움직임을 예리하게 관찰하는 능력이 victory를 좌우할 것이다. Super DodgeBall Advance V2 is a unique action-oriented custom map for StarCraft: Brood War where two teams compete by picking up a ball and throwing it at opponents to reduce their health points. Set against a space-themed tile set, the expansive central arena allows for dynamic movement and tactical play, making dodging and throwing mechanics the core of the experience. The physics of the ball’s trajectory and collision create a satisfying challenge, requiring players to anticipate enemy movements and time their throws perfectly. While the game emphasizes individual skill in throwing and dodging, teamwork plays a crucial role in coordinating attacks and defense. The recommended player count is 4 to 6, but with 7 players, balancing teams can be tricky, so careful team formation is advised. Beginners may find the mechanics difficult at first, but as players improve, the game offers increasingly engaging and skill-based gameplay. The map’s large open space can sometimes make the ball hard to locate, so checking spawn points beforehand is helpful. Overall, Super DodgeBall Advance V2 is a fun and strategic custom map that blends action and teamwork, making it a great choice for players who enjoy quick reflexes and tactical challenges. To get the most out of the experience, team coordination and sharp observation of opponents’ movements are key to victory.
차량 학살 2.0 (Car Massacre 2.0)
스타크래프트 브루드워의 유즈맵 ‘Car Massacre 2.0’은 플레이어가 차량을 조종해 가능한 한 많은 인명을 치고 다니는 하이퍼 액션 스타일의 맵으로, 4명의 플레이어가 동시에 경쟁하는 형식의 아레나 게임이다. 맵은 황무지 타일셋을 기반으로 제작되었으며, 넓은 도로와 건물들이 배치된 공간에서 벌어지는 이 맵의 핵심은 속도와 정확성이다. 플레이어는 차량을 움직이며 도로 위에 배치된 NPC 무작위 보행자들을 치워야 하며, 동시에 등장하는 경찰 차량의 추격을 피하거나 교전해야 한다. 맵의 구조는 도로를 따라 펼쳐진 넓은 필드와 구획화된 건물이 특징으로, 보행자들은 도로 위를 무작위로 배회하거나 건물을 오가며 등장한다. 경찰 차량은 일정 시간마다 등장해 플레이어의 차량을 공격하며, 치고 다니는 보행자 수가 많을수록 점수가 오르는 방식이다. 승리 조건은 제한 시간 내 최대한 많은 보행자를 치거나, 경찰 차량을 파괴하는 데 성공하는 등 맵에 따라 변할 수 있으나, 기본적으로는 보행자 학살 수를 경쟁하는 게임으로 구성되어 있다. 이 맵은 속도감 넘치는 액션과 간단한 조작으로도 누구나 쉽게 즐길 수 있지만, 경찰 차량을 상대할 때는 전략적인 회피가 필요해 초보와 숙련자 모두에게 적합한 재미를 제공한다. 또한, 4인 동시 플레이가 가능해 친구들과의 경쟁이 치열해지는 즐거움도 있다. 이 맵을 즐기기 위해서는 빠른 조작 반응과 도로 위의 보행자 위치를 파악하는 시야가 중요하며, 건물과 도로의 배치를 숙지하면 더 높은 점수를 노릴 수 있다. Car Massacre 2.0은 단순한 ‘치기’ 게임 같지만, 실제로는 시뮬레이션과 액션이 조합된 독특한 유즈맵으로, 스타크래프트의 유즈맵 역사에서 독특한 위치에 있는 맵 중 하나다. 특히, 차량을 조작하는 감각과 경찰 추격의 긴장감, 보행자 학살의 쾌감이 조화를 이뤄 짧은 플레이 타임에도 강한 몰입감을 준다. 초보자는 낮은 난이도에서 천천히 적응해 볼 수 있으며, 숙련자는 경찰 차량을 상대하며 전략을 구사하는 재미를 느낄 수 있다. 다만, 맵의 난이도는 플레이어의 조작 실력에 크게 좌우되므로, 처음 플레이 시에는 NPC 보행자의 움직임과 경찰 차량의 패턴을 익히는 것이 중요하다. 이 맵은 특히나 친구들과의 대결에서 그 진가가 발휘되므로, 팀 플레이보다는 개인 경쟁을 즐기는 유저들에게 강력히 추천할 만한 작품이다. 또한, 맵의 BGM이나 효과음도 액션과 잘 어우러져 atmosfer를 살려주며, 스타크래프트 특유의 그래픽 스타일이 오히려 이 맵의 독특한 분위기를 돋보이게 한다. 이 맵을 플레이하면서 얻을 수 있는 가장 큰 재미는 ‘최고의 학살자’가 되는 순간의 성취감이다. Car Massacre 2.0은 단순한 유즈맵을 넘어, 스타크래프트의 유즈맵 문화에서 한 획을 그은 작품으로, 액션과 경쟁의 묘미를 동시에 느낄 수 있는 매력적인 맵이다. 플레이 전에는 반드시 자신의 차량 조작 감각을 테스트해 보고, 경찰 차량의 공격 패턴을 숙지한 뒤 도전해 보기를 권장한다. 이 맵은 한 번 플레이하면 중독성이 강해, 스트레스 해소용으로도 손색이 없을 것이다. 또한, 맵의 넓고 개방적인 공간 덕분에 다양한 플레이 스타일을 구사할 수 있어, 매번 다른 재미를 느낄 수 있는 것도 이 맵의 큰 장점 중 하나다. 특히, 보행자를 치는 순간의 소리와 점수 반영은 매우 직관적이어서, 초보자도 금방 적응할 수 있는 구조로 설계되어 있다. Car Massacre 2.0은 스타크래프트 유즈맵의 역사에서 잊을 수 없는 명작으로, 액션과 경쟁의 조화를 극대화한 작품으로 평가받고 있다. 이 맵을 통해 스타크래프트의 새로운 재미를 발견해 보길 바란다. 이 맵의 가장 큰 특징은 바로 ‘치기’라는 단순한 목적에도 불구하고, 그 안에 숨겨진 전략과 경쟁의 깊이다. 보행자를 치는 것만으로도 점수를 얻을 수 있지만, 경찰 차량을 상대하며 시간을 벌거나 보행자 밀집 지역을 찾아 다니는 등 다양한 플레이가 가능하다는 점이 이 맵의 매력이다. 또한, 맵의 구조가 넓고 개방적이어서, 플레이어는 자신의 전략에 따라 다양한 루트를 선택할 수 있어, 매번 새로운 플레이 경험을 제공한다. 이 맵을 즐기기 위해서는 먼저 자신의 차량 조작에 익숙해지는 것이 중요하며, 경찰 차량의 공격 패턴을 미리 숙지하는 것이 좋다. 또한, 보행자 밀집 지역을 찾아 다니는 것도 높은 점수를 얻는 데 도움이 된다. Car Massacre 2.0은 스타크래프트 유즈맵의 역사에서 손꼽히는 명작으로, 액션과 경쟁의 묘미를 동시에 느낄 수 있는 매력적인 작품이다. 이 맵을 플레이하면毫无疑问, 스타크래프트 유즈맵의 새로운 재미를 발견할 수 있을 것이다. *Car Massacre 2.0* is a hyper-action StarCraft: Brood War custom map where players control vehicles to mow down as many pedestrians as possible. It’s a four-player arena game where speed, precision, and carnage are key. Set in a wasteland tile set with sprawling roads and scattered buildings, the goal is to smash NPC pedestrians while evading or engaging pursuing police vehicles that spawn at intervals. Pedestrians wander randomly on roads or between buildings, and the more you hit, the higher your score climbs. Victory conditions vary—either racking up the highest pedestrian body count within the time limit or destroying police vehicles—but the core experience is a high-octane race to see who can commit the most vehicular manslaughter. The controls are simple enough for anyone to pick up, yet the chase dynamics against police demand strategic maneuvering, making it fun for both beginners and veterans. With four players competing simultaneously, the rivalry among friends adds an extra layer of intensity. Success hinges on quick reflexes and spatial awareness—spotting pedestrians on the road and mastering the map layout for optimal routes. While it might seem like a mindless "smash-and-score" game, *Car Massacre 2.0* blends simulation and action into something uniquely engaging. The thrill of controlling your vehicle, the tension of police pursuit, and the visceral satisfaction of mowing down crowds create an immersive experience that keeps you hooked even in short sessions. Beginners can ease in with lower difficulty settings, while advanced players will enjoy outmaneuvering police and refining their strategies. The map’s difficulty scales with your skill, so mastering pedestrian movement patterns and police attack cycles early on is crucial. Though it shines brightest in head-to-head showdowns, its open, modular design lets you experiment with different routes and tactics every game. The sound design—from the satisfying *thwack* of each hit to the wailing sirens of police—complements the action perfectly, and the game’s retro StarCraft aesthetic only enhances its chaotic charm. The ultimate thrill comes from becoming the undisputed champion of vehicular destruction, and once you do, you’ll be hooked. It’s addictive, stress-relieving, and packed with replay value thanks to its dynamic layout and variety of playstyles. *Car Massacre 2.0* isn’t just a custom map—it’s a landmark in StarCraft’s custom map history, a masterpiece that perfectly balances action and competition. Whether you're chasing high scores, outsmarting cops, or just enjoying the carnage with friends, this game delivers a fresh, adrenaline-packed take on what StarCraft custom maps can be. If you’re ready to embrace your inner road rager, dive in—but first, hone your vehicle handling and study those police spawn patterns. You won’t regret it.
토마와 제리 (Tom vs Jerry)
스타크래프트 브루드워 유즈맵 중 독특한 컨셉을 가진 '토마와 제리(Tom vs Jerry)' 스타일의 액션 디펜스 맵을 소개합니다. 이 맵은 이미지와 파일명을 통해 추정할 때, 플레이어가 특정 대상을 추격하거나 방어하는 서바이벌 형태의 미션을 수행하는 구조를 가지고 있습니다. 맵의 전체적인 배경은 황량한 사막 지형으로 구성되어 있으며, 좁은 길목과 복잡한 지형지물이 배치되어 있어 전략적인 움직임이 필수적입니다. 게임의 주요 목표는 적절한 유닛을 활용하여 몰려오는 적들을 처치하거나, 특정 목표물을 보호하는 것으로 보입니다. 맵의 구조를 살펴보면, 중앙의 개활지와 외곽의 숲, 그리고 인위적으로 조성된 듯한 석재 도로가 혼재되어 있어 플레이어의 이동 경로에 따라 전투 양상이 크게 달라질 수 있습니다. 특히 석재 도로는 유닛의 이동 효율을 높여주는 경로 역할을 할 것으로 추정되며, 이는 방어 라인을 구축하거나 기동성을 활용한 공격을 수행할 때 핵심적인 요소가 됩니다. 이 맵은 단순한 밀리(Melee) 방식이 아닌, 정해진 시나리오에 따라 적을 물리치는 유즈맵(UMS) 특유의 재미를 강조합니다. 따라서 단순한 자원 채취와 병력 생산보다는, 적의 이동 경로를 예측하고 효율적인 배치로 방어선을 유지하는 플레이 경험을 제공합니다. 혼자서도 충분히 즐길 수 있는 싱글 플레이 중심의 구성으로 보이며, 정교한 컨트롤과 적절한 타이밍의 유닛 투입이 승패를 가르는 핵심 요소가 될 것입니다. 이 맵은 복잡한 전략보다는 직관적인 액션과 몰입감 있는 미션 수행을 선호하는 유저들에게 추천합니다. 플레이 전, 맵의 특수한 트리거로 인해 유닛의 생산이나 자원 획득 방식이 일반적인 스타크래프트와 다를 수 있음을 인지하고 플레이하는 것이 좋습니다. This StarCraft: Brood War custom map, reminiscent of 'Tom vs Jerry' themes, is a unique action-defense UMS (Use Map Settings) experience. Based on the visual elements, the map features a desert terrain with a mix of open areas, forested patches, and paved stone paths. The core gameplay appears to revolve around a survival or mission-based objective, where players must engage with encroaching enemies or protect a specific target. The layout includes strategic pathways, such as the stone roads, which likely serve as efficient movement corridors for units, making them crucial for both defensive positioning and rapid response. Unlike a standard Melee game focused on resource management and macro play, this map emphasizes tactical unit placement and reactive combat to overcome specific scenarios. The environment's diverse topography—ranging from open deserts to narrow passages—suggests that positioning and map awareness will be vital for success. This map is highly recommended for players who enjoy mission-driven gameplay and direct combat encounters rather than long-term economic management. As it appears to be optimized for a single-player or focused mission experience, mastering unit control and timing will be the key to victory. Players should be prepared for non-traditional mechanics, as custom triggers often alter standard resource or unit production systems in such specialized maps.
네오 아르카노이드 2.2 (Neo Arkanoid 2.2)
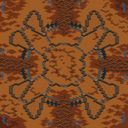
스타크래프트 브루드워의 ‘네오 아르카노이드 2.2’는 이름 그대로 아르카노이드 스타일의 벽돌깨기 유즈맵으로, classic한 벽돌깨기 게임의 재미를 스타크래프트의 맵 디자인과 결합한 작품이다. 맵 중앙 하단에 위치한 플레이어의 ‘Vaus’라는 우주선 유닛이 공을 튕겨 벽돌을 깨는 전형적인 액션을 펼치며, 상단과 좌우에 배치된 벽돌들은 차근차근 부수어 나가야 한다. 벽돌은 총 4층으로 나뉘어 있으며, 각 층마다 파괴 가능한 벽돌과 파괴 불가능한 장애물이 조화를 이룬다. 벽돌을 모두 깨면 다음 층으로 진행되는 구조로, 맵의 심플한 디자인과 달리 공의 궤적을 예측하고 패들을 조작하는 감각이 요구된다. 맵의 ‘Neo’라는 접두사는 클래식한 벽돌깨기의 현대적인 리메이크라는 의미를 담고 있으며, 2.2 버전은 맵 제작팀 ‘Forgotten_Ongamenet Map Architect Team’이 선보인 개선판으로 보인다. 맵의 전체적인 분위기는 황혼 테마의 타일셋을 활용해 차분한 색감으로 마무리되었으나, 벽돌깨기라는 게임의 본질은 밝고 역동적인 플레이를 강조한다. 벽돌을 깨는 즉시 보너스 아이템이 드랍되는지는 명확하지 않지만, 벽돌의 배치 패턴과 층 구조는 공의 속도와 방향을 조절하는 전략적 요소를 제공한다. 벽돌깨기 게임의 기본 규칙은 동일하므로 초보 플레이어도 쉽게 접근할 수 있지만, 맵의 디자인상 공이 튕기는 각도나 벽돌의 밀집도 등으로 인해 난이도 조절이 가능할 것으로 추정된다. 특히 하단 중앙의 Vaus 우주선은 패들의 움직임이 제한적이므로, 공의 궤도를 미리 예상하고 패드를 움직이는 타이밍이 중요하다. 맵의 전체적인 분위기는 우주를 배경으로 한 SF풍이 강하지만, 게임 플레이 자체는 순수한 액션과 반사 신경에 초점을 맞추고 있다. 추천 대상은 벽돌깨기 게임의 팬부터 스타크래프트 유즈맵을 즐기는 유저까지 폭넓은 층에 걸쳐 있으며, 특히 실시간 액션을 선호하는 유저들에게 적합할 것이다. 플레이 전에는 패들의 조작감과 공의 속도를 미리 설정할 수 있는지, 벽돌 파괴 후 보상 시스템이 존재하는지 등을 확인해 보는 것이 좋다. 또한, 멀티플레이어 환경에서 진행되는 만큼 팀원 간의 협력이나 경쟁 요소가 추가될 가능성도 배제할 수 없다. 맵의 전체적인 재미는 공을 튕기는 재미와 벽돌을 깨는 성취감에 달려 있으므로, 공의 조작감을 미리 테스트해 보는 것이 중요하다. 맵의 디자인과 구조는 단순해 보이지만, 층별로 벽돌의 밀집도가 달라지는 등 전략적 요소가 포함되어 있어 반복 플레이 시에도 신선함을 느낄 수 있다. 특히 벽돌의 배치 패턴을 익히면 공의 궤도를 예측하는 능력이 향상되어 더 높은 점수를 노릴 수 있을 것이다. 맵의 전체적인 볼륨은 크지 않지만, 벽돌깨기의 클래식한 재미를 스타크래프트 내에서 즐길 수 있다는 점에서 큰 장점이 있다. 또한, 맵의 해상도와 타일셋이 스타크래프트의 기본적인 환경을 고려해 제작되었으므로, 구형 시스템에서도 원활한 플레이가 가능하다. 마지막으로, 벽돌깨기라는 장르의 특성상 공의 속도나 패들의 이동 속도를 조정할 수 있는 옵션이 제공될 경우, 난이도 조절이 용이해질 것으로 예상된다. 맵의 제작 의도와는 별개로, 벽돌깨기 게임의 기본 규칙을 벗어나는 요소는 없으므로 익숙한 유저라면 누구나 쉽게 접근할 수 있을 것이다. 벽돌깨기라는 장르의 단순함과 스타크래프트의 멀티플레이 기능이 결합되면서, 이 맵은 고전 게임의 재미를 현대적으로 재해석한 작품으로 평가할 수 있다. StarCraft: Brood War’s *Neo Arcaniod 2.2* is, as its name suggests, a brick-breaking custom map in the classic *Arkanoid* style, blending the fun of a traditional brick-breaker with StarCraft’s map design. Players control a spaceship unit called the *Vaus* at the bottom center of the map, bouncing a ball to smash bricks while navigating the upper and side walls. The bricks are divided into four layers, each featuring a mix of destructible blocks and indestructible obstacles. Once all bricks in a layer are cleared, players advance to the next, requiring precise prediction of ball trajectories and paddle control despite the map’s simple layout. The "Neo" prefix hints at a modernized remake of the classic brick-breaker, and version 2.2 appears to be an improved iteration by the map-making team *Forgotten_Ongamenet Map Architect Team*. The map adopts a twilight-themed tileset, lending a subdued aesthetic, though the core brick-breaking gameplay remains bright and dynamic. While it’s unclear if destroying bricks immediately drops bonus items, the brick layouts and layer structure introduce strategic elements by influencing ball speed and direction. The basic rules mirror traditional brick-breakers, making it accessible to newcomers, though the angles of ball bounces and brick density allow for adjustable difficulty. The *Vaus* at the bottom center has limited paddle movement, so anticipating ball paths and timing paddle adjustments are crucial. Though the map evokes a sci-fi space setting, the gameplay focuses purely on reflexes and action. It appeals to both brick-breaker fans and StarCraft custom map enthusiasts, particularly those who enjoy real-time challenges. Before playing, it’s worth checking if paddle sensitivity and ball speed can be adjusted, or if a reward system exists for brick destruction. As a multiplayer experience, teamwork or competition could further enhance the fun. Despite its straightforward design, the map offers strategic depth through varying brick densities across layers, keeping gameplay fresh even after multiple plays. Mastering brick patterns improves trajectory prediction, enabling higher scores. While compact in scale, its strength lies in delivering classic brick-breaker fun within StarCraft’s framework, with tile sets and resolution optimized for smooth play even on older systems. Ideally, options to tweak ball speed or paddle movement would make difficulty adjustments easier. Sticking to the genre’s core mechanics ensures accessibility for all familiar with brick-breakers. By merging the simplicity of brick-breaking with StarCraft’s multiplayer capabilities, this map stands as a modern reinterpretation of a classic game, offering timeless fun in a familiar setting.
폭탄피하기 최신 4배속 (Bomb Avoidance: Latest 4x Speed)
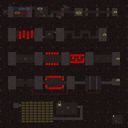
스타크래프트 브루드워의 대표적인 미니게임 중 하나인 '폭탄피하기 최신 4배속'은 이름 그대로 폭발하는 폭탄을 피해 살아남는 단순하면서도 중독성 강한 플레이가 특징이다. 맵 전체가 좁은 길로 구성되어 있으며, 플레이어는 중앙의 시작점에서부터 빠져나가기 위해 좌우로 움직이며 끊임없이 떨어지는 폭탄을 피해야 한다. 특히 '4배속'이라는 타이틀이 시사하듯, 맵의 속도가 매우 빨라 조작감이 타이트하고 긴장감이 지속된다. 맵 중앙에는 여러 개의 통로가 있으며, 일부 통로는 벽으로 막혀 있어 우회로가 제한적이다. 폭탄은 마치 비처럼 일정 패턴으로 떨어지는데, 이 패턴을 숙지하고 타이밍을 맞춰 움직여야만 살아남을 수 있다. 미니게임답게 난이도는 플레이어의 숙련도에 따라 크게 달라지며, 초보자는 첫 시도에서 쉽게 실패할 수 있지만, 반복 플레이를 통해 패턴을 익히면 점차 안정적으로 클리어할 수 있다. 이 맵의 가장 큰 매력은 바로 속도감과 달성감으로, 짧은 플레이 타임 안에 긴장감을 유지하며 빠르게 결과를 확인할 수 있다는 점이다. 또한, 7인까지 동시에 플레이할 수 있어 타인과의 경쟁이나 협력 플레이도 가능하다는 점이 재밌는 요소로 작용한다. 다만, 통로가 좁고 폭탄의 밀도가 높아져 난이도가 급격히 상승하는 후반 구간에서는 실수가 용납되지 않으므로, 집중력을 잃지 않는 것이 중요하다. 이 맵은 스타크래프트의 기본 조작만 익숙하다면 누구나 쉽게 접근할 수 있지만, 숙련자를 위한 고수준의 플레이도 요구되는 등 초보자부터 고수까지 폭넓은 층에서 즐길 수 있는 콘텐츠로 평가된다. 마지막으로, 맵의 색상 구성과 타일셋이 단순하면서도 깔끔하여 시야 방해 요소가 적다는 점도 장점으로 작용한다. 이렇듯 '폭탄피하기 최신 4배속'은 스타크래프트의 유즈맵 중에서도 손꼽히는 재미와 접근성을 지닌 미니게임으로, 짧은 시간 안에 많은 재미를 제공하는 콘텐츠를 찾는 플레이어들에게Strongly recommended이다. This StarCraft: Brood War mini-game, '폭탄피하기 최신 4배속' (Bomb Avoidance: Latest 4x Speed), delivers a fast-paced, adrenaline-fueled challenge where players must navigate through narrow pathways while dodging falling bombs. The map’s name hints at its core mechanic—speed—which is amped up to four times the usual, creating a frantic experience that demands quick reflexes and precise movement. The layout consists of a central starting point connected to multiple narrow corridors, some of which are blocked by walls, forcing players to strategize their escape routes. Bombs rain down in a predictable yet dense pattern, requiring players to memorize their trajectories and time their movements accordingly. While the game is simple in concept, its difficulty scales sharply with speed and bomb density, making it accessible for beginners yet challenging enough to engage experienced players. The ability to support up to seven players adds a layer of competition or cooperation, enhancing replayability. The map’s minimalist design, featuring clean visuals and a jungle-themed tileset, ensures minimal visual clutter, allowing players to focus solely on the action. Despite its straightforward premise, '폭탄피하기 최신 4배속' offers a satisfying blend of tension, skill progression, and instant gratification, making it a standout mini-game in the StarCraft community. Whether you're looking for a quick break or a test of reflexes, this map delivers a fun and rewarding experience for all skill levels.
맵 선택 가이드
태그는 맵의 핵심 특징을 빠르게 설명하지만 제작 버전마다 규칙이 다를 수 있습니다. 상세 설명에서 권장 인원, 난이도, 플레이 시간과 버전을 함께 확인한 뒤 다운로드하세요.