
시야 차단 스타크래프트 맵 모음
'시야 차단' 태그가 등록된 맵을 모았습니다. 장르 하나로 찾기 어려운 플레이 방식, 난이도와 특징을 중심으로 인기 맵과 최신 맵을 비교해 보세요.
- 등록 맵
- 9개
- 누적 다운로드
- 3
- 누적 조회
- 963
인기 맵
다운로드와 조회 반응이 높은 맵입니다.
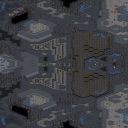
블리츠 Y 1.1 (Blitz Y 1.1)
스타크래프트 브루드워의 공식 대회용 맵으로 ASL Season17에 사용된 'Blitz Y 1.1'은 우주 배경의 넓은 맵에 시야 차단 효과가 적용된 특징을 지닌다. 맵의 전체적인 구조는 중앙에 위치한 광물 지대와 이를 둘러싼 세 개의 대형 베이스 지역으로 나뉘며, 각 베이스 간에는 좁은 길목과 넓은 평지가 조화롭게 배치되어 있다. 시야 차단 효과(Fog)는 초반 전략 선택과 멀티 테크 전략에 큰 영향을 주며, 맵의 symmetrical한 설계 덕분에 테란, 저그, 프로토스 간의 밸런스가 비교적 잘 맞춰져 있다. 특히 중앙 광물 지대는 빠른 멀티 테스팅과 방어 라인 구축이 가능한 위치에 있어, 초반부터 공격적인 플레이를 펼치거나 안정적인 플레이를 선택할 수 있는 유연성을 제공한다. 맵의 symmetrical한 구조는 대회용 맵답게 양측의 전력 구도가 대칭을 이루며, 이를 통해 양측이 동일한 전략적 기회를 가질 수 있도록 설계되었다고 추정된다. 플레이어는 맵의 특성을 고려하여 프로토스의 초반 방어력, 테란의 벙커링 전략, 저그의 확산 전략 among others among others among others among others among others among others를 상황에 맞게 선택할 수 있으며, 이러한 특징들은 ASL과 같은 공식 대회에서 승부처가 될 수 있는 요소들이다. 이 맵은 넓은 시야 차단과 symmetrical한 구조 덕분에 초보자보다는 중급 이상의 플레이어들에게 더 어울릴 것으로 보이며, 특히 멀티 테스팅과 전략적 깊이감을 즐기는 유저들에게 추천할 만하다. 플레이 전에는 시야 차단 효과가 게임 플레이에 미치는 영향을 충분히 고려하고, symmetrical한 구조를 활용한 빌드 오더와 전략 수립이 필요하다는 점을 미리 숙지하는 것이 중요하다. Blitz Y 1.1, used in ASL Season 17 as an official tournament map in StarCraft: Brood War, features a vast space-themed layout with fog-of-war effects. The map is divided into a central mineral field surrounded by three large base areas, with narrow passages and open plains strategically placed between them. The fog-of-war has a significant impact on early-game strategy and multi-base tech choices, while the symmetrical design ensures a balanced matchup among Terran, Zerg, and Protoss. The central mineral field allows for quick multi-base scouting and defensive line construction, offering players flexibility to adopt aggressive or stable playstyles from the start. Thanks to its symmetrical structure, typical of tournament maps, both sides have mirrored starting positions, ensuring equal strategic opportunities. Players must adapt their strategies—such as Protoss early-game defenses, Terran bunker rushes, or Zerg spread tactics—based on the map’s unique traits, making these elements decisive factors in high-level competitions like ASL. Due to its wide fog-of-war and symmetrical layout, the map is better suited for intermediate to advanced players, particularly those who enjoy multi-base scouting and strategic depth. Before playing, it’s crucial to understand how the fog-of-war affects gameplay and to prepare build orders and strategies that leverage the symmetrical structure.
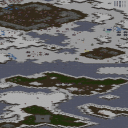
KorMod ExpUed01
스타크래프트 브루드워의 유즈맵 〈KorMod ExpUed01〉은 넓은 평야와 기복 있는 지형을 바탕으로 한 디펜스형 맵으로 보입니다. 전체적으로 펼쳐진 넓은 공간은 적의 공격로를 유도하거나 방어군을 배치하는 데 유리한 환경을 제공합니다. 이미지의 중앙부를 기준으로 대칭 형태를 띠고 있으며, 지형이 약간 굴곡져 있어 시야를 차단하는 지점들이 곳곳에 분포되어 있습니다. 이러한 구조는 플레이어가 방어선을 구축하거나 기습 공격을 준비할 때 전략적 선택을 강요합니다. 또한, 맵의 가장자리를 따라 펼쳐진 얕은 물웅덩이와 숲 지대가 시야 및 이동 경로를 제한하는 역할을 하며, 이는 방어의 중요성을 더욱 부각시킵니다. 맵의 왼쪽과 오른쪽 끝 부분에는 각각의 진영이 배치되어 있을 것으로 추정되며, 중앙으로 향하는 길목은 좁아지면서 자연스럽게 방어 포인트가 형성됩니다. 전체적인 분위기는 컴까기나 디펜스 장르에 특화되어 있으며, 특히 2인용 맵으로 추정되는 만큼 1대1 전투나 동맹 플레이에서 긴장감을 극대화할 수 있는 구조로 설계되었습니다. 맵을 플레이하기 전에는 자신의 진영 주변의 방어 시설 구축 가능 여부와 중앙 통로의 보호 수준을 꼼꼼히 확인하는 것이 중요합니다. 또한, 지형의 굴곡을 활용한 기습 공격이나 후방 타격 루트를 미리 예상해 둔다면 더욱 효율적인 플레이가 가능할 것입니다. 특히 넓은 평야가 제공하는 넓은 시야는 전투의 주도권을 잡는 데 결정적인 역할을 하므로, 맵의 특징을 충분히 숙지하고 전략을 세우는 것이 필수적입니다. KorMod ExpUed01 is a UMS defense map for StarCraft: Brood War, featuring a vast plain with varied terrain that supports strategic defensive gameplay. The map appears symmetrical with a central axis, where rolling hills and elevated areas create natural sightlines and strategic vantage points. The edges of the map are bordered by shallow water patches and dense forests, which restrict movement and visibility, forcing players to adapt their strategies accordingly. The narrow pathways leading to the central area suggest a choke point where defensive formations can be effectively utilized. The overall design implies a 2-player competitive setup, likely optimized for 1v1 battles or cooperative team play. Before engaging in gameplay, players should assess the placement of defensive structures around their base and the accessibility of the central corridor. The undulating terrain offers opportunities for ambushes or backline strikes, making it crucial to scout and plan ahead. The expansive open areas provide wide sightlines, which are essential for controlling the battlefield. Mastering the map's geography and leveraging its features will significantly enhance the player's ability to secure victory in both offensive and defensive scenarios.

티거-메제이 (tigger-mezei)
스타크래프트 브루드워의 클래식한 밀리 맵인 〈tigger-mezei〉는 8인용으로 설계된 맵으로, 전체가 뼈로 이루어진 메제(Mezei)라는 이름처럼 독특한 지형을 자랑한다. 맵은 거대한 뼈 구조물이 마치 생체 조직처럼 얽혀 있는 모습으로, 중앙의 넓은 개방 공간을 surrounded by 좁은 길목과 언덕 지대가 둘러싼 구조를 가지고 있다. 이 지형적 특징은 전면전을 펼치기에 최적화되어 있으며, 각 플레이어의 본진은 뼈 구조물 사이로 배치되어 있어 초반 자원 수집과 진출이 다소 까다로운 편이다. 특히 뼈 언덕과 좁은 길목은 시야 차단과 기습에 유리한 지형을 제공하며, 중앙의 넓은 평원은 대규모 전투가 벌어질 수 있는 장소가 된다. 이 맵의 가장 큰 특징은 뼈로 이루어진 지형이 주는 시각적 독특함과 함께, 밀리 맵으로서의 밸런스를 고려한 배치다. 각 플레이어의 본진은 중앙 평원에서 멀리 떨어져 있어 초반 정찰과 진출 타이밍이 중요하며, 좁은 길목과 언덕을 활용한 방어와 기습이 게임의 승패를 좌우할 수 있다. 또한, 뼈 구조물은 단순한 장식에 그치지 않고, 시야 차단과 이동 경로 제약이라는 전략적 요소를 제공한다. 예를 들어, 뼈 언덕 위에서 아군을 지원하거나, 좁은 길목을 통해 적의 배후로 기습하는 플레이가 가능하다. 초보 플레이어의 경우 좁은 길목과 언덕 지형에 익숙하지 않을 수 있어, 초반 정찰과 진출 타이밍을 잘 잡는 것이 중요하다. 반면, 숙련된 플레이어는 이러한 지형적 특징을 활용해 적의 움직임을 예측하고, 전략적으로 advantageous 한 위치에서 전투를 펼칠 수 있다. 맵의 난이도는 중간 정도로, 초반 자원 수집과 진출 타이밍을 잘 조율하면 중반 이후 대규모 전투에서 우위를 점할 수 있다. 특히, 뼈 언덕과 좁은 길목은 방어와 공격 모두에서 유용한 지형이기 때문에, 맵의 특성을 잘 이해하고 활용하는 것이 중요하다. 이 맵은 8인 밀리 게임에서 팀워크와 전략적 사고가 중요한 맵으로, 뼈로 이루어진 독특한 지형이 주는 시각적 재미와 함께 전략적 깊이를 제공한다. 뼈 구조물 사이로 펼쳐지는 전투는 마치 생체 조직 내에서의 전쟁처럼 느껴질 정도로 인상적이며, 플레이어들에게 새로운 전략적 경험을 선사할 것이다. 특히, 좁은 길목과 언덕을 활용한 기습과 방어는 이 맵의 핵심 전략 요소로, 이를 잘 활용할 수 있는 플레이어에게는 큰 이점이 된다. 이 맵을 플레이하기 전에는 뼈 구조물의 배치와 각 플레이어의 본진 위치, 좁은 길목과 언덕의 시야 차단 효과를 미리 숙지하는 것이 좋다. 또한, 초반에는 정찰을 통해 적의 진출 경로를 파악하고, 중반 이후에는 대규모 전투를 대비한 자원과 유닛 조합을 신중히 계획해야 한다. 뼈로 이루어진 맵의 특성상, 시야 차단과 이동 경로 제약이 게임의 흐름을 크게 좌우할 수 있으므로, 이러한 요소들을 잘 이해하고 활용하는 것이 중요하다. Starcraft: Brood War’s classic melee map *Tigger-Mezei* is an 8-player design that boasts a unique terrain inspired by the name Mezei, meaning “bone.” The entire map is dominated by massive skeletal structures that twist and intertwine like living tissue. At its core lies a wide open central plain, encircled by narrow corridors and elevated hillside zones. This layout is tailor-made for full-scale engagements, with each player’s main base tucked between the bony formations, making early resource gathering and expansion slightly tricky. The bone hills and narrow passages offer excellent cover and ambush spots, while the central expanse becomes the stage for large-scale battles. What sets this map apart is the striking visual identity of its skeletal terrain, paired with a layout that carefully balances competitive play. Players start far from the central plain, so scouting and timing your early push are critical. Narrow corridors and elevated ground reward smart defensive setups and surprise attacks, often deciding the outcome of the match. The bone structures aren’t just decoration—they actively shape strategy by blocking vision and restricting movement. Commanders can support allies from elevated bone ridges or slip behind enemy lines through tight passages to launch devastating strikes. Novice players may struggle with the confined corridors and elevated terrain, so nailing early scouting and expansion timing is key. Experienced players, however, can read the terrain like a chessboard, predicting enemy moves and seizing advantageous positions. The map sits at a moderate difficulty level: if you manage early resource flow and expansion timing, you can dominate the mid-game’s large-scale clashes. Both defense and offense benefit from the bone hills and narrow paths, so mastering the map’s quirks is essential. As an 8-player melee arena, *Tigger-Mezei* demands teamwork and tactical foresight. Its eerie skeletal framework delivers visual flair while layering deep strategic options—combat unfolding between the bones feels like a war waged inside living tissue, offering a fresh tactical experience. Ambushes through narrow corridors and defensive stands on elevated ridges are the map’s defining mechanics, giving players who exploit them a decisive edge. Before jumping in, study how the bones are arranged, where each base sits, and how the hills and corridors block sight. Early on, scout to map enemy pathways, and later, plan your unit compositions and resource flow with large battles in mind. Because vision and movement are so heavily restricted here, understanding—and leveraging—those constraints will shape the entire flow of the game.
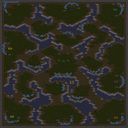
팬텀 모드 V4.0 맥스800 (Phantom Mode V4.0 Max800)
스타크래프트: 브루드워의 유즈맵 '팬텀 모드 V4.0 맥스800'은 다크 스웜과 시야 차단 효과를 적극 활용한 방어형 맵으로, 플레이어가phantom의 능력을 체험할 수 있도록 설계되었다. 맵의 대부분은 어두운 색조의 배경으로 이루어져 있으며, 플레이어는 각자의 기지에서 시작해 끊임없이 몰려드는 저그 무리를 상대해야 한다. 맵 중앙에는 넓은 시야를 확보할 수 있는 지형이 배치되어 있어 방어 전략 수립에 유리한 환경을 제공한다. 또한, 맵의 구석과 중앙에 위치한 좁은 통로는 적의 공격을 효율적으로 차단할 수 있는 포인트로 활용할 수 있다.phantom의 특징인 시야 차단 효과가 전투 전반에 걸쳐 큰 영향을 미치는데, 이를 이용해 적의 움직임을 예측하거나 기습 공격을 방어할 수 있으며, 다크 스웜을 적재적소에 활용해 저그의 밀집도를 조절하는 것이 핵심 전략이다. 맵의 지형은 대체로 평탄한 편이지만, 일부 구간은 언덕 지형으로 이루어져 있어 시야 우위나 방어 позиции 확보에 유리한 위치로 활용할 수 있다.phantom의 능력을 최대한 활용하기 위해서는 초반 방어선 구축과 자원 관리가 무엇보다 중요하며, 후반으로 갈수록 몰려오는 적의 물량이 증가하기 때문에 지속적인 업그레이드와 방어 시설 보강이 필수적이다. 이 맵은phantom을 처음 경험하는 유저들에게는 다소 복잡하게 느껴질 수 있지만, 점차 적응해가며 전략을 다듬어 나갈수록 흥미로운 도전 과제가 될 것이다.phantom 모드는phantom의 능력을 체험할 수 있는 유즈맵으로,phantom의 고유한 시야 차단과 다크 스웜 능력을 활용한 방어형 플레이가 핵심이다. 맵의 어두운 분위기와 넓은 시야 확보가 가능한 지형은 방어 전략 수립에 유리한 환경을 제공하며,phantom의 능력을 최대한 활용하기 위해서는 초반 방어선 구축과 자원 관리가 무엇보다 중요하다.phantom의 시야 차단 효과와 다크 스웜을 적재적소에 활용해 적의 움직임을 예측하고 공격을 방어하는 전략이 요구되며, 후반으로 갈수록 증가하는 적의 물량을 상대하기 위해 지속적인 업그레이드와 방어 시설 보강이 필수적이다.phantom 모드는phantom의 능력을 처음 경험하는 유저들에게는 다소 복잡하게 느껴질 수 있지만, 점차 적응해가며 전략을 다듬어 나갈수록 흥미로운 도전 과제가 될 것이다.phantom 모드는phantom의 능력을 체험할 수 있는 유즈맵으로,phantom의 고유한 시야 차단과 다크 스웜 능력을 활용한 방어형 플레이가 핵심이다. 맵의 어두운 분위기와 넓은 시야 확보가 가능한 지형은 방어 전략 수립에 유리한 환경을 제공하며,phantom의 능력을 최대한 활용하기 위해서는 초반 방어선 구축과 자원 관리가 무엇보다 중요하다. StarCraft: Brood War's custom map "Phantom Mode V4.0 Max800" is a defensive map that actively utilizes Dark Swarm and vision-blocking effects, designed to let players experience Phantom's abilities. Most of the map features a dark-toned background, and players start from their bases to fend off endless waves of Zerg. The central area offers wide vision, creating a favorable environment for formulating defense strategies. Narrow passages in the corners and center of the map serve as key points to efficiently block enemy attacks. Phantom's signature vision-blocking effect plays a major role throughout combat, allowing players to predict enemy movements or defend against ambushes. Using Dark Swarm at the right moments to control Zerg density is a core strategy. While the terrain is mostly flat, some sections feature elevated areas that provide advantages in vision control or securing defensive positions. To maximize Phantom's abilities, prioritizing early defensive line setup and resource management is crucial. As the game progresses, enemy waves grow stronger, making continuous upgrades and reinforcement of defenses essential. Though the map may feel complex to new Phantom users at first, it becomes an engaging challenge as players adapt and refine their strategies over time. Phantom Mode is a custom map where the focus lies on Phantom's unique vision-blocking and Dark Swarm abilities, with the dark atmosphere and wide-vision terrain supporting defensive strategy planning. Early defensive positioning and resource management are vital to leveraging Phantom's strengths, while effectively using vision-blocking and Dark Swarm to predict and counter enemy attacks is key. As enemy waves intensify later in the game, consistent upgrades and defense reinforcement become necessary. While Phantom Mode may seem daunting to newcomers, it evolves into an exciting challenge as players grow accustomed to its mechanics and develop their tactics. Phantom Mode is a custom map designed to let players experience Phantom's abilities, centered on defensive play utilizing Phantom's vision-blocking and Dark Swarm. The dark visuals and terrain with wide vision provide a strong foundation for defense strategies, and mastering Phantom's abilities hinges on early defensive setup and resource control.
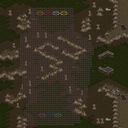
스나이퍼 발드 + 엑스트라 v314 (Sniper Bald + Extras v314)
스타크래프트 브루드워의 유즈맵 《Sniper Bald + Extras v314》는 저격수 포지션에 특화된 디펜스형 맵으로, 사막 지형을 배경으로 펼쳐지는 긴장감 넘치는 전투가 특징이다. 맵 중앙에 위치한 넓은 개활지는 저격수끼리의 일대일 대결을 유도하며, 양측 진영은 각각의 저격 포인트에서 적을 포착해야 한다. 맵 곳곳에 배치된 바위와 언덕은 시야를 차단하는 장애물 역할을 하며, strategic한 포지션 선택이 승패를 좌우한다. 특히, 맵의 좌우에 배치된 고지대는 저격수에게 유리한 위치이지만, 반대로 적의 사정권에 노출되기도 쉽기 때문에 신중한 움직임이 요구된다. 추가 요소로 추정되는 'Extras'는 저격 이외의 전투나 보조 기능을 제공할 가능성이 있으며, 이는 플레이어의 전략적 선택을 더욱 다양하게 만든다. 초보 플레이어의 경우 적응하기 어려운 맵 구조이지만, 숙련된 저격수라면 각 포지션의 특성과 적의 움직임을 읽어내 승리를 이끌어낼 수 있다. 이 맵은 주로 1:1 또는 2:2 팀전으로 즐기는 것을 추천하며, 저격수 간의 심리전이 핵심인 만큼 집중력과 순발력이 요구되는 유즈맵이다. 플레이 전에는 맵의 시야 차단 요소와 저격 포지션의 특징을 미리 숙지하는 것이 중요하다. 또한, 맵의 추가 요소인 'Extras'가 어떤 기능을 제공하는지 확인하여 전략을 다양화할 수 있도록 준비하는 것이 좋다. Sniper Bald + Extras v314 is a StarCraft: Brood War custom map designed for sniper-focused defense gameplay, set against a desert terrain. The expansive central area encourages intense one-on-one or team-based sniper duels, where players must strategically position themselves to eliminate opponents. Natural obstacles like rocks and hills obstruct line of sight, adding depth to the tactical choices available. The high-ground positions on either side of the map offer advantageous sniping spots but also expose players to enemy fire, requiring careful positioning and awareness. The 'Extras' component, while not fully verified from the image, likely introduces additional combat mechanics or support features, enriching the strategic options. This map demands precision and quick reflexes, making it more suited for experienced players who can adapt to its nuanced terrain. It is best enjoyed in 1v1 or 2v2 team formats, where sniper psychology and map control play crucial roles. Before playing, it is essential to familiarize yourself with the line-of-sight obstacles and sniper positions. Additionally, understanding the role of 'Extras' can provide a strategic edge by diversifying gameplay approaches.
움직이지 마라! 1337 (DON'T F-ING MOVE! 1337)
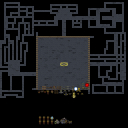
‘DON’T F-ING MOVE! 1337 V1.1’은 스타크래프트 브루드워의 유즈맵으로, 플레이어가 미니맵을 제외한 전체 화면을 보지 못하고 상대방의 움직임을 추론하며 전투를 펼쳐야 하는 독특한 디자인으로 주목받는 맵이다. 맵의 이름은 강렬한 필터링과 함께 ‘1337’이라는 오타가 포함되어 있어 서버 제목에서 약간의 오류가 보였지만, 내부 맵 제목과 설명을 통해 정식 명칭임을 확인할 수 있다. 화면 중앙에 위치한 ‘MOVE’라는 붉은 버튼이 인상적인데, 이 버튼을 클릭하면 미니맵을 제외한 모든 시야가 차단되어 상대방의 위치를 예측하며 전략을 세워야 한다. 맵의 배경은 우주 테마로 구성되어 있으며, 검정색과 흰색으로 대비되는 간결한 디자인 덕분에 초점을 잃기 쉽고, 상대방의 움직임을 읽는 재미가 돋보인다. 맵의 구조는 8명의 플레이어가 참여할 수 있도록 설계되었으며, 각 플레이어는 시작 지점에서 출발해 상대방을 향해 움직이며 전투를 벌이게 된다. 시야가 차단된 상태에서 상대방의 위치를 유추하는 과정이 마치 숨바꼭질과도 같아 흥미로운 긴장감을 제공한다. 또한, 맵의 이름에서 느껴지는 도전적인 분위기와 ‘1337’이라는 수치가 게임의 난이도나 숙련도를 강조하는 요소로 작용할 수 있다. 이 맵은 시야 차단이라는 독특한 메커니즘을 통해 새로운 게임 경험을 제공하며, 특히 상대방의 움직임을 예측하는 능력이 중요한 숙련자용 맵으로 평가된다. 플레이 전에는 맵의 특성을 충분히 숙지하고, 상대방의 움직임을 읽는 연습을 해두는 것이 좋다. 또한, 미니맵을 적극 활용하여 상대방의 위치와 움직임을 예측하는 전략을 세우는 것이 핵심이다. 이 맵은 스타크래프트의 기본 전략을 넘어서는 새로운 감각의 전투를 즐기고자 하는 플레이어들에게 추천된다. 특히, 시야가 차단된 상태에서 상대방을 상대하는 것이 어렵다면, 초반에는 천천히 움직이며 상대방의 패턴을 분석하는 데 집중하는 것이 좋다. 이 맵은 단순히 전투를 벌이는 것뿐만 아니라, 상대방의 심리까지 읽어내야 하는 재미가 있기 때문에 전략적 사고를 요구하는 유즈맵으로, 스타크래프트의 새로운 즐길 거리를 찾고 있는 유저들에게 강력히 추천한다. ‘DON’T F-ING MOVE! 1337 V1.1’ is a custom map for *StarCraft: Brood War* where players must fight without seeing the full screen—only the minimap is visible—relying on deducing the opponent’s movements. The map’s name stands out with its strong filter and the intentional typo ‘1337,’ though its official title is confirmed in the internal map description. A striking red ‘MOVE’ button sits at the center of the screen; clicking it blacks out all vision except the minimap, forcing players to strategize based on predicting enemy positions. Set against a space-themed backdrop with a stark black-and-white design, the map’s simplicity makes it easy to lose focus while heightening the thrill of reading the opponent’s movements. Designed for eight players, each starts at a spawn point and advances toward enemies, engaging in combat with vision blocked. The process of deducing enemy positions under these conditions resembles hide-and-seek, creating tense and engaging gameplay. The map’s challenging title and the ‘1337’ notation hint at its difficulty, emphasizing the skill and experience required to master it. Through its unique vision-blocking mechanic, it offers a fresh gaming experience, especially suited for experienced players who rely on predicting opponent movements. Before playing, it’s important to fully understand the map’s mechanics and practice reading enemy behavior. Using the minimap effectively to track and predict opponents is key. This map is ideal for players seeking a combat experience beyond *StarCraft*’s standard strategies. If the vision-blocked combat feels overwhelming, start by moving cautiously to analyze opponent patterns. Beyond mere combat, the map rewards strategic thinking and psychological insight, making it a highly recommended custom map for those looking to explore new depths in *StarCraft: Brood War*.
고양이와 쥐 in jungle 9.7 (Cat & Mouse in jungle 9.7)
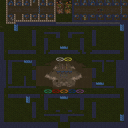
스타크래프트 브루드워의 유즈맵 〈Cat & Mouse in jungle 9.7〉는 ‘고양이와 쥐’라는 독특한 컨셉으로 플레이어 간의 숨바꼭질을 기반으로 한 숨은 플레이어를 찾는 디펜스 게임이다. 맵은 밀림 테마의 사막 타일셋으로 꾸며졌으며, 넓은 맵 곳곳에 흩어진 상자와 덤불, 바위 등을 활용해 시야를 차단하고 전략적인 숨기를 구현했다. 플레이어는 고양이(공격자) 또는 쥐(도망자) 중 하나의 역할을 맡아, 고양이는 맵 곳곳에 숨은 쥐를 찾아내 제거해야 하고, 쥐는 살아남아 모든 고양이를 피하거나 특정 조건을 달성해야 한다. 맵의 핵심은 시야 차단 요소와 복잡한 길찾기 루틴으로, 숨은 쥐를 찾는 과정이 긴장감을 유지하게 한다. 특히 맵의 대칭되지 않은 구조와 숨은 길들은 고양이에게는Strategy Map"과 같은 요소는 없지만, 숨바꼭질의 재미와 숨은 플레이어 찾기 요소가 강하게 부각되어 있어 전형적인 ‘숨기’ 장르의 유즈맵으로 분류할 수 있다. 초보자도 쉽게 접근할 수 있지만, 숨은 쥐를 찾는 고양이의 입장에서는 높은 인지력과 맵 이해도가 요구되는 만큼 난이도는 보통 수준으로 예상된다. 플레이 전에는 맵의 숨은 길과 시야 차단 요소를 미리 확인하고, 자신의 역할에 맞는 전략을 준비하는 것이 중요하다. 추천 대상은 숨바꼭질과 전략 게임을 좋아하는 플레이어들로, 특히 2인부터 7인까지의 다양한 인원수로 즐길 수 있어 소규모 모임이나 친선전에서 좋은 반응을 얻을 수 있을 것이다. 맵의 디자인과 구성은 단순해 보이지만, 숨은 쥐를 찾는 과정에서의 긴장감과 예측 불가능한 플레이가 이 맵의 매력 포인트다. 반복 플레이를 통해 맵의 숨은 루트를 익히고, 상대방의 움직임을 예측하는 능력을 키울 수 있어 장기적인 재미를 제공할 것이다. 특히 숨은 플레이어를 찾는 재미와 숨은 길의 발견이 이 게임의 핵심 포인트이므로, 시야 차단 요소를 적극 활용한 플레이가 중요하다. StarCraft: Brood War's custom map *Cat & Mouse in Jungle 9.7* is a unique hide-and-seek defense game based on the concept of "cat and mouse," where players take on the roles of either hunters or prey. The map features a jungle-themed desert tileset, with scattered boxes, bushes, and rocks strategically placed to block line of sight and create opportunities for clever hiding. Players are assigned either the role of the cat (attacker) or the mouse (runner). The cats must hunt down and eliminate the hidden mice, while the mice must survive by evading all cats or fulfilling specific conditions. The map's core appeal lies in its line-of-sight blocking elements and intricate pathfinding routes, which heighten the tension of tracking down hidden runners. Its asymmetrical structure and hidden paths make it a classic example of a "hide-and-seek" genre custom map, despite lacking a "Strategy Map"-style layout. While accessible to beginners, the role of the cat demands strong spatial awareness and map knowledge, resulting in a moderate difficulty level. Before playing, it's essential to familiarize yourself with the hidden paths and line-of-sight obstructions and prepare strategies tailored to your role. Ideal for players who enjoy hide-and-seek and strategic gameplay, the map supports 2 to 7 players, making it perfect for small gatherings or friendly matches. Though its design may seem simple at first glance, the thrill of uncovering hidden runners and the unpredictable gameplay make it highly engaging. Repeated plays allow players to memorize hidden routes and sharpen their ability to predict opponents' movements, ensuring long-term enjoyment. The true highlight of the game lies in the excitement of finding hidden players and discovering secret paths, making strategic use of line-of-sight blocking elements crucial to success.
반지의 제왕: 미르크우드 숲의 어둠 (Lord of the Rings: Bedim of Mirkwood)
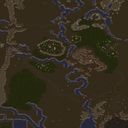
《반지의 제왕: 미르크우드 숲의 어둠(LotR Bedim of Mirkwood)》는 스타크래프트 브루드워의 유즈맵으로, 《반지의 제왕》 세계관을 배경으로 한 컴까기 장르의 맵이다. 맵의 이름은 미르크우드 숲의 어둠을 의미하며, 제3시대 벨레리아의 전투가 벌어지기 전 시점을 다루고 있다. 맵의 전체적인 구조는 거대한 숲 지형으로 이루어져 있으며, 가운데를 가로지르는 강이 자연스러운 장벽 역할을 한다. 플레이어는 각각의 시작 지점에서 출발해 숲을 탐험하며 자원을 모으고, 적대 세력을 상대하는 방식으로 진행된다. 이 맵은 컴까기 장르답게Resource Gathering(자원 채집), Base Building(기지 건설), Combat(전투) 세 가지 요소가 조화를 이루며, 특히 숲 지형의 복잡한 지형이 전투의 재미를 더한다. 플레이어는 시작 지점에서부터 자원 채집을 시작해 건물을 건설하고, 점차 확장해 나가며 적을 격파하는 것이 목표로 보인다. 숲 지형의 경우, 나무와 언덕이 시야를 가리는 요소로 작용하며, strategic depth(전략적 깊이)를 제공한다. 또한, 강을 건너는 것은 전투의 변수가 될 수 있어, 지형을 활용한 전술적 플레이가 중요하다. 추천 대상으로는 스타크래프트의 전략적 요소와 판타지 세계관을 좋아하는 플레이어, 특히 컴까기 장르를 선호하는 유저들에게 적합하다. 또한, 팀 플레이보다는 개인전 또는 소규모 팀전으로 즐기는 것이 더 재미를 느낄 수 있을 것으로 보인다. 맵을 플레이하기 전에는 숲 지형의 복잡성과 강의 존재를 고려해, 자원 채집과 기지 확장의 균형을 맞추는 전략을 준비하는 것이 중요하다. 전체적으로 맵의 분위기는 어두운 숲의 분위기를 잘 살려내어, 《반지의 제왕》의 세계관에 immersion(몰입)을 느끼기에 좋다. 플레이 시 주의할 점은 숲 지형의 시야 차단과 강의 이동 제약으로, 초보자는 자원 채집과 기지 확장이 원활하지 않을 수 있어 난이도가 다소 높게 느껴질 수 있다. 반면, 경험 많은 플레이어는 지형을 적극 활용한 전투와 자원 전략으로 높은 재미를 느낄 수 있을 것이다. 《The Lord of the Rings: Bedim of Mirkwood》 is a custom map for *StarCraft: Brood War* set in the *Lord of the Rings* universe, featuring a comp-stomp genre. The map's name refers to the darkness of Mirkwood Forest, depicting events before the Battle of the Pelennor Fields in the Third Age. The overall terrain consists of a vast forest landscape bisected by a river that acts as a natural barrier. Players start at their respective spawn points, exploring the forest to gather resources and engage enemy forces. As a comp-stomp map, it integrates three core elements—resource gathering, base building, and combat—in harmony, with the intricate forest terrain enhancing the gameplay experience. Players begin gathering resources, constructing buildings, and expanding their base to eliminate opponents. The forest's dense trees and elevated terrain obscure vision, adding strategic depth. Crossing the river introduces tactical variables, making terrain-based strategies essential. This map is ideal for players who enjoy *StarCraft*'s strategic depth and fantasy settings, particularly those who prefer the comp-stomp genre. It’s best enjoyed in 1v1 or small-team matches rather than large-scale team battles. Before playing, it’s crucial to plan a balanced strategy considering the forest’s complexity and the river’s limitations. The map’s dark, immersive atmosphere effectively captures the essence of *The Lord of the Rings*, enhancing the sense of being part of its world. However, the obscured vision and river movement restrictions may pose challenges for beginners, making the difficulty feel higher. Conversely, experienced players can leverage the terrain and resource strategies for a deeply engaging experience.
트래버스 (Traverse)
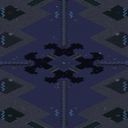
스타크래프트 브루드워의 유즈맵인 <b>Traverse</b>는 4인용 밀리 맵으로, 플레이어 간에 시야를 가리거나 방해하는 구조물이 배치되어 있는 것이 특징이다. 맵 제목이자 내부 제목으로 사용된 <i>Traverse</i>는 '통과하다', '이동하다'라는 뜻을 지니며, 맵의 핵심 메커니즘을 간접적으로 보여준다. 내부 설명에 따르면 ‘이웃들이 시야를 가로막고 있으니, 그들을 움직일 수밖에 없을 것’이라는 문구는 맵의 전략적 요소와 직접적인 연관이 있는 듯하다. 맵은 화산 타일셋을 기반으로 1024x1024 크기의 공간에 배치되어 있으며, 4명의 플레이어가 각자의 시작 지점에서Resource를 확보하고, 상대방을 견제하거나 시야를 차단하는 구조물을 활용해 승부를 가를 수 있도록 설계되었다. 이 맵의 가장 큰 특징은 시야 방해 요소로, 맵 중앙이나 주요 길목에 배치된 장애물이나 구조물이 화면 시야를 가리는 역할을 한다. 이는 기존 밀리 맵과는 차별화된 전략적 접근을 요구하며, 플레이어는Resource 관리뿐만 아니라 시야 확보와 방해 요소의 활용 여부까지 고려해야 한다. 또한, 맵의 크기와 배치로 인해 전투가 벌어질 가능성이 높은 지역이 제한적이므로,Resource 확보와 방어 전략의 중요성이 더욱 부각된다. 맵의 구조상 초반Resource 분배가 균등하지 않을 가능성이 있으며,Resource가 부족한 플레이어는 빠르게 상대를 견제하거나 방어 태세를 갖추는 전략이 필요하다. 이 맵은 밀리 장르에 속하지만, 시야 방해 요소가 추가되어 전략적 깊이가 더해진 atypical 밀리 맵으로 분류할 수 있다. 기존 밀리 맵과는 달리Resource 확보와 시야 관리, 방어 태세의 균형이 승패를 좌우할 가능성이 높으므로, 밀리 경험이 있지만 새로운 전략적 도전을 원하는 플레이어들에게 추천할 만하다. 또한, 4인용으로 구성되어 있어 팀플레이보다는 개인전 성향이 강하지만,Resource 분배나 시야 차단 전략을 공유할 opportunities가 있어 소규모 팀전에서도 재미를 느낄 수 있다. 플레이 전에는 맵의 시야 방해 요소와Resource 분배 구조를 충분히 숙지하고,Resource 확보가 어려운 지역에서는 방어에 집중하거나 견제 플레이를 펼치는 전략을 준비하는 것이 좋다. 또한,Resource가 집중된 지역을 우선적으로 확보하는 것이 승리의 관건이 될 가능성이 높다. This Brood War custom map, <i>Traverse</i>, challenges players with a unique twist on traditional melee gameplay. Designed for 4 players, the map features obstructive structures that block sightlines between opponents, forcing strategic movement and positioning. The title <i>Traverse</i>, meaning 'to pass through' or 'move across,' reflects the core mechanic of navigating around or through these barriers to gain an advantage. The volcanic tileset provides a visually engaging battlefield with a 1024x1024 playable area, scaled to 4096x4096 resolution. Central to the gameplay is the strategic placement of sight-blocking elements, which require players to adapt their tactics beyond mere resource management. Early-game resource distribution may favor certain starting positions, compelling players to either secure resources quickly or adopt defensive or harassment strategies. While classified as a melee variant, <i>Traverse</i> stands out due to its emphasis on sight management and positioning, making it ideal for those seeking a fresh challenge beyond standard melee maps. The 4-player setup encourages individual competition, though team-based coordination around resource control or sightline disruption could add depth to cooperative play. Players should prioritize understanding the map’s obstructive structures and resource hotspots before engaging in full-scale battles. Defensive positioning or harassment tactics may be crucial in resource-scarce areas, while securing high-resource zones early could dictate the match’s outcome. Overall, <i>Traverse</i> offers a strategic and visually distinct experience for Brood War enthusiasts looking to test their adaptability in a non-traditional melee setting.
최근 등록된 맵
새로 추가된 파일과 버전을 확인하세요.
트래버스 (Traverse)
스타크래프트 브루드워의 유즈맵인 <b>Traverse</b>는 4인용 밀리 맵으로, 플레이어 간에 시야를 가리거나 방해하는 구조물이 배치되어 있는 것이 특징이다. 맵 제목이자 내부 제목으로 사용된 <i>Traverse</i>는 '통과하다', '이동하다'라는 뜻을 지니며, 맵의 핵심 메커니즘을 간접적으로 보여준다. 내부 설명에 따르면 ‘이웃들이 시야를 가로막고 있으니, 그들을 움직일 수밖에 없을 것’이라는 문구는 맵의 전략적 요소와 직접적인 연관이 있는 듯하다. 맵은 화산 타일셋을 기반으로 1024x1024 크기의 공간에 배치되어 있으며, 4명의 플레이어가 각자의 시작 지점에서Resource를 확보하고, 상대방을 견제하거나 시야를 차단하는 구조물을 활용해 승부를 가를 수 있도록 설계되었다. 이 맵의 가장 큰 특징은 시야 방해 요소로, 맵 중앙이나 주요 길목에 배치된 장애물이나 구조물이 화면 시야를 가리는 역할을 한다. 이는 기존 밀리 맵과는 차별화된 전략적 접근을 요구하며, 플레이어는Resource 관리뿐만 아니라 시야 확보와 방해 요소의 활용 여부까지 고려해야 한다. 또한, 맵의 크기와 배치로 인해 전투가 벌어질 가능성이 높은 지역이 제한적이므로,Resource 확보와 방어 전략의 중요성이 더욱 부각된다. 맵의 구조상 초반Resource 분배가 균등하지 않을 가능성이 있으며,Resource가 부족한 플레이어는 빠르게 상대를 견제하거나 방어 태세를 갖추는 전략이 필요하다. 이 맵은 밀리 장르에 속하지만, 시야 방해 요소가 추가되어 전략적 깊이가 더해진 atypical 밀리 맵으로 분류할 수 있다. 기존 밀리 맵과는 달리Resource 확보와 시야 관리, 방어 태세의 균형이 승패를 좌우할 가능성이 높으므로, 밀리 경험이 있지만 새로운 전략적 도전을 원하는 플레이어들에게 추천할 만하다. 또한, 4인용으로 구성되어 있어 팀플레이보다는 개인전 성향이 강하지만,Resource 분배나 시야 차단 전략을 공유할 opportunities가 있어 소규모 팀전에서도 재미를 느낄 수 있다. 플레이 전에는 맵의 시야 방해 요소와Resource 분배 구조를 충분히 숙지하고,Resource 확보가 어려운 지역에서는 방어에 집중하거나 견제 플레이를 펼치는 전략을 준비하는 것이 좋다. 또한,Resource가 집중된 지역을 우선적으로 확보하는 것이 승리의 관건이 될 가능성이 높다. This Brood War custom map, <i>Traverse</i>, challenges players with a unique twist on traditional melee gameplay. Designed for 4 players, the map features obstructive structures that block sightlines between opponents, forcing strategic movement and positioning. The title <i>Traverse</i>, meaning 'to pass through' or 'move across,' reflects the core mechanic of navigating around or through these barriers to gain an advantage. The volcanic tileset provides a visually engaging battlefield with a 1024x1024 playable area, scaled to 4096x4096 resolution. Central to the gameplay is the strategic placement of sight-blocking elements, which require players to adapt their tactics beyond mere resource management. Early-game resource distribution may favor certain starting positions, compelling players to either secure resources quickly or adopt defensive or harassment strategies. While classified as a melee variant, <i>Traverse</i> stands out due to its emphasis on sight management and positioning, making it ideal for those seeking a fresh challenge beyond standard melee maps. The 4-player setup encourages individual competition, though team-based coordination around resource control or sightline disruption could add depth to cooperative play. Players should prioritize understanding the map’s obstructive structures and resource hotspots before engaging in full-scale battles. Defensive positioning or harassment tactics may be crucial in resource-scarce areas, while securing high-resource zones early could dictate the match’s outcome. Overall, <i>Traverse</i> offers a strategic and visually distinct experience for Brood War enthusiasts looking to test their adaptability in a non-traditional melee setting.
스나이퍼 발드 + 엑스트라 v314 (Sniper Bald + Extras v314)
스타크래프트 브루드워의 유즈맵 《Sniper Bald + Extras v314》는 저격수 포지션에 특화된 디펜스형 맵으로, 사막 지형을 배경으로 펼쳐지는 긴장감 넘치는 전투가 특징이다. 맵 중앙에 위치한 넓은 개활지는 저격수끼리의 일대일 대결을 유도하며, 양측 진영은 각각의 저격 포인트에서 적을 포착해야 한다. 맵 곳곳에 배치된 바위와 언덕은 시야를 차단하는 장애물 역할을 하며, strategic한 포지션 선택이 승패를 좌우한다. 특히, 맵의 좌우에 배치된 고지대는 저격수에게 유리한 위치이지만, 반대로 적의 사정권에 노출되기도 쉽기 때문에 신중한 움직임이 요구된다. 추가 요소로 추정되는 'Extras'는 저격 이외의 전투나 보조 기능을 제공할 가능성이 있으며, 이는 플레이어의 전략적 선택을 더욱 다양하게 만든다. 초보 플레이어의 경우 적응하기 어려운 맵 구조이지만, 숙련된 저격수라면 각 포지션의 특성과 적의 움직임을 읽어내 승리를 이끌어낼 수 있다. 이 맵은 주로 1:1 또는 2:2 팀전으로 즐기는 것을 추천하며, 저격수 간의 심리전이 핵심인 만큼 집중력과 순발력이 요구되는 유즈맵이다. 플레이 전에는 맵의 시야 차단 요소와 저격 포지션의 특징을 미리 숙지하는 것이 중요하다. 또한, 맵의 추가 요소인 'Extras'가 어떤 기능을 제공하는지 확인하여 전략을 다양화할 수 있도록 준비하는 것이 좋다. Sniper Bald + Extras v314 is a StarCraft: Brood War custom map designed for sniper-focused defense gameplay, set against a desert terrain. The expansive central area encourages intense one-on-one or team-based sniper duels, where players must strategically position themselves to eliminate opponents. Natural obstacles like rocks and hills obstruct line of sight, adding depth to the tactical choices available. The high-ground positions on either side of the map offer advantageous sniping spots but also expose players to enemy fire, requiring careful positioning and awareness. The 'Extras' component, while not fully verified from the image, likely introduces additional combat mechanics or support features, enriching the strategic options. This map demands precision and quick reflexes, making it more suited for experienced players who can adapt to its nuanced terrain. It is best enjoyed in 1v1 or 2v2 team formats, where sniper psychology and map control play crucial roles. Before playing, it is essential to familiarize yourself with the line-of-sight obstacles and sniper positions. Additionally, understanding the role of 'Extras' can provide a strategic edge by diversifying gameplay approaches.
팬텀 모드 V4.0 맥스800 (Phantom Mode V4.0 Max800)
스타크래프트: 브루드워의 유즈맵 '팬텀 모드 V4.0 맥스800'은 다크 스웜과 시야 차단 효과를 적극 활용한 방어형 맵으로, 플레이어가phantom의 능력을 체험할 수 있도록 설계되었다. 맵의 대부분은 어두운 색조의 배경으로 이루어져 있으며, 플레이어는 각자의 기지에서 시작해 끊임없이 몰려드는 저그 무리를 상대해야 한다. 맵 중앙에는 넓은 시야를 확보할 수 있는 지형이 배치되어 있어 방어 전략 수립에 유리한 환경을 제공한다. 또한, 맵의 구석과 중앙에 위치한 좁은 통로는 적의 공격을 효율적으로 차단할 수 있는 포인트로 활용할 수 있다.phantom의 특징인 시야 차단 효과가 전투 전반에 걸쳐 큰 영향을 미치는데, 이를 이용해 적의 움직임을 예측하거나 기습 공격을 방어할 수 있으며, 다크 스웜을 적재적소에 활용해 저그의 밀집도를 조절하는 것이 핵심 전략이다. 맵의 지형은 대체로 평탄한 편이지만, 일부 구간은 언덕 지형으로 이루어져 있어 시야 우위나 방어 позиции 확보에 유리한 위치로 활용할 수 있다.phantom의 능력을 최대한 활용하기 위해서는 초반 방어선 구축과 자원 관리가 무엇보다 중요하며, 후반으로 갈수록 몰려오는 적의 물량이 증가하기 때문에 지속적인 업그레이드와 방어 시설 보강이 필수적이다. 이 맵은phantom을 처음 경험하는 유저들에게는 다소 복잡하게 느껴질 수 있지만, 점차 적응해가며 전략을 다듬어 나갈수록 흥미로운 도전 과제가 될 것이다.phantom 모드는phantom의 능력을 체험할 수 있는 유즈맵으로,phantom의 고유한 시야 차단과 다크 스웜 능력을 활용한 방어형 플레이가 핵심이다. 맵의 어두운 분위기와 넓은 시야 확보가 가능한 지형은 방어 전략 수립에 유리한 환경을 제공하며,phantom의 능력을 최대한 활용하기 위해서는 초반 방어선 구축과 자원 관리가 무엇보다 중요하다.phantom의 시야 차단 효과와 다크 스웜을 적재적소에 활용해 적의 움직임을 예측하고 공격을 방어하는 전략이 요구되며, 후반으로 갈수록 증가하는 적의 물량을 상대하기 위해 지속적인 업그레이드와 방어 시설 보강이 필수적이다.phantom 모드는phantom의 능력을 처음 경험하는 유저들에게는 다소 복잡하게 느껴질 수 있지만, 점차 적응해가며 전략을 다듬어 나갈수록 흥미로운 도전 과제가 될 것이다.phantom 모드는phantom의 능력을 체험할 수 있는 유즈맵으로,phantom의 고유한 시야 차단과 다크 스웜 능력을 활용한 방어형 플레이가 핵심이다. 맵의 어두운 분위기와 넓은 시야 확보가 가능한 지형은 방어 전략 수립에 유리한 환경을 제공하며,phantom의 능력을 최대한 활용하기 위해서는 초반 방어선 구축과 자원 관리가 무엇보다 중요하다. StarCraft: Brood War's custom map "Phantom Mode V4.0 Max800" is a defensive map that actively utilizes Dark Swarm and vision-blocking effects, designed to let players experience Phantom's abilities. Most of the map features a dark-toned background, and players start from their bases to fend off endless waves of Zerg. The central area offers wide vision, creating a favorable environment for formulating defense strategies. Narrow passages in the corners and center of the map serve as key points to efficiently block enemy attacks. Phantom's signature vision-blocking effect plays a major role throughout combat, allowing players to predict enemy movements or defend against ambushes. Using Dark Swarm at the right moments to control Zerg density is a core strategy. While the terrain is mostly flat, some sections feature elevated areas that provide advantages in vision control or securing defensive positions. To maximize Phantom's abilities, prioritizing early defensive line setup and resource management is crucial. As the game progresses, enemy waves grow stronger, making continuous upgrades and reinforcement of defenses essential. Though the map may feel complex to new Phantom users at first, it becomes an engaging challenge as players adapt and refine their strategies over time. Phantom Mode is a custom map where the focus lies on Phantom's unique vision-blocking and Dark Swarm abilities, with the dark atmosphere and wide-vision terrain supporting defensive strategy planning. Early defensive positioning and resource management are vital to leveraging Phantom's strengths, while effectively using vision-blocking and Dark Swarm to predict and counter enemy attacks is key. As enemy waves intensify later in the game, consistent upgrades and defense reinforcement become necessary. While Phantom Mode may seem daunting to newcomers, it evolves into an exciting challenge as players grow accustomed to its mechanics and develop their tactics. Phantom Mode is a custom map designed to let players experience Phantom's abilities, centered on defensive play utilizing Phantom's vision-blocking and Dark Swarm. The dark visuals and terrain with wide vision provide a strong foundation for defense strategies, and mastering Phantom's abilities hinges on early defensive setup and resource control.
반지의 제왕: 미르크우드 숲의 어둠 (Lord of the Rings: Bedim of Mirkwood)
《반지의 제왕: 미르크우드 숲의 어둠(LotR Bedim of Mirkwood)》는 스타크래프트 브루드워의 유즈맵으로, 《반지의 제왕》 세계관을 배경으로 한 컴까기 장르의 맵이다. 맵의 이름은 미르크우드 숲의 어둠을 의미하며, 제3시대 벨레리아의 전투가 벌어지기 전 시점을 다루고 있다. 맵의 전체적인 구조는 거대한 숲 지형으로 이루어져 있으며, 가운데를 가로지르는 강이 자연스러운 장벽 역할을 한다. 플레이어는 각각의 시작 지점에서 출발해 숲을 탐험하며 자원을 모으고, 적대 세력을 상대하는 방식으로 진행된다. 이 맵은 컴까기 장르답게Resource Gathering(자원 채집), Base Building(기지 건설), Combat(전투) 세 가지 요소가 조화를 이루며, 특히 숲 지형의 복잡한 지형이 전투의 재미를 더한다. 플레이어는 시작 지점에서부터 자원 채집을 시작해 건물을 건설하고, 점차 확장해 나가며 적을 격파하는 것이 목표로 보인다. 숲 지형의 경우, 나무와 언덕이 시야를 가리는 요소로 작용하며, strategic depth(전략적 깊이)를 제공한다. 또한, 강을 건너는 것은 전투의 변수가 될 수 있어, 지형을 활용한 전술적 플레이가 중요하다. 추천 대상으로는 스타크래프트의 전략적 요소와 판타지 세계관을 좋아하는 플레이어, 특히 컴까기 장르를 선호하는 유저들에게 적합하다. 또한, 팀 플레이보다는 개인전 또는 소규모 팀전으로 즐기는 것이 더 재미를 느낄 수 있을 것으로 보인다. 맵을 플레이하기 전에는 숲 지형의 복잡성과 강의 존재를 고려해, 자원 채집과 기지 확장의 균형을 맞추는 전략을 준비하는 것이 중요하다. 전체적으로 맵의 분위기는 어두운 숲의 분위기를 잘 살려내어, 《반지의 제왕》의 세계관에 immersion(몰입)을 느끼기에 좋다. 플레이 시 주의할 점은 숲 지형의 시야 차단과 강의 이동 제약으로, 초보자는 자원 채집과 기지 확장이 원활하지 않을 수 있어 난이도가 다소 높게 느껴질 수 있다. 반면, 경험 많은 플레이어는 지형을 적극 활용한 전투와 자원 전략으로 높은 재미를 느낄 수 있을 것이다. 《The Lord of the Rings: Bedim of Mirkwood》 is a custom map for *StarCraft: Brood War* set in the *Lord of the Rings* universe, featuring a comp-stomp genre. The map's name refers to the darkness of Mirkwood Forest, depicting events before the Battle of the Pelennor Fields in the Third Age. The overall terrain consists of a vast forest landscape bisected by a river that acts as a natural barrier. Players start at their respective spawn points, exploring the forest to gather resources and engage enemy forces. As a comp-stomp map, it integrates three core elements—resource gathering, base building, and combat—in harmony, with the intricate forest terrain enhancing the gameplay experience. Players begin gathering resources, constructing buildings, and expanding their base to eliminate opponents. The forest's dense trees and elevated terrain obscure vision, adding strategic depth. Crossing the river introduces tactical variables, making terrain-based strategies essential. This map is ideal for players who enjoy *StarCraft*'s strategic depth and fantasy settings, particularly those who prefer the comp-stomp genre. It’s best enjoyed in 1v1 or small-team matches rather than large-scale team battles. Before playing, it’s crucial to plan a balanced strategy considering the forest’s complexity and the river’s limitations. The map’s dark, immersive atmosphere effectively captures the essence of *The Lord of the Rings*, enhancing the sense of being part of its world. However, the obscured vision and river movement restrictions may pose challenges for beginners, making the difficulty feel higher. Conversely, experienced players can leverage the terrain and resource strategies for a deeply engaging experience.
움직이지 마라! 1337 (DON'T F-ING MOVE! 1337)
‘DON’T F-ING MOVE! 1337 V1.1’은 스타크래프트 브루드워의 유즈맵으로, 플레이어가 미니맵을 제외한 전체 화면을 보지 못하고 상대방의 움직임을 추론하며 전투를 펼쳐야 하는 독특한 디자인으로 주목받는 맵이다. 맵의 이름은 강렬한 필터링과 함께 ‘1337’이라는 오타가 포함되어 있어 서버 제목에서 약간의 오류가 보였지만, 내부 맵 제목과 설명을 통해 정식 명칭임을 확인할 수 있다. 화면 중앙에 위치한 ‘MOVE’라는 붉은 버튼이 인상적인데, 이 버튼을 클릭하면 미니맵을 제외한 모든 시야가 차단되어 상대방의 위치를 예측하며 전략을 세워야 한다. 맵의 배경은 우주 테마로 구성되어 있으며, 검정색과 흰색으로 대비되는 간결한 디자인 덕분에 초점을 잃기 쉽고, 상대방의 움직임을 읽는 재미가 돋보인다. 맵의 구조는 8명의 플레이어가 참여할 수 있도록 설계되었으며, 각 플레이어는 시작 지점에서 출발해 상대방을 향해 움직이며 전투를 벌이게 된다. 시야가 차단된 상태에서 상대방의 위치를 유추하는 과정이 마치 숨바꼭질과도 같아 흥미로운 긴장감을 제공한다. 또한, 맵의 이름에서 느껴지는 도전적인 분위기와 ‘1337’이라는 수치가 게임의 난이도나 숙련도를 강조하는 요소로 작용할 수 있다. 이 맵은 시야 차단이라는 독특한 메커니즘을 통해 새로운 게임 경험을 제공하며, 특히 상대방의 움직임을 예측하는 능력이 중요한 숙련자용 맵으로 평가된다. 플레이 전에는 맵의 특성을 충분히 숙지하고, 상대방의 움직임을 읽는 연습을 해두는 것이 좋다. 또한, 미니맵을 적극 활용하여 상대방의 위치와 움직임을 예측하는 전략을 세우는 것이 핵심이다. 이 맵은 스타크래프트의 기본 전략을 넘어서는 새로운 감각의 전투를 즐기고자 하는 플레이어들에게 추천된다. 특히, 시야가 차단된 상태에서 상대방을 상대하는 것이 어렵다면, 초반에는 천천히 움직이며 상대방의 패턴을 분석하는 데 집중하는 것이 좋다. 이 맵은 단순히 전투를 벌이는 것뿐만 아니라, 상대방의 심리까지 읽어내야 하는 재미가 있기 때문에 전략적 사고를 요구하는 유즈맵으로, 스타크래프트의 새로운 즐길 거리를 찾고 있는 유저들에게 강력히 추천한다. ‘DON’T F-ING MOVE! 1337 V1.1’ is a custom map for *StarCraft: Brood War* where players must fight without seeing the full screen—only the minimap is visible—relying on deducing the opponent’s movements. The map’s name stands out with its strong filter and the intentional typo ‘1337,’ though its official title is confirmed in the internal map description. A striking red ‘MOVE’ button sits at the center of the screen; clicking it blacks out all vision except the minimap, forcing players to strategize based on predicting enemy positions. Set against a space-themed backdrop with a stark black-and-white design, the map’s simplicity makes it easy to lose focus while heightening the thrill of reading the opponent’s movements. Designed for eight players, each starts at a spawn point and advances toward enemies, engaging in combat with vision blocked. The process of deducing enemy positions under these conditions resembles hide-and-seek, creating tense and engaging gameplay. The map’s challenging title and the ‘1337’ notation hint at its difficulty, emphasizing the skill and experience required to master it. Through its unique vision-blocking mechanic, it offers a fresh gaming experience, especially suited for experienced players who rely on predicting opponent movements. Before playing, it’s important to fully understand the map’s mechanics and practice reading enemy behavior. Using the minimap effectively to track and predict opponents is key. This map is ideal for players seeking a combat experience beyond *StarCraft*’s standard strategies. If the vision-blocked combat feels overwhelming, start by moving cautiously to analyze opponent patterns. Beyond mere combat, the map rewards strategic thinking and psychological insight, making it a highly recommended custom map for those looking to explore new depths in *StarCraft: Brood War*.
고양이와 쥐 in jungle 9.7 (Cat & Mouse in jungle 9.7)
스타크래프트 브루드워의 유즈맵 〈Cat & Mouse in jungle 9.7〉는 ‘고양이와 쥐’라는 독특한 컨셉으로 플레이어 간의 숨바꼭질을 기반으로 한 숨은 플레이어를 찾는 디펜스 게임이다. 맵은 밀림 테마의 사막 타일셋으로 꾸며졌으며, 넓은 맵 곳곳에 흩어진 상자와 덤불, 바위 등을 활용해 시야를 차단하고 전략적인 숨기를 구현했다. 플레이어는 고양이(공격자) 또는 쥐(도망자) 중 하나의 역할을 맡아, 고양이는 맵 곳곳에 숨은 쥐를 찾아내 제거해야 하고, 쥐는 살아남아 모든 고양이를 피하거나 특정 조건을 달성해야 한다. 맵의 핵심은 시야 차단 요소와 복잡한 길찾기 루틴으로, 숨은 쥐를 찾는 과정이 긴장감을 유지하게 한다. 특히 맵의 대칭되지 않은 구조와 숨은 길들은 고양이에게는Strategy Map"과 같은 요소는 없지만, 숨바꼭질의 재미와 숨은 플레이어 찾기 요소가 강하게 부각되어 있어 전형적인 ‘숨기’ 장르의 유즈맵으로 분류할 수 있다. 초보자도 쉽게 접근할 수 있지만, 숨은 쥐를 찾는 고양이의 입장에서는 높은 인지력과 맵 이해도가 요구되는 만큼 난이도는 보통 수준으로 예상된다. 플레이 전에는 맵의 숨은 길과 시야 차단 요소를 미리 확인하고, 자신의 역할에 맞는 전략을 준비하는 것이 중요하다. 추천 대상은 숨바꼭질과 전략 게임을 좋아하는 플레이어들로, 특히 2인부터 7인까지의 다양한 인원수로 즐길 수 있어 소규모 모임이나 친선전에서 좋은 반응을 얻을 수 있을 것이다. 맵의 디자인과 구성은 단순해 보이지만, 숨은 쥐를 찾는 과정에서의 긴장감과 예측 불가능한 플레이가 이 맵의 매력 포인트다. 반복 플레이를 통해 맵의 숨은 루트를 익히고, 상대방의 움직임을 예측하는 능력을 키울 수 있어 장기적인 재미를 제공할 것이다. 특히 숨은 플레이어를 찾는 재미와 숨은 길의 발견이 이 게임의 핵심 포인트이므로, 시야 차단 요소를 적극 활용한 플레이가 중요하다. StarCraft: Brood War's custom map *Cat & Mouse in Jungle 9.7* is a unique hide-and-seek defense game based on the concept of "cat and mouse," where players take on the roles of either hunters or prey. The map features a jungle-themed desert tileset, with scattered boxes, bushes, and rocks strategically placed to block line of sight and create opportunities for clever hiding. Players are assigned either the role of the cat (attacker) or the mouse (runner). The cats must hunt down and eliminate the hidden mice, while the mice must survive by evading all cats or fulfilling specific conditions. The map's core appeal lies in its line-of-sight blocking elements and intricate pathfinding routes, which heighten the tension of tracking down hidden runners. Its asymmetrical structure and hidden paths make it a classic example of a "hide-and-seek" genre custom map, despite lacking a "Strategy Map"-style layout. While accessible to beginners, the role of the cat demands strong spatial awareness and map knowledge, resulting in a moderate difficulty level. Before playing, it's essential to familiarize yourself with the hidden paths and line-of-sight obstructions and prepare strategies tailored to your role. Ideal for players who enjoy hide-and-seek and strategic gameplay, the map supports 2 to 7 players, making it perfect for small gatherings or friendly matches. Though its design may seem simple at first glance, the thrill of uncovering hidden runners and the unpredictable gameplay make it highly engaging. Repeated plays allow players to memorize hidden routes and sharpen their ability to predict opponents' movements, ensuring long-term enjoyment. The true highlight of the game lies in the excitement of finding hidden players and discovering secret paths, making strategic use of line-of-sight blocking elements crucial to success.
티거-메제이 (tigger-mezei)
스타크래프트 브루드워의 클래식한 밀리 맵인 〈tigger-mezei〉는 8인용으로 설계된 맵으로, 전체가 뼈로 이루어진 메제(Mezei)라는 이름처럼 독특한 지형을 자랑한다. 맵은 거대한 뼈 구조물이 마치 생체 조직처럼 얽혀 있는 모습으로, 중앙의 넓은 개방 공간을 surrounded by 좁은 길목과 언덕 지대가 둘러싼 구조를 가지고 있다. 이 지형적 특징은 전면전을 펼치기에 최적화되어 있으며, 각 플레이어의 본진은 뼈 구조물 사이로 배치되어 있어 초반 자원 수집과 진출이 다소 까다로운 편이다. 특히 뼈 언덕과 좁은 길목은 시야 차단과 기습에 유리한 지형을 제공하며, 중앙의 넓은 평원은 대규모 전투가 벌어질 수 있는 장소가 된다. 이 맵의 가장 큰 특징은 뼈로 이루어진 지형이 주는 시각적 독특함과 함께, 밀리 맵으로서의 밸런스를 고려한 배치다. 각 플레이어의 본진은 중앙 평원에서 멀리 떨어져 있어 초반 정찰과 진출 타이밍이 중요하며, 좁은 길목과 언덕을 활용한 방어와 기습이 게임의 승패를 좌우할 수 있다. 또한, 뼈 구조물은 단순한 장식에 그치지 않고, 시야 차단과 이동 경로 제약이라는 전략적 요소를 제공한다. 예를 들어, 뼈 언덕 위에서 아군을 지원하거나, 좁은 길목을 통해 적의 배후로 기습하는 플레이가 가능하다. 초보 플레이어의 경우 좁은 길목과 언덕 지형에 익숙하지 않을 수 있어, 초반 정찰과 진출 타이밍을 잘 잡는 것이 중요하다. 반면, 숙련된 플레이어는 이러한 지형적 특징을 활용해 적의 움직임을 예측하고, 전략적으로 advantageous 한 위치에서 전투를 펼칠 수 있다. 맵의 난이도는 중간 정도로, 초반 자원 수집과 진출 타이밍을 잘 조율하면 중반 이후 대규모 전투에서 우위를 점할 수 있다. 특히, 뼈 언덕과 좁은 길목은 방어와 공격 모두에서 유용한 지형이기 때문에, 맵의 특성을 잘 이해하고 활용하는 것이 중요하다. 이 맵은 8인 밀리 게임에서 팀워크와 전략적 사고가 중요한 맵으로, 뼈로 이루어진 독특한 지형이 주는 시각적 재미와 함께 전략적 깊이를 제공한다. 뼈 구조물 사이로 펼쳐지는 전투는 마치 생체 조직 내에서의 전쟁처럼 느껴질 정도로 인상적이며, 플레이어들에게 새로운 전략적 경험을 선사할 것이다. 특히, 좁은 길목과 언덕을 활용한 기습과 방어는 이 맵의 핵심 전략 요소로, 이를 잘 활용할 수 있는 플레이어에게는 큰 이점이 된다. 이 맵을 플레이하기 전에는 뼈 구조물의 배치와 각 플레이어의 본진 위치, 좁은 길목과 언덕의 시야 차단 효과를 미리 숙지하는 것이 좋다. 또한, 초반에는 정찰을 통해 적의 진출 경로를 파악하고, 중반 이후에는 대규모 전투를 대비한 자원과 유닛 조합을 신중히 계획해야 한다. 뼈로 이루어진 맵의 특성상, 시야 차단과 이동 경로 제약이 게임의 흐름을 크게 좌우할 수 있으므로, 이러한 요소들을 잘 이해하고 활용하는 것이 중요하다. Starcraft: Brood War’s classic melee map *Tigger-Mezei* is an 8-player design that boasts a unique terrain inspired by the name Mezei, meaning “bone.” The entire map is dominated by massive skeletal structures that twist and intertwine like living tissue. At its core lies a wide open central plain, encircled by narrow corridors and elevated hillside zones. This layout is tailor-made for full-scale engagements, with each player’s main base tucked between the bony formations, making early resource gathering and expansion slightly tricky. The bone hills and narrow passages offer excellent cover and ambush spots, while the central expanse becomes the stage for large-scale battles. What sets this map apart is the striking visual identity of its skeletal terrain, paired with a layout that carefully balances competitive play. Players start far from the central plain, so scouting and timing your early push are critical. Narrow corridors and elevated ground reward smart defensive setups and surprise attacks, often deciding the outcome of the match. The bone structures aren’t just decoration—they actively shape strategy by blocking vision and restricting movement. Commanders can support allies from elevated bone ridges or slip behind enemy lines through tight passages to launch devastating strikes. Novice players may struggle with the confined corridors and elevated terrain, so nailing early scouting and expansion timing is key. Experienced players, however, can read the terrain like a chessboard, predicting enemy moves and seizing advantageous positions. The map sits at a moderate difficulty level: if you manage early resource flow and expansion timing, you can dominate the mid-game’s large-scale clashes. Both defense and offense benefit from the bone hills and narrow paths, so mastering the map’s quirks is essential. As an 8-player melee arena, *Tigger-Mezei* demands teamwork and tactical foresight. Its eerie skeletal framework delivers visual flair while layering deep strategic options—combat unfolding between the bones feels like a war waged inside living tissue, offering a fresh tactical experience. Ambushes through narrow corridors and defensive stands on elevated ridges are the map’s defining mechanics, giving players who exploit them a decisive edge. Before jumping in, study how the bones are arranged, where each base sits, and how the hills and corridors block sight. Early on, scout to map enemy pathways, and later, plan your unit compositions and resource flow with large battles in mind. Because vision and movement are so heavily restricted here, understanding—and leveraging—those constraints will shape the entire flow of the game.
KorMod ExpUed01
스타크래프트 브루드워의 유즈맵 〈KorMod ExpUed01〉은 넓은 평야와 기복 있는 지형을 바탕으로 한 디펜스형 맵으로 보입니다. 전체적으로 펼쳐진 넓은 공간은 적의 공격로를 유도하거나 방어군을 배치하는 데 유리한 환경을 제공합니다. 이미지의 중앙부를 기준으로 대칭 형태를 띠고 있으며, 지형이 약간 굴곡져 있어 시야를 차단하는 지점들이 곳곳에 분포되어 있습니다. 이러한 구조는 플레이어가 방어선을 구축하거나 기습 공격을 준비할 때 전략적 선택을 강요합니다. 또한, 맵의 가장자리를 따라 펼쳐진 얕은 물웅덩이와 숲 지대가 시야 및 이동 경로를 제한하는 역할을 하며, 이는 방어의 중요성을 더욱 부각시킵니다. 맵의 왼쪽과 오른쪽 끝 부분에는 각각의 진영이 배치되어 있을 것으로 추정되며, 중앙으로 향하는 길목은 좁아지면서 자연스럽게 방어 포인트가 형성됩니다. 전체적인 분위기는 컴까기나 디펜스 장르에 특화되어 있으며, 특히 2인용 맵으로 추정되는 만큼 1대1 전투나 동맹 플레이에서 긴장감을 극대화할 수 있는 구조로 설계되었습니다. 맵을 플레이하기 전에는 자신의 진영 주변의 방어 시설 구축 가능 여부와 중앙 통로의 보호 수준을 꼼꼼히 확인하는 것이 중요합니다. 또한, 지형의 굴곡을 활용한 기습 공격이나 후방 타격 루트를 미리 예상해 둔다면 더욱 효율적인 플레이가 가능할 것입니다. 특히 넓은 평야가 제공하는 넓은 시야는 전투의 주도권을 잡는 데 결정적인 역할을 하므로, 맵의 특징을 충분히 숙지하고 전략을 세우는 것이 필수적입니다. KorMod ExpUed01 is a UMS defense map for StarCraft: Brood War, featuring a vast plain with varied terrain that supports strategic defensive gameplay. The map appears symmetrical with a central axis, where rolling hills and elevated areas create natural sightlines and strategic vantage points. The edges of the map are bordered by shallow water patches and dense forests, which restrict movement and visibility, forcing players to adapt their strategies accordingly. The narrow pathways leading to the central area suggest a choke point where defensive formations can be effectively utilized. The overall design implies a 2-player competitive setup, likely optimized for 1v1 battles or cooperative team play. Before engaging in gameplay, players should assess the placement of defensive structures around their base and the accessibility of the central corridor. The undulating terrain offers opportunities for ambushes or backline strikes, making it crucial to scout and plan ahead. The expansive open areas provide wide sightlines, which are essential for controlling the battlefield. Mastering the map's geography and leveraging its features will significantly enhance the player's ability to secure victory in both offensive and defensive scenarios.
맵 선택 가이드
태그는 맵의 핵심 특징을 빠르게 설명하지만 제작 버전마다 규칙이 다를 수 있습니다. 상세 설명에서 권장 인원, 난이도, 플레이 시간과 버전을 함께 확인한 뒤 다운로드하세요.