
시야 싸움 스타크래프트 맵 모음
'시야 싸움' 태그가 등록된 맵을 모았습니다. 장르 하나로 찾기 어려운 플레이 방식, 난이도와 특징을 중심으로 인기 맵과 최신 맵을 비교해 보세요.
- 등록 맵
- 20개
- 누적 다운로드
- 0
- 누적 조회
- 736
인기 맵
다운로드와 조회 반응이 높은 맵입니다.
고양이 대 쥐 SE (Cats vs Mice SE)
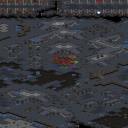
‘고양이 대 쥐 SE (Cats vs Mice SE)’는 스타크래프트: 브루드워의 유즈맵으로, 고양이 진영과 쥐 진영이 대결을 펼치는 디펜스 기반의 전략 게임이다. 맵은 평평한 지형을 중심으로 중앙의 좁은 통로와 주변의 넓은 공간으로 구성되어 있으며, 고양이는 쥐를 사냥하고 쥐는 고양이를 피하거나 역으로 사냥을 시도하는 방식으로 진행된다. 맵의 특징은 초반 중앙 통로에서의 치열한 전투와 후반부로 갈수록 넓어지는 공간을 활용한 기습 또는 도주 전략에 있다. 플레이어는 각각의 진영에 할당된 유닛을 조작하여 상대방을 전멸시키는 것이 목표이며, 맵의 지형과 시야 차이는 전략의 핵심으로 작용한다. 맵의 디자인과 트리거는 ‘고양이와 쥐 델럭스(Cats and Mice Deluxe)’를 기반으로 일부 개선된 버전으로, 맵의 밸런스와 플레이Feel을 고려한 디자인으로 보인다. 이 맵은 주로 7인 플레이를 지원하며, 초보자와 숙련자 모두 즐길 수 있도록 난이도가 조절되어 있는 것으로 추정된다. 플레이 전에는 고양이와 쥐 각각의 유닛 능력치와 맵의 시야 차이를 숙지하는 것이 중요하며, 중앙 통로에서의 선공 여부가 승패를 좌우할 수 있다. 맵의 분위기는 밝고 깔끔한 편으로, 우주 테마의 타일셋을 사용해 공중 전투나 특수 능력보다는 지상 기반의 전투에 초점을 맞추고 있다. 이 맵은 디펜스와 전략의 조합을 즐기는 유저들에게 추천할 만하다. ‘Cats vs Mice SE’ is a StarCraft: Brood War custom map where two factions, cats and mice, compete in a defense-based strategy game. The map features a flat terrain centered around a narrow central corridor flanked by wide open areas. Cats hunt mice, while mice either evade or attempt to hunt cats in return. The map’s key features lie in the intense early-game battles along the central corridor and the expanded space in the late game, allowing for ambushes or escape strategies. Players control their assigned units to eliminate the opposing faction, with terrain and visibility playing crucial roles in strategy. The map’s design and triggers are based on an improved version of ‘Cats and Mice Deluxe,’ with a focus on balance and playability. It primarily supports 7-player matches and appears to offer adjustable difficulty for both beginners and experienced players. Before playing, it’s important to understand the unit stats for both factions and the map’s visibility differences, as securing the first strike in the central corridor can determine victory. The map has a bright and clean aesthetic, using a space-themed tileset that emphasizes ground-based combat over aerial or special abilities. This map is highly recommended for players who enjoy a mix of defense and strategy.
오버룩 (Overlook)
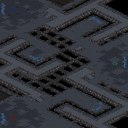
‘오버룩(Overlook)’은 스타크래프트: 브루드워의 맵 파일명 ‘(3)Overlook.scm’과 내부 제목, 그리고 우주 타일셋을 바탕으로 제작된 정밀한 3인용 밀리 맵입니다. 맵의 전체적인 배치는 사각형 형태의 중앙 평지 주위에 세 개의 언덕이 삼각형으로 배치되어 있으며, 각 언덕은 미네랄과 가스 멀티를 중심으로 한 작은 평지로 연결됩니다. 이 구조는 플레이어들이 언덕 위에서 시야를 확보하고 적의 움직임을 미리 감지할 수 있도록 설계되어 있습니다. 맵의 이름은 ‘ 내려다보다’라는 뜻의 ‘오버룩’이지만, 맵 이미지 상으로는 언덕의 고지대뿐만 아니라 중앙 평지에서도 시야가 원활하게 확보되는 특징을 보입니다. 내부 설명에 ‘당신은 감시당하고 있는 듯한 느낌이 들지 않나요?’라는 문구가 포함되어 있어, 시야와 정찰의 중요성을 강조하는 분위기를 느낍니다. 플레이어는 각 언덕에 위치한 본진에서 시작하며, 이 언덕들은 각각의 미네랄 멀티와 가스 멀티로 연결되어 있어 초기 자원 확보가 중요합니다. 중앙 평지는 비교적 평탄한 지형이지만, 언덕의 고지대와는 달리 시야가 제한적인 구간이 존재합니다. 이러한 지형적 특성은 초반 정찰과 시야 싸움, 그리고 멀티 테크 전략의 중요성을 부각시키며, 특히 언덕 고지대에서의 전투에서 유리한 고지를 차지하는 것이 승리의 관건이 됩니다. 또한, 맵의 크기는 3072x3072 픽셀로 비교적 넓은 편이지만, 언덕과 중앙 평지의 균형 있는 배치로 인해 밸런스가 잘 맞춰져 있습니다. 이 맵은 초보와 중급자 모두 즐길 수 있는 밸런스형 밀리 맵으로, 시야 관리와 멀티 운영을 중시하는 플레이어들에게 특히 추천됩니다. 초반에는 언덕 고지대에서 정찰을 통해 상대의 전략을 파악하고, 중앙 평지에서 벌어지는 전투에서 유리한 위치를 점유하는 것이 중요합니다. 또한, 가스 멀티 확보와 테크 트리의 적절한 타이밍도 승패를 좌우할 수 있는 요소로 작용합니다. 이 맵을 플레이하기 전에는 언덕과 중앙 평지의 시야 차이를 충분히 숙지하고, 정찰 유닛을 적극 활용하여 상대의 움직임을 끊임없이 확인하는 것이 좋습니다. 특히, 언덕 고지대에서 벌이는 전투에서는 시야 우위의 이점을 최대한 활용하여 상대방을 압박하는 전략을 구사하는 것이 중요합니다. ‘Overlook’ is a meticulously designed three-player melee map from StarCraft: Brood War, based on the map file name ‘(3)Overlook.scm,’ its internal title, and its space tile set. The map features a rectangular central lowland surrounded by three triangularly arranged hills, each connected to a small plateau centered around mineral and gas expansions. This layout allows players to secure vision from the high ground and anticipate enemy movements. Though the map’s name means “overlook,” its design ensures clear sightlines not only from the hilltops but also across the central lowland. The internal description includes the line, “Don’t you feel like you’re being watched?” underscoring the map’s emphasis on vision control and scouting. Players begin in their main bases on the hills, each linked to mineral and gas expansions, making early resource collection critical. While the central lowland is relatively flat, certain sections offer limited visibility compared to the high ground. These terrain features heighten the importance of early scouting, vision battles, and multi-base tech strategies, with controlling the high ground in hilltop engagements often proving decisive. Despite its size of 3072x3072 pixels, the balanced distribution of hills and central lowland ensures a well-matched experience. Suitable for both beginners and intermediate players, this balanced melee map is especially recommended for those who value vision management and multi-base play. Early on, scouting from the hilltops to gauge opponents’ strategies and securing advantageous positions in central engagements are key. Gas expansions and timely tech progression also play pivotal roles in determining victory. Before playing, it’s crucial to understand the vision differences between the hills and central lowland, actively using scouting units to continuously monitor enemy movements. In hilltop battles, leveraging vision advantages to pressure opponents is essential.
심즈 위드 울브스 (Sims With Wolves)
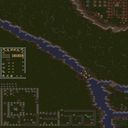
스타크래프트 브루드워의 대표적인 유즈맵 중 하나로 꼽히는 <Sims With Wolves>는 8명의 플레이어가 한 팀을 이뤄 대결하는 컴까기 스타일의 맵이다. 사막 테마의 넓은 평지에서 벌어지는 전투는 시야 확보와 자원 관리가 중요한 포인트로, 초반에는 상점이나 건물을 짓는 데 자원을 집중해야 하며 후반에는 강력한 유닛을 조합해 상대방을 압박하는 전략이 필수적이다. 맵의 중앙에는 광물이 풍부한 멀티 지역이 있어 자원 경쟁이 치열해지며, 각 플레이어의 시작 위치가 고르게 배치되어 있어 공정한 전투가 가능하다. 특히 맵의 가장자리는 상대방의 공격을 방어하기 좋은 지형으로 구성되어 있어 방어적인 플레이도 충분히 고려해 볼 만하다. 이 맵의 가장 큰 특징은 바로 ‘늑대’라는 특수 유닛을 조합할 수 있다는 점이다. 늑대는 일반 유닛에 비해 체력이 높고 공격력이 강력해, 후반부로 갈수록 강력한 카드로 활용할 수 있다. 하지만 늑대를 조합하기 위해서는 일정량의 미네랄과 가스가 필요하며, 유닛을 잃지 않고 전투를 지속하는 것이 중요하다. 때문에 초보자들은 자원 관리와 유닛 컨트롤에 어려움을 느낄 수 있지만, 숙련된 플레이어들은 늑대를 중심으로 한 전략으로 승부를 결정짓는 경우가 많다. 또한 맵의 중앙 멀티 지역은 자원 확보와 더불어 상대방의 움직임을 관찰하는 데 유용한 장소로, 이 지역을 차지하는 것이 전투의 흐름을 좌우하기도 한다. <Sims With Wolves>는 단순히 전투만 하는 것이 아니라, 상대방을Resource Management, Unit Composition, Wolf Unit Strategy, Desert Terrain, Multi Resource Area, Defensive Positioning, Resource Competition, Balanced Starting Positions, Central Multi Area, Unit Control, Late-Game Power, Resource Starvation, Territory Control, Strategic Depth, Team Coordination, Resource Efficiency, Map Control, Unit Upgrades, Base Defense, Early Game Rush, Mid-Game Balance, Wolf Unit Synergy, Mineral and Gas Management, Player Interaction, Combat Tactics, Resource Denial, Wolf Unit Training, Defensive Structures, Offensive Push, Resource Gathering, Map Awareness, Battlefield Control, Resource Pressure, Unit Composition Flexibility, Wolf Unit Counter, Resource Allocation, Strategic Planning, Map Features, Team Play, Competitive Balance, Resource Scarcity, Player Positioning, Combat Engagement, Resource Optimization, Late-Game Dominance, Map Control Strategies, Resource Starvation Tactics, Unit Micro Management, Wolf Unit Evolution, Resource Sharing, Base Expansion, Resource Denial Strategies, Map Control Points, Resource Management Skills, Combat Resolution, Resource Efficiency, Player Coordination, Resource Allocation Strategy, Wolf Unit Advantage, Defensive Playstyles, Offensive Strategies, Resource Competition Dynamics, Map Control Advantages, Strategic Resource Use, Combat Outcome, Resource Scarcity Management, Player Decision Making, Resource Utilization, Combat Flow, Resource Pressure Tactics, Map Awareness Skills, Resource Denial Tactics, Strategic Resource Planning, Combat Engagement Strategies, Resource Management Challenges, Player Interaction Dynamics, Resource Allocation Decisions, Wolf Unit Synergy Tactics, Resource Efficiency Optimization, Combat Resolution Strategies, Resource Scarcity Challenges, Player Coordination Skills, Resource Utilization Strategies, Combat Outcome Determination, Resource Management Mastery, Player Decision Making Process, Resource Allocation Tactics
스나이퍼 레퀴엠 2.2 (Sniper Requiem 2.2)
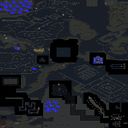
스타크래프트: 브루드워의 눈길을 사로잡는 유즈맵으로 유명한 〈Sniper Requiem 2.2〉는 저격수 대 저격수 간의 치열한 전투를 그린 디펜스 장르의 정석과도 같은 작품이다. 맵의 전체적인 구조는 넓은 평야와 중앙에 위치한 고지대를 중심으로 펼쳐지며, 곳곳에 배치된 바위와 잔디, 얼음 지형이 시야를 가리고 전술을 짜기 좋게 설계되어 있다. 플레이어는 각자의 저격수 유닛을 조종하며, 상대방의 저격수나 주요 건물을 파괴하는 것이 목표로 보인다. 맵의 타일셋은 설원으로 구성되어 있어 차가운 분위기를 연출하며, 특히 밤하늘과 별이 반짝이는 효과가 맵의 분위기를 한층 더 깊게 만든다. 중앙 고지대에서 벌어지는 1대1 대결은 긴장감을 고조시키며, 넓은 필드에서 펼쳐지는 저격전은 섬세한 컨트롤과 전략이 요구된다. 이 맵은 저격수 간의 전투에 특화된 만큼, 시야 확보와 지형의 활용이 승패를 좌우할 가능성이 크며, 특히 맵 곳곳에 배치된 바위와 잔디는 시야를 차단하는 동시에 엄폐물을 제공하여 전술을 다양하게 전개할 수 있도록 한다. 초보 플레이어는 시야 싸움의 중요성을 간과하기 쉬우며, 경험이 많은 플레이어는 맵의 고지대와 저지대를 적극 활용하여 상대방을 압박하는 플레이를 선호할 것으로 보인다. 〈Sniper Requiem 2.2〉는 저격수 간의 전투를 즐기고자 하는 유저들에게는 필수적인 맵으로, 단순한 사냥이 아니라 전략과 전술을 요구하는 깊이 있는 플레이가 가능하다는 점에서 높은 평가를 받을 만하다. 특히 맵의 디자인과 분위기가 조화를 이루며, 플레이어의 집중력을 끌어올리는 데 일조한다는 점도 큰 장점이다. Sniper Requiem 2.2 is a standout user-made map in StarCraft: Brood War, renowned for its intense sniper-versus-sniper battles. Set in a snowy terrain with ice-tiled landscapes, the map features open plains and elevated central highlands, offering strategic vantage points and natural cover through scattered rocks and grass. Players control sniper units, aiming to eliminate enemy snipers or key structures. The map’s cold, serene atmosphere is enhanced by a night sky with twinkling stars, creating a moody and engaging backdrop for tactical play. The central highlands serve as a focal point for 1v1 duels, while the expansive terrain demands precise positioning and sharp aiming. Sightlines are crucial, as the map’s design emphasizes blocking and cover, allowing players to outmaneuver opponents. Novices may struggle with vision control, whereas experienced players can leverage elevation and terrain to dominate engagements. With its focus on sniper combat, Sniper Requiem 2.2 offers more than just a shooting gallery—it rewards strategic depth and thoughtful positioning, making it a must-play for fans of tactical duels. The map’s cohesive design and immersive ambiance further elevate the experience, ensuring players remain engaged throughout.
Twisted Jungle (꼬인 정글)
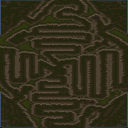
스타크래프트 브루드워의 대형 맵Twisted Jungle은 이름 그대로 복잡한 지형을 자랑하는 유즈맵으로, 밀리 계열의 대형 맵에서 흔히 볼 수 있는 대규모 전투를 제공합니다. 맵의 특이점은 거대한 규모와 뒤틀린 듯한 지형 배치에 있습니다. 8192x8192의 거대한 크기를 자랑하는 이 맵은 사막 타일셋을 활용해 건조한 느낌의 사막 지형을 배경으로 삼고 있으며, 곳곳에 복잡한 언덕과 협곡이 배치되어 있습니다. 플레이어는 맵 중앙에 위치한 주요 전장지역에서 충돌을 벌이거나, 주변의 협소한 길목을 활용해 적의 움직임을 방해할 수 있습니다. 이 맵의 가장 큰 특징은 바로 '길 잃음'에 있습니다. 맵 자체가 크고 복잡하게 설계되어 있어 아군의 유닛들이 예상치 못한 길로 빠지거나, 적의 시야에 노출되지 않은 채 길목을 막고 있는 경우가 빈번합니다. 이는 단순히 전투뿐만 아니라 전략적 플레이의 중요성을 더욱 부각시키며, 맵을 осво하는 데 상당한 연습이 필요하다는 점을 강조합니다. 초보자는 물론이고 숙련자도 맵의 구조를 완전히 숙지하지 않으면 예상치 못한 Situational Awareness(상황 인식) 실수로 패배할 가능성이 높습니다. 전체적인 분위기는 밀리 계열의 대형 맵으로서, 넥서스나 커맨드 센터를 파괴하는 것이 승리 조건으로 추정됩니다. 맵의 규모와 복잡한 지형 덕분에 대규모 전투가 벌어질 가능성이 높으며, 이는 실력과 전략이 균형을 맞추는 맵으로 평가할 수 있습니다. 또한, 유닛의 이동 경로와 시야 확보가 매우 중요해, 유닛 테크트리나 빌드 오더뿐만 아니라 맵 리딩 능력도 요구됩니다. 초보자보다는 중수 이상이 즐기기에 적합한 맵이며, 특히 맵 컨트롤과 시야 싸움에 익숙한 플레이어에게 재미를 줄 수 있을 것입니다. 다만, 맵의 복잡성 때문에 처음 접하는 플레이어는 여러 번의 실전을 통해 맵의 구조를 익히는 과정이 필요합니다. Twisted Jungle은 단순히 전투만 벌어지는 공간이 아니라, 전략적 깊이를 제공하는 맵이라는 점에서 큰 장점을 지닙니다. 맵의 복잡한 지형을 활용한 기습 공격이나 길막 전략은 이 맵의 백미라고 할 수 있습니다. 또한, 맵의 크기 때문에 자원 수급이 원활하다는 점도 장점으로 작용합니다. 다만, 맵의 복잡성을 고려할 때, 플레이어의 실력과 맵에 대한 이해도가 맵의 재미를 좌우한다는 점은 기억해야 합니다. 이 맵을 즐기기 위해서는 충분한 연습과 맵에 대한 연구가 필수적입니다. 특히, 길 잃음을 방지하고 시야를 확보하는 데 중점을 두는 것이 중요합니다. Twisted Jungle, a large-scale custom map from StarCraft: Brood War, lives up to its name with a notoriously complex terrain, offering large-scale battles typical of the mill-series’ big maps. The map stands out for its enormous scale and twisted terrain layout, spanning a massive 8192x8192 grid. It uses a desert tileset to create a dry, arid landscape, dotted with intricate hills and ravines. Players can clash in the central battlefield or use the narrow pathways around it to disrupt enemy movements. What truly sets this map apart is its maze-like design. The sheer size and complexity often lead to friendly units taking unexpected detours or blocking narrow chokepoints without enemy detection—frequent occurrences that elevate both combat and strategic play. Mastering the map demands significant practice, and even experienced players risk losing due to poor situational awareness if they don’t fully grasp its layout. Beginners and veterans alike will struggle without a solid understanding of the terrain. As a large mill-style map, the win condition likely revolves around destroying the opponent’s Nexus or Command Center. The vast scale and convoluted terrain make large-scale engagements inevitable, making it a map where skill and strategy must align. Unit paths and vision control are critical, requiring not just strong unit compositions and build orders but also sharp map-reading abilities. While intermediate and advanced players will enjoy it most—especially those skilled in map control and vision wars—beginners will need multiple matches to familiarize themselves with the layout. Twisted Jungle isn’t just a battleground; it’s a map rich in strategic depth. Its intricate terrain enables ambushes and chokepoint plays, elevating the gameplay experience. The expansive size also ensures smooth resource gathering, another advantage. However, the map’s complexity means that player skill and familiarity ultimately determine how enjoyable it is. To fully appreciate it, thorough practice and study are essential—prioritizing navigation and vision control to avoid getting lost.
타르타르 컨트롤러스 월드 (Tartar Controllers World)
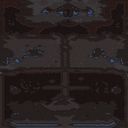
스타크래프트 브루드워의 정글 타일셋을 배경으로 한 ‘타르타르 컨트롤러스 월드(Tartar Controllers World)’는 4인용 밀리 맵으로, 파괴된 고대 도시의 폐허 위로 펼쳐진 넓은 평지에서 펼쳐지는 전투가 특징이다. 맵의 중앙부는 넓은 개활지로 이루어져 있어 유닛의 기동성이 중요하며, 곳곳에 흩어져 있는 건물 잔해와 잔디가 덮인 언덕들은 엄폐물 역할을 하며 전술적 깊이를 더한다. 맵의 가장자리에는 높은 지형이 둘러싸고 있어 시야 확보와 기습 공격에 유리한 지점을 제공하며, 특히 맵의 4개 모서리에는 각각의 기지 건설 구역이 배치되어 있어 초반Resource gathering과 방어선 구축이 필수적이다. 맵의 symmetry는 비교적 균형 있게 설계되어 있어 각 플레이어가 동일한 자원과 시작 위치를 확보할 수 있지만, 중앙 지역으로의 접근이 용이하다는 점은 빠른 진출과 초반 교전으로 이어질 수 있다. 유닛의 시야와 이동 경로를 고려할 때, 보병 계열 유닛보다는 기동성이 뛰어난 기갑 유닛이나 공중 유닛이 더 큰 활약을 보일 것으로 예상된다. 또한, 맵의 넓은 개활지는 대규모 전투나 기습 작전의 가능성을 높이며, 방어 시에는 후방의 건물 잔해를 활용한 요새화 전략이 중요해 보인다. 이 맵은 정글 타일셋의 어두운 색감과 폐허의 분위기가 어우러져 전략적 깊이를 더하는 동시에, 넓은 시야와 넓은 평지라는 특징으로 인해 플레이어의 판단력과 적응력이 요구되는 작품이다. 초보 플레이어보다는 중급 이상의 실력을 갖춘 유저들이 전략적 선택지를 풍부하게 활용할 수 있을 것이다. 특히,_resource gathering과 동시에 방어선을 구축하는 타이밍, 중앙 지역을 장악하는 시점, 그리고 상대방의 전략적 허점을 파고드는 플레이 스타일이 승리への近道가 될 것이다. 맵의 symmetry와 균형 있는 설계 덕분에 다양한 전략이 공존할 수 있지만, 그만큼 상대방의 움직임을 신속히 읽고 대응하는 능력이 중요하다. 맵을 플레이하기 전에는 맵의 주요 엄폐물과 시야 확보 지점을 미리 숙지하고, 초반 자원 확보와 동시에 방어 태세를 갖추는 연습이 필요하다. 또한, 중앙 지역으로의 진출 타이밍과 대규모 유닛 동원 여부를 신중히 결정해야 한다. 이 맵은 단순한 파괴가 아닌, 전략적 깊이를 요구하는 밀리 맵으로, 플레이어 간의 두뇌 싸움이 승패를 좌우할 것이다. Tartar Controllers World, a 4-player melee map set in the jungle tileset of *StarCraft: Brood War*, features battles unfolding across vast open plains atop the ruins of an ancient city. The map’s central area consists of wide open spaces, emphasizing unit mobility, while scattered debris and grassy hills provide cover and tactical depth. High terrain along the edges offers advantageous vantage points for scouting and ambushes, and each of the four corners contains a base construction zone, making early resource gathering and defensive positioning essential. The map’s symmetry is relatively balanced, ensuring each player starts with equal resources and positioning, though easy access to the central region encourages swift advances and early engagements. Given the terrain’s visibility and movement paths, mobile armored or aerial units are likely to dominate over slower infantry. The expansive open areas also heighten opportunities for large-scale battles and surprise tactics, while defensive play benefits from fortifying rear positions using ruins. The map blends the dark, desolate aesthetic of jungle tiles with the ruins’ atmosphere, adding strategic depth while demanding strong map awareness due to its wide visibility and open terrain. While beginners may struggle, intermediate and advanced players can leverage its balanced design to explore diverse strategies. Key to victory lies in timing resource collection alongside base defenses, securing the central zone at the right moment, and exploiting opponents’ strategic weaknesses. Thanks to its symmetrical and balanced layout, multiple approaches can thrive, but quick adaptation and rapid responses to enemy movements are critical. Before playing, familiarize yourself with key cover spots and scouting points, practice balancing early resource collection with defense, and carefully decide when to push into the center or commit large-scale forces. More than just a battlefield, Tartar Controllers World is a map that rewards strategic depth and mind games, where victory hinges on outthinking your opponent.
고양이와 쥐의 화성 전쟁 (Cat And Mice On Mars)
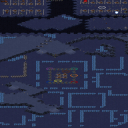
‘고양이와 쥐의 화성 전쟁’이라는 부제를 달고 있는 《Cat And Mice On Mars》는 스타크래프트 브루드워의 유즈맵으로, 고전적인 고양이와 쥐의 구도를 화성 배경으로 재해석한 디펜스+킬링 게임이다. 맵 중앙의 넓은 개방형 평원과 주변의 협곡, 분화구 지형이 조화를 이루며, 붉은 화산 지형의 어두운 톤이 전체적 분위기를 강렬하게 끌어낸다. 플레이어는 고양이 팀과 쥐 팀으로 나뉘어 각자 상대방을 전멸시켜야 하는 승리를 놓고 경쟁하는데, 고양이 팀은 모든 쥐를 사냥해야 하고 쥐 팀은 모든 고양이를 제거해야 한다. 맵 구조는 중앙 평원이 주요 전투 공간으로, 주변의 협곡과 분화화구는 기습과 은신에 유리한 지형으로 기능한다. 따라서 초반부터 중앙으로의 진출이 치열해지며, 후방에서 기습을 노리는 플레이가 중요해진다. 맵의 디자인상으로는 중앙 평원의 넓은 시야가 균형을 맞추는 핵심 요소로, 시야를 확보하지 못하면 상대의 움직임을 읽기 어렵기 때문에 고수와 초보의 차이를 크게 만든다. 또한 맵의 전체적인 색감과 조명이 어두운 편이라, 밝은 색상의 유닛이나 건물이 시야 확보에 더 효과적일 수 있다. 맵의 밸런스는 고양이와 쥐의 유닛 비율, 맵의 시야, 기습 루트 수 등에 따라 좌우될 것으로 추정된다. 추천 플레이 인원은 7인으로, 이는 맵의 넓이와 전투 밀도, 팀 간의 균형을 고려할 때 적정 수치로 보인다. 이 맵은 고양이와 쥐의 대결이라는 익숙한 소재를 화성 배경과Dark한 분위기로 재구성해 독특한 플레이 경험을 제공하며, 디펜스와 사냥의 조합을 즐기는 유저들에게 특히 매력적일 것으로 예상된다. 다만, 초보 유저의 경우 중앙 평원의 넓은 시야와 주변 협곡의 기습 루트를 제대로 활용하지 못해 쉽게 패배할 수 있으니, 맵의 지형과 시야 확보 전략을 사전에 숙지하고 플레이하는 것이 중요하다. 또한, 양 팀의 유닛 밸런스와 맵의 승리 조건이 명확히 제시되지 않았으므로, 플레이 전 내부 설명을 꼼꼼히 읽고 팀원과의 전략 협의가 필수적이다. “Cat And Mice On Mars,” subtitled “The War of Cats and Mice on Mars,” is a *StarCraft: Brood War* custom map that reimagines the classic predator-prey dynamic in a Martian setting as a defense-and-hunting game. The map blends a wide central plain with surrounding canyons and crater terrain, its overall mood heightened by the dark tones of the red volcanic landscape. Players are split into two teams—cats and mice—each tasked with wiping out the other: the cats must hunt down all the mice, while the mice must eliminate every cat. The open central plain serves as the primary battleground, with the canyons and craters providing ideal spots for ambushes and stealth maneuvers. This design forces intense early rushes toward the center and rewards players who lurk in the rear for surprise attacks. Visually, the map’s balance hinges on the wide sightlines of the central plain; failing to secure vision makes it nearly impossible to track enemy movements, creating a stark skill gap between veterans and newcomers. The map’s dark color palette and lighting also mean brightly colored units or structures are far more effective for controlling vision. Balance likely depends on unit ratios between cats and mice, sightline distribution, and the number of viable ambush routes. The recommended player count is seven, a number that balances map size, combat density, and team parity. By blending the familiar cat-and-mouse rivalry with a moody Martian backdrop, the map delivers a fresh play experience, especially appealing to fans of defense and hunting mechanics. However, inexperienced players may struggle to capitalize on the central plain’s sightlines and the canyons’ ambush routes, leading to quick defeats—so studying the terrain and vision strategies in advance is crucial. Since the unit balance and victory conditions aren’t explicitly laid out, reading the in-game instructions thoroughly and coordinating with teammates before the match are essential.
사격전 v1.6 (Shoot Out v1.6)
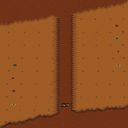
스타크래프트 브루드워의 대표적인 유즈맵 중 하나인 〈Shoot Out v1.6〉는 8명의 플레이어가 동시에 참가하는 팀 기반의 전투형 디펜스 맵이다. 맵의 배경은 황혼의 황색 톤이 강렬하게 느껴지는 황혼 타일셋으로 구성되어 있으며, 중앙의 넓은 평야를 중심으로 좌측과 우측에 각각의 기지가 배치되어 있다. 각 플레이어는 시작 지점에서부터 적진을 향해 진격해야 하며, 맵 곳곳에 흩어져 있는 미네랄과 가스를 확보해 유닛 생산 능력을 유지하는 동시에, 방어선을 구축하거나 적을 공격하는 전략을 세워야 한다. 맵의 구조는 중앙 평야를 중심으로 대칭을 이루며, 좌우로 좁은 길목이 존재해 소규모 팀 간의 교전이 빈번하게 발생할 수밖에 없다. 또한, 맵의 가장자리에 위치한 언덕 지대에서는 시야가 확보되어 적의 움직임을 미리 포착할 수 있지만, 반대로 중앙 평야는 개활지로 노출되어 있어 다수의 유닛이 한꺼번에 전투를 벌이는 경우가 많다. 플레이어는 초반에 기본 유닛을 확보한 뒤, 맵 곳곳의 자원을 확보하거나 적을 먼저 공격해 teritorial advantage를 차지하는 전략을 구사할 수 있다. 맵의 진행은 주로 저글링, 질럿, 마린 등 기본 유닛의 조합으로 이루어지며, 후반으로 갈수록 테란의 시즈 탱크나 프로토스의 하이 템플러 등 강력한 유닛이 등장해 전투의 양상이 급격히 변하기도 한다. 〈Shoot Out v1.6〉는 이러한 구조적 특징 덕분에 팀워크와 전략적 판단력이 요구되는 맵으로, 초보자는 물론 숙련자까지 모두 즐길 수 있는 밸런스 좋은 유즈맵으로 알려져 있다. 특히, 중앙 평야에서의 대규모 전투에서 승리하기 위해서는 적절한 자원 관리와 유닛 조합, 그리고 팀 간의 호흡이 무엇보다 중요하다. 맵을 플레이하기 전에는 중앙 평야의 지형과 양측 기지의 배치를 숙지하여, 초반 자원 확보와 방어선 구축 계획을 미리 세워두는 것이 좋다. 또한, 맵의 가장자리 언덕에서 시야를 확보하는 것도 승리를 좌우하는 중요한 요소 중 하나이다. 이 맵은 주로 8인 팀 플레이를 전제로 제작되었으므로, 혼자 플레이하기보다는 팀원과의 원활한 소통을 통해 전략을 공유하는 것이 필수적이다. Shoot Out v1.6 is one of the most iconic custom maps in StarCraft: Brood War, featuring an 8-player team-based combat defense format. The map’s aesthetic is dominated by a striking twilight color palette, with its terrain set against a vivid yellow-hued dusk. At the center lies a vast open plain, flanked on both sides by player bases, each positioned to launch offensives toward the enemy. From the starting point, players must march forward, securing scattered mineral and gas deposits to sustain unit production while simultaneously building defenses or launching attacks. The layout is symmetrical around the central plain, with narrow corridors on either side that inevitably funnel small-scale skirmishes between opposing teams. Elevated terrain along the map’s edges provides crucial sightlines to scout enemy movements early, though the exposed central plain often erupts into chaotic, large-scale battles. Early on, players secure basic units before branching out to claim resources or strike first to seize territorial dominance. Combat typically revolves around core units like Zerglings, Zealots, and Marines, but escalates as powerful late-game units—such as Terran Siege Tanks or Protoss High Templars—enter the fray, drastically shifting the battlefield dynamics. Thanks to its design, Shoot Out v1.6 demands strong teamwork and strategic foresight, appealing to both beginners and veterans alike. Success in the central plain’s large-scale engagements hinges on meticulous resource management, unit composition, and synchronized team execution. Before diving in, it’s wise to study the terrain of the central plain and the layout of both sides’ bases to plan early resource gathering and defensive setups. Controlling vision from the elevated edges can also be decisive in tipping the balance. Built primarily for 8-player team play, the map thrives on communication—coordinating strategies with teammates is essential rather than playing solo.
스나이퍼 듀얼스 락스 (Snipers Duels Locks 1.03)
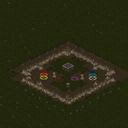
스타크래프트 브루드워의 유즈맵 〈Snipers Duels Locks〉는 6인용 저격수 대결을 중심으로 구성된 컴뱃 맵으로, 좁고 복잡한 공간에서 펼치는 일대일 전투가 특징이다. 맵은 사막 타일셋으로 꾸며졌으며, 중앙에 위치한 작은 오브젝트와 주변의 장애물들이 저격전의 긴장감을 한층 높인다. 플레이어는 각자의 시작 지점에서 출발해 맵 중앙의 좁은 길목이나 터널을 통해 이동하며, 상대방과 마주치는 순간 저격전을 펼친다. 맵의 구조는 대칭적이면서도 일부 구역에서 복잡한 통로와 장애물이 배치되어 있어, 적의 움직임을 예측하고 기습을 당하지 않기 위한 전략적 플레이가 필요하다. 맵의 이름은 'Snipers Duels'로 저격수 대결을, 'Locks'는 좁고 제한된 공간을 뜻하는 것으로 보인다. 맵의 크기는 2048x2048이며, 타일 단위는 64x64로 깔끔하게 구성되어 있다. 내부 맵 설명에 따르면 'A More Condensed Way To Snipe'로, 좁고 밀집된 공간에서 저격을 연습할 수 있도록 디자인된 것으로 추정된다. 이 맵은 주로 6인용으로 제작되었지만, 팀 플레이보다는 개인전 또는 듀오전 중심으로 플레이할 수 있도록 설계된 듯하다. 저격수의 명중률과 반응 속도가 중요한 요소로, 맵의 좁은 길목에서 벌어지는 순간적인 교전이 관전 포인트다. 또한 맵의 장애물과 통로는 저격수 간의 거리를 조절하는 데 영향을 미치므로, 맵을 충분히 숙지하고 적의 움직임을 예측하는 능력이 필요하다. 초보자는 맵의 구조를 익히기 어렵고, 숙련자도 적의 기습에 대응하는 데 익숙해지기까지 시간이 걸릴 수 있다. 따라서 이 맵은 저격수 대결에 관심이 있는 플레이어나, 좁은 공간에서의 교전 경험을 쌓고 싶은 유저들에게 추천할 만하다. 다만, 맵의 복도와 터널이 다소 복잡해 초보자가 길을 잃기 쉽다는 점은 주의해야 한다. 맵의 플레이 시간은 저격전 한 판당 10~30분 정도로 추정되며, 난이도는 중간 정도로 평가된다. 이 맵을 즐기기 위해서는 저격수 유닛의 컨트롤과 맵 리딩 능력이 중요하다. 또한, 맵의 좁은 공간 때문에 실수로 아군을 공격하지 않도록 주의가 필요하다. 맵을 플레이하기 전에는 맵의 구조를 미리 확인하고, 저격수 간의 거리와 시야를 고려한 전략을 세우는 것이 좋다. 특히, 맵 중앙의 터널이나 좁은 길목에서는 순간적인 반응이 승패를 좌우할 수 있다. 이 맵은 주로 저격수 대결을 즐기는 플레이어들에게 인기가 있을 것으로 보이며, 좁은 공간에서의 교전Experience를 추구하는 유저들에게도 좋은 선택이 될 것이다. 맵의 디자인과 구조는 간결하면서도 효과적으로 저격전을 연출할 수 있도록 짜여져 있으며, 반복 플레이를 통해 맵의 패턴을 익히는 재미도 있다. 마지막으로, 맵의 이름은 'Snipers Duels Locks'로, 'Locks'가 좁은 공간을 뜻하는 만큼, 맵의 구조 자체가 이 맵의 핵심 아이디어임을 알 수 있다. 이 맵은 저격수 대결을 좋아하는 유저들에게는 필수적인 맵 중 하나로 자리매김할 수 있을 것이다. StarCraft: Brood War's custom map *Snipers Duels Locks* is a combat-focused 6-player map centered around sniper duels, featuring intense one-on-one battles in tight, maze-like spaces. The map is designed with a desert tile set, where a small central object and surrounding obstacles heighten the tension of sniper engagements. Players start at their respective bases and navigate through narrow paths or tunnels toward the center, where sudden encounters trigger sniper battles. The map’s layout is symmetrical overall but includes complex corridors and obstacles in certain areas, requiring strategic play to predict enemy movements and avoid ambushes. The name *Snipers Duels* clearly references the core sniper combat, while *Locks* likely refers to the narrow, confined spaces. The map measures 2048x2048 with a clean 64x64 tile layout. According to internal descriptions, it’s designed as *"A More Condensed Way To Snipe,"* emphasizing sniper practice in tightly packed areas. Though built for six players, it leans toward solo or duo matches rather than team play. Accuracy and reaction time are critical, as the map’s tight corridors force quick, decisive engagements. Obstacles and tunnels also influence sniper distance, so mastering the layout and predicting enemy behavior are essential. Beginners may struggle to navigate the complex structure, and even experienced players need time to adapt to ambushes. Thus, the map is best suited for players interested in sniper duels or honing close-quarters combat skills. However, its intricate hallways and tunnels can easily disorient newcomers. Each match typically lasts 10 to 30 minutes, with a moderate difficulty level. Success depends on precise sniper control and map awareness—mistakenly targeting allies in the cramped spaces is a real risk. Before playing, it’s wise to study the layout and plan strategies around sniper range and visibility. Central tunnels and narrow paths demand split-second reactions that can determine victory or defeat. The map’s straightforward yet effective design makes it a favorite among sniper-focused players and those seeking intense close-quarters combat. Repeated plays help uncover patterns, adding replay value. With *Locks* reinforcing the theme of confined spaces, the map’s structure itself embodies its core concept. For sniper enthusiasts, *Snipers Duels Locks* stands out as a must-try addition to the custom map roster.
스나이퍼 정글 엘리트 (Sniper Jungle Elite)
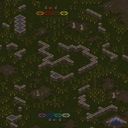
스타크래프트 브루드워의 유즈맵 'Sniper Jungle Elite'는 8명의 플레이어가 참여하는 섬멸전 형식의 맵이다. 맵 제목에서 알 수 있듯이 정글 지형 위에 요새와 방어시설이 배치되어 있으며, 적군을 모두 섬멸하고 깃발을 회수하는 것이 목표로 보인다. 내부 설명에 'Kill all Enemies, Bring Flag back'이라고 명시된 점에서, 단순한 섬멸전 이상의 전략적 요소가 포함된 것으로 추정된다. 맵의 디자인과 배치된 구조물들을 보아 공중 유닛보다는 지상 유닛의 활용이 강조될 가능성이 높으며, 특히 스나이퍼 계열 유닛의 활용을 고려한 디자인으로 보인다. 플레이어들은 각자 개별적인 시작 위치를 확보하며, 맵 중앙과 외곽에 위치한 요새들과 방어시설들을 활용해 적을 제압해야 한다. 맵의 지형은 정글과 오아시스, 바위 지형이 혼합되어 있어 시야 확보와 기동성 확보가 중요할 것으로 예상된다. 또한, 깃발을 회수하기 위한 이동 루트를 보호하거나 차단하는 전략적 선택이 게임의 승패를 좌우할 수 있다. 맵의 크기가 2048x2048로 상당히 넓은 편이므로, 빠른 이동과 효율적인 자원 관리가 필수적일 것이다. 이 맵은 초보자보다는 중급 이상의 플레이어들에게 적합할 것으로 보인다. 복잡한 지형과 전략적 요소들이 요구되기 때문에, 기본적인 스타크래프트 컨트롤과 맵리딩 능력이 충분하지 않다면 상대하기 어려울 수 있다. 또한, 팀플레이보다는 개인전 또는 소규모 팀전으로 진행될 가능성이 높아 보인다. 맵의 디자인과 목표를 고려할 때, 전장 전체를 활용한 기동성과 시야 싸움, 그리고 효율적인 자원 활용이 게임의 핵심 포인트가 될 것이다. 플레이 전에는 맵의 주요 길목과 요새 위치, 깃발의 위치 등을 미리 숙지하는 것이 중요하다. 또한, 스나이퍼 계열 유닛의 활용 가능성과 방어시설의 배치 상태를 확인하여 전략을 세우는 것이 승리의 열쇠가 될 것이다. 맵의 난이도는 보통 수준으로 예상되지만, 적절한 전략과 컨트롤이 뒷받침되지 않는다면 승리를 장담하기 어려울 수 있다. Sniper Jungle Elite is a custom StarCraft: Brood War map designed for 8 players, featuring a jungle-themed terrain with fortresses and defensive structures. The map appears to be a modified elimination mode where the objective is to defeat all enemies and retrieve a flag, as indicated by the internal description 'Kill all Enemies, Bring Flag back'. The layout suggests a focus on ground units rather than air units, with potential emphasis on sniper-type units due to the map's title. Players begin in isolated positions scattered across the map, surrounded by strategically placed fortresses and defensive structures. The terrain includes dense jungles, oases, and rocky areas, which likely require careful consideration of visibility and mobility. The wide-open spaces and mixed terrain mean that controlling key routes to the flag and defending against enemy advances will be crucial for victory. With a map size of 2048x2048, efficient resource management and quick movement are essential. This map seems best suited for intermediate to advanced players. The complex terrain and strategic elements demand solid StarCraft control skills and map-reading abilities; beginners may struggle without sufficient practice. While the map layout suggests a free-for-all or small-team format, the dense jungle areas and defensive structures encourage strategic positioning and tactical combat rather than chaotic rushes. Before playing, it's important to study the map's key paths, fortress locations, and flag positions. Understanding the potential use of sniper units and the layout of defensive structures will help in forming an effective strategy. While the difficulty is estimated to be moderate, success will heavily depend on proper planning and execution, as a lack of strategy or control could easily lead to defeat.
레알 흑인 눈치게임 (Real Black Reaction Game)
‘레알 흑인 눈치게임’는 스타크래프트: 브루드워의 유즈맵으로, 플레이어들이 제한된 공간 안에서 상대의 행동을 읽고 순발력을 발휘해야 하는 흥미로운 경쟁을 펼치는 맵이다. 맵은 사막 테마의 넓은 평야를 배경으로 하며, 중앙에 위치한 넓은 개방 공간과 주변에 배치된 자원 멀티, 그리고 곳곳에 숨겨진 함정이나 시야 방해 요소들이 특징적이다. 맵의 구조상 모든 플레이어는 시작 시 동일한 위치에서 출발하며, 게임의 목표는 상대방을 먼저 쓰러뜨리거나 특정 조건을 달성하는 것일 것으로 추정된다. 맵의 symmetrical한 배치와 넓은 시야는 빠른 판단과 이동이 요구되며, 특히 초반Resource gathering보다는 즉각적인 전투와 위치 선점이 승패를 좌우할 가능성이 높다. 맵의 인코딩과 파일명, 내부 제목이 모두 한글로 통일되어 있어 한국 유저들에게 친숙한 느낌이 강하며, 버전 정보가 HoKo2v0.1로 표시되어 있어 지속적인 업데이트가 이루어진 맵임을 짐작할 수 있다. 이 맵의 핵심은 ‘눈치게임’이라는 이름에서 알 수 있듯이 심리전과 타이밍 싸움에 있으며, 플레이어들은 상대의 움직임을 예측하고 자신의 전략을 유연하게 바꿔야 한다. 초보자도 쉽게 접근할 수 있지만, 숙련된 플레이어와의 대결에서는 그 진가가 더 잘 발휘될 것으로 예상된다. 다만, 맵의 상세 승리 조건이나 밸런스에 대한 정보는 제공되지 않아, 실제 게임에서는 플레이어 간 커뮤니케이션이나 규칙 설명이 필수적일 것으로 보인다. 이 맵은 넓은 공간을 활용한 전투와 심리전이 조화를 이룰 수 있는 유즈맵으로, 특히 8명의 플레이어가 참여하는 경쟁형 맵을 선호하는 유저들에게 추천할 만하다. 플레이 전에는 맵의 특성과 승리 조건을 사전에 확인하는 것이 중요하다. 맵의 symmetrical한 구조상 선공과 후공의 차이가 크지 않지만, 중앙 자원이나 함정의 위치에 따라 초반 전략이 달라질 수 있으므로 각자의 스타일에 맞는 플레이 스타일을 연습해 보는 것이 좋다. "Real Black Man’s Reaction Game" is a custom map for *StarCraft: Brood War* where players compete in an engaging battle of wits and reflexes within confined spaces, reading opponents' actions and reacting swiftly. Set against a desert-themed vast plain, the map features a central open area, resource expansions scattered around the edges, and hidden traps or vision-blocking elements throughout. All players start from identical positions, and the objective likely involves defeating opponents or meeting specific conditions. The symmetrical layout and wide visibility demand quick decision-making and movement, with early combat and securing positions playing a decisive role over resource gathering. The map’s coding, filename, and internal title are all in Korean, giving it a familiar feel for Korean players, and the version info "HoKo2v0.1" suggests ongoing updates. As the name implies, the core of this map revolves around psychological warfare and timing—players must predict opponents' moves and adapt their strategies flexibly. While accessible to beginners, its true potential shines in matches against skilled players. However, since details on victory conditions or balance aren’t provided, players should clarify rules or communicate before starting. This map excels in blending large-scale combat with psychological play, making it a great pick for users who enjoy competitive 8-player maps. Before diving in, it’s crucial to review the map’s mechanics and victory conditions. Thanks to its symmetrical design, the advantage of going first or second is minimal, but early strategies can shift based on central resources or trap placements, so experimenting with playstyles that suit your strengths is key.
난파선 만 (Shipwreck Cove)
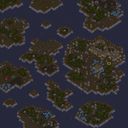
스타크래프트 브루드워 유즈맵 「Shipwreck Cove」는 한 명의 플레이어가 외딴 해안가에서 ресур스와 건물을 관리하며 적대 세력을 상대로 방어전을 펼치는 디펜스 장르의 맵이다. 맵 중앙의 넓은 섬을 중심으로 여러 개의 작은 섬이 흩어져 있으며, 각 섬마다 자원과 건물을 배치할 수 있는 공간이 마련되어 있다. 해안가 주변에는 적의 공격 루트가 형성되어 있어 방어선을 구축해야 하며, 섬 간 연결 다리나 해상 통로를 통해 이동할 수 있다. 맵의 분위기는 사막 타일셋을 활용해 건조하고 황량한 섬 풍경을 연출하며, 절묘한 지형 배치로 시야를 차단하는 요소와 공격로를 제공한다. 특히 해변가와 절벽 지형이 조화를 이루며, 방어 포인트를 세심히 선택해야 한다. 플레이어는 자원을 채취해 테란 건물을 건설하거나 유닛을 생산해 적을 막아야 하는데, 섬 간 이동이 제한적이므로 전략적 자원 관리와 방어선 설계가 핵심이다. 맵의 진행은 비교적 단조로운 듯하지만, 섬의 위치와 자원 분포가 플레이어의 플레이 스타일을 강제하는 구조로 되어 있어 다양한 전술을 요구한다. 초보자는 자원 관리와 방어선 구축에 어려움을 느낄 수 있으며, 숙련된 플레이어는 섬 간 이동과 시야 싸움에서 우위를 점할 수 있다. 맵의 vittoria 조건은 명확히 제시되지 않지만, 내륙 깊숙이 있는 적 기지를 파괴하거나 모든 적 유닛을 제거하는 방식으로 추정된다. 맵을 플레이하기 전에는 섬 간의 연결 다리나 해상 통로의 위치, 주요 자원 지점의 분포를 미리 확인하고, 방어에 유리한 지형을 선정하는 것이 중요하다. 또한, 해안가나 절벽 지형에 방어 건물을 배치해 적의 접근을 차단하는 전략이 효과적일 것이다. 이 맵은 테란 종족을 기반으로 한 디펜스 유즈맵으로, 섬세한 지형 활용과 자원 관리 능력을 테스트하는 데 중점을 두고 있다. 특히 사막 타일셋의 황량한 분위기는 플레이어에게 긴장감을 더하는 요소로 작용한다. 맵의 난이도는 플레이어의 자원 관리와 방어 전략에 따라 크게 달라지며, 섬 간의 이동과 시야 싸움에서 실수를 줄이는 것이 관건이다. StarCraft: Brood War custom map *Shipwreck Cove* is a defense-style game where a single player manages resources and buildings on a remote coastline while fending off hostile forces. The map centers around a large central island surrounded by several smaller islands, each offering space to place resources and buildings. The shoreline features enemy attack routes, requiring the player to establish defensive lines, while bridges and sea passages connect the islands. The map’s aesthetic uses a desert tileset to evoke a dry, desolate island landscape, with clever terrain placement blocking lines of sight and guiding attack paths. The interplay of beaches and cliffs creates strategic choke points, demanding careful selection of defensive positions. Players must gather resources to construct Terran buildings and produce units to repel enemies, but limited inter-island movement forces strategic resource management and defensive line design to the forefront. While the progression may seem straightforward, the positioning of islands and resource distribution compel players into distinct playstyles, demanding versatile tactics. Beginners may struggle with resource allocation and fortification, while experienced players can leverage inter-island movement and vision control for an advantage. The victory condition isn’t explicitly stated, but it likely involves destroying the enemy base deep inland or eliminating all enemy units. Before playing, it’s crucial to scout the bridges and sea routes connecting the islands, as well as the distribution of key resources, and to secure advantageous terrain for defense. Placing defensive structures along the coastline or cliffs to block enemy advances is a particularly effective strategy. This is a Terran-focused defense custom map that emphasizes terrain utilization and resource management. The barren, desert-themed atmosphere heightens the tension, making the experience more immersive. Difficulty varies greatly depending on the player’s resource efficiency and defensive planning, with success hinging on minimizing mistakes in inter-island movement and vision control.
최근 등록된 맵
새로 추가된 파일과 버전을 확인하세요.
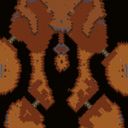
Invisible Sunken
스타크래프트 브루드워의 숨은 고수들이 즐기던 유즈맵 ‘Invisible Sunken’이 한층 진화한 버전으로 돌아왔다. 내부 제목과 설명만으로는 감이 잘 오지 않지만, 이름 그대로 ‘보이지 않는 저그’를 컨셉으로 삼은 이 맵은 플레이어에게 새로운 전략적 깊이를 요구한다. 필드의 절반 이상을 차지하는 넓은 수중 지형이 인상적인데, 이 수중 지역은 일렉트릭 필드와 더불어 전체적인 시야를 흐리게 만드는 안개 효과로 덮여 있어 적의 움직임과 건물을 가리는 것이 최대 관건이다. 단순히 시야가 가려지는 수준이 아니라, 미니맵에서도 일부 지역이 아예 보이지 않는 구조이기 때문에, 플레이어는 끊임없이 지형을 탐험하고 예측해야 한다. 게임의 시작은 스타팅 포인트가 단 2개뿐인 점이 특징이다. 이 두 기지 사이에는 넓은 평원과 수중 지대가 펼쳐져 있으며, 특히 수중 지대는 저그의 특수 건물인 히드라리스크 던과 크립 콜로니가 숨겨진 곳이다. 초반 자원 확보를 위해서는 이 수중 지역으로 빠르게 진출해야 하지만, 적의 시야 차단과 시야 방해 유닛들 때문에 쉽지 않다. 플레이어는 초반부터 적극적인 정찰과 시야 확보를 위해 스파이더 마인이나 오버로드, 레이스가 필수적으로 활용된다. 또한, 수중 지형에서는 잠수함과 같은 유닛이 더 빠른 속도로 이동할 수 있어, 적의 기지 침투와 기습에 유용하게 활용할 수 있다. 중반으로 접어들면, 수중 지역을 중심으로 한 전투가 본격화된다. 이 맵의 핵심 전략은 수중 지역의 제어권 싸움인데, 수중에서만 생산 가능한 유닛들과 방어 시설, 그리고 시야 차단이 복합적으로 작용해 치열한 공방전이 펼쳐진다. 특히, 적의 공격 루트를 예측하고 수중 지역에 미리 방어 시설이나 유닛을 배치하는 것이 중요하다. 후반으로 가면 넓은 평원과 수중 지역이 모두 전투의 무대가 되며, 이時点で의 시야 싸움은 승패를 좌우할 수 있다. 플레이어는 끊임없이 지형을 탐험하고, 적의 시야를 차단하며, 수중 지대의 이점을 최대한 활용하는 전략적 플레이를 요구받는다. 이 맵은 특히 한정된 시야와 넓은 맵 크기 때문에 초보 플레이어보다는 경험 많은 유저들에게 더 적합하다. 또한, 수중 지역과 지상 지역의 균형 잡힌 전투가 요구되기 때문에, 유닛의 종류와 특성을 잘 이해하고 있어야 한다. 이 맵의 또 다른 매력은 맵 자체가 제공하는 ‘보이지 않는 위협’이 주는 긴장감과 surprises인데, 특히 적의 기습을 예상치 못한 순간에 당하는 경험은 이 맵만의 독특한 재미를 선사한다. 만약 당신이 스타크래프트의 숨은 전략성과 시야 싸움의 중요성을 즐긴다면, ‘Invisible Sunken’은 반드시 시도해 볼 만한 가치가 있는 맵이다. 단, 넓은 맵과 제한된 시야 때문에 초반 자원 관리와 정찰이 매우 중요하다는 점을 명심하자. 이 맵의 진정한 재미는 시야 싸움과 수중 지역을 얼마나 잘 활용하느냐에 달려 있다. Invisible Sunken, an evolved version of a hidden gem among StarCraft: Brood War custom maps, returns with enhanced features. The map, as hinted by its name and internal description, revolves around the concept of 'invisible Zergs,' challenging players to adapt to a new layer of strategic depth. The standout feature is the vast underwater terrain, covering more than half of the map, enveloped in a fog of war that obscures not just vision but entire sections on the minimap, making enemy movements and structures nearly undetectable. The game begins with only two starting points, separated by a vast plain and underwater expanse. The underwater regions hide key Zerg structures like the Hydralisk Den and Creep Colony, making early resource collection dependent on navigating these murky waters. However, the lack of visibility and the presence of vision-blocking units or structures mean that securing resources is no small feat. Players must rely on early scouting and vision control, utilizing units like the Spider Mine, Overlord, or Reaver to gain the upper hand. Submarine units move faster underwater, adding a layer of tactical flexibility for base raids and ambushes. As the game progresses, control over the underwater regions becomes critical. The map’s core strategy revolves around dominating these zones, where unique underwater units, defensive structures, and vision-blocking mechanics create intense battles. Mid-game sees a shift to full-scale combat across both the plain and underwater, where predicting enemy movements and preemptively setting up defenses in key locations can turn the tide. Late-game escalates the chaos, with all areas becoming potential battlegrounds, and vision control remaining a decisive factor in securing victory. Invisible Sunken is best suited for experienced players rather than beginners, given its reliance on limited vision, expansive map design, and the nuanced balance between underwater and ground combat. Understanding unit types, their strengths, and the terrain’s advantages is crucial. The map’s true allure lies in the tension created by the 'invisible threats' it introduces—players must constantly adapt to unexpected ambushes and surprises, a hallmark of its unique appeal. If you relish StarCraft’s strategic depth and the thrill of vision-based warfare, Invisible Sunken is a must-try. Just remember, early resource management and scouting are vital, as the map’s brilliance hinges on how well you navigate and exploit its obscured environments.
난파선 만 (Shipwreck Cove)
스타크래프트 브루드워 유즈맵 「Shipwreck Cove」는 한 명의 플레이어가 외딴 해안가에서 ресур스와 건물을 관리하며 적대 세력을 상대로 방어전을 펼치는 디펜스 장르의 맵이다. 맵 중앙의 넓은 섬을 중심으로 여러 개의 작은 섬이 흩어져 있으며, 각 섬마다 자원과 건물을 배치할 수 있는 공간이 마련되어 있다. 해안가 주변에는 적의 공격 루트가 형성되어 있어 방어선을 구축해야 하며, 섬 간 연결 다리나 해상 통로를 통해 이동할 수 있다. 맵의 분위기는 사막 타일셋을 활용해 건조하고 황량한 섬 풍경을 연출하며, 절묘한 지형 배치로 시야를 차단하는 요소와 공격로를 제공한다. 특히 해변가와 절벽 지형이 조화를 이루며, 방어 포인트를 세심히 선택해야 한다. 플레이어는 자원을 채취해 테란 건물을 건설하거나 유닛을 생산해 적을 막아야 하는데, 섬 간 이동이 제한적이므로 전략적 자원 관리와 방어선 설계가 핵심이다. 맵의 진행은 비교적 단조로운 듯하지만, 섬의 위치와 자원 분포가 플레이어의 플레이 스타일을 강제하는 구조로 되어 있어 다양한 전술을 요구한다. 초보자는 자원 관리와 방어선 구축에 어려움을 느낄 수 있으며, 숙련된 플레이어는 섬 간 이동과 시야 싸움에서 우위를 점할 수 있다. 맵의 vittoria 조건은 명확히 제시되지 않지만, 내륙 깊숙이 있는 적 기지를 파괴하거나 모든 적 유닛을 제거하는 방식으로 추정된다. 맵을 플레이하기 전에는 섬 간의 연결 다리나 해상 통로의 위치, 주요 자원 지점의 분포를 미리 확인하고, 방어에 유리한 지형을 선정하는 것이 중요하다. 또한, 해안가나 절벽 지형에 방어 건물을 배치해 적의 접근을 차단하는 전략이 효과적일 것이다. 이 맵은 테란 종족을 기반으로 한 디펜스 유즈맵으로, 섬세한 지형 활용과 자원 관리 능력을 테스트하는 데 중점을 두고 있다. 특히 사막 타일셋의 황량한 분위기는 플레이어에게 긴장감을 더하는 요소로 작용한다. 맵의 난이도는 플레이어의 자원 관리와 방어 전략에 따라 크게 달라지며, 섬 간의 이동과 시야 싸움에서 실수를 줄이는 것이 관건이다. StarCraft: Brood War custom map *Shipwreck Cove* is a defense-style game where a single player manages resources and buildings on a remote coastline while fending off hostile forces. The map centers around a large central island surrounded by several smaller islands, each offering space to place resources and buildings. The shoreline features enemy attack routes, requiring the player to establish defensive lines, while bridges and sea passages connect the islands. The map’s aesthetic uses a desert tileset to evoke a dry, desolate island landscape, with clever terrain placement blocking lines of sight and guiding attack paths. The interplay of beaches and cliffs creates strategic choke points, demanding careful selection of defensive positions. Players must gather resources to construct Terran buildings and produce units to repel enemies, but limited inter-island movement forces strategic resource management and defensive line design to the forefront. While the progression may seem straightforward, the positioning of islands and resource distribution compel players into distinct playstyles, demanding versatile tactics. Beginners may struggle with resource allocation and fortification, while experienced players can leverage inter-island movement and vision control for an advantage. The victory condition isn’t explicitly stated, but it likely involves destroying the enemy base deep inland or eliminating all enemy units. Before playing, it’s crucial to scout the bridges and sea routes connecting the islands, as well as the distribution of key resources, and to secure advantageous terrain for defense. Placing defensive structures along the coastline or cliffs to block enemy advances is a particularly effective strategy. This is a Terran-focused defense custom map that emphasizes terrain utilization and resource management. The barren, desert-themed atmosphere heightens the tension, making the experience more immersive. Difficulty varies greatly depending on the player’s resource efficiency and defensive planning, with success hinging on minimizing mistakes in inter-island movement and vision control.
타르타르 컨트롤러스 월드 (Tartar Controllers World)
스타크래프트 브루드워의 정글 타일셋을 배경으로 한 ‘타르타르 컨트롤러스 월드(Tartar Controllers World)’는 4인용 밀리 맵으로, 파괴된 고대 도시의 폐허 위로 펼쳐진 넓은 평지에서 펼쳐지는 전투가 특징이다. 맵의 중앙부는 넓은 개활지로 이루어져 있어 유닛의 기동성이 중요하며, 곳곳에 흩어져 있는 건물 잔해와 잔디가 덮인 언덕들은 엄폐물 역할을 하며 전술적 깊이를 더한다. 맵의 가장자리에는 높은 지형이 둘러싸고 있어 시야 확보와 기습 공격에 유리한 지점을 제공하며, 특히 맵의 4개 모서리에는 각각의 기지 건설 구역이 배치되어 있어 초반Resource gathering과 방어선 구축이 필수적이다. 맵의 symmetry는 비교적 균형 있게 설계되어 있어 각 플레이어가 동일한 자원과 시작 위치를 확보할 수 있지만, 중앙 지역으로의 접근이 용이하다는 점은 빠른 진출과 초반 교전으로 이어질 수 있다. 유닛의 시야와 이동 경로를 고려할 때, 보병 계열 유닛보다는 기동성이 뛰어난 기갑 유닛이나 공중 유닛이 더 큰 활약을 보일 것으로 예상된다. 또한, 맵의 넓은 개활지는 대규모 전투나 기습 작전의 가능성을 높이며, 방어 시에는 후방의 건물 잔해를 활용한 요새화 전략이 중요해 보인다. 이 맵은 정글 타일셋의 어두운 색감과 폐허의 분위기가 어우러져 전략적 깊이를 더하는 동시에, 넓은 시야와 넓은 평지라는 특징으로 인해 플레이어의 판단력과 적응력이 요구되는 작품이다. 초보 플레이어보다는 중급 이상의 실력을 갖춘 유저들이 전략적 선택지를 풍부하게 활용할 수 있을 것이다. 특히,_resource gathering과 동시에 방어선을 구축하는 타이밍, 중앙 지역을 장악하는 시점, 그리고 상대방의 전략적 허점을 파고드는 플레이 스타일이 승리への近道가 될 것이다. 맵의 symmetry와 균형 있는 설계 덕분에 다양한 전략이 공존할 수 있지만, 그만큼 상대방의 움직임을 신속히 읽고 대응하는 능력이 중요하다. 맵을 플레이하기 전에는 맵의 주요 엄폐물과 시야 확보 지점을 미리 숙지하고, 초반 자원 확보와 동시에 방어 태세를 갖추는 연습이 필요하다. 또한, 중앙 지역으로의 진출 타이밍과 대규모 유닛 동원 여부를 신중히 결정해야 한다. 이 맵은 단순한 파괴가 아닌, 전략적 깊이를 요구하는 밀리 맵으로, 플레이어 간의 두뇌 싸움이 승패를 좌우할 것이다. Tartar Controllers World, a 4-player melee map set in the jungle tileset of *StarCraft: Brood War*, features battles unfolding across vast open plains atop the ruins of an ancient city. The map’s central area consists of wide open spaces, emphasizing unit mobility, while scattered debris and grassy hills provide cover and tactical depth. High terrain along the edges offers advantageous vantage points for scouting and ambushes, and each of the four corners contains a base construction zone, making early resource gathering and defensive positioning essential. The map’s symmetry is relatively balanced, ensuring each player starts with equal resources and positioning, though easy access to the central region encourages swift advances and early engagements. Given the terrain’s visibility and movement paths, mobile armored or aerial units are likely to dominate over slower infantry. The expansive open areas also heighten opportunities for large-scale battles and surprise tactics, while defensive play benefits from fortifying rear positions using ruins. The map blends the dark, desolate aesthetic of jungle tiles with the ruins’ atmosphere, adding strategic depth while demanding strong map awareness due to its wide visibility and open terrain. While beginners may struggle, intermediate and advanced players can leverage its balanced design to explore diverse strategies. Key to victory lies in timing resource collection alongside base defenses, securing the central zone at the right moment, and exploiting opponents’ strategic weaknesses. Thanks to its symmetrical and balanced layout, multiple approaches can thrive, but quick adaptation and rapid responses to enemy movements are critical. Before playing, familiarize yourself with key cover spots and scouting points, practice balancing early resource collection with defense, and carefully decide when to push into the center or commit large-scale forces. More than just a battlefield, Tartar Controllers World is a map that rewards strategic depth and mind games, where victory hinges on outthinking your opponent.
스나이퍼 듀얼스 락스 (Snipers Duels Locks 1.03)
스타크래프트 브루드워의 유즈맵 〈Snipers Duels Locks〉는 6인용 저격수 대결을 중심으로 구성된 컴뱃 맵으로, 좁고 복잡한 공간에서 펼치는 일대일 전투가 특징이다. 맵은 사막 타일셋으로 꾸며졌으며, 중앙에 위치한 작은 오브젝트와 주변의 장애물들이 저격전의 긴장감을 한층 높인다. 플레이어는 각자의 시작 지점에서 출발해 맵 중앙의 좁은 길목이나 터널을 통해 이동하며, 상대방과 마주치는 순간 저격전을 펼친다. 맵의 구조는 대칭적이면서도 일부 구역에서 복잡한 통로와 장애물이 배치되어 있어, 적의 움직임을 예측하고 기습을 당하지 않기 위한 전략적 플레이가 필요하다. 맵의 이름은 'Snipers Duels'로 저격수 대결을, 'Locks'는 좁고 제한된 공간을 뜻하는 것으로 보인다. 맵의 크기는 2048x2048이며, 타일 단위는 64x64로 깔끔하게 구성되어 있다. 내부 맵 설명에 따르면 'A More Condensed Way To Snipe'로, 좁고 밀집된 공간에서 저격을 연습할 수 있도록 디자인된 것으로 추정된다. 이 맵은 주로 6인용으로 제작되었지만, 팀 플레이보다는 개인전 또는 듀오전 중심으로 플레이할 수 있도록 설계된 듯하다. 저격수의 명중률과 반응 속도가 중요한 요소로, 맵의 좁은 길목에서 벌어지는 순간적인 교전이 관전 포인트다. 또한 맵의 장애물과 통로는 저격수 간의 거리를 조절하는 데 영향을 미치므로, 맵을 충분히 숙지하고 적의 움직임을 예측하는 능력이 필요하다. 초보자는 맵의 구조를 익히기 어렵고, 숙련자도 적의 기습에 대응하는 데 익숙해지기까지 시간이 걸릴 수 있다. 따라서 이 맵은 저격수 대결에 관심이 있는 플레이어나, 좁은 공간에서의 교전 경험을 쌓고 싶은 유저들에게 추천할 만하다. 다만, 맵의 복도와 터널이 다소 복잡해 초보자가 길을 잃기 쉽다는 점은 주의해야 한다. 맵의 플레이 시간은 저격전 한 판당 10~30분 정도로 추정되며, 난이도는 중간 정도로 평가된다. 이 맵을 즐기기 위해서는 저격수 유닛의 컨트롤과 맵 리딩 능력이 중요하다. 또한, 맵의 좁은 공간 때문에 실수로 아군을 공격하지 않도록 주의가 필요하다. 맵을 플레이하기 전에는 맵의 구조를 미리 확인하고, 저격수 간의 거리와 시야를 고려한 전략을 세우는 것이 좋다. 특히, 맵 중앙의 터널이나 좁은 길목에서는 순간적인 반응이 승패를 좌우할 수 있다. 이 맵은 주로 저격수 대결을 즐기는 플레이어들에게 인기가 있을 것으로 보이며, 좁은 공간에서의 교전Experience를 추구하는 유저들에게도 좋은 선택이 될 것이다. 맵의 디자인과 구조는 간결하면서도 효과적으로 저격전을 연출할 수 있도록 짜여져 있으며, 반복 플레이를 통해 맵의 패턴을 익히는 재미도 있다. 마지막으로, 맵의 이름은 'Snipers Duels Locks'로, 'Locks'가 좁은 공간을 뜻하는 만큼, 맵의 구조 자체가 이 맵의 핵심 아이디어임을 알 수 있다. 이 맵은 저격수 대결을 좋아하는 유저들에게는 필수적인 맵 중 하나로 자리매김할 수 있을 것이다. StarCraft: Brood War's custom map *Snipers Duels Locks* is a combat-focused 6-player map centered around sniper duels, featuring intense one-on-one battles in tight, maze-like spaces. The map is designed with a desert tile set, where a small central object and surrounding obstacles heighten the tension of sniper engagements. Players start at their respective bases and navigate through narrow paths or tunnels toward the center, where sudden encounters trigger sniper battles. The map’s layout is symmetrical overall but includes complex corridors and obstacles in certain areas, requiring strategic play to predict enemy movements and avoid ambushes. The name *Snipers Duels* clearly references the core sniper combat, while *Locks* likely refers to the narrow, confined spaces. The map measures 2048x2048 with a clean 64x64 tile layout. According to internal descriptions, it’s designed as *"A More Condensed Way To Snipe,"* emphasizing sniper practice in tightly packed areas. Though built for six players, it leans toward solo or duo matches rather than team play. Accuracy and reaction time are critical, as the map’s tight corridors force quick, decisive engagements. Obstacles and tunnels also influence sniper distance, so mastering the layout and predicting enemy behavior are essential. Beginners may struggle to navigate the complex structure, and even experienced players need time to adapt to ambushes. Thus, the map is best suited for players interested in sniper duels or honing close-quarters combat skills. However, its intricate hallways and tunnels can easily disorient newcomers. Each match typically lasts 10 to 30 minutes, with a moderate difficulty level. Success depends on precise sniper control and map awareness—mistakenly targeting allies in the cramped spaces is a real risk. Before playing, it’s wise to study the layout and plan strategies around sniper range and visibility. Central tunnels and narrow paths demand split-second reactions that can determine victory or defeat. The map’s straightforward yet effective design makes it a favorite among sniper-focused players and those seeking intense close-quarters combat. Repeated plays help uncover patterns, adding replay value. With *Locks* reinforcing the theme of confined spaces, the map’s structure itself embodies its core concept. For sniper enthusiasts, *Snipers Duels Locks* stands out as a must-try addition to the custom map roster.
스나이퍼 레퀴엠 2.2 (Sniper Requiem 2.2)
스타크래프트: 브루드워의 눈길을 사로잡는 유즈맵으로 유명한 〈Sniper Requiem 2.2〉는 저격수 대 저격수 간의 치열한 전투를 그린 디펜스 장르의 정석과도 같은 작품이다. 맵의 전체적인 구조는 넓은 평야와 중앙에 위치한 고지대를 중심으로 펼쳐지며, 곳곳에 배치된 바위와 잔디, 얼음 지형이 시야를 가리고 전술을 짜기 좋게 설계되어 있다. 플레이어는 각자의 저격수 유닛을 조종하며, 상대방의 저격수나 주요 건물을 파괴하는 것이 목표로 보인다. 맵의 타일셋은 설원으로 구성되어 있어 차가운 분위기를 연출하며, 특히 밤하늘과 별이 반짝이는 효과가 맵의 분위기를 한층 더 깊게 만든다. 중앙 고지대에서 벌어지는 1대1 대결은 긴장감을 고조시키며, 넓은 필드에서 펼쳐지는 저격전은 섬세한 컨트롤과 전략이 요구된다. 이 맵은 저격수 간의 전투에 특화된 만큼, 시야 확보와 지형의 활용이 승패를 좌우할 가능성이 크며, 특히 맵 곳곳에 배치된 바위와 잔디는 시야를 차단하는 동시에 엄폐물을 제공하여 전술을 다양하게 전개할 수 있도록 한다. 초보 플레이어는 시야 싸움의 중요성을 간과하기 쉬우며, 경험이 많은 플레이어는 맵의 고지대와 저지대를 적극 활용하여 상대방을 압박하는 플레이를 선호할 것으로 보인다. 〈Sniper Requiem 2.2〉는 저격수 간의 전투를 즐기고자 하는 유저들에게는 필수적인 맵으로, 단순한 사냥이 아니라 전략과 전술을 요구하는 깊이 있는 플레이가 가능하다는 점에서 높은 평가를 받을 만하다. 특히 맵의 디자인과 분위기가 조화를 이루며, 플레이어의 집중력을 끌어올리는 데 일조한다는 점도 큰 장점이다. Sniper Requiem 2.2 is a standout user-made map in StarCraft: Brood War, renowned for its intense sniper-versus-sniper battles. Set in a snowy terrain with ice-tiled landscapes, the map features open plains and elevated central highlands, offering strategic vantage points and natural cover through scattered rocks and grass. Players control sniper units, aiming to eliminate enemy snipers or key structures. The map’s cold, serene atmosphere is enhanced by a night sky with twinkling stars, creating a moody and engaging backdrop for tactical play. The central highlands serve as a focal point for 1v1 duels, while the expansive terrain demands precise positioning and sharp aiming. Sightlines are crucial, as the map’s design emphasizes blocking and cover, allowing players to outmaneuver opponents. Novices may struggle with vision control, whereas experienced players can leverage elevation and terrain to dominate engagements. With its focus on sniper combat, Sniper Requiem 2.2 offers more than just a shooting gallery—it rewards strategic depth and thoughtful positioning, making it a must-play for fans of tactical duels. The map’s cohesive design and immersive ambiance further elevate the experience, ensuring players remain engaged throughout.
스나이퍼 정글 엘리트 (Sniper Jungle Elite)
스타크래프트 브루드워의 유즈맵 'Sniper Jungle Elite'는 8명의 플레이어가 참여하는 섬멸전 형식의 맵이다. 맵 제목에서 알 수 있듯이 정글 지형 위에 요새와 방어시설이 배치되어 있으며, 적군을 모두 섬멸하고 깃발을 회수하는 것이 목표로 보인다. 내부 설명에 'Kill all Enemies, Bring Flag back'이라고 명시된 점에서, 단순한 섬멸전 이상의 전략적 요소가 포함된 것으로 추정된다. 맵의 디자인과 배치된 구조물들을 보아 공중 유닛보다는 지상 유닛의 활용이 강조될 가능성이 높으며, 특히 스나이퍼 계열 유닛의 활용을 고려한 디자인으로 보인다. 플레이어들은 각자 개별적인 시작 위치를 확보하며, 맵 중앙과 외곽에 위치한 요새들과 방어시설들을 활용해 적을 제압해야 한다. 맵의 지형은 정글과 오아시스, 바위 지형이 혼합되어 있어 시야 확보와 기동성 확보가 중요할 것으로 예상된다. 또한, 깃발을 회수하기 위한 이동 루트를 보호하거나 차단하는 전략적 선택이 게임의 승패를 좌우할 수 있다. 맵의 크기가 2048x2048로 상당히 넓은 편이므로, 빠른 이동과 효율적인 자원 관리가 필수적일 것이다. 이 맵은 초보자보다는 중급 이상의 플레이어들에게 적합할 것으로 보인다. 복잡한 지형과 전략적 요소들이 요구되기 때문에, 기본적인 스타크래프트 컨트롤과 맵리딩 능력이 충분하지 않다면 상대하기 어려울 수 있다. 또한, 팀플레이보다는 개인전 또는 소규모 팀전으로 진행될 가능성이 높아 보인다. 맵의 디자인과 목표를 고려할 때, 전장 전체를 활용한 기동성과 시야 싸움, 그리고 효율적인 자원 활용이 게임의 핵심 포인트가 될 것이다. 플레이 전에는 맵의 주요 길목과 요새 위치, 깃발의 위치 등을 미리 숙지하는 것이 중요하다. 또한, 스나이퍼 계열 유닛의 활용 가능성과 방어시설의 배치 상태를 확인하여 전략을 세우는 것이 승리의 열쇠가 될 것이다. 맵의 난이도는 보통 수준으로 예상되지만, 적절한 전략과 컨트롤이 뒷받침되지 않는다면 승리를 장담하기 어려울 수 있다. Sniper Jungle Elite is a custom StarCraft: Brood War map designed for 8 players, featuring a jungle-themed terrain with fortresses and defensive structures. The map appears to be a modified elimination mode where the objective is to defeat all enemies and retrieve a flag, as indicated by the internal description 'Kill all Enemies, Bring Flag back'. The layout suggests a focus on ground units rather than air units, with potential emphasis on sniper-type units due to the map's title. Players begin in isolated positions scattered across the map, surrounded by strategically placed fortresses and defensive structures. The terrain includes dense jungles, oases, and rocky areas, which likely require careful consideration of visibility and mobility. The wide-open spaces and mixed terrain mean that controlling key routes to the flag and defending against enemy advances will be crucial for victory. With a map size of 2048x2048, efficient resource management and quick movement are essential. This map seems best suited for intermediate to advanced players. The complex terrain and strategic elements demand solid StarCraft control skills and map-reading abilities; beginners may struggle without sufficient practice. While the map layout suggests a free-for-all or small-team format, the dense jungle areas and defensive structures encourage strategic positioning and tactical combat rather than chaotic rushes. Before playing, it's important to study the map's key paths, fortress locations, and flag positions. Understanding the potential use of sniper units and the layout of defensive structures will help in forming an effective strategy. While the difficulty is estimated to be moderate, success will heavily depend on proper planning and execution, as a lack of strategy or control could easily lead to defeat.
심즈 위드 울브스 (Sims With Wolves)
스타크래프트 브루드워의 대표적인 유즈맵 중 하나로 꼽히는 <Sims With Wolves>는 8명의 플레이어가 한 팀을 이뤄 대결하는 컴까기 스타일의 맵이다. 사막 테마의 넓은 평지에서 벌어지는 전투는 시야 확보와 자원 관리가 중요한 포인트로, 초반에는 상점이나 건물을 짓는 데 자원을 집중해야 하며 후반에는 강력한 유닛을 조합해 상대방을 압박하는 전략이 필수적이다. 맵의 중앙에는 광물이 풍부한 멀티 지역이 있어 자원 경쟁이 치열해지며, 각 플레이어의 시작 위치가 고르게 배치되어 있어 공정한 전투가 가능하다. 특히 맵의 가장자리는 상대방의 공격을 방어하기 좋은 지형으로 구성되어 있어 방어적인 플레이도 충분히 고려해 볼 만하다. 이 맵의 가장 큰 특징은 바로 ‘늑대’라는 특수 유닛을 조합할 수 있다는 점이다. 늑대는 일반 유닛에 비해 체력이 높고 공격력이 강력해, 후반부로 갈수록 강력한 카드로 활용할 수 있다. 하지만 늑대를 조합하기 위해서는 일정량의 미네랄과 가스가 필요하며, 유닛을 잃지 않고 전투를 지속하는 것이 중요하다. 때문에 초보자들은 자원 관리와 유닛 컨트롤에 어려움을 느낄 수 있지만, 숙련된 플레이어들은 늑대를 중심으로 한 전략으로 승부를 결정짓는 경우가 많다. 또한 맵의 중앙 멀티 지역은 자원 확보와 더불어 상대방의 움직임을 관찰하는 데 유용한 장소로, 이 지역을 차지하는 것이 전투의 흐름을 좌우하기도 한다. <Sims With Wolves>는 단순히 전투만 하는 것이 아니라, 상대방을Resource Management, Unit Composition, Wolf Unit Strategy, Desert Terrain, Multi Resource Area, Defensive Positioning, Resource Competition, Balanced Starting Positions, Central Multi Area, Unit Control, Late-Game Power, Resource Starvation, Territory Control, Strategic Depth, Team Coordination, Resource Efficiency, Map Control, Unit Upgrades, Base Defense, Early Game Rush, Mid-Game Balance, Wolf Unit Synergy, Mineral and Gas Management, Player Interaction, Combat Tactics, Resource Denial, Wolf Unit Training, Defensive Structures, Offensive Push, Resource Gathering, Map Awareness, Battlefield Control, Resource Pressure, Unit Composition Flexibility, Wolf Unit Counter, Resource Allocation, Strategic Planning, Map Features, Team Play, Competitive Balance, Resource Scarcity, Player Positioning, Combat Engagement, Resource Optimization, Late-Game Dominance, Map Control Strategies, Resource Starvation Tactics, Unit Micro Management, Wolf Unit Evolution, Resource Sharing, Base Expansion, Resource Denial Strategies, Map Control Points, Resource Management Skills, Combat Resolution, Resource Efficiency, Player Coordination, Resource Allocation Strategy, Wolf Unit Advantage, Defensive Playstyles, Offensive Strategies, Resource Competition Dynamics, Map Control Advantages, Strategic Resource Use, Combat Outcome, Resource Scarcity Management, Player Decision Making, Resource Utilization, Combat Flow, Resource Pressure Tactics, Map Awareness Skills, Resource Denial Tactics, Strategic Resource Planning, Combat Engagement Strategies, Resource Management Challenges, Player Interaction Dynamics, Resource Allocation Decisions, Wolf Unit Synergy Tactics, Resource Efficiency Optimization, Combat Resolution Strategies, Resource Scarcity Challenges, Player Coordination Skills, Resource Utilization Strategies, Combat Outcome Determination, Resource Management Mastery, Player Decision Making Process, Resource Allocation Tactics
사격전 v1.6 (Shoot Out v1.6)
스타크래프트 브루드워의 대표적인 유즈맵 중 하나인 〈Shoot Out v1.6〉는 8명의 플레이어가 동시에 참가하는 팀 기반의 전투형 디펜스 맵이다. 맵의 배경은 황혼의 황색 톤이 강렬하게 느껴지는 황혼 타일셋으로 구성되어 있으며, 중앙의 넓은 평야를 중심으로 좌측과 우측에 각각의 기지가 배치되어 있다. 각 플레이어는 시작 지점에서부터 적진을 향해 진격해야 하며, 맵 곳곳에 흩어져 있는 미네랄과 가스를 확보해 유닛 생산 능력을 유지하는 동시에, 방어선을 구축하거나 적을 공격하는 전략을 세워야 한다. 맵의 구조는 중앙 평야를 중심으로 대칭을 이루며, 좌우로 좁은 길목이 존재해 소규모 팀 간의 교전이 빈번하게 발생할 수밖에 없다. 또한, 맵의 가장자리에 위치한 언덕 지대에서는 시야가 확보되어 적의 움직임을 미리 포착할 수 있지만, 반대로 중앙 평야는 개활지로 노출되어 있어 다수의 유닛이 한꺼번에 전투를 벌이는 경우가 많다. 플레이어는 초반에 기본 유닛을 확보한 뒤, 맵 곳곳의 자원을 확보하거나 적을 먼저 공격해 teritorial advantage를 차지하는 전략을 구사할 수 있다. 맵의 진행은 주로 저글링, 질럿, 마린 등 기본 유닛의 조합으로 이루어지며, 후반으로 갈수록 테란의 시즈 탱크나 프로토스의 하이 템플러 등 강력한 유닛이 등장해 전투의 양상이 급격히 변하기도 한다. 〈Shoot Out v1.6〉는 이러한 구조적 특징 덕분에 팀워크와 전략적 판단력이 요구되는 맵으로, 초보자는 물론 숙련자까지 모두 즐길 수 있는 밸런스 좋은 유즈맵으로 알려져 있다. 특히, 중앙 평야에서의 대규모 전투에서 승리하기 위해서는 적절한 자원 관리와 유닛 조합, 그리고 팀 간의 호흡이 무엇보다 중요하다. 맵을 플레이하기 전에는 중앙 평야의 지형과 양측 기지의 배치를 숙지하여, 초반 자원 확보와 방어선 구축 계획을 미리 세워두는 것이 좋다. 또한, 맵의 가장자리 언덕에서 시야를 확보하는 것도 승리를 좌우하는 중요한 요소 중 하나이다. 이 맵은 주로 8인 팀 플레이를 전제로 제작되었으므로, 혼자 플레이하기보다는 팀원과의 원활한 소통을 통해 전략을 공유하는 것이 필수적이다. Shoot Out v1.6 is one of the most iconic custom maps in StarCraft: Brood War, featuring an 8-player team-based combat defense format. The map’s aesthetic is dominated by a striking twilight color palette, with its terrain set against a vivid yellow-hued dusk. At the center lies a vast open plain, flanked on both sides by player bases, each positioned to launch offensives toward the enemy. From the starting point, players must march forward, securing scattered mineral and gas deposits to sustain unit production while simultaneously building defenses or launching attacks. The layout is symmetrical around the central plain, with narrow corridors on either side that inevitably funnel small-scale skirmishes between opposing teams. Elevated terrain along the map’s edges provides crucial sightlines to scout enemy movements early, though the exposed central plain often erupts into chaotic, large-scale battles. Early on, players secure basic units before branching out to claim resources or strike first to seize territorial dominance. Combat typically revolves around core units like Zerglings, Zealots, and Marines, but escalates as powerful late-game units—such as Terran Siege Tanks or Protoss High Templars—enter the fray, drastically shifting the battlefield dynamics. Thanks to its design, Shoot Out v1.6 demands strong teamwork and strategic foresight, appealing to both beginners and veterans alike. Success in the central plain’s large-scale engagements hinges on meticulous resource management, unit composition, and synchronized team execution. Before diving in, it’s wise to study the terrain of the central plain and the layout of both sides’ bases to plan early resource gathering and defensive setups. Controlling vision from the elevated edges can also be decisive in tipping the balance. Built primarily for 8-player team play, the map thrives on communication—coordinating strategies with teammates is essential rather than playing solo.
맵 선택 가이드
태그는 맵의 핵심 특징을 빠르게 설명하지만 제작 버전마다 규칙이 다를 수 있습니다. 상세 설명에서 권장 인원, 난이도, 플레이 시간과 버전을 함께 확인한 뒤 다운로드하세요.