
스피드런 스타크래프트 맵 모음
'스피드런' 태그가 등록된 맵을 모았습니다. 장르 하나로 찾기 어려운 플레이 방식, 난이도와 특징을 중심으로 인기 맵과 최신 맵을 비교해 보세요.
- 등록 맵
- 6개
- 누적 다운로드
- 2
- 누적 조회
- 316
인기 맵
다운로드와 조회 반응이 높은 맵입니다.
탈옥 7 (Jail Break 7)
스타크래프트 브루드워 유즈맵 '탈옥 7 (Jail Break 7)'은 우주 타일셋을 배경으로 6명의 플레이어가 감옥에서 탈출하는 협동 미션형 맵이다. 제작자 chobyhy가 '지루하지 않게 더 길게 만들었다'고 밝힌 만큼, 단순한 탈출을 넘어 여러 단계의 구간과 퍼즐 요소가 연속적으로 배치되어 있다. 맵 크기는 128×128 타일로 넓은 편이며, 우주 정거장이나 함선 내부를 연상시키는 복도와 방들이 미로처럼 연결되어 있다. 플레이어는 제한된 자원과 유닛으로 시작해 경비 병력과 보안 시스템을 뚫고 나아가야 하며, 중간중간 트리거로 작동하는 문, 엘리베이터, 함정 등이 진행을 조절한다. 설명에 '더 빠르게 클리어해 보라'는 도전이 있는 만큼 클리어 타임을 겨루는 스피드런 성격도 겸비했다. 6인 전용으로 설계되어 혼자서는 클리어가 사실상 불가능하며, 역할 분담과 타이밍 맞춤이 필수적이다. 난이도는 초반 진입로 확보부터 후반 보스급 교전까지 점진적으로 상승하며, 실수 하나로 전멸할 수 있는 긴장감이 유지된다. 추천 대상은 협동 퍼즐과 탈출 장르를 즐기는 유저, 고정된 빌드 대신 상황 판단과 컨트롤로 풀어가는 플레이를 선호하는 팀이다. 플레이 전에는 맵 설명에 별도 트리거나 승리 조건이 명시되지 않았으므로, 게임 시작 후 첫 화면의 브리핑과 미니맵 구조를 반드시 확인하고 진입하는 것이 좋다. 우주 테마의 시각적 분위기와 긴 호흡의 레벨 디자인이 어우러져 한 판 플레이에 30분에서 50분 정도 소요될 것으로 보이며, 반복 플레이로 최단 기록을 경신하는 재미도 기대할 수 있다. StarCraft Brood War UMS map 'Jail Break 7' is a cooperative mission-style map where six players escape from a prison set against a space tileset. As creator chobyhy stated they 'made it extra long so people dont get bored,' the map goes beyond a simple escape, featuring multiple sequential stages and puzzle elements. The map size is 128×128 tiles, quite spacious, with corridors and rooms reminiscent of a space station or starship interior connected like a maze. Players start with limited resources and units, needing to break through guard forces and security systems, while trigger-operated doors, elevators, and traps control progression throughout. The description's challenge to 'try to beat the game faster' adds a speedrun element, competing for clear times. Designed exclusively for six players, solo clear is virtually impossible, making role assignment and timing coordination essential. Difficulty scales gradually from early route securing to late-game boss-grade engagements, maintaining tension where a single mistake can wipe the team. Recommended for users who enjoy cooperative puzzles and escape genres, and teams preferring situational judgment and control over fixed builds. Since the map description doesn't specify separate triggers or victory conditions, it's advisable to check the initial briefing and minimap structure upon game start. The space-themed visual atmosphere and long-form level design combine for an estimated 30-50 minute playthrough, with replay value in beating personal best records.
5-3헌터 컴퓨터255업 V9
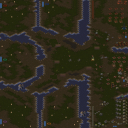
5-3헌터 컴퓨터255업 V9는 사막 타일셋을 활용한 UMS(유즈맵) 기반의 컴퓨터 상대 킬보너스 맵이다. 맵 전체가 4096×4096 규모의 넓은 전장으로 구성돼 있으며, 중앙에 위치한 주요 입구를 통해 적 컴퓨터 유닛이 지속적으로 스폰된다. 플레이어는 제한된 자원으로 방어 건물과 유닛을 배치해 적을 최대한 오래 막아야 한다. 주요 목표는 "모든 유닛을 죽여라"라는 킬보너스 조건을 달성하는 것으로, 적을 전멸시키면 추가 점수를 획득한다. 전투는 주로 사막 지형의 높은 지형과 좁은 통로를 활용한 전술적 움직임이 핵심이며, 적의 스폰 위치와 타이밍을 예측해 효율적인 방어 라인을 구축하는 것이 승리의 열쇠다. 초반에는 기본 유닛과 간단한 방어 타워를 배치해 적의 첫 파동을 막고, 중후반으로 갈수록 고급 유닛과 스킬을 활용해 대규모 공격을 방어한다. 맵은 5인 멀티플레이를 기본으로 설계됐으며, 팀플레이보다는 개인 실력이 크게 작용한다. 플레이 전에는 적 스폰 주기와 자원 회수 속도를 확인하고, 방어 건물의 배치 순서를 미리 계획하는 것이 좋다. 전술에 자신 있는 플레이어와 빠른 속도로 킬보너스를 달성하고 싶은 유저에게 특히 추천한다. 5-3Hunter Computer 255 Up V9 is a computer‑opponent kill‑bonus map built on a desert tileset and classified as a UMS (use map). The map spans a large 4096×4096 battlefield, with the main entrance in the centre where enemy computer units continuously spawn. Players must allocate limited resources to place defensive structures and units to hold off the enemy as long as possible. The primary objective is the kill‑bonus condition "destroy all units," granting extra points when the enemy is completely eliminated. Combat relies heavily on tactical movement using the desert’s high ground and narrow passages; predicting spawn locations and timing to build an efficient defense line is essential for victory. Early game focuses on basic units and simple towers to block the first wave, while mid‑to‑late game shifts to advanced units and abilities to withstand larger assaults. The map is designed for five players, favoring individual skill over team coordination. Before playing, check the enemy spawn intervals and resource regeneration rates, and plan the order of defensive placements. It is especially recommended for players confident in micro‑management and those who enjoy rapidly achieving kill‑bonus scores.
런 저글링 런 3.1 (Run Zergling Run 3.1)
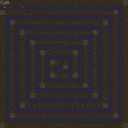
스타크래프트 브루드워의 대표적인 유즈맵 장르 중 하나로 손꼽히는 '런 저글링 런(Run Zergling Run)'의 최신 버전인 3.1을 소개한다. 이 맵은 저글링을 조종해 맵 내의 다양한 장애물과 적을 피해 목적지까지 도달하는 서바이벌 형식의 게임으로, 플레이어는 키보드나 마우스로 저글링을 조작하며 생존을 위한 도전을 펼쳐야 한다. 맵의 주된 특징은 빠른 진행과 긴장감을 유지할 수 있도록 설계된 루트와 장애물 배치에 있으며, 특히 맵 중앙의 넓은 평지와 좁은 통로를 오가며 전략적인 움직임을 요구한다. 이미지에서도 확인되는 것처럼, 맵의 배경은 사막 테마로 꾸며져 있으며, 지형은 평지, 언덕, 계단 등으로 구성되어 있어 조작감과 시야 확보가 중요한 요소로 작용한다. 맵의 난이도는 버전별로 조금씩 조절되지만, 3.1 버전은 '이제 더 어려움은 없고, 재미만 있다(Now less difficult, more fun!)'라는 설명처럼 이전 버전보다 접근성이 높아졌다. 초보자도 쉽게 즐길 수 있지만, 세밀한 조작과 타이밍을 요구하는 구간이 있어 숙련자도 만족할 만한 볼륨을 자랑한다. 추천 대상은 스타크래프트 유즈맵을 즐기는 모든 플레이어층으로, 특히 빠르게 플레이를 즐기고 싶거나 저글링의 민첩한 조작감을 경험해 보고 싶은 유저들에게 적합하다. 플레이 전에는 맵의 루트를 숙지하고, 장애물이 많은 구간에서는 미리 속도를 조절할 필요가 있다. 또한, 저글링의 이동 속도와 시야를 고려해 좁은 통로에서는 보폭을 넓히는 전략을 사용하는 것이 좋다. Introducing the latest version, 3.1, of *Run Zergling Run*, one of the most iconic user-made map genres in *StarCraft: Brood War*. In this survival-style game, players control a zergling, navigating through various obstacles and enemies to reach the destination. Using a keyboard or mouse, players must maneuver the zergling to survive the challenges. The map is designed with fast-paced routes and strategically placed obstacles to maintain tension, featuring wide open areas and narrow passages that demand precise movement. As seen in the images, the desert-themed background and terrain—comprising flatlands, hills, and staircases—make control and visibility key factors. While difficulty varies by version, 3.1 is described as "now less difficult, more fun!" making it more accessible than previous iterations. It’s easy for beginners to enjoy, yet offers enough intricate controls and timing to satisfy experienced players. Recommended for all *StarCraft* custom map enthusiasts, especially those who want quick gameplay or to experience the agility of controlling a zergling. Before playing, familiarize yourself with the routes, adjust your speed in obstacle-heavy sections, and consider widening your stride in tight passages to account for the zergling’s speed and visibility.
패밀리 가이 MASS 스피드 스폰 v2 (FAMILY GUY MASS speed spawn v.2)
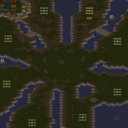
이 맵은 스타크래프트: 브루드워의 유즈맵으로, 대규모 스폰 지역을 무대로 펼쳐지는 속도전과 디펜스 요소가 혼합된 재미있는 플레이 경험을 제공한다. 맵 중앙에는 거대한 스폰 지역이 위치해 있으며, 플레이어는 이곳에서 끊임없이 몰려드는 적 유닛을 상대해야 한다. 맵의 주된 목표는 적의 공격을 방어하면서 아군을 보호하는 것이다. 맵 곳곳에는 보호막이나 방어 시설이 배치되어 있어 전략적으로 활용할 수 있으며, 초보자와 숙련자 모두 즐길 수 있도록 난이도가 조절되어 있다. 플레이 방식은 비교적 단순하지만, 스폰되는 적의 종류와 수가 점점 증가하기 때문에 플레이어의 반응 속도와 판단력이 중요하다. 맵의 구조는 사막 타일셋을 사용하여 개방적이면서도 전략적인 요소를 강조하고 있다. 특히 맵의 외곽 지역은 방어선으로 활용할 수 있는 지형이 많기 때문에, 플레이어는 자신의 진영을 어떻게 배치하고 방어할지를 신중히 결정해야 한다. 맵의 스케일은 상당히 크기 때문에, 한 번의 실수가 큰 손실로 이어질 수 있어 긴장감을 유지할 수 있다. 이 맵은 특히 팀플레이를 중시하는 유저들에게 추천된다. 팀원 간의 협력이 필수적이기 때문에, 원활한 소통과 전략적 협력이 요구된다. 또한, 맵의 디자인 자체가 방어와 생존에 초점을 맞추고 있으므로, 디펜스와 스피드런을 좋아하는 플레이어들에게도 적합하다. 맵의 난이도는 초보자가 잡기에는 다소 어려울 수 있지만, 꾸준한 연습을 통해 극복할 수 있는 수준으로 설계되어 있다. 맵의 플레이 시간은 개인차가 있지만, 일반적으로 20~40분 정도로 예상된다. 플레이 전에는 맵의 주요 스폰 포인트와 방어 지점을 미리 확인해 두는 것이 좋다. 또한, 팀원과의 역할 분담을 미리 정해두면 보다 효율적인 플레이가 가능하다. 맵의 특성상 적의 스폰 속도가 빠르기 때문에, 초반부터 방어 체계를 갖추는 것이 중요하다. 마지막으로, 맵의 특성을 잘 이해하고 있는 숙련된 플레이어의 팁을 참고하면 더 원활한 플레이가 가능하다. This custom map in *StarCraft: Brood War* blends fast-paced offense and defense in a large-scale spawn area, offering an engaging gameplay experience. At the center of the map lies a massive spawn zone where players must constantly fend off waves of enemy units. The main objective is to defend against attacks while protecting your own forces. Strategically placed shields and defensive structures throughout the map can be leveraged to your advantage, and the difficulty is balanced to suit both beginners and experienced players. While the gameplay mechanics are straightforward, the increasing variety and number of spawned enemies demand quick reflexes and sharp decision-making. The map’s open desert-themed design emphasizes strategic depth, with the outer edges featuring terrain ideal for setting up defensive lines—players must carefully plan their base positioning and fortifications. Given the map’s large scale, even a single mistake can lead to significant losses, keeping tension high throughout. This map is especially recommended for players who enjoy teamwork, as seamless communication and coordinated strategies are essential. Its design focuses heavily on defense and survival, making it a great fit for fans of defensive play and speedruns. While the difficulty may pose a challenge for beginners, it’s designed to be surmountable with consistent practice. Playtime varies by player, but most sessions last around 20 to 40 minutes. Before playing, it’s wise to familiarize yourself with key spawn points and defensive spots on the map. Assigning roles and responsibilities with your team beforehand can also streamline gameplay. Since enemies spawn rapidly, establishing a solid defense early is crucial. Finally, heeding advice from experienced players who understand the map’s mechanics can help you perform more smoothly.
클래식 오브스턱스 (Classic Obstacles)
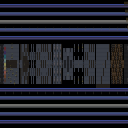
‘클래식 오브스턱스(Classic Obstacles)’는 스타크래프트 브루드워에서 체험할 수 있는 UMS 장르의 유즈맵으로, 이름 그대로 고전적인 장애물들을 넘어서며 진행하는 코스형 맵이다. 플레이어는 제한된 시간 내에 일련의 장애물을 통과해야 하며, 실수하더라도 무한 리바이브 시스템 덕분에 실수에서 배우고 재도전할 수 있어 입문자도 부담 없이 즐길 수 있다. 맵의 구조는 세로로 긴 맵에서 시작해 점차 복잡한 장애물을 배치한 구간으로 나뉘며, 각 구간은 점프, 레이저, 함정, 좁은 통로 등 다양한 장애물로 구성되어 있다. 특히 맵 하단에서 확인되는 ‘PC20XX’ 제작자의 흔적은 이 맵이 비교적 오래된 작품임을 시사하지만, 간결한 디자인과 명확한 목표 덕분에 여전히 많은 플레이어에게 사랑받고 있다. 이 맵은 한 명의 플레이어 또는 소규모 팀이 함께 도전하는 방식으로 구성되며, 장애물을 통과하는 속도와 정확성이 핵심이다. 맵의 배경은 우주 테마로 설정되어 있어 SF 분위기를 연출하며, 깔끔한 타일셋 덕분에 시야를 가리는 요소 없이 장애물의 위치를 한눈에 확인할 수 있다. 그러나 맵의 세로 길이가 길고 장애물의 밀도가 높아지면 실수할 가능성이 커지므로, 초보자는 천천히 진행하는 것이 좋다. 또한 맵의 난이도는 장애물의 조합에 따라 달라질 수 있으므로, 처음 플레이 시에는 쉬운 구간부터 반복하여 연습하는 것이 추천된다. ‘클래식 오브스턱스’는 단순한 재미 외에도 일종의 ‘도전 과제’ 같은 성격을 지니고 있다. 플레이어는 자신의 기록을 갱신하며 더 빠른 시간 내에 장애물을 통과하는 재미를 느낄 수 있으며, 친구들과 경쟁하거나 협동하여 기록을 깰 수도 있다. 맵의 난이도가 높지 않기 때문에 짧은 시간 안에 여러 번 플레이해 볼 수 있으며, 특히 새로운 장애물이나 패턴을 발견했을 때의 성취감이 크다. 또한 무한 리바이브 시스템 덕분에 실수를 두려워하지 않고 도전할 수 있어, 게임에 익숙하지 않은 플레이어라도 부담 없이 즐길 수 있다. 이 맵을 즐기기 위해서는 스타크래프트 브루드워가 설치된 환경과 해당 맵 파일이 필요하며, 맵 파일명은 ‘Classic Obstacles.scm’이다. 맵의 크기는 8192x1024로 비교적 큰 편이지만, 타일셋과 배경이 단순하여 로딩 시간은 짧다. 플레이 전에는 맵의 전체 구조를 파악하고, 각 구간의 장애물을 미리 확인하는 것이 중요하다. 특히 레이저나 함정 구간에서는 신속한 반응이 요구되므로, 마우스와 키보드 조작에 익숙해질 필요가 있다. 마지막으로, 이 맵은 멀티플레이보다는 싱글플레이 또는 소규모 팀플레이에 최적화되어 있으며, 한 명의 플레이어가 모든 장애물을 통과해야 하는 구조이기 때문에 팀원 간의 협력은 제한적이다. nonetheless, 상대방의 기록과 경쟁하는 재미도 considerable하다. Classic Obstacles is a UMS-style custom map for StarCraft: Brood War, designed as a course-based game where players must navigate through classic obstacles to reach the end. The map emphasizes continuous challenge with an unlimited revive system, making it accessible for newcomers who can learn from mistakes without frustration. The structure extends vertically, featuring progressively complex segments filled with jumps, lasers, traps, and narrow passages. The 'PC20XX' signature suggests an older creation, yet its clean design ensures clarity and replayability. Players can tackle the obstacles solo or in small teams, focusing on speed and precision. The space-themed background and minimalist tileset enhance visibility, allowing players to spot hazards quickly. However, the extended vertical layout and dense obstacle placement demand patience, especially for beginners who may benefit from mastering easier segments first. The difficulty fluctuates based on obstacle combinations, requiring adaptability rather than brute force. Beyond pure entertainment, Classic Obstacles functions akin to a challenge mode, rewarding players who improve their completion times or discover optimal routes. The unlimited revive system removes the fear of failure, encouraging experimentation and multiple attempts. Short play sessions make it ideal for casual gaming, while competitive players can compare records or team up for cooperative runs. To play, users need StarCraft: Brood War and the map file 'Classic Obstacles.scm' (8192x1024 resolution). The map loads swiftly due to its simple visuals, but understanding each segment’s layout beforehand is crucial—especially laser or trap zones requiring quick reactions. While primarily single-player or small-team oriented, the competitive spirit of beating personal bests or friends' times adds depth. Note that team coordination is minimal, as each player must independently navigate the course.
파이어 바운드 v1.1 (Fire Bound v1.1)
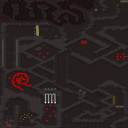
‘Fire Bound v.1.1’이라는 제목의 이 스타크래프트 브루드워 유즈맵은 이름처럼 불타는 듯한 붉은색 장애물과 좁은 통로를 통과해 나아가는 장애물 통과형 게임이다. 맵 전체에 걸쳐 četvrtaste한 붉은색 장애물이 배치되어 있으며, 플레이어는 이 장애물을 피해가며 지정된 코스를 통과해야 한다. 맵 중앙에는 넓은 빈 공간이 있으나, 그곳으로 진출하면 적의 공격이나 추가 장애물에 노출될 위험이 있으므로 대부분 플레이어는 가장자리의 좁은 길로 빠르게 이동하는 전략을 취하게 된다. 장애물의 배치 패턴은 단순하면서도 반복적이지만, 순간적인 집중력을 요구하는 구간이 많아 게임의 긴장감을 높인다. 특히 좁은 통로에서 순간적으로 방향을 틀어야 하는 순간은 긴장감을 더해주며, 장애물에 부딪히면 뒤로 밀려나는 듯한 모션이 있어 플레이어의 실수를 그대로 반영한다. 맵의 배경은 어두운 색조의 정글 타일셋으로, 붉은색 장애물이 더욱 도드라져 보이며, 플레이어의 시야를 제한하는 효과도 있다. 맵의 구조상 플레이어 간의 상호작용은 거의 없으며, 각 플레이어는 독립적으로 코스를 완주하는 것에 집중하게 된다. 장애물 통과 후에는 일정 시간이 지나면 맵이 리셋되어 다시 도전할 수 있으며, 빠른 클리어 타임을 노리는 플레이어들에게는 반복 플레이가 권장된다. 이 맵은 초보자부터 숙련자까지 모두 즐길 수 있지만, 특히 순간적인 반응력이 필요한 구간에서 실수를 줄이는 것이 핵심이다. 또한, 맵의 길이가 비교적 길지 않기 때문에 짧은 시간 안에 여러 번의 도전을 시도해 볼 수 있어 부담 없이 즐길 수 있다. 다만, 맵의 디자인상 일부 구간에서는 장애물이 지나치게 밀집되어 있어 운에 의한 클리어가 가능하다는 점은 아쉬운 점으로 남는다. 전체적으로는 단순한 규칙이지만, 반복해서 플레이할수록 실력을 향상시킬 수 있는 재미있는 유즈맵으로 추천할 만하다. 플레이 전에는 맵의 전체적인 코스를 미리 파악하고, 좁은 통로에서의 움직임에 익숙해지는 것이 중요하다. 또한, 장애물에 부딪히면 뒤로 밀려나는 모션이 있기 때문에 거리를 미리 계산하는 것이 성공의 열쇠가 된다. This StarCraft: Brood War custom map, titled "Fire Bound v.1.1," is an obstacle-clearing game where players navigate through narrow passages and fiery red obstacles that give the map its blazing aesthetic. The map is dotted with jagged red obstacles throughout, forcing players to dodge them while following a designated course. While there is a large open space in the center, venturing there exposes players to enemy attacks or additional hazards, so most opt for the safer strategy of sticking to the tight edges. The obstacle patterns are simple yet repetitive, but the game demands sharp focus in certain sections, heightening tension. The need to quickly change direction in tight corridors adds extra pressure, and colliding with obstacles pushes players backward, making mistakes feel immediate. The map’s dark jungle-themed tileset enhances the visibility of the red obstacles while also limiting visibility, adding to the challenge. Structurally, player interactions are minimal, as each participant focuses on completing the course independently. After finishing, the map resets after a set time, allowing for repeated attempts—ideal for those aiming for faster clear times. While accessible to both beginners and experts, the key to success lies in minimizing mistakes in sections that require quick reflexes. The map’s relatively short length lets players attempt multiple runs in a short time without feeling overwhelmed. However, some areas are so densely packed with obstacles that luck can play a bigger role in clearing them, which is a minor drawback. Overall, despite its straightforward rules, the map offers a fun challenge that rewards practice, making it worth trying. Before playing, it’s helpful to study the course layout and get comfortable with movement in tight spaces. Since collisions send players backward, precise distance calculations are crucial for success.
최근 등록된 맵
새로 추가된 파일과 버전을 확인하세요.
런 저글링 런 3.1 (Run Zergling Run 3.1)
스타크래프트 브루드워의 대표적인 유즈맵 장르 중 하나로 손꼽히는 '런 저글링 런(Run Zergling Run)'의 최신 버전인 3.1을 소개한다. 이 맵은 저글링을 조종해 맵 내의 다양한 장애물과 적을 피해 목적지까지 도달하는 서바이벌 형식의 게임으로, 플레이어는 키보드나 마우스로 저글링을 조작하며 생존을 위한 도전을 펼쳐야 한다. 맵의 주된 특징은 빠른 진행과 긴장감을 유지할 수 있도록 설계된 루트와 장애물 배치에 있으며, 특히 맵 중앙의 넓은 평지와 좁은 통로를 오가며 전략적인 움직임을 요구한다. 이미지에서도 확인되는 것처럼, 맵의 배경은 사막 테마로 꾸며져 있으며, 지형은 평지, 언덕, 계단 등으로 구성되어 있어 조작감과 시야 확보가 중요한 요소로 작용한다. 맵의 난이도는 버전별로 조금씩 조절되지만, 3.1 버전은 '이제 더 어려움은 없고, 재미만 있다(Now less difficult, more fun!)'라는 설명처럼 이전 버전보다 접근성이 높아졌다. 초보자도 쉽게 즐길 수 있지만, 세밀한 조작과 타이밍을 요구하는 구간이 있어 숙련자도 만족할 만한 볼륨을 자랑한다. 추천 대상은 스타크래프트 유즈맵을 즐기는 모든 플레이어층으로, 특히 빠르게 플레이를 즐기고 싶거나 저글링의 민첩한 조작감을 경험해 보고 싶은 유저들에게 적합하다. 플레이 전에는 맵의 루트를 숙지하고, 장애물이 많은 구간에서는 미리 속도를 조절할 필요가 있다. 또한, 저글링의 이동 속도와 시야를 고려해 좁은 통로에서는 보폭을 넓히는 전략을 사용하는 것이 좋다. Introducing the latest version, 3.1, of *Run Zergling Run*, one of the most iconic user-made map genres in *StarCraft: Brood War*. In this survival-style game, players control a zergling, navigating through various obstacles and enemies to reach the destination. Using a keyboard or mouse, players must maneuver the zergling to survive the challenges. The map is designed with fast-paced routes and strategically placed obstacles to maintain tension, featuring wide open areas and narrow passages that demand precise movement. As seen in the images, the desert-themed background and terrain—comprising flatlands, hills, and staircases—make control and visibility key factors. While difficulty varies by version, 3.1 is described as "now less difficult, more fun!" making it more accessible than previous iterations. It’s easy for beginners to enjoy, yet offers enough intricate controls and timing to satisfy experienced players. Recommended for all *StarCraft* custom map enthusiasts, especially those who want quick gameplay or to experience the agility of controlling a zergling. Before playing, familiarize yourself with the routes, adjust your speed in obstacle-heavy sections, and consider widening your stride in tight passages to account for the zergling’s speed and visibility.
탈옥 7 (Jail Break 7)
스타크래프트 브루드워 유즈맵 '탈옥 7 (Jail Break 7)'은 우주 타일셋을 배경으로 6명의 플레이어가 감옥에서 탈출하는 협동 미션형 맵이다. 제작자 chobyhy가 '지루하지 않게 더 길게 만들었다'고 밝힌 만큼, 단순한 탈출을 넘어 여러 단계의 구간과 퍼즐 요소가 연속적으로 배치되어 있다. 맵 크기는 128×128 타일로 넓은 편이며, 우주 정거장이나 함선 내부를 연상시키는 복도와 방들이 미로처럼 연결되어 있다. 플레이어는 제한된 자원과 유닛으로 시작해 경비 병력과 보안 시스템을 뚫고 나아가야 하며, 중간중간 트리거로 작동하는 문, 엘리베이터, 함정 등이 진행을 조절한다. 설명에 '더 빠르게 클리어해 보라'는 도전이 있는 만큼 클리어 타임을 겨루는 스피드런 성격도 겸비했다. 6인 전용으로 설계되어 혼자서는 클리어가 사실상 불가능하며, 역할 분담과 타이밍 맞춤이 필수적이다. 난이도는 초반 진입로 확보부터 후반 보스급 교전까지 점진적으로 상승하며, 실수 하나로 전멸할 수 있는 긴장감이 유지된다. 추천 대상은 협동 퍼즐과 탈출 장르를 즐기는 유저, 고정된 빌드 대신 상황 판단과 컨트롤로 풀어가는 플레이를 선호하는 팀이다. 플레이 전에는 맵 설명에 별도 트리거나 승리 조건이 명시되지 않았으므로, 게임 시작 후 첫 화면의 브리핑과 미니맵 구조를 반드시 확인하고 진입하는 것이 좋다. 우주 테마의 시각적 분위기와 긴 호흡의 레벨 디자인이 어우러져 한 판 플레이에 30분에서 50분 정도 소요될 것으로 보이며, 반복 플레이로 최단 기록을 경신하는 재미도 기대할 수 있다. StarCraft Brood War UMS map 'Jail Break 7' is a cooperative mission-style map where six players escape from a prison set against a space tileset. As creator chobyhy stated they 'made it extra long so people dont get bored,' the map goes beyond a simple escape, featuring multiple sequential stages and puzzle elements. The map size is 128×128 tiles, quite spacious, with corridors and rooms reminiscent of a space station or starship interior connected like a maze. Players start with limited resources and units, needing to break through guard forces and security systems, while trigger-operated doors, elevators, and traps control progression throughout. The description's challenge to 'try to beat the game faster' adds a speedrun element, competing for clear times. Designed exclusively for six players, solo clear is virtually impossible, making role assignment and timing coordination essential. Difficulty scales gradually from early route securing to late-game boss-grade engagements, maintaining tension where a single mistake can wipe the team. Recommended for users who enjoy cooperative puzzles and escape genres, and teams preferring situational judgment and control over fixed builds. Since the map description doesn't specify separate triggers or victory conditions, it's advisable to check the initial briefing and minimap structure upon game start. The space-themed visual atmosphere and long-form level design combine for an estimated 30-50 minute playthrough, with replay value in beating personal best records.
파이어 바운드 v1.1 (Fire Bound v1.1)
‘Fire Bound v.1.1’이라는 제목의 이 스타크래프트 브루드워 유즈맵은 이름처럼 불타는 듯한 붉은색 장애물과 좁은 통로를 통과해 나아가는 장애물 통과형 게임이다. 맵 전체에 걸쳐 četvrtaste한 붉은색 장애물이 배치되어 있으며, 플레이어는 이 장애물을 피해가며 지정된 코스를 통과해야 한다. 맵 중앙에는 넓은 빈 공간이 있으나, 그곳으로 진출하면 적의 공격이나 추가 장애물에 노출될 위험이 있으므로 대부분 플레이어는 가장자리의 좁은 길로 빠르게 이동하는 전략을 취하게 된다. 장애물의 배치 패턴은 단순하면서도 반복적이지만, 순간적인 집중력을 요구하는 구간이 많아 게임의 긴장감을 높인다. 특히 좁은 통로에서 순간적으로 방향을 틀어야 하는 순간은 긴장감을 더해주며, 장애물에 부딪히면 뒤로 밀려나는 듯한 모션이 있어 플레이어의 실수를 그대로 반영한다. 맵의 배경은 어두운 색조의 정글 타일셋으로, 붉은색 장애물이 더욱 도드라져 보이며, 플레이어의 시야를 제한하는 효과도 있다. 맵의 구조상 플레이어 간의 상호작용은 거의 없으며, 각 플레이어는 독립적으로 코스를 완주하는 것에 집중하게 된다. 장애물 통과 후에는 일정 시간이 지나면 맵이 리셋되어 다시 도전할 수 있으며, 빠른 클리어 타임을 노리는 플레이어들에게는 반복 플레이가 권장된다. 이 맵은 초보자부터 숙련자까지 모두 즐길 수 있지만, 특히 순간적인 반응력이 필요한 구간에서 실수를 줄이는 것이 핵심이다. 또한, 맵의 길이가 비교적 길지 않기 때문에 짧은 시간 안에 여러 번의 도전을 시도해 볼 수 있어 부담 없이 즐길 수 있다. 다만, 맵의 디자인상 일부 구간에서는 장애물이 지나치게 밀집되어 있어 운에 의한 클리어가 가능하다는 점은 아쉬운 점으로 남는다. 전체적으로는 단순한 규칙이지만, 반복해서 플레이할수록 실력을 향상시킬 수 있는 재미있는 유즈맵으로 추천할 만하다. 플레이 전에는 맵의 전체적인 코스를 미리 파악하고, 좁은 통로에서의 움직임에 익숙해지는 것이 중요하다. 또한, 장애물에 부딪히면 뒤로 밀려나는 모션이 있기 때문에 거리를 미리 계산하는 것이 성공의 열쇠가 된다. This StarCraft: Brood War custom map, titled "Fire Bound v.1.1," is an obstacle-clearing game where players navigate through narrow passages and fiery red obstacles that give the map its blazing aesthetic. The map is dotted with jagged red obstacles throughout, forcing players to dodge them while following a designated course. While there is a large open space in the center, venturing there exposes players to enemy attacks or additional hazards, so most opt for the safer strategy of sticking to the tight edges. The obstacle patterns are simple yet repetitive, but the game demands sharp focus in certain sections, heightening tension. The need to quickly change direction in tight corridors adds extra pressure, and colliding with obstacles pushes players backward, making mistakes feel immediate. The map’s dark jungle-themed tileset enhances the visibility of the red obstacles while also limiting visibility, adding to the challenge. Structurally, player interactions are minimal, as each participant focuses on completing the course independently. After finishing, the map resets after a set time, allowing for repeated attempts—ideal for those aiming for faster clear times. While accessible to both beginners and experts, the key to success lies in minimizing mistakes in sections that require quick reflexes. The map’s relatively short length lets players attempt multiple runs in a short time without feeling overwhelmed. However, some areas are so densely packed with obstacles that luck can play a bigger role in clearing them, which is a minor drawback. Overall, despite its straightforward rules, the map offers a fun challenge that rewards practice, making it worth trying. Before playing, it’s helpful to study the course layout and get comfortable with movement in tight spaces. Since collisions send players backward, precise distance calculations are crucial for success.
클래식 오브스턱스 (Classic Obstacles)
‘클래식 오브스턱스(Classic Obstacles)’는 스타크래프트 브루드워에서 체험할 수 있는 UMS 장르의 유즈맵으로, 이름 그대로 고전적인 장애물들을 넘어서며 진행하는 코스형 맵이다. 플레이어는 제한된 시간 내에 일련의 장애물을 통과해야 하며, 실수하더라도 무한 리바이브 시스템 덕분에 실수에서 배우고 재도전할 수 있어 입문자도 부담 없이 즐길 수 있다. 맵의 구조는 세로로 긴 맵에서 시작해 점차 복잡한 장애물을 배치한 구간으로 나뉘며, 각 구간은 점프, 레이저, 함정, 좁은 통로 등 다양한 장애물로 구성되어 있다. 특히 맵 하단에서 확인되는 ‘PC20XX’ 제작자의 흔적은 이 맵이 비교적 오래된 작품임을 시사하지만, 간결한 디자인과 명확한 목표 덕분에 여전히 많은 플레이어에게 사랑받고 있다. 이 맵은 한 명의 플레이어 또는 소규모 팀이 함께 도전하는 방식으로 구성되며, 장애물을 통과하는 속도와 정확성이 핵심이다. 맵의 배경은 우주 테마로 설정되어 있어 SF 분위기를 연출하며, 깔끔한 타일셋 덕분에 시야를 가리는 요소 없이 장애물의 위치를 한눈에 확인할 수 있다. 그러나 맵의 세로 길이가 길고 장애물의 밀도가 높아지면 실수할 가능성이 커지므로, 초보자는 천천히 진행하는 것이 좋다. 또한 맵의 난이도는 장애물의 조합에 따라 달라질 수 있으므로, 처음 플레이 시에는 쉬운 구간부터 반복하여 연습하는 것이 추천된다. ‘클래식 오브스턱스’는 단순한 재미 외에도 일종의 ‘도전 과제’ 같은 성격을 지니고 있다. 플레이어는 자신의 기록을 갱신하며 더 빠른 시간 내에 장애물을 통과하는 재미를 느낄 수 있으며, 친구들과 경쟁하거나 협동하여 기록을 깰 수도 있다. 맵의 난이도가 높지 않기 때문에 짧은 시간 안에 여러 번 플레이해 볼 수 있으며, 특히 새로운 장애물이나 패턴을 발견했을 때의 성취감이 크다. 또한 무한 리바이브 시스템 덕분에 실수를 두려워하지 않고 도전할 수 있어, 게임에 익숙하지 않은 플레이어라도 부담 없이 즐길 수 있다. 이 맵을 즐기기 위해서는 스타크래프트 브루드워가 설치된 환경과 해당 맵 파일이 필요하며, 맵 파일명은 ‘Classic Obstacles.scm’이다. 맵의 크기는 8192x1024로 비교적 큰 편이지만, 타일셋과 배경이 단순하여 로딩 시간은 짧다. 플레이 전에는 맵의 전체 구조를 파악하고, 각 구간의 장애물을 미리 확인하는 것이 중요하다. 특히 레이저나 함정 구간에서는 신속한 반응이 요구되므로, 마우스와 키보드 조작에 익숙해질 필요가 있다. 마지막으로, 이 맵은 멀티플레이보다는 싱글플레이 또는 소규모 팀플레이에 최적화되어 있으며, 한 명의 플레이어가 모든 장애물을 통과해야 하는 구조이기 때문에 팀원 간의 협력은 제한적이다. nonetheless, 상대방의 기록과 경쟁하는 재미도 considerable하다. Classic Obstacles is a UMS-style custom map for StarCraft: Brood War, designed as a course-based game where players must navigate through classic obstacles to reach the end. The map emphasizes continuous challenge with an unlimited revive system, making it accessible for newcomers who can learn from mistakes without frustration. The structure extends vertically, featuring progressively complex segments filled with jumps, lasers, traps, and narrow passages. The 'PC20XX' signature suggests an older creation, yet its clean design ensures clarity and replayability. Players can tackle the obstacles solo or in small teams, focusing on speed and precision. The space-themed background and minimalist tileset enhance visibility, allowing players to spot hazards quickly. However, the extended vertical layout and dense obstacle placement demand patience, especially for beginners who may benefit from mastering easier segments first. The difficulty fluctuates based on obstacle combinations, requiring adaptability rather than brute force. Beyond pure entertainment, Classic Obstacles functions akin to a challenge mode, rewarding players who improve their completion times or discover optimal routes. The unlimited revive system removes the fear of failure, encouraging experimentation and multiple attempts. Short play sessions make it ideal for casual gaming, while competitive players can compare records or team up for cooperative runs. To play, users need StarCraft: Brood War and the map file 'Classic Obstacles.scm' (8192x1024 resolution). The map loads swiftly due to its simple visuals, but understanding each segment’s layout beforehand is crucial—especially laser or trap zones requiring quick reactions. While primarily single-player or small-team oriented, the competitive spirit of beating personal bests or friends' times adds depth. Note that team coordination is minimal, as each player must independently navigate the course.
패밀리 가이 MASS 스피드 스폰 v2 (FAMILY GUY MASS speed spawn v.2)
이 맵은 스타크래프트: 브루드워의 유즈맵으로, 대규모 스폰 지역을 무대로 펼쳐지는 속도전과 디펜스 요소가 혼합된 재미있는 플레이 경험을 제공한다. 맵 중앙에는 거대한 스폰 지역이 위치해 있으며, 플레이어는 이곳에서 끊임없이 몰려드는 적 유닛을 상대해야 한다. 맵의 주된 목표는 적의 공격을 방어하면서 아군을 보호하는 것이다. 맵 곳곳에는 보호막이나 방어 시설이 배치되어 있어 전략적으로 활용할 수 있으며, 초보자와 숙련자 모두 즐길 수 있도록 난이도가 조절되어 있다. 플레이 방식은 비교적 단순하지만, 스폰되는 적의 종류와 수가 점점 증가하기 때문에 플레이어의 반응 속도와 판단력이 중요하다. 맵의 구조는 사막 타일셋을 사용하여 개방적이면서도 전략적인 요소를 강조하고 있다. 특히 맵의 외곽 지역은 방어선으로 활용할 수 있는 지형이 많기 때문에, 플레이어는 자신의 진영을 어떻게 배치하고 방어할지를 신중히 결정해야 한다. 맵의 스케일은 상당히 크기 때문에, 한 번의 실수가 큰 손실로 이어질 수 있어 긴장감을 유지할 수 있다. 이 맵은 특히 팀플레이를 중시하는 유저들에게 추천된다. 팀원 간의 협력이 필수적이기 때문에, 원활한 소통과 전략적 협력이 요구된다. 또한, 맵의 디자인 자체가 방어와 생존에 초점을 맞추고 있으므로, 디펜스와 스피드런을 좋아하는 플레이어들에게도 적합하다. 맵의 난이도는 초보자가 잡기에는 다소 어려울 수 있지만, 꾸준한 연습을 통해 극복할 수 있는 수준으로 설계되어 있다. 맵의 플레이 시간은 개인차가 있지만, 일반적으로 20~40분 정도로 예상된다. 플레이 전에는 맵의 주요 스폰 포인트와 방어 지점을 미리 확인해 두는 것이 좋다. 또한, 팀원과의 역할 분담을 미리 정해두면 보다 효율적인 플레이가 가능하다. 맵의 특성상 적의 스폰 속도가 빠르기 때문에, 초반부터 방어 체계를 갖추는 것이 중요하다. 마지막으로, 맵의 특성을 잘 이해하고 있는 숙련된 플레이어의 팁을 참고하면 더 원활한 플레이가 가능하다. This custom map in *StarCraft: Brood War* blends fast-paced offense and defense in a large-scale spawn area, offering an engaging gameplay experience. At the center of the map lies a massive spawn zone where players must constantly fend off waves of enemy units. The main objective is to defend against attacks while protecting your own forces. Strategically placed shields and defensive structures throughout the map can be leveraged to your advantage, and the difficulty is balanced to suit both beginners and experienced players. While the gameplay mechanics are straightforward, the increasing variety and number of spawned enemies demand quick reflexes and sharp decision-making. The map’s open desert-themed design emphasizes strategic depth, with the outer edges featuring terrain ideal for setting up defensive lines—players must carefully plan their base positioning and fortifications. Given the map’s large scale, even a single mistake can lead to significant losses, keeping tension high throughout. This map is especially recommended for players who enjoy teamwork, as seamless communication and coordinated strategies are essential. Its design focuses heavily on defense and survival, making it a great fit for fans of defensive play and speedruns. While the difficulty may pose a challenge for beginners, it’s designed to be surmountable with consistent practice. Playtime varies by player, but most sessions last around 20 to 40 minutes. Before playing, it’s wise to familiarize yourself with key spawn points and defensive spots on the map. Assigning roles and responsibilities with your team beforehand can also streamline gameplay. Since enemies spawn rapidly, establishing a solid defense early is crucial. Finally, heeding advice from experienced players who understand the map’s mechanics can help you perform more smoothly.
5-3헌터 컴퓨터255업 V9
5-3헌터 컴퓨터255업 V9는 사막 타일셋을 활용한 UMS(유즈맵) 기반의 컴퓨터 상대 킬보너스 맵이다. 맵 전체가 4096×4096 규모의 넓은 전장으로 구성돼 있으며, 중앙에 위치한 주요 입구를 통해 적 컴퓨터 유닛이 지속적으로 스폰된다. 플레이어는 제한된 자원으로 방어 건물과 유닛을 배치해 적을 최대한 오래 막아야 한다. 주요 목표는 "모든 유닛을 죽여라"라는 킬보너스 조건을 달성하는 것으로, 적을 전멸시키면 추가 점수를 획득한다. 전투는 주로 사막 지형의 높은 지형과 좁은 통로를 활용한 전술적 움직임이 핵심이며, 적의 스폰 위치와 타이밍을 예측해 효율적인 방어 라인을 구축하는 것이 승리의 열쇠다. 초반에는 기본 유닛과 간단한 방어 타워를 배치해 적의 첫 파동을 막고, 중후반으로 갈수록 고급 유닛과 스킬을 활용해 대규모 공격을 방어한다. 맵은 5인 멀티플레이를 기본으로 설계됐으며, 팀플레이보다는 개인 실력이 크게 작용한다. 플레이 전에는 적 스폰 주기와 자원 회수 속도를 확인하고, 방어 건물의 배치 순서를 미리 계획하는 것이 좋다. 전술에 자신 있는 플레이어와 빠른 속도로 킬보너스를 달성하고 싶은 유저에게 특히 추천한다. 5-3Hunter Computer 255 Up V9 is a computer‑opponent kill‑bonus map built on a desert tileset and classified as a UMS (use map). The map spans a large 4096×4096 battlefield, with the main entrance in the centre where enemy computer units continuously spawn. Players must allocate limited resources to place defensive structures and units to hold off the enemy as long as possible. The primary objective is the kill‑bonus condition "destroy all units," granting extra points when the enemy is completely eliminated. Combat relies heavily on tactical movement using the desert’s high ground and narrow passages; predicting spawn locations and timing to build an efficient defense line is essential for victory. Early game focuses on basic units and simple towers to block the first wave, while mid‑to‑late game shifts to advanced units and abilities to withstand larger assaults. The map is designed for five players, favoring individual skill over team coordination. Before playing, check the enemy spawn intervals and resource regeneration rates, and plan the order of defensive placements. It is especially recommended for players confident in micro‑management and those who enjoy rapidly achieving kill‑bonus scores.
맵 선택 가이드
태그는 맵의 핵심 특징을 빠르게 설명하지만 제작 버전마다 규칙이 다를 수 있습니다. 상세 설명에서 권장 인원, 난이도, 플레이 시간과 버전을 함께 확인한 뒤 다운로드하세요.