
스피드 스타크래프트 맵 모음
'스피드' 태그가 등록된 맵을 모았습니다. 장르 하나로 찾기 어려운 플레이 방식, 난이도와 특징을 중심으로 인기 맵과 최신 맵을 비교해 보세요.
- 등록 맵
- 23개
- 누적 다운로드
- 17
- 누적 조회
- 1,412
인기 맵
다운로드와 조회 반응이 높은 맵입니다.
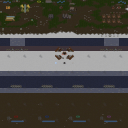
컴 까기 쓰나미 ver2.0 Speed (Com Kkagi Tsunami ver2.0 Speed)
스타크래프트 브루드워 유즈맵 중에서도 컴퓨터를 상대하며 빠른 게임 진행을 선호하는 유저들에게 꾸준히 사랑받는 대표적인 작품이 바로 컴 까기 쓰나미 ver2.0 Speed입니다. 이 스타크래프트 맵은 타이틀에서 직관적으로 드러나듯 밀리나 복잡한 생존 규칙 대신 컴퓨터 적의 공세를 효과적으로 막아내며 빠른 속도감으로 승부를 보는 컴까기 장르의 특성을 극대화한 구조를 보여줍니다. 내부 설명에 따르면 스겜, 즉 빠른 게임을 지향하는 스피드 버전으로 제작되어 불필요한 지연 요소를 줄이고 박진감 넘치는 플레이를 유도하도록 설계되었습니다. 전체적인 맵 구조를 살펴보면 플레이어들이 진지를 구축하고 다가오는 적의 거센 물결을 상대할 수 있도록 공간이 구성되어 있으며, 플랫폼 타일셋 특유의 지형적 특징을 살려 방어선 형성과 병력 운용의 재미를 더합니다. 특히 정식 버전과 노멀 버전을 거쳐 발전해 온 시리즈의 흐름 속에서 속도감을 대폭 끌어올린 버전인 만큼, 짧은 시간 동안 집중도 높은 방어전을 즐기고 싶어 하는 유저들에게 알맞은 구성을 자랑합니다. 복잡한 컨트롤이나 장시간의 대치 상황보다는 시원하게 몰려오는 적들을 상대로 화려한 유닛 조합과 자원 활용을 뽐내고 싶은 플레이어라면 누구나 흥미롭게 즐길 수 있습니다. 스타크래프트 브루드워 커스텀 게임에서 빠르고 시원한 컴퓨터 상대 디펜스형 유즈맵을 찾고 있는 유저나 친구들과 함께 가볍게 손발을 맞춰 적의 공세를 돌파하는 재미를 느끼고 싶은 이들에게 추천할 만한 가치가 있는 맵입니다. 플레이를 시작하기 전에는 맵 설명에 명시된 스피드 버전의 특징과 템포를 미리 파악하고, 팀원들과 자원 및 방어 구역을 효율적으로 조율하여 몰려오는 적의 쓰나미에 대비하는 전략적 접근이 요구됩니다. Com Kkagi Tsunami ver2.0 Speed is a representative StarCraft Brood War use map that is consistently loved by users who prefer fast-paced gameplay against computer opponents. As intuitively revealed in the title, this map maximizes the characteristics of the computer-versus genre, focusing on effectively blocking the offensive waves of computer enemies with a fast sense of speed rather than standard melee or complex survival rules. According to the internal description, it was produced as a speed version aiming for quick games, designed to reduce unnecessary delays and induce thrilling gameplay. Looking at the overall map structure, the space is organized so that players can build camps and deal with the incoming waves of enemies, adding to the fun of forming defense lines and operating troops by utilizing the topographical features unique to the platform tileset. As a version that significantly increases the sense of speed within the flow of a series that has developed through official and normal versions, it boasts a configuration suitable for users who want to enjoy high-concentration defense battles in a short time. Rather than complex controls or long-term standoff situations, any player who wants to show off brilliant unit combinations and resource utilization against enemies rushing in a refreshing way can enjoy it with interest. It is a map worth recommending to users looking for a fast and refreshing computer-versus defense-type use map in StarCraft Brood War custom games, or those who want to feel the fun of breaking through enemy offensives by coordinating hand and foot lightly with friends. Before starting play, a strategic approach is required to grasp the characteristics and tempo of the speed version specified in the map description in advance, and efficiently coordinate resources and defense zones with teammates to prepare for the tsunami of enemies flocking in.
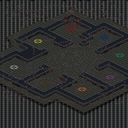
저글링 블러드 (Zergling Blood)
설원의 차가운 대지 위에서 오직 저글링의 발톱만이 승리를 결정짓는 단순하면서도 치열한 유즈맵이다. 총 여덟 명의 플레이어가 동시에 참여하는 이 맵은 복잡한 건설이나 자원 관리 없이 오로지 저글링 한 유닛의 컨트롤에 집중하도록 설계되어 있다. 시작과 동시에 각 플레이어에게 주어지는 저글링 무리는 곧장 전장으로 투입되며, 살아남기 위해 끊임없이 움직이고 상대를 물어뜯어야 한다. 맵의 구조는 넓게 트인 얼음 평원에 장애물이 거의 배치되지 않아 은신하거나 도망칠 구석이 거의 존재하지 않는다. 이는 곧바로 맞닥뜨리는 전투를 유도하며, 한 치의 망설임도 용납하지 않는 속도감을 만들어낸다. 시야에서 벗어나는 순간 다른 저글링의 기습에 노출되기 쉬우므로, 화면 구석구석을 살피는 넓은 시야 확보가 무엇보다 중요하게 작용한다. 플레이 경험은 예측 불가능한 난전 그 자체다. 여덟 명이 뒤엉켜 싸우는 구도는 개인 간의 일대일 대결을 넘어 순간적으로 형성되는 임시 동맹과 배신이 끊임없이 일어나는 혼돈의 장을 제공한다. 체력이 약한 저글링의 특성상 한두 번의 공격에 생사가 갈리기 때문에, 긴장감은 게임 내내 극도로 유지된다. 특히 다수의 저글링이 한 지점에 몰리며 발생하는 이른바 뭉치기 싸움에서는 한 번의 무빙 실수로 제어하던 모든 유닛이 순식간에 녹아내리는 뼈아픈 경험을 하게 된다. 공격 대상을 잘못 선택하여 상대의 빈틈을 노리지 못하면 순식간에 전세가 뒤집히며, 마지막 한 마리까지 살아남아야 한다는 압박감이 아드레날린을 솟구치게 만든다. 이 맵은 특별한 트리거나 승리 조건을 내세우지 않고 오직 잔존하는 마지막 저글링의 주인이 되는 순수한 서바이벌 형식을 취한다. 연출되는 장면 하나하나가 철저히 플레이어의 기량과 순간 판단력에 의존하기 때문에, 매 판매 색다른 긴장과 결과를 마주하게 된다. 이런 특성상 이 맵은 복잡한 전략보다는 직관적인 액션과 빠른 반사 신경을 즐기는 플레이어에게 이상적이다. 특히 친구들과 함께 가볍게 즐기기에 부담이 없으며, 짧은 시간 안에 승부가 결정되기 때문에 여러 판을 연속으로 플레이하기에도 좋다. 다만 플레이에 앞서 반드시 알아두어야 할 점은, 이 맵이 저글링의 무빙과 어택땅, 홀드 컨트롤 같은 세밀한 조작 숙련도를 요구한다는 사실이다. 기본적인 유닛 컨트롤에 익숙하지 않다면 전투의 흐름을 따라잡기 어려울 수 있다. 또한 맵의 지형이 단조롭기 때문에 변수를 만드는 것은 전적으로 플레이어의 손에 달려 있다는 점을 인지해야 한다. 저글링 블러드는 군더더기 없는 기획으로 유닛 조작의 본질적인 재미에 충실한, 파티 플레이에 최적화된 유즈맵이다. On the frozen tundra of the ice tileset, victory is decided solely by the claws of zerglings in this simple yet fiercely intense use map setting. Designed for eight players to engage simultaneously, the map strips away all complex building or resource management and forces you to focus entirely on controlling a single type of unit. A pack of zerglings is deployed directly into the battlefield from the start, and you must constantly move and tear into opponents just to survive. The map structure consists of a wide-open icy plain with almost no obstacles, leaving no corners to hide or seek cover. This immediately forces direct confrontations and creates a sense of speed that tolerates no hesitation. The moment you slip out of sight, you become vulnerable to a sudden ambush from another zergling pack, making broad map awareness and scanning every edge of the screen absolutely critical. The gameplay experience feels like unpredictable chaos itself. With eight players entangled in a brawl, the fight goes beyond simple one-on-one duels and becomes a scene of constant chaos where temporary alliances and betrayals form and shatter in an instant. Because a zergling's low health means survival can be decided in just one or two hits, the tension remains extremely high throughout the entire match. In the so-called clumped fights where multiple packs collide at a single point, a single misstep in movement can cause all your units to vanish in a flash, delivering a painfully harsh lesson. Choosing the wrong target and failing to exploit an opening can flip the tide of battle instantly, and the pressure of having to survive until the very last zergling pumps adrenaline constantly. This map does not rely on special triggers or complex victory conditions; it is a pure survival format where the only goal is to be the owner of the last remaining zergling. Every unfolding scene depends entirely on the player's skill and split-second judgment, so each round presents a completely different fight and strategic tension. Given these traits, this map suits players who enjoy intuitive action and fast reflexes over deep, complex strategy. It is a hassle-free way to have a lighthearted session with friends, and since the outcome is decided quickly, it is perfect for playing multiple rounds back to back. However, before jumping in, you must be aware that this map demands a high level of proficiency in precise controls such as zergling movement, attack-moving, and hold position. If you are not comfortable with basic unit micro, you may find it difficult to keep up once the fight begins. You must also recognize that because the terrain is so flat and open, creating any kind of variable relies entirely on the player's own hands. Zergling Blood is a use map that strips away all excess to focus purely on the fundamental fun of unit control, making it an ideal choice for party play.
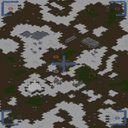
오펜시브 스트라이크 (Offensive Strike)
오펜시브 스트라이크는 서바이벌 장르에 속하는 스타크래프트 브루드워 유즈맵으로, 제한된 시간 안에 적 건물을 모두 파괴해야 하는 목표를 가지고 있습니다. 맵은 3072×3072 타일 기반으로 설계되어 있으며, 플랫폼 타일셋을 사용해 지형이 비교적 평탄하면서도 전략적 위치가 존재합니다. 각 레벨이 진행될수록 적 유닛과 건물의 배치가 복잡해지고, 타이머가 점점 짧아져 난이도가 상승합니다. 플레이어는 4인까지 동시에 참여할 수 있으며, 팀 전투보다는 개인 전투에 초점을 맞춘 솔로 혹은 자유로운 멀티플레이가 주된 플레이 방식입니다. 초기 레벨에서는 기본 유닛과 간단한 방어 구조를 활용해 빠르게 건물을 파괴하는 연습을 할 수 있지만, 후반부에서는 적의 방어 타워와 고레벨 유닛이 등장해 전투 전략을 재조정해야 합니다. 특히 건물 파괴 순서를 어떻게 잡느냐가 전체 클리어 시간에 큰 영향을 미치며, 자원 관리와 유닛 생산 타이밍이 핵심 요소로 작용합니다. 맵 내에는 숨겨진 고지대와 이동 경로가 몇 군데 존재해, 이를 활용하면 적의 방어선을 우회하거나 급습할 수 있는 전술적 선택지가 제공됩니다. 플레이 전에는 각 레벨의 타이머와 적 배치를 미리 확인하고, 필요한 유닛 조합을 미리 준비하는 것이 좋습니다. 초보자보다는 기본적인 유닛 운용에 익숙한 플레이어에게 적합하며, 빠른 판단과 지속적인 압박을 즐기는 유저에게 특히 추천됩니다. Offensive Strike is a survival‑type custom map for StarCraft: Brood War where the objective is to destroy all enemy buildings before the timer expires. The map spans 3072×3072 tiles using the platform tileset, offering a relatively flat terrain with several strategic positions. As the levels progress, enemy unit placements become more intricate and the time limit shortens, increasing overall difficulty. Up to four players can join, and the focus is on solo or free‑for‑all multiplayer rather than team combat. Early stages serve as a tutorial for basic unit control and rapid building demolition, while later stages introduce defensive towers and higher‑tier units that force players to rethink their tactics. The order in which buildings are targeted heavily influences the total clearance time, making resource management and unit production timing critical. Hidden high grounds and alternative pathways appear in several spots, allowing players to bypass defenses or launch surprise attacks. Before starting, it’s advisable to review the timer and enemy layout for each level and prepare the appropriate unit composition. This map suits players who are comfortable with basic unit handling and enjoy fast decision‑making and constant pressure, making it especially recommended for experienced gamers who like high‑tempo challenges.
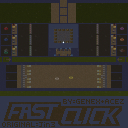
패스트 클릭 (FAST CLICK)
‘FAST CLICK(패스트 클릭)’은 스타크래프트 브루드워의 유즈맵으로, 빠른 클릭과 반응 속도를 요구하는 미니게임 장르에 속하는 맵이다. 맵의 중앙에 위치한 거대한 사각형 구역을 중심으로 플레이어는 순간적인 판단을 필요로 하며, 각종 이벤트나 목표가 충돌 없이 빠르게 처리되어야 한다. 이미지 상으로는 맵 중앙에 넓은 테두리 없이 빈 공간이 있고, 그 주변으로 건물이 배치되어 있는 구조가 보이며, 이는 플레이어의 시야를 확보하고 클릭 반경의 민첩성을 시험한다. 맵의 제목과 파일명에 ‘FAST CLICK’이라는 키워드가 명시되어 있어, 게임의 핵심 메커니즘이 클릭 속도에 있음을 직관적으로 알 수 있다. 게임 진행 중에는 예상치 못한 트리거나 이벤트가 발생할 수 있으며, 이는 플레이어의 집중력과 손 velocidade를 동시에 시험한다. 초보자보다는 숙련된 플레이어에게 더욱 어울리며, 특히 반응 속도를 경쟁하고 싶어 하는 유저들에게 적합한 맵으로 추정된다. 플레이 전에는 마우스 감도와 클릭 민첩성을 미리 조정하는 것이 좋으며, 맵의 넓은 공간을 활용한 전술적 클릭이 필요한 만큼 시야 확보와 예기치 않은 상황의 대처가 중요하다. 맵의 구조상 중앙 구역이 넓고 평탄한데, 이는 클릭의 정확성과 속도 모두를 요구하는 요소로 작용할 수 있다. 또한, 맵의 테두리 부분에 위치한 건물들은 시각적 방해 요소로 작용하지 않으며, 오히려 플레이어의 시선 분산을 최소화하는 역할을 한다. 맵의 해상도와 타일셋은 사막 테마로 구성되어 있으며, 이는 넓은 시야와 개방감을 강조하는 데 기여한다. 이 맵은 스타크래프트의 유즈맵 커뮤니티에서 ‘클릭 테스트’나 ‘반응 속도 테스트’ 등으로 불리며, 짧은 플레이 타임에도 불구하고 높은 재플레이 가치를 지닌다. 특히, 경쟁력 있는 플레이를 즐기는 유저들에게는 도전 과제로 작용할 수 있는 맵으로 보인다. “Fast Click” is a StarCraft: Brood War custom map that falls under the minigame genre, demanding quick clicks and fast reflexes. Players must make split-second decisions around the large rectangular zone in the map’s center, rapidly handling various events and objectives without collisions. Visually, the map features an open empty space in the middle with buildings arranged around the perimeter, ensuring clear sightlines and testing the player’s click responsiveness. The name and filename both include “Fast Click,” immediately signaling that speed is the core mechanic. Unexpected traps or events can occur during play, pushing both concentration and hand-eye coordination to the limit. This map is better suited for experienced players, especially those looking to compete in reaction-speed challenges. Before playing, it’s wise to adjust mouse sensitivity and click responsiveness; the wide open space requires tactical clicking, so maintaining awareness and handling surprises are crucial. The central area is large and flat, which can both enhance and challenge click accuracy and speed. The buildings along the edges don’t obstruct vision—they actually help minimize distractions. The map’s desert-themed tileset and resolution emphasize openness and wide visibility. Within the StarCraft custom-map community, it’s often called a “click test” or “reaction-speed test,” offering high replay value despite its short playtime. For players who enjoy competitive play, it presents a compelling challenge.
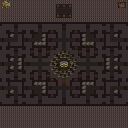
Cat n Mouse Bits
Cat n Mouse Bits는 7인용 UMS(유즈맵) 형태의 컴까기(킬) 맵으로, 정글 타일셋을 활용한 2048×2048 크기의 넓은 전장이 특징이다. 맵 중앙에 배치된 복잡한 정글 지형은 시야를 제한하고 이동 경로를 다양하게 만들어, 플레이어가 상대를 추격하거나 도망칠 때 전략적인 판단이 요구된다. 초반에는 자원을 빠르게 확보하고, 유닛을 적절히 분산시켜 방어와 공격을 동시에 준비한다. 중반 이후에는 상대의 진영을 포위하거나, 주요 통로를 차단해 교전이 집중되며, 마지막까지 긴장감이 유지된다. 특히, 정글의 울창한 숲과 작은 오브젝트가 배치된 구역은 유닛 이동을 방해하면서도 기습적인 매복을 가능하게 해, 초보자보다는 약간의 경험이 있는 플레이어에게 적합하다. 플레이 전에는 유닛 조합과 스킬 쿨다운을 미리 체크하고, 주요 통로를 파악해 빠른 이동 루트를 설정하는 것이 승패를 좌우한다. 전반적으로 빠른 템포와 지속적인 교전이 어우러진 이 맵은 스피드와 전략을 동시에 즐기고 싶은 유저에게 추천한다. Cat n Mouse Bits is a 7-player UMS (Use Map) kill‑type map that uses a jungle tileset on a large 2048×2048 battlefield. The central jungle terrain creates limited vision and multiple pathways, requiring strategic decisions when chasing or evading opponents. At the start, players should quickly gather resources and spread units to prepare both defense and offense. From the mid‑game onward, the focus shifts to encircling enemy bases or blocking key routes, keeping tension high until the end. The dense forest and scattered objects hinder movement but allow ambushes, making the map more suitable for players with some experience rather than beginners. Before playing, check unit compositions, skill cooldowns, and identify main corridors to plan fast routes, as these factors often decide the outcome. Overall, its fast pace and constant engagements make it ideal for users who enjoy both speed and strategic depth.
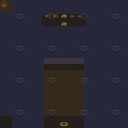
라바 피하기 (Dodge the Larva)
Dodge the Larva는 스타크래프트 브루드워의 미니게임 맵으로, 플레이어가 맵 전체에 흩어져 나타나는 라바(유충)를 피하며 살아남는 것을 목표로 한다. 맵은 2048×2048 타일 기반 황무지 타일셋으로 구성되어 있어 넓은 필드에 다양한 지형 요소가 배치돼 있다. 라바는 일정 시간마다 무작위 위치에서 스폰되며, 이동 속도가 빠르고 충돌 시 즉시 사망한다. 따라서 플레이어는 라바의 스폰 패턴을 파악하고, 지형을 이용해 이동 경로를 지속적으로 바꾸는 것이 핵심 전략이다. 맵은 7명의 플레이어가 동시에 참여할 수 있도록 설계돼 있어, 혼자서도 혹은 소규모 팀으로도 즐길 수 있다. 라바는 시야가 제한된 구역에서도 나타날 수 있기 때문에 미니맵을 자주 확인하고, 주변 상황을 예의주시해야 한다. 또한, 라바가 스폰되는 지역은 점차 확대되는 경향이 있어, 초반에는 안전한 구역을 확보하고, 중후반으로 갈수록 맵 중앙으로 이동하며 회피 기술을 연마하는 것이 바람직하다. 플레이 전에는 라바의 스폰 주기와 이동 속도를 확인하고, 이동 키와 마우스 클릭을 조합해 빠른 방향 전환 연습을 권한다. 이 맵은 반사 신경과 상황 판단 능력을 테스트하는 데 적합하며, 특히 회피 능력을 키우고 싶은 초중급 유저에게 추천한다. Dodge the Larva is a mini‑game map for StarCraft: Brood War where players must survive by evading larvae that randomly appear across the map. The map uses a 2048×2048 tile‑based desert tileset, providing a large open field with varied terrain features. Larvae spawn at random locations at regular intervals, move quickly, and cause instant death on contact, so recognizing spawn patterns and constantly changing movement routes are essential strategies. Designed for up to seven players, it can be enjoyed solo or in small groups. Since larvae can also emerge in fog‑of‑war areas, frequent mini‑map checks and constant situational awareness are required. Over time the spawn zones tend to expand, encouraging players to secure safe zones early and gradually move toward the center as the game progresses, honing their evasion skills. Before playing, note the larvae’s spawn frequency and speed, and practice rapid direction changes using movement keys and mouse clicks. This map tests reflexes and decision‑making, making it ideal for beginners to intermediate players who want to improve their dodging abilities.
![개인랜덤디펜스[Gold] 맵 미리보기](https://cdn-star-data.huzy.net/thumbnail_bd3aa1d011bf492ca9bb9764e2416076.jpg)
개인랜덤디펜스[Gold]
스타크래프트 브루드워 유즈맵 '개인랜덤디펜스 골드'는 정글 타일셋 위에서 6명의 플레이어가 각자의 레인을 맡아 몰려오는 적 웨이브를 막아내는 랜덤 디펜스 맵이다. 제작자 Speed[Fast]가 'Final Version'으로 공개한 이 맵은 제목 그대로 개인별 독립 공간에서 랜덤하게 생성되는 유닛 조합을 상대하며 생존을 겨루는 구조를 갖는다. 맵 크기 128x128타일 전장에 6개의 대칭형 레인이 배치되어 있으며, 플레이어는 시작 자원과 유닛을 활용해 타워를 건설하거나 유닛을 생산해 입구를 막는 방식으로 방어선을 구축한다. 'Speed[Fast]' 표기에서 알 수 있듯 게임 템포가 빠르고 웨이브 간격이 짧아 초반 빌드 오더와 자원 분배 판단이 승패를 가른다. 랜덤 요소로 매 판 다른 적 조합이 출현하므로 고정된 공략보다는 상황 대처 능력과 유닛 상성 이해도가 중요하다. 개인전 특성상 아군 지원 없이 혼자 모든 라인을 커버해야 하므로 멀티태스킹과 컨트롤 숙련도가 요구된다. 최종 버전인 만큼 밸런스 조정과 버그 수정이 마무리된 상태로 보이며, 제작자 블로그와 인투더맵 링크를 통해 추가 정보나 업데이트 이력을 확인할 수 있다. 빠른 호흡의 랜덤 디펜스를 즐기고 싶거나 혼자서 끝까지 버티는 성취감을 원하는 유저에게 추천한다. 플레이 전 버전 표기가 'Final'인지, 맵 해시(403428a52466a5bc)가 배포본과 일치하는지 확인하면 좋다. StarCraft Brood War UMS map 'Individual Random Defense Gold' is a random defense map where six players each defend their own lane against incoming enemy waves on a Jungle tileset. Released as a 'Final Version' by creator Speed[Fast], this map features a structure where players survive against randomly generated unit combinations in independent individual spaces. Six symmetrical lanes are arranged on a 128x128 tile battlefield, and players build towers or produce units using starting resources to block entrances. As indicated by 'Speed[Fast]', the game tempo is fast with short wave intervals, making early build orders and resource allocation decisions critical. Since different enemy combinations appear each game due to random elements, situational adaptability and unit matchup knowledge are more important than fixed strategies. Being an individual match, players must cover all lanes alone without ally support, demanding multitasking and control proficiency. As a final version, balance adjustments and bug fixes appear complete, and additional information or update history can be found via the creator's blog and IntoTheMap links. Recommended for users who enjoy fast-paced random defense or seek the achievement of surviving alone to the end. Before playing, verify the version is marked 'Final' and the map hash (403428a52466a5bc) matches the distributed file.
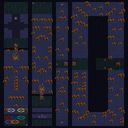
라바 더지 - 팀워크 (Larva Dodge - Team Work)
스타크래프트 브루드워의 재미있는 팀워크 미니게임인 <Larva Dodge - Team Work>는 플레이어들이 협동하여 살아남는 재미를 느낄 수 있는 유즈맵입니다. 맵은 넓은 필드에 scattered된 larva(유충)들을 모아 팀원들과 함께 안전하게 보호하는 것이 목표로 보입니다. 화면에서 larva는 밝은 주황색으로 빛나며, 플레이어들은 각자 조종하는 유닛(추정: 저글링)을 움직여 larva를 보호하거나 이동시키는 역할을 맡습니다. 맵의 구조는 비교적 개방적이지만, 중간중간 장애물이나 위험 지대가 배치되어 있어 팀원 간의 빠른 의사소통과 전략이 요구됩니다. larva를 잃지 않고 목표 지점까지 도달하는 것이 관건으로 보이며, 특히 팀원 중 한 명이라도 larva를 잃으면 패배할 수 있는 규칙이 적용되는 듯합니다. 난이도는 중간 정도로, larva의 이동 경로를 예측하고 팀원 간의 호흡을 맞추는 연습이 필요할 것입니다. 초보 플레이어는 larva를 보호하는 기본적인 패턴부터 익혀야 하며, 숙련된 플레이어는 보다 복잡한 전략을 구사할 수 있을 것입니다. 맵의 분위기는 밝고 경쾌한 편으로, 팀워크를 강조하는 메시지가 담겨 있는 듯해 보입니다. 플레이 전에는 반드시 팀원들과의 역할 분담을 명확히 하고, larva의 이동 경로를 사전에 논의하는 것이 좋습니다. 또한, 맵의 특성상 키보드와 마우스 조작을 동시에 요구할 수 있으니 사전 연습을 권장합니다. StarCraft: Brood War’s fun teamwork minigame, *Larva Dodge - Team Work*, is a custom map where players cooperate to survive and enjoy the thrill of working together. The goal appears to be gathering scattered larva (pupae) across a wide field and safely escorting them to a designated area with teammates. On-screen, the larva glow a bright orange, and players control units—likely zerglings—to protect or move the larva. While the map’s layout is relatively open, scattered obstacles and hazardous zones demand quick communication and strategy among teammates. The key challenge is ensuring no larva is lost while reaching the destination, with the game likely ending in defeat if even one larva is lost. The difficulty is moderate, requiring practice in predicting larva movement paths and synchronizing with teammates. Beginners should start by mastering basic larva protection patterns, while advanced players can employ more complex strategies. The map’s tone is bright and lively, with a clear emphasis on teamwork. Before playing, it’s best to clearly assign roles among teammates and discuss larva movement routes in advance. Given the map’s mechanics, simultaneous keyboard and mouse control may be necessary, so practicing beforehand is recommended.
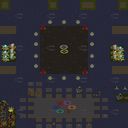
Naruto: Speed Hokage 1.1
Naruto: Speed Hokage 1.1은 6명의 플레이어가 동시에 전투에 참여할 수 있는 UMS(유즈맵) 형태의 빠른 템포 전투맵이다. 맵은 사막 타일셋을 기반으로 2048×2048 크기의 넓은 전장을 제공하며, 각 플레이어는 18명의 나루토 세계 영웅 중 하나를 선택한다. 선택된 영웅은 4~5개의 고유 주술(술)을 보유하고 있어, 전투 중 전략적으로 스킬을 교체하면서 상대를 압박한다. 전장은 대체로 개방형이며, 주요 목표는 적 영웅을 전멸시키는 것이지만, 특정 지점에 배치된 중립 오브젝트가 전투 흐름을 바꾸는 역할을 한다. 전투가 진행될수록 주술 쿨다운과 마나 관리가 핵심 요소가 되며, 초반에는 빠른 이동과 스킬 연계가 승패를 좌우한다. 맵은 팀 기반이 아닌 자유 전투를 전제로 설계돼 있어, 개인 실력과 영웅 선택이 직접적인 승부에 영향을 미친다. 플레이 전 확인해야 할 포인트는 영웅별 주술 쿨다운 차이, 맵 중앙에 위치한 중립 오브젝트의 재생성 시간, 그리고 사막 타일에 숨겨진 지형 장애물이다. 이러한 요소들을 고려해 전략을 세우면 초보자도 비교적 쉽게 적응할 수 있지만, 고급 플레이어는 영웅 별 스킬 조합과 위치 선점을 통해 압도적인 승리를 거둘 수 있다. 빠른 템포와 다양한 영웅 조합 덕분에 파티 게임이나 친목 모임에서 높은 재플레이 가치를 제공한다. Naruto: Speed Hokage 1.1 is a fast‑paced UMS map that supports up to six players in simultaneous combat. Built on a desert tileset with a 2048×2048 battlefield, each player chooses one of eighteen Naruto‑universe heroes, each equipped with four to five unique jutsus. The open‑field arena encourages aggressive engagements, while neutral objects placed at key points can shift the flow of battle. Managing jutsu cooldowns and mana becomes crucial as the match progresses, and early‑game mobility and skill combos often decide the outcome. The map is designed for free‑for‑all play rather than team‑based modes, meaning individual skill and hero selection directly impact victory. Before starting, players should note the differences in cooldowns between heroes, the respawn timers of central neutral objects, and hidden terrain obstacles within the desert tiles. Considering these factors allows beginners to adapt quickly, while advanced players can dominate by mastering hero skill synergies and map control. Its rapid pace and diverse hero lineup make it ideal for party games or casual gatherings, offering high replay value.
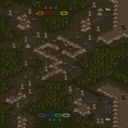
스나이퍼 페인트볼 엘리트 (Sniper Paintball Elite)
스나이퍼 페인트볼 엘리트는 한 번에 죽을 수 있는 위험한 게임을 즐기기 위해旗를 잡는 즐거움을 위해 생명을 무시하는 총격전의 화끈한 대결을 즐길 수 있는 UMS 장르의 맵입니다. 플레이 인원은 8명으로, 팀 수는 지정되지 않았습니다. 맵의 배경은 사막으로, 사막의 넓은 공간을 활용하여 플레이어들은 총격전을 즐기며 서로의 팀원들을 제거하거나, 적의旗를 잡는 것을 목표로 합니다. 플레이어들은 사막의 다양한 지역을 돌아다니며, 적의 위치를 파악하고, 적을 죽이거나, 적의旗를 잡는 것을 목표로 합니다. 스나이퍼 페인트볼 엘리트는 플레이어들의 전략과 팀워크를 요구하는 게임입니다. 플레이어들은 적의 위치를 파악하고, 적을 죽이거나, 적의旗를 잡는 것을 목표로 합니다. 플레이어들은 사막의 다양한 지역을 돌아다니며, 적의 위치를 파악하고, 적을 죽이거나, 적의旗를 잡는 것을 목표로 합니다. 스나이퍼 페인트볼 엘리트는 플레이어들이 함께 협력하여 게임을 즐기기를 원하는 플레이어들에게 적합한 맵입니다. 플레이어들은 팀을 구성하여, 적의 위치를 파악하고, 적을 죽이거나, 적의旗를 잡는 것을 목표로 합니다. 스나이퍼 페인트볼 엘리트는 플레이어들이 함께 협력하여 게임을 즐기기를 원하는 플레이어들에게 적합한 맵입니다. 플레이어들은 팀을 구성하여, 적의 위치를 파악하고, 적을 죽이거나, 적의旗를 잡는 것을 목표로 합니다. 스나이퍼 페인트볼 엘리트는 플레이어들이 함께 협력하여 게임을 즐기기를 원하는 플레이어들에게 적합한 맵입니다. 플레이어들은 팀을 구성하여, 적의 위치를 파악하고, 적을 죽이거나, 적의旗를 잡는 것을 목표로 합니다. 스나이퍼 페인트볼 엘리트는 플레이어들이 함께 협력하여 게임을 즐기기를 원하는 플레이어들에게 적합한 맵입니다. 플레이어들은 팀을 구성하여, 적의 위치를 파악하고, 적을 죽이거나, 적의旗를 잡는 것을 목표로 합니다. 스나이퍼 페인트볼 엘리트는 플레이어들이 함께 협력하여 게임을 즐기기를 원하는 플레이어들에게 적합한 맵입니다. 플레이어들은 팀을 구성하여, 적의 위치를 파악하고, 적을 죽이거나, 적의旗를 잡는 것을 목표로 합니다. 스나이퍼 페인트볼 엘리트는 플레이어들이 함께 협력하여 게임을 즐기기를 원하는 플레이어들에게 적합한 맵입니다. 플레이어들은 팀을 구성하여, 적의 위치를 파악하고, 적을 죽이거나, 적의旗를 잡는 것을 목표로 합니다. 스나이퍼 페인트볼 엘리트는 플레이어들이 함께 협력하여 게임을 즐기기를 원하는 플레이어들에게 적합한 맵입니다. 플레이어들은 팀을 구성하여, 적의 위치를 파악하고, 적을 죽이거나, 적의旗를 잡는 것을 목표로 합니다. 스나이퍼 페인트볼 엘리트는 플레이어들이 함께 협력하여 게임을 즐기기를 원하는 플레이어들에게 적합한 맵입니다. 플레이어들은 팀을 구성하여, 적의 위치를 파악하고, 적을 죽이거나, 적의旗를 잡는 것을 목표로 합니다. 스나이퍼 페인트볼 엘리트는 플레이어들이 함께 협력하여 게임을 즐기기를 원하는 플레이어들에게 적합한 맵입니다. 플레이어들은 팀을 구성하여, 적의 위치를 파악하고, 적을 죽이거나, 적의旗를 잡는 것을 목표로 합니다. 스나이퍼 페인트볼 엘리트는 플레이어들이 함께 협력하여 게임을 즐기기를 원하는 플레이어들에게 적합한 맵입니다. 플레이어들은 팀을 구성하여, 적의 위치를 파악하고, 적을 죽이거나, 적의旗를 잡는 것을 목표로 합니다. 스나이퍼 페인트볼 엘리트는 플레이어들이 함께 협력하여 게임을 즐기기를 원하는 플레이어들에게 적합한 맵입니다. 플레이어들은 팀을 구성하여, 적의 위치를 파악하고, 적을 죽이거나, 적의旗를 잡는 것을 목 Sniper Paintball Elite is a map in the UMS genre that allows players to experience a thrilling and potentially deadly game for the sake of flag capture. The map has an 8-player capacity and is teamless. The map's background is a desert, and players must utilize the desert's vast space to engage in a firefight, eliminating each other's teammates or capturing the enemy's flag. Players must navigate the desert's various regions to locate the enemy, eliminate them, or capture their flag. Sniper Paintball Elite is a game that requires players' strategies and teamwork. Players must work together to locate the enemy, eliminate them, or capture their flag. This map is suitable for players who want to play together and enjoy the game cooperatively. Players form teams to locate the enemy, eliminate them, or capture their flag.
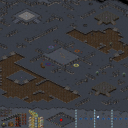
언덕의 왕 (KING OF THE HILL)
KING OF THE HILL 맵은 UMS(유즈맵) 기반의 8인 전용 언덕 점령형 전투 맵이다. 전체 맵 크기는 3072×3072 타일 96×96으로, 우주 타일셋을 사용해 넓은 평야와 고지대가 자연스럽게 배치되어 있다. 플레이 시작 시 각 플레이어는 랜덤한 위치에 기지를 세우고, 중앙에 위치한 언덕을 차지하기 위해 빠른 러시와 방어를 반복한다. 언덕을 점령하면 일정 시간 유지 시 승리 조건이 충족되므로, 초반 공격력과 이동 속도, 그리고 적의 방어 타워를 어떻게 무력화하느냐가 핵심 전략이다. 맵 구조는 대칭적이지만, 중앙 고지대 주변에 몇 차례의 작은 고지와 협곡이 있어 우회로를 이용한 측면 공격도 가능하다. 따라서 공격형 플레이어와 방어형 플레이어 모두에게 균형 잡힌 경험을 제공한다. 추천 대상은 빠른 전투와 지속적인 압박을 즐기는 유저이며, 특히 초중급 수준의 플레이어가 전략을 시험하기에 적합하다. 플레이 전 확인해야 할 포인트는 초기 자원 배치와 언덕 주변에 배치된 중립 유닛·타워의 존재 여부이다. 이 요소들은 초반 러시 성공 여부에 큰 영향을 미치므로, 미리 파악하고 대응 전략을 준비하는 것이 좋다. KING OF THE HILL is an 8‑player UMS (use‑map) hill‑control map for StarCraft: Brood War. The map spans 3072×3072 tiles (96×96 per tile) and uses the Space tileset, featuring a large open plain with a central elevated hill. At the start each player builds a base at a random location and rushes toward the central hill, aiming to hold it for a set duration to meet the victory condition. The core strategy revolves around early aggression, unit speed, and disabling enemy defensive structures. While the overall layout is symmetric, several smaller elevations and valleys around the hill provide flanking routes, allowing both offensive and defensive playstyles to thrive. This balance makes the map suitable for players who enjoy fast‑paced combat and continuous pressure, especially those at beginner to intermediate skill levels. Before playing, check the initial resource distribution and the presence of neutral units or turrets near the hill, as these significantly affect the success of early rushes and should be accounted for in your opening plan.
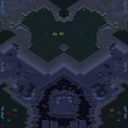
3:3 Ride Of Valkyries FINAL4
3:3 Ride Of Valkyries FINAL4는 3대3 팀전 형태의 유즈맵으로, 화산 타일셋을 기반으로 한 넓은 전장이 특징이다. 맵은 중앙에 높은 지형이 자리하고 있어 시야 확보와 유닛 이동에 전략적 영향을 미치며, 양쪽 진영은 대칭적인 위치에 기지와 자원 채취 구역이 배치되어 있다. 초기 자원은 비교적 풍부하게 제공되지만, 자원 채취 지점이 제한적이기 때문에 초반 확장보다는 방어 라인을 빠르게 구축하는 것이 유리하다. 유닛 이동 경로가 복잡하게 얽혀 있어 측면을 이용한 기습이나 고지점을 점령해 사거리 우위를 확보하는 전략이 자주 사용된다. 특히 화산 지형의 일부 구역은 이동 속도가 감소하는 효과가 있어, 유닛을 몰아넣는 전술이나 방어벽을 설치해 적의 진형을 교란시키는 데 활용할 수 있다. 게임 진행 중에는 중간에 등장하는 중립 건물이나 작은 오브젝트가 전투 흐름을 바꾸는 요소로 작용하며, 이를 점령하면 추가 자원을 얻거나 방어 보조 시설을 가동할 수 있다. 플레이 경험은 빠른 템포와 끊임없는 교전이 특징이며, 팀원 간의 협력이 승패를 좌우한다. 초반에는 방어 라인을 견고히 하고, 중반 이후에는 상대 진영을 압박해 핵심 건물을 파괴하는 것이 일반적인 승리 루트다. 이 맵은 팀워크와 미세한 포지셔닝을 중시하는 플레이어에게 적합하며, 특히 3대3 구성을 즐기는 유저들에게 추천한다. The map 3:3 Ride Of Valkyries FINAL4 is a 3‑vs‑3 UMS map built on a volcanic tileset, featuring a large, symmetrical battlefield. The central high ground provides vision advantage and influences unit movement, while each side’s base and resource nodes are placed mirror‑wise. Early resources are plentiful, but the limited harvesting spots encourage players to focus on quick defensive structures rather than extensive early expansion. Complex side paths allow for flank attacks and hill‑top control to gain range superiority. Certain volcanic areas slow unit speed, making them ideal for choke points or for setting up defensive walls that disrupt enemy formations. Mid‑game neutral structures or small objects appear on the map, offering extra resources or auxiliary defenses when captured. The gameplay is fast‑paced with constant skirmishes, and teamwork is decisive; early fortification followed by mid‑game pressure on the opponent’s core buildings is the typical win path. This map suits players who value coordinated tactics and precise positioning, especially those who enjoy 3‑vs‑3 matches.
최근 등록된 맵
새로 추가된 파일과 버전을 확인하세요.
3:3 Ride Of Valkyries FINAL4
3:3 Ride Of Valkyries FINAL4는 3대3 팀전 형태의 유즈맵으로, 화산 타일셋을 기반으로 한 넓은 전장이 특징이다. 맵은 중앙에 높은 지형이 자리하고 있어 시야 확보와 유닛 이동에 전략적 영향을 미치며, 양쪽 진영은 대칭적인 위치에 기지와 자원 채취 구역이 배치되어 있다. 초기 자원은 비교적 풍부하게 제공되지만, 자원 채취 지점이 제한적이기 때문에 초반 확장보다는 방어 라인을 빠르게 구축하는 것이 유리하다. 유닛 이동 경로가 복잡하게 얽혀 있어 측면을 이용한 기습이나 고지점을 점령해 사거리 우위를 확보하는 전략이 자주 사용된다. 특히 화산 지형의 일부 구역은 이동 속도가 감소하는 효과가 있어, 유닛을 몰아넣는 전술이나 방어벽을 설치해 적의 진형을 교란시키는 데 활용할 수 있다. 게임 진행 중에는 중간에 등장하는 중립 건물이나 작은 오브젝트가 전투 흐름을 바꾸는 요소로 작용하며, 이를 점령하면 추가 자원을 얻거나 방어 보조 시설을 가동할 수 있다. 플레이 경험은 빠른 템포와 끊임없는 교전이 특징이며, 팀원 간의 협력이 승패를 좌우한다. 초반에는 방어 라인을 견고히 하고, 중반 이후에는 상대 진영을 압박해 핵심 건물을 파괴하는 것이 일반적인 승리 루트다. 이 맵은 팀워크와 미세한 포지셔닝을 중시하는 플레이어에게 적합하며, 특히 3대3 구성을 즐기는 유저들에게 추천한다. The map 3:3 Ride Of Valkyries FINAL4 is a 3‑vs‑3 UMS map built on a volcanic tileset, featuring a large, symmetrical battlefield. The central high ground provides vision advantage and influences unit movement, while each side’s base and resource nodes are placed mirror‑wise. Early resources are plentiful, but the limited harvesting spots encourage players to focus on quick defensive structures rather than extensive early expansion. Complex side paths allow for flank attacks and hill‑top control to gain range superiority. Certain volcanic areas slow unit speed, making them ideal for choke points or for setting up defensive walls that disrupt enemy formations. Mid‑game neutral structures or small objects appear on the map, offering extra resources or auxiliary defenses when captured. The gameplay is fast‑paced with constant skirmishes, and teamwork is decisive; early fortification followed by mid‑game pressure on the opponent’s core buildings is the typical win path. This map suits players who value coordinated tactics and precise positioning, especially those who enjoy 3‑vs‑3 matches.
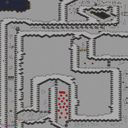
속도 (Speed)
스타크래프트 브루드워 유즈맵 중 독특한 게임성을 가진 'Speed' 맵을 소개합니다. 이 맵은 일반적인 전략 시뮬레이션과는 궤를 달리하는 독특한 구조를 보여주는 유즈맵으로, 플레이어의 빠른 판단력과 컨트롤 능력을 요구하는 것이 특징입니다. 맵의 전체적인 구조를 살펴보면, 복잡하게 얽힌 통로와 구역들이 나뉘어 있는 미로 형태를 띠고 있으며, 특정 구역에는 유닛들이 밀집되어 있는 패턴이 관찰됩니다. 이러한 구조는 플레이어가 단순히 자원을 채취하고 병력을 생산하는 기존의 밀리 방식이 아니라, 정해진 경로를 따라 이동하거나 특정 목표를 향해 빠르게 전진해야 하는 특수한 게임 방식을 암시합니다. 장르 측면에서는 플레이어의 반응 속도와 이동 효율성이 승패를 가르는 요소로 작용하는 것으로 보이며, 맵의 시각적 요소로 볼 때 특정 지점에서 유닛이 쏟아져 나오거나 플레이어가 이를 통과하며 생존해야 하는 방식의 플레이 경험을 선사할 것으로 추정됩니다. 맵의 타일셋은 플랫폼 스타일을 채택하여 지형의 고저차나 통로의 느낌을 강조하고 있으며, 이는 플레이어가 이동 시 경로를 선택하는 데 있어 중요한 전략적 요소로 작용할 것입니다. 이 맵은 정교한 컨트롤을 즐기는 숙련된 플레이어나, 기존 스타크래프트의 문법에서 벗어난 색다른 유즈맵을 찾는 분들에게 추천할 만한 콘텐츠입니다. 플레이 전 확인 포인트로는 맵의 복잡한 통로 구조로 인해 유닛이 끼이거나 이동 경로가 꼬일 수 있으므로, 이를 고려한 정밀한 컨트롤 연습이 필요할 것으로 보입니다. 또한, 맵의 이름이 'Speed'인 만큼 빠른 속도감이 핵심인 게임 플레이가 예상되므로, 긴박한 상황 속에서도 침착하게 대응할 수 있는 집중력이 요구됩니다. 스타크래프트 브루드워의 엔진을 활용한 이 독특한 시도는 유저들에게 새로운 재미를 선사할 것입니다. I’d like to introduce the “Speed” map, a unique use map from StarCraft: Brood War that stands out for its distinctive gameplay. Unlike typical strategy simulations, this map features an unconventional layout that tests players’ quick judgment and control abilities. Looking at its overall structure, the map is maze‑like, with intricately intertwined passages and divided sections; certain areas show dense clusters of units. This design suggests a special play style that goes beyond the usual resource gathering and army production—players must follow set paths or rush toward specific objectives rapidly. In terms of genre, reaction speed and movement efficiency appear to be decisive factors for victory. Visually, the map seems to offer moments where units surge from particular points, requiring players to navigate through them while staying alive. The tileset adopts a platform style, emphasizing elevation changes and the feel of corridors, which will become an important strategic consideration when choosing routes. This map is recommended for skilled players who enjoy precise control, as well as anyone looking for a fresh use map that deviates from the standard StarCraft formula. Before playing, note that the complex passageways can cause units to get stuck or paths to tangle, so practicing fine‑grained control is advisable. Also, because the map is named “Speed,” fast‑paced gameplay is expected, demanding calm focus even in high‑pressure situations. This inventive use of the Brood War engine should bring new fun to the community.
헉 이럴수가....... (What the Hell.......)
스타크래프트 브루드워의 유즈맵 중에서도 특이한 전투형 맵인 〈헉 ㅇㅣ럴수가.......〉는 8명의 플레이어가 동시에 펼치는 혈전이라는 점에서 주목할 만하다. 맵의 내부 설명을 보면 저그와 테란의 대표 유닛이 각각의 종족 특성을 극대화한 상태로 배치되어 있으며, 저그는 X2 X2로 강화된 체력과 방어력, 테란은 X3 프로토스 X2 X2로 체력과 방어력이 255에 달하는 강력한 스펙을 자랑한다. 또한 스피드가 '짱'이라는 설명으로 보아 이동 속도 또한 상당히 빠르다는 것을 짐작할 수 있다. 이러한 설정은 단순히 유닛을 모아서 싸우는 평범한 밀리 맵과는 차별화된 전투의 재미를 제공할 것으로 예상된다. 맵의 구조는 전체적으로 넓은 평야 지형이 펼쳐져 있으며, 중앙에는 저그와 테란의 대규모 병력이 배치되어 있다. 플레이어는 각자의 시작 위치에서 유닛을 생산하고, 맵 곳곳에 scattered되어 있는 미네랄과 가스를 확보하여 전력을 보강해야 한다. 전투의 핵심은 체력과 방어력이 강화된 유닛들 간의 치열한 교전으로, 상대방을 먼저 전멸시키는 쪽이 승리하는 것으로 추정된다. 다만 내부 설명에만 언급된 '종족의 기적'이 무엇인지는 명확하지 않지만, 이를 확인하기 위해선 직접 플레이해보는 수밖에 없을 듯하다. 이 맵의 가장 큰 특징은 바로 유닛의 스펙 강화에 있다. 일반적인 밀리 맵과는 달리, 유닛의 능력치가 수십 배나 향상되어 있어 전투의 스케일이 크고 긴장감이 느껴질 것으로 예상된다. 또한 8명이 동시에 전투를 펼치기 때문에 팀워크와 전략이 중요해질 수밖에 없다. 초보자보다는 중수 이상의 플레이어에게 추천할 만한 맵이며, 특히 종족별 특성을 максима化하여 싸우고 싶은 유저들에게는 훌륭한 선택지가 될 것이다. 다만 유닛의 스피드가 빠르다는 점은 조작의 난이도를 높일 수 있으니, 컨트롤에 자신이 없는 플레이어는 주의가 필요하다. 시작하기 전에는 반드시 유닛의 스펙과 맵의 배치, 그리고 승리 조건을 미리 숙지하고 플레이할 것을 권장한다. 또한 팀 게임의 경우, 팀원 간의 전략적인 합이 잘 맞아야만 승리를 거두기 수월할 것으로 보인다. 이 맵은 단순히 유닛을 모아서 싸우는 것이 아니라, 종족의 특성을 최대화한 전투를 즐길 수 있는 특별한 경험을 제공할 것이다. This StarCraft: Brood War custom map, titled 〈헉 ㅇㅣ럴수가.......〉, stands out for its intense 8-player battle royale format. The internal description reveals that Zerg and Terran units are significantly buffed, with Zerg units having X2 X2 upgrades for health and armor, while Terran units feature X3 Protoss upgrades, granting them 255 armor and a 'speed boost' described as 'the best.' This extreme power scaling creates a fast-paced, high-stakes combat experience unlike typical melee maps. The map layout consists of a vast open plain with central spawn points for both Zerg and Terran forces. Players begin at fixed positions, gathering minerals and gas to reinforce their armies before engaging in large-scale battles. The core gameplay revolves around these enhanced units clashing, with victory likely determined by eliminating the opposing team first. While the 'miracle of the race' remains unclear, its ambiguity adds an intriguing layer to the experience. What truly sets this map apart is the dramatic stat boosts applied to units, far exceeding standard melee parameters. The fast-paced, high-intensity combat demands strong teamwork and strategic coordination, making it more suited for intermediate to advanced players rather than beginners. The 'speed boost' mentioned in the description suggests that unit control is critical, requiring precise micro-management to outmaneuver opponents. Before diving in, players should familiarize themselves with the unit stats, map layout, and presumed victory conditions—likely team elimination. For team-based play, coordination and synergy between teammates will be essential for success. This map isn’t just about stacking units; it’s about experiencing the raw power of maxed-out racial units in a thrilling, high-octane battle scenario.
저글링 블러드 (Zergling Blood)
설원의 차가운 대지 위에서 오직 저글링의 발톱만이 승리를 결정짓는 단순하면서도 치열한 유즈맵이다. 총 여덟 명의 플레이어가 동시에 참여하는 이 맵은 복잡한 건설이나 자원 관리 없이 오로지 저글링 한 유닛의 컨트롤에 집중하도록 설계되어 있다. 시작과 동시에 각 플레이어에게 주어지는 저글링 무리는 곧장 전장으로 투입되며, 살아남기 위해 끊임없이 움직이고 상대를 물어뜯어야 한다. 맵의 구조는 넓게 트인 얼음 평원에 장애물이 거의 배치되지 않아 은신하거나 도망칠 구석이 거의 존재하지 않는다. 이는 곧바로 맞닥뜨리는 전투를 유도하며, 한 치의 망설임도 용납하지 않는 속도감을 만들어낸다. 시야에서 벗어나는 순간 다른 저글링의 기습에 노출되기 쉬우므로, 화면 구석구석을 살피는 넓은 시야 확보가 무엇보다 중요하게 작용한다. 플레이 경험은 예측 불가능한 난전 그 자체다. 여덟 명이 뒤엉켜 싸우는 구도는 개인 간의 일대일 대결을 넘어 순간적으로 형성되는 임시 동맹과 배신이 끊임없이 일어나는 혼돈의 장을 제공한다. 체력이 약한 저글링의 특성상 한두 번의 공격에 생사가 갈리기 때문에, 긴장감은 게임 내내 극도로 유지된다. 특히 다수의 저글링이 한 지점에 몰리며 발생하는 이른바 뭉치기 싸움에서는 한 번의 무빙 실수로 제어하던 모든 유닛이 순식간에 녹아내리는 뼈아픈 경험을 하게 된다. 공격 대상을 잘못 선택하여 상대의 빈틈을 노리지 못하면 순식간에 전세가 뒤집히며, 마지막 한 마리까지 살아남아야 한다는 압박감이 아드레날린을 솟구치게 만든다. 이 맵은 특별한 트리거나 승리 조건을 내세우지 않고 오직 잔존하는 마지막 저글링의 주인이 되는 순수한 서바이벌 형식을 취한다. 연출되는 장면 하나하나가 철저히 플레이어의 기량과 순간 판단력에 의존하기 때문에, 매 판매 색다른 긴장과 결과를 마주하게 된다. 이런 특성상 이 맵은 복잡한 전략보다는 직관적인 액션과 빠른 반사 신경을 즐기는 플레이어에게 이상적이다. 특히 친구들과 함께 가볍게 즐기기에 부담이 없으며, 짧은 시간 안에 승부가 결정되기 때문에 여러 판을 연속으로 플레이하기에도 좋다. 다만 플레이에 앞서 반드시 알아두어야 할 점은, 이 맵이 저글링의 무빙과 어택땅, 홀드 컨트롤 같은 세밀한 조작 숙련도를 요구한다는 사실이다. 기본적인 유닛 컨트롤에 익숙하지 않다면 전투의 흐름을 따라잡기 어려울 수 있다. 또한 맵의 지형이 단조롭기 때문에 변수를 만드는 것은 전적으로 플레이어의 손에 달려 있다는 점을 인지해야 한다. 저글링 블러드는 군더더기 없는 기획으로 유닛 조작의 본질적인 재미에 충실한, 파티 플레이에 최적화된 유즈맵이다. On the frozen tundra of the ice tileset, victory is decided solely by the claws of zerglings in this simple yet fiercely intense use map setting. Designed for eight players to engage simultaneously, the map strips away all complex building or resource management and forces you to focus entirely on controlling a single type of unit. A pack of zerglings is deployed directly into the battlefield from the start, and you must constantly move and tear into opponents just to survive. The map structure consists of a wide-open icy plain with almost no obstacles, leaving no corners to hide or seek cover. This immediately forces direct confrontations and creates a sense of speed that tolerates no hesitation. The moment you slip out of sight, you become vulnerable to a sudden ambush from another zergling pack, making broad map awareness and scanning every edge of the screen absolutely critical. The gameplay experience feels like unpredictable chaos itself. With eight players entangled in a brawl, the fight goes beyond simple one-on-one duels and becomes a scene of constant chaos where temporary alliances and betrayals form and shatter in an instant. Because a zergling's low health means survival can be decided in just one or two hits, the tension remains extremely high throughout the entire match. In the so-called clumped fights where multiple packs collide at a single point, a single misstep in movement can cause all your units to vanish in a flash, delivering a painfully harsh lesson. Choosing the wrong target and failing to exploit an opening can flip the tide of battle instantly, and the pressure of having to survive until the very last zergling pumps adrenaline constantly. This map does not rely on special triggers or complex victory conditions; it is a pure survival format where the only goal is to be the owner of the last remaining zergling. Every unfolding scene depends entirely on the player's skill and split-second judgment, so each round presents a completely different fight and strategic tension. Given these traits, this map suits players who enjoy intuitive action and fast reflexes over deep, complex strategy. It is a hassle-free way to have a lighthearted session with friends, and since the outcome is decided quickly, it is perfect for playing multiple rounds back to back. However, before jumping in, you must be aware that this map demands a high level of proficiency in precise controls such as zergling movement, attack-moving, and hold position. If you are not comfortable with basic unit micro, you may find it difficult to keep up once the fight begins. You must also recognize that because the terrain is so flat and open, creating any kind of variable relies entirely on the player's own hands. Zergling Blood is a use map that strips away all excess to focus purely on the fundamental fun of unit control, making it an ideal choice for party play.
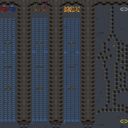
광산 질주 (The Amazing Mining Race)
스타크래프트 브루드워의 유즈맵 중 하나로, 플레이어들이 광산 굴착 차량을 조종하며 장애물을 피해 결승선을 향해 질주하는 경주형 맵이다. 맵의 주요 특징은 중앙을 가로지르는 긴 굴착로와 곳곳에 배치된 다양한 장애물로, 이들을 피해가며 최대한 빠른 시간에 골인하는 것이 목표다. 이미지에서 확인되는 굴착 차량의 아이콘과 굴착로의 구조, 결승선 플래그를 통해 맵의 장르가 '레이싱' 또는 '경주'임을 쉽게 짐작할 수 있다. 굴착로 주변으로는 굴착 흔적이나 잔해가 scattered되어 있으며, 맵 상단과 하단에는 추가적인 경로나 지름길이 존재하는 것으로 보인다. 이 맵의 플레이 방식은 단순히 속도만으로 승부가 나는 것이 아니라, 장애물을 피하거나 파괴하는 타이밍과 경로 선택이 중요하다. 예를 들어 굴착로에 있는 바위나 잔해는 차량으로 밀어내거나 통과할 수 있으며, 일부 구간에서는 지름길을 통해 시간을 단축할 수 있다. 맵의 색상 대조가 뚜렷해 시야 확보가 용이하며, 특히 우주 타일셋을 사용해 광산 feel을 강조하고 있다. 플레이어는 각자 독립된 차량을 조종하며, 맵의 구조상 충돌이나 간섭은 발생하지 않는 것으로 추정된다. 이 맵은 6명의 플레이어가 동시에 참여할 수 있으며, 팀전보다는 개인전이 주를 이루는 것으로 보인다. 맵의 길이가 상당히 길고, 굴착로를 따라 일직선으로 진행하는 구간이 많기 때문에 플레이 시간은 10~20분 내외로 예상된다. 난이도는 장애물의 배치와 굴곡에 따라 달라질 수 있으나, 기본적으로는 진입 장벽이 낮은 편으로 보인다. 초보자도 쉽게 접근할 수 있지만, 숙련된 플레이어는 지름길을 활용하거나 장애물을 효율적으로 통과하는 전략을 구사할 수 있을 것이다. 주로 레이싱이나 경주형 유즈맵을 즐기는 플레이어들에게 적합하며, 특히 속도감과 전략적 요소 모두를 즐기고 싶은 유저들에게 추천할 만하다. 또한, 여러 명이 동시에 플레이할 수 있어 친목이나 대회용으로도 활용될 가능성이 높다. 맵을 플레이하기 전에는 자신의 차량 속도와 장애물 통과 능력, 지름길 위치를 숙지하는 것이 중요하다. 맵의 구조가 복잡하지 않지만, 속도감을 극대화하기 위해선 연습이 필요할 수 있다. This is a custom map from *StarCraft: Brood War* where players control mining vehicles, racing to the finish line while dodging obstacles. The map’s key features include a long central excavation path and various obstacles scattered throughout, requiring players to navigate quickly while avoiding hazards. The mining vehicle icons, excavation path structure, and finish line flags clearly indicate that the genre is a racing or speed-based challenge. The gameplay isn’t just about raw speed—timing obstacle avoidance or destruction and choosing the right path are crucial. Players can push aside rocks or debris blocking the excavation path, and some sections offer shortcuts to save time. The map’s sharp color contrast ensures good visibility, and its space-themed tileset enhances the mining atmosphere. Since each player controls their own vehicle and the layout prevents collisions or interference, races play out independently. The map supports up to six players, focusing primarily on individual competition rather than team play. Given its length and the many straight stretches along the excavation path, matches typically last between 10 to 20 minutes. While difficulty varies based on obstacle placement and turns, the map has a low entry barrier, making it accessible to beginners. Experienced players can optimize their runs by using shortcuts or navigating obstacles more efficiently. This map is ideal for fans of racing or speed-based custom maps, especially those who enjoy both fast-paced action and strategic elements. Its multiplayer design also makes it suitable for casual play or even tournaments. Before jumping in, players should familiarize themselves with their vehicle’s speed, obstacle-clearing ability, and shortcut locations. Though the layout is straightforward, mastering the race’s speed requires practice.
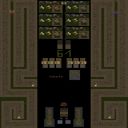
스폰 디펜스 6.1 스피드 (Spawn Defense 6.1 SPEED)
스폰 디펜스 6.1 스피드는 스타크래프트 브루드워 유즈맵 중 스폰 디펜스 장르에 속하는 6인용 협동 맵이다. 사막 타일셋을 기반으로 96x128 타일 크기의 전장에서 진행되며, 주기적으로 생성되는 적 유닛 무리를 막아내는 것이 핵심 목표다. 이번 6.1 버전은 기존 버그 수정과 난이도 상향이 이루어졌고, '스피드'라는 부제답게 게임 템포가 빨라져 초반 자원 확보와 빌드 오더 최적화가 더욱 중요해졌다. 내부 설명에 따르면 로보틱스 팩토리 비용이 2000으로 조정되었고, 중첩 가능한 선큰 콜로니와 포자 촉수 건설이 가능해져 방어선 구축의 자유도가 높아졌다. 또한 하이퍼 트리거 적용으로 트리거 순환 속도가 빨라졌고, 새로운 미로 구조가 추가되어 적 경로를 유도하는 미로 디펜스 요소가 강화된 것으로 보인다. 핸디캡 기능이 포함되어 있어 실력 차이에 따른 난이도 조절도 가능하다. 플레이어는 6명이 한 팀이 되어 입구를 막거나 미로를 설계하며 몰려오는 저그 무리를 상대하게 되며, 후반으로 갈수록 거대 유닛과 특수 능력이 등장해 집중적인 화력 분담과 업그레이드 타이밍이 승부를 가른다. 빠른 템포와 미로 설계의 재미를 동시에 원하는 중급 이상 유저에게 적합하며, 초보자는 핸디캡을 활용해 입문할 수 있다. 플레이 전에는 트리거 주석 내용과 변경된 유닛 비용, 미로 구조 변화를 숙지하는 것이 좋다. Spawn Defense 6.1 SPEED is a six-player cooperative StarCraft: Brood War UMS map belonging to the spawn defense genre. Set on a desert tileset with a 96x128 tile battlefield, the core objective is to hold off periodically spawning enemy unit waves. Version 6.1 fixes previous bugs and raises the difficulty, while the "SPEED" subtitle indicates a faster game tempo that makes early resource management and build-order optimization even more critical. According to the internal description, the Robotics Facility cost has been set to 2000, stackable Sunken Colonies and Spore Colonies are now allowed, increasing defensive layout freedom. Hyper triggers accelerate trigger cycles, and a new maze structure has been added, strengthening the maze defense element where players guide enemy paths. A handicap option is included for skill-gap adjustment. Six players work as one team, walling off entrances or designing mazes to face incoming Zerg swarms; later waves introduce massive units and special abilities that demand focused fire coordination and precise upgrade timing. The map suits intermediate-to-advanced users seeking both fast pacing and maze-building depth, while beginners can use the handicap to ease in. Before playing, it is advisable to review the trigger comments, updated unit costs, and maze layout changes.
스나이퍼 페인트볼 엘리트 (Sniper Paintball Elite)
스나이퍼 페인트볼 엘리트는 한 번에 죽을 수 있는 위험한 게임을 즐기기 위해旗를 잡는 즐거움을 위해 생명을 무시하는 총격전의 화끈한 대결을 즐길 수 있는 UMS 장르의 맵입니다. 플레이 인원은 8명으로, 팀 수는 지정되지 않았습니다. 맵의 배경은 사막으로, 사막의 넓은 공간을 활용하여 플레이어들은 총격전을 즐기며 서로의 팀원들을 제거하거나, 적의旗를 잡는 것을 목표로 합니다. 플레이어들은 사막의 다양한 지역을 돌아다니며, 적의 위치를 파악하고, 적을 죽이거나, 적의旗를 잡는 것을 목표로 합니다. 스나이퍼 페인트볼 엘리트는 플레이어들의 전략과 팀워크를 요구하는 게임입니다. 플레이어들은 적의 위치를 파악하고, 적을 죽이거나, 적의旗를 잡는 것을 목표로 합니다. 플레이어들은 사막의 다양한 지역을 돌아다니며, 적의 위치를 파악하고, 적을 죽이거나, 적의旗를 잡는 것을 목표로 합니다. 스나이퍼 페인트볼 엘리트는 플레이어들이 함께 협력하여 게임을 즐기기를 원하는 플레이어들에게 적합한 맵입니다. 플레이어들은 팀을 구성하여, 적의 위치를 파악하고, 적을 죽이거나, 적의旗를 잡는 것을 목표로 합니다. 스나이퍼 페인트볼 엘리트는 플레이어들이 함께 협력하여 게임을 즐기기를 원하는 플레이어들에게 적합한 맵입니다. 플레이어들은 팀을 구성하여, 적의 위치를 파악하고, 적을 죽이거나, 적의旗를 잡는 것을 목표로 합니다. 스나이퍼 페인트볼 엘리트는 플레이어들이 함께 협력하여 게임을 즐기기를 원하는 플레이어들에게 적합한 맵입니다. 플레이어들은 팀을 구성하여, 적의 위치를 파악하고, 적을 죽이거나, 적의旗를 잡는 것을 목표로 합니다. 스나이퍼 페인트볼 엘리트는 플레이어들이 함께 협력하여 게임을 즐기기를 원하는 플레이어들에게 적합한 맵입니다. 플레이어들은 팀을 구성하여, 적의 위치를 파악하고, 적을 죽이거나, 적의旗를 잡는 것을 목표로 합니다. 스나이퍼 페인트볼 엘리트는 플레이어들이 함께 협력하여 게임을 즐기기를 원하는 플레이어들에게 적합한 맵입니다. 플레이어들은 팀을 구성하여, 적의 위치를 파악하고, 적을 죽이거나, 적의旗를 잡는 것을 목표로 합니다. 스나이퍼 페인트볼 엘리트는 플레이어들이 함께 협력하여 게임을 즐기기를 원하는 플레이어들에게 적합한 맵입니다. 플레이어들은 팀을 구성하여, 적의 위치를 파악하고, 적을 죽이거나, 적의旗를 잡는 것을 목표로 합니다. 스나이퍼 페인트볼 엘리트는 플레이어들이 함께 협력하여 게임을 즐기기를 원하는 플레이어들에게 적합한 맵입니다. 플레이어들은 팀을 구성하여, 적의 위치를 파악하고, 적을 죽이거나, 적의旗를 잡는 것을 목표로 합니다. 스나이퍼 페인트볼 엘리트는 플레이어들이 함께 협력하여 게임을 즐기기를 원하는 플레이어들에게 적합한 맵입니다. 플레이어들은 팀을 구성하여, 적의 위치를 파악하고, 적을 죽이거나, 적의旗를 잡는 것을 목표로 합니다. 스나이퍼 페인트볼 엘리트는 플레이어들이 함께 협력하여 게임을 즐기기를 원하는 플레이어들에게 적합한 맵입니다. 플레이어들은 팀을 구성하여, 적의 위치를 파악하고, 적을 죽이거나, 적의旗를 잡는 것을 목표로 합니다. 스나이퍼 페인트볼 엘리트는 플레이어들이 함께 협력하여 게임을 즐기기를 원하는 플레이어들에게 적합한 맵입니다. 플레이어들은 팀을 구성하여, 적의 위치를 파악하고, 적을 죽이거나, 적의旗를 잡는 것을 목표로 합니다. 스나이퍼 페인트볼 엘리트는 플레이어들이 함께 협력하여 게임을 즐기기를 원하는 플레이어들에게 적합한 맵입니다. 플레이어들은 팀을 구성하여, 적의 위치를 파악하고, 적을 죽이거나, 적의旗를 잡는 것을 목 Sniper Paintball Elite is a map in the UMS genre that allows players to experience a thrilling and potentially deadly game for the sake of flag capture. The map has an 8-player capacity and is teamless. The map's background is a desert, and players must utilize the desert's vast space to engage in a firefight, eliminating each other's teammates or capturing the enemy's flag. Players must navigate the desert's various regions to locate the enemy, eliminate them, or capture their flag. Sniper Paintball Elite is a game that requires players' strategies and teamwork. Players must work together to locate the enemy, eliminate them, or capture their flag. This map is suitable for players who want to play together and enjoy the game cooperatively. Players form teams to locate the enemy, eliminate them, or capture their flag.
오펜시브 스트라이크 (Offensive Strike)
오펜시브 스트라이크는 서바이벌 장르에 속하는 스타크래프트 브루드워 유즈맵으로, 제한된 시간 안에 적 건물을 모두 파괴해야 하는 목표를 가지고 있습니다. 맵은 3072×3072 타일 기반으로 설계되어 있으며, 플랫폼 타일셋을 사용해 지형이 비교적 평탄하면서도 전략적 위치가 존재합니다. 각 레벨이 진행될수록 적 유닛과 건물의 배치가 복잡해지고, 타이머가 점점 짧아져 난이도가 상승합니다. 플레이어는 4인까지 동시에 참여할 수 있으며, 팀 전투보다는 개인 전투에 초점을 맞춘 솔로 혹은 자유로운 멀티플레이가 주된 플레이 방식입니다. 초기 레벨에서는 기본 유닛과 간단한 방어 구조를 활용해 빠르게 건물을 파괴하는 연습을 할 수 있지만, 후반부에서는 적의 방어 타워와 고레벨 유닛이 등장해 전투 전략을 재조정해야 합니다. 특히 건물 파괴 순서를 어떻게 잡느냐가 전체 클리어 시간에 큰 영향을 미치며, 자원 관리와 유닛 생산 타이밍이 핵심 요소로 작용합니다. 맵 내에는 숨겨진 고지대와 이동 경로가 몇 군데 존재해, 이를 활용하면 적의 방어선을 우회하거나 급습할 수 있는 전술적 선택지가 제공됩니다. 플레이 전에는 각 레벨의 타이머와 적 배치를 미리 확인하고, 필요한 유닛 조합을 미리 준비하는 것이 좋습니다. 초보자보다는 기본적인 유닛 운용에 익숙한 플레이어에게 적합하며, 빠른 판단과 지속적인 압박을 즐기는 유저에게 특히 추천됩니다. Offensive Strike is a survival‑type custom map for StarCraft: Brood War where the objective is to destroy all enemy buildings before the timer expires. The map spans 3072×3072 tiles using the platform tileset, offering a relatively flat terrain with several strategic positions. As the levels progress, enemy unit placements become more intricate and the time limit shortens, increasing overall difficulty. Up to four players can join, and the focus is on solo or free‑for‑all multiplayer rather than team combat. Early stages serve as a tutorial for basic unit control and rapid building demolition, while later stages introduce defensive towers and higher‑tier units that force players to rethink their tactics. The order in which buildings are targeted heavily influences the total clearance time, making resource management and unit production timing critical. Hidden high grounds and alternative pathways appear in several spots, allowing players to bypass defenses or launch surprise attacks. Before starting, it’s advisable to review the timer and enemy layout for each level and prepare the appropriate unit composition. This map suits players who are comfortable with basic unit handling and enjoy fast decision‑making and constant pressure, making it especially recommended for experienced gamers who like high‑tempo challenges.
맵 선택 가이드
태그는 맵의 핵심 특징을 빠르게 설명하지만 제작 버전마다 규칙이 다를 수 있습니다. 상세 설명에서 권장 인원, 난이도, 플레이 시간과 버전을 함께 확인한 뒤 다운로드하세요.